
TOPCLEAN BATA SELF - Washing machine Ulsonix - Free user manual and instructions
Find the device manual for free TOPCLEAN BATA SELF Ulsonix in PDF.


| Product type | Scrubber dryer (automatic cleaning and scrubbing machine) |
| Brand | Ulsonix |
| Model | TOPCLEAN BATA SELF |
| Intended use | Cleaning of hard floors: tiles, marble, epoxy, PVC, emery, terrazzo, concrete, ceramic |
| Supply voltage | 200-240 V / 50-60 Hz |
| Output voltage / current | 24 V / 25 A |
| Battery type | 4 x maintenance-free lead-acid batteries 6 V / 200 Ah |
| Total battery capacity | 200 Ah (24 V) |
| Cleaning efficiency | 5200 m²/h |
| Cleaning width | 740 mm |
| Squeegee width | 960 mm |
| Clean water tank capacity | 90 L |
| Dirty water tank capacity | 100 L |
| Brush motor | 500 W |
| Suction motor | 600 W |
| Drive motor | 950 W |
| Dimensions (L x W x H) | 900 x 1500 x 1305 mm |
| Weight | 340 kg |
| Protection class | I |
| Maintenance and cleaning | Regular cleaning of tanks, water filter, and replacement of worn brushes and squeegees |
| Safety | Electromagnetic brake, overload protection, protection class I |
| Spare parts and repairability | Replaceable brushes, pads, squeegees, rubber, filters and motors |
Frequently Asked Questions - TOPCLEAN BATA SELF Ulsonix
User questions about TOPCLEAN BATA SELF Ulsonix
0 question about this device. Answer the ones you know or ask your own.
Ask a new question about this device
Download the instructions for your Washing machine in PDF format for free! Find your manual TOPCLEAN BATA SELF - Ulsonix and take your electronic device back in hand. On this page are published all the documents necessary for the use of your device. TOPCLEAN BATA SELF by Ulsonix.
USER MANUAL TOPCLEAN BATA SELF Ulsonix


Berichtigungsposten


Betriebsanleitung






7

This User Manual has been translated using machine translation. We have made every effort to ensure the translation is accurate, but please note that automated translations are not perfect and are not meant to replace human translators. The official version of the User Manual is in English. Any differences between the translated version and the original English are not legally binding. If you have any questions about the accuracy of the translation, please refer to the English version, which is the official reference. More language versions are available upon request via info@expondo.com.
Technical data
| Parameter description | Parameter value |
| Product name | Automatic cleaning and scrubbing machine |
| Model | TOPCLEAN BATA SELF |
| Voltage [V] / Frequency [Hz] | Input: 200 - 240 / 50-60 |
| Voltage [V] / Current [A] | Output: 24 / 25 |
| Battery capacity [Ah] | 250 |
| Cleaning efficiency [m2/h] | 5200 |
| Cleaning width [mm] | 740 |
| Sucker width [mm] | 960 |
| Clean water tank [L] | 90 |
| Dirty water tank [L] | 100 |
| Brush motor [W] | 500 |
| Sucker motor [W] | 600 |
| Driver motor [W] | 950 |
| Dimensions (Width x Length x Height) (mm) | 900x1500x1305 |
| Weight [kg] | 340 |
| Protection class | I |
Product overview

This product is suitable for various environments, including restaurants, schools, hospitals, factories, supermarkets, warehouses, and office buildings. It effectively cleans multiple types of hard flooring, such as mirror tile, marble, epoxy, PVC, emery, terrazzo, concrete, and ceramic tile surfaces.
The user is liable for any damage resulting from unintended use of the product.
Unloading and assembling
Unloading the machine
- Remove the packaging carefully & avoid damaging the machine.
- We recommend that you keep the packaging of the product since it can be used to transport the machine.
Assembling the machine
Installing the squeegee
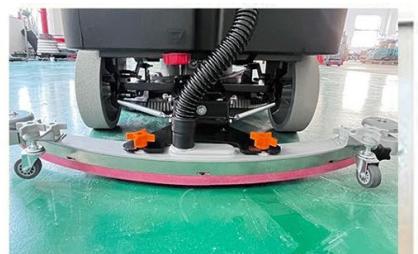
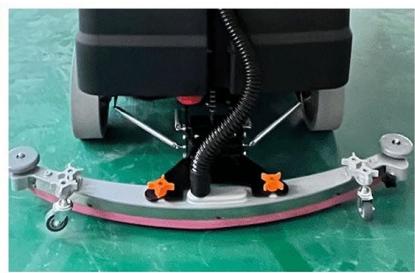
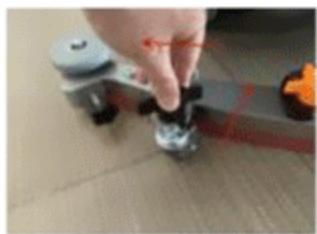
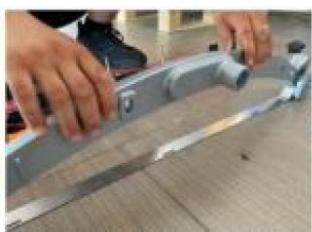
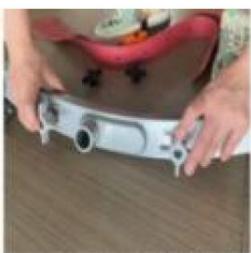
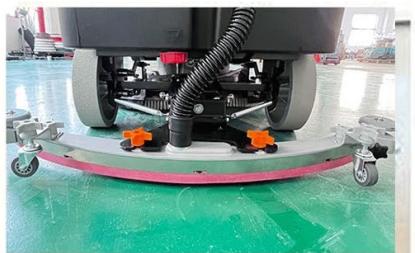
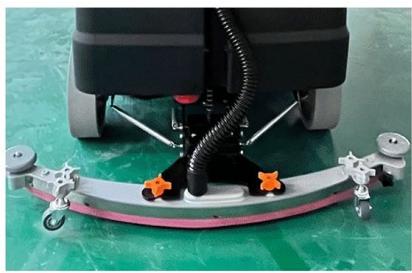
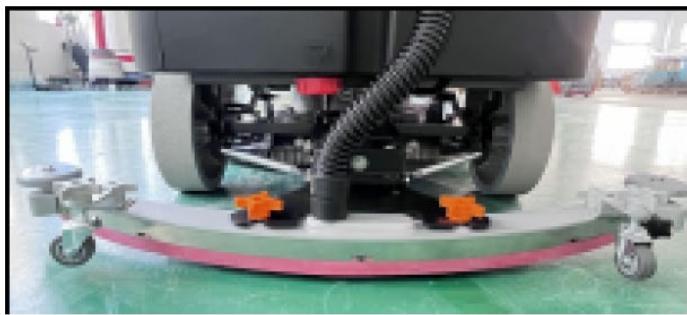
- Connect the squeegee assembly with the machine and turn the two innermost knobs to keep it tightened.
- Connect the suction hose to the squeegee assembly.


Connecting the battery cords
- Drain the sewage tank if needed.
- Carefully flip open the sewage tank and check whether all the cables on the batteries are connected and tightened.
- Connect the battery poles. Pay attention to the positive and negative terminals.
- Flip the sewage tank back to its original position.
Checks and adjustments before using
Check items
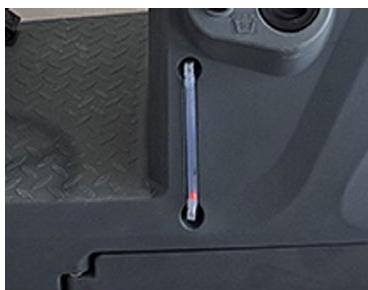

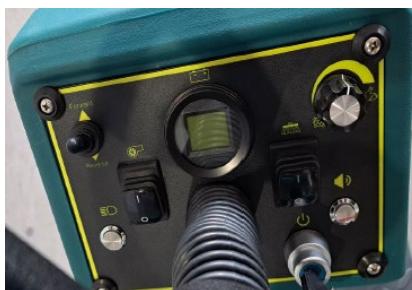
Checking the water volume in the clean water tank
Make sure that there is sufficient water in the clean water tank before work. Do NOT do the cleaning without enough water, or dust may be sucked into the suction motor leading to loud noise and low working efficiency.
Checking the water level in the sewage tank
Pay special attention to the water level in the sewage tank. Discharge the sewage tank when needed or the suction motor will be burned.
Checking the voltage of the batteries
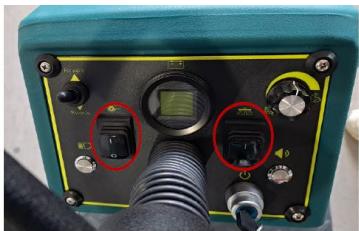
When the general switch is turned on, the current voltage of the batteries will be displayed on the voltmeter. If the last bar of the voltmeter is flashing, the power is insufficient and please charge the batteries immediately.
Note that deep discharging (e.g., frequently using the machine when the voltage is lower than 21 V) will reduce the service life of the batteries.
Checking the status of the brush plate
Check whether the brush plate is worn. If so, please replace it.

Checking the status of the rubber
- The rubber needs to be replaced if it’s worn out or cut.
- If the rubber cannot create an airtight situation when it's touching the floor, the suction effect will not be satisfactory.

Adjustment items
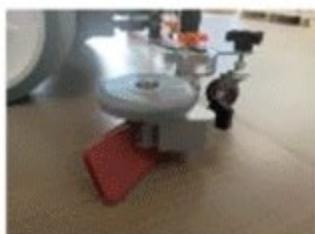
Adjustment of the squeegee assembly
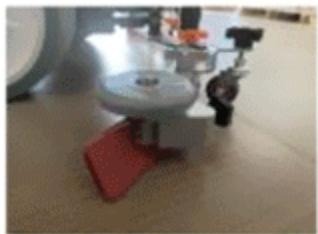
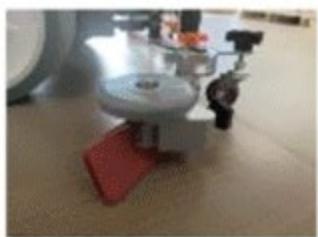
- Put down the squeegee assembly to see whether the rubber touches the ground.
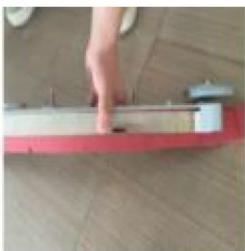
- Push the machine gently to see whether the rubber is slightly bent and leaves no gap in between itself and the ground.
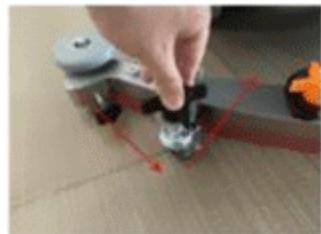
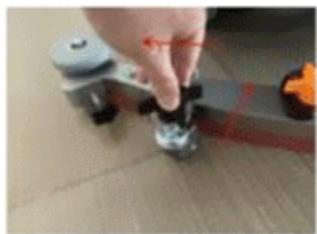
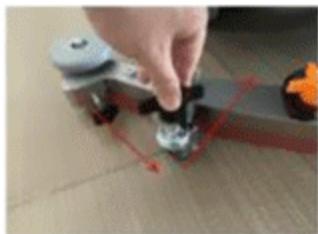
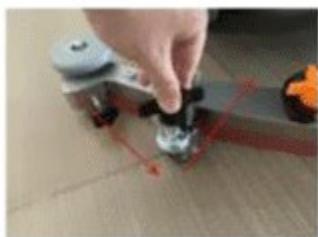
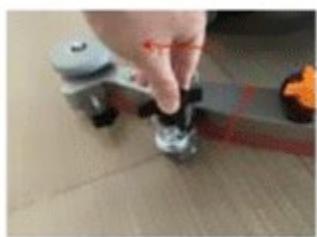
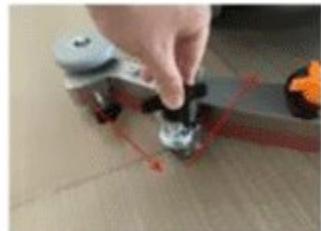
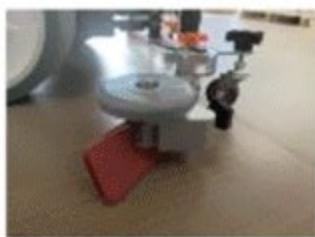
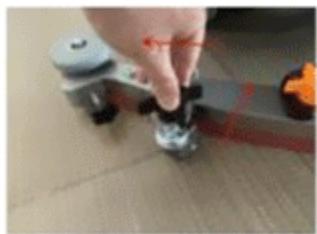
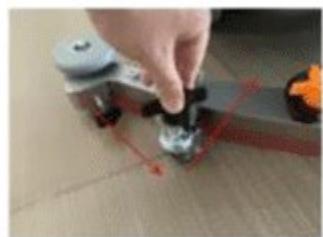
- If there is any gap between the rubber and the ground or the rubber is pressed too tightly, turn the outermost plastic knobs/nuts on the universal wheels to adjust the height of the squeegee. It is ideal to have the rubber bent at a 45 degree angle while touching the floor to create an airtight situation for better suction effect.



Operating instructions
Moving the Machine
- Switch on the general power.
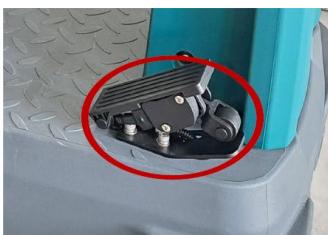
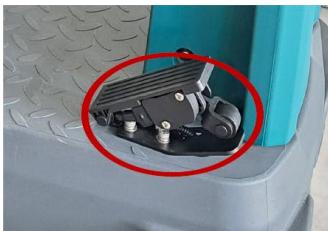
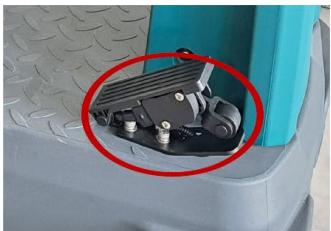
- Push the forward/backward toggle to the forward position, then press the accelerator pedal to move the machine forward.
- Pull the forward/backward toggle to the backward position, then press the accelerator pedal to reverse the machine.
- To stop, simply release the accelerator pedal. The electromagnetic brake will engage automatically, bringing the machine to a halt.

NOTE When reversing or transporting the machine, ensure the brush plate and squeegee are raised to prevent wear on the brush plate and deformation of the squeegee.
Scrubbing the Floor
- Lower the brush plate and squeegee.
- Switch on the general power.
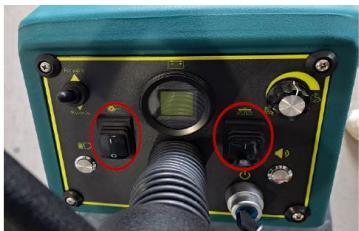
- Press the brush plate and suction motor buttons.
- Set the forward/backward toggle to the forward position, hold the steering wheel, press the accelerator, and smoothly maneuver the machine across the floor.
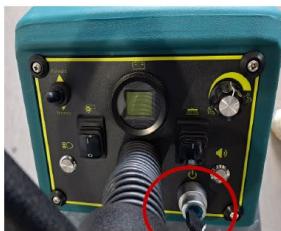


NOTE When the brush plate motor is turned on, do NOT leave the machine in the same place for a long time, because this would leave unnecessary marks on the ground.
Draining the sewage
- Before draining the sewage tank, stop the machine and turn off the main power switch.
- Lower the sewage drain hose, open the cap, and discharge the sewage.
- Rinse the sewage tank thoroughly with clean water.
Stopping the machine
- When the work is finished, turn off the brush plate button and lift the brush plate.
- Switch off the suction motor and lift the squeegee.
- Drain the sewage tank.
- Move the machine to a suitable storage location.
- Turn off the main power switch and remove the key.

NOTE If the machine is not going to be used for an extended period, please fully charge the batteries and disconnect the battery cords to prevent power loss. It is recommended to charge the batteries twice a month.
Charging the Batteries

NOTE The machine is powered by four 6V (200 Ah) maintenance-free lead-acid batteries, providing a total system voltage of 24V.
- The total voltage of the batteries will decrease gradually during operation. When the last bar on the voltmeter flashes, the machine is low on power. Please charge the batteries immediately.
-
Wear gloves when handling the batteries to avoid direct contact with any acidic substances.
-
Inspect the battery cords for wear and check the connections for any looseness; replace as necessary.
- Keep the batteries dry and clean, ensuring no dust accumulates on them, as dust can damage the batteries and, in severe cases, may even cause them to ignite. Avoid placing any objects, especially metallic ones, on the batteries.
- To extend the service life of the batteries, charge them immediately after completing the cleaning work. Deep discharging is strictly prohibited, as it reduces battery capacity and lifespan.
- Connect the external charger to the machine's red plug (located under the seat) before plugging the charger into a wall outlet.
- If the machine will not be used for an extended period, fully charge the batteries, disconnect the battery cables to prevent power loss, and charge the batteries every two weeks to avoid deep discharging, which could lead to battery failure.

Cleaning and maintenance
Cleaning the Machine
- Regularly check the wheels and remove any entanglements.
- Clean the sewage tank and sewage drain hose with clean water periodically.
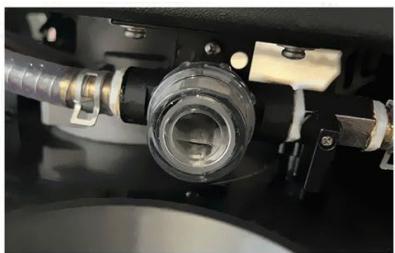
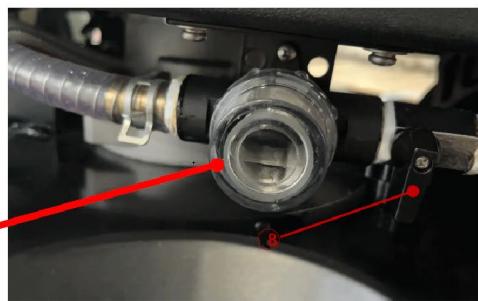
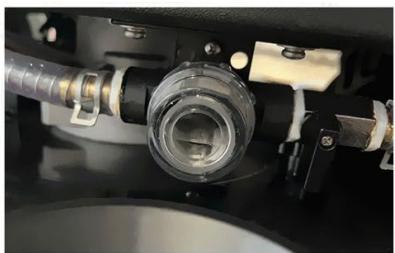
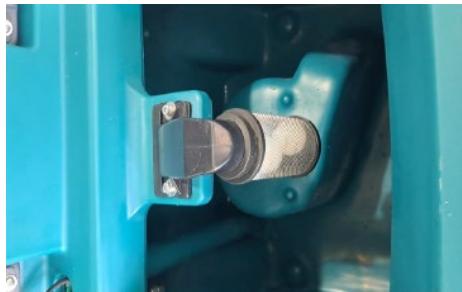
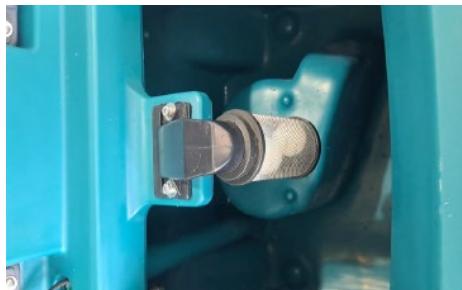
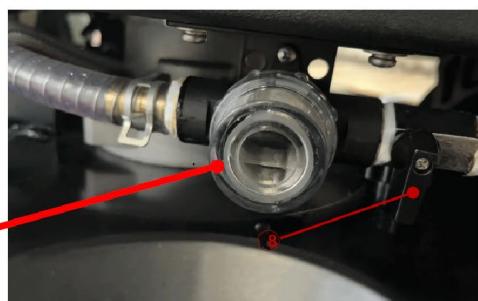
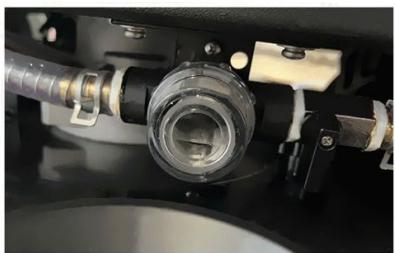
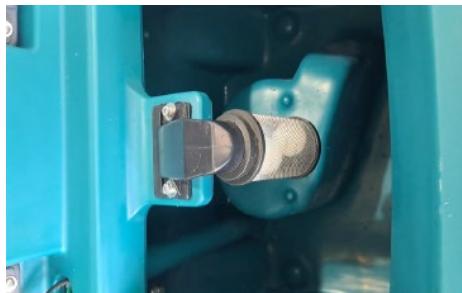
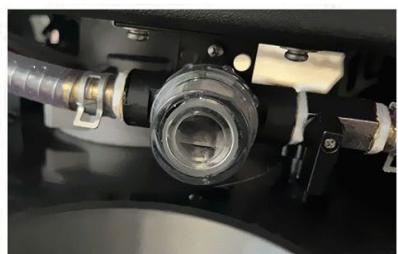
- Clean the water valve filter. If dirt or particles are visible on the transparent cover, unscrew the filter to wash the cover and filter screen thoroughly.

NOTE Do NOT wash the machine body directly with water, as it is not fully waterproof. Direct washing may cause a short circuit or even burn out the machine.


Maintenance of the Machine
Replacing the Brush Plate
-
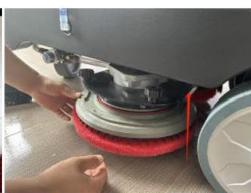
Park the machine on a flat surface and lower the brush plate.
-
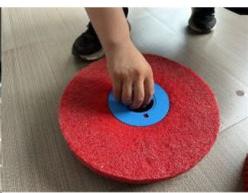
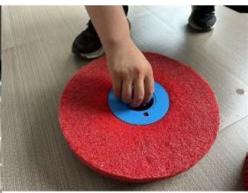
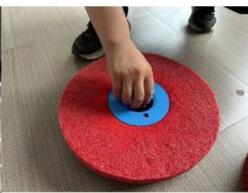
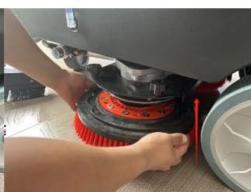
Pull down the brush to detach it from the magnets. Push a new brush or pad onto the magnetic holder until the magnets snap and secure it to the machine.
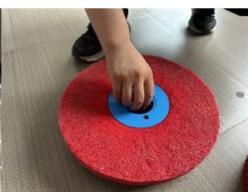
- Installing the Needle Holder: Place a pad at the bottom of the needle holder. Push down or turn the center blue cap to secure the pad in place before snapping the holder onto the bottom of the machine. Extra brushes, pads, or needle holders can be purchased from the original manufacturer.
- Preparation for Delicate Floors: Before cleaning more delicate floors, soak the pad in water for 10-15 minutes to soften it. This step is essential to prevent potential damage to the floor.

Replacing the Squeegee Strip
- Park the machine on a flat surface and ensure it is powered off.
- Turn the innermost knobs to release and remove the squeegee assembly.


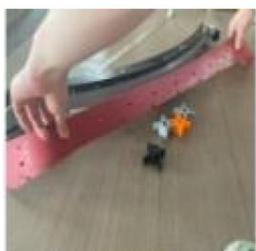
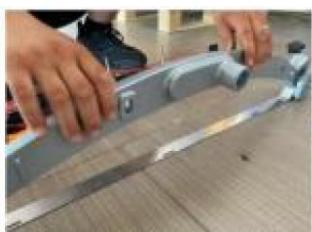
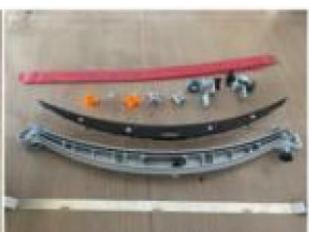
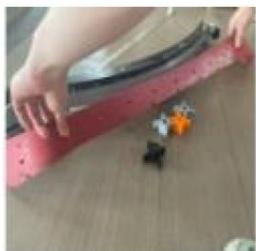
- Unlatch the squeegee assembly and disassemble its components to remove and replace the rubber.


Storage and transportation
Storage
If the machine will not be used for an extended period, remove and clean the squeegee and brush plate, and store them in a dry, clean place. It is recommended to store these parts in an airtight plastic container.
- Ensure that the water tanks are completely drained and cleaned.
- Fully charge the battery before storing the machine. If the machine will remain unused for a long time, recharge the battery regularly (at least twice a month) to maintain battery health.
Transportation
- When lifting or lowering the machine, ensure it is stable to prevent tipping or falling.
- The machine is fixed on a wooden pallet when leaving the factory and transported with appropriate equipment. At the destination, arrange a similar setup for safe loading or unloading.
- When using a forklift to move the machine, transport the entire box with the machine securely inside. Do NOT lift the machine directly with a forklift, as this may cause damage to the machine, and it could easily tip over, leading to potential property damage or injury.
Troubleshooting
| Problem | Cause | Solution |
| The batteries cannot be charged. | The charger is faulty. | The charging port is oxidized. |
| The charging port is oxidized. | Replace the charging port. | |
| The suction motor does not work. | The overload protector has tripped. | Reset the overload protector. |
| The brush plate motor does not work. | The overload protector has tripped. | Reset the overload protector. |
| Not enough water is coming out. | The clean water hose is blocked. | Clean the water hose. |
| There are impurities in the filter cover. | There are impurities in the filter cover. | |
| The water solenoid has failed. | Check, clean, or replace the water solenoid. | |
| Loud noise is produced. | The squeegee is positioned incorrectly. | Adjust the height of the squeegee's universal wheels. |
| The suction motor is faulty. | Replace the suction motor. | |
| The brush plate drops often. | The brush plate is not properly installed. | Re-install the brush correctly. |
| Low water suction efficiency. | The suction hose is blocked. | Clean the suction hose. |
| The sewage tank seal is cracked. | Replace the rubber sealant. | |
| The squeegee strip is cracked. | Replace the squeegee strip. |
Disposing of Used Devices
Do not dispose of this device in municipal waste systems. Hand it over to an electric and electrical device recycling and collection point. Check the symbol on the product, instruction manual and packaging. The plastics used to construct the device can be recycled in accordance with their markings. By choosing to recycle you are making a significant contribution to the protection of our environment.
Contact local authorities for information on your local recycling facility.
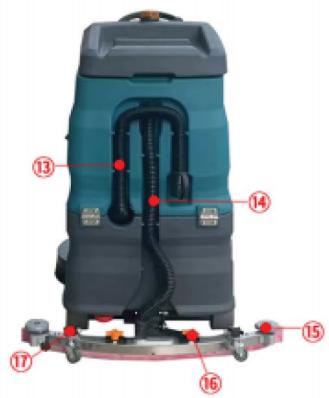
Parts
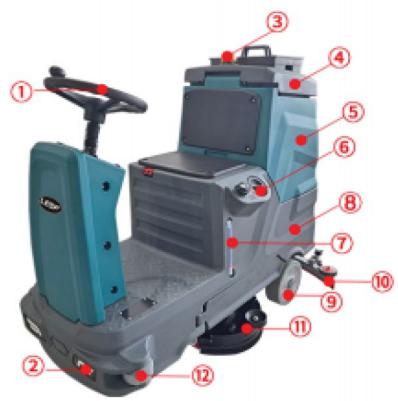

1- Steering wheel
2- LED lights
3- Warning light
4- Sewage tank cover
5- Sewage tank
6- Cleaning water tank inlet
7- Water level indicator
8- Clean water tank
9- Main wheel
10- Squeegee assembly
11- Brush skirt
12- Front collision wheel
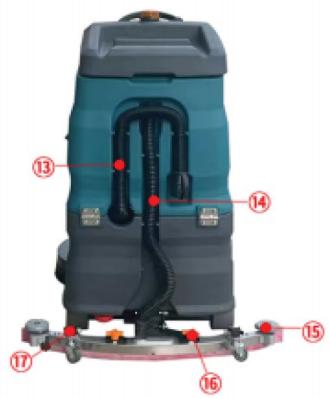
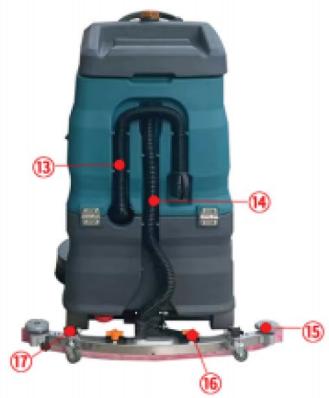
13- Sewage hose
14- Vacuum hose
15- Anti-collision wheel
16- Fixed squeegee
17- Knob to adjust the angle of the squeegee
Control panel and buttons

7
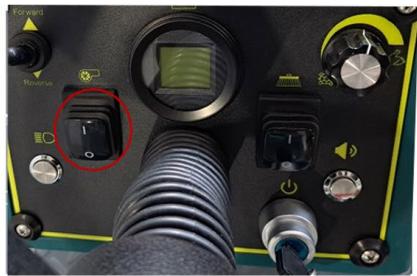
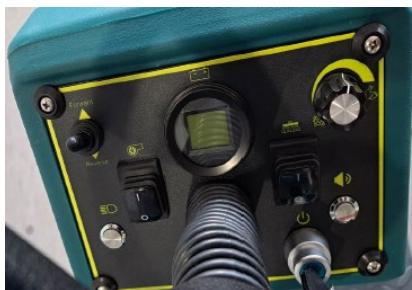
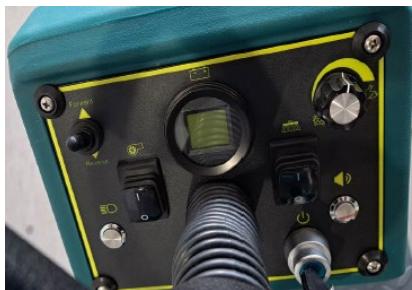
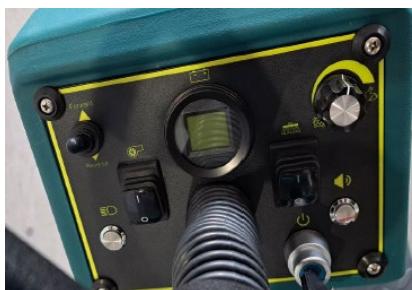
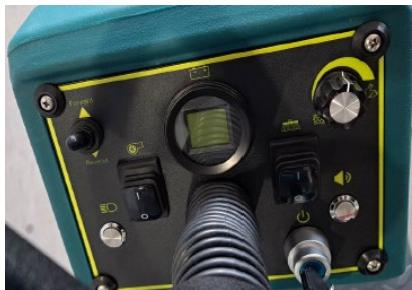
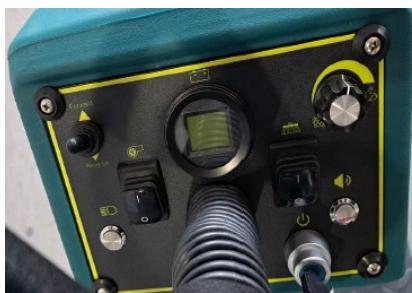
1- Forward/backward button
2- Brush motor button
3- Power display screen
4- Vacuum motor button
5- Speed dial
6- General switch
7- Clean water filter & cap
8- Water valve switch


Instrukcja obsługi
Przesuwanie maszyny





Konserwacja maszyny






1- Kierownica
2- Światła LED
7


Kontrola stavu gumy
Položky úprav

Návod k obsluze
Přesouvání stroje


ČISTĚNÍ A ÚDRŽBA
Čištění stroje


Údržba stroje




1- Volant
2- LED světla
3- Výstražné světlo
7




Mode d'emploi
Déplacer la machine




Entretien de la machine




1- Volant
2- Lumières LED
3- Témoin lumineux
7

1- Bouton avant/arrière


1- Volante
2- Luci a LED
3- Spia luminosa
4- Copertura del serbatoio fognario
7


Elementos de ajuste






1- Volante
2- Luces LED
7

6- Interruptor general


Kiigazítási tételek


Használati utasítás
A gép mozgatása


A gép karbantartása






1- Kormánykerék
2- LED fények
7


Kontrol af gummiets status
Justeringsposter






1- Rattet
2- LED-lys
3- Advarselslampe
1- Frem/tilbage-knap
2- Knap til børstemotor


Kumin tilan tarkistus
Säätökohteet


Käyttöohjeet
Koneen siirtäminen


Koneen huolto


1- Ohjauspyörä
2- LED valot
3- Varoitusvalo
7




Gebruiksaanwijzing



Opslag en transport
Opslag

1- Stuur
2- LED-verlichting
7

Koble til batteriledningene

Kontrollere vannmengden i rentvannstanken
Justeringselementer


Bruksanvisning
Flytte maskinen


Bytte av nalstripen


1- Ratt
2- LED-lys
3- Varsellampe
4- Kloakktankdeksel
5- Kloakktank
6- Rensevanntankinntak
7- Vannivåindikator
8- Ren vanntank
9- Hovedhjul
10- Nalmontering
11- Børsteskjørt
7

1- Forover/bakover-knapp
2- Børstemotorknapp
3- Power display skjerm
4- Vakuummotorknapp
5- Hurtigvalg
6- Generell bryter

Anslutning av batterikablar


Kontrollera gummits status
Justeringsartiklar


Bruksanvisning
Flytta maskinen




Byte av skrapremsan





1- Ratt
2- LED-lampor
3- Varningslampa
4- Avloppstankens lock
7

Itens de ajuste




Carregando as baterias


Armazenamento e transporte
Armazenar
1- Volante
2- Luzes LED
7


Pripojenie káblov batérie


Kontrola stavu gumy


Návod na obsluhu
Presúvanie stroja

Čistenie a údržba
Čistenie stroja


Údržba stroja


Skladovanie a preprava
Skladovanie

1- Volant
2- LED svetlá
3- Výstražné svetlo
7

1- Tlačidlo dopredu/dozadu
2- Tlačidlo motora kefy
3- Obrazovka napájania







1- Волан
2- LED светлини
7

1- Бутон за напред/назад






1- Τιμόνι
2- Φώτα LED

Ovaj proizvod je prikladan za različita okruženja, uključujući restorane, škole, bolnice, tvornice, supermarkete, skladišta i uredske zgrade. Učinkovito čisti više vrsta tvrdih podova, kao što su zrcalne pločice, mramor, epoksid, PVC, šmirgl, terrazzo, beton i površine od keramičkih pločica.

Spajanje kabela baterije
- Ispraznite kanalizacijski spremnik ako je potrebno.
- Pažljivo otvorite spremnik otpadne vode i provjerite jesu li svi kabeli na baterijama spojeni i zategnuti.
- Spojite polove baterije. Obratite pozornost na pozitivne i negativne terminale.
- Okrenite spremnik za kanalizaciju natrag u prvobitni položaj.
Provjere i podešavanja prije uporabe
Provjerite stavke


Stavke prilagodbe
Podešavanje sklopa brisača


Upute za rad
Premještanje stroja


Održavanje stroja
Zamjena ploče četke
Zamjena gumene trake


Skladištenje i transport
Skladištenje
1- Volan
2- LED svjetla


Gumos büklès patikrinimas
Koregavimo elementai


Mašinos priežiūra



1- Vairas
2- LED lemputés
7

1- Pirmyn/atgal mygtukas



Instructiuni de operare
Mutarea Maşinii




Depozitare si transport
Depozitare

1- Volan
2- Lumini LED
7


Preverjanje količine vode v rezervoarju za čisto vodo
Preverjanje stanja gume
• Gumo je treba zamenjati, če je obrabljena ali razrezana.
- Če guma ne more ustvariti zrakotesne situacije, ko se dotika tal, sesalni učinek ne bo zadovoljiv.

Prilagoditveni elementi
Prilagoditev sklopa strgala


Navodila za uporabo
Premikanje stroja
- Vklopite splošno napajanje.
- Potisnite stikalo naprej/nazaj v položaj naprej, nato pritisnite pedal za plin, da premaknete stroj naprej.
- Povlecite stikalo za naprej/nazaj v položaj nazaj, nato pritisnite pedal za plin, da stroj premaknete vzvratno.
- Za ustavitev preprosto spustite pedal za plin. Elektromagnetna zavora se bo samodejno vključila in stroj zaustavila.


Vzdrževanje stroja
Zamenjava traku strgala
- Stroj parkirajte na ravno površino in se prepričajte, da je izklopljen.
- Obrnite najbolj notranje gumbe, da sprostite in odstranite sklop strgala.

- Sprostite sklop strgala in razstavite njegove komponente, da odstranite in zamenjate gumo.


1- volan
2- LED luči
3- Opozorilna lučka
4- Pokrov rezervoarja za kanalizacijo
7

1- Gumb naprej/nazaj
2- Gumb za motor krtač
For the disposal of the device please consider and act according to the national and local rules and regulations.
CONTACT
expondo Polska sp. z o.o. sp. k.





- BERICHTIGUNGSPOSTEN
- BETRIEBSANLEITUNG
- UNLOADING AND ASSEMBLING
- UNLOADING THE MACHINE
- ASSEMBLING THE MACHINE
- INSTALLING THE SQUEEGEE
- CONNECTING THE BATTERY CORDS
- CHECKS AND ADJUSTMENTS BEFORE USING
- CHECK ITEMS
- CHECKING THE WATER VOLUME IN THE CLEAN WATER TANK
- CHECKING THE WATER LEVEL IN THE SEWAGE TANK
- CHECKING THE VOLTAGE OF THE BATTERIES
- CHECKING THE STATUS OF THE BRUSH PLATE
- CHECKING THE STATUS OF THE RUBBER
- ADJUSTMENT ITEMS
- ADJUSTMENT OF THE SQUEEGEE ASSEMBLY
- OPERATING INSTRUCTIONS
- MOVING THE MACHINE
- SCRUBBING THE FLOOR
- DRAINING THE SEWAGE
- STOPPING THE MACHINE
- CHARGING THE BATTERIES
- CLEANING AND MAINTENANCE
- CLEANING THE MACHINE
- MAINTENANCE OF THE MACHINE
- REPLACING THE BRUSH PLATE
- REPLACING THE SQUEEGEE STRIP
- STORAGE AND TRANSPORTATION
- STORAGE
- TRANSPORTATION
- DISPOSING OF USED DEVICES
- PARTS
- CONTROL PANEL AND BUTTONS
- INSTRUKCJA OBSŁUGI
- PRZESUWANIE MASZYNY
- KONSERWACJA MASZYNY
- KONTROLA STAVU GUMY
- POLOŽKY ÚPRAV
- NÁVOD K OBSLUZE
- PŘESOUVÁNÍ STROJE
- ČISTĚNÍ A ÚDRŽBA
- ČIŠTĚNÍ STROJE
- ÚDRŽBA STROJE
- LED SVĚTLA
- VÝSTRAŽNÉ SVĚTLO
- MODE D'EMPLOI
- DÉPLACER LA MACHINE
- ENTRETIEN DE LA MACHINE
- ELEMENTOS DE AJUSTE
- KIIGAZÍTÁSI TÉTELEK
- HASZNÁLATI UTASÍTÁS
- A GÉP MOZGATÁSA
- A GÉP KARBANTARTÁSA
- KONTROL AF GUMMIETS STATUS
- JUSTERINGSPOSTER
- KUMIN TILAN TARKISTUS
- SÄÄTÖKOHTEET
- KÄYTTÖOHJEET
- KONEEN SIIRTÄMINEN
- KONEEN HUOLTO
- GEBRUIKSAANWIJZING
- OPSLAG EN TRANSPORT
- OPSLAG
- KOBLE TIL BATTERILEDNINGENE
- KONTROLLERE VANNMENGDEN I RENTVANNSTANKEN
- JUSTERINGSELEMENTER
- BRUKSANVISNING
- FLYTTE MASKINEN
- BYTTE AV NALSTRIPEN
- ANSLUTNING AV BATTERIKABLAR
- KONTROLLERA GUMMITS STATUS
- JUSTERINGSARTIKLAR
- FLYTTA MASKINEN
- BYTE AV SKRAPREMSAN
- RATT
- ITENS DE AJUSTE
- CARREGANDO AS BATERIAS
- ARMAZENAMENTO E TRANSPORTE
- ARMAZENAR
- PRIPOJENIE KÁBLOV BATÉRIE
- NÁVOD NA OBSLUHU
- PRESÚVANIE STROJA
- ČISTENIE A ÚDRŽBA
- ČISTENIE STROJA
- ÚDRŽBA STROJA
- SKLADOVANIE A PREPRAVA
- SKLADOVANIE
- ВОЛАН
- LED СВЕТЛИНИ
- SPAJANJE KABELA BATERIJE
- PROVJERE I PODEŠAVANJA PRIJE UPORABE
- PROVJERITE STAVKE
- STAVKE PRILAGODBE
- PODEŠAVANJE SKLOPA BRISAČA
- UPUTE ZA RAD
- PREMJEŠTANJE STROJA
- ODRŽAVANJE STROJA
- ZAMJENA PLOČE ČETKE
- ZAMJENA GUMENE TRAKE
- SKLADIŠTENJE I TRANSPORT
- SKLADIŠTENJE
- GUMOS BÜKLÈS PATIKRINIMAS
- KOREGAVIMO ELEMENTAI
- MAŠINOS PRIEŽIŪRA
- INSTRUCTIUNI DE OPERARE
- MUTAREA MAŞINII
- DEPOZITARE SI TRANSPORT
- DEPOZITARE
- PREVERJANJE KOLIČINE VODE V REZERVOARJU ZA ČISTO VODO
- PREVERJANJE STANJA GUME
- PRILAGODITVENI ELEMENTI
- PRILAGODITEV SKLOPA STRGALA
- NAVODILA ZA UPORABO
- PREMIKANJE STROJA
- VZDRŽEVANJE STROJA
- ZAMENJAVA TRAKU STRGALA
- CONTACT
Brand : Ulsonix
Model : TOPCLEAN BATA SELF
Category : Washing machine