
ULX-SOCL L - Washing machine Ulsonix - Free user manual and instructions
Find the device manual for free ULX-SOCL L Ulsonix in PDF.


| Product type | Telescopic brush for cleaning glass surfaces |
| Brand | Ulsonix |
| Model | ULX-SOCL L |
| Maximum water inlet pressure | 5.9 bar |
| Brush extension (min / max) | 1.78 m / 7.2 m |
| Water hose length | 20 m |
| Brush width | 35 cm |
| Weight | 3.2 kg |
| Intended use | Cleaning glass and similar surfaces |
| Water supply | Connection to the water network |
| Mounting system | Locking clamps and angle adapter |
| Operating safety | Do not exceed the recommended inlet pressure |
| Maintenance | Store in a well-ventilated and dry place |
| Assembly required | Yes, assembly of the hoses, brush, and telescopic bar |
| Repairability | Repair only by the manufacturer's after-sales service |
| Included accessories | Water hoses, Y and T connectors, angle adapter, telescopic bar |
Frequently Asked Questions - ULX-SOCL L Ulsonix
User questions about ULX-SOCL L Ulsonix
0 question about this device. Answer the ones you know or ask your own.
Ask a new question about this device
Download the instructions for your Washing machine in PDF format for free! Find your manual ULX-SOCL L - Ulsonix and take your electronic device back in hand. On this page are published all the documents necessary for the use of your device. ULX-SOCL L by Ulsonix.
USER MANUAL ULX-SOCL L Ulsonix
Read the manual before use.

CAUTION! Read all safety warnings and instructions. Failure to follow warnings and instructions could result in serious injury or even death.
The term „device“ or „product“ in the warnings and in the description of the instructions refers to: TELESCOPIC BRUSH FOR CLEANING GLASS SURFACES.
- SAFETY OF USE
a) Keep the work area tidy and well-lit. Disorder or poor lighting can lead to accidents. Be foresighted, watch what you are doing, and use common sense when using the device.
b) If in doubt as to whether the product is working properly or found to be damaged, contact the manufacturer's technical service.
c) Only the manufacturer's service department may repair the appliance. Do not attempt to repair the product on your own!
d) Keep packaging components and small installation parts out of the reach of children.
e) Do not overestimate your capabilities. Maintain body balance and equilibrium at all times during operation. This allows for better control of the machine in unexpected situations.
f) Disconnect the water supply before making adjustments, replacing accessories, and after working with the device. This precaution reduces the risk of accidents.
g) Do not tamper with the device to alter its performance or design.
h) Keep the unit away from sources of fire and heat.
i) Do not exceed the recommended supply pressure as this may damage the unit.
- SCOPE OF APPLICATION
The product is designed for cleaning glass and similar surfaces.
The operator is responsible for any damage caused by misuse.
- PRODUCT DESCRIPTION
ATTENTION! This product's view can be found on the last pages of the operating instructions (pp. 21-29).
- Brush
- Water hose system
- Locking clamps
- Telescopic tube
- Handle
-
Water supply connection
-
PRODUCT ASSEMBLY
1) Connect the short water hoses with the „Y“ and „T“ connectors (fig. 1a, 1b, 1c).
2) Connect the water hose set to the brush (Fig. 1d).
3) Connect the angle adapter to the brush (Fig. 1e, 1f).
4) Pass the water hose through the telescopic tube (Fig. 1g).
5) When the hose is visible in the opening of the telescopic tube, lever it up and pull the end of the hose out of the opening (fig. 1h, 1i, 1j).
6) Connect the telescopic tube to the brush and connect the water hose to the connector. Adjust the correct angle between the brush and the telescopic tube (Fig. 1k, 1l, 1m).
7) Connect the long water hose to the other part of the hose with a coupling. At the end of the hose, attach a connector suitable for the water supply (fig. 1n).
- REPAIRS
Step 1: Mounting the clamp
a) Sort the parts (fig. 2a).
b) Slide the clamp over the pipe (fig. 2b).
c) Put the clamp in the right place (fig. 2c).
Step 2: Installing the gasket
a) Place the gasket on the end of the pipe (fig. 3a).
b) Align the grooves (fig. 3b).
c) Connect the pipes (fig. 3c).
Step 3: Installation of the connection
Slide the clamp into the appropriate position (Fig. 4a).
Step 4: Installation of the clamping lever
a) Tighten the smaller arm of the plastic clamp with a screw (Fig. 5a).
b) Screw the lever to the larger clamp arm with a screw (fig. 5b).
c) Open the lever to adjust the length of the telescopic tube or close the lever to lock the length (fig. 5c).
- CLAMPING FORCE ADJUSTMENT
a) Tighten the lever screw clockwise to increase the clamping force (Fig. 6a).
b) Loosen the lever screw counterclockwise to reduce the clamping force (fig. 6b).
- DIRECTIONS FOR USE
1) If there are leaks in the hose connections (see Figure 7a, locations marked „A“), try to seat the hose ends deeper.
2) Ensure that the angle adapter is properly tightened.
3) Store the product in a well-ventilated and dry place.
INSTRUKCJA OBSŁUGI
DANE TECHNICZNE
VORBEREITUNG FÜR DIE NUTZUNG | PREPARATION FOR USE | PRZYGOTOWANIE DO UŻYTKOWANIA PRÍPRAVA K POUŽIVÁNÍ | PRÉPARATION À L'UTILISATION | PREPARAZIONE ALL'USO | PREPARACIÓN PARA EL USO ELÓKÉSZÍTÉS A HASZNÁLATRA | FORBEREDELSE TIL BRUG

1c

1d

1e

1f

1g

1h

1i

1j

1k
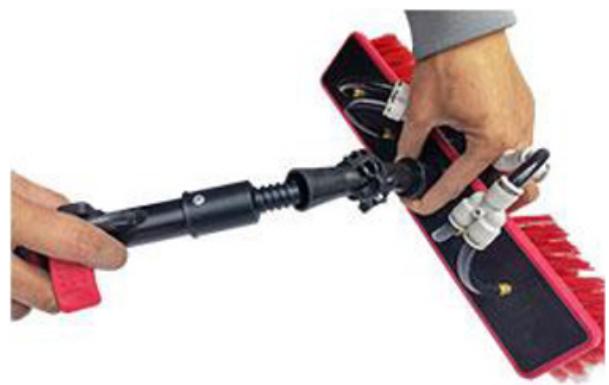
11

1m
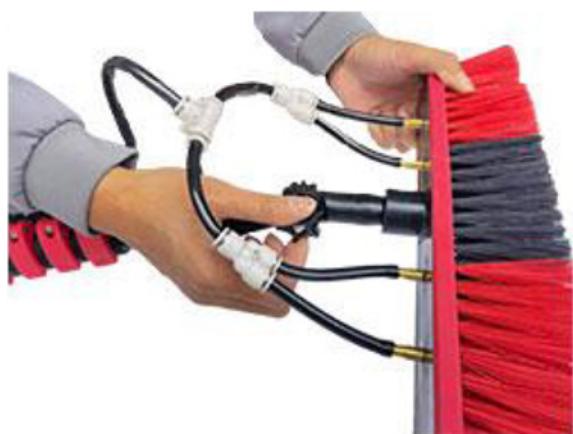
1n

2a

2b

18.05.2023
2c

3a

3b
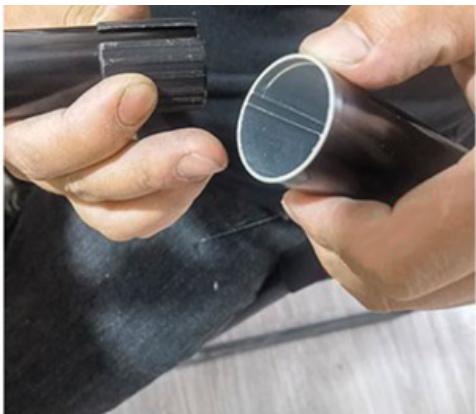
3c

4a

5a

18.05.2023
5b

5c

6a

ulsonix
6b

7a

NOTES/NOTIZEN
NOTES/NOTIZEN
Our customers' satisfaction is our main goal!
Please contact us with questions AT:




Brand : Ulsonix
Model : ULX-SOCL L
Category : Washing machine