
51.6 Li SP comfort - Lawn mower AL-KO - Free user manual and instructions
Find the device manual for free 51.6 Li SP comfort AL-KO in PDF.
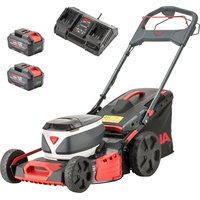


| Brand | AL-KO |
| Model | 51.6 Li SP comfort |
| Product type | Self-propelled cordless lawn mower |
| Power supply | Lithium-ion batteries (2x 18 V, 36 V) |
| Cutting width | 51 cm |
| Cutting height adjustment | Centralized, 6 positions |
| Cutting system | Rotary blade |
| Self-propulsion | Yes, with clutch lever |
| Mowing modes | Collection, side discharge, mulching (with accessory) |
| Grass catcher | With fill level indicator |
| Handlebar | Height adjustable, foldable |
| Charge level display | 4 green LEDs on the cockpit |
| Safety devices | Safety bail, Start button, deflector flap |
| Battery compatibility | AL-KO 18V/36V range (Bxxx Li, Cxxx Li) |
| Maintenance | Regular cleaning of the cutting deck, check and replace blade |
| Warranty | Legal warranty against manufacturing defects |
Frequently Asked Questions - 51.6 Li SP comfort AL-KO
User questions about 51.6 Li SP comfort AL-KO
0 question about this device. Answer the ones you know or ask your own.
Ask a new question about this device
Download the instructions for your Lawn mower in PDF format for free! Find your manual 51.6 Li SP comfort - AL-KO and take your electronic device back in hand. On this page are published all the documents necessary for the use of your device. 51.6 Li SP comfort by AL-KO.
USER MANUAL 51.6 Li SP comfort AL-KO
34.6 Li comfort 38.6 Li comfort 43.6 Li comfort 46.6 Li SP comfort 51.6 Li SP comfort
ALKO18V/36V 1BATTERY/2 VOLTAGES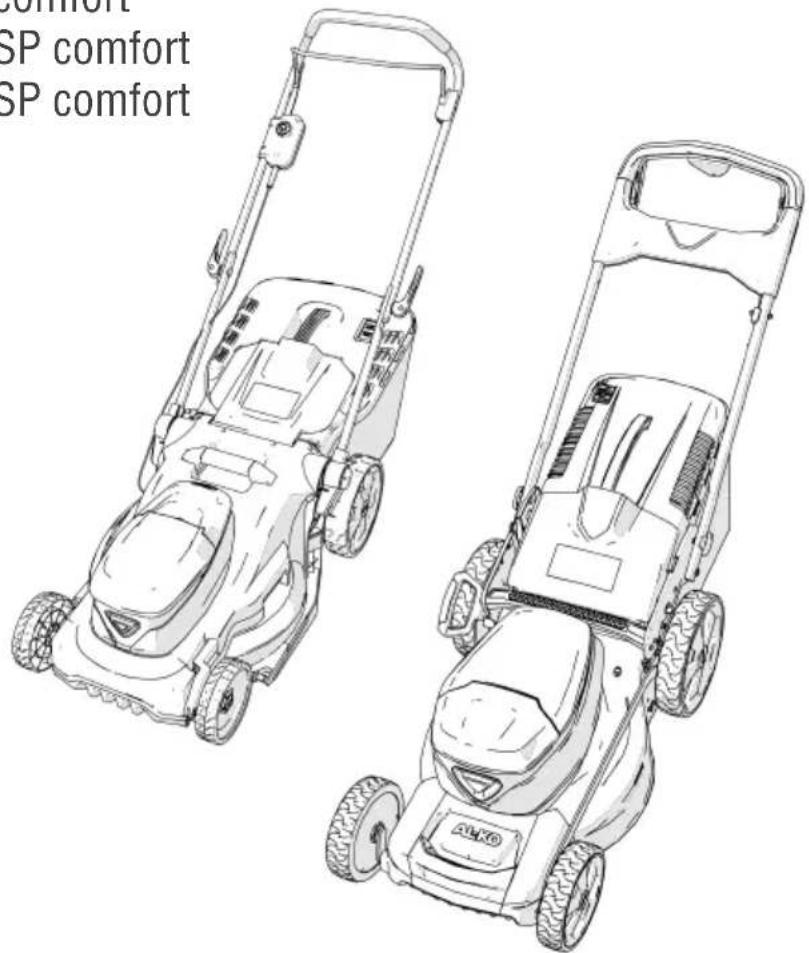






Table of Contents
German 16 English 36 Dutch 55 French 74 Spanish 95 Italian 115 Slovenian 135 Croatian 154 Serbian 173 Polish 193 Czech 214 Slovak 233 Hungarian 252 Danish 272 Swedish 291 Norwegian 309 Finnish 327 Estonian 345 Lithuanian 363 Latvian 382 Romanian 402 Bulgarian 421 Russian 443 Ukrainian 466
© 2026
AL-KO KOBER GROUP Kottz, Germany
This documentation or excerpts therefrom may not be reproduced or disclosed to third parties without the express permission of the AL-KO KOBER GROUP.
01 * 34.6 Li comfort
a) In complete set
02 ** 38.6 Li comfort a) In complete set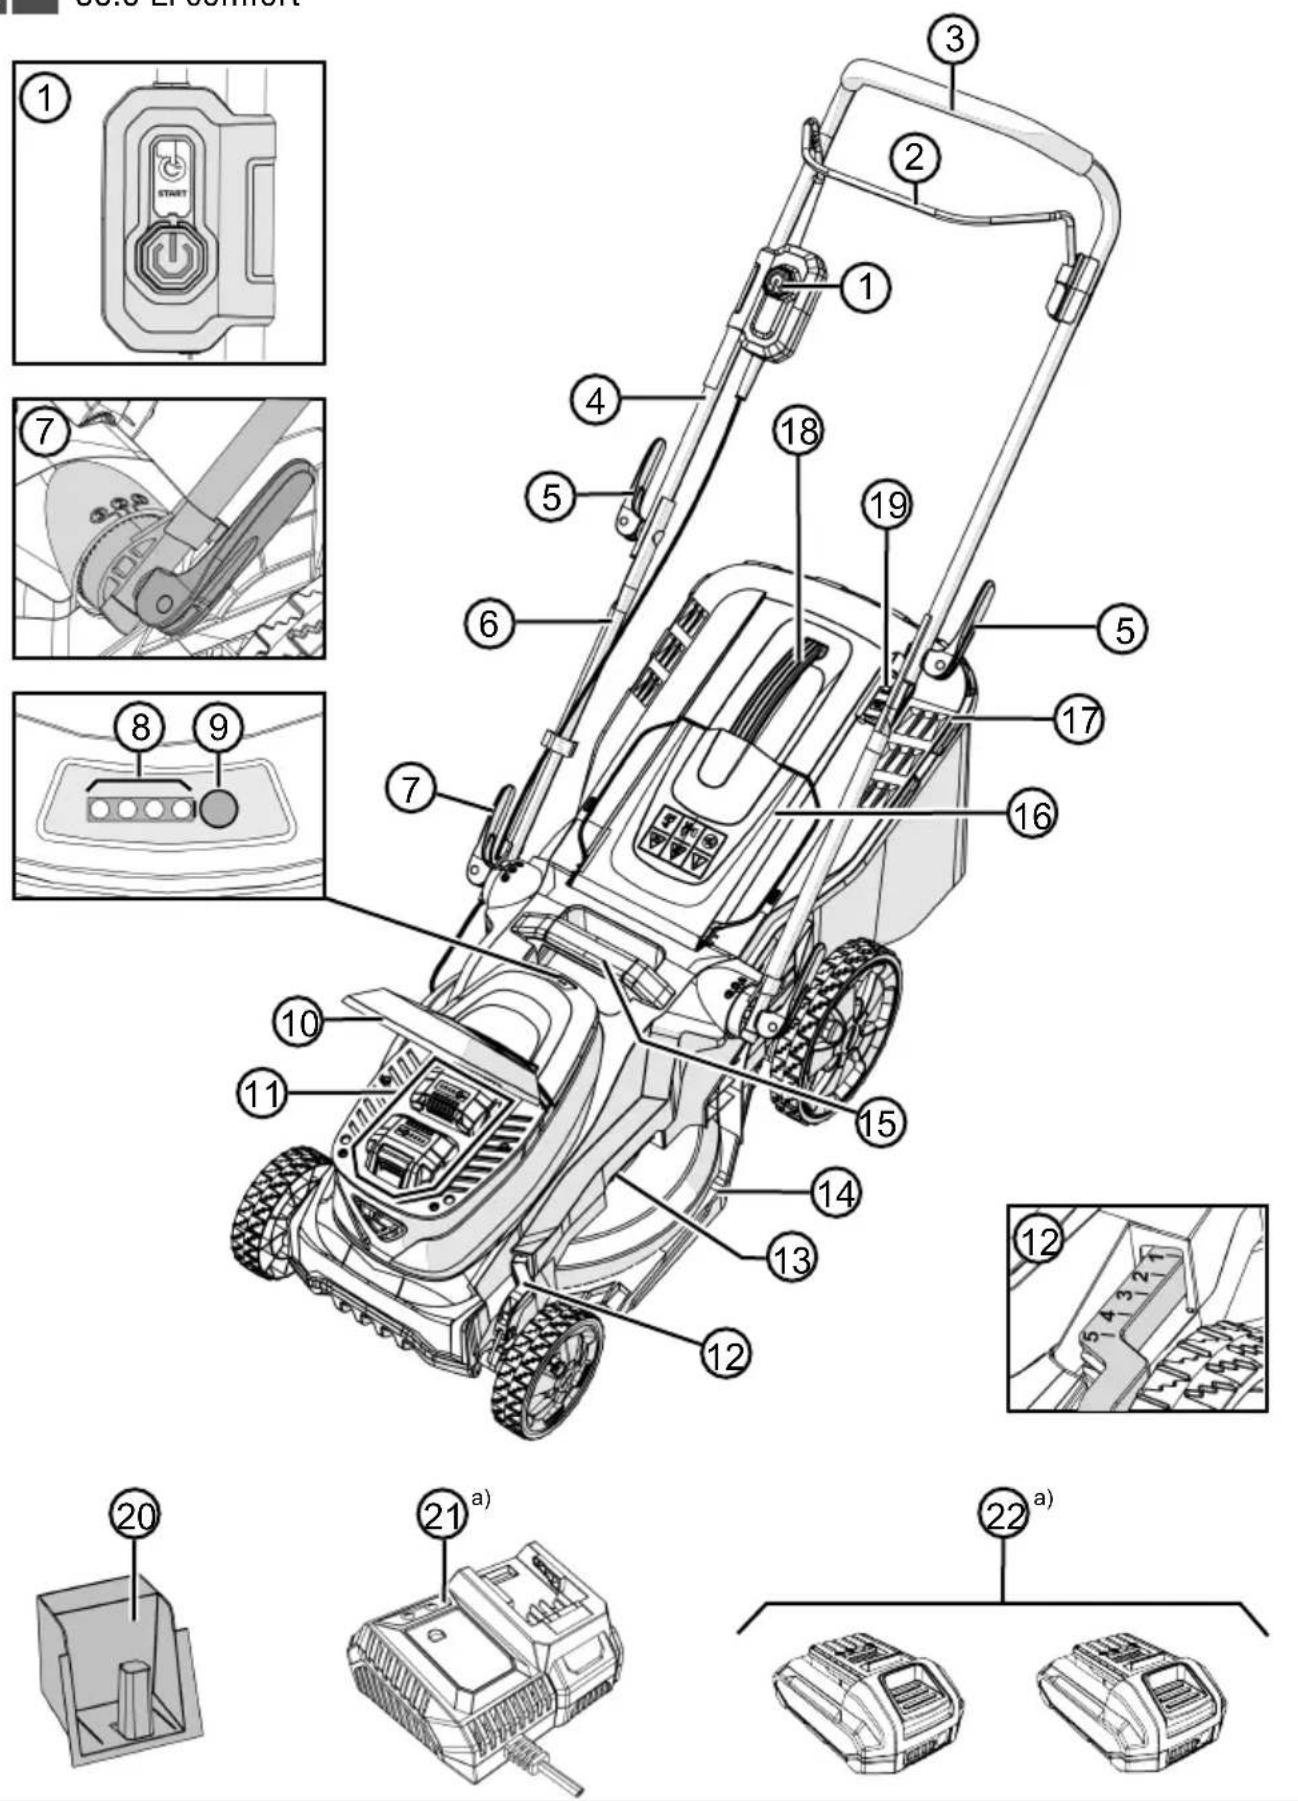
43.6 Li comfort
a) In complete set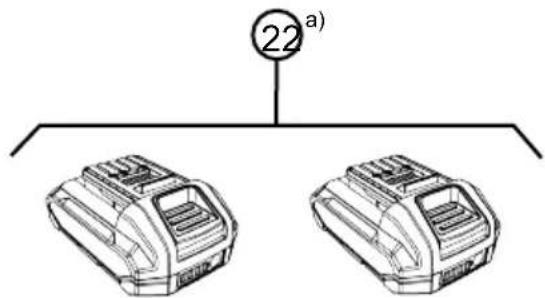
04 *** 46.6 Li SP comfort | 51.6 Li SP comfort a) In complete set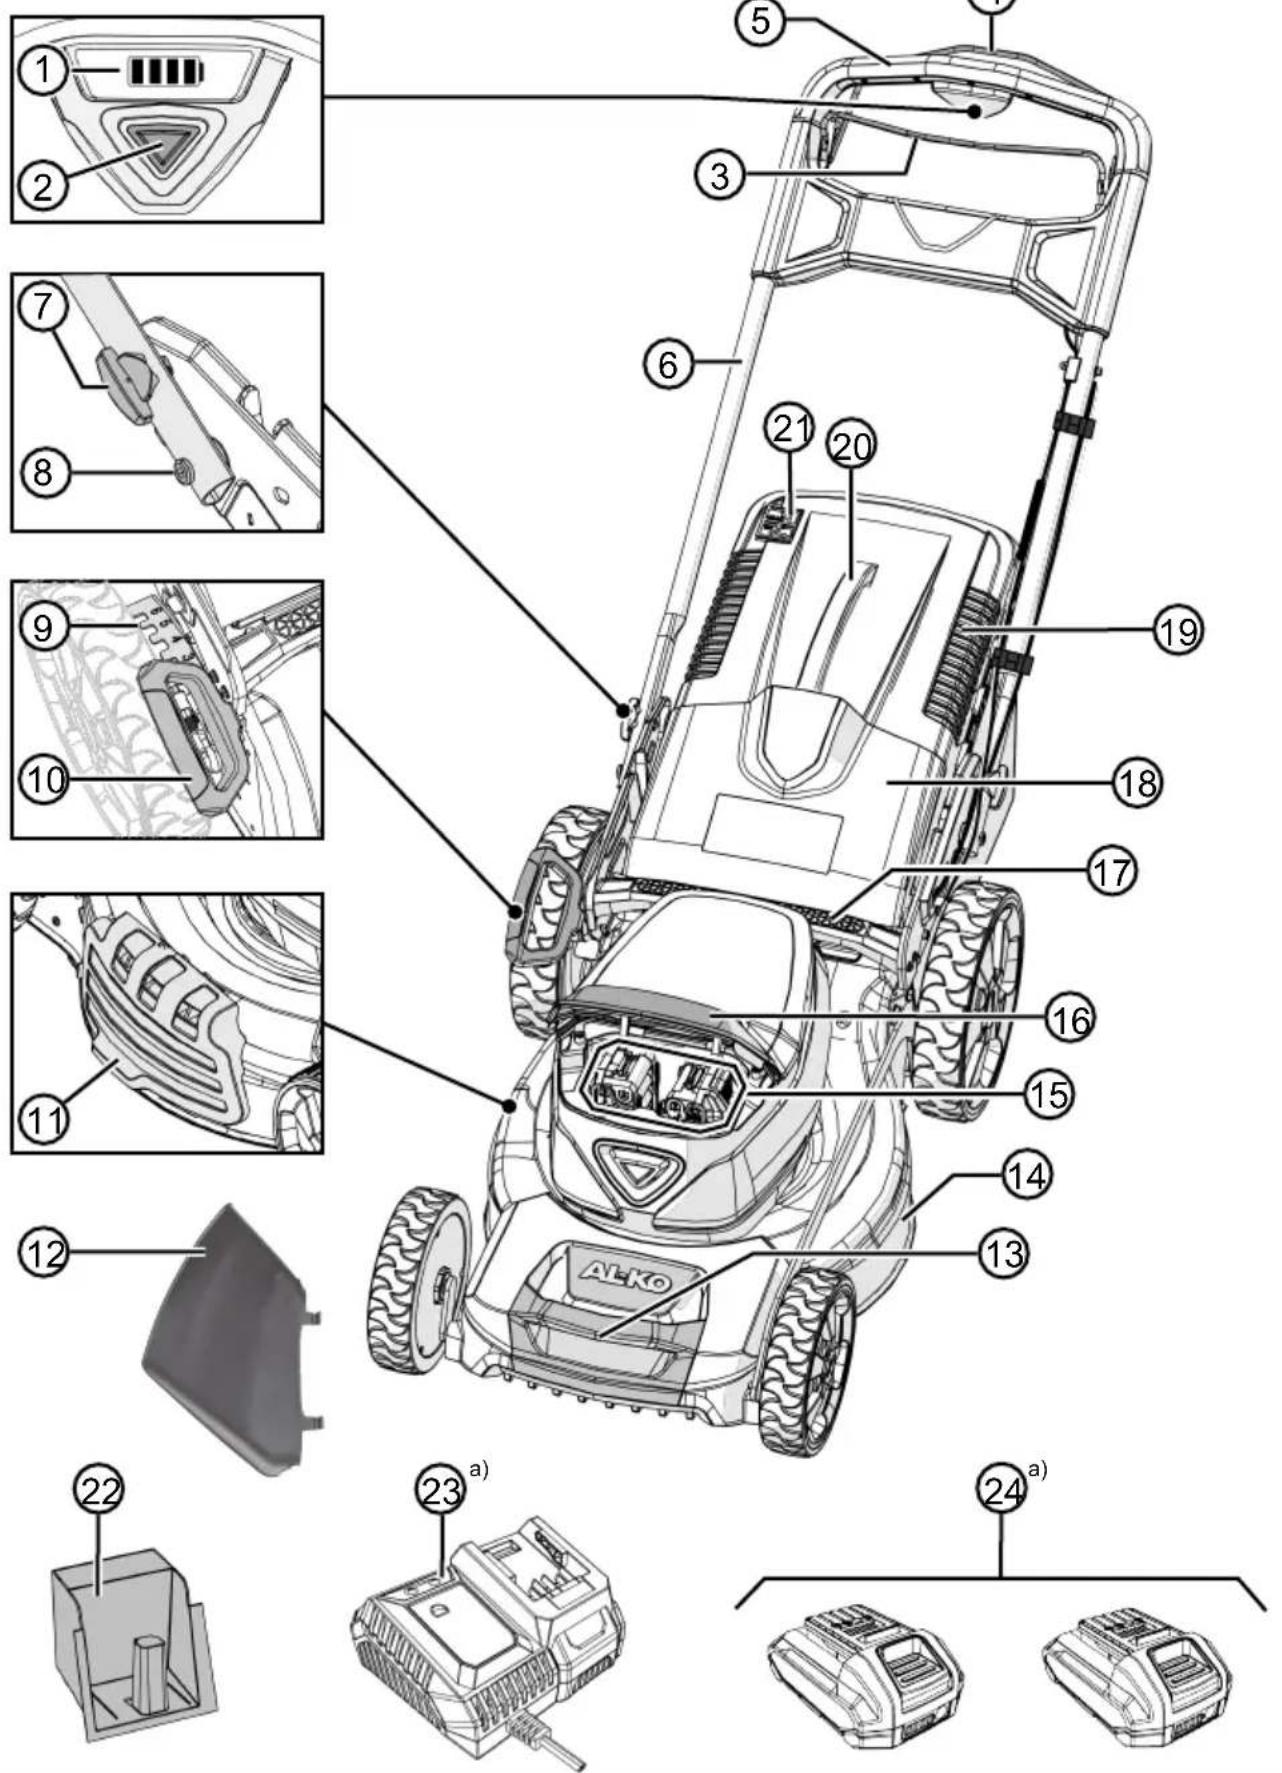
* 34.6 Li comfort ** 38.6 Li comfort|43.6 Li comfort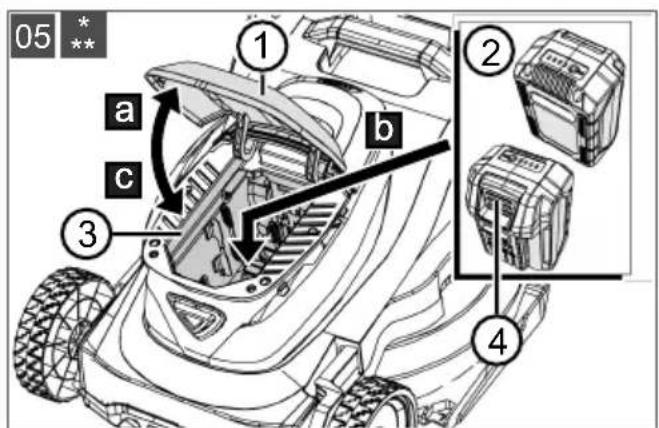
*** 46.6 Li SP comfort | 51.6 Li SP comfort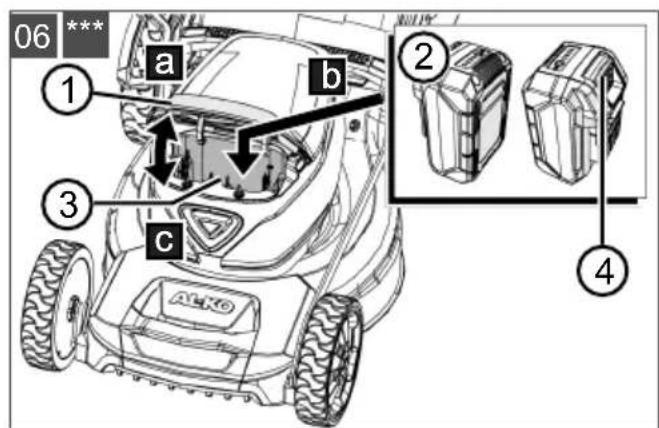
* 34.6 Li comfort ** 38.6 Li comfort | 43.6 Li comfort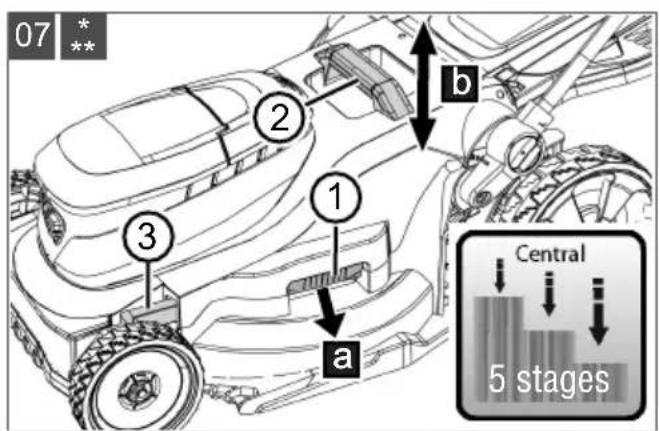
*** 46.6 Li SP comfort | 51.6 Li SP comfort
* 34.6 Li comfort ** 38.6 Li comfort | 43.6 Li comfort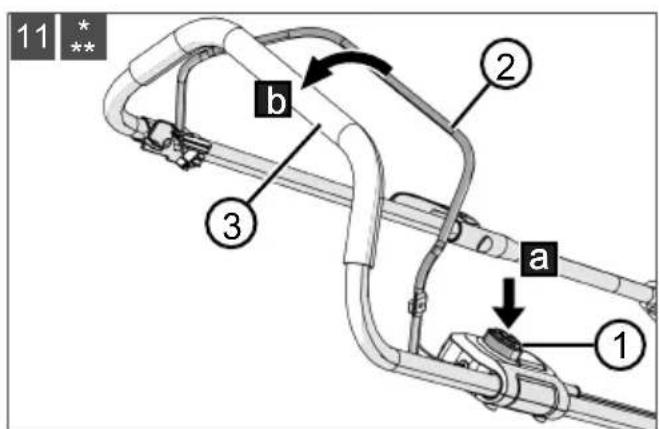
*** 46.6 Li SP comfort | 51.6 Li SP comfort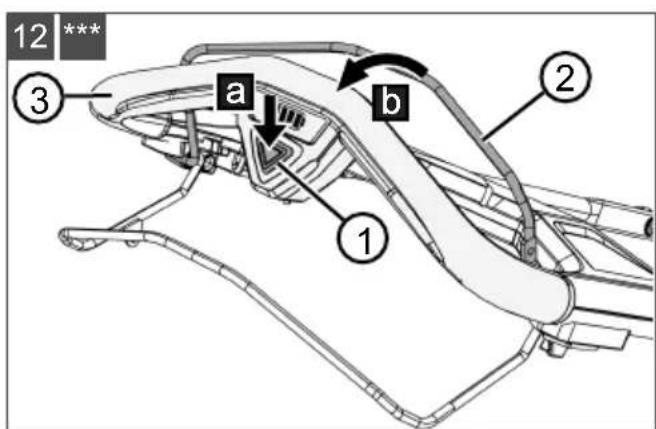
46.6 Li SP comfort | 51.6 Li SP comfort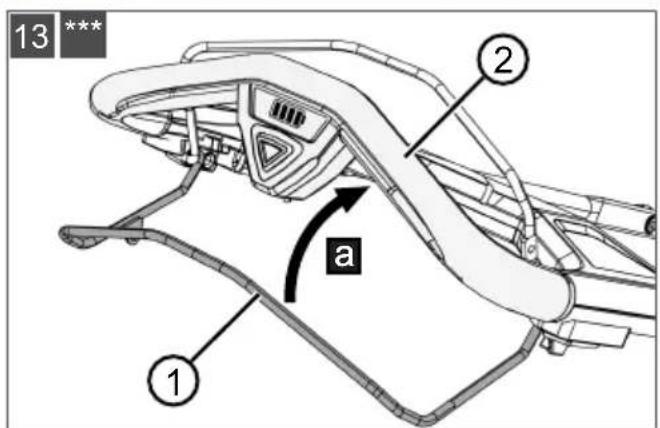
* 34.6 Li comfort ** 38.6 Li comfort | 43.6 Li comfort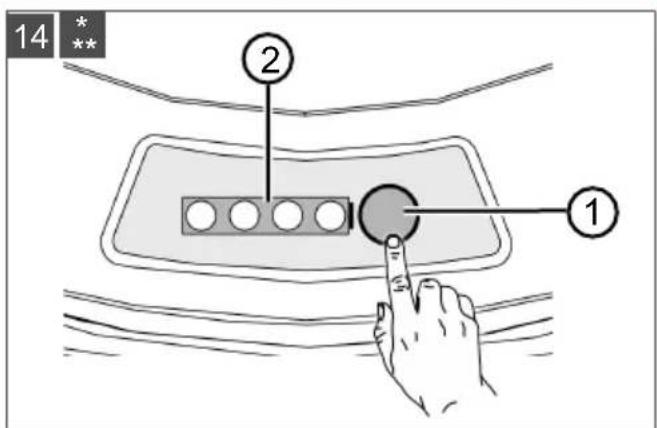
*** 46.6 Li SP comfort | 51.6 Li SP comfort ** 38.6 Li comfort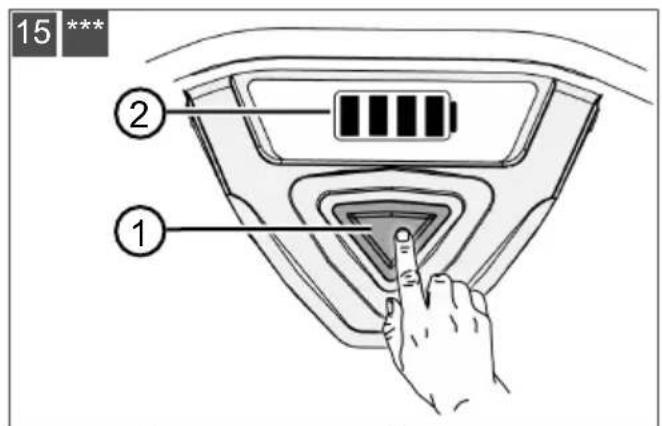
** 43.6 Li comfort *** 46.6 Li SP comfort | 51.6 Li SP comfort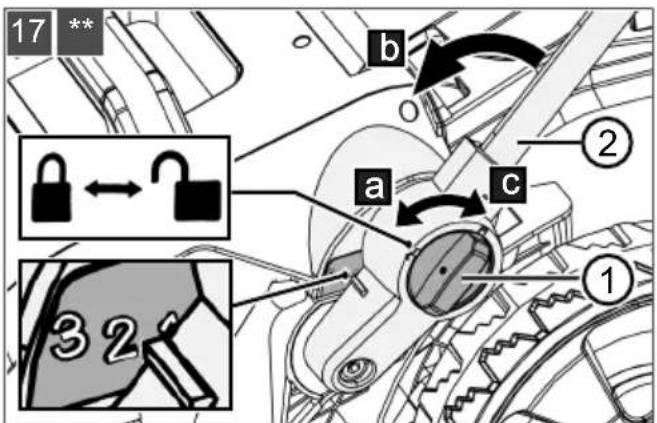
* 34.6 Li comfort ** 38.6 Li comfort | 43.6 Li comfort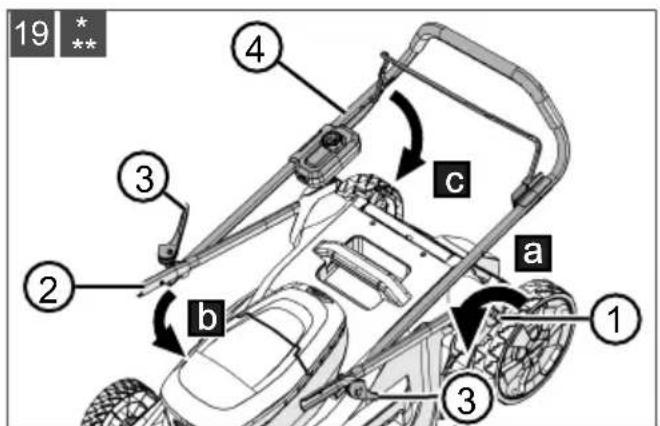
46.6 Li SP comfort | 51.6 Li SP comfort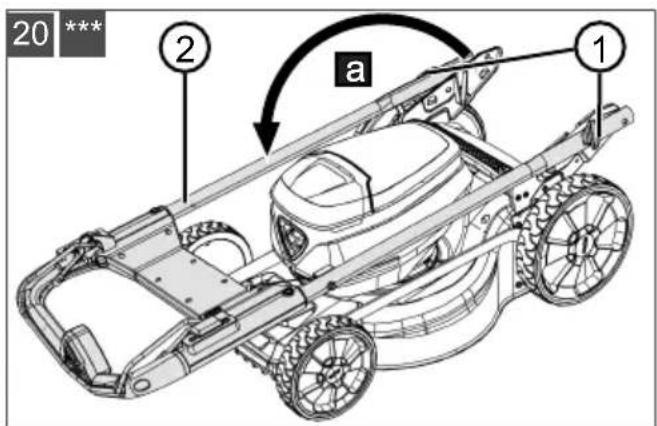
** 38.6 Li comfort | 43.6 Li comfort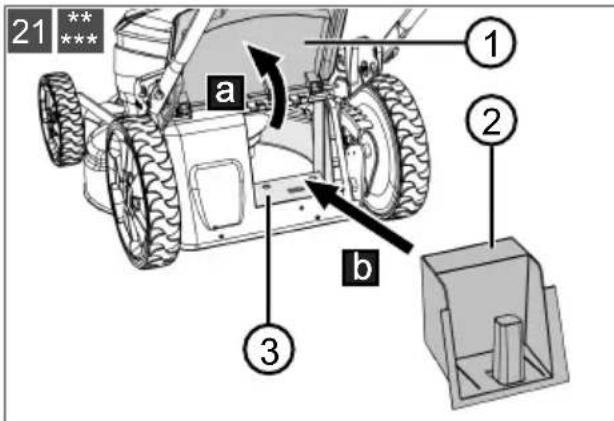
*** 46.6 Li SP comfort | 51.6 Li SP comfort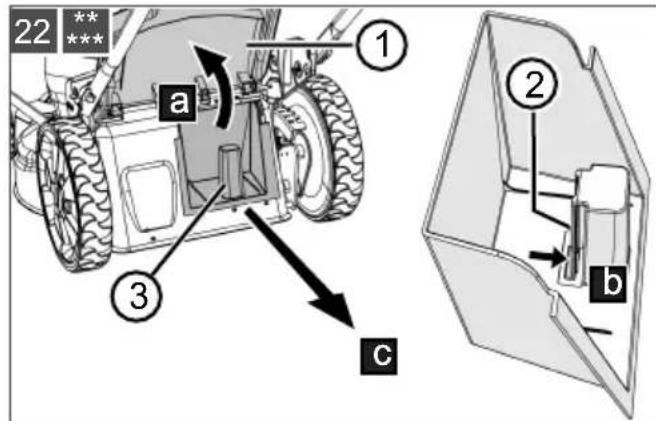
*** 46.6 Li SP comfort | 51.6 Li SP comfort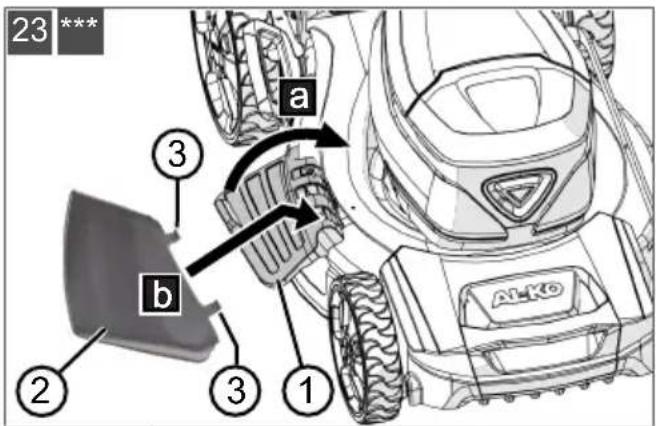
*** 46.6 Li SP comfort | 51.6 Li SP comfort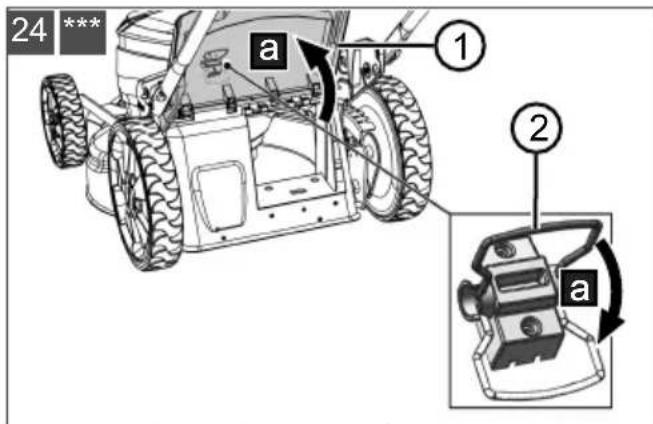
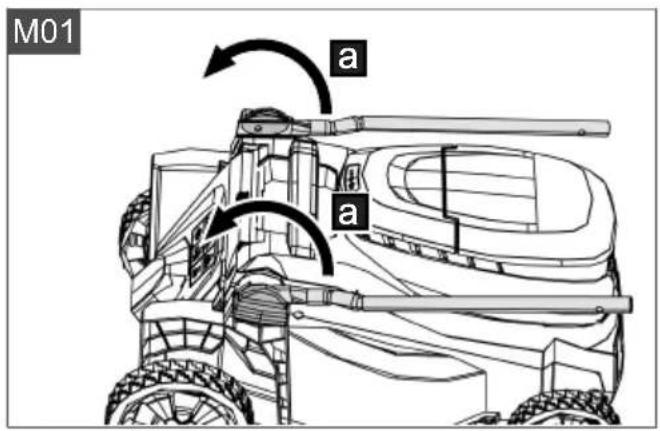
Installation
34.6 Li comfort
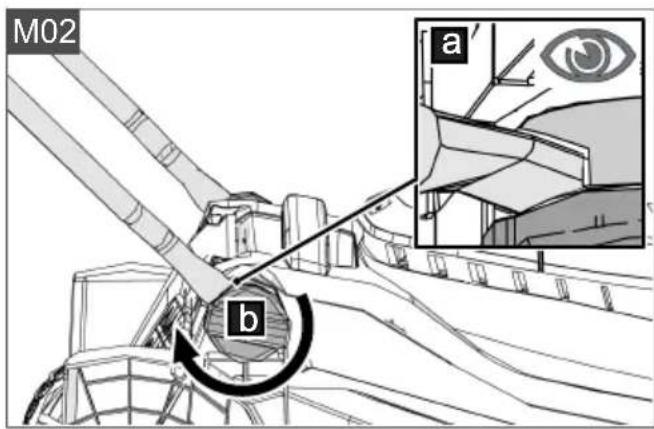
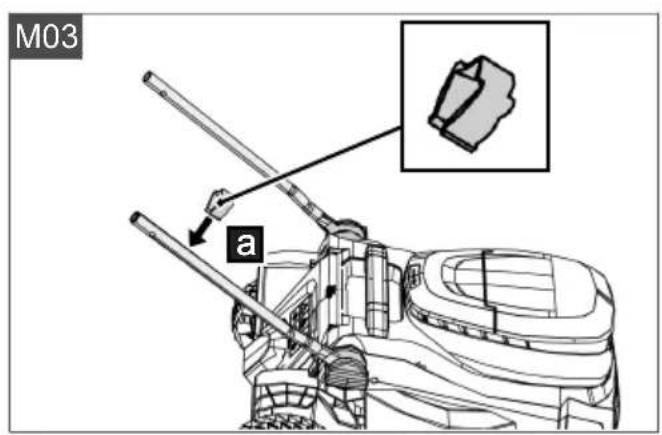
Installation 38.6 Li comfort
Installation
43.6 Li comfort
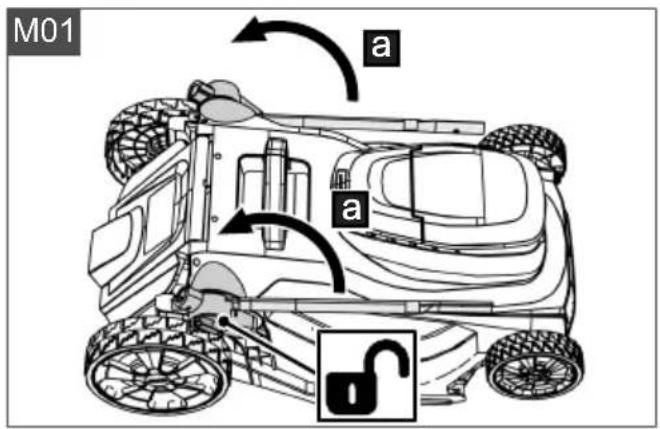
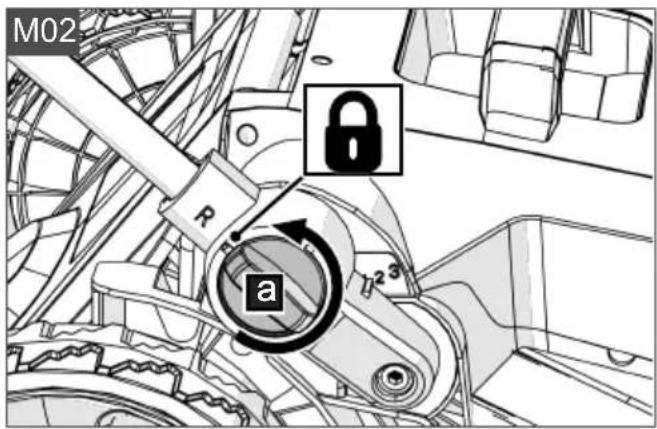
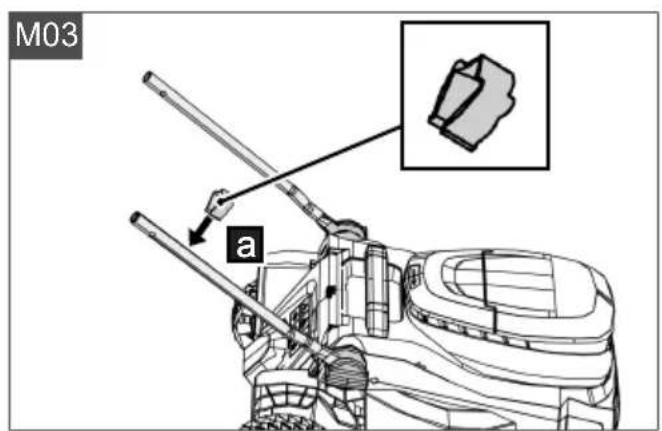
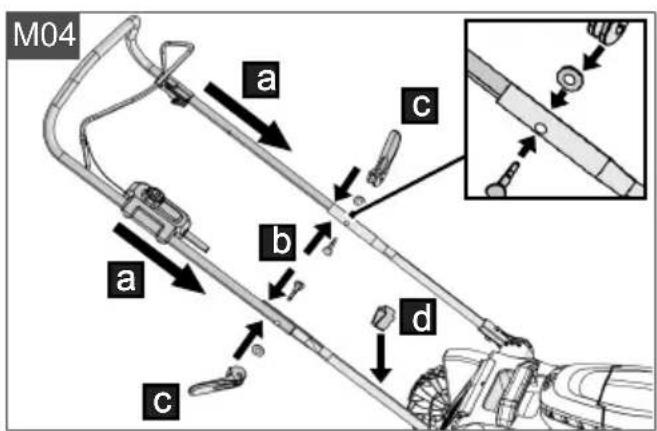
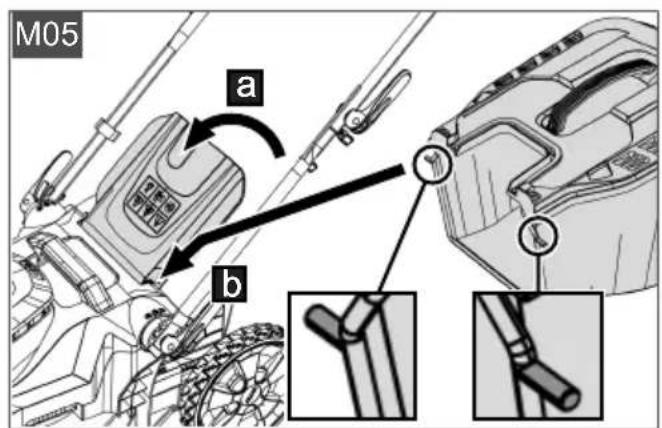
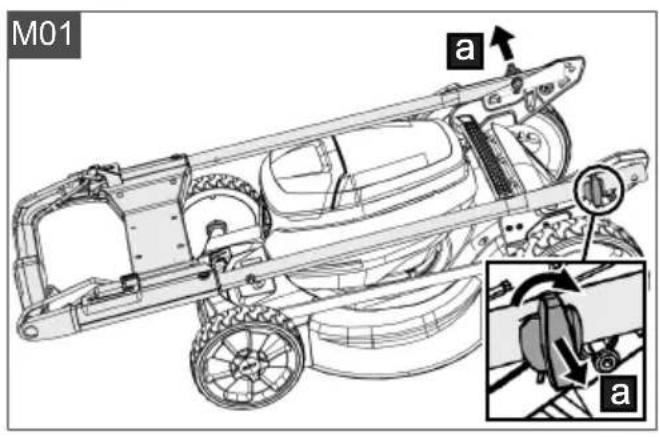
Installation
46.6 Li SP comfort $1.6 Li SP comfort
| 34.6 Li comfort | 38.6 Li comfort | 43.6 Li comfort | 46.6 Li SP comfort | 51.6 Li SP comfort |
| 114170 | 114171 | 114172 | 114173 | 114174 |
| Lawn mower 2 batteries Charger 2x 2,5 Ah batteries | Lawn mower 2 batteries Charger 2x 4,0 Ah batteries | Lawn mower 2 batteries Charger 2x 5,0 Ah batteries | Lawn mower 2 batteries Charger 2x 5,0 Ah batteries | Lawn mower 2 batteries Charger 2x 8,0 Ah batteries |
| + double charger C300.6 Li (order no. 114132) | ||||
| Lawn mower 114164 | Lawn mower 114165 | Lawn mower 114166 | Lawn mower 114167 | Lawn mower 114168 |
| Lithium-lon batteries 18 V: 2,0 Ah | 2,5 Ah 18/36 V: 4,0/2,0 Ah | 5,0/2,5 Ah | 8,0/4,0 Ah | ||||
| 34 cm 38 cm | 43 cm 46 cm 51 cm | |||
| 400 m² | 500 m² | 650 m² | 800 m² | 800 m² |
| 11,1 kg 13,0 kg 15,2 kg 30,2 kg 30,7 kg | ||||
| 35 | 40 | 50 | 60 | 60 | | ||||
| 25 – 75 mm | ||||
| 5 (central) | 6 (central) | |||
| Stages of working height | ||||
| Cutting blade | Order number | Order number | Order number | Order number |
| Wheel drive | 34.6 Li comfort | 38.6 Li comfort | 43.6 Li comfort | 46.6 Li SP comfort | 51.6 Li SP comfort |
| Mulching insert | - - - XX | ||||
| Side discharge unit | - - - XX | ||||
| Working temperature range | 0 °C - 35 °C | ||||
| Storage temperature range | 0 °C - 50 °C | ||||
| Sound pressure level | LpA = 77,1 dB(A), K = 3 dB(A) * | LpA = 74,3 dB(A), K = 3 dB(A) * | LpA = 75,0 dB(A), K = 3 dB(A) * | LpA = 76,4 dB(A), K = 3 dB(A) * | LpA = 78,9 dB(A), K = 3 dB(A) * |
| Sound power level | LpX = 88,6 dB(A), K = 1,79 dB(A) * | LpX = 87,8 dB(A), K = 1,89 dB(A) * | LpX = 88,9 dB(A), K = 1,86 dB(A) * | LpX = 89,7 dB(A), K = 1,79 dB(A) * | LpX = 92,5 dB(A), K = 1,99 dB(A) * |
| Vibration value | ah < 0,780 m/s2, K = 1,5 m/s2 * | ah < 1,008 m/s2, K = 1,5 m/s2 * | ah < 0,696 m/s2, K = 1,5 m/s2 * | ah < 1,341 m/s2, K = 1,5 m/s2 * | ah < 1,564 m/s2, K = 1,5 m/s2 * |
*: Refer to technical data section. x: available, not available
**: 46.6 Li SP comfort, 51.6 Li SP comfort
Nr. Component
Cockpit with:
46.6 Li SP comfort $1.6 Li SP comfort
5 COMMISSIONING
5.1 Charging the batteries
**: 46.6 Li SP comfort, 51.6 Li SP comfort
**: 46.6 Li SP comfort, 51.6 Li SP comfort
1 Safety instructions. 37
1.1 General electrical machine safety warnings 37
1.1.1 Work area safety 37 1.1.2 Electrical safety 37 1.1.3 Personal safety 37 1.1.4 Battery machine use and care.... 38 1.1.5 Service 38
1.2 Lawnmower safety warnings 38 1.3 Safety notes for rechargeable battery and charger 39
2 About these operating instructions. 39
2.1 Symbols on the title page 39 2.2 Legends and signal words 39
3 Product description 39
3.1 Designated use 40 3.2 Possible foreseeable misuse 40 3.3 Residual risks 40 3.4 Safety and protective devices 40
3.5 Symbols on the appliance 40
3.5.1 Safety signs.. 40 3.5.2 Operating signs 41
3.6 Product overviews 41
3.6.1 Product overview (01)* 41 3.6.2 Product overview (02, 03)**. 42 3.6.3 Product overview (04)*** 42
4 Installation 43 5 Start-up 43
5.1 Charging the batteries 43 5.2 Inserting and removing the batteries (05, 06) 43 5.3 Switching the power supply on and off (05, 06) 43
6 Operation 44
6.1 Setting the cutting height 44 6.1.1 Setting the cutting height (07) 44 6.1.2 Setting the cutting height (08)* ... 44
6.2 Mowing with grass catcher (09, 10) ... 44 6.3 Starting and stopping the mower mechanism (11, 12) 45 6.4 Starting and stopping the wheel drive (13)** 45 6.5 Checking the battery charge status (14, 15) 45 6.6 Adjusting the handlebar to your body size 45
6.6.1 Adjusting the handlebar (16) 45 6.6.2 Adjusting the handlebar (17) .... 46 6.6.3 Adjusting the handlebar (18)*** ... 46
6.7 Folding the handlebar in and out.... 46
6.7.1 Folding the handlebar in and out (19)*,** 46 6.7.2 Folding the handlebar in and out (20)*** 46
6.8 Mulching with mulching insert (21, 22)**,*** 46
6.9 Mowing with side discharge unit (23) 47 6.10 Mowing without grass catcher (24) 47
7 Work instructions 47 8 Maintenance and care 48
8.1 Regular maintenance work 48 8.2 Cleaning the appliance and mower mechanism 48 8.3 Checking and renewing the cutting blade 48 8.4 Repair work 48
9 Help in case of malfunction 49
9.1 Correcting appliance and handling faults 49 9.2 Error codes and troubleshooting 50
10 Transport 51
10.1 Transporting the appliance 51 10.2 Transport 51
11 Storage 51 11.1 Storing the rechargeable battery lawnmower 51
11.2 Storing the rechargeable battery and charging unit 52
12 Disposal 52 13 Technical data 53 14 After-Sales/Service 53 15 Information on the Declaration of Conformity 53 16 Warranty 54
1 SAFETY INSTRUCTIONS
1.1 General electrical machine safety warnings
WARNING! Read all safety warnings, instructions, illustrations and specifications provided with this machine. Failure to follow all instructions listed below may result in electric shock, fire and/or serious injury. Save all warnings and instructions for future reference.
The term "machine" in the warnings refers to your mains-operated (corded) machine or battery-operated (cordless) machine.
1.1.1 Work area safety
- Keep work area clean and well lit. Cluttered or dark areas invite accidents.
- Do not operate machines in explosive atmospheres, such as in the presence of flammable liquids, gases or dust. Machines create sparks which may ignite the dust or fumes.
- Keep children and bystanders away while operating a machine. Distractions can cause you to lose control.
1.1.2 Electrical safety
Machine plugs must match the outlet. Never modify the plug in any way. Do not use adapter plugs with earthed (grounded) machines. Unmodified plugs and matching outlets will reduce risk of electric shock. - Avoid body contact with earthed or grounded surfaces, such as pipes, radiators, ranges and refrigerators. There is an increased risk of electric shock if your body is earthed or grounded. - Do not operate the lawnmower in rain or wet conditions. This may increase the risk of electric shock.
- Do not abuse the cord. Never use the cord for carrying, pulling or unplugging the machine. Keep cord away from heat, oil, sharp edges or moving parts. Damaged or entangled cords increase the risk of electric shock.
- When operating a machine outdoors, use an extension cord suitable for outdoor use. Use of an extension cord suitable for outdoor use reduces the risk of electric shock. If operating a machine in a damp location is unavoidable, use a residual current device (RCD) protected supply. Use of an RCD reduces the risk of electric shock.
1.1.3 Personal safety
- Stay alert, watch what you are doing and use common sense when operating a machine. Do not use a machine while you are tired or under the influence of drugs, alcohol or medication. A moment of inattention while operating machines may result in serious personal injury. Use personal protective equipment. Always wear eye protection. Protective equipment such as a dust mask, non-skid safety shoes, hard hat or hearing protection used for appropriate conditions will reduce personal injuries. Prevent unintentional starting. Ensure the switch is in the off-position before connecting to power source and/or battery pack, picking up or carrying the machine. Carrying machines with your finger on the switch or energising machines that have the switch on invites accidents.
- Remove any adjusting key or wrench before turning the machine on. A wrench or a key left attached to a rotating part of the machine may result in personal injury.
- Do not overreach. Keep proper footing and balance at all times. This enables better control of the machine in unexpected situations.
- Dress properly. Do not wear loose clothing or jewellery. Keep your hair and clothing away from moving parts. Loose clothes, jewellery or long hair can be caught in moving parts. If devices are provided for the connection of dust extraction and collection facilities, ensure these are connected and properly
used. Use of dust collection can reduce dust-related hazards.
- Do not let familiarity gained from frequent use of machines allow you to become complacent and ignore machine safety principles. A careless action can cause severe injury within a fraction of a second.
1.1.4 Battery machine use and care
- Recharge only with the charger specified by the manufacturer. A charger that is suitable for one type of battery pack may create a risk of fire when used with another battery pack. Use machines only with specifically designated battery packs. Use of any other battery packs may create a risk of injury and fire.
- When battery pack is not in use, keep it away from other metal objects, like paper clips, coins, keys, nails, screws or other small metal objects, that can make a connection from one terminal to another. Shorting the battery terminals together may cause burns or a fire. Under abusive conditions, liquid may be ejected from the battery; avoid contact. If contact accidentally occurs, flush with water. If liquid contacts eyes, additionally seek medical help. Liquid ejected from the battery may cause irritation or burns.
- Do not use a battery pack or machine that is damaged or modified. Damaged or modified batteries may exhibit unpredictable behaviour resulting in fire, explosion or risk of injury.
- Do not expose a battery pack or machine to fire or excessive temperature. Exposure to fire or temperature above 130°C may cause explosion.
- Follow all charging instructions and do not charge the battery pack or machine outside the temperature range specified in the instructions. Charging improperly or at temperatures outside the specified range may damage the battery and increase the risk of fire.
1.1.5 Service
Have your machine serviced by a qualified repair person using only identical replacement parts. This will ensure that the safety of the machine is maintained. Never service damaged battery packs. Service of battery packs should only be per
formed by the manufacturer or authorized service providers.
1.2 Lawnmower safety warnings
- Do not use the lawnmower in bad weather conditions, especially when there is a risk of lightning. This decreases the risk of being struck by lightning. Thoroughly inspect the area for wildlife where the lawnmower is to be used. Wildlife may be injured by the lawnmower during operation. Thoroughly inspect the area where the lawnmower is to be used and remove all stones, sticks, wires, bones, and other foreign objects. Thrown objects can cause personal injury. Before using the lawnmower, always visually inspect to see that the blade and the blade assembly are not worn or damaged. Worn or damaged parts increase the risk of injury. Check the grass catcher frequently for wear or deterioration. A worn or damaged grass catcher may increase the risk of personal injury.
- Keep guards in place. Guards must be in working order and be properly mounted. A guard that is loose, damaged, or is not functioning correctly may result in personal injury.
- Keep all cooling air inlets clear of debris. Blocked air inlets and debris may result in overheating or risk of fire. While operating the lawnmower, always wear non-slip and protective footwear. Do not operate the lawnmower when barefoot or wearing open sandals. This reduces the chance of injury to the feet from contact with the moving blade. While operating the lawnmower, always wear long trousers. Exposed skin increases the likelihood of injury from thrown objects.
- Do not operate the lawnmower in wet grass. Walk, never run. This reduces the risk of slipping and falling which may result in personal injury.
- Do not operate the lawnmower on excessively steep slopes. This reduces the risk of loss of control, slipping and falling which may result in personal injury.
- When working on slopes, always be sure of your footing, always work across the face of slopes, never up or down and ex
ercise extreme caution when changing direction. This reduces the risk of loss of control, slipping and falling which may result in personal injury.
Use extreme caution when reversing or pulling the lawnmower towards you. Always be aware of your surroundings. This reduces the risk of tripping during operation. - Do not touch blades and other hazardous moving parts while they are still in motion. This reduces the risk of injury from moving parts. - When clearing jammed material or cleaning the lawnmower, make sure all power switches are off and the battery pack is disconnected. Unexpected operation of the lawnmower may result in serious personal injury. Always allow the product to cool down before storing. Empty the grassbox before storing. - When adjusting the machine, make sure not to pinch your fingers between the moving blades and fixed parts of the machine.
1.3 Safety notes for rechargeable battery and charger
Remove the battery from the appliance before charging. Insert the battery into the appliance with the correct polarity. - Remove the battery from the appliance before putting it into storage for an extended period. - Do not short-circuit the terminals of the appliance or battery.
Operating instructions
Please observe the safety instructions for the battery and charger in the separate operating instructions:
Operating instructions 443998: Batteries Operating instructions 443999: Chargers
2 ABOUT THESE OPERATING INSTRUCTIONS
The German version is the original operating instructions. All additional language versions are translations of the original operating instructions. - Keep these operating instructions in a safe place at all times so that they can be consult
ed if you need any information about the appliance.
Only pass on the appliance to other persons together with these operating instructions. Comply with the safety and warning information in these operating instructions.
2.1 Symbols on the title page
Symbol Meaning

It is essential to read through these operating instructions carefully prior to starting operation. This is essential for safe working and trouble-free handling.

Operating instructions
Handle Li Ion rechargeable batteries with care! In particular, observe the notes on transport, storage and disposal in these operating instructions!

This product conforms to the applicable European Directives, and a conformity evaluation procedure for these Directives has been carried out.
2.2 Legends and signal words
DANGER! Denotes an imminently dangerous situation which will result in fatal or serious injury if not avoided. WARNING! Denotes a potentially dangerous situation which can result in fatal or serious injury if not avoided. CAUTION! Denotes a potentially dangerous situation which can result in minor or moderate injury if not avoided.
IMPORTANT! Denotes a situation which can result in material damage if not avoided.
NOTE: Special instructions for ease of understanding and handling.
3 PRODUCT DESCRIPTION
This documentation describes several appliance models. Identify your model based on the product images and the description of the different options.
images and the description of the different options.
IMPORTANT! Danger of damage to the appliance and battery. If the appliance is operated with unsuitable batteries, both the device and the batteries may be damaged.
Operate the appliance only with the specified rechargeable batteries.
IMPORTANT! Danger of damage to the appliance and battery. If the appliance is operated with unsuitable batteries, both the device and the batteries may be damaged.
- Operate the appliance only with the specified rechargeable batteries.
NOTE: Further information can be found in the operating instructions for the batteries and chargers from the system.
Any use not in accordance with this designated use shall be regarded as misuse. Only work with the appliance when it is fully assembled.
This machine is intended for the non-commercial mowing of lawns, and must only be used on dry grass.
Any use not in accordance with this designated use shall be regarded as misuse. Only work with the appliance when it is fully assembled.
This appliance is intended solely for use in non-commercial applications. Any other use, as well as unauthorized conversions or modifications, is regarded as contrary to the intended use and will result in voiding of the warranty as well as loss of conformity; the manufacturer will thus decline any responsibility for damage and/or injury suffered by the user or third parties.
3.2 Possible foreseeable misuse
The tool is designed neither for commercial use in public parks and sports facilities, nor for use in farming and forestry.
- Do not use the appliance in the rain or on wet grass. There must be no foreign objects on the area to be mowed, e.g. stones, pieces of wood, bottles.
- Installed safety devices must not be removed or bypassed, e.g. by tying the operator presence control to the handlebar.
3.3 Residual risks
Even during correct use of the appliance, there is always a certain residual risk that cannot be excluded. Depending on the use, the following potential risks can be derived from the type and construction of the appliance:
- Throwing out of cuttings, soil and small stones.
Inhalation of cuttings particles if no breathing protection is worn. Lacerations from reaching into the rotating cutting blade.
3.4 Safety and protective devices
WARNING! Risk of injury. Defective and disabled safety and protective devices can result in serious injury.
Have any defective safety and protective devices repaired. Never disable safety and protective devices.
Operator presence control
The appliance is equipped with an operator presence control. In an emergency, simply release the operator presence control. The motor and mower mechanism are stopped.
Start button (on the handlebar)
To be able to switch on the motor using the operator presence control, the start button must be pressed beforehand.
Baffle
The baffle offers protection against e.g. material particles and stones which can be flung out.
3.5 Symbols on the appliance
3.5.1 Safety signs
Symbol Meaning
Pay special attention when handling this appliance!

Read the operating instructions before starting operation!

Risk of objects being thrown out!
Keep bystanders out of the danger area!
Risk of injury! Keep your hands and feet away from the blade system!
Symbol Meaning
If not used, or before starting maintenance and repair work: Switch off the appliance and remove the battery from the appliance!
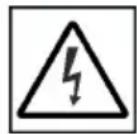
Not applicable; used only with electric lawnmowers.a)
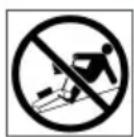
Do not mow on steep slopes!a)

Do not use the appliance in the rain or store it outdoors!a)
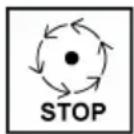
The cutting blade continues running for a short while after the appliance has been switched off. Touch the cutting blade only when all parts of the appliance have come to a stop!
a) 46.6 Li SP comfort, 51.6 Li SP comfort
3.5.2 Operating signs
Symbol Meaning
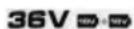
Lawnmower operating at 36 V with two 18 V batteries.
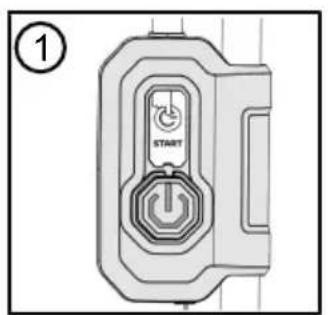
Press the Start button to start the lawnmower.

Procedure for starting the lawnmower (see chapter 6.3 "Starting and stopping the mower mechanism (11, 12)," page 45)b)
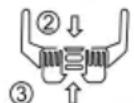
Fill level indicator on the grass catcher:
Fill level indicator is at the top (GO): Continue working! Fill level indicator is at the bottom (STOP): Stop working and empty the grass catcher!
Symbol Meaning
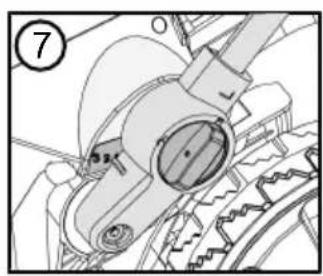
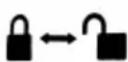
Operating symbol for twist knob on the handlebar:
Padlock closed: Fix the handlebar in the selected position. Padlock open: Loosen the handlebar for adjustment.
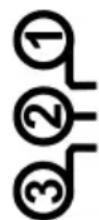
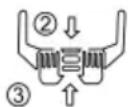
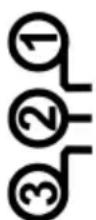
Steps for adjusting the height of the handlebar (2-step)c)
The third step is used for folding down the handlebar.
In the event of danger: Release the operator presence control immediately to stop the lawnmower.
a) 34.6 Li comfort, 38.6 Li comfort, 43.6 Li comfort b) 46.6 Li SP comfort, 51.6 Li SP comfort, 38.6 Li comfort, 43.6 Li comfort
3.6 Product overviews
3.6.1 Product overview (01)*
*: 34.6 Li comfort
No. Component
1 Start button 2 Operator presence control
Handlebar:
3
- Handle surface
4
Upper brace
5
Swivel joint with quick-release lever
6
Lower brace
7
Swivel joint with locking knob
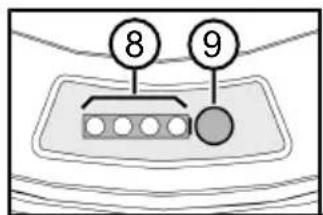
Charge status display for batteries:
8
LEDs
9
- Button for checking the charge status
10
Battery compartment cover
11
Battery compartment
Central cutting height adjustment:
12
Display of cutting height (5-step)
13
Release lever
No. Component
14 Mower deck with cutting blade
15 Carrying handle
16 Baffle
Grass catcher:
17 Housing of grass catcher
18 Handle of grass catcher
19 Fill level indicator of grass catcher
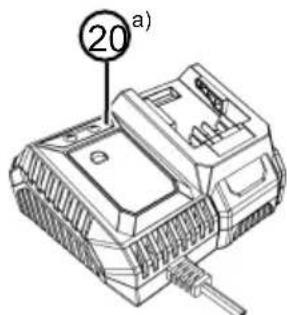
20 a) Charger a)
21 a) Batteries (2x) a)
a) In complete set
3.6.2 Product overview (02, 03)**
**: 38.6 Li comfort, 43.6 Li comfort
No. Component
1 Start button
2 Operator presence control
Handlebar:
3 Handle surface
4 Upper brace
5 Swivel joint with quick-release lever
6 Lower brace
7 2-step height adjustment:
38.6 Li comfort: Swivel joint with
quick-release lever,
43.6 Li comfort: Spring pin with twist
knob
The third step is used for folding down the handlebar.
Charge status display for batteries:
8 LEDs
9 Button for checking the battery charge status
10 Battery compartment cover
11 Battery compartment
Central cutting height adjustment:
12 Display of cutting height (5-step)
13 Release lever
No. Component
14 Mower deck with cutting blade
15 Carrying handle
16 Baffle
Grass catcher:
17 Housing of grass catcher 18 Handle of grass catcher 19 Fill level indicator of grass catcher
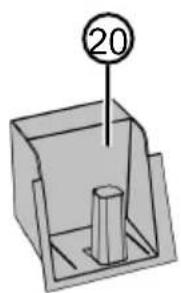
20 Mulching insert
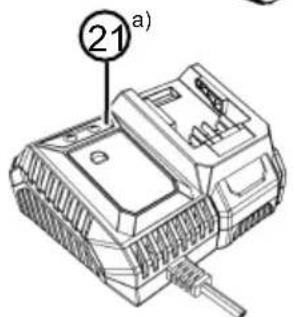
21 a) Charger a)
22 a) Batteries (2x) a)
a) In complete set
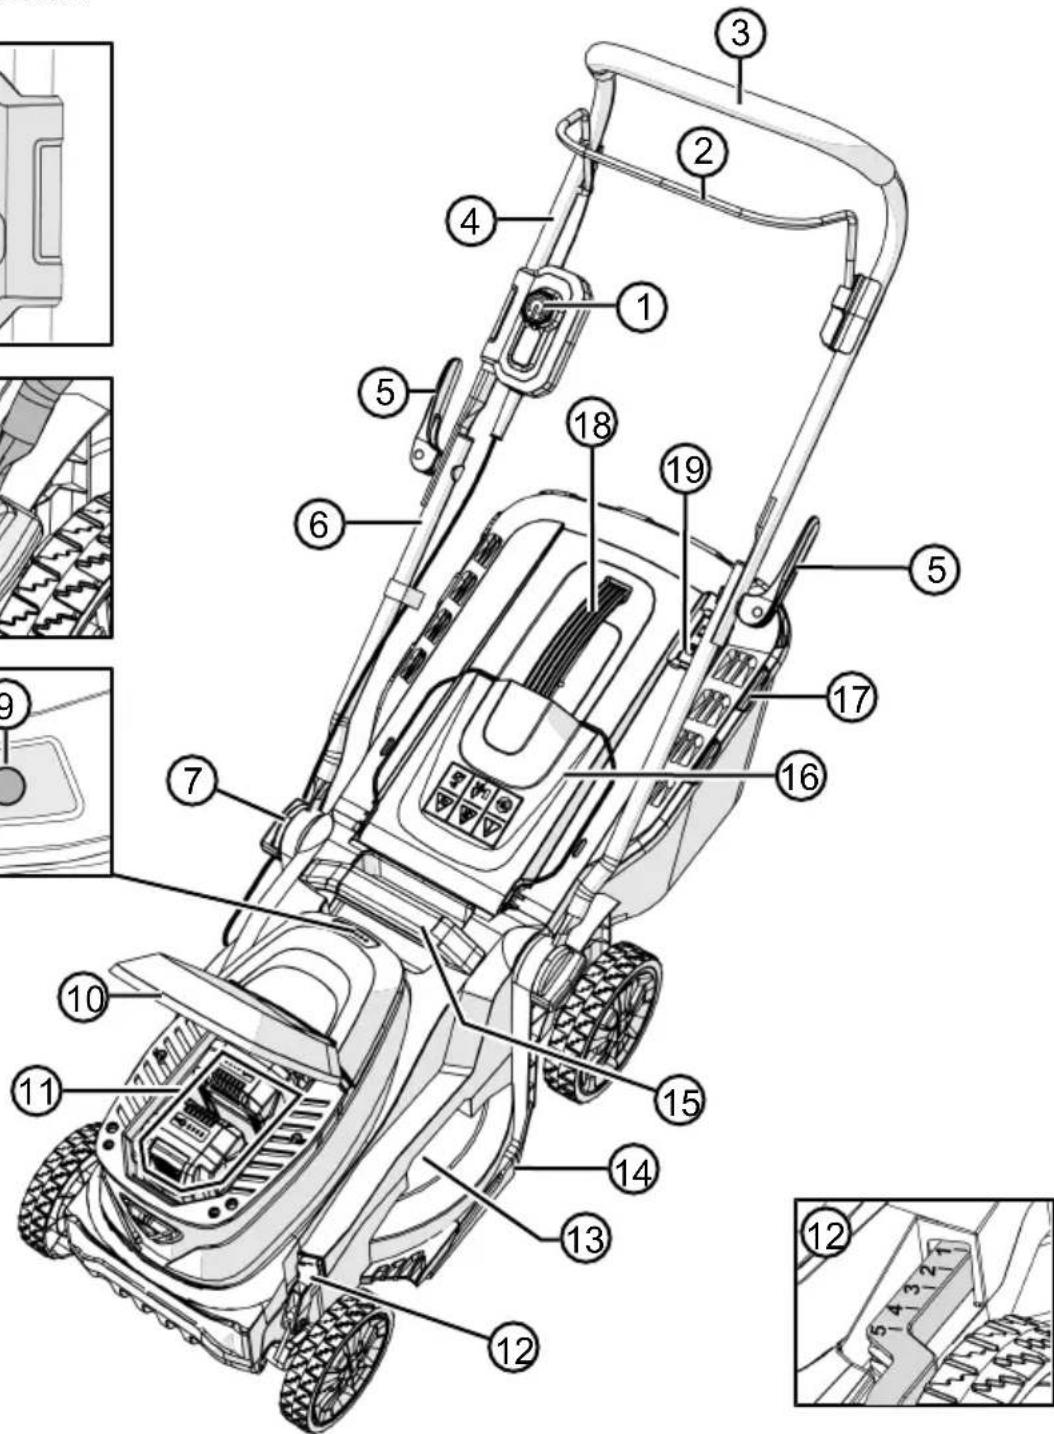
3.6.3 Product overview (04)***
**: 46.6 Li SP comfort, 51.6 Li SP comfort
No. Component
| Cockpit with: | |
| 1 | Charge status display for batteries |
| 2 | Button with double function: 1. Start button, 2. Battery charge status check |
| 3 Operator presence control | |
| 4 Engagement bar for wheel drive | |
| Handlebar: | |
| 5 | Handle surface |
| 6 | Column |
| 7 | Spring pin with twist knob (2-step) The third step is used for folding down the handlebar. |
| 8 | Handlebar column swivel joint |
| Central cutting height adjustment: | |
| 9 | Display of cutting height (6-step) |
| 10 | Adjustment lever |
| 11 Side discharge flap | |
| 12 Side discharge insert | |
| 13 Front carrying handle | |
| 14 Mower deck with cutting blade | |
No. Component
15 Battery compartment 16 Battery compartment cover 17 Rear carrying handle 18 Baffle
Grass catcher:
19 Housing of grass catcher 20 Handle of grass catcher 21 Fill level indicator of grass catcher
22 Mulching insert 23 a) Charger a) 24 a) Batteries (2x)a)
a) In complete set
4 INSTALLATION
WARNING! Danger if assembly is not
carried out completely! Use of an incompletely assembled appliance can result in serious injury.
Operate the appliance only when it is fully assembled! Do not insert the batteries into the appliance until it is fully assembled!
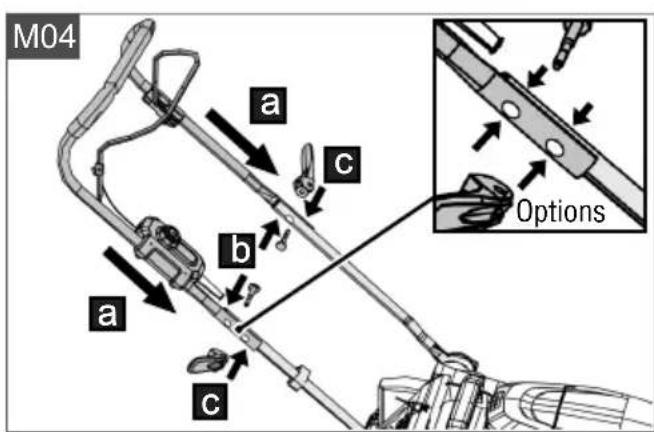
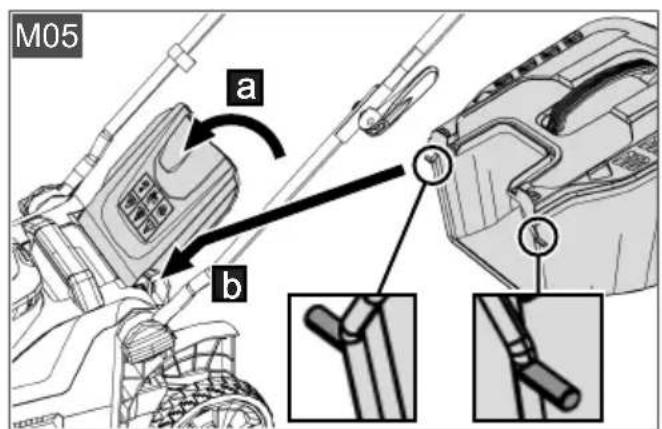
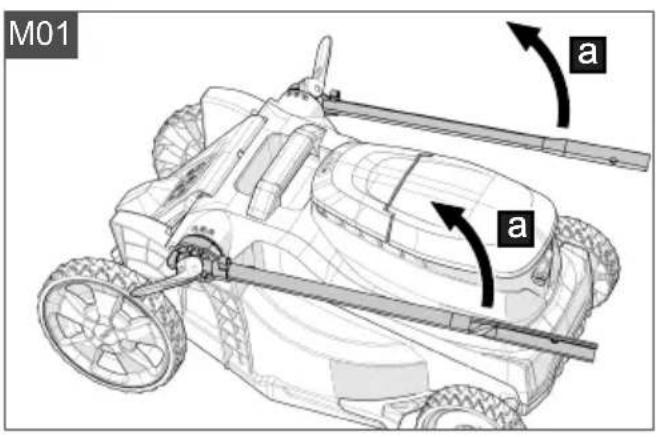
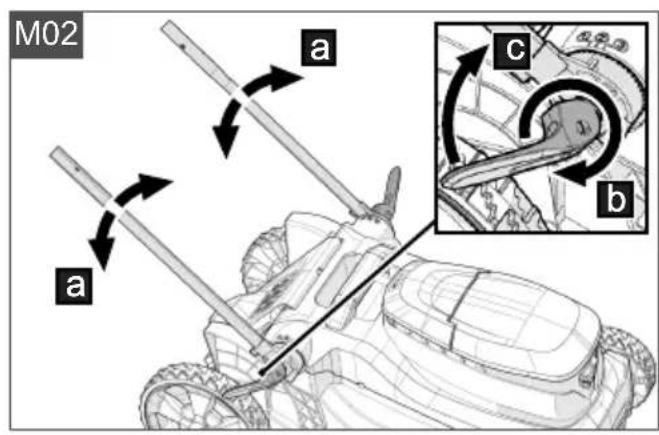
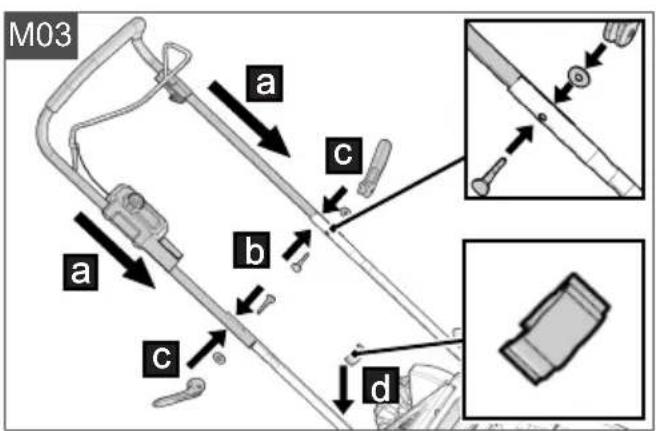
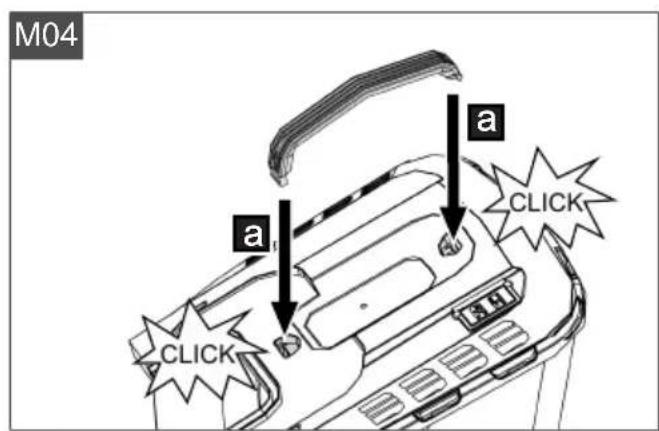
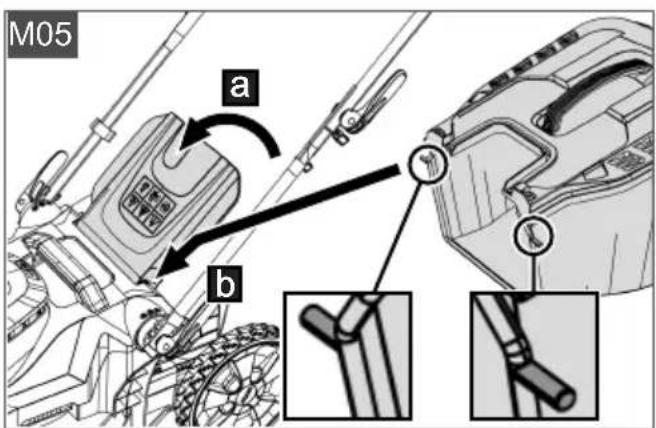
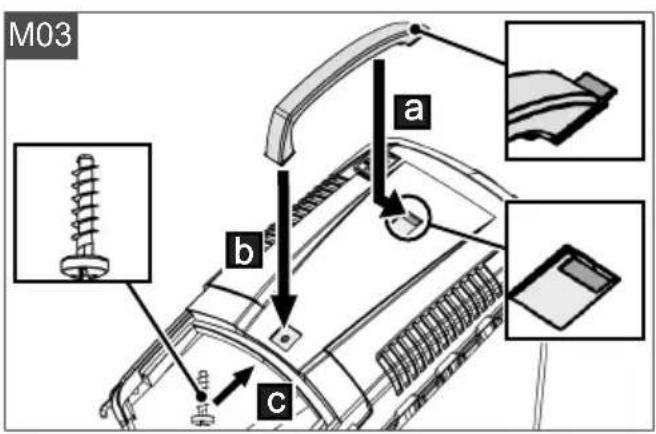
Follow the assembly steps applicable to your model in the illustration section:

Installation
34.6 Li comfort

Installation
38.6 Li comfort

Installation
43.6 Li comfort

Installation
46.6 Li SP comfort §1.6 Li SP comfort
5 START-UP
5.1 Charging the batteries
The rechargeable batteries are partially charged. Fully charge the rechargeable batteries prior to initial use. The rechargeable batteries can be charged in any charge status. Interrupting charging does not damage the rechargeable batteries.
NOTE For detailed information, heed the separate operating instructions for the rechargeable batteries and for the charger.
5.2 Inserting and removing the batteries (05, 06)
The lawnmower functions only when both batteries are installed.
IMPORTANT! Risk of damage to the batteries. If the batteries are left in the appliance after use, they could be damaged.
Take the batteries out of the appliance immediately after use and store in a frost-protected area. Install the batteries in the appliance only immediately before starting work.
Inserting the batteries
- Open (05/a, 06/a) battery compartment cover (05/1, 06/1).
- Push batteries (05/2, 06/2) into battery compartment (05/3, 06/3) from above until they engage (05/b, 06/b).
- Close (05/c, 06/c) the battery compartment cover.
Removing the batteries
- Press and hold release button (05/4, 06/4) on the battery. 2.Pull out the battery.
5.3 Switching the power supply on and off (05, 06)
WARNING! Risk of injury. Unintentional switching on can lead to serious injuries. Each time before work breaks and maintenance work: Remove the batteries.
Switching on the power supply
- Open (05/a, 06/a) battery compartment cover (05/1, 06/1).
- Insert the batteries: see chapter 5.2 "Inserting and removing the batteries (05, 06)", page 43.
- Close (05/c, 06/c) the battery compartment cover.
- Switch on the appliance: see chapter 6.3 "Starting and stopping the mower mechanism (11, 12)," page 45.
Switching off the power supply
- Pull out the batteries: see chapter 5.2 "Inserting and removing the batteries (05, 06)", page 43.
- Immediately after use, remove the batteries from the appliance, charge and store in a frost-protected area. Insert the batteries into the appliance only immediately before the next use.
6 OPERATION
WARNING! Risk of injury. Defective and disabled safety and protective devices can result in serious injury.
Before switching on, check that all safety and protective devices are in place and functioning correctly!
WARNING! Risk of injury from abnormal operating conditions. Stop the lawn mower immediately. Remove the batteries. Then check that all moving parts have come to a complete standstill:
After a collision with a foreign object: Inspect the lawn mower for damage and repair it. Only then switch the lawn mower back on and put it into operation. If the lawn mower vibrates abnormally: Inspect it for damage immediately. Repair or replace damaged parts. Look for loose parts and secure them again.
IMPORTANT! Hazard to damage the appliance. If the cutting blade jams, the motor may be overloaded.
Clean the mower mechanism after each use. Set a higher cutting length. Cut taller grass and thicker vegetation gradually.
6.1 Setting the cutting height
CAUTION! Danger of lacerations. Danger of lacerations when reaching into the running mower mechanism. Only adjust the cutting height when the motor is switched off and the mower mechanism is stationary.
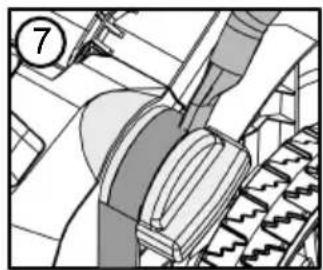
6.1.1 Setting the cutting height (07)*
*: 34.6 Li comfort, 38.6 Li comfort, 43.6 Li comfort
- Pull (07/a) release lever (07/1).
- Pull the lawnmower up or push it down (07/b) at carrying handle (07/2). Read off the desired cutting height on the scale (07/3).
- Release the release lever.
6.1.2 Setting the cutting height (08)
**: 46.6 Li SP comfort, 51.6 Li SP comfort
- Pull adjustment lever (08/1) outwards to disengage it (08/a) and hold.
For a short lawn: Push the adjustment lever in the direction of the front wheel (08/b). For a longer lawn: Push the adjustment lever in the direction of the grass catcher (08/b). Read off the desired cutting height on the scale (08/3).
- Release the adjustment lever so that it engages at the required level.
6.2 Mowing with grass catcher (09, 10)
The appliance can be operated with and without a grass catcher.
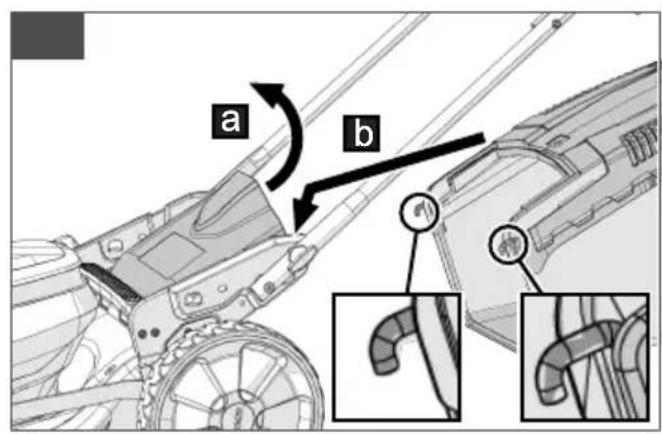
Hooking in the grass catcher
- Make sure that the appliance is switched off and the mower mechanism has come to a standstill.
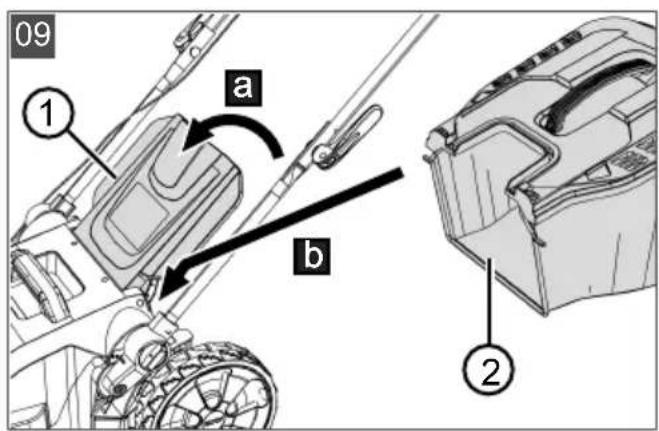
- Raise baffle (09/1) (09/a).
- Hook the grass catcher (09/2) into the holders (09/b).
- Release the baffle.
Checking the fill level
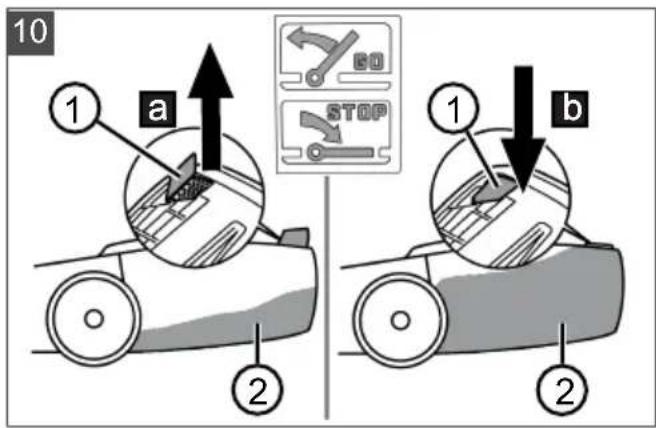
The fill level indicator (10/1) is pressed upwards by the air stream when mowing (10/a). If the grass catcher (10/2) is full, the fill-level indicator is in contact with the grass catcher (10/b). The grass catcher must be emptied.
Unhooking and emptying the grass catcher
CAUTION! Danger of lacerations. Danger of lacerations when reaching into the running mower mechanism. Only remove the grass catcher when the mower mechanism has stopped.
NOTE: When emptying the grass collector, also clean the discharge holes of the fill level indicator so they keep functioning properly.
- Make sure that the appliance is switched off and the mower mechanism has come to a standstill.
- Raise the baffle (09/1).
- Lift the grass catcher (09/2) out of the holders and take off to the rear.
- Empty the grass catcher.
- Clean the air outlet holes of the fill level indicator.
- Hook in the grass catcher (see above).
6.3 Starting and stopping the mower mechanism (11, 12)
Start the mower mechanism on level ground and not in long grass. The ground must be free of foreign objects such as stones, etc. Do not lift or tilt the appliance to start it.
IMPORTANT! Risk of damage to the appliance. The motor and mower mechanism can be damaged by repeatedly switching on and off.
- Switch the motor on only when the mower mechanism has stopped.
NOTE Permitted operating position: You stand behind the lawnmower and hold the handlebar with both hands.
Starting the mower mechanism
- If you have not already done so: Switch on the power supply (see chapter 5.3 "Switching the power supply on and off (05, 06)", page 43).
- Press the Start button (11/1, 12/1) and keep it pressed (11/a, 12/a).
- Pull (11/a, 12/a) operator presence control (11/2, 12/2) towards handlebar (11/3, 12/3). Motor and mower mechanism are started.
- Release the start button and keep holding the operator presence control.
NOTE The operator presence control does not lock in place. Hold it tight against the handlebar during the entire working period.
Stopping the mower mechanism
- Release the operator presence control. It automatically returns to its starting position.
- Wait for the mower mechanism to come to a standstill.
- Switch off the power supply (see chapter 5.3 "Switching the power supply on and off (05, 06),"page 43).
CAUTION! Danger of cuts and lacerations. Danger of lacerations when reaching into the running mower mechanism.
Wait until the mower mechanism has come to a standstill. Before all maintenance and care work: Switch off the appliance and wait until the mower mechanism has come to a standstill. Remove the battery.
6.4 Starting and stopping the wheel drive (13)**
**: 46.6 Li SP comfort, 51.6 Li SP comfort NOTE Wheel drive can only be engaged when the engine is running.
Engaging wheel drive
- Switch on the appliance and start the motor (see chapter 6.3 "Starting and stopping the mower mechanism (11, 12)", page 45).
- Press the engagement bar for the wheel drive (13/1) against the handlebar (13/2) and hold (13/a). The engagement bar for wheel drive does not engage.
Disengaging wheel drive
- Release the engagement bar for wheel drive. It automatically moves to its initial position.
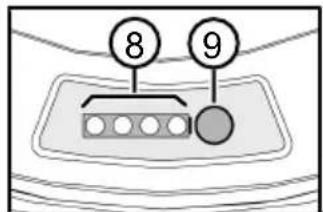
6.5 Checking the battery charge status (14, 15)
- Press button (14/1, 15/1) briefly. The LEDs (14/2, 15/2) light up or flash, depending on the battery charge status:
LEDs (green) Battery charge status
4 LEDs are lit. Battery fully charged. 3 LEDs are lit. Battery 75% charged. 2 LEDs are lit. Battery 50% charged. 1 LED is lit. Battery 25% charged. 4 LEDs flash. Battery flat.
NOTE The LEDs also signal error codes (see chapter 9.2 "Error codes and troubleshooting", page 50).
6.6 Adjusting the handlebar to your body size
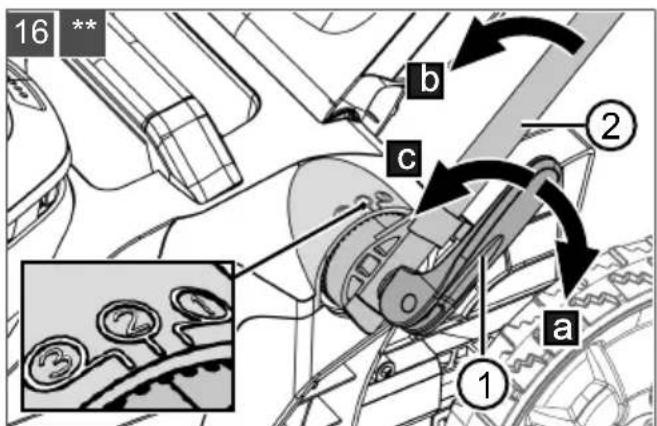
6.6.1 Adjusting the handlebar (16)**
**: 38.6 Li comfort
- On both sides: Open (16/a) quick-release lever (16/1).
- Turn handlebar (16/2) to position 1 or 2 (16/b). Note: The third step is used for folding down the handlebar.
- On both sides: Close (16/c) the quick-release lever.
6.6.2 Adjusting the handlebar (17)**
**: 43.6 Li comfort
- On both sides: Turn (17/a) twist knob (17/1) to the open padlock symbol.
- Turn handlebar (17/2) to position 1 or 2 (17/b). Note: The third step is used for folding down the handlebar.
- On both sides: Turn (17/c) the twist knob to the closed padlock symbol.
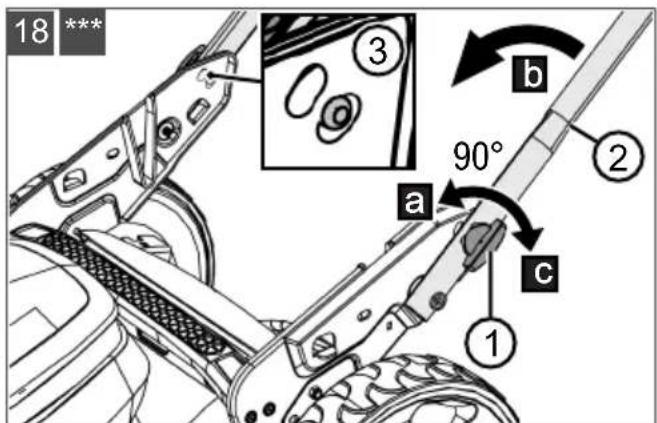
6.6.3 Adjusting the handlebar (18)***
***: 46.6 Li SP comfort, 51.6 Li SP comfort
- On both sides: Turn (18/a) twist knob (18/1) by 90°.
- Turn (18/b) handlebar (18/2) to one of the two positions (18/3).
- On both sides: Turn (18/c) the twist knob back by 90°.
6.7 Folding the handlebar in and out
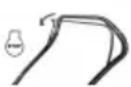
After folding in the handlebar, the appliance can be turned onto its side to allow the mower mechanism to be easily cleaned. Folding in the handlebar saves space when storing the appliance.
CAUTION! Danger of crushing. Fingers or other parts of the body can be crushed between the loose parts of the handlebar.
Hold the loose parts of the handlebar tightly. - Do not hold any fingers or other parts of the body between the loose parts.
6.7.1 Folding the handlebar in and out (19)*,**
*: 34.6 Li comfort
**: 38.6 Li comfort, 43.6 Li comfort
Folding in the handlebar
- On both sides: Loosen (19/a) handlebar fastener (19/1) on the housing until the handlebar can be turned forwards.
- Fold (19/b) handlebar (19/2) completely to the front.
- On both sides: Loosen upper quick-release levers (19/3).
- Fold down (19/c) upper handlebar (19/4).
Folding out the handlebar
Proceed in the reverse order.
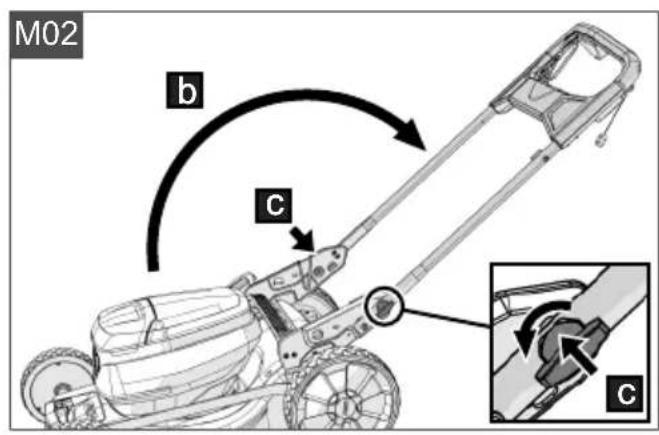
6.7.2 Folding the handlebar in and out (20)***
**: 46.6 Li SP comfort, 51.6 Li SP comfort
Folding in the handlebar
- On both sides: Turn twist knob (20/1) by 90°.
- Fold handlebar (20/2) completely to the front.
Folding out the handlebar
Proceed in the reverse order.
6.8 Mulching with mulching insert (21, 22)**, ***
: 38.6 Li comfort, 43.6 Li comfort *: 46.6 Li SP comfort, 51.6 Li SP comfort
When mulching, the cuttings are not collected but remain on the lawn. The mulch protects the ground from drying out and supplies it with nutrients. The best results are achieved through regularly cutting back by approx. 2 cm. Only new grass with soft leaf tissue rots quickly.
Grass height before mulching: max. 8 cm. Grass height after mulching: min. 4 cm.
NOTE: Adjust the stepping speed for mulching; do not go too quickly.
Installing mulching insert (21)
CAUTION! Danger of cuts and lacerations. Danger of lacerations when reaching into the running mower mechanism. - Switch off the appliance before inserting or removing the mulching insert.
IMPORTANT! Danger of damage to the appliance. If the mulching insert does not engage, the mulching insert and mower mechanism can be damaged.
Make sure that the locking mechanism engages.
- Switch off the appliance (see chapter 5.3 "Switching the power supply on and off (05, 06)," page 43).
- Unhook the grass catcher (see chapter 6.2 "Mowing with grass catcher (09, 10)," page 44).
- Raise baffle (21/1) (21/a).
- Push (21/b) mulching insert (21/2) into discharge chute (21/3) until the lock engages.
Removing mulching insert (22)
- Switch off the appliance.
- Raise baffle (22/1) (22/a).
- Release (22/b) lock (22/2) of the mulching insert by gripping handle (22/3) firmly.
- Pull out the mulching insert (22/c).
6.9 Mowing with side discharge unit (23)***
***: 46.6 Li SP comfort, 51.6 Li SP comfort
CAUTION! Danger of cuts and lacerations. Danger of lacerations when reaching into the running mower mechanism.
Only install or remove the side discharge insert when the motor and mower mechanism have come to a standstill.
Installing the side discharge insert
- Switch off the appliance and pull out the battery.
- Remove the grass catcher.
- Fold out (23/a) cover flap (23/1) for the side discharge and hold it.
- Push in (23/b) side discharge insert (23/2) and hook lugs (23/3) under the top of the side discharge.
- Slowly close the cover flap. The cover flap prevents the side discharge insert from falling out.
- Insert the battery and switch on the appliance again.
Removing the side discharge insert
- Switch off the appliance and pull out the battery.
- Fold out the cover flap for the side discharge and hold it.
- Unhook and pull out the side discharge insert.
- Close the cover flap.
- Insert the battery and switch on the appliance again.
6.10 Mowing without grass catcher (24)***
***: 46.6 Li SP comfort, 51.6 Li SP comfort
The appliance can also be operated without grass catcher. The baffle must be opened slightly so that the discharge channel does not clog.
- Make sure that the appliance is switched off and the mower mechanism has come to a standstill.
- Raise baffle (24/1) (24/a).
- Pull up (24/b) baffle prop (24/2) until it engages.
- Release the baffle.
7 WORK INSTRUCTIONS
Observe the safety instructions!
NOTE Comply with the local regulations as to when a lawnmower may be operated.
Watch out for objects in the grass and remove them from the working area. Mow only when visibility is good. Mow only with a sharp cutting blade. Steer the appliance only by the handlebar. Move the appliance only at walking speed. Always move the appliance across the slope. Do not mow up or down the slope, or on slopes with a gradient of more than 10°. Exercise particular care when changing the working direction.
Cutting performance or operating time of the batteries
The cutting performance or the area that can be mowed depends on the characteristics of the lawn. Factors such as the length of the grass, the grass density, the selected cutting height and wet grass affect the cutting performance. An optimum operating time is achieved by frequent mowing and keeping the grass short. Frequently switching the lawnmower on and off during mowing reduces the cutting performance as do non-fully charged batteries. - Engaging wheel drive a) reduces the cutting performance and the operating time of the batteries. To optimise the cutting performance, we recommend that you mow the lawn frequently, set a high cutting height and move the appliance at walking speed.
NOTE Additional batteries can be purchased to prolong the operating time.
a) 46.6 Li SP comfort, 51.6 Li SP comfort
Tips for mowing
- Maintain a constant cutting height of 3 - 5 cm; do not mow the lawn to less than half its original height.
- Do not overload the lawnmower! If the engine speed drops noticeably because of long, thick grass, increase the cutting height and mow in several passes. Wind and sun can dry out the lawn after mowing, so it is better to mow in the late afternoon.
8 MAINTENANCE AND CARE
DANGER! Risk of injury or death due to improper maintenance. Maintenance work carried out by unqualified persons and the use of non-approved spare parts, as well as removing or modifying safety devices can result in serious injuries and even death during operation of the appliance.
- Do not remove or deactivate any safety installations. Use only approved OEM spare parts. Ensure through regular and proper maintenance that the appliance is in a clean and functional condition at all times.
WARNING! Danger of cuts and lacerations. Danger of cuts and lacerations when reaching into sharp-edged, moving appliance parts and into cutting tools.
Before maintenance, care and cleaning work, always switch off the appliance. Remove the safety key, and remove the batteries! Always wear protective gloves during maintenance, care and cleaning work.
WARNING! Risk of injury during maintenance work. Improper maintenance can result in serious injury and damage to the appliance.
Have repairs to the appliance carried out only by qualified companies.
8.1 Regular maintenance work
Make sure that all nuts, bolts and screws are tightened and the appliance is in a safe working condition. Check the grass collector regularly for correct operation and wear.
8.2 Cleaning the appliance and mower mechanism
IMPORTANT! Danger from water. Water in the appliance causes short-circuits and destroys electrical components.
Do not spray the appliance with water. Only use a broom or a brush for cleaning.
- Stop the motor. 2. Pull out the batteries.
- Unhook the grass catcher.
- Tilt the appliance and clean the mower mechanism.
8.3 Checking and renewing the cutting blade
WARNING! Severe injuries due to blade parts being flung out. A worn, cracked or damaged cutting blade can break, and its parts can become dangerous projectiles.
Regularly check the cutting blade for damage. - Do not use the lawnmower if the cutting blade is worn or damaged. Have blunt or damaged cutting blades sharpened or replaced only by one of the manufacturer's service centres or an authorised specialist company. - When servicing the cutting blade, note that the cutting blade can move even when the power source is switched off. - Be careful when adjusting the machine to avoid trapping fingers between the moving cutting blades and fixed parts of the machine. To avoid vibrations, the cutting blade and blade bolt must always be replaced together. - Resharpened cutting blades must be balanced. Unbalanced cutting blades cause strong vibrations that can damage the mower.
8.4 Repair work
WARNING! Risk of injury during repair work. Improper repairs can lead to serious injuries and damage to the appliance.
Have repair work performed by the manufacturer's service centres and authorised specialist companies only!
In the following cases, contact one of the manufacturer's service centres:
Motor no longer starts. Appliance has run onto an obstacle. Cutting blade and/or motor shaft are bent.
- Appliance vibrates and does not run smoothly. Battery has leaked or is damaged.
9 HELP IN CASE OF MALFUNCTION
CAUTION! Risk of injury. Sharp-edged and moving appliance parts can lead to injury. Always wear protective gloves during maintenance, care and cleaning work!
9.1 Correcting appliance and handling faults
NOTE For malfunctions that are not listed in this table or that you cannot resolve yourself, please contact our customer service.
| Malfunction Cause Remedy | ||
| Motor does not start. Batteries are missing or not seated correctly. | Insert the batteries correctly. | |
| Batteries are flat. Charge the batteries. | ||
| Cutting blade is blocked. 1. Thoroughly clean cutting blade and mower deck. The cutting blade must rotate freely. 2. Start the lawn mower on short grass. | ||
| Cables or switches are defective. | Do not operate the appliance! Contact one of the manufacturer's service centres. | |
| Motor loses power. Batteries are flat. Charge the batteries. | ||
| Cutting blade is blunt. Have the cutting blade sharpened at one of the manufacturer's service centres. | ||
| Too much grass in the dis-charge channel or mower deck. | 1. Thoroughly clean cutting blade and mower deck. 2. Start the lawn mower on short grass. | |
| Motor stops during mowing. | Cutting blade is blunt. Have the cutting blade sharpened at one of the manufacturer's service centres. | |
| Motor is overloaded. Switch off the lawn mower, set down on level ground or short grass and restart. | ||
| Grass catcher is not filled sufficiently. | Grass is wet. Allow the lawn to dry. | |
| Grass catcher is clogged. Clean the grid of the grass catcher. | ||
| Too much grass in the dis-charge channel or mower deck. | Thoroughly clean cutting blade and mower deck. Set the cutting height higher. | |
| Cutting blade is blunt. Have the cutting blade sharpened at one of the manufacturer's service centres. | ||
| Grass falls out of the mower deck. | Grass catcher is full. Empty the grass catcher and clean the discharge channel. | |
| Battery operating hours drop significantly. | Cutting height is too low. Set the cutting height higher. | |
| Grass is too long or too wet. | Allow the grass to dry. Set the cutting height higher. | |
| Mowing speed is too high. | Reduce the mowing speed. Clean the discharge channel and mower deck. The cutting blade must rotate freely. | |
| Grass catcher is full. Empty the grass catcher and clean the discharge channel. | ||
| The service life of the batteries has expired. | Replace the batteries. Use only genuine accessories from the manufacturer. | |
| Batteries cannot be charged. | Battery contacts are soiled. Clean the battery contacts with a non-metallic object and spray with a contact spray. Caution: Do not short-circuit the battery contacts with a metallic object! | |
| Batteries or charger defective. Order replacement parts from the manufacturer. | ||
| Batteries are too hot. Allow the batteries to cool down. | ||
9.2 Error codes and troubleshooting
Faults are indicated by different flashing signals of the 4 green LEDs:
| Error code Cause Remedy | ||
| Flashing 2x Appliance is overloaded. | ■ Set the cutting height higher. ■ Drive more slowly. ■ Take a short break. ■ Mow the grass in several passes. | |
| Flashing 4x Temperature too high or too low at: ■ Appliance ■ Batteries ■ Control unit | Appliance and batteries: 1. Switch off. 2. Allow to cool down or warm up. 3. Switch on and use within the operat-ing temperature range. | |
| Flashing 6x | ■ Electric voltage or current too low ■ Appliance and batteries too hot | ■ Check the battery charge status. Charge if too low. ■ Switch off the appliance and batter-ies and allow to cool down. |
| Flashing 10x Other faults Contact one of the manufacturer's service centres or your dealer. | ||
10 TRANSPORT
10.1 Transporting the appliance
IMPORTANT! Risk of damage to the mower mechanism. At the lowest cutting height, the mower mechanism can be damaged by driving over steps, edges or kerbs.
Set the cutting height to the highest level for transport.
- Stop the mower mechanism and wait until it has come to a standstill.
- Set the highest cutting height.
Transporting the appliance between two working areas
Move the appliance to the working area with the mower mechanism set to the highest cutting height. - Engage the wheel drive a) for easier manoeuvring. Use the handles to carry the appliance (see chapter 3.6 "Product overviews", page 41).
a) 46.6 Li SP comfort, 51.6 Li SP comfort
Transporting the appliance in a vehicle
Remove the battery. Fold down the handlebar. - Secure the appliance in the vehicle against falling over and slipping. - Protect the appliance against collisions with loose objects. Do not place objects on the appliance.
10.2 Transport
Perform the following measures before transporting the appliance:
- Switch off the appliance.
- Remove the battery from the appliance.
- Pack the battery properly (see below).
NOTE: The nominal energy of the rechargeable battery is more than 100 Wh. Therefore, observe the following transport instructions.
The Li-ion rechargeable battery contained in the appliance is subject to hazardous goods regulations, but can be transported under simplified conditions:
The rechargeable battery can be transported on public roads by a private user without further conditions, provided it is packaged for retail sale and the transport serves personal purposes.
- Commercial users who carry out the transport in connection with their main activity (e.g., delivery from and to building sites, or demonstrations) can also take advantage of this simplification.
In both cases, it is essential to take the mandatory precautions mentioned above to prevent any leakage of the contents. In other cases, it is essential to comply with the regulations of the hazardous goods law. In the case of non-compliance, severe penalties can be imposed on the sender and possibly the transporter.
Additional notes on transport and shipment
Only transport or send the li-ion rechargeable battery in an undamaged condition. For transporting the rechargeable battery, only use the original cardboard box or a suitable hazardous goods cardboard box (not required for rechargeable batteries with a nominal energy less than 100 Wh). Tape off exposed rechargeable battery contacts to avoid a short circuit. Secure the rechargeable battery against shifting in the packaging to avoid damage to the rechargeable battery. Ensure the correct marking and documentation of the shipment for transport or shipping (e.g., by parcel service or freight forwarding). Check in advance that transport with the selected service provider is possible and indicate the shipment.
We recommend involving a hazardous goods specialist in preparation of the shipment. Also heed any further national regulations.
11 STORAGE
Thoroughly clean the appliance after each use and, if present, attach all covers. Perform the required maintenance works. Store the appliance in a dry, lockable place out of the reach of children.
11.1 Storing the rechargeable battery lawnmower
CAUTION! Risk of injury during storage. There is a risk of injury from sharp parts on the stored appliance.
Store the appliance out of the reach of children and unauthorised persons. Always remove the battery before storing the appliance.
- Switch off the appliance. 2. Pull out the battery.
- Empty the grass catcher and clean the discharge channel.
- Thoroughly clean the appliance.
- Allow the motor and the whole appliance to cool down.
- Apply a thin coat of oil or silicon to all metal parts for corrosion protection.
- Fold down the handlebar.
- Store the appliance in a dry, clean location protected from frost.
Cover with a breathable tarpaulin to protect against dust. Do not use plastic film in order to avoid the accumulation of moisture. NOTE! Storage temperature of the lawnmower: see Technical data.
11.2 Storing the rechargeable battery and charging unit
DANGER! Danger of explosion and fire!
Persons will be fatally or severely injured if the rechargeable battery explodes because it was stored in front of naked flames or heat sources.
Store the rechargeable battery in cool and dry conditions, but not in front of naked flames or heat sources.
NOTE When charging, the rechargeable battery is protected from overcharging due to automatic detection of the charge status and thus can remain connected to the charging unit for some time, but not permanently.
NOTE Heed the separate operating instructions for the rechargeable battery and for the charging unit.
Store the battery in a dry, frost-free place at an ambient temperature between 0°C and 25°C and with a charge status of approx. 40 - 60%. - Do not store the battery in the vicinity of metallic objects or of objects containing acid to avoid the risk of short-circuit.
12 DISPOSAL
Only for EU countries:
According to the European Directive 2012/19/EU on Waste Electrical and Electronic Equipment and its implementation into national law, chargers
that are no longer usable must be collected separately and disposed of in an environmentally friendly manner.
If disposed incorrectly, waste electrical and electronic equipment may have harmful effects on the environment and human health, due to the potential presence of hazardous substances.
Information on the German Electrical and Electronic Equipment Act

Electrical and electronic appliances do not belong in household waste, but should be collected and disposed of separately!
Used batteries or rechargeable batteries that are not installed permanently in the old appliance must be removed before disposal. Their disposal is regulated by the battery law. - Owners or users of electrical and electronic appliances are obliged by law to return them after use. The end user bears personal responsibility for deleting his personal data from the old appliance to be disposed of.
The symbol of the crossed-through rubbish bin means that electrical and electronic appliances may not be disposed of in the household rubbish. Electrical and electronic appliances can be handed in at the following places at no charge:
Public service disposal or collection points (e.g. municipal building yards) Points of sale of electrical appliances (stationary and online) if dealers are obliged to take them back or offer this voluntarily.
These statements only apply to appliances that are installed and sold in the countries of the European Union and are subject to European Directive 2012/19/EU. Different provisions may apply to the disposal of electrical and electronic appliances in countries outside the European Union.
Information on the German Battery Act (BattG)

Used batteries and rechargeable batteries do not belong in household waste, but should be collected and disposed of separately.
For safe removal of batteries or rechargeable batteries from the electrical appliance and for information on their type or chemical system, follow the further information within the operating or assembly instructions.
- Owners or users of batteries and rechargeable batteries are obliged by law to return them after use. Return is limited to the handover of customary household quantities.
Used batteries can contain harmful substances or heavy metals that can cause damage to the environment and human health. Reuse of the used batteries and use of the resources contained therein contributes to the protection of these two essential commodities.
The symbol of the crossed-through rubbish bin means that batteries and rechargeable batteries may not be disposed of in household rubbish.
In addition, if the symbol Hg, Cd or Pb appears under the rubbish bin, this stands for the following:
Hg: battery contains more than 0.0005% mercury Cd: battery contains more than 0.002% cadmium - Pb: battery contains more than 0.004% lead Rechargeable batteries and batteries can be handed in at the following places at no charge: Public service disposal or collection points (e.g. municipal building yards) Points of sale of batteries and rechargeable batteries Disposal points of the common take-back system for the used batteries of appliances Disposal point of the manufacturer (if not a member of the common take-back system)
These statements apply only to batteries and rechargeable batteries sold in the countries of the European Union that are subject to European Directive (EU) 2023/1542. Different provisions may apply to the disposal of batteries and rechargeable batteries in countries outside the European Union.
Only for United Kingdom:
According to The Waste Electrical and Electronic Equipment Regulations 2013 (SI 2013/3113) (as amended), products that are no longer usable must be collected separately and disposed of in an environmentally friendly manner.
13 TECHNICAL DATA
Technical data: see table of technical data at the beginning of these operating instructions.
- Notes on vibration emission and noise emission values:
The vibration emission and noise emission values given were measured according to a standardised test method and can be used to compare one machine with another. The vibration emission and noise emission values given can also be used for an initial assessment of the exposure (vibration exposure level). The vibration emission and noise emission values may differ from the given values during actual use of the machine, depending on how the machine is used. - Observe the safety precautions in the Safety chapter. Try to keep the vibration load as low as possible. Exemplary measures for reducing the vibration load are the wearing of gloves when using the machine and limitation of the working time. All parts of the operating cycle must be taken into account (e.g. times when the machine is switched off and those in which it is switched on but is running without load).
14 AFTER-SALES/SERVICE
In the event of questions about warranty, repair or spare parts, please contact your nearest AL-KO Service Centre. This can be found on the Internet at:
www.alko-garden.com/service-contacts
Further information on spare parts can be found at:
www.alko-garden.com/spareparts
15 INFORMATION ON THE
DECLARATION OF CONFORMITY
We hereby declare, as the exclusively responsible party, that this product in its marketed form meets the requirements of the harmonised EU Directives, EU safety standards and the product-specific standards. The Declaration of Conformity forms part of the operating instructions and is included with the machine.
16 WARRANTY
We will remedy any material or manufacturing defects discovered in the device during the statutory period of limitation for claims for defects by repair or replacement at our discretion. The period of limitation is determined in each case by the law of the country in which the device was purchased.
Our warranty promise applies only if:
These operating instructions are observed. The device is handled correctly. Original spare parts have been used.
The warranty becomes void in the case of:
Unauthorised repair attempts. Unauthorised technical modifications. Use for other than the intended purpose.
The warranty does not include:
Paint damage attributable to normal wear. Wear parts that are marked with a box xxxx (x) on the spare parts card.
The warranty period commences with the purchase by the first end user. The date on the proof of purchase is decisive. In the event of a warranty claim, please contact your dealer or the nearest authorised customer service centre with this declaration and the original proof of purchase. This declaration does not affect the purchaser's statutory claims for defects against the vendor.
TRANSLATION OF THE ORIGINAL USER MANUAL Table of contents
3 PRODUCT DESCRIPTION
a) 46.6 Li SP comfort, 51.6 Li SP comfort
3.5.2 Control symbols
Symbol Meaning
36V
46.6 Li SP comfort, 51.6 Li SP comfort
5 INITIAL OPERATION
5.1 Charging the batteries
*: 34.6 Li comfort, 38.6 Li comfort, 43.6 Li comfort
**: 46.6 Li SP comfort, 51.6 Li SP comfort
**: 46.6 Li SP comfort, 51.6 Li SP comfort
: 38.6 Li comfort, 43.6 Li comfort *: 46.6 Li SP comfort, 51.6 Li SP comfort
**: 46.6 Li SP comfort, 51.6 Li SP comfort
a) 46.6 Li SP comfort, 51.6 Li SP comfort
**: 38.6 Li comfort, 43.6 Li comfort
46.6 Li SP comfort, 51.6 Li SP comfort
5 COMMISSIONING
5.1 Charging the batteries
*: 34.6 Li comfort, 38.6 Li comfort, 43.6 Li comfort
**: 46.6 Li SP comfort, 51.6 Li SP comfort
**: 46.6 Li SP comfort, 51.6 Li SP comfort
**: 46.6 Li SP comfort, 51.6 Li SP comfort
N. Component
Control panel with:
46.6 Li SP comfort $1.6 Li SP comfort
*: 34.6 Li comfort, 38.6 Li comfort, 43.6 Li comfort
**: 46.6 Li SP comfort, 51.6 Li SP comfort
**: 46.6 Li SP comfort, 51.6 Li SP comfort
46.6 Li SP comfort $1.6 Li SP comfort
5 COMMISSIONING
5.1 Charging the batteries
*: 34.6 Li comfort, 38.6 Li comfort, 43.6 Li comfort
**: 46.6 Li SP comfort, 51.6 Li SP comfort
**: 46.6 Li SP comfort, 51.6 Li SP comfort
46.6 Li SP comfort 51.6 Li SP comfort
5 OPERATION
5.1 Charging the battery
The batteries are partially charged. Fully charge the batteries before first use. The batteries can be charged at any state of charge. Interrupting the charging process does not damage the batteries.
NOTE For detailed information, follow the separate instructions for use for the batteries and charger.
**: 46.6 Li SP comfort, 51.6 Li SP comfort
- Pull the adjustment lever (08/1) outward (08/a) and hold it.
For lower grass: Push the adjustment lever toward the front wheel (08/b). For taller grass: Push the adjustment lever toward the grass catcher (08/b). Read the cutting height on the scale (08/3).
: 38.6 Li comfort, 43.6 Li comfort *: 46.6 Li SP comfort, 51.6 Li SP comfort
**: 46.6 Li SP comfort, 51.6 Li SP comfort
CAUTION! Risk of cuts. There is a risk of cuts when reaching into a running mower.
**: 46.6 Li SP comfort, 51.6 Li SP comfort
a) 46.6 Li SP comfort, 51.6 Li SP comfort
Transporting the device in a vehicle
**: 46.6 Li SP comfort, 51.6 Li SP comfort
Part No.
| Upravljacka ploča s: | |
| 1 | ■ Pokazivačem razine napunjenosti akumulatorskih baterija |
Part No.
46.6 Li SP comfort 51.6 Li SP comfort
5 STARTING OPERATION
5.1 Charging the battery
**: 46.6 Li SP comfort, 51.6 Li SP comfort
- Push the adjustment lever (08/1) outward to release it (08/a) and hold it.
For low grass: Move the adjustment lever towards the front wheel (08/b). For high grass: Move the adjustment lever towards the grass catcher (08/b). Read the desired cutting height on the scale (08/3).
- Release the adjustment lever so that it engages in the desired position.
6.2 Mowing with the grass catcher (09, 10)
The device can be operated with or without the grass catcher.
**: 46.6 Li SP comfort, 51.6 Li SP comfort
: 38.6 Li comfort, 43.6 Li comfort *: 46.6 Li SP comfort, 51.6 Li SP comfort
**: 46.6 Li SP comfort, 51.6 Li SP comfort
The device can be used without the grass collection basket. Carefully open the protective flap so that the ejection opening does not become clogged.
- Make sure the device is switched off and that the mowing mechanism has stopped.
- Lift the protective flap (24/1) (24/a).
- Lift the flap housing (24/2) (24/b) until it engages.
- Release the protective flap.
7 OPERATING MODE
Observe the following safety instructions!
NOTE: Observe local regulations regarding mowing times.
Watch out for objects in the grass and remove them from the work area. Mow only with good visibility. Mow only with a sharp blade. Guide the device only by the handle. Move at a walking pace. Always move the device across the slope. Do not use the mower on uphill or downhill slopes or on slopes with an incline of more than 10 degrees. Be especially careful when changing mowing direction.
Cutting performance and battery life
1.3 Safety instructions for the battery
Remove the battery from the device before charging. Insert the battery into the device with the correct polarity. Remove the battery from the device if you intend to store it for an extended period. Do not short-circuit the device's terminals or the battery.
Operating instructions
Battery safety instructions for the radio device in this manual:
Radio device 443998: battery Radio device 443999: charger
2 INFORMATION ABOUT THE INSTRUCTIONS FOR USE
The German version is the original instructions for use. Versions in all other languages are translations of the original instructions for use. These instructions for use are kept in a readily accessible place so that you always have them at hand when you need to look up information. Please pass on the instructions for use to the new owner only with the instructions for use. Read and follow all safety and warning notices from these instructions for use.
2.1 Symbols on the title page
SymbolMeaning

Before first use, you must carefully read this radio manual. This is a condition for safe and proper handling.

Radio manual
Operate the device only with the battery! Pay special attention to the notices for transport, storage and disposal from this radio manual!

This product complies with the applicable European directives and the conformity assessment procedure for these directives has been carried out.
2.2 Explanation of symbols and signal words
DANGER! Indicates an imminent danger that - if not avoided - will result in death or serious injury. WARNING! Indicates a potential danger that - if not avoided - could result in death or serious injury. CAUTION! Indicates a potential danger that - if not avoided - could result in minor or moderate injury.
NOTE! Indicates a situation that - if not avoided - could cause material damage.
NOTICE Special notice for better understanding and handling.
3 SCOPE OF DELIVERY
This document describes all possible models. Identify your model based on the product label and the description of the various options. All batteries (Bxxx Li) and chargers (Cxxx Li) from the range can be used.
ALKO 18V/36V 1 BATTERY 2 VOLTAGES
WARNING! Danger of injury to the device and battery. If the device is operated with incorrect batteries, the device and batteries may be damaged.
The device must only be operated with the prescribed batteries.
NOTE: When using batteries and chargers from the ALKO 18V/36V range, no additional information is required.
3.1 Intended use
This device is intended for mowing private lawns and may only be used on a dry lawn.
Any use other than that described above is considered improper use. The device may only be operated when it is fully assembled. This device is intended exclusively for private use. Any commercial use, as well as unauthorized modifications or repairs, is considered improper use and leads to the expiry of the warranty, loss of conformity with the standards, and the manufacturer's liability for damage to the user or third parties is excluded.
3.2 Possible foreseeable misuse
The device is not intended for commercial use in public parks and sports facilities, nor for use in agriculture and forestry.
Do not use the device on wet grass. The surface being mowed must not contain foreign objects, such as stones, pieces of wood, or bones.
Existing safety devices must not be dismantled or bypassed, e.g., by tying down safety switches.
3.3 Residual risks
Even with proper use of the device, there will always be a certain residual risk that cannot be excluded. Depending on the type and design of the device, the following potential hazards may arise, depending on use:
Ejection of cut material, soil, or stones. Inhalation of particles of cut material if a mask is not worn. Cuts when reaching into the mower blade that is rotating.
3.4 Safety device for protection

WARNING! Danger of injury.
Incorrectly adjusted or deactivated safety devices can lead to serious injuries.
Have incorrect safety devices repaired. Never deactivate safety devices.
Safety lock
The device is equipped with a safety lock. In case of danger, immediately release the safety lock. The motor and drive mechanism stop.
Start lever (on the drive wheel)
To start the motor, you must first press the start lever.
Discharge valve
Discharge valve type HPR. Protects against debris from cutting material and stones.
3.5 Symbols on the device
3.5.1 Safety label
Symbol meaning

Special caution when handling!
Symbol meaning

Read the instructions before installation!
Danger of injury from thrown objects!
Remove the tool from the danger zone!
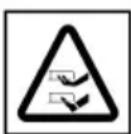
Danger of injury! Keep hands and feet away from the cutting mechanism!
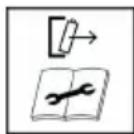
In case of malfunction, stop the device and perform maintenance: switch off the device and remove the battery from the device!
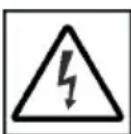
Not applicable, used only for electric lawn mowers. a)
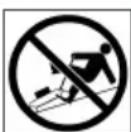
Do not mow on steep slopes! a)
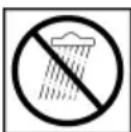
Do not use the device if it is damaged or if it is open! a)
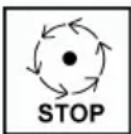
The blade continues to rotate after the device is switched off. The blade stops only when the device is completely stopped! a)
a) 46.6 Li SP comfort, 51.6 Li SP comfort
3.5.2 Operating symbol
Symbol Meaning
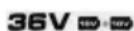
Lawn mower in 36 Volt mode with two 18 Volt batteries.
Symbol Meaning
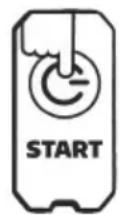
To start the lawn mower, press the start lever. a)

Instruction for covering the mower (see chapter 6.3 "Covering and securing the mower mechanism (11, 12), page 183)")
Order of filling level on the collection bag:
The filling level indicator is at the top (GO): Continue with work! The filling level indicator is at the bottom (STOP): Stop work and empty the collection bag!
Control symbol for turning the handle on the control lever:
Lock closed: Fix the control lever in the selected position. Lock open: Release the control lever for adjustment.
Step for adjusting the height of the control lever (2-step)
Press the step to adjust the control lever.
In case of danger: Immediately release the safety stop for the mower.
a) 34.6 Li comfort, 38.6 Li comfort, 43.6 Li comfort b) 46.6 Li SP comfort, 51.6 Li SP comfort c) 38.6 Li comfort, 43.6 Li comfort
3.6 Product overview
3.6.1 Product overview (01)*
*: 34.6 Li comfort
No. Component
1 Drive lever for moving the safety stop
Control lever:
3 Nozzle for mowing 4 Throat plate 5 Cutting blade with blade bolt 6 Blade 7 Reverse blade with locking lever
Battery charge level indicator:
8 Charger 9 Battery charge level tester
10 Battery cover 11 Battery
Central cutting height adjustment:
12 Cutting height adjustment lever (5 steps) 13 Release button
14 Grass catcher bag 15 Handle for grass catcher
16 Safety key
For grass collection:
17 Grass catcher bag 18 Grass catcher bag for rear discharge 19 Grass catcher bag fullness indicator
3.6.2 Product variants (02, 03)**
**: 38.6 Li comfort, 43.6 Li comfort
Br. Saravn Deo
1 Start lever
Br. CactaBn deo
Handle for control:
3 Cover for gripping 4 Top cover 5 Screw with quick-release 6 Bottom cover 7 2-stage height adjustment Upper: 38.6 Li comfort: Screw with quick-release, 43.6 Li comfort: Screw with quick-release
The 2-stage height adjustment is operated via the handle for control.
Battery charge level indicator:
8 LED display 9 Button for checking charge level
10 Battery compartment cover 11 Battery
Central height adjustment for cutting height:
12 Cutting height adjustment lever (5-stage) 13 Locking button
14 Grass catcher with fill level indicator 15 Handle for carrying
16 Grass catcher flap
Grass catcher:
17 Grass catcher 18 Handle for grass catcher 19 Fill level indicator for grass catcher
20 Lubrication nipple 21 a) Blade a) 22 a) Batteries (2x) a)
a) Included in delivery
3.6.3 Starting the device (04)***
***: 46.6 Li SP comfort, 51.6 Li SP comfort
Spare parts
5.3 Operation and maintenance of the device (05, 06)
WARNING! Danger of injury.
Improper operation may lead to serious injury. Always observe pauses and maintain order: remove the battery.
Starting the device
- Open (05/a, 06/a) the battery compartment cover (05/1, 06/1).
- Insert the battery: see section 5.2 "Inserting and removing the battery (05, 06), page 181."
- Close the battery compartment cover (05/c, 06/c).
- Starting the device: see section 6.3 "Starting and stopping the mowing mechanism (11, 12), page 183."
Stopping the device
- Removing the battery: see section 5.2 "Inserting and removing the battery (05, 06), page 181."
- Immediately after use, remove the battery from the device, charge it and store it in a safe place. The battery should be fully charged before the next use.
6 MAINTENANCE
WARNING! Danger of injury.
Improper use and deactivation of safety devices can lead to serious injuries.
Before use, check all safety and protective devices to ensure they are present and functional!
WARNING! Risk of injury under abnormal working conditions. First, stop the mower. Remove the battery. Then check that all rotating parts are completely stationary:
After impact with a foreign object: Check if the mower has damage and repair it. Only then restart the mower and put it back into operation. If the mower vibrates abnormally: Immediately check it for damage. Replace or repair damaged parts. Tighten loose parts and reattach them.
DANGER! Danger of injury from the mower blade.
When the blade for cutting is blocked, the motor may overheat.
Clean the cutting mechanism after each use. Set the cutting height to the highest position. Remove grass and plant debris gradually.
6.1 Adjusting the cutting height
WARNING! Danger of cuts.
Danger of cuts from the blade when reaching into the moving cutting mechanism. Adjust the cutting height only when the motor is switched off and the cutting mechanism has stopped.
6.1.1 Adjusting the cutting height (07)*
*: 34.6 Li comfort, 38.6 Li comfort, 43.6 Li comfort
- Pull the lever (07/a) towards the deflector (07/1). 2. Pull the mower upwards by the handle for lifting (07/2) or press it (07/b) downwards. Then set the desired cutting height (07/3) on the scale.
- Release the lever for the deflector.
**: 46.6 Li SP comfort, 51.6 Li SP comfort
**: 46.6 Li SP comfort, 51.6 Li SP comfort
Tilting the thrust lever
to adjust the engine thrust.
Tilting the thrust lever
- Tilt the lever to adjust the thrust (see Figure 6.3 "Covering and adjusting the mechanism for the lever (11, 12), page 183).
- Tilt the lever for thrust adjustment (13/1) against the control handle (13/2) and hold it (13/a). The lever for thrust adjustment does not lock.
Disengaging the thrust lever
- Press the tilt lever for thrust adjustment. It automatically returns to the neutral position.
6.5 Checking the charge status of the battery (14, 15)
- Briefly press the button (14/1, 15/1).
The LED (14/2, 15/2) lights up or flashes depending on the charge status:
**: 46.6 Li SP comfort, 51.6 Li SP comfort
Folding the control handle
- On both sides: Turn the rotary handle (20/1) by 90°.
- Puyky 3a ynpabbahe (20/2) 3aknonite (20/a) cacbIM npema Hanpei.
Otklanabe pyuKe 3a ynpabbaHe
2cM.CAMOMaTpaBa CMeKIMJNCTOBIMA 6p3o nctpynn.
BucnHa TpaBe npe MaJUnpaHa:MaKc.8cM BucnHa TpaBe nocJe MaIynpaHa: MNH. 4 cM
HANOMEHA Bp3nHy Kopaka npnilarOndTe MaNHy, HeMoJTe Da xaOdaTe npe6p3o.
YMeTaBe KInHa 3a MaJUnpaBe (21)
ONPE3! OnachocT od noceKOTnHa.
OnachocT od nocekotnHa y cnuyajy XbaTaHa 3a MexAHm3am 3a KOweHe KoJn paNi. Ickbyyuhte ypehaj, npe Hero uTo yMeTHeTe OHN. yKnOHHTe KInH 3a MaNupaHe.
PAXHbA! OnachocT od owTeheha ypehaja.
yKoNko ce KInH 3a MaIuPaBe He yrNaBn,KnH 3a MaIuPaBe n MexaHn3am 3a KOSeHe Mory Da ce OWTeTe. I Na3nte Ha To da ce 6nokada yrnaBn.
1.ИckbyuTe ypehaj(BnI NIOaJIaBbe 5.3 "YkbyueaHe u uCKbyueaHe cHa6deBaHb a cmpyom (05,06),cmpaHa 181). 2.Obecnte Kytnjy 3a cakynbahe TpaBe (BnDn Pooanae6.2"KoWeHcckymujom 3a cakynbahe nokoweh mpaee (09,10)cmpaHa 182). 3.Подигнite (21/a) oДбоиу kлану (21/1). 4.Клннза малчирье (21/2) rypajte (21/b) y ytop 3a n36aциваьe (21/3),doKблokада He hanelerHe.
YknaBaHe KInHa 3a MaJUnpaBe (22)
1.ИckbyuHTe ypehaj. 2.ПодигнITE (22/a) oДбоиу klnanhy (22/1). 3.Блokаду (22/2)HaКинHy 3a MaIчираьe OДВИТN (22/b)ЧВрстим XBaTаHBem Дршke (22/3). 4.ИЗВун Клин 3a Малчupahe (22/c).
6.9 KoWeHe ca DeIom 3a 6oUHo n36aunBaHe (23)**
***: 46.6 Li SP comfort, 51.6 Li SP comfort
DANGER! Danger of injury.
Danger of injury when mowing with hands near the mowing mechanism.
The safety guard must be used only when the motor and mowing mechanism are stopped.
Installing the safety guard
- Switch off the device and remove the battery.
- Remove the grass catcher body.
- Fold down the protective flap (23/1) for the safety guard and remove it (23/a).
- Insert the safety guard (23/2) with the pins (23/3) into the openings on the protective flap (23/b). 5. Then close the protective flap. The protective flap secures the safety guard against falling out.
- Insert the battery and switch on the device again.
Removing the safety guard
- Switch off the device and remove the battery.
- Fold down the protective flap for the safety guard and hold it.
- Open and remove the protective cover.
- Close the protective cover and lock it.
- Remove the batteries and recharge them.
6.10 Mowing without the grass collection bag (24)***
***: 46.6 Li SP comfort, 51.6 Li SP comfort The device can also be used without the grass collection bag. To prevent the discharge opening from clogging, the flap must be properly positioned.
- Make sure the device is switched off and the mowing mechanism is stationary. 2. Lift (24/a) the flap (24/1).
- Place (24/b) the deflector (24/2) until it engages.
- Release the flap.
7 SAFETY NOTES REGARDING WORK
Observe the following safety instructions!
NOTE: Follow local regulations regarding when you may mow.
Before working on the lawn, remove stones and objects from the work area. Check that the blade is in good condition. Use only sharp blades for cutting. Adjust the handle for control. Move the handle only at walking speed.
Always move the handle perpendicular to the slope. The blades are for grass; do not use them on slopes or inclines greater than 10 degrees. Be especially careful when mowing on slopes.
Battery operating time
The cutting width and the area that can be mowed depend on the characteristics of the grass. Factors such as grass length, grass density, selected cutting height, and grass moisture affect the cutting width. The working time is reduced by frequent starting and stopping, and also by short mowing intervals. Frequent engaging and disengaging of the blade during mowing also reduces the cutting width, as does mowing when the battery is not fully charged. Engaging the blade (a) reduces the cutting width and shortens the battery operating time. To optimize the cutting width, it is recommended to mow the grass when it is dry, set a higher cutting height, and move the handle at walking speed.
NOTE: To extend the operating time, additional batteries can be found.
a) 46.6 Li SP comfort, 51.6 Li SP comfort
Mowing tips
Cutting height constant at 3-5 cm; do not cut more than half the grass height. Do not overload the blade! If the motor speed drops significantly due to thick grass, increase the cutting height and mow in several passes. Wind and sun can dry the grass after mowing, so mow early after rain.
8 MAINTENANCE AND CARE
DANGER! Danger to life due to improper maintenance. Maintenance work performed by unqualified persons, use of unauthorized spare parts, and removal or modification of safety devices can lead to serious injuries and even death.
Do not remove safety devices and do not put them out of operation. Use only approved original spare parts. With regular and proper maintenance, you ensure that the device remains in functional and safe condition.
WARNING! Danger of
cutting injuries. Danger of cutting injuries when reaching into moving parts and blades.
Before maintenance work, always switch off the device and remove the safety key and disconnect the battery! When performing maintenance, always wear protective gloves.
CAUTION! Danger of injury during maintenance work. Improper maintenance can cause serious injuries and damage to the device.
Do not use the device without the protective guard in place.
8.1 Replacing the blade
Make sure that all nuts, bolts and screws are tightened and that the device is in a safe working condition. Regularly check the grass collection box for wear and tear.
8.2 Lubricating the cutting mechanism
DANGER! Risk of injury. Water in the device can cause short circuits and damage electrical components.
Do not spray the device with water. For cleaning, use only a damp cloth or brush.
- 1. Stop the motor. 2. Remove the spark plug connector.
- Empty the grass collection box.
- Clean the device and the cutting mechanism.
8.3 Removing and installing new blades

WARNING! Serious injury
Avoid contact with the blade. A blunt, bent or damaged blade can break, and parts may be thrown off, causing dangerous situations.
Regularly check the blades for damage. Do not use the device if the blades are blunt or damaged.
Replace the blades only with original manufacturer's blades. When using the blade for yourself, keep in mind that the blade can be damaged even when the power source is disconnected. Be careful when you need the machine to avoid pinching your fingers between moving blades and fixed parts of the machine. To avoid vibration, the blades must always be replaced together. Worn blades must be disposed of properly. Unbalanced blades cause vibration and damage to the machine.
8.4 Repair work

WARNING! Danger of injury
During repairs. Incorrect repairs can cause serious damage and injury.
Repair work may only be carried out by the manufacturer's service department or an authorized specialized company!
In the following cases, contact the manufacturer's service:
The motor no longer starts. The device has tripped the circuit breaker. The blade or motor parts are damaged. The device vibrates and does not run smoothly. The battery is discharged or damaged.
9 Troubleshooting

WARNING! Danger of injury. Sharp
Moving parts of the device can cause injury. When working with the device, always wear protective gloves.
9.1 Correcting faults on the device and errors during operation

NOTE: Components that are not
listed in this table or that you cannot fix yourself, contact the customer service.
Battery "B160.6 Li" (art. no. 114128)
NOTE: The battery capacity is over 100 Wh! Therefore, observe the special transport regulations!
Damaged lithium-ion accumulators are subject to the law on dangerous materials and may only be transported under special conditions:
Private individuals may transport undamaged accumulators without additional requirements if they are intended for sale and if the transport serves private purposes. Commercial users who transport them in connection with their main activity (e.g., sales presentations and the like) may also use this simplification.
In both of the above-mentioned cases, safety measures must be taken to prevent the release of contents. In all other cases, the provisions of the law on dangerous materials must be observed! In case of violation, fines and possibly criminal prosecution can be expected.
Further notes on transport and disposal
Transport damaged lithium-ion accumulators only in an undamaged condition! For transport, use the original packaging or suitable packaging for dangerous goods (not required for accumulators with a nominal capacity of less than 100 Wh). Cover the open contacts of the accumulator with tape to prevent short circuits. Protect the accumulator from slipping inside the packaging to prevent damage to the accumulator. Ensure proper labeling and documentation for shipping when transporting (e.g., via parcel delivery service or freight forwarding). It is advisable to inform yourself whether transport via the selected carrier service is possible and to declare the shipment.
We recommend consulting a dangerous goods specialist before preparing the shipment. Observe any additional national regulations.
11 Cleaning
After each use, thoroughly clean the device and, if present, replace all protective covers. Perform necessary maintenance work. Store the device in a dry place that is out of reach of children.
11.1 Cleaning the accumulator housing
WARNING! Risk of injury from cleaning. There is a risk of injury due to the device's operation with sharp edges on the cleaning device.
Clean the device in a place inaccessible to children and unauthorized persons. Only clean when the battery has been removed.
- 1. Switch off the device. 2. Remove the accumulator. 3. Empty the dust box and clean the filter channel. 4. Thoroughly clean the device.
- Allow the motor and the device to cool down.
- Coat all metal parts thinly with oil or spray to protect them from corrosion.
- Close the handle.
- Store the battery in a dry, clean place protected from moisture.
Cover the battery with a protective cap for the vent to protect it from dust. Do not use the protective cap if it would cause the creation of moisture. NOTE! Temperature of the battery: in the exhaust air flow.
11.2 Storing the battery and charger
DANGER! Danger of explosion and fire! People may be killed or seriously injured if the battery is exposed, as it was stored in front of an open flame or heat source. Always keep the battery in a cool and dry place, never in front of an open flame or heat source.
NOTE: The charger is connected to the battery for automatic identification of the battery status, so for some time, but not permanently, it may remain connected to the charger.
NOTE: Pay attention to the special instructions for using the battery and charger.
Store the battery in a dry place at a protected temperature. The storage temperature changes the battery status by about 40-60%. Due to the danger of a short circuit, do not keep the battery near metal objects or objects containing acid.
12 DISPOSAL
Only for EU countries:
According to the European Directive 2012/19/EU on electrical and electronic equipment and its implementation in national law, chargers that are no longer usable must be collected separately and sent for environmentally acceptable recycling. In case of incorrect disposal, old electrical and electronic equipment can have a harmful effect on the environment and human health due to the possible presence of hazardous materials.
Note regarding the law on electrical and electronic equipment


Old electrical and electronic equipment must not be disposed of with household waste, but must be subjected to separate collection and sorting for recycling!
Old batteries or accumulators that are not permanently installed in old equipment must be removed before disposal! Their disposal is regulated by the law on batteries. Owners/users of electrical and electronic equipment are legally obliged to return them after the end of their useful life. The end user is responsible for erasing their personal data from the old equipment that is to be disposed of.
The symbol of a crossed-out waste bin indicates that old electrical and electronic equipment must not be disposed of together with household waste.
Old electrical and electronic equipment can be handed over free of charge at the following places:
Public places for disposal of waste. Its acceptance (e.g., municipal goods yard) Sales places for electrical appliances (stationary or via the Internet), if they are obliged to accept the return of old appliances or if they voluntarily provide such a service.
This edition is valid only for devices that are installed and sold in the countries of the European Union and to which the European Directive 2012/19/EU applies. In countries outside the European Union, other provisions for the disposal of old electrical and electronic devices may apply.
Note regarding the Battery Act (BattG)

Old batteries and accumulators must not be disposed of with household waste, but must be subjected to separate disposal or recycling!
For the safe removal of the battery and accumulator from the electrical device and for information about their type and chemical system, please follow the instructions in the user manual regarding installation. The owner of the device or the user of the battery and accumulator is legally obliged to return them after their service life. The return is limited to the delivery of quantities typical for households.
Old batteries may contain harmful substances or heavy metals that could harm the environment or health. The reuse of old batteries and the use of the resources contained in them contributes to the protection of these two valuable resources.
The crossed-out wheeled bin symbol means that batteries and accumulators must not be disposed of together with household waste.
If, in addition, the chemical symbols Hg, Cd, or Pb are found below the bin symbol, this indicates the following:
Hg: battery contains more than 0.0005% mercury Cd: battery contains more than 0.002% cadmium Pb: battery contains more than 0.004% lead
Accumulators and batteries can be returned free of charge at the following places:
Public places for waste disposal. Its acceptance (e.g., municipal goods yard) Sales places for batteries and accumulators Places for returning the joint system for returning old batteries of devices Places of the manufacturer (if not part of the joint return system)
This edition is valid only for accumulators and batteries that are sold in the countries of the European Union and to which the European Regulation (EU) 2023/1542 applies. In countries outside the European Union, other provisions for the disposal of accumulators and batteries may apply.
13 TECHNICAL DATA
Technical data: See the technical data table at the beginning of this user manual.
- Note on the values of radio emissions:
The vibration and noise emission values were measured according to the standard test procedure and can be used to compare one machine with another. The stated vibration and noise emission values can also be used for a preliminary assessment of exposure (degree of exposure to vibrations). The vibration and noise emission values during actual use of the machine may
differ from the stated values, depending on the way the machine is used. Take safety measures in accordance with the safety regulations. Try to keep vibration exposure as low as possible. Example measures to reduce vibration exposure are wearing gloves when using the machine and organizing working time. All parts of the work cycle must be taken into account (for example, the time when the machine is switched off and the time when it is switched on, but runs without load).
14 SERVICE FOR USERS/SERVICE
For questions regarding the warranty, repair, or spare parts, please contact your nearest ALKO service center. You can find them on the Internet at the following address: www.alko-garden.com/service-contacts
Further information about spare parts can be found at: www.alko-garden.com/spareparts
15 DECLARATION OF CONFORMITY
We hereby declare under our sole responsibility that this product, in the form in which it is placed on the market, complies with the requirements of the harmonized EU directives, EU safety standards, and the standards specific to this product. The declaration of conformity is part of the operating instructions and is attached to the machine.
16 WARRANTY
Any material or manufacturing defects will be repaired or replaced within the statutory warranty period. The warranty period is determined by the law of the country in which the purchase is made.
The warranty is valid only in the case of:
proper use of the operating instructions, intended use, and use of original spare parts
The warranty becomes void in the case of:
self-made repairs, self-made technical modifications, or unintended use
The warranty does not cover:
wear parts that are subject to normal wear and tear, which are marked with the frame (x) on the spare parts list.
The warranty period starts from the date of purchase from the first end user. The date on the invoice is considered the start date. With this warranty statement, contact the seller or the nearest authorized service center with the original invoice. This statement does not affect the legal rights that the buyer has against the seller in case of defects.
TRANSLATION OF THE ORIGINAL INSTRUCTION MANUAL
Table of contents
**: 46.6 Li SP comfort, 51.6 Li SP comfort
46.6 Li SP comfort $1.6 Li SP comfort
5 START-UP
*: 34.6 Li comfort, 38.6 Li comfort, 43.6 Li comfort
**: 46.6 Li SP comfort, 51.6 Li SP comfort
**: 46.6 Li SP comfort, 51.6 Li SP comfort
C. Part
46.6 Li SP comfort 51.6 Li SP comfort
5 COMMISSIONING
**: 46.6 Li SP comfort, 51.6 Li SP comfort
**: 46.6 Li SP comfort, 51.6 Li SP comfort
WARNING The drive unit may only be connected to a running motor.
Connecting the wheel drive
- Switch on the device and start the engine (see Chapter 6.3 "Starting and stopping the mower (11, 12)", page 223).
- Press the wheel drive lever (13/1) against the handle guide (13/2) and hold it (13/a). Do not engage the wheel drive switch.
Disconnecting the wheel drive
**: 46.6 Li SP comfort, 51.6 Li SP comfort
**: 46.6 Li SP comfort, 51.6 Li SP comfort
c) 38.6 Li comfort, 43.6 Li comfort
3.6 Product overviews
3.6.1 Product overview (01)*
*: 34.6 Li comfort
C. Construction component
1 Start button
**: 46.6 Li SP comfort, 51.6 Li SP comfort
| Č. Konštrukčný diel | |
| Kokpit s: | |
| 1 | ■ Signalizácia stavu nabilitia akumulá-tora |
| 2 | ■ Tlačidlo s dvojitou funkciou: 1. Tlačidlo Štart, 2. Zistenie stavu nabilitia |
| 3 Bezpečnostné strmeŋ | |
| 4 Spínicé strmeŋ pre pohon kolies | |
| Vodiace držadlo: | |
| 5 | ■ Plocha rukovăte |
| 6 | ■ Držadlo |
| 7 | ■ Ručný Čap s otočnou rukovătou (2-stupnový) Tretí stupeř slúži na prestavenie vodiacheho držadla. |
| 8 | ■ Otočný kíb držadla |
| Centrálne prestavenie výšky kosenia: | |
| 9 | ■ Kontrolka výšky kosenia (6-stupno-vá) |
| 10 | ■ Nastavovacia páka |
46.6 Li SP comfort $1.6 Li SP comfort
5 COMMISSIONING
*: 34.6 Li comfort, 38.6 Li comfort, 43.6 Li comfort
- Pull the release lever (07/1).
- Using the handle (07/2), lift the mower upwards or press it downwards (07/b). Read the desired cutting height on the scale (07/3).
- Release the locking lever.
6.1.2 Setting the cutting height (08)**
**: 46.6 Li SP comfort, 51.6 Li SP comfort
- To unlock, pull the adjusting lever (08/1) outwards (08/a) and hold it.
**: 46.6 Li SP comfort, 51.6 Li SP comfort
WARNING The wheel drive can only be engaged when the engine is running.
Engaging the wheel drive
- Switch on the device and start the engine (see Chapter 6.3 "Starting and stopping the mowing mechanism (11, 12)", page 242).
- Press the wheel drive lever (13/1) against the guide handle (13/2) and hold it (13/A). The wheel drive lever will lock.
: 38.6 Li comfort, 43.6 Li comfort *: 46.6 Li SP comfort, 51.6 Li SP comfort
**: 46.6 Li SP comfort, 51.6 Li SP comfort
CAUTION! Risk of injury from cuts. Risk of injury from cuts when reaching into the running mowing mechanism.
46.6 Li SP comfort, 51.6 Li SP comfort
5 START-UP
**: 46.6 Li SP comfort, 51.6 Li SP comfort
**: 46.6 Li SP comfort, 51.6 Li SP comfort
**: 46.6 Li SP comfort, 51.6 Li SP comfort
10.1 Transport of the machine 287 10.2 Transport 287
11 Storage 287 11.1 Storage of battery-powered lawn mowers 287 11.2 Storage of battery and charger 288
12 Disposal 288 13 Technical data 289 14 Customer service/Service 289 15 Information for declaration of conformity 289 16 Warranty 289
1 SAFETY INSTRUCTIONS
46.6 Li SP comfort 51.6 Li SP comfort
5 START-UP
**: 46.6 Li SP comfort, 51.6 Li SP comfort
**: 46.6 Li SP comfort, 51.6 Li SP comfort
NOTE: The wheel drive can only be engaged while the engine is running.
**: 46.6 Li SP comfort, 51.6 Li SP comfort
46.6 Li SP comfort, 51.6 Li SP comfort
10.1 Transport of the machine
Risk of thrown objects!
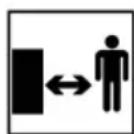
46.6 Li SP comfort, 51.6 Li SP comfort
5 START
5.1 Charging the batteries
46.6 Li SP comfort, 51.6 Li SP comfort
46.6 Li SP comfort, 51.6 Li SP comfort
NOTE: The wheel drive can only be started when the engine is running.
Starting the wheel drive
46.6 Li SP comfort, 51.6 Li SP comfort
CAUTION! Risk of cuts. Risk
4 Assembly 316 5 Starting. 316
46.6 Li SP comfort, 51.6 Li SP comfort
5 STARTING
5.1 Charging the battery packs
The batteries are partially charged. Charge the batteries fully before first use. The batteries can be charged at any charge level. Interrupted charging does not damage the batteries.
**: 46.6 Li SP comfort, 51.6 Li SP comfort
**: 46.6 Li SP comfort, 51.6 Li SP comfort
NOTE: The wheel drive can only be engaged when the engine is running.
: 38.6 Li comfort, 43.6 Li comfort *: 46.6 Li SP comfort, 51.6 Li SP comfort
**: 46.6 Li SP comfort, 51.6 Li SP comfort
CAUTION! Risk of cuts. If you reach into the cutting deck while it is still running, there is a risk of cuts.
The side discharge chute should only be inserted or removed when the engine and cutting deck are stationary.
Inserting the side discharge chute
**: 46.6 Li SP comfort, 51.6 Li SP comfort
8 MAINTENANCE AND CARE
**: 46.6 Li SP comfort, 51.6 Li SP comfort
46.6 Li SP comfort $1.6 Li SP comfort
5 OPERATION
**: 46.6 Li SP comfort, 51.6 Li SP comfort
**: 46.6 Li SP comfort, 51.6 Li SP comfort

: 38.6 Li comfort, 43.6 Li comfort *: 46.6 Li SP comfort, 51.6 Li SP comfort
46.6 Li SP comfort §1.6 Li SP comfort
5 START-UP
5.1 Charging the batteries
**: 46.6 Li SP comfort, 51.6 Li SP comfort
**: 46.6 Li SP comfort, 51.6 Li SP comfort
**: 46.6 Li SP comfort, 51.6 Li SP comfort
**: 46.6 Li SP comfort, 51.6 Li SP comfort
**: 46.6 Li SP comfort, 51.6 Li SP comfort
46.6 Li SP comfort $1.6 Li SP comfort
5 START-UP
5.1 Charging the batteries
The batteries are partially charged. Before first use, fully charge the batteries. The batteries can be charged regardless of their current charge level. Interrupting the charging process does not damage the batteries.
*: 34.6 Li comfort, 38.6 Li comfort, 43.6 Li comfort
**: 46.6 Li SP comfort, 51.6 Li SP comfort
**: 46.6 Li SP comfort, 51.6 Li SP comfort
**: 46.6 Li SP comfort, 51.6 Li SP comfort
- On both sides: turn the rotary handle (18/1) by 90° (18/a).
- Turn the guide handle (18/2) to one of the two positions (18/3).
- On both sides: turn the rotary handle back 90° (18/c).
a) 46.6 Li SP comfort, 51.6 Li SP comfort
Transporting the device in a vehicle
Remove the battery. Fold down the guide handle.
46.6 Li SP comfort, 51.6 Li SP comfort
5 MAINTENANCE AND CARE
5.1 Charging the battery
Charge the battery and parts. Before first use, the battery must be fully charged. The battery can be charged at any charge level. Interrupting the charging process does not damage the battery.
NOTE For more detailed information, please refer to the separate instructions for the battery and charger.
*: 34.6 Li comfort, 38.6 Li comfort, 43.6 Li comfort
- Pull the unlocking lever (07/1) upwards.
- Lift the lawn mower by the carrying handle (07/2) upwards or press it downwards (07/b). While doing so, read the desired cutting height on the scale (07/3).
- Release the unlocking lever.
6.1.2 Setting the cutting height (08)**
**: 46.6 Li SP comfort, 51.6 Li SP comfort
- Pull the adjusting lever (08/1) outwards (08/a) to unlock it, and hold it.
For short lawns: Push the adjusting lever towards the front wheel (08/b). For longer lawns: Push the adjusting lever towards the grass collection box (08/b). Read the desired cutting height on the scale (08/3).
**: 46.6 Li SP comfort, 51.6 Li SP comfort
INSTRUCTION: The wheel drive can only be engaged with the motor switched on.
**: 46.6 Li SP comfort, 51.6 Li SP comfort
No. Part
46.6 Li SP comfort $1.6 Li SP comfort
5 START-UP
5.1 Charging the batteries
The batteries are partially charged. Fully charge the batteries before first use. The batteries can be charged in any state of charge. Interrupting the charging process does not damage the batteries.
Inserting the batteries
**: 46.6 Li SP comfort, 51.6 Li SP comfort
- Pull the adjustment lever (08/1) outward (08/a) to release it and hold it pressed.
For shorter grass: Push the adjustment lever towards the front wheel (08/b). For taller grass: Push the adjustment lever towards the grass catcher (08/b). The desired cutting height can be read on the scale (08/3).
- Release the adjustment lever so that it locks into the desired position.
6.2 Mowing with the grass catcher (09, 10)
**: 46.6 Li SP comfort, 51.6 Li SP comfort
**: 46.6 Li SP comfort, 51.6 Li SP comfort
**: 46.6 Li SP comfort, 51.6 Li SP comfort
11.1 Storing the battery-powered lawn mower 440 11.2 Storing the battery and charger 440
12 Disposal 440 13 Technical data 441 14 Service/Maintenance 442 15 Declaration of Conformity 442 16 Transport 442
1 SAFETY INSTRUCTIONS
1.1 General safety instructions for electric machines
WARNING! Read all safety warnings, instructions, illustrations and technical data provided with this machine. Failure to follow the instructions below may result in electric shock, fire and/or serious injury. Save all warnings and instructions for future reference.
The machine is designed according to the safety instructions and is protected against electric shock from the mains (with mains cable) or for machines also protected from battery (without mains cable).
1.1.1 Workplace safety
Keep the workplace clean and well lit. Cluttered or unlit work areas can lead to accidents. Do not work with the machine in an explosive atmosphere in which there are flammable liquids, gases or dust. Machines produce sparks that can ignite dust or vapors. Keep children and other people away while using the machine. If you are distracted, you may lose control of the machine.
1.1.2 Electrical safety
The machine plug must fit into the outlet. It must not be modified in any way. Do not use adapter plugs with grounded machines. Unmodified plugs and matching outlets reduce the risk of electric shock. Avoid physical contact with grounded surfaces, such as pipes, heaters, stoves and refrigerators. There is an increased risk of electric shock if your body is grounded. Do not expose the machine to rain or wet conditions. Water entering the machine will increase the risk of electric shock. Do not misuse the cord. Never use the cord for carrying, pulling or unplugging the machine. Keep the cord away from heat, oil, sharp edges or moving parts. Damaged or entangled cords increase the risk of electric shock. When operating the machine outdoors, use only extension cords suitable for outdoor use. Use of a cord suitable for outdoor use reduces the risk of electric shock. If operating the machine in a damp location is unavoidable, use a residual current device (RCD) protected supply. Use of an RCD reduces the risk of electric shock.
1.1.3 Personal safety
Stay alert, watch what you are doing and use common sense when
operating the machine. Do not use the machine while you are tired or under the influence of drugs, alcohol or medication. A moment of inattention while operating the machine may result in serious personal injury.
Wear personal protective equipment. When using the machine, wear a dust mask, non-slip safety shoes, safety helmet, or hearing protection, depending on the type and manner of use of the machine, to reduce the risk of injury. Avoid accidental starting. Make sure the machine is switched off before connecting it to the power supply or battery pack, picking it up, or carrying it. If you carry the machine with your finger on the switch or connect it to the power supply while it is switched on, this can lead to accidents. Before switching on the machine, remove adjusting tools or wrenches. A tool or wrench left attached to a rotating part of the machine can cause injury. Avoid abnormal body posture. Keep proper footing and balance at all times. This will allow you to better control the machine in unexpected situations. Wear suitable clothing. Do not wear loose clothing or jewelry. Keep your hair and clothing away from moving parts. Loose clothing, jewelry, or long hair can be caught in moving parts. If dust extraction and collection equipment can be fitted, make sure they are connected and used correctly. The use of dust extraction systems can reduce dust-related hazards. Do not develop a false sense of security and do not disregard the safety rules for machines, even if you are familiar with the machine after repeated use. Careless
actions can lead to serious injury to parts of the body.
1.1.4 Use and operation of the machine with battery pack
Use only the charger specified by the manufacturer for charging the device's battery. If the charger suitable for one type of battery pack is used with another battery pack, there is a risk of fire. Use only the specified battery pack in the machine. Using other battery packs may cause damage and fire hazard. Store unused battery packs away from paper clips, coins, keys, nails, screws, or other small metal objects that can make a connection from one terminal to another. Shorting the battery terminals together may cause burns or a fire. If the battery pack is used incorrectly, liquid may leak from it. Avoid contact with this liquid. If contact occurs accidentally, flush with water. If the liquid contacts your eyes, seek additional medical help. Leaking battery liquid may cause skin irritation or burns. Do not use a damaged or modified battery pack, nor a damaged or modified machine. Damaged or modified batteries may malfunction and cause fire, explosion, or injury. Do not expose the battery or the machine to fire or excessive temperatures. Fire or temperatures above 130 °C may cause explosion. Follow all charging instructions and never charge the battery or the machine outside the temperature range specified in the operating instructions. Incorrect charging or charging outside the specified temperature range may
damage the battery pack and increase the risk of fire.
1.1.5 Maintenance
Repairs to your machine should only be carried out by qualified personnel using only original spare parts. This will ensure that the machine remains safe. Never service damaged battery packs. Battery servicing should only be performed by the manufacturer or authorized service centers.
1.2 Safety instructions for working with the mower
Do not use the mower in bad weather conditions, especially when there is a danger of lightning. This reduces the risk of injury from lightning. Pay attention to the zone where the mower is used, for animals. The blades can be dangerous during work. Pay attention to the zone where the mower is used, remove all stones, branches, wires, bones, and other solid objects. Before using the mower, check visually to ensure that the blade and the blade bolt are not worn or damaged. Worn or damaged parts increase the risk of injury. Check the grass collector regularly for wear or damage. A worn or damaged grass collector can increase the risk of injury. Leave all protective devices mounted. Protective devices must be functional and correctly mounted. A protective device that is disassembled, damaged, or not working correctly can cause injury. Keep all ventilation openings clean and unobstructed. Blocked ventilation openings and obstructions can cause overheating or fire hazard.
When working with the mower, wear non-slip protective footwear. Do not work with the mower barefoot or with open sandals. This reduces the risk of injury to the feet upon contact with the moving blade. When working with the mower, wear long trousers. Unprotected skin increases the risk of injury from thrown objects. Do not work with the mower on wet grass. Walk, never run. This reduces the risk of slipping or falling, which can lead to injury. Do not work with the mower on steep slopes. This reduces the risk of loss of control, slipping, or falling, which can lead to injury. When working on slopes, pay attention to a stable position, work transversely to the slope, never uphill or downhill. Be especially careful when reversing the mower. This reduces the risk of loss of control, slipping, or falling, which can lead to injury. Be especially careful when pulling the mower backwards or towards yourself. Pay attention to the obstacle behind you. This reduces the risk of tripping during work. Do not touch the blade or other dangerous moving parts while they are still moving. This reduces the risk of injury from moving parts. Ensure that when removing jammed material or when cleaning the mower, all power switches are in the off position and the battery is removed. Unexpected operation of the mower can lead to serious injuries. Always let the product cool down before storage. Empty the grass collector before storage. When adjusting the cutting height, be careful not to trap your fingers between the moving blade and the stationary parts of the machine.
1.3 Safety instructions regarding the battery and the charging device
Disconnect the battery before charging. Connect the battery with the correct polarity. If you are storing the device for a long time, remove the battery from it. Do not connect the battery terminals with a cable.
Operating Instructions
Follow the safety instructions for the battery and the charging device, which are in the separate operating instructions:
Operating Instructions 443998: Batteries Operating Instructions 443999: Charging devices
2 ABOUT THESE OPERATING INSTRUCTIONS
The German version is the original operating instructions. All other versions are translations of the original operating instructions. Keep these operating instructions in a safe place so that you can refer to them when you need information about this device. Pass the device on to other users only together with these instructions. Read and follow the safety instructions and warning notices in these operating instructions.
2.1 Symbols on the title page
Symbol Meaning

Be sure to read this operating manual carefully before putting the device into operation. This is the prerequisite for safe work and trouble-free handling of the device.

Operating Instructions
Symbol Meaning
Handle lithium-ion batteries with care! In particular, observe the instructions for transport, storage, and disposal given in these operating instructions!

This product complies with the applicable European Directives regarding the assessment of conformity.
2.2 Explanation of the symbols and signal words
DANGER! Indicates an imminently hazardous situation which, if not avoided, will result in death or serious injury. WARNING! Indicates a potentially hazardous situation which, if not avoided, could result in death or serious injury. CAUTION! Indicates a potentially hazardous situation which, if not avoided, may result in minor or moderate injury. NOTICE! Indicates a situation which, if not avoided, may cause property damage. NOTE! Special instructions for better understanding and handling.
3 PRODUCT DESCRIPTION
This documentation describes various models of the device. Identify your model using the product images and the descriptions of the different versions.
All rechargeable batteries (Bxxx Li) and charging devices (Cxxx Li) from the ALKO 18V/36V BATTERY VOLTAGES product range can be used.
WARNING! Risk of damage to the device and the rechargeable battery. If the device is used with unsuitable batteries, the device and the rechargeable batteries may be damaged.
Use the device only with the prescribed rechargeable batteries.
NOTE: Additional information can be found in the operating instructions for the rechargeable batteries and charging devices from the product range.

3.1 Intended use
This product is intended for mowing grass areas in private gardens and must only be used with dry grass.
Other use, going beyond these limits, is considered use not in accordance with the intended purpose. The device must only be operated when it is fully functional.
This device is intended for private use only. Any other use, as well as unauthorized modifications or the installation of non-approved parts, is considered use not in accordance with the intended purpose, and as a consequence, the warranty becomes void, as does the conformity (CE marking), and the manufacturer declines any liability for damage caused to the user or to third parties.
3.2 Possible foreseeable misuse
The device is not designed for professional use in public parks and sports facilities, nor for use in agriculture and forestry.
Do not use the device when you or the grass is wet. The surface intended for mowing must not contain any hard objects, e.g., stones, sticks, wires, or bottles. The cutting devices must not be dismantled or tampered with, e.g., by tightening the cutting blade for the handle.
3.3 Residual risks
Even when the equipment is used correctly, there are always certain residual risks that cannot be excluded. The following potential dangers may arise depending on the type and design of the device, depending on the application:
When mowing on slopes, always wear sturdy shoes and long trousers. Do not mow on wet grass unless wearing respiratory protection.
Sharpening the cutting blades.
3.4 Safety devices
WARNING! Danger of injury. The safety devices are designed to protect you from serious injury.
Repair or replace defective safety devices. Never bypass or disable safety devices.
Safety bar
The device is equipped with a safety bar. In case of danger, simply release the safety bar. The motor and cutting mechanism will stop.
Start button (on the main handle)
To start the motor via the safety bar, the start button must first be pressed.
Safety guard
The safety guard protects against parts of the mower blade that could be thrown out.
3.5 Symbols on the device
3.5.1 Safety symbols
Symbol meaning

Special attention when using!

Translation of the operating and maintenance instructions!
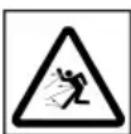
Danger of projectile ejection!
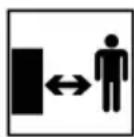
Keep people away from the danger zone!
Symbol meaning
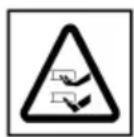
Danger of cutting! Keep hands and feet away from the cutting blade
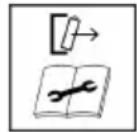
When not in use, as well as before maintenance and repair: Switch off the device and remove the battery!
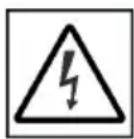
Not applicable, used only for electric hedge trimmers. a)
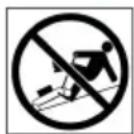
Do not cut above the recommended cutting height! a)

Do not use the device during rain and do not store it outdoors! a)
The cutting blade continues to rotate after the device has been switched off. Wait until the cutting blade has come to a complete stop before touching it! a)
a) 46.6 Li SP comfort, 51.6 Li SP comfort
3.5.2 Maintenance symbols
Symbol meaning
Hedge trimmer, powered by an 18 V rechargeable battery.
To start the hedge trimmer, press the start button. a)
Procedure for starting the grass catcher (see chapter 6.3
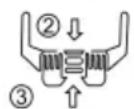
"Starting and stopping the mowing mechanism (11, 12)," page 431)
Symbol Meaning
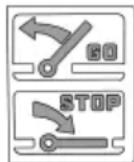
Indicator for filling the grass catcher container:
The filling indicator is full (GO): Continue working! The filling indicator is empty (STOP): Stop working and empty the grass catcher container!

Symbol for controlling the lever for turning the main blade:
Lever closed: Lock the main blade in the selected position. Lever open: Release the main blade to move it.
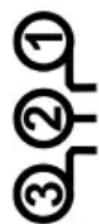
Steps for adjusting the height of the main blade (2 steps)
Third step uses the main blade for cutting.
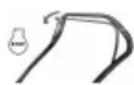
Danger: Release the safety lever immediately to stop the grass catcher.
a) 34.6 Li comfort, 38.6 Li comfort, 43.6 Li comfort b) 46.6 Li SP comfort, 51.6 Li SP comfort c) 38.6 Li comfort, 43.6 Li comfort
3.6 Product overview
3.6.1 Product view (01)*
*: 34.6 Li comfort
No component
1 Chapter 6 Button 2 Adjusting
Main frame:
3 Surface treatment 4 Precise adjustment 5 Panel with post for quick release 6 Holder
| № Kompoent | |
| 7 | Шарнир с-byтон 3а Фикурахе |
| Индikatop 3a НВOTO на заразжданы Akулаторнаха 6аерия: | |
| 8 | LED Иndikatори |
| 9 | Бутон 3a повера на сбстаяпсюнeto на заразд |
| 10 | Калak на отденило 3a akumулатор |
| 11 | Оденице на akumулаторнаха 6аерия |
| Централина有很大ого Кам Височино-Та на косе: | |
| 12 | Индikацяna на височино на косе- He (5-cтени): |
| 13 | Лост за освобождаванe |
| 14 | Косачно крилс с рекеши Нож |
| 15 | Дръжka 3a Носе |
| 16 | Предимаизны пergара |
| Контунер 3a сбиз pareне на Трав: | |
| 17 | Корпунс на контунера 3a сбиз pare- He на Трав |
| 18 | Дръжka на контунера 3a сбиз pare- He на Трав |
| 19 | Индikatop 3a нальваене на кон- Тeyнера 3a сбиз pareне на Трав |
| 20a) | Зарядно устroduя STBOa) |
| 21a) | Акумулаторни батерни (2x)a) |
a) In the complete set 3.6.2 Transfer to products (02, 03): 38.6 Li comfort, 43.6 Li comfort
| № Kompoent | |
| 1 StapTOB 6yToH | |
| 2 Празпазна релса | |
| Осювна дьжka: | |
| 3 | Повьхоста xВашанe |
| 4 | Горна дьжka |
| 5 | Шарни с loostа 6ьрзо освобож- даванe |
| 6 | Долна дьжka |
WARNING! Danger of dust
Dusty work! Working with dusty tools can lead to serious injuries.
Use protective equipment when dusty! Place the battery in the tool only when it is dust-free!
Follow the adjustment steps, according to your model, in the section shown:

Installation
34.6 Li comfort

Installation
38.6 Li comfort

Installation
43.6 Li comfort

Installation
46.6 Li SP comfort 51.6 Li SP comfort
5 CHARGING THE BATTERIES
5.1 Charging the batteries
The batteries are partially charged. Charge the batteries before first use. The batteries can be charged regardless of their charge state. The charging process does not damage the batteries.
INSTRUCTION FOR DETAILED INFORMATION
SEE THE SEPARATE MANUALS FOR THE BATTERIES AND THE CHARGING DEVICE.
5.2 Inserting and removing the
batteries (05, 06)
The device works only when both batteries are inserted.
WARNING! Danger of damage to the batteries. If the batteries are left in the device after use, the batteries may be damaged.
Immediately after use, remove the batteries from the device and store them in a place protected from frost. Immediately before starting work, insert the batteries into the device.
Inserting the batteries
- Open the cover (05/a, 06/a) of the battery compartment (05/1, 06/1).
- Insert the batteries (05/2, 06/2) into the battery compartment (05/3, 06/3) until they click into place (05/b, 06/b).
- Close the cover (05/c, 06/c) of the battery compartment.
Remove the battery pack.
- Press the release button (05/4, 06/4) to release the battery pack. 2. Remove the battery pack.
5.3 Switching the electric drive on and off (05, 06)
WARNING! Risk of injury. Improper switching on can lead to serious injuries. Before starting work or before maintenance procedures: remove the battery pack.
Switching on the electric drive
- Open the cover (05/a, 06/a) of the battery compartment (05/1, 06/1).
- Insert the battery pack: see Chapter 5.2 "Inserting and removing the battery pack (05, 06)", page 429.
- Close the cover (05/c, 06/c) of the battery compartment.
- Switching on the device: see Chapter 6.3 "Starting and stopping the mowing mechanism (11, 12), page 431.
Switching off the electric drive
1. Remove the battery pack: see Chapter 5.2 "Inserting and removing the
battery pack (05, 06)", page 429. 2. Immediately after use, remove the battery pack from the device, store it protected from dirt. Insert the battery pack into the device only immediately before starting work.
6 MAINTENANCE
WARNING! Risk of injury. Defective and switched-off safety and protection devices can lead to serious injuries. Before switching on, check all safety devices to ensure they are present and functional!
WARNING! Risk of injury during unexpected starting. Switch off the mowing mechanism. Remove the battery pack. Then check that all moving parts have come to a standstill:
Check the cutting unit for damage and repair it. Then switch on the cutting unit again and use it. If the cutting unit is blocked unexpectedly: check it immediately for damage. Replace or repair damaged parts. Tighten loose parts and then switch on again.
WARNING! Danger of injury from the cutting unit. If the cutting unit is blocked, the motor may overheat.
Clean the cutting mechanism after every use. Set the cutting height to the correct position. Cut the taller grass first, then adjust to the desired height.
6.1 Adjusting the cutting height
WARNING! Danger of injury from the cutting unit. Danger of injury from the cutting unit when reaching with your hand towards the moving cutting mechanism. Adjust the cutting height only when the motor is switched off and the cutting mechanism is stationary.
6.1.1 Adjusting the cutting height (07)*
*: 34.6 Li comfort, 38.6 Li comfort, 43.6 Li comfort
1. Press the release lever (07/a) to unlock. 2. Lift the cutting unit by the carrying handle (07/2) upwards until it engages (07/b). The desired cutting height can be read from the scale (07/3). 3. Release the release lever.
6.1.2 Adjusting the cutting height (08)**
**: 46.6 Li SP comfort, 51.6 Li SP comfort
- To unlock, press the adjustment lever (08/1) inwards and hold it.
For low grass: press the lever in the direction of the front wheel (08/b). For taller grass: press the lever in the direction of the grass collection container (08/b). The desired cutting height can be read from the scale (08/3).
2. Press the adjustment lever so that it locks into the desired position.
6.2 Mowing with the grass collection container (09,10)
The device can work with or without the grass collection container.
Warning about the grass collection container.
- Make sure the grass catcher mechanism is switched off. 2. Lift the protective guard (09/1).
- Attach the grass collection container (09/2) to the holders (09/b). 4. Release the protective guard.
Danger of injury when emptying the grass catcher mechanism.
Empty the grass collection container only when the grass catcher mechanism is switched off.
NOTE: When emptying the grass collector, also clean the air vents of the blower so that it can function properly.
- Make sure the grass catcher mechanism is switched off. 2. Lift the protective guard (09/1).
- Lift the grass collection container (09/2) off the holders and empty it. 4. Empty the container. 5. Clean the air vents of the blower.
- Attach the grass collection container (see above).
6.3 Starting and stopping the grass catcher mechanism (11, 12)
The grass catcher mechanism should only be started on a flat surface, with low grass. The surface must be free of stones and other objects. Do not lift or tilt the device to start it.
CAUTION! Risk of damage to the device. If the engine is switched on and off repeatedly for short periods, the engine and the grass catcher mechanism may be damaged.
Switch on the engine only when the blade is...
NOTE: Uneven working position: hold the grass catcher by the handle with both hands.
Starting the grass catcher mechanism
- Follow this procedure to switch on the electrical protection (see chapter 5.3 "Switching on and off the electrical protection (05, 06)", page 430).
- Press and hold the starter button (11/a, 12/a). 3. Pull out (11/b, 12/b) the intended blade (11/2, 12/2) towards the main handle (11/3, 12/3). The mower motor starts. 4. Release the starter button and continue to hold the intended blade.
INSTRUCTION: The intended blade cannot be fixed. Hold it all the time while working, until it reaches the main handle.
Stopping the mower mechanism
1. Release the intended blade. It automatically returns to the initial position. 2. Wait until the mower mechanism stops. 3. Switch off the electrical protection (see chapter 5.3 "Switching on and off the electrical protection (05, 06)", page 430).
WARNING! Danger of cutting.
Danger of cutting when reaching into the mower mechanism.
Wait until the mower mechanism stops. Before any work on the surface and accessories: switch off the device and wait until the mower mechanism stops. Remove the battery.
6.4 Switching on and off the wheel lock (13)**
**: 46.6 Li SP comfort, 51.6 Li SP comfort
INSTRUCTION: The wheel lock can only be switched on when the motor is running.
Switching on the wheel lock
- Switch on the device and start the mower (see chapter 6.3 "Starting and stopping the mower mechanism (11, 12)", page 431).
- Press the wheel lock lever (13/1) towards the main handle (13/2) and hold it (13/a). The wheel lock lever does not lock.
Switching off the wheel lock
- Pull the lever to release the cable. Automatically takes its initial position.
6.5 Checking the condition of the battery charge (14, 15)
- Press the button (14/1, 15/1) briefly. The LED indicators (14/2, 15/2) light up or flash depending on the state of the charge:
| LED Инданka-to- ри (зелени) | Състаяни на заюд | |
| 4 LED Инданka-to- pa светят. | Актулатogaраза заегия e нально заюда. 3 LED Инданka-to- pa светят. | Актулатogaраза заегия e заюда на 75%. |
| 2 LED Инданka-to- pa светят. | Актулатogaраза заегия e заюда на 50%. | |
| 1 LED Инданka- top свети. | Актулатogaраза заегия e заюда на 25%. | |
| 4 LED Инданka-to- pa мигат. | Актулатogaраза заегия e заюда. |
NOTE: The LED indicators also show error codes (see Chapter 9.2 "Error codes for troubleshooting", page 438).
6.6 Adjusting the main spring according to growth
6.6.1 Adjusting the main spring (16)**
**: 38.6 Li comfort
1. Pull the release lever (16/a) to release the spring. 2. Turn the main spring (16/2) to position 1 or 2. Note: The third level is used for loosening the main spring. 3. Pull the release lever (16/c) for quick release.
6.6.2 Adjusting the main spring (17)**
**: 43.6 Li comfort 1. On both sides: Turn the adjusting knob (17/1) towards the open slot.
- Turn the main spring (17/2) to position 1 or 2.
Note: The third level is used for loosening the main spring.
- On both sides: Turn the adjusting knob towards the closed slot (17/c).
6.6.3 Adjusting the main spring (18)***
***: 46.6 Li SP comfort, 51.6 Li SP comfort
- From both sides: Close (18/a) the rotary handle (18/1) by 90°.
- Close (18/b) the main frame (18/2) in one of the two positions (18/3).
- From both sides: Close (18/c) the rotary handle for turning back by 90°.
6.7 Folding and unfolding the main frame
By folding the main frame, you can tilt the device forward or backward to move the mechanism easily. With the main frame folded, the device can be stored compactly.

WARNING! Danger of crushing.
Your fingers or other body parts can get caught between the unfolded parts of the main frame.
Hold the main frame firmly unfolded. Do not place your fingers or other parts of your body between the unfolded parts.
6.7.1 Folding and unfolding the main frame (19*, **
: 34.6 Li comfort *: 38.6 Li comfort, 43.6 Li comfort
Folding the main frame
- From both sides: Loosen (19/a) the fastening (19/1) of the main frame to the housing sufficiently so that the main frame can be folded forward.
- Fold (19/b) the main frame (19/2) fully forward.
- From both sides: Release the upper quick-release lever (19/3).
- Fold (19/c) the upper main frame (19/4) forward.
Unfolding the main blade
Proceed in the reverse order.
6.7.2 Folding the main blade (20)**
**: 46.6 Li SP comfort, 51.6 Li SP comfort
Folding the main blade
- From both sides: Turn the handle (20/1) by 90°.
- Fold the main blade (20/2) until it stops.
Unfolding the main blade
Proceed in the reverse order.
6.8 Mulching the side grass with the mulching attachment (21, 22)**, ***
: 38.6 Li comfort, 43.6 Li comfort *: 46.6 Li SP comfort, 51.6 Li SP comfort
When mulching, the side grass is not collected but remains on the ground. Mulch protects the soil from drying out and provides nutrients. Best results are achieved with regular mowing of about 2 cm. Only grass with a soft structure decomposes quickly into mulch.
Height of the grass before mulching: max. 8 cm. Height of the grass after mulching: max. 4 cm.
INSTRUCTION: Adjust the walking speed to the mulching process, do not walk too fast.
Attach the mulching attachment (21)

WARNING! Risk of injury.
Risk of injury when reaching into the running mower mechanism.
Before installing, switch off. To remove, remove the mulching insert, switch off the device.
WARNING! Risk of damage to the device. If the mulching insert is not locked, this can lead to damage to the mower mechanism.
Make sure the lock engages.
1. Switch off the device (see chapter 5.3 "Switching on and off" on page 430). 2. Empty the grass catcher (see chapter 6.2 "Mowing with grass catcher (09, 10)", page 431).
- Lift (21/a) the ejector flap (21/1).
- Insert (21/b) the mulching insert (21/2) into the discharge opening for the grass (21/3) so that the lock engages.
Removing the mulching insert (22)
1. Switch off the device. 2. Lift (22/a) the ejector flap (22/1). 3. Release (22/b) the lock (22/2) of the mulching insert by pulling the handle (22/3). 4. Remove the mulching insert (22/c).
6.9 Mowing with side discharge (23)***
***: 46.6 Li SP comfort, 51.6 Li SP comfort
WARNING! Risk of injury.
Risk of injury when reaching into the running mower mechanism.
Install and remove the side discharge chute only when the motor and mower mechanism are stopped.
Accessory for side discharge
1. Switch off the device and remove the battery pack. 2. Remove the grass catcher. 3. Open and hold the side discharge flap (23/1). 4. Attach the side discharge accessory (23/2) and lock it with the latch (23/3) for side discharge. 5. Close the flap. The flap protects the side discharge accessory from falling. 6. Insert the battery pack and switch on the device again.
Removing the side discharge accessory
1. Switch off the device and remove the battery pack. 2. Open and hold the side discharge flap. 3. Unlock and remove the side discharge accessory.
- Close the flap.
- Insert the battery pack and switch on the device again.
6.10 Mowing without the grass catcher (24)***
***: 46.6 Li SP comfort, 51.6 Li SP comfort
The device can also work without the grass catcher. To prevent the discharge opening from clogging, the deflector must be slightly tilted.
- Make sure the device is switched off and the cutting mechanism is at a standstill. 2. Lift the deflector (24/1). 3. Position the support hook (24/2) until it engages. 4. Release the deflector.
7 WORKING INSTRUCTIONS
Follow the safety instructions!
Observe the local regulations regarding when a lawn mower may be used.
Check for foreign objects in the grass and remove them from the working area. Mow only in good visibility. Mow only with a sharp blade. Adjust the device only with the main plug. Charge the device only with the charger, in a dry, dark place. Do not charge the device on slopes. Do not use the lawn mower on slopes or on inclines greater than 10°. Be especially careful when changing the working direction.
Mowing performance, see specifications. Working time of the battery packs
The productivity of the mower depends on the type of grass to be mowed. Factors such as the height and density of the grass, the selected mowing height, as well as the moisture of the grass, influence the productivity of the mowing.
Continuous use can be achieved with more frequent mowing and trimming of lower grass. The productivity of the mower is reduced with frequent switching on and off of the blade motor during mowing, as well as with improperly charged batteries. Switching on the blade drive reduces the productivity of the mower, respectively the runtime of the batteries. To optimize the productivity of the mowing, it is recommended to mow frequently, set a large mowing height and move the device in dry weather.
TIP: To extend the runtime of the mower, additional batteries can be used.
a) 46.6 Li SP comfort, 51.6 Li SP comfort
MOWING TIPS
Constant mowing height of 3-5 cm, do not mow more than the height of the grass. Do not overload the blade! If the sound of the motor drops noticeably and the grass is tougher, increase the mowing height and mow several times. The blades should be sharp so that the grass is cut cleanly, so mow in dry weather.
8 MAINTENANCE AND CARE
DANGER! Danger to life from improper maintenance. Maintenance by unqualified personnel, use of unapproved spare parts, as well as modification of the safety devices can lead to serious injuries and even death during work.
Do not remove any safety devices and do not bypass them. Use only approved original spare parts. Through regular and proper maintenance, you ensure that the device is in proper working condition.
WARNING! Danger of injury. Danger of injury from moving parts when touching parts with sharp edges or moving parts, as well as on moving tools.
Before maintenance, servicing and cleaning, switch off the device. Remove the safety key and remove the batteries! Wear protective gloves when performing maintenance, servicing and cleaning.
WARNING! Danger of injury from maintenance work. Improper maintenance can lead to serious injuries and damage to the device.
Repairs of the device must only be carried out by qualified service personnel.
8.1 Regular maintenance
Ensure that all nuts, bolts and screws are properly tightened and that the device is in a safe operating condition. Regularly check the function and wear of the grass collection container.
8.2 Setting up and adjusting the mowing mechanism
WARNING! Danger from water. Water entering the device may cause a short circuit and damage to the electrical parts.
Do not rinse the device with water. For cleaning, use a brush for collecting debris or a cleaning brush.
- Stop the motor. 2. Remove the accumulator batteries.
- Empty the grass collection container.
- Then set the device and adjust the mowing mechanism.
8.3 Checking and maintaining the cutting blade
WARNING! Sharp cutting blade
parts. A worn, bent, or damaged cutting blade may break and its parts may be thrown at dangerous speeds.
Regularly check the cutting blade for damage. Do not use the lawn mower when the cutting blade is worn or damaged. A blunt or damaged cutting blade may be sharpened or replaced only at the manufacturer's service or at an authorized specialized service. When turning the cutting blade, make sure the cutting blade can be turned only when the power source is disconnected. Be careful when adjusting the machine to avoid pinching your fingers between the moving cutting blades and the stationary parts of the machine. To avoid vibrations, the cutting blade and the blade bolt must be replaced together. The cutting blade must be balanced. An unbalanced cutting blade may cause strong vibrations and damage to the mower.
8.4 Repair work
WARNING! Danger of injury during repair work.
Incorrect repairs may lead to serious injuries and damage to the device.
Repair work may only be carried out by the manufacturer's service centers or by authorized specialized companies!
In special cases, contact the manufacturer's service.
Before starting. Check the obstacles above. Adjust the mower height to your lawn. Before mowing, check the area. The battery is discharged or damaged.
9 TROUBLESHOOTING
WARNING! Danger of injury.
Sharp moving parts can cause injury. Wear protective gloves when working, servicing, and cleaning the device!
9.1 Correcting errors when working and dealing with them
INSTRUCTION If a malfunction that is not listed in this table or that you cannot fix yourself occurs, contact the manufacturer's customer service.
| НемправноctПрочина | Остразоваhe | |
| Двигателей не павOTи. | АктуларонITE батери ПИСВAT ИПИ He са постaveni правлино. | Посавete павлино AkтуларонITE батери. |
| АктуларонITE батери са правли. | ЗaperdeTe akтуларонITE сатери. | |
| Рекешит пож e绛кован. 1. Почистete осnobно рекешия пож и кocayното крillo. Рекешият пож Травда сбобodно. 2. Стапайte радинска т кocayka Вьрху Н stickа Трав. | ||
| Heɪзправноct Причина | Одстразноаhe | |
| Кабелът щли превключва te- ля садфекту. | He paBOTeTe c урEDA! Свьржete ce сьс сервиЗ на пОНЗВODИТЕЛЯ. | |
| Моцността на двига- теля пада. | Акумуалаторнite бateрши са праЗни. | ЗарdeTeе akumуалatорнiteбateрши. |
| Решшил.Tож e Тьл.НatoЧeTe | решшил.Hож b.cerВиЗ ha пОНЗВODИТЕЛЯ. | |
| В каналa 3a ИЗХьрлге щли в косачното крпло Има Тььр- De Mного Трев. | 1.Почистete оснOBно решшил.Hож И косачнOTо КрпLO.2.Стат彦е Гадинската косачka Вьрху НSCа Трев. | |
| Двигастета спupa no врeme на косеон. | Решшил.Tож e Tьл.НatoЧeTe | решшил.Hож b.cerВиЗ ha пОНЗВODИТЕЛЯ. |
| Двигастета epotobarpen.Изкючete Гадинската косачka, по-stавeteя на равна поьрхноCT щли Вьрху НSCa Трев и OTНову StapTi- paITE. | ||
| Контынерът 3a сьби-pane на Треве на се 3апьлв доctаТьчо. | Трева t e Влжна.Оставete Тревада ИЗСьхнe. | |
| Контынерът 3a сьбиране на Трева e Запшen. | Почистete решETКATA Na контынера 3a сьбиранe на Тревa. | |
| В каналa 3a ИЗХьрлге щли в косачното крпло Има Тььр- De Mного Тревa. | ■Почистete оснOBно решшил.Hож И косачнOTо КрпLO.Pergunayte Na lo-BvscOKa STOJ- HOCT BvscOnHATA Na KOSCEHe. | |
| PreshelstnoT noK Tьл.НatoЧeTe | рeshelstnoHож b.cerВиЗ ha пОНЗВODИТЕЛЯ. | |
| От косачноTo крпло пада Тревa. | Контынерът 3a сьбиранe на Тревa e пьlen. | Изпраэнete контынера и почистete KaHana 3a ИЗХьрлгe Na OKocehaTa Tревa. |
| Прдьлжптелноctta на пбotingа на akumуla-Topнataбateреля e 3a-6belexимо по-mалka. | Висун�а на косеон на Тревa t e пекаленo ИSCa. | Peruginpaite Na lo-BvscOKa STOJHOCT BvscOnHata Na KOSCEHe. |
| Тревa t e пекаленo ВSCa Или пекаленo Влажна. | ■Оставete Тревaда ИЗСьхнe.Pergunayte Na lo-BvscOKa STOJ- HOCT BvscOnHATA Na KOSCEHe. | |
| СkopocstTu Na косеон e пекал- leHo BvScOKa. | ■Hamalente skopocstTu Na KOSCeHe.Pergunayte OTBexdauzma otBovи КосачнOTO крпLo. Рожшил.Tож ТряБада се Вьрtn свобodnO. | |
| Контынерът 3a сьбиранe на Тревa e пьlen. | Изпраэнete контынера и почистete KaHana 3a ИЗХьрлгe Na OKOCehaTa Tревa. | |
| Henisправноct Причina | Оствае | |
| ЖиBOTьТ на akумлалорнite 6batери визд. | Смене akумлалорнite батери. ИЗ- полз Bavе само оригинални части от пожимовпеля. | |
| Акymлалорнite 6bat- ри не се зарочдат. | КонтактITE на akумлалорна- та 6batери сиз[bрсени. | Почисте контактITE на akумлалор- нота 6batери с hemetален поздмети нанрьскайе сkontakтен спөг. Вимане: He preduzburkaше кьсо съedingию на konhmaхumsе на ak- улamopнama bameря с memален поздмem! |
| Акymлалорнite 6batери вли зарадOTO устroduстvo сиз- фектни. | Порьаче рezервни части от поз- вodителя. | |
| Акymлалорнite 6batери са п配电ален горец. | Оставе akумлалорнite bateри дa се охладят. |
9.2 Error codes and troubleshooting
Errors are indicated by different patterns of the 4 green LEDs on the indicator:
| Кod 3a rpeшka Прична | Оствае | |
| 2х мигане Уредьт e петоварен. | ■Увелоче Височина на рязANE. ■Двожete се по-бавно. ■Налразе кратук почыка. ■Косе трават постенио. | |
| 4х мигане П装配ално висока илп пека- лесно Ниска Temпера typа на: ■Урeding ■Акумалatorни батери ■Управливац升降 | Урeding и akumулatableни батери: 1.Изке лочete. 2.Оставе за се охлади илл заг pee. 3.Вк Liquidуete и Из也不可能 в рамки.... ha paBOTNHЯ Temпера typen диапа- Зон. | |
| 6х мигане | ■Тьрдце Нскло eilektpruce- ско наржения ил升降. ■Урeding и akumулatableни... батери се Тьрдце rope- ци | ■Проберete сбстаяне... наб... Ако... НИВOTO e Тьрдце Нскло, зapede... ■Изке лочete урeding и akumулatableни- .... te сьатери и я... octabete на се... oxлад... |
| 10х мигане Друга rpeшka | Сьржete се сьс сервизни ... centbpr Na пюзBOДNTe... илс с Тьрговский ... пpeД-став'te... |
10 TRANSPORTATION
10.1 Transporting the device
WARNING! Danger of damage to the mower deck. At the lowest height of the mower deck, it can be damaged when moving over curbs, bumps, or uneven terrain.
Set the mower deck to the highest level when transporting. 1. Stop the mower deck and wait until it stops. 2. Set the mower deck to the highest height.
Transporting the device between two working zones
Move the device to the working zone, set to the highest mower deck height. For easier movement, engage the wheel drive a). To carry the device, use the carrying handles (see Chapter 3.6 "Product overview", page 427).
a) 46.6 Li SP comfort, 51.6 Li SP comfort
Transporting the device in a vehicle
Remove the battery. Pull out the main plug. Secure the device in the vehicle against tipping or falling. Protect the device against impacts from loose objects. Do not place objects on top of the device.
10.2 Transport
Take the following measures before transport:
1. Switch off the device. 2. Remove the battery pack. 3. Pack the battery pack properly (see section 10.3).
Battery pack "B160.6 Li" (article no. 114128)
INSTRUCTION: The nominal energy of the battery is less than 100 Wh! Therefore, follow the instructions for transport!
The battery is a lithium-ion battery and is subject to the legislation for dangerous goods, but for all that it can be transported under simplified conditions:
The battery can be transported by the end user without additional conditions, provided it is packaged for retail and the transport is carried out by private individuals. Professional users who carry out transport in connection with their main professional activity (e.g. deliveries from construction sites or to commercial enterprises) may also use this simplified procedure.
In both cases, the necessary precautionary measures must be taken to prevent leakage and spillage. In any case, compliance with the regulations of the legislation for dangerous goods is required! In case of non-compliance, both the manufacturer and the transporter may be held liable for significant damages.
Additional information for transport and dispatch
Transport and dispatch lithium-ion battery packs only in undamaged condition! For transport of battery packs, use only the original cardboard packaging or a suitable cardboard packaging for dangerous goods (not mandatory for battery packs with nominal energy less than 100 Wh). Cover the open contacts of the battery pack to prevent short circuits. Inside the packaging, secure the battery pack in place to prevent damage to the battery. Ensure correct labeling and documentation practice during transport and dispatch (e.g. with courier service or freight forwarder). Inform yourself in advance whether transport with the selected delivery service is possible and label the packaging accordingly.
We recommend consulting a dangerous goods specialist for the preparation of the packaging. Comply with all additional national regulations.
11 STORAGE
After use of the device, place it on the main stand and insert the charging adapter (if available). Perform the necessary maintenance. Store the device in a dry, lockable place and out of reach of children.
11.1 Storing the hedge trimmer without the battery
WARNING! Risk of injury when storing. There is a risk of injury from the sharp blades on the parts of the storage device.
Store the device out of the reach of children and unauthorized persons. Store the device only with the battery removed.
1. Switch off the device. 2. Remove the battery. 3. Empty the container and clean the oil drain channel. 4. Clean the main device. 5. Leave the engine and muffler to cool down. 6. To protect against corrosion, coat all metal parts with a thin layer of oil or silicone spray. 7. Fold the main handle. 8. Store the device in a dry, clean place, protected from frost.
Cover it with a tarpaulin to protect it from dirt. Do not use plastic covers to avoid moisture accumulation. NOTE! Storage temperature of the hedge trimmer: see technical data.
11.2 Storing the battery and charger
DANGER! Risk of explosion and fire! If the battery is exposed to fire or heat sources, it may explode and cause serious injury. Store the battery dry, away from open flames and heat sources.
NOTE The battery automatically detects the charging level and is protected against overcharging. Therefore, charging may take some time, but not too long, when connected to the charger.
NOTE Follow the separate instructions for use of the battery and charger.
Store the battery in a dry place, protected from frost, at a temperature between 0°C and 25°C and with a charge level of about 40-60%. To avoid the risk of short circuit, store the battery away from metal objects or objects containing metal.
12 DISPOSAL
Only for EU countries:
According to European Directive 2012/19/EC on waste electrical and electronic equipment and its implementation in national law, devices that can no longer be used must be collected separately and sent for environmentally sound recycling.
If you dispose of old electrical and electronic devices incorrectly, hazardous substances may have adverse effects on the environment and human health.
Note regarding the German Electrical and Electronic Equipment Act

Old electrical and electronic devices do not belong to household waste, but must be collected and disposed of separately!
Old batteries and accumulators that are not built into old devices must be removed before disposal! Their disposal is regulated by the Battery Act. The retailer, the end user of electrical and electronic devices, is obliged by law to take them back free of charge after use.
The end user is responsible for deleting personal data from old devices before disposal!
The symbol of the crossed-out wheeled bin indicates that electrical and electronic devices must not be disposed of together with household waste.
Electrical and electronic devices can be returned free of charge to the following collection points:
Public waste collection services - resp. collection points (e.g. municipal recycling yards), collection points for the sale of electrical appliances (stationary or mobile), as well as retailers are obliged to take back electrical appliances or voluntarily offer this.
These instructions apply only to devices that are sold, installed, and maintained in the EU and are subject to the provisions of EU Directive 2012/19/EU. In countries outside the EU, different regulations for the disposal of old electrical appliances and electronics may apply.
Instructions regarding the Battery Act (BattG)

Old batteries and accumulators do not belong in household waste, but must be collected and disposed of separately!
For the safe removal of batteries and accumulators from electrical devices and for information on their type and corresponding chemical composition, please also note the additional instructions in the operating instructions or the installation instructions. End users are legally obliged to return used batteries and accumulators. The return is limited to quantities typical for households.
Old batteries may contain harmful substances or heavy metals that can be harmful to health and the environment. The recycling of old batteries and the reuse of the resources they contain contribute to the protection of these two important resources.
The symbol of the crossed-out wheeled bin indicates that batteries and accumulators must not be disposed of together with household waste.
If the wheeled bin symbol is additionally marked with the letters Hg, Cd, or Pb, this means the following:
Hg: The battery contains more than 0.0005% mercury Cd: The battery contains more than 0.002% cadmium Pb: The battery contains more than 0.004% lead
Accumulators and batteries can be returned free of charge to the following collection points:
Observe the service instructions for collecting old devices at collection points (e.g., communal collection points), sales points for battery accumulators, return and recycling points of the common system for take-back of used batteries. Return points for producers (if not a member of the common take-back system).
These requirements apply only to battery accumulators sold in EU countries and are subject to EU Regulation 2023/1542. Outside the EU, different regulations for the disposal of accumulators and batteries may apply.
13 TECHNICAL DATA
Technical data: See the table with technical data at the beginning of this operating manual.
- Notes on vibration and noise emissions:
The stated vibration and noise emission values are measured according to the standard test method and can be used for comparing one machine with another. The stated vibration and noise emission values can also be used for a preliminary assessment of exposure (level of emitted vibrations).
The vibration and noise emissions may differ from the stated values during actual use of the machine, depending on the way it is used. Follow the safety measures according to the safety chapter. Try to keep the maximum exposure to vibrations as low as possible. Example measures for reducing vibration exposure include wearing gloves when using the machine and limiting working time. Consider all parts of the work cycle (e.g., time when the machine is switched off, and time when it is switched on but running without load).
14 MAINTENANCE / SERVICE
For questions regarding warranty, repair, or spare parts, contact the nearest service center of AL-KO. You can find it on the internet at the following address: www.alko-garden.com/service-contacts
For more information about spare parts, visit: www.alko-garden.com/spareparts
15 INFORMATION DECLARATION OF CONFORMITY
We hereby declare under our sole responsibility that this product, in the form in which it is placed on the market, complies with the requirements of the harmonized EU directives, EU safety standards, and product-specific standards. The declaration of conformity is part of the operating instructions and is attached to the machine.
16 WARRANTY
Any material or manufacturing defects will be rectified by us within the statutory warranty period for defects, at our discretion through repair or replacement delivery. The warranty period is determined in accordance with the laws of the country where the device was sold.
Warranty only applies to:
Translation of the original operating instructions. The warranty is valid only if the original spare parts are used.
The warranty becomes invalid in the event of:
Unauthorized repairs, self-made technical modifications, use not in accordance with the intended purpose.
Excluded from the warranty are:
Seals, wear parts, and damage caused by normal wear and tear, as well as parts marked with frame XXXX (x) in the spare parts list.
The warranty period starts from the date of purchase by the first end user. The date of the purchase document is decisive. Please contact your dealer or the nearest customer service center with this declaration and the original purchase document. The buyer's claims for defects against the seller remain unchanged by this declaration.
Translation of the original operating instructions
Table of contents
1 Safety instructions.....444
1.1 General safety instructions for electric machines. 445
1.1.1 Safety at the workplace 445
1.1.2 Electrical safety...445
1.1.3 Personal safety 445
1.1.4 Use and handling of the battery-powered machine 446
1.1.5 Service 447
1.2 Safety instructions for the radio remote control 447
1.3 Safety instructions for the battery and charging device 448
2 Information on the operating manual 448
2.1 Symbol and title page ... 448
2.2 Conditions and signal words 448
3 Product description 448
3.1 Intended use..... 449
3.2 Foreseeable misuse 449
3.3 Residual risks 449
3.4 Protective and safety devices... 449
3.5 Symbols on the device 449
3.5.1 Safety marking 449
3.5.2 Operating symbols.. 450
3.6 Product overview 450
6.1 Adjusting the cutting height 454
6.1.1 Adjusting the cutting height (07)* 454
6.1.2 Adjusting the cutting height (08)** 454
6.2 Mowing with the grass catcher (09, 10) 454
6.3 Engaging and stopping the blade drive (11, 12). 454
6.4 Switching the wheel drive on and off (13)** 455
6.5 Checking the battery charge level (14, 15) 455
6.6 Adjusting the guide bar according to the user's height 455
6.6.1 Adjusting the guide bar (16)** 455
6.6.2 Adjusting the guide bar (17)** 455
6.6.3 Adjusting the guide bar (18)*** 456
6.7 Folding and unfolding the guide bar.. 456
6.7.1 Folding and unfolding the guide bar (19)*,**. 456
6.7.2 Folding and unfolding the guide bar (20)***.... 456
6.8 Maneuvering with the maneuvering lever (21, 22)**, *** 456
6.9 Mowing using the side discharge system (23)***....457
6.10 Mowing without the grass catcher (24)*** 457
7 Operating instructions... 457
8 Maintenance and care... 458
8.1 Regular maintenance work... 458
8.2 Cleaning the device and the mowing mechanism... 458 8.3 Checking and replacing... 459 8.4 Repair work... 459
9 Troubleshooting... 459
9.1 Correcting device errors and processing... 459 9.2 Error codes and troubleshooting... 461
10 Transport... 461
10.1 Transporting the device... 461 10.2 Transporting... 462
11 Storage... 462
11.1 Storing the battery-powered lawn mower... 462 11.2 Storing the battery and charging device... 463
12 Disposal... 463 13 Technical specifications... 464 14 Service... 464 15 Information on the Declaration of Conformity... 465 16 Warranty... 465
1 SAFETY INSTRUCTIONS
Only for countries of the Eurasian Economic Union (Customs Union)
The operating documents provided by the manufacturer for the product may include this operating manual as well as attachments.
Information about conformity is contained in the appendix.
Information about the country of origin is indicated on the product body and in the appendix.
The date of manufacture is indicated on the last page of the cover of the manual.
Contact information regarding the manufacturer is contained in the packaging.
Service life of the product
The service life of the product is 7 years. It is not recommended to operate after 5
years of storage from the date of manufacture without prior inspection (see the date of manufacture on the label).
The specified service life is valid provided that the consumer complies with the requirements of this manual.
List of critical failures
Do not use with strong sparking. Do not use with strong vibration. Do not use with a frayed or bare electrical cable. Do not use when smoke appears directly from the product body.
Possible erroneous actions of personnel
Do not use with a damaged handle or damaged protective cover. Do not use in open space during rain. Do not turn on if water gets into the body.
Criteria for limit states
Breakage of the electrical cable, damage to the product body
Type and frequency of technical maintenance
It is recommended to protect the instrument from dust after each use.
Storage
It must be stored in a dry place, away from sources of elevated temperatures and exposure to sunlight. During storage, avoid sharp temperature changes. Storage without packaging is not allowed. Detailed requirements for storage conditions are specified in GOST 15150-69 (condition 1). Store in the manufacturer's packaging in dry rooms at an ambient temperature from +5 to +40 °C. Relative air humidity should not exceed 80%.
Transportation
It is strictly forbidden to subject the packaging to strong mechanical impacts during transportation and loading/unloading. The use of any equipment operating on the principle of gripping the packaging is not allowed. Detailed requirements for transportation conditions are specified in GOST 15150-69 (condition 5). Transport at an ambient temperature from -50 °C to +50 °C. Relative air humidity should not exceed 100%.
1.1 General safety instructions for electric machines
WARNING! Read all safety instructions, manuals, illustrations, and technical specifications included with this machine. Failure to follow the safety instructions and manuals may result in electric shock, fire, and/or serious injury. Keep all safety instructions and manuals for future use.
The term "machine" used in the safety instructions refers to machines powered from the mains (with a mains cable) or machines powered by a battery (without a mains cable).
1.1.1 Workplace safety
The workplace must be clean and well lit. Clutter in the workplace and unlit areas can lead to accidents. Do not operate the machine in an explosive atmosphere where flammable liquids, gases, or dust are present. Machines produce sparks that can ignite dust or vapors. While using the machine, do not allow children or other people near you. If you are distracted, you may lose control of the machine.
1.1.2 Electrical safety
The plug of the machine must fit the socket. The plug must not be modified. In machines with protective grounding, adapter plugs must not be used. Unmodified plugs and suitable sockets reduce the risk of electric shock. Avoid physical contact with grounded surfaces such as pipes, radiators, stoves, and refrigerators. If your body is grounded, there is an increased risk of electric shock. It is forbidden to use the power cord for purposes other than its intended use, such as carrying or hanging the machine, or pulling the plug out of the socket. Keep the power cord away from sources of heat, oil, sharp edges, or moving parts of the device. Damaged or tangled power cords increase the risk of electric shock. If you work with the machine outdoors, use only extension cords that are also suitable for outdoor use. Using an extension cord intended for outdoor use reduces the risk of electric shock. When operating the machine in damp environments, use a residual current device (RCD). Using an RCD reduces the risk of electric shock.
1.1.3 Personal safety
When working with the machine, you must be attentive and approach the work with a clear understanding of the appropriateness of your actions. Do not use the machine when you are tired or under the influence of alcohol, narcotics, or medications. A brief lapse of attention while using
the machine may result in serious injury.
Use personal protective equipment. Always wear protective glasses. Depending on the type and conditions of use of the machine, the use of personal protective equipment such as a respirator, non-slip safety footwear, safety helmet or hearing protection significantly reduces the risk of injury. Avoid accidental starting. Make sure the machine is switched off before connecting it to the power source and/or battery pack, picking it up or carrying it. Carry the machine with your finger off the switch and do not connect it to the mains while it is switched on. This can cause accidents. Before switching on the machine, remove adjustment tools or wrenches. A tool or wrench left attached to a rotating part of the machine can lead to injury. Avoid awkward body positions. Choose a stable stance that allows you to maintain balance at all times. This will help you control the machine better in unexpected situations. Wear suitable clothing. Do not wear loose clothing or jewelry. Keep hair and clothing away from moving parts. Loose clothing, jewelry or long hair can get caught in moving parts. If devices for dust extraction and collection are provided, make sure they are properly connected and used. Dust extraction can reduce dust-related hazards. Do not consider yourself immune to danger and do not ignore safety rules for machines, even if you are familiar with the machine after repeated use. Careless handling can lead to serious injuries within seconds.
Operating Instructions
Follow the safety measures specified in the separate operating instructions for the battery and the charging device:
Operating Instructions 443998: Batteries Operating Instructions 443999: Charging devices
2 INFORMATION ABOUT THE OPERATING INSTRUCTIONS
The German version is the original operating instructions. All other language versions are translations of the original operating instructions. Always keep these operating instructions at hand so that you can read them if you need information about the device. Pass the device on to third parties only together with these operating instructions. Read and follow the safety instructions and warnings given in these operating instructions.
2.1 Symbols on the title page
Symbol Meaning

Mandatory: Read these operating instructions before commissioning. This is necessary for safe work and trouble-free use of the device.
Symbol Meaning

Operating Instructions

Handle rechargeable batteries with care! In particular, follow the instructions for transport, storage and disposal in these operating instructions!

This product complies with the applicable European Directives and has undergone the conformity assessment procedure for these Directives.
2.2 Symbols and signal words
DANGER! Indicates a hazardous situation which, if not avoided, will result in death or serious injury. WARNING! Indicates a potentially hazardous situation which, if not avoided, could result in death or serious injury. CAUTION! Indicates a potentially hazardous situation which, if not avoided, may result in minor or moderate injury.
NOTICE! Indicates a situation which, if not avoided, may result in property damage.
NOTE Special instructions for easier understanding and operation.
3 PRODUCT DESCRIPTION
This document describes several product models. Identify the model by the illustrations and description of the various functions.
It is permitted to use batteries (Bxxx Li) and charging devices (Cxxx Li) of the type
ALKO 18V/36V 1BATTERY/2 VOLTAGES
WARNING! Danger of damage to the device and battery. If the device operates with unsuitable batteries, the device and batteries may be damaged. The device operates only with the batteries intended for this purpose.
NOTE For additional information, refer to the operating instructions for the battery and charging device of the type ALKO 18V/36V 1BATTERY/2 VOLTAGES
3.1 Intended use
This device is intended for cutting turf in private gardens and may only be used outdoors.
Any other use or use beyond this is considered contrary to the intended use. The device must be used only in a fully assembled condition.
This device is intended for private use. Any other use, as well as unauthorized modifications or additions, are considered improper use and lead to loss of warranty, as well as to loss of conformity and to rejection of any liability for damage to the user or third parties on the part of the manufacturer.
3.2 Foreseeable misuse
The device is not intended for commercial use in public parks, sports facilities, or in agriculture and forestry.
Do not use the device on wet ground. There should be no foreign objects on the mowing surface, such as stones, tree roots, or bottles. It is forbidden to block or cover the protective devices, for example, the circuit breaker on the tank.
3.3 Residual risks
Even if the device is used correctly, there is always a certain residual risk that cannot be eliminated. The following potential
hazards may arise depending on the type and design of the device and its use:
Ejection of cut material, soil, or small stones. Inhalation of parts of the cut material if a respirator is not used. Cuts from contact with rotating blades.
3.4 Protective and safety devices
Risk of injury. Malfunction or failure of protective and safety devices can lead to injury.
Faulty protective and safety devices must be repaired. Never disable protective and safety devices.
Protective circuit breaker
The device is equipped with a protective circuit breaker. In case of danger, simply release the protective circuit breaker. The engine and blade mechanism stop.
The "Start" button (on the control panel)
To start the engine with the protective circuit breaker, first press the "Start" button.
Deflector flap
The deflector flap provides protection, for example, from parts of the cut material and stones that may be thrown out.
3.5 Symbols on the device
3.5.1 Safety symbols
Symbol meaning

Observe special caution when using the device!

Before commissioning, read the operating instructions!
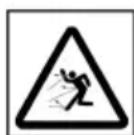
Danger of injury from thrown objects!
Symbol meaning
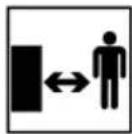
Keep bystanders out of the danger zone!
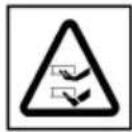
Danger of injury! Keep hands and feet away from the cutting mechanism!
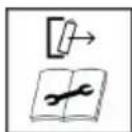
During idle periods and before maintenance or repair: switch off the power using the switch, remove the battery from the device!
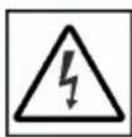
Not applicable. Used only for electric mowers.
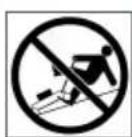
Do not mow grass on steep slopes!

Do not use the device in the rain and do not store it outdoors!
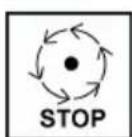
The blade will continue to rotate after switching off. Do not touch the blade until all parts of the device have stopped!
a) 46.6 Li SP comfort, 51.6 Li SP comfort
3.5.2 Operating symbols
Common value
Gasoline-powered brush cutter, operating time 36 hours, with two batteries with a voltage of 18 V.
**: 46.6 Li SP comfort, 51.6 Li SP comfort
46.6 Li SP comfort, 51.6 Li SP comfort
5 COMMISSIONING
5.1 Charging the battery
The battery is not fully charged. Before first use, the battery must be fully charged. The battery can be charged at any charge level.
Interrupting the charging process does not damage the batteries.
I NOTE: For details, see the separate instructions for batteries and the charging device.
5.2 Inserting and removing the batteries (05, 06)
The brush cutter only works when both batteries are inserted.
CAUTION! Danger of damaging the batteries. If you leave the batteries in the device after use, they may be damaged.
Immediately after finishing work, remove the batteries from the device and store them in a dry place. Insert the batteries into the device immediately before work.
Inserting the battery
- Fold open (05/a, 06/a) the battery compartment cover (05/1, 06/1).
- Insert the batteries (05/2, 06/2), top side up, into the battery compartments (05/3, 06/3) until they click into place (05/b, 06/b).
- Close (05/c, 06/c) the battery compartment cover.
Removing the battery
- Press and hold the release button (05/4, 06/4) on the battery. 2. Remove the battery.
5.3 Switching the power supply on and off (05, 06)
WARNING! Risk of injury. Switching the device on unintentionally can lead to serious injuries. Always switch off the device before maintenance: Remove the battery.
Switching on the power supply
- Open (05/a, 06/a) the battery compartment cover (05/1, 06/1).
- Installing the battery: see Chapter 5.2 "Installing and removing the battery (05, 06)", page 453.
- Close (05/c, 06/c) the battery compartment cover.
- Switching on the device: see Chapter 6.3 "Starting and stopping the mowing mechanism (11, 12)", page 454.
Switching off the power supply
1. Remove the battery: see Chapter 5.2 "Installing and removing the battery (05, 06)", page 453. 2. Immediately after finishing work, remove the battery from the device, charge it and store it in a place protected from low temperatures. Insert the battery into the device only immediately before use.
DANGER! Risk of injury. Malfunction or failure of the protective devices can cause injury. Before switching on, check the presence and proper functioning of all protective devices!
DANGER! Risk of injury under abnormal operating conditions. Immediately stop the lawn mower. Remove the battery. Then make sure that all moving parts are completely stationary.
After hitting a foreign object: Check the lawn mower for damage and have it repaired. Only then switch the lawn mower on again and put it into operation. If the lawn mower vibrates abnormally: Immediately check it for damage. Replace or repair damaged parts. Look for loose parts and tighten them.
CAUTION! Risk of damage to the device. If the blade is blocked, the motor may be overloaded.
Clean the cutting mechanism after each use. Set a high cutting height. Mow tall grass and dense undergrowth gradually.
6.1 Adjusting the cutting height
CAUTION! Risk of cuts. Risk of cuts when touching the running cutting mechanism.
Adjust the cutting height only with the engine switched off and the cutting mechanism stopped.
6.1.1 Adjusting the cutting height (07)*
*: 34.6 Li comfort, 38.6 Li comfort, 43.6 Li comfort
- Press the unlocking lever (07/a). 2. Lift the lawn mower by the transport handle (07/2) upwards or press it downwards (07/b). Read the desired cutting height on the scale (07/3).
- Release the unlocking lever.
6.1.2 Adjusting the cutting height (08)**
**: 46.6 Li SP comfort, 51.6 Li SP comfort
- Press the control lever (08/a) downwards and hold it to unlock it.
For low cutting height: press the control lever (08/b) towards the front wheel. For high cutting height: press the control lever (08/b) towards the grass catcher. Adjust the cutting height (08/3).
- Release the control lever so that it engages in the desired position.
6.2 Mowing with the grass catcher (09, 10)
The machine can work with or without the grass catcher.
Attaching the grass catcher
- Make sure the machine is switched off and the cutting mechanism is stopped. 2. Lift (09/a) the deflector flap (09/1).
- Hang (09/b) the grass catcher (09/2) onto the holder.
- Lower the deflector flap.
Checking the fill level
The fill level indicator (10/1) rises upwards (10/a) with the airflow when mowing. If the grass catcher (10/2) is full, the
indicator will show a full level (10/b). The grass catcher must be emptied.
Attaching and emptying the grass catcher
CAUTION! Danger of cuts. Danger of cuts when working on the cutting mechanism.
Remove the grass catcher only when the cutting mechanism is stationary.
WARNING: Emptying the grass catcher also cleans the discharge openings of the fill level indicator to ensure proper functioning.
- Make sure that the device is switched off and the blade mechanism is stopped. 2. Lift the deflector flap (09/1).
- Remove the grass catcher (09/2) with the locking motion towards you.
- Empty the grass catcher.
- Clean the discharge openings of the fill level indicator.
- Install the grass catcher (see above).
6.3 Starting and stopping the blade mechanism (11, 12)
Start the blade mechanism only on level ground, not in tall grass. The surface must be free of foreign objects such as stones. Do not lift or tilt the device when starting.
WARNING! Risk of damage to the device. Repeated brief switching on/off leads to damage to the engine and the blade mechanism.
Switch off the engine only when the blade mechanism is in a stationary state.
NOTE: Permissible working position: You stand behind the lawn mower and hold the guide bar with both hands.
Starting the blade mechanism
- If nothing happens: Switch on the power (see Chapter 5.3 "Switching the power supply on and off (05, 06) page 453").
- Press the "Start" button (11/1, 12/1) and hold it down (11/a, 12/a). 3. Pull the safety bracket (11/2, 12/2) towards the guide bar (11/3, 12/3). The engine and blade mechanism start.
- Release the “Start” button; the protective bracket will then return to its original position.
Note: The protective bracket must not be locked. Keep it pressed on the handlebar throughout the entire operation.
Stopping the mower mechanism
- Release the protective bracket. It will automatically return to its original position. 2. Wait until the mower mechanism has come to a complete stop.
- Switch off the power (see section 5.3 "Switching the power supply on and off (05, 06)", page 453).
CAUTION! Risk of cuts. Risk of cuts when touching the running mower mechanism.
Wait for the mower mechanism to stop. Before all maintenance and care work: switch off the device, wait for the mower mechanism to stop, and remove the battery.
6.4 Switching the wheel drive on and off (13)**
**: 46.6 Li SP comfort, 51.6 Li SP comfort
Note: The wheel drive can only be switched on when the engine is running.
Switching on the wheel drive
- Switch on the device and start the engine (see section 6.3 "Starting and stopping the mower mechanism (11, 12)", page 454). 2. Press the gear shift lever for the wheel drive (13/1) towards the guide rail (13/2) and hold it (13/a). The gear shift lever for the wheel drive does not lock.
Switching off the wheel drive
- Release the gear shift lever for the wheel drive. It automatically returns to the neutral position.
**: 46.6 Li SP comfort, 51.6 Li SP comfort
Folding the guide bar
- On both sides: turn the rotary handle (20/1) by 90°
- Fold the guide bar (20/2) completely forward.
To unfold the guide bar, perform all steps in reverse order.
6.8 Mulching with the mulching wedge (21, 22)**, ***
**: 38.6 Li comfort, 43.6 Li comfort
***: 46.6 Li SP comfort, 51.6 Li SP comfort
During mulching, the cut material is not collected but remains on the lawn. The mulch covers the lawn and provides it with nutrients. Best results are achieved with regular mowing. At 2 cm, young grass with soft leaf tissue dies quickly.
Grass height before mulching: max. 8 cm. Grass height after mulching: min. 4 cm.
Note: Adjust the travel speed to match the mulching, do not move too fast.
Installing the mulching wedge (21)
CAUTION! Danger of cuts. Risk of cuts when touching the rotating blade mechanism. Before adjusting, switch off the device and pull out the safety key.
ATTENTION! Risk of damage to the device. If the mulching wedge does not latch, it may be damaged or the blade mechanism may be damaged.
Make sure that the lock engages. 1. Switch off the device (see Chapter 5.3 "Switching the device on and off" (05, 06), page 453).
- Grass catcher (see Chapter 6.2 "Working with the grass catcher (09, 10), page 454). 3. Lift (21/a) the deflector flap (21/1).
- Insert (21/b) the mulching plug (21/2) into the discharge chute (21/3) until it engages.
Removing the mulching plug (22)
- Switch off the device. 2. Lift (22/a) the deflector flap (22/1).
- Grip the handle (22/3) firmly, turn (22/b) the lock (22/2) on the mulching plug. 4. Pull out (22/c) the mulching plug.
6.9 Working with the side discharge system (23)***
**: 46.6 Li SP comfort, 51.6 Li SP comfort
CAUTION! Risk of cuts. Risk of cuts when touching the rotating blade mechanism.
Install or remove the side discharge insert only when the engine and blade mechanism are stopped.
Installing the side discharge insert
- Switch off the device and wait for the blade to stop.
- Remove the grass catcher.
- Fold down and hold in this position (23/a) the flap of the side discharge system (23/1).
- Insert the side discharge insert (23/2) and hook it (23/b) onto the lugs (23/3) located in the upper part of the side discharge system.
- Slowly close the flap of the side discharge system. The side discharge cover holds the side discharge insert in place.
- Install the battery and turn on the device.
Remove the side discharge chute insert.
- Turn off the device and remove the battery.
- Fold back and hold the side discharge chute flap in this position.
- Disconnect and remove the side discharge chute insert.
- Close the side discharge chute flap.
- Install the battery and turn on the device.
6.10 Mowing without the grass catcher (24)***
***: 46.6 Li SP comfort, 51.6 Li SP comfort The device can operate without the grass catcher. To prevent the discharge chute from clogging, it is necessary to slightly adjust the deflector flap.
- Make sure the device is turned off and the cutting mechanism is stopped. 2. Lift the deflector flap (24/1).
- Place the (24/b) lock (24/2) into the slot.
- Lower the deflector flap.
7 OPERATING INSTRUCTIONS
Comply with the safety regulations!
NOTE: Observe local
regulations regarding the use of lawn mowers.
Pay attention to the grass and remove it from the work area. Mow only in good lighting. Mow only with a sharp blade. Operate the device only on a level surface. Move the device only at walking pace. Always move the device across slopes. Do not move the lawn mower up or down slopes, nor on slopes with an angle greater than 10°. Exercise particular caution when changing the working direction.
Cutting efficiency and battery service life
The cutting capacity or the area that can be mowed depends on the characteristics of the lawn. The cutting capacity is also influenced by factors such as the length
of the grass, the density of the grass, the selected cutting height, and the moisture of the lawn.
Optimal working time is achieved by frequent mowing, thus keeping the grass at a low height. Frequent switching on and off of the lawn mower during mowing also reduces the cutting capacity, as does a not fully charged battery. Switching on the wheel drive also reduces cutting efficiency and battery service life. To optimize cutting capacity, we recommend mowing the lawn frequently, setting the cutting height, and moving the device at walking pace.
NOTE: To extend the service life, additional batteries can be purchased.
a) 46.6 Li SP comfort, 51.6 Li SP comfort
Mowing tips
The cutting height of the grass remains at a level of 3-5 cm; do not perform mowing at a level that exceeds half of this value. Do not overload the lawn mower! In the case of long and heavy grass, the rotation speed noticeably drops, the cutting height of the grass increases, and it becomes necessary to mow several times. Wind and sun can dry out the lawn after mowing, so mow in the evening.
Maintenance and care
DANGER! Risk of fatal injury due to improper maintenance. Performing maintenance work on unqualified personnel, using non-certified spare parts, as well as removing or bypassing protective devices can lead to serious injuries or even death during operation.
Do not remove protective devices and do not bypass them. Use only approved original spare parts. Ensure that the device is in a clean working condition through regular proper maintenance.
DANGER! Risk of cuts. Risk of cuts when in contact with sharp moving parts of the device and with the cutting tool.
Always switch off the device before technical and service maintenance or cleaning. Disconnect the safety key and remove the batteries! Always wear protective gloves during technical maintenance, care, and cleaning.
DANGER! Risk of injury during technical maintenance. Incorrect technical maintenance can lead to serious injuries and damage to the device.
Repair of the device may only be carried out by an authorized specialized company.
8.1 Regular maintenance work
Make sure that all nuts, bolts, and screws are tightly tightened, and the device is in a safe working condition. Regularly check the functionality and wear of the grass catcher.
8.2 Cleaning the device and the cutting mechanism
CAUTION! Danger due to water ingress. Water entering the device can cause a short circuit and damage to electrical components.
Do not spray water on the device; use only a dry cloth for cleaning.
1. Stop the engine. 2. Remove the batteries. 3. Remove the grass catcher. 4. Tilt the device and clean the cutting mechanism.
9.2 Error codes and troubleshooting
Error messages are indicated by corresponding signals, which are formed by the flashing of
4 green LEDs.
Disposal points for recycling of waste equipment in accordance with public legislation (e.g., municipal collection points) and points of sale of electrical appliances (stationary and online), where the seller is obliged to take them back or offer them voluntarily.
This data applies only to equipment installed and sold in the countries of the European Union and subject to European Directive 2012/19/EU. In countries outside the European Union, other rules regarding the disposal of electrical and electronic devices may apply.
Disposal in accordance with the Battery Act (BattG)

Used batteries and rechargeable batteries must not be disposed of with household waste. They must be collected and recycled separately!
For safe removal of batteries or rechargeable batteries from the electrical device, as well as for information about their type or chemical system, see the supplementary information in the operating or installation instructions. Owners or users of batteries or rechargeable batteries are obliged to return the devices after use in accordance with the law. Return is limited to the permissible quantity of purchased or recycled goods for household use.
Used batteries may contain hazardous substances or heavy metals that can harm the environment and human health. Recycling of used batteries and the use of resources contained in them contributes to the protection of these two important assets.
The symbol of a crossed-out waste container indicates that batteries and rechargeable batteries must not be disposed of with household waste.
In addition, the symbols Hg, Cd, or Pb are placed below the waste container symbol. This means the following:
Hg: battery contains more than 0.0005% mercury; Cd: battery contains more than 0.002% cadmium; Pb: battery contains more than 0.004% lead.
Batteries and rechargeable batteries can be returned free of charge at the following locations:
Public collection points for waste recycling in accordance with local regulations
(e.g., municipal collection points)
Shops selling batteries and rechargeable batteries, collection points of the joint take-back system for used batteries and devices, and collection points of manufacturers (if they are not members of the joint take-back system).
These regulations apply only to rechargeable batteries and batteries sold in the countries of the European Union and comply with EU Regulation 2023/1542/EC. Outside the European Union, other rules regarding the recycling of batteries and rechargeable batteries may apply.
13 Technical specifications
Technical specifications: see the table with technical specifications at the beginning of this operating manual.
*Notes regarding values and tolerances for dimensions and noise levels:
The measured values of vibration emission and noise level were determined in accordance with the standardized test method; they can be used to compare one machine with another. The specified values of vibration emission and noise level can also be used for a preliminary assessment of exposure (degree of vibration exposure). The values of vibration emission and noise level may differ from the specified values during actual use of the machine, depending on the manner of use. Observe safety measures in accordance with the chapter on safety technology. Try to keep the vibration load within the minimum limits. Example measures to reduce vibration load include using gloves when using the machine and limiting working time. In this case, all parts of the work cycle must be considered (e.g., machine switch-off time and switch-on time without load).
14 SERVICE AND MAINTENANCE
If you have questions about warranty, repair, or spare parts, contact the
AL-KO service center. You can find it on the Internet at: www.alko-garden.com/service-contacts
You can find detailed spare parts information at: www.alko-garden.com/spareparts
15 DECLARATION OF CONFORMITY INFORMATION
We hereby declare under our sole responsibility that this product, in the form in which it is placed on the
market, complies with the requirements of the harmonized EU directives, EU safety standards, and special standards applicable to this product. The declaration of conformity is valid in accordance with the operating instructions and is attached to the
16 WARRANTY
We will remedy any possible material or manufacturing defects within the statutory limitation period, as established by law with regard to quality claims, by repair or replacement of the product. The limitation period is determined by the legislation of the country in which the device was purchased.
Our warranty obligation is void - the warranty is invalidated if:
but only if:
Follow this operating manual carefully; use only original spare parts.
attempts at self-repair; unauthorized technical modifications; use not in accordance with the intended purpose.
The warranty does not cover:
Coverage of the product caused by normal wear; wearing parts, indicated in the spare parts list of the frames XXXXX (x).
The warranty period starts after the purchase by the first end user. The determining factor is the date on the document confirming the purchase. Contact the service center with this certificate and the document confirming the purchase, or in the billing department of the authorized service center. This certificate does not affect the statutory rights of the buyer to claim against the seller.
TRANSLATION OF THE ORIGINAL OPERATION MANUAL
Contents
1 Safety instructions 467
1.1 General safety instructions for electric machines 467 1.1.1 Safety at the workplace... 467 1.1.2 Electrical safety... 467 1.1.3 Personal safety 467 1.1.4 Use and handling of the electric machine, operation with battery... 468 1.1.5 Service 468
1.2 Safety instructions for lawn mowers 469 1.3 Safety instructions for the battery and charging device.....469
2 Information about the manual and operation 470
2.1 Symbols on the title page..... 470 2.2 Symbols and signal words... 470
3 Description of the device 470
3.1 Intended use..... 470 3.2 Possible misuse... 471 3.3 Residual risks... 471 3.4 Protective and safety elements..... 471 3.5 Device symbols.... 471
3.5.1 Safety labels 471 3.5.2 Symbols in operation 472
3.6 Overview 472 3.6.1 Overview of product (01) * ....472 3.6.2 Overview of product (02, 03) * 473 3.6.3 Overview of product (04)**.473
4 Installation 474 5 Commissioning 474
5.1 Charging the battery.. 474 5.2 Inserting and removing the battery (05, 06) 474 5.3 Switching on and off (05, 06) 475
6 Eknpnyataia 475
6.1 PeryliobAHnB BUCOTpi3aHH 475 6.1.1 PeryIIOBaHHB BUCOTn 3pi3aHHH (07)* .475 6.1.2 PeryIIOBaHHB BUCOTn 3pi3aHH (08)*** .476
6.2 KociHHa 3 TpaBO36ipHNKOM (09, 10) ...476 6.3 3aynck i 3yynHka KocnIbHoro Mexa-Hi3My (11, 12) 476 6.4 YbIMKHeHH Ta BmKHeHH KOJIICHOnpNbOdy (13)** 477 6.5 IpeBipka pIBHЯ 3apAу akyMnyTo-piB (14, 15) 477 6.6 PeryIIOBaHHHaHpMaMHOi 6aJIKN BiID- NOVNO Do 3poCTy KopNCtYbaua....477
6.6.1 PeryunobHnHa npMaHoi 6aI- KI (16) 477 6.6.2 PerylIOBaHHHaHnpMHOi 6aI- KI (17) 477 6.6.3 PeryIIOBaHHa HAnpMaHoi 6aJI- Kn (18)*** 477
6.7 CknaaHnry np3KnaaHnHa npMaHOi 6anKn 478
6.7.1 CklaaHnTa po3KnaaHnHa-CTINH HaprrMHOi 6aIKN (19) , *.478 6.7.2 CklaaHnTa po3KnaaHnHa- npMHOi 6aIkn (20)*** 478
6.8 MyIbUyBaHnHa 3a DOnOMoTO MyIb- cyBaJIbHO KInHa (21, 22) , .....478 6.9 CkOuSyBaHHa 3 BnKOpNCtAHHm CnCTeMn 6iHOro po3BaHTaKeHHa (23) 478 6.10 Kocinna 6e3 TpaBo36ipHnka (24) *.... 479
7Bka3iBkn 3 BnKOpncTaHHn 479 8Texhiueo6cnyroByBaHHraDorI..480
8.1 NepioDnHi npo6To 3 TexHOrO o6CnyroByBaHHa 480 8.2 OuHHeHHa npicTpoTo Ta KocnIbHoro MexaHi3My 480 8.3 NepeBipka Ta 3aMiHa HoKa .480 8.4 PemOHTHi po6oTu 481
9 YcyHeHH HeCnpaBHOcte 481
9.1 BnnpaBneHnnoMnIOK npncTropo Ta o6pO6kn 481 9.2 Kojn nomnoK Ta ycyHeHHn NOMIOK 482
10 TpahcnopTyBaHHra 483
10.1 TpaHcnpTyBaHH npncTpoIO 483 10.2 TpaHcnpTyBaHHra 483
11 36epiraHHra 484
11.1 36epirahnna akymyIaTropHOI ra3oHo-Kocapkn. 484 11.2 36epirahnna akymyIaTopa Ta 3apd-Horo npncTroo 484
12 Ytuniana 485 13TexHiHxapaKTepcntkN 486 14 Cepbiche o6cnyroByvaHH 486 15 Inopmaia npo deknapaio BIDNOBIOHOCTi. 486 16Garantia. 486
1 SAFETY INSTRUCTIONS
1.1 General safety instructions for electric machines
WARNING! Read all safety rules, instructions, illustrations and technical specifications included with this machine. Failure to follow safety rules and instructions may result in electric shock, fire and/or serious injury. Keep safety rules and instructions for future reference.
The term "machine" used in safety instructions refers to a machine that operates on mains power (with a mains cable) or a machine that operates on battery (without a mains cable).
1.1.1 Workplace safety
The work area must be clean and well lit. Cluttered or dark areas are accident-prone. Do not operate the machine in explosive atmospheres, where flammable liquids, gases or dust are present.
The machine creates sparks, which may ignite dust or fumes. While operating the machine, keep children and other people at a safe distance. If you are distracted, you may lose control of the machine.
1.1.2 Electrical safety
The machine plug must match the outlet. Never modify the plug in any way. Do not use any adapter plugs with earthed (grounded) machines. Use of unmodified plugs and matching outlets reduces the risk of electric shock. Avoid body contact with earthed surfaces such as pipes, radiators, stoves and refrigerators. If your body is earthed, the risk of electric shock increases. Do not expose the machine to rain or wet conditions. Water entering the machine will increase the risk of electric shock. Do not abuse the cord. Never use the cord for carrying, pulling or unplugging the machine. Keep the cord away from heat, oil, sharp edges or moving parts. Damaged or entangled cords increase the risk of electric shock. When operating the machine outdoors, use an extension cord suitable for outdoor use. Use of a cord suitable for outdoor use reduces the risk of electric shock. If operating the machine in a damp location is unavoidable, use a residual current device (RCD) protected supply. Use of an RCD reduces the risk of electric shock.
1.1.3 Personal safety
Stay alert, watch what you are doing and use common sense when operating the machine. Do not use the machine while you are tired or under the influence of drugs,
alcohol or medication. A moment of inattention while operating the machine may result in serious personal injury.
Personal protective equipment must be used to protect against injury and is mandatory to wear protective goggles. Depending on the method and conditions of use of the machine, personal protective equipment such as a respirator, non-slip safety shoes, helmet, and hearing protection significantly reduce the risk of injury. Avoid accidental starting. It is recommended that the machine is switched off before connecting it to the power source and/or battery, picking it up, or carrying it. Do not carry the machine with your finger on the switch, and do not connect it to the mains while it is switched on. This can lead to an accident. Before switching on the machine, remove any adjustment tools or wrenches from it. A tool or wrench that remains on a rotating part of the machine can cause injury. Avoid an awkward body position. Choose a stable position and maintain your balance. This allows better control of the machine in unexpected situations. Wear suitable clothing. Do not wear loose clothing or jewelry. Keep hair and clothing at a safe distance from moving parts. Loose clothing, jewelry, or long hair can get caught in such parts. If devices for dust extraction and collection are provided, make sure they are properly connected and used. The use of such devices reduces the risk of accidents caused by dust. Do not consider yourself safe and do not ignore the safety rules for the machine, even if you are familiar with the machine after repeated use. Careless handling can lead to serious injuries within a few seconds.
1.1.4 Use and handling of the cordless electric machine
Charging the battery is permitted only with the charger recommended by the manufacturer. If a charger not intended for a specific type of battery is used with other batteries, there is a risk of damage. Use only the battery intended for your machine. Using other batteries may cause injury or damage. Keep the battery away from paper clips, coins, keys, nails, screws, and other small metal objects that could short-circuit the contacts. Short-circuiting the battery contacts may cause fire or damage. Improper use of the battery may cause a fire. Avoid contact with it. In case of contact, rinse the affected area with water. If liquid gets into the eyes, seek medical help. Liquid escaping from the battery may cause skin irritation or burns. Do not use a damaged or modified battery or machine. Damaged or modified batteries may behave unpredictably and cause fire, explosion, or injury. Keep the battery away from fire or high temperatures. Water or temperatures above 130 °C may cause an explosion. Follow the charging instructions and never charge the battery or the machine powered by the battery outside the temperature range specified in the operating manual. Incorrect charging or charging outside the approved temperature range may damage the battery and increase the risk of fire.
1.1.5 Service
Have the machine repaired only by qualified specialists using original spare parts. This ensures that the machine remains safe for use. Never perform maintenance on damaged batteries. Battery maintenance should only be carried out by the manufacturer or its authorized service.
1.2 Safety rules for brushcutters
Before using the gas trimmer in poor weather conditions, especially in the presence of lightning, it is necessary to be careful. This reduces the risk of electric shock. Carefully check the area where the gas trimmer will be used for the presence of foreign objects. During operation, the gas trimmer may throw out foreign objects. Carefully inspect the area where the gas trimmer will be used and remove all stones, sticks, wires, bones, and other foreign objects. Objects that are thrown out may cause injuries. Before using the gas trimmer, check that the cutting head and blade are not damaged or worn. Damaged or worn parts pose a danger during operation. Regularly check the trimmer head for wear or damage. A worn or damaged trimmer head may cause a hazard during operation. It is forbidden to remove any safety devices. Safety devices must be in good working order and installed correctly. Safety devices that are weakened, damaged, or not working properly may cause injuries. Keep all ventilation openings clean. Clogged ventilation openings and debris may cause overheating or fire. Wear non-slip protective footwear during work with the gas trimmer. It is forbidden to use the gas trimmer barefoot or in open sandals. This reduces the risk of injury from contact with the moving blade.
Wear long trousers during work with the gas trimmer. Exposed skin increases the risk of injury from objects that are thrown out. It is forbidden to use the gas trimmer on wet grass. Do not walk or run; it is forbidden. This reduces the risk of slipping or falling, which may cause injuries. It is forbidden to use the gas trimmer on very steep slopes. This reduces the risk of losing control, slipping, or falling, which may cause injuries. When working on slopes, ensure a stable footing, work across the slope, not going up or down, and be extremely careful when changing direction. This reduces the risk of losing control, slipping, or falling, which may cause injuries. Be especially careful when moving the gas trimmer backwards or pulling it towards you. Pay attention to the surrounding environment. This reduces the risk of injury during operation. It is forbidden to touch the blade or other dangerous moving parts while in motion. This reduces the risk of injury from moving parts. When removing jammed material or cleaning the gas trimmer, make sure all switches are off and the battery is removed. Improper operation of the gas trimmer may lead to serious injuries. Before storing the device, let it cool down. Before storing the trimmer head, empty it. When adjusting the device, make sure that your fingers are not caught between the moving blades and the stationary parts of the machine.
Can be used only on dry grass.
Any use other than that intended is considered improper use. The device should only be used when fully assembled.
The device is intended for private use. Any other use or unauthorized modifications and structural changes are considered improper use and will result in the loss of warranty, as well as the loss of liability and responsibility of the manufacturer for any damage caused to the user or third parties.
3.2 Intended use
**: 46.6 Li SP comfort, 51.6 Li SP comfort
46.6 Li SP comfort $1.6 Li SP comfort
5 COMMISSIONING
5.1 Charging the battery
The batteries are supplied partially charged. The batteries should be fully charged before first use. The batteries can be charged at any time. Charging does not affect the condition of the batteries.

NOTE More detailed information
Can be found in the separate instructions for the batteries and the charging device.
5.2 Inserting and removing the batteries (05, 06)
The lawn mower only works when the batteries are inserted.
WARNING! Danger of injury from the batteries. If you leave the batteries in the device after use, they may be damaged.
Immediately after finishing work, remove the batteries from the device and store them in a dry place. Insert the batteries into the device immediately before work.
Inserting the battery
- Open the battery compartment cover (05/1, 06/1).
- Insert the batteries (05/2, 06/2), observing polarity, into the battery compartment (05/3, 06/3) until they click into place (05/b, 06/b).
- Close (05/c, 06/c) the battery compartment cover.
Removing the battery
- Press and hold the release button (05/4, 06/4) on the battery.
- Remove the battery.
5.3 Switching On and Off (05, 06)
WARNING! Risk of injury. Improper switching on may lead to serious injuries. Before switching on and maintenance: remove the battery.
Switching On
- Open (05/a, 06/a) the battery compartment cover (05/1, 06/1).
- Inserting the battery: see section 5.2 "Inserting and Removing the Battery (05, 06)", page 474.
- Close (05/c, 06/c) the battery compartment cover.
- Switching on the device: see section 6.3 "Starting and Stopping the Mowing Mechanism (11, 12)", page 476.
Switching Off
- Removing the batteries: see section 5.2 "Inserting and Removing the Battery (05, 06)", page 474.
- After use, the battery must be removed from the device, charged, and stored in a place protected from low temperatures. Next time, insert the battery into the device only after it has been fully charged.
6 OPERATION
WARNING! Risk of injury. Incorrect operation or absence of safety and protective elements can lead to serious injuries. Before switching on, check the presence and functionality of all safety and protective devices!
WARNING! Risk of injury under abnormal operating conditions. Immediately stop the lawn mower. Remove the battery. Then make sure that all moving parts have completely stopped:
After each stop on the slope: Check the lawn mower for damage and repair it. Only after this, switch the lawn mower back on and put it into operation. If the lawn mower vibrates abnormally: Immediately check it for damage. Replace or repair the damaged parts. Tighten loose parts and secure them.
CAUTION! Danger of damage to the device. If they are blocked, the motor may be overloaded.
Sharpen the cutting mechanism after each use. Set the highest cutting height. Cut tall grass and dense thickets gradually.
6.1 Adjusting the cutting height
CAUTION! Danger of cuts! Danger of cuts in case of contact with the rotating cutting mechanism. Set the cutting height only with the motor switched off and the cutting mechanism stopped.
6.1.1 Adjusting the cutting height (07)*
*: 34.6 Li comfort, 38.6 Li comfort, 43.6 Li comfort
- Press the unlocking button (07/a) and pull the adjustment lever (07/1). 2. Lift the lawn mower by the handle (07/2) up or lower it down (07/b). When lifting, set the desired cutting height according to the scale (07/3).
- Release the adjustment lever.
6.1.2 Adjusting the cutting height (08)**
**: 46.6 Li SP comfort, 51.6 Li SP comfort
- Turn the adjusting valve (08/1) to the unlocking position (08/a) and hold it.
For low gas: turn (08/b) the adjusting valve towards the front nozzles. For high gas: turn (08/b) the adjusting valve towards the fuel pump. Set the tank height according to the scale (08/3).
- Release the adjusting valve so that it locks in the required position.
6.2 Mowing with the mower (09, 10)
The mower can be used with or without the mower.
Installing the mower
1. Make sure the device is switched off and the mowing mechanism is stopped. 2. Lift (09/a) the locking lever (09/1). 3. Slide (09/b) the mower (09/2) onto the bar. 4. Lower the locking lever.
Check the fill level
The fill level indicator (10/1) should be visible in the window (10/a) with a steady flow while mowing. If the mower (10/2) is full, the fill level indicator (10/b) will be visible. It is necessary to empty the mower.
Emptying the mower
CAUTION! Danger of injury! Risk of injury in case of contact with the moving mowing mechanism.
Remove the mower only when the mowing mechanism is stationary.
During emptying of the mower, also check the vent openings of the fill level indicator to ensure proper functioning.
1. Make sure the device is switched off and the mowing mechanism is stopped. 2. Lift the locking lever (09/1). 3. Remove the mower (09/2) from the bracket downwards.
4. Empty the mower. 5. Clean the vent openings of the fill level indicator. 6. Install the mower (see above).
6.3 Starting and stopping the mower deck (11, 12)
Start the mower deck only on level surfaces, not in tall grass. Clean the deck from foreign objects, e.g., stones. Do not lift or tilt the starting device.
WARNING! Risk of injury from the starting device. Due to repeated starting and stopping, which is very common, the mower deck may be damaged.
■ Pull the starting lever only after the mower deck has come to a complete stop. The handle allows a working position: you stand behind the mower and hold the frame part with both hands.
Starting the mower deck
1. If not already done: switch on the drive (see section 5.3 "Switching the drive on and off (05, 06), page 475). 2. Press the "Start" button (11/1, 12/1) and hold it pressed (11/a, 12/a). 3. Pull the handle (11/b, 12/b) of the safety bar (11/2, 12/2) towards the upper handlebar (11/3, 12/3). The drive and the mower deck start. 4. Release the "Start" button, while continuing to hold the safety bar.
NOTE: The safety bar does not lock. The upper handlebar must be held continuously during the entire mowing process.
Stopping the mower deck
- Release the safety bar. It automatically returns to the initial position. 2. Wait for the mower deck to come to a complete stop.
- Switch off the drive (see section 5.3 "Switching the drive on and off (05, 06), page 475).
CAUTION! Risk of injury. Risk of injury if you come into contact with the rotating mower deck.
It is necessary to wait for the mower deck to come to a complete stop. Before carrying out any work related to maintenance and care: switch off the device and wait until the mower deck has stopped. Remove the battery.
6.4 Switching the blade drive on and off (13)**
**: 46.6 Li SP comfort, 51.6 Li SP comfort
NOTE: The blade drive can only be switched on when the drive is running.
- Perform the drive and start the engine (see section 6.3 "Starting and stopping the mower mechanism (11, 12), page 476). 2. Press the lever of the mower drive (13/1) to the bracket (13/2) and hold it (13/a). The lever of the mower drive is not fixed.
Mower drive operation
- Release the lever of the mower drive. It automatically returns to the neutral position.
6.5 Checking the charge level of the batteries (14, 15)
- Briefly press the buttons (14/1, 15/1).
The LED indicators (14/2, 15/2) light up or flash depending on the charge level:
| Свittлоб diони снд (зел -ног кол ) | Ровь заря у ak у -topа |
| Свittя с 4 CBIT- lo di di di c hi ihdi -Topu. | Ак м lay pop nobhi trio 3a- prя -heo. |
| Свittя с 3 CBIT- lo di di di c hi ihdi -Topu. | Ак м lay pop zapя -heo ha 75%. |
| Свittя с 2 CBIT- lo di di di c hi ihdi -Topu. | Ак м lay pop zapя -heo ha 50%. |
**: 46.6 Li SP comfort, 51.6 Li SP comfort
- On both sides: turn the rotary handle (18/1) by 90 degrees. 2. Turn the handle (18/b) of the fuel tank (18/2) to one of the two positions (18/3).
- On both sides: turn the rotary handle (18/c) by 90 degrees.
6.7 Folding and unfolding the fuel tank
After folding the fuel tank, the device can be turned over for easier maintenance of the actual device. When the fuel tank is folded, the device can be stored, saving space.
WARNING! Danger of crushing.
Fingers and other body parts can be crushed by frame elements that are not properly fixed.
It is necessary to secure such elements. Do not hold fingers and other body parts near elements that are not properly fixed.
6.7.1 Assembling and disassembling the side tank (19)*, **
: 34.6 Li comfort *: 38.6 Li comfort, 43.6 Li comfort
Assembling the side tank
- On both sides: Loosen (19/a) the fastening (19/1) of the side tank on the housing, so that the side tank can be turned forward.
- Fold (19/b) the side tank (19/2) completely forward.
- On both sides: Disconnect the upper hose connections (19/3).
- Fold (19/c) the upper part of the side tank (19/4) downwards.
Disassembling the side tank
Perform all steps in reverse order.
6.7.2 Assembling and disassembling the front tank (20)***
***: 46.6 Li SP comfort, 51.6 Li SP comfort
Assembling the front tank
- On both sides: Turn the rotary handle (20/1) by 90°.
- Fold (20/a) the front tank (20/2) completely forward.
Disassembling the front tank
Turn the device to the reverse side.
6.8 Mowing with the mowing blade (21, 22)**,***
: 38.6 Li comfort, 43.6 Li comfort *: 46.6 Li SP comfort, 51.6 Li SP comfort
During mowing, material that is cut is not collected but left on the lawn. The mower protects the grass from high temperatures and provides it with nutrients. Better results are achieved with regular mowing. At 2 cm, only young grass with soft leaf tissue is cut.
Grass height before mowing: max. 8 cm Grass height after mowing: min. 4 cm
The mower starts moving slowly before mowing, but do not move it too quickly.
Installing the mowing blade (21)
DANGER! Risk of injury. Risk of injury if hands come into contact with the rotating blade mechanism.
Before installation, switch off the device and pull out the safety key.
CAUTION! Risk of injury from the device. If the mowing blade is not locked, it and the blade mechanism can be damaged.
Make sure that the device is locked.
- Switch off the device (see section 5.3 "Switching the device on and off (05, 06), page 475).
- Tilt the mower (see section 6.2 "Mowing with the mower (09, 10), page 476). 3. Lift the mowing blade (21/a) and the blade guard (21/1).
- Insert (21/b) the mowing blade (21/2) into the recess (21/3) until it clicks into place.
Removing the mowing blade (22)
- Turn off the device. 2. Remove the battery cover (22/1).
- Grasp the handle (22/3), rotate the latch (22/b), and fix the cover (22/2) on the hinge pin.
- Press (22/c) the hinge pin.
6.9 Removing the battery cover (23)***
***: 46.6 Li SP comfort, 51.6 Li SP comfort
WARNING! Danger of injury! Risk of injury if hand comes into contact with the rotating mechanism.
Install or remove the battery cover only when the rotating mechanism is completely stopped.
Installing the battery cover
- Turn off the device and remove the battery. 2. Remove the battery cover.
- Press and hold in this position (23/a) the battery cover latch (23/1).
- Insert the battery cover (23/2) and engage it (23/b) with the tab (23/3) located in the upper part of the battery cover.
- Firmly close the battery cover. The battery cover protects the battery cover from being dislodged.
- Insert the battery and turn on the device again.
Removing the battery cover
- Turn off the device and remove the battery.
- Before using the system, read the safety instructions carefully.
- Insert the battery pack into the system. 4. Close the battery compartment.
- Insert the battery and turn the device on again.
6.10 Mowing without grass catcher (24)***
**: Models 46.6 Li SP comfort and 51.6 Li SP comfort can be operated without the grass catcher. To ensure proper development of the cold, it is necessary to slightly adjust the corresponding setting.
- Make sure the device is switched off and the blade mechanism is stopped. 2. Press the release button (24/a) and pull out the grass catcher (24/1).
- Pull out the supports of the grass catcher (24/2) (24/b) to the stop.
- Lower the corresponding grass catcher.
7 OPERATING INSTRUCTIONS
Follow the safety regulations!
NOTE: Observe local regulations regarding the use of grass trimmers.
Remove foreign objects from the work area. Mow only in good lighting. Mow only with a sharp blade. Always hold the device with both hands on the handle. Operate the device at moderate speed. Move the device across the slope. It is forbidden to use the grass trimmer on slopes with an incline greater than 10° and to work moving uphill or downhill. Be especially careful when changing the working direction.
Efficiency of cutting and battery service life
The cutting efficiency or performance can be affected by the characteristics of the grass. The cutting efficiency is influenced by factors such as grass density, selected cutting height, and grass moisture. Optimal working time is achieved by frequent mowing, and thus with low grass height. Frequent switching on and off of the grass trimmer during mowing also reduces cutting productivity, as do not fully charged batteries. Switching on the drive (a) reduces cutting efficiency and battery service life. To optimize cutting efficiency, we recommend mowing the grass frequently, setting the cutting height, and moving the device at moderate speed.
NOTE: To extend the working time, additional batteries can be purchased.
a) 46.6 Li SP comfort, 51.6 Li SP comfort
The cutting height of the grass should be 3-5 cm; do not cut the grass too low if you prefer half of the value. Do not overload the lawn mower! In case of long and heavy grass, the rotation speed
will noticeably decrease, and the cutting height will increase, so it is necessary to mow several times.
Wind and sun can dry out the lawn after mowing, so mow at the end of the day.
8 TECHNICAL MAINTENANCE AND CARE
DANGER! Risk of injury due to improper maintenance. Maintenance work performed by unqualified persons, use of non-standard spare parts, and removal or modification of safety devices can lead to serious injuries or even death during operation.
Do not remove safety devices and do not bypass them. Use only approved original spare parts. Make sure that the devices are in proper working condition for regular and reliable maintenance.
A WARNING! Risk of injury.
Risk of injury from sharp moving parts of the device when in contact with the cutting tool.
Before technical and service maintenance and cleaning, switch off the device. Remove the safety key and battery! Wear protective gloves during technical maintenance, adjustment, and cleaning.
A WARNING! Risk of injury during maintenance. Improper maintenance can lead to serious injuries and disruption of normal operation. Repair of the device may only be carried out by qualified specialists at an authorized service center.
8.1 Periodic maintenance work
Make sure that all nuts, bolts, and screws are tightly tightened and that the device is in a safe working condition. Regularly check the functionality and wear of the grass catcher.
8.2 Cleaning the device of the cutting mechanism
WARNING! Safety through residual current devices. Residual current devices must be triggered by a short circuit and damage to electrical components.
9 TROUBLESHOOTING
WARNING! Risk of injury.
Hand tools and tools with sharp edges can cause injury.
Wear protective gloves during technical and service maintenance and cleaning!
9.1 Adjusting the mowing deck and processing
8 NOTE If a malfunction occurs that is not listed in this table, or a malfunction that the user cannot fix themselves, contact the service workshop.
13 TECHNICAL SPECIFICATIONS
Technical specifications: see the table with technical specifications at the beginning of this manual.
* The values for vibration emission and noise level are subject to measurement tolerances:
The measured values for vibration emission and noise level were measured according to a standardized test method and can be used for comparison with other machines. The specified values for vibration emission and noise level can also be used for a preliminary assessment of exposure (degree of vibration exposure). The values for vibration emission and noise level may differ from the specified values during actual use of the machine, depending on the method of use. Follow the safety measures according to the safety section. The vibration emission values are not intended for exact exposure assessment. Examples of measures to reduce vibration exposure include wearing gloves when working with
the machine and limiting the working time. All stages of the work cycle must be considered (for example, the time when the machine is switched on and the time when it is switched off, but not under load).
14 SERVICE MAINTENANCE
If you have questions about warranty, repair, or spare parts, contact the nearest service center of the company "AL-KO". You can find it on the INTERNET at the address:
www.alko-garden.com/service-contacts
www.alko-garden.com/spareparts
15 INFORMATION ON DECLARATION OF CONFORMITY
We declare with full responsibility that this product, in the form in which it is placed on the market, complies with the requirements of the harmonized EU Directives, EU safety standards, and the standards applied to it. The declaration of conformity is part of the operating instructions and is attached to the machine.
16 WARRANTY
Until the end of the advertising period established by law, the manufacturer eliminates possible defects in material or manufacturing defects by repair or replacement (at their choice). The warranty period is determined by the legislation of the country where the device was purchased.
The warranty is maintained only under the following conditions:
Follow the operating instructions, use the device for its intended purpose, use original spare parts.
The warranty is void under the following conditions:
Self-repair, unauthorized modification of technical characteristics, use not for its intended purpose.
The warranty does not cover:
Damage to the paint coating, natural wear of parts, wear, damage to spare parts within the framework; xxxxx (x)
The warranty period starts from the date of purchase of the product by the first end user. The purchase date is indicated in the receipt. In case of a warranty claim, contact your dealer or the nearest authorized service center with the receipt and original invoice confirming the purchase. This warranty obligation does not affect the statutory rights of the buyer against the seller.
Ukraine
TOB AJI-KO KOSEP
ByI. BpoBapcbka 156,07442
c. Beiika DImepka, BpOBApcbki paH,
KniBcbka o6laactb, YkpaHa
Telefoh/phiKc: +38 044 392-07-08 / 09
UK
Imported by: AL-KO Gardentech UK Ltd, Murray way, Wincanton, Somerset, BA9 9RS / UK | +44 (0) 1963 828055
shop.uk@al-ko.com | www.alko-garden.uk


- TABLE OF CONTENTS
- INSTALLATION
- NR. COMPONENT
- COCKPIT WITH
- COMMISSIONING
- CHARGING THE BATTERIES
- SAFETY INSTRUCTIONS
- GENERAL ELECTRICAL MACHINE SAFETY WARNINGS
- WORK AREA SAFETY
- ELECTRICAL SAFETY
- PERSONAL SAFETY
- BATTERY MACHINE USE AND CARE
- SERVICE
- LAWNMOWER SAFETY WARNINGS
- SAFETY NOTES FOR RECHARGEABLE BATTERY AND CHARGER
- OPERATING INSTRUCTIONS
- ABOUT THESE OPERATING INSTRUCTIONS
- SYMBOLS ON THE TITLE PAGE
- SYMBOL MEANING
- LEGENDS AND SIGNAL WORDS
- PRODUCT DESCRIPTION
- ANY USE NOT IN ACCORDANCE WITH THIS DESIGNATED USE SHALL BE REGARDED AS MISUSE. ONLY WORK WITH THE APPLIANCE WHEN IT IS FULLY ASSEMBLED
- POSSIBLE FORESEEABLE MISUSE
- RESIDUAL RISKS
- SAFETY AND PROTECTIVE DEVICES
- OPERATOR PRESENCE CONTROL
- START BUTTON (ON THE HANDLEBAR)
- BAFFLE
- SYMBOLS ON THE APPLIANCE
- SAFETY SIGNS
- OPERATING SIGNS
- PRODUCT OVERVIEWS
- PRODUCT OVERVIEW (01)
- NO. COMPONENT
- HANDLEBAR
- CHARGE STATUS DISPLAY FOR BATTERIES
- CENTRAL CUTTING HEIGHT ADJUSTMENT
- GRASS CATCHER
- PRODUCT OVERVIEW (02, 03)
- PRODUCT OVERVIEW (04)
- WARNING! DANGER IF ASSEMBLY IS NOT
- START-UP
- INSERTING AND REMOVING THE BATTERIES (05, 06)
- IMPORTANT! RISK OF DAMAGE TO THE BATTERIES. IF THE BATTERIES ARE LEFT IN THE APPLIANCE AFTER USE, THEY COULD BE DAMAGED
- INSERTING THE BATTERIES
- REMOVING THE BATTERIES
- SWITCHING THE POWER SUPPLY ON AND OFF (05, 06)
- SWITCHING ON THE POWER SUPPLY
- SWITCHING OFF THE POWER SUPPLY
- OPERATION
- SETTING THE CUTTING HEIGHT
- SETTING THE CUTTING HEIGHT (07)
- SETTING THE CUTTING HEIGHT (08)
- MOWING WITH GRASS CATCHER (09, 10)
- HOOKING IN THE GRASS CATCHER
- CHECKING THE FILL LEVEL
- UNHOOKING AND EMPTYING THE GRASS CATCHER
- STARTING AND STOPPING THE MOWER MECHANISM (11, 12)
- STARTING THE MOWER MECHANISM
- STOPPING THE MOWER MECHANISM
- STARTING AND STOPPING THE WHEEL DRIVE (13)
- ENGAGING WHEEL DRIVE
- DISENGAGING WHEEL DRIVE
- CHECKING THE BATTERY CHARGE STATUS (14, 15)
- LEDS (GREEN) BATTERY CHARGE STATUS
- ADJUSTING THE HANDLEBAR TO YOUR BODY SIZE
- ADJUSTING THE HANDLEBAR (16)
- ADJUSTING THE HANDLEBAR (17)
- ADJUSTING THE HANDLEBAR (18)
- FOLDING THE HANDLEBAR IN AND OUT
- FOLDING THE HANDLEBAR IN AND OUT (19)
- FOLDING IN THE HANDLEBAR
- FOLDING OUT THE HANDLEBAR
- FOLDING THE HANDLEBAR IN AND OUT (20)
- MULCHING WITH MULCHING INSERT (21, 22)
- INSTALLING MULCHING INSERT (21)
- REMOVING MULCHING INSERT (22)
- MOWING WITH SIDE DISCHARGE UNIT (23)
- CAUTION! DANGER OF CUTS AND LACERATIONS. DANGER OF LACERATIONS WHEN REACHING INTO THE RUNNING MOWER MECHANISM
- INSTALLING THE SIDE DISCHARGE INSERT
- REMOVING THE SIDE DISCHARGE INSERT
- MOWING WITHOUT GRASS CATCHER (24)
- WORK INSTRUCTIONS
- NOTE COMPLY WITH THE LOCAL REGULATIONS AS TO WHEN A LAWNMOWER MAY BE OPERATED
- CUTTING PERFORMANCE OR OPERATING TIME OF THE BATTERIES
- NOTE ADDITIONAL BATTERIES CAN BE PURCHASED TO PROLONG THE OPERATING TIME
- TIPS FOR MOWING
- MAINTENANCE AND CARE
- REGULAR MAINTENANCE WORK
- CLEANING THE APPLIANCE AND MOWER MECHANISM
- CHECKING AND RENEWING THE CUTTING BLADE
- REPAIR WORK
- HELP IN CASE OF MALFUNCTION
- CORRECTING APPLIANCE AND HANDLING FAULTS
- ERROR CODES AND TROUBLESHOOTING
- TRANSPORT
- TRANSPORTING THE APPLIANCE
- TRANSPORTING THE APPLIANCE BETWEEN TWO WORKING AREAS
- TRANSPORTING THE APPLIANCE IN A VEHICLE
- ADDITIONAL NOTES ON TRANSPORT AND SHIPMENT
- STORAGE
- STORING THE RECHARGEABLE BATTERY LAWNMOWER
- STORING THE RECHARGEABLE BATTERY AND CHARGING UNIT
- DANGER! DANGER OF EXPLOSION AND FIRE
- DISPOSAL
- ONLY FOR EU COUNTRIES
- INFORMATION ON THE GERMAN ELECTRICAL AND ELECTRONIC EQUIPMENT ACT
- INFORMATION ON THE GERMAN BATTERY ACT (BATTG)
- ONLY FOR UNITED KINGDOM
- TECHNICAL DATA
- AFTER-SALES/SERVICE
- INFORMATION ON THE
- DECLARATION OF CONFORMITY
- WARRANTY
- TRANSLATION OF THE ORIGINAL USER MANUAL TABLE OF CONTENTS
- CONTROL SYMBOLS
- V
- INITIAL OPERATION
- COMPONENT
- CONTROL PANEL WITH
- CHARGING THE BATTERY
- TRANSPORTING THE DEVICE IN A VEHICLE
- PART NO
- STARTING OPERATION
- MOWING WITH THE GRASS CATCHER (09, 10)
- OPERATING MODE
- CUTTING PERFORMANCE AND BATTERY LIFE
- SAFETY INSTRUCTIONS FOR THE BATTERY
- INFORMATION ABOUT THE INSTRUCTIONS FOR USE
- SYMBOLMEANING
- EXPLANATION OF SYMBOLS AND SIGNAL WORDS
- SCOPE OF DELIVERY
- INTENDED USE
- SAFETY DEVICE FOR PROTECTION
- WARNING! DANGER OF INJURY
- SAFETY LOCK
- START LEVER (ON THE DRIVE WHEEL)
- DISCHARGE VALVE
- SYMBOLS ON THE DEVICE
- SAFETY LABEL
- OPERATING SYMBOL
- PRODUCT OVERVIEW
- CONTROL LEVER
- BATTERY CHARGE LEVEL INDICATOR
- FOR GRASS COLLECTION
- PRODUCT VARIANTS (02, 03)
- BR. SARAVN DEO
- BR. CACTABN DEO
- HANDLE FOR CONTROL
- CENTRAL HEIGHT ADJUSTMENT FOR CUTTING HEIGHT
- STARTING THE DEVICE (04)
- SPARE PARTS
- OPERATION AND MAINTENANCE OF THE DEVICE (05, 06)
- STARTING THE DEVICE
- STOPPING THE DEVICE
- MAINTENANCE
- WARNING! RISK OF INJURY UNDER ABNORMAL WORKING CONDITIONS. FIRST, STOP THE MOWER. REMOVE THE BATTERY. THEN CHECK THAT ALL ROTATING PARTS ARE COMPLETELY STATIONARY
- DANGER! DANGER OF INJURY FROM THE MOWER BLADE
- ADJUSTING THE CUTTING HEIGHT
- WARNING! DANGER OF CUTS
- ADJUSTING THE CUTTING HEIGHT (07)
- TILTING THE THRUST LEVER
- DISENGAGING THE THRUST LEVER
- CHECKING THE CHARGE STATUS OF THE BATTERY (14, 15)
- YMETABE KINHA 3A MAJUNPABE (21)
- ONPE3! ONACHOCT OD NOCEKOTNHA
- PAXHBA! ONACHOCT OD OWTEHEHA YPEHAJA
- YKNABAHE KINHA 3A MAJUNPABE (22)
- KOWEHE CA DEIOM 3A 6OUHO N36AUNBAHE (23)
- DANGER! DANGER OF INJURY
- INSTALLING THE SAFETY GUARD
- REMOVING THE SAFETY GUARD
- MOWING WITHOUT THE GRASS COLLECTION BAG (24)
- SAFETY NOTES REGARDING WORK
- NOTE: FOLLOW LOCAL REGULATIONS REGARDING WHEN YOU MAY MOW
- BATTERY OPERATING TIME
- MOWING TIPS
- WARNING! DANGER OF
- REPLACING THE BLADE
- LUBRICATING THE CUTTING MECHANISM
- REMOVING AND INSTALLING NEW BLADES
- WARNING! SERIOUS INJURY
- TROUBLESHOOTING
- WARNING! DANGER OF INJURY. SHARP
- CORRECTING FAULTS ON THE DEVICE AND ERRORS DURING OPERATION
- NOTE: COMPONENTS THAT ARE NOT
- BATTERY "B160.6 LI" (ART. NO. 114128)
- FURTHER NOTES ON TRANSPORT AND DISPOSAL
- CLEANING
- CLEANING THE ACCUMULATOR HOUSING
- STORING THE BATTERY AND CHARGER
- NOTE REGARDING THE LAW ON ELECTRICAL AND ELECTRONIC EQUIPMENT
- NOTE REGARDING THE BATTERY ACT (BATTG)
- SERVICE FOR USERS/SERVICE
- TRANSLATION OF THE ORIGINAL INSTRUCTION MANUAL
- PART
- CONNECTING THE WHEEL DRIVE
- DISCONNECTING THE WHEEL DRIVE
- CONSTRUCTION COMPONENT
- ENGAGING THE WHEEL DRIVE
- CAUTION! RISK OF INJURY FROM CUTS. RISK OF INJURY FROM CUTS WHEN REACHING INTO THE RUNNING MOWING MECHANISM
- TRANSPORT OF THE MACHINE
- START
- STARTING THE WHEEL DRIVE
- STARTING
- CHARGING THE BATTERY PACKS
- INSERTING THE SIDE DISCHARGE CHUTE
- NO. PART
- GENERAL SAFETY INSTRUCTIONS FOR ELECTRIC MACHINES
- WORKPLACE SAFETY
- USE AND OPERATION OF THE MACHINE WITH BATTERY PACK
- SAFETY INSTRUCTIONS FOR WORKING WITH THE MOWER
- SAFETY INSTRUCTIONS REGARDING THE BATTERY AND THE CHARGING DEVICE
- EXPLANATION OF THE SYMBOLS AND SIGNAL WORDS
- SAFETY DEVICES
- SAFETY BAR
- START BUTTON (ON THE MAIN HANDLE)
- SAFETY GUARD
- SAFETY SYMBOLS
- MAINTENANCE SYMBOLS
- PRODUCT VIEW (01)
- NO COMPONENT
- MAIN FRAME
- WARNING! DANGER OF DUST
- INSTRUCTION FOR DETAILED INFORMATION
- INSERTING AND REMOVING THE
- BATTERIES (05, 06)
- REMOVE THE BATTERY PACK
- SWITCHING THE ELECTRIC DRIVE ON AND OFF (05, 06)
- SWITCHING ON THE ELECTRIC DRIVE
- SWITCHING OFF THE ELECTRIC DRIVE
- ADJUSTING THE CUTTING HEIGHT (08)
- MOWING WITH THE GRASS COLLECTION CONTAINER (09,10)
- WARNING ABOUT THE GRASS COLLECTION CONTAINER
- STARTING AND STOPPING THE GRASS CATCHER MECHANISM (11, 12)
- STARTING THE GRASS CATCHER MECHANISM
- WARNING! DANGER OF CUTTING
- SWITCHING ON AND OFF THE WHEEL LOCK (13)
- SWITCHING ON THE WHEEL LOCK
- SWITCHING OFF THE WHEEL LOCK
- CHECKING THE CONDITION OF THE BATTERY CHARGE (14, 15)
- ADJUSTING THE MAIN SPRING ACCORDING TO GROWTH
- ADJUSTING THE MAIN SPRING (16)
- ADJUSTING THE MAIN SPRING (17)
- ADJUSTING THE MAIN SPRING (18)
- FOLDING AND UNFOLDING THE MAIN FRAME
- WARNING! DANGER OF CRUSHING
- FOLDING AND UNFOLDING THE MAIN FRAME (
- FOLDING THE MAIN FRAME
- UNFOLDING THE MAIN BLADE
- FOLDING THE MAIN BLADE (20)
- FOLDING THE MAIN BLADE
- MULCHING THE SIDE GRASS WITH THE MULCHING ATTACHMENT (21, 22)
- ATTACH THE MULCHING ATTACHMENT (21)
- WARNING! RISK OF INJURY
- WARNING! RISK OF DAMAGE TO THE DEVICE. IF THE MULCHING INSERT IS NOT LOCKED, THIS CAN LEAD TO DAMAGE TO THE MOWER MECHANISM
- REMOVING THE MULCHING INSERT (22)
- MOWING WITH SIDE DISCHARGE (23)
- ACCESSORY FOR SIDE DISCHARGE
- REMOVING THE SIDE DISCHARGE ACCESSORY
- MOWING WITHOUT THE GRASS CATCHER (24)
- WORKING INSTRUCTIONS
- OBSERVE THE LOCAL REGULATIONS REGARDING WHEN A LAWN MOWER MAY BE USED
- MOWING PERFORMANCE, SEE SPECIFICATIONS. WORKING TIME OF THE BATTERY PACKS
- REGULAR MAINTENANCE
- SETTING UP AND ADJUSTING THE MOWING MECHANISM
- CHECKING AND MAINTAINING THE CUTTING BLADE
- WARNING! SHARP CUTTING BLADE
- WARNING! DANGER OF INJURY DURING REPAIR WORK
- CORRECTING ERRORS WHEN WORKING AND DEALING WITH THEM
- TRANSPORTATION
- TRANSPORTING THE DEVICE
- TRANSPORTING THE DEVICE BETWEEN TWO WORKING ZONES
- BATTERY PACK "B160.6 LI" (ARTICLE NO. 114128)
- ADDITIONAL INFORMATION FOR TRANSPORT AND DISPATCH
- STORING THE HEDGE TRIMMER WITHOUT THE BATTERY
- NOTE REGARDING THE GERMAN ELECTRICAL AND ELECTRONIC EQUIPMENT ACT
- INSTRUCTIONS REGARDING THE BATTERY ACT (BATTG)
- MAINTENANCE / SERVICE
- INFORMATION DECLARATION OF CONFORMITY
- TRANSLATION OF THE ORIGINAL OPERATING INSTRUCTIONS
- LIST OF CRITICAL FAILURES
- POSSIBLE ERRONEOUS ACTIONS OF PERSONNEL
- CRITERIA FOR LIMIT STATES
- TYPE AND FREQUENCY OF TECHNICAL MAINTENANCE
- INFORMATION ABOUT THE OPERATING INSTRUCTIONS
- SYMBOLS AND SIGNAL WORDS
- FORESEEABLE MISUSE
- PROTECTIVE AND SAFETY DEVICES
- PROTECTIVE CIRCUIT BREAKER
- THE "START" BUTTON (ON THE CONTROL PANEL)
- DEFLECTOR FLAP
- OPERATING SYMBOLS
- COMMON VALUE
- INSERTING THE BATTERY
- REMOVING THE BATTERY
- CAUTION! RISK OF DAMAGE TO THE DEVICE. IF THE BLADE IS BLOCKED, THE MOTOR MAY BE OVERLOADED
- ATTACHING THE GRASS CATCHER
- ATTACHING AND EMPTYING THE GRASS CATCHER
- STARTING AND STOPPING THE BLADE MECHANISM (11, 12)
- STARTING THE BLADE MECHANISM
- SWITCHING THE WHEEL DRIVE ON AND OFF (13)
- SWITCHING ON THE WHEEL DRIVE
- SWITCHING OFF THE WHEEL DRIVE
- FOLDING THE GUIDE BAR
- MULCHING WITH THE MULCHING WEDGE (21, 22)
- INSTALLING THE MULCHING WEDGE (21)
- ATTENTION! RISK OF DAMAGE TO THE DEVICE. IF THE MULCHING WEDGE DOES NOT LATCH, IT MAY BE DAMAGED OR THE BLADE MECHANISM MAY BE DAMAGED
- REMOVING THE MULCHING PLUG (22)
- WORKING WITH THE SIDE DISCHARGE SYSTEM (23)
- REMOVE THE SIDE DISCHARGE CHUTE INSERT
- NOTE: OBSERVE LOCAL
- CUTTING EFFICIENCY AND BATTERY SERVICE LIFE
- CLEANING THE DEVICE AND THE CUTTING MECHANISM
- DISPOSAL IN ACCORDANCE WITH THE BATTERY ACT (BATTG)
- TECHNICAL SPECIFICATIONS
- SERVICE AND MAINTENANCE
- DECLARATION OF CONFORMITY INFORMATION
- TRANSLATION OF THE ORIGINAL OPERATION MANUAL
- CONTENTS
- SAFETY RULES FOR BRUSHCUTTERS
- NOTE MORE DETAILED INFORMATION
- SWITCHING ON AND OFF (05, 06)
- SWITCHING ON
- SWITCHING OFF
- MOWING WITH THE MOWER (09, 10)
- INSTALLING THE MOWER
- CHECK THE FILL LEVEL
- EMPTYING THE MOWER
- STARTING AND STOPPING THE MOWER DECK (11, 12)
- STARTING THE MOWER DECK
- STOPPING THE MOWER DECK
- SWITCHING THE BLADE DRIVE ON AND OFF (13)
- MOWER DRIVE OPERATION
- CHECKING THE CHARGE LEVEL OF THE BATTERIES (14, 15)
- FOLDING AND UNFOLDING THE FUEL TANK
- ASSEMBLING AND DISASSEMBLING THE SIDE TANK (19)
- ASSEMBLING THE SIDE TANK
- DISASSEMBLING THE SIDE TANK
- ASSEMBLING AND DISASSEMBLING THE FRONT TANK (20)
- ASSEMBLING THE FRONT TANK
- DISASSEMBLING THE FRONT TANK
- MOWING WITH THE MOWING BLADE (21, 22)
- THE MOWER STARTS MOVING SLOWLY BEFORE MOWING, BUT DO NOT MOVE IT TOO QUICKLY
- INSTALLING THE MOWING BLADE (21)
- DANGER! RISK OF INJURY. RISK OF INJURY IF HANDS COME INTO CONTACT WITH THE ROTATING BLADE MECHANISM
- CAUTION! RISK OF INJURY FROM THE DEVICE. IF THE MOWING BLADE IS NOT LOCKED, IT AND THE BLADE MECHANISM CAN BE DAMAGED
- REMOVING THE MOWING BLADE (22)
- REMOVING THE BATTERY COVER (23)
- INSTALLING THE BATTERY COVER
- REMOVING THE BATTERY COVER
- EFFICIENCY OF CUTTING AND BATTERY SERVICE LIFE
- TECHNICAL MAINTENANCE AND CARE
- A WARNING! RISK OF INJURY
- PERIODIC MAINTENANCE WORK
- CLEANING THE DEVICE OF THE CUTTING MECHANISM
- ADJUSTING THE MOWING DECK AND PROCESSING
- SERVICE MAINTENANCE
- INFORMATION ON DECLARATION OF CONFORMITY
- UKRAINE
- UK
Brand : AL-KO
Model : 51.6 Li SP comfort
Category : Lawn mower