
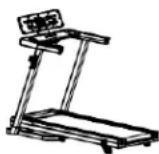
BE5872N - Treadmills HMS Premium - Free user manual and instructions
Find the device manual for free BE5872N HMS Premium in PDF.

| Product Type | Treadmill |
| Brand | HMS Premium |
| Model | BE5872N |
| Dimensions (unfolded) | 150 x 77 x 123 cm |
| Dimensions (folded) | 89 x 77 x 132.5 cm |
| Running Surface | 125 x 42 cm |
| Speed | 1.0 to 16.0 km/h |
| Power Supply | 220-240 V, grounded plug 10 A |
| Motor | Brushless external rotor motor |
| Adjustable Incline | Yes, by adjustable plastic elements (3 positions) |
| Workout Programs | Manual program (P0), 36 automatic programs (P1-P36), 3 user programs (U1-U3), FAT mode |
| Connectivity | Bluetooth (compatible ANYRUN, Kinomap, Zwift), USB port |
| Display | LED screen: time, distance, speed, calories, heart rate |
| Heart Rate Sensors | Integrated in handles |
| Safety | Safety key with immediate stop, overload and overvoltage protection |
| Maintenance | Belt lubrication with silicone oil, cleaning with damp cloth |
| Folding | Ezfit system: automatic vertical folding |
| Maximum User Weight | Not specified |
| Warranty | 24 months (excluding wear parts) |
Frequently Asked Questions - BE5872N HMS Premium
User questions about BE5872N HMS Premium
0 question about this device. Answer the ones you know or ask your own.
Ask a new question about this device
Download the instructions for your Treadmills in PDF format for free! Find your manual BE5872N - HMS Premium and take your electronic device back in hand. On this page are published all the documents necessary for the use of your device. BE5872N by HMS Premium.
USER MANUAL BE5872N HMS Premium
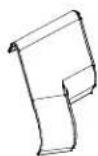
natural_image
Line drawing of a treadmill with adjustable arms and wheels (no text or symbols)- Manual instruction EN
- Instrukcja obsługi PL
- Návod k obsluze CZ
- Manuel instruktion DA
- Gebrauchsanweisung DE
- Manual de instrucciones ES
- Käsijuhend ET
- Manuel d'instruction FR
- Kézi utasítás HU
- Manuale di istruzioni IT
- Naudojimo instrukcijos LT
- Rokasgrāmatas instrukcija LV
- Handmatige instructie NL
- Manual de instruções PT
- Instructiuni manuale RO
- Návod na obsluhu SK
- Navodila za uporabo SL
- Instruktionsbok SV
- Інструкція з експлуатації UK

A-1
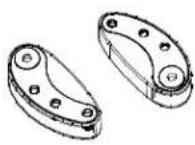
natural_image
Technical line drawing of a mechanical component or housing (no text or symbols visible)1.

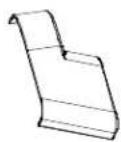
natural_image
Technical line drawing of a U-shaped mechanical component with no visible text or symbols2.
3.
natural_image
Pure mechanical linkage diagram without any text, numbers, or symbols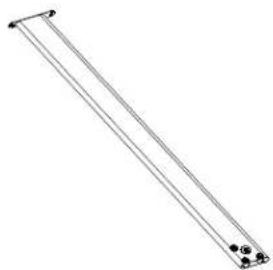
natural_image
Simple line drawing of a diagonal pole with two small circular connectors at the base (no text or symbols)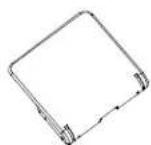
7.6.5.4.
8. 9. 10. 11.

natural_image
Line drawing of a medical or laboratory device with a curved line and a rectangular body (no text or symbols)- 13.

A-2

natural_image
Six identical mechanical bolts arranged in a 2x2 grid, each with hexagonal end caps (no text or symbols)1.
2.
3.
4.
5.

6.
7.
8.
9.
10.

1.

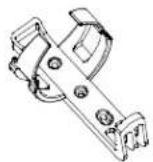
natural_image
Technical line drawing of a mechanical component with no visible text or symbols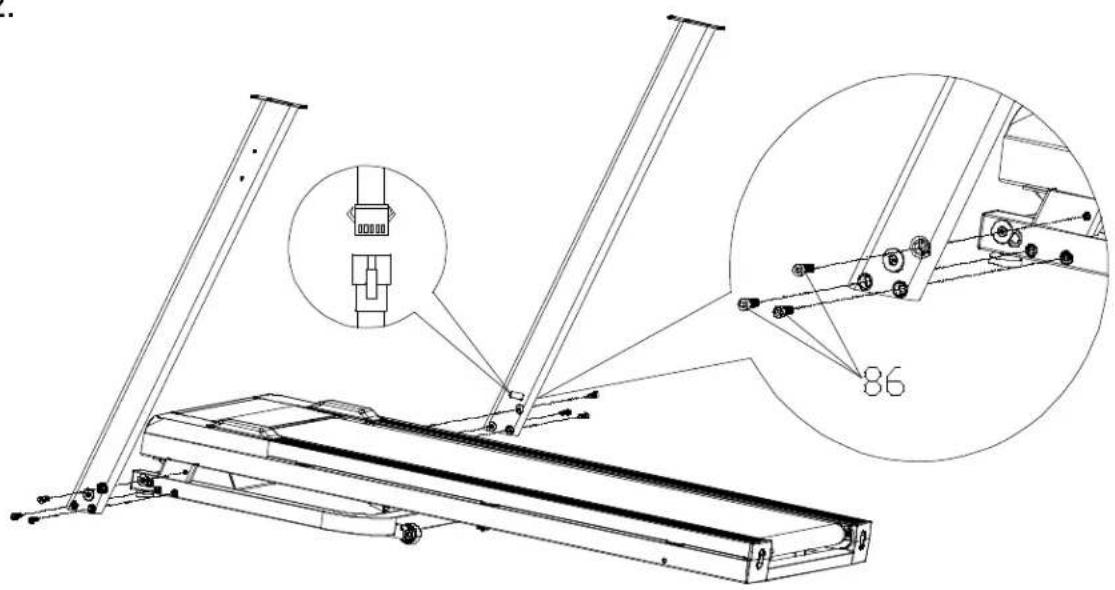

natural_image
Line drawing of a mechanical device with articulated arms and legs (no text or symbols)
natural_image
Technical line drawing of a mechanical linkage or support structure (no text or symbols)
TAB 1.
| SegsPRO. | set time/10 = execution time of each segment | ||||||||||
| 1 2 3 | 4 5 6 7 8 9 10 | ||||||||||
| P1 2 4 6 6 6 8 8 6 | 4 4 | ||||||||||
| P2 2 2 6 8 6 6 8 6 | 2 2 | ||||||||||
| P3 | 2 | 6 | 4 | 10 | 8 | 8 | 10 | 4 | 6 | 2 | |
| P4 | 2 | 8 | 4 | 4 | 10 | 10 | 4 | 4 | 8 | 2 | |
| P5 | 4 | 6 | 10 | 8 | 6 | 6 | 8 | 10 | 6 | 4 | |
| P6 | 4 | 4 | 6 | 8 | 8 | 8 | 10 | 10 | 6 | 4 | |
| P7 4 8 6 6 4 4 6 6 | 8 4 | ||||||||||
| P8 4 4 8 8 4 4 8 8 | 4 4 | ||||||||||
| P9 4 4 4 6 8 8 6 4 | 4 4 | ||||||||||
| P10 4 6 8 5 4 4 6 8 | 6 4 | ||||||||||
| P11 | 4 | 10 | 4 | 6 | 10 | 10 | 6 | 4 | 10 | 4 | |
| P12 | 4 | 6 | 10 | 10 | 10 | 8 | 8 | 10 | 6 | 6 | |
| P13 | 4 | 8 | 6 | 4 | 10 | 10 | 4 | 6 | 8 | 4 | |
| P14 | 4 | 6 | 6 | 10 | 6 | 6 | 10 | 6 | 6 | 4 | |
| P15 | 4 | 10 | 10 | 6 | 4 | 4 | 6 | 10 | 10 | 4 | |
| P16 | 4 | 10 | 6 | 6 | 10 | 10 | 6 | 6 | 10 | 4 | |
| P17 | 4 | 8 | 8 | 10 | 10 | 10 | 10 | 8 | 8 | 4 | |
| P18 | 4 | 4 | 8 | 8 | 8 | 8 | 10 | 12 | 6 | 4 | |
| P19 | 6 | 6 | 6 | 6 | 10 | 10 | 6 | 6 | 6 | 6 | |
| P20 | 6 | 8 | 8 | 4 | 10 | 10 | 4 | 8 | 8 | 6 | |
| P21 | 6 | 6 | 10 | 8 | 8 | 8 | 8 | 10 | 6 | 6 | |
| P22 | 6 | 8 | 10 | 10 | 8 | 8 | 10 | 10 | 8 | 6 | |
| P23 | 6 | 10 | 10 | 6 | 10 | 10 | 6 | 10 | 10 | 6 | |
| P24 | 6 | 8 | 12 | 12 | 12 | 8 | 8 | 12 | 8 | 4 | |
| P25 6 6 8 8 6 6 8 8 | 6 6 | ||||||||||
| P26 | 6 | 4 | 4 | 6 | 10 | 10 | 6 | 4 | 4 | 6 | |
| P27 | 6 | 8 | 4 | 12 | 8 | 8 | 12 | 4 | 8 | 6 | |
| P28 | 6 | 10 | 6 | 4 | 6 | 6 | 4 | 6 | 10 | 6 | |
| P29 | 6 | 6 | 12 | 10 | 6 | 6 | 10 | 12 | 6 | 6 | |
| P30 | 6 | 6 | 6 | 8 | 12 | 12 | 8 | 6 | 6 | 6 | |
| P31 | 8 | 4 | 4 | 10 | 10 | 10 | 10 | 4 | 4 | 8 | |
| P32 | 8 | 6 | 6 | 4 | 10 | 10 | 4 | 6 | 6 | 8 | |
| P33 8 4 6 8 6 6 8 6 | 4 8 | ||||||||||
| P34 | 8 | 6 | 4 | 4 | 10 | 10 | 4 | 4 | 6 | 8 | |
| P35 | 8 | 12 | 8 | 10 | 6 | 6 | 10 | 8 | 12 | 8 | |
| P36 | 6 | 8 | 12 | 12 | 12 | 10 | 10 | 12 | 8 | 8 | |


natural_image
Close-up of a hand holding a white plastic bag, partially visible through a dark panel (no text or symbols)
IMPORTANT SAFETY INSTRUCTIONS
Thank you for purchasing this treadmill. This device will help you stay healthy and fit — safely and comfortably.
BASIC RULES OF USE
- Connect the treadmill to a grounded outlet with a separate circuit.
• Before use, make sure that the device is stable and working properly. - Stand on the side rails, attach the safety key and press "Start".
- Start with your left foot and, once you feel confident, begin running with the correct posture.
- Only one person may exercise on the treadmill at a time.
• After finishing your workout, stop the treadmill and disconnect the power supply.
PRECAUTIONS
- Use the treadmill indoors only, away from water, sunlight and heat sources.
- Wear comfortable sports clothing and appropriate footwear.
- Do not overload the device — this may damage the motor and belt.
- Do not use the treadmill for more than 2 hours without a break.
- Ensure good ventilation and a free space of 200 × 100 ~cm in front of the treadmill.
- Do not jump on or off the treadmill while running.
- Do not exercise after a meal, after drinking alcohol or when you are tired.
• If you experience pain, dizziness or other discomfort, stop exercising and consult a doctor. - Do not disassemble or repair the treadmill yourself — contact customer service.
MEDICAL CONTRAINDICATIONS
Consult your doctor before using the treadmill if:
- You have back, neck or leg pain, or numbness in your limbs.
• You suffer from joint disease, osteoporosis, heart disease, high blood pressure, circulatory or respiratory disorders.
• You have a pacemaker, cancer, thrombosis, diabetes with sensory disturbances.
• You have a fever, skin injuries, or spinal curvature.
• You are pregnant or menstruating. - You use the treadmill for rehabilitation purposes.
CHILDREN AND THE ENVIRONMENT
- Keep children away from the treadmill — it is not a toy.
• Make sure that no people or animals are nearby when using or moving the treadmill. - Keep silicone oil and accessories out of the reach of children.
ELECTRICAL SAFETY
- Do not touch the plug with wet hands.
• Always unplug the treadmill when:
o you are not using the treadmill, - performing maintenance,
o there is a malfunction or power failure.
• Pull out the plug by holding the casing, not the cord. - Clean the socket and plug regularly — dust and moisture can damage the insulation.
EARTHING
- The device must be connected to a grounded socket in accordance with local regulations.
- Do not use adapters or plug adapters.
• If the plug does not fit, contact an electrician. - If you have any doubts about the grounding, have a professional check the installation.

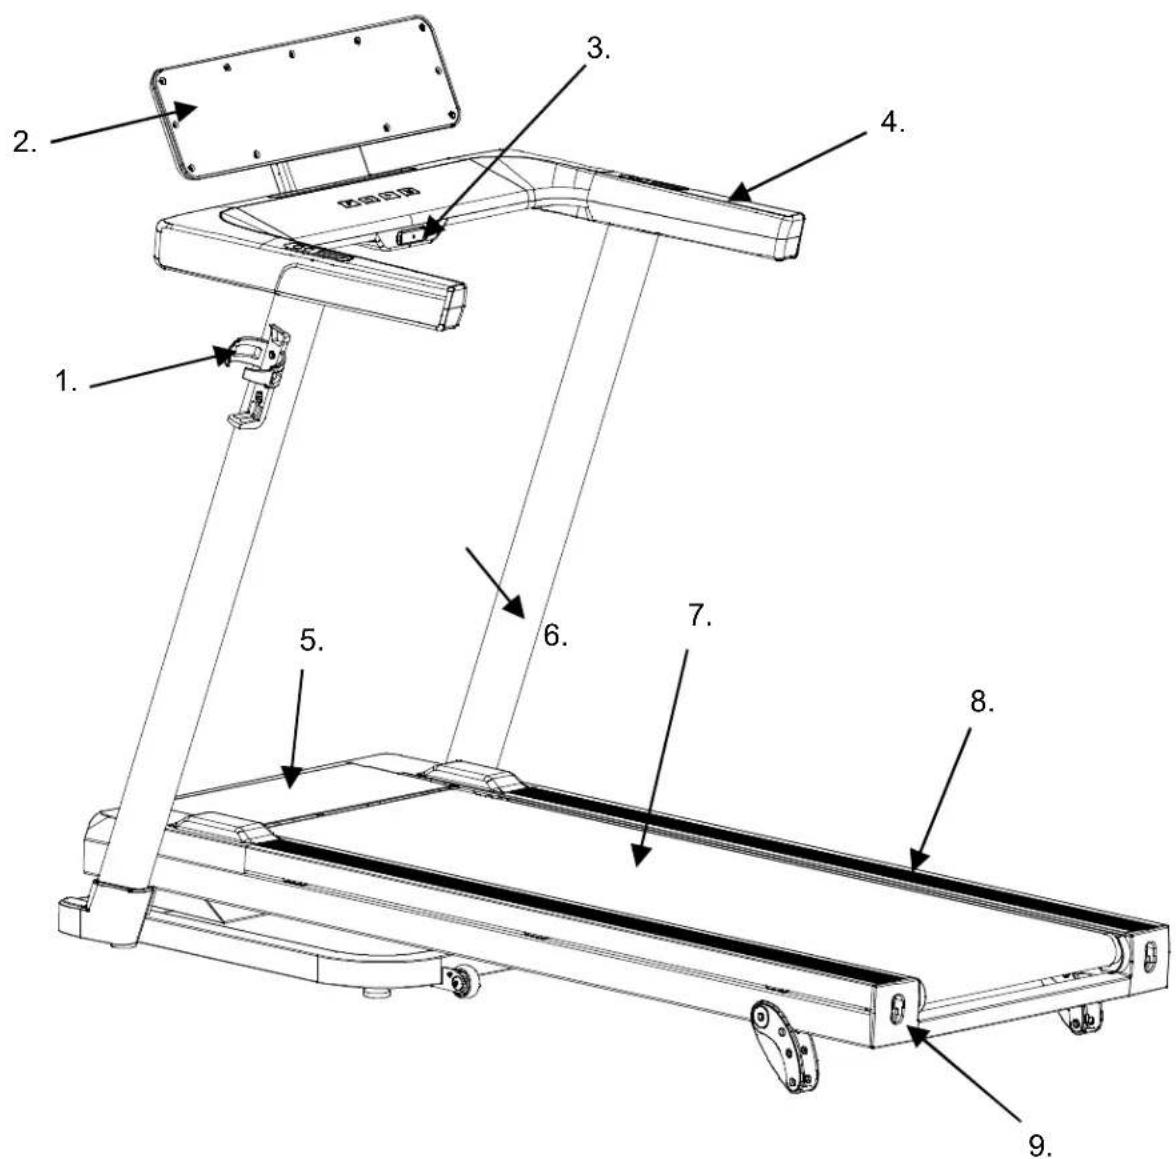
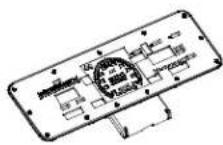
Product Description
-
Water bottle holder
-
Console
-
Safety key
-
Handle
-
Engine cover
-
Vertical post
-
Running belt
-
Side guides
-
Guide cover
Technical data
| Dimensions | When folded: 89 x 77 x 132.5 cm |
| when unfolded: 150x77x123cm | |
| Running belt | 125 x 42 cm |
| Speed | 1.0-16.0 km/h |


Set components
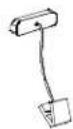
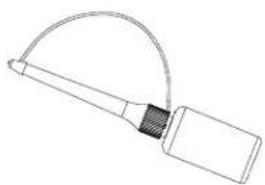
A-1
- Machine
- Console stand
- Console set
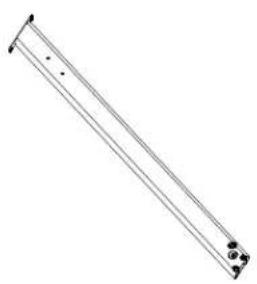
- Left vertical post
- Right vertical post
- Rear console cover
- Bottom cover (left/right)
- Adjustable plastic two-speed parts (2 pcs.)
- Kettle holder
- Bag with screws
- Safety key
- Silicone bottle
- User manual
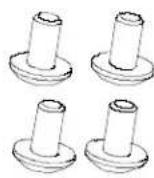
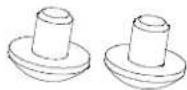
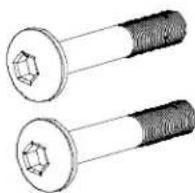
A-2
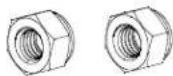
- Full threaded screw M8×25 (6 pcs.)
- M8×15 fully threaded Allen screw (4 pcs.)
- M8×10 fully threaded Allen screw (2 pcs.)
- Fully threaded Allen screw M8×50×20 (2 pcs.)
- Self-locking hex nut M8 (2 pcs.)
- Cross-head screw with large flat head and sharp tip M4×16 (2 pcs.)
- TAB screw (2 pcs.)
- Flat washer Φ8 (2 pcs.)
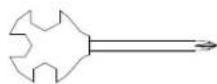
- Cross wrench 14×17×75 (1 pc.)
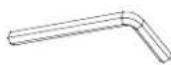
- L-shaped wrench 6×35×80 (1 pc.)
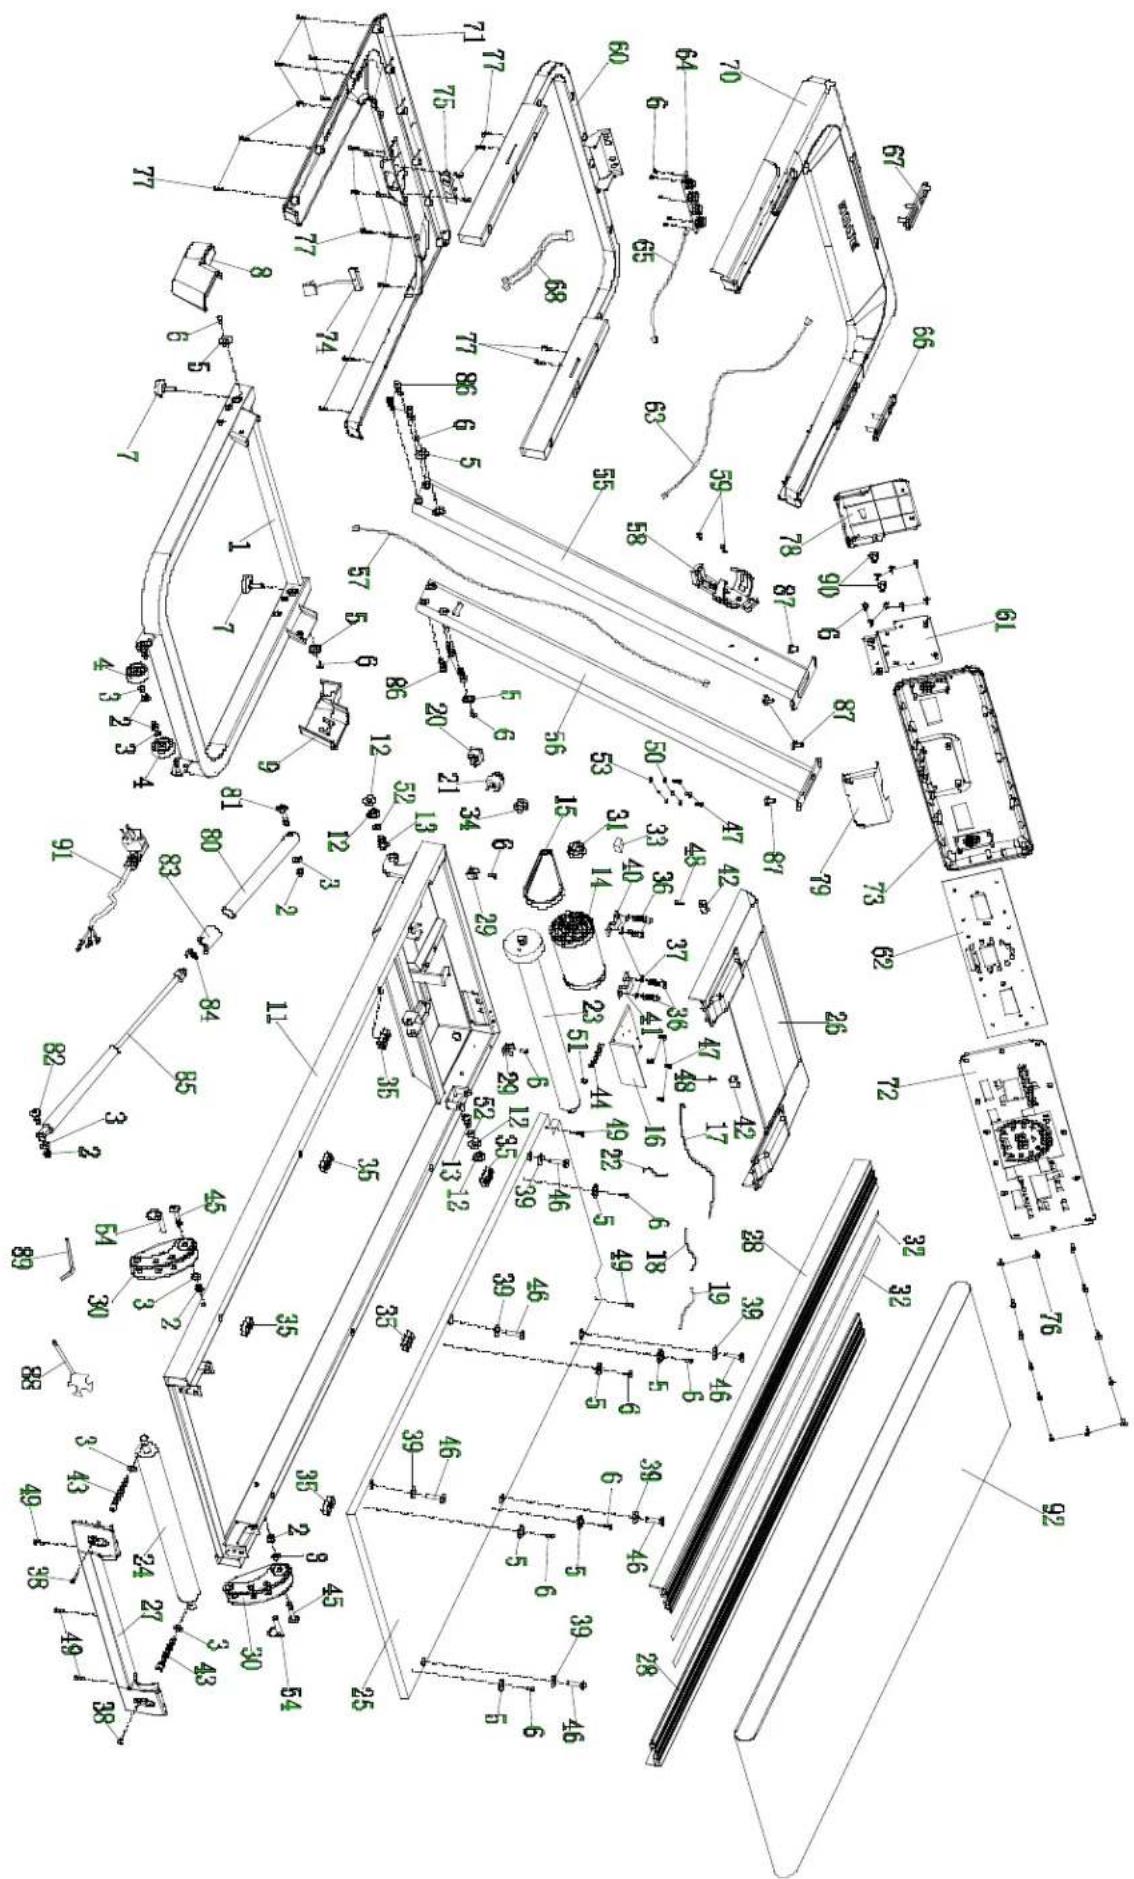
Parts table:
| NO. | NAME | QUANTITY | NO. | NAME | QUANTITY |
| 1 | Base frame | 1 | 47 | Self-tapping screw ST4×12 | 7 |
| 2 | Hexagon self-locking nut | 6 | 48 | Self-tapping screw ST4×16 | 2 |
| 3 | Flat washer | 6 | 49 | Spring washer Φ5 | 5 |
| 4 | Wheel | 1 | 50 | Flat washer Φ6 | 3 |
| 5 | Round side guide | 10 | 51 | Flat washer Φ10 | 1 |
| 6 | Self-tapping screw with countersunk head ST4×15 | 20 | 52 | External serrated washer Φ5 | 2 |
| 7 | Conical foot washer | 4 | 53 | TAB screw | 3 |
| 8 | Base beam cover (left) | 1 | 54 | Left vertical post | 2 |
| 9 | Base beam cover (right) | 1 | 5 | Right vertical post | 1 |
| 1 | Main frame | 1 | 5 | Communication cable L=1200 mm | 1 |
| 1 | Tilt shaft sleeve | 4 | 57 | Bottle holder | 1 |
| 13 | Partially threaded Allen screw M10×25×15 | 2 | 5 | Cross-head screw with large flat head M4×16 (grade 6.8 / black) | 1 |
| 14 | Brushless motor with external rotation | 1 | 59 | Computer frame | 2 |
| 15 | Flexible motor belt | 1 | 6 | Console mounting plate | 1 |
| 16 | Controller 7201EB | 1 | 61 | 7201EB console | 1 |
| 17 | Communication cable L=500 mm | 1 | 62 | Communication cable L=800 mm | 1 |
| 1 | Power cable L=200 mm (red) | 1 | 63 | Touch control panel | 1 |
| 19 | Power cable L=200 mm (black) | 1 | 64 | Keyboard cable | 1 |
| 2 | Switch | 1 | 65 | Pulse sensor in handle (speed) | 1 |
| 21 | Self-resetting switch | 1 | 66 | Pulse sensor in handle (start/stop) | 1 |
| 2 | Power cable L=100 mm (red) | 1 | 67 | Pulse sensor cable L=650 mm / black | 1 |
| 23 | Front roller 3300EB | 1 | 68 | Upper accessory tray | 1 |
| 24 | Rear roller 3300EB | 1 | 70 | Lower accessory tray | 1 |
| 25 | Running deck 3300EB | 1 | 71 | Upper console cover | 1 |
| 26 | Engine cover 3300 | 1 | 72 | Rear console cover | 1 |
| 27 | Rear cover | 1 | 73 | Safety key | 1 |
| 2 | Side guide | 2 | 7 | Safety lock socket | 1 |
| 2 | Tube clamp | 2 | 75 | Self-tapping screw ST4×15 (black) | 1 |
| 30 | Two-stage adjustable plastic elements | 2 | 76 | Self-tapping screw ST4×16 (black) | 13 |
| 31 | Magnetic ring | 1 | 77 | Front console cover | 19 |
| 32 | Double-sided tape | 8 | 78 | Rear console cover | 1 |
| 3 | EVA rubber pad | 1 | 79 | Ezfit connecting elements | 1 |
| 34 | Power cord latch | 1 | 80 | Partially threaded Allen screw M8×50×20 (black) | |
| 35 | Square washer | 6 | 81 | Partially threaded Allen screw M8×30×20 (black) | 1 |
| 3 | Fully threaded Allen screw M8×15 | 4 | 82 | Tube cap | 1 |
| 3 | Spring washer | 4 | 83 | Spring-1 | 1 |
| 3 | Full thread cross screw M5×10 | 2 | 8 | Hydraulic cylinder | 1 |
| 39 | Flat PVC washer | 6 | 85 | M8×25 fully threaded Allen screw (class 6.8) | 1 |
| 40 | Left motor plate | 1 | 86 | Full threaded Allen screw M8×15 | 6 |
| 4 | Right motor plate | 1 | 87 | Cross wrench 14×17×75 | 2 |
| 42 | Painted tube for securing the cover | 2 | 88 | L-shaped wrench | 1 |
| 43 | Full threaded Allen screw M8×75 (grade 8.8) | 2 | 89 | Full thread Allen screw M8×10 (class 6.8 / black) | 1 |
| 4 | M6×50 fully threaded Allen screw | 1 | 90 | Power cable | 2 |
| 45 | Partially threaded Allen screw M8×50×20 (black) | 2 | 91 | Running belt | 1 |
| 4 | Hexagon socket screw with conical head M6×55×Φ16 | 6 | 92 | Self-tapping screw ST4×12 | 1 |
INSTALLATION INSTRUCTIONS
Step 1: Unpacking
- Remove the treadmill from the box.
- Place it on a flat surface (as shown in the illustration).
- Remove all plastic bags and safety straps.
Step 2: Assembling the vertical posts
- Connect the communication cable of the right vertical post (57) to the cable in the base frame (17).
- Secure the left and right vertical posts on both sides of the base.
• Use 6 M8×25 Allen screws (86) to secure them.
Note: Do not tighten the screws permanently until all of them have been inserted.
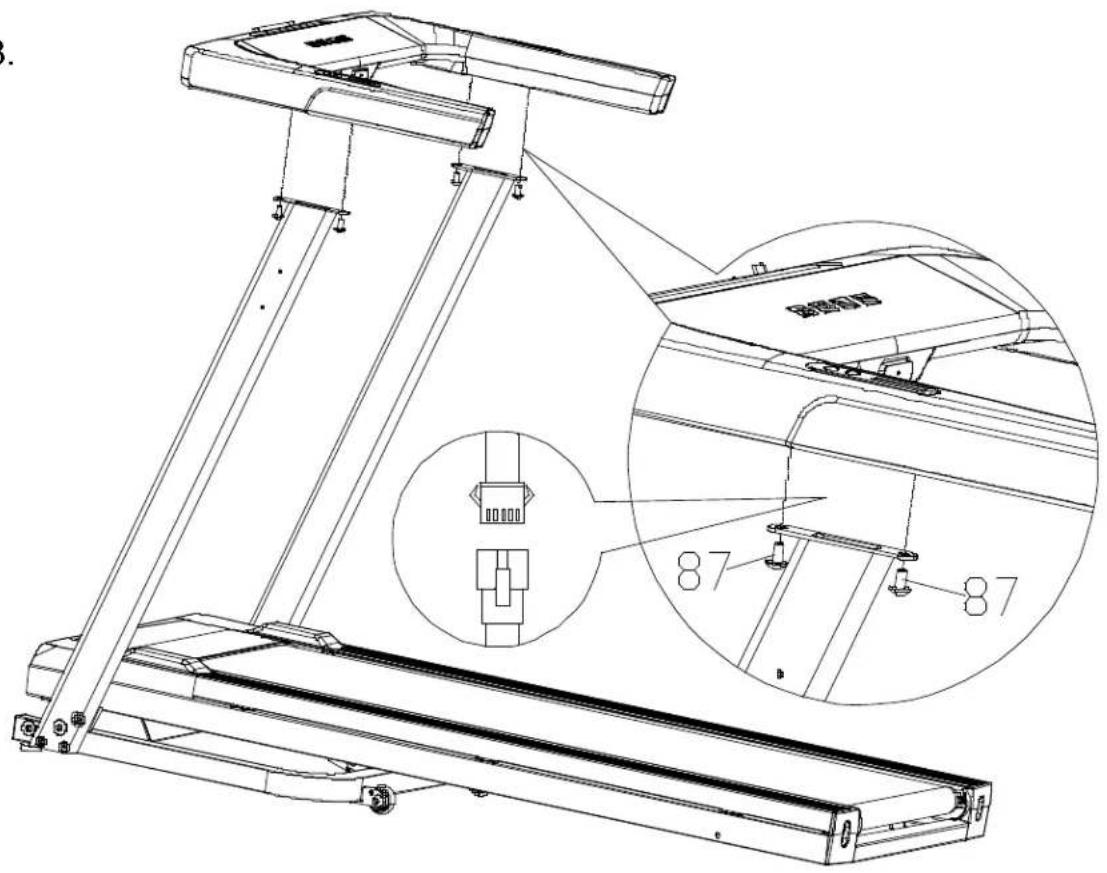
Step 3: Mounting the console bracket
- Connect the communication cable of the console bracket (63) to the cable in the vertical post (57).
- Secure the console bracket to the left and right vertical posts.
• Use 4 M8×15 Allen screws to secure
Note: Do not tighten the screws permanently until all of them have been inserted.
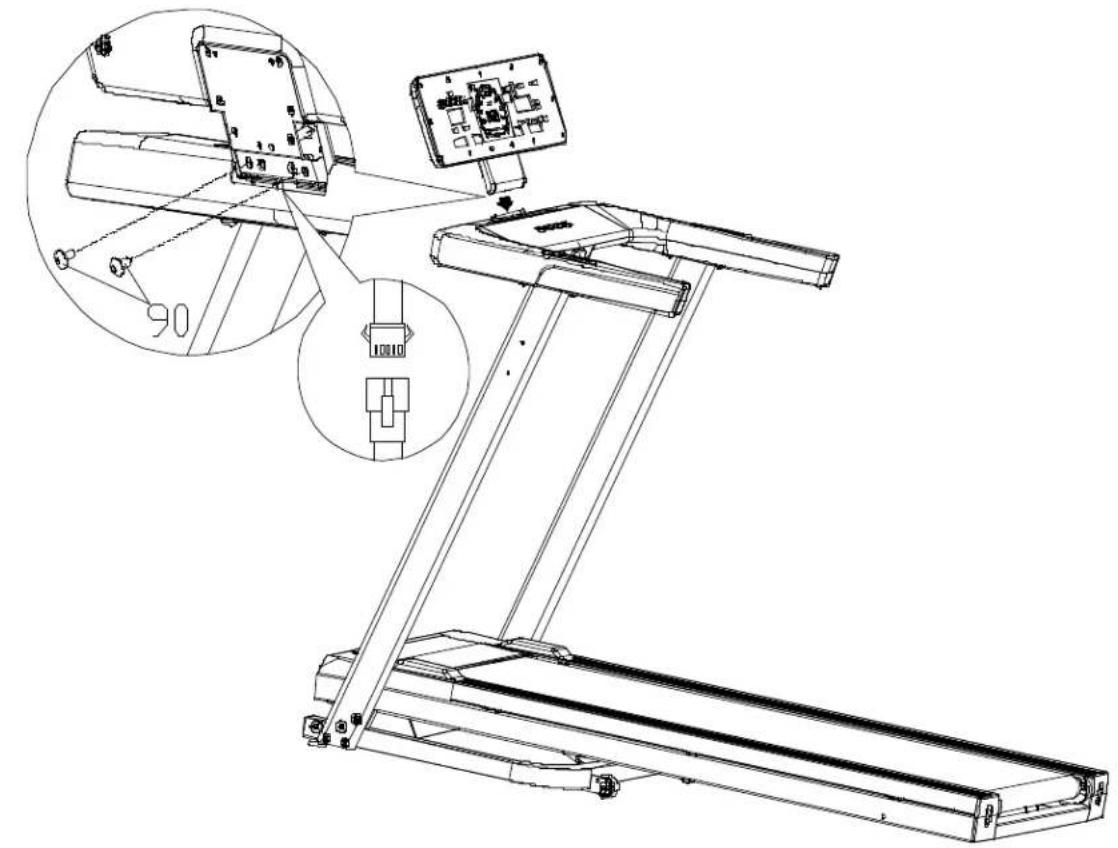
Step 4: Mounting the console
- Place the console in the console holder (as shown in the illustration).
• Use 2 M8×10 Allen screws that pass through the mounting holes on the back of the control frame. - Connect them to the console mounting plate and tighten.
Note: Do not tighten the screws permanently until all of them have been inserted.
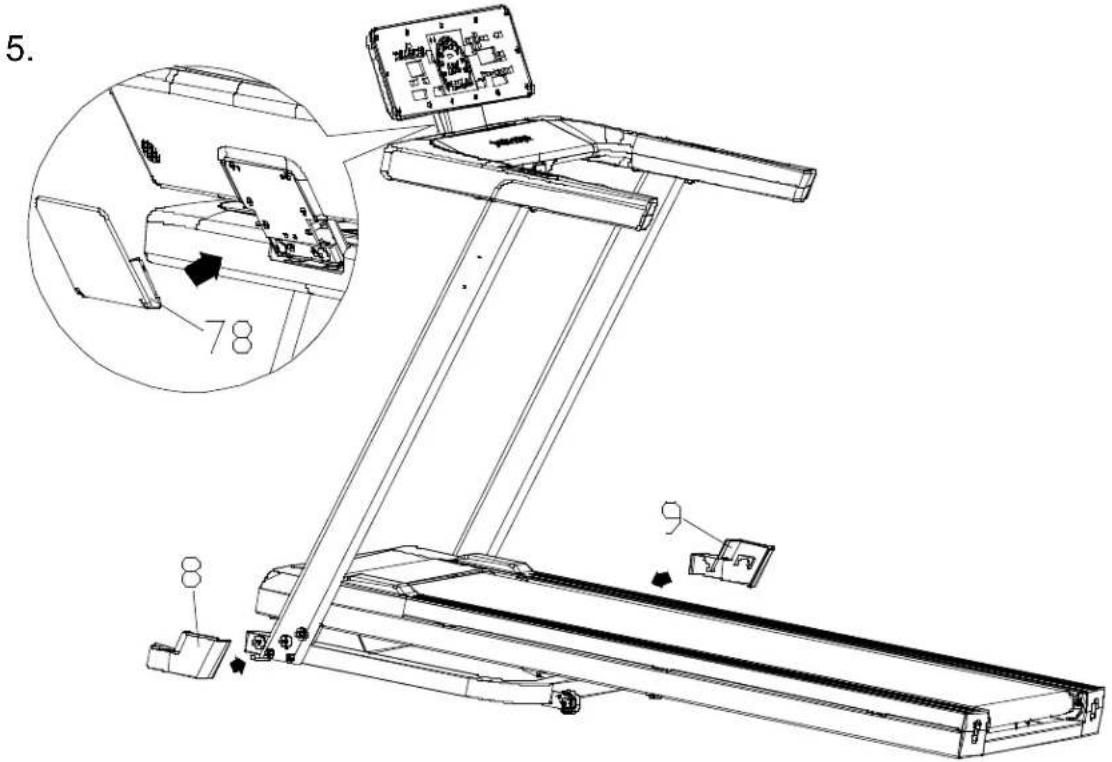
Step 5: Covers
- Attach the front console cover (78).
- Put the left (8) and right (9) covers of the lower beam in place, align them with the sides of the base and screw them in place.
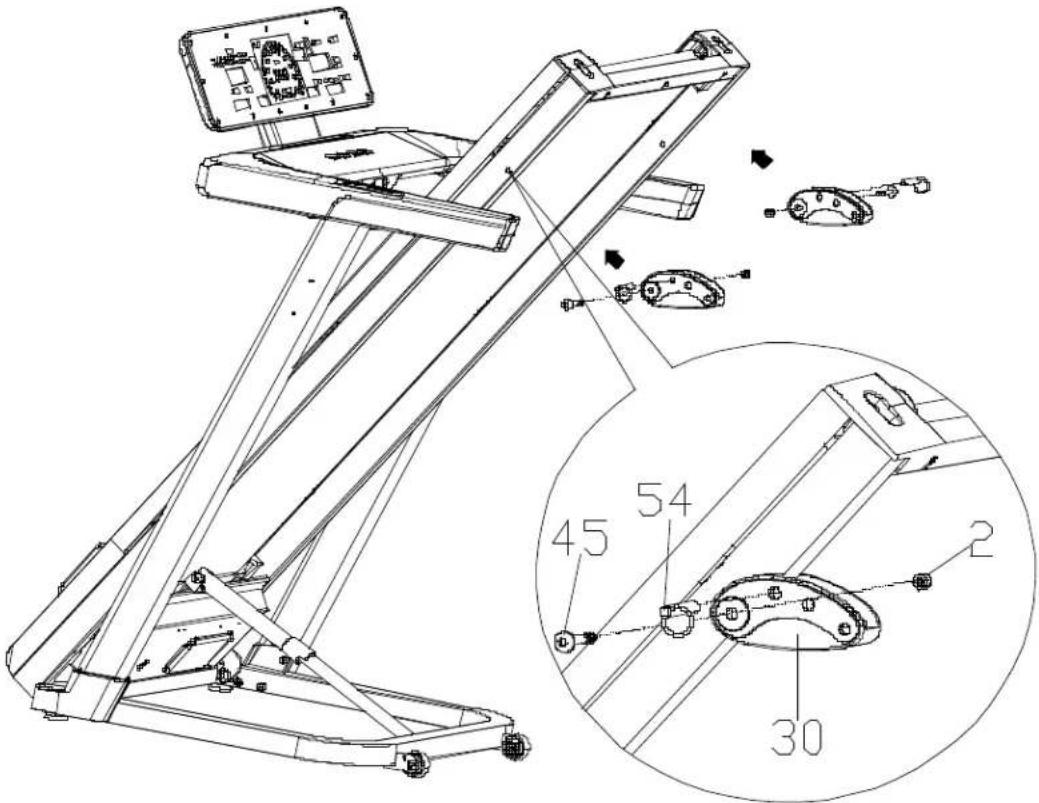
Step 6: Assembling the treadmill
- Assemble the treadmill as shown in the illustration.
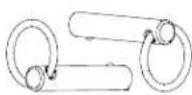
- Insert the plastic incline adjustment element (30) into the square tubes on both sides of the frame.
• Use 2 M8×50×20 screws (45) and tighten them with self-locking nuts (2). - Insert the TAB screw (54) into the appropriate hole in the plastic element to adjust the incline of the treadmill.
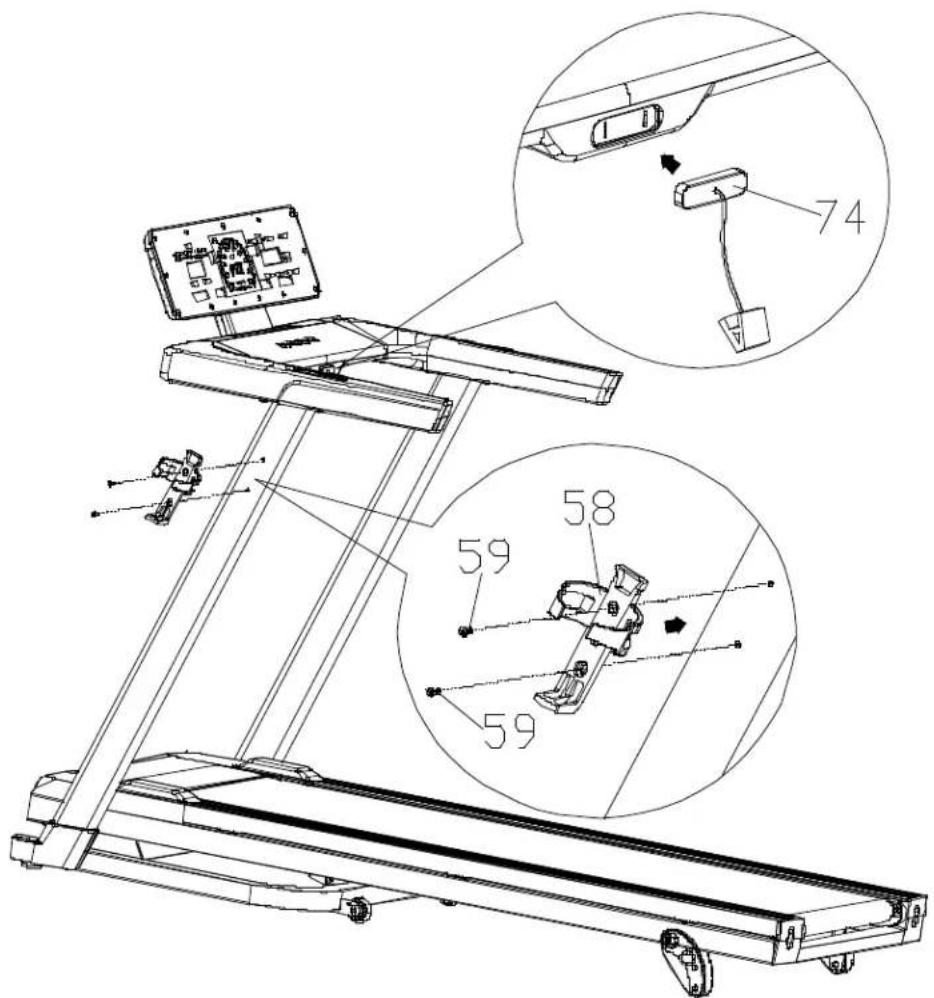
Step 7: Bottle holder and finishing touches
- Attach the bottle holder (58) to the left vertical post.
• Use 2 M4×16 screws (59) with a large flat head - Check that all screws are tightened securely.
• Finally, install the safety key (74). Done! The
treadmill is assembled and ready to use.
General training tips
- Warm-up - Warm up for 5-10 minutes before each workout. Do not hold your breath - warming up prepares your body for exercise and reduces the risk of injury.
- Breathing - Breathe rhythmically: in through your nose, out through your mouth. Your movements should be synchronised with your breathing. If you start breathing too quickly, stop the exercise and rest.
- Frequency - Each muscle group should have at least 48 hours of rest between workouts. This means that you should exercise a given muscle group every other day.
- Load - Adjust the intensity of your workout to your fitness level. Initial muscle soreness is normal — regular exercise will help reduce it. Train according to the principle of gradually increasing the load.
- Relaxation - After each workout, spend 5 minutes stretching and relaxing, especially your leg muscles. This prevents them from stiffening and helps maintain flexibility.
- Diet - To avoid putting strain on your digestive system:
• Exercise at least one hour after eating.
- Wait at least 30 minutes after training before eating
- Drink water in moderation — excess water can strain your heart and kidneys
Stretching
Stretching is recommended both before and after training. Warmed-up muscles stretch more easily, so start with a 5–10 minute warm-up, followed by: Do each exercise 5 times, holding the position for 10–15 seconds.
1. Downward stretch
Stand straight, bend your knees slightly and slowly lean forward. Relax your back and shoulders, try to touch your toes. Repeat 3 times.
2. Tendon stretch
Sit on a mat, straighten one leg and bend the other towards the centre. Lean forward and try to touch the toes of your straight leg. Repeat 3 times on each leg.
3. Calf and heel stretch
Place your hands against a wall or tree, extend one leg backwards. Your heel should touch the ground and your leg should be straight. Lean towards the wall. Repeat 3 times on each leg.
4. Quadriceps stretch
Hold onto a stable object with one hand, grab the ankle of the opposite leg with the other hand and pull it towards your buttocks. Repeat 3 times on each leg.
5. Sartorius muscle stretch (inner thigh)
Sit down, place the soles of your feet together and pull them towards your groin. Hold your feet and gently press your knees down. Repeat 3 times.
TREADMILL INSTRUCTIONS
Start
- Connect the power supply and make sure the treadmill is in the lowest position.
- Attach the safety key to your clothing.
- Stand on the side rails, holding the handles.
- Press the "START" button — the treadmill will start after 5 seconds at a speed of 1.0 km/h.
- Increase the speed to 2.5–3.5 km/h using the "+" button — this is a comfortable pace to start running.
- Step onto the running belt gradually, holding onto the handles.
- During your run, you can adjust the speed using the "+" and "-" buttons.
- To stop the treadmill, press the "STOP" button at any time.
Modes and heart rate measurement
• After turning on the power, select the mode with the "CHOOSE" button.
- Press "START" to begin your workout.
- Adjust the speed using the "+" and "-" buttons, stop the treadmill with the "STOP" button.
- To check your heart rate (HRC), place your hands on the metal sensors — the result will appear on the display. Note: Removing the safety key immediately stops the treadmill and turns off the computer.

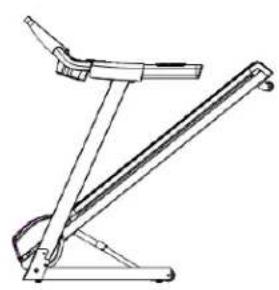
Folding and unfolding the treadmill
Folding:
- Disconnect the power supply.
- Set the treadmill to the lowest incline position
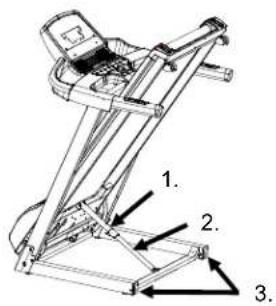
- Lift the treadmill to an upright position — the Ezfit mechanism will lock automatically.
- Check that the Ezfit lock is properly locked.
Unfolding:
- Select a location approximately 1 metre from a power outlet, on a flat surface.
- Hold the treadmill with both hands and step on the Ezfit mechanism — the treadmill will slowly lower to the floor.
- Keep a safe distance of at least 1 metre when unfolding.
Moving the treadmill
Before moving the treadmill, make sure that:
The power is turned off,
• The plug is disconnected,
The frame is folded.
Then, grasp the treadmill with one hand at the end and the other at the handrail, and move it gently, tilting it at an angle of 40–50° towards your chest.

Console Panel – Function Description
- Training programmes: P0 – user's own programme, P1–P36 – automatic built-in programmes, 3 USER programmes, FAT.
• LED display: Shows time, distance, speed, calories, heart rate. - Controls: 4 main buttons+, shortcut buttons on the left and right sides.
• Speed range: From 1.0 to 16.0 km/h. - Safety features: Overload, overvoltage, shock, overspeed and electromagnetic interference protection.
• System functions: Self-test, error messages, 3 user-defined functions.
Safety instructions
- Plug the plug into a 10A socket with earth connection and switch on the power.
- Insert the safety key into the console and attach the clip to your clothing on your chest.
- In the event of a malfunction, the treadmill will stop automatically and a message will appear on the screen accompanied by an audible signal.
- To clear the error, remove the safety key or turn off the power.
Description of Displays and Buttons
- When switched on: The full screen is displayed for 2 seconds, then "V1.0" appears, followed by standby mode or quick start when "Start/Pause" is pressed.
- Standby mode
o Pulse: displayed when a sensor is connected; otherwise, it shows "0".
○ Time/Distance: "0:00", time icon active.
- Speed: "0.0", speed icon active
o LED animation: light sequence (green 1–16, yellow 17–31, red 32–47).
- Stop: After finishing your workout, the treadmill enters standby mode after 5 seconds.
- Pause mode: Press "STOP" to return to standby mode.
- Energy saving mode: After 4 minutes and 30 seconds of inactivity, the screen turns off. Press any button or reset the safety key to resume operation.
Additional features
• USB charging: Charging starts when a mobile device is connected via USB. Disconnecting stops charging.
- Bluetooth – Music: When the power is turned on, you can connect your phone or other audio device via Bluetooth and play music through the console. Volume can be adjusted on the source device.
FUNCTION BUTTONS
PROGRAM button ("P")
• In standby mode, it allows you to select the mode:
- G - training goal,
o P – automatic programme, - U - user programme
• To exit without selecting, press "STOP".
MODE button ("M")
- Confirms parameter settings.
- Locks the current screen view (e.g. time, distance) so that it does not switch automatically.
- Pressing again unlocks the automatic switching every 5 seconds.
START/PAUSE button and "+ / -" on the handles
- START/PAUSE starts the programme with a countdown of "3 2 1".
- During the pause, the screen displays the data from before the pause, and the pulse is displayed in real time
- Pressing "START/PAUSE" again resumes training with the data continuing.
• "+ / -" on the handles:
○ Increase or decrease the speed by 0.1 km/h.
○ Holding for more than 1 second causes continuous change. - They are also used to select time, distance, calories and programmes (P1–P36, U1–U3).
STOP button
• In pause mode, returns to standby mode and resets the data.
• In the settings, it returns to the previous step.
Safety key
- Removing the key immediately stops the treadmill.
• The message "SAF" appears on the screen and 3 beeps sound.
- When the key is removed, the treadmill does not respond to any buttons.
- To resume operation, disconnect and reconnect the key — the treadmill will enter standby mode.
PROGRAM DESCRIPTION
QUICK START Starting a workout
- Press "START/PAUSE" in standby mode
- Countdown "3 2 1" with an audible signal
- Start at 1.0 km/h
• Time, distance, calorie and heart rate counters start from zero
During exercise
- The "+ / -" keys change the speed
• Windows switch every 5 seconds
o Calories (0–999 kcal) / Pulse (40–220 bpm)
○ Time (0:00–99:59 min) / Distance (0.00–99.99 km)
• The semi-circular indicator shows % speed
• The 400 m indicator lights up every 100 m (4 segments)
Pause and end
- "START/PAUSE" stops the workout, data is saved
• Speed: "0.0", 400 m indicator flashes - Press "START/PAUSE" again= , resumes with countdown
- "STOP" = resets data, returns to standby mode Starting a workout
TARGET COUNTDOWN MODE Mode selection
- In standby mode: "P" → G mode (target), "M" → confirmation
• Available goals:
○ Time: 1–99 min (default 10:00)
o Distance: 1.00–99.00 km (default 5.00)
o Calories: 1–999 kcal (default 100)
- Set the value using "+ / −", confirm with "M" or "START/PAUSE"
Training progress
• Countdown "3 2 1" and audible signal
• The programme is divided into 10 sections (target / 10)
• The speed can be changed with "+ / -"
• The windows switch every 5 seconds:
○ Calories/Heart rate (40–220 bpm)
○ Time/Distance (counting forwards or backwards)
• The 400 m indicator lights up every 100 m
Pause and end
- "START/PAUSE" stops the workout, data is saved
- "STOP" resets the data and returns to standby mode
- When the target is reached: END message+, 3 beeps
PROGRAM MODE
Program selection
• In standby mode: "P" (→) P mode, "M" (→) confirmation
- Select programme "p1-p36" using the "+ /—" keys
• Default time: 10:00 min (can be changed)
Time settings
• "M"→ time settings (range: 0:00–99:00)
- Confirm with "START/PAUSE" or return with "STOP"
Programme sequence
• Countdown "3 2 1" and audible signal
• The programme is divided into 10 sections
o During the countdown: each section = time / 10
- When counting forward: change every 1 minute
- Moving to the next section: "Bi" signal
• The speed changes automatically, but can be adjusted manually
Displayed data
- Calories/Heart rate: switch every 5 seconds
o Calories: 0–999 kcal
o Heart rate: 40–220 bpm (or 0 without sensors)
• Time/Distance: 0:00–99:59 min / 0.00–99.99 km
- Semicircular indicator: % speed
• 400 m indicator: lights up every 100 m (cyclically)
Pause and end
• "START/PAUSE" stops training, data is saved
- "STOP" resets the data and returns to standby
• After completion: 3 "Beep-Beep-Beep" signals, END message
USER MODE
Program selection
• In standby mode: "P"→ U mode, "M"→ confirmation
- Select programme "U1–U3" using the "+ / −" buttons
• The default time appears in the TIME window (can be changed)
Time and speed settings
• "M"→ time settings (range: 0:00–99:00)
- Hold down "M" for 3 seconds→ speed settings for 10 segments
• Each segment is set separately, confirm with "M"
The data is permanently stored (does not disappear when the power is turned off)
Programme sequence
- Countdown "3 2 1" and audible signal
• The programme is divided into 10 sections - When counting down: each = time / 10
- When counting forward: change every 1 minute
• Transition to the next section: "Bi" signal - The speed changes automatically and can be adjusted manually
Displayed data
• Calories/Heart rate: switch every 5 seconds
• Calories: 0–999 kcal
• Heart rate: 40–220 bpm (or 0 without sensors)
• Time/Distance: 0:00–99:59 min / 0.00–99.99 km
• Semicircular indicator: % speed
• 400 m indicator: lights up every 100 m (cyclically)
Pause and end
- "START/PAUSE" stops training, data is saved
- "STOP" resets the data and returns to standby
• After completion: 3 "Beep-Beep-Beep" signals, END message
FAT MODE (Body fat measurement)
Mode selection
- In standby mode, press "P" to select FAT mode – "F" will appear in the "CALORIES/PULSE" window
- Press "M" to scroll through the settings:
Settings
• F1 – Gender: "+ / -" → 01 = male, 02 = female
• F2 – Age: Range: 10–99 years
• F3 – Height: Range: 100–220 cm
• F4 – Weight: Range: 20–150 kg
After completing the settings, press "M" to start the measurement
Measure
• Takes 25 seconds
- If your pulse is stable→, the result will appear when finished
- If there is no pulse signal→, the result will not be displayed
• After 10 seconds, the result disappears and the device returns to standby mode
Interpretation of the result
| FAT result | Meaning |
| < 18 | Too low |
| 19–24 | Normal |
| 25 | Overweight |
| > 29 | Obese |
The result is indicative and does not replace medical advice.
CALCULATION FORMULA (for advanced users)
• BMI= weight (kg) / height ^2 (m)
• The FAT formula depends on height:
o Height 140–190 cm: FAT = centile value + {{(BMI / (1.6 / height)) + (age - 18) × 0.013} × pulse × gender}
o Height≤ 140 cm: use 1.4
o Height≥ ,190 cm: use 1.9
• Hundredth value: last digit of your pulse (if none, enter 0)
- Tens of pulse:
○ odd number→×0.95
○ even number→×1.05
- Gen
der: ○ 01 (male) → × 1
○ 02 (female) → × 1.15
• Result display range: 5–50
< 5→ displays 5
FUNCTION DESCRIPTION
1. ODO - Total time / distance
• Time: 0:00–99:59 h:min (rounded after 100 h)
• Distance: 0.00–9999 km
2. Speed (SPEED)
- Range: 1.0–16.0 km/h (adjustable in increments of 0.1)
- In programmes P1–P36: speed depends on the segment
• Engineering mode:
o Max: 12.0–24.0 km/h (default 16.0)
o Min.: 0.5–2.0 km/h (default 1.0)
3. Pulse (PULSE)
• Range: 40–220 beats/min
• Visible in standby, running and pause modes
• Switches with alarms every 5 seconds.
4. Time (TIME)
- Range: 0:00–59:59 min:sec (counting forwards or backwards)
• Target: 1:00–99:00 min (default 10:00) - Programmes divided into 10 stages
o Counting forward: change every 1 min
○ Countdown: stage= time / 10
○ Transition: "Bi" signal
5. Distance (DISTANCE)
• Range: 0.00–9999 km
• Target: 1.00–9999 km (default 5.00)
- Switch every 5 seconds.
6. Calories (CALORIES)
• Range: 0–999 kcal
• Target: 1–999 kcal (default 100)
- Switching with pulse every 5 seconds.
7. Semicircular speed indicator
• Green: 1–16, Yellow: 17–31, Red: 32–47
• Shows % of current speed
8. 400 m indicator
• Lights up every 100 m (4 squares)
• After 400 m, the cycle repeats
9. Wheel diameters (engineering mode)
- Strip: 10–5000 mm (default 75)
• Motor: 5–2000 mm (default 25) - Roller: 10–5000 mm (default 48)
10–13. User data
Weight: 20–150 kg (default 70 kg)
Gender: 01 = male, 02 = female Height:
100–220 cm (default 170 cm)
Age: 10–99 years (default 25 years)
14. Audible signal (BUZZER)
• Each press of the key= , "beep"
- Program start: countdown "3→2→1" with signal
Service mode (Engineering Mode)
Mode 1 - Calibration
• +Entry: press "P" and "M" simultaneously for 3 seconds in standby mode
- Step-by-step settings (confirm with "M" after each value):
○ Unit system: 0 = metric, 1 = imperial
o Pulley diameter: 10–5000 mm (default 75)
o Minimum speed: 0.5–2.0 km/h or 0.3–1.2 mph
○ Motor wheel diameter: 5–2000 mm (default 25)
○ Roller diameter: 10–5000 mm (default 48)
o. Maximum speed: 12.0–24.0 km/h or 7.5–15.0 mph (default 16.0)
- Calibration: press "START/PAUSE"→, "SAE" will appear
- Exit: "STOP"→ return to the calibration page, long press "STOP"→ standby mode
Mode 2 – System information
• Entry: press "P"+ "STOP" for 3 seconds
- Displays:
- "M"→ shows total time and distance (switches every 5 seconds)
- Reset distance: "P" + "M" for 3 seconds
- Exit: "STOP" for 3 seconds
Key test
• Input: "M" + "STOP" for 3 seconds
- Displays "TEST"→, tests all buttons
- Press each key () and its number will appear in the window
• After pressing all keys→, an audible signal will sound and the display will return to "TEST"
Key numbers:
| Key | Code | Key | Code |
| P | 1 | START handle | 5 |
| STOP | 2 | STOP handle | 6 |
| START/PAUSE | 3 | "+" | 7 |
| M | 4 | "-" | 8 |
- Quick sleep mode: select "SLEE"→ "M" = activation
- Exit: press the security key or restart
Bluetooth connection with ANYRUN
apps
• Download the ANYRUN app, register an account and log in
- In the settings, select Device Management→ find the treadmill (e.g. SW7201EB-0124)
• +After connecting: a sound signal will be heard and "BT" will appear in the "SPEED" window
- Select the mode and start your workout from the app
- →Disconnecting: in the app settings, you will hear a beep and the treadmill will return to standby mode
- Connection only possible in standby mode After connecting, only quick start mode is available
KINOMAP
- Download the Kinomap app, register an account and log in
- Select Fitness Equipment Management "+" "My Treadmill" brand "FTMS" or "anyrun"
- Select the Bluetooth device (e.g. SW7201EB-0124)
• After connecting: a beep+ "BT" in the "SPEED" window
• You can view workout videos and start your workout - Disconnection: beep, treadmill returns to standby mode
ZWIFT
- Download the Zwift app, register an account and log in
- Select your running device→, find your treadmill (e.g. SW7201EB-0124)
• +After connection: an audible signal and "BT" in the "SPEED" window
• Start your workout from the app - Disconnection: audible signal, treadmill returns to standby mode
ERROR CODES displayed in the calories/heart rate window
| Error code | Error description | Solution |
| E01 | Overload | 1. Overload – restart the device.2. Parts friction – lubricate and restart.3. Check the motor – noise, burning smell→ replace.4. Replace the controller. |
| E02 | HALL sensor error | 1. Check and reconnect the motor cable.2. Replace the motor.3. Replace the controller. |
| E03 | Hardware overload | 1. Excessive current – restart.2. Check the power plug and motor plug.3. Replace the controller. |
| E04 | Phase failure | 1. Check and reconnect the motor cable.2. Replace the motor.3. Replace the controller. |
| E06 | Voltage too high | Check the supply voltage. |
| E08 | Hardware error | 1. Check the connection between the power socket and the motor.2. Replace the controller. |
| E21 | Data recording error | Turn off the power for 2 minutes, then turn it back on. If it does not work, replace the controller. |
| E22 | Communication time exceeded | 1. Check the cable between the display and the controller.2. Check if the controller or display is damaged.3. Turn it back on after 2 minutes. |
| E31 | Overheating | Wait until the temperature returns to normal and restart. |
| E32 | Reversed motor direction | Check that the UVW cables are connected correctly to the engine. |
| E33 | Engine parameter error | Enter the correct parameters from the manufacturer. |
| E50 | Other errors | Replace the controller. |
| SAF | No safety key | 1. Check that the key button is working smoothly.2. Check the key cable – make sure it is not loose.3. Check the key plate.4. Check the display. |
Programme description
Each programme divides the exercise time into 10 segments. Each of these stages has a corresponding speed (km/h). (see Table 1)
Ground
- The treadmill must be connected to a grounded socket (220–240V).
• If in doubt, consult an electrician. - Do not change the plug without authorisation.

- Lubricating the belt
• <3 hours/week→ every 5 months
• 4–7 hours/week→every 2 months
• >7 hours/week→ every month
- Check by touch under the belt – if dry, lubricate.
- Application: stop the treadmill, unfold the belt, spray the centre and sides with silicone, start at 1 km/h and spread with your feet.
2. Cleaning
- Disconnect the power supply before cleaning.
• After training: wipe the console and housing with a damp cloth. - Do not use chemicals or spill liquids on the computer.
- Once a week: clean the mat under the treadmill.
• Storage: store in a dry place, with the power turned off and disconnected.
1. Belt tension
- If the belt slips: tighten the screws on both sides by half a turn.
• Excessive tension may damage the motor and rollers.
2. Belt misalignment correction
- Start the treadmill at low speed.
- If the belt shifts to the left → tighten the left screw or loosen the right one.
• If it moves to the right→, do the opposite. - Observe the changes after each adjustment.
Belt misalignment is not covered by the warranty – the user must correct it themselves.
3. Engine belt adjustment
- If the motor belt slips loosen the adjustment screw (to the left) until it stabilises.
- Clean the belt and pulley grooves regularly.
Common faults and solutions – treadmill section
| Problem | Cause | Solution |
| The treadmill does not work | a. No power | Plug into a power outlet |
| b. Safety key is not in place | Insert or replace the safety key | |
| c. Signal circuit is damaged | Check the controller and signal cable | |
| d. Switch in the OFF position | Switch to the "ON" position | |
| e. Blown fuse | Replace the fuse | |
| The treadmill belt does not run smoothly | a. Insufficient lubrication | Use silicone oil |
| b. Belt too tight | Adjust the belt tension | |
| The treadmill belt slips | a. Belt too loose | Adjust the belt tension |
| b. Motor belt too loose | Adjust the motor belt tension |
Console part – Meaning of error message codes
| Error code | Description | Solution |
| E1 | Communication error between the console and the controller | Check the communication cable – make sure it is properly connected and not damaged. Replace if necessary. |
| E3 | No connection to the motor | Check the motor cable and reconnect it. If you smell something burning – replace the controller. |
| No signal from the speed sensor | Check the speed sensor – make sure it is connected and working properly. Replace if necessary. | |
| E4 | Lift self-calibration error | Check the lift motor cables (sensor and power supply). After correction, press the "learn" button on the controller. |
| E5 | Overload protection | Excessive current – check the load, lubricate the track, check the motor and controller. Use the correct voltage. |
| E6 | Overvoltage protection | Check the power supply voltage (make sure it is not too low). Check the controller and motor cables – replace if damaged. |
WAŻNE INSTRUKCJE BEZPIECZEŃSTWA
o Distance: 1,00–99,00 km (standard 5,00)
o Kalorier: 1–999 kcal (standard 100)
OLULISED OHUTUSJUHISED
o Calories (0–999 kcal) / Pulsations (40–220 bpm)
o Temps (0:00–99:59 min) / Distance (0,00–99,99 km)
5. Distance (DISTANCE)
5. Distanza (DISTANCE)
o Viteză maximă: 12,0–24,0 km/h sau 7,5–15,0 mph (implicit 16,0)
DÔLEŽITÉ BEZPEČNOSTNÉ POKYNY
NAVODILA ZA TEKALNO POVRŠINO
Začnite
EN: The marking of the equipment with the crossed-out waste container symbol indicates that it is prohibited to place used electrical and electronic equipment with other waste. According to the WEEE Directive on the management of used electrical and electronic waste, separate disposal methods must be used for this type of equipment.
The user who intends to dispose of this product is obliged to take it to a collection point for used electrical and electronic equipment, thus contributing to reuse, recycling or recovery and thus to the protection of the environment. To do this, please contact the point from which the appliance was purchased or your local authority. Hazardous components contained in electronic equipment may cause long-term adverse effects on the environment, as well as harmful effects on human health.
-
The Seller, on behalf of the Guarantor, provides a guarantee in the territory of the Republic of Poland for a period of 24 months from the date of sale.
-
The guarantee will be honoured by the shop or service centre upon presentation by the customer:
- a legibly and correctly completed warranty card with the sales stamp and the seller's signature,
- a valid proof of purchase of the equipment with the date of sale / receipt, the goods claimed.
-
Any defects and damage discovered during the warranty period will be repaired free of charge within a maximum of 21 days from the date of delivery of the goods to the service.
-
In the case of the necessity to import parts, the repair period may be extended by the time necessary for their import, but not longer than 90 days.
-
The warranty does not cover:
- mechanical damage and defects caused by them,
- damages and defects resulting from improper use and storage,
- improper assembly and maintenance,
- damage and wear of components such as cables, straps, rubber parts, pedals, sponge grips, wheels, bearings, etc.
- The warranty is void in the event of:
- expiry date,
- self-repair,
- failure to observe the rules of correct operation.
-
Product returned for repair should be complete and clean. In the case of defects the service has the right to refuse acceptance for repair. If the product is delivered dirty, the service centre may refuse to accept it or clean it at the customer's expense with his written consent.
-
The warranty does not cover installation and maintenance work, which, according to the user manual, must be carried out by the user himself.
-
The guarantor also informs that it provides post-warranty service.
-
The goods should be protected for shipping.
-
In order to make use of the warranty, please follow the procedure on the website: https://serwis.abisal.pl/.
In case of non-conformity of the sold thing with the contract, the buyer is entitled by law to legal remedies from and at the expense of the seller. The guarantee does not affect such remedies.
THE EQUIPMENT IS NOT INTENDED FOR REHABILITATION AND THERAPY
NOTES ON THE COURSE OF REPAIRS
| Item | Date of notification | Date of provision | Course of repairs | Signature of the recipient (shop, owner) |
KARTA GWARANCYJNA
CONDITIONS DE GARANTIE:
HMS-FITNESS.COM

IMPORTER: ABISAL SP. Z O.O., ul. Pyskowicka 17, 41-807 Zabrze, Polska
DISTRIBUTOR: ABISTORE SPORT S.R.O, U Cihelny 230/3, 74801 Hlučín, Česká Republika

- A-2
- IMPORTANT SAFETY INSTRUCTIONS
- BASIC RULES OF USE
- PRECAUTIONS
- MEDICAL CONTRAINDICATIONS
- CHILDREN AND THE ENVIRONMENT
- ELECTRICAL SAFETY
- EARTHING
- Product Description
- Set components
- A-1
- INSTALLATION INSTRUCTIONS
- Step 1: Unpacking
- Step 2: Assembling the vertical posts
- Step 3: Mounting the console bracket
- Step 4: Mounting the console
- Step 5: Covers
- Step 6: Assembling the treadmill
- Step 7: Bottle holder and finishing touches
- General training tips
- Stretching
- Downward stretch
- Tendon stretch
- Calf and heel stretch
- Quadriceps stretch
- Sartorius muscle stretch (inner thigh)
- TREADMILL INSTRUCTIONS
- Start
- Modes and heart rate measurement
- Folding and unfolding the treadmill
- Folding:
- Unfolding:
- Moving the treadmill
- Console Panel – Function Description
- Safety instructions
- Description of Displays and Buttons
- Additional features
- FUNCTION BUTTONS
- PROGRAM button ("P")
- MODE button ("M")
- START/PAUSE button and "+ / -" on the handles
- STOP button
- Safety key
- PROGRAM DESCRIPTION
- QUICK START Starting a workout
- During exercise
- Pause and end
- TARGET COUNTDOWN MODE Mode selection
- Training progress
- PROGRAM MODE
- Program selection
- Time settings
- Programme sequence
- Displayed data
- USER MODE
- Time and speed settings
- FAT MODE (Body fat measurement)
- Mode selection
- Settings
- Measure
- Interpretation of the result
- CALCULATION FORMULA (for advanced users)
- FUNCTION DESCRIPTION
- ODO - Total time / distance
- Speed (SPEED)
- Pulse (PULSE)
- Time (TIME)
- Distance (DISTANCE)
- Calories (CALORIES)
- Semicircular speed indicator
- 400 m indicator
- Wheel diameters (engineering mode)
- 10–13. User data
- Audible signal (BUZZER)
- Mode 1 - Calibration
- Mode 2 – System information
- Key test
- Key numbers:
- Bluetooth connection with ANYRUN
- apps
- KINOMAP
- ZWIFT
- Programme description
- Ground
- Cleaning
- Belt tension
- Belt misalignment correction
- Engine belt adjustment
- WAŻNE INSTRUKCJE BEZPIECZEŃSTWA
- OLULISED OHUTUSJUHISED
- Distanza (DISTANCE)
- DÔLEŽITÉ BEZPEČNOSTNÉ POKYNY
- NAVODILA ZA TEKALNO POVRŠINO
- Začnite
- THE EQUIPMENT IS NOT INTENDED FOR REHABILITATION AND THERAPY
- KARTA GWARANCYJNA
- CONDITIONS DE GARANTIE:
Brand : HMS Premium
Model : BE5872N
Category : Treadmills