
AD 1356 - Kettle ADLER - Free user manual and instructions
Find the device manual for free AD 1356 ADLER in PDF.

 FR
FR
 AZ
AZ
 BG
BG
 CS
CS
 DA
DA
 DE
DE
 EL
EL
 EN
EN
 ES
ES
 ET
ET
 FI
FI
 HU
HU
 IT
IT
 KA
KA
 LT
LT
 LV
LV
 MK
MK
 NL
NL
 PL
PL
 PT
PT
 RO
RO
 RU
RU
 SK
SK
 SL
SL
 SQ
SQ
 SR
SR
 SV
SV
 UK
UK
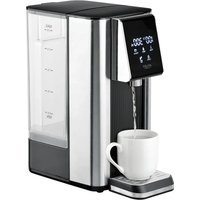
| Product type | Electric kettle / Water dispenser |
| Brand | Adler |
| Model | AD 1356 |
| Maximum capacity | 2.5 L |
| Minimum capacity | 0.5 L |
| Power supply | 220-240 V ~ 50/60 Hz |
| Power | 2200-2600 W |
| Standby consumption | 0.49 W | Temperature setting | Yes, via touch panel (includes 40°C for milk) |
| Water volume adjustment | Yes, via touch panel |
| Water filter included | Yes, replaceable cartridge |
| Filter change indicator | Yes |
| Descaling indicator | Yes |
| Auto shut-off | Yes (after dispensing selected quantity) |
| Dry boil protection | Yes (low water indicator) |
| Reset thermostat | Yes (manual reset) |
| Touch panel lock | Yes (LOCK button) |
| Removable drip tray | Yes |
| Cleaning | Wipe with damp cloth; periodic descaling with citric acid or vinegar |
| Spare parts available | Water filter (replacement cartridge) |
| Repairs | Authorized service center only |
| Usage | Indoor, domestic |
Frequently Asked Questions - AD 1356 ADLER
User questions about AD 1356 ADLER
0 question about this device. Answer the ones you know or ask your own.
Ask a new question about this device
Download the instructions for your Kettle in PDF format for free! Find your manual AD 1356 - ADLER and take your electronic device back in hand. On this page are published all the documents necessary for the use of your device. AD 1356 by ADLER.
USER MANUAL AD 1356 ADLER
GENERAL SAFETY CONDITIONS
IMPORTANT SAFETY INSTRUCTIONS FOR USE. READ CAREFULLY AND KEEP FOR FUTURE REFERENCE.
- Before using the device, read the instruction manual and follow the instructions contained therein. The manufacturer is not responsible for damage caused by using the device contrary to its intended use or improper operation.
- The device is for domestic use only. Do not use it for other purposes incompatible with its intended use.
- Connect the device only to a grounded outlet rated 220-240 V ~ 50/60 Hz. To increase safety, do not plug multiple electrical appliances into a single circuit at the same time.
- To provide additional protection, it is advisable to install a residual current device (RCD) with a rated residual current of not more than 30 mA in the electrical circuit. In this regard, consult a specialist electrician.
- Take special care when using the device when children are around. Do not allow children to play with the device, and do not allow children or anyone unfamiliar with the device to use it.
- WARNING: This equipment may be used by children over 8 years of age and persons with limited physical, sensory, or mental abilities, or persons without experience or familiarity with the equipment, if this is done under the supervision of a person responsible for their safety or if they have been given instructions on the safe use of the equipment and are aware of the dangers associated with its use. Children should not play with the equipment. Cleaning and maintenance of the equipment should not be performed by children unless they are over 8 years of age and these activities are performed under supervision.
- WARNING: Do not use the device if its housing is cracked.
- WARNING: Do not leave the device plugged into an outlet unattended.
- WARNING: Keep the device out of the reach of children.
- WARNING: Improper use of the device may result in injuries such as cuts, abrasions, or electric shock, among others.
- WARNING: Always remove the plug from the power outlet after use by holding the outlet with your hand. DO NOT pull on the power cord.
- WARNING: Do not move the unit while it is in use.
- Do not immerse the cord, plug, or entire unit in water or other liquid. Do not expose the unit to weather conditions (rain, sun, etc.) or use in high humidity conditions (bathrooms, humid motor homes).
- Periodically check the condition of the power cord. If the power cord is damaged, it should be replaced by a specialized repair facility to avoid danger.
- Do not use the device with a damaged power cord or if it has been dropped or damaged in any other way or is not working properly. Do not repair the device yourself, as there is a risk of electrocution. Return a damaged device to a competent service center for inspection or repair. All repairs may be made only by authorized service centers. Improper repair may cause serious danger.
- Place the device on a cool, stable, level surface, away from hot kitchen appliances such as an electric stove, gas burner, etc.
- Do not use the device near flammable materials.
- The power cord must not hang over the edge of the table or touch hot surfaces.
- This equipment is intended for domestic and similar use, such as: staff kitchen areas in stores, offices, and other working environments; farm rooms; by customers in hotels, motels, and other residential environments of this type; and in bed and breakfast rooms.
- The device is designed for indoor use.
- Always take special care when using it.
- The device must not be placed in a cabinet when in use.
- Do not fill the unit above the MAX or below the MIN, as this may cause damage to the unit.
- Do not turn on the appliance without water, as this may damage the heating elements.
- Do not use the appliance with the lid open.
- Periodically, the device should be descaled using the means designed for this purpose. Using the device with a stoned heater will damage the device and void the warranty.
- Do not use aggressive detergents to wash the housing of the device, which may damage it or remove the markings on it.
- The device is not designed to work with external timers or a separate remote control system.
- Do not wash the device directly in water, only wipe it with a dry cloth.
- Each time you pick up the device, remove the plug from the power outlet.
PRODUCT DESCRIPTION (FIGURE A):
- Housing
- Water tank
- Water tank cover
- Touch panel
- Spout/ faucet
- Drip tray
- Water filter container
- Water filter
- Drain plug
- Thermostat reset hole
- Reset key
DESCRIPTION OF THE CONTROL PANEL (FIGURE B):
- LOCK - lock button
- TEMP - temperature button 3.VOLUME - volume button 4.MILK - to prepare water at 40°C for powdered milk
- START/STOP - starts and stops water dispensing
- "Lack of water" - indicator of lack of water
- "Change filter" - filter replacement indicator
- "Descale" - indicator of the need to descale
- Temperature indicator - currently selected value
- Volume indicator - currently selected amount of water
Before first use:
- Remove any packing materials from the unit and check that the unit is whole and undamaged.
- Using a damp cloth, wipe all external parts of the device.
FILTER IN THE DEVICE
After opening the package, black dust may appear on the filter - this is normal. Rinse the filter thoroughly under running water. Holding the top of the cartridge, immerse the filter vertically in a pan of water so that the water level covers the entire filter. Gently shake and rotate the filter to remove air bubbles. Let the filter sit in the water for about 15 minutes, then rinse under the tap once more.
INSTALLING THE FILTER IN THE DEVICE
Open the cover of the water tank (3). Place the filter (8) in the special holder inside the tank - push it firmly until it is firmly seated.
Fill the tank with water.
NOTE!
The first 2 tanks of filtered water may contain residues of activated carbon - not suitable for drinking. Water from the first two cycles should be poured out.
After that, the water will be clean and ready for consumption.
The buttons on the touch panel (4) should be touched only with fingertips, touching with fingernails may damage the panel !
METHOD OF USE
Open the water tank cover (3) and fill the tank (2) with clean water (not exceeding the MAX level). Plug the power cord plug into a 220-240V ~ 50/60Hz grounded power outlet. Place the cup on the drip tray (6) under the spout/faucet (5). Press the LOCK button for 3-5 seconds to unlock the panel.
Select the desired temperature by pressing the TEMP button (2). Select the desired amount of water by pressing the VOLUME button (3). Press the START/STOP button (5), water will start flowing out of the spout (5). The machine will automatically stop pouring when the selected amount is reached.
NOTE!
Do not touch the boiling water and steam to prevent burns.
If only a small amount of water is poured, the desired temperature may vary. The difference may be + - 15%.
If the device has not been used for a long time, deposits may form. In this case, make 100 ml of water at 100°C to rinse the device.
The amount of set water may vary by ±15%.
The device remembers the last setting before it is unplugged.
MANUAL RESETTING OF THE THERMOSTAT
The unit is equipped with a reset thermostat to restore the heating function
in case of unexpected tripping. If the manual thermostat shuts down, remove the reset key (12) located under the base of the unit, then insert it into the thermostat reset hole (10).
REMOVING WATER FROM THE DRIP TRAY
When the drip tray (6) is full, grasp and stabilize the appliance with one hand, and with the other hand slightly lift the tray to remove it, empty the tray and put it back into its original place using enough force.
FILTER CHANGE
When the message "Change filter" (7) appears on the display, it means that the filter needs to be changed (after about 150 l). Open the tank lid (3) and remove the entire filter basket (7 and 8). Remove the used cartridge and install the new one according to the preparation and installation steps. After replacement, press the LOCK and START/STOP buttons (1 and 5) simultaneously for about 3-5 seconds, and then the unit will beep 3 times. The message "Change filter" (7) will be turned off and the filter life counter will be reset.
CLEANING AND MAINTENANCE
Always turn off the water dispenser, unplug it from the power supply and let it cool completely before cleaning. Do not immerse the device in any liquid to avoid damage. Do not use any chemicals, metal, wood or abrasive detergents to clean the housing of the device. Always use a damp cloth.
After cleaning the device, open the drain plug (11) to remove dirt. After opening, tighten the plug.
Note: If you find water leaking from underneath, tighten the drain plug (11).
Always handle the device carefully, do not put it close to the edge of the table and countertop, in order to prevent deformation or damage in case of accidental fall from the table.
Scale deposited inside the appliance should be removed regularly. This activity is not subject to warranty service. Lack of regular descaling will lead to damage to the device and will void the warranty.
After about 10 hours of operation of the appliance, the descaling light "Descale" (8) will light up. The cleaning process should then be carried out according to the following steps:
Preparation of the solution:
Pour about 80 g of citric acid or pour 100 ml of vinegar into the water tank. Then add water to half of the tank (2) and mix. Press and hold the volume setting button "VOLUME" (3) for 3 seconds to start the descaling mode. Let the machine run until the tank (2) is completely empty. Prepare the solution again (80 g of citric acid or 100 ml of vinegar + water to half of the tank).
Set the temperature to 45°C and the volume to 200 ml. Leave the device for about 2 hours for the solution to work.
After two hours, repeat step 1 - start descaling mode and empty the tank (2). Fill the reservoir with clean water to the full and perform step 1 (rinse) again. Once again fill the tank (2) with clean water and repeat step 1 to rinse the device thoroughly.
When all steps are completed, the device is clean and ready for further use.
TECHNICAL SPECIFICATIONS:
Capacity max 2.5L min: 0.5L
Voltage: 220-240V ~ 50/60 Hz
Power: 2200-2600W
Power consumption of the device in any state where only the status display works - 0.49W
For the sake of the environment. Information about waste electrical and electronic equipment In accordance with Article 13(1) and (2) of the Law of September 11, 2015 on waste electrical and electronic equipment, we inform you about the proper handling of waste electrical and electronic equipment:
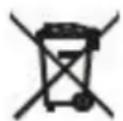
- It is forbidden to place waste electrical and electronic equipment together with other waste - this is confirmed by marking in the form of a "crossed out basket", ordering selective collection of this type of waste.
- Electrical and electronic equipment may contain hazardous substances, mixtures and components that, when released into the environment, can cause serious danger to the health and life of humans and living organisms. They can lead to numerous health ailments, such as vision, hearing and speech disorders, and can also damage the kidneys, liver and heart, and cause skin diseases. Harmful substances can also have adverse effects on the respiratory and reproductive systems and lead to cancerous changes. Consumption of plants growing on contaminated soils, and products made from them, can risk the aforementioned health effects.
- Waste electrical and electronic equipment should be handed over only to authorized collection points, a list of which should be included on each Municipality's website.
- The household plays an important role in contributing to the reuse and recovery, including recycling, of waste equipment. It also plays a key role in the waste electrical and electronic equipment management system due to the possibility of direct delivery to authorized collection points and the elimination of undesirable social habits resulting in leaving waste equipment in places not intended for it.
In addition, donate waste electrical and electronic equipment at the point of delivery. A distributor, when supplying equipment intended for households to a purchaser, is obliged to take back used household equipment free of charge at the place of delivery of such equipment, provided the used equipment is of the same type and performed the same functions as the supplied equipment.
Cardboard packaging and polyethylene (PE) bags should be placed in the appropriate containers for separate collection of municipal waste according to their description. If there are batteries in the equipment, remove them and separately dispose of them at a collection and storage facility.
Do not dispose of the device in the municipal waste container!!!
Service: If you wish to purchase spare parts or report any complaints, please contact directly the seller who issued the receipt.
PRODUCT DESCRIPTION (FIGURE A):
Power: 2200-2600W
MANUAL RESET THERMOSTAT
The device is equipped with a reset thermostat that allows restoring the heating function in case of unexpected shutdown. If the thermostat trips manually, remove the reset key (12) located under the base of the device, and then insert it into the thermostat reset opening (10).
REMOVING WATER FROM THE DRIP TRAY
When the drip tray (6) is full, with one hand hold and stabilize the device, and with the other hand slightly lift the tray to remove it, empty the tray, and, applying sufficient force, place it back in its original position.
FILTER REPLACEMENT
When the display shows the message "Replace filter" (7), it indicates that the filter needs to be replaced (after approximately 150 liters). Open the tank lid (3) and remove the entire filter basket (7 and 8). Remove the used cartridge and install the new one according to the preparation and installation steps. After replacement, simultaneously press the LOCK and START/STOP buttons (1 and 5) for about 3-5 seconds. The device will beep 3 times. The "Replace filter" (7) message will be cleared, and the filter operating time counter will be reset.
CLEANING AND MAINTENANCE
Before cleaning, always turn off the water dispenser, disconnect it from the power supply, and allow it to cool completely. To avoid damage, do not immerse the dispenser in any liquid. Do not use any chemicals, metal, wooden, or abrasive cleaning agents to clean the dispenser body. Always use a damp cloth.
After cleaning the device, open the drain plug (11) to remove dirt. After opening, tighten the plug.
After cleaning, open the drain plug (11) to remove debris. After opening, tighten the plug.
Piezime: Pull the drain plug (11) if water leakage is detected from the bottom.
GENERAL SAFETY CONDITIONS
IMPORTANT SAFETY INSTRUCTIONS FOR USE - READ CAREFULLY AND KEEP FOR FUTURE USE
Before first use:
1. Remove the packaging material from the device and make sure that the device is not damaged. 2. Wipe all external parts with a damp cloth.
FILTER IN THE DEVICE
After opening the filter, it may appear black - this is normal. Rinse the filter thoroughly under running water. Hold the top part of the cartridge, immerse the filter vertically in a pot of water so that the water level completely covers the filter. Gently shake and turn the filter to remove air bubbles.
Leave the filter in water for about 15 minutes, then rinse it once more under the tap.
INSTALLING THE FILTER IN THE DEVICE
Open the lid of the water reservoir (3). Place the filter (8) in the special holder inside the tank - press it firmly until it stops. Fill the reservoir with water.
ATTENTION!
The first 2 reservoirs of filtered water may contain residues of activated carbon - they are not suitable for drinking.
The water from the first two cycles should be poured out.
After this time, the water will be clean and ready for consumption.
Do not touch the sensor panel (4) with anything other than your fingertips; touching it with other objects may damage the panel!
INSTRUCTIONS FOR USE
Open the water reservoir lid (3) and fill the reservoir (2) with clean water (do not exceed the MAX level). Connect the power cord to a grounded wall outlet of 220-240 V ~50/60 Hz. Place the drip tray (6) under the spout/faucet (5). Press the LOCK button for 3-5 seconds to unlock the panel.
Select the desired temperature by pressing the TEMP button (2). Select the desired water volume by pressing the VOLUME button (3). Press the START/STOP button (5); water will begin to flow from the spout (5). The device will automatically stop dispensing water when the selected volume is reached.
WARNING!
Do not touch boiling water or steam to avoid burns.
If you dispense a small amount of water, the desired temperature may differ. The difference may be up to ±15%.
If the device has not been used for a long time, deposits may form. In this case, prepare 100 ml of water at 100 °C for rinsing the device.
The amount of dispensed water may vary by ±15%.
The device remembers the last setting before disconnecting from the power supply.
MANUAL THERMOSTAT RESET
The device is equipped with a thermostat with a reset function that allows restoring the heating function in case of accidental activation. If the manual thermostat activates, press the reset button (12), located under the base of the device, and then insert it into the thermostat reset hole (10).
DRAINING WATER FROM THE DRIP TRAY
When the drip tray (6) is full, hold the device with one hand to stabilize it, and with the other hand lift the tray by its handle to remove it. Empty the tray and return it to its original position, applying sufficient force.
REPLACING THE FILTER
When the "Replace filter" (7) message appears, it means the filter needs to be replaced (approximately every 150 liters). Open the tank lid (3) and remove the entire filter basket (7 and 8). Remove the used cartridge and install a new one following the installation steps. After replacement, press the LOCK and START/STOP buttons (1 and 5) for about 3-5 seconds. After this, the device will emit two beeps.
The "Replace filter" (7) message will turn off, and the filter service life counter will reset.
CLEANING AND MAINTENANCE
Before cleaning, always unplug the dispenser, disconnect it from the power supply, and let it cool completely. To avoid damage, do not immerse the dispenser in liquids. Do not use chemical substances, metal, wood, or abrasive cleaning agents to clean the dispenser housing. Always use a damp cloth.
After cleaning the device, open the drain plug (11) to remove dirt. After opening, close the plug.
Note: Close the drain plug (11) if you notice that water is leaking from under it.
Always handle the device with care, do not place it near the edge of a table or countertop to prevent deformation or damage if it accidentally falls off the table.
It is necessary to regularly remove limescale deposits inside the device. This work is not covered by warranty service. Lack of regular cleaning from scale can lead to device damage and void the warranty.
After the device has operated for 100 hours, the "Descale" (8) indicator will light up. Then it is necessary to perform the descaling process according to the following steps:
Prepare the solution:
Pour approximately 80 g of citric acid or 100 ml of vinegar into the water reservoir. Then add water to half the reservoir (2) and mix. Press and hold the "VOLUME" (3) button for 3 seconds to start the descaling mode. Let the device run until the reservoir (2) is completely empty. Prepare the solution again (80 g citric acid or 100 ml vinegar + water to half the reservoir).
Set the temperature to 45°C and the volume to 200 ml. Leave the device for about 2 hours to let the solution work. After two hours, repeat steps 1-3 to start the descaling mode and empty the reservoir (2). Fill the reservoir to the brim with clean water and repeat step 1 (rinse). Again fill the reservoir (2) with clean water and repeat step 1 to thoroughly rinse the device.
After completing all steps, the device will be clean and ready for further use.
TECHNICAL DATA:
Capacity max: 2.5 L; min: 0.5 L
Voltage: 220-240V ~ 50/60 Hz
Power: 2200-2600 BTU
Power consumption of the device in standby mode when only the status indicator is on: 0.49 W
Information on waste electrical and electronic equipment disposal. Information on the disposal of waste electrical and electronic equipment in accordance with Article 13 (1) and (2) of the Law on Waste Electrical and Electronic Equipment of 11 August 2015. The manufacturer is obliged to inform you about the proper handling of waste electrical and electronic equipment.
- It is forbidden to dispose of waste electrical and electronic equipment together with household waste. This is confirmed by the symbol of a crossed-out wheeled bin, which requires separate collection of this type of waste.
- Electrical and electronic equipment may contain hazardous substances that can pose a serious threat to human health and life. They can lead to a number of health problems, such as impaired vision, hearing and speech, and can also damage substances and have a negative impact on the respiratory system and lead to cancer.
The use of devices operating on contaminated soils and products derived from them can lead to the above-mentioned health consequences.
- Waste electrical and electronic equipment should be handed over only to authorized collection points, the list of which should be published on the website of each municipality.
- Households play a key role in promoting reuse and recovery, including recycling of used equipment. They also play a key role in the waste electrical and electronic equipment management system, thanks to the possibility of direct contact with authorized collection points and the elimination of negative social consequences resulting from leaving used equipment in places not intended for this purpose.
Return the used electrical and electronic equipment to the place of purchase. The distributor who supplied the equipment to the buyer for use in private households is obliged to accept the waste equipment at the place of purchase of this equipment, provided that the used equipment is of the same type and performs the same functions as the supplied equipment.
Cardboard packaging and plastic (PE) bags should be placed in the appropriate containers and separately from household waste in accordance with their description. If the device has batteries, they must be removed and disposed of separately at the collection and storage point. Do not throw the device into the household waste container!!!
Service: If the device contains spare parts that are subject to wear, please contact the dealer who sold you the device directly.
Useful information (EN)
IMPORTANT SAFETY INSTRUCTIONS SAFETY INSTRUCTIONS FOR USE READ CAREFULLY AND KEEP FOR FUTURE REFERENCE
PRODUCT DESCRIPTION (FIGURE A):
- Housing
- Water reservoir
- Water reservoir lid
- Touch panel
- Spout/faucet
- Drip tray
- Water filter
- Water filter
- Drain plug
- Thermostat reset button
- Reset key
DESCRIPTION OF THE CONTROL PANEL (FIGURE B):
FILTER IN THE APPLIANCE
MANUALLY RESETTING THE THERMOSTAT
IMPORTANT SAFETY INSTRUCTIONS FOR USE
READ CAREFULLY AND SAVE FOR FUTURE USE
This appliance can be used by children aged from 8 years and above and persons with reduced physical, sensory or mental capabilities or lack of experience and knowledge if they have been given supervision or instruction concerning use of the appliance in a safe way and understand the hazards involved. Children shall not play with the appliance. Cleaning and user maintenance shall not be made by children without supervision.
- WARNING: Do not use the appliance if it is damaged or malfunctioning.
- WARNING: Do not leave the appliance plugged into the electrical outlet unattended.
- WARNING: Keep the appliance out of reach of children.
- WARNING: Improper use of the appliance may cause injuries such as burns, electric shock, or fire.
- WARNING: Always unplug the appliance from the electrical outlet after use, by pulling the plug, not the cord. Do not pull the cord to disconnect.
- WARNING: Do not move the appliance while it is operating.
- Do not immerse the cord, plug, or appliance in water or any other liquid. Do not expose the appliance to atmospheric conditions (rain, snow, etc.) and do not use it in humid environments (bathrooms, damp garages).
- Always check the power cord for damage. If the power cord is damaged, it must be replaced by a qualified service technician to avoid danger.
- Do not use the appliance with a damaged power cord or if it has been dropped or damaged in any way or is not working properly. Do not attempt to repair the appliance yourself, as there is a risk of electric shock. Take the damaged appliance to a qualified service center for inspection or repair. All repairs must be carried out only by authorized service centers. Improper repair may lead to serious danger.
- Place the appliance on a dry, stable, and level surface, away from heat sources such as electric stoves,
gas burners, etc.
- Do not use the appliance near flammable materials.
- The power cord must not hang over the edge of the table or come into contact with hot surfaces.
- This appliance is intended for household and similar use, such as: staff kitchens in shops, offices, and other workplaces; farmhouses; by clients in hotels, motels, and other residential environments; bed and breakfast establishments.
- The appliance is intended for indoor use only.
- Always follow the instructions for use to avoid potential risks.
- The appliance must not be placed in a cabinet while in use.
- Do not fill the appliance above the MAX level or below the MIN level, as this may cause damage to the appliance.
- Do not switch on the appliance without water, as this may damage the heating elements.
- Do not use the appliance with an open lid.
- Always descale the appliance regularly using the recommended descaling agent to remove limescale. Using the appliance with limescale buildup will damage the appliance and void the warranty.
- Do not use abrasive cleaning agents to clean the appliance body, as they may damage it and remove the markings on it. 28. The appliance is not intended for use with an external timer or remote control.
- He might direct water into the boiler, but only through dry steam.
- Always unplug the device from the electrical outlet before cleaning.
- Water reservoir
- Water reservoir cap 4. Sensor panel 5. Spout/Nozzle
- Control panel
- Container for water filter 8. Water filter 9. Drain hole
- Thermostat reset button
- Reset key
DESCRIPTION OF CONTROLS (FIG. B):
- LOCK - button for locking
- TEMP - button for temperature 3. VOLUME - button for sound level 4. MILK - for preparing water at 40°C for milk powder
- START/STOP - start and stop water dispensing 6. "Water level" - indicator for water level 7. "Filter change" - indicator for filter change
- "Descaling" - indicator for need to descale 9. Temperature indicator - current selected value 10. Indicator - current selected water volume
Important: Use only with the supplied material.
- Check the appliance and the power cord for damage before use. 1. If the cord is damaged, do not use the appliance. 2. Remove all packaging parts from the appliance.
FILTER INSTALLATION
The filter packaging may be dusty; this is normal. Remove the filter from the bag. Hold the top part of the filter vertically in the water, so that the water level covers the entire filter. Carefully squeeze the filter several times to remove trapped air. Leave the filter in the water for about 15 minutes, then remove it and shake off excess water.
INSTALLING THE FILTER IN THE DEVICE
Open the water reservoir lid (3). Place the filter (8) into the special holder inside the reservoir.
- Press it down firmly until it clicks into place. Fill the water reservoir with water.
WARNING!
Water in the reservoir with a filter may contain active residues - not suitable for drinking.
The first batch of water must be discarded.
After that, the water will be clean and ready for drinking.
Touch the sensor panel (4) only with the tips of your fingers; touching it with nails may damage it!
METHOD OF USE
Open the water reservoir lid (3) and fill the reservoir (2) with clean water (do not exceed the MAX level). Plug the power cord into a grounded outlet of 220-240V ~50/60Hz. Place the cup on the drip tray (6) under the spout (5). Press the LOCK button for 3-5 seconds to unlock the panel.
Select the desired temperature by pressing the TEMP button (2). Select the desired water volume by pressing the VOLUME button (3). Press the START/STOP button (5); water will start flowing from the spout (5). The device will automatically stop dispensing when the selected volume is reached.
The door closes tightly to prevent evaporation.
If only a small amount of water is filled, the iron temperature may vary. The difference may be ±15%. If the iron has not been used for a long time, limescale may form. In this case, fill 100 ml of water at a temperature of 100°C to clean the iron.
The amount of water in the tank may vary by ±15%.
The iron remembers the last setting before it was disconnected from the power supply.
MANUAL RESET OF THE THERMOSTAT
The iron is equipped with a thermostat reset button, which allows restoring the heating function in case of accidental activation. If the thermostat is activated, press the reset button (12), located at the base of the iron, and then place it in the thermostat reset opening (10).
DRAINING WATER FROM THE TANK FOR IRONING
When the water tank for ironing (6) is full, hold and stabilize the iron with one hand, while with the other hand gently lift the tank to remove it. Empty the tank and place it back in its original position, using sufficient force.
REPLACING THE FILTER
When the display shows the message "Replace filter" (7), this means that the filter needs to be replaced (after approximately 150 liters). Open the reservoir cap (3) and remove the old filter cartridge (7 and 8). Remove the used cartridge and install the new one according to the preparation and installation steps. After filling, press the LOCK (locking) and START/STOP buttons simultaneously (1 and 5) for approximately 3-5 seconds. After that, the iron will emit an audible signal. The message "Replace filter" (7) will be cleared and the filter counter will be reset.
CLEANING THE IRON
First unplug the iron from the power supply, unplug it from the electrical outlet and let it cool completely before cleaning it. Do not immerse the iron in any liquid to avoid damage. Do not use any chemicals, metal, or abrasive cleaners for cleaning the iron body. Use only a damp cloth. After cleaning the iron, open the filling cap (11) to remove any blockages. After opening, close the cap.
Note: Close the filling cap (11) if it is installed, to prevent water from leaking out.
Handle the iron carefully, do not place it close to the edge of a table or shelf to prevent it from falling or being damaged if it accidentally falls off the surface.
The appliance must be descaled regularly. This activity is not covered by the warranty. Regular descaling will prevent damage to the appliance and will lead to proper operation.
After the appliance has been working for about 10 hours, the indicator light for descaling the boiler "Descale" (8) lights up. After this cleaning process, it must be carried out according to the following steps:
Preparation of the solution:
Dissolve approximately 80 g of citric acid or pour 100 ml of vinegar into the water reservoir. Then add water up to half of the reservoir (2) and stir. Press and hold the button for setting the "VOLUME" menu (3) for 3 seconds to start the descaling program. Leave the appliance working until the reservoir (2) is completely empty. Prepare another solution (80 g of citric acid or 100 ml of vinegar + water up to half of the reservoir).
Set the temperature to 45°C and the volume to 200 ml. Leave the appliance for about 2 hours, so that the solution can act.
After two hours, repeat step 1 - start the descaling program and empty the reservoir (2).
Fill the reservoir with clean water and repeat step 1 (rinsing). Again, fill the reservoir (2) with clean water and repeat step 1, to rinse the appliance well.
When all steps are completed, the appliance is clean and ready for normal use.
TECHNICAL DATA:
Capacity max. 2.5 L. Min.: 0.5 L
- The appliance must be connected to a grounded outlet of 220-240V ~ 50/60Hz. To increase safety, do not connect multiple electrical appliances to the same circuit at the same time.
- For additional protection, it is recommended to install a residual current device (RCD) in the electrical circuit with a rated residual current not exceeding 30 mA. For this, contact a qualified electrician.
- Be extremely careful when using the appliance when children are nearby. Do not
allow children to play with the appliance. Do not allow children or anyone unfamiliar with the appliance to use it.
The manufacturer is not responsible for any damage caused by misuse or improper operation of the appliance.
- This appliance is intended for household use only. Do not use it for any other purpose other than its intended use. The appliance must be connected only to a grounded outlet of 220-240V ~ 50/60Hz. To increase safety during operation, do not connect multiple electrical appliances to one circuit at the same time.
- To ensure additional protection, it is recommended to install a residual current device (RCD) in the electrical circuit with a rated residual current not exceeding 30 mA. For this, consult a qualified electrician.
- Be extremely careful when using the appliance when children are nearby. Do not allow children to play with the appliance. Do not allow children or anyone unfamiliar with the appliance to use it.
- WARNING: This appliance can be used by children aged 8 years and above and persons with reduced physical, sensory or mental capabilities or lack of experience and knowledge if they have been given supervision or instruction concerning use of the appliance in a safe way and understand the hazards involved. Children shall not play with the appliance. Cleaning and user maintenance shall not be made by children unless they are older than 8 and supervised.
- WARNING: Do not use the appliance if it is damaged.
- WARNING: Do not leave the appliance plugged in without supervision.
- WARNING: Keep the appliance away from the reach of children.
- WARNING: Improper use of the appliance may result in injuries such as burns, cuts, or electric shock.
- WARNING: Always unplug the appliance from the socket after use by pulling the plug, not the cord. Do not pull the cord to unplug.
- WARNING: Do not place the appliance near heat sources.
- Do not immerse the cable, plug, or appliance in water or other liquids. Do not expose the appliance to weather conditions (rain, sun, etc.) and do not use it in high humidity conditions (bathrooms, damp rooms).
- Regularly check the power cord for damage. If the power cord is damaged, it must be replaced by a qualified service to avoid danger.
- Do not use the appliance with a damaged power cord or if the appliance is damaged in any way, or if it is not working properly. Do not attempt to repair the appliance yourself, as this may result in electric shock. If the appliance is damaged, return it to an authorized service center for inspection or repair. All repairs must be carried out only by authorized service centers. Improper repair may pose a serious danger.
- Place the appliance on a flat, stable, level surface, away from hot appliances such as electric stoves, gas burners, etc.
- Do not use the appliance near flammable materials.
- The power cord must not hang over the edge of the work surface or touch hot surfaces.
- This appliance is intended for household and similar use, such as: staff kitchens in shops, offices, and other working environments, farmhouses, by clients in hotels, motels, and other residential environments, as well as in bed and breakfast accommodations.
- The appliance is intended for indoor use.
- Always be careful when using the appliance.
- The appliance must not be placed in a cabinet while in use.
- Do not operate the appliance above the MAX level or below the MIN level, as
This may damage the appliance.
- Do not switch on the appliance without water, as this may damage the heating elements.
- Users should use the device with the filter. 26. The device is intended for use with the filter for the specified products. Using the device with a damaged filter element will void the warranty.
- Do not use abrasive detergents for cleaning the device housing; they may damage or remove any markings.
- The device is not intended for use with hard water or a special system for water softening.
- Do not immerse the device directly in water; only clean it with a damp cloth.
- When you turn the device, remove the plug from the socket.
DESCRIPTION OF THE APPLIANCE (FIGURE A):
1. Lid 2. Water reservoir 3. Reservoir lid 4. Control panel 5. Spout/faucet 6. Scale remover 7. Water filter container 8. Water filter 9. Outlet for steam 10. Thermostat reset opening 11. Reset button
DESCRIPTION OF THE CONTROL PANEL (FIGURE B):
1. ON/OFF - button for switching on/off 2. TEMP - button for temperature 3. SOUND - button for sound level 4. MILK - for preparing water at 40°C for milk in a bottle 5. START/STOP - for starting and stopping the device 6. "No water" - indicator for lack of water 7. "Filter change" - indicator for filter replacement 8. "Descaling" - indicator for descaling 9. Temperature indicator - momentarily selected value 10. Volume indicator - momentarily selected amount of water
Before first use:
- Remove all packaging material from the device and check that the device is undamaged and unbroken.
- Use a damp cloth to wipe the outer surfaces of the device.
FILTER IN THE DEVICE
When you open the packaging, you may notice black particles on the filter - this is normal. Rinse the filter thoroughly under running water. Remove the top part of the cartridge, then place the filter vertically in a container with water until the water does not cover the entire filter. Gently press and rotate the filter to remove air bubbles. Leave the filter to soak in water for about 15 minutes, then rinse again under running water.
INSTALLING THE FILTERS IN THE DEVICE
Open the cap of the water reservoir (3). Place the funnel (8) into the special opening of the reservoir - simply attach it so that the funnel does not mix. Fill the reservoir with water.
WARNING!
The two reservoirs with chlorinated water may contain residual active chlorine and are not suitable for drinking.
The water from the two tanks must be drained.
After this, the water will be clean and ready for use.
The lid of the drip tray (4) must be pressed only with the edges of the fingers, pressing with the palm may damage the tray!
HOW TO USE
Open the cap of the water reservoir (3) and fill the reservoir (2) with clean water (do not exceed the MAX level). Plug the power cord into a grounded outlet 220-240V ~50/60Hz. Place the cup under the drip spout (6) of the pump/valve (5). Press the LOCK button for 3-5 seconds to unlock the device.
Select the desired temperature by pressing the TEMP button (2). Select the desired water volume by pressing the VOLUME button (3). Press the START/STOP button (5), water will start flowing from the spout (5).
The machine will automatically stop when the selected volume is reached.
WARNING!
Do not add hot water or steam to stop the flow.
If only a small amount of water is used, the dispensed temperature may vary by +/- 15%.
If the device is not used for a long time, scale may form. If this happens, run 100 ml of water at 100°C to descale the device.
The water volume may vary by +/- 15%.
The device is not intended for use by children.
RESETTING THE THERMOSTAT
The reset is performed with the thermostat reset button, which allows you to return the heating function
in case of accidental activation. If the thermostat is reset, the reset button (12) is pressed with a pointed object and held in the reset opening of the thermostat (10).
DRAINING WATER FROM THE DRIP TRAY
When the drip tray (6) is full, hold it with one hand and stabilize the appliance, and with the other hand pull the tray out, empty it, and put it back in its original position with appropriate force.
REPLACING THE FILTER
When the display shows the message "Replace filter" (7), this means that the filter needs to be replaced (after approximately 150 liters). Open the reservoir cap (3) and remove the entire assembly with the filter (7 and 8). Remove the used filter and install a new one. Check for leaks and close. After replacement, press the LOCK and START/STOP buttons (1 and 5) simultaneously for 3-5 seconds, and then the device will emit a sound signal. The message "Replace filter" (7) will disappear and the filter replacement time counter will be reset.
CLEANING AND MAINTENANCE
Always unplug the water dispenser, disconnect it from the power supply, and let it cool down before cleaning. Do not immerse the device in water to avoid damage. Do not use chemicals, metal, wooden, or abrasive detergents to clean the device housing. Always use a soft cloth.
After cleaning the device, open the drain plug (11) to remove all residues. After opening, close the plug.
Note: If water leaks from the bottom, close the drain plug (11).
Always handle the device with care, do not place it near heat sources or work surfaces to
prevent deformation or damage in case of accidental contact with heat.
The built-in filter in the device must be regularly replaced. This is not covered by the warranty. Improper replacement of the filter will damage the device and void the warranty.
Approximately 10 hours of work, the descaling lamp will turn off (8) to the light. The process of cleaning must be performed according to the following steps:
Preparation of the solution:
Pour approximately 80 g of citric acid into 100 ml of water into the water reservoir. Then add water up to half of the reservoir (2) and stir. Attach it and hold it to the “WATER” (3) for 3 seconds to activate the descaling process. Leave the appliance to work until the reservoir (2) is completely empty.
Prepare the solution again (80 g of citric acid into 100 ml of water + water up to half of the reservoir).
Set the temperature to 45°C and the volume to 200 ml. Leave it for approximately 2 hours for the solution to act.
After an hour, repeat step 1 - turn on the descaling mode and empty the reservoir (2).
Fill the reservoir completely with clean water and repeat step 1 (rinsing). Fill the reservoir (2) again with clean water and repeat step 1 to rinse it thoroughly.
After all steps are completed, the device is clean and ready for normal use.
TECHNICAL DATA:
Maximum capacity 2.5L, minimum: 0.5L
Voltage: 220-240V ~ 50/60Hz
Power: 2200-2600W
Power consumption of the device in any state in which it is active, only shown on the status - 0.49 W
Protection of the environment. Information on disposal of electrical and electronic equipment. According to Directive 13, paragraphs 1 and 2 of the Law of 11 September 2015 on disposal of electrical and electronic equipment, we inform you about the correct handling of waste electrical and electronic equipment:
- Collection and disposal of used electrical and electronic equipment together with other waste - this is prohibited by the symbol in the form of a "crossed-out wheelie bin", which requires separate collection of this type of waste.
- Electrical and electronic devices may contain hazardous substances, mixtures, and components that, if released into the living environment, can pose a serious threat to the health and life of people and living organisms. They can lead to various health problems, such as poisoning and intoxication, dryness and irritation. They can also damage the kidneys, liver, and spleen and cause chronic diseases. These substances, in turn, can negatively affect the respiratory and reproductive systems and lead to cancer. Consumption of plants that grow in contaminated soil and products made from them may pose a risk to human health.
- The used electrical and electronic equipment must be handed over only to authorized collection points. The list should be provided on the website and updated regularly.
- Households play a key role in contributing to the reuse and recovery of materials, including recycling, of used equipment. They also play a key role in the waste management system for used electrical and electronic equipment, enabling the proper transfer and disposal of waste to authorized collection points and the disposal of hazardous substances that result from the composition of waste equipment at unauthorized locations.
The device is intended for household use and for similar applications. When using the device for household purposes, follow the instructions for household use, provided the device is used in accordance with its intended purpose.
The cardboard packaging and the accompanying documentation (PE) must be disposed of in the appropriate containers for selective collection of household waste, as is customary. Since the device contains batteries, they must be removed and disposed of at a special collection point for batteries.
Do not dispose of the device in the household waste container!!
If you wish to purchase spare parts or carry any type of blade, you can contact the seller directly or the manufacturer.
User manual (HR)
GENERAL SAFETY CONDITIONS
IMPORTANT SAFETY INSTRUCTIONS
READ CAREFULLY AND SAVE FOR FUTURE REFERENCE
- Before using the device, read the instructions for use and follow them.
The manufacturer is not responsible for any damage caused by misuse or
The installed power may vary by +/- 15%
The device switches off automatically when the plug is disconnected from the power source.
MANUAL THERMOSTAT
The device is equipped with a manual thermostat with a dial, which allows you to restore the heating function.
In case of unexpected operation, if the thermostat is faulty, turn the dial (12) to the base position and insert it into the thermostat opening (10).
When the device is full, hold it with one hand and press the lid with the other hand to remove it, then turn the device upside down and pour out the contents.
REPLACING THE FILTER
When the display shows "Replace filter" (7), it means the filter needs to be replaced (approximately every 150 L). Open the reservoir lid (3) and rinse out the entire container with the filter (7 and 8). Rinse the used cartridge and install a new one according to the preparation and assembly steps. After replacement, press the LOCK and START/STOP buttons (1 and 5) simultaneously for about 3-5 seconds, after which a sound signal will be emitted. The "Replace filter" (7) message will disappear, and the filter usage time will be reset.
CLEANING AND MAINTENANCE
Before cleaning the device, unplug it from the power supply and let it cool completely. Do not immerse the device in water to avoid damage. Do not use chemical reagents, metal, wooden, or abrasive cleaning agents to clean the device body. Use only a damp cloth.
After cleaning the device, open the drain plug (11) to drain any remaining water. Then close the drain plug.
Note: If water remains, tilt the device to drain it through the drain plug (11).
Handle the device with care; do not place it near the edge of a table or shelf to prevent deformation or damage in case of accidental falls.
Descaling the device should be done regularly. It is not covered by the warranty. Improper descaling may lead to device damage and void the warranty.
Approximately every 10 hours of operation, the "Descale" indicator (8) will light up. The cleaning process should be performed according to the following steps:
Preparation of the solution:
Add about 80 g of citric acid or 100 ml of vinegar to the water reservoir. Then fill the reservoir (2) with water to the maximum level and stir. Press and hold the "Clean" button (3) for 3 seconds to activate the descaling mode. Then let it run until the reservoir (2) is completely empty. Prepare the solution again (80 g of citric acid or 100 ml of vinegar + water to the maximum level of the reservoir).
Set the temperature to 45°C and the volume to 200 ml. Let the device run for about 2 hours to dissolve the limescale.
After 2 hours, repeat steps 1-3 to start the descaling mode and empty the reservoir (2). Completely fill the reservoir with clean water and repeat step 1 (rinsing). Again fill the reservoir (2) with clean water and repeat step 1 to thoroughly rinse the device.
This completes the final steps before the device is ready for use.
TECHNICAL DATA:
Capacity: max 2.5 L, min 0.5 L
Voltage: 220-240 V ~50/60 Hz
Power: 2200-2600 W
Power consumption in standby mode: 0.49 W

Charging for disposal. Information on proper disposal of electrical and electronic equipment. In accordance with Article 13, paragraphs 1 and 2 of the Law of Ukraine of 11 September 2015 on waste electrical and electronic equipment. This informs you about proper handling of waste electrical and electronic equipment:
1. It is forbidden to dispose of used electrical and electronic equipment together with other waste. This is subject to separate collection, as it contains hazardous components. 2. Electrical and electronic equipment contains hazardous substances, which, if damaged, can pose a threat to the environment and human health. They can cause various diseases, such as allergies, hearing and speech disorders. They can also damage the liver, kidneys and heart, and cause skin diseases. They can also negatively affect the respiratory and reproductive systems and lead to cancer. Consumption of plants growing on contaminated soil and products derived from them may pose a risk to health. 3. Used electrical and electronic equipment must be handed over to authorized collection points, a list of which should be available from the local municipal administration. 4. The state plays an important role in the reuse and recycling, including processing, of used equipment. It also
plays a key role in the waste management system for used electrical and electronic equipment, allowing for the safe transfer of waste to authorized collection points, preventing illegal and harmful social practices that lead to the contamination of equipment waste in unforeseen places.
In addition, return used electrical and electronic equipment to the place of delivery. During the delivery of household appliances, the distributor is obliged to take back the used household appliance free of charge at the place of delivery, provided that the used appliance is of the same type and serves the same purpose as the delivered appliance.
Cardboard packaging and polyethylene (PE) bags should be disposed of in appropriate containers intended for separate collection of household waste, if applicable. If the device contains batteries, they should be removed and taken to a separate collection point for recycling.
Do not dispose of the device in household waste containers!!
If you wish to purchase spare parts or file a complaint, contact the seller or manufacturer directly.
WARRANTY TERMS
WARRANTY CARD
- Before using the device, read the instruction manual and all instructions contained in it. The manufacturer is not responsible for any damage caused by misuse or improper operation of the device. 2. This device is intended solely for household use. Do not use it for any other purpose than that for which it is intended.
- The device should be connected only to a grounded outlet of 220-240V ~ 50/60Hz.
EMPTYING THE ASH TRAY AND CLEANING
When the ash tray (6) is full, hold and stabilize the device with one hand and use the other hand to lift the tray slightly to remove it, empty the tray, and place it back in its original position using the appropriate force. REPLACING THE FILTER
- 8g60b0gds: ydny60ab dgaogy3g03ob
aamnoan aoggbmo gobol yosmsb gmo. 6
ambsmnn qgbo 3s8gmo.
- gognoobgds: 6g gosfoom dmyoosdo bo
aagssnobs qoans.
- 56 Bsynoo 38gmo, 00gboo 56 doogmo doyymdoos
ydo sb bgs boobdo. 6g yd3o anyomnd
s06m88g (30ds, 88g cos s.a.) 88 g
dsosmo 8gbsmbdo 3o6mgoa (s8s8sbgo,6b0sbo
3g30680b jmbg8o).
16. The device must be installed in a well-ventilated area, away from heat sources, moisture, and direct sunlight. 17. Do not operate the device if the power cord is damaged. 18. Ensure that the device is placed on a stable surface to prevent tipping. 19. The following safety instructions must be observed: keep the device away from children, do not immerse in water, do not use near flammable materials, and unplug when not in use. 20. The device should be cleaned regularly with a dry cloth. 21. Do not attempt to repair the device yourself; contact qualified personnel. 22. The device is intended for indoor use only. 23. The operating temperature range is between 5°C and 40°C. 24. In case of malfunction, disconnect the device from the power supply immediately. 25. Do not expose the device to extreme temperatures.
- The device must be used in accordance with the manufacturer's instructions. Any misuse may result in damage or injury.
- The manufacturer is not liable for damages caused by improper use or failure to follow the safety guidelines.
- The device is intended for use in accordance with the instructions, and the device must be used correctly.
- 2008-03-03 15:49 p.m. 2008-03-03 15:49 p.m.
0006o doyymdoos
aaggno3ob 8b6ob aqdoa, gomogbgy aodmoos yadbbomoo a3o a33o - 1b bmdsmaos. 3688 bsmod800 gomogno aodqobssy hygmo 33d. 3690xov 800 bsfoom 800 369035cmnog hysd300 ygmoow bsug fynfymdo, bsad ygmol qmgo 200 gnoobomoo ag5xmoog oao dmsghosmg oomgno 35mol dyaggdol dmudmogmo. 8886 gnofoy osso 15 yonol 85dsammaso, adqoea 33c0s3 bsmod860 m6360b j3d.
Goofoob amgymoogmoaog Qsyg5gds
sbo hymol sbo oslsbgo (3). aosssgog 0006o (8) sbo aogbo saugogm b0006 bsagdo -dgoocqossfoogoa, lbsa dyssoq gosdsagogas. agsbom sbo hycnoo.
ygggds!
8880888888888888888888888 888888888888888 8888888888 88 8 8 8 8 8 8 8 8 8 8 8 8 8 8 8 8 8 8 8 8 8 8 8 8 8 8 8 8 8 8 8 8 8 8 8 8 8 8 8 8 8 8 8 8 8 8 8 8 8 8
b6b6m6yem 356gog (4) mss3gds abcmmo oomob f36g0o gbs agbmo, 68bocg0o abgds aodggs 356gnoossbosms!
6m8m 3d30y3m
sblgbo 8yogob sbo oosbgyo (3) 0s aygob ggo (2) yggocn 6mgo 56 bqos sdsgmoj MAX qmbgu). 33gob 38gco 0dofooy 220-240 3mgo \~50/60 3g ogob hysmdo. dmsgsbo jds fgoab dmssamogg yx6sbg (6) mb3sbol/b5fnoob j3gd (5). 36gwoob 85bsaemsscossgongonocssbLOCK 3-5 fdoob 85dsgwmosda.
dymoos os 3000s 80030600s 0600, mgoosg 5000s
dmoqmo5gmo h6m03ob 2do0b33sao. oyn mndmoosol dofofofofofofofofofofofofofofofofofofofofofofofofofofofofofofofofofofofofofofofofofofofofofofofofofofofofofofofofofofofofofofofofofofofofofofofofofofofofofofofofofofofofofofofofofofofofofofofofofofofofof0 (12) qo foqoo mo6dmoosol 800306m03ob 36gmao (10).
yomob samsgbs 3g00m356 2x600s5
60000350 6 (6) 133, 60000000000000000000000000000000000000000000000000000000000000000000000000000000
600gus3 3656g2 8adm66gds 8y0066gbs, 30006b0s43c0s" (7), 15 b0a53u, 6mo gomno 60 30036cmmb (oossbcmmn 150 mohob aqoo8). 8ab6boo s9bol bsbgns3o (3) os dmoogmo doon 3c0ssos gomnoo (7 o8). admoogmo ssdmy6gdoo 3666oxo os cossobsscoohmdo dmbsogobols qshymobol 83gdol dobgqo3o. 83cmofo 4oqo, 600mngmoqossfogno LOCK QS START/STOP moosgds (1 o5 5) wssbmcgm0n 3-5 ydsol bsdszmmdo, agoogda mmdomms 3-xo 8solodol bo85mo. 8y0066gbs, 8omno66b0s" (7) 8admoohmgds os gomnohfo dsmdy6gdoo qommo 600bgccmo 8ocysg6gds.
600gus3 3656g2 8adm66gds 8y0066gbs, 30006b0s43c0s" (7), 15 b0a53u, 6mo gomno 60 30036cmmb (oossbcmmn 150 mohob aqoo8). 8ab6boo s9bol bsbgns3o (3) os dmoogmo doon 3c0ssos gomnoo (7 o8). admoogmo ssdmy6gdoo 3666oxo os cossobsscoohmdo dmbsogobols qshymobol 83gdol dobgqo3o. 83cmofo 4oqo, 600mngmoqossfogno LOCK QS START/STOP moosgds (1 o5 5) wssbmcgm0n 3-5 ydsol bsdszmmdo, agoogda mmdomms 3-xo 8solodol bo85mo. 8y0066gbs, 8omno66b0s" (7) 8admoohmgds os gomnohfo dsmdy6gdoo qommo 600bgccmo 8ocysg6gds.
The device is designed for use with 50g of material and 60g of solvent. It operates at 60°C and 30°C. The mixture is stirred for 40 minutes, then allowed to settle for 60 minutes. After 10 minutes of rest, the "clear solution" is collected (8) times. The remaining solid is then dried at 60°C for 30 minutes.
aamymoosdo 086mgo 50gdo mgsymsy g60s amodmmn. 86s60s sdsu 836s3u. bogobmoagcysco 40dmoab33so, amyommoos 96bos60gds 85660s 87d0gds. qssbomoo 10 bssosfo agasodol ago, "bsogol dmgojodob" obqosso (8) sbojds. qdoj sfoj60gob 36mglo 60s 85bmogoggl agogao bsxgol dobgog:
The device is designed for use with the 680x model (2). The installation instructions are provided in the manual. The device (2) must be installed in accordance with the 680x model specifications.
The device must be installed in accordance with the manufacturer's instructions.
y30s yssob oobgymgob gagga, mhyoommsa hgbocmoos os aegoss agogmdo sdybgbolongots.
0g503g60a065g8g8o:
dsjbdosggo 2.5,do5odso:0.5
boadg:2200-2600 3
aoymogomobu 5bngmabbsgos mnnnagc agamdsnosao, madgmo abmmoq bOoBub B3jbsss
aagab aagab aagab aagab aagab aagab aagab aagab aagab aagab aagab aagab aagab aagab aagab aagab aagab aagab aagab aagab aagab aagab aagab aagab aagab aagab aagab aagab aagab aagab aagab aagab aagab aagab aaggab
Electric Kettle AD 1282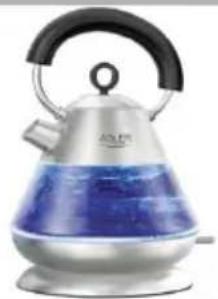
Burr Coffee Grinder AD4450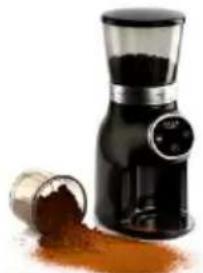
Milk Frother AD 4491
Sandwich Maker AD 3055
TOASTER 2 SLICE AD 3222
ELECTRIC GRILL AD 3052
CITRUS JUICER AD 4009
PERSONAL BLENDER AD4081
FOOD PROCESSOR AD 4224
MIXER AD 4225
AIR FRYER AD 6310
PASTEURIZATION POT AD 4496
AIR CONDITIONER AD 7916
AIR HUMIDIFIER AD 7966
FAN HEATER AD 7725
KITCHEN SCALE AD 3166
ADLER
EUROPE
COFFEE GRINDER AD 4446
TOASTER 2 SLICE AD 3214
HAND BLENDER AD 4625
MIXER WITH BOWL AD 4222
AIR FRYER OVEN AD 6309
MICROWAVE OVEN AD 6205
WAFFLE MAKER AD 3049
KITCHEN SCALE AD 3170
ELECTRIC KETTLE AD 1286
SANDWICH MAKER AD 3043 PORTABLE FRIDGE AD 8077
Electric Oven With HOB AD 6020
FAN HEATER AD 7728
MOSQUITOLAMP AD7938
HEATED PAD AD 7433
ORAL IRRIGATOR AD 2176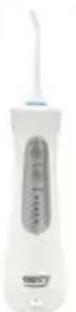
ADLER
EUROPE
AIR COOLER AD 7913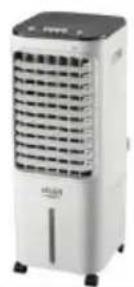
FOOT SPA AD 2177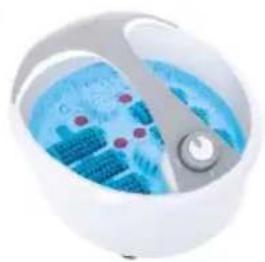
HAIR CLIPPER AD 2831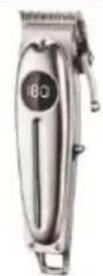
HAIR DRYER AD 2265
HEATED PAD AD 7412
CERAMIC FAN HEATER AD 7731
OIL-FILLER RADIATOR AD 7811
KITCHEN SCALE AD 3171
CHOCOLATE FOUNTAIN AD 4487
HAND BLENDER AD4617
LINT REMOVER AD 9616
VACUUM CLEANER AD 7044
MEAT MINCER AD 4811
Blender AD 4078
ELECTRIC GRILL AD 6610
ELECTRIC KETTLE AD 1293
| AFTER SALE SERVICE NOTICE | |
| GB | If you want to buy spare parts or make any complaints, please contact the seller who issued the receipt directly. |
| DE | Wenn Sie Ersatzteile kaufen oder reklamieren möchen, wenden Sie sichitte direkt an den Verkäufer, der die Quittung ausgestellt hat. |
| FR | Si vous souhaitez acheter des pieces de rechange ou faire des réclamations, veuillez contacter directement le vendeur qui a émis le reçu. |
| ES | Si desea comprar repuestos o presentation alguna queja, comuniquesse directamente con el vendedor que emitió el recibo. |
| PT | Se você quiser comprar peças de reposicao ou fazer alguma reclamação, entre em conta diretamente com o vendedor que emitiou o recibo. |
| LT | Jei norite jsigyti atsarginiu daliu ar pateiki nusiskundimu, susisiekite tiesiogai su kvita isdavusiu pardaveju. |
| LV | Ja vélas iegadãtres rezerves dalas vai izteikt pretenzijas, ludzu, sazinieties tieši ar pärdevēju, kürš izsnedza Čeku. |
| EST | Kui sooïve ista varuosi vii esitada pretensioone, vôtke otse ühendust kviltungi väljastanud muñjaga. |
| HU | Ha potalkatrészeket szeretne vásárolni, vagy panaszt szeretne tenni, forduljon kózvetlenü al bizonylatot kiàllíto eladóhoz. |
| BS | Ako Želite kupiti rezervne dijelove iii napravitri reklamaciju, obratite se direktno prodavaču koji je izdao račun. |
| RO | Ecnii Bvi XOTITE KYNITB ZANCACTNI IINI PPEDYABITB KAKHE-ILIBO PPETENHNI, NOXAYIHTA, CBAJNTIECTB HAPRAHYC C PONDAUOM, BIDABUIMM YEK. |
| CZ | Chcete-li zakoupit náhradni dily nebo uplatnit jakoukoli reklamaci,kontaktujte primo prodejce, ktery ÚCTENKU VYSTAVIL. |
| RU | Dacà doriti sá cumpárati piese de schimb sau sá faceti vreo reclamações, vá rugam sá contacta direl direct vānzatorul care am cis chitanla. |
| GR | Eáv θÉLETE VA OYOPAOETE AVTALAAKTIKÁ NVA KAVETE OTIOAβHΠOTE TAPATNOV, ETIKOVUVTAE ATTEUθEIAÇ MTOV ΠIIAANTN TPOU EΕδδωε ΜTV AITOBEIGN. |
| MK | Ako cakate da KYNITPE pezebrnii delobovii IINI DA NOINCETE KAKBI BINO nonpaqui, KONTAKTIAPAJTE DIPREKTHO CO PONDAUAWOT KOJ IA3DAN CMETKATA. |
| NL | Als u reserveonderdelen wilt kopen of een klacht wilt indienen, neem danrechtstreeks contact op met de verkoper die de bon heeft afgegeben. |
| SL | Če Želite kupiti nadomestne dele alli vložiti reklamacije, se obrnite neposredno na prodajalca, ki je izdal račun. |
| FI | Jos haluat ostaa varaosia tai tehdä valituksaia, ota yhteyttä suoraan kuitin antaneeseen myyjän. |
| PL | W przypadku checi zakupu czésci zamiennych lub zgloszenia ewentualnych reklamaciji nalezykontaktowac sie bezposrednio ze sprezedawca, ktrý wystawil paragon. |
| IT | Se desideri acquisare pezzi di ricambio o presentare reclami, contatta direttamente il venditore che ha emesso la ricevuta. |
| HR | Se desideri acquisare pezzi di ricambio o presentare reclami, contatta direttamente il venditore che ha emesso la ricevuta. |
| SV | Om du vill köpa reservdelar ellere gora nagra reklamationer, vänligen kontakta sälljaren som utfardat kvittot direkt. |
| DK | Hvis du onsker al kobe resedelee ellere reklamere, bedes du kontakte saelgeren, som har udstedt kvitteringen, direkte. |
| UA | Якsoи вхоче пindбати зац actinii abo nodatи byd-bякіпретензii, зberніюсья BEANOCERDEHBO do nopondabuaя, кун BiNDAVch. |
| SR | Ako Jęwitàteда КYNITTE pezebrnii Делове лимда улочite pekmamaцу, obpatnte ce dípeKTHO PONDAUч.KOJI IE 3DADO Pauyn. |
| SK | Ak si chcete kupit náhradné diely alebo uplatnil' akúkolvek reklamáciu, kontaktujte priamo predajcu, ktory ÚCTENKU VYSTAVIL. |
| AR | iS JUSUSSLJSSLJSSLJSSLJSSLJSSLJSSLJSSLJSSLJSSLJSSLJSSLJSSLJSSLJSSLJSSLJSSLJSSLJSSLJSSLJSSLJSSLJSSLJSSLJSSLJSSLJSSLJSSLJSSLJSSLJSSLJSSLJSSLJSSLJ8 |
| BG | Ako NCKATEда ЗакупITE pezeрвни чASTИ ИДАнравпITE ONПКВаньМ, MONA, CBpKTeCe dupeKTHO C PONDAUч.ΚотTo E 3DAN KACOBATA BENKKKA. |
| AZ | Ehtiyat hisseleri almaq va ya hər hansi sikayat etmek istayirsinizsa, qebzi veren satici ile birbaşa olqaş saxayin. |
| ALB | Nëse déshironi tè blini pjesë kembimi osse të beni ndonjë ankesë, ju lutemi kontaktoni drejtpredrejt shitësin që ka leshuar faturën. |
| KA | mçʌbɪðmʌbɪðmʌbɪðmʌbɪðmʌbɪðmʌbɪðmʌbɪðmʌbɪðmʌbɪðmʌbɪðmʌbɪðmʌbɪðmʌbɪðmʌbɪðmʌbɪðmʌbɪðmʌbɪðmʌbɪðmʌbɪðmʌbɪðmʌbɪð |


- GENERAL SAFETY CONDITIONS
- IMPORTANT SAFETY INSTRUCTIONS FOR USE. READ CAREFULLY AND KEEP FOR FUTURE REFERENCE
- PRODUCT DESCRIPTION (FIGURE A)
- DESCRIPTION OF THE CONTROL PANEL (FIGURE B)
- BEFORE FIRST USE
- FILTER IN THE DEVICE
- INSTALLING THE FILTER IN THE DEVICE
- NOTE
- METHOD OF USE
- MANUAL RESETTING OF THE THERMOSTAT
- REMOVING WATER FROM THE DRIP TRAY
- FILTER CHANGE
- CLEANING AND MAINTENANCE
- MANUAL RESET THERMOSTAT
- WHEN THE DRIP TRAY (6) IS FULL, WITH ONE HAND HOLD AND STABILIZE THE DEVICE, AND WITH THE OTHER HAND SLIGHTLY LIFT THE TRAY TO REMOVE IT, EMPTY THE TRAY, AND, APPLYING SUFFICIENT FORCE, PLACE IT BACK IN ITS ORIGINAL POSITION
- WHEN THE DISPLAY SHOWS THE MESSAGE "REPLACE FILTER" (7), IT INDICATES THAT THE FILTER NEEDS TO BE REPLACED (AFTER APPROXIMATELY 150 LITERS). OPEN THE TANK LID (3) AND REMOVE THE ENTIRE FILTER BASKET (7 AND 8). REMOVE THE USED CARTRIDGE AND INSTALL THE NEW ONE ACCORDING TO THE PREPARATION AND INSTALLATION STEPS. AFTER REPLACEMENT, SIMULTANEOUSLY PRESS THE LOCK AND START/STOP BUTTONS (1 AND 5) FOR ABOUT 3-5 SECONDS. THE DEVICE WILL BEEP 3 TIMES. THE "REPLACE FILTER" (7) MESSAGE WILL BE CLEARED, AND THE FILTER OPERATING TIME COUNTER WILL BE RESET
- BEFORE CLEANING, ALWAYS TURN OFF THE WATER DISPENSER, DISCONNECT IT FROM THE POWER SUPPLY, AND ALLOW IT TO COOL COMPLETELY. TO AVOID DAMAGE, DO NOT IMMERSE THE DISPENSER IN ANY LIQUID. DO NOT USE ANY CHEMICALS, METAL, WOODEN, OR ABRASIVE CLEANING AGENTS TO CLEAN THE DISPENSER BODY. ALWAYS USE A DAMP CLOTH
- IMPORTANT SAFETY INSTRUCTIONS FOR USE - READ CAREFULLY AND KEEP FOR FUTURE USE
- ATTENTION
- INSTRUCTIONS FOR USE
- WARNING
- MANUAL THERMOSTAT RESET
- DRAINING WATER FROM THE DRIP TRAY
- REPLACING THE FILTER
- USEFUL INFORMATION (EN)
- IMPORTANT SAFETY INSTRUCTIONS SAFETY INSTRUCTIONS FOR USE READ CAREFULLY AND KEEP FOR FUTURE REFERENCE
- FILTER IN THE APPLIANCE
- MANUALLY RESETTING THE THERMOSTAT
- IMPORTANT SAFETY INSTRUCTIONS FOR USE
- READ CAREFULLY AND SAVE FOR FUTURE USE
- DESCRIPTION OF CONTROLS (FIG. B)
- IMPORTANT: USE ONLY WITH THE SUPPLIED MATERIAL
- FILTER INSTALLATION
- MANUAL RESET OF THE THERMOSTAT
- DRAINING WATER FROM THE TANK FOR IRONING
- CLEANING THE IRON
- INSTALLING THE FILTERS IN THE DEVICE
- HOW TO USE
- RESETTING THE THERMOSTAT
- USER MANUAL (HR)
- MANUAL THERMOSTAT
- WARRANTY TERMS
- WARRANTY CARD
- EMPTYING THE ASH TRAY AND CLEANING
- ADLER
- EUROPE
Brand : ADLER
Model : AD 1356
Category : Kettle