Babycook Solo Duo - Food Processor BEABA - Free user manual and instructions
Find the device manual for free Babycook Solo Duo BEABA in PDF.

User questions about Babycook Solo Duo BEABA
0 question about this device. Answer the ones you know or ask your own.
Ask a new question about this device
Download the instructions for your Food Processor in PDF format for free! Find your manual Babycook Solo Duo - BEABA and take your electronic device back in hand. On this page are published all the documents necessary for the use of your device. Babycook Solo Duo by BEABA.
USER MANUAL Babycook Solo Duo BEABA
natural_image
Exterior view of a modern gray and white portable food blender with control panel (no visible text or symbols)® DUO
natural_image
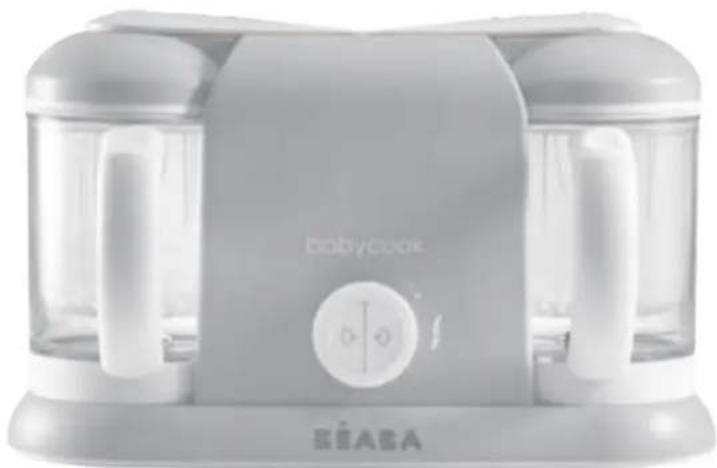
Exterior view of a babycrouk appliance with two transparent containers and a circular control knob (no text or symbols on the device itself)SYSTÈME BREVETÉ patented product
BABYCOOK® SOLO / BABYCOOK® DUO
FR Notice d'utilisation
EN Instructions
NL Handleiding
DE Gebrauchsanweisung
ES Folleto de Instrucciones
IT Istruzioni per l'uso
RU Инструкция по эксплуатации
PT Instruções de utilização
FI Käyttöohje
SE Brugsanvisning
NO Bruksanvisning
DK Bruksanvisning
HU Használati
RO Instructiuni
PL Instrukcja obsługi
GR Οδηγίες Χρήσης
TR Kullanım kılavuzu
cz Návod k použití
AR الإرشادات

natural_image
Diagram of a hand pressing a button on a device with a play button (no text or symbols)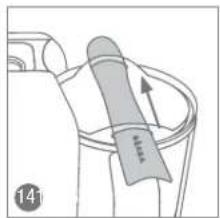
natural_image
Diagram of a mechanical component with a labeled arrow and circular number 141 (no text or symbols on the diagram itself)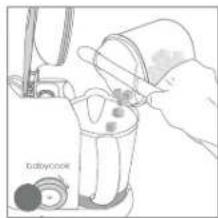
natural_image
Illustration of a hand pouring liquid into a bottle with a baby icon, no text or symbols present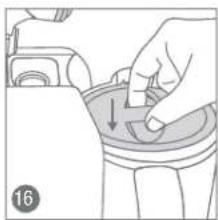
natural_image
Illustration of a hand pressing down on a mechanical component (no text or symbols visible)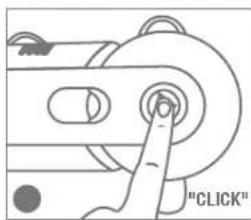
natural_image
Diagram of a mechanical component with a finger pressing a button (no text or symbols)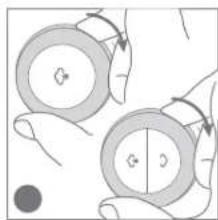
natural_image
Illustration of two hands holding circular components with arrows indicating motion (no text or symbols)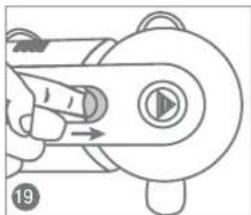
natural_image
Diagram of a mechanical device with directional arrows indicating motion (no text or symbols)
natural_image
Line drawing of a mechanical component with a cylindrical shaft and circular base (no text or symbols)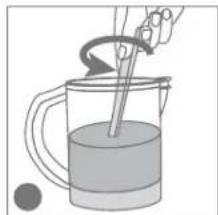
natural_image
Illustration of a hand stirring a liquid in a glass mug with a stirring rod (no text or symbols)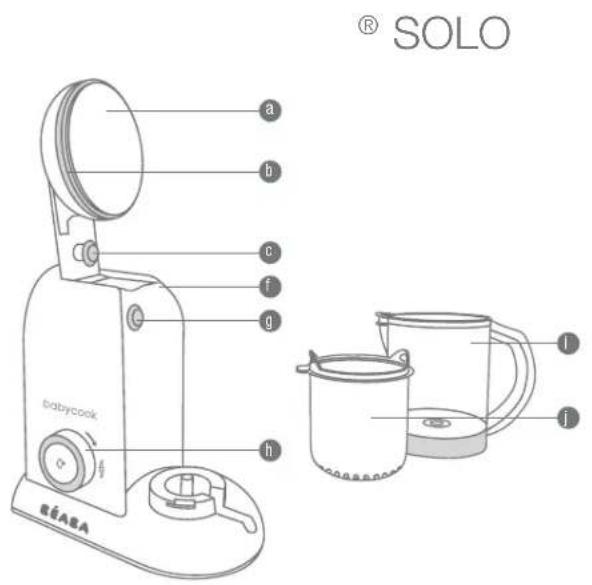
text_image
® SOLO a b c f g babycook h G I f BASA
text_image
BABYCOOK® DUOBABYCC a b c f g babycook h BÉAEA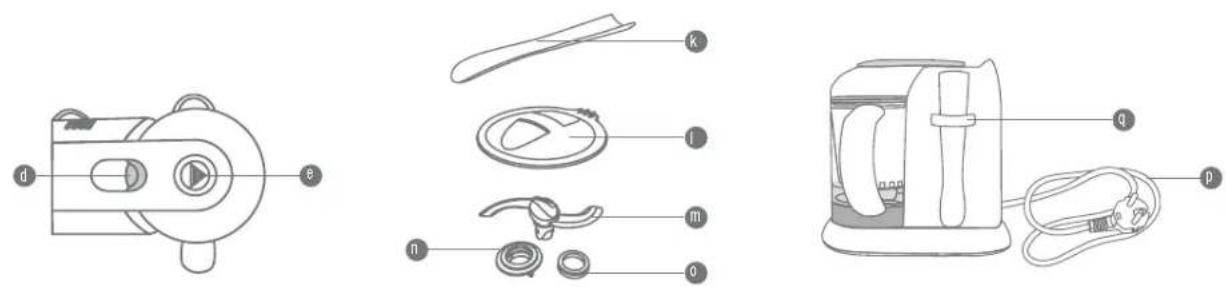
text_image
Diagram showing exploded view of a portable electric kettle with labeled parts including front panel, lid, handle, and power adapter.BABYCOOK® SOLO
natural_image
Illustration of a hand using a tool to lift a circular component, with arrows indicating upward and downward motion (no text or symbols)V
natural_image
Two identical dome-shaped objects with a horizontal bar, one upward and one flat (no text or symbols)VI

natural_image
Line drawing of a pair of scissors cutting through a handle (no text or symbols)QUESTIONS / REPONSES.
a Removable jug lid
b Lidjoint
c Locking arm
d Arm release button
e Heat-resistant zone
f Heating reservoir
g Joint/steam outlet
h Control button
cooking mixing
i Jug
Cooking/heating basket
k Spatula
Mixing lid/smoothie filter
m Mixing blade
n Blade nut
0 Blade joint
p Power cable
q Spatula storage
BABYCOOK® DUO
a Removable jug lid x2
b Lid joint x2
c Locking arm x2
d Arm release button x2
e Heat-resistant zone x2
f Heating reservoir x2
g Joint/steam outlet x2
h Control button
cooking mixing
i Jug x2
Cooking/heating basket x2
k Spatula
1 Mixing lid/smoothie filter x2
m Mixing blade x2
n Blade nut x2
0 Blade joint x2
p Power cable
q Spatula storage
EN
READ THESE INSTRUCTIONS CAREFULLY BEFORE USING THIS APPLICANCE FOR THE FIRST TIME
SAFETY INSTRUCTIONS / IMPORTANT:
- Incorrect use of the appliance may cause injury: always follow these instructions.
- CAUTION, BURN RISK - This appliance generates very hot steam (100°C/212°F) which cooks the food.
- Be careful if hot liquid is poured into the food processor or blender as it can be ejected out of the appliance due to a sudden steaming.
- Do not approach the appliance during the cooking cycle.
- Do not open the lid until the cooking cycle has finished (risk of scalding from hot water).
- CAUTION, CUTTING RISK - The blades are extremely sharp.
- Follow the instructions for dismantling the blade carefully (cleaning).
- Be careful when you empty the jug.
- If the power cable is damaged it must be replaced by the manufacturer, its after-sales service or any other similarly qualified person in order to avoid any danger.
USE :
• This appliance shall not be used by children.
- This device may be used by people with reduced physical, sensorial or mental capacities, or without any experience or knowledge, if they are correctly supervised or if the instructions for using the device safely have been provided and the risks have been understood.
- This appliance is designed for domestic and other such use, for example: kitchen areas reserved for staff in shops, offices and other professional environments, farms, guests staying at hotels, motels and other residential type environments, environments such as bed and breakfast accommodation.
POWER CONNECTION:
- Never immerse the appliance in water.
- Unplug the appliance before assembling, dismantling or cleaning.
- Unplug the appliance if you leave it unsupervised.
- Unplug the appliance if it is not working properly*.
- Do not use your appliance if the power cable is damaged, to avoid danger, it must be replaced by the professional personnel of the manufacturer, the maintenance department or the similar department.*
* contact the customer Service immediately.
CAUTION/CHILDREN:
- Keep the appliance and its cord out of the reach of children.
- Always close the jug's lid (cutting risk with blades).
- The appliance should not be cleaned by a child.
• The appliance should not be maintained by a child.
- Do not let a child play with the appliance.
THANK YOU FOR YOUR PURCHASE. Congratulations— you now own a baby food maker appliance that offers you unique performance. BABYCOOK ^® has been specifically designed to prepare healthy meals for your baby, simply and rapidly. BABYCOOK ^® cooks, reheats and defrosts food by steaming, which locks in vitamins and nutrients. It also blends food to the perfect consistency.
INSTRUCTIONS
- When using for the first time, launch a cooking cycle without any food in the jug and with the water level at number 3, when done, rinse the jug and the accessories in hot water.
- Wash your hands well with soap and water before handling your baby's products and food.
CAUTION
• Always use the appliance on a solid and even surface.
- Do not place the appliance near a heat source, hotplates, etc.
- Do not carry the appliance by the jug's handle.
- Do not launch the cooking cycle if there is no water in the reservoir.
- Do not place Babycook's jug « i » in a microwave.
COOKING CYCLE
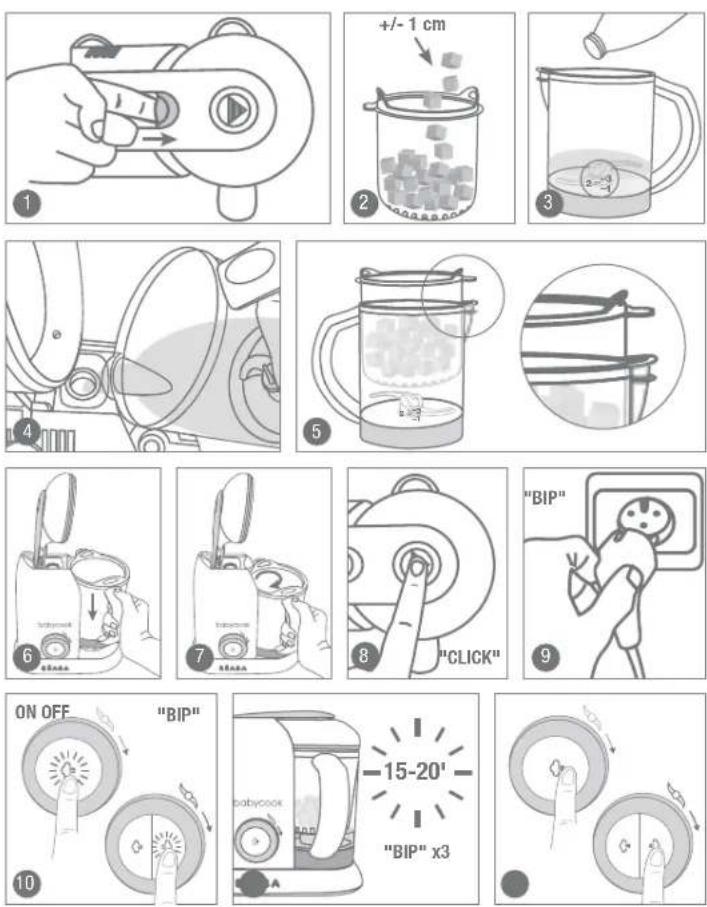
- Release the arm to access the jug and the heating reservoir. Fig 1
- Cut the food into 1cm x 1cm (1/2 inch) cubes and place them in the basket. To ensure even cooking, it is advised to not overload the basket. Fig 2
- The jug has graduations from 1 to 3. These graduations allow you to measure out the amount of water to pour into in the heating reservoir and determine the cooking time. Refer to the cooking guide (p 10). Measure out the water using the jug according to the chosen recipe and without added anything (salt, sugar, etc.) Fig 3
- Pour the water into the reservoir. Fig 4
- Place the basket in the jug, taking care to position the tongue of the basket in the lip of the jug. Fig 5
- Lock the jug onto the appliance fig 6 and 7
- Check that the steam outlet joint « g » is not blocked
- close the jug's lid by pressing firmly on the arm fig 8
- Plug the appliance into an adapted socket. You will hear a beep, and the Béaba® logo and the control button will flash once. Fig 9
-
Press (4) to start the cooking cycle Fig 10. The appliance beeps once, the Béaba ^® logo and the steam symbol light up.
-
At the end of the cooking cycle, the appliance beeps three times and the Béaba ^23 logo goes out fig 11, the steam symbol on the button flashes until the cycle has been stopped. To stop the cycle, press on the button again Fig 12.
- CAUTION. BURN RISK, to open the jug after cooking, press the button on the arm taking care to avoid touching the lid which is hot. Fig 13
- Wipe the lid in order to prevent condensation falling into the reservoir
- Remove the basket with the spatula. Fig 14
- If you wish, set aside the cooking juices collected in the bottom of the jug to add to the preparation or facilitate blending.
BABYCOOK®PLUS: It is possible to cook in both jugs at the same time. Remember to fill the right-hand heating reservoir if you are using the right-hand jug and the left-hand heating reservoir if you are using the left-hand jug.
Avoid opening both locking arms at the same time.
Plug in the device and press the right steam button if you are using the right-hand jug, or the left steam button if you are using the left-hand jug.
RECOMMENDATIONS
- Do not stop the cooking process during the cycle so as to avoid leaving water in the heating reservoir.
- Only use clean drinking water which is free of any food or any other type of residue.
• Always check the temperature of food before serving. - It is advised to not heat food for a long period of time.
BLENDING CYCLE
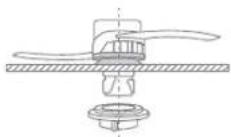
- Check that the blade is correctly installed in the bottom of the jug with the joint and the nut.
- After checking the cooking time, empty the food into the basket in the jug Fig 15. According to the desired consistency, add some of the cooking juices before starting the cycle.
- Place the blending cover on the jug Fig 16
- Close the jug's lid by pressing firmly on the arm Fig 17
- Plug in the appliance and turn the button (☐) to the right using pulses lasting a maximum of 10 seconds until you have obtained the desired consistency. Fig 18
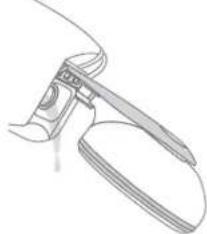
- Open the arm and remove the mixing cover using the spatula fig 19, fig 20
- Stir with the spatula taking care to avoid touching the blades and, if necessary, blend again. fig 21
BABYCOOK®PLUS: Mixing is only possible in the right-hand position with either one of the jugs.
HEATING and DEFROSTING
The food to be heated or defrosted should be placed in a suitable container and then placed in the cooking basket without a lid. The container must not block the steam outlet « 9 »
- Measure out 1 to 3 doses of water according to the amount of food to be reheated and then follow the cooking cycle instructions.
- When the sound signals marks the end of the cycle, remove the container with a cloth (CAUTION
NB.: Although it is always best to use fresh fruit and vegetables which have a high vitamin content, it is also possible to cook frozen fruit and vegetables which have been defrosted in the BABYCOOK® jug or in the fridge (never defrost food at room temperature).
CLEANING and MAINTENANCE
• Always unplug the appliance before cleaning it.
- It is advised to wash the removable parts by hand: jug, basket, spatula, mixing cover, lid, joints, blade, etc. These elements can also be washed in a dishwasher. Dishwasher cleaning may cause parts to wear faster over time.
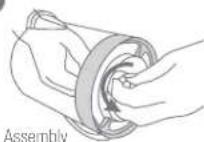
• To clean the blade and its joint, follow the dismantling and assembly instructions:
11

●
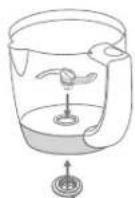
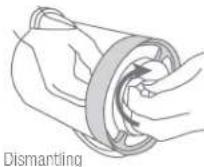
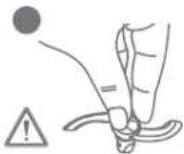
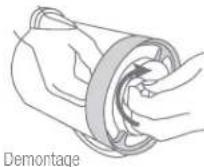
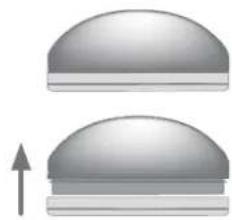
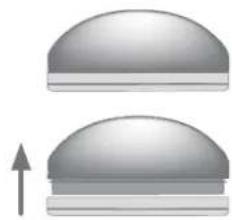
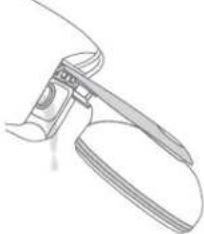
• To dismantle the cover and the cover's joint:
natural_image
Diagram of a mechanical device with a lever and directional arrows indicating motion (no text or symbols)V
natural_image
Two identical dome-shaped objects with a vertical arrow pointing upward (no text or symbols)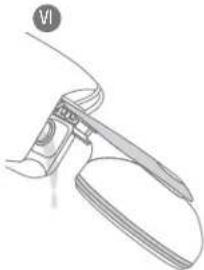
natural_image
Line drawing of a pair of scissors with a handle, no text or symbols present- Clean the body of the appliance with a damp sponge and dish soap.
DESCALING
The appliance is equipped with a cycle counter which indicates when your product requires descaling (50 cycles).
- When the appliance's steam button ( ) turns red, it is necessary to descale the heating reservoir.
- Only use white vinegar or the BEABA cleaning product for Babycook.
-
Never use a chemical descaler or a coffee machine descaler in the reservoir.
-
Unplug your appliance, descaling should be done cold and does not require a heating cycle.
- Pour a mixture of 110 ml (1/2 cup) of water and 110 ml (1/2 cup) of white vinegar or the BEABA cleaning product for Babycook into the reservoir.
- Leave to soak overnight with the lid open.
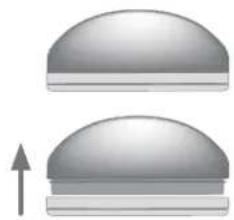
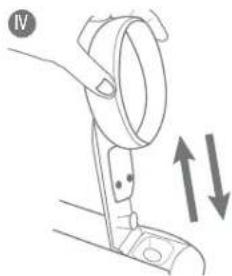
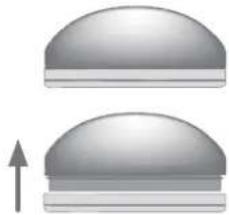
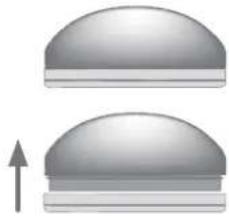
- Remove the lid from the arm (Fig IV)
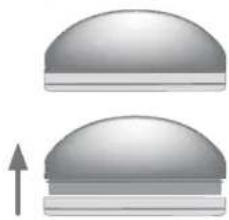
- Empty the contents of the reservoir by turning the product upside down (Fig VI)
- Rinse the reservoir with water at least twice making sure to empty its contents each time.
- Replace the lid by clipping it firmly on to the arm (Fig IV)
- Start a heating cycle with water in the reservoir (level 1 = 100 ml) and without any food. The steam cooking button will still be red.
- To reset the appliance, pour water into the reservoir (level 1) and launch a second heating cycle, pressing down on the steam button for a few seconds. The steam button will turn white.
- Rinse the jug with water before using it.
- Depending to the type of water you have, you may have to descale your appliance more often. See table (troubleshooting)
- You can also reset Babycook without descaling it. However, we strongly advise you to do so because it helps to prolong your appliance's life span.
SPECIFICATIONS
Voltage/Power: Refer to the information panel under the appliance.
Temperature for use: 10 to 40°C.
TROUBLESHOOTING
An updated and detailed table can be found on the BEABA website.
| The product does not work | Check that the appliance is connected to a electricity supplyCheck that the jug is locked on the base and that the lid is correctly locked. |
| The jug leaks | Check that the lid's joint is inserted correctly (refer to the paragraph on inserting the joint on the lid)Check that the lid is connected properly to the locking arm.Check that the basket is positioned correctly in the jugCheck that the joint is mounted correctly on the blade (refer to the Maintenance paragraph on page 9)Check the condition of the blade's joint and replace it if necessary.Check that the nut is mounted the right way round (see picture page 9) |
| My food is not cooked at the end of the cycle | There is no more water in the reservoir:- The initial quantity of water was too low. Fill the reservoir again with 100 ml of water and start the cycle again.- The heating performance is decreasing: launch one or more descaling cyclesThere is still water in the reservoir: the cooking cycle has been interrupted:- Relaunch a cycle and make sure that the lid's arm and the jug are correctly locked.- Or call the customer Service |
| The Babycook whistles at the start of the heating cycle. | The steam hole may be blocked.Stop the cycle immediately by pressing on the button ( ).Do not open the lid and wait for the appliance to stop producing steam and stop whistling (about 10 mins)Unlock the arm of the Babycook.Check that the hole on the lid of the jug and the joint are not blocked.If blocked, unblock it. |
COOKING GUIDE
| Food Number of doses of water | |||
| 1 2 3 | |||
| 100 ml 150 ml 200 ml | |||
| Vegetables Potatoes* | To reheat | ● | |
| Carrots* ● | |||
| Turnips* ● | |||
| Green beans ● | |||
| Courgettes ● | |||
| Leeks ● | |||
| Peas ● | |||
| Pumpkin ● | |||
| Cauliflower ● | |||
| Red meat ● | |||
| White meat ● | |||
| Fish ● | |||
| Fruit Apples ● | |||
| Pears ● | |||
| Strawberries ● | |||
| Mandarin | ● | ||
| Pineapple | ● | ||
| Cooking time** | about 12 mins | about 17 mins | about 21 mins |
* Cut into small 1 cm x 1 cm (1/2 inch) cubes.
“ Approximate cooking time for a full 300 g (10 ounces) basket.
BABYCOOK® SOLO
natural_image
Diagram of a mechanical device with a magnified circular component and directional arrows indicating motion (no text or symbols)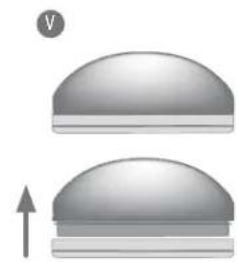
natural_image
Two identical dome-shaped objects with a downward arrow indicating rotation or movement (no text or symbols)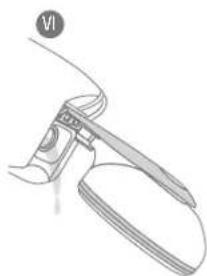
natural_image
Line drawing of a mechanical tool or device with a curved handle and circular label (VI), no readable text or symbols present.natural_image
Illustration of hands holding a cylindrical object with a circular element above, labeled 'montage' (no other text or symbols)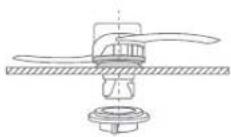

natural_image
Diagram of a mechanical device with directional arrows indicating motion or force (no text or symbols)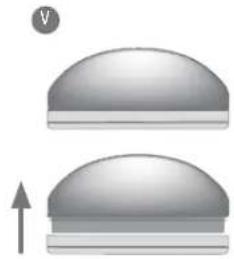
natural_image
Two identical dome-shaped objects with a circular icon labeled 'V' above them, one with an upward arrow below (no text or symbols on the objects themselves)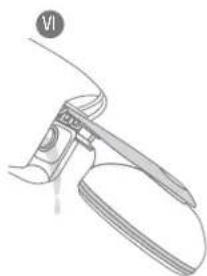
natural_image
Line drawing of a pair of scissors with a handle and base, no text or symbols presenttext_image
Technical diagram illustrating the steps of a mechanical assembly and dismounting process with labeled illustrations.text_image
Diagram illustrating a medical procedure with labeled steps I, V, and VI showing mechanical device insertion and assembly.g Joint/steam outlet
g Joint/steam outlet x2
text_image
Technical diagram illustrating the step-by-step procedure for using a mechanical device, labeled with 'Montaggio' and 'Smontaggio' instructions.text_image
Diagram illustrating a sewing machine tool with labeled parts (I, V, VI) showing how to adjust or adjust the base of a dome-shaped object.text_image
Diagram illustrating a sewing machine tool with labeled parts (I, V, VI) showing how to adjust or adjust the base of a dome-shaped object.natural_image
Diagram of a mechanical device with directional arrows indicating motion or force (no text or symbols)V
natural_image
Two identical dome-shaped objects with a horizontal bar, one upward and one flat (no text or symbols)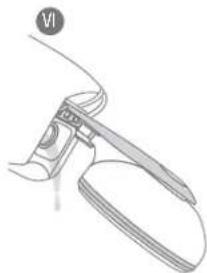
natural_image
Line drawing of a mechanical tool or device with a curved handle and a circular label (VI) on the top left corner, no readable text or symbols present.PERGUNTAS / RESPOSTAS
natural_image
Three technical illustrations of a pump mechanism: a tap, a jar with a handle, and a motor (no text or symbols)text_image
Diagram illustrating three stages of a device operation: lighting, lifting, and disassembly with labeled parts (I, V, VI)natural_image
Diagram of a mechanical device with a magnifying glass and directional arrows indicating motion (no text or symbols)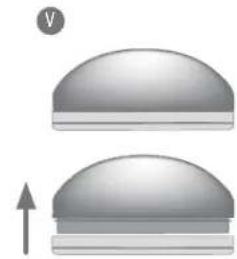
natural_image
Two 3D-rendered dome-shaped objects with an upward arrow, no text or symbols present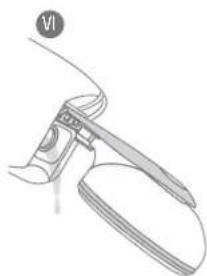
natural_image
Line drawing of a mechanical tool or device with a curved handle and a circular label (VI) at the top left, no readable text or symbols present.natural_image
Diagram of a mechanical device with a hand holding a circular component and directional arrows indicating motion (no text or symbols)V
natural_image
Two identical dome-shaped objects with a horizontal bar at the top and an upward arrow below (no text or symbols)VI
natural_image
Line drawing of a mechanical tool or device with a handle and lever (no text or symbols)natural_image
Technical line drawing of a mechanical device with directional arrows indicating motion (no text or symbols)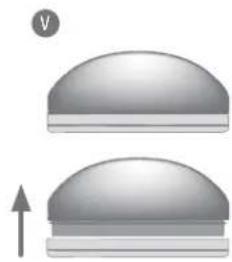
natural_image
Two identical dome-shaped objects with a circular symbol above them, one with an upward arrow below (no text or symbols)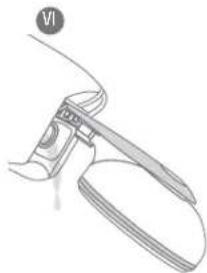
natural_image
Line drawing of a pair of scissors with a handle, no text or symbols presentnatural_image
Three-step diagram showing a mechanical assembly with a knob, warning symbol, and hands holding a roller (no text or labels)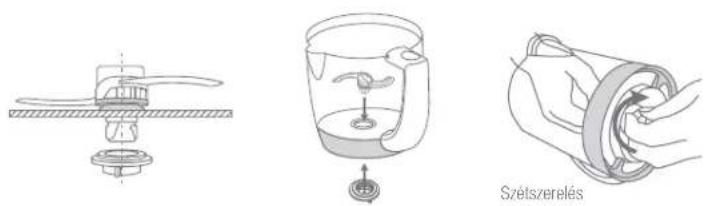
natural_image
Three technical illustrations of a water pump assembly: a tap, a container with a stirrer, and a cylindrical container with hands (no text or symbols)text_image
Diagram illustrating three stages of a device operation: lighting, lifting, and disassembly with labeled parts IV, V, and VI.natural_image
Diagram of a mechanical device with directional arrows indicating motion or force (no text or symbols)V
natural_image
Two identical dome-shaped objects with a horizontal bar, one upward and one flat (no text or symbols)VI
natural_image
Line drawing of a tool interacting with a curved surface (no text or symbols)natural_image
Diagram of a mechanical device with directional arrows indicating movement or force (no text or symbols)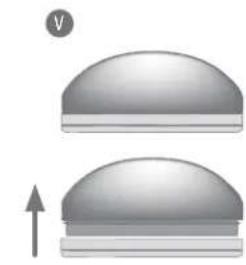
natural_image
Two identical dome-shaped objects with a downward arrow indicating rotation or change (no text or symbols)
natural_image
Line drawing of a pair of scissors with a handle, no text or symbols presentnatural_image
Illustration showing a hand holding a magnifying glass with arrows indicating movement, alongside two dome-shaped objects and a pair of scissors (no text or symbols)natural_image
Diagram of a mechanical device with a handle and directional arrows indicating motion (no text or symbols)V
natural_image
Two identical dome-shaped objects with a horizontal bar, one upward and one flat (no text or symbols)VI
natural_image
Line drawing of a mechanical tool or device with a handle and lever (no text or symbols)text_image
Designal BookAvailable on the App Store

GET IT ON Google play