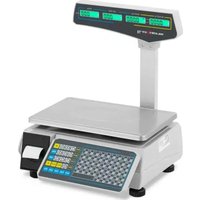
USER MANUAL SBS-EBS-101 STEINBERG
This User Manual has been translated using machine translation. We have made every effort to ensure the translation is accurate, but please note that automated translations are not perfect and are not meant to replace human translators. The official version of the User Manual is in English. Any differences between the translated version and the original English are not legally binding. If you have any questions about the accuracy of the translation, please refer to the English version, which is the official reference. More language versions are available upon request via info@expondo.com.
Technical data
| Parameter description | Parameter value |
| Product name | ELECTRONIC BARCODE SCALE |
| Model | SBS-EBS-101 |
| Input [V/Hz/A] | 200-240 / 50-60 / 0.8 MAX |
| Output [V/A] | 7.5 / 3 |
| Platform size [mm] | 380 x 265 |
| Capacity [kg] | 30 |
| Division (g) | 5 |
| Dimensions [Width x Depth x Height; mm] | 395 x 490 x 485 |
| Weight [kg] | 5.7 |
1. General description
The user manual is designed to assist in the safe and trouble-free use of the device. The product is designed and manufactured in accordance with strict technical guidelines, using state-of-the-art technologies and components. Additionally, it is produced in compliance with the most stringent quality standards.
DO NOT USE THE DEVICE UNLESS YOU HAVE THOROUGHLY READ AND UNDERSTOOD THIS USER MANUAL.
To increase the product life of the device and to ensure trouble-free operation, use it in accordance with this user manual and regularly perform maintenance tasks. The technical data and specifications in this user manual are up to date. The manufacturer reserves the right to make changes associated with quality improvement. The device is designed to reduce noise emission risks to a minimum, taking into account technological progress and noise reduction opportunities.
Legend

The product satisfies the relevant safety standards.
Read instructions before use.
The product must be recycled.
WARNING! or CAUTION! or REMEMBER! Applicable to the given situation.
(general warning sign)
Read the instructions.
ATTENTION! Electric shock warning!
Only use indoors.

PLEASE NOTE! Drawings in this manual are for illustration purposes only and in some details may differ from the actual product.
2. Usage safety
Electrical equipment:

ATTENTION! Read all safety warnings and all instructions. Failure to follow the warnings and instructions may result in electric shock, fire and/or serious injury or even death.
The terms "device" or "product" are used in the warnings and instructions to refer to: Electronic barcode scale.
2.1. Electrical safety
a) The plug must fit the socket. Do not modify the plug in any way. Using original plugs and matching sockets reduces the risk of electric shock.
b) Avoid touching earthed elements such as pipes, heaters, boilers and refrigerators. There is an increased risk of electric shock if the earthed device is exposed to rain, comes into direct contact with a wet surface or is operating in a damp environment. Water getting into the device increases the risk of damage to the device and of electric shock.
c) Do not touch the device with wet or damp hands.
d) Use the cable only for its designated use. Never use it to carry the device or to pull the plug out of a socket. Keep the cable away from heat sources, oil, sharp edges or moving parts. Damaged or tangled cables increase the risk of electric shock.
e) Do not use the device if the power cord is damaged or shows obvious signs of wear. A damaged power cord should be replaced by a qualified electrician or the manufacturer's service centre.
f) To avoid electric shock, do not immerse the cord, plug or device in water or other liquids. Do not use the device on wet surfaces.
g) ATTENTION! DANGER TO LIFE! While cleaning, never immerse the device in water or other liquids.
h) Do not use in very humid environments or in the direct vicinity of water tanks.
i) Prevent the device from getting wet. Risk of electric shock!
2.2. Safety in the workplace
a) Make sure the workplace is clean and well lit. A messy or poorly lit workplace may lead to accidents. Try to think ahead, observe what is going on and use common sense when working with the device.
b) Do not use the device in a potentially explosive environment, for example in the presence of flammable liquids, gases or dust. The device generates sparks which may ignite dust or fumes.
c) If you discover damage or irregular operation, immediately switch the device off and report it to a supervisor without delay.
d) If you are unsure about whether the device is operating correctly or if you find damage, please contact the manufacturer's service centre.
e) Only the manufacturer's service centre may make repairs to the device. Do not attempt to make repairs yourself!
f) In case of fire, use a powder or carbon dioxide (CO _2 ) fire extinguisher (one intended for use on live electrical devices) to put it out.
g) Use the device in a well-ventilated space.
h) Please keep this manual available for future reference. If this device is passed on to a third party, the manual must be passed on with it.
i) Keep packaging elements and small assembly parts in a place not available to children.
j) Keep the device away from children and animals.

Remember! When using the device, protect children and other bystanders.
2.3. Personal safety
a) The device is not designed to be handled by persons (including children) with limited mental and sensory functions or persons lacking relevant experience and/or knowledge unless they are supervised by a person responsible for their safety or they have received instruction on how to operate the device.
b) The device can be handled only by physically fit persons who are capable of handling it, properly trained, familiar with this manual and trained within the scope of occupational health and safety.
c) When working with the device, use common sense and stay alert. Temporary loss of concentration while using the device may lead to serious injuries.
d) To prevent the device from accidentally switching on, make sure the switch is on the OFF position before connecting to a power source.
e) Remove all adjusting tools or spanners before turning the device on. A tool or spanner left in the revolving part of the device may cause injury.
f) The device is not a toy. Children must be supervised to ensure that they do not play with the device.
2.4. Safe device use
a) Do not overload the device. Use the appropriate tools for the given task. A correctly-selected device will perform the task for which it was designed better and in a safer manner.
b) Do not use the device if the "ON/OFF" switch does not function properly (does not switch the device on and off). Devices which cannot be switched on and off using the "ON/OFF" switch are hazardous, should not be operated and must be repaired.
c) Make sure the plug is disconnected from the socket before attempting any adjustments, accessory replacements or before putting the device aside. Such precautions will reduce the risk of accidentally activating the device.
d) Disconnect the device from the power supply before commencement of adjustment, cleaning and maintenance. Such a preventive measure reduces the risk of accidental activation.
e) When not in use, store in a safe place, away from children and people not familiar with the device who have not read the user manual. The device may pose a hazard in the hands of inexperienced users.
f) Keep the device in perfect technical condition. Before each use check for general damage, especially check moving components for cracked parts or elements, and for any other conditions which may impact the safe operation of the device. If damage is discovered, hand over the device for repair before use.
g) Keep the device out of the reach of children.
h) Device repair or maintenance should be carried out by qualified persons, only using original spare parts. This will ensure safe use.
i) To ensure the operational integrity of the device, do not remove factory-fitted guards and do not loosen any screws.
j) When transporting and handling the device between the warehouse and the destination, observe the occupational health and safety principles for manual transport operations which apply in the country where the device will be used.
k) Avoid situations where the device stops working during use due to excessive loading. This may result in overheating of the drive elements and damage to the device.
I) Do not move, adjust or rotate the device in the course of work.
m) Do not leave this appliance unattended while it is in use.
n) Clean the device regularly to prevent stubborn grime from accumulating.
o) The device is not a toy. Cleaning and maintenance may not be carried out by children without supervision by an adult person.
p) It is forbidden to interfere with the structure of the device in order to change its parameters or construction.
q) Keep the device away from sources of fire and heat.
r) Do not overload the device.
s) Exceeding the maximum permissible user weight can damage the product.
t) Do not cover the ventilation openings!

ATTENTION! Despite the safe design of the device and its protective features, and despite the use of additional elements protecting the operator, there is still a slight risk of accident or injury when using the device. Stay alert and use common sense when using the device.
3. Use guidelines
This device is used to weigh items and scan barcodes, providing accurate measurements and efficient inventory management.
This scale is not suitable for commercial transactions, legal purposes, medical uses, pharmaceutical applications, price determination in sales.
The user is liable for any damage resulting from unintended use of the device.
3.1. Preparing for use
APPLIANCE LOCATION
The temperature of environment must not be higher than 40^ C and the relative humidity should be less than 85%. Ensure good ventilation in the room in which the device is being used. There should be at least 10 cm distance between each side of the device and the wall or other objects. The device should always be used when positioned on an even, stable, clean, fireproof and dry surface, and be out of the reach of children and persons with limited mental and sensory functions. Position the device such that you always have access to the power plug. The power cord connected to the appliance must be properly grounded and correspond to the technical details on the product label.
3.2. Device use
Note:
- In this manual, the term [ADD] refers collectively to the following buttons on the keypad:
Each of these buttons functions as an [ADD] button, allowing you to add items to different customer accounts or categories. When you see instructions that mention pressing [ADD], you can use any of these four buttons based on the specific customer or category you are processing.
This scale does not include a built-in battery and requires a direct power connection for operation.
- This scale does not include a built-in battery and requires a direct power connection for operation.
- In certain scenarios, the USB interface can be utilized to connect external devices, such as scanners, thereby enhancing the functionality and versatility of the equipment.
Operation instructions
Using the Label Printer
- Loading the Printer: Open the printer compartment and place the roll inside. Make sure the end of the paper feeds from the bottom and exits towards the front of the printer.
- Roll Size: The printer uses thermal paper rolls that are 55cm wide.
- Printer Type: This device uses a thermal printer.
- Printer Side Flap: The side flap allows access to the printer components for maintenance and troubleshooting.
- Maintenance: Regularly clean the printer head and roller using a soft, dry cloth. Avoid using abrasive materials or chemical cleaners which could damage the printer.
Note:
- The red flashing LED on the printer signifies that the printer is in standby mode, not an error.
- Thermal paper rolls with a width of 55 cm are commonly used consumables and can be replenished based on size once depleted.
Two Methods of weighing
1. Method one:
1) Weighing:
- Turn on the scale and reset it to zero (e.g., 0.000 or 0.00).
- Place the item on the scale (e.g., 0.470).
- Enter the unit price (e.g., 2.60).
- The display will show the total amount (e.g., 1.22).
Example:
Weight: 0.470
Unit Price: 2.60
Total Amount: 1.22
2) Adding items (if weighing only one product, skip this step):
- Press [ADD], and the display will show "Add 01 1.22" and print the amount.
- Place the next item on the scale (e.g., 0.065) and press [ADD].
- The display will show "Add 02 1.57" with the updated total.
Example:
Weight: 0.065
Unit Price: 5.4
Total Amount: 1.57
- Place customer A's items on the scale and enter the unit price, then press A+.
- If customer A needs to add more items later, leave the current total on hold.
- Place customer B's items on the scale, enter the unit price, and press B+.
- When customer A returns, place their new items on the scale, enter the unit price, and press A+ again.
- Press PRT to print the receipt for customer A with the total amount.
- Repeat for customer B by pressing B+, then PRT for their receipt.
Note:
• You can add up to 20 items across all customers (A, B, C, D), with a maximum total of 9999.99.
4) Cash payment:
- Press, and the display will show "Add 02-F 0.00".
- Enter the payment amount (e.g., 5.00). The display will show the amount paid.
Example:
Input Amount: 5.00
Display: "Add 02-F 5.00"
CASH
Note: If the entered amount is incorrect, press again to restart.
5) Charge:
- Press, and the display will show "Add 02-F 3.43".
- The cash drawer will open, indicating the change amount.
6) Print receipt:
-
Press , and the display will show "Add 02-P 3.43" for 5 seconds.
-
The following information will print on the receipt:
markdown
Copy code
2. Method two: USD/PCS (items that cannot be placed on the plate)
1) Weighing:
- Turn on the scale and reset it to zero (e.g., 0.000 or 0.00).
- Enter the unit price manually (e.g., 0.26) or press M1-M50 to retrieve a stored commodity's name and price.
o Press to confirm, and the display will show: "0.26 0 0.00".
- Press the numbers 0-9 to enter the quantity (e.g., 5), and the display will update to show "0.26 5 1.30".
2) Cash:
- Press CASH, and the display will show "0.26 00-r 0.00".
- Enter the payment amount (e.g., 20.00), and the display will update accordingly.
Example:
Entered Amount: 20.00
Display: "0.26 00-r 20.00"

Note: If the input amount is incorrect, press again to restart the input process.
3) Change:
- Press, and the display will show "0.26 00-F 18.70".
- The cash drawer will open, indicating the amount of change.
4) Print receipt:
- Press, and the display will show "0.26 00-P 18.70" for 5 seconds.
- The printed receipt will contain the following information:
Copy code
WELCOME
Date: YYYY-MM-DD Time: HH:MM:SS
Items N.W./QTY PRICE TOTAL (USD)
Item 5 0.26 1.30
TOTAL: 1.30 USD
CASH: 20.00 USD
CHANGE: 18.70 USD
Additional Notes:
- After printing, the display will show "0.000 0.00 0.00". This total (e.g., 1.3) is saved automatically and will not be lost after power-off (check again later if needed).
1. Single reprint:
○ After printing, press, and the display will show [CF00].
- Press again to reprint the last receipt.
2. Reprint with additional options:
○ After the initial print, press PRT. The unit price window will show [CF00].
Press [A+/B+/C+/D+] for additional customer options, and then press to reprint the last receipt with updates.
Note: If there is no print history, this function will not work. To clear [CF00] on the price window, press

Setting
1. Set the shop name:
1. Turn on the scale.
- The display will show "0.000 0.00 0.00".
2. Press

- The display will show "pro -- 0.00".
Note: Only proceed if the display shows a non-accumulative amount and the unit window displays "0.00".
3. Enter the shop name using the encoding table:
a. Press [2]
- The display will show "pro S-01 0.00".
Use the encoding table to find the code for each letter (e.g., for "Kai," the codes are K (4B), a (61), i (69)).
- The display will show "pro S-01 4B".
- If the input is incorrect, use to correct it.
c. Press [Zero]
- The display will show "Pro S-02 0.00".
- The display will show "Pro S-02 61".
e. Press [Zero]
- The display will show "Pro S-03 0.00".
- The display will show "Pro S-03 69".
g. Press [Zero]
- The display will show "Pro S-04 0.00".
4. Finalize the shop name:
- Continue pressing [Zero] until the display shows "0.000 0.00 0.00".
- This confirms that the shop name has been set.
Note: The shop name can contain up to 20 characters.
2. Set the goods name:
1. Turn on the scale.
- The display will show "0.000 0.00 0.00".
2. Press

- The display will show "pro -- 0.00".
Note: Only proceed if the display shows a non-accumulative amount and the unit window displays "0.00".
3. Enter the goods name using the encoding table (example: "APPLE 2.6USD"):
Use the encoding table to find the code for each character. For "APPLE 2.6USD," the codes are:
■ A (41), P (50), P (50), L (4C), E (45)
a. Press [3]
- The display will show "pro P-01 0.00".
- The display will show "pro P-01 41".
○ If incorrect, use to correct.
c. Press [Zero]
- The display will show "Pro P-02 0.00".
- The display will show "Pro P-02 50".
e. Press [Zero]
- The display will show "Pro P-03 0.00".
f. Input [50].
- The display will show "Pro P-03 50".
g. Press [Zero]
- The display will show "Pro P-04 0.00".
h. Input [4C].
- The display will show "Pro P-04 4C".
i. Press [Zero]
- The display will show "Pro P-05 0.00".
j. Input [45].
- The display will show "Pro P-05 45".
k. Press `[Zero]
- The display will show "Pro P-06 0.00".
- Finalize the goods name:
- Continue pressing [Zero] until the display shows "Pro Save 0.00".
- Assign the name to a memory location:
a. Press [M1] to assign to memory location M1.
- The display will show "Pro -- 0.00".
![STEINBERG SBS-EBS-101 - e. Press [Zero] - 1](/content/2026/04/733470/images/7a0000974d9f4bc215a26326d5cc6b51b88ea25ae98acbcfb636cbc06418a999.jpg)
b. Press to finish the setting.
- The display will show "0.000 0.00 0.00".
- Set the unit price:
- Enter the unit price (e.g., 2.6) and press [M1].
- The display will show "0.000 2.60 0.00".
- Save the settings:
![STEINBERG SBS-EBS-101 - e. Press [Zero] - 2](/content/2026/04/733470/images/4173fa48567f5afee7e3eb0a2c5a88cb32cad47bd1d7984bc1a6ebd78947fc46.jpg)
○ Press
- The display will show "0.000 2.60 0.00".
- Confirm the saved name and price:
○ Press [M1] again.
- The display will show "0.000 2.60 0.00".
Final Confirmation: "APPLE 2.6USD" has now been saved to memory location M1.
Note: Goods names are limited to 8 words.
- How to save 2000 prices:
A. Read price from M1 to M50
- To read prices stored from memory locations M1 to M50, press [M1] through [M50] on the keyboard directly.
B. Read price from M51 to M2000
![STEINBERG SBS-EBS-101 - e. Press [Zero] - 3](/content/2026/04/733470/images/bff39d3eda62b99bde51800c2fbe5a696eb54f3694410c139c2d0dfccba8b4d8.jpg)
-
Press to clear the unit price window. The display will show "0.00".
-
Enter a memory location from M51 to M2000 (e.g., 51-2000).
-
Enter the price you want to save (e.g., for M2000, enter 20.00 on the unit price window).
![STEINBERG SBS-EBS-101 - e. Press [Zero] - 4](/content/2026/04/733470/images/2c5498db3835ab5f5c7135a9e480ccf32f00997aaeb0a8f2ca65c4ce65ed0c37.jpg)
- The price on M2000 will now be displayed in the unit price window.
C. Store prices from M1 to M50
- Enter the unit price you want to save (e.g., 123.45).
![STEINBERG SBS-EBS-101 - e. Press [Zero] - 5](/content/2026/04/733470/images/3082a992cbb5e131624ba38cbf1cd81c3163b2ac394092abfac6e6005de4cbd9.jpg)
-
Press
-
Press one of the memory buttons [M1] to [M50] to store the price in that location.
- The price 123.45 is now saved to the selected memory location.
D. Store prices from M51 to M2000
- Enter the unit price you want to save (e.g., 123.45).
![STEINBERG SBS-EBS-101 - e. Press [Zero] - 6](/content/2026/04/733470/images/c9b0d22bf3204fad303255aa77f343b10b5ec63031cbcf02a3bb756cf8fa618d.jpg)
-
Press
-
Enter the memory location number you want to save the price to (e.g., 2000).
-
Press again to confirm.
- The price is now saved to the specified memory location.
Note: These functions cannot be used while the scale is in use.
4. Setting up time:
1. Turn on the scale.
The display will show "88.888 888.88 8888.88" followed by the date and time format: "year month day hour mins second" (e.g., 2010-05-22 10:28:20).
- Finally, the display will show "0.000 0.00 0.00".
- Press.
○ The display will show "Pro 0 0.00".
Note: Only proceed if the display shows a non-accumulative amount and the unit window displays "0.00".
3. Enter the date and time:
a. Set the year:
- Press [1], and the display will show "Pro t.1 0.00", indicating year entry mode.
- Press [0-9] and [. ] to enter the year (e.g., for 2013, input [13]).
■ The display will show "Pro t.1 0.13".
○ Correction: If there is an error, press CLR to clear and re-enter the value.
Press [ZERO] to confirm. If the display shows "Pro t.2 0.00", the year entry is correct. Proceed to the next step. Otherwise, repeat the year entry.
b. Set the day of the week:
- Press [0-9] and [. ] to enter the day of the week (e.g., for Tuesday, input 2).
■ The display will show "Pro t.2 0.02".
Press [ZERO] to confirm. If the display shows "Pro t.3 0.00", the entry is correct. Proceed to the next step. Otherwise, re-enter the day.
c. Set the date (month and day):
- Press [0-9] and [. ] to enter the date in the format MMDD (e.g., for October 26, input 1026).
■ The display will show "Pro t.3 10.26".
Press [ZERO] to confirm. If the display shows "Pro t.4 0.00", the date entry is correct. Proceed to the next step. Otherwise, re-enter the date.
d. Set the time (hour and minute):
- Press [0-9] and [. ] to enter the time in the format HHMM (e.g., for 16:58, input 1658).
■ The display will show "Pro t.4 16.58".
- Press [ZERO] to confirm. If the display shows "0.000 0.00 0.00", the time is set successfully.
4. Final Confirmation:
- The display "0.000 0.00 0.00" confirms that the setting time process is complete.
Check sales turnover:
The scale can store details for up to 2000 sales transactions, which can be reviewed based on specific terms you entered.
Note: This function can only be used when the scale is idle and reset to zero. Do not use it during active weighing.
Steps to check sales turnover:
1. Print or Clear Total Sales Data
○ After turning on the scale and resetting it to zero, press FUN and then press [8].
- Option A: Press PRT to print the total sales amount and total trade value.
- Option B: Press CLR to clear all sales details, including the total trade amount and total trade value.
2. Print Sales Record by Date
○ After turning on the scale and resetting it to zero, press FUN, then press [8], and then press 2.
- Enter the desired date as a six-digit number (e.g., for March 31, 2015, enter 150331).
PRT
- Press to print the sales record for that date.
3. Check Sales Record by Item Code
○ After turning on the scale and resetting it to zero, press FUN, then press [8], and then press 3.
- Enter the item code (e.g., for an item with code M10, enter 10) and press PRT.
- This will print the total sales for that specific item.
4. Print All Sales Details
○ After turning on the scale and resetting it to zero, press FUN, then press [8], then press PRT.
- This will print all stored sales details.
Query time:
- Turn on the scale and reset it to zero (e.g., "0.000 0.00 0.00").
FUN
- Press, which will display "Pro 00 0.00".
Note: Ensure there is no accumulated amount and that the unit price window displays "0.00" before proceeding.
- Press [7].
For example, if the current time is 9:58:25 on December 16, the display will show "Pro 12-16 09.58.25".
- After a few seconds, the display will return to "0.000 0.00 0.00" in normal weighing mode.
Edit phone numbers:
- After turning on the scale and resetting it to zero, press
FUN
-
Press [4] and enter the phone number (e.g., 057987066660).
-
Press [ZERO] to confirm.
Clear the shop name (reset to "welcome to use"):
-
After turning on the scale and resetting it to zero, press FON, then press [7].
-
Enter 1002 and press [ZERO].
- This clears the current shop name and resets it to the default.
Clear the goods name and unit price:
-
After turning on the scale and resetting it to zero, press FON, then press [7].
-
Enter 1003 and press [ZERO].
- This clears the current goods name and unit price.
How to use the Encode Table
Each row in the table contains several columns with the following headers:
• Decimalism: Decimal ASCII code for the character.
- Unicode: Hexadecimal (Unicode) representation of the character.
• Character: The corresponding character for the ASCII and Unicode codes.
Example:
If you want to encode the name "Apple" using the table, find the codes for each letter:
• A: Decimal code 065 or Unicode 41
• P: Decimal code 080 or Unicode 50
• P: Decimal code 080 or Unicode 50
• L: Decimal code 076 or Unicode 4C
• E: Decimal code 069 or Unicode 45
Using this encoding, you would input:
• [065] for A
• [080] for P
• [080] for P
• [076] for L
• [069] for E
Each character can be entered by pressing the corresponding numeric keys on your device as per the encoding guide.
Common Codes:
Here's a list of a few frequently used characters and their codes:
• Space: 032 (Decimal), 20 (Unicode)
- **Exclamation Mark (!)**: 033 (Decimal), 21 (Unicode)
• Dollar Sign (\$): 036 (Decimal), 24 (Unicode)
• Numbers 0-9: 048-057 (Decimal)
• Uppercase A-Z: 065-090 (Decimal)
- Lowercase a-z: 097-122 (Decimal)
Tips for Using the Table:
• Refer to this table each time you need to input a character directly by code.
- Ensure that you enter the correct decimal value (e.g., 065 for "A") to avoid errors.
- If your scale requires hexadecimal (Unicode) input, use the Unicode column values.
| Decimal Code | Unicode | Character | Decimal Code | Unicode | Character | Decimal Code | Unicode | Character | Decimal Code | Unicode | Character |
| 032 | 20 | (space) | 056 | 38 | 8 | 080 | 50 | P | 104 | 68 | h |
| 033 | 21 | ! | 057 | 39 | 9 | 081 | 51 | Q | 105 | 69 | i |
| 034 | 22 | " | 058 | 3A | : | 082 | 52 | R | 106 | 6A | j |
| 035 | 23 | # | 059 | 3B | ; | 083 | 53 | S | 107 | 6B | k |
| 036 | 24 | $ | 060 | 3C | < | 084 | 54 | T | 108 | 6C | l |
| 037 | 25 | % | 061 | 3D | = | 085 | 55 | U | 109 | 6D | m |
| 038 | 26 | & | 062 | 3E | > | 086 | 56 | V | 110 | 6E | n |
| 039 | 27 | ' | 063 | 3F | ? | 087 | 57 | W | 111 | 6F | o |
| 040 | 28 | ( | 064 | 40 | @ | 088 | 58 | X | 112 | 70 | p |
| 041 | 29 | ) | 065 | 41 | A | 089 | 59 | Y | 113 | 71 | q |
| 042 | 2A | * | 066 | 42 | B | 090 | 5A | Z | 114 | 72 | r |
| 043 | 2B | + | 067 | 43 | C | 091 | 5B | [ | 115 | 73 | s |
| 044 | 2C | , | 068 | 44 | D | 092 | 5C | \ | 116 | 74 | t |
| 045 | 2D | - | 069 | 45 | E | 093 | 5D | ] | 117 | 75 | u |
| 046 | 2E | . | 070 | 46 | F | 094 | 5E | ^ | 118 | 76 | v |
| 047 | 2F | / | 071 | 47 | G | 095 | 5F | _ | 119 | 77 | w |
| 048 | 30 | 0 | 072 | 48 | H | 096 | 60 | ` | 120 | 78 | x |
| 049 | 31 | 1 | 073 | 49 | I | 097 | 61 | a | 121 | 79 | y |
| 050 | 32 | 2 | 074 | 4A | J | 098 | 62 | b | 122 | 7A | z |
| 051 | 33 | 3 | 075 | 4B | K | 099 | 63 | c | 123 | 7B | { |
| 052 | 34 | 4 | 076 | 4C | L | 100 | 64 | d | 124 | 7C | | |
| 053 | 35 | 5 | 077 | 4D | M | 101 | 65 | e | 125 | 7D | } |
| 054 | 36 | 6 | 078 | 4E | N | 102 | 66 | f | 126 | 7E | ~ |
| 055 | 37 | 7 | 079 | 4F | O | 103 | 67 | g | 127 | 7F | |
3.3. Cleaning and maintenance
a) Unplug the mains plug and allow the device to cool completely before each cleaning, adjustment or replacement of accessories, or if the device is not being used.
- Wait for the rotating elements to stop.
b) Always unplug the device before cleaning or putting it away.
c) Use only non-corrosive cleaners to clean the surface.
d) Use only mild, food-safe detergents to wash the device.
e) After cleaning the device, all parts should be dried completely before using it again.
f) Store the unit in a dry, cool place, free from moisture and direct exposure to sunlight.
g) Do not spray the device with a water jet or submerge it in water.
h) Do not allow water to get inside the device through vents in the housing of the device.
i) Clean the vents with a brush and compressed air.
j) The device must be regularly inspected to check its technical efficiency and spot any damage.
k) Use a soft cloth for cleaning.
I) Use a soft, damp cloth for cleaning.
m) Do not use sharp and/or metal objects for cleaning (e.g. a wire brush or a metal spatula) because they may damage the surface material of the appliance.
n) Do not clean the device with an acidic substance, agents of medical purposes, thinners, fuel, oils or other chemical substances because it may damage the device.
DISPOSING OF USED DEVICES:
Do not dispose of this device in municipal waste systems. Hand it over to an electric and electrical device recycling and collection point. Check the symbol on the product, instruction manual and packaging. The plastics used to construct the device can be recycled in accordance with their markings. By choosing to recycle you are making a significant contribution to the protection of our environment.
Contact local authorities for information on your local recycling facility.

■ A (41), P (50), P (50), L (4C), E (45)
a. Naciśnij [3]
■ A (41), P (50), P (50), L (4C), E (45)
a. Stiskněte [3]
○ Na displeji se zobrazí "pro P-01 0.00".
b. Vstup [41].
1. Allumez la balance.
■ A (41), P (50), P (50), L (4C), E (45)
a. Presione [3]
APPARATETS PLACERING
■ A (41), P (50), P (50), L (4C), E (45)
a. Tryk på [3].
○ Displayet vil vise "pro P-01 0.00".
○ Displayet vil vise "pro P-01 41".
• [065] for A
• [080] for P
• [080] for P
• [076] for L
• [069] for E
PLAATS VAN HET APPARAAT
■ A (41), P (50), P (50), L (4C), E (45)
a. Trykk [3]
○ Displayet vil vise "pro P-01 0.00".
b. Inngang [41].
○ Displayet vil vise "pro P-01 41".
• [065] for A
• [080] for P
• [080] for P
• [076] for L
• [069] for E
APPARATENS PLACERING
■ A (41), P (50), P (50), L (4C), E (45)
a. Tryck på [3]
- pre A
• [080] pre P
• [080] pre P
• [076] pre L
- pre E
■ A (41), P (50), P (50), L (4C), E (45)
ένα. Πατήστε [3]
■ A (41), P (50), P (50), L (4C), E (45)
a. Pritisnite [3]
■ A (41), P (50), P (50), L (4C), E (45)
a. Paspauskite [3]
○ Ekrane bus rodoma „pro P-01 0.00“.
b. Ivestis [41].
○ Ekrane bus rodomas „pro P-01 41“.
Data: AAAA-LL-ZZ Ora: HH:LL:SS
Articole NW/CANTITATE PRET TOTAL (USD)
Punctul 5 0,26 1,30
TOTAL: 1,30 USD
NUMERAR: 20,00 USD
SCHIMBARE: 18,70 USD
Note suplimentare:
For the disposal of the device please consider and act according to the national and local rules and regulations.
expondo Polska sp. z o.o. sp. k.