Rabbit - Child bike seat Bellelli - Free user manual and instructions
Find the device manual for free Rabbit Bellelli in PDF.

User questions about Rabbit Bellelli
0 question about this device. Answer the ones you know or ask your own.
Ask a new question about this device
Download the instructions for your Child bike seat in PDF format for free! Find your manual Rabbit - Bellelli and take your electronic device back in hand. On this page are published all the documents necessary for the use of your device. Rabbit by Bellelli.
USER MANUAL Rabbit Bellelli
03ISRABMF01_interno.qxd 18-01-2010 9:44 Pagina 510 Read the instructions carefully before using this child seat. Keep them in a safe place for future reference. Before using the product, consult the highway code for the country of use. WARNING
- Do not add any extra loads to the child seat.
- For transporting any other loads, use other supports, such as for example, a front parcel rack.
- All modifications to the child seat and supports are prohibited. The manufacturer or retailer will not be held responsible for any damage caused by modifications.
- When a child is using the seat, the bicycle may handle differently from normal conditions, especially in terms of balance, steering and brakes.
- The child seat may reduce the manoeuvrability of the handlebars. Replace the handlebars if the child seat reduces the steering angle to less than 45° on each side.
- Never leave the bicycle parked with the child unattended in the child seat.
- Do not use the child seat if any part of the seat and/or bicycle is broken or missing.
- Contact the manufacturer or dealer to order spare parts for the seat.
- Replace it completely after an accident even when there is no visible damage. GENERAL INFORMATION
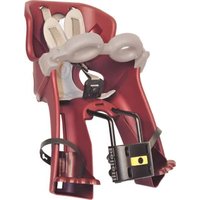
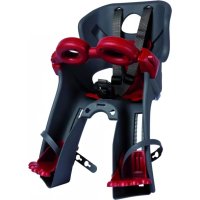
- Front child seat for children weighing maximum 15 kg; check the child’s weight periodically to make sure it does not exceed this limit.
- Only use with children able to remain seated on their own for a long time without requiring support (aged 9/12 months approx.).
- Use on bicycles with wheel diameters of 26” - 28” which can bear additional loads of at least 18 kg.
- Refer to the bicycle manual or retailer.
- Do not mount the child seat so that it leans forwards.
- Lean it slightly backwards in order to hold the child in more effectively.
- Mount the child seat facing front.
- Do not use the child seat on mopeds, motor scooters, motorcycles, electric bicycles, racing bicycles or bicycles with suspensions.
- Check that no limbs or clothes of the child or the cyclist can become trapped in the moving parts of the bicycle or child seat (e.g. in the brakes).
- Check that the child cannot insert its fingers between the springs of the saddle. Use a saddle cover or a saddle with internal springs.
- Check that the child cannot insert its fingers or feet between the wheel spokes of the bicycle. We recommend the use of a wheel guard.
- Check that the child cannot reach any sharp or pointed parts (e.g. frayed brake cables).
- Always fasten the child’s seat belt and the footrest ties.
- Check that the child is always wrapped up warmly enough, more than the cyclist and that he/she is protected in the event of rain.
- Use an approved helmet suitable for the head size of the child.
- Never carry two children at the same time.
- The cyclist must be at least 16 years old.
- Always fasten all the straps, even when there is no child being carried.
- Check that the straps do not reach the wheels or other moving parts on the bicycle, both with and without child on board.
- Never leave the child seat in the sun: the heated plastic could burn the child.
- Remove the child seat from the bicycle each time the latter must be transported on the outside of a vehicle (e.g. on a car roof, on a towed trailer or behind a motorhome).
- Periodically check the bicycle: tyres, brakes, lights, etc.
- Periodically wash the child seat with soap and water. Do not use aggressive substances.
MOUNTING THE CHILD SEAT
Do not mount the child seat when the child is sitting in it. Make sure you have all the components before proceeding with assembly (fig. A). Mounting the support block Mount the support block around the bicycle frame, as illustrated (fig. B). IMPORTANT: Make sure that the brake cables and gears do not get in the way of the block. Choose the most suitable screws for your frame (fig. C). Place the screws in the appropriate holes. Tighten the nuts loosely and evenly (fig. D). The support block must remain free to run along the bicycle frame; tighten firmly in place only when the correct position for the child seat has been determined (see paragraph: MOUNTING THE CHILD SEAT ON THE BICYCLE). Mounting the support fork on the child seat Position the support fork beneath the base of the child seat (fig. E). Insert the screws into the base of the child seat (fig. F). Position the fixing plate beneath the child seat (fig. G). Tighten the nuts to fasten the support fork (fig. H). Insert the anti-rolling device inside the support fork (fig. X). Mounting the child seat on the bicycle Keep the yellow button on the block pressed down and insert the support fork in the holes on the upper part of the block (fig. I). Important: once inserted, make sure that the yellow button has clicked into place, otherwise it means that the fork has not been inserted correctly: repeat the process. Determine the best position for the child seat:
- There must be sufficient room for the cyclist to steer and pedal comfortably.
- Check that the cyclist’s knees do not knock against the child seat when pedalling.
- Check that the handlebars do not get caught in the child seat when steering.
- Leave sufficient room to be able to move the child in and out of the child seat comfortably.
03ISRABMF01_interno.qxd 18-01-2010 9:44 Pagina 711 Read the instructions carefully before using this child seat. Keep them in a safe place for future reference. Before using the product, consult the highway code for the country of use. WARNING
- Do not add any extra loads to the child seat.
- For transporting any other loads, use other supports, such as for example, a front parcel rack.
- All modifications to the child seat and supports are prohibited. The manufacturer or retailer will not be held responsible for any damage caused by modifications.
- When a child is using the seat, the bicycle may handle differently from normal conditions, especially in terms of balance, steering and brakes.
- The child seat may reduce the manoeuvrability of the handlebars. Replace the handlebars if the child seat reduces the steering angle to less than 45° on each side.
- Never leave the bicycle parked with the child unattended in the child seat.
- Do not use the child seat if any part of the seat and/or bicycle is broken or missing.
- Contact the manufacturer or dealer to order spare parts for the seat.
- Replace it completely after an accident even when there is no visible damage. GENERAL INFORMATION
- Front child seat for children weighing maximum 15 kg; check the child’s weight periodically to make sure it does not exceed this limit.
- Only use with children able to remain seated on their own for a long time without requiring support (aged 9/12 months approx.).
- Use on bicycles with wheel diameters of 26” - 28” which can bear additional loads of at least 18 kg.
- Refer to the bicycle manual or retailer.
- Do not mount the child seat so that it leans forwards.
- Lean it slightly backwards in order to hold the child in more effectively.
- Mount the child seat facing front.
- Do not use the child seat on mopeds, motor scooters, motorcycles, electric bicycles, racing bicycles or bicycles with suspensions.
- Check that no limbs or clothes of the child or the cyclist can become trapped in the moving parts of the bicycle or child seat (e.g. in the brakes).
- Check that the child cannot insert its fingers between the springs of the saddle. Use a saddle cover or a saddle with internal springs.
- Check that the child cannot insert its fingers or feet between the wheel spokes of the bicycle. We recommend the use of a wheel guard.
- Check that the child cannot reach any sharp or pointed parts (e.g. frayed brake cables).
- Always fasten the child’s seat belt and the footrest ties.
- Check that the child is always wrapped up warmly enough, more than the cyclist and that he/she is protected in the event of rain.
- Use an approved helmet suitable for the head size of the child.
- Never carry two children at the same time.
- The cyclist must be at least 16 years old.
- Always fasten all the straps, even when there is no child being carried.
- Check that the straps do not reach the wheels or other moving parts on the bicycle, both with and without child on board.
- Never leave the child seat in the sun: the heated plastic could burn the child.
- Remove the child seat from the bicycle each time the latter must be transported on the outside of a vehicle (e.g. on a car roof, on a towed trailer or behind a motorhome).
- Periodically check the bicycle: tyres, brakes, lights, etc.
- Periodically wash the child seat with soap and water. Do not use aggressive substances.
MOUNTING THE CHILD SEAT
Do not mount the child seat when the child is sitting in it. Make sure you have all the components before proceeding with assembly (fig. A). Mounting the support block Mount the support block around the bicycle frame, as illustrated (fig. B). IMPORTANT: Make sure that the brake cables and gears do not get in the way of the block. Choose the most suitable screws for your frame (fig. C). Place the screws in the appropriate holes. Tighten the nuts loosely and evenly (fig. D). The support block must remain free to run along the bicycle frame; tighten firmly in place only when the correct position for the child seat has been determined (see paragraph: MOUNTING THE CHILD SEAT ON THE BICYCLE). Mounting the support fork on the child seat Position the support fork beneath the base of the child seat (fig. E). Insert the screws into the base of the child seat (fig. F). Position the fixing plate beneath the child seat (fig. G). Tighten the nuts to fasten the support fork (fig. H). Insert the anti-rolling device inside the support fork (fig. X). Mounting the child seat on the bicycle Keep the yellow button on the block pressed down and insert the support fork in the holes on the upper part of the block (fig. I). Important: once inserted, make sure that the yellow button has clicked into place, otherwise it means that the fork has not been inserted correctly: repeat the process. Determine the best position for the child seat:
- There must be sufficient room for the cyclist to steer and pedal comfortably.
- Check that the cyclist’s knees do not knock against the child seat when pedalling.
- Check that the handlebars do not get caught in the child seat when steering.
- Leave sufficient room to be able to move the child in and out of the child seat comfortably.
- The child must have sufficient leg room during transit.
- Make sure that the child seat does not get in the way of the pedals, brakes, gears and other moving parts of the bicycle. Line up the child seat with the axis of the bicycle. Tighten all nuts properly. Attach the anti-rolling device to the bicycle frame (fig. Y). Important: Check periodically that the screws are properly tightened. They can loosen with use. Removing the child seat from the bicycle Keep the yellow button on the block pressed down and remove the support fork, pulling it upwards.
INSTALLING AND ADJUSTING THE FOOTRESTS
Do not carry out these operations when the child is in the child seat. Installing the footrests Take the left footrest (with the symbol L printed on the back). Insert into the vertical slot of the left leg shield. Push upwards as far as it will go. Take hold of the locking lever for the left footrest (with the symbol SX printed on the back). Push the locking lever into the hole behind the rest. Insert from the outside and push right in (fig. L). Close the locking lever by pushing downwards until you hear a click. Repeat the same processes for the right footrest. Adjusting the height of the footrests Before using the child seat, check that the child’s feet rest completely on the footrests. To adjust the height of the footrests:
- Turn the locking lever behind the bracket upward (fig. M).
- Move the footrest upward or downward to the desired position.
- Close the locking lever by pushing downwards until you hear a click. FINAL CHECK Do not carry out these tests with the child in the child seat. Push the bicycle forwards for a few metres, making sure that none of the moving parts touch the child seat, there are no belts hanging loose near the wheel and that the brakes and pedals still work properly.
PLACING THE CHILD IN THE SEAT
Press the button on the central buckle until you hear a click (fig. N). Place the child in the child seat. Pull the safety belts down over the child’s head (fig. O). Fasten the central buckle (fig. P). Push the buckle all the way into the opening until you hear a click.
03ISRABMF01_interno.qxd 18-01-2010 9:44 Pagina 8 Adjust the loops on the belt so that the belt fits snugly on the child’s body (fig. Q). Place the child’s feet in the footrests. Fasten the laces by hooking them over the pin on the rear of the footrest (fig. R). When travelling, periodically check that the child is properly belted.
REMOVING THE CHILD FROM THE SEAT
Unhook the laces which keep the feet in place. Push the button on the central buckle until you hear a click. Remove the buckle by pulling upwards. Pull the safety belts up over the child’s head. GUARANTEE The conditions of the guarantee can be seen on our web site: www.bellelli.com.