PHD 170 C2 - Pressure washer PARKSIDE - Free user manual and instructions
Find the device manual for free PHD 170 C2 PARKSIDE in PDF.
| Product type | High pressure cleaner |
| Brand | Parkside |
| Model | PHD 170 C2 |
| Power | 2400 W |
| Power supply voltage | 230 V~, 50 Hz |
| Operating pressure | 11.5 MPa (115 bar) |
| Maximum admissible pressure | 17 MPa (170 bar) |
| Rated water flow | 330 l/h (5.5 l/min) |
| Maximum water flow | 500 l/h (8.3 l/min) |
| Power cable length | 5 m |
| High pressure hose length | 10 m |
| Weight | 11.4 kg |
| Protection class | II (double insulation) |
| Protection rating | IPX5 |
| Sound pressure level | 79.9 dB(A) (uncertainty 3 dB) |
| Measured sound power level | 92.5 dB(A) (uncertainty 2.18 dB) |
| Guaranteed sound power level | 97 dB(A) |
| Vibration (handle) | < 2.5 m/s² (uncertainty 0.15 m/s²) |
| Vibration (spray gun) | 3.7 m/s² |
| Maximum inlet temperature | 40 °C |
| Maximum inlet pressure | 0.8 MPa |
| Detergent tank capacity | 0.5 L |
| Included accessories | Lance, adjustable standard nozzle, turbo cutter, rotary brush, cleaning needle, quick connector, water coupling with filter, spray gun, cleaning product (0.5 L) |
| Warranty | 3 years |
| Intended use | Domestic (non-industrial) |
Frequently Asked Questions - PHD 170 C2 PARKSIDE
User questions about PHD 170 C2 PARKSIDE
0 question about this device. Answer the ones you know or ask your own.
Ask a new question about this device
Download the instructions for your Pressure washer in PDF format for free! Find your manual PHD 170 C2 - PARKSIDE and take your electronic device back in hand. On this page are published all the documents necessary for the use of your device. PHD 170 C2 by PARKSIDE.
USER MANUAL PHD 170 C2 PARKSIDE
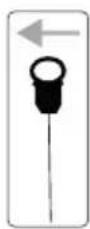
natural_image
Black industrial water purifier device with attached hose and handle (no visible text or symbols)
text_image
PDF ONLINE www.lidl-service.com
Hochdruckreiniger / Pressure Washer / Nettoyeur haute pression PHD 170 C2
DE AT CH
Hochdruckreiniger
Translation of the original instructions
NL BE
Hogedrukreiniger
Before reading, unfold the page containing the illustrations and familiarise yourself with all functions of the device.
FR BE
Service-Center....19
Importeur ......19
Original-EG-
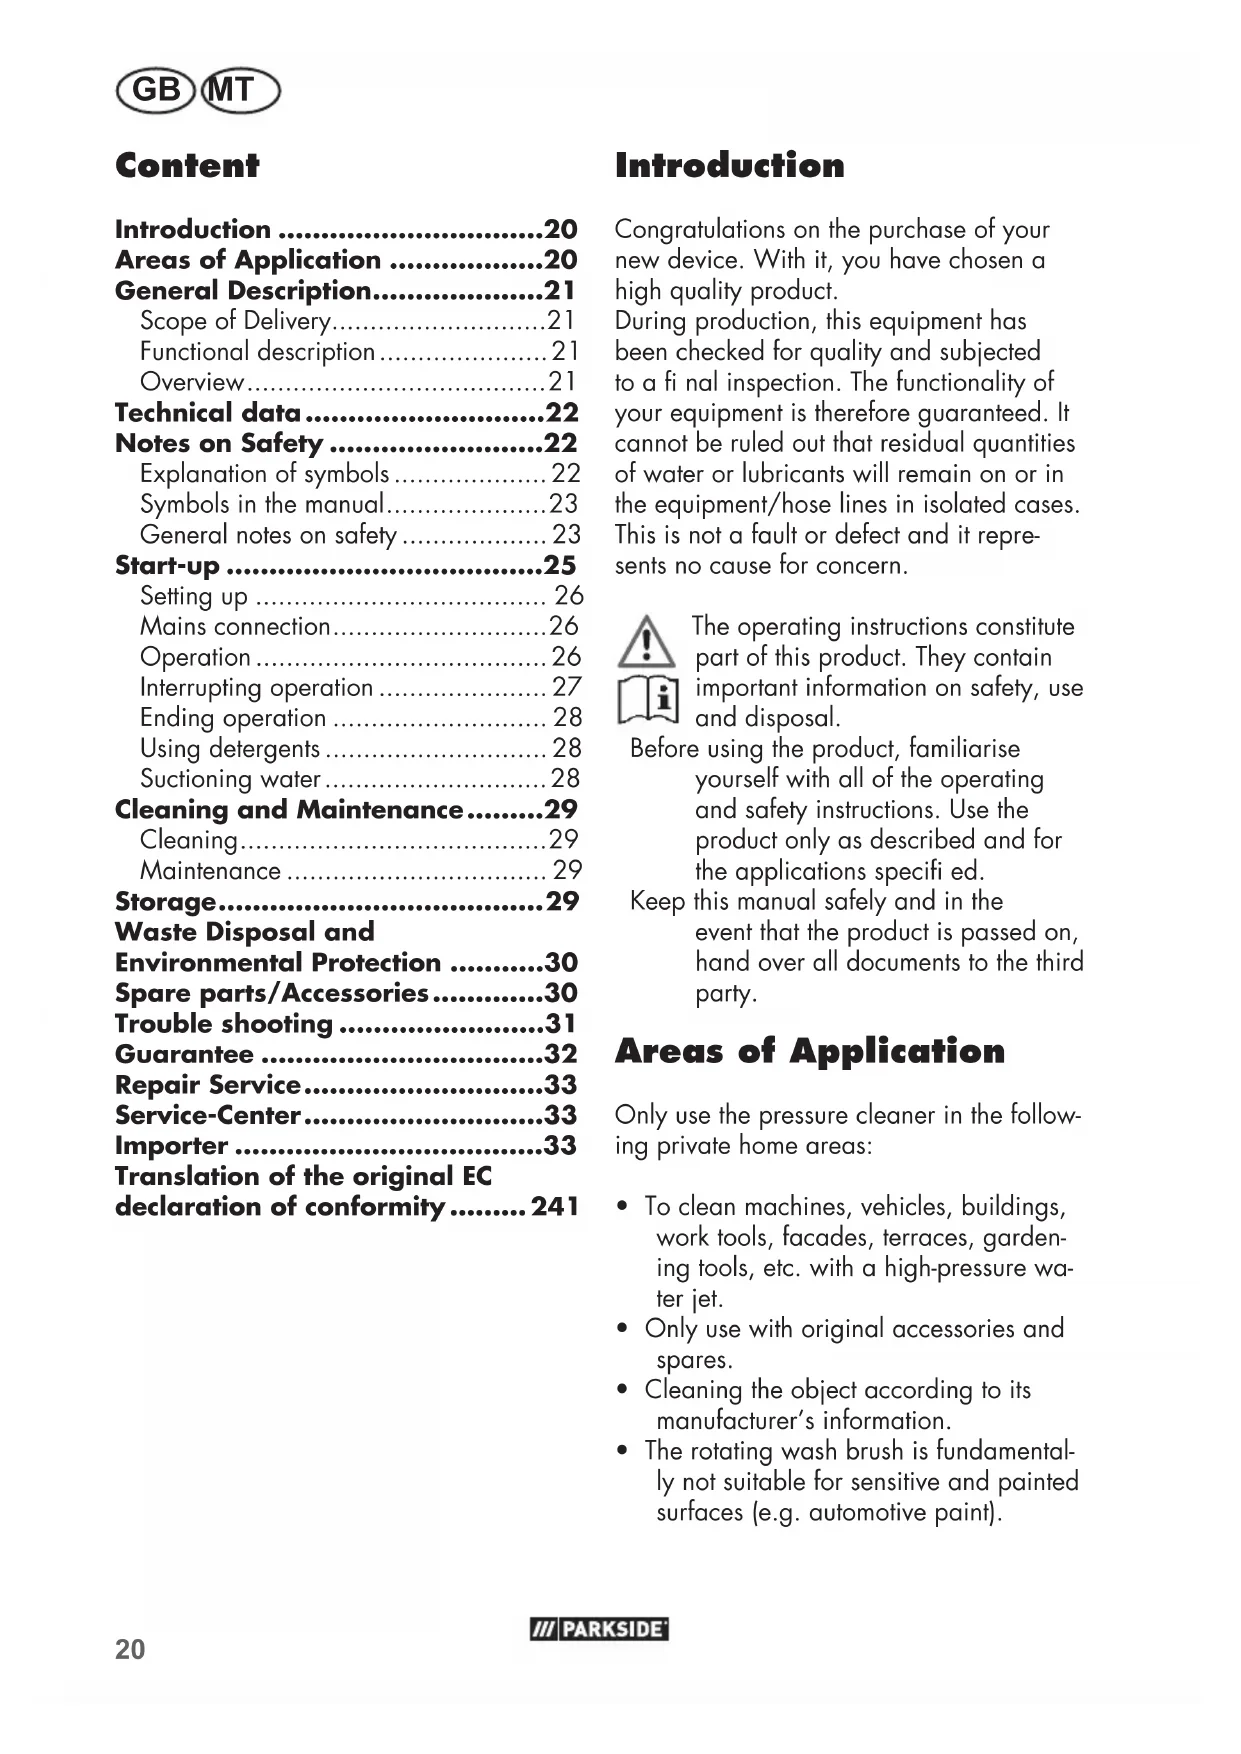
Areas of Application .....20
General Description......21
Scope of Delivery......21
Functional description 21
Overview....21
Technical data....22
Notes on Safety ......22
Explanation of symbols 22
Symbols in the manual....23
General notes on safety 23
Start-up 25
Setting up 26
Mains connection....26
Operation 26
Interrupting operation 27
Ending operation 28
Using detergents 28
Suctioning water 28
Cleaning and Maintenance......29
Cleaning....29
Maintenance 29
Storage....29
Waste Disposal and
Environmental Protection ....30
Spare parts/Accessories......30
Trouble shooting ....31
Guarantee 32
Repair Service....33
Service-Center 33
Importer 33
Translation of the original EC declaration of conformity ..... 241
Introduction
Congratulations on the purchase of your new device. With it, you have chosen a high quality product.
During production, this equipment has been checked for quality and subjected to a final inspection. The functionality of your equipment is therefore guaranteed. It cannot be ruled out that residual quantities of water or lubricants will remain on or in the equipment/hose lines in isolated cases. This is not a fault or defect and it represents no cause for concern.
The operating instructions constitute part of this product. They contain important information on safety, use and disposal.
Before using the product, familiarise yourself with all of the operating and safety instructions. Use the product only as described and for the applications specified.
Keep this manual safely and in the event that the product is passed on, hand over all documents to the third party.
Areas of Application
Only use the pressure cleaner in the following private home areas:
- To clean machines, vehicles, buildings, work tools, facades, terraces, gardening tools, etc. with a high-pressure water jet.
- Only use with original accessories and spares.
- Cleaning the object according to its manufacturer's information.
- The rotating wash brush is fundamentally not suitable for sensitive and painted surfaces (e.g. automotive paint).
This equipment is not suitable for commercial use. Commercial use will invalidate the guarantee.
General Description
The diagram of the most important functional elements can be found on the foldout side.
Scope of Delivery
Unpack the pressure cleaner and verify the contents:
- Pressure cleaner with mains cable
- Quick connector for garden hose adaptor (22)
- Jet gun (14)
- Lance (3)
- Standard Vario nozzle (25)
- Turbo dirt miller (26)
- Rotating wash brush (21)
- Nozzle cleaning needle (30)
- Water connection coupling (12) and sieve insert (12.1)
- 0.5 | cleaning agent
- Instructions for use
Dispose of the packaging material correctly.
Functional description
The pressure cleaner cleans by means of a water jet, with a choice of high or low pressure operation.
A detergent can be added if this is required.
For the functions of the operating elements please refer to the subsequent description. Ensure that the safety instructions are always observed!
Overview
1 Bow-type handle release button 2 Bow-type handle
3 Lance
4 High-pressure hose on hose reel
4.1 Guide for high-pressure hose
4.2 Velcro fastener on high-pressure hose
5 Hose reel
6 Hose reel crank (not visible)
7 Nozzle release button
8 On/Off switch
9 Holder for mains cable
10 Mains cable
10.1 Clip for cord
11 Wheels
12 Water connection coupling
12.1 Filter insert
13 Water connection
14 Jet gun
15 Holder for spray gu
16 Accessories holder (not visible)
17 Holder for nozzle cleaning needle (not visible)
18 Operating pressure gauge (not visible)
19 Starting lever
20 Locking button
21 Rotating wash brush
22 Quick connector for garden hose adaptor
23 Sealing cap with suction hose
24 Cleaning agent container
25 Standard Vario nozzle
26 Turbo dirt miller
27 High-pressure fitting
28 Release button
29 High-pressure fi tting (gun)
30 Nozzle cleaning needle
31 Cleaning agent
Technical data
Pressure washer ......PHD 170 C2
Mains connection....230 V\~, 50 Hz Power consumption ....2400 W Mains cable length....5 m High-pressure hose length....10 m Weight (without accessories) ....11.4 kg Safety class....□ II Degree of protection....IPX5 Rated/operating pressure (p) ....11.5 MPa Max. permissible pressure (p max) 17 MPa Max. infl ow pressure (p in max)...0.8 MPa Max. infl ow temperature (T in max) ..40 °C Pumping rate, water
(Q)....330 l/h; 5.5 l/min
Max. pumping rate, water
(Q max)....500 l/h; 8.3 l/min
Sound pressure level
(L_pA) 79.9 dB; K_pA = 3 dB
Sound power level ( L_WA )
measured....92.5 dB; K_WA = 2.18 dB
guaranteed 97 dB
Vibration (a_h) ..... < 2.5m / s^2 ; K = 0.15~m / s^2
Vibration Jet gun 3.7 m/s²
The values for noise and vibration were determined according to EN 60335-2-79:2012.
This device is intended to be operated using a mains supply network with an service current capacity on the transfer point (house connection) of max. 100 A per phase.
The user must ensure that the device is only operated using a mains supply network that meets the requirements.
If necessary, local power supply companies can be consulted with regards to the service current capacity.
The stated vibration emission value was measured in accordance with a standard testing procedure and may be used to compare one power tool to another.
The stated vibration emission value may also be used for a preliminary exposure assessment.

Warning: The vibration emission value may differ during actual use of the power tool from the stated value depending on the manner in which the power tool is used.
Try to keep the exposure to vibrations as low as possible. Examples of measures to reduce vibration exposure are the wearing of gloves when using the tool and limiting the working hours. For this purpose all parts of the operating cycle have to be considered (for example, times when the electric tool is switched off and times when it is switched on but running without any load).
Notes on Safety
This section is concerned with the basic safety rules when working with the pressure cleaner.
Explanation of symbols

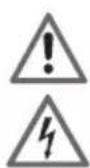
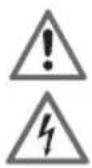
Attention!

Before beginning work, familiarise yourself thoroughly with all the operating elements, particularly with how they function and operate. Ask a specialist if necessary.

Attention: Remove the plug from the socket as soon as the power lead is damaged or cut.
Also disconnect the plug from the socket when connecting to the water supply or trying to eliminate leaks.

The pressure cleaner is not suitable for direct connection to the drinking water supply system.

Safety class II (Double insulation)
Electric appliances should not be disposed of in the domestic garbage.
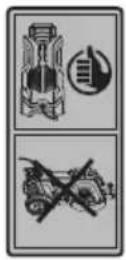
Operate the equipment only in an upright and never in a reclined position.
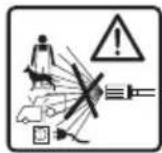
CAUTION. pressure cleaners can be dangerous if they are not operated correctly! The jet must never be directed at people, animals, electric equipment connected to the power supply or against the actual pressure cleaner.
Nozzle cleaning needle

Marking on the On/Off switch

Noise level specification L_WA in dB.
Symbols in the manual

Warning symbols with in- formation on damage and injury prevention

Instruction symbols with information on preventing damage

Help symbols with information on improving tool handling
General notes on safety
• Machines shall not be used by children. Children should be supervised to ensure that they do not play with the machine.
- This machine can be used by people with reduced physical, sensory or mental capabilities or lack of experience and knowledge if they have been given supervision or instruction concerning use of the machine in a safe way and understand the hazards involved.
- People who are unfamiliar with the operating instructions are not permitted to use the equipment.
- High pressure cleaner may not be operated by non-trained persons
- In the event of a fault or defect during operation, immediately switch off and unplug the equipment. Then read page 31 of the operating instructions for possible fault causes or contact our service centre.
Working with the equipment

Caution: to avoid accidents and injuries:
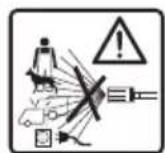
CAUTION. pressure cleaners can be dangerous if they are not operated correctly! The jet must never be directed at people, animals, electric equipment connected to the power supply or against the actual pressure cleaner.
- Use the equipment only when standing and on a level, stable base.
GB MT
- Use the equipment only on a flat, stable surface.
- Do not direct the jet at yourself or others in order to clean clothes and shoes.
- To protect against water or dirt splashing back, wear suitable protective clothing and safety goggles.
- Do not operate the pressure cleaner when other people are in the immediate vicinity, other than they are also wearing protective clothes.
• Take appropriate measures to keep children away from the equipment whilst it is running.
- Do not use the equipment in the vicinity of fl ammable liquids or gases. Non-observance will result in a risk of fi re or explosion.
- Do not spray combustible liquids. Risk of explosion.
- If you come into contact with cleaning agents, rinse with plenty of clean water.
- Store the equipment in a dry place and out of reach of children.

Caution! To avoid damage to the equipment and any possible person injury resulting from this:
- Do not work with damaged or incomplete equipment, or with equipment that has been converted without the approval of the manufacturer. Before initial operation, have a specialist check that the required electrical protection measures are in place.
- Do not operate the equipment if the mains cable, water supply or other important parts such as the high-pressure hose or gun are damaged/ leaking.
- Protect the pressure cleaner from frost and dry running.
- High-pressure hoses, fi ttings and couplings are important for machine safety. Use only high-pressure hoses, fi ttings and couplings recommended by the manufacturer.
- Use only original accessories and do not carry out conversion work on the equipment.
- Please read the notes in the operating instructions on the topic of "maintenance and cleaning". Any measures above and beyond these, particularly opening the equipment, are to be carried out by an authorised electrician. In the case of repairs, always contact our service centre.
Electrical safety:

Caution: to avoid accidents and injuries from electric shocks:
- The plug and socket of an extension cable must be water-tight!

Unsuitable extension cables can be dangerous as people can be harmed by an electric shock!
- Protect the electric plug connections against moisture.
- If there is a risk of flooding,
fi x the plug connections in an area that is safe from fl ood-ing.
- Ensure that the mains voltage matches the specifications on the rating plate.
- Connection to the mains must be carried out by an experienced electrician and meet the requirements of IEC 60364-1.
- The electrical installation shall be according to national wiring rules.
- The device must only be connected to a mains socket via a RCD (Residual Current Device) with a rated leakage current of not more than 30 mA. Fuse: at least 13 ampere.
- Before each use, check the equipment, cable and plug for damage.
- If the power cable for this equipment is damaged, it must be replaced by the manufacturer, a customer service agent of the same or a similarly qualified person in order to prevent hazards.
- Do not pull the plug from the socket by the cable. Protect the cable from heat, oil and sharp edges.
- Do not carry or fix the equipment by the cable.
- Unsuitable extension cables can be dangerous. If an extension cable is used it must be suitable for outdoor use, and be routed above the ground. We recommend using a cable drum that holds the socket at least 60 mm above the ground.
Check the cable for damage.
- Before any work on the equipment, during work breaks and in the case of non-use, remove the plug from the socket.
- Extension cables must not have a cross-section less than 2 × 2.5 ~mm^2 .
- Wear sturdy footwear to protect against electric shock.
• To protect against electric shock, operate the equipment only in an upright position.
• Always shut off the power switch when leaving the machine unattended.
Start-up

In keeping with current regulations a pressure cleaner must never be operated off the drinking water mains supply without a controllable backflow preventer. A suitable backflow preventer in conformity with EN 12729 type BA must be used.
Water that has passed through a backfl ow preventer is classified as undrinkable. A backfl ow preventer is available in specialist shops.
A system separator (check valve) prevents the backflow of water and detergent into the drinking water pipeline.
- Use a commercially available 1/2" garden hose, at least 5 m long, for water supply.
Do not exceed a length of 30 m. - Use the device on a domestic water connection with an output of at least 500 l/h.

Suction hose with filter basket (not included)
Setting up
With the curved handle (2) pulled out, you can conveniently roll the device.
- Pulling out the handle:
Pull the curved handle (2) upwards. - Pulling in the handle:
Press the release button of the curved handle (1) and push the curved handle (2) downwards.
- Place the device horizontally on a level surface.
- Insert the high-pressure hose (4) through the guide for the high-pressure hose (4.1).
- Insert the high-pressure connector for the spray gun (29) into the high-pressure connection (27) on the spray gun (14). Make sure that the hose does not pass through the curved handle (2) so as not to obstruct the curved handle (2).
- Connect the supply hose to the water supply and bleed the hose by allowing water to flow bubble-free out of the other end of the supply hose. Close the tap.
- Insert the sieve insert (12.1) in the water connection (13).
- Mount the water connection coupling (12) on the water connection (13).
- Connect the feed hose with the help of the quick connector for garden hose adaptor (22) with the water connection coupling (12) and the water connection (13) on the device.
- Connect the lance (3) to the spray gun (14) by inserting it and screwing it in (bayonet catch).
- If the lance (3) is mounted, connect either the standard vario-nozzle (25) or turbo dirt blaster (26) by inserting into the lance (3). The attachments snap into place. To remove the attachments, press the side lock (7) on the front end
of the lance (3) and pull the attachment forwards to disconnect it.
- Connect the rotating washing brush (21) directly to the spray gun (14) by inserting it and tightening (bayonet fi t-ting). It is always used without applying any pressure. The cleaning function is produced by the rotational movement and the flow of water. If there is no water flow, the washing brush does not rotate.
If you turn the tip of the standard Vario nozzle (25) to the left you will increase the width of the jet. If you turn the nozzle tip to the right you will reduce the width of the jet.
The roles of the unit, use the handle (2) only in conjunction with the wheels (11). For lifting and carrying use the carrying handle (2).
Mains connection
The pressure cleaner you have acquired is already fitted with a mains plug. The equipment is designed for connection to an earthed wall socket with a RCD (Residual Current Device) at 230 V\~50 Hz.
Only operate the pressure cleaner after all the above points have been observed.
- Ensure that the pressure cleaner is turned off by its ON / OFF switch (8).
- Insert the mains plug into the mains socket
Operation
Be prepared for the recoil force of the emitted water jet! Ensure that you are standing firmly and that you are holding the gun (14) se-
curely, otherwise you could injure yourself or other people.

Never operate the pressure cleaner with a closed water tap. Dry running will damage the pressure cleaner!
- Turn on the water tap entirely.
-
Switch on the pressure cleaner with the ON / OFF switch (8).
Only ever switch on the pressure cleaner once you have connected all of the water pipes and they do not leak.
The motor switches on until the required pressure has built up. After the pressure has built up, the motor switches off. -
Press the gun (14) starting lever (19). The nozzle operates by pressure and the motor switches back on.
Releasing the starting lever (19) causes the equipment to switch off. The system remains pressurised.
- The turbo dirt miller (26) with its rotating water jet is particularly suitable for working with low water consumption.
- The standard Vario nozzle (25) with its fl at jet is particularly suitable for surface cleaning.
If you turn the nozzle tip to the left you will increase the pressure. If you turn the nozzle tip to the right you will reduce the pressure.
- The rotating washing brush (21) is basically used without pressure exertion. The cleaning function results from the rotary movement and the water flow. The wash brush does not rotate if the water flow is missing.
In the event of leaks in the water system, switch off the equipment immediately at the on/off switch (8) and disconnect the equipment from the
mains at the mains power cord. Risk of electric shock! Start afresh with making the water connections (cf. "Start-up/Operation" from point 3.).
If there is still air in the device, please proceed as follows:
To vent the supply hose:
- Remove the quick connector for garden hose adapter (22) on the water connection coupling (12) and turn the water tap on until the water comes out without bubbles.
- Switch off the water tap.
- Connect the supply hose to the water connection (12) on the equipment using the quick connector for garden hose adapter (22).
- Fully open the water tap.
To vent the equipment:
- Switch on the on/off switch (8) until pressure has built up.
- Switch off the on/off switch (8).
- Press the on lever (19) on the gun (14) until the pressure has gone.
- Please repeat process 5. to 7. a few times until there is no more air in the device.

- You can lock or unlock the start lever (19) of the spray gun (14) by pressing the locking button (20). Lock the starting lever to prevent the pressure cleaner from being inadvertently / accidentally started.
Interrupting operation
- Release the lever (19) of the gun (14).
- During prolonged work intervals turn off the pressure cleaner by its ON / OFF switch (8).
If the equipment falls over, switch off the equipment immediately at the on/off switch (8) and disconnect the equipment from the mains at the mains power cord. Risk of electric shock! Only now should the equipment be returned to an upright position. For your own safety, wait approx. 5 minutes before reconnecting to the electricity.
Ending operation
- After having worked with a detergent rinse the pressure cleaner with clear water.
- Release the lever of the gun (14).
- Turn off the pressure by its ON / OFF switch (8). Disconnect the mains plug.
- Turn off the water tap.
- Disconnect the pressure cleaner from the water mains.
- Pull the lever (19) of the gun (14) to vent the pressure existing within the system.
Using detergents
The pressure cleaner was designed for operation with a neutral detergent based on a biologically decomposable anionic tenside. Other detergents or chemical substances could impair the safety of the pressure cleaner and damage it. Such damage to the equipment is not covered by the guarantee.
Filling/emptyting the cleaning agent:
- To use cleaning agent, there must be cleaning agent in the cleaning agent container (24).
- To remove the cleaning agent container (24), grip the container from the side and push it upwards. Now you can
use the lower and lateral guide to remove the cleaning agent container from the pressure washer. Remove the suction hose with the sealing cap (23) from the opening of the cleaning agent container. These remain on the pressure washer.
- To reinsert the cleaning agent container (24), proceed in reverse order.
Working instructions for the standard Vario nozzle: Use the standard Vario nozzle (25) in low-pressure operation (turn completely to the right) and the cleaning agent is automatically sucked up.
The further you turn the nozzle to the left, the less cleaning agent is sucked up. How to switch to high-pressure operation.
Working instructions for the rotating washing brush: The rotating washing brush (21) works in low-pressure operation, the cleaning agent is automatically sucked up.
Suctioning water
- Irrespective of the water pipe, you can also use the device (for example, rain barrel) through the integrated water suction function. This function must only be used with a suction hose with a filter basket.

The device itself must not be immersed in open water sources. There is a risk of personal injury from an electric shock.

Do not draw in any water from natural accumulations. There is a risk of contamination from backwashed cleaning agent.
- Plug the suction hose with filter basket onto the water connector (12) with
sieve insert (12.1) on the water connection (13) of the device.
- Hang the end with the filter basket into the water collector (e.g. rain barrel). Ensure there is a sufficient and reliable water supply.

Dry running will damage the device.
- Remove the lance (3) from the spray gun (14). Press the switch-on lever (19) on the spray gun (14) and then turn the device on.
- The device begins to suction water and air can escape.
- Once the device is free of air, you can release the switch-on lever (19) on the spray gun (14). You can connect an attachment of your choice to the spray gun (14).

The device should not be higher than the tap point.
Cleaning and Maintenance

Pull out the power plug before every maintenance operation. This also includes connecting to the water supply or trying to eliminate leaks. There is a risk of electrocution or of injury from moving parts.
Cleaning

Never direct the water jet against the pressure cleaner, nor clean the pressure cleaner under flowing water. This could give rise to the danger of electric shock and damage the pressure cleaner!
Always keep the pressure cleaner clean. Do not use any detergents or solvents.
• Always keep the ventilation slots clean and free.
- Only clean the pressure cleaner with a soft brush or a slightly moist cloth.
- If the standard Vario nozzle (25) is soiled or blocked, you can remove any foreign bodies in the nozzle using the nozzle cleaning needle (30). Rinse the standard Vario nozzle with water to remove the foreign body.
- Clean the sieve insert (12.1) under running water.
Maintenance
The pressure cleaner is maintenance free.

Ask our service centre to carry out any work that is not described in these instructions. Use only original parts.
Storage
- Drain all the water from the pressure cleaner.
Disconnect the unit from the water supply. Press the On/Off switch (8) to turn on the pressure cleaner for no longer than 1 minute until no more water escapes from the jet gun(14) or from the attaching parts (21/25/26). Turn off the unit.
- Store all add-ons (21/25/26) vertically with the connection side facing downwards.
- Protect the pressure cleaner and its accessories from frost when they have not been completely drained of all water.
- Store the pressure cleaner and its accessories in a frost-free room.
- Roll the high-pressure hose (4) onto the hose reel (5) and secure it using the Velcro fastener on the high-pressure hose (4.2).
- Store the cord (10) in the holder (9) provided. Use the clip for the cord
(10.1) to prevent unwinding of the cord (10).
Waste Disposal and Environmental Protection
Be environmentally friendly. Return the tool, accessories and packaging to a recycling centre when you have fi nished with them.
Electric appliances should not be disposed of in the domestic garbage.
- Waste material must be disposed of in accordance with the Directive on waste 2008/98/EC as well as other national and local regulations. It is not possible to determine a waste code for this product in accordance with the Euro-
pean Waste Catalogue (EWC) since it is only possible to classify it according to how it is used by the customer. The waste code is to be determined within the EU in liaison with the waste-disposal operator.
- Uncontaminated packaging may be taken for recycling.
- Packaging that cannot be cleaned should be disposed of as for product.
- Hand the tool in at a recycling centre. The plastics and metal parts can be separated and recycled. Ask your Service Center about this.
Spare parts/Accessories
Spare parts and accessories can be obtained at www.grizzlytools.shop
If you have issues ordering, please use the contact form.
If you have any other questions, contact the "Service-Center" (see page 33).
A Item Description Product No.
3 Jet lance....91105892 14 Jet gun....91105893
21 Rotating wash brush....91103750
22 Quick connector for garden hose adaptor 91097401
24 Cleaning agent container, complete 91105898
25 Standard Vario nozzle....91105895
26 Turbo dirt miller 91105894
31 Cleaning agent (URM 500)....30990010
Trouble shooting
| Problem Possible cause Remedy | ||
| Severe pressure fl uctuations | Standard Vario nozzle (25) soiled | Rinse the standard Vario nozzle (25) with water. Clean the nozzle bore hole with a needle (see chapter entitled cleaning). |
| Block in standard Vario nozzle (25) | Remove the standard Vario nozzle (25) and ensure that the water can discharge from the jet gun (14) unimpeded. In other words, the device is working perfectly. The turbo dirt miller (26) and the rotating wash brush (21) do not normally get blocked. | |
| Pressure cleaner is not operating | ON / OFF switch (8) is turned off | Check ON / OFF switch |
| Damaged power supply cable | Switch off the equipment and disconnect from the mains. Check power supply cable for damage. If necessary have the power supply cable replaced by a qualified electrician. | |
| Mains fault | Check the electrical system for conformity with the data on the rating plate. | |
| Pressure cleaner does not generate any pressure | Air trapped in the pressure cleaner | Switch on the equipment with the jet gun and with no nozzle until bubble-free water comes out. |
| Drop in the water mains pressure | Check the water mains. | |
| Leaks in the water system | Connections not fitted correctly | Switch off the equipment and disconnect from the mains. Reconnect the equipment to the water pipes (cf. “Initial Operation/Set-Up”) |
Guarantee
Dear Customer,
This equipment is provided with a 3-year guarantee from the date of purchase. In case of defects, you have statutory rights against the seller of the product. These statutory rights are not restricted by our guarantee presented below.
Terms of Guarantee
The term of the guarantee begins on the date of purchase. Please retain the original receipt. This document is required as proof of purchase.
If a material or manufacturing defect occurs within three years of the date of purchase of this product, we will repair or replace – at our choice – the product for you free of charge. This guarantee requires the defective equipment and proof of purchase to be presented within the three-year period with a brief written description of what constitutes the defect and when it occurred.
If the defect is covered by our guarantee, you will receive either the repaired product or a new product. No new guarantee period begins on repair or replacement of the product.
Guarantee Period and Statutory Claims for Defects
The guarantee period is not extended by the guarantee service. This also applies for replaced or repaired parts. Any damages and defects already present at the time of purchase must be reported immediately after unpacking. Repairs arising after expiry of the guarantee period are chargeable.
Guarantee Cover
The equipment has been carefully produced in accordance with strict quality guidelines and conscientiously checked prior to delivery.
The guarantee applies for all material and manufacturing defects. This guarantee does not extend to cover product parts that are subject to normal wear and may therefore be considered as wearing parts (e.g. Washing brush bristles) or to cover damage to breakable parts (e.g. switches, batteries, or parts made of glass).
This guarantee shall be invalid if the product has been damaged, used incorrectly or not maintained. Precise adherence to all of the instructions specified in the operating manual is required for proper use of the product. Intended uses and actions against which the operating manual advises or warns must be categorically avoided. The product is designed only for private and not commercial use. The guarantee will be invalidated in case of misuse or improper handling, use of force, or interventions not undertaken by our authorised service branch.
Processing in Case of Guarantee
To ensure efficient handling of your query, please follow the directions below:
- Please have the receipt and item number (IAN 373767_2204) ready as proof of purchase for all enquiries.
- Please find the item number on the rating plate.
- Should functional errors or other defects occur, please initially contact the service department specified below by telephone or by e-mail. You will then receive further information on the processing of your complaint.
- After consultation with our customer service, a product recorded as defective can be sent postage paid to the service address communicated to you, with the proof of purchase (receipt) and specification of what constitutes the defect and when it occurred. In order to avoid acceptance problems and additional costs, please be sure to use only the address communicated to you.
Ensure that the consignment is not sent carriage forward or by bulky goods, express or other special freight. Please send the equipment inc. all accessories supplied at the time of purchase and ensure adequate, safe transport packaging.
Repair Service
For a charge, repairs not covered by the guarantee can be carried out by our service branch, which will be happy to issue a cost estimate for you.
We can handle only equipment that has been sent with adequate packaging and postage.
Attention: Please send your equipment to our service branch in clean condition and with an indication of the defect.
Equipment sent carriage forward or by bulky goods, express or other special freight will not be accepted.
We will dispose of your defective devices free of charge when you send them to us.
Service-Center
Service Great Britain
0800 404 7657
E-Mail: grizzly@lidl.co.uk
IAN 373767_2204

Service Malta
Tel.: 80062230
E-Mail: grizzly@lidl.com.mt
IAN 373767_2204
Importer
Please note that the following address is not a service address. Please initially contact the service centre specified above.
Service-Center....50
Importateur ....50
Service-Center......65
Importeur ......65
Service-Center......80
Importer 80
Service-Center....92
Dovozce....92
Service-Center......121
Importør 121
Service-Center....136
Service-Center....151
Importatore ....151
(T in max.)...... 40 °C
Portata, acqua (Q) .....330 l/h; 5,5 l/min
Portata, acqua max.
(Q max)....500 l/h; 8,3 l/min
(T in max.).... 40 °C
Pooblaščeni serviser:
Tel.: 080 080 917
E-Mail: grizzly@lidl.si
(Birotehnika, Hodošček Renata s.p., Lendavska ULICA 23, 9000 Murska Sobota)
Garancijski list
Service-Center....194
Proizvođač......194
Prijevod originalne CE Izjave
o podudarnosti ....252
Uvod
Srdačno Vam čestitamo na kupnji Vašega novog uređaja. Time ste se Vi odlučili za jedan visokokvalitetni proizvod.
Identifi care defectiuni......207
Garantie 208
Reparatii-Service......209
Service-Center 209
Importator 209
Traducerea Declaratiei Originale
de Conformitate CE ......253
Introducere
Identifi care defectiuni
Service-Center......238
Εισαγωγέας......238
| GBMT | Translation of the original EC declaration of conformity | |
| We hereby confi rm that thePressure washerDesign Series PHD 170 C2Serial Number 000001 - 409000conforms with the following applicable relevant version of the EU guidelines : | ||
| 2006/42/EC • 2014/30/EU • 2000/14/EC & 2005/88/EC2011/65/EU* & (EU) 2015/863 | ||
| In order to guarantee consistency, the following harmonised standards as well as national standards and stipulations have been applied: | ||
| EN 60335-1:2012/A15:2021 • EN 60335-2-79:2012 • EN 62233:2008EN IEC 55014-1:2021 • EN IEC 55014-2:2021EN IEC 61000-3-2:2019/A1:2021 • EN IEC 61000-3-11:2019 • EN IEC 63000:2018 | ||
| We additionally confi rm the following in accordance with the 2000/14/EC emissions guideline:Sound power levelguaranteed: 97 dBmeasured: 92,5 dBCompliance evaluation process carried out in accordance withAppendix V, 2000/14/EC | ||
| This declaration of conformity is issued under the sole responsibility of the manufacturer: | ||
 | Grizzly Tools GmbH & Co. KGStockstädter Straße 2063762 GroßostheimGermany30.09.2022 |  Christian FrankDocumentation Representative Christian FrankDocumentation Representative |
* The object of the declaration described above satisfies the provisions of Directive 2011/65/EU of the European Parliament and the Council of 8 June 2011 on limiting the use of certain harmful substances in electrical and electronic appliances
text_image
FSC www.fsc.org MIX Paper from responsible sources FSC® C142184