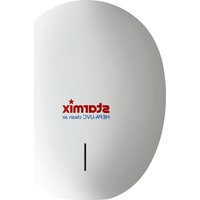
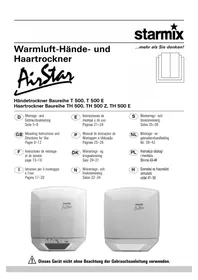
AirStar T-C1 M/Mw - Hand dryer Starmix - Free user manual and instructions
Find the device manual for free AirStar T-C1 M/Mw Starmix in PDF.
User questions about AirStar T-C1 M/Mw Starmix
0 question about this device. Answer the ones you know or ask your own.
Ask a new question about this device
Download the instructions for your Hand dryer in PDF format for free! Find your manual AirStar T-C1 M/Mw - Starmix and take your electronic device back in hand. On this page are published all the documents necessary for the use of your device. AirStar T-C1 M/Mw by Starmix.
USER MANUAL AirStar T-C1 M/Mw Starmix
1 Important safety informaon Carefully read the operang instrucons all the way through before operang the equipment and retain them for future reference. The pictures in these instrucons refer to all available versions of the model and may be dierent from the actual scope of delivery. Explanaon of symbols and signs used This is the warning symbol. It warns against possible risk of injury. Follow all in- strucons which are marked with this sign to avoid injury or death. The warning symbol always appears in associaon with the signal words DANGER, WARNING and CAUTION. Symbol Signal word Descripon DANGER Idenes a hazard with a high degree of risk which will cause death or serious injury if not avoided. WARNING Idenes a hazard with a medium degree of risk which could cause death or serious injury if not avoided. CAUTION Idenes a hazard with a low degree of risk which could cause minor or moderate injury if not avoided. NOTICE Idenes a hazard which could result in material damage if not avoided.
Idenes a requirement which needs to be met before an acon is taken. 1./2./3. Idenes steps to be taken one aer the other by the user.
Idenes the results of an acon. Qualicaon of operang, installaon and maintenance personnel The installaon and electrical connecon may only be executed by trained qualied person
nel. Maintenance may only be performed by persons who have been trained to handle the device and explicitly assigned to this task. This device may be used by children aged 8 and over as well as by persons with reduced physical, sensory or mental capacies or a lack of experience and knowledge if they are supervised or have been instructed on safe use of the device and understand the associated risks. Children must be supervised to ensure that they do not play with the device.18
Intended use The device is used to rapidly dry hands (Type T-C1 M / T-C1 Mw) and hair (Type TH-C1 M / TH-C1 Mw). The device is intended for commercial use, for example for use in hotels, public baths, tness studios, spas, saunas, public facilies, industries and businesses. The manufacturer does not accept liability for damages caused by misappropriaon, inappro
priate usage or incorrect repairs. Avoid danger from electric shocks The voltage on the rang plate must match the mains voltage. Only connect the vacuum cleaner to a suciently protected electric socket. Do not pull the mains connecon cable over sharp edges, do not bend it or clamp it. Only re
place a damaged mains connecon cable with one meeng the specicaons in the Technical Data chapter. Do not operate the device including the accessories in the following cases: – Power cord is defecve or has cracks – Device is noceably damaged, e.g. by cracks in the housing – If an invisible defect is suspected, e.g. aer a fall or impact In the following cases, unplug the power cord, switch o the circuit breaker or unscrew the fuse: – When the device makes unusual noises – Before any maintenance or cleaning When unplugging, only pull on the mains plug and not on the mains connecon cable. Never touch the mains plug with wet hands. Avoiding risks during installaon For the installaon and operaon of the device, please observe: – The naonal and regional regulaons – The technical regulaons and guidelines – The provisions of the local authories Avoiding risks during operaon Do not use the device in rooms with toxic, explosive or ammable fumes and gases, or with microbiologically contaminated air. Do not insert any objects into the opening of the device. Do not cover the device or deposit objects on it. Avoid any danger during maintenance and repair Only have repairs carried out by experts. Only use original accessories and spare parts.19
1. Take all parts out of the packaging.
Scope of delivery: 1 Device 1 Oset screwdriver TX25 4 Screws 1 Drilling template 4 Dowels 1 Instrucon manual Installing the device See Fig. B, C, D, E CAUTION Unsuitable installaon material and tooling! Risk of injury caused by the device falling down. Before installaon:
1. Check if screws and dowels supplied with the device are suitable for the surface material.
2. Have suitable tools to hand for installaon.
Preparaon (see Fig. B, C):
1. Select a wall with a sturdy, weight-bearing surface.
2. Observe installaon height and minimum distances.
3. Have suitable fastening material to hand for installaon on the wall.
Remove hood from the device (see Fig. D):
1. Loosen upper two fastening screws of the hood.
2. Loosen lower two fastening screws of the hood.
3. Remove hood from the mounng plate.
4. Disconnect protecve earth wire (PE) of the hood from the terminal. NOTICE! Do not open the screw on
the metal hood. Fasten mounng plate to the wall (see Fig. E, F):
1. Hold drilling template or mounng plate against the wall and mark the drill holes.
3. Insert electrical connecon cable into cable duct of the mounng plate (see Fig. F) and fasten the mounng
plate to the wall.20
Connect device to power supply See Fig. G, H Observe the following condions for the electrical connecon: – Only connect the device to a properly installed grounded socket. – With xed connecon: Supply line must have a switch-o device, e.g. a circuit breaker that can be switched o or a screw-in fuse. – Connect the device to an electrical supply line with a residual current circuit breaker. – Do not connect other loads to the electrical supply line of the device. DANGER Live electrical supply line and device components! Risk of deadly electric shock in case of contact. Before performing any work on the device:
1. Unplug power cord. With xed connecon: Switch o circuit breaker or unscrew fuse.
2. Secure against accidental switching on.
2. Connect electrical supply cable to terminal.
3. Insert electrical supply cable into strain relief and x it.
Place hood on device (see Fig. H):
1. Place hood on device. NOTICE! Do not damage protecve earth wire. Ensure that motor protecon lter
(Fig. A, item 7) is correctly seated.
2. Tighten lower two fastening screws of the hood.
3. Tighten upper two fastening screws of the hood.
4. Plug the plug into socket, switch on automac circuit breaker or screw in fuse.
4 Inial operaon Please observe the following before inial operaon Ensure that the following requirements are met: r Safety distances according to DIN have been observed. r The power supply is properly connected. r All lters are inserted and undamaged. Switching on and o The device is switched on and o without contact by means of the sensor:
1. Hold hands or head under the outlet opening of the device.
9 Sensor automacally switches on the device. 9 Device is switched o as soon as hands or head are removed from sensor range. 9 Device is automacally switched o if hands or head remain in sensor range for a longer period of me: Hand dryer: 35 seconds Hair dryer: 4 minutes21
Safety features The hand dryer is equipped with the following safety features: – Safety cut-o sensor aer 35 seconds – Safety temperature limiter in case of overheang, e.g. if outlet opening is blocked – Thermal fuse in case of overheang The hair dryer is equipped with the following safety features: – Safety cut-o sensor aer approx. 4 minutes, e.g. in case of chewing gum vandalism – Safety temperature limiter in case of overheang, e.g. if outlet opening is blocked – Thermal fuse in case of overheang 5 Conduct in case of emergency In cases of re hazard, electrical shock, mechanical damage, unusual operang condions or misuse, proceed as follows:
1. Unplug power cord. With xed connecon: Switch o circuit breaker or unscrew fuse.
2. Secure against accidental switching on.
6 Troubleshoong and repairs Malfuncon Cause Remedy The device does not start Sensor is soiled Remove dirt from sensor and wipe with damp cloth Fuse has tripped Switch on circuit breaker or replace fuse Overheang due to blocked outlet opening Clean out outlet opening, allow device to cool down The thermal fuse was triggered Have thermal fuse replaced by customer service Air output is insucient Air intake grille is soiled Clean air intake grille Do not take any further acon; contact customer service instead. 7 Maintenance Clean the air intake grille See Fig. I Clean the air intake grille at regular intervals, but at least every 6 months. The air intake grille may only be cleaned by trained specialist personnel.22
DANGER Live electrical supply line and device components! Risk of deadly electric shock in case of contact. Before performing any work on the device:
1. Unplug power cord. With xed connecon: Switch o circuit breaker or unscrew fuse.
2. Secure against accidental switching on.
Remove hood from the device:
1. Unplug power cord. With xed connecon: Switch o circuit breaker or unscrew fuse.
2. Loosen upper two fastening screws of the hood.
3. Loosen lower two fastening screws of the hood.
4. Remove hood from the mounng plate.
5. Disconnect protecve earth wire (PE) of the hood from terminal. NOTICE! Do not open the screw on the
metal hood. Clean the air intake grille:
1. Unscrew locking screw on air intake grille on the underside of the device.
2. Pull air intake grille downwards out of the device.
3. Remove any lint and adhering dirt from the air intake grille.
4. Push air intake grille into the device from below.
5. Fix air intake grille with the locking screw.
Place hood on the device:
1. Place hood on the device. NOTICE! Do not damage protecve earth wire. Ensure that motor protecon
lter (Fig. A, item 7) is correctly seated.
2. Tighten lower two fastening screws of the hood.
3. Tighten upper two fastening screws of the hood.
4. Plug the plug into socket, switch on automac circuit breaker or screw in fuse.
Cleaning the device Do not clean the device with a high-pressure cleaner. Only use a damp cloth and mild cleaning agents to clean the device. Acids, acetone or solvents can damage the housing or device components. 8 Disposal Old equipment contains valuable materials which are designed for re-processing. The vacuum cleaners must not be thrown away in the normal household waste, but should be disposed of at a suitable proper collecon system, e. g. via your communal disposal locaon.23
10 Declaraon of conformity Declaraon of conformity We hereby declare that the machine described below complies with the relevant basic safety and health requirements of the EC Direcves, both in its basic design and construcon as well as in the version put into circulaon by us. This declaraon shall cease to be valid if the machine is modied without our prior approval. Product: Hot air hand dryers and hair dryers Type: AirStar The design of the appliance corresponds to the following pernent regulaons: EMC Direcve 2014/30/EU EC Direcve 2014/35/EU RoHS 2011/65/EU Applied harmonized standards: EN 60335-1:2012 EN 60335-1:2012/AC:2014 EN 60335-1:2012/A11:2014 EN 60335-2-23:2003+A1+A11+A11/AC+A2:2015 EN 62233:2008 EN 62233 Ber.1:2008 EN 61000-3-2:2014 EN 61000-3-3:2013 Applied naonal standards and technical specicaons: DIN EN 55014-1 (VDE 0875-14-1):2018-08 EN 55014-1:2017 DIN EN 55014-2 (VDE 0875-14-2):2016-01 EN 55014-2:2015
Carsten Gresser Head of Quality Assurance25
Carsten Gresser Head of Quality Assurance41
Carsten Gresser Head of Quality Assurance49
Carsten Gresser Head of Quality Assurance57
Carsten Gresser Head of Quality Assurance65
Forberedelse (se g. B, C):
Carsten Gresser Head of Quality Assurance81
Forberedelse (se g. B, C):
Carsten Gresser Head of Quality Assurance97
Carsten Gresser Head of Quality Assurance105
Carsten Gresser Head of Quality Assurance121
Carsten Gresser Head of Quality Assurance129
Příprava (viz obr. B, C):
Carsten Gresser Head of Quality Assurance153
Priprema (vidi sl. B, C):
EasyManual