Berkano - Baby monitors Neno - Free user manual and instructions
Find the device manual for free Berkano Neno in PDF.
| Product type | Digital baby monitor |
| Brand | Neno |
| Model | Berkano |
| Frequency | 2.4 GHz |
| Range (open area) | Up to 260 m |
| Monitor screen | 3.2 inch IPS LCD |
| Monitor resolution | 320 x 240 pixels |
| Camera resolution | 720p |
| Night vision | Yes, 5 m range (IR LED) |
| Monitor battery | Lithium polymer 1150 mAh |
| Sensors | Light and temperature |
| Functions | Two-way talk, VOX, lullabies, alarm, zoom, multi-camera pairing |
| Power supply | 220V power adapter (2 included) |
| Kit contents | Camera, monitor, 2 power adapters, wall mount kit, flexible stand, user manual |
| Safety | Keep out of reach of children, use only original charger |
| Maintenance | Clean with a soft dry cloth |
| Warranty | 24 months |
Frequently Asked Questions - Berkano Neno
User questions about Berkano Neno
0 question about this device. Answer the ones you know or ask your own.
Ask a new question about this device
Download the instructions for your Baby monitors in PDF format for free! Find your manual Berkano - Neno and take your electronic device back in hand. On this page are published all the documents necessary for the use of your device. Berkano by Neno.
USER MANUAL Berkano Neno
natural_image
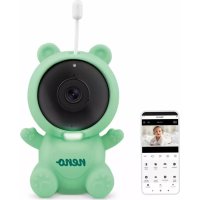
White Neno infant care device with a digital display showing a sleeping photo, no visible text or symbols on the device itself.Table of contents
Spis treści
text_image
Diagram of a smartphone front panel with numbered parts for identificationC
text_image
1 2 3 4 5 6 7 8 26.1°C J#1 VCK @0x2 10:58 AM 20/03/2024 Wed 9 10 11 12PL
INSTRUKCJA OBSŁUGI
natural_image
Illustration of a person with a megaphone and exclamation mark, symbolizing attention or urgency (no text present)Wymiary: 124x72x17mm
Waga: 123g
KAMERA
Thank you for purchasing our product!
With this device, you can monitor your child's sleep or play in another room in real time.
This manual contains all the information necessary for the correct use of the device. Before using the electronic nanny, we recommend that you insert and fully charge the battery in the monitor so that it will continue to work if you disconnect the mains supply to move it to another room. Please read the safety instructions before installing the equipment.
natural_image
Illustration of a person with a warning sign and exclamation mark (no text or symbols)CAUTION: Leave the charging cable in a safe place (position) out of the reach of the child. Failure to do so may put the child at risk of suffocation or other dangerous situations (e.g. electric shock).
01. CONTENTS OF THE KIT
- Camera
- Monitor
-
Power supply x2
-
Operating instructions
- Wall mounting set
- Flexible mount
WARNING: Use only the original charger for the original set. Do not connect directly to 220 / 230V power supply. Failure to follow the instructions may result in damage to the device or other dangerous situations.
- Temperature sensor
- Pairing button
- USB-C charging socket
- Loudspeaker
- Microphone
- Light sensor
- Camera lens
- Infrared LEDs
- Power supply diode
03. DESCRIPTION OF THE MONITOR
SEE FIG. B
- LCD display
- Microphone
- Power/signal LED
- Volume key +/up
- Voice transmission key/Lullaby playback control key
- Zoom
- Key to decrease screen brightness/left
- Menu/Key OK
- Key to increase screen brightness/right
- Switching on camera rotation
- Power/back key
- Volume down key
- Loudspeaker
- USB-C charging socket
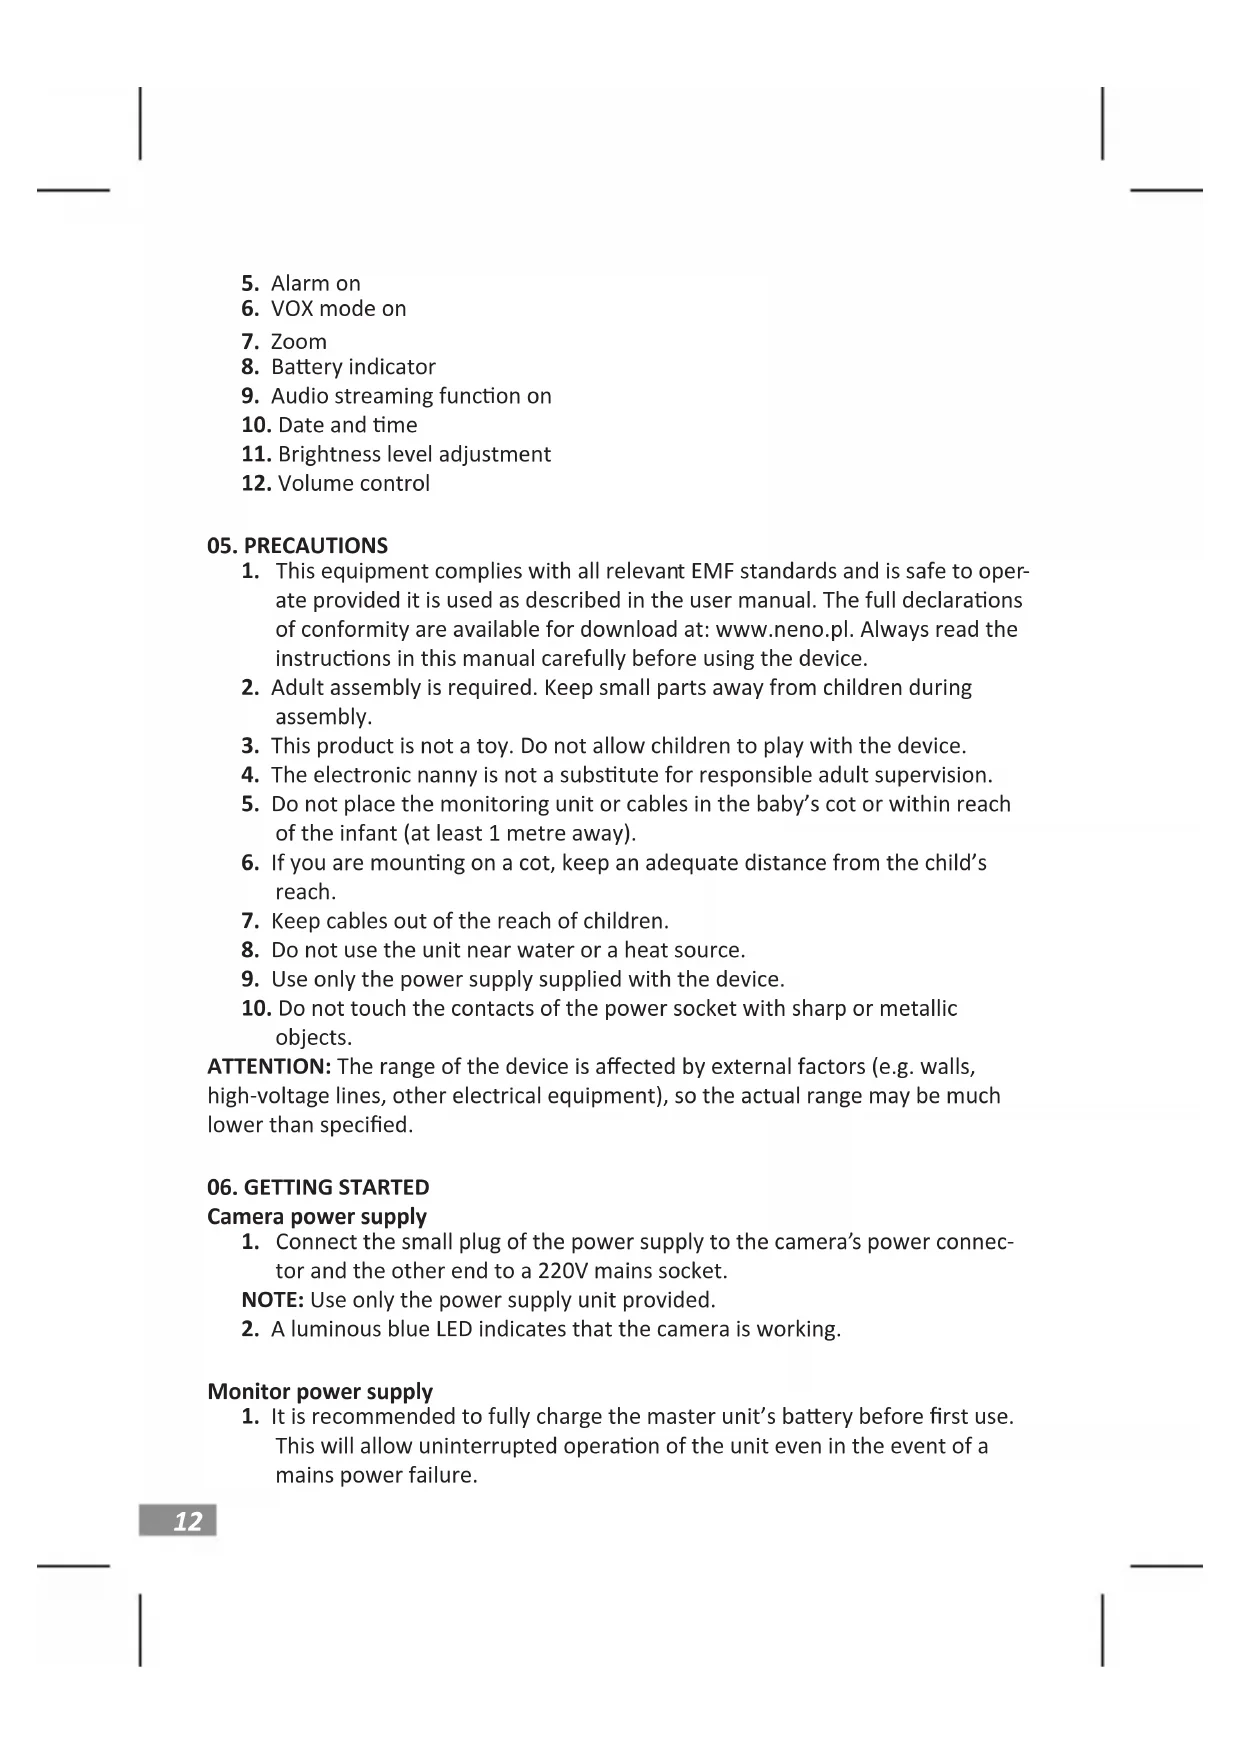
04. ICONS ON THE MONITOR DISPLAY
SEE FIG. C
- Signal strength indicator
- First or second camera view
- Temperature at camera location
-
Lullaby playback
-
Alarm on
- VOX mode on
- Zoom
- Battery indicator
- Audio streaming function on
- Date and time
- Brightness level adjustment
- Volume control
05. PRECAUTIONS
- This equipment complies with all relevant EMF standards and is safe to operate provided it is used as described in the user manual. The full declarations of conformity are available for download at: www.neno.pl. Always read the instructions in this manual carefully before using the device.
- Adult assembly is required. Keep small parts away from children during assembly.
- This product is not a toy. Do not allow children to play with the device.
- The electronic nanny is not a substitute for responsible adult supervision.
- Do not place the monitoring unit or cables in the baby's cot or within reach of the infant (at least 1 metre away).
- If you are mounting on a cot, keep an adequate distance from the child's reach.
- Keep cables out of the reach of children.
- Do not use the unit near water or a heat source.
- Use only the power supply supplied with the device.
- Do not touch the contacts of the power socket with sharp or metallic objects.
ATTENTION: The range of the device is affected by external factors (e.g. walls, high-voltage lines, other electrical equipment), so the actual range may be much lower than specified.
06. GETTING STARTED
Camera power supply
- Connect the small plug of the power supply to the camera's power connector and the other end to a 220V mains socket.
NOTE: Use only the power supply unit provided.
- A luminous blue LED indicates that the camera is working.
Monitor power supply
-
It is recommended to fully charge the master unit's battery before first use. This will allow uninterrupted operation of the unit even in the event of a mains power failure.
-
The charging LED will light up to indicate that battery charging has started.
07. USE OF THE DEVICE
Preparation of the device
Place the monitoring unit in a convenient location (e.g. on a table) and point the camera lens towards the area you wish to monitor. Adjust the camera until you are satisfied with the image displayed by the monitor. A flexible bracket and wall mounting set are also included with which you can mount the camera anywhere.
After mounting, make sure the camera is properly attached and will not fall out of the threads.
NOTE: Do not place the monitoring unit within the reach of a child! If there is interference with the image or sound, move the units to other locations and make sure they are not near other electrical equipment.
Camera pairing
The attached camera has already been paired at the factory, you do not need to re-register it with the receiver (LCD) unless it loses connection with the monitor. Please refer to the "Camera registration" section for details.
VOX button
Press the MENU button to enter VOX mode. In this mode, the screen automatically switches off to save power. The screen reactivates automatically when noise is detected at the camera location.
Lullaby playback
Press the music playback control button to switch on the music player and play the lullaby through the camera's built-in speaker. Press the same button again to turn off the lullaby playback
Voice transmission function
Press and hold the PTT (microphone) button on the monitor unit to speak to the child via the camera speaker. The corresponding symbol will appear at the bottom of the screen.
Volume control
During playback, press the DOWN key to decrease the volume or the UP key to increase the volume. The current volume level will be shown on the display for 5 seconds.
08. MENU OPTIONS
Main menu
Press the 'OK' button to enter the main menu, which contains 6 items:
- Camera
- Alarm
- Selings
- VOX
- Language
- Information about the system
Press the UP or DOWN button to move the cursor to select the desired option. Then use the OK button to enter the submenu of the selected item. Press the RETURN button to return to the main screen.
Camera registration
- Add camera
Press the OK button to access the add camera function, then press the pairing (connection) button on the back of the monitoring unit within 10 seconds. If you want to add another camera, select CAMERA2. Proceed as you did with the first camera. - Camera preview The function informs you about the preview from the first or second camera.
- Switch camera view
Use the arrows to switch the image from camera1 to camera2 if the monitor is paired with two cameras. To start automatic switching, select <
> in the MENU. - Delete camera Allows you to remove a previously added camera.
- Power LED Select whether the camera LED should be switched o//on/on automatically.
- Intercom volume Select the volume level of the sound transmitted by the monitor.
- Lullabies A. Select one of the eight available lullabies or enable loop playback B. Set the volume low/medium/high
Alarm
Press OK to move to the alarm option, then use the up/down buttons to change the me. Press OK to confirm.
Settings
- Time and date
This menu contains two items:- Set date/☐me- Set date/☐me format. Use the arrows to move the cursor and to change the value. - Temperature unit
You can switch the unit to degrees Celsius or Fahrenheit.
3. Antimigration
You can adjust the image refresh mode (50/60Hz) to adjust the display parameters to eliminate image flicker.
4. Alert sound
Use the arrows to select the volume and sound of the alerts.
5. Monitor LED
Use the arrows to turn off or adjust the brightness of the LED on the monitor.
6. Screen backlight
You can adjust the degree of backlighting of the LCD screen.
09. BATTERY REMOVAL
- Disconnect from power supply.
- Lift the stand.
- Swipe to remove the flap covering the battery.
- Remove the battery.
- Carefully pull the battery plug out of the port. Do not pull on the cables when removing the battery plug.
10. TECHNICAL SPECIFICATIONS
GENERAL
Frequency: 2.4 GHz
Operating temperature: -10 to +50°C
Permissible humidity: <85%
Range: up to 260m (open area)
Maximum radio frequency power emitted in the frequency range: 17dBm
Frequency range: 2.400-2.483.5GHz
MONITOR
Screen: 3.2" IPS LCD
Video resolution: 320x240p
Battery: Lithium-polymer 1150mAh
Dimensions: 124x72x17mm
Weight: 123g
CAMERA
Minimum illumination: 0 lux (IR LED on)
Resolution: 720p
Range in night mode: 5metres
Sensors: light/temperature
Dimensions: 116x72x66mm
Weight: 179g
11. WARRANTY CARD
The product comes with a 24-month guarantee.
Details, contact and service address can be found at:
https://neno.pl/contact/?lang=en
Specifications and contents are subject to change without notice. We apologise for any inconvenience.
KGK Trend declares that the Neno Berkano device complies with the essential requirements of Directive 2014/53/EU. The full declaration can be found at the following link: https://neno.pl/download/DOC/deklaracja-CE-Neno-Berkano.pdf
DE
BEDIENUNGSANLEITUNG
natural_image
Illustration of a person with an exclamation mark and exclamation mark, symbolizing attention or warning (no text present)text_image
Warning symbol with a person reacting to a warning light, indicating danger or cautionnatural_image
Illustration of a person with a red exclamation mark and exclamation mark, symbolizing attention or warning (no text present)natural_image
Illustration of a person with a megaphone and exclamation mark, no text or symbols presentnatural_image
Illustration of a person with a megaphone and red exclamation mark, symbolizing urgency or failure (no text present)01. INNEHÅLL I SATSEN
natural_image
Illustration of a person with a megaphone and exclamation mark, symbolizing attention or urgency (no text present)natural_image
Illustration of a person with a megaphone and exclamation mark, symbolizing attention or urgency (no text present)01. INNHOLDET I SETTET
- Kamera
- Skjerm
- Strømforsyning x2
- Bruksanvisning
- Veggmonteringssett
- Fleksibel montering
natural_image
Illustration of a person with a megaphone and exclamation mark, symbolizing attention or urgency (no text present)natural_image
Illustration of a person with a megaphone and exclamation mark, symbolizing attention or urgency (no text present)natural_image
Illustration of a person with a megaphone and exclamation mark, symbolizing alert or warning (no text present)natural_image
Illustration of a person with a warning sign and exclamation mark (no text or symbols)natural_image
Illustration of a person with a megaphone and exclamation mark, symbolizing attention or urgency (no text present)Dimensions: 124x72x17mm
Poids: 123g
CAMÉRA
Dimensions: 116x72x66mm
Poids: 179g
11. CARTE DE GARANTIE
natural_image
Illustration of a person with a red exclamation mark and exclamation mark, symbolizing attention or warning (no text present)The crossed out trash can symbol indicates that unusable electrical or electronic devices, its accessories (such as power supplies, cords) or components (for example batteries, if included) cannot be disposed of alongside with household waste. In order to dispose of the devices or its components (for example, batteries) deliver the device to the collection point, where it will be accepted free of Disposal is subject to the recast version of the WEEE Directive 19/EU and the Directive on batteries and accumulators (2006/66 / oper disposal of the device prevents degradation of the natural ment. Information about the collection points of the facilities is by the competent local authorities. Incorrect disposal of waste is to penalties provided for by the law in force in the given area.
DE
KGK TREND Sp. z o.o.
ul. Ujastek 5b, 31-752 Kraków, Polska.
Wyprodukowano w PRC
Manufacturer:
KGK TREND Sp. z o. o.
st. Ujastek 5b, 31-752 Cracow, Poland.
Made in PRC