Avante - Baby monitors Neno - Free user manual and instructions
Find the device manual for free Avante Neno in PDF.
| Product Type | IP Baby Monitor with Camera |
| Brand | Neno |
| Model | Avante |
| Dimensions (L x W x H) | 85 x 85 x 120 mm |
| Weight | 222 g |
| Power Supply | USB-C, 5 V / 1.5 A (power adapter included) |
| Maximum Resolution | 4 MP (2560 x 1440 pixels) |
| Viewing Angle | 100° |
| Night Vision | Yes, with 6 IR LEDs |
| Wi-Fi Connectivity | 802.11 b/g/n, 2.4 GHz only |
| Main Features | Live view, two-way voice communication, motion detection, motion tracking, night mode, video recording, photo capture, privacy mode, siren |
| Required App | Tuya Smart (iOS / Android) |
| Storage | micro SD card up to 128 GB (not included) and optional cloud |
| Care and Cleaning | Clean with a soft, dry cloth. Do not use abrasive products or liquids. |
| Safety | Keep cables out of reach of children. Do not place the camera less than one meter from the baby. Use only the original charger. |
| Spare Parts and Repairability | Adapter and USB cable included. SD card and accessories optional. Contact customer service for any repairs. |
| Warranty | 24 months (see terms at neno.pl/gwarancja) |
| Operating Temperature | -10 °C to +50 °C |
Frequently Asked Questions - Avante Neno
User questions about Avante Neno
0 question about this device. Answer the ones you know or ask your own.
Ask a new question about this device
Download the instructions for your Baby monitors in PDF format for free! Find your manual Avante - Neno and take your electronic device back in hand. On this page are published all the documents necessary for the use of your device. Avante by Neno.
USER MANUAL Avante Neno
natural_image
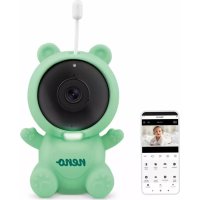
White and black robot-shaped device with camera lens and 'neno' logo (no additional text or symbols)Table of contents
Spis treści
text_image
Diagram of a robot with labeled parts, showing front view and interior views with numbered annotations.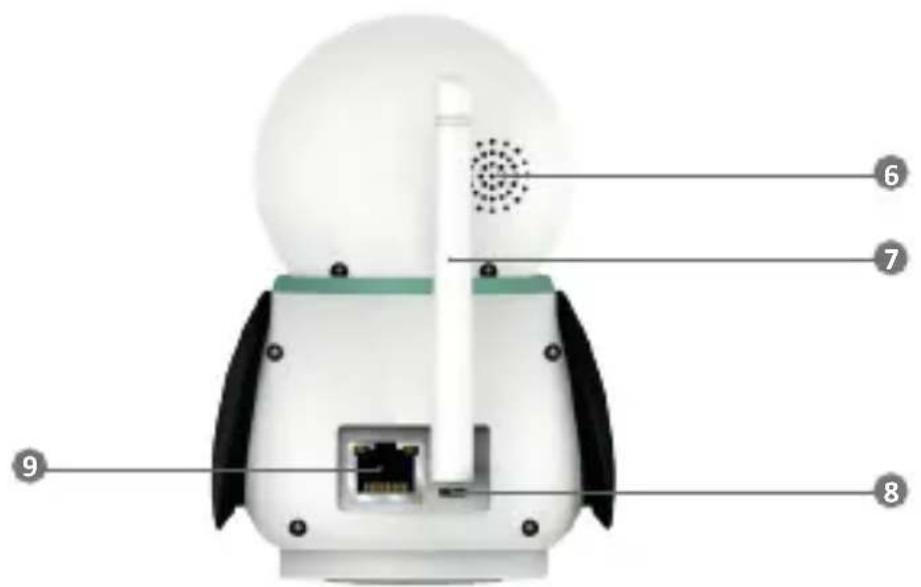
text_image
Labeled diagram of a robot's internal components, showing numbered parts from 6 to 9.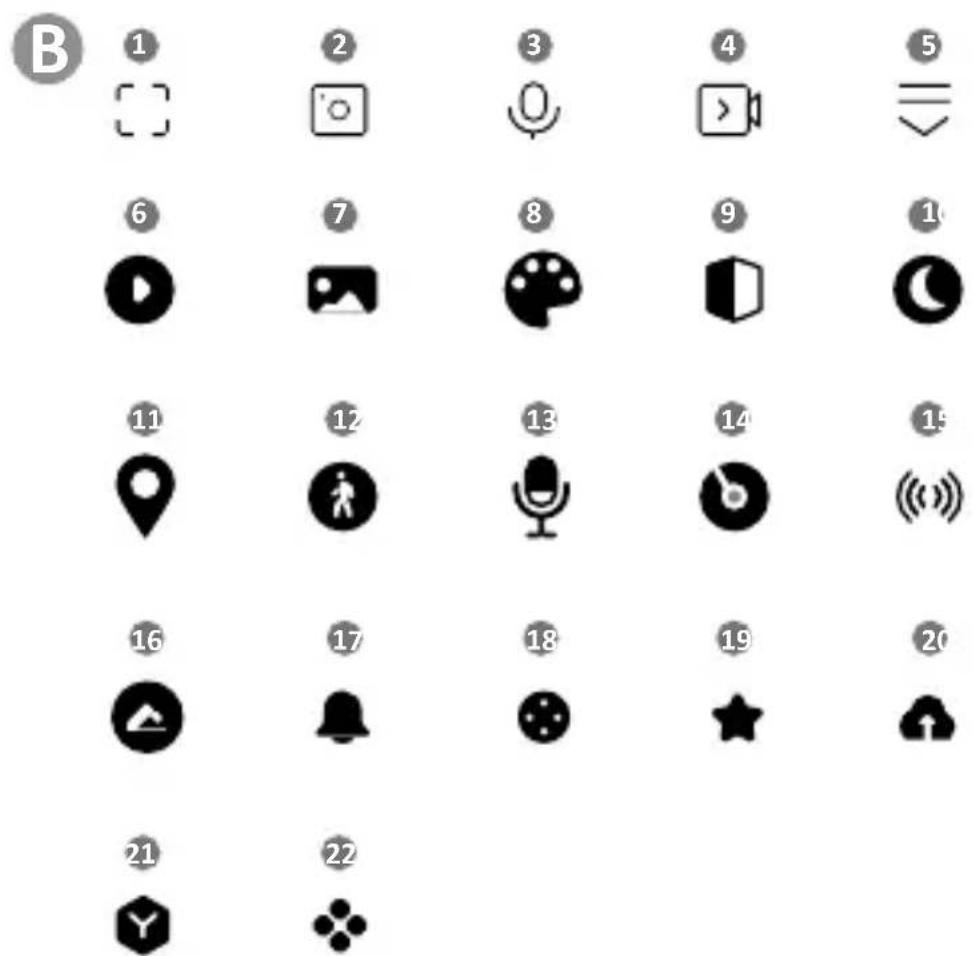

1

text_image
QR code image containing encoded data, no visible human-readable textDownload Tuya Smart on Google Play
2

text_image
QR code image containing encoded data, no visible human-readable textDownload Tuya Smart on App Store
D

text_image
1 HD 2 3 4PL
INSTRUKCJA OBSŁUGI
natural_image
Illustration of a person with an exclamation mark and a warning symbol (no text or numbers present)Thank you for purchasing our product!
With the help of this device, you can monitor your child's sleep or play in another room on an ongoing basis using an application on your phone! This manual contains all the information necessary for proper use. Please read the operating instructions before using the device.

natural_image
Illustration of a person with a megaphone and exclamation mark, symbolizing attention or urgency (no text present)ATTENTION! Leave the charging cable in a safe place/position, out of the reach of a child. Failure to do so may result in the child's suffocation or in other dangerous situations (e.g. electric shock).
ATTENTION! Only original chargers should be used for the original set. Failure to follow the instructions can result in damage to the device or other dangerous situations.
01. KIT CONTENTS
- IP baby monitor Neno Avante
- Power adapter + USB cable
- User manual
02. MAIN FUNCTIONS
- Remote control via app
- Night mode
- Tracking the movement
- Two-way voice communication
- Live view
-
Video recording
-
Motion detector and in-app notifications
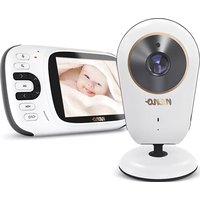
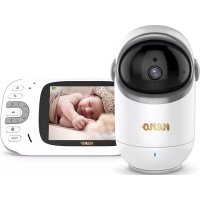
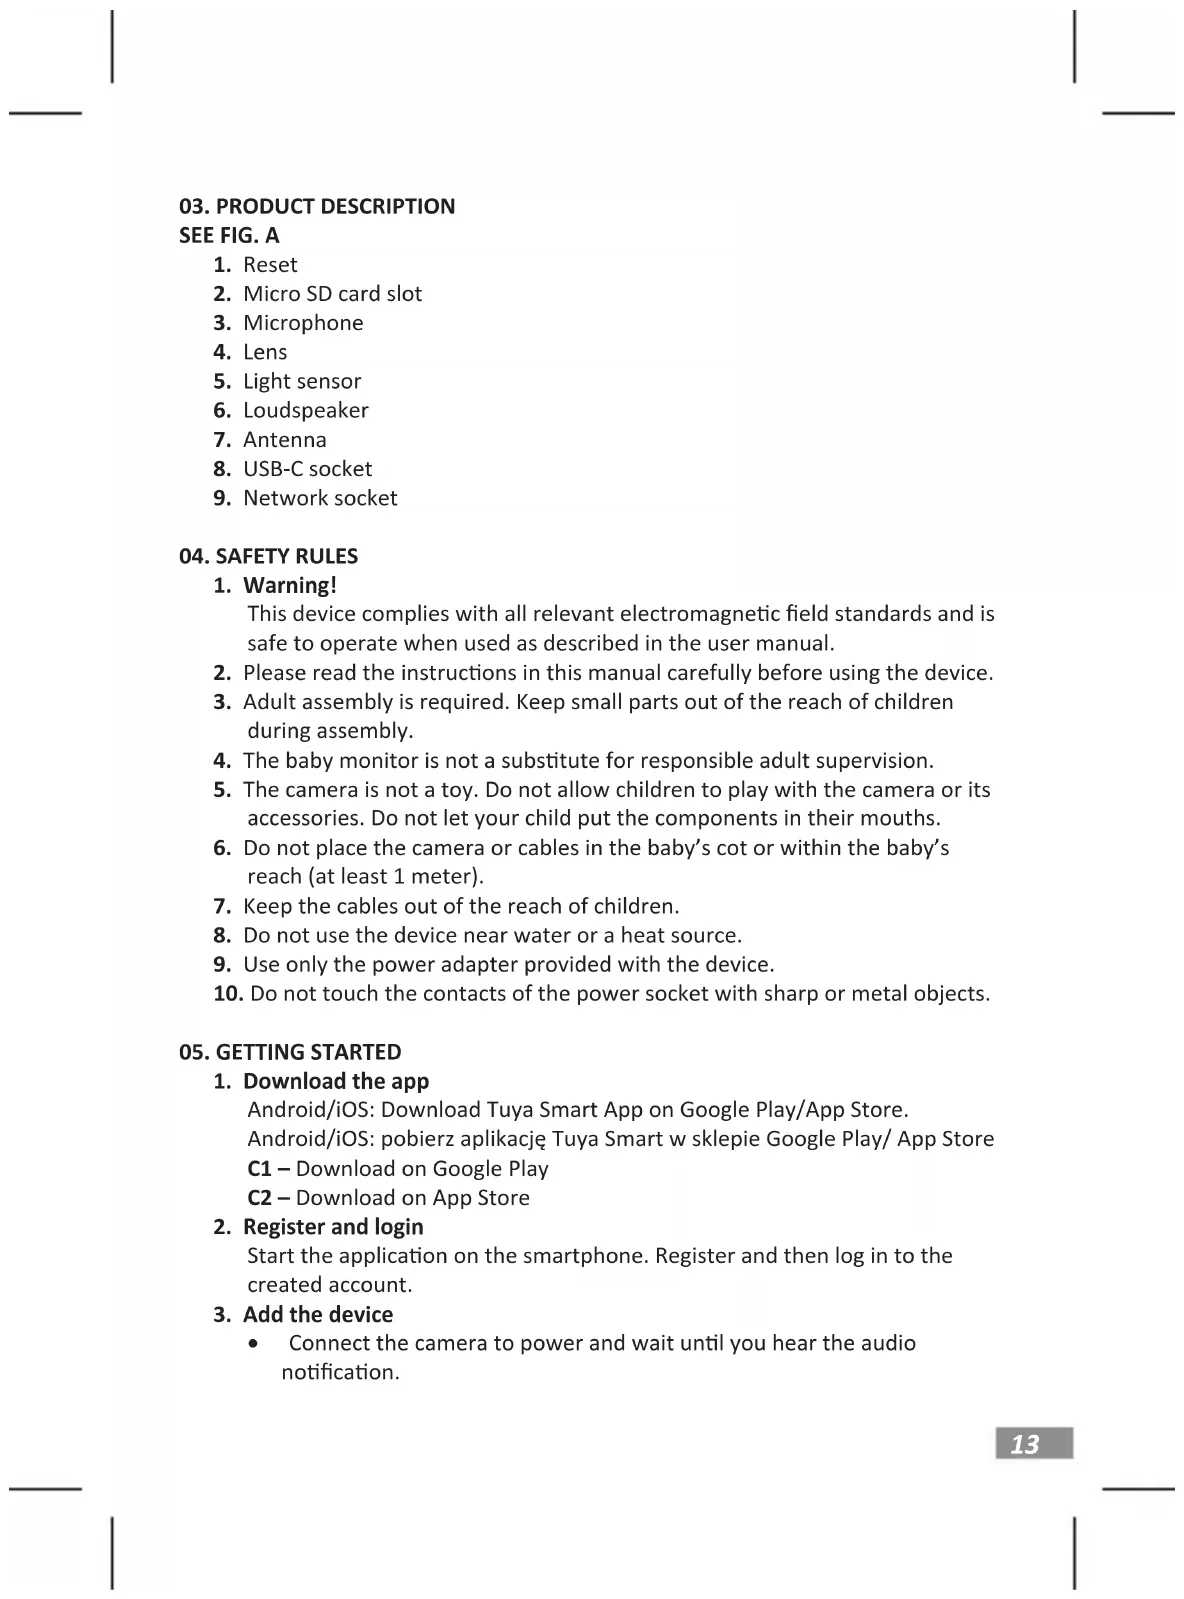
03. PRODUCT DESCRIPTION
SEE FIG. A
- Reset
- Micro SD card slot
- Microphone
- Lens
- Light sensor
- Loudspeaker
- Antenna
- USB-C socket
- Network socket
04. SAFETY RULES
1. Warning!
This device complies with all relevant electromagnetic field standards and is safe to operate when used as described in the user manual.
- Please read the instructions in this manual carefully before using the device.
- Adult assembly is required. Keep small parts out of the reach of children during assembly.
- The baby monitor is not a substitute for responsible adult supervision.
- The camera is not a toy. Do not allow children to play with the camera or its accessories. Do not let your child put the components in their mouths.
- Do not place the camera or cables in the baby's cot or within the baby's reach (at least 1 meter).
- Keep the cables out of the reach of children.
- Do not use the device near water or a heat source.
- Use only the power adapter provided with the device.
- Do not touch the contacts of the power socket with sharp or metal objects.
05. GETTING STARTED
1. Download the app
Android/iOS: Download Tuya Smart App on Google Play/App Store.
C2 – Download on App Store
2. Register and login
Start the application on the smartphone. Register and then log in to the created account.
3. Add the device
- Connect the camera to power and wait until you hear the audio notification.
- Press and hold the RESET button for 5 to 10 seconds.
- Wait until you hear the notification „wait for Wi-Fi config”.
- The camera is ready to connect to the application on the phone.
- Make sure that the phone is connected to the Wi-Fi network that the device will be connected to.
- Note: for the proper operation of the camera, a connection to a 2.4 GHz Wi-Fi network is required. The camera does not support 5GHz network.
- Press the plus (+) symbol in the upper right corner of the application interface or select „Add Device”.
- From the product categories, select „Video Surveillance“ and then „Security Camera“. (Wi-Fi) „
- Make sure the device is restarted and ready to connect (repeated „wait for Wi-Fi config” message).
- In the upper right corner, select the camera's network connection mode and go to the next step.
Connection modes available:
- QR code - Connection mode by scanning the QR code generated in the application with the camera lens.
- EZ mode (recommended) - Automatic mode. In this mode, the application searches for the camera itself.
• Cable - connection via a network cable.
• After selecting the connection mode, follow the instructions in the app. - The camera will inform about the next stages of connection with sound messages „connect router“, „Connect internet“ and „device access“.
- NOTE: while connecting, do not disconnect the camera from the power supply.
• After the device is connected successfully, give it any name in the app.
4. Removing the device
On the home screen, touch and hold the name of any of the added devices. Then select one or more devices you want to remove and click the trash can icon.
06. FUNCTIONS OF THE APPLICATION
1. Home screen
a. Full screen SEE FIG. B.1
The function allows us to view in full screen.
Additional functions under this tab:
• manual control of the camera head. SEE FIG. D.1
• video recording - when this function is activated, video recording is
started. By default, the device saves recordings in the phone gallery (Android) or app (iOS). When activated by the user, it is also possible to save recordings to the cloud. SEE FIG. D.2
- communication (Speak) - depending on the selected settings, the button is responsible for one-way or two-way audio communication. For one-way communication, press the button; when two-way communication is selected in the application settings, hold down the button to communicate using the unit's built-in speakers. SEE FIG. D.3
- taking photos (Screenshot) - when selected, the camera will take and save a photo to the phone's memory or to the cloud. SEE FIG. D.4
• recording quality - SD/HD, HD recommended. SEE FIG. D.5 - Listen to surroundings - press to listen to the camera's surroundings SEE FIG. D.6
b. Taking a picture (Screenshot) SEE FIG B.2
When selected, the camera will take and save a photo to the phone's memory or in the cloud.
c. Communication (Speak) SEE FIG B.2
Depending on the settings selected, the button is responsible for one-way or two-way audio communication. For one-way communication, press the button; when two-way communication is selected in the application settings, hold down the button to communicate via the unit's built-in speakers.
d. Video recording (Record) SEE FIG B.3
When the function is activated, the recording of the video will start. By default, the device saves recordings in the phone gallery (Android) or app (iOS). When activated by the user, it is also possible to save recordings to the cloud.
e. Playback SEE FIG. B.4
This function allows the playback of recordings stored on the SD card and the recording of screenshots.
f. Verical view SEE FIG. B.5
g. Playback SEE FIG. B.6
This function allows the playback of recordings from a microSD card in the camera.
h. Photo and recording gallery SEE FIG B.7
View recordings in the phone gallery (Android) or app (iOS). Once activated by the user, it is also possible to save recordings to the cloud.
i. Theme colour SEE FIG. B.8
Change of background colour.
j. Private mode SEE FIG. B.9
Camera preview sleep mode.
k. Night mode SEE FIG. B.10
Night mode with IR LED illumination.
I. Motion tracking SEE FIG. B.11
Mode for tracking detected motion in the camera's field of view.
m. Motion detection SEE FIG. B.12
Motion detection mode. It sends a notification when activated and motion is detected.
n. Sound detection SEE FIG. B.13
Sound detection mode. It sends a notification when activated and detects sound.
o. Patrol SEE FIG. B.14
Camera environment monitoring mode.
p. Siren SEE FIG. B.15
Alarm function.
q. Edit SEE FIG. B.16
Information about the function keys.
r. Messages SEE FIG. B.17
Information about recent notifications.
s. Direction SEE FIG. B.18
Manual control of the camera head.
t. Site SEE FIG. B.19
Ability to save the current image (screenshot) under a name of your choice.
u. Cloud SEE FIG. B.20
Function for accessing files stored in the cloud.
v. Smart SEE FIG. B.21
Mode for setting and activating selected parameters at a specific time.
w. Features SEE FIG. B.22
Return to the main control MENU.
2. Settings
You can access the settings by clicking on the pencil icon in the top right-hand corner of the screen.
a. Device information
Information on the device owner's account, the IP address the camera is connected to, the device ID, the time zone and the Wi-Fi signal strength.
b. Press to start scenes
Switch previews between other devices added to the Tuya app.
c. Hibernation
Hibernation of the camera.
d. Basic function settings
Settings: reverse screen/time watermark/audio mode - we recommend two-way audio.
e. IR night vision function
Settings for IR night-vision operation - on/off or automatic mode.
f. Alarm detection settings
Activation/deactivation of motion detection, tracking and in-app notifications.
g. Siren adjustment
Settings for alarm volume and duration.
h. VAS Cloud Storage
Access to shopping in the Tuya app.
i. Offline notifications
On/off.
j. FAQ and Feedback
Questions and answers about the device. Default inactive.
k. Shared devices
Setting up the sharing of a device with other users.
I. Add voice assistant to home screen
Shortcut settings for quick access to the device interface from the phone's home screen.
m. Device update
07. SPECIFICATION
Resolution max.: 4 MPX (2560x1440)
Mobile application: Tuya Smart
Night mode: 6 diodes IR
Working temperature: -10°C + 50°C
Micro SD card support: max 128 GB
Libra: 222 g
Dimensions: 85 x 85 x 120 mm
08. WARRANTY CARD
The product is covered by a 24-month warranty. The terms of the guarantee can be found at: https://neno.pl/gwarancja
Details, contact and website address can be found at: https://neno.pl/contact/?lang=en
Specifications and contents of the kit are subject to change without notice. We apologise for any inconvenience.
KGK Trend declares that this device Neno Avante is compliant with significant requirements of directive 2014/53/EU. The text of this declaration may be found on the website: https://neno.pl/download/DOC/deklaracja-CE-Neno-Avante.pdf
DE
BEDIENUNGSANLEITUNG
natural_image
Illustration of a person with a red exclamation mark and a small symbol (no text or numbers present)natural_image
Illustration of a person with a megaphone and exclamation mark, symbolizing danger or caution (no text present)natural_image
Illustration of a person with a warning sign and exclamation mark (no text or symbols)natural_image
Illustration of a person with a warning sign and exclamation mark (no text or symbols)natural_image
Illustration of a person with a warning sign and exclamation mark (no text or symbols)natural_image
Illustration of a person with a megaphone and exclamation mark, symbolizing risk or urgency (no text present)06. SOVELLUKSEN TOIMINNOT
1. Aloitusnäyttö
natural_image
Illustration of a person with a megaphone and exclamation mark, no text or symbols presentnatural_image
Illustration of a person with a warning sign and exclamation mark (no text or symbols)06. FUNKTIONER I APPLIKATIONEN
1. Startskærm
a. Fuld skærm VIDERE FIGUR B.1
c. Kommunikation (tale) SE FIG B.2
b. Tryk for at starte scener
natural_image
Illustration of a person with a megaphone and red exclamation mark, symbolizing alert or warning (no text present)03. PRODUCTOMSCHRIJVING
ZIE FIGUUR A
v. Smart Zie FIG. B.21
natural_image
Illustration of a person with a warning sign and exclamation mark (no text or symbols)natural_image
Illustration of a person with a megaphone and exclamation mark, no text or symbols presentnatural_image
Illustration of a person with a megaphone and exclamation mark, no text or symbols presentApplication mobile: Tuya Smart
natural_image
Illustration of a person with a megaphone and exclamation mark, no text or symbols presentKGK TREND Sp. z o.o.
ul. Ujastek 5b, 31-752 Kraków, Polska.
Wyprodukowano w PRC
Manufacturer:
KGK TREND Sp. z o. o.
Ujastek 5b, 31-752 Cracow, Poland.
Made in PRC