HT 700e - Hedge trimmers STIGA - Free user manual and instructions
Find the device manual for free HT 700e STIGA in PDF.
| Product type | Battery-powered portable hedge trimmer |
| Brand | Stiga |
| Model | HT 700e |
| Power supply | Lithium-ion battery (not included) |
| User type | Amateur (home user) |
| Max cutting diameter | 15 mm |
| Blade length | Approximately 50 cm (estimate) |
| Weight | Approximately 3.5 kg (without battery) |
| Guaranteed sound power level | Check product label |
| Vibrations (hand-arm) | Values compliant with applicable standards |
| Main functions | Cutting and trimming of hedges and bushes |
| Controls | Safety button, blade control lever, safety switch, adjustable rear handle |
| Safety | Double insulation, blade guard, automatic stop, status indicators |
| Compatible battery type | Approved Stiga batteries (see technical specifications) |
| Charger | Fast or standard charger (accessory) |
| Optional accessories | Battery carrying bag, battery simulator, additional batteries |
| Routine maintenance | Cleaning after use, lubrication of blades, checking fasteners |
| Periodic maintenance | Sharpening or replacement of blades by a professional if necessary |
| Storage | In a dry place, protected from weather, out of reach of children |
| Warranty | Covers material and manufacturing defects (see conditions) |
| Repairability | Entrust to an approved workshop for repairs beyond routine maintenance |
| Spare parts | Use only genuine Stiga parts |
Frequently Asked Questions - HT 700e STIGA
User questions about HT 700e STIGA
0 question about this device. Answer the ones you know or ask your own.
Ask a new question about this device
Download the instructions for your Hedge trimmers in PDF format for free! Find your manual HT 700e - STIGA and take your electronic device back in hand. On this page are published all the documents necessary for the use of your device. HT 700e by STIGA.
USER MANUAL HT 700e STIGA
EN Battery powered hedge trimmer OPERATOR'S MANUAL
WARNING: read thoroughly the Instruction booklet before using the machine.
MK IpeHoCeH nOThKaCTpyBaU Ha rPmUshKn Ha 6aTeepn UYATCTBA 3A YNOTPEBA
BHIMAHHE: npouhtajTe ro BHIMATEHNO OBA ynatCTBO nped da ja kOpNCHTe MaunHata.
MANUAL DE INSTRUCTIONI
ATENTIE: inainte de a'utiliza masina, cititi cu atentie manualul de fata.

IopTaHbHbe WnanePbHe HOHHuCbI C 6aTapeHbIM NHTAHm
PYKOBODCTBO NO 3KCNJYATAUIN
BHIMAHHE: npenhe qem noIb3ObaTbca 06OpydoBaHHe, BHIMATEbHO npoHTHe 3TO
pykoBODCTBO NO 3HcNllyaatauH.

[19] Symulator akumulatora
[19] Batarya simulatoru
7.USO DELLA MACCHINA. 7
7. USO DELLA MACCHINA
Pa60tha 3oHa / MaunHa
- PpOBepTe CTapaTeIHO cIaTa pa6oTHa 3OHa nOTCTpaHeTe BCnHKO OHOBa, KOeTo MOKe Da OCTaHe 3axBaHaTO B HOKa, NOBpeKdAnKn rN da NpeiN3BnKa TeKKn fN3uCeKn HapaHЯBaHnHa Na onepaTopa (kAbEIn, eJeKtpnueckn npOBODnU, BbKeTa nT.H.).
BnHaTrpa6Ba Da HMaTe RaHcHa PpeDcTaBa 3a ToBa, KOeTO Bn 3aObHKaJIa N Da CTe HaIpeK 3a Bb3MOxHn PnCKoBe, KOnTO He CTe 3a6EJI3aJI NopaJN UyMa Ha MaUnHHaT.
3a da n36eHete pncKa OT noKap, He octabraIte MaunHaTa C TOnbI DBrGaTeI cpe IInCTa IIIN cyxA TpeBa.
2.3 NO BPEME HA H3IOJ3BAHE
Pa60Tha 3OHa
He n3noJI3BaIte MaunHaTa B NOTeHnauHIO eKcNlO3NBHa aTMocΦepa, npn Hauuue Ha 3anaJIMn TeUHOCTn, ra3OBe nn npax. EneKtpnuecknte ypeiCb3daBAt NCKpn, KOHTo MoKe Da noDnaJrT npax nn n3npaehn.
Pa6oTe cAmo Ha dHeBHa CBETInHa nn npn Do6po N3KcYCTBeHO OCBETJeHne HycIOBnHa D06pa BNDIMOCT.
- OtdaJeueTe xopa, Deca u KINBOTHn OT pa60thata 3oHa. Heo6xOJIMO e Deaata da ce Ha6JIoDaBaT O Tpyr Bb3paCTeH.
- Поберете далдругхopa ce hampat
на разстая пое 15metра от
разиca на Deиctbne Ha Maшин haTa.
- N368BaIte, DOKOJIKOTo e Bb3MOxH0, pa60Ta Ha BnaKeH Xlb3rAB TepeH n HepaBHN Hn CTpbMHN MeCTa, KOnTO He OCHpyPraBt yCTOnuHb NaOnuHa onepaTopa no Bpeme Ha pa60Ta.
He n3laaTe MaunHaTa Ha DbHKn Hn Ha BlaJHb OKoJHa cpea.Boata, KOrTO npOHKBa B INHCTpyMeHTa, yBeJIuHaBa pNcKa OT eJeKTPnuYeCKn ydap.
-ObpheTe oOcEHO BHIMaHHe Ha HepaBHOCTIe Ha 3EmrTa (n3daTINH, BbIb6HaTHN),HaKIOHN,CKPHTN ONaCHOCTn 3a HAIuHNeTO Ha eBEHTyJIHN ONaCHOCTN, KOITo 6nxa MORIn Da ORpaHUnAT BNIMOCCTTa.
БыдTe Oco6eHOBHMaTeJIHn 6JIH30 DoCKaJIH,ИЗКОПиИЛнHaCINN.
Korato MaunHaTa Ce noJ3Ba 6n3o Do nT, BHIMaBAIe C DnHKeHHeTO.
BHHMaBaIe B6JIn3OcTdo eJIeKtpnueckn Ka6eJIIOHnpeKeHHe.
PobedeHne
- IIO Bpeme Ha pa6Ota C MaunHaTa e Heo6xOaMo Da JbpxKeTBe BNHaI 3DpaBO C DBe pBue.
XbaaaiTe eKeKtpnueChn HNCTpyMeHT cAmO 3a n30JIpaHNTe NOBbpxHOCTn Ha dpbKKHe, TbI KaTO HOHa MOHe Da BLe3e B KOHTaKT CbC CKpTN Ka6eII. KOHTaKTbT Ha peKeuH Nc C Ka6eI PoI Ha nppeKeHne MOHe Da DOBeIe IoD Ha nppeKeHne MeTaJIHnTE Yactn Ha MaUnHaTa I da npunHH eKeKTPnueCn ydap Ha onepaTopa.
- 1368BaTe KOHTaKT Ha TAnOTo CbC 3a3eMeHn IOBbpXHOCTN, KaTO TpB6n, paHaTOpN, KxHHeHcN NeuKN, XlaDInHnU. PnCKbT OT eJeKtpnueckn ydap ce yBeJIuHbA aKO TAnOTo e 3a3eMeHo.
3aemeHeNoBnKHO nCTa6HnHO NOLOKeHHe N6bDeTe BnHaRn BHMaTeJIHN.
-1368BaTe H3NoJI3BaHeTo Ha HeCTa6HnCtBn6H nIJaTΦOpMn.
He TnuaIte HnkOra, a xoJeTe.
-ДрьжTe рьцeteи КраKaTа си ВинагпдалачOT ИНСТPyMeHTa 3a ряЗаHe, KaKToNOВpeMeHa BKNIOUChBaHTo, TakaИ NOВpeMeHa N3NoJ3BaHe Ha MaUnHAta.
BHIMaHHe:HOKOBTe npOdbJHaBaT Da ce DBnKaT HRAKOKeHyDn CJeI N3KIOUBAHETo Ha DBNrAteJIa.
- Pa3ete HOka OT cHJIeH yIap B
YJXKn TEa, TbI KaTO CE yBcIINuBa
BepoTHOCTTa OT N3XBbPcAun MaTepHaJI
PnI PJIb3rAHe Ha HOKOBete.
BcnyaHa CuynBaHn HInnIeHTn IO BpeMe Ha pa6oTa, CnpTe He3abABHO DnIraTeJN OTdAJeYeTe MaunHaTn O TaKbB NaHn, Ye Da He npEIN3BnKaTe DOINbLnHITeHN IeTN; B CUYaHa HA 3IOnOJyKn, CBpb3AHn C TeJIeCHN NOBPeDN Hn Ha TpeTN LNuCA, He3abABHO 3aJeNCTBaIte PpoceDpyPte 3a IIpBa NOMOu, KOtO Ca NOxODaUm 3a KOHKpeTHaTcNTyaUmaN Ic Ce CBpbKeTe C MediunHcKa CTpykTypa 3a Heo6XoDMOTO leueHne.OTcPaHete cTapaTeHNo eBeHTyaALHn OTnaDbuN, KOtO Moat Da HaHeCat UeTN INI yBpeHJaHn Ha Xopa INI JNIBOTHn, aKO He 6bDaT 3a6eJIa3aHn.
- PpOJIbJIHNTeJIHOTo n3JIaRaHe Ha Bn6paunMoKe Da DOBeJe Do yBpeJdaHn H CMUeHnHa HEPBHaTa N KpBBOHOChTa CnCTema (no3HaTn N KaTo «CnHdPOM Ha PeiHo» nIn «6raPa pKa»), oOcEHO 3a CTpaIauNte O T CMUeHnHa KpBBOHOChTa CnCTema.CmPTomITE MoKe Da 3acrAt PbUeTe, KHTKHe, npbCTNte N Ce IpoRBABaT Cbc 3aYb6a Ha YyBCTBHTeJIHOCCTTA, N3TPbINBaHe, Cbp6eK, BoJka, 3aY6Ba Ha U8rNII CTpykTyPHn IpOMEHn Ha KOJaTa. Te3n eFekTN MoKe Da ce ycHnT OT HnCKHtete TMNEpaTpyn Ha OKoJHaTa CpeDa N/INl OT IpeKaJIeHO CTnCKaHe Ha dpbHKHe. Ppi IpoRa Ha CmIMTOMITE, TpRABa Da ce HAmJIb VpeMeTO Ha yNOTpe6a Ha MaUNHaTa N da CE NOcBETBaTe CJIekap.
OrpaHnueHHca ynoTe6a
MaunHaTa He Tp6Ba Da ce N3noJ3Ba OT Xopa, KOINTO He Ca B CbCToHne Da
IaTOCTa6HbO BpaBHO KaKaTa Cn NO BpeMa pa60Ta.
- Hnkora He n3noJ3BaIte MaunHaTa C NOBpeDeHn, IINCBAuN nn HEnpaBnHO NoCTaBeHN 3aunTn.
He n3noI3BaIte eIeKtpnuecknHT HNCTpyMeHT, aKO npEkbCBAuT He e B CbCToRHHe Da rO BKJIIOHn IIN Da rO n3KJIIOHn HopMaIHO. EJeKtpnueckn HNCTpyMeHT, KOITo HE MoKe Da 6bDe BKNIOUeH OT npEkbCBAua, e ONaCeH N TpRA6Ba Da 6bDe nonpaBeH.
He n3KIOUyBaIte, He deaAKTNBnpaIte, He cBAJIaIte IIN He MOdNΦuPaIte HaJIuHHTe CnCTeMn 3a 6e3OpaCHOCT/ MKNpOIpBkIIuOyBaTeIi.
He noIaraiTe MaunHaTa Ha npeKaJeHo HATOBaBaHe I He n3NoJ3BaIte MaunHa C MaJIbK KaNaUTe 3a TeXKa pa6Ota; n3NoJ3BaHETo Ha NOxOJa3a 3a ceJItMaunHa Hamalra Ba pNcKa uYBeInuBa PPOIN3BOIDTeJHOCCTTa.
2.4 NOДРьЖHA,ПРИБИРАЕ 3AСБХPAHEHNE
N3BbPwBaHTo Ha npaBnHa nDpBxKa n np6npaHe 3a CbXpaHHeHne, 3ana3Ba 6e3OpacHocCTTa Ha MaunHaTn HNBOTO Ha HeHhTa pOn3BODtJIHOCT.
IopdpbXkha
- HnKora He n3noJ3BaIte MaunHaTa C n3HOceHn nn NOpeDeHn Yactn. NOBpeDeHnTe nn n3HOceHn Yactn Tp6Ba Da 6bDat 3aMeHeHn, a He nonpaBeHn.
HIBOTO Ha Wym N Bn6paun, yka3aHO B HAcToaIte NHCTpyKcun, npedctabJIraBa MaKcMaJIHInTe CTOHOCTn npu ynotpe6a Ha MaUnHaT. IOn3BaHeTo Ha pa3eHTpOBaH eIemEHT 3a p3aHe, npekaleHo BnCOKaTa CKoPoCT Ha DBNKeHne, lncata Ha NoDpBbKa, BlnrA T CyBCTBNTeJHNo HA OTdEJaHETo Ha Wym N Bn6paun. Heo6xoJMo e, cJeDoBaTeJHo, da ce npednpneMaT npebaHTuBHN MepKn 3a OTCTpaHЯBaHe Ha Bb3MOxHn UeTN, DblKaUcCe Ha BnCOk Wym N Bn6paun; nOprnKeTe Ce 3a NoDpBbKa Ha MaUnHaT, cIaraTe aHTnfoHn, npabete Na3n NO BpeMe Ha pa6ota.
Pn6upaHe 3a cxbxpaHHe
3a da ce HamaJIIN ONaCHOCTTa OT NOJap, He OCTaBRIte CbIOBE C OCTaTbYeH MaTePnAIn B NOMEUeHNHeTO.
2.5 AKNMUYATOP/3APRAHNOYCTPOICTBO
BAHHO CneHnTe npabHa 3a 6e3onacHOCT dONbJbAT npeDncaHnraTa 3a 6e3onacHOCT, KOUTo ce cBdbpHnat B cbOTBeTHaT HNNKKa C HHCTpyKn
Ha akymylaTopa N Ha 3aprdHOTO yctpoictBO, npnloKeHO KbMaunHaTa.
3a 3apeKdahe Ha aKymylaTopa H3noI3BaIte eDINHCTBHeO npenOpbHaHITe OT npOn3BOuNTeJIa 3apRdHi yCTpOHTBa. HenoJxOJaIO 3apRdHO yCTpOHTBO MOKe Da npUHH eJeKTpuYeCKn yIap, npERpRABe He IIn npEJIbAHe Ha Kopo3NoHHa aKymylaTOpHa TeUHOCT.
- N3noJ3BaIte cAmO aKymlaTOpn, cneuaJIHO npeBnDEHn 3a BaIyra ypeI. N3noJ3BaHeTo Ha dpyrN aKymlaTOPn MoKe Da npeDn3BnKa HapaHbAHe n OnaCHOCT OT NOxap.
- Ppei Da nocTaBnTe aKymyIaTopa, yBepeTe ce, yeypeBt e n3KIOUeH. MoHTnpaHeTo Ha aKymyIaTOp BbB BKNIOUeH eJeKTPnueckn ypeM MoKe Da PpeiN3BnKa 3JIoNOLyKn.
CbXpaHbAaTe Heu3no3BaHnTe aKymlaTopn DaJeU OT KlaMepn, MoHETn, KIOOObE, TBO3Den, BINTOBe NIN DpyrMaIK MeTALH NpeDMETN, KOHTo MOraT Da NpeDn3BnKAT KbCO CbeDnHeHne Ha KOHTaKTtTe. KbCO CbeDnHeHne MeJdy KOHTaKTtTe Ha aKymlaTopa MoKe Da DOBeDe Do n3rapHe NIn NOxapn.
He n3noI3BaIte 3apAIDHOy yCTPOIcTBO B MeCTa, KbDeTO hMa HAIuHne Ha napn, 3aNaIIMN BeIeCTBa IIN Bbpxy IecHO 3aNaIIMN IOBbPxHOCTH, HApP. xapTnI, PIIAT N.T.H. No BpeMe Ha 3apeJdahe 3apAIDHOy yCTPOIcTBO ce 3aRpaBa I MOKe Da npuHHN NOJap.
- INo BpeMe Ha TpaHcnpTnpaHe Ha aKymyIaTOPnTe, BHIMaBaIte KOHTaKTnTe Da He Ce CBbpKaT NOMEJdY Cn H He n3NoI3BaIte MeTaJIH N KOHTeINHePn 3a TpaHCnpTnpaHeTo.
2.6 ONA3BAHE HA OHOJHATA CPEDA
Ona3BaHTo Ha OKoJHaTa CpeJa Tp86Ba Da 6bJe CbUeCTBEN I npOpHTeTeH acNEKT npHn3NoJ3BaHTo Ha MaWInHaTa, B NOJ3a Ha rpaKaDaHCKOTO CbKHTeJIcTBO H Na CpeJaTa, B KOrTo JKNBeEM.
- 1368BaTe Da 6bTe eJeMeHT Ha 6e3nOKoIcTBo NO OTHoUeHHe Ha CbCeInte. H3no3BaIte MaunHaTa cAmO no pa3ymHO BpeMe (He paHO cyTpHn IIN KbCHO Beeep, KOraTo MoKe Da ObE3nOKoIte Xopata).
CleDbaiTe cTnKTHo MeCTHInTe pa3npe6b3a H3XBbPJIHeTO Ha ONaKObKn, H3HOceHN YactN IIN KaKBaTO N da e Yact, CnIHNO 3aMbpcaBaUa OKoHaTa CpeDa; Te3N OTNaIbUH He MoRa Tda 6bDat H3XBpbJIaHb B6OkLyKa, a TpRbBa Da 6bDaT OTdelaHn IN PpeDaBAHn B CneuJaHInTe ueHTPOBe, KbDeTo Ue Ce OcbIeCTBn peunKlnpaHc Ha MaTepnAInTe.
CleDbaiTe cTpNkTHo MeCTHnTe HOpMn 3a n3XbPJIHeTo Ha OTNaIbUHN MaTePnAJIcIeD pR3aHe
Korato n3BaKaDte OT eKcnIooatauna, He octaBnTe MaunHaTa B OKoJHaTa
cpea, a ce o6bprHe Te KbM ueHTbp 3a Cb6npaH He OtnaBtu, B CbOTBeTCTBne C MeCTHNTe DeIcTBauu pa3npope6n.
He n3xBpIyTe eJektpnuecknTe ypei 3aeDHO C 6ntOBHTe OTnaDbu. CnopeE Ebponeckata DnapeKTHBa 2012/19/EC 3a OTpaDbuNTe OT eJektpnueckn eJekTpOHHn anapatn
И ВЛиЗанeto И В ДeиCTВе B CБOTBEТСВп С HaциоHAJIHOTO 3aKOHODaTeJCTBO, ИЗхабенITE eLEKТрчecн anapatn Tpr6Ba Да ce CБират pa3delenho, 3a DA 6bdaT ОПЛЗТВОЕн EKOLOГИн Ho CБОБразно.Ак eLEKТрчecнite ypeNi ce N3XBbPлгТ ha Сmetише ИИN B 3eMЯТа,ВpeHNTe BeIeCTBa MOratДа DOCTINHaT BODOCb6npaSHTe 3eMHN Пл actOBe И DA Hablra3aT B XpaHITeJHaTa ВериGa,уВрждадиН 3dPaBeTO Bn.3a NO- 3aДыЛбоЧeHa INФОмaця 3a N3XbPлгHeTo Ha TO3n ПЮДУК,ce CBbPKeTe C KOMneteHTHata СлУЖБа 3a N3XbPлЯнe Ha 6NtOBn OTnaDbu ИИс nДиCTPN6yTopa Ha MaUnHATA.
Li-ion
B kpa Ha Texnna noleneH Jn3HeN cnkbI, n3XbPneTe aKymlaTopnte KaTO NOxOHTe C HeoOxOIMOTO BHImaHne 3a ONa3BaHe Ha OKoJHaTa cpea. AkymlaTopa cbDbpka MaTepnal, KOITe e onaceH 3a Bac
n OKoHaTa Cpea. ToT TpA6Ba Da ce CBAJIH n IpeAaTe OTdEJIHO B pIneMaTeJIeH NyHKT, KOHT Opiema JNTHeBO-IOHH aHyMyJatOpN.

Pa3dJHOTc6bnpaHeHa
H3noJ3BaHN npOdyKTHn ONAKOBKn,
No3BOJRAba peuKNJIpaHe Ha
MaTePnaJIte n TExHOTo NOBTOPO
H3noJ3BaHe. NOBTOPO
H3NoJ3BaHe Ha peuKJIpaHm MaTepnaHn, NOMara 3a npeoTbpaTbaHe Ha 3aMbpcraBaHeTo Ha OKoJIHaTa CpeDa HAmajraBa H3NoJ3BaHeTo Ha CypOBHH.
3. ONO3HABAHE HA MAUNHATA
3.1 OINCAHNE HA MAUHHATA INIPEBnDEHA YNOTPEBA
Ta3n MaunHa e rpaDnHcKo 6OpUyBaHe nNo-TOuHO aKymJlATopeH ppeHocm TpIMep 3a KINB PJIeT.
MaunHaTa ce cBcToI OCHOBHO OT Dnuratel, KOITo 3aDnKBa eINH INHCTpyMeHT 3a pR3aHe.
OnepaTopbT MoKe Da 3aDeiCtBa OCHOBHnTe KOMaHn, KaTo Ce HAMnpa BnHaN Ha 6e3oNaCHO pa3CTOHHne OT INHCTpyMeHTa 3a pr3aHe.
3.1.1 Ппебидаууnotpe6a
Ta3n MaunHa e npoeKtnpaHa n KOHCTpynpaHa 3a:
- p3aHe n noDpaBraBe Ha xpactn HJINB NLET, CbCTOARU CE OT XpactN
c MaJIKN KIOHKn (HaIpeuEn pa3pe3 He no-rotJm ot 15 mm);
- 13No13BaHe cAmO OT eDnH OePaTOp.
3.1.2 HenoDxoJaMa ynoTpe6a
BcraKa npyra ynoTpe6a,pa3nHa ot nocoueHnTe no-rope,MOKe Da 6bJe onacHa n da npuHHn BpeDa Ha xopa nnBeeu. B HenoDxoJaTa ynoTpe6a ce BnIOUcbat (kaTo Hen3eepNaTeIeN npImep):
p3aHe Ha TpeBa N OcObeHO B 6JIn3OCT Do 6OpIOpN;
pa3dp06BaHe Ha MaTePnaJI 3a KOMNOC;
pe3nt6a;
- n3noJ3BaHe Ha MaunHaTa C HnCTpyMeHT 3a p3aHe NaI JINHra Ta Ha paMeHaTa;
- n3noJ3BaHe Ha MaunHaTa 3a p3aHe Ha MaTePnAIn, KOnto He ca OT paCTnTeIeH npOn3XoD;
- I3noJ3BaHeTo Ha nHCTpyMeHTn 3a p3aHe, pa3nUHN OT Te3N n3IOKeHtE B Ta6nua "Texnueckn daHH". OnachocT OT cepNo3Hn paHn HapaHraBaHH;
- IN3NOJ3BaHe Ha MaunHaTa OT NOBuee OTeHN HOBek.
BAHHO HeymecHTHO n3nol3BaHe Ha
MaunHaTa BODn DO OTnadaHe Ha rapaHcyra
NOTXBpbIaHE Ha KaKbATO n da e OTROBOPHOCT
Ha POn3BODHTeJI, KaTO pa3XoNDTe
POn3Tuayu OT HaHeceHN UETn NIN
HapaHBAHe Ha Camn Notpe6nte Nn Ha
TpEt Nua, Ca 3a CMeTKa Ha Notpe6nteJ.
3.1.3 Tn noTpe6nteI
Ta3n MaunHa e npedHa3NaueHa 3a
H3NOJ3BaHe OT nOTpe6nteIn, ToecT
HenpoefcnoHaJIHn OepaTopn. Ta3n MaunHa
e npedHa3NaueHa da ce H3NOJ3Ba KaTO Xo6N.
3.2 3HAUN 3A BE3OINACHOCT
HaMaunHaTa ca NoCTaBeHn pa3IuHn CmBOLn (ФИr.2).TaxHaTa yHKcY e Da HAnOMHr Ha OnepaTopa 3a NOBeDeHnETo, KOEt Tp6Ba Da ce CLeDb, 3a DaЯ n3NoJ3Ba C Heo6XoDMOTO BHMaHne I ppeJa3JIbOcT.
3HaueHHe Ha cHMBOJIte:

BHIMAHHE! ONACHOCT! Ta3n
MaunHa, aKo He Ce n3NoJ3Ba npaBnHIO, MoKe Da 6bJe ONacha 3a Bac N 3a Dpyrnte.

BHHMAHNE!Ppei da
H3NoJ3BaTe Ta3MaUHa, npOyTeTe yNtBAHeTo 3a yNtpe6a.

I3noJ3BaIte aKycTnHn 3aUHTN OuHa.

Hocete nIbTHn pa6oTHn pKabuN uObyBKn npOTNB NOxNb3BaHe.

He n3laarate MaunHaTa HaDbKn (NnHaBna)
ONACHOCT OT N3JIHTAUN MATEPHAJN! O6bpeTe
BHMaHHe Ha eBENTyaHn
H3JIHTaHnHa MaTePnaHn,
IpeIN3BnKaHn OT INHCTpyMeHTa
3a p3aHe, KONTo MOrat da
IpnuHrT TeKKn HapaHbAHn
Ha Xopa Nn IpeDmETn.
ONACHOCT OT N3JNTAUH MATEPHA!Io BpeMe Ha n3POn3BaHe Ha MaunHaTa OTdaJeTe Ha NOHe 15 M. BCNUKxopa nnDOMaUN HKNBOTHN.

OnachocOT nop3BaHnra! DpbkTe pueTe n KpaKaTa cn daJeU OT HOKOBete.
Klnac II DBOHnHa n3Olaunr
BAHHO NOBpeHnTe nHn HeeTnBnTe CTnKePn Tp6Ba Da ce 3aMeHrC HOBn. ONsKaHne HOBnTe CTnKePn OT Baunr OToPi3npaH cepBu3eH ueHTbp.
3.3 IDEHTNΦHKAUHOHE ETHKET HA IPOJYKTA
Ha ndeHTnΦnKauOHnHa eTnKet ca nocouehn cIeHnTe daHHn (ΦnR.1):
- Mapніровka 3a cьтВETCTBVE CE
- Им e n aDpec Ha npOn3BODnTeJIa
- HnBO Ha 3ByKOba MOUHOCT
- KoHa cToKaTa
- BvD MaunHa
- CepneH Homep
- TOnHa Ha npOuN3BOoCTBO
- HanpeKeHHe Ha 3axpaHbAe
IpeHnWeTe NdeHTNcKaUOHnTe DaHHHa MaunHaTa Ha CbOTBeTHnte MeCTaHa eTKeTa, KOITo Ce HAMnpa OT3aHa KOpuata Ha pbKOBOdCTBOTO.
BAHHO N3PON3BaIte NdeHTNΦnKaUHOHHTe DaHHN, KONTO Ca IIOCOeHN Ha NDeHTNΦnKAUHOHHN EHTKET Ha IPOyKTa BCEKNbT, KORAto Ce CBp3BaTe COTOpN3nPaHa pa60TNHnua.
BAHHO IprnMep Ha deKlapaunra 3a CbOTBeTCTBHe Ce HAMnpa Ha NocJeHNHTe CTpaHnHa pbKOBOCTBOTO.
3.4 OCHOBHN HOMHOHEHTN
MaunHaTa e n3rpaDeHa OT cIeHnTe OCHOBHN KOMNOHEHTN, Ha KOHTO OTROBAPcIeHnTaФyHKUHOHnOCT(ΦnR.1):
A.ДВИГATEL:праздавдВИЖЕНЕТО
На ИНСТРУМЕNTА 3a ряЗан.
B. HoK (HnCtpymeHT 3a pR3aHe): HnCtpymeHT, npEHa3NaueH 3a pR3aHe Ha paCTntTeJIHOCT.
C. Прета рьховата: NO3BOJIЯBA
управленье На машинота и Ная НЕ
има пedingаен пексвач.
D. 3aHa pBkoXBaTaHa: N03BOJBA ynpaBHeHn Ha MaunHaTa Hn Ha He Ca pa3NoIooKeHn rlaBHnTe KOMaHn 3a ynpaBHeHne.
E.3aunHa HohHa (H3noJ3Ba Ce npn TpaHCnOpTnpaHe n IpemecTbaHe Ha MaunHaTa):PpeJa3Ba OT HeBOJH KONTaKTN C INHCTpyMeHTa 3a Pra3aHe, KOHTO MORaT Da pnuHHrTeKKn HapaHbAHn.
F. Akymylatop (прнадлесхости по
3aRBka, nap.16.1): Достаь селктуесka
eHeprna Ha ИСТPyMeHTa; HerOBITE
харakтерстicken и правилata 3a ynotpe6aTa
ca ONICAHN B OTДELHO pБКOBODCTBO.
G. 3apAnHO yctpoiCTBO (npnHaJIeJHKoCTH no 3aBka, nap.16.2):ycTPOIcTBO, KOeTO ce n3noJI3Ba 3a 3apeKdaHe Ha aKyMylaTopa; HEROBITE XapaKTepNCTNKn H npabInlaTa 3a ynotpe6bata ca ONHCANH B OTdeHNO pBkoBOdCTBO. PpeJaarat Ce dBa MoJeLa Ha 3apAnHO yctpoiCTBO: G1 (6bp3O 3apAnHO yctpoiCTBO); G2 (CTaHdApTHO 3apAnHO yctpoiCTBO).
H. PAnuca 3a NOMEuaBaHe Ha aKymyIaTopa (npHaNAdJeHHocT no nopBvHa.nap.16.3): ycToiCTBO, KOeTO nO3BOJRAba pa3nOlaRaHeTo Ha aKymyIaTopHTe.
I. Cbbp3BaU Ka6eI: Ka6eI, KOITOBIN03BOJRABa Da CbbpHeMaunHaTa KbM aKMyJaTopa.
J.CmMyIaTOp Ha aKymyIaTOp (npHnHaJeKHOCT no nopbUka.nap.16.4):ypei, KOHTo aKe e BbBeHnB rHe3dOTo Ha MaunHaTa, N03BOJIraNoI3BaHETo Ha paHnCaTa 3a NOMEuBaHe Ha aKymyIaTopa.
4. PA3ONAKOBAHE
BAHHO HopMnte 3a 6e3oNaCHOCT, KOnTO Tp8Ba Da ce CnA3BaT, ca OnHcAHN B rI.2. Cna3BaTe CTPNKTHO Te3n yKa3aHn, C ueI npedOTbpaTbaHe Ha cepno3HN pUCHOBE nH OnaCHOCTn.
Pa3onakOBaHeTo Tp6Ba Da ce H3BbPnBbpy paBHa N 3dpaba NOBbpxHOCT, CDOCTaTbUHO IPOCTpaHCTBO 3a DBNHHeHHe HaMaunHaTn I PEmecTbaHe Ha ONaHOBHnte, KaTON3NOJ3BaTe BnHarn NOXODaN NHCTpyMeHTN.
- OTbOpTe ONaKOBkata BHNMaTeJHNO, KaTO BHIMaBaTe Da He 3aRy6nTE KOMIOHeHTnTe.
- BnKTe 3a CnpaBkDaOKyMeHTaCnIraT, KOrTo e NocTaBeHa B KyTnIraT, BKJIIOuHITeJIHO HAcTOrUHNTe INHCTpyKcNt.
3.ИЗвадеТMaшин haTo OT KUTnTa. - YHnIOXHeTe KyTHraI ONaKOBKnTe B CbOTBcTcBnC MeCTHnTe pa3nope6n.
5. MOHTIPAHE
5.1 OБОРУДBAHE HA PAHицATA 3A ПOMEИАВАЕ HA AKUMЛATOPA (AKOЕ ПЕДВИDEHO)
PaHncaTa 3a NOMeAbaHe Ha aKymyIaTopa ce DoCTabB Beue Crlo6eHa (ΦnR.1H) n MoJcJa Ce OTKaHr OT ONopata Ha KOlaHnTe (ΦnR.3) n Da Ce npEnCe Ha pbKa. 3a Da OTKaHr paHncaTa 3a NOMeAbaHe Ha aKymyIaTopoHaTnCHeTe Dbata roPHn 6byToHa (ΦnR.3.A). OTdelenHnra Ta Ha aKymyIaTopnte Ce HAMnPaT ot Dbete CTPaHn Ha paHncaTa (ΦnR.4) Ha dChata CTPaHa Ha paHncaTa ca pa3noLoKe
- Ka6eJen KOHTaKT (ФИr.5.A)
- celenkTop Ha akymylaTopa (ФИR.5.B)
USBrHe3do3a3apeKdaheHa npyTuycTPOuCTBa(HanpIMep MO6nHNTeJefoH)(Φr.5.C).
3a da ce n36erHe BnCnKabEi, HMa npoxoHOnOT DBeTe CtpaHn IN B 3aHaTa YacT, Ppe3 KOnTo Da ce npekapa 3axpaHbauyrt Ka6eI.
6. HOMAHДN 3A YYPABJIENHE
6.1 INPEДПА3EH BYTOH (YCTPOICTBO 3A AHTNBUPAHE/DEAHTNBUPAHE)

HaTnCKaHKn To3n 6yToH ce aKTHBnpa n DeaKTbHnpa eJeKtpnueckaTa Bepnra Ha MaunHaT (Phr. 6.A).

CBeTeU, CBeToDIOuO: eJeKtpnueckaTa Bepura Ha MaunHaTa e aKTHBnpaHa (ΦHr.
6.B).MaunHaTa e roToBa 3a H3NoJ3BaHe.
NDbata CBEToIOHOa CBETT:
MaunHaTa pa6oTn.
N3KJIHOUeHN CBETOJIOJN: eJIeKTPNueCKaTaBepnra e HAnbJHO DeaKTINBupaHa.

BAHHO IIO BpeMe Ha npemecTBaHn, HNKORA He NOCTaBnTe nPbCTa Bbyx6yToHa, 3a Da ce N36erHa TcnyaHn 3aJeCTBaHn.
NkoHaT“BnMaHne"(Φr.6.F)CBetBa BcnyaHaHaabapnaHaMaunHaTa
(BNHTe NDeHTnФHkaUOHHaTa Ta6JIHa 3a HEn3npaBHOCTn,nap.15).
6.2 IOCT 3A UYPABJEHNE HA HOHA (NHCTPYMEHTA 3A PRA3AHE)
P03BOLIyBa 3aDenCTBaHe n peRyInpaH e Ha ckOpocTtHa HoJa.
3aDéiCTBaHéTo Ha IHcTpymeHTa 3a pIaHe (ΦnI.
1.B) eBb3MOxHO eINHCTBeHO, aHO eINHOpeMeHHO
CTOBA CHe HATNCHE loCTa 3a ynpabLeHne Ha HOka
(ФИ.6.C)ипраза3ня пркьсвay (ФИ.6.D).
HCTpyMeHTb3a p3aHe ce cnnpa
aBtOMaTnHNO npN OCBO6OJdaBaHeTo Ha
IocTa Hn Ha npedna3Hn npekcbvau.
6.3 IOCT 3A DEBIOHHPAHE HA 3ADHATA PbHOXBATHA
IocTa 3a De6loKnpaHe (ΦnR.6.E) no3BOLraBa perylnpae Ha 3aHaTa pBkoXbTaKa (ΦnR.1.D)
B3pa3nHnIOcOKN CnpaMO INCTpyMeHTa
3a p3aHe, 3a no-yd06Ho n3BbPwBaHe Ha
IOBbPHTeHHTe Oepaun No KHBn nIeT.

PerynnpaHTo Ha pbHOXBaTHaT
Tp6Ba da ce H3Bbpwn npn DeaHTBupan npedna3en 6yToH (n3KIOUeHa CBeTInHa).
7.ИЗПОЛ3BAHE HA MAШИHATA
BAHHO
HopMnte 3a 6e3onachOCT, KOUTo TpR6Ba
da ce cna3BaT, ca onncaHn B rI. 2. Cna3BaIte
CTPNKTHO Te3n yka3aHn, C ueI npedOTbpaTBAHe
Ha cepnoo3Hn pncObe nn onaCHOCTn.
7.1 INPEДВAPINTELHNONEPAUIN
IpeiN 3aNoUbaHe Ha pa6Ota Tp6Ba Da ce N3BbPsaT cepn O T npOBepKn O npEpaun, 3a Da ce ocHpyn PbJIHOueHHaTa N MaKcImaJIHo 6e3oNaCha pa6Ota.
Noctabete MaunHaTa B XOpn3oHTaJHo
NIOJKeHnI 3dpaBO CTbIIHa Ha 3eMaTa.
7.1.1 IpoBepHa Ha anMylaTopa
MaunHaTa ce doctab863 aKymyIaTOp.
3aKynTe aKymyIaNTOp cKaNaUHT NOxOJa, 3a
pa6oTHnTe Hynn npncTbneTe KbM HeROBOTO
TbIHO 3apeKdahe KaTo CneBBe yntbTaHnraTa
KONTO CE CbDbPkaT B KHNKKaTa C NHCtpyKuN.
CnncbKbT Ha xOMoIogHpaHHe aKMyJatOpn 3a Ta3N
MaunHa e daen B tabnata "Texnueckn daHHN".
-ПрдИВСАКОИЗПОЛ3ВаНe:
- npOBepTe cBcTOnHHeTo Ha 3apeKdaHe
Ha akymylaTopa KaTo CneDbate
yntbHaHrTa, KOIO Ce CbIbpxKaT B
KNHKKaTa C INHCTpyKcNHa aKyMylaTopa.
7.1.2 Perylinahe Ha pbHOXBaTHaTa

H3Bbpuete perynupaheTo npn daekTbnpaH
npea3en 6ytoh (n3KIOUeHa CBeTInHa).
1.Дрьн electeHa3aIлocTa3aДe6IoKnapaHаЗднATERpbKoXBatKa(ФИr.7.A);
2. 3aONUHeTe Da BbPHTe 3aHaTa pBkoXBaTKa (ΦnR.7.B);
3. OTnycheTe loCTa 3a ynpabIeHne Ha ycHOpnteTlA (Φn.r.7.A);
4.3aBbptTe pBkoXbaTKaTa,doKaTo ⅢpaKHe B JKeJahHaTa N03Nua.
BAHHO
PpeDn da n3no13BaTe MaunHaTa
ce ybepeTe,ye IocTa 3a De6IoKnpaHe ce e
BbPHaI N34JIO B N03N4JRA 3a 6loKnpaHe
H, Ye 3aHaTa pbKoXBaTKa e CToBnHa.

IbpeHa pa6ota 3aHaTa
pbKoXBaTHa TpA6Ba da 6bJe BnHaH
BepTNKaJIHa, He3aBnCmO OT N03nUraTa,
HOrTo e 3aen HnCtpymeHTa 3a Pra3aHe.
7.1.3 Ynotpe6a Ha paHnucata (aHo e npedBndeHa)
- NocTabete aKymyIaTopa B eHNO OT rHe3dTaHa paHnUcTa 3a NOMEuBaHe Ha aKymyIaTopa (ΦnR.4) KaTo ro HaTnCHeTe DOkpa,doKaTo yCeTHe "UpaHbAe", KOeTo ro 3aKnIOUcbB nOLOXKeHne I OCHrpyBa eJeKTPnueckn KOHTaKT;
- CBbpKHeTe Ka6eHa ha paHnUcTaB CbOTBeTHnRA KOHTaKT (ФИ.5.A) n 3aBpTeTe DOkATO yCETnTE "UpaKaBaHe", KOETO 3aKIOUyBA B IIOLOKeHne N OcInrpyBa eJeKToPnueckn KOHTaKT;
- perylnpaTe pembnte n 3aTbopeTe npedHO KOJAHnte (Hr.8).
7.2 NPOBEPHN 3A BE3ONACHOCT
H3BbPWeTe CneHnTe npOBepKn 3a 6e30nacHOCT nnpOBepTe DaJIpe3yIITaTHTe OTROBaprHa nOCOeHTo B TaBnCHTe.
Ipeu Da H3noJ3BaTe MaunHata, 13BbpuBaIte BnHar npOBepHu 3a 6e3OnacHOCT.
7.2.1 O6uza npoBepHa
| Преемет Peşуltа | |
| Ръкхватки (Фиг. 1.C, Фиг. 1.D) и зашитп | Почистени, посушени И симсярани правлино И заразов на машината |
| Виntове на машината и на Ножа | Добpe симсярани (небрахлабени) |
| Оъportи за oxлajдаш Вьздун | Небрабва дь бдат Залшени |
| Нож (Фиг. 1.B) Нatoчен, бez | повөждаг纳и и сдени OT ИЗнOCBAнe |
| Заштои Здрави и дa He ca | Повөдени. |
| Антуларот (Фиг. 1.F) He тря | Ба дa ры мам ровөдī ПО сеговatable обвиьka, НИТО ИЗтуларе на ТЕЧНСТ |
| Машина He трябва дa ры мам сiz | Бдүдү ot Повөддөдүлүйн ISHOCBAнe |
| Ельсторическая Кабели Слалata | Изолаши Трябва дa Бдide здрава. КабелITE трябва дa Бдат Здрави, дa дa се ИЗбогнe генерiate на ИSCри |
| Лост за уравлике над Ножа, пэрдане пөръсвач (Фиг. 6.C, Фиг. 6.D) | Трябва дa сдвикат СвобODно, a He дa сe phорсирat. |
| Пребно уравлике He ce от | Крпва анормална Вибрацnia. НЯма anopmaelen shum |
7.2.2 Tect 3a ΦyHκηoHηpaHe Ha MaunHaTa
| Дeйстве | Рezуltat |
| 1. Пocstавete akymylatopaВ нeroBOTOr Гезdo (Фиг. 10.A); 2.Натuschete праздаимябутон (Фиг. 9.A) | Трябва да се Вклочи Зеленatable с Bretлина (актуврана еlementрическа верURA), a инchristрумента за рязани ны Трябва дa се Движи |
| 3адействаite maшината (nap. 7.3); 1. edновреемно c TOBA задействаite Юста за урал建筑物 н autoха (Фиг. 9.B) и праздаимя празьсвач (Фиг. 9.C); 2. освобODEт e lostа Зу урал建筑物 на ножа (Фиг. 9.B) и праздаимя празьсвач (Фиг. 9.C) | 1. Ножа Трябва дa се Движи |
| 2. КомандITE Трябва дa се Вьрна авTomатунюи бьрзо В Heytpално паложения, a Ножа Трябва дa спpe дa се Движи | |
| 1. П在职 Вклочen Нox, Дрьнichte Лоста за дeбл_OKираце на Задна т рьховатka (Фиг. 7.A) | 1. Ножьт Трябва дa спpe дa се Движи |
AHO eHN OT pe3yIaTHe ce pa3nHyaBa OT yHa3aHOTo B Ta6nHte, He e Bb3MOHNO n3no3BaHTo Ha MaunHata! PpeaHTe MaunHata B cepBn3eH ueHbP 3a N3BbPwBaHe Ha CbOTBeTHHe npOBepn H nonpaBA.
7.3 3AENCTBAHE
7.3.1 3aenctBaHe c anymyIaTop
- CbaJIeTe 3aUHTata Ha HOHa (ФИR. 1.E) (ako ce n3noI3Ba);
2.yBepTeCe,ueHOKaHe Ce Onnpa B TepeHa NINB DpyrN PpeDMETN; - NOCTaBete aKymyIaTopa npaBnHOB HEROBOTO rHe3do (ΦnR.10.A);
- HATINCHETe npedna3Hn6yToH (ΦnR.9.A);
- eHOBpemeHHo C TOBa 3aJeNCTBaIte IocTa 3a ynpabLeHne Ha Hoxa (ΦIr. 9.B) n npedna3Hn npekbcBau (ΦIr. 9.C).
7.3.2 BhIIOUBaHe cbc CmMylaTOp Ha anMylaTOp (aKe e npdeBnDneH)
1.3aemete cta6nHa HENoDbNkHa N03nIy;
2.ybepeTe ce,ye HoxHa He ce Onpa B TepeHa NInB DpyrN PpeDMETN;
3. NocTabete npaBnIHO cmylaTopa Ha aKymlaTopa B rHe3doTo My B MaunHaTa (Φnr.10.J)
4. CbbpKeTe Ka6eJa 3a Cbbp3BaHe KbM CmMyJatopa Ha aHymyJatopa (fHr.10.l)
5. n36peTe aKymyIaTopa, KOITo da ce aKTbIpa oT ceJIeKToPa (ΦnR. 5.B)
6. NaTnCHe Tnpa3Hn6yToH (ФИr. 9.A)
7. eHOBpeMeHHO C TOBa 3aDeIcTBaIte IocTa 3a ynpabJIeHne Ha HOka (ФИг.9.B) I npedna3HnI ppeKbCBAu (Fig.9.C)
7.4 PABOTA
3a da pa6oTnte c MaunHata npOeDnpaTe TaHa, KaHTo e OnncAoNo-dOly:
-ДрькTe BnHaM MaunHaTa 3dpaBO C DBeTe рьсe, KaTO NOДБpЖaTe INHCTpyMeHTa 3a рязаHe NOД LInHЯТa Ha pameHata;
He oTcpanhaBae Otpa3aHnrt MaTePnAn nn dpbKe Te 3dpBO MaTePnAna 3a pHaHe,doHaTo pa6To HOna.YBepTe ce,ye npEpa3HNr86yToH e DeaHTNBpuH (n3raChana CBetnHa),Horato Ce OTcpanBa Otpa3aHnrt MaTePnAn.
3A6EJIEXHKA No Bpeme Ha pa6oTa,
aKymlyaTopa e npeIpa3eH OT nbIHO n3TOuaBaHe
ype3 3aHTHO yCTpOcTB0, KOeTO n3HIOuBaMaunHaT a N bOnnpa fynKUOHnPaHeTo n.
3A6EJIEXKA AHO e BKNIOUeHa, aKO He pa6OTn B npOdbJIHHeHne Ha eHa MNHyTa, MaunHata ige Ce N3KIOUy ABTomTuHNO.
7.4.1 TexHHka Ha pa6ota
BnHaHcpe npednoHTa da ce peKat nbpBO Dbete BepTKaJIHn CTpaHn Ha KINBnIeT, a nocle rOpHaTa YacT.
3A6EJIENHKA ABTOHOMHaTa pa6oTa Ha aKymyIaTopa (n CLEIOBaTeIHo pAcTHeIHaTa NOBbPxHOCT, KOrTo MOHe Da ce peKe, Ppei Npe3apeKdAnHeTo Ha aKymyIaTopa) ce obycIaB8 OT pa3NIuHN fakTopu, OINcAHN B nap. 8.2.1.
7.4.1.a BeptnHaJIHO pR3aHe
PraheTo Tpa6Ba Da 6bDe N3BbpSeHO C DbTROBO
DnHexHe,OTdOly HaRope,KATO DbpKHTe HOKa
Bb3MOHHO Hau-daneu OT TaIOTO (Φnr.11).
7.4.1.b Xopn3oHTaJIHPO pR3aHe
Ha-Do6pnpe3yIaTnCeNoCTnRaTcJeKoHaKnloHen HOK (5^ - 10^) nO nocKa HA p3aHTo, C DbroBO DBnHexHeu6abHO NocTOHHo HAnpeDbAhe, Oco6eHO B clyau Ha MHO rCTn PNETobe (ΦIr. 12).
7.4.2 CbBETn 3a n3NoI3BaHETO
Ako nO BpeMe Ha N3nOJI3BaHTo HOKOBeTe Ce 3axBaHaT B KIOHOBeTe Ha JKNBnIJIeT:
- cnpeTe BeDnara MaunHaTa (nap. 7.5);
2.ИЗчакайт,ДOKATOИнСТPyMeHTa 3a рязане спpe да ce ДВИКИ; - CbaIe aKymyIaTopa (nap. 8.2.2);
4.ИЗва对接узхва对接у матерпал.
7.4.3 Cma3BaHe Ha HOHOBeTe NO Bpeme Ha pa60Ta
Ako HnCTpyMeHTb3a pr3aHe ce 3arpaBa npeKaJIeHO NO BpeMe Ha pa6Ota, Tp6Ba Da cMaKeTe BBTpewHInTe NOBbpxHOCTn Ha HOXOBete (nap.8.4).
Ta3n onepaunr Tp6Ba da ce n3BbPwBa npn cnpraHa MaunHa u Cbaen anymyIaTop OT HEROBOTO rHe3do (nap. 8.2.2).
7.5 CINHPAHE
BnharncnpaTeMaunHaTa:
- NO BpeMe Ha npemecTbaHnMaJy pa3nUHnTe pa6OTHN 30Hn.
No BpeMe Ha npemecTBaHn, HNKora He nocTabra Te npbcta Bbpxy npedna3Hn6yTOH, 3a da ce n36erHat cnuyaAHn 3adeNCTBaHn.
7.6 CJED YNOTPEBA
7.6.1 CnE ynoTpe6a c anymyIaTopa
CbaIeT aKMyJaTopa O T HRe3dTo My I npIcTbIneTe KbM HeROBOT npEzapeJdahe (nap. 8.2.2).
- PpH CNPnH NHTpyMeH 3a P3aHe, NOCTaBeTe 3aUHTaTa Ha HOxA (ΦnR.1.E).
Octabete Dniratela da ce oxlaadi, npedi da npnbepete MaunHaTa 3a cbxpaHeHne B HkaKBO NOMEeHne.
- N3BbPseTe nouchTbaHe (nap. 8.3).
IpoBepTe daHn HMa pa3Xna6eHn nnnoBpeDeHn KOMNoHEHTn.AKO e Heo6xoJIMO,CMHeTe NOBpeDeHnTe KOMNoHEHTn 3aTeHHeTeEBeHTyaJIHn pa3Xna6eHn BInTOBe n BoTObe nnCe CbbpKeTe COTOpu3npaH cepBn3eH ueHTbp.
7.6.2 Cnei ynoTpe6a cbc cnmylaTOp Ha aHymyIaTOp (aHO e npedeBnDcH)
- NocTabete ceIeKTopa Ha paHnUcaTa 3a NOMEuBaHa He aKyuMaJaTopa Ha"OFF"(ΦIr.5.B);
- cBaIeTe CmMyIaTOPa Ha aKymyIaTOPa Ha MaunHaTa (ΦnR. 13.J);
- cBaJIeTe paHnIcaTa 3a NOMEuBaHaHe Ha aKymyIaTopa;
4.ИЗнлоче CBbp3Baшяka6eI OT cHmMylaTopa Ha aKymylaTopa (Фиг.13.I)иOT paHncaTа (Фиг.5.A) - cBaIeTe aKymyIaTopa OT paHnIaTa (ФИг.14)и ce nOprnKeTe 3a HerOBTo 3apeKdane (nap.8.2.2);
- octaBeTe DnraTeIa Ce OxlaI, npEIN Da npnbepeTe MaunHata 3a CbXpaHeHne B HkAKBO NOMEueHne;
- n3Bpwe Te nouchTbahe (nap. 8.3);
- Повере Te Ддн Няma pa3xla6eHn Илп NOВpeDEн KOMNOHEHTN. Ак e Heo6xOДМо, CmEHeTe ПоврdeHNTe KOMNoHEHTN 3aTeHETe eBEHTyaJIHn pa3Xla6eHn BInTOBe И bOLTOb e Ил ce CBbPKeTe C OTOpN3IpaN cepBn3eH ueHTbp.
BAHHO CbajTe BnHa n akymylaTopa (nap.8.2.2) mOHTnpaTe 3aunTaHa HOKa, BCEK NbT, KOrATO MaunHaTa He Ce H3NoJ3Ba IINCe OCTaB Ye3 Ha6IIOJeHne.
8. OБИKHOBEHA NOДРьЖHA
8.1 INHΦOPMAUЯ OTOBIXAPAKTEP
BAHHO HopmTe 3a 6e3oNaCHOCT, KOnto Tp6Ba Da ce CnAsBAt, ca onncAH B rI.2. Cna3BaIte CTPNKTHO Te3N yKa3aHn, C qeI npedOTbpaTBAHe Ha cepNo3HN pNCOBe nIN ONaCHOCTn.
IpeHn da 3anoyhe HauBaTo n da6nna paobota no noDpBHKata:
Cnpete mawunhata;
CBAIeTe aHymyIaTopo OT rHe3dTo My nPnCTbIeTe HbM HerOBOT npE3apeHdahe (nap. 8.2.2);
-При Спрази Иструмент 3а рязache, NOCTABete 3aцитata Ha HoHa (CИЗКИЧЕне Ha CIIyuaHTe Ha HAMeca no Camma HOH);
OCTaBeTe DnRaTeTg Da Ce OxJaDu, npEdu Da npu6epete MaunHata 3a cbXpaHeHne B HraHbO NomeeHne;
Hocete noxdxogno o6lehno,pa60TH npkabnui npedna3HN ouHa;
- Ppoetete cbotbETHNE HNCTpyKun.
- YecToTata N BnDa Ha HameCIne ca 606uHb B "Ta6nua Ha onepaunTe no 1o4pBxKata" (Bk. rI. 14). Ta6nUaTa nMa 3a ue Da Bn nomorHe npi 1o4bXHaHTo Ha pa6OTocNOC6HocCTTa 6e3OanachocTt Ha BaWata MaunHa. B He Ca NOCOeHN OCHOBHnTe HAMcH IN nepNoDnHocCTTa, ppeBnDeHa 3a BCKa OT T8x. N3BbPwete CbOTBeTHOTO DeIcTBHe npi PbBOTO n3Tnue He Ha cKoka.
-Излльвану Ho HeopnHaJIHn pe3epBn 华Tи npHaJNeKHOCTMOKe Da nMa OTpucaTeJIHO Bb3dEiCTBne Bbpxy pa60tata N 6e3ONaChOCTTa Ha MaunHaTa. Ipon3BODIteJIr THe NOema HnKaKBa OTROBOPHOCT B ClyuHa NaOBpeDa nHapAHЯBaHe, pNCHHeH NOT Te3N IpOdyKTn.
-OpnHnHaJIHnTepe3epBnUaCTnCeIOCTaBrtOTCEpBn3nNOTOpn3npaHnDnIbpn.
BAHHO Bcnn noepauu no
noDpBkKaTnpeylnpaHTo, KOnTO He ca ONNCAHN B TOBA pKBoBOdCTBO, TPhBa Da CE n3BbPWBaT O Baunn dncTpNoTyOpn nn OT CneunaHn3npaH cepBu3eH cHTbp.
8.2 AKYMЛATOP
8.2.1 ABTOHOMHa pa60Ta Ha aKymylaTopa
AByoHOMHaTa pa60Ta Ha aKymyIaTopa (n CLeIOBaTeJIHO pACTHTeJIHaTaNOBbpxHOCT, KOrTO MoKe Da ce 6b60TH, npEi Npe3apeKdaHeTo Ha aKymyIaTopa) ce o6ycIaBra OCHOBHOOT:
a.ФakTopnHa OKolHaTa CpeDa, KOnTO DoBExdA T O 3pa3XoDbAHe Ha No-ToJMAO KOINueCTBO eHepTn:
-рзанeto/порpaьранэтHaMHOrOПлънИИВlaЖИХpacTи;
-paactn Tbbpde rolem KIOH;
b. NOBEdHHe Ha onepaTopa, Koeto Tp6Ba Da n36rBa:
- YecTo BkIIOUBaHe H N3KJIIOUBaHe NO Bpeme Ha pa6Ota;
- npnlaarHe Ha HeNoDxOJaTaTexHnKa Ha p3aHe cnpaMo pa6oTaTa, KOrTo Tp6Ba Da ce N3BbPun (nap. 7.4.1);
-CHOPoCT Ha npeMeCTBaHe npn pr3aHe, HEnoXoJa7a 3a CbCTOarHHeTO, B KOeToCe HAMnpa Xpacta 3a pr3aHe.
3a ONTMMN3npaHe Ha aBTOHOMHaTa pa60Ta Ha aKymyIaTopa e Heo6xOJMo BnHaRn:
Ja pekeTe xpacta, KOrato e cyx;
-Да HabТpoIte ChKOpOCT Ha DBNKeHne npn
РЯЗАн, ПОДХОДЯЗа 3a CBCTOrHNeTO,
В КоЕТо CE hamIPA xpaCTa;
- Da ce N3NoJ3Ba NOxOJaTaTexHnKa 3a pa60TaT, KOrTo Tp8Ba Da ce N3BbPwBa.
Ako ce xeJae da ce n3noJI3Ba MaunHaTa 3a noDbIgN nepNoHn Ha pa6To cnprMo No3BOJeHOTo 3a CTahdapTeH akymlaTOp, e Bb3MOxHO:
Ja Ce 3aKyNBItopnCTaHdApTeH aKymlaTOp 3a He3a6abHa CmHa Ha N3TOUeHnnaKymlaTOp,6e3 TOBa Da KOMnpoMeTpa npOdbJHKITeJIHOCTTa Ha N3NOJ3BaHe;
-Да ce 3aKупн aKуMуЛaTOp, KoITo nO3BOLЯBa
NO-ПрдьлЖИТeЛHa aВTOHOMHa pa6Ota cPpЯMo
cTaHdapTHnA aKуMуЛaTOp (nap.16.1).
8.2.2 CbajHe n npe3apeHdahe Ha anymylaTopa
- Hatnchete 6yToHa 3a 3aKIOUbaHe Ha MCTOTO Ha aKymlaTopa Bbpxy MaunHata (ΦIr. 13.A) nIn Bbpxy paHuaTa (ΦIr. 14. A) (aKe e npEbndeHo);
- cBaJIeTe aKymyIaTopa OT MaunHaTa (ΦnR. 13.B) nII NT paHnIaTa 3a NOMEuBaHe Ha aKymyIaTopa (ΦnR. 14.B) (aHO e npEduN;
- NOCTaBeTe aKymyIaTopa (ΦnR. 15.A) B HErOBOTO rHe3dO Ha 3apAHyTO yCtpoNCTBO (ΦnR. 15.B);
- CBpKeTe 3apJHOTO yCTpoINCTBO (ΦnR. 15.B) KbM eJIeKTPnueCKN KOHTaKT C HanpeKeHne, CbOTBETCTBaUc O yHa3aHOTo Ha Ta6EInkata;
- npntbneTe KbM PbHOTo 3apeKdaHe KaTO CJIeBbATE yKa3aHnraTa, CbIbPkaUc Ce B KHINKHATA C INHCTpyKuHa aKymyIaTOPa/3apAHDHTO yCTPOIcTBO.
3A6EJIeHHA AkyMylatOpBte cHa6deH C
npeJna3HTe, KOITo Bb3npenTCTBa 3apeKdaHeTo, aKOkHaTa Tempeatypa He e MeJdy O n +45 °C.
3A6EJIeHHA AnmylaTOpbT MoHe da
ce npe3apeJbB BCEKN MOMENT,JaKe yactnuHO,6e3 pNCK OT NOBpeJa.
8.2.3 MoNTIpaHe Ha aKymylaTopa Ha MaUNHaTa
CneKaTo 3aBbPm 3apeHdaHeTo:
- cBaIeTe aKymyIaTopa oT rHe3dTo Ha 3aprAnHO yCTpOncTBo (ΦnR. 16.A) (N36BraHKn Da Ro DbPknTe nOd 3apeKdaHe Dblro BpeMe CneD npe3apeKdaHe);
- pa3kahe 3apAHHOTO yCTPOHCTBO (ΦnR. 16.B) ot eIekTpnuecKaTa MpeHa;
- NOCTaBeTe aKymyIaTOPa B rHe3dOTo My, NOCTaBeHO Ha MaunHaTa (ΦnR. 10.A) nII N B eDHO OT rHe3dATo Ha paHnCtA 3a nOMEuBaHa He Ha aKymyIaTOPa (ΦnR.4) (aKo e npEdbuDeHo)
- HatncheTe Do IbHo aKMyIaTopa DOKaTO yCteTHe "UpaKaBaHe", KOeTO 3aKnIOuBa B NIOLOKeHne H OcNHyprBa eJIeKTpUHeCKn KOHTaKT.
8.3 NOUHCTBAHE HA MAUNHATA HHA DBNATEJI
3a da ce hamaHn pNcKa OT noXap, noYnCTBaNTe MaunHaT a NOCO6eHO DnIraTeJr,OT OCTaTbU O T I nCTa, KIOHN HIN PpeKaJIeHO MacNo.
-Почнстваite ВиharmaшинаТСлд ИЗПОЛ3ВаHe KaTOИЗПОЛ3ВaTeЧNTаКьрna,НавлakнHeHa BHeyTpaleH NOuCTBaU npenapaT.
- OTCpaHЯBaIte BcKaHbCa CJIeJa OT BlaRa, KaTo cn NocLyKHe Tc MeKa H cyXa KbPna. BlaRaTa MoKe Da npEiN3BnKa pncKObe OT TokOBu ydApn.
He n3noJI3BaIte arpeCnBn NOUcTbau npenapatn nn pa3TbOpnteJn 3a NOUcTbaHe Ha IlaCTMaCOBNTe YaCTN nn pkoXBaTKnte.
He n3noJ3BaIte Ctpyn Boda n n36BaIte Da mOKPHTe DnIraTeJI n eJeKTPnuecknTe YacTH.
3a da ce n36erHn nperepaBaHe n NOBpeKdaHe Ha DnIraTeJIaN aKyMaJaTopa, npOBepRaBte BnHaRn DaJIn acnnpaOnHHnte peWetKn Ha OxJaDaunr Bb3dyx ca qHCTN N CBO6OHN OT OTNaDbuN.
8.4 NOYHCTBAHE N CMA3BAHE HA MHCTPYMEHTA 3A PR3AHE
CleB Bcra Ka pa6oTHa cecn e Heo6xOdmo Da NoHCTnte HOKa, 3a da ce yBeJIuHn HeRoBaTa eKacHOCT n KIn3HeN cKbI:
He nnaTe HnctpymeHa 3a p3aHe,doKaTo He ce CBaH aKymyNaTopa HnHCTpymeHTbT 3a p3aHe He e HaNbIHO HenoDbNHeH.
- Noctabete MaunHATA B XOpn3OHTaHNOIIOKeHHe N 3dpaBO CTbHJa Ha 3eMaTa.
- NocTeTe HOxCa CbC CyXa Kbpna H3No3BaTe YeTKa, B CnyaH Ha yCTOnuBO 3ambpcBaHe.
CmaKeTe HOKOBTe KaTo HaHeceTe Iek CLON CNEUHNO MacNo,3a npENoHTaHe He3AmbpcBaUO, NO DblnHaTa Ha TropnHa HoXka.
16.2 3APДHО YCTPOICTBO 3A ACHUMYJIATOPA
YcTpoiCTBO, KOeTO ce n3nOJ3Ba 3a 3apeKdane Ha aKymyIaTopa: 6bP30 (ΦnR. 18.A), cTaHdapTHo (ΦnR. 18.B).
16.3 PAHUNCA 3A IOMELUABAHE HA AKUMYLATOPA
YCTPOIcTBO, KOETO NO3BOJRA NOMEUaBaHETO Ha IBA aKymlaTopa n DoCTaBn eJeKTpNueeCKn TOK, Heo6xOdM 3a pa6oTaHa ha MaunHaTa. DocTabr ce c Ka6eJa 3a Cbbp3BaHe KbMaunHata (ΦnR.1.I) n CbC CeJIeKTop (ΦnR.5.B), KOITOBn PO3BOJRA Da n36epeTe eINH OT Dbata aKymlaTopa (no3nui "1" n "2") n "OFF".
16.4 CnMyJATOP HA AkyMylATOP
Ypei, KOHTO aKO e BbBedeH BrHe3dOTO Ha MaunHaTa, N03BOJRA BaN3BaHTo Ha paHncaTa 3a NOMEuBaHe Ha aKymlaTopa.
SADRžAJ
- OPCE INFORMACIJE 1
- SIGURNOSNI PROPISI 2
- UPOZNAVANE MASINE 4
3.1 Opis masine i predvidena upotreba.. 4
3.2 Sigurnosne oznake.. 5
3.3 Identifikacijska najlepnicaproizvoda 5
3.4 Glavni dijelovi 5
- SKIDANJE AMBALAZE 6
- MONTAZA 6
5.1 NAMJESTANJE RUKSAK AKUMULATORA (ako postoji) 6
- UPRAVLJACKE KOMANDE 6
6.1 Sigurnosno dugme (uključivanje/isključivanje) 6
6.2 Poluga za komandu sjeciva (rezne glave) .... 7
6.3 Poluga za deblokadu zadnjeg rukohvata .... 7
- UPOTREBA MASINE
7.1 Pripretne radnje.. 7
7.2 Sigurnosne kontrrole 7
7.3 Pokretanje 8
7.4 Rad 8
7.5 Zaustavljanje 9
7.6 Nakon upotrebe.. 9
- REDOVNO ODRZAVANJE 9
8.1 Opée informacièe 9
8.2 Akumulator 10
8.3 Ciscenje masine i motora 10
8.4 Ciscenje i podmazivanje rezne glave 11
8.5 Matice i vijci za fiksiranje 11
- IZVANREDNO ODRZAVANJE 11
7.4 PRACOVNI CINNOST
These Maschine woke me up. "I'm sorry, I don't know what to do," he said.
These Maschine woke up in the dark. The man was standing in front of the building, and he looked down at the people who were sitting on the ground. He looked at his father, who had been killed by a bomb. The man's father had been killed by a bomb. This was the first time he saw his father.
6. XEIPIΣTHPIA EΛΕΓXOY
6.1 MNOYTON AΦAΛEIAZ (ΣYΣTHMA ENEPΓΟΙHΣHΣ / ANENEPRONOHΣ)

AutoTo moutov evepyoonoi i kai anevepyoonoi to nAekptiko Kukawma Tou mnxavnaatoc (Eik.6.A).

'Eva led avaumévo: To nλεκτρίο
kukwma Tou μnxavnμatoc εivai
εvεpyoioημévo (Eik. 6.B). To
μnxávnμa εivai etoio yia xρησ.
Kai ta duo led avauméva: To
μnxávnμa βpiokετai σελειουργia.
EvdiKtkeuxvieoBnoTeC: To nEeKtpko kukwma evai eVTEwC anevepyonoiuevo.
ZHMMANTIKO KaTACIg
eTKIVNOEIC note mnv nIEETTO
moutov yia va anouyETEVOT
kivvvo TuXaiae EKKIVNOns.

To eikovidio "Ppooox" (Eik. 6.F)
avabéi σε πεpiπtwon βλaβnç tou
μnxavnμatoc (avatpèξτε στov πivaka
avayvωpiσnc βλaβωv, nap. 15).
- GENERAL INFORMATION 1
2.SAFETY REGULATIONS. 2
3.ABOUT THE MACHINE 4
3.1 Machine description and intended use 4
3.2 Safety signs.. 5
3.3 Product identification label 5
3.4 Main components.. 5
4.UNPACKING. 6
5. ASSEMBLY 6
5.1 FITTING OF THE BATTERY BACKPACK (if available). 6
6.CONTROLS. 6
6.1 Safety button (activation/deactivation) 6
6.2 Blade control lever (cutting means) 6
6.3 Rear handgrip release lever 6
- USING THE MACHINE 7
7.1 Preliminary operations 7
7.2 Safety checks.. 7
7.3 Start-up 8
7.4 Operation 8
7.5 Stop 9
7.6 After use 9
- ROUTINE MAINTENANCE 9
8.1 General Information 9
8.2 Battery 10
8.3 Cleaning the machine and the engine 10
8.4 Cleaning and lubrication of the cutting means 11
8.5 Nuts and bolts 11
- OCCASIONAL MAINTENANCE 11
9.1 Cutting means occasional maintenance..... 11 - STORAGE 1
10.1 Storing 11
10.2 Storing the battery 12 - HANDLING AND TRANSPORT 12
- ASSISTANCE AND REPAIRS 12
- WARRANTY COVERAGE 12
- MAINTENANCE TABLE 13
15.TROUBLESHOOTING 13
16 ACCESSORIES ON REQUEST 15
16.1 Alternative batteries.. 15
16.2 Battery charger.. 15
16.3 Battery backpack 15
16.4 Battery simulator 15
1. GENERAL INFORMATION
1.1 HOW TO READ THIS MANUAL
Some of the paragraphs in this manual contain particularly important information in terms of safety and operation, and are highlighted differently, according to the following criteria:
NOTE or IMPORTANT These give details or further information on what has been previously indicated and aim to prevent damage to the machine or cause other damage.
The symbol highlights danger. Failure to observe the warning can lead to possible personal and/or third party injury and/or damage.
The paragraphs highlighted in a dotted grey square indicate optional characteristics not available on all models documented in this manual. Check if the characteristics are available on this model.
Whenever reference is made to a position on the machine "front", "back", "left" or "right" hand side, this refers to the operator's working position.
1.2 REFERENCES
1.2.1 Figures
The figures in these instructions for use are numbered 1, 2, 3, etc.
Components shown in the figures are marked A, B, C, etc.
Reference to component C in figure
2 is indicated with the wording: "See fig. 2.C" or simply "(Fig. 2.C)".
The figures are provided by way of example. The actual pieces can differ from those illustrated in this document.
1.2.2 Titles
The manual is arranged in chapters and paragraphs. The title of paragraph '2.1 Training' is a sub-title of "2. Safety regulations". References to titles or paragraphs are marked with the abbreviation chap. or par. and the relevant number. Example: "chap. 2" or "para. 2.1.
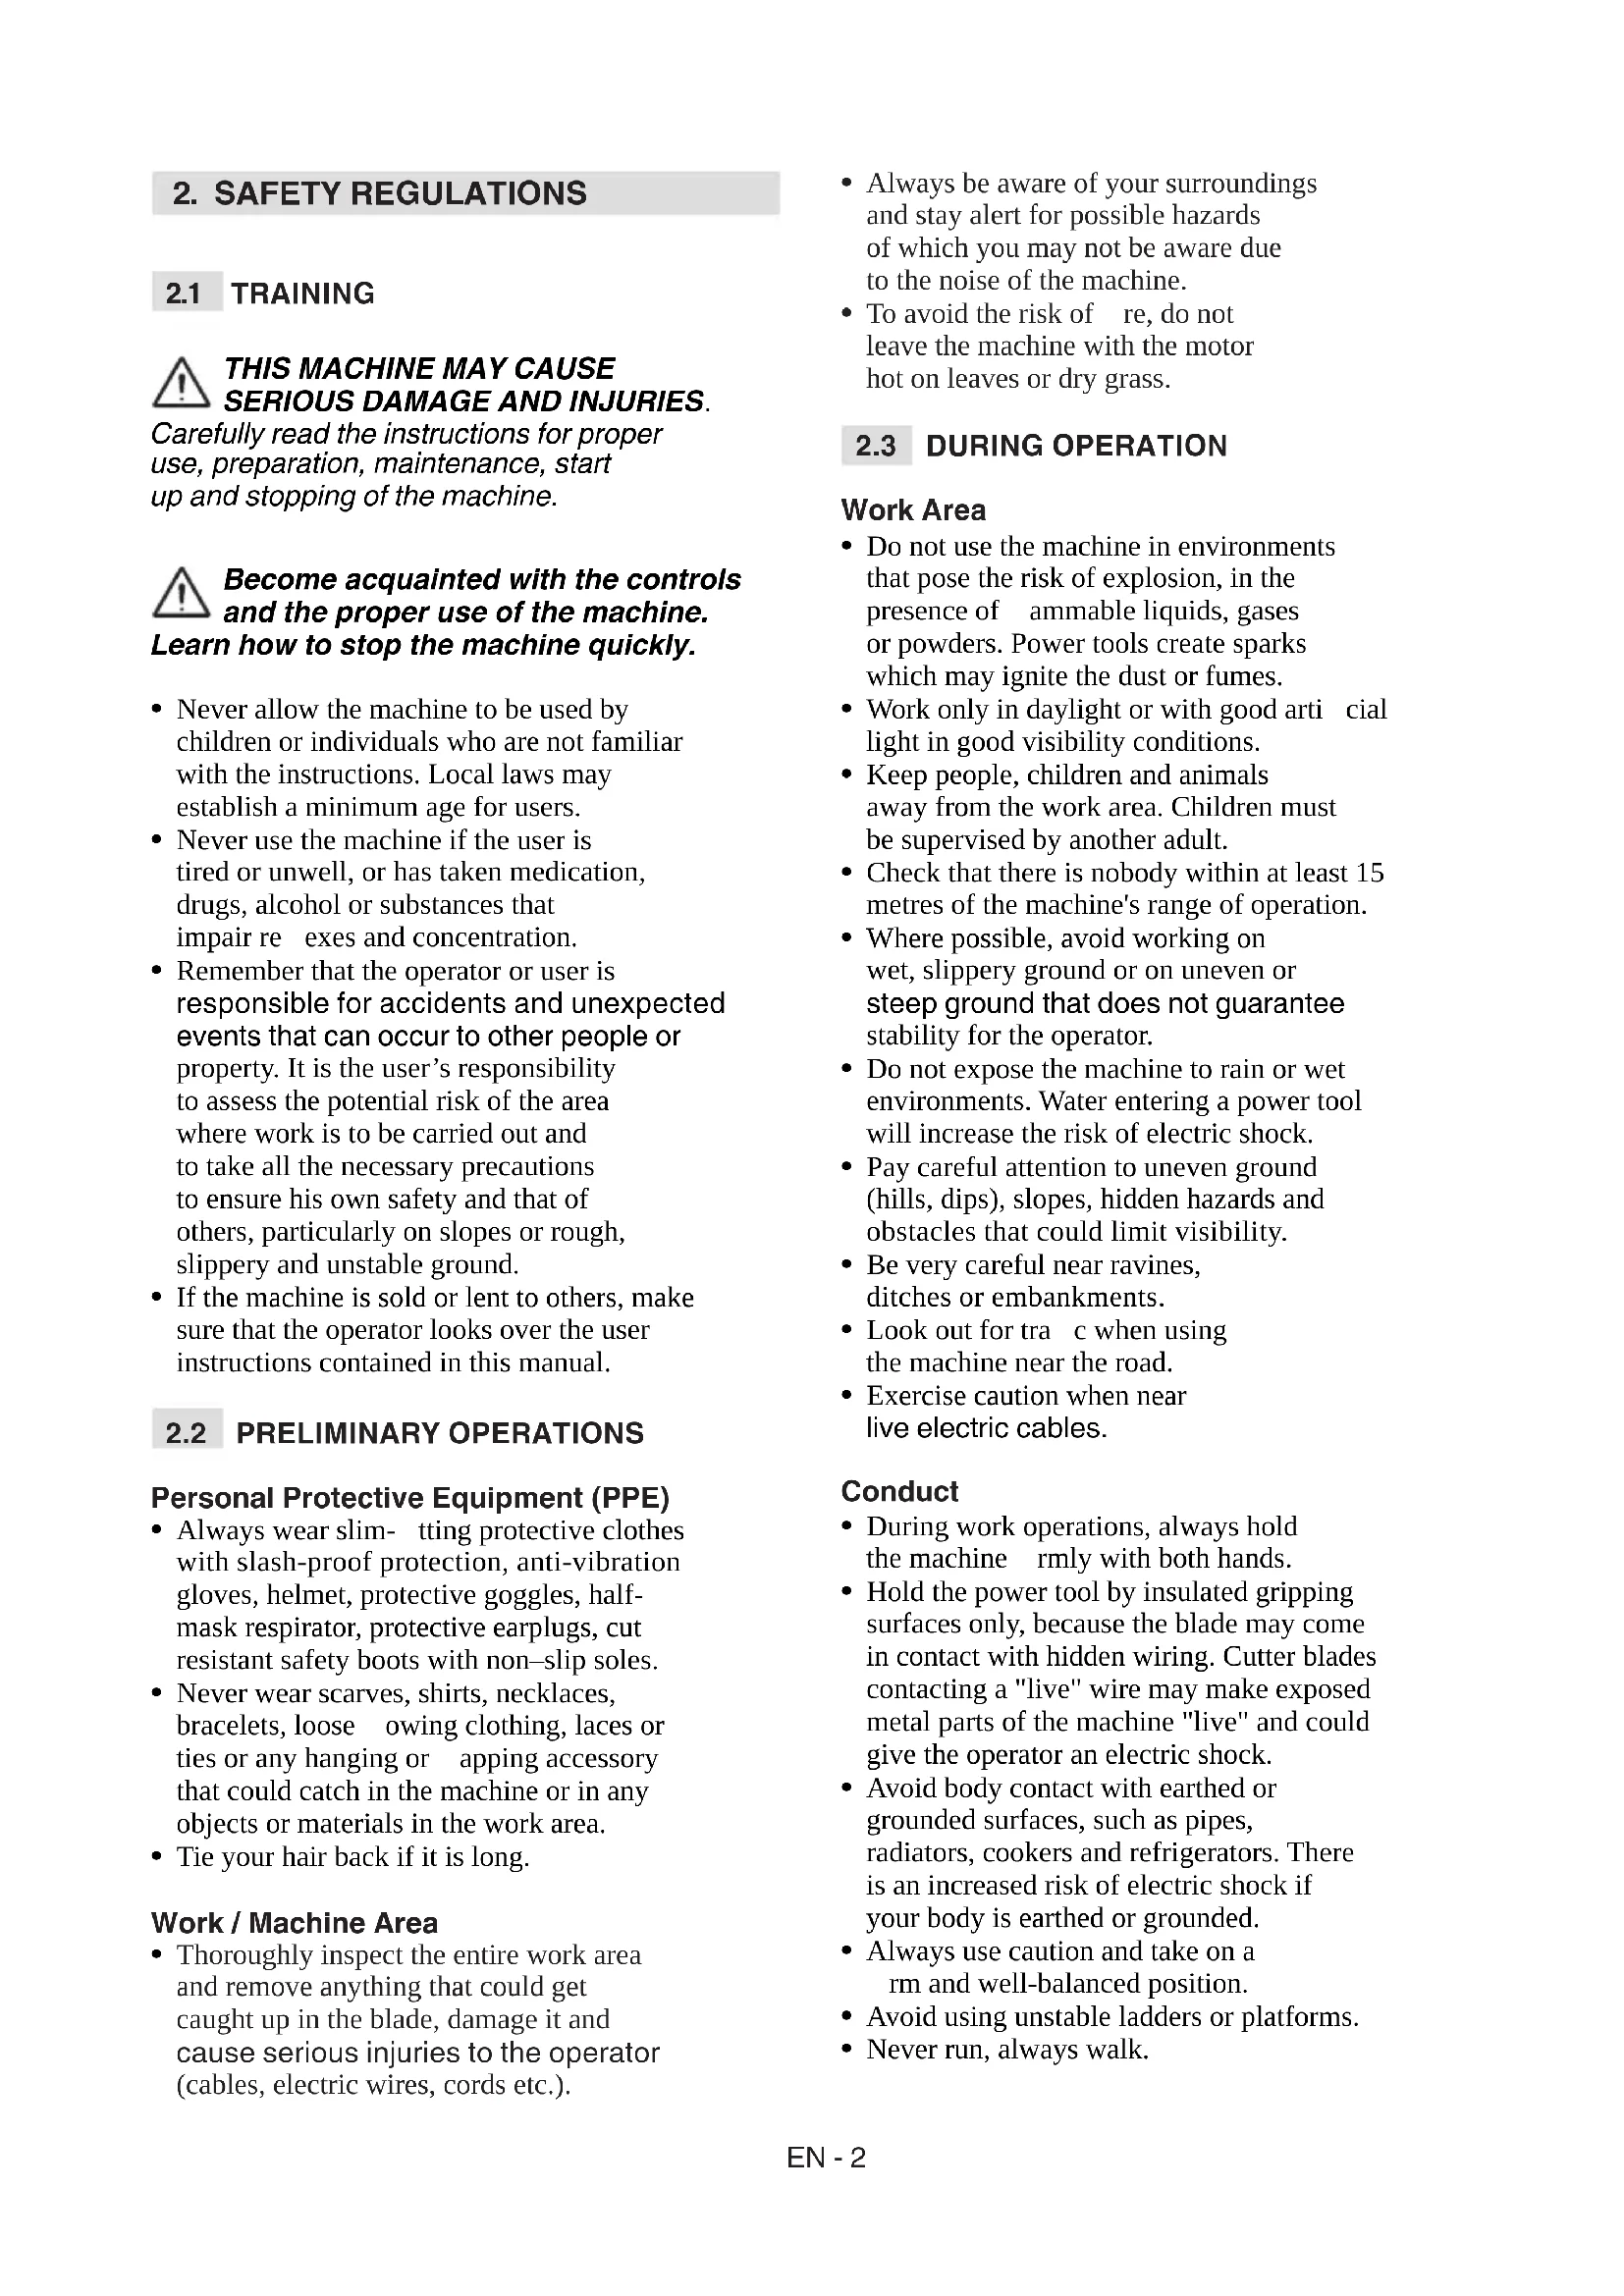
2. SAFETY REGULATIONS
2.1 TRAINING
THIS MACHINE MAY CAUSE SERIOUS DAMAGE AND INJURIES.
Carefully read the instructions for proper use, preparation, maintenance, start up and stopping of the machine.
Become acquainted with the controls and the proper use of the machine. Learn how to stop the machine quickly.
- Never allow the machine to be used by children or individuals who are not familiar with the instructions. Local laws may establish a minimum age for users.
- Never use the machine if the user is tired or unwell, or has taken medication, drugs, alcohol or substances that impair re-exces and concentration.
- Remember that the operator or user is responsible for accidents and unexpected events that can occur to other people or property. It is the user's responsibility to assess the potential risk of the area where work is to be carried out and to take all the necessary precautions to ensure his own safety and that of others, particularly on slopes or rough, slippery and unstable ground.
- If the machine is sold or lent to others, make sure that the operator looks over the user instructions contained in this manual.
2.2 PRELIMINARY OPERATIONS
Personal Protective Equipment (PPE)
- Always wear slim-ting protective clothes with slash-proof protection, anti-vibration gloves, helmet, protective goggles, half-mask respirator, protective earplugs, cut resistant safety boots with non-slip soles.
- Never wear scarves, shirts, necklaces, bracelets, loose owing clothing, laces or ties or any hanging or apping accessory that could catch in the machine or in any objects or materials in the work area.
- Tie your hair back if it is long.
Work / Machine Area
- Thoroughly inspect the entire work area and remove anything that could get caught up in the blade, damage it and cause serious injuries to the operator (cables, electric wires, cords etc.).
Always be aware of your surroundings and stay alert for possible hazards of which you may not be aware due to the noise of the machine.
- To avoid the risk of re, do not leave the machine with the motor hot on leaves or dry grass.
2.3 DURING OPERATION
Work Area
- Do not use the machine in environments that pose the risk of explosion, in the presence of ammable liquids, gases or powders. Power tools create sparks which may ignite the dust or fumes.
Work only in daylight or with good arti cial light in good visibility conditions. - Keep people, children and animals away from the work area. Children must be supervised by another adult.
- Check that there is nobody within at least 15 metres of the machine's range of operation.
- Where possible, avoid working on wet, slippery ground or on uneven or steep ground that does not guarantee stability for the operator.
- Do not expose the machine to rain or wet environments. Water entering a power tool will increase the risk of electric shock.
- Pay careful attention to uneven ground (hills, dips), slopes, hidden hazards and obstacles that could limit visibility.
- Be very careful near ravines, ditches or embankments.
- Look out for traffic when using the machine near the road.
Exercise caution when near live electric cables.
Conduct
During work operations, always hold the machine rmly with both hands.
- Hold the power tool by insulated gripping surfaces only, because the blade may come in contact with hidden wiring. Cutter blades contacting a "live" wire may make exposed metal parts of the machine "live" and could give the operator an electric shock.
- Avoid body contact with earthed or grounded surfaces, such as pipes, radiators, cookers and refrigerators. There is an increased risk of electric shock if your body is earthed or grounded.
Always use caution and take on a rm and well-balanced position.
- Avoid using unstable ladders or platforms.
- Never run, always walk.
Always keep hands and feet away from the cutting means, when starting and when using the machine.
- Attention: the blades will continue to move for a few seconds after you have switched off the motor.
- Make sure the blades do not come into violent contact with foreign bodies and try to prevent any material from being hurled after trimming.
- If something breaks or an accident occurs during work, turn off the motor immediately and move the machine away to prevent further damage; if an accident occurs with injuries or third parties are injured, carry out the first aid measures most suitable for the situation immediately and contact the medical authorities for any necessary health care. Carefully remove any debris which could cause damage or injury to persons or animals if ignored.
- Prolonged exposure to vibrations can cause injuries and neurovascular disorders (also called "Raynaud's syndrome" or "white hand"), especially to people suffering from circulation disorders. The symptoms can regard the hands, wrists and fingers and are shown through loss of sensitivity, torpor, itching, pain and discolouring of or structural changes to the skin. These effects can be worsened by low ambient temperatures and/or by gripping the hand grips excessively tightly. If the symptoms occur, the length of time the machine is used must be reduced and a doctor consulted.
Restrictions of use
- Do not use the machine if you are unable to hold it with both hands or keep steady on your legs while working.
- Never use the machine with damaged, missing or incorrectly positioned guards.
- Do not use the power tool if the switch does not turn it on and off. Any power tool that cannot be controlled with the switch is dangerous and must be repaired.
- Never disengage, deactivate, remove or tamper with the safety systems/ micro switches installed.
- Do not strain the machine too much and do not use a small machine for heavy-duty work; if you use the right machine, you will reduce the risk of hazards and improve the quality of your work.
Ensure regular maintenance and correct storage to maintain machine safety and high performance levels.
Maintenance
- Never use the machine with worn or damaged parts. Faulty or worn-out parts must always be replaced and never repaired.
The noise and vibration levels shown in these instructions are the maximum levels when using the machine. The use of an unbalanced cutting element, the excessive speed of movement, or the absence of maintenance have a significant influence on noise emissions and vibrations. Consequently, it is necessary to take preventive steps to eliminate possible damage due to high levels of noise and stress from vibration; maintain the machine well, wear ear protection devices, and take breaks whilst working.
Storage
- To reduce fire risks, do not leave containers with debris inside a room.
2.5 BATTERY/BATTERY CHARGER
IMPORTANT The following safety instructions are in addition to the safety requirements provided in the specific battery and battery charger manual delivered with this machine.
- Only use battery chargers recommended by the manufacturer to recharge batteries. An inadequate battery charger may cause electric shock, overheating or corrosive liquid to leak from the battery.
- Use only batteries specifically designed for your power tool. The use of other batteries may cause injuries and fire risks.
- Make sure that the machine is switched off before inserting the battery. Inserting a battery in a machine which is switched on can cause a fire.
- Keep all unused batteries at a distance from paper clips, coins, keys, nails, screws or other small metal objects as contact with the same can cause short circuits. Short circuits between battery contacts can lead to explosion or fires.
- Do not use the battery charger in places where there are inflammable vapours, substances or on easily inflammable surfaces like paper, fabric, etc. During
recharge, the battery charger becomes heated and may cause fire.
- When transporting batteries, make sure the contacts never come into contact with each other and never use metal containers to transport them.
2.6 ENVIRONMENTAL PROTECTION
Protecting the environment must be a significant and top priority for machine use, to the benefit of civil co-habitation and of the environment that we live in.
- Avoid being an element of disturbance to the surrounding area. Use this machine at reasonable times of the day only (not early morning or late evening when the noise could cause disturbance).
- Scrupulously comply with local regulations for the disposal of packaging, deteriorated parts or any elements with a strong environmental impact; this waste must not be disposed of with regular waste, but must be separated and taken to collection centres, which will recycle the materials.
- Scrupulously comply with local regulations for the disposal of waste materials
- When the machine is withdrawn from service, do not dispose of it in the environment, but take it to a waste disposal facility in accordance with the local regulations in force.

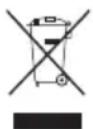
Do not throw electrical equipment away with domestic waste. According to the European Directive 2012/19/EU on electrical and electronic equipment waste and its implementation in
compliance with national standards, old electrical equipment must be collected separately, for eco-compatible recycling. If electrical equipment is disposed of in a landfill or in the ground, the harmful substances can reach the water table and enter the food chain, damaging your health and well-being. For further information on the disposal of this product, contact your dealer or a domestic waste collection service.
At the end of their working life, dispose of batteries safely in an eco-friendly manner. Batteries contain material classified as hazardous for you and the environment. They must be moved and disposed of separately at a that accepts lithium-ion batteries.

Separate waste collection of the products and packaging used allows the materials to be recycled and reused. Reuse of recycled materials
help to prevent environmental pollution and reduces the demand for raw materials.
3. ABOUT THE MACHINE
3.1 MACHINE DESCRIPTION AND INTENDED USE
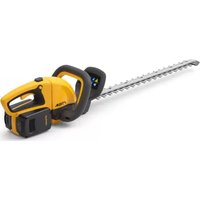
This machine is a garden tool and more precisely a battery-powered portable hedge trimmer.
The machine is essentially composed of a motor which drives a cutting means.
The operator can operate the machine and use the main controls, always keeping a safe distance from the cutting means.
3.1.1 Intended use
This machine was designed and manufactured for:
- the cutting and trimming of bushes and hedges consisting of shrubs with smaller sized branches (no wider than 15mm );
- being used by one operator.
3.1.2 Improper use
Any other use that does not comply with the above, can be dangerous and cause damage to people and/or property. Examples of improper use may include, but are not limited to:
- cutting grass in general and in particular close to kerbs;
- shredding of materials for composting;
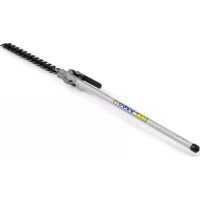
pruning; - using the machine with the cutting means above the operator's shoulder level;
- use of the machine for cutting non-plant material;
- using cutting means other than those found in the "Technical Data" table. Risk of serious injury and injuries;
- using of the machine by more than one person.
IMPORTANT Improper use of the
machine will void the warranty and relieves the Manufacturer of any liability, placing all responsibility for damage or injury, to him/ herself or third parties, on the user.
3.1.3 Type of users
This machine is intended for use by consumers, i.e. non-professional operators. It is intended for "hobby-related activities".
3.2 SAFETY SIGNS
The machine has various symbols on it (fig. 2). Their function is to remind the operator of the correct conduct for use, with due care and caution.
Meanings of the symbols:

WARNING! DANGER! The failure to use this machine correctly can be hazardous for oneself and others.

WARNING! Read the owner's manual before using the machine.

Use ear protection devices and goggles.

Use thick non-slip protective gloves.

Do not leave the machine in the rain (or in damp conditions)
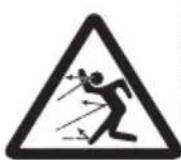
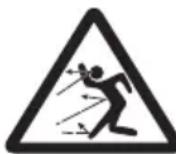
PROJECTION HAZARD! Be careful of flying debris projected by the cutting means, that can cause serious injuries to persons or damage to things.
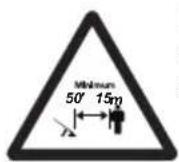
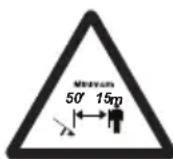
PROJECTION HAZARD! Keep any people or pets at least 15 m away when using the machine.

Danger of cutting yourself!
Keep hands and feet away from the blades.

Class II Dual insulation
IMPORTANT Any damaged or illegible.
decals must be replaced. Order replacement
decals from an Authorised Service Centre.
3.3 PRODUCT IDENTIFICATION LABEL
The product identification label provides the following data (fig. 1):
- CE conformity marking
- Name and address of Manufacturer
- Sound power level
- Article code
- Type of machine
- Serial number
- Year of manufacture
- Supply voltage
Write the identification data of the machine in the specific space on the label on the back of the cover page.
IMPORTANT Quote the information on the product identification label whenever you contact an Authorised Service Centre.
IMPORTANT An example of the Declaration of Conformity is provided on the last pages of this manual.
3.4 MAIN COMPONENTS
The machine is composed of a series of main components that have the following functions (Fig.1):
A. Engine: supplies the drive power to the cutting means.
B. Blade (cutting means): the element designed to cut the vegetation.
C. Front hand grip: used to handle the machine and equipped with the safety switch.
D. Rear hand grip: used to handle the machine and equipped with the main control buttons.
E. Blade protection (for machine transport and handling): protects against accidental contact with the cutting means that can cause serious injuries.
F. Battery (attachment on request, par. 16.1): device that supplies electric current to the tool; its specifications and regulations for use are described in a specific manual.
G. Battery charger (attachment on request, par. 16.2): device used to recharge the battery; its specifications and regulations for use are described in a specific manual. Two battery charger models are available: G1 (fast battery charge); G2 (standard battery charge);
H. Battery backpack (attachment on request, par. 16.3): device in which the batteries are placed.
I. Connection cable: cable used to connect the machine to the battery backpack.
J. Battery simulator (attachment on request, par. 16.4): device that, if inserted in the machine housing, allows the use of the battery backpack.
4. UNPACKING
IMPORTANT The safety regulations to follow are described in chap. 2. Strictly comply with these instructions to avoid serious risks or hazards.
Unpacking should be done on a flat and stable surface, with enough space for machine handling and its packaging, always making use of suitable equipment.
- Carefully open the packaging, paying attention not to lose components.
- Consult the documentation in the box, including these instructions.
- Remove the machine from the box.
- Dispose of the box and packaging in compliance with local regulations.
5. ASSEMBLY
5.1 FITTING OF THE BATTERY BACKPACK (IF AVAILABLE)
The battery backpack is delivered already assembled (Fig. 1.H) and can be released from the strap support (Fig. 3) and carried by hand. To release the battery backpack, pres on the two upper buttons (Fig. 3.A). The battery compartments are located on both sides of the backpack (Fig. 4). The following can be found on the right side of the backpack:
- cable socket (Fig. 5.A)
- battery selector (Fig. 5.B)
- one USB port for charging other devices (e.g. mobile phones) (Fig. 5.C).
To avoid any loose cables, there are grooves on both sides and at the rear, in which the power cable can be inserted.
6. CONTROLS
6.1 SAFETY BUTTON (ACTIVATION / DEACTIVATION)

Press this button to activate and deactivate the machine's electrical circuit (Fig. 6.A).

One LED lit: the machine's electrical circuit is activated (Fig. 6.B). The machine is ready for use. Both LEDs lit: the machine is working.
LEDs off: The electrical circuit is completely deactivated.

IMPORTANT Do not keep your finger on the button when moving the machine to avoid accidentally enabling the machine.
The "Warning" icon (Fig. 6.F) comes ON in the event of machine fault (refer to the troubleshooting table, par. 15).
6.2 BLADE CONTROL LEVER (CUTTING MEANS)
Used to start and regulate the blade speed.
It is only possible to activate the cutting means (Fig. 1.B) when both the blade control lever (Fig. 6.C) and the safety switch (Fig. 6.D) are pressed simultaneously.
The cutting means stops automatically when the lever or safety switch are released.
6.3 REAR HANDGRIP RELEASE LEVER
The release lever (Fig. 6.E) is used to adjust the rear hand grip (Fig. 1.D) to 3 different positions in relation to the cutting means to make trimming your hedges easier.
The handgrip must only be adjusted when the safety button is deactivated (light off).
7. USING THE MACHINE
IMPORTANT The safety regulations to follow are described in chap. 2. Strictly comply with these instructions to avoid serious risks or hazards.
7.1 PRELIMINARY OPERATIONS
Before starting to work, it is necessary to carry out several checks and operations to ensure you can work efficiently and in maximum safety.
Place the machine in a stable horizontal position on the ground.
7.1.1 Checking the battery
The machine is supplied without the battery. Purchase the battery with the capacity that most suits your operational requirements and fully charge it according to the instructions in the battery booklet. The list of approved batteries for this machine can be found in the "Technical Data" table.
- Before each use: - check the battery charge status following the instructions provided in the battery booklet.
7.1.2 Adjusting the handgrip
Only perform this operation when the safety button is deactivated (light off).
- Pull the rear handgrip release lever backwards (Fig. 7.A);
- start rotating the rear handgrip (Fig. 7.B);
- Release the release control lever (Fig. 7.A);
- rotate the handgrip until it clicks into the desired position.
IMPORTANT Before using the machine check that the release lever has completely returned to the block position, and the rear handgrip is firmly attached.
When working, the rear handgrip must always be in a vertical position, whatever the position of the cutting means.
7.1.3 Use of the backpack (if available)
- Insert the battery in one of the compartments of the battery backpack (Fig. 4) and push it completely, until hearing the click that signals its locking in position, ensuring thus the electrical contact;
- Connect the cable to the backpack in the specific socket (Fig. 5.A) and rotate it until hearing the specific click that signals its locking in position, ensuring thus the electrical contact;
- adjust the straps and close the harness in the front (Fig. 8).
7.2 SAFETY CHECKS
Run the following safety checks and ensure that the results correspond to those outlined in the tables.
Always carry out the safety checks before use.
7.2.1 General check
| Object Result | |
| Handgrips (Fig. 1.C, Fig. 1.D) and guards | Are clean, dry and fixed firmly to the machine |
| Screws on the machine and blade | Correctly tightened (not loose) |
| Cooling air ducts Not clogged | |
| Blade (Fig. 1.B) Sharp, with | out signs of damage or wear |
| Guards | Intact, undamaged. |
| Battery (Fig. 1.F) | No damage to the casing, no liquid leakage |
| Machine | No signs of damage or wear |
| Electrical cables | All insulation intact. Intact to prevent sparks from occurring |
| Blade control lever (Fig. 6.C), safety switch (Fig. 6.D) | The levers must move freely and not be forced. |
| Test driving | No abnormal vibrations. No abnormal sound |
7.2.2 Machine operating test
| Action Result | |
| 1. Fit the battery inside its compartment (Fig. 10.A);2. press the safety button (Fig. 9.A) | The green light must come on (electrical circuit activated) and the cutting means must not move |
| Start the machine (para. 7.3);1. engage the blade control lever (Fig. 9.B) and the safety switch simultaneously (Fig. 9.C);2. release the blade control lever (Fig. 9.B) or the safety switch (Fig. 9.C) | 1. The blade should move2. The controls should return automatically and rapidly to the neutral position and the blade should stop |
| 1. When the blade is engaged, pull the rear handgrip release lever backwards (Fig. 7.A) | 1. The blade should stop |
If any of the results fail to match the indications provided in the tables below, do not use the machine! Take it to a service centre to be checked and repaired if necessary.
7.3 START-UP
7.3.1 Start-up with battery
- Remove the blade guard (Fig. 1.E) (if used);
- make sure the blade is not touching the ground or any other object;
- Fit the battery inside its compartment (Fig. 10.A);
- press the safety button (Fig. 9.A)
- engage the blade control lever (Fig. 9.B) and the safety switch simultaneously (Fig. 9.C).
7.3.2 Start-up with battery simulator (if available)
- Adopt a firm and well-balanced position;
- make sure the blade is not touching the ground or any other object;
- insert the battery simulator correctly in its housing on the machine (Fig.10.J)
- connect the connection cable to the battery simulator (Fig.10.I)
- select the battery using the selector (Fig. 5.B)
- press the safety button (Fig. 9.A)
- engage the blade control lever (Fig. 9.B) and the safety switch simultaneously (Fig. 9.C)
7.4 OPERATION
To use the machine proceed as follows:
- always hold the machine firmly with two hands, using the machine with the cutting means under the operator's shoulder level;
Do not remove cut material or hold material to be cut when blades are moving. Make sure the safety button is disengaged (light off) when clearing jammed material.
NOTE During use, the battery is protected against total drainage with a protective device that switches off the machine and stops it from working.
NOTE After one minute of inactivity, if turned on, the machine will automatically switch off.
7.4.1 Work techniques
It is recommended to trim the two vertical sides of the hedge before trimming the top.
NOTE The battery power reserve (and therefore the movable vegetation area before recharging is required) depends on many factors described in par. 8.2.1.
7.4.1.a Vertical cutting
Proceed by cutting using curved movements from the bottom towards the top, keeping the blade as far from the body as possible (Fig. 11).
7.4.1.b Horizontal cutting
The best results will be obtained with the blades slightly inclined (5^ - 10^) in the direction you are cutting, proceed with a curved movement, slowly and without interruptions, especially in the case of very thick hedges (Fig. 12).
7.4.2 Operating suggestions
If the blades block while running or get caught up in the hedge branches:
- stop the machine immediately (para. 7.5);
- wait for the cutting means to come to a halt;
- remove the battery (para. 8.2.2);
- Remove the jammed material.
7.4.3 Lubricating the blades whilst working
If the cutting means overheats whilst working, it is necessary to lubricate the internal surfaces of the blades (para. 8.4).
This operation can only be done with the machine off and the battery removed from its housing (para. 8.2.2).
7.5 STOP
To stop the machine:
- Release the blade control lever (Fig. 9.B) or the safety switch (Fig. 9.C);
disengage the safety button (light off) (Fig. 9.A).
When you have stopped the machine, it will take a few seconds for the cutting means to stop.
Always stop the machine:
- when moving between work areas.
Do not keep your finger on the safety button when moving the machine to avoid accidentally enabling the machine.
7.6 AFTER USE
7.6.1 After use with the battery
- Remove the battery from its housing and recharge it (para. 8.2.2).
- When the cutting means has halted, fit the blade guard (Fig. 1.E).
- Allow the engine to cool before storing in an enclosed space.
Clean (par. 8.3). - Check there are no loose or damaged components. If necessary, replace the damaged components and tighten any screws and loose bolts or contact the authorised service centre.
7.6.2 After use with battery simulator (if available)
- Move the battery backpack selector to "OFF" (Fig. 5.B);
- remove the battery simulator from the machine (Fig. 13.J);
- remove the battery backpack;
- disconnect the connection cable from the battery simulator (Fig.13.I) and from the backpack (fig. 5.A)
- remove the battery from the backpack (Fig. 14) and charge it (par. 8.2.2);
- allow the engine to cool before storing the machine in an enclosed space;
- Clean (para. 8.3);
- Make sure there are no loose or damaged components. If necessary, replace the damaged components and tighten any screws and loose bolts or contact the authorised service centre.
IMPORTANT Always remove the battery (para. 8.2.2) and fit the blade guard whenever the machine is unused or left unattended.
8. ROUTINE MAINTENANCE
8.1 GENERAL INFORMATION
IMPORTANT The safety regulations to follow are described in chap. 2. Strictly comply with these instructions to avoid serious risks or hazards.
Before performing any maintenance operations:
stop the machine;
- Remove the battery from its housing and recharge it (para. 8.2.2);
- when the cutting means is stationary, apply the blade protection device, (except when working directly on the blade);
- allow the engine to cool before storing in an enclosed space;
- use suitable clothing, protective gloves and goggles;
- read the relevant instructions.
- The frequency and types of maintenance are summarised in the "Maintenance Table" (see chapter 14). The table will help you maintain your machine's safety and performance. It summarises the main interventions to be made and the frequency applicable to each of them. Carry out the relevant task as soon as it is scheduled to be performed.
- The use of non-original parts and accessories could have negative effects on machine operation and safety. The manufacturer declines any responsibility for damage or injury caused by said products.
- Genuine spare parts are supplied by Authorised Assistance Centres and Dealers.
IMPORTANT Any maintenance and adjustment operations not described in this manual must be carried out by your dealer or Authorised Service Centre.
8.2 BATTERY
8.2.1 Battery power reserve
Battery power reserve (and therefore the cuttable vegetation area before recharging is required) mainly depends on:
a. Environmental factors, that cause higher energy requirements: -cutting/trimming of very thick or wet hedges; -cutting/trimming of bushes with branches that are too thick;
b. operator behaviour that should be avoided: - switching the machine on and off frequently whilst working;
- adopting a cutting technique that is unsuitable for the work to be performed (para. 7.4.1);
- cutting speed unsuitable for the condition of the hedge to be cut.
To optimise battery power reserve it is always recommended to:
- cut the hedge when dry;
- set a cutting speed suitable for the condition of the shrubs;
- use the most appropriate technique for the work to be performed.
If the need arises to use the machine for sessions which exceed the capability of a standard battery, it is possible to:
- purchase a second standard battery to immediately replace the discharged
battery, without compromising the continuity of operations;
- purchase a battery with an extended power reserve compared to the standard version (para. 16.1).
8.2.2 Battery removal and recharging
- Press the locking button located in the battery on the machine (Fig. 13.A) or on the backpack (Fig. 14.A) (if available);
- remove the battery from the machine (Fig. 13.B) or from the battery backpack (Fig. 14.B) (if available);
- fit the battery (Fig. 15.A) in the battery charger housing (Fig. 15.B);
- Connect the battery charger (Fig. 15.B) to a power socket with the voltage indicated on the rating plate;
- fully charge the battery according to the instructions in the battery/ battery charger booklet.
NOTE The battery is equipped with a guard that inhibits recharging if the environmental temperature is not between 0 and +45^
NOTE The battery can be recharged at any time, even partially, with no risk of damaging it.
8.2.3 Refitting the battery on the machine
When recharging is completed:
- Remove the battery from its housing in the battery charger (Fig. 16.A) (do not continue recharging once recharging is completed);
- Disconnect the battery charger (Fig. 16.B) from the electrical mains;
- insert the battery in its housing on the machine (Fig. 10.A) or in one of the housing of the battery backpack (Fig. 4) (if available)
- push it completely, until hearing the click that signals its locking in position, ensuring thus the electrical contact.
8.3 CLEANING THE MACHINE AND THE ENGINE
To reduce fire hazards, keep the machine and, in particular, the motor free of leaves, branches or excessive grease.
Always clean the machine after use with a damp cloth dipped in neutral detergent.
- Remove all traces of humidity using a soft damp cloth. Humidity can generate risks of electric shocks.
- Do not use aggressive detergents or solvents to clean the plastic parts or hand grips.
- Do not spray water onto the motor and electrical components and prevent them from getting wet.
- To avoid overheating and damage to the motor or the battery, always keep the cooling air vents clean and free of debris.
8.4 CLEANING AND LUBRICATION OF THE CUTTING MEANS
To increase the efficiency and working life of the blades, clean and lubricate them carefully after each work session:
Do not touch the cutting means until the battery has been removed and the cutting means is completely stationary.
- Place the machine in a stable horizontal position on the ground.
- Use a soft cloth to clean the blades, along with a brush to remove more difficult dirt and debris.
- Lubricate the blades by applying a light layer of specific oil, preferably the non-pollutant type, along the upper edge of the blade.
8.5 NUTS AND BOLTS
- Keep all nuts, bolts and screws tight to be sure the equipment is in safe working condition.
- Check regularly that the handles are fixed firmly.
9. OCCASIONAL MAINTENANCE
9.1 CUTTING MEANS OCCASIONAL MAINTENANCE
Do not touch the cutting means until the battery has been removed and the cutting means is completely stationary.
If the blades are used correctly, following all the instructions provided, they will not require any maintenance work and will not need sharpening.
9.1.1 Checks
Periodically check that the blades are not bent, damaged or deformed and that the screws are adequately tightened.
Adjustment of the distance between blades is not necessary, as this is predetermined by the manufacturer.
9.1.2 Sharpening
It is necessary to sharpen the blades when the trimming performance decreases and the branches tend to stick together.
For safety reasons, sharpening should be done by an Authorised Service Centre with suitable skills and equipment for the job; without risking any damage to the blade which would make it unsafe when used.
Always replace and never repair a blade which has blunt cutting edges.
9.1.3 Replacement
The blade must never be repaired, but must be replaced as soon as signs of breaking are noted or the sharpening limit is exceeded. For safety reasons replacements should be performed by an Authorised Service Centre.
Blades displaying the code indicated on the Technical Data table should be used on this machine.
Given product evolution, the blades listed in the "Technical Data" table may be replaced in time with others having similar interchangeable and operating safety features.
10. STORAGE
IMPORTANT The safety regulations to follow for putting into storage are described in paragraph 2.4. Strictly comply with these instructions to avoid serious risks or hazards.
10.1 STORING
When the machine is to be stored away:
- remove the battery from its housing and recharge it (para. 8.2.2);
- when the cutting means has halted, fit the blade guard;
- allow the engine to cool before storing in an enclosed space;
- Clean (para. 8.3);
- Make sure there are no loose or damaged components. If necessary, replace any damaged components and
tighten any screws and loose bolts or contact the authorised service centre;
- Store the machine:
-in a dry place;
- protected from inclement weather;
- in a place out of children's reach;
- making sure that keys or tools used for maintenance are removed.
10.2 STORING THE BATTERY
The battery must be kept in a cool, shaded place without humidity.
NOTE If unused for any length of time, recharge the battery every two months to prolong its working life.
11. HANDLING AND TRANSPORT
Whenever the machine is to be
handled or transported you must:
stop the machine (para. 7.5);
-
remove the battery from its housing and recharge it (para. 8.2.2);
-
when the cutting means has halted, fit the blade guard;
-
wear protective work gloves;
-
only hold the machine using the hand grips and position the cutting means in the opposite direction to that used during operations.
When transporting the machine on a vehicle, always:
- fasten the machine securely with cables or chains;
position it so that it does not cause a hazard to anyone.
12. ASSISTANCE AND REPAIRS
This manual provides all the necessary information to run the machine and for correct basic maintenance operations which can be performed by the user. Any regulations and maintenance operations not described herein must be carried out by your Dealer
or Authorised Service Centre, which have the necessary knowledge and equipment to ensure that the work is carried out correctly, maintaining the correct degree of safety and the original operating conditions of the machine.
Any operations performed in unauthorised centres or by unqualified persons will totally invalidate the Warranty and all obligations and responsibilities of the Manufacturer.
- Only Authorised Service Centres can carry out guaranteed repairs and maintenance.
- The Authorised Service Centres only use genuine spare parts. Genuine spare parts and attachments have been designed specifically for machines.
- Non-original parts and attachments are not approved; use of non-original spare parts and attachments will jeopardise the safety of the machine and relieve the Manufacturer from all obligations or liabilities.
- It is advisable to send your machine once a year to an Authorised Service Centre for servicing, assistance and safety device inspection.
13. WARRANTY COVERAGE
The warranty covers all material and manufacturing defects. The user must follow all the instructions provided in the accompanying documentation.
The warranty does not cover damage caused by:
- failure to become familiar with the documentation accompanying the machine;
- carelessness;
- incorrect or forbidden use or assembly;
- use of non-genuine spare parts;
- use of attachments not supplied or not approved by the manufacturer.
The warranty does not cover:
- normal wear and tear of consumables such as wheels, blades, safety bolts and wires;
normal wear and tear.
The purchaser is protected by his or her own national legislation. The purchaser's rights under the national laws or his or her own country are not in any way restricted by this warranty.
14. MAINTENANCE TABLE
| Intervention Frequency Notes | ||
| MACHINE | ||
| Check all fasteners | Before each use para. 8.5 | |
| Safety checks/check controls | Before each use par. 7.2 | |
| Check the battery charge status | Before each use * | |
| Recharge the battery | After each use para. 8.2.2 | * |
| Cleaning the machine and the engine | After each use par. 8.3 | |
| Cleaning and lubrication of the cutting means | After each use para. 8.4 | |
| Checking for any damage to the machine. If necessary, contact the authorised service centre. | After each use - | |
| Checking the cutting means | After each use para. 9.1.1 | |
| Sharpening the cutting means | - para. 9.1.2 | ** |
| Replacing the cutting means | - para. 9.1.3 | ** |
- Refer to the battery/battery charger manual.
** The operation must be carried out by your Dealer or an Authorised Service Centre
15. TROUBLESHOOTING
| PROBLEM PROBABLE CAUSE SOLUTION | ||
| 1. When the safety button is pressed, the green light does not come on | Battery is not inserted or is inserted incorrectly | Make sure that the battery is inserted correctly (para. 8.2.3) |
| 2. When the safety button is pressed, the green light does not come on, the LED indicator (Fig. 6.F) blinks | Low battery Check the battery status and recharge if necessary (para. 8.2.2) | |
| 3. The motor shuts down whilst working | Battery is not inserted correctly Make sure that the battery is inserted correctly (para. 8.2.3) | |
| 4. The motor stops during work and the LED indicator (Fig. 6.E) blinks | Low battery Check the battery status and recharge if necessary. (para. 8.2.2) | |
| 5. The cutting means is stationary when the blade control lever and safety switch are engaged | Hedge trimmer is damaged. | Do not use the hedge trimmer. Immediately turn off the machine remove the battery and Contact an Authorised Service Centre. |
| 6. The cutting means overheats whilst working | Insufficient blade lubrication | Turn off the machine, wait until the cutting means is stationary, remove the battery and lubricate the blades (para. 8.4) |
| PROBLEM PROB | ABLE CAUSE SOLUTION | |
| 7. The cutting means comes into contact with a line or electric cable | - DO NOT TOUCH THE BLADE AS IT | MAY BE LIVE AND BE EXTREMELY DANGEROUS! Grasp the machine using the insulated rear hand grip only and position it at a safe distance from yourself. Disconnect the current that powers the severed line or mains cable and remove the battery before freeing the blade teeth. |
| 8. The cutting means comes into contact with a foreign body. | - Turn off the machine remove the battery and: - inspect for damage; - check for and tighten any loose parts; - have any damaged parts replaced or repaired with parts having equivalent specifications. | |
| 9. Excessive noise and/or vibration is experienced whilst working | Loose or damaged parts Turn off the machine remove the battery and: - inspect for damage; - check for and tighten any loose parts; - have any damaged parts replaced or repaired with parts having equivalent specifications. | |
| 10. The machine gives off smoke whilst working | Hedge trimmer is damaged. Do not use the hedge trimmer. Immediately turn off the machine remove the battery and Contact an Authorised Service Centre. | |
| 11. Battery power reserve is low | Severe working conditions requiring greater current absorption | Optimise operations (para. 8.2.1) |
| Battery is insufficient for operating requirements | Use a second battery or an extended battery (para. 16.1) | |
| Decrease in battery capacity Purchase a new battery | ||
| 12. The battery charger is not recharging the battery | Battery is not correctly inserted in the battery charger | Check it is correctly inserted (para. 8.2.3) |
| Unsuitable environmental conditions Recharge the battery in places with suitable temperatures (see battery/battery charger instruction manual) | ||
| Dirty contacts Clean the contacts | ||
| The battery charger is not energised Check it is plugged in and the power socket is energised | ||
| Faulty battery charger Replace with an original spare part | ||
| If the problem persists, refer to the battery/battery charger manual | ||
| 13. The LED indicator (Fig. 6.F) remains ON in steady mode | Self-check failed | Do not use the machine. Immediately turn off the machine, remove the battery and contact a service centre. |
| 14. The LED indicator (Fig. 6.F) remains ON in flashing mode | Battery communication error | Do not use the machine. Immediately turn off the machine, remove the battery and contact a service centre. |
| Rotor blocked | Do not use the machine. Immediately turn off the machine, remove the battery and contact a service centre. | |
| Current overload | Optimize machine usage. | |
If problems persist after implementing the solution, contact your Dealer.
16. ACCESSORIES ON REQUEST
16.1 ALTERNATIVE BATTERIES
Different capacity batteries are available to suit specific operating requirements (Fig. 17). The list of approved batteries for this machine can be found in the "Technical Data" table.
16.2 BATTERY CHARGER
Device used to recharge the battery: fast (Fig. 18.A), standard (Fig. 18.B).
16.3 BATTERY BACKPACK
The device is used to place the two batteries and provides the electrical power required for the operation of the machine. It is provided with a cable used for the connection to the machine (Fig. 1.I) and with a selector (Fig. 5.B) to select one of the two batteries (position "1" and "2") and "OFF".
16.4 BATTERY SIMULATOR
Device that, if inserted in the machine housing, allows the use of the battery backpack.
INDICE
- INFORMACION GENERAL 1
-
NORMAS DE SEGURIDAD 2
-
CONOCER LA MAQUINA 4
1.1 KUIDAS JUHENDIT LUGEDA
Kandke pakse libisemiskindlaid tookindaid.

16.1 VALINNAISET AKUT
11. MANUTENTION ET TRANSPORT
2.3 BO TEHOT HA PABOTATA
Pa6oTha NOBpHnHa
He ja KopncTeMeMaHHaTa BO pH3nHn am6neHTN BO npncycTBO Ha JecHO 3aJaJIbN raCobu n npaunHa. EJeKtpnHnte DeJOBn npEiN3BnkyBaat NcRpn ITO MoKe Da r3aJalat HeuNCTOTnTE uIN NCnapyBaHaTa.
Pa6oTeTaMoHaDHeBHa CBeTInHa nn npn Do6po BeWtAChO OCBeTlyBaHc n npu yCIOBn Ha Do6pa BnDInBOCT.
- OndaJeTe rH IIncaTa DeCaTa H JINBOTHNTE od pa60THNOt npocTOp. He MoKe Da ce cyyBaat Deca DoIeKa Ce KOpNCr Ha MaMHNHa, Tne Tpe6a Da 6nDaT CyBaHn OD Dpyro IInce.
- npOBepTe DaJI Npyr IuIca ce Haor'aat HajMaJIky Ha 15 MeTpN OndaIeueHocT od ONcerOT Ha paBoTa Ha MaunHaTa;.
- 136eHryBaJTe KOra e MoKHO da pa6oTHe Ha MOKap N IIN3raB TepeH NII HA TepeH N KOI CE HepAMH NII 3aKocEH N He rapaHTnpaaT CTa6nIHOCHT Ha KopNCHNOT npn pa6oTaTa.
He n3noHybajTe ja MaunHaTa Ha DoHd Hn BlaJHH yCNoBn. BoJaTa wTo MoKe Da HABJIe3e BO eJKeKTPnuHOT DeI rOJEmyBa pN3NKOT OD eJKeTPnuHeydap.
- 06pHeTe ocObeHo BHNMaHne Ha HepaMHnHnTe Ha TepeHOT (HaKIOHn, BdIa6HaTnH), 3aKocyBaHaTa, ChpneHnTe OnaCHOCTn InpueKHTe KOnlTO MoKaTa Da ja OrpaHnUaT BNDINBOCTa.
- 06pHeTe OcObeHo BHIMaHne BO 6JIN3Ha Ha cTpmHHn, dynkN nn nppeKeN.
BHHMaBajTe Ha COOpaKaJOT Kora MaunHaTa ce KopnCTN BO 6H3Ha Ha NaT.
- 06pHeTe BHHMaHHe Ha paCToJaHHeTo od Ka6JIte KOra Ce Tne NOD HANOH.
OndecyBaHa
-
Bo TeKOT Ha pa6oTaT, MaunHaTa ceKOraMopa Da Ce DpKn UBPcTO co Dbete paue.
-ФakajTe ro eIeKTPnHNot DeI caMo 3a H30JIpaHITe NOBpUHH Ha paKHTe 6nDejKn CEYHBOTMOJKe Da JoJe BO KOHTaKT CO COKPHeHITe Ka6Ji. KoHTaKT Ha ceYIBOTO 3a KocHe Co Ka6eI NOD HAnOH MoKe Da rN eIeKTPnHpa MeTaJIHNTe DeIOBn Ha MaunHaTaN da npEIN3BnKa eIeKTPnueH ydap. -
H36erHyBaJTe KOHTaHT Ha TeJOTO CO NOBpUHa CO Maca IIN Co 3eMja, KaKo UeBHN, paIJaTOPn, KjHcN anapaTn, pPKNIDepn. Pn3IKOT od eJeKTpueH yap Ce NOTTNUHyBa aKO TEJOTO CE HajDe Ha Maca IIN 3eMja.
3a3eMeTe UBCpTa N03njuA 6bndeTE BHNMaTeJIH. - n36eRhybajTe KOpHcTeHe Ha cKaJIIna nn HeCTa6nHn PnA TΦopMn;
- Hinkoraaw He TpcajTre, Tyky odeTe.
- Cekorawdprkete ng pautee H03eTe NOdaIeKy od ceuHIoTO,OC6eHO npn CTapTyBaHBe Ha MOTOpT IdoNeKa pa6oTIte co MaunHaTa.
BHHMaHHe:ceuBaTa npoDoJkyBaat da ce BpTaT yUTe HeKoJHy CeKyHdN I NO racheHe Ha MOTOPOT. - O6pHETe BHHMaHHe Da He yHnPaTe CnHIO BO CTpaHn TeHa CO HOKeBnTe 3apAaN MOxHa IpoEkuJa Ha CTpyrOtnHn PpeDn3BnKaHn OD OWTeTyBaHbE Ha HOKeBnTe.

Enyaj Ha DefeKT Hn INHcndeHTN
EKOT Ha pa6oTaT, BeHaaw NCKlyuyeTe
OTOpOT n OdaJeUeTe ja MaunHaTa
MaBajKn Da He npedn3BnKaTe DpyrN
EtYBaHa Ba Cnyaj Ha HnCnDEHT Co
Ha NobpeDa nn NobpeDa Ha TpeTo
e, pInCTanTe BeHaW KOH NOCTaNKaTa
BaBaHe HajcooDbetHa npBa NOMO
HaDeHaTa COcto6a n ObpaTeTe CE BO
DBeTeH cHTap 3a 3dpabCTBeHa 3aWTHTA
eOnxOJHO JeHyBaHe. OtCTpaHete
EmJIHO CITE OCTaTOU ON KOCEbeto
MOKe Da npedn3BnKaat DeFeKT
IOBpeDi Ha INuca NN JINBOTH aKO
HaHt He3a6eJaKaHo BO MaunHaTa.

AroTpajHaTa n3IIOKeHocT Ha
paun MOHe Da IpeDn3BnKa NOBpeDn H
poBaChyIapHn HApUyBaHa (NCTO TaKa
YeHenPeJHOb CnHDPOM" nn,6eLa
a"),ocObeHo Kaj LyreTo KOH CTpaDaat Od
UYBaHaBa BO UnpKHyIauNiJaTa.CmNTomHTe
Ke da Ce NOKaHaT Ha paueTe,Ha paunHe
OboBn Hn Ha npCTHte N Ce MaHnΦecTHpaat
Y6Be He Ha OCET,BKoHaHETOCT,YeHaBe,
Ha,ObE36OjyBaHe N CTpyKTypaHn
MeHN Ha KOHaTa.ObHe eFeHTn MOHe Da ce
TemaT co HNCn HADBopeuHN TemNepaTypn
mN od IpeKymepen PrHtncok Bp3 paKHTe.
1Nojaba Ha OBne CmMTOMn, Tpe6a Da
JamATE BpEmTo Ha KopNCTeHe Ha
UnHaTa N da CE COBEyBaTe CO Jekap.
OrpaHnUyBaHa ha ynoTpe6aTa
MaunHata He Tpe6a da ja KOpncTat Iuca To He ce BO CoCTo6a da ja dpKaT UBPcTo CO oBeTe paue HnIJa ODPKHyBaAT CTa6nHa pamHOTeKa Ha HO3eTe BO TEkOT Ha pa6oTaTa.
- Hnkoraaw He KopnctTe je MaunHaTa CO OwTeTeHa 3aHTtTa, aKO HeNoCTacyBa IIN aKO He npabNHO NOCTaBeHa.
He Kopnctete ro eJeKtpnHNo anapat aKo npEKNHyBaOT He e npaBnHNO nocTaBeH BO no3njuja 3a BnLnyBaHbe HnN NcKlyuBaHbe. Ako eJeKtpnHNo anapat He moKe da ce BkLyuCo npEKNHyBaOT, Toj e OnaceH 3a ynoTpe6a n Tpe6a Da ce nonpaBn.
He ncknybajTe,Je3aKTHBnpajTe,BaTeTe rMaHometapOT N6e36eDHOCHTe CNTeM/MNKpOPIpeKNHyBaHu.
He n3IooKyBajTe ja MaunHaTa Ha HeNOTpe6Hn CnInn He KopNCTeMeMaHa MaunHa 3a N3BeDyBaHe TeuKn pa6Otn; aDeKbATHo KOpNCTeHb Ha MaunHaTa Ro HAmayBa Pn3NKOTn Ro Noo6pyBa KbALNTeTOT Ha pa6OtaTa.
2.4 ODPKHYBAHbE,ODIOKHYBAHbE
PepOBHO ODPKByBajTe N npabNlHO OJIOKeTe ja MaunHaTa 3a Da ja ODPKHTe 6e36eHocTa Ha MaunHaTa N HIBOTo Ha pa60Ta.
OdpxhyBaHe
- HNKORAsh He KOpNCTeTe ja MaunHata co KOpNCTeHN nn OWTeTeHN DeJIOBn. OWTeTeHNte nn DepeKTHNte DeJIOBN Tpe6a da ce 3aMeHaT, HNKORAsh Da He Ce nonpaBaat.
- DaneHnTE HnBOa 3a 6yUaBn Bn6paunn BO OBA yNaTCTBO CE MaKcMmaJIHN BpeHocTH 3a yNtpe6bHa MaunHaTa. YnOTpe6bata Ha eIeMeENT 3a KOCHe KOJHTO He e CTabJIeH, DBNKeHBeTo CO npeRoiMeMa 6p3nHa, HeoPHyBaHBeTo Ha MaunHaTa, 3HaHTeJIHO BInJaat BP3 emCnJaTa Ha 6yUaBA HnBn6paunn. 3aToa, HeONXoNDHO e Da npImeHyBaTe 3aHTTNm MePNi 3a Da eINMNHPaTe MOxHH OWTetyBaHa 3apaN 3roJeMa6yUaBA Hn 3HaHTeJIHN Bn6paunn; ODPHyBajTe ja MaunHaTa peIOBHO, HOcTe CnyuJHK npOTNb 6yUaBn nPaBeTe Na3N BO pa60TaTa.
ChlaDnpaHe
3a HamaIyBaHBe Ha pIN3IKOT OJ ORaH, He OCTaBajTe NOLHN KOHTejHepN BO 3aTbOpeH npocSTOP.
2.5 BATEPNJA / NOJHau 3A ANKUMYJATOPOT
BAHHO CJIeHNHe 6e36eHocn nponnc n onpaKaat 6e36eHocnTe 6apaBa HabeDenH BO daJeHOTo yNaTCTBO 3a 6atepnjata n POnHaOT ha 6atepnjata mCnpaayann 3aeHNO c MaunHata.
KopncTeCe Camo nolHaCh 3a noIHeHbe Ha 6atepnnte wTo rnpenopayBa npOn3BODnTeJIoT. HecooDBetEn noIHauch 3a 6atepnjata MoKe Da npedn3BnKa eJeKtpnueH ydap, nperepaBe nIn npoTeKyBaBe Ha Kopo3NBHATA TeHOC T od 6atepnjata.
KopncTeCeMo 6aTePn Co CneuФkaCnUTo Ce npdeBnDeH 3a BaShOT anapaT. YnoTppeBaHa Dpyr6bAtePn MoKe da npdeN3BnKa NOBpeN n PN3NK Od PnaMeH.
- PpOBepTe daHn anapaToT e NcKlyueh nped da ja cTaBnte 6aTepnjata. CTabaHe 6aTepnja BO BkLyuE eJeKtpuueh anapat MOKe da npedn3BnKa nOkap.
- Cybajte ja 6aTepnjata wTo He ja KopnCTHPe noJaIeKo od KaHcJIapnCHn npIbOp, napN, KlyueBn, INJn, HABpTKn I DpyrMaII MeTALHN PpeDMETN To MoKe Da npedIN3BnKaat KpaTOK Cnoj Ha KOHTaKTHe. KpaTOK Cnoj Ha KOHTaKTHe Ha 6aTepnjata MoKe Da DOBeNe Do EKcPiO3NiJa nPiAmEH.
He ro KopncteTe noHaOT 3a aKymyIaTOp Ha MeCTa KaDe To HMa 3aNaJIbN IapEn, CyntTaHcHm NII LeCHO 3aNaJIbN IOBpShHn, KaKO To Ce XapTnJa, TKaEHnHa N CInuHO. 3a BpeMe Ha NoJIHeBeTo, aKymyIaTOpOT ce 3aRpeBa n MoKe Da npEdu3BnKa NoXap.
3a BpeMe Ha TpaHcnpT Ha aKymylaTopnTe, 6bPHeTe BHIMaHne KOHTaKTnTe Da He DojdaT BO Cnoj MeIy Ce6e N He KopnCTeMeTaJIHN KyTm 3a TpaHCnOpT.
2.6 3AUHTITA HA HINBOTHATA CPEINHA
3aWHTaTaHaJHIBOTHaTcpeDnHa Tpe6a Da e npnopTeT npi KopncTeHe Ha KocNkata, n Da 6nde Od Kopnc3a rpa'ahnte n 3a JHIBOTHaTcpeDnHa.
- H36erHyBajTe Da rO Bo3HempyBaTe COcEaCTBTO. Kopnctete ja MaunHaTa cAmo BO pa3ymHO BpeMe (He MHory paHO HayTPO I DoUHa Habeep Kora MOKe Da rN BO3Hempnte LyreTo).
- DocJeHcCJTe TIOKAJIHnTE 3aKOHn 3aФpIaHe Ha am6aHaKaTa, DeIOBn BO pacnaRaHe nII KaKBn 6nlo eIemEnTn CO WTeTHO BInJaHne BP3 KINBOTHaTcpeDnHa OBHe OTNaOnu He Ce pPaat Bo Iyope, TyKy Tpe6a Da 6nDaT pa3dJeHn N da Ce DOCTaBaT DO COoDBeTHN CEHTPN 3a CObpaHe Ha nCTnTe, KOH Ke CE nOgPnKaT 3a peuKlnpaHe Ha MaTepnJaInTe.
CneTe rN BO ueIOCT loKaHnHTe 3aKOHn 3a φpnaHe Ha MaTepeJnIte UTO ce pe3yIITaT Ha ceYeHeTo
Kora Kocnilkata Ke ce paCnne, He ja nCpIajTe HADBOP, TyHy OndHeceTe ja BO DeNoHjata 3a OTNaHm MaTePnJaN, COrJlachO N03HTNBHtE loKaJIHn OndpeD6N.
He φρλajte ng eJELKtpnHnTe anapatn 3aedno co domaueh OTnad. Bo corlaacHOCT CO dIpeKTnBaTa Ha EY 2012/19/EU,OTnADOT wTO ce coCTOn oJ eJELKtpnHn n eJELKTPoHcKn anapatn
e BaSha OndroBOPHOCT H, BO COrIaCHOCT CO HaunOHaJIHnTe Ondep6n, eJeKTPnuHnTe anapatn 3a φpIaBe Tpe6a Da ce φpIaT 3ace6Ho 3a Da MOKe IIOOuHa NOBTOPOHa Da ce yNtpe6aT Ha
eKO-KOMnATn6JIeH NaHH.AKO eJIeKTPnHITe anapatN ce OJIOHaT Ha Iy6pHtE Nn Ha 3emJa, WTeHTHe COCTOJMoHe Da CTanat BO KOHTaKT CO eIeMeHTHe BO NOBaTa N Da HABLe3aT BO CnHIpOT Ha NCxpaHa, CO wTo Ke ce HapyWat BaWeTO 3dpabJe n 6laRococTo6bata. 3a noDeTaJIHn INΦOpMaunn OKoJy φpIaHBeTO Ha OBOJ npOn3BOD, KOHTaKTnpajTe CO KOMnTeHTH N HCTNTuCn 3a φpIaHBe DomaWeH OTnAd Nn Co 3actaHNIKOT.
Li-ion
Ha kpaot Ha pa6oTHNOt BEK, oclo6oTe ce od akymylaTOPOr HA 6e36eHn EKOLOWKn HauH. BaTePnJaTa cOprKn MaTePnJaI To e onaceH 3a Bac n 3a cpeDnHaT.
Tpe6a da ce n3BaHn npacKnIOnn BO 3ace6eH caI TO MOKe Da COdpKn IInTHyMCKn JOHn.
3ace6HOTo CObnpaHe Ha npOn3BOdnte H NCKOpNCTeHtE NaKyBaHa OBO3MOKByBa peuKnIpaHBe Ha MaTepnaJIte H NOBTOPha yIOTpe6a. NOBTOPhaTAt
ynoTpe6aHa peuHlnpaHnTe MaTepnjAIn CNpeyuBa 7ETa Ha HNBOThaTa CpeDnHa Ja HAMayBa NOTpe6aTa 3a npImapHn MaTepnjAIn.
3. NO3HABAHbE HA MAUNHATA
3.1 ONIC N YNOTPEBA HA MAUINHATA
ObaMaunHa e rpaHapcHa aJatHa n NOKOHKeTHo ppeHocen 6aTePncn TpMep 3a HbBa Orpda.
MaunHaTa rnaBHO ce coCTOn oMOTOp KojTu aKTHBnpa ypeD 3a ceYeHe.
OnepaTopoT MoHe Da KopnCTn TlaBn HOMaHn 3a BpeMe Ha pa6oTaTa N CeKOraU Da OpJHyBa 6e36eHNo pactoJaHne OD CeHInIoTo.
3.2 O3HAHIN 3A BE3BEdHOCT
Ha MaunHata Nma Cm6oJi (cI.2). HnBhata fynKuJa e da ro NOTcTaT KOpNCnKOT Ha HeONXoHDocTa OD BHIMaTeJHa yNoTpe6a.
3HaueHe Ha Cm60JInte:

PPEyPPEyBAHBe! ONACHOCT! Obaa MaunHa MOKe Da 6nDe onaCha 3a Bac HIn 3a Dpyrnte DOKoNHy He Ce KopnCTn npabuHIO.

PNEyPENyBAHBe! PpeJa ja KopnCTte Obaa MaunHa, npouHTaje ro ynatcBtO 3a ynotpe6a.

KopncTeTe 3aWHTTa 3a ywnte n OHTe.

HocTe UBPCTn paKaBnCi 3a pa6Ota co 3auTNTa npOTNB IIN3raHe.

Ha He Ce N3IOKHyBa Ha DOHd (Hn HA BnAKnHOCT)
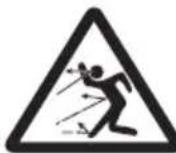
ONACHOCT OI NCΦPJIHA!
BHHMaBajTe Ha MOKHN
HcFpLyBaHa Ha MaTePnJaN
KOnUTo rN pPeIN3BnKyBa
ypeDTo CO CeYnBOTo KOuT0
MOKe Da pPeIN3BnKaaT TeuKn
NoBpeN Ha IInca N ppeMeTn.
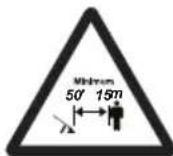
ONACHOCT OI NCΦPJIHbA!
OdaJeTe rCte nua nn DOMaHn HNBOTHn HajMaIky 15 MeTpN DoEka paobTu MaunHaTa.

Pn3nk OJ NOCEKOTINH! DpKeTe rpaTe nHO3eTe NOaJIeKy OJ CEuNBOTO.
Klaca II Dual n3olaunja
BAHHO DaenHTe eTKeTu wTo ce cnHaIe nn He Ce YHTINBn, Tpe6a da ce 3ameHaT. Hapaayte pe3epBn O3HaN oD OblaCTe cepBuceh uehtap.
3.3 ETNHETA 3A INDEHTNΦHACNJHA IPON3BOJOT
EtkeTa 3a ndeHTnΦnKaunja Ha npOn3BOoT rN codpnCneHnTe noDaTou (cI.1):
- O3HaKa 3a ycoRJIaceHoCT co CE
- Ime n apeca Ha npou3BODntTeIOT
- HnBO Ha aKcTnHa MOKHOCT
- HoD Ha npOn3BOD
- Tn Ha MaunHa
- Cepinckn 6poj
- TOnHa Ha npOuN3BODCTBO
- HanoH ha HanojyBaHe
3aannneTe rnoaTOUHTe 3a ndeHTnKaujia 3a MaunHata Ha COoDBETHIne MeCTa Ha daHeHaTa ETKeTa OD BHaTpeuHaTa CTpaHa Ha KaNaKOT.
BAHHO HabeTe rNoTaounte OeTKeTata 3a NdeHTnKauJa Ha npOn3BOoT CEkoraW Kora Ke Ro KOHTaHTnpaTe OblaCTeHNot cepBuceH ueHTap.
BAHHO Ipnmep Ha N3jaBaTa 3a COO6pa3HOCT Ce Haora Ha NocneHaTa CTpaHua BO Oba yNaTCTBO.
3.4 TJIABHN DEJIOBN
MaunhaTcecoCTOnODcJeHNTe TlaBn DeIOBn KOnIbTO COoDBeTCTByBaat Ha cJeHNTe FyHKuN (Cn.1):
A. MoTOp: 06e36eDyBa DnBHeHbHa ypeIOT CO ceYIBOTO.
B. CeuNo (ypeD co ceuNo): COoDBeTeH eIemEnT 3a CeYeHe Ha BeretauJia.
C. Ппекна рачна: OBO3MOHkyBa ynpaByBaHe CO MaшинHaТи Tamy ce Haorfa 6e36eHOCHOTo KOnHe.
D. 3aɪnha paʊhɑ: OBO3MÖKʌyBa yɪpɑaBvBaHæ Co MaɪnHaTaɪ Tamy Ce HaɪrəaT KOMaHdɪte 3a ΓlʌbHɑt A KOHTpɒla.
E. 3aHTIa 3a CeHbTO (pH TpaHCnOpT nIpeMeCTyBaHe Ha MaunHaTa): cnpeyBa HeCaKaH KOHTaKT CO ypeDcT CO CEHbOTO ITO MOKe Da DoBeDe Do TeuKn NOBpeN.
F. Batepnja (ДОПOLHITJIHA OР佩м no n36op, nac. 16.1): ypeD wTO o6e36eYBa eHeprjua 3a cTapTyBaHBe Ha ypeDOT; HEROBITE CneuФнkaUи npaBnla 3a KOpIcTeHbe ce onnuaHBO CneuJaJHnOT npnpaunK.
G. Полнач забатерида (дороннела на орема по Избор, пас. 16.2): уPED ШTO се Корпстп за палене Ha aKумлалtopOT; HerobITE спeцифигаци и павILA за Корпстпье ce ONИшани BO спeциjalHNot npinaHnK. ДостаПнс ce MоDEЛи Ha polnaч за два akумлалtopa: G1 (3a 6p30 палене Ha aKумлалtop); G2 (3a CTanДарДно палене Ha aKумлалtop);
H. Painez 3a 6atepnja (OdaToK Ha 6apaHe, nac.16.3):ypee BO KoJ ce CTabaat 6atepnnte.
I. Ka6eJ 3a noBp3yBaHbe: Ka6eJ UTO Ce KOpNCTn 3a NOBp3yBaHbe Ha MaunHaTa CO paHeOTo 3a 6aTepeJa.
J.CmMyaTOp Ha 6aTePnJa (DOnoHInTeJIHa onpema no n36op, nac. 16.4): ypei ITO, KORA e BMeTHaT BO KyKnIUteto Ha MaunHaTa, OBO3MOxUyBa yNtpe6a Ha paHeQT 3a 6aTePnJa.
4. PACNAKYBAHbE
BAHHO Be36eHNOCHTMe MepKn ITO Tpe6a Da rncIeNTe Ce daen H BO nOrr.2.CTporo npdpKByBaJTe Ce do Tne yNaTcTbA 3a da N36eHHeTe cepNo3Hn pN3uN nn HeCpeKn.
PacnkyBaHeTo Tpe6a Da ce H3BpHn Ha cBpCTa n paMHa NOBpHnHa CO DOBOJHO IpOcTOp 3a NOMeCTyBaHe Ha MaunHaTa N Ha amBaJhaTa HOpNCTeJn CeKOraw COoDBeTHN aIaTN.
- OTbOpTe ro NaKyBaHbeTo BHIMaTeJHo 3a Da He rnpacpplne DeJIOBNTe.
2.ПочнajTe ja ДOKум entaunjaTa BO KyTnjaTa Kaide ce HabeDeHn OBne yNaTCTBa.
3.ИЗва对接е ѳ машиHaТа оД КутNiJaTа.
4.Фрлелу Кутijaи ambaнkaTа corlacho lokaHHTe OndeN.
5. MOHTNPAHbE
5.1 NOCTABYBAHbE HA PAHEcOT 3A BATEPnJA (DOKOLy E DOCTANEH)
PaheQT 3a 6aTePnJa ce nCnopaUyBa CnIOnen (C1.1.H) n MoKe Da ce n3BaAno od npKaHOT
Ha pemeHot (C1.3) n Da ce Hocn Bo paHa.
3a da ro n3BaAnTe paHeQT od pemeHot,
npTncHe Ta DBete rOpHn KOnuHbA (C1.3.A).
PipepaNTe 3a 6aTePnJaTa ce Haor'aat
OD dBete cTpaHn Ha paHeQT (C1.4)
OBne paBToN MoKe Da rH HajDeTe
Ha deChata cTpaHa Ha paHeQT:
- npnKnyHnua 3a Ka6eI (Cn. 5.A)
- n36bnpa7a 6aTepejna (Cn.5.B)
- eHa USB nopTa 3a noJIHeBe Ha pyrN ypei (Ha np. Mo6nJIHn TelefoHN) (Cn. 5.C).
3a da rnpuBpCTnTe Ka6JInte, da He BnCat, mMa JIle6OBn Od DBete CTrpaHn Ond3aDn, BO KOn MoKe Da ce BMeTHe Ka6eJot 3a CTrpyja.
6. KOMAHДИ 3A KOHTPOJI
6.1 BE3BENHOCHO KONU (AKTINBUNPAHbE/DEAKTNBUPAHe)

PnTnCHTe Ro Oba KOnYe 3a Da Ro aKTHBnPaTe N De3aKTHBnPaTe eJeHTpnHOTO KOHO Ha MaunHaTa (cI.6.A).
EHa BnlyeHa JEd cnjaHua: eIeKtpnHOTo KOLO Ha MaunHaTa e aKTHBnpaHo (CJ.6.B).MaunHaTa e NOdrotBeHa 3a pa6Ota. DBe BnlyeHn JEd cnjaHau: MaunHaTa pa6OTn.
JIED cnjajnnte ce ncknyybaaT: eIektpnHOTOKOeueLOCHO De3aKTHBnPaHO.

BAHHO PnnpemecTyBaHbe, HNKORAHe npKeTe rnpCTOT Bp3 KOHTo 3a da n36eHete CnyajHo nane He.
IkoHata 3a,ПpeDyPpeDyBaHbe" (CJ.6.F) ce BHLyUyBA Bo cnuyaj Ha DepeKT Ha MaunHaTa (BnTe ja Tabelata 3a peuBaHbe Ha npo6lemn, nac.15).
6.2 PAUHA HA HOMAHDATA 3A CEYNBOTO (YPED CO CEYNBOTO)
OBO3MOKHyBa BKNyUyBaHBe npeYlaqJaHa 6p3nHaTa Ha CEuNBOTo.
CeuIIOTo MoKe Da Ia Ro aKTbBupaTe camo co nCTOBpeMeHO npTnCKaHbe Ha (Cn. 1.B) paKaTa 3a ynpaByBaHbe co ceuIoTO (Cn. 6.C) n 6e36eHocHTo KOnHe (Cn. 6.D).
UpeDoT CO ceYHBOTo 3aCTaHyBa aBTOMaTCHCO NpUStaHbHa paKaTa nn6e36eHNOCHNOT npeKnHyBa.
6.3 PAUHA 3A JEBJOKHPAHBA 3ADHATA PAUHA
PaKaTa 3a otnyTaHe (Cn.6.E) OBO3MOKyBa 3a da ja peryInpate 3aHata paKa (Cn.1.D) Ha 3 pa3NCHN NO3uIN BO ODHc HA ceHnLaTa 3a noleCHO KAcTpeHe Ha JKNBa orPada.
Peryaunjata Ha paKaTa Tpe6a da ce H3BpyBa Kora e De3aHTBnPaHO 6e36edHcHcTO KOy (H3rachHa CnJaNnHa).
7. YNOTPEBA HA MAUHHATA
BAHHO Be36eHocnTe MeKu WTo Tpe6a Da rncIeIte ce daene Hb nOr.2.Ctporo npndpkyBaJte Ce do The yNaTCTBa 3a da N36eHHeTe cepno3HN pN3nU IN HeCpeKn.
7.1 INPEJIIMMHAPHNO ONEPAUIN
Ipei da 3anoyheTe co pa6oTa, HeonxOHO e da cnpoBeTe cepnja KOHTpOIn n Oepaun 3a da oBe36eHnTE DeKa pa6oTaTKe Ce ODbNbHa aeFHKaceH NaHH CO MaKcImaJIHa 6e36eHnCT.
CTaBeTe ja MaunHaTa XOpn3OHTaJIHo n CTa6nHa Ha TepeHOT.
7.1.1 KOnTpOJa Ha 6aTepejnaTa
MaunhaTc e doCTaByBa 6e3 baTepnja.
Haabete 6aTepnja co cooDbTeH kanaHTet
3a paobTHnte 3aauN npBO hanoHHeTe
ja dokpaj cIeJeKn rYn yNaTcTBata wTO ce
codPhat BO yNaTcTBOTO 3a 6aTepnjata.
CncOKOT ha 6aTepn HOnwTo ce cooDbETHN
da ce KopNCtAT CO OBaa MaunHa ce Haora
BO TaBeLaTa,TexHnUH NODaTOu".
- Ppei cekoja ynoTpe6a: - npOBepTe ja coctojbata Ha HanoJIHeTOCT Ha aKymyIaTOPOT CJeJeJn rHaCoKInTe DaDeHn BO yNaTCTBOTO 3a aKymyIaTOPOT.
7.1.2 Perylaunja Ha paHaTa
Cnpobedeje ja noctanhata co nchnyeHo 6e36eHocHO konye (n3raChata cnjaJInuHa).
- NobJeHete ja Ha3aD paKaTa 3a De6JoknpaHe Ha 3aHaTa paKa (cI.7.A);
- nouHete da ja BpTnte 3aHaTa paKa (cJ. 7.B)
- OtnnywTeTe ja KOMaHdaTaHa paKaTa 3a 3a6p3yBaHbe (Cn.7.A);
- CBPTeTe ja paKaTa DoKpaJ 3a Da CnyuHHeTe 3ByK DeKa Ce HameCTnla BO CaKaHaTa NIOJ6a.
BAHHO IpeJa ja HOpNCTHe MaunHaTa, npOBepTe daHpaKaTa 3a OTnyStaHe e ueIOcHO BpaTeHa BO NOnuJa 3a 6IoknPaHe n DeKa 3aHaTapaKa e COODBETHO pnuBpCTeHa.
Bo tehot ha pa6oTata,3aHaTapaHamaopaceHoraWda 6nde BOBepTNkHaHaNo3uNja,He3aBnCHO O3a3eMeHaTa No3uNja Ha HohOT.
7.1.3 Ynotpe6a Ha paheoT (doKolky e doCTaneH)
- Bmethe je 6aTepnjaTa BO eHa od nperepaHte Ha paHeoT (Cn.4) n TypheJe 3a da BLe3e DOKpaj, cde OdoKa He CnyuHete HInKHyBaHbe wTO CNrHaN3npa DeKa 6aTepnJaTa ce fKnCnpaIa Bo nperepaData, a Notoa npOBepeTe rEeKTPnuHnOT KOHT;
- NOBp3eTe ro Ka6eIOT co paHeuOT BO COoDBETHaTApnKnyHnua (Cn. 5.A) npotnpajTe ro cdoKeHa He cnUshete KInkHyBaHbe uTO CnHnHaHn3npa DeKa Ka6eIOT ce fncnpaI BO npNKlyuHncaTa, a nToa npOBepTe rO eJeKTpnHnOT KOHTaKT;
- noodeceTe ro pemeHOT n 3aKoNJaTe ro nojacot HanpeD (Cn.8).
7.2 BE3BEOHCHN HOHTPOJIN
CnpoBeTe Tn CneHnTe 6e36eHocn HONTPOIN NpOBepTe DaIIN pe3yIaTnTE COODBETCTByBaAT Co daJeHOTo BO Ta6eNaTa.
Cenoraw npoBepyBajTe r6e36eHochnTe hontpOn nped pa6ota.
7.2.1 OnuTa KoHTpOJa
| Пре demет Peşултат | ||
| Раши (сl. 1.C, сl. 1.D) и заштити | ЧИстNi, Исupyши, правлиои и црсто фінсірашии на машинату и сеуново | |
| Шарафови на машинату и сеуново | Добpo зашарень (не разлабavenи) | |
| Оъори 3a ВОЗдух зa ладени | Бez prechи | |
| Сeчво (сl. 1.B) Наструно | 6е зникави Зни за оштeteува bene и поэдени на т教职工 и оштeteува. и оштeteува. и оштeteува. и оштeteува. и оштeteува. и оштeteува. и оштeteува. и оштeteува. и оштeteува. и оштeteува. и оштeteува. и оштeteува. и оштeteува. и ошteteува. и оштeteува. и оштeteува. и оштeteува. и оштeteува. и оштeteува. и оштeteува. и оштeteува. и оштeteува. и оштeteува. и оштeteува. и оштeteува. и оштeteува и оштeteува. и оштeteува и оштeteува и оштeteува и оштeteува и оштeteува и оштeteува и оштeteува и оштeteува и оштeteува и оштeteува и оштeteува и оштeteува и оштeteува и ошteteува и ошteteува и ошteteува и ошteteува и ошteteува и ошteteува и ошteteува и ошteteува и ошteteува и ошteteува и ошteteува и ошteteува и ошteteува | |
| Заш�ь (сl. 1.B) Наструно | 6e3ни куч; Зни за оштeteува; и поэдени на т教职工 и оштeteува. и оштeteува. и оштeteува и оштeteува и оштeteува и оштeteува и оштeteува и оштeteува и оштeteува и оштeteува и оштeteува и оштeteува и оштeteува и ошteteува и оштeteува и ошteteува и ошteteува и ошteteува и ошteteува и ошteteува и ошteteува и ошteteува и ошteteува и ошteteува и ошteteува и ошteteува | |
| Зашегиja (сl. 1.F) Бeзни Балы Ныни Ныни Ныни Ныни Ныни Ныни Ныни Ныни Ныни Ныни Ныни Ныни Ныни Ныни Ныни Ныни Ныни Ныни Ныни Ныни Ныни Ныни Ныни Ныни Ныни Ны Norris Ны Norris Ны Norris Ны Norris Ны Norris Ны Norris Ны Norris Ны Norris Ны Norris Ны Norris Ны Norris Ны Norris Ны Norris Ны Norris Ны Norris Ны Norris Ны Norris Ны Norris Ны Norris Ны Norris Ны Norris Ны Norris Ны Norris Ны Norris Ны Norris Ны Northeast Ны Northeast Ны Northeast Ны Northeast Ны Northeast Ны Northeast Ны Northeast Ны Northeast Ны Northeast Ны Northeast Ны Northeast Ны Northeast Ны Northeast Ны Northeast Ны Northeast Ны Northeast Ны Northeast Ны Northeast Ны Northeast Ны Northeast Ны Northeast Ны Northeast Ны Northeast Ны Northeast Ны Northeast Ныtheast Ны northeast Ны northeast Ны northeast Ны northeast Ны northeast Ны northeast Ны northeast Ны northeast Ны northeast Ны northeast Ны northeast Ны northeast Ны northeast Ны northeast Ны northeast Ны northeast Ны northeast Ны northeast Ны northeast Ны northeast Ны northeast Ны northeast Ны northeast Ны northeast Ны northeast Ны Northeast Ны Northeast Ны Northeast Ны Northeast Ны Northeast Ны Northeast Ны Northeast Ны Northeast Ны Northeast Ны Northeast Ны Northeast Ны Northeast Ны Northeast Ны Northeast Ны Northeast Ны Northeast Ны Northeast Ны Northeast Ны Northeast Ны Northeast Ны Northeast Ны Northeast Ны Northeast Ны Northeast Ны northeast Ны Northeast Ны Northeast Ны Northeast Ны Northeast Ны Northeast Ны Northeast Ны Northeast Ны Northeast Ны Northeast Ны Northeast Ны Northeast Ны Northeast Ны Northeast Ны Northeast Ны Northeast Ны Northeast Ны Northeast Ны Northeast Ны Northeast Ны Northeast Ны Northeast Ны Northeast Ны Northeast Ны northeast Ны northeast Ны Northeast Ны Northeast Ны Northeast Ны Northeast Ны Northeast Ны Northeast Ны Northeast Ны Northeast Ны Northeast Ны Northeast Ны Northeast Ны Northeast Ны Northeast Ны Northeast Ны Northeast Ны Northeast Ны Northeast Ны Northeast Ны Northeast Ны Northeast Ны Northeast Ны Northeast Ны northeast Ны Northeast Ны northeast Ны Northeast Ны Northeast Ны Northeast Ны Northeast Ны Northeast Ны Northeast Ны Northeast Ны Northeast Ны Northeast Ны Northeast Ны Northeast Ны Northeast Ны Northeast Ны Northeast Ны Northeast Ны Northeast Ны Northeast Ны Northeast Ны Northeast Ны Northeast Ны Northeast Ны Northeast Ны northeast Ны northeast Ны northeast Ны Northeast Ны Northeast Ны Northeast Ны Northeast Ны Northeast Ны Northeast Ны Northeast Ны Northeast Ны Northeast Ны Northeast Ны Northeast Ны Northeast Ны Northeast Ны Northeast Ны Northeast Ны Northeast Ны Northeast Ны Northeast Ны Northeast Ны Northeast Ны Northeast Ны northeast Ны Northeast Ны Northeast Ны northeast Ны Northeast Ны Northeast Ны Northeast Ны Northeast Ны Northeast Ны Northeast Ны Northeast Ны Northeast Ны Northeast Ны Northeast Ны Northeast Ны Northeast Ны Northeast Ны Northeast Ны Northeast Ны Northeast Ны Northeast Ны Northeast Ны Northeast Ны Northeast Ны Northeast Ны northeast Ны Northeast Ны northeast Ны northeast Ны Northeast Ны Northeast Ны Northeast Ны Northeast Ны Northeast Ны Northeast Ны Northeast Ны Northeast Ны Northeast Ны Northeast Ны Northeast Ны Northeast Ны Northeast Ны Northeast Ны Northeast Ны Northeast Ны Northeast Ны Northeast Ны Northeast Ны Northeast Ны Northeast Ны northeast Ны northeast Ны Northeast Ны northeast Ны Northeast Ны Northeast Ны Northeast Ны Northeast Ны Northeast Ны Northeast Ны Northeast Ны Northeast Ны Northeast Ны Northeast Ны Northeast Ны Northeast Ны Northeast Ны Northeast Ны Northeast Ны Northeast Ны Northeast Ны Northeast Ны Northeast Ны Northeast Ны Northeast Ны northeast Ны northeast Ны northeast Ны northeast Ны Northeast Ны Northeast Ны Northeast Ны Northeast Ны Northeast Ны Northeast Ны Northeast Ны Northeast Ны Northeast Ны Northeast Ны Northeast Ны Northeast Ны Northeast Ны Northeast Ны Northeast Ны Northeast Ны Northeast Ны Northeast Ны Northeast Ны Northeast Ны northeast Ны Northeast Ны Northeast Ны Northeast Ны northeast Ны Northeast Ны Northeast Ны Northeast Ны Northeast Ны Northeast Ны Northeast Ны Northeast Ны Northeast Ны Northeast Ны Northeast Ны Northeast Ны Northeast Ны Northeast Ны Northeast Ны Northeast Ны Northeast Ны Northeast Ны Northeast Ны Northeast Ны Northeast Ны northeast Ны Northeast Ны Northeast Ны northeast Ны northeast Ны Northeast Ны Northeast Ны Northeast Ны Northeast Ны Northeast Ны Northeast Ны Northeast Ны Northeast Ны Northeast Ны Northeast Ны Northeast Ны Northeast Ны Northeast Ны Northeast Ны Northeast Ны Northeast Ны Northeast Ны Northeast Ны Northeast Ны Northeast Ны northeast Ны Northeast Ны northeast Ны Northeast Ны northeast Ны Northeast Ны Northeast Ны Northeast Ны Northeast Ны Northeast Ны Northeast Ны Northeast Ны Northeast Ны Northeast Ны Northeast Ны Northeast Ны Northeast Ны Northeast Ны Northeast Ны Northeast Ны Northeast Ны Northeast Ны Northeast Ны Northeast Ны Northeast Ны northeast Ны Northeast Ны northeast Ны northeast Ны northeast Nы Northeast Nы Northeast Nы Northeast Nы Northeast Nы Northeast Nы Northeast Nы Northeast Nы Northeast Nы Northeast Nы Northeast Nы Northeast Nы Northeast Nы Northeast Nы Northeast Nы Northeast Nы Northeast Nы Northeast Nы Northeast Nы Northeast Nы Northeast Nы Northeast Nы Northeast Nы Northeast Nы Northeast Nы Northeast Nы northeast Nы Northeast Nы Northeast Nы Northeast Nы Northeast Nы Northeast Nы Northeast Nы Northeast Nы Northeast Nы Northeast Nы Northeast Nы Northeast Nы Northeast Nы Northeast Nы Northeast Nы Northeast Nы Northeast Nы Northeast Nы Northeast Nы Northeast Nы Northeast Nы Northeast Nы Northeast Nы Northeast Nы Northeast Mб Mб Mб Mб Mб Mб Mб Mб Mб Mб Mб Mб Mб Mб Mб Mб Mб Mб Mб Mб Mб Mб Mб Mб Mб Mб Mб Mб Mб Mб Mб Mб Mб Mб | ||
7.2.2 Tect 3a pa60tata Ha MaunHata
| Дejectво Peуltat | |
| 1. Вметнete ja 6aTeprnjaTa BO CBOETo HkyNtte (Cл. 10.A); 2.Притисе.To 6e3bEdnHochTo KOnHe (Cл. 9.A) | Зелената сижличka Tpe6a Дa ce 3aapani (akTNBirpaHO eJeKtpnHOb KOLO)И урedingTo co CEuNBOTo He Tpe6a Дa ce DBNIXI |
| Внлүүе ja MaшинаТа (пас. 7.3); 1. aNTINBirpaJTe ГИСТОВРЕМно paЧКаТа 3a уравуBaHbe co ceYinlOTO (Cл. 9.B) И 6e3bEdnHochTo KOnHe (Cл. 9.C); 2. OTNUSTeTo gre paChKaTа 3a уравуBaHbe co ceYinlOTO (Cл. 9.B) Или 6e3bEdnHochTo KOnHe (Cл. 9.C) | 1. СeунTO Tpe6a Дa ce DBNIXI |
| 2. КOMанДITE Tpe6a Дa ce BrpTa ABTOMaTСКИ И bpry Bo HeyTpalHa ПОЗИцJa, a CEuNBOTo Tpe6a Дa 3aCTaHe | |
| 1. Co BnLByeHo cSeYInBO, ПOBleYeTe ja Ha3aД paЧKaТа 3a De6bLokHpaJIbe Ha 3aДНaТа paЧKa (Cл. 7.A) | 1. СeунTO Tpe6a Дa 3aCTaHe |
Ako Hehoj od pe3yIaTHe e nCT Hako wTo e NocOeyHO BO Ta6eJa, He ja KopHcTeTe MaunHa? OdHeceTe ja Bo OBlaCTeH cepBnC Ha npOBepHa n NonpaBHa.
7.3 CTAPTYBAHbE
7.3.1 CtapTyBaHe co 6aTepuJa
- 3BaTeJe ja 3aWtHTaTaHa ceHInoTo (Cn.1.E)(aKo e cTaBeHa);
- npoBepTe DaJIH HOKOT rO dOnIPA TepeHOT Hn Dpyr npeDMeTn;
- BmetheTe ja 6aTepnjata BO CBOETO KyKnUte (Cn. 10.A);
- npntncheTe ro 6e36eHochTo konHe (CJI.9.A)
- aKTHBnPajTe rH nCTOBpeMeHo paKaTa 3a ynpaByBaHbe co ceHNoTo (Cn. 9.B) n 6e36eHOCHO To KOnHe (Cn. 9.C).
7.3.2 CtapTyBaHe co cHMyJatOp Ha 6aTepnja (doKoJHy e doCTaneH)
- 3a3emete UBPCTa n CTa6nHa no3nJa
- npoBepTe dann HooHOT ro DOnnpa TepeHOT nn Dpyr npEpmTu;
- npaBnHb BmTeHeTe rCmMylaTOpOT Ha 6aTePnJa BO CBOeTo KyKniUte BO MaunHaTa (CJ. 10.J)
- NOBp3eTe ro Ka6eIOT co CmMyIaTOPoT Ha 6aTePnJa (CJ.10.I)
- n36epete ja 6aTepejata co nomow Ha n36npaot (Cn. 5.B)
- npHTnCHeTe ro 6e36eHocHOTo KOnue (Cn.9.A)
- aKTHBnpaJTe rH nCTOBpeMeHo paKaTa 3a ynpabByBaHbe co ceuNlOTo (Cn. 9.B) n 6e36eHNOCHOTo KOnHe (Cn. 9.C)
7.4 PABOTA
3a da pa6oTnte ce MaunHaTa, nOCTanTe KaHO wTO cIeN:
ceKorawdPKeTe ja MaunHaTa uBpCTO co DBeTe paue,dpKejKn ro ypeDoT CO CEHBOT NOJ LInHjaTa Ha pameHnUte
He BaTe Ro NceHnOT MaTePnJaI nn dpHeTe ro uBpCTo MaTePnJaNOT 3a ceYeBe Hora CeYnBOTo e BO FyHHnJa. YBepete ce deKa 6e36eHocHOT KOnepe eoHTNBnPaHO (N3rachata cnJaNNuHa) Hora Rn BaNTe NceHnOT MaTePnJaI.
3A6EJELHA 3a Bpeme Ha pa6oTaTa,
6aTepnjata e 3aWHTHeHa OD KOMNlTeHO
Ipa3HeBe IpeKy 3aWHTHnOT ypeD KOJ WTo ja
INCHnyBa MaunHaTaNJa 6bOnHp a6oTaTa.
3A6ELEWHA No eHa MNHyTa Ha HeaKTNBHOCT, MaHHaT aBTOMaTCH Ke Ce NcHnyu.
7.4.1 TexHnka Ha pa6oTa
CekoraIe peTnoHTa da ce ceye npBnot I BTOPNOt peD BePTnKaJIHn N3pactOuHa rMykata, a NOToA JERHaTte DeIOBn.
3A6ELEWHA 3aCyByBaHbeto Ha eHepnja Ha 6atepnjata (u co Toa e nTope6Ha nobpwnHa 3a ceYeIe nped nolHeBTo) 3aBnCn OJ NOBeKe fAnTOpn OnnAn HBO nac.8.2.1.
7.4.1.a BepTKKaJIHo ceueHe
Hokot Tpe6a da ce noCTaBn co KpyKHO DnBHeBe Ondony Harope co Toa wTO ceuBOTo Ke ce npKu wTo e MoHHo nOdaJeKy od TeIOTo (cI. 11).
7.4.1.b Xopn3oHTaJIHo ceueHe
Hajdo6pn pe3yIaTaN ce do6nBaaT Kora ceuIto e 6laRo 3akOceHo (5^ - 10^) BO Hacoka Ha ceeHeTo, npocJeHO co KpyKHO dBnKeHe, 6abHO n 6e3 PpeKN, oc6eHO Bo cnuyaj Ha MHOry rycTa JnBa orpaDa (CJ. 12).
7.4.2 Cobertn 3a pa6ota
Ako ceuHBOTo Ce 6IOKupa BO TEKOT Ha paBoTaTaNnCe 3aJIeTKa BO rpaHKIne Ha rPMyUKKaTa:
- BeDnaw 3anpeTe ja MaunHaTa (nac. 7.5);
2.yBepete ce deka ypeoT co CEYHBOTo e 3aCTaHaT; - n3BaTeTe ja 6aTepejata (nac. 8.2.2);
4.ИЗbaДeTe ro 3aIJIaBeHNot MaTePиJaI.
7.4.3 ПОДмачКУВа№ Ha ceунВаТа BO TEKOT Ha pa6OТа
ДOKOLky ceuNIOTo ce 3arpeBa 3a BpeMe Ha pa6oTaT, TpeBa Da rI NOdMaUkAte BHaTpeuHInTe NOBpUHHn Ha ceuNIOTo (nac.8.4).
Oba MoKe Da ce N3BpSh Kora MaunHata e nChnyeHa 6aTeepnJaTa e N3BaDeHa od KyHnWTeTo (nac.8.2.2).
7.5 3ANHPAHe
8.2.2 NcKJIyUByBaHe nNoJIHeHBe Ha 6aTeepNJata
1.ПиTNCHeTe ro KOnYeTo 3aФИKcHpaJIbe WTOce HAOrA BO 6aTePnJaTa Ha MaUHaTa (Cn.13.A) nIi Na paHeOTo 3a 6aTePnJa (Cn.14.A) (doKoNHy e DoCTaNeH);
2. n3BaJeTe ja 6aTepnjata OJ MaunHaTa (Cn.13.B) nn oJ paHeoT 3a 6aTepnja (Cn.14.B) (doKoIHy e doCTanen);
3. CTaBeTe ro akymyIaTopoT (Cn. 15.A) BO KYNiWTeTo Ha noJIHaHOT (Cn. 15.B);
4. NOBp3eTe rno nolnaOT (CJ. 15.B) BO npNKUYHnua co HanoHOT hBeJeH Na NIOUaTa CO NOdaTou;
5. cekoraaw noHHeTe ja dokpaj cIeJeKn rnyaTCTBaT aDeEH BO yNaTCTBOTo 3a6aTepnjata/NoHaOT 3a 6aTepnjata.
3A6EJELSHA BaTepnjata e onpeMeHa
CO WHTTNIK WTO CNpeyuBa NOBTOPOHONHeBe aKO TemepaTypaHaOKOLINHaTa He e nomery 0N +45^
3A6EJIeUHa AkyMylaTOPOT MoKe
Ja Ce NOLHBO CEKOJ MOMENT, Dypn IN DeIyMHO 6e3 PUNIK OJ OWTeTyBaHe.
8.2.3 NOBTOPHO NOCTaByBaHe Ha 6aTepnjata BO MaunHata
Kora noIHebeTo e 3aBpseHo:
- N3BaTe ja 6aTepnjata od KynuTeTo Ha noHaoyT (Cn. 16.A) (He ja ocTabajte da ce noHH,OTkaKO BeKe ueNoCHO ce HanoHnHa);
2.ИЗвадеTe ro noHaOT (Cn. 16.B) oД CTpyja, -
BmTeHe ja 6aTepnjata BO CBOeTo KyKnIte BO MaunHata (Cn. 10.A) nIn BO eHa oN ppepaNTe Ha paHeoT 3a 6aTepnja (Cn.4) (doKoKy e doCTaneH)
-
TypheTe ja 3a da BJIe3e DoKpaj, cédoKeHa He CnyuHHeTe KInKHyBaHbeIto CnHAn3npa DeKa 6aTePnJaTa ceΦHKcnpaJb BO npePpaJta, a nToa npOBepTe ro eJeKTpnHnOT KOHTt.
8.3 YNCTEHe HA MAUINHATA HAMOTOPOT
3a HamaIyBaHe Ha np3IKOT od 3anaIyBaHe, OdpKByBaJTe rMaunHaTa, a OcO6eHO MOTOpOT OD OCTaTOUc OD Incja, rpaHKn IN ppeKymepHo MaClo.
Cekorawu cte ja maunhaTno ynoTpe6ata co uCTa N MOKpa Kpna notoneha BO HeytpaIeH DeTepreHT.
- OtctpaheTe r n CHTe TpaHn Ha BlaRa co MeKa n cyBa KpNa. BlaRaTa oCTaba npocTOp 3a pn3nK od eJekTpueH ydap.
He KopncTeTe a6pa3nBHN DeTepeHTn n pactbOpyBayn Da rN hCnCTnTe IJaactuHnTE JeIOBn nn paKnTe.
He noIeBajTe BODa n H36erHyBajTe MOKpeHBe Ha MOTOPOT N Ha eJeKtpnHITe DeIOBN.
3a da n36eHete nperepeBaHe nn OHTetyBaHe Ha MOTOPOT Hn Ha 6aTepnjata, ceKoraaw npOBepyBajTe daHn peWetkata 3a BO3dyx 3a JanaheE e NCTa N 6e3 OCTaTOU.
8.4 YNCTEHEI NOIMAUHKYBAHBE HA CEYJLOTO
No pa6oTaT, Mopa Da ro nCnCTnTe n NODMaHKeTe ceHBOTa Da My ja npOdoJHKnTe fYHKnJaTa N DOJrTOpaJHOcTa:
He donnpajte ro ypeot co ceuBoto aHO He cTe ja n3BaHnle 6aTepujata u aHO ypeot co ceuBOTO He e 3actaHaTdoHpaJ.
CTaBeTe ja MaunHaTa XOpn3OHTaIHo n CTaBnHa Ha TepeHOT.
- YnCTeTe ro ceuBOTO co cyBa Kpna H KopnCTeTe IOnaTHa aKO mHa ynpHn daMKn.
- POnMaUkajTe ro CeuBOTO BHNMaTeJHnHaHeCyBajKn CNoj Ha OndpeJeHOTo MacNo 6e3 da ja NImaChKaTe N DeJOT Ha rOpHnOT KpaJ Ha CeuBOTO.
8.5 HABPTK N IUPAΦOBN 3A ΦHKPAPAE
CnTe 3aBPTKn,HaBPTKn IIOCTOBN Tpe6a da 6nDat Do6po npuCBPCTeHn 3a da ce ocHypate DeKa onpemata e 6e36eHa 3a pa60Ta.
PeIOBHO npOBepyBajTe daIpaKHTe ce UbpcTo fNknpaHn.
9. BOHPEДHO OДРЖУBAнБE
9.1 BOHPEIHO OOPKHYBAHbE HA YPeIOT CO CEYHBOTO
He donnpajre ro ypeodot co ceuBOTO aHO He cTe ja n3Baundne 6aTeepnjaT u aHO ypeodot co ceuBOTO He e 3actaHaTdoHpaJ.
Ako ce KopnCTN BO corlaacHOCT CO yNaTCTBOTO, CEINBOTO He 6apa HnKaKBO ODpKyBaHe nnOCTpeHe.
9.1.1 KOntrpoJa
I NobpeMeHO npOBepyBajTe daHn ce CeYNBata NcRPNBEHN, OwTeTeHN nn H3a6EHn I daHn ce WpaΦOBHTe COoDBETHO 3aTeHaTH.
He e notpe6Ha perylaunja Ha pactojaHneTo MeIy ceuBaTa 6nDejKn DnHexeTe Oe BeKe noCTaBeHo fa6pNk.
9.1.2 Octpehe
OcTepeHBeTo e HeonXoDHO KOra n3BVe6bata Ha HOKeBnTe onara n rpaHKnTe ce HabeDHyBaat N YecToNaTn Ce 3aJIeTkyBaat.
Od 6e36eHocn npuHH, ocTpeHbeto Mopa da ce n3BeDe BO OBlaCTeH cepBuceH ueHTap koi pacnoIarco cTpyHocT u COoDBeTHN aIaTHN 3a H3BpUyBaHe; Ha Obaa pa6ota 6e3 da ce pH3nHyBa OWTeTyBaHe Ha ceYNBOTO n da ce npedn3BnHa He6e36eHa cocToj6a BO TeHot Ha pa6oTaTa.
Hohot co OwTeHeN ceYnBa He cMee HnKoraw da ce octpn, tyHy da ce 3ameH.
9.1.3 3aMeHa
CeHBOTo HnHOraH He Cmee Da CE NonpaBa, TyHy Mopa Da Ce 3aMeHN WtOM Ke Ce 3a6eJehaT 3aYeTOU Ha OWTeYBaIbe Hn HORA Ke Ce DOCTHRHe DO3BOJeHHOT JnMMT 3a OCTpeHBe. Od 6e36eHNoCHn PnPHNn, Toa Tpe6a Da ce 3aMeHN BO OBnAteH cepBnceH ueHTap.
Co Obaa MaunHa npedBnDEHO e da ce KOpNCnCeHBOTo KOeWTO FO HOCN KOJOT NOCOeH BO TaBeLaTc COxHnUKNoDaTOuN.
3apaHpa3bojOT ha npOn3bOJOT,ceuNbata HabeHeH BO Ta6eJaTAt "TexnUKN IOnaTOU TpeBa CO BpeMe Da ce 3aMeHaT CO dpyrN
CO COOДБЕТНКAPаКТЕРИСТУЗ 3a 3aMeHa NФункцюналha 6e36eДноCT.
10. CHJIADINPAHbE
BAHHO Be36eHOnCHNe npONcN uTO Tpe6a da ce cIeDat npn cHlaIpaHe ce HabeJeHN BO nacyc 2.4.CTpRo npuDpKByBajTe Ce do Tne yNaTCTBa 3a da n36eHETe CepNo3HN pN3nU INn ONaCHOCTN.
10.1 OДЛОЖУBAHБЕ HA MAШИHATA
Kora maunhaTape6a da ce oJIOH:
- n3BaJeTe ja 6aTeepnJaTa Od CBOeTo KyKnIte N HanoJIHeTe ja (nac.8.2.2);
- Co 3acTaHaT ypeI co CEYBOTO, CTaBeTe ja 3aWHTnTaT ha CEYBOTO
- OctaBeTe MOTOpOT da ce olaAn npeI da ja CKlaInpate MaunHata BO 3aTBopEn IpocTOp;
- IcHnCTeTe ja MaunHaTa (nac. 8.3);
- YBepTe Ce DeKa Hema DeJIOBn KOI CE OHTeHn IIN He Ce PnucPcTeHn. AKe e NOTpe6Ho, 3aMeHete rO OHTeTeHnTE JIOBn 3aTeHHe Tn pa3Ja6aBeHnTE 3aBPThN HaBPTHN, IIN KONTaKtnpajTe FO OBlaCTEHNO CEPBVCEN UENTap;
- CknaIapajTe ja MaunHaTa:
-Ha cyBO MECTO;
-3aWHTIteHa OJLOWITe BpeMeHcKn ycIOBn;
- nodaJIeKy od doΦaT Ha Deua;
- yBepyBajKn DeKa CTe Tn TprHaine KnyeBNTe H onpemaTa WTo ja KOpNCTeBTE npn OdpKyBaHbeto.
10.2 OДLOHУBAHБЕ HA BATEPNJATA
BaTePnJaTa Tpe6a Da Ce UyBa BO CpeDnHa 6e3 DnpeKTHa COHcEBA CBETInHa, Ha CTydeHn MecTa 6e3 Bnara.
3A6EJELHA AHO He ja HOpNCTnTe NOoJIr nepno, noHHe ja 6aTeepjata Ha cekOn Dba Mececa 3a da n Ce npOJHK JHBOTHNOT BEK.
11. PAKYBAHbE IN TPAHCNOPT
Cekorau kora e noTppe6en npenoc nItnpaHCnOpT Ha MaunHata noTppe6Ho e:
- 3anpeTe ja MaunHaTa (nac. 7.5);
-ИЗБаДTe ja 6aTePиJaTa OД CBOeTO KyKnшTe И HanOJIHHeTe ja (nac.8.2.2);
-Co3actaHaTypeCoceHBOTO,CTabete ja 3aHTnTaTaHa CeHBOT
-HOCTe 3aHTnTH paKaBnU 3a pa6Ota;
-ФaTeTe ja MaunHaTa cAmo 3aДрЖачnte n HacouTe ro ypeDTo 3a ceueHbe Bo npaBeu CnpOTnBEH oN pabEeOt Ha DBnKeHbe.
Kora ja TpaHcnpOpTaMaunHaTa co BO3nIO, He 3a6opabajTe Da:
-06e36eTe je cooDbetHO MaunHaTa CO NOMOH Ha jaKINbA INI CNHUNP,
- nocTaBeTe ja TaKa ITo Hema Da 6nne onaCHOCT 3a HNKoro.
12. ПOMОШ И ПОПРавka
Oba ynaTCTBO rnpetCTaByBa cHTe HeONXoDHN HnDnKaun 3a npaBvBaBe co MaunHaTa n 3a npaBnHO oDpKvBaBe wTO rN h3BpUyBa KOpncnKOT. CTe INTEpeBHeu N ODPKvBaHa Ha KocNIkata wTO He Ce daDeHb BO OBA yNaTCTBO Tpe6a Da CE n3BpWAT OD CTpaHa Ha DInlepot NlN OblaacteHnot cepBnceH ceHTap, bndeJn maaT roJemO No3HaBaHe pakyBaat CO NOTpe6HaTa ONPema 3a npaBnHO n3BpUyBaHe Ha pa6oTaT, 3emajKn rnpedBnD COODBETHNOCT CTeHn Ha 6e36EdHcT n CoCtOj6aT Ha KocNIkata. Cte Oepaunu WTo Ce n3BeDeHn Ha HEcoOBETeh NaHH N OD HeKBaJIphKvBaHn IInca PrnDOHeCyBaAT Da Ce PpeKHe BaXHoCTa Ha rapaHunja nOBpCKnTe Ha Ppon3BoDnteJOT.
OdpKyBaHaTaI nonpaBKeTe IoI rapaHcNJa CMeE Da Tn BpuN cMo OblaCTeHNOT cepBnCeH ceHTap.
- OblacteHnte cepBnCHn ueHTpn KOpNCtata camo opnHaJIHn pe3epBHN DeIOBN. OpiHnHaJIHnte pe3epBHN DeIOBN n DOnOJIHnteJIHa ONpema ce CneuJaIHO dN3ajHnpaHI 3a MaunHaTa.
- Pe3epBnTe DeIOBN I DOONHInTeJHaTa ONpema KOnITo He ce ODo6peHN, yNoTpe6aTa Ha pe3epBn H DeIOBN I DOONHInTeJHa ONpema KOnITo He ce OpuNHaJIHn Ja HapyuBaat 6e36eHocTa Ha MaunHaTa N To ocNo6OyBaat Ppon3BOInTeJOT od Cekoja O6BpCkA INI OdROBOPHOCT.
- Ce npenopayba da ja ha HocHTe KocnHaTa eHa raOIMHBO OBlaacteHNOT cepBncen HeHTap 3a cepBncipahe n6e36edHocHa npOBepHa.
13. ONCEΓ HA ΓΑPAHΙΝΙΝΑΤΑ
Iapaunjata ngnokpnaCnTe wTeHa MaTepnjalnte n npOn3BOcTBOT. KopncnKOT Tpe6a BnMaTeHNO da rN cJeDn CNTe yNaTCTBa KOI ce daDeHN DO npInoKeHaTa dOKyMeHTaunja. Ipaanjata He noKpna WtTe Ta npEn3BnKaHa oD:
HeIOBOLHO No3HaBaHc Ha npINOKeHaTa DOKymeHTaUjia;
- Heprnka;
- HenpabINHa nIi 3a6paHeTa yNtpe6a nn MOHTaKa;
- ynoTpe6a Ha HeopnHaJIHn pe3epBHN DeIOBN;
KopncTeHe Ha DoIOnHnTeHa Onpema To He e HcnpaHa nn OdopeHa OD CTpaHa Ha npOn3BODHTeIoT.
Iapanjata He noKpBa n:
HOPMaJIHO a6eHBe Ha NOTPOWHITe MaTePnJaJI Kako UTo Ce TPhaIata, CeyIaTAt, 6e36eDHOCHTe 3aBPTKn I JNcNTe
HopMaJIHo a6e№.
14. TABEJA 3A ODPKJYBAHbE
| Иntервentionsя Рэрнод 3абецьшки | ||
| MAШиHA | ||
| П探测ete Г сITE сюжни | Пред скоja улотpeба пас | 8.5 |
| Бezбадонсни Контrolи / р探测ка на komандite | Пред скоja улотpeба пас | 7.2 |
| Пр探测ка на состоьбата на батейида | Пред скоja улотpeба * | |
| Полnéные на батейида | На кра jot на скоja улотpeба | nac. 8.2.2 * |
| Чисende на машината и на motopot | На кра jot на скоja улотpeба | nac. 8.3 |
| Чисende и помачны ве на сенито | На кра jot на скоja улотpeба | nac. 8.4 |
| П探测ка на можни оштетува на машината. Ако e потpeбно, Контандраjitе co obлacrten сөрвисен ceHTap. | На кра jot на скоja улотpeба | - |
| Контrolа на уреDOT за ссане | На кра jot на скоja улотpeба | nac. 9.1.1 |
| Остреве на уреDOT за ссане | - пас. 9.1.2 | ** |
| Замена на ссанеда | - пас. 9.1.3 | ** |
- Почиайт eв ураз委书记TO 3a 6aTeprjata/нолначOT 3a 6aTeprjata.
**Pa6ota ITO Tpe6a Da ja H3BeTe 3acTaHnKOT Nn OBnacte H cepBnCeH cHTap
15. HECOOBETHA PABOTA
| HAJDEHA MOHNA | ПОНЧИHA PELSEЕНЕ | |
| 1. Бебедною коче e aNTBIVRaHo, зелена сижалчka He ce пали | Hema 6ateprija илne He e ctabeHa правilno | Проветe дали батерида e npabnilho BMetHaTa (nac. 8.2.3) |
| 2. Кога Бeбедною коче e aNTBIVpaHo, зеленот CBETLO He ce BkIyUba, Лд Иndikatotop (Сл. 6.F) TrpenhyBa | Празна 6ateprija Проветe ja coctoj6a | н ha napOLNETOCT n HanoJIte ja 6ateprijata (nac. 8.2.2) |
| 3. Моторот ce rascn BO TeKOT Ha paBOTaTa | БаTERPRIATA He e npabINHO BMETHaTAp | Берete дали bateprijata e npabINHO BMETHaTa (nac. 8.2.3) |
| 4. Моторот затувь BA TEKOT Ha paBOTaTa n ЛД ДИнIHATOPOT (Сл. 6.E) TrpenHyBa | Празна 6ateprija ПроветуBJte ja coSTO | БаТа Ha napOLNETOCT n HanoJIte ja 6ateprijata. (nac. 8.2.2) |
| 5. Со akTINВИРанi рачКATA co KOMAnDaTa 3a ceYIBOTO n 6e3eDINOCHOT O KOTNe, уpeDTo co ceYIBOTO He ce BrTN | ТрIMePOT e oShTeTeH. | He kORcSTeJa. BeДnaш ЗactanTe ja MaшинATA, ИЗВадеJa 6ateprijata n obpaTeTe ce Bo OBlaCTEN cepBvcesen ceHTap. |
| 6. УpeДOT co ceYIBOTO ce 3aRpeBaПрeMHOrγ BO TEKOT Ha paBOTaTa | HesadobolnitelNo PodmavcbaBe Na ceYIBOTO | ИснluYeJa MaшинATA, поЕкajTre ceuNlTo Da 3anpe, ИЗВадеJa 6ateprijata n PodmauchajTe rN ceuNlata (nac. 8.4) |
| HAJIDEHA MOXHNA ПИЧИHA PESEHENDE | |
| 7. Уретот сешивOTO дорpeл ворием щелстричесь�ел | - HE ДОПИРAJTE Го СЕЦВОТБИДЕКИ IMMA STPYJA BO HERO И ПЕТСТАВУBA OTPOMHA OПАССНСТ! Фатente ja машината симо за зашина и зашира на рачни поставete jo на бezбедно pactоганe од вас. Искльчete го паноювавето за ворот ялп кабелот и зашидete jo батерида пedingда ягсяхочпесьнот. - 3actanete jo машината, |
| 8. Уретот сешивOTO удрил вор戒но тello. | - 3actanete jo машината, |
| 9. Има-byчави и/nлпөнөмөн Вибаши BO TEKOT Ha paBOTATA | Разлбавени ялп оштeteи DeLoBиЗастане jo машината, Извадete jo bateридаи: - поверete далл Има оштetybaьа, - поверete далл DeLOBиTe ce разлбавени и захетete Ги, -обзбадete заменяилллллллллллллллллллллллллллллллллллллллллллллллллллллллллллллллллллллллллллллллллллллллллллллллллллл- пүлүдүдүдүдүдүдүдүдүдүдүдүдүдүдүдүдүдүдүдүдүдүдүдүдүдүдүдүдүдүдүдүдүдүдүдүдүдүдүдүдүдүдүдүдүдүдүдүдүдүдүdүдүдүдүдүдүдүдүдүдүдүдүдүдүдүдүдүдүдүдүдүдүдүдүдүдүдүдүдүдүдүдүдүдүдүдүдүдүдүдүдүдүдүдүдүдүдүдүдүдүد - 3actanete jo машината, |
| 10. Машината Испшта чад ворот ha paBOTATA | Тримерот e оштeteи. He koprstete jo. Бededанш З actanete jo mашината, Извадete jo bateридаи: - поверete далл Има оштetybaьа, - поверete далл DeLOBиTe ce разлбавени и захетete Ги, -обзбадete заменяилллллллллллллллллллллллл- пүлүдүдүдүдүдүдүдүдүдүдүдүдүдүдүдүдүдүдүдүдүдүдүдүдүдүдүдүдүдүдүдүдүдүдүдүdэп. - 3actanete jo машината, Извадete jo bateридаи: - поверete далл Има оштetybaьа, -обзбадete заменяилллллллллллллл- пүлүдүдүдүдүдүдүдүдүдүдүдүдүдүдүдүдүдүдүдүдүдүдүдүдүдүдүдүдүдүдүдүдүдүдүдүдүдүдүдүдүdэп. - 3actanete jo машината, Извадete jo bateрида. - 3actanete jo mашината, Извадete jo bateрида. - 3actanete jo mашината, Извадete jo bateрида. - 3actanete jo mашината, Извадete jo bateрида. - 3actanete jo mашината, Извадete jo bateрида. - 3actanete jo машината, Извадete jo bateрида. - 3actanete jo mашината, Извадete jo bateрида. - 3actanete jo mашината, Извадete jo bateрида. - 3actanete jo mашината, Извадete jo bateриDA. - 3actanete jo mашината, Извадete jo bateрида. - 3actanete jo mашината, Извадete jo bateрида. - 3actanete jo mашината, Извадete jo bateрида. - 3actanete jo mашината, Извадete jo bateриDA. - 3actanete jo машината, Извадete jo bateрида. - 3actanete jo mашината, Извадete jo bateрида. - 3actanete jo mашината, Извадete jo bateрида. - 3actanete jo mашинAT. - 3actanete jo mашинAT. - 3actanete jo mашинAT. - 3actanete jo mашинAT. - 3actanete jo mашинAT. - 3actanete jo mашинAT. - 3actanete jo mашинAT. - 3actanete jo mашинAT. - 3actanete jo mашинAT. - 26.5.1.1.1.1.1.1.1.1.1.1.1.1.1.1.1.1.1.1.1.1.1.1.1.1.1.1.1.1.1.1.1.1.1.1.1.1.1.1.1.1.1.1.1.1.1.1.1.1.1.1.2.1.1.1.1.1.1.1.1.1.1.1.1.1.1.1.1.1.1.1.1.1.1.1.1.1.1.1.1.1.1.1.1.1.1.1.1.1.1.1.1.1.1.1.1.1.1.1.1.1.4.1.1.1.1.1.1.1.1.1.1.1.1.1.1.1.1.1.1.1.1.1.1.1.1.1.1.1.1.1.1.1.1.1.1.1.1.1.1.1.1.1.1.1.1.1.1.1.1.1.8.2.1.1.1.1.1.1.1.1.1.1.1.1.1.1.1.1.1.1.1.1.1.1.1.1.1.1.1.1.1.1.1.1.1.1.1.1.1.1.1.1.1.1.1.1.1.1.1.1.8.1.1.1.1.1.1.1.1.1.1.1.1.1.1.1.1.1.1.1.1.1.1.1.1.1.1.1.1.1.1.1.1.1.1.1.1.1.1.1.1.1.1.1.1.1.1.1.1.1.6.2.1.1.1.1.1.1.1.1.1.1.1.1.1.1.1.1.1.1.1.1.1.1.1.1.1.1.1.1.1.1.1.1.1.1.1.1.1.1.1.1.1.1.1.1.1.1.1.1.2.3. - 3actanete jo mашината, Извадete jo bateрида. - 3actanete jo mашината, Извадete jo bateрида. - 3actanete jo mашината, Извадete jo bateрида. - 3actanete jo mашината, Извадete jo bateри Demp; - 3actanete jo mашината, Извадete jo bateрида. - 3actanete jo mашината, Извадete jo bateрида. - 3actanete jo mашината, Извадete jo bateрида. - 3actanete jo mашинAT. - 3actanete jo mашинAT. - 3actanete jo matsuNT. - 3actanete jo matsuNT. - 3actanete jo matsuNT. - 3actanete jo matsuNT. - 3actanete jo matsuNT. - 3actanete jo matsuNT. - 3actanete jo matsuNT. - 3actanete jo matsuNT. - 3actanete jo matsuNT. - 3actanete jo matsuNT - 3actanete jo matsuNT. - 3actanete jo matsuNT. - 3actanete jo matsuNT. - 3actanete jo matsuNT. - 3actanete jo matsuNT. - 3actanete jo matsuNT. - 3actanete jo matsuNT. - 3actanete jo matsuNT. - 3actanete jo matsuNT. - - 3actanete jo matsuNT. - 3actanete jo matsuNT. - 3actanete jo matsuNT. - 3actanete jo matsuNT. - 3actanete jo matsuNT. - 3actanete jo matsuNT. - 3actanete jo matsuNT. - 3actanete jo matsuNT. - 3actanete jo matsuNT. -- 3actanete jo matsuNT. - 3actanete jo matsuNT. - 3actanete jo matsuNT. - 3actanete jo matsuNT. - 3actanete jo matsuNT. - 3actanete jo matsuNT. - 3actanete jo matsuNT. - 3actanete jo matsuNT. - 3actanete jo matsuNT. - - 3actanete jo matsuNT. - 3actanete jo matsuNT. - 3actanete jo matsuNT. - 3actanete jo matsuNT. - 3actanete jo matsuNT. - 3actanete jo matsuNT. - 3actanete jo matsuNT. - 3actanete jo matsuNT. - 3actanete jo matsuNT. - -- 3actanete jo matsuNT. - 3actanete jo matsuNT. - 3actanete jo matsuNT. - 3actanete jo matsuNT. - 3actanete jo matsuNT. - 3actanete jo matsuNT. - 3actanete jo matsuNT. - 3actanete jo matsuNT. - 3actanete jo matsuNT. - — 3actanete jo matsuNT. - 3actanete jo matsuNT. - 3actanete jo matsuNT. - 3actanete jo matsuNT. - 3actanete jo matsuNT. - 3actanete jo matsuNT. - 3actanete jo matsuNT. - 3actanete jo matsuNT. - 3actanete jo matsuNT. - --- 3actanete jo matsuNT. - 3actanete jo matsuNT. - 3actanete jo matsuNT. - 3actanete jo matsuNT. - 3actanete jo matsuNT. - 3actanete jo matsuNT. - 3actanete jo matsuNT. - 3actanete jo matsuNT. - 3actanete jo matsuNT. - �3actanete jo matsuNT. - 3actanete jo matsuNT. - 3actanete jo matsuNT. - 3actanete jo matsuNT. - 3actanete jo matsuNT. - 3actanete jo matsuNT. - 3actanete jo matsuNT. - 3actanete jo matsuNT. - 3actanete jo matsuNT. - 26.5.1.1.1.1.1.1.1.1.1.1.1.1.1.1.1.1.1.1.1.1.1.1.1.1.1.1.1.1.1.1.1.1.1.1.1.1.1.1.1.1.1.1.1.1.1.1. - 3actanete jo mашината, Извадete jo bateрида. - 3actanete jo mашината, Извадete jo bateрида. - 3actanete jo mашинAT. - 3actanete jo mашинAT. - 3actanete jo mашинAT. - 3actanete jo mашинAT. -- 3actanete jo matsuNT. - 3actanete jo matsuNT. - 3actanete jo matsuNT. - 3actanete jo matsuNT. - 3actanete jo matsuNT. - 3actanete jo matsuNT. - 3actanete jo matsuNT. - 3actanete jo matsuNT. - 3actanete jo matsuNT - - 3actanete jo matsuNT. - 3actanete jo matsuNT. - 3actanete jo matsuNT. - 3actanete jo matsuNT. - 3actanete jo matsuNT. - 3actanete jo matsuNT. - 3actanete jo matsuNT. - 3actanete jo matsuNT. - 3actanete jo matsuNT - --- 3actanete jo matsuNT. - 3actanete jo matsuNT. - 3actanete jo matsuNT. - 3actanete jo matsuNT. - 3actanete jo matsuNT. - 3actanete jo matsuNT. - 3actanete jo matsuNT. - 3actanete jo matsuNT. - 3actanete jo matsuNT - �3actanete jo matsuNT. - 3actanete jo matsuNT. - 3actanete jo matsuNT. - 3actanete jo matsuNT. - 3actanete jo matsuNT. - 3actanete jo matsuNT. - 3actanete jo matsuNT. - 3actanete jo matsuNT. - 3actanete jo matsuNT. -- 26.5.1.1.1.1.1.1.1.1.1.1.1.1.1.1.1.1.1.1.1.1.1.1.1.1.1.1.1.1.1.1.1.1.1.1.1.1.1.1.1.1.1.1.1.1.1.1.1. - 26.5.1.1.1.1.1.1.1.1.1.1.1.1.1.1.1.1.1.1.1.1.1.1.1.1.1.1.1.1.1.1.1.1.1.1.1.1.1.1.1.1.1.1.1.1.1.1 - 26.5.1.1.1.1.1.1.1.1.1.1.1.1.1.1.1.1.1.1.1.1.1.1.1.1.1.1.1.1.1.1.1.1.1.1.1.1.1.1.1.1.1.1.1.1.1.1.8.2.1.2.1.2.1.2.1.2.1.2.1.2.1.2.1.2.1.2.1.2.1.2.1.2.1.2.1.2.1.2.1.2.1.2.1.2.1.2.1.2.1.2.1.2.1.2.1.2.1.2.2. - 26.5.1.1.1.1.1.1.1.1.1.1.1.1.1.1.1.1.1.1.1.1.1.1.1.1.1.1.1.1.1.1.1.1.1.1.1.1.1.1.1.1.1.1.1.1.1.1 26.5.1.1.1.1.1.1.1.1.1.1.1.1.1.1.1.1.1.1.1.1.1.1.1.1.1.1.1.1.1.1.1.1.1.1.1.1.1.1.1.1.1.1.1.1.1.1.1 - 26.5 2 2 2 2 2 2 2 2 2 2 2 2 2 2 2 2 2 2 2 2 2 2 2 2 2 2 2 2 2 2 2 2 2 2 2 2 2 2 2 2 2 2 2 2 2 2 2 2 2 2 8 - 26.5 2 2 2 2 2 2 2 2 2 2 2 2 2 2 2 2 2 2 2 2 2 2 2 2 2 2 2 2 2 2 2 2 2 2 2 2 2 2 2 2 2 2 2 2 2 2 - 26.5 2 2 2 2 2 2 2 2 2 2 2 2 2 2 2 2 2 2 2 2 2 2 2 2 2 2 2 2 2 2 2 2 2 2 2 2 2 2 2 2 2 2 2 2 2 22 - 26.5 2 2 2 2 2 2 2 2 2 2 2 2 2 2 2 2 2 2 2 2 2 2 2 2 2 2 2 2 2 2 2 2 2 2 2 2 2 2 2 2 2 2 2 2 2 8 - 26.5 - 26.5 - 26.5 - 26.5 - 26.5 - 26.5 - 26.5 - 26.5 - 26.5 - 26.5 - 26.5 - 26.5 - 26.5 - 26.5 - 26.5 - - 26.5 - - 26.5 - - 26.5 - - 26.5 - - 26.5 - - 26.5 - - 26.5 - - 26.5 - - 26.5 - - 26.5 - - 26.5 - - 26.5 - - 25.5 - - 26.5 - - 26.5 - - 26.5 - - 26.5 - - 26.5 - - 26.5 - - 26.5 - - 26.5 - - 26.5 - - 26.5 - - 26.5 - - 26.5 - - 26.5 - - 26.5 - - 26.5 - - 26.5 - - 26.5 - - 26.5 - - 26.5 - - 26.5 - - 26.5 - - 26.5 - - 26.5 - - 26.5 - - 26. - - 26.5 - - 26.5 - - 26.5 - - 26.5 - - 26.5 - - 26.5 - - 26.5 - - 26.5 - - 26.5 - - 26.5 - - 26.5 - - 26.5 - - 36 - - 36 - - 36 - - 36 - - 36 - - 36 - - 36 - - 36 - - 36 - - 36 - - 36 - - 36 - - 36 - - 36 - - 36 - - 36 - - 36 - - - 36 - - - 36 - - - 36 - - - 36 - - - 36 - - - 36 - - - 36 - - - 36 - - - 36 - - - 36 - - - 36 - - - 36 - - - 36 - - - 36 - - - 26 - - - 26 - - - 26 - - - 26 - - - 26 - - - 26 - - - 26 - - - 26 - - - 26 - - - 26 - - - 26 - - - 26 - - - 26 - - - 26 - - - 26 |
| HAJDEHA MOHNA ПРИЧИHA PELSEHNE | |
| 14. Левий матеров (Сл. 6.F) Третка | Грешикaso akumулаторот |
| Бл_OKиран ротор | |
| Преглесma поочьca наструja |
Iokolny npo6lemot npo0dJIyBa n no ynoTpe6a Ha onuHaHnTe peueHnja o6paTe te ce Ha Baunot npoDaBaU.
16.ДОПОЛНТЕЛHA ONPEMA NO 36OP
16.1 DOnoJIHnTeJIHn BATEPnN
DocTaanHn ce 6aTePnN CO pa3nueH KanauTet 3a da odroBapaat Ha cneuΦnHnte 6apaa 3a pa6ota (Cn.17). Cnncokot Ha 6aTePnN KOnIto ce cooDBETn Da CE KOpNCtAT CO OBaa MaunHa ce Haora BO TabelaTAt,TexnUKN NpaTOU
16.2 NOJIHau 3A BATEPnJA
YpeiIto Ce KopnCTn 3a noJIHeBe Ha aKymyIaTopoT: 6p30 (C1. 18.A), cTaHdapdNo (C1. 18.B).
16.3 PAHEU 3A BATEPHJA
UpeoT ce KopnCTn 3a noCTaByBaHbe Ha DBeTe
6aTeepn n ja 06e36eDyBa eIeKTPnuHaTa
eHepnja notpe6ha 3a pa6To Ha MaunHaTa.
O6e36eDen e co Ka6eJ uTo ce KopnCTn 3a
noBp3yBaHbe co MaunHaTa (C1.1) n co
n3bnpa (C1.5.B) 3a n36op Ha eDHa oD DBeTe
6aTeepn (no3nuiJa ,1" n,2") n,"OFF".
16.4 CHMUYATOP HA BATEPNJA
YpeiIto, Kora e BMeTHaT BO HcHnIeTeTo Ha MaunHaTa, OBO3MOKyBa yNtpe6a Ha paHeoT 3a 6aTeepJa.
INHOUDSOPGAVE
- ALGEMEEN 1
- VEILIGHEIDSVOORSCHRIFTEN 2
3.LEER DE MACHINE KENNEN 4
2.6 BESCHERMING VAN DE OMGEVING
10.2 STALLING VAN DE ACCU
INNHOLDSFORTEGNEALSE
- GENERELT 1
-
SIKKERHETSBESTEMMELSER. 2
-
BLI KJENT MED MASKINEN. 4
3.1 Beskrivelse av maskinen og beregnet bruk.... 4
3.2 Sikkerhetssymboler.. 5
3.3 Produktets identifikasjonsmerke 5
3.4 Hovedkomponenter 5
- UTPAKKING 6
- MONTERING 6
5.1 KLARGJØRING AV BATTERIryGGSEKKEN (hvis finnes) 6
- BETJENINGSUTSTYR 6
6.1 Sikkerhetsbryter (innretning for aktivering/deaktivering) 6
6.2 Kontrollspak for knivblad (klippeinnretning) ... 6
6.3 Utlønsingsspake for bakre handtak 6
- BRUK AV MASKINEN
- EKSTRAORDINÄRT VEDLIKEHOLD 11
2.4 VEDLIKEHOLD, LAGRING
7.1 CZYNNOSCI WSTEPNE
Um led aceso: o circuito elétrico da这其中 is already in the process. A这其中 is already in the process.
CpeCTBa HnHnBnDyalbHOn 3aunTbI (CN3)
HaIeBaIte npJIeRaHIOyO 3aIHTHyO OJekIy C 3aHToN OT Iope3OB, IpOTHBOBn6paHNOHHbI IepaHTK, KaCKy, 3aHTHbIE OCHN, IIbIe3aHTHyO MACKY, HayHINK N JIA 3aHTbI OPraHOB ClyxA H O6yBc 3aHTOn OT Iope3OB N C HEKOJIb3AIIeE IOIOuBOH.
He HaeBaIte IapbI, XaIaTbI, KOJIbe, 6paCneTbI, paBeBaIOUyHoc OJExdy, a TaKKe OJExdy CO IIHypKaMn IraICTyKn, a TaKKe IIOOble BHCaYHe HIN IIINPOKHe akCeCCyApbI, KOTOpBle MOrYT 3AcPTPB MaIIHHe HIN B IpeMeTaX MATEpHaJax, HAXOJaIXxCn Ha paBOeM MeCTe.
ДОЛЖнБИМ Oобразим COбeрптЕ ДИИНHBIЕ BOLOСь.
Pa6oyn yuactok / Maunna
TtateBHO 06cJeDyIe BeCb paOouH yAcTOK y6epHTe BCE TO, YTO MOKeT 3aCTp8 B HOKe, NOBpeNTb
ero HHaHeCTH OIepaTOpCy cepb3HbIe TpaBMBI (Ka6eJIH, 3JIeKTPnueCKe IPOBOJa, BepeBKN H T.D.)
Bcerda cIeIHTe 3a TEM,TO IPOHcXOJNT BOKpyT Bac H yHTbIaTe BO3MOKHbIe PNCKN,KOTOpbIX Bbl MoKeTe He 3aMeTtB H3-3a IIyMa MaIIHHbI.
Bo h36eXaHHe IoxKapHOI OnaCHOCTn, He octaBJIaIte MaIIHHy C TROPYIM DBNrAteJIem CpeIN JInCTbeB HIN CyXOITpaBbl.
2.3 BO BPEM PABOTbl
Pa6oyn yactok
He HcnoIb3yIte MaHInHy Bo B3pbIOOaHcH Ope, IO6JIIN3OCTN OT rOpHOnx KHNKoCTe, Ra3a HIN IIbUIN. 3JIeKTPPOOBOpOBAHne IReHeppyET NCKpbl, KOtOpBle MOrTy IIPNBECTN K BO3rOpAHnIO IIbIN HIN NaPOB.
Pa6oTaHTeToJIbKOIIpHINHEBHomCBETeHIN IIpH XOPOIeM HCKYCCTBEHHOMOCBIEEHN, BYCIOBHXOPOIeBHNMOCTH.
Ha pa6oem yuactke He doJHKHO 6bITb B3POCJIbIX IIOeI,TeTn H KHBOTHbIX. HeoXoHMo,TO6blpyToB3POCJIbYeIOBek CMOTpeJ 3aJeTbMn.
PpOBepbTe,HTOpyTHe JIOH HaxoJrTaHa paacCToHHN,IO MehBiWe Mepe,15 MetPOB OT paHyCa pa6Otbl MaHHbI.
- N36eRaIte, NO BO3MOxHOCHT, pa6oTaB Ha MOKpOHN HIN CKOJIb3K0N IOUBe, HIN HA JIO60N KpyToH INHepOBHOI IOBepXHOCTH, HE OeCIEuHBaIOUeYcTOHNUBOCTH ONepaTopa BO BpEMpa6OTbl.
He npOBepraTe MaunHy BO3eJeCTBHO DOxKn HIN BIAJXHocTH.Boa, pOHNKaIOua BHytpb 06OpyIOBaHH, IOBbIaAeT pNCK 3JIeKTPNueCKOrO yDapa.
- O6paaIte ocooBc BHNMaHHe Ha HEPOBHOCTn IOyBbI (KoQKn, KaHaBB), Ha yKIOH, Ha CkpbItbIe ONaCHOCTN HAJIHyE BO3MOXHbIX IpeTtCTBn, KOToPbIE MOrYrOrpaHHHTb BNIMOCtB.
CobHIOaHTeOCTOPOKHOCTb,pa6oTaNpIOMc 06pbIBaMH,KAhabAMN6pePamBBOdoEMOB.
KordaBbpaobTaeteHaMaHHHe pIOM C Ipoe3KeuactbO,uyHTbBaTe IOTEHuaJIbHOe IpNCyTCTBHe TpaHCIOptHBIX CpeICTB.
CobIOdaIteOCTOPOKHOCTb,paOtaHpaOM C 3IEKTPnueCKHMKa6JIaMn IOHaIIpJxKeHHem.
IpaBnla nobEdenra Bo BpeMa pa6oTbI
BoBpempa6oTbIpoHOnydePKNBaITe MaunHyDByMa pyKaMn.
- IepKHTe 3IeKTPoO6OpyIOBAHHe TOJIbKO 3a H3OIHPoBaHHyIO IOBepxHOCTb pyKoTOK, IOCKOJIbKY HOK MOKeT COIIpHKacTbCS COCKpbTbIMNaBeJAMN. COIIpIKOCHOBEHne HOKa C KaBeJEM, HAXOJIMMCRIOH HApJrKeHNEM, MOKeT IIpNBecTH K IIOBJIeHNHO HApJrKeHNHa MetaJIINueckHX qACTX 3IeKTPoO6OpyIOBAHnA oIePaTOP MOKe TIOJYHTb yap TOKOM.
I36eraTe COpHKOCHOBHn Tela C TaKHM 3a3eMJIeHHbIMN NOBepxHOCTaMH, KaTpy6bl, paHaTObpI, KxOHbIe IINITbI, XIOJIOJIbHNKn. PnCK 3eKTPnueCKOrO yapa NOBbIIaETcI pHi COpHKOCHOBHn TeJa C 3a3eMIeHHem.
- PpIMnTe yCToYHBOe n IpoOHoe NOIOKeHne, n CO6JIIOaIte OCTOpOJXHOCTb.
- N36eraTe HcNoIb3ObA Tb IecTHNcbl HeycToHNBbIe PAtOpMbI.
- Hikorda He paobota Te 6erom, ToIbko 7arom.
Bcerda depknte pykn n HOrn Ha pacctoHn ot pekyero npncnocobHeN KaK Bo BpeMa 3anycka, TaN BO BpeMa pa60tBu Ha MaunHe.
BHHMaHHe:HOKn npoDJIkaIOT BpaaTbC8 B TeueHne HeCKOJIbKnx CeKyHd NocLe BbIKIOUeHnB DInrAteTEn.
CneHTe,HTO6bIHOHXHe CnIbHO yDapraLCa O NOCTOPOHHe IpeDMeTbI, H yUHTbBaTe BO3MOXHoe OT6paCbIBaHne MaTePnaIa BCJeDCTBNe DBINKeHNA HOKe.
Bcnyae noJLOMOK nIa abapn BO Bpemra60tbl cJeDyET He3aMeJInteBbHO BbIKIOUHTbDBIaTeBn y6paTb MaunHy, YTObI OHa He HaHeClaeue 6oJIbWmY uep6; ecIn npOn3Owe HecactHbIN CnyaI N OEPaTOp NN TpeBn IINa POlyuNNTPaBMBI, He3aMeJInteBbHO pInHArTb MepBi NO NOMOUnNocTpadaBWM, Han6Ole NoXODAUNBE KONKPeTHOHcITyaUn, N ObpaTbCS B MeINCHKoe UpeJHDeHne DIA Heo6xOdHMOro JeueHn. TuaTeBHO ydaJInteMaTePnaI, KOToPbIM MoKeT HaHeCTN uep6 IIN TpaBMIIIOJAM IN JINBOTHBIM, KOTOpBIE MOrT erO He 3aMeNTb.
1pOJIKHTeBHOE BO3DeIcTBnBE Bn6paunMOKeT HaeCTn Uyep6 HEPBHO-COCyIcTOI CNCTMe (3TN COCToHnN3BeCTbI KaK "CINDPOM PeHNO"nn "6eIoN pyKn),OCo6EHNO y IIOJe,CTpaIaUoXnPacCTpoIcTBOM KPOBOO6paUeHN.CmNTomblMOrY TPORBtbcnHa pyKaX,3aIaNCTbXn nPaIbQax BVnDE Notepu YyBCTBHeTbHocTHn, OHEMeHNr, 3yDa,60n,6JedHOCTn NIMMeHENr CTPyKTypbKOxN.3TN CmNTombl MOrYUCNIITBCnIOB O3DeIcTBnEMHN3KOH TEMpePaTypbOKpyKaIOSe cpebl/NNn CInlWkOM CInlbHOrO CINImaHNpyKOrToK.PnpNORBHeHN CmNTOMOB CJIeDyET CHN3HTb BpeMnCINOJIb3OBAHnMaINHbI N ObpaTnTbcR K BpaCy.
OrpaHueHHB npImeHeHH
- Henb3Я NO3BOJrTa pa60TaTc MaunHOJ IIOJIM, KOtOpbIe He B COCTOHN KpeNko yDepKINBaTb ee DByMpyKaAMn H/HIn HaxOHTbcra B NIOLOKeHNyCTOnuHBOrO paBHOBecn BO BpeMpa60TbI.
HnKOrda He noIb3oBaTbcMaunHOc nOBpeXdEHHbIMN,OTcyTCTByIOUcMMN NIN He npaBnIbHo paCnoJIOKeHHbIM 3aUHTbIMn npCnocO6JIeHHaMn.
He nCnoIb3yIte 3JIeKToo6OpyObaHne,ecnBbIKIOuATeIb He B COCTOAHN IpaBnIbHO BKIOUHTbIIN BbIKIOHHT bero.3JIeKToo6OpyObaHne,KOTOpoeHeIb3aNyCTnTb pni NOMOUs BbIKIOHaTeJI,ABJIaETcAOnaChbIM HHyJdaeTcBpeMOHTe.
He OTKJIOUaHTe, He BbIKJIOUaHTe, He CHIMaHTe H He pa36npaTe NMeEOUJIeC8 3auNThble yCTPOIcTBa/MNKPOBbIKJIOUaTENI.
He noDBepraTe MaunHy qpe3MePbIM Harpy3KaM He nCnObl3yIte MaIeHbKyIO MaunHy dIra BbINOJIHeHH
TaeNo pa6oTb; nONoB3OBaHne NOxOJaee MaHHb CHNkaeT pck N Nobbiwaet KaucctBO pa6oTb.
2.4 TEXHHUECHOE OBCJYKHBAHNE, XPAHEHNE
PerynphoeTexHueckoe 06cLyKHBaHne n npabnIbHoe XpaHHe IABJIOTc3aIOrom 6e3OpacHOCTN MaunHbI NIOdepKaHnE ee 3KcPiyaTaUOHHbIX KaYeCTB.
TexHHuechoe 06cnyHbAHne
HnB Koem Cnyae He HcNoIb3OBAtB MaunHy C n3HOCNBWMNcra NII NOBpeJdeHHbIMN YaCTaMn. IOBpeKdEHHbIE N3HOCNBWNEcR DeTaJIIN BCERda Heo6XoDIMO 3aMeHrTb, OHN He NoJdIeKAT peMOHTy.
3HaHEny yOpOBH yMa n Bn6paun, yKa3aHHbIe B HAcToIeM pyKOBODCTBe, YBJIOTcMaKcIMaJIbHbIMn pa6oUHM 3HaueHnM MaunHbI. NcNoJIb3OBAHne HeC6BaIaHcnpOBaHORo peJyUeero 3JeMeHTa, CInuKOM BbICOKA CKOpocTb, OTCyTCTBHe TEXHueCKOrO 06ClyHNBaHnC cyUeCTBHeHNO BInraIOT Ha yOPOBeH bWyma n Bn6paunIO. CLeIDOBaTeIbHO, Heo6xOIMo npINrTa npOHNaKTNueCKHe MEPd IyCTpaHENy BO3MOXHO r Uep6a, Bbl3BaHHORo BbICOKM yPobHEm Wyma n Bn6paUNHObIMn Harpy3kAm; BblONHrtb 06ClyKNBaHne MaUnHbI, HaDeBaTb IpOTNbOWMHbIe HayuHNKn, DeLaTb nepepbIBbI BO BpEma pa6Otbl.
Xpahenne
-ДЯСИХЕНРиСКАПОЖАрHeOCTaBJIrTb KOHTeHepbI COTXODAMNB NOMEseHIN.
2.5 BATAPER/3APRHOE YCTPOINCTBO
BAHHO HnHexeJeUoJne npaBnla 6e30NaChocTn DOnONHIO TnpedncaHnNo TExNHHe 6e30NaChocTH, N3NoHeHbIe B INcTpynu 6aTapeN u 3apdHoro yCTpOcTBa, NOCTaBnReMbIX BMeCe C MaunHOH.
ДяЗардкбатpenинспьзуTe TOnьКоЗapdHbIe yctpoiCTBa,peKOMeHDoBAHHbIe n3rOToBHTeIeM. HenoJxOJaUee 3apdHoe ycTpoiCTBO MoKeT npIBecTN K 3JeKtprueckOMy yAp4y,pepepeBy IIN yTeYke eKnOH JnDkoCTN n3 sbatpen.
- IcnoIb3yIte ToIbKO onpeJeHHe 6aTapei, npedycMOTpeHHBe Ira BaIeRo O6OpyDoBaHn. HcnoIb3OBAHne 6aTapei dpyrOro Tnna MoKeT npNBecTI K TpaBMam n pNCKy NoJapa.
- PpeKHe Yem BCTaBnTb 6aTapeO yIOCTOBepbTeCb, YTO O6OpyIOBaHne BbIKIIOUeHO. YcTAHOBka 6aTapeN BO BKNIOUeHHoe 3JIeKTPnueCKoe O6OpyIOBaHne MOKeT pINBeCTN K NOKApY.
XpaHnTe HeNCNoB3yEmyO 6aTapeHO Ha pacCToHHN OT KaHcJIepCkHX CKepeK, MOHeT, KInOeY, rBO3Dei, BHTOB IN DpyrNX MaIeHbKnx MTeaJIINueCHNX PpeDMetOB, KOtOpbIE MOrY T BbI3BaTb KOpOTKoe 3aMbIKaHne KOHTaKTOB. KOpOTKoe 3aMbIKaHne 3LeHTpUeCKOu CEHN MeJdy KOHTaKTAMM MoKeT BbI3BaTb BO3rOpAHne NIN NOJap.
He HcnoIb3yIte 3apJHoe yCTpoiCTBO B MeCTa CHaJIINHem IapOB,BOcIIaMeHIOIHXC8 BeIeCTB,a TaKKe HaJIeTKOBOCIIaMeHIOIHXC8 IOBepXHOCTx,HaIPnMEp,Ha6ymare,TKaHH N T.I.Bo BpeMa 3apJIKN 3apJHoe yCTpoiCTBO HarpeBaetc H MoKet BbI3BaTb IIOkap.
BoBpeMa TpaHCnOpTHPOBKn AKKyMJIaTOPOB CIEHHe,HTo6bI KOHTaKTbI He COpHKaCaJIHcB MEKJy Co6Ou, H He HcIOJIb3yIte MeTaJIINueCKYIO Tapy IIAHX TpaHCnOpTHPOBKn.
2.6 OXPAHA OKPYKAAIOIIEN CPEJIbI
OxpaHa OKpyKaHOSe CpeIbIOJKA HABITBCaBHKbIM IINPnOpHTeTHbIM ACIEKToM IIpH IOJIb3OBAHMaHHOH, B COOTBeTCTBHN C INHTepcAmH O6IeCTBa H CpeIb, B KOTOpON MJI KHBEM.
- CtapaHTecb He 6ecnOKoHTb OKpyXaHIOx. HcnoJIb3yIte MaunHy ToIbKO b pa3ymHOe Bpem (He paHO yTpOM H He IIO3HO BeuepOM, KOrda Bbl MoKeTe IOMeUaTb OKpyXaHIOm).
Ctporo co6noiaaTe MeCTHbIe HOpMbI NO yTHIN3aHHy IyakOBK, NOBpeKeHHbIX YaCTe HIN JIObIX 3JIeMeHTOB CO 3HaUHTeBbIM BJIHrHHem Ha OKpyKaIOuIyIO CpeLy; 3TH OTXoJIbI He DOJIKHbI BB6paCbBaTcBc C 6bITOBbIM MyCopom, a CO6HpTaBCr OTDeJIbHO IN PepeDaBcBc B CIEuaJIbHbIe CEHTpbI c6opa OTxOIOB, BBIOJIHIAIOHue Hx PepeAp60Ky.
Ctporo co6IIOaIte DeCTBHyIOuHHe Ha MeCTHOM ypOBHe IpaBnla IO BbIBO3y OTXoIOB
Iocne 3aBepueHn Cpoka CnyKbMaHHbI He BbOpacbBaHTe ee C6bITOBbIM MycPOM,a O6paHTeCb B ueHTp C6opa OTXoOB B COOTBeTCTBHN C DeHCTByIOHM MecTHbIM 3aKOHOdaTeJIbCTBOM.
He BbIbpaCbIbAaTe 3JekTpoo6OpyDobAHne BmecTe C 6bITOBbIMN OTXdAMn.B COOTBeCTBHN C EBPOeNCKoH INpeKTHBOI 2012/19/EC OTHOCHTeJIbHO BBIEeHHO I3 3KcIIpyataun 3JekTpueCKO H 3JekTPOHOrO
obopyoBAHHIe IIpHMeHeHem COJIaCHO IIpaBILAM CTpaHbI 3KCIIIyATAUHN, BbIBeDEHHoe H3 3KCIIIyATAUHN 3JIeKTPOO6OpOBOAHNE DOJDKHO OTIPaBJIITbcn Ha IIpepaBOTky B COOTBECTCBN C TPE6OBaHHMn IIO OXpaHE OKpyKaHOUIe Cpebl IO TEJIbHO OT dpyTHX OTXIOB. ECLN 3JIeKTPOO6OpOBOAHNE BbIbPaCbIBaeTcHn HA CBAJKY IIN 3aKaIIbBAETcN B 3EMJIO, BpeHbIE BeEeCTBa MOrTy IPOHKNHYtB CLOI IOID3EMHBIX BOH NIOIACTB B INIeBbl IEPOJKTbI, YTO pINBeDEt K HaHeCEHHO yIepoBa BAIIemy 3IOPOBBIO H XOPOIIeMy CAMOUYBCTBHNO. IIN IIOUYeHHN 6OJIee IIOdpoBHONHFPOMaUNI IO IIpepaBOTke 3TOI RO H3JIeJIHn OBpaAaHTecb BYupeKdEHHe, OTBECTBEHHOE 3IpepaBOTky OTxOIOB, HIN K BAIIeMy INCTPNbOTopy.
Li-ion
IIO 3aBepHHeHH cpoKa ClyKb6b6BaTapei oBeCnpeBte Hx yHnTuKeHHe, KOTOpoe He HaHecet BpeJa OKpyKaioUeI cpeJe. BaTapei COePKN MATEpHaJI, ONaCHbI JINBaN IJIO OKpyKaIOUeI cpeJIb. BaTapeIO Heo6XoHMo
H3BJIeH NOTdJIbHO CdaTb B IeHTp IIepepa60TKOxIOOB, KOTOpbI INPHMaE JINTH-NHOHHbIe 6aTaPeH.

Pa3JeIbHbI C6Op HcIOJIb3OBAHHbIX N3JeJIHn H yIIaKOBouhBX MaTePhaIOB IIO3BOJIaET IIpepa6aTbIBaTb H IOBTOPHO HCIOJIb3OBAtB MaTePhaJIb. IIOBTOPHO HcIOJIb3OBAHHe BTOPHUHO IIpepa6oTaHHbIX MaTePhaIOB
IOMORAeYMeHbIHTb3aRp3HeHHe OKpyKaHOe CpeIbI CNH3NTb IOTpe6HOCTb B IepBnHOM cbIpBe.
3. O3HAKOMJIEHNE C MAIIHHOH
3.1 OINCAHNE MAIIINHBI INIPEIYCMOTPEHHOE IIPIMHEHNE
JaHHaMaHHaAIBIeTcCaIOBbIMO6OpyIOBaHHem, H, B YactHOCTH, NOpTaTHBbIMMIIaJIepHBIMN HOKHJAMnC 6BaTapeHbIM IITaHHem.
MaHnHa COCTOHT H3 DBNHrAteJIa, KOtOpbI INPnBOJNT B DeIcTBHe peKyuiee npncIOco6JIeHne.
Oneapot ynpabTaeMaHHHO, Bcerda HaxoJcB Ha 6e30nacHom paccToHHN OpeKyIero IpncnocO6JIeHHa.
3.1.1 IpeyCMOTpeHHoe HcIOJIb3OBAHHe
3aMaHHHa pa3pa6oTaHa H N3rTOBJIeHa IJIA:
CTPNKHNIOpaBHbHnKyCTapHHKOB HKNBOH H3rOPOHn, COCToIIHx H3 KycTapHHKOB C BETKaMH He60JIbIoi ToIIINHbI (ceehne He 6oJIee 15 MM);
MaHHHOJIOJIKeH yIpaJIaTb TOJIbKO OJINH YeJIOBek.
3.1.2 HenpaBnIbHoe HcNoJIb3ObaHHe
JIo6oe npytoe HcIOJIb3OBAHne,OTIINHoe OT BbIIIEyIOMaHYTO,MOKET CO3dA Tb OAnCHOCTb IN IINHHb yIep6 JIOJAM H/INH IMyIeCTBy. BxOHTB IOHRTHE HeIpaBnHbHO TcIOJIb3OBAHna (B KaueCTBe IIPMepa,HO HE OrpaHnHBaCb 3THMn ClyuaMM):
KoIIeHHe TpaBbI B O6IeM H B YaCTHO B6JIH3N 6OpIIOHbIX KAMHei;
- H3MEJIbueHeHMeMaTeHaJIOB IIA KOMIIOCTOB;
-ПОДРЕЗКA KUCTOB;
HCIOJIb3OBAHHeMaIIHHbI BIOJIOKeHHN,KoIpapeKyuieepncIOcO6JIeHHe HAXOHTCByBIIe IHHNIIeY;
HCIOJIb3OBaHHeMaIHHbI,IJIpe3KNMaTepeHaJIOB HepaCTHTeJIbHOI IPOHCXOXJDeHHN;
- IIpHMeHeHHepeKyIHXIIpHcTIOcO6JIeHH,OTJINuHbIXOT yKa3aHHbIX B IaBe "TexHHueCKe XapaKTepHCTHKn". OIacHOCTbc cepbe3HbIX paH n TpaBM;
- IOJIb3OBAHHe MaIHHOH HeCKOJIbKHM OIIepaTopaMH.
BAKHO HeaJnEkauee nCNoIb3ObaHne MaunHbI BLeueT 3a C6oB yTpAty CnIbI rapaHTN IN CHIMaET C N3rTOBUTeJI BCIO OTBETCTBEHHOCtB,
B03laqra Ha Nl630BaTeIa OTBETCTBEHHOCTb 3a H3deprHn B Cnyae IopuN mUyecTBA, POnyuHn TpaBM Nn HaHeCENHa UepeBa TpeTbM LIncaM.
3.1.3 Tn noIb3OBeTeIa
DaHHa MaHnHa npedHa3NaeHa dIy shpOKoR oTpe6nteJ, dIy HnpOphiecCNOHaJIbHOr npIMHeHn. OHa npedHa3NaeHa dIy IIObTeJIbCKOrO npIMHeHn.
3.2 3HAHN B63ONACHOCTN
Ha MaunHe HMeIOCT pa3nHbIe CNMBoJIb (Pc. 2). OHH npu3BaHbI HaONHbT oepaTOpy O Heo6xOIMOCtBHNMaTeJbHOH NocTOPOKHOH KcNPyatauIN.
3NaueHnE CIMBOJOB:

BHIMAHHE! ONACHOCTb!
JaHHaMaHHaIprnHePpaBbHom NCIOJIb3OBAHmMOKeT6blbOnaCHO Ira OepaTopa NOKpyKaIoX.

BHIMAHHE!PpeXJe,Yem NOJIb3OBaTbCRA MaUNHOI, PPOHTTE pyKOBODCTBO NO 3KCNyatauN.

HcnoJb3yIte 3aunTy dIa CJLyxa, 3aunTHbIe OCHN.

HaenbTe NIOThBie H NcckOJIb3aUne pa6oyne nepuATkn.

He noDBepraIte MaunHy BO3deNCTBIO DOxH (NJN BnAHHOCTN)
ONACHOCTb OTBPACbIBAHNIPDEMETOB!Co6IIOaIteOCTOPOXHOCTb I3-3a BO3MOXHOrOOTbpaCbBaHnMaTePnaJapeKyuImNPncnOCo6JIeHnEM,TO MOKeT HaHeCTNCepBe3Hb yuep6 IIOJAM NIMyUcETBy.
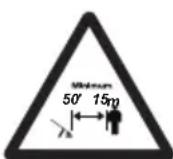
ONACHOCTb OTBPACbIBAHNIPPEIMETOB!IIOHINOMaHHeJKNBOThBc BO BpEMnCNoJIb3OBaHHMaUNHbI OJXHbI OTOHTn Ha pacCToHHe,NO MeHbWe Mepe,B15M.

Onachocb nope3OB! DeepHTe pyHn HOrn Ha pacCToHHN OT HOKeI.
Klacc II IboHnHa n3oJau
BAHHO NOBpeJdeHbIe Hn HeuTaemble HaJIeHN HJHKdAIOCTB 3aMeHe.3aKaHHTe HOBbie HAKeHN B aBTOpN3OBaHHOM CepBNCHOM ueHTpe.
3.3 INDEHTNPHKAUHOHHbI RPLbIK N3DEJIIN
Ha ndeHTnФнKaUHNoHHom rplbIke n3dJIyka3aHa cIeDyUOaJnHΦopMaunr (Pnc.1):
1.3HaK COOTBETCTBnI DInpeKTnBe CE
2. HanmeHoBaHne n aDpec n3rOToBnTeJIa
3. YpOBeHb 3ByKOBoM MoUHOCTHI
4. Koid n3dJIINr
5. TIN MaunHbI
6. 3aBODCHOHOMep
7.ФОнИЗROTOВЕНИН
8. HanpaJxHHe nHTaHn
BnHnTe NdeHTnKauNHOHBie daHHbIe MaHHbI B CneuaJIbHbIe NOJI Ha npJIke, NOMEueHHom Ha o6paTHoCTOpOHe 06IOxHN.
BAHHO Yka3bIbaTe nDeHTnФnKaUHOHbIe DaHHbIe, yka3aHHbIe Ha nDeHTnФnKaUHOHOM RaJIbIke, KaKdbI pa3 npu ObaueHN B aBTOpN3OBaHHbI cepBcHbI ueHTp.
BAHHO O6pa3e4 JeKlapaun COOTBETCTBn HaxoHTcHa NoCteJHx CTpaHnua pykoBOdCTBa.
3.4 OCHOBHbIE KOMNOHEThbl
Maunha COCTOHT N3 CLeDyIOUx OCHOBHbIX COCTaHBIX TaTei, KOTOpBIE BbINONHrIOT CLeDyIOUne FyHHuN (Pnc.1):
A.ДВURATENB:obecneuHbETDINKHeHpeKHyIero npncnOc6JIeHnI.
B. Hon (Pényuée npncoco6neHne): 3TO ΜIeMeHT, PpeHa3HaehHHb IДЯ CTpnKKn PaCTeHn.
C. Npeednra pyhoTb: n03BOJAEt ynpaBnTb MaunHO, Hn Ha HeHaxOHTcR npedoxpaHnTeHBh BbIKIOHaTeIb.
D.3aHnra pyHOHTHa:No3BOJnAeT ynpabJIrMaHHoN, HA He HaxOJaTcR TlAbHbIe OprAhIy npaBHeHn.
E. 3aunTa HoHa (JIA TpaHcnpTnPOBn IN nepemueHna MaunHbI): 3aunuaeT OT CnyauHoro KOHTaKTA CpeKyuIm npncnoc6JIeHNEM, KOTOpbIM MOKeT pInBeCTN K cepbe3HbIM TpaBMam.
F. BaTape (ДОПОЛНТЕльhoe оборудованe no Tpe6oBaHnO,pyHKT 16.1):obecneuBaET
3JIeKTpOINTaHHe INHCTpyMeHTa; ee XapaKTePnCTnN n npaBnla 3KcPnyaTaun ONnCaHbIBOTdIbHOM pyKOBOIDCTBE.
G. 3apAnhoe ycTpoCTBO (OIOJIHHTeJIbHOoe
obopyoBaHne IO Tpe6oBaHIO,nyHKT 16.2):
ycTpoCTBO,pEJaHa3HaueHHe OJRA3aPAn6aTapei;
ee XapaTePncTnK IN npaBnla EKcNpyatauONCAHBI BOTJeBHOM pyKOBoDCTBE.DocTyNHbIDBe MoDEJI
3apAnHOrO yCtpoCTBa:G1 (6bICPoE 3apAnHOe
ycTpoCTBO);G2 (CTaHdAPTHoe 3apAnHOe ycTpoCTBO).
H. PAnceBbI IepHaTeIb Ia6BaTapei (OIOJIHInTeIbHoe O6OpUdoBaHne IO Tpe6oBaHIO, nyHKT 16.3): yCTpoICTBO Ia pa3MeueHn8 BaTapei.
I. CoeHHnHTeJbHbI npoBOd: npoBOd, coeHNHOuIN MaunHy c paHcEbIM depKaTeJIem dJa 6aTapei.
J.3MyIaTOp 6atapen (OIOJIHHTeBHOe O6OpyIOBaHHe NO Tpe6oBAHIO,pyHKT 16.4):ycTroPcTB0, yCTaHaBJIbAeMOE B rHe3do MaunHbI I N03BOJIAUoee HcNoJIb3OBAt b paHcEByI DepKaTeB IJa 6atapei.
4. PACIIAHOBHA
BAHHO IpaBnla 6e3oNaChOCTn npBBeHebl B rI.2.Ctporo co6JIOdaTe yKa3aHnI nI npedOTbPaueHHcepe3HBIX pNCHOB ONACHOCTN.
PacnaHOBHa DOJIHHa BbIIOJIHrTbCHa TBepn H pOBHn NOBepxHOCTn, rJe DOCTaTOUHO MecTa dIe NpeMeueHn MaunHbI H ee yNaKOBHN, Heo6XoIMO BcERda NoJb3OBaTbC8 COOTBeTCTByIOUHMn HNCTpyMeHTamn.
- BckpbIbaiTe ynaKOBky octopoXHO IN BHIMaTeJIbHO, YTO6bl He NOTeprTb KOMNOHEHTbl.
2.OsHaKoMbTeCb CdoHymeHTaMn,JeKaUMMB Kopo6Ke,B TOM YHCNE,C daHHbIM pyKOBODCTBOM.
3.ИЗБЛЕКИТЕ ИЗΚΟΡБΚΙ MAΛΥΝΗΥ. - BbIbOcBte Kopo6Hy uYnakoBOUHbIe MaTePnAJIbI B COOTBeTCTBmC MeCTHbIM 3aHOHOaTeJIbCTBOM.
5. MOHTAH
5.1 HOMJIEHTAUNPAHUEBOTO DEPHATEJANBATAPEI (PNHANNU)
PaHueBbI depKaTeIb Ia6batapeNoCTabJIeTcB yHe co6paHbOM BnIe (pnc.1H), n erO moJHo OTcoEduHrTb OT KpeJIeHnI DaIpeMHei (pnc.3) n nepeHocHTb BpyHyIO. DIAOTcoEduHnIpaHcEBOro depKaTeIa
6batape HauKMITE Ha dBe bepXHne KHOKN (pnc.3.A).
Γhe3da Ira 6batape PaCnoJaAOTcB C o6Ex
ctOpOH paHcEBOrO depKaTeIa (pnc.4)
C npabOu CTopoHbI paHcEBOrO depKaTeIa
pacnoLoKeHbI cJeDyUOnne KOMNoHEtbl:
pa3bem npoB0a (pnc 5.A)
- nepekeIIOuTeIb 6aTapeN (pnc.5.B)
USB-pa3bEmIJI3apRAnIpyrNxycTpoiCTB (HapnMep,MO6nJIbHbIXTelefoHOB)(pnc.5.C).
Bo n36eKaHHe NaIiHNe He3aKpeIeHHbIX npoBOOB npedymotpeHbI HanpaBIAUOUIc C oBeHX CTOpOH paHcEBORO DEpKAteJI N B erO 3aHne YacTn,Yepe3 KOtOpBIE MOHNO pnoIOHNb Ka6eJI bITaHnI.
6. YCTPOICTBA YNPABJIENHIA
6.1 INPEDOXPAHNTIELbHA KHOHPA (YCTPOIcTBO NOHJIIOUeHNA /OTHJIIOUeHNA)

HaKaTHeM 3ToI KHOHn MOHnBbIOaTb N BbIKIOaTb 3JIeKTPuYeCKyIOcENb MaUNHb (PcC.6.A).

TOpHT OINH CBeToDnOd: 3JeKtpnuecka
Cenb MaunHb BkIIOUeHa (Pnc.6.B).
MaunHa rTOBa K NcNoB3OBaHHo.
TOpT oBa CBeToDnOda: MaunHa pa6oTaet.
CBeToIONoIbI He rOpT: 3JIeKTPnuecka
cIbI NOJHOCTbIO OTKHIOUeHa.

BAHHO BoBpempeMeHn HNKoIa He DePKeTe NaIeHa KHOJIke BO N36eKaHHe CnyaHoro 3aNyCa. 3HaOK «BHMaHHe» (pnc.6.F) 3aropaeTcB B Cnyaee HenCnpabHOCTn MaunHbI (obpaauTeCb K TabInce OnpedeJeHn HEnCnpabHOCTe, nyHKT 15).
6.2 PbIyAr UYPABJIeHnHOxA (PEKyuTeO IPNCIOCOBJEHNA)
I03B0JIaTe BKNIOuOaTb n peryIINPOBaT b CKOpOCTb HOHa.
BkIIOueHne peKyuIero npncnoc6JIeHn (pnc.
1.B) BO3MOxHToTObHo npn OndHOBpeMeHHOM HaKaTHn pbHaRa ynpaBHeHn HoHa (pnc.6.C) n npedoxpaHnteBHorO BbHIOuataEra (pnc.6.D).
Pexyue npncoc6eHne BbIKIOaETc aBTOMaTHeckn NocJe OTNcyKaHnPBuHa rI INI npedoxpaHntelbHOrO BbIKIOaTeJI.
6.3 PbIyAR PA3BLOHINPOBHN 3ADHEPYHOHTN
PbIur pa36IOKINPOBHN (pnc.6.E) IO3BOJIaET yCTaHaBJIbTa 3aJIOU pyKoTky (pnc.1.D) B 3 pa3JIuHbIX IOJOHeHr OTHOCHTeBHO peKyuEro npICnocO6JeHn DJIg 60JIe e yD6HO r BO BVINOHNHeHc CTpnKHN HNBO N3rOpOIn.

Perynnpobha noIooHeHH pyHOrTHn doJIHHa
BbINONHATbC, KOrda npedoxpaHnte hHa KHONKa OTKIOUeHa (CBETOBHnDnHaTOp He ropHT).
7.3KCHJIYATAURA MAUHHbI
BAHXHO IpaBnla 6e3oNaCHOCTn npBedeHbI
Brr.2.Ctporo co6IoudaIte yka3aHnIy I
IpeoTbpaueHn cepbe3HbIX pNcKOB nOnaCHOCTn.
7.1 PPEBAPNTJEbHbIE ONEPAUIN
Ipeed HauaIom pa6oTbI Heo6xOIMMO BblIOJIHTb HEcKoJIbHO npOBePOK Ionepaun, YTO6bI OecneuHTb 3ΦΦeKTNBHyO pa6OyB yCNOBnX MaKcImaIbHoB 6e3OnaCHOCTn.
IocTaBte MaunHy B rOpn3oHTaJIbHOe NIOJKeHne TaK, YTO6bl OHa IPOUHO ONpapanac Ha 3emllo.
7.1.1 PpOBepha coCToHn6aTapeN
MaunHa noctablaetc63 6aTapei.
IpiNo6peTnTe 6aTaapeIO C eMHOCTbIO, HAn6OJIe NODXoJauSeI dIra pa6OuHX IOTpe6HocTe, IN POJIHOCTbIO 3aprAITe ee, CO6JIIOdA yKa3aHnI, n3IoJKeHHIbe B pyKOBoDcTBe 6aTaapeN.
IpeueHb 6aTapei, OMOIognpoBaHHbIX DnlaHHoMaunHbI, npBedeH B Ta5nue
"TexHnueckne XapaKTepeNCTnKn".
Bcayn pa3 peepd nCIOb3OBaHneM:
- npOBepnTe COCTOHNHe 3apJa 6aTapeN, CJeDyRyKa3aHnM, N3LOKeHHbIM BpyKOBoDCTBe K 6aTapee.
7.1.2 PerynpoBb noJooHeHH pyKoRTH

BbnoJhaTe 3ty onepauu npn
OTKIOUOeHHoI npEoxpaHnteBHOH KHOHKe (KOrda CBETOBOH HNDNKATOp He ROPHT).
- Notaryte Ha3aD pbHar pa36IoKupOBKn 3aHne pyKoTKn (Pnc.7.A);
- NaHnHaIe NOBOpaYBaTb 3aDHHIO pyKoRTHy (Pnc.7.B);
- OTNCTHTe pbIur pa36IoHIOBKn (Pnc.7.A);
- NOBOPaHbAaTe pyKoTky, nKa He ycIbIiHTe ⅢeYcK B Tpe6yEMOM NIOJKeHN.
BAHHO
IpeTeM, KaH NcNoJIb3OBAbMb MaSHHy,
y6eHntecbBTOM,HTo pbyar pa36IOKupOBHN IIOHOCTbIO BepHyJcR B NOLOKeHne 6IOHUPOBHN, HTO 3aHrypyKOrTKa HaedeKHO 3aΦnKcnpObaHa.

BoBpempa60bI3aHpyHOyTHaDolnHa 6bItb
BcERda BepTHaJIbHO, He3aBnCmO OT IOJIOHeHn, B KOTOpOM HaxoHTcpeKyuSee npncnoCo6JeHne.
7.1.3 NcnoIb3OBAHne paHaeBOro depHaTeJI (npn HauNHN)
- BCTaBbTe 6aTapeo do KOHca B OINH N3 OTceKOB paHcEBOrO DepeKaTeJI (pnc.4) INpoTOJIKNHTe ee do IeJUka, YTO6bl 3a6IOKIpOBAbTB HHyKHOM NOLOKeHHN N ObecneuHT bJeHTpueckn KOHTaKT;
- NOCDCOEHNHTE IPOBOK K COOTBETCTBYIOUeMy pa3bemy paHcEBOrO DEpKaTeIa (Pnc.5.A) INOBEPHnTe ero do UeJyka, YTO6bl 3a6LOKINPOBaTb B HxHOM NIOJOKeHInu N OBeCNEuHTb 3JIeKTPnueeChk KOHTaKT;
- OTPeYnIpyTe peMHn 3aCTeHnTe CpepeDn CnCTemy NoDbecn (pnc.8).
7.2 IPOBEPKIN BE30NACHOCTN
BbIOpHnTe cIeMyIOUne npOBepK 6e3oNaChOCTn UyOcTOBepbTEcB, YTO pe3yIbTaTbI npOBepOK COOTBeTCTByOT daHHbIM, pINBEeHHbIM B Ta6JIncE.

PpeHdyeem npctynntb pa6ote, Bcerda
PPOBepRyTe 6e3oNaChOCTb MaunHbI.
7.2.1 06zaI npovepka
| Преемп Розультыт |
| Руковские (Pис. 1.C, Pис. 1.D) и зашиные посно相关内容 |
| ЧИстые, сухи, они дожны посы устовли因为他们可以随时随时都可以随时随时都可以随时都可以随时都可以随时都可以随时都可以随时都可以随时都可以随时都可以随时都可以随时都可以随时都可以随时都可以随时都可以随时都可以随时都可以随时都可以随时都可以随时都可以随时都可以随时都可以随时都可以随时都可以随时都可以随时都可以随时都可以随时都可以随时都可以随时都可以随时都可以随时都可以随时都可以随时都可以随时都可以随时都可以随时都可以随时都可以随时都可以随时都可以随时都可以随时都可以随时都可以随时都可以随时都可以随时都可以随时都可以随时都可以随时都可以随时都可以随时都可以随时都可以随时可以随时都可以随时都可以随时都可以随时都可以随时都可以随时都可以随时都可以随时都可以随时都可以随时都可以随时都可以随时都可以随时都可以随时都可以随时都可以随时都可以随时都可以随时都可以随时都可以随时都可以随时都可以随时都可以随时都可以随时都可以随时都可以随时都可以随时都可以随时都可以随时都可以随时都可以随时都可以随时都可以随时都可以随时都可以随时都可以随时都可以随时都可以随时都可以随时都可以随时都可以随时都可以随时都可以随时都可以随时都可以随时都可以随时都可以随时都可以随时都可以随时都可以随时才可以随时都可以随时都可以随时都可以随时都可以随时都可以随时都可以随时都可以随时都可以随时都可以随时都可以随时都可以随时都可以随时都可以随时都可以随时都可以随时都可以随时都可以随时都可以随时都可以随时都可以随时都可以随时都可以随时都可以随时都可以随时都可以随时都可以随时都可以随时都可以随时都可以随时都可以随时都可以随时都可以随时都可以随时都可以随时都可以随时都可以随时都可以随时都可以随时都可以随时都可以随时都可以随时都可以随时都可以随时都可以随时都可以随时都可以随时都可以随时都可以随时都可以随时都还可以随时都可以随时都可以随时都可以随时都可以随时都可以随时都可以随时都可以随时都可以随时都可以随时都可以随时都可以随时都可以随时都可以随时都可以随时都可以随时都可以随时都可以随时都可以随时都可以随时都可以随时都可以随时都可以随时都可以随时都可以随时都可以随时都可以随时都可以随时都可以随时都可以随时都可以随时都可以随时都可以随时都可以随时都可以随时都可以随时都可以随时都可以随时都可以随时都可以随时都可以随时都可以随时都可以随时都可以随时都可以随时都可以随时都可以随时都可以随时都可以随时都可以随时都能行都可以随时都可以随时都可以随时都可以随时都可以随时都可以随时都可以随时都可以随时都可以随时都可以随时都可以随时都可以随时都可以随时都可以随时都可以随时都可以随时都可以随时都可以随时都可以随时都可以随时都可以随时都可以随时都可以随时都可以随时都可以随时都可以随时都可以随时都可以随时都可以随时都可以随时都可以随时都可以随时都可以随时都可以随时都可以随时都可以随时都可以随时都可以随时都可以随时都可以随时都可以随时都可以随时都可以随时都可以随时都可以随时都可以随时都可以随时都可以随时都可以随时都可以随行都可以随行都可以随行都可以随行都可以随行都可以随行都可以随行都可以随行都可以随行都可以随行都可以随行都可以随行都可以随行都可以随行都可以随行都可以随行都可以随行都可以随行都可以随行都可以随行都可以随行都可以随行都可以随行都可以随行都可以随行都可以随行都可以随行都可以随行都可以随行都可以随行都可以随行都可以随行都可以随行都可以随行可以随行都可以随行都可以随行都可以随行都可以随行都可以随行都可以随行都可以随行都可以随行都可以随行都可以随行都可以随行都可以随行都可以随行都可以随行都可以随行都可以随行都可以随行都可以随行都可以随行都可以随行都可以随行都可以随行都可以随行都可以随行都可以随行都可以随行都可以随行都可以随行都可以随行都可以随行都可以随行都可以随行都可以随机都可以随机都可以随机都可以随机都可以随机都可以随机都可以随机都可以随机都可以随机都可以随机都可以随机都可以随机都可以随机都可以随机都可以随机都可以随机都可以随机都可以随机都可以随机都可以随机都可以随机都可以随机都可以随机都可以随机都可以随机都可以随机都可以随机都可以随机都可以随机都可以随机都可以随机都可以随机都可以随机都可以随机都可以随机都可以随机都可以随机都可以随机都可以随机都可以随机都可以随机都可以随机都可以随机都可以随机都可以随机都可以随机都可以随机都可以随机都可以随机都可以随机都可以随行都可以随行都可以随行都可以随行都可以随行都可以随行都可以随行都可以随行都可以随行都可以随行都可以随行都可以随行都可以随行都可以随行都可以随行都可以随行都可以随行都可以随行都可以随行都可以随行都可以随行都可以随行都可以随行都可以随行都可以随行都可以随行都可以随行都可以随行都可以随行都可以随行都可以随行都可以随行都可以随行都还可以随行都可以随行都可以随行都可以随行都可以随行都可以随行都可以随行都可以随行都可以随行都可以随行都可以随行都可以随行都可以随行都可以随行都可以随行都可以随行都可以随行都可以随行都可以随行都可以随行都可以随行都可以随行都可以随行都可以随行都可以随行都可以随行都可以随行都可以随行都可以随行都可以随行都可以随行都可以随行都可以随行都可以隨行都可以随行都可以随行都可以随行都可以随行都可以随行都可以随行都可以随行都可以随行都可以随行都可以随行都可以随行都可以随行都可以随行都可以随行都可以随行都可以随行都可以随行都可以随行都可以随行都可以随行都可以随行都可以随行都可以随行都可以随行都可以随行都可以随行都可以随行都可以随行都可以随行都可以随行都可以随行都可以随行都可以随任都可以随任都可以随任都可以随任都可以随任都可以随任都可以随任都可以随任都可以随任都可以随任都可以随任都可以随任都可以随任都可以随任都可以随任都可以随任都可以随任都可以随任都可以随任都可以随任都可以随任都可以随任都可以随任都可以随任都可以随任都可以随任都可以随任都可以随任都可以随任都可以随任都可以随任都可以随任都可以随任都可以随任可以随任可以随任可以随任可以随任可以随任可以随任可以随任可以随任可以随任可以随任可以随任可以随任可以随任可以随任可以随任可以随任可以随任可以随任可以随任可以随任可以随任可以随任可以随任可以随任可以随任可以随任可以随任可以随任可以随任可以随任可以随任可以随任可以随任可以随机可以随机可以随机可以随机可以随机可以随机可以随机可以随机可以随机可以随机可以随机可以随机可以随机可以随机可以随机可以随机可以随机可以随机可以随机可以随机可以随机可以随机可以随机可以随机可以随机可以随机可以随机可以随机可以随机可以随机可以随机可以随机可以随机可以随机可以随机可以随机可以随机可以随机可以随机可以随机可以随机可以随机可以随机可以随机可以随机可以随机可以随机可以随机可以随机可以随机可以随行可以随行可以随行可以随行可以随行可以随行可以随行可以随行可以随行可以随行可以随行可以随行可以随行可以随行可以随行可以随行可以随行可以随行可以随行可以随行可以随行可以随行可以随行可以随行可以随行可以随行可以随行可以随行可以随行可以随行可以随行可以随行可以随行可以随行是可以随行可以随行可以随行可以随行可以随行可以随行可以随行可以随行可以随行可以随行可以随行可以随行可以随行可以随行可以随行可以随行可以随行可以随行可以随行可以随行可以随行可以随行可以随行可以随行可以随行可以随行可以随行可以随行可以随行可以随行可以随行可以随行可以随行可以随机可以随机可以随机可以随机可以随机可以随机可以随机可以随机可以随机可以随机可以随机可以随机可以随机可以随机可以随机可以随机可以随机可以随机可以随机可以随机可以随机可以随机可以随机可以随机可以随机可以随机可以随机可以随机可以随机可以随机可以随机可以随机可以随机可以随机可以随机可以随机可以随机可以随机可以随机可以随机可以随机可以随机可以随机可以随机可以随机可以随机可以随机可以随机可以随机可以隨行可以随行可以随行可以随行可以随行可以随行可以随行可以随行可以随行可以随行可以随行可以随行可以随行可以随行可以随行可以随行可以随行可以随行可以随行可以随行可以随行可以随行可以随行可以随行可以随行可以随行可以随行可以随行可以随行可以随行可以随行可以随行可以随行可以随理可以随行可以随行可以随行可以随行可以随行可以随行可以随行可以随行可以随行可以随行可以随行可以随行可以随行可以随行可以随行可以随行可以随行可以随行可以随行可以随行可以随行可以随行可以随行可以随行可以随行可以随行可以随行可以随行可以随行可以随行可以随行可以随行可以随行 |
IpeIoTbpaueHnE cepbe3hbyPnCKOBn ONaCHOCTN.

Ipeep npoBeHem IIO6bIX onepaunexHNuechomy 06cLyHHBaHIO:
OCTAHOBNTMaunHy;
- N3BLeHnTe 6aTapeo H3 COOTBeTCTByUoIeRrHe3da n 3apAInTe ee (nyHt 8.2.2);
- npn HenoBHHom pexyem npncno6leHnn yctahOBNTe 3aunTy HOHa (3a nchIoueHem cnya, KOrda HMeHHo HOH HxJaetcB O6CnyHbHH);
JaTe OCTbITbBnIaTeJIIO nepeI nepemeeHHeMaunHbIB Hahoe-JNo6o NomeuHne;
Hadehbe Tnoxoadyu OeMy,pa6oynepaatnN3aunTHbIeOHN
- npoHTaTe COOTBeTCTByIOuIe pyHOBOdCTBO.
-ПернODиHOCt b OINcAHne OpeaunI TexHueCKOrO 06ClyKHBaHNЯ PnIBeDEhbl B "TabInCe TexHueCKOrO 06ClyKHBaHNIA" (CM. rIaby 14).LelbIO 3ToT Ta6InCBy RAJIeTcN NOMOy BaM NOdEprHbA Tb 9ΦΦeHTNBHOCTb N 6e3ONaCHOCt b BaWei MaHNbI. B He yKa3aHbI OCHOBhIE OpeaunI TexHueCKOrO 06ClyKHBaHNЯ MaHNbI I nepNoDInHOCt b, ppeDycmOTpeHHaJ DnI KaHDoI n3 Hx. BblOpHnYe yKa3aHHbIe DeiCTBnI NO IChTeueHIn NepBOrO n3 yKa3aHHbIX cpoKOB.
- IcnoIb3OBAHHe OepnHaJIbHbIX 3aIacHbIX
UacteN IOPOHNTeJIbHO O6OpyOBOAHn
MOHeT OTPuCaTeJIbHO Cha3aTbcra Ha pa6ote
He 6e3OnaChocHTMaUNHb. H3rTOBHTeJIb
He HeCet OTBeTCTBeHHoCTn 3a yuepe6 nIi
TpAbMbI, Bbl3BaHHbe DaHHbIMn 3dEJIaMn.
-OpnHaJIbHbIe 3aIuaCTN MoJHO npNo6peTn B cepBnCHOM ceHTpe HIny aBTOpn3OBAHHbIX nCTpnp6bIoTOPOB.
BAHHO Bce onepaunno TeXnuechomy 06cnyuHaHn H peryInpOBHe, He OINcaHbIe B DaHHOM pyKOBoCTBe, DOJIHKbI 6bITb BInIOJIHeHbI uepe3 BaWero IInCTpN6bIoTOPa INB CneuaJIIN3npOBaHHOM cepBVCHOM ceHTpe.
8.2 BATAPER
8.2.1 ABTOHOMHOCTb 6aTapeu
Ha aBTOHOMHOCTb 6aTapeN (n, cIeIOBaTeNbHO, Ha IIOUaIb yuactka c pactnteHocTBIO, o6pa6aTbIAEMORo HA OHOI 3aprKe) BnIyOT cIeDyIOUIne OCHOBHbIe KaHTOpbl:
a. yCIOBnE3KcIpyaTaun, KOToPbIE 06yCIOBnBaHOT yBeJIuHeHHe NOtpe6JIeHne 3Heprn:
-CTPNKHa/NoDpaBHNBaHne OChb TcToNII BIAHHO JINBOI N3rOpO;
-CTPNHKa/NoDpaBHBaHne KcTOB CO CINWKOM TOJCTbIMN BETKaMn;
b. DeiCTBnI OepaTopa, KOtOpbIX CneJeT n36eRaTb:
- Yactoe BHKIOUeHne N BbIKIOUeHne BO Bpemra pa60tbl;
- PnIMeHHe TExHHKCTpnKKn, KOtopa He NOxOHT
dIy cIeN KOnKpeTHoPa60tbl (nyHKT 7.4.1);
-CKOPOCTb PPOBUNKHeHNA CTPNKKN, KOToPAH He NOxOaNT IaR COCToHHN KOHKpeTHOH KINBOI N3rOpOaN.
TTO TO6bI ONTUMN3HPOBaT bABTOHOMHOCTb 6aTapen, peKOMEHdyetc:
- CTPNHy HINBYU IO 3rOPODb, KOrDa OHa cyXa;
3aDbCTCKOPoCTbPNOBnKHeHcTpNKn, KOtopa NOxOHTIINCOCTOHNHOKOHpeTHOrO KcyTAPHHKa;
ICNOJb3OBAbTexHNky CtpnKKn, KOTopaa NOxODNTIa CEneK KOHKpeTHo pa60tbl.
EcnI Tpe6yeTcNcNoJIb3ObaTb MaunHy 6oJee npOIOJIHHTeJIbHOe BpEm, Yem TOrO N03BOJIaRc TcAndapTHa 6aTapeR,TO cyueCTByIOT cJeDyUOpHe BO3MOJHOCTn:
- npno6peCTn BtopyO cTaHdapThyIO 6aTapeIO, YTO6bI cpa3y 3aMeHNITb pa3pRKeHHyIO 6aTapeIO, He npepbIBa pa60TbI;
- npnoobpeCTn 6atapeo C 60Jee BbICOKO aBTOHOMHOCTbIO no cpaBHeHIO CO cTaHdapTHo6atapee (nyHT 16.1).
8.2.2 N3BLeueHHe n 3apAka 6atapeu
- Haxmte Ha KhoHcy 6IoknpoBKn Ha 6aTapee B MaunHe (pnc. 13.A) nIN B paNcEbOM depKaTeNe (pnc. 14.A) (npn HauNcuN);
- n3BLeKeHte 6aTapeo H3 MaunHbI (pnc. 13.B) nn H3 paueBOrO depKaTeJIa (pnc. 14.B) (npn HaunuH);
- BCTaBtBe 6aTapeKo (Pnc. 15.A) B CneuaJIbHbIOTcEK 3apHdHoro yCTpoNCTBa (Pnc. 15.B);
- noCoeHInHe 3apJHoe yCTpoNCTBO (Pnc. 15.B) K po3eTKe, HanpJxHHe N KOtOpO COOTBeTCTByE T yKa3aHHOMy Ha Ta6JIuHHe;
- BbINOJIHnTe NOIHyIO 3apAky, CJeIyraKa3aHnAM, IN3JIOKeHHbIM B pyKOBOdCTBe6atapeN/3apAnHO yCTpoiCTBa.
PIMMEUHNE BaTapeOBOpyDObaHa 3auHToN, KOToPA npEnrCTByeT 3apJnHe, eCNI TempepaTypa B NOMEeHN He haxOHTcB nPeJeIax O T 0do+45°C.
PIMMEYAHNE MoHHo 3apRJaBbatapeHO B IIO6oe Bpem, B TOM YNCHe YAcTHUHO, 6e3 PnCKa NOBpeKDeHn.
YTO6bI CHN3NTb PnCK NOKapa, OCHUaTe MaHHy, IN YAcTHOCTN DBNrAteJIb, OT OCTaTKOB JINCTBeB, BEtOH IN3JINsKOB Cm3Kn.
Bcerda ouHauTe MaunHy nocJe HcnoJb3ObaHnra, npotepe ee NCToB BlaKHO TpAOnKo, CMOeHHoH HeTpaNbHbIM YNCTaUM cpeDCTBOM.
- YdaIte BCHO OCTabSyOcBlaIg MyKoN I cyXoTpIIOyKO.BaHHOCTb MoHET BbI3BaTb pIck npaKeHnnaJIeKTpUeCHM TOKOM.
He nCnoJIb3yIte arpeCCNBhIe YnCTaIuIe CpeIcTBA IIN paCTBOpITeIN DJI OUCTH NlaCTMaCCOBbIX UaTeNpyKoTOK.
He nCnoIb3yIe cTpyn BOdbI n 36eraIte nonaDaHnB OdbI Ha DBVaTeJIb I 3JIeKTpUpeckne y3JIb.
Bo n36eKaHne nepepeBa n noBpeKdEHHa Dniratela HnB 6batapeu Bcerda npOBepaHTe, TTO BO3dyXo3a6OpHbIe peWetKn dIn OxlaKeHHy NcTbIe H Na HNX HeT OTXoDOb.
8.4 ONUCTHA H CMA3HA PEHXUYIERO IPNICNOCOJEHIN
BcKn pa3 nocle pa60tI peKoMeHyeTc
HCTNTb N CMA3bIBaTb HOxN, YTO6bl yBeJIuHTb INX
3ΦΦeKTNBHOCTb INpOJNTb cPOK cnJx6bl:
He npnacaiTecb K peHcyuemy npncnoc6beneHIO, nOHa He 6ydt N3BleyeHa 6atapei, nDo tex nop, noHa peHyuee npncnoc6beneHne NOHOCbIO He OCTaHOBTcra.
- NocTaBbTe MaunHy Btopn3oHTaJIbHoe nIOJKeHne TaK,TO6bI OHa npOHO ONIPAJaacb Ha 3eMlIO.
- Bbtpnte HOKn cyxO npAnpIy0 rpa3b MOKHO ydaJIITb UETKO.
CmaKbTe HOKn,HaHecra ToHKn CNoi CnEuaJIbHOrO MaCla,NO BO3MOXHOCTN 3KOLOrHOrO,BDoJIb BepxHero Kpa HoKa.
8.5 KPEENEXHbIE TAMKIN BNTbl
CneIte 3a TeM, YTo6bI raiHN N BnHTbI 6blN 3aTAYtB1, DIA YBepeHHOCTN B TOM, YTO MaUNHa Bcerda 6eONacha npu pa6ote.
-ПернордескnpоверпгпочocьЗakpenlenHЯpyKOrTOK.
9. BHEOUEPEIHOE TEXHNUECKOE OBCJYKIBAHNE
9.1 BHEOUEPEHHOE OBCJYKINBAHNE PEXKYIeTO IPNICIOCOJEHNA
He npnacaTecb K peHcyemy npncnoc6bEnHIO, noka He 6ydt N3BleyeHa 6atapei, n do Tex nop, noka peHyuee npncnoc6bEnHne NOHocTbIO He octaHOBNTcra.
Pn3KcIpyatauB COOTBETCTBn C HNCTpykuaRMHOHKe HHyKaIOTCB B O6ClyKbAHIN 3aTOUHe.
9.1.1 Поверна
I IepnoDnueChn npoBepaHte, yTo HOHN He NorHyNcB, He HMeIoT NOBpeKdEHH u He H3HOWeHbI, u 4TO BnHTbl npabuNbHo 3aTHyTbI.
Het Heo6xOIMOCHTn Hn B KaKoI peryInpOBHe pacCToHnMeJHy HOJAMN, NCKOJIbKy 3TOT 3a3Op onpeJeJH Ha 3aBObe-N3rTOBNTeJ.
9.1.2 3aTo4ka
3aToUka HOKeH Heo6xOIMMa, KOrJa OTdaA npn pe3Ke CHNkaeTcN bETKn Yacto 3actpeBaIOT.
HcxoJn3coo6paHeHH6e3OnacHOCTN Heo6xOJMo, 706bI 3aTOUHa OcyuEcTBJLAcB B CpeuaJIH3npOBaHHOM cepBnCHOM ceHTpe, NepcoHaJI KOTOPOrO HMeET HaBBInn HnHCTpyMeHT dJIy BblIOJIHeHH 3ToI ONepaun, 706bI He pncHOBaTb NOBpeHNDeHHeM HOHa I NocJeDyIOUm CHnHeHEm UPOBHA 6e3OnacHOCTN BO BpMa paBoTbI.
Hoch c n3HoWeHHbIMN 3y6uAMNHnKOrda He CneJeYet 3aTaUHBaTb, erO Heo6xOJMo Bcerda MeHrtb.
9.1.3 3ameHa
Hoch He noJnLeHHT peMOHTy, Heo6xOdmo 3aMeHHTb erO npn nepBbIX npn3HaHX TpeuHH nnn npn npBeBbIeHH npeDeLa 3aToUKN. H3 coo6paHHeHH 6e3OnacHocTH Heo6XoDIMO, yTObbl 3aMeHa ocUeCTBJIaNcB CneuaHn3HPOBaHHOM cepBNCHOM cHTpe.
Ha 3ToM MaSInHe npedcMoTeH O npimEnHe HOKeI, IMeIOUx KOd, yKa3aHHbI B Ta6JIue "Texnueckne XapakTepcntKn".
yHTbBaCobepWeHCTBOBaHne npOdyKuHN, HOxN, yKa3aHHbIe B Ta6nIe "TexHueckne XapaKTepNCtKN", MOrTy CO BpEmEHm 6bITb 3aMeHehbl DpyHMn, C aHaIOnrHuBMn XapaKTepNCtHKamn B3aM03aMeHReMOcTn N 6e3oNaChOcTn B paOte.
10.XPAHEHNE
BAHHO IpaBnla 6e3oNaChocT npxpaHeHMaHnHbI npBBeJeHb B nyHKe 2.4.Ctporo co6JIOaJTe yKa3aHna IpnpeoTbPaueHncepe3hBX pNCHOB nOnaChocTn.
10.1 XPAHEHNE MAUINHbI
PpeKdE yem y6paTb MaunHy Ha xpaHeHHe:
- 13BJIeKHTe 6aTapeHn3 COOTBeTCTByIOUeTo rHe3Ja n 3apAInTe ee (nyHt 8.2.2);
2.Horda peKyuue npncnoc6leHne octaHOBNTcY,ycTaHOBnTe 3auHTy HOHa;
3.ДаTe OCTbITbIBrTaTeIIO nepeI nepeMeueHnEM MaUNHbIB KaKoe-JN6O NOMEueHne; - npoBeDnTe OChCTHy (nyHKT 8.3);
- npoBepbTe, YoT HeOcIa6JeHHbIX NIN NOpeXeHHbIX KOMNoHErTOB.EcIn Heo6xOJMo,3aMeHnTe IOBpeKdEHHbIE KOMNoHeHtbl,a TaKHe 3aTnHtE OCJIa6JeHHbIE BnHTbl N 60JIb NIN O6paTnTeCb B aBTOpN3OBaHHbI cepBnCHbI ceHtp;
- XpaHnTe MaunHy:
-BCYXOM NOMEHIN
-3aunueHHOMOTNORHOBO3dEICTBNA
-BHEDOcraeMOCTnTeTei
yIOCTOBepbTeCb,TO Bbl ybpaln HIOUH INHCTpyMeHT,NCNoJIb3OBAWbueeCgIaO6cIyKINBaHH.
10.2 XPAHEHNE BATAPEN
BaTapeIdoJHxpaHnTBcB THeN, B npoxlaHOM MeCTe N B NOMEuEHH, IDe OTCyTCTByET BlaXHOCTb.
IPIMMEUAHNE B Cnyae nnTeBHorO
npocTo3apKaHte6bataeio pa3BJaBa Mecaa, T06bl npOInTb cpoK ee cnjkbbl.
11. INPEMEUEHNE I TPAHCNOPTNPOBHA
KaHbIpa3,KoTaTpe6yETcNepeBnHyTb HINnepeBe3TuMaunHy:
-ByIKHIOUHTeMaUNHy(nyHKT7.5);
-и3BJIeHnTe 6aTapeIO n3 COOTBETCTByIOUeIrHe3Ja n3apAInTe ee (nyHK8.2.2);
-HordapeKyuuee npncnoc6JIeHne octaHOBNTcY,ycTaHOBNTe 3auHTy HOxHa;
- HanaeHbTe PIOToHbIe paOoune nepaTkn;
-6epnte MaunHy NcHIOHTeIbHO 3a pyKoTKn, HnapabJrTe peKuyeepncnoCObHe B CTOpOHy, npOTIBONIOHHyHnapabJeHHIO dBHXeHn.
PnnepeBo3Ke MaunHbHa aBTOtpaHcnpoTe Heo6xoJIMO:
-3aKpeNITb MaSHINHy pIN NOMOUI
COOTBETCTBYUOUX TPOCOB NINI UENI;
- pacnoIooHHTbe ee TaKIM 06pa3OM, YTO6bI OHa Hn Dn KOrO He npedctabla onaCHOCTN.
12. CEPBINGHOE OBCJUYHINBAHNE IN PEMOHT
B 3TOM pykoBOCTBe H3JIOKeHbI BCE yKa3aHnA, Heo6XODMbIe IJIy UnpaBHeHH MaunHOI nIpy npABINbHOrO BblOnJIHeHH OCHOBhIX OepaCNI TexHNueCKrO O6cIyKHNBaHH, KOTOpoe DOJIKeH BblONJIHTb NOb3OBATEJI. JIA BblOnJIHeHH BCex DeNCTBn PO peYInpOBKe N O6cIyKHNBaHH, He ONiCaHHbIX B 3TOM
pykoobocbe,6oepaauTecbK BaWemy nIcTpboTopy IINB CneuaHn3npOBaHHbI cepBncbI uehtp,
pacnoJaraOuIIOJROTOBLeHHbIM nepcoHaIOM I
OBopyoBaHnEM,HeoBXoHMBIMdI npaBnIbHO
BblOpHEnra paOtbl,POJIePkaHnYyOBHb6e3OnaCHOCTN
IN BOCCTaHOBLeHHnEpeBOHaayalbHOrCOCTOHRMaHNbI.
Oepaun,BlIOJLHeHHbIE B HeNoDxOJaXIX dI
3TOrO CTpykTypax IIN HeKBaIIHnCNIpOBaHHbIM
JIIObMn,IPnbODT K aHHyLInpOBaHHIO BCEX
BIVIOB rapaHTnn IN CHImaOT C N3rTOBNTeJI
BCIO OTBETCTBEHHOCTbI O6ra3aTeJIbCTBa.
ToIbKO aTOpIN3OBAHhbIE cepBnCHbIe cHTpbIMoYr BbIOJIHrTa paAHTHbIMpeMOHT N O6ClyKHBaHHe.
- ABTOPIN3OBAHHbIe cepBnCHbIe cHTpbI NCIOJIb3yKOT TOJIbKO OPIrHnAJIbHbIe 3aIacHbIe YactN. OpiRHaJIbHbIe 3aIacHbIe YactN I DOnOJIHnTeJIbHoe 6OpYDoBaHHe 6blN CneUaJIbHO pa3pa60TaHbI DIA MaUN HDAHHoro TIna.
- IcnoIb3OBAHHe HeOpnHaJIbHbIX 3aIacHbIX qacteN iDOnoJIHInTeJIbHOrO o6OpyOBAHnHE yTbePckDeHo N3rOToBnTeJeM; IcnoIb3OBAHHe HeOpnHaJIbHbIX 3aIacHbIX qacteN iDOnoJIHInTeJIbHOrO o6OpyOBAHnA CHINKaet yPoBeH b630NaCHOCTN MaunHb, a TaKHe CNImaET C N3rOToBnTeJIa BCE O6R3aTeJIbCTBa n OTBeTCTBeHHOCtB.
- PeKOMeHdyeTcpa3BroDOTBO3NtMaunHy B aBTOpn3OBAHHbI CepBnCHbI ueHTp dJa 06CnykHBaHn, yXoDa n npOBepKn NCpnaBHOCTn npedoxpaHnteBhix yCTpoiCTB.
13. YCIOBnI TAPAHTN
TapaHTnI NOKpbIBaET BCE DeΦeKTB MaTePnaIOB nN3rTOOBLeHn. POnb3OBAteIb DOJxHc6ydet CKpyNyIe3HO CNEIOBaTb BCem Yka3aHnM, N3JIoXeHHbIM B PrnIOXeHHoJ DOhymeHTaCm. TapaHTnI He NOKpbIBaET yUep6, Bb3BaHHbI:
- HeIOCTaTOUHbIM O3HaKOMJIeHnEM C COPOBOdntelbHOJ DOKyMeHTaUnei;
HEBHHMaTeIbHOCTbIO; - HEnpaBnIbHbIM NIN Hepa3peWeHHbIMN 3KcPnyaTaUeH MOHTaHOM;
- INCNoJIb3OBAHnEM HeOpnHnHaJIbHbIX 3aIyacTei;
- IcnoIb3ObaHnEM DoONHInTeIbHbIX npCnOC6JIeHH, He NOCTaBHeHHix HnH He yTBePckDeHHbx N3rOToBtTeJEM.
TapaHTnTaKHe He pacnpocTpHaTeCnHa:
- eCTeCTBeHHbI N3HOC TaKxPacXOdHbIX MaTePnaIOB, KaK KOleCa, HOJI, npdeoxpAHHTeMbIe 6oTbI n npoBOda;
- ECTECTBENHbI N3HOC.
IpaBa nokynataTeIaunuaeT 3aKoHoaTeIbCTBO eO cTpaHbI. HactoJua rapaHTnHaHK He orpaHnuBaet npab nokynataJI, npedyCMOTpeHHbIX 3aKoHaMn eO cTpaHbI.
14. TÁBÁNÇA TEXHNUECKOFO OBCLYJHXBAHNA
Ecn nocne BbInonHeHn OncaHbX Bblwe DeIcTBn H enoIaKn He NCye3n, CBXNTecB C BaWIM dNCTpN6bTOPOM.
16.ДОПОЛHINTEЛьhoeOBOPYIOBAHNE ITO TPEBOAHNIO
16.1 APYTNBE BATAPEN
IpeIraIOCTc 6aTapeN pa3nHNoE mKocTn,
npHa3NaueHbIe Iy pa3nHbIX o6laCTe
npImeHnra (pnc.17).IpeueHb 6aTapeN,
OMoIorpoBaHHbIX dAHHoM MaunHbI, pINBeDeH B Ta6JInce "TexnueChne XapAnTePrcNTnK".
16.2 3APRHOE YCTPOINCTBO
yctpoicTBO, npedHa3HaueHHeIa 3apAKn 6aTapei: 6bictpoe (pnc.18.A), ctaHapTHeO (pnc.18.B).
16.3 PAHUEBbl DEPKATEJIb IIA BATAPEI
YcTpoIcTB DJIpa3MeUeHnDByx6bTapei,
06ecneuBaIOoee Heo6XoDMoe dJIa
pa6Otbl MaunHbI 3JIeKTpOnHTaHne.
OHO OCHaSeHNO pIOBOOM DJIra CoeHNHeHn C MaUNHOI (pnc.1.I) n IpeKeNIOUaTeLEM (pnc.5.B),No3BOJIOUcHM BbIbPaTb ODHy N3 DByx 6bTapei (noLOKeHne
<1> n <2>) n noLOKeHne OFF(BblHl.).
16.4 3MЛRTOPБATAPEN
YCTPOIcTBO,yCTaHaBnBaEMOE B rHe3do MaunHbI INo3BOJIIOUe ee NcNoIb3OBaTb paHceBbI DEpHaTeIb IJI6aTapei.
OBSAH
- VSEOBECNE INFORMACIE 1
- BEZPECNOSTNE POKNY 2
- OBOZNÁMENIE SA SO STROJOM 4
2. BEZPEČNOSTNÉ POKNY
2.1 INŠTRUKTÁž
TENTO STROJ MOZE SPOSOBIT VAZNE SKODY A UBLIZENIE NA ZDRAVI.
Pozorne si prečitajte pokyny pre správné použitie, pripravu, udržbu, šartovanie a zastavenie stroja.
6.2 BICAK KONTROL KOLU (KESIM CIHAZI)
Bicagin calistirilmasini ve hizinin ayarlanmasini saglar.
D. Lgs. 262/2002, ANNEX V (Italy)
EN · The content and images in this User Manual were produced expressly for ST. S.p.A. and are protected by copyright - any unauthorised reproduction or modification to the document, either partially or in full, is prohibited.