USER MANUAL GL 6412 Gerlach
SAFETY CONDITIONS - IMPORTANT INSTRUCTIONS ON SAFETY OF USE PLEASE READ CAREFULLY AND KEEP FOR FUTURE REFERENCE
The warranty conditions are different, if the device is used for commercial purpose.
- Before using the product please read carefully and always comply with the following instructions. The manufacturer is not responsible for any damages due to any misuse.
- The product is only to be used indoors. Do not use the product for any purpose that is not compatible with its application.
- The appliable voltage is 220-240V, 50 / 60Hz . For safety reasons it is not appropriate to connect multiple devices to one power outlet.
- Please be cautious when using around children. Do not let the children to play with the product. Do not let children or people who do not know the device to use it without supervision.
- WARNING: This device may be used by children over 8 years of age and persons with reduced physical, sensory or mental capabilities, or persons without experience or knowledge of the device, only under the supervision of a person responsible for their safety, or if they were instructed on the safe use of the device and are aware of the dangers associated with its operation. Children should not play with the device. Cleaning and maintenance of the device should not be carried out by children, unless they are over 8 years of age and these activities are carried out under supervision.
- After you are finished using the product always remember to gently remove the plug from the power outlet holding the outlet with your hand. Never pull the power cable!!!
- Never leave the product connected to the power source without supervision. Even when use is interrupted for a short time, turn it off from the network, unplug the power.
- Never put the power cable, the plug or the whole device into the water. Never expose the product to the atmospheric conditions such as direct sun light or rain, etc.. Never use the product in humid conditions.
- Periodically check the power cable condition. If the power cable is damaged the product should be turned to a professional service location to be replaced in order to avoid hazardous situations.
- Never use the product with a damaged power cable or if it was dropped or damaged in any other way or if it does not work properly. Do not try to repair the defected product yourself because it can lead to electric shock. Always turn the damaged device to a professional service location in order to repair it. All the repairs can be done only by authorized service professionals. The repair that was done incorrectly can cause hazardous situations for the user.
- Never put the product on or close to the hot or warm surfaces or the kitchen appliances like the electric oven or gas burner.
- Never use the product close to combustibles.
- Do not let cord hang over edge of counter.
- Do not immerse the Device in water.
-
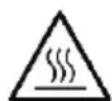
Do not touch the hot surface of the device. Use gloves to remove or touch any hot parts.
-
Do not move or carry the device during operation. After completion of the work device can be moved only when cold.
17. !!WARNING!! The device emits hot steam under pressure. There is a high chance of burning. Please make sure to use protective gloves or wooden utensils when handling the device and when opening the device.
DESCRIPTION OF THE APPLIANCE: DEVICE (1A)
-
Handle
-
Pressure limiting Valve
-
Inner Pot
-
Heating Element
-
Body 10. Carrying handles 11.Middle layer
-
Float Valve
-
Control Panel
4.Lid
- Plastic base
Control Panel (2B)
- Corn 2. Soup 3. Stew
- Meat 5. Reservation 6. Fry
- Rice 8. Porridge 9. Waterless Bake
- Keep pressure
- Function:
A. Fish
B. Bean
C. Chicken
D. Cake
E. Vegetable
F. Seafood
- Taste 13. +/ - 14. Warm / Cancel
- Display
Preparing the Device:
- Opening the lid: Hold the handle (1) firmly, turn the lid (4) clockwise until it loosens and lift vertically. The lid (2).
- Remove the inner pot (5) and add desired ingredients. The amount of water and food should not exceed 2/3 of the height of the inner Pot (5). For food that will expand in water, the level should not exceed 1/2 of the Inner Pot (5).
- Be certain the inner receptacle, where the Electronic Heater is located, is clean and dry before inserting the Inner Pot (5) into the pressure cooker and adjust the pot left and right to ensure optimal contact between the Inner Pot and the Heating Element (6).
4.Closing the Lid: Make sure the Rubber Seal Ring is fitted properly onto the metal ring inside the lid.
- Close the lid (2). Hold the handle (1) and turn it Counter-Clockwise to the "LOCKED" position. (A clamping sound can be heard)
- Check the pressure limiting valve (2) and the float valve (3). The valve should be in the down position.
It will stay in that position until pressure is reached inside the inner pot during work.
- Plug in the Power cord into the hole positioned in the Plastic base (8) of the device.
- Plug the power cord into the mains.
- The device will emit a Beep sound tone, all lights will turn on for a second and then turn off. The device will then go into standby mode and show "0000" on the display (15).
Device Operation:
- Press the desired function button (1-11).
- After choosing the desired program the default time will be shown on display and it will start flashing. You can change that by pressing the - and + (14) buttons.
You can press "Cancel" to stop the program at any time.
Reservation: The button can be used with combination with any of the menu programs. It is designed to delay the start of the chosen program the starting time is 30 minutes. The program will start after 30 minutes has passed. The maximum time is 24 hours. It advances in 30 minute steps.
00:30, 01:00, 01:30... etc.
Keep warm: In standby mode press the "Keep warm / Cancel" (13) button. The function will start and the display (15) will show "bb". The keep warm temperature is 65C-75C. Press the button again to finish the function and revert to standby. This function will also activate automatically after finishing each of the programs.
Cancel / Stop program / Stop cooking: During any of the programs you can press the "Keep warm / Cancel" (13) button to abort any program in progress.
Finishing cooking:
After the device finishes work on the program it will give off a sound signal. Then it will turn on the "Keep Warm" program.
Press the Cancel / Keep warm (13) button to return the device will enter Standby mode.
The lid is locked by the pressure lock.
To open the lid first turn the "Pressure limiting valve" (2) to the right. !!! CAUTION !!! this will start releasing pressure and steam. If not handled with care you can burn yourself !!!
Please keep the "Pressure limiting valve" in the "Open" position until the "Float valve" drops down.
You will hear a click and then you will be able to open the lid.
- "Corn": First place the ingredients into the Inner pot (5) then close the lid (4) and turn the pressure limiting valve (2) into Closed position. The device starts work after 5 seconds. After finishing the countdown the device goes into Keep warm mode.
- "Soup": First put water into the Inner pot (5) then close the lid (4) and turn the pressure limiting valve (2) into Closed position. Let the water boil. The device will indicate when the water is boiling by a sound tone. Open the lid. Add the pasta and boil for a time
specific to the pasta. After countdown ends it will go back into default state.
-
"Stew": First place the ingredients into the Inner pot (5) then close the lid (4) and turn the pressure limiting valve (2) into Closed position. The device starts work after 5 seconds. After finishing the countdown the device goes into Keep warm mode.
-
"Meat": First place the ingredients into the Inner pot (5) then close the lid (4) and turn the pressure limiting valve (2) into Closed position. The device starts work after 5 seconds. After finishing the countdown the device goes into Keep warm mode.
-
"FRY": Must open the Lid (4) to cook Default temperature is 175 - 178^ . Countdown starts after "FRY" button is pressed and back to the original state after finishing work.
-
"RICE": First place the ingredients into the Inner pot (5) then close the lid (4) and turn the pressure limiting valve (2) into Closed position. For each cup of rice please add around 1 cup of water. The device starts work after 5 seconds.. After finishing the countdown the device goes into Keep warm mode.
-
"Porridge": First place the ingredients into the Inner pot (5) then close the lid (4) and turn the pressure limiting valve (2) into Closed position. The device starts work after 5 seconds. After finishing the countdown the device goes into Keep warm mode.
-
"Waterless Bake": Default temperature is 120 - 130^ . Countdown starts after "Waterless bake" button is pressed and keep warm starts after finishing work.
-
"Keep pressure": This function keeps the device pressurized without cooking. It heats up only to keep the pressure. Default time is 2 minutes. It then goes into Keep warm mode. Not intended for heating up food. If you think that the food is hard and could use more of pressure treatment then use this function.
-
Function Buttons- Additional more specific programs Press the button to choose one of the 6 sub-programs listed below:
11.A "Fish": First place the ingredients into the Inner pot (5) then close the lid (4) and turn the pressure limiting valve (2) into Closed position. The device starts work after 5 seconds. After finishing the countdown the device goes into Keep warm mode.
11.B "Bean": First place the ingredients into the Inner pot (5) then close the lid (4) and turn the pressure limiting valve (2) into Closed position. The device starts work after 5 seconds. After finishing the countdown the device goes into Keep warm mode.
11.C "Chicken": First place the ingredients into the Inner pot (5) then close the lid (4) and turn the pressure limiting valve (2) into Closed position. The device starts work after 5 seconds. After finishing the countdown the device goes into Keep warm mode.
11.D "CAKE": Default temperature is 125-135C.": First place the ingredients into the Inner pot (5) then close the lid (4) and turn the pressure limiting valve (2) into Closed position. The device starts work after 5 seconds.. After finishing the countdown the device goes into Keep warm mode.
11.E "Vegetable": First place the ingredients into the Inner pot (5) then close the lid (4) and turn the pressure limiting valve (2) into Closed position. The device starts work after 5 seconds. After finishing the countdown the device goes into Keep warm mode.
11.F "Seafood": First place the ingredients into the Inner pot (5) then close the lid (4) and turn the pressure limiting valve (2) into Closed position. The device starts work after 5 seconds. . After finishing the countdown the device goes into Keep warm mode.
- "Taste": Each program has 3 preset times. You can change the time by pressing the "Taste" button and choosing one of the three options or you can change the time by pressing the "+" or -- buttons.
Working Times for functions:
All programs can have their times adjusted from 1 minute to 99 minutes.
Corn:
Default time: 00:25 Minutes | Taste time Options: 20 .25. 32 minutes
Soup:
Default time: 00:15 Minutes | Taste time Options: 10,15,18 minutes
Stew:
Default time: 00:40 Minutes | Taste time Options: 35,40,60 minutes
Meat:
Default time: 00:20 Minutes | Taste time Options: 12 .20, 28 minutes
Fry:
Default time: 00:30 Minutes | Taste time Options: 25,30,35 minutes
Rice:
Default time: 00:25 Minutes | Taste time Options: 20,25,30 minutes
Porridge:
Default time: 00:15 Minutes | Taste time Options: 10,15,20 minutes Waterless Bake:
Default time: 00:28 Minutes | Taste time Options: 26,28,32 minutes Fish:
Default time: 00:10 Minutes | Taste time Options: 8, 10, 16 minutes Bean:
Default time: 00:30 Minutes | Taste time Options: 25,30,40 minutes Chicken:
Default time: 00:15 Minutes | Taste time Options: 12,15, 20 minutes Cake:
Default time: 00:32 Minutes | Taste time Options: 25,32,40 minutes Vegetable:
Default time: 00:18 Minutes | Taste time Options: 13,18,25 minutes Sea Food:
Default time: 00:13 Minutes | Taste time Options: 11,13,17 minutes
Reservation:
You can set the delay of the program from 10 minutes till 24 hours the step is 10 minutes per press of the + / - buttons.
Cleaning:
- Unplug the power cord from the wall socket
- Unplug the power cord from the device
- With a slightly damp rag wipe the outside of the device
- Open the lid.
- With a damp rag clean the underside of the lid.
- Remove the inner pot.
- Clean the inner pot with clean water with cleaning detergent.
-
With a slightly damp cloth you can clean the inner part of the middle layer.
-
With a slightly damp cloth you can clean the heating element. Do not use any detergent.
- Remove the collection box and clean it with a damp cloth and remove any liquid that has collected inside.
- Let all the parts dry before assembly.
- Store in a dry and cool place.
WARNING:
Do not modify, disassemble or repair the product by yourself.
Do not place the product in water to clean.
Do not use inner pot in any other way than intended by the producer. You cannot use it directly on any heat source besides the pressure cooker.
Do not lift or move the device during cooking
The inner pot is to be used with plastic or non-scratching cooking utensils and cleaning products.
Ensure that the heating element, temperature sensor and inner pot outside is clean and dry before connecting to mains power supply, impurities or foreign matter may cause malfunction of electric pressure cooker.
Never damage, cut, remove, replace the rubber seal ring or tension seal ring. Doing so can cause malfunction or damage to the user.
If a large amount of steam is emanating from the device with the pressure valve is closed indicates a malfunction. Please turn off the device from mains power. Let it cool down, and inform the seller for maintenance or repair.
When transporting please use the side handles on the sides of the device and NOT the lid handle. The lid handle is only used for opening and closing the device.
Troubleshooting:
Hard to close lid:
Reason 1: Seal ring not placed well. How to fix: Make sure the seal ring on the underside of the lid is placed well.
Reason 2: Float valve is stuck How to fix: move the lid left and right a few times or push the float valve with your finger. If it does not work please contact the seller for maintenance.
Hard to open the lid:
Reason: The float valve did not release. How to fix: Move the lid slightly from left to right. If it does not work release more steam by gently pressing the pressure release valve upwards until you hear a *Click* sound.
WARNING!! This will release hot steam. Use a wooden spoon or chopstick to release the pressure and not get burned.
Leaking lid:
Reason 1: Seal ring not placed well. How to fix: Make sure the seal ring on the underside of the lid is placed well.
Reason 2: Food residue stuck on seal ring. How to fix: Clean the seal ring.
Reason 3: Seal ring broke. How to fix: Replace seal ring.
Reason 4: Lid not closed well. How to fix: Close the lid correctly.
Pressure Valve leaks:
Reason 1: Food residue stuck on the pressure valve seal ring. How to Fix: Clean the valve seal ring.
Reason 2: Pressure valve seal ring broken. How to fix: Change the pressure valve seal ring.
Float valve not working:
Reason 1: Food residue stuck on the float valve seal ring. How to Fix: Clean the valve seal ring.
Reason 2: Pressure valve seal ring broken. How to fix: Contact the seller for maintenance and repair.
Continuous exhaust of pressure during work:
Reason 1: Pressure limiting valve not set in sealed position. How to fix: Set pressure limiting valve in sealed position.
Reason 2: Too little water or food in the pot. How to fix: Add water or more food.
Reason 3: Pressure switch break. How to fix: Contact the seller for maintenance and repair.
Errors on display:
E1 - Bottom temperature sensor broken. How to fix: Contact the seller for maintenance and repair.
E2 - Bottom temperature short circuit. How to fix: Turn off, let cool, turn on again. If it does not help. Contact the seller for maintenance and repair.
E3 - Temperature too high, not enough water in inner pot. How to fix: Turn off, let cool, turn on again. Add water. If it does not help. Contact the seller for maintenance and repair.
E4 - Pressure switch failure. How to fix: 'How to fix: Turn off, let cool, turn on again. If it does not help. Contact the seller for maintenance and repair.
Technical details:
Capacity: 6L
Input Voltage: 220-240V~50/60 Hz
Power: 1000W

To protect your environment: please separate carton boxes and plastic bags and dispose them in corresponding waste bins. Used appliance should be delivered to the dedicated collecting points due to hazardous components, which may effect the environment. Do not dispose this appliance in the common waste bin.
DEUTSCH
00:30, 01:00, 01:30... usw.
00:30, 01:00, 01:30...etc.
00:30, 01:00, 01:30 ... etc.
Detalhes techniques:
Capacidade: 6L
00:30, 01:00, 01:30... jne
00:30, 01:00, 01:30... itd.
Drzite toplo: U stanju pripravnosti pritsnite dugme „Ugrevaj / Otkaži" (13). Funkcija ce sePokrenuti, a na ekranu (15) prikazat ce se „bb". Temperatura odrzavanja toplom je 65C-75C. Pritsnite dugme ponovo da biste završili funkcjju i vratili se u stanje pripravnosti. Ova funkcjja ce se automatni nakon zavrsetka svakog programa.
Otkazivanje / Zaustavlianje programa / Zaustavlanje kuhanja: Tijekom bilo kojeg programa mozete pritisnuti tipku „Ugri se / Otkazi" (13) da biste prekinuli bilo koji program koji je u toku.
Zavrso knuhanje:
00:30, 01:00, 01:30...stb.
He meHybajTe,packnonyBajTe nn nonpaBajTe ro npOn3BODot camn.
He ctabajte ro npon3bOdoT BO B0da 3a uicTeHe.
He KopncTe BHaTpeWeH caI Ha npYr NaHn OTKoJIky To e HameHET OI pOn3BODnteJIoT. He MoXeTe Da T O KOpNCtnte DInpeKTHO Ha KoJ 6nIO n3BOP Ha TOnnnHa, NOKpa JwnOpetOT NOI npTuCOK.
He KpeBaJTe NnN NomeCTyBaJTe ro ypeDTo 3a BpeMe Ha rotBeHBeTO
BhaTpeuHnOt caI Tpe6a Da ce KopncTu Co nIpaCTuHn nn He rpe6eHe npnbop 3a rotBeHe i npOn3BOAn 3a YnCTeHe.
OcnIpyTe Ce deKa IpejHnOT eIeMeHT, CEN3OpOT 3a TeMnepaTypa N BHaTpeuHnOT caq HaNBoP CE qNCTU n CyBn nped da CE NOBp3Te CO HanojyBaHe oD MPexa, HeuNCTOTmN ININ CTpaHcKMaTePN MoKe Da IpeDN3BnKaaT DePeKT Ha WnOpETOT 3a eJIeKtpueH npITNCOK.
HnKoraw He OwTeTyBajTe, Iceyete, OTcpaHyBajTe, 3aMeHyBajTe FO pCTeHOT Ha rymeHaT3aNTuBka NIN IpCTeHOT Ha 3aNTuBhata 3aNTuBka. Co Toa MoKe Da ce NojABN DepeKT NIN OWTeTyBaBe Ha KOpNCHMKOT.
Ako rolemKa KOnuHa Ha napea npou3neryBa OJ ypeoT co 3aTBOpEN BeHTnI, ykaKyBa Ha JeOeKT. NcknyTe ro ypeoT oD ctpya. OctabeTe Ro da ce Oanm HOpMnpajTe rpoDabayot 3a OdpKyBaHe nn nonpaBka.
Pn TpaHcnpT, KopncTeTe nCtpaHnHTe paKn Ha cTpaHnTe Ha ypeDTo, a HE paKaTa Ha kaNakOT. PaKaTa Ha kaNakOT ce KopnCTm CaMo 3a OTbopaHe n 3aTBopaHe Ha ypeDTo.
CmeHa Ha npo6nem:
Teuko e da ce 3aTbOpn kanakot:
PnHbHa 1: PcTeHOT 3a neyat He e do6po nocTaBeH. KaKo da nonpaBITE: IpOBepTe dAnI npCTeHOT Ha 3anTINBkata Od DOJIHATA cTpHa H a Kanakot e do6po noCTaBeH.
PnunHa 2: NIOBeyKnOT BeHTnJ e 3aRnabEn KaO da nonpaBITE: NOMEcTe Ro KAnakOT neBO n DeCHO HeKOnKy NaTn nn npNTncHete ro PnIBauchNt BeHTnJ co npCTOT. Ako He paBoTn, Be MOJIme KOHTaKTnpajTe rpoDaBaHOT 3a OpJxBaHe.
Teuko e da ce OTBOpn KaNAKOT:
PnHHa: NINBaKnot BeHTn He ce ocNo6oN. KaO da nonpaBnte: NomeCTe ro Kanakot MaJIky OndeBO HaDecHO. Ako He pa6OT, OCNo6oTe NOBeKe Napea co HexHo npTnCKaHe Ha BeHTnOT 3a OCNo6oDyBaHe Ha npTnCOK Harope, cdoEka He cnYuHHe 3ByK KInkHeTe *.
I I PEPYIPPEYBAE I OBa Ke ocnoobn tonla napea. KopncTe Te npBeHa Jaxuca nn CTanue 3a da ro ocnoobnte npitucokot n da He ce n3ropute.
Kanak wto npotekyba:
PnHbHa 1: PcTeHOT 3a nechat He e do6po nocTaBeH. KaKo da nonpaBITE: IpOBepeTe daHn npCTeHOT Ha 3aNTNBkata OddoJIHATA cTpaHa H a Kanakot e do6po noCTaBeH.
PpnuHa 2: OctatoOn oXpaHa 3aIaBHeH Na npCTeHOT Ha neYaTOT. KaO da ce nonpaBn: NcHcTeTe ro npCTeHOT Ha 3aNTbKata.
PpUHnHa 3: PcTeHOT 3a neuat ce cKpU. KaO da ce nonpaBn: 3aMeHete ro npCTeHOT Ha 3aNTNBkata.
PnunHa 4: Kanakot He e do6po 3aTbOpen. KaKo da nonpaBnte: 3aTbOpTe ro Kanakot npabJHo.
PpOteKyBaHbE Ha BeHTNlOT NOD PnTUCOK:
PpHnHa 1: OcTaOuO nd XpaHa 3aRbEHN Ha npCTeHOT 3a 3anTbKa Ha BeHTnOt noD npNTcOK. KaO da ce nonpaBn: NcuncteTe ro npCTeHOT Ha 3aTnBkata Ha BeHTnOt.
PpHnHa 2: PpCTeH Ha 3aANTNkata Ha BcHTNJOT NOI npNTUCOK e cKpweH. KaO da ce IopnpaBn: Ppomehe Tg npctehOT Ha 3aNTNBkata Ha BEHTNJOT NOI npNTUCOK.
JIIMBaQKBEHTINHe paBOTn:
PnHbHa 1: OcTaOuO xpaHa 3aIabeHn Ha npcTeHOT 3a 3aNTNBkHa nIOBnOT BeHTnJ. KaKo da ce nonpaBn: NcHnCTe Ro npctehOT Ha 3aNTNBkata Ha BENTnOT.
PpHnHa 2: PpCTeH Ha 3aANTbKata Ha BeHTNIOT nOd npNTcOK e cKpWeH. KaO da nonpaBITE: KoHTaKTnpajTe ro npoDaBaoy 3a ODPKyBaHe i NonpaBAka.
KoHTnHynpaHO nCnyuTaHbHe Ha npNTcOK 3a BpeMe Ha pa6OTata:
PnHHa 1: BENTNIOT 3a orpaHcyBaHe Ha npNTUCOKOT He e nocTaBeH BO 3aneuataHa noIOX6a. KaO da nonpabute: NocTabete BeHTIN 3a orpaHcyBaHe Ha npNTUCOKOT BO 3aneuataHa noIOX6a.
PpnuHa 2: PpeMaNky Boda nHn XpaHa BO TeHuepeTo. KaKo da ce nonpaBn: IOnaTe BoDa nHn NOBeKe XpaHa.
PpunHn 3: PpeKnH nIpeKnHyBaUOT nOД npNTUCOK. KaKo da nonpaBnte: KoTakTupajTe ro npOdaBaUOT 3a oDpxyBaHe nNONpaBAka.
PeleuKHaekpaHOT:
E1 - ckpuehen ceh3opot 3a donhata temnepaTypa. KaKo da nonpabnte: KoHTaknpajte ro npodabaOT 3a odpxyBaHe nnonpaBka.
E2 - KpaTOK cnoj Ha dHOTo HA Tempepatyata. KaO da nonpabnte: Ncknyte ro, octabeTe ro da ce n3nai, Bknyte re noBtopHO. Ako He nomorHe. KOHTaKTPajTe ro npodabayot 3a oDpxkyBaHe i nonpabka.
E3 - Temnepaypatae npebncoka, hema doBONHO BODA BO BHATpeHNOt ca. KaKo da nonpaBnte: Ncknyte ro, octabeTe ro da ce
TexHnUKN DeTaNi:
Kanauntet: 6L
Bne3eH haoh:220-240V\~50/60Hz
MokHOCT:1000W
Ce TpIXKIMe 3a npipOHaTc CpeiHa. KapTOHCKITe NAKOBMOJIME Da CE HAMEHAT 3a peuKNIPAhe. POJIneTNIEHOBITE Kecn (PE) da ce cPpNaT BO KOHTeHep 3a Pnactika. NcOpNCTeHNOT ypeI Tpe6a Da CE npeJaTe BO COODBeTHNOT CKJaDnpaKINyHK, BndejKn He636EHNTE CoCTojkn KOn CE HAOaAT BO ypeoT MoKaT Da BnDat 3arpo3yBaHe 3a CpeiHaTa. ENEKTPnuHnOT ypeI Tpe6a Da CE npeJaTe Ha NaHH Koj Ke OHeBO3MOxN HeROBA NOBtropHa YnOTpe6a NcKOpNCtYBaHe. DOKOLky BO ypeoT IMa 6atepn, Tpe6a Da CE n3Baat Nnoce6Ho Da CE npeJaT ABO CKJaDnPAuKInOT nyHKT.
(GR) EAAAADA
OPOI AΣΦAΛEIAΣ - ΣHMANTIKEΣ OΔHΓIEΣ ΓΙA THN AΣΦAΛEIA XPHΣHΣ ΔIABASE ΠPOSEKTΙKA KAI KPATHΕΤΕ ΓΙΑ MEΛΛΟ NΑΦΟΡΑ
Oi opoi eyyunonc evai diaopetikoi, av n ouokeuun xpnoiooieitai yia eptiokouc OKOTOUc.
00:30, 01:00, 01:30... K.λΠ.
Kpatnote ZEto: ZE kataaotaan avauovnc patnote To koupi "Aiatnpnon Zeotou / Akupon" (13). H aeitoupyia 8eiknoei kai n obovn (15) 8a deiEi "bb". H eepokpaia diatnpetai Zeotnivai 65C-75C. Patnote EaVTo koupi ia va oloknpwoeTe Tne ioupyia kai va etniopseveTc otnv kataaotaan avauovnc. Autn n aeitoupyia 8eepoytono9ei tioans autupa Ta Tnv oloknpwOn KaTe TTpoypamatoC.
Akupwn / Diaoknipoypaumoc / DiaoknnayepaatoC:Kata n diapkeia otioouonntote ato ta npoypaumata mtpeite va tnatnoet To koupi "Keep warm / Cancel" (13) ia va akupwoeTe otioioonntote poypma piokeai eEiAig.
TeLeiuvovTaTo mayeipea:
Apoou olokwnepdi npoypaum, 0a kntemu eva nxtik o nma. Tn ouvexia, 0a evpyoioinEi to npoypma "Keep Warm".
Tnote to koupi Akpo / Di npon 0epoTnta (13) yia va eioptpee t on oukeun oe kataoan avapovnc.
To kattaki aqaaieatai to kaiidomega nieonc.
Tia va avoiete to katiaki, yupioe Tpota n «baiaia piepiopou triocg (2) poc ta dejia. IIPOOXH !!! Auto ta apxioei va ateuepewvei triocn kai atuo. Eav dev to xeiipoteite me Tpooxn mtopeite va kaute tov eauto oac !!!
KpatnoTe n "BaIbda Iepiopiaou nieo" oT h eon "Avoiyia" eOg otou neo i n "BaIbda Iwtnpa".
Oa akouoTe eva * klik * kal otn ouvexia 0a mtopeite va avoieTe to kaTaki.
KOYMIIA MENOY:
00:30, 01:00, 01:30...atd.
00:30, 01:00, 01:30 ... itd.
Držite se toplo: U stanju Čekanja pritsnite tipku „Ugrijavaj / ponisti" (13). Funkcija ce sePokrenuti, a na zaslonu (15) prikazat ce se "bb". Temperatura odžavanja toplom je 65C-75C. Ponomno pritsnite gumb za zavrsetak funkcije i vracanje u stanje pripravnosti. Ova ce se funkcija takoder automatiski aktivirati nakon zavrsetka svakog programa.
IoproToBka yctpoNCTBa:
- OtkpbItne KpbIuKn: KpeIIO yIepxNBAy pyKy (1), NOBepHnTe KpbIuKy (4) no YacOBn CTpeJIke, Ioka OHa He ocNa6HeT, n NODHMnTe ee B BeptnKaIbHOM HapBaJIeHN. KpbIuKy (2).
- CHIMITE BHYTPEHHIO KAcTPOIIO (5) IdoabBte XeNaembIe INHPeDInENTbI. KoJIuYeCTBO BOdbI N KOpMa He DoJnxHO ppeBbIaTb 2/3 BbICOTBI BHYTPEHHeN KAcTPOIN (5). IJn npOdyKToB, KOtOpBle paCUnpRcTcB BOde, ypoBeHb He DoJxKeH ppeBbIaTb 1/2 BHyTPEHHe EMKOCTn (5).
- Y6eHNTecb, yTO BHYTpEHnRA EMKoCTb, B KOTOpO paCNoIoxE hJNeKtpOHnBn HArpeBaTeJIb, UcTae n CyXa, npExJe cem BCTaBnTb BHYTpEHNO EMKoCTb (5) B CkOpOBapKy u OTrpeYnIpOBaTB EMKoCTb BnEBO n BnPaBO, yTObI ObecneHTb ONTImaJIbHbN KOHTAKT MeJxDy BHYTpEHnE MKKoCTu HArpeBaTeJIbHbIM 3JemeHTOM. (6).
- 3akpoTe KpbIuKy: y6eDntecb, yTO pe3HOBoe yNIOHTeJIbHOe KOJIbO npaBnIbHO yCTaHOBNeHO Ha MetaJIINueCKOE KOJIbO BVHTPNKpbIuKiN.
- 3akpoTe KpbIky (2). YdepeKmba pyky (1), noBepHnTe ee npoTb yacobn CTrpeJIKn B nOIOKeHne «3A5JIOKINPOBAHO». (Cbliueh 3axmaou 3Byk)
- IpoBepbTe KJIanah orpaHueHn DaBHeHn (2) n nonJaBKObB Knahan (3).Knahan DoJIkeH 6bITb HnXKHeM NOIOKeHn.
Oh 6yIeT OCTaBbC B 3TOM NOJIOXeHn Do Tex nop, NOKA BO BpeM pa60tB HByTpB HByTpEHHEn EMKOCHe He 6yIeT DOCTNHyTO DaBJIeHne.
- BctaBte uHyp nHTaHn B OTBepCTne B nIpaTkoBOM OCHOBAHn (8) yCTpOCTBa.
8.ПодклioчITEshypпntанняКэлкtpocetn.
- YcTpoNCTBO n3dact 3BvKOBo CnHAn, BCE nHnKAtOpbI BkIouaTcRa Ha ceKyHny, a 3aTeM nOracHyT. Iocne 3TOrO yCTpOJCTBO nepeiDeT B peKIM OxNiDaHnI HA dncnnee (15) otobpaatcr «0000».
Pa60Ta yCTpoCTBa:
- Haxmte KhoNky HyKhoN cyHKUIM (1-11).
- Tocne BbIbopa Jeklaemn Iporpammbi Ha dncnlee OTo6pa3ntcBpeMn OyMOJuaHIO, N OHO HauHET MmraTb. Bbl MoXeTe n3MeHHTb 3TO, Haxkab KhoNk - + (14).
Bb moKTe HaxKaTb «OTMeHa», YTO6bI OCTaHOBnTb nporpaMMy B IIO6oMOMeHt.
Reservation: KhoKy MoXHO MNoJIb3OBAbB CooTaHmC IIO6oN 13 nporpAMM MeHIO. OH npEHa3NaueH dIra OTCPOuKn cTApTa Bbl6paHHo nporpAMMbI, BpeMcSTapTa - 30 MNHyT. IporpAMMa NaHeTcYepe3 30 MNHyT. MakcImaJIbHoe BpeMra - 24 Yaca. OH npoDBnRaTeC r C warom 30 MNHyT.
00:30, 01:00, 01:30... nT.Д.
Corpebca: B pexmme oKuHaHn HaXmTe KONky Corpebca / Otmehntb (13). FyHKUa 3anyctntc, n Ha dncnnee (15) oTo6pa3ntcra bb . Temnepatya coxpanen Hn Tnla coCTabIeT 65 - 75^ . Haxmte KONky eue pa3, yTo6bl 3aBepunb fHykuiu BepHybcB pexmOxuaHn. 3Ta fYHKUa TAKke AKTNBUPyeTCABTOMaTHUeCKN Iocne 3aBepweHn KaKdoi n3 nporpamM. Otmeha / OctahOBka nporpammb/ OctahOBka npiroTOBHeHn: Bo Bpem JIOboB n3 nporpamM Bbl MoKeTe HaxaTb KONky POndePkmBaTb TEnJIO / Otmeha (13), YTo6bl npepBaTb NIObyo BBInONHryOuyoc nporpamMy.
3aBepseHne npiroTOBJIeHnA:
IIO OKOHaHHn pa6Oblc nporpAMMO yCTpoJcTBo I3dAcT 3ByKOBo CnHAn. 3aTeM BKnIOuHTcra nporpAMMA «Corpebca»
Haxmnte KhoNky «Otmeha»/ «CorpeTbca»(13),yTo6bI BepHyTb yCTpoiCtBO B pexIM OxuHaHnA.
KpbIka 3aKpbIbAeTcHaxMHbIM 3aMKOM.
YTo6bI OTKpbItb KpbIiKy, Chayana NOBepHnTe «KnanaH orpaHnueHn daBHeHn» (2) BnpaBO. !!! OCTOPOXHOCTb !!! 3to NaHET BbInyCKaTb DaBHeHne n nap. Ppi HeoCTopoXHOM oBaPaeHHo MOxHo OBKeYbCRA !!!
Toxayncta, depknte Klananoh orpanuHneHn daBHeN B nIOxehn OTKpbITo, nKa (nonnaKBOBn KlananH) He onyCTNTcA.
Bby ycbiWnte * uenHOK * n CMOXeTe OTKpbTb KpbIiKy.
KHONK MEHIO:
- «Kукура»: сачала постпе ИнгрденитBI BO BHTpeHIOEO EMKOCtB (5), 3aTeM 3akpoite KpbIswy (4) nOBepHnTE KnaHAnOrpaHnEHHaДавеня (2)ВЗakpblToe NOLOKeHne.YcTpoCTBO HauHHaet pa6Oty uepe3 5 cekHyd.ПО OkOHuaHm ObpaTHoroOTCheta YcTpoiCTBO NepExoDIT B peKIM POnDEpKHaHn TePNa.
- «Cyn»: chayana haJeTe BOy BO BHyTpEHHIOKacTpHIO (5), 3aTeM 3akpoTe KpbIuKy (4) nOBepHnTe knanah orpaHneHnaDabHeHn (2) B 3akpItoe noIOKeHne. DaTb BoTe 3akIneTb. Korda BOda 3akInaeT, np6op coo6UHT 3ByKObIM CnHaJOM. OTKpoTe KpbIuKy. DobabTe MaKapOHi N Bapnte B TeueHne onpeJeHHO BPemHn. PocNe OKOHuaHn o6paTHOro OTcheta OHBepHeTc B COCTOAHnNo yMOJUHaHIO.
- «Tушенье»: санчала постinte Ингрдente BO BHTpeHIOIO KAcTPOJIIO (5), 3aTeM 3akpoite KpbIshky (4) И NOBepHInTe KnaanorOrgaHueHnA DBaHEnHn (2)ВЗakpItoe noIOxHne.YcTpoCTBO HauHHaet pa60Tu yepe3 5 cekyHd.По OkOHuaHN ObpaTHoroOTCheta YcTpoiCTBO NepExoHT B pexHM NODepKjaHn Tenla.
- «Miro»: chayana nomeCTte HnreHEnbBo BHyTreHHIOeMKoCTb (5), 3aTe m3akpoTKe KpbIuKy (4) nOBepHnte KnaanorpaHneHn DaBHeHn (2) B 3akpItoe NoIOJKeHne.YcTPOCTBO HaunHaet pa6Oy uepe3 5 cekynd. Ito OkOHaHN o6paTHoroOTcHeta YcTPOCTBO NepExoHT B peKIM NOdEprKaHn Tenla.
- «ЖAPKA»: Дд пiroTOBHeH HeO6xOДmO OTKpbIb KpbIshky (4). Temnepatypa no ymoJuaHIO COCTaBnE 175-178 °C..。Образьн OTCeT NaUHaETcЯ NOcJIe HaxKaTЯ KHOJKN «ЖAPKA» n BO3BpaUaTeCBAxCODHoe COCToRHeNIE NOcJIe 3aBePseHnra paOTobl.
- «PNC»: chaua nomeCTnTE INHpeIeHENTb BO BHTpeHHIO EMKoCTb (5), 3aTeM 3akpoTKe KpbIuKy (4) I NOBepHnTe KJanaH OrpaHueHn DaBHeHn (2) B 3akpyToe noIooXeHne. Ha KaKdyu YauKy pica Doababte npImepHo 1 CtaKaH BoDbl. YcTPOIcTB O HauHaet pa60Ty uepe3 5cekynd.. No OKOHaHN o6paTHOrO oTcye Ta cTPOIcTB NpeXoDIT B peKIM NODepKHaHn Tenla.
- «Kaша»: счанаяnomecnte ИнгpeиentbI BO BHytpeHHIO KacTpIONI (5), 3aTeM 3akpoTne KpbIshky (4) I NOBepHITe KnaanorOpaHnueHnI daJIeHnI (2) B 3akpItOE nIoXeHne.YcToPcTBO HaunHaet pa6Ot ype3 5 cekyH..No OKOHuaHIn O6paTHoroOTcYeTa YcToPcTBo NepExoNTB pexIM NoIdepXaHnI TeIIJa.
- «Вынчka 6e3 BОдь»: Temпатура по умочаню 120-130 ° C ount Обатный OTCЧET Начнaitя NOСе Нжатя КНОКИ «Вынчka 6e3 BОдь», a no OKOHУАнIM pa6OТы 3anyCKaTeC coхpaHeHne TENJa.
- «Подержьавы давлины»: 3а Функцяп Дадерхиваet давлины B yctpoiCTBe 6e3 nprirotoblenяпии. ON harpebaetc TOnbkoДЯТOrO,УTOБь ПОДерхиваы давлины. Брем NOуMOnuHaHIO-2 MInHyTbI. 3aTeM ON epexoDITВ pexIM POndepxahnry TeTTa. He npedna3haueH dЯ pa3orpeBa пии. Ecnn Bbl CHTaTe, YTOпиц a TbepaTЯ n Tpe6yET 6OJIbWeJ OpbapOTkn DabLeHem, BOCNoJIb3yIteCb 3Tof yHKzneJ.
11.ФункионьньгдКногн-ДОПЛHNTeNBHgIe CNEuaJIbHbIe IporpamMbI.HaxMITE KHOJIky,TO6bI BbI6paTb OndHy n3 6 NOINpOrpamM, nepeHCJIeHHIX HIXe:
11.A «Рьба»: chачаляnomeCTITE nHrpeDneHTb BO BHytpeHHIO KAcTpOJIIO (5), 3aTeM 3akpoTKe KpbIuKy (4) nOBepHnTe Knaanor orpaHnueHn IabHeHn (2) B 3akpblTOe nnoJxHeHne. YcToPocTBO HauHaet pa60Ty Chepe3 5 cekyHd. N o OKOHuaHn O6paTHoro OTCYeTa YcToPocTBo nepeXoDnB PexIM NoDdePckHn TepNa.
11.B «3epHa»: chauana nomeCTne uHrpeneHTb BO BHytpenHIO KAcTPOII (5), 3aTe makpoTe KpbIky (4) nOBepHnTe KlananorpaHnueHn DaBHeHn (2) B 3akpyote noLoXeHne. YcTPOCTBO HauHnaet pa6Oty uepe3 5 cekyHd. IIO OKOHuaHN o6paTHoroOTcYeTa ycTPOINCTBO nepexoDIT B peXIM NOdePkaHn TEnla.
11.C «Kypuca»: Chayana NomeCTte INHrpEnHeTb BO BHyTpEnHHIO KAcTpOJIIO (5), 3aTeM 3akpoIte KpbIshky (4) n NobepHnte KlaIaan OOrpaHnueHn IabNeHn (2) B 3akpItoe NoIoxKeHne. YcTpoIcTBo HauHnaeT pa6Oty Upe3 5 cekyHd. IIO OKOHuaHN oBpaTHoro OTCYeTa YcTPOINCTBO NepExODNT B PexIM NODePxAHn TepNa.
11.D «TOPT»: TemnepaTpaNo ymoJuaHIO 125-135 °C.": ChauJa NomeCTne INHpeJeHbI BO BHYtpEHHO EMKoCTb (5), 3aTeM 3akpoite KpbIuKy (4) n nobepHnte Knaan OprahueHn daJIeHnra (2) B 3akpblote NOJoxKeHne. YcToPcTBO HaunHaet pa6Oty uepe3 5 cekyHd.. No OKOHaHHn o6paTHOro OTCueta YcToPcTBO nepeXoDITB PexKIM NOIDepKahnra Tennla.
11.E «OBoUH»: chauana nomeCTnTe INHpeIeHENTbI BO BHyTpEHHIO EMKoCTb (5), 3aTeM 3akpoNTe KpbIuKy (4) n NobepHnte KJIanaH orpaHneHna DABHeHnra (2) B 3akpblote noLoXKeHne. YcTPOINCTBO HauHHaet pa60Ty Chepe3 5 cekyHd. IIO OKOHuaHNn ObaPthoro OTCeTa YcTPOINCTBO NepExoDHT B PexIM NoIepJxHnra TeIINa.
11.F «MopenpoDyKtbI»: cHauaia nOmeCTte MHrpeDneHTbI BO BHyTpeHHIO KAcTpOJIIO (5), 3aTeM 3akpoTte KpbIswky (4) i NOBepHnte KnaanorpaHnueHnraDaBHeHnra (2) B 3akpbIToe NOnOKeHnE. YcTPOJCTBO HaunHaet pa60Ty ue3 5 cekynd.. Ito OKOHuaHNn OBpaTHoro OTCueta yCTponCTBO nepeXoDNT B pexnIM NODepJxHnA TENla.
- «Bkyc»: kajda nporpma mMeet 3 npedyctaHOBHeHHbIX BpeMeHN. Bbl MOxete N3MeHHTb BpeM, Haxab KhoNky «Bkyc» n Bbl6paB OINH IN3 Tpex BapnaHTOB, INI Bbl MOxete N3MeHHTb BpeM, Haxab KhoNk «+» INI IN «-».
Bpempa6oTbI JnФyHKn:
BpemI Bcex nporpaMM MoKet 6bItb N3MeHeHO t 1do 99 MmHyT.
Kykypy3a:
BpeMa no yMOnuHaHHIO: 00:25 MmHyTbI BApnaHTbI BKyCa: 20, 25, 32 MmHyTbI
Cyn1
Bpemno ymoJuaHnIO: 00:15 MmHyTbI | BapnaHTbI BKyCa: 10, 15, 18 MmHyT
Tymntb:
Bpemno ymoJIuaHnIO:00:40 MmHyT | BapnaHTbI BKyCa:35,40,60 MmHyT MrcO:
Bpemno ymoJuaHnO:00:20 MmHyT | BapnaHTbI BKyCa:12,20,28 MmHyT XApuTB:
BpeMn ymoJuaHnIO: 00:30 MmHyTbI | BapnaHTbI BkyCa: 25, 30, 35 MnHyT Pnc:
Bpemno ymoJIuaHnIO:00:25 MmHyTbI | BapnaHTbIBkyca:20,25,30MmHyT Ka7a:
Bpemno ymoJuaHIO:00:15MmHyTbI | BapnaHTbIKyCa:10,15,20MNHyT Be3BOHaBbIneUka:
Bpemno ymoJuaHIO:00:28 MInHyTbI | BapnaHTbI BKyCa: 26, 28, 32 MInHyTbIPb16bl:
Bpemno ymoJuaHIO: 00:10 MmHyT | BapnaHTbI BKyCa: 8, 10, 16 MmHyT
Bpem ymoJuaHnIO:00:30 MmHyTbIBapnaHTbI BkyCa:25,30,40 MNHyT Kypuca:
Bpemno ymoJIuaHnIO:00:15 MmHyTbI | BapnaHTbI BKyCa:12,15,20 MNHyT Topr:
Bpemno ymoJuaHnIO:00:32 MmHyTbIBapnaHTbIKyCa:25,32,40MmHyT OBOU:
Bpemno ymouhauHIO:00:18 MHyTbI | BapnaHTbIKyCa:13,18,25MnHyT MopenpoNyKTbl:
Bpem no ymoJuaHIO: 00:13 MmHyTbI | BapnaHTbI BKyCa: 11, 13, 17 MmHyT
BbMoKeTe yCTaHOBnTb 3aepKky nporpAMMbI OT 10 MmHyT do 24 YacOB, WAr - 10 MmHyT npn HaxaTN KhONOK + / -
OuInCTka:
1.BbHbTe shHyp nITaHnI n3 pO3eTkn.
2. Otknouhte uHyp nHTaHnO tYcTpoiCTBa.
3.CnerkaBlaXHOnTprnKoNpOtpuTe yCTpoiCtBOchapyKn.
4. OtkpoTe KpbIiKy.
5. IpoTpnte HmXHIOU qacTb KpbIuKn BJIaXHO TpIkoN.
6. CHHMMTE BHYTpEHHN IROPOK.
7. OYHCTNTe BHYTpEHHHIO EMKOCTb YNCTO BDOO C MOUUM CpeIDCTBOM.
8.CJerKa BJaXHO TpIKN OuNCTNe BHyTpeHHIO YacTb CpeHrO cNoI.
9. Pnptpnte HarpBeBaTeIbHbI 3JIeMeHT CJIeKa BJIaxKHO TkaHbIO. He nCNoJIb3yUte MOUOuNe CpeDCTBa.
10. Chmnte c6opHbI 6okc, npotpnte erO BnaXHO TkaHbIO ydaNTe BcIO XnIKoCTb, KOTOPa CKONIIacB BHyTpN.
11. Npeed c6opkOДaHTe BcEM DeTaIaM BbICOXHyTb.
12. XpaHntb BCyXOM npoxJaHOM MeCTe.
IPEDUYPKEJEHNEI:
He moiounpynte, He pa36npaTne Hpe moHTnpyTe n3dene camOCToTeJbHO.
He nomeuaine i3dene B body oucnctkn.
He nCnOJIb3yIte BHyTpEHHIO EMMKOCtB HNaue, Yem npEydCMOTpeHO pPON3BOJNTeHem. Bbl He moXeTe nCnOJIb3OBaTb erO HenocpeDCTBeHHo Ha KaKOM-JIn6o NcTOUHnke TeNJa, KpOME CKOpOBapKn.
He npHmMaTe n He nepemaeaTe yctpOCTBO BO BpeM nprirotobJeHnA.
BHytpenHHIO KAcTPOIO CNeIeYEt IcNOJIb3OBAtB CPiNactIKOBbIMN NIIH He capanaIOUIMCRA KxOHbIMN pInHaIeXHOCTaMn NCHCTaMM CpeDCTBAMN.
Ipeep noKIOHcHnEM K 3eKTPocetu y6eNTecb, YTO HArpeBaTeNbHbN 3JeMeHT, DaTtNK TempeaTybl N BHyTpEHnra KActpOJIa ChapyKn UCTbI e CUYNE; 3aqr3HeHn IIN NOCTOpOHnne PpeMetb MOYr BBi3BaTb HEnCpabHOCTb 3JKeTpnuecko CKOPOBAPKn.
Hikorda He nobpekdaute, He pa3pe3aute, He cHmMaTe I He 3aMeHnTe pe3nHOBoe yNtHTeNbHoe KOJIbOu HATJKeHn. 3TO MOKET pINBecT N HENCIPABHOCT N JI IN NOBpeKDeHIO NOL3OBATEJI.
EcIn 60nbuee konuueCTBO npa, nCxOJaunn i3 yctpoiCTBa c KnaHOM daBneHn 3akpyt yka3bIbaet Ha HeNCpabHocTb. Ioxayncta, OTKIOHTe yctpoiCTBO OT 3JeKTPoCeTn. DaTe emy OCTbITb n COo6uNTe npoDauy o Heo6xoImocTn 6cIyKBAHNn nn peMOHTa.
Pn TpaHcnpTnpOBke nCOnJb3yIe 60KOBbIe pyuKn no 6okam yCTpoNCTBa, a HE pyuKy KpbIuKn. PyuKa KpbIuKn IcNoJIb3yeTcra TOnbKO dna OTKpbIBaHn I 3aKpbIBaHn yCTpoNCTBa.
IcnpaBHeHne npo6nem:
KpbIwka 3akpbBaetc Tpydom:
IpnuHa 1: yNIOHTnHbHoe KOJIbO yCTaHO He npABnJIbHO. KaK nCnpabNTb: Y6eINTEcB, YTO yNIOHTnHbHoe KOJIbO Ha HIXHe CTOpOHe KpbIshKn paCNOJoxEo IpaBnJIbHO.
PnHb2: nonNaBkoBk nnanah 3aEaet KaK yCTpaHntb: HeCKoNbKO pa3 CdBHbTe KpbIbky BneBO nBpABO nHaxMITE naJIbueM Ha nonNaBkoBbKnanaH. Ecn 3TO He pa60taeT, o6paNTecb K npdaBu y dna ObcnyKBAHHa.
Tpydno OTKpbbTb KpbuKy:
PnunHa: He cpaabIbIaJI nonnaBKOBI KJanaH. KaNcnpaBtB: HEMHO CdBHbTe KpbIky CneBa HAnpabo. Ecnn OH He pa6oTaET, BbInyCTNTe 60JIbe napa, octopoxHo HaKaB HA KJanaH c6pOca daBHe HnBepx, NOKa He ycblWnte 3Byk * JEnyok *.
IITPEyIPPEXJEHNE!! 3To BbInyCTnT ropn nap. NcnoB3ynte DepeBraHHyo loxky nnn npaoKy dna ebl, TTObI ChrTb daBneHne H He o6keYbc.
IpoTeKaIOUaK kpbIuKa:
PnHb 1: yNIOHTeNbHO KOBuO yCTAHOBJIeHO HEnpaBUNbHO. KaK nCnpaBtB: Y6eINTEcB, YTO yNIOHTeJbHOE KOJBUo Ha HIXKHe CTOpOHe KpbIshKn paCNOJOKeHO pBaBUNbHO.
PnunHa 2: OctaTkn nuii 3actpnn Ha yNIOHTHtEnbHom KOJIbue. KaK Icnpabntb: OOCTNTb yNIOHTHtEnbHOe KONbIoo.
PnHnHa 3: cIOMaIocb yIyIOTHInTeJIbHOe KOJIbO. KaK nCnpabNTb: 3aMeHInb yIyIOTHInTeJIbHOe KOJIbO.
PnunHa 4: KpbIka nIOxo 3akpbIbAeTc. Ka nCnpaBt: PpaBnJbHO 3akpoTe KpbIkuy.
YteuN3KlaNaHaDaJIeHnIa
PnHnHa 1: OctaTknPiun 3actprn Ha yNIOHTeHbHom KOIbue KIanaHa daBHeHra. KaK nCnpabntb: OuncTe yNIOHTeJIbHOe KOIbUO KIanaHa.
PnHnHa 2: CnomaHo yNIOHTeNbHOe KOJIbO HArHeTaTeJbHoro KJanaHa. KaK nCnpaBntb: 3AmEHNTb KJanaH yNIOHTeNbHoro KONBa.
PonJaBkoBbKJanaH He pa6oTaet:
PnHb 1: OctaTkn nni 3acTprn Ha yNIOTHNTeBHom KOIbue nonIaBKOBOrO KnaHa. KaK ncPabntb: OuNCTnTe yNIOHTeBHOe KOJIbUc KNaHaHa.
PnH2: CnmoHO yNIOHTeBHOe KOJIbO HAHeTaTeBHoro KNaHa. KaK nCpABtB: oBpaTNEcB K npOdaBcy dIra 06cnyxBaHna I peMOHTa.
HenpepbBbHb c6poc daBHeHn BO BpeMa pa60Tb:
Причпа 1: Клалан Orpaичeyня Давелен He yctahOBJIeH B 3akpbIToe noJoxKeHne. KaK nCnPaBNTb: YCTaHOBITe KlananorpaHueHn DaBJIeH N B 3akpbIToe noJIOxKeHne.
PnunHa 2: cInuKOM MaIO BObl INI eBb I KAcTpIone. KaK nCnpaBntb: do6aBNTb BObl INI eue eBbl.
PnunHa 3: OpbIb peJe daBHeHna. KaK nCpapBntb: oBaPntecb K npOaBu y dIy o6cnykBaHnI neMoHTa.
OTo6paKaemble oUH6Kn:
E1-HnKnn DaTnK TemnepaTyb cIOMaH. KaK nCpnaBtB: o6paTntEc b K npOdaBcy dJa o6cnykBaHn r peMOHTa.
E2 - KopoTKe 3aMbIkaHHe NO HxHHe TEmpePaType. KaN cnpaBntb: BbIKIOuHTb, daTb OCTbITb, CHOBA BKIOUHTb. EcHn He NOMOKeT. CBrXNTecb c npoDaBcUM dnn o6cnyKbHaHn n peMOHTa.
E3 - TemnepaTpya cnIrkom BbICOKA, BO BHyTpHHe mKoCTn HeOCTaTOHNO BoIb. KaK nCnpaBHTb: BbIKIOHTb, DaTb OCTb, CHOBA BKNIOHTb. Do6aBBTe BOIb. EcHn He NOMOXET. CBXNTecb C npOdaBcOM DnI OBCnykBaHn IpeMOHTa.
Texnueckne Detajin:
EMKOCb:6J
BxoHoe HapxKeHne: 220-240 B 50/60 T
Mouhoctb:1000BT
3a60TcB o6 Okpykaoue Cpe. ..YnakOBky n3 KapToHa nepeaTe, noXaIyNCTa, Ha MaKynatpy. POni3tnHeOBbIe MeuK (PE) BbIKDaTb B pe3epByap dIra nnactMaCbb. HHOseHNOE yctpoiCTBO hAO nepeDaTB B COOTBeCTBHyUO TOUY TOKY xpaHEnH, TAK KAK HAXoJUncBcB yctpoiCTBeONAcHbIE CoCTABnIOUne MOrY ABnTbCRAyPO30d IIN OKpykaoue cpebl. 3NeKTPnueCeOe yctpoiCTBO hAO nepeDaTb TakIM o6p3OM, YTObI OrpAHnHTb erO NOBtPoHne ynoTpe5JeHne NcNoJIb3OBAHne. EclN B yctpoiCTBe HaxoJrTa 6BaTapeH, IN HAO BbITaHyt b n pe3epaTb ToUY XPAHENH OTrElbHO. YcTpoiCTBO He BBkUdaTb B pe3epByap dIra KOMMyHaJIbHbIX OTxOIOB!
(NL) NEDERLANDS
BESCHRIJVING VAN HET APPARAAT:
APPPARAAT (1A)
- Handgreep 2. Drukbegrenzingsklep 3. Vlotterklep 4. Deksel
- Binnenpan 6. Verwarmingselement 7. Bedieningspaneel 8. Kunststof voet
- Lichaam 10. Handvatten 11. Middelste laag
Configurationschem (2B)
1. Mais 2. Soep 3. Stoofpot
4. Vlees 5. Reserveren 6. Fry
7. Rijst 8. Pap 9. Waterloos bakken
10. Houd druk
11. Functie:
Een vis
B. Boon
C.Kip
D. Cake
E. Groente
F. Zeevruchten
12. Smaak 13. +/- 14. Warm / Annuleren
15. Weergave
BESKRIVELSE AF APPARATET:
ENHED (1A)
00:30, 01:00, 01:30... osv.
00:30, 01:00, 01:30... jne.
- He 3aHpyoIte npicrpiy Body

- He Topkañtebc rapiyoi nobepxhi npucptoio. 3a donomoroyo pykabinyok 3himitb abo topkhitcb6 ydb-ynix
.
-
He pyxaIte ta He hociItb npucTpii ni d yac poBOTn. Iicna 3aBepueHn rpoBOTn npucTpiM oKHa nepeCyBaTHOMy cTAHI.
-
IIOPEKHEHHI IIpncpi BnDInrE rapny np ny nTCKOM. lChy BeNkA mOBipHcTB oniKy. Bydb naCKa, BnkOpNCTOByTe 3axnch pykabuyn a6o depeB'HN noCUD nD uac pOBoTn 3 npctpoem Ta npn BiDKPNTTI npntpOio.
ONIC PUNIADY:
PNTPOI(1A)
- Puyka 2. Klianah obmexeHH TcKy 3. NonnaBkoBn Klanah 4. Kpnika
5.BhytpiunKactpyJ6.HarpibanbHn enemT 7. NaHEny ynpabNHH8. NpactNKoBa ochoBa
Yac 3a 3AmOByBaHHaM: 00:25 XBnINH | BapiaHTN yacy cMaKy: 20, 25, 32 XBnINH
Cyn:
Yac 3a 3amOByBaHHm:00:15 xBnINH | BapiaHTn yacy cMaKy: 10, 15, 18 xBnINH
Pary:
Yac 3a 3amOBuyBaHHaM:00:40 XBnInH | BapiaHTn yacy cMaKy: 35, 40, 60 XBnInH
M'aco:
Yac 3a 3amOByBaHHm: 00:20 xBnINH | BapiaHTn yacy cMaKy: 12, 20, 28 xBnINH
Фраз:
Yac 3a 3amOByBaHHm:00:30 xBnINH | BapiaHTn yacy cMaKy:25,30,35 xBnINH
Pnc:
Yac 3a 3amOByBaHHm: 00:25 xBnINH | BapiaHTn yacy cMaKy: 20, 25, 30 xBnINH
Kaaa:
Yac 3a 3amOByBaHHm: 00:15 xBnINH | BapiaHTn yacy cMaKy: 10, 15, 20 xBnINH
Be3BODHe BUNiKaHHa:
Yac 3a 3AMOByBaHHaM: 00:28 XBnINH | BapiaHTN Yacy Cmaky: 26, 28, 32 XBnINH
Pn6a:
Yac 3a 3AMOByBAHHM: 00:10 xBnINH | BapiaHTN yacy cMaKy: 8, 10, 16 xBNINH
Kbacon
Yac 3a 3amOByBaHHm: 00:30 xBnINH | BapiaHTn Yacy cMaKy: 25, 30, 40 xBnINH
Kypka:
Yac 3a 3amOByBaHHm: 00:15 xBnINH | BapiaHTn yacy cMaKy: 12, 15, 20 xBnINH
Topr:
Yac 3a 3amOByBaHHm:00:32 xBnINH | NapaMeTpN yacy cMaKy:25,32,40 xBnINH
OboyeBn:
Yac 3a 3amOByBaHHm: 00:18 xBnINH | BapiaHTn yacy cMaKy: 13, 18, 25 xBnINH
Mopcbka k:
Yac 3a 3amOByBaHHm: 00:13 xBnINH | BapiaHTn yacy cMaKy: 11, 13, 17 xBnINH
BpOHIOBaHHa:
BIMoKTe BCTaHOBtN 3aTpMkY nporpaMn BiD 10 xBNiINH Do 24 rOHN, KPOK cTaHOBtB 10 XBNiINH 3a HaTnCKaHHM KHONOK ^+ /
Прибupaнь:
1.BiD'edHaIte HHyp XnVBneHHy BiD pO3eTKN
-
BiD'edHaHTe 7Hyp XnBJIeHHa BiD npncTpoIO
-
Tpoxn BONoroio raHupkoio npoTpib 3OBHIHIO qactiny npncTroio
-
BīdkpniTe kpiuKy.
-
Bonioro raHyipKOIO OChntiTB HxHIO CTOpOH KyuKIN.
-
BnMItb BHyTpiUHHi rOpUHK.
-
Ouchitb BHyTpHIO NocdyHcyNTO BOHO 3 MIOOH MIOOH 3aCO6OM.
-
Tpoxn BOIoroIO raHcyipKOIO MOxHA ONUCTNTH BHYTpIWIO YAcTHNY cepeHbOro WApY.
-
3a donomoroio troxn Bonoi raHypk MoXHa oUcHTn HarpBaIbHm eJeMeH. He BHKOpNCObYuTe MNUOuX 3ac06IB.
-
BnIMtB 36ipHy Kopo6ky Ta oynctItb II BONIO IO raHcIPO IO Ta BUnaITb pIDHy, IIO 3IbpaJacr BCEpeuHi.
11.ДайтЕ BCIM DeTaNМ BUCOXHHTI Nepe CKnJaAHHЯM.
- 36epiratn B cyxomy Ta npoxoJIOHOMy Micu.
YBARA:
He moDnphiKyIte, He po3bpaIte Ta He peMoHTyIte Bnpi6 camocTiH.
He Knaaditb Bpi6 y Body dnyuunenHn.
He BnKOpNCToBnyTe BHyTpiuHm rOpun 6bIy-b-ram mInuM cnoCobom, HIX nepeDbaeHo Bnpo6hKOM. Bu He moXeTe BnKOpNCToBvBaTu Noro 6e3nocepEnHbHa 6byb-akomy dxpeeni TeNJa, Kpim ckopOBapKn.
He niiHimaiTe Ta He pyxainTe npictriin iid yac roTybaHHa
BntyiHni nocyd cnid BnKOpNCbOyBaTn 3PiactIKOBm NocyDom Ta 3ac06amn dnyuHHe npnaTbcra.
IpekoHaTeCb, 0n HarpBaJIbHn eEnMeHT, DaTtHK TeMnepaTyra BHyTpIiHn NocyDnHa 3oBHi UcNCTa cyx, nepu Hix NiKlIOHaTu Do eEeKTPoMepeXi, DOMiIKn abO CTOpOHHI peOBOHN MOKyTb Pn3BecTn Do HeCnpabHOCTeNEKTPnHOT CKOPOBAPKN.
Hikojn He noWKoJkyuTe, He pixTe, He 3iMauiTe, He 3aMIHOJte rMoBE yUJIbHOBaIbHe KJIbCe a6o HATXKHe KJIbCe. Lc MoKe npN3BecTIO He cnpabHocTi a6o NOWKoJxKHeHHa KopNCyBaHa.
KJIO 3 npntpoio 3aKpHm HnipHm KnaHOM BnIJIeTbCBAeNka KJIbKICTb napu, ue CbiUHT bno HecnpaBHCtB. Byd naCka, BIMKHITb npntpri BID eJeKtpomepekxi DaTe Nomy OxOnOHTu i NobIDomte npodabur npo TexHue ObcnyroByBaHH a6o pemont.
IiD yac TpaHcnpTyBaHHB BnKOpNCToByIe 6iHi pyuKn 3 6okB npncTpoIO, a HE pyuKy KpuKn. PyuKa KpuKn BnKOpNCToByEcTbcra JInWe DnB BiKpNbAHHH Ta 3aKpNbAHHH npncTpoIO.
BupiueHn npo6nem:
KpnskU, 0BaKko 3akpntn:
Pnunha 1: yuinbHOBaIbHe KInbue po3MiueHo HnnpabNtB. Ra BnnpaBtu: PepeKaHaTecb, 0o yuiNbHOBaIbHe KInbue Ha HnxHi
CTOPOHKpNIuKNIO6pe po3MIueHe.
Pnunha 2: NonnabKobn Knaian 3acptra. Ra ce BnnpaBnTn: Knbka pa3ib nocyhte kpiuky Bnibo i Bnpabo abo haTncHtB naIbceM nonnabKobn Knaanah. Kaio ce He donomorno, 3'jxitbc3 npdaBcem dner texHOro o6cnrobyBaHH.
Baxko BiDkpnTn KpnuKy:
PnunHa: NonJaBKOH KnaHn He BiDnycKABcRA. Ra BnnpaBHTn: TPOXn NocyHbTe KpNkUy 3JIba HnpaBO. RaIO ue He cnpaCbOBye, BndjIb 6ilbe npn, oBepeXHO HATNCaOuH KnaHn BnNyCk Tycky Bropy, DOKn He NoCyTe 3Byk * KnaHITb*.
!!YBAGA!!Ie BnDijntb rapa npy.BnkOpncToByte depeB'ny JIOKky a6o naNHy, 063Hrt Tnck i He oBneKTscra.
Kpnska, 0o Teue:
IpnuHa 1: yuiJIbHIOBaJIbHe KInbue po3MiueHo HnnpaBnIbHO. Jk BnnpaBnTn: IpekoHaTeCb, 0o yuiJIbHIOBaJIbHe KInbue Ha HnKHi CTOpOH KpUKN Do6pe po3MiueHe.
PnunHa 2:3aHsKn iXi 3acTpRn Ha yuiNbHIOBajbHomy KInbui. RaBnPaBHTo:OuCTITyuiNbHIOBaJIbHe KJIbue.
Pnunha 3: yuinbHOBaBHe KInbue 3JamaNoC. YK BUNpaBHTN: 3amHITb yuiNbHOBaJIbe KINbIe.
PpunHa 4: KpnuKa noraHo 3akpnta. Jk BnnpaBnTn: npabNbHOb 3akpntn KpnuKy.
Bntik knaHa Tncky:
PpunHa 1: 3aIIuKk iXi 3actprn Ha KJIbci yuiIbHIOBabHO rO klanana. Ra CE BnnpaBtN: Ouncitb KInbcye uJINbHOBaHa knanana.
Pnunha 2: Nookkxdke nIbue yuiNbHOBaBHoro Knaana. Ra Bnnpabnti: 3miHitb kIbue yuiNbHOBaBHoro Knaana.
PonJIaBKObI KlaNaH He npaCIOe:
Pnunha 1: 3a nn k i xi 3actprrn Ha Knlbui yuilbHIOBau nonnaBKOBOK OlananaHa. JaC ue BnnpaBNT: OucntiB Knlbcue yuilbHIOBa KaIanaHa.
PpnuHa 2: PooKoJxHe KJIbue yUJIbHIOBaJIbHOrO KlaIaHa. Jk BnnpaBtN: 3B'JXITbcra 3 npOaBcEm dJa TexHiyHOro oScnyroByBaHHa Ta peMOHTy.
Be3nepepbhe BuaJenHn TscKy niJ cac poBoTn:
TnKyBepMeTnHHe NOXeHHI. KnPaBn BcTaHOBJIeHn y repMeTnHOMy noOxehHI. RaBnPaBn: BCTaHOBHTN KnaHOBtN KnaHobmexeHH
PnunHa 2:3a6aato BoOn a6o iXi B ropuKy. Jk BnnpaBHT: DoaTe BoOn a6o bilbue iXi.
PpunH3:O6pBpeTncky.ЯK BnnpabuTn:3B'JxItbc3 npoabCem dIeyTexHnHOrO obcnyroBaHHra Ta peMOHTy.
POMNIKHaDnCnIeI:
E1-HnKhi DaTChk Tempepatyn 3naMaHn. K BnPabTu: 3B'jXtbc8 3 npOaBcem IJraTexHIO O6CnyROBaHn Ta peMOHTy.
E2-KopOTke 3aMKKaHH HnKHbO TeMnepaTpyr. Ra BnPpABHTb, daTe OxOJHOHyt, yBIMKHITb 3HOBy. KaIO ue He Donomarae. 3BepHtbc Do npoDaBz dIra TexHCHOrO o6cNyTOBvBaHH Ta peMOHTy.
E3-3aHTo BnOka TeMnepatya, HeIOCTaTHbO BOHy BHYTIuHbOMy Nocydi. Jk BNpabNTu: BmKHiTb, daIte OxJOHOHTu, yBIMKHITb 3HOBy. DOnaTe BOHy. RaIoo ue He Donomarae. 3BepHtbcra Do npoDaBua Ira TeXHcHoro 06CnyROyBaHHra Ta peMOHTy.
E4 - HecnpabHicbpe Tncky. RaBnnpabTu: RaBnnpabTu: BmKHiTb, daTe OxOHOHTu, yBIMKHiTb 3HOBy. RaIIO ue He IOnomarae. 3BepHtbcdo npodabq dnn texHrHoro oocnyrobyaHHra Ta peMOHTy.
Texhi Dieta
EMHCTb:6n
Bxinda hanyra:220-240B\~50/60T
NToTyKHiCTb:1000Bt

Y iHTepecax HABKOJIiHbOro cepeoBnua.
Byd naCa, BiDnaiTe KAPToHny ynaKOBky B Micce 36Opy MykylaTypn. POniTneHOBi MiXKn (PE) BnKHyTN B CMITHNK dIa nnactKy. BiDnpaBObAHn npCtpi NOBHeH 6TyN BiDnpabNeHm y BiDnOBiHy TOcky 36epiraHHr, Tomy 0u B npCtpoi E He6e3neHi iHrpEicHTn, kMoKytb cTaHOBnT 3arpo3y HABKOImHbOMy cepedOBuSy. EJeKtpnHn npCtpi nOTpiHo NobepHyTu Tak, 06 ObMeKHTn Ioro NOBTopHe BnKOpNCtaHHra. RaUo y npCtpoi E 6aTepeRkn, To NotpiHo ix BNTaTHNu i BiDaTn Do BiNobIDHO rNYHTKy.
(SV) SVENSKA
SÄKERHETSVILLKOR - VIKTIGA INSTRUKTIONER FÜR SÄKERHET FÜR ANVÄNDNING LÄS VANLIGHT OCH HÄLL FÜR FRAMTIDA HANVISNINGAR
00:30, 01:00, 01:30 ... etc.
He ctabbajte npoun3bOy bOyo 3a yu
He ynoTpe6babaJte yHyTpaBn IOnaH na 6bn KOJ dpyn HauHr Hero wTo je npedBndeo npou3Bohaj. He moKeTe ra KopncTtN DnpeKTHO Ha 6nIIO KOM N3BOPy TOnlote OCIM WnOpeta ND pntnckom.
He noDnKIne n He nomepajte ypehaj Tokom KyBaHa
YHyTpaHbN IHOaC Ce KopnCTn Ca IIaCTnHm NocyHem 3a KyBaHe n IpnON3BODnma 3a YnshHe KoJn Ce He Orpe6e.
YBepnte ce da cy rpejHn enemt, temepaTyprn ceh3op n yHytpaHb a nocyda cnoJb a nCTn n CyBn pne NOB3BaHa ha eNekTpnuHo Hanajahe, HeuIcToHe nn CTpaH e MATEpHJe MOr npOy3pOKOBaTn KBap eNekTpnuHOr IINOpEta NOD npNTnCKOM.
HnkaHa HeMoTe OHTu, HceH, yKIOHTu, 3aMeHTu rmeH nnn 3aNTBn npCTeH. To MoKe npoy3pOKoBaTu KBap nnn OWTtN KOpncnKa.
Ako n3 ypehajca 3aTBOpeHIM BeHTNIOM NOI pINTNCKOM I3Ja3n BEJIKA KOJIUNHa nape, yka3yje Ha KBap. MoJIMO NCKJbYHTe ypehaj n3 eJekTPnUHe MPeKe. IyCTNTe Da ce OXJaDi N O6aBeCTNTe npoDaBua o ODPKabAbBy nII nn PnpaBn.
Ipn TpaHcnpOpy KOpNCtnte 60ue He pyuKe Ha 6oUHM cTpaHama ypehaja, a HE pyuky noklonua. Pyka noklonua ce kopnctn camo 3a OTbapaHe n 3aTbapahe ypehaja.
PeBaBHe npo6JIema:
Ioklonauc ce Teuko 3aTbapa:
Pa3IIOr 1: BpTBHeH npCTeH HJe DObpo NoCTaBbEh. KaKo nonpaBHTn: YBepnte ce Ja je 3aNTuBHe NpCTeH Ha DoBoj CToPAH NOKIOnIa do6po NoCTaBbEh.
Pa3nior 2: PnytajyHn BeHTn je 3aRJIaBbEn KaKo da ce nonpaBn: NOpMePte NOKIOnaue HeKOLNko NyTa IeBO n DeCHO nIN rypHnTe PnytajyHn BeHTn npCTOM. AKO He ycne, KOHTaKTIpaJte npOdaBa paDN ODPKaBaHa.
Teewko je OTBOPNT NOKJIOJA.
Pa3nIg: InytajyHn BeHTnIe HJne OtnyCTno. Kako nonpaBNTn: Nomepnte noknonaM aJIO cneBa ydeCHO. Ako He ycne, nCnyCTnte Bnwe nape naHO npNTNcKaiyHn BeHTnIa OTNYuTaHe npNTNcKa npema rope dOK He 3auyjTe 3Byk * Lmuk *.
!!YIO3OPEHBe!! OBO he ocnoobnTn Bpyh npy. Kopncntte dpBey Kaunky nnn 7anin da bncTe ocnoobnI npuTncaK n He oneknn ce.
Poklonau Koju uyp:
Pa3IIOr 1: BpTBHeH npCTeH HJe DObpo NoCTaBbEh. KaKo nonpaBHTn: YBepnte ce da je 3aNTuBHe NpCTeH Ha doBoj cTpaHn noklionca Do6po noCTaBbEh.
Pa3nor 2: Octaun Xpahe 3aenbHeH Na 3aTnBHom npCTeHy. KaKo nonpaBHTN: Ouchntte 3aTnBnH npCTeH.
Pa3nor 3: PJIOMbEn npCTeH 3aNTNBKe KaKo nonpaBHTN: 3aMeHrTe 3aNTNBHN npCTeH.
Pa3nor 4: Noknonauc Hne do6po 3aTbOpen. Kako nonpaBHTn: PpaBnHIO 3aTbOpTe noknonaui.
PponyuTa BENTIN NOI npNTNCKOM:
Pa3Ior 1: OcTaUxpaHe 3aJIeINuCy ce Ha 3aNTNBHom npCTeHy BeHTnla 3a npTuCAk. KaKo IOnpABTu: OunCTte npCTeH 3aNTBKe BeHTnla.
Pa3Jor 2: PJIOMJbEn IpCteH 3aTINBHor BeHTnJa KaKo nonpaBHTn: IpomeHnte 3aTINBn npCTeH BeHTnla 3a npNTnCaK.
Ipytajyh BENTn He padn:
Pa3nor 1: Octaun xpahe 3arnaBbeHn Ha 3anTubHom npcteHy nIOBHor BeHTnJa. KaKo nonpaBtu: OuchTeH npcteH 3antNBke BeHTnJa.
Pa3nor 2: NolomJIbEN npCTeH 3aNTnBHor BeHTnla Kako nonpaBHTn: Obpatnte ce npoDaCy paDi oDpxabaHa nnonpaBKe.
HenpeKnDno nCnyuTaBe npTuNcKa TOKOM paJa:
Pa3nor 1: BeHTnI 3a orpaHnuehe npntuCKa Hne je nocTaBbeH y 3aneuaheHn noLoXaj. KaKo nonpaBtuN: BeHTnI 3a orpaHnuehe npTuCKa noCTabTuN y 3aneuaheHn noLoXaj.
Pa3nor 2: Ppemano Bode uIN xpahe y IOnu. Kako nonpaBntu: Odojte BDOy uIN Bwse xpahe.
Pa3nor 3: Ppeknid Ppeknidaa npitnica KaKo nonpaBntu: ObaTte ce npodabuy paDn odpxaba n nonpaBke.
Ppka3aHe rpeKe:
E1 - POKBAPEN je DoHb TempepaTyprn CeH3Op KaO nonpaBHTN: O6paTne Ce npoDaBy paDn oDpxKaBaHa n nonpaBKe.
E2 - Kpatkn cnoj dohe temnepaType. KaKo nCnpabNTn: Nckbvynte, oxnaDnTe, noHOBO ykbvynte. Ako He IOMorHe. ObaTne ce npodabuy paN oDPXkBaHa n nonpaBke.
E3 - IpeBncoKa Temnepatya, HeMa DOBOJbHO BOe y UyHTpaHem NoHcy. KaKo NcnpaBNTu: NckbyuHte, OXnaITe, NOHOBO YKbUyHte. OdaJTE BODy. Ako He NOMORHe. Obpatnte ce npOabuy paN oDpKaabaHa n NonpaBke.
E4 - Kbap npeknnda apnpntca. Kaqo nonpaBHT: Kaqo nonpaBHT: NckbyuTe, oxnaTe, noHOBO yKByuTe. Ako He nomorHe. 6paTne ce npodabuy paDn odpxkaba n nonpabke.
TexHnUckn DeTaJbN:
KanaqtTeT:6JI
Yna3n Hanoh: 220-240B 50/60 X3
Chara: 1000B
(SK) SLOVENSKY
00:30, 01:00, 01:30, atd'.
Udrzujte teplotu: V pohotovostnom rezime stlacte tlacidlo "Udrzat' teplotu / Zrušit" (13). Spustí sa funkcia a na displeji (15) sa zobráži,bb. Teplota zahrivania je 65^ - 75^ . Dalsim stlacenim tlacidla ukoncite funkciu a vrátite sa do pohotovostného režimu. Tato funkcia sa tiež aktivuje automaticky po dokončeni každého z programov.
00:30, 01:00, 01:30... itd.
设 SA = SB = 12PQ
□□□
S
□□□
□□□
□□□□□□□□□□□□□□
□
jzai□ jzai
□
□□□□□□□□□□□□□□□□□□□□□□□□□□□□□□□□□□□□□□□□□□□□□□□□□□□□□□□□□□□□□□□□□□□□□□□□□□□□□□□□□□□□□□□□□□□□□□□□□□
□□
1
□
aalalalalalalalalalalalalal
T
□
□D
□□
□□□□□□□□□□□□□□□□□□□□□□□□□□□□□□□□□□□□□□□□□□□□□□□□□□□□□□□□□□□□□□□□□□□□□□□□□□□□□□□□□□□□□□□□□□□□□□□□□□□□
y
□□□□□□□□□□□□□□□□□□□□□□□□□□□□□□□□□□□□□□□□□□□□□□□□□□□□□□□□□□□□□□□□□□□□□□□□□□□□□□□□□□□□□□□□□□□□□□
2
Juaai
a#
220-240\~50/60
sall□□□□□□□


111 111 111 111 111 111 111 111
jglal g ljlal jls 1lglal sllgalsale! Juaia Jai jai all aball llgill, gdlj
KARTA GWARANCYJNA
00:30, 01:00, 01:30... itd.
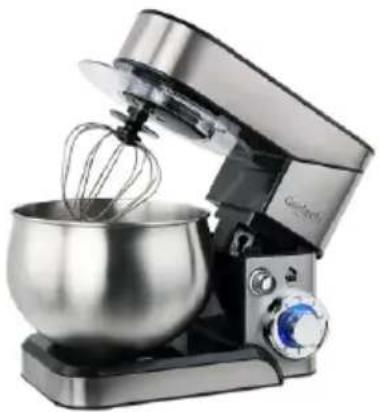
Planetary Mixing System GL 4219
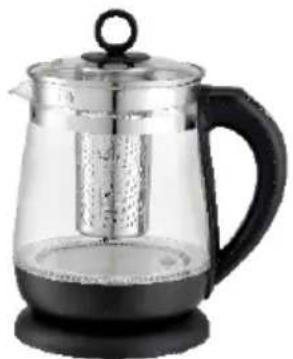
Kettle GL 1296
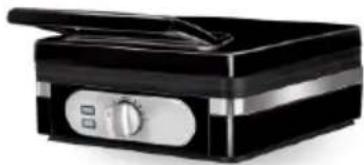
Waffle Maker GL 3048
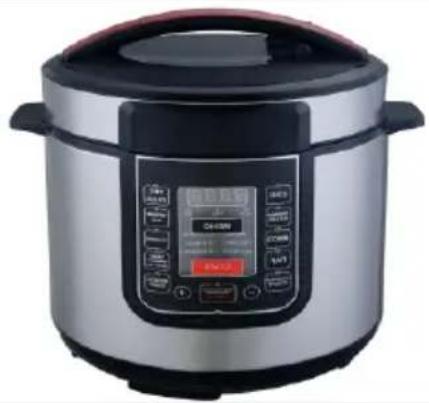
Pressure Cooker GL 6412

WineCooler GL8079
Hair Clipper GL 2829
Stand Fan With Remote GL 7325
Trimmer Set GL 2932

Meat Mincer GL 4812