
BS 14.4 Li - Drill METABO - Free user manual and instructions
Find the device manual for free BS 14.4 Li METABO in PDF.
| Brand | Metabo |
| Model | BS 14.4 Li |
| Product type | Cordless impact drill/driver |
| Power supply | Li-ion 14.4 V battery |
| Chuck | Self-tightening chuck |
| Speeds | Two mechanical speeds (1st/2nd) |
| Direction of rotation | Reversible (direction switch) |
| Adjustable torque | Yes, torque limitation |
| Hammer drilling | Yes |
| LED light | Yes, for lighting |
| Battery capacity indicator | Yes, LED |
| Functions | Drilling, hammer drilling, screwdriving, tapping |
| Workable materials | Metal, wood, plastic, walls, bricks, stones |
| Safety | Transport lock (start lock), overload and discharge protection |
| Protection system | Automatic shutdown in case of overheating or overcurrent |
| Operating temperature | -20°C to 50°C |
| Battery storage temperature | 0°C to 30°C |
| Sound level | May exceed 80 dB(A) – wear hearing protection |
| Maintenance | Occasional cleaning of self-tightening chuck |
| Repairs | Only by an authorized Metabo professional |
| Recommended accessories | Original Metabo accessories |
Frequently Asked Questions - BS 14.4 Li METABO
User questions about BS 14.4 Li METABO
0 question about this device. Answer the ones you know or ask your own.
Ask a new question about this device
Download the instructions for your Drill in PDF format for free! Find your manual BS 14.4 Li - METABO and take your electronic device back in hand. On this page are published all the documents necessary for the use of your device. BS 14.4 Li by METABO.
USER MANUAL BS 14.4 Li METABO
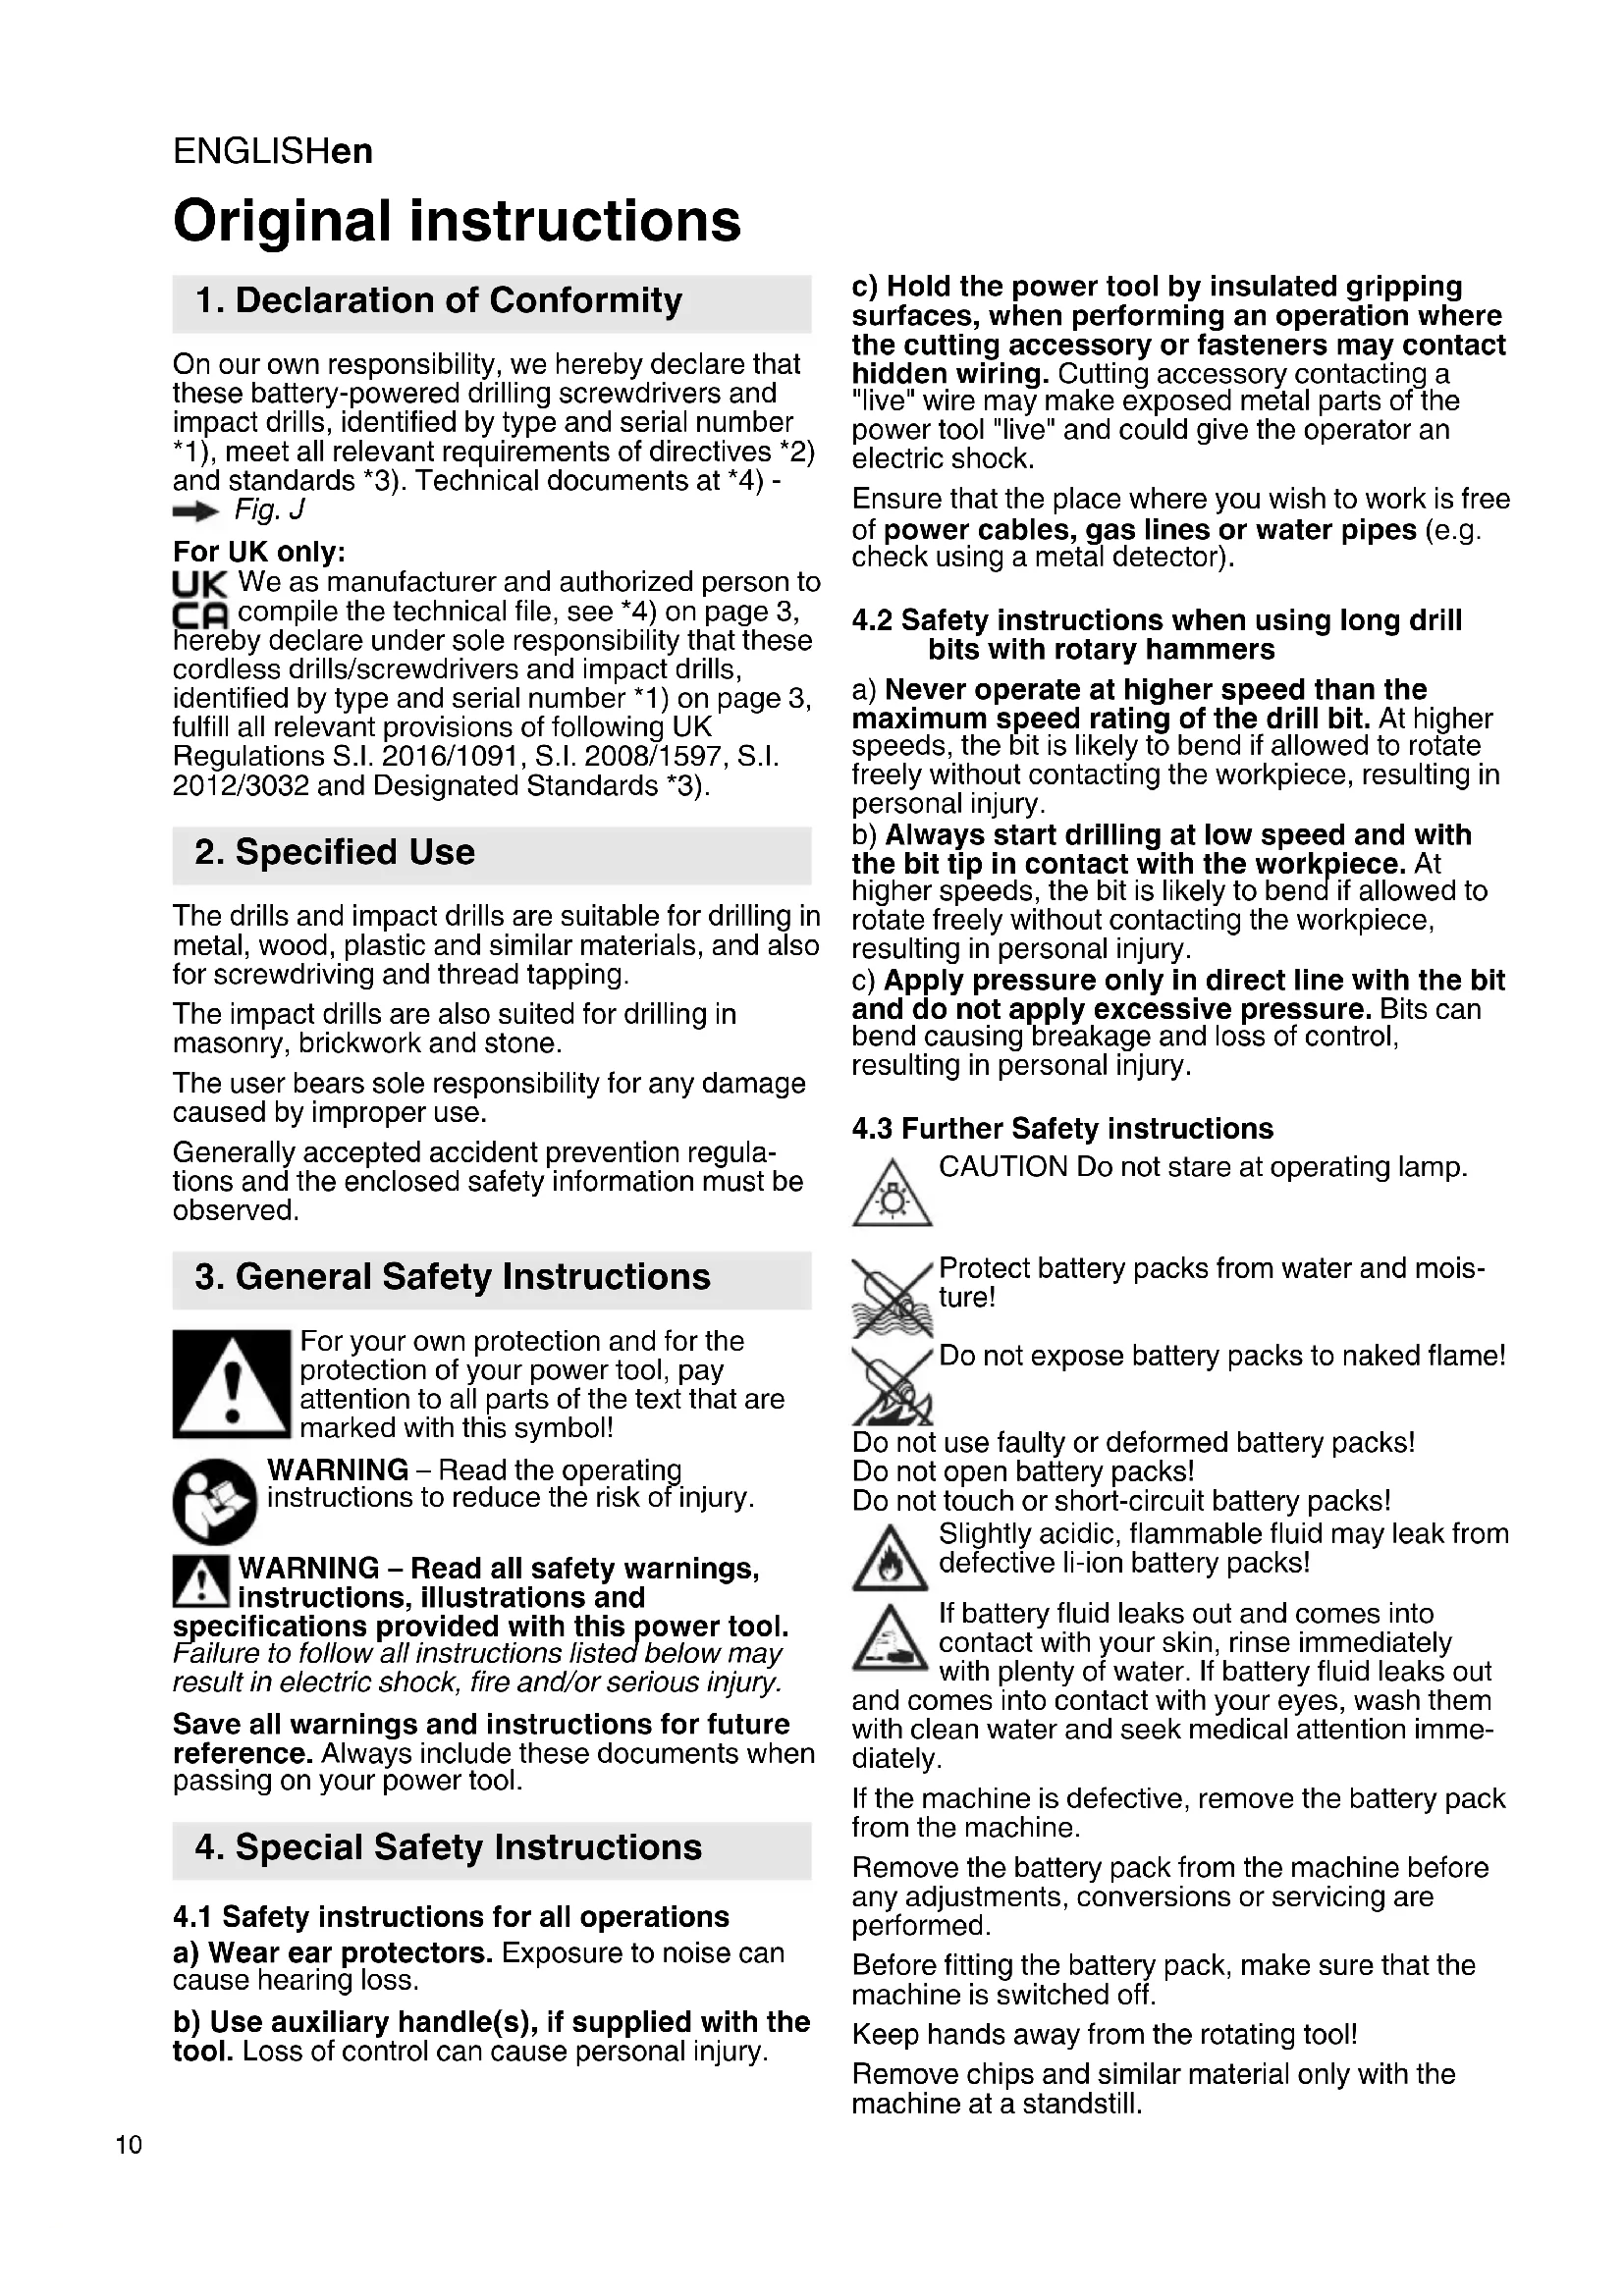
Original instructions
1. Declaration of Conformity
On our own responsibility, we hereby declare that these battery-powered drilling screwdrivers and impact drills, identified by type and serial number 1), meet all relevant requirements of directives 2) and standards 3). Technical documents at 4)-

Fig. J
For UK only:
UK We as manufacturer and authorized person to CA compile the technical file, see *4) on page 3, hereby declare under sole responsibility that these cordless drills/screwdrivers and impact drills, identified by type and serial number *1) on page 3, fulfill all relevant provisions of following UK Regulations S.I. 2016/1091, S.I. 2008/1597, S.I. 2012/3032 and Designated Standards *3).
2. Specified Use
The drills and impact drills are suitable for drilling in metal, wood, plastic and similar materials, and also for screwdriving and thread tapping.
The impact drills are also suited for drilling in masonry, brickwork and stone.
The user bears sole responsibility for any damage caused by improper use.
Generally accepted accident prevention regulations and the enclosed safety information must be observed.
3. General Safety Instructions

For your own protection and for the protection of your power tool, pay attention to all parts of the text that are marked with this symbol!

WARNING - Read the operating instructions to reduce the risk of injury.

WARNING - Read all safety warnings, instructions, illustrations and
specifications provided with this power tool. Failure to follow all instructions listed below may result in electric shock, fire and/or serious injury.
Save all warnings and instructions for future reference. Always include these documents when passing on your power tool.
4. Special Safety Instructions
4.1 Safety instructions for all operations
a) Wear ear protectors. Exposure to noise can cause hearing loss.
b) Use auxiliary handle(s), if supplied with the tool. Loss of control can cause personal injury.
c) Hold the power tool by insulated gripping surfaces, when performing an operation where the cutting accessory or fasteners may contact hidden wiring. Cutting accessory contacting a "live" wire may make exposed metal parts of the power tool "live" and could give the operator an electric shock.
Ensure that the place where you wish to work is free of power cables, gas lines or water pipes (e.g. check using a metal detector).
4.2 Safety instructions when using long drill bits with rotary hammers
a) Never operate at higher speed than the maximum speed rating of the drill bit. At higher speeds, the bit is likely to bend if allowed to rotate freely without contacting the workpiece, resulting in personal injury.
b) Always start drilling at low speed and with the bit tip in contact with the workpiece. At higher speeds, the bit is likely to bend if allowed to rotate freely without contacting the workpiece, resulting in personal injury.
c) Apply pressure only in direct line with the bit and do not apply excessive pressure. Bits can bend causing breakage and loss of control, resulting in personal injury.
4.3 Further Safety instructions

CAUTION Do not stare at operating lamp.
Protect battery packs from water and moisture!
Do not use faulty or deformed battery packs! Do not open battery packs!
Do not touch or short-circuit battery packs!

Slightly acidic, flammable fluid may leak from defective li-ion battery packs!

If battery fluid leaks out and comes into contact with your skin, rinse immediately with plenty of water. If battery fluid leaks out
and comes into contact with your eyes, wash them with clean water and seek medical attention immediately.
If the machine is defective, remove the battery pack from the machine.
Remove the battery pack from the machine before any adjustments, conversions or servicing are performed.
Before fitting the battery pack, make sure that the machine is switched off.
Keep hands away from the rotating tool!
Remove chips and similar material only with the machine at a standstill.
Secure the workpiece to prevent slipping or rotation (e.g. by securing with screw clamps).
LED lights (10): Do not observe the LED radiation directly with optical instruments.
Reducing dust exposure:
WARNING - Some dust created by power sanding, sawing, grinding, drilling, and other construction activities contains chemicals known to cause cancer, birth defects or other reproductive harm. Some examples of these chemicals are:
- Lead from lead-based paints,
- Crystalline silica from bricks and cement and other masonry products, and
- Arsenic and chromium from chemically treated lumber.
Your risk from these exposures varies, depending on how often you do this type of work. To reduce your exposure to these chemicals: work in a well ventilated area, and work with approved safety equipment, such as those dust masks that are specially designed to filter out microscopic particles.
This also applies to dust from other materials such as some timber types (like oak or beech dust), metals, asbestos. Other known diseases are e.g. allergic reactions, respiratory diseases. Do not let dust enter the body.
Observe the relevant guidelines and national regulations for your material, staff, application and place of application (e.g. occupational health and safety regulations, disposal).
Collect the particles generated at the source, avoid deposits in the surrounding area.
Use suitable accessories for special work. In this way, fewer particles enter the environment in an uncontrolled manner.
Use a suitable extraction unit.
Reduce dust exposure with the following measures:
- do not direct the escaping particles and the exhaust air stream at yourself or nearby persons or on dust deposits,
- use an extraction unit and/or air purifiers,
- ensure good ventilation of the workplace and keep clean using a vacuum cleaner. Sweeping or blowing stirs up dust.
- Vacuum or wash the protective clothing. Do not blow, beat or brush.
Transport of li-ion battery packs:
The shipping of li-ion battery pack is subject to laws related to the carriage of hazardous goods (UN 3480 and UN 3481). Inform yourself of the currently valid specifications when shipping li-ion battery packs. If necessary, consult your freight forwarder. Certified packaging is available from Metabo.
Only send the battery pack if the housing is intact and no fluid is leaking. Remove the battery pack from the machine for sending. Prevent the contacts from short-circuiting (e.g. by protecting them with adhesive tape).
5. Figures
Illustrations are provided at the beginning of the operating instructions.
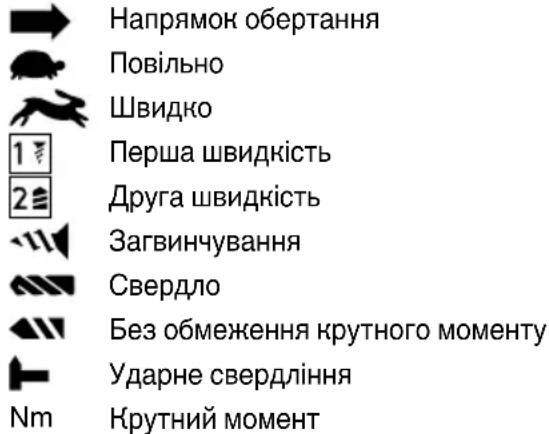
Symbol explanation:

6. Overview
Fig. A
1 Keyless chuck
2 Sleeve (torque, drilling, impact drilling)
3 Switch (1st/2nd gear)
4 Rotation selector switch (rotation setting, transport lock) - both sides of the machine
5 Handle
6 Battery pack release button
7 Capacity indicator button
8 Capacity and signal indicator
9 Battery pack
0 LED lights
11 TTrigger equipment-specific
7. Use
7.1 Battery pack, capacity and signal display Fig. B
Charge the battery pack before use.
If performance diminishes, recharge the battery pack.
Instructions on charging the battery pack can be found in the operating instructions of the Metabo charger.
Battery packs have a capacity and signal display (8) (depends on design variant):
The ideal storage temperature is between 10^ and 30^ .
ENGLISHen
7.2 Removing, replacing battery pack Fig.C
7.3 Setting direction of rotation, transporting safety device (switch-on lock) Fig. D
7.4 Selecting gear stage Fig E

Do not set the switch (3) unless the motor has stopped completely!
7.5 Setting torque limitation, drilling, impact drilling Fig. F
7.6 Switching on/off, setting speed Fig.A
Switching on, speed: press the trigger (11). The speed can be changed by pressing in the trigger.
Switching off: release the trigger (11). Note: The noise that the machine makes when it switches off is due to the design (quick stop) and has no influence on the function or the service life of the machine.
7.7 Keyless chuck Fig G
With a soft tool shank, retightening may be required after a short period of operation.
Notes on machines with the designation SB...
- The ratchet sound which can possibly be heard after opening the drill chuck is functional and is switched off by a reverse rotation of the sleeve.
- Clamping tool:
Turn sleeve (1) in direction "GRIP, ZU" until the noticeable mechanical resistance has been overcome.
Caution! The chuck is not yet fully tightened! Keep turning the sleeve (it must "click" when turning)) until it cannot be turned any further - only now is the tool safely clamped.
Cleaning: From time to time, hold the machine vertically with the keyless chuck facing downwards and turn the sleeve fully in direction "GRIP, ZU" and then turn fully in direction "AUF, RELEASE". The dust collected falls from the keyless chuck.
7.8 Unscrewing chuck Fig H
Employ the same procedure when attaching the chuck, except in reverse order.
8. Troubleshooting
8.1 The machine's multifunctional monitoring system
If the machine switches off automatically, the machine electronics have activated automatic protection mode. A warning signal sounds (continuous beeping). The beeping stops after a maximum of 30 seconds or when the trigger (11) is released.
In spite of this protective function, overloading is still possible with certain applications and can result in damage to the machine.
Causes and remedies:
- Battery pack almost empty Fig. A, B (The electronics protect the battery pack against damage through total discharge). If one LED is flashing (10), the battery pack is almost flat. If necessary, press the (7) button and check the LEDs (10) to see the charge level. If the battery pack is almost flat, it must be recharged.
- Long continuous overloading of the machine will activate the temperature cut-out. Leave the machine or battery pack to cool.
Note: If the battery pack feels very warm, the pack will cool more quickly in an "AIR COOLED" charger.
Note: The machine will cool more quickly if you operate it at idling speed.
- If the current is too high (for example, if the machine seizes continuously for long periods), the machine switches off.
Switch off the machine at the trigger (11). Then continue working as normal. Try to prevent the machine from seizing.
9. Accessories
Only use original Metabo battery packs and Metabo accessories.
For a complete range of accessories, see www.metabo.com or the catalogue.
10. Repairs
Repairs to electrical tools must be carried out by qualified electricians ONLY!
If you have Metabo electrical tools that require repairs, please contact your Metabo service centre. For addresses see www.metabo.com.
You can download spare parts lists from www.metabo.com.
11. Environmental Protection
Observe national regulations on environmentally compatible disposal and on the recycling of disused machines, packaging and accessories.
Packaging materials must be disposed of according to their labelling in accordance with municipal guidelines. Further information can be found at www.metabo.com in the "Service" section.
Battery packs must not be disposed of with regular waste. Return faulty or used battery packs to your Metabo dealer!
Do not allow battery packs to come into contact with water!
Only for EU countries: Never dispose of power tools in your household waste! In accordance with European Guideline 2012/ 19/EU on used electronic and electric equipment and its implementation in national legal systems, used power tools must be collected separately and
handed in for environmentally compatible recycling. Before disposal, discharge the battery pack in the power tool. Prevent the contacts from short-circuiting (e.g. by protecting them with adhesive tape).
During operation the noise level can exceed 80 dB(A).

Wear ear protectors!
12. Technical Specifications
Fig.1. We reserve the right to make technical improvements.
U = Voltage of battery pack
n_0 = No-load speed
Tightening torque for screwing:
M_1 = Soft screwing application (wood)
M_3 = Hard screwing application (metal)
M_4 =Adjustable torque
Max. drill diameter:
D1max = in steel
D_2 = in softwood
D_3 = in concrete
s = Max. impact rate
m = Weight (with smallest battery pack)
G = Spindle thread
D max = Chuck clamping range
Measured values determined in conformity with EN 62841.
Permitted ambient temperature during operation: -20^ (-4^) to 50^ (120^) (limited performance with temperatures below 0^ (32^) ). Permitted ambient temperature for storage: 0^ (32^) to 30^ (86^) .
--- Direct current
The technical specifications quoted are subject to tolerances (in compliance with the relevant valid standards).
A Emission values
Using these values, you can estimate the emissions from this power tool and compare these with the values emitted by other power tools. The actual values may be higher or lower, depending on the particular application and the condition of the tool or power tool. In estimating the values, you should also include work breaks and periods of low use. Based on the estimated emission values, specify protective measures for the user - for example, any organisational steps that must be put in place.
Vibration total value (vector sum of three directions) determined in accordance with EN 62841:
a_h, ID = Vibration emission value (impact drilling into concrete)
a_h,D = Vibration emission value (drilling into metal)
a_h,S = Vibration emission level (screwing without impact)
K_h, = Uncertainty (vibration)
Typical A-effective perceived sound levels:
LpA =Sound pressure level
Transport van Li-ion-accupacks:
7.7 Snelspan-boorhouser AfoG
G = schroefdraad as
D max = boorhouser-spanbreedte
a_h,D = trillingsemissiewaarde (boren in metaal)
Ladda batterietforeanvanding.
a_h,D = varähtelyarvo
(poraus metallin)
a_h,S = var ahtelyarvo (ruuvaus ilman iskua)
K_n, = epavarmuus (varahently)
7.6 Sla pa/av, stille inn turtall Fig A
Transport at Li-ion-batteripakker:
a_h, ID = Vibrationsemission (slagboring i beton)
a_h,D = Vibrationsemission (boring i metal)
a_h,S = Vibrationsemission (skruning uden slag)
K_n, = Usikkerhed (vibration)
He BCKpbBaIte aKHyMylTOpHbIe 6JOKn!
He KacaTecb KOHTaKTOB aKKyMylrTOPHOro 6Joka n He 3aMbIkaTe IN HAkOpOTko!
B clyuae noIOMKn HnCTpyMeHTa n3BLeKeHte n3 Hero aKKymyTApOpHbI 6Jok.
Ipeed hauaIom KaKx-Jin6o pa60T no
peryInpOBKe nnTexHnuecKOMy 06CnyKnBaHNIO
n3BLeKeHTe aHHMyJrTOpHbI 6loK n3
3JIeKTponHCTpyMeHTa.
Y6eHNTecbBTOM,HTO3JIeKTPoHHCTpyMeHT npu yctahOBHe aKHymyIaTOpHOro 6JloHa BblKnIOueH.
He doTpaHbaiTecbdo BpaaiooeroCMeHHoro HnCTpymEnTa!
YdaJIaIte CtpyKHy I dpyroMycop TolbHo nocJe NOHOr OCTaHOBKn HnCTpyMeHTa.
3aKpenTe 6bTaBbAeMyo DeTalb, 3aunuaaee ot cDnra nn camOBpaueHna (Haepmep, 3aTAYB ee NOMOu bIO 3aKHMOB).
CBeToOnoHnA NoCDBeTka (9): He cmOTpnte Ha ropaun CBetoOnoD uepe3 onTNueckne npnbOpbl.
CHINHEHNE nbIeBOH Harpy3Kn:
Auctu,6pa3yioeoc npn pa6oTe c DaHHbIM HHCTpyMeHToM, MoryT COepKaTaB BeueCTBa,KOTOpbIE CNOCO6CTByIOT pa3BHTIO paKa, NOBLeHNIO aJIePrNuecKnx peaKni, 3a6oJIeBAHNI DbIXaTeJIbHbIX NyTei, BPOJDeHHbIX DeΦeKTOB INpOuNX 3a6oJIeBAHNI pePOnyKTUBHO CHTeMbI. HeCKoJIbKO npImePoB IOo6HbIX BeueCTB: CBIneC (B COepeKHaUem CBIneU JIKII), MNHepaJIbHaN PyIbI (IN3 CTponTeJIbHOro KnpNua,BeToHa N T.I.),do6aBN
PYCCHNIRu
IolHbI accOPTmENT npHaJnEHHOCTeM. HacaiTe www.metabo.com nIN B KaTAlore.
10. PemoHT
K peMOHTy 3JIeKTPOINHCTpyMeHTa DOnyCKaIOTcra TOLbKO KBaIIHΦHnCnPObaHHbIe CneuaJIInCTbl-3JIeKTpIKN!
CnNCK3aIpaTeM MoXHo cKaaTb Ha www.metabo.com.
11. 3auntata OKpykaiooey cpebl
BbInHnIe HaunOHaIbHbIe npaBnla yTnIIN3aunn n nepepa6OTKn OTCJyKnBWeRo 3JeKtpOnHCTpyMeHTA, yNaKOBnN n pInHaJNeXHOCTeN.
PYCCHNIRu
He yTnIIN3NpyNe aKKyMylrTopHbIe 6LOKN BmecTe C 6bIIOBbIMN OTXoDAMN! CdaBaIte HeNCpabHbIe INIOTCnyKINBwne aKKyMylrTopHbIe 6LOKN dInIepy fnpMbI Metabo!
He BbIbpaCbIbAaHTe aKKymyJIaTOpHbIe 6JIOKNB BOIOEMbl!

I03a6oTbTeScb 0 3auHte OkpykaiouSei CpeIb: He BbI6paCbBaaiTe 3JIeKTpOHHCTpyMeHTbI aKKMyJIAToPbHe 6JOKn BMeCTe C
6bITOBbIM MycOpOM. BbINOLHnTe HaUNoHaBhBie npabNla yTtIN3aunno pa3dJeBHOy TtIN3aunn IN nepepa6OTKe OTcLyKHBwIX 3JleKTPoHNCTpyMeHTOB, yNaKOBKn IN npHaADJeXHoCTeN.
PpeJde Yem npOn3BecTn yTHIn3aCnIO aKKyMylA TOpHOro 6Loka, pa3pAnTe erO B 3JeKTPoHNCTpyMeHTe. PpIMNTe MepbI BO n36eKaHne KOpOTKOrO 3aMbIHANr KOHTaKTOB (HaNPmEp, n3OJInpYnte KJIeIKoN JHeTO).
12. Texnueckne xapaKtepncTNKn
Pnc.1.Bo3MOHHbI N3MeHeHnB CBr3N CycOBepueHCTBOBaHnEM N3DeJIInr.
U=Ha npjKeHne aKHyMylTOpHOro 6Ioka n0 =YacToTaBpaueHn8e3Harpy3Kn
Moment 3aTJHKn npi 3aBOpaUnBaHn NwpynoB:
LpA = yPOBeHb 3ByKOBOr DaBHeHnRA LWA = yPOBeHb 3ByKOBOmOuHOCTH
KpA, KWA= KOaΦΦnueHT norgpeuHoctn (ypoBeHb wyMa)
BoBpempaobTbIypoBeHbUymaMOKeTnpebblwatb80dA).

HaedeBaIte 3aunTHbIe HayuHnKn!
EAC
HΦopmaaJnIyNOKynatela:
CeptnuHkAT COOTBETCTBnA:
No TC RU C-DE.BJ08.B.00990, cpoK DeiCTBnC 24.11.2017 no 23.11.2022 r., BbIaH opraHOM nO ceptuKaun npodyuun «IBAHOBO-CEPTU-Kaun» OOO «IbAHOBcH NΦoHd CeptuKaun); Adpec(lop. n faoT.): 153032, Pocsnckan Phedepaun, IBaHOBCaH o6l., r. IbAHOBO, yI. CtaHKOcTpOnTeJeN, d. 1; TeL. (4932)77-34-67; paKc (4932)77-34-67; E-mail: ivfs@mail.ru; AtteCTaT aKKpeDHTaun No RA.RU.11BJ08 ot 24.03.16 r., BbIaH PhedepaIbHoN clyxboN no aKKpeDHTaun
CtpaHa n3roTOBJeHn: Hnta
Поживдпел: "Metabowerke GmbH", Metaboallee 1, D-72622 Nuertingen, Германя
UmmopTeB Poccn:
OOO"MeTa6o EBa3nA
Poccn,127273,MockBa
yI. Bepe3oBa aIJIe, I 5 a, cTp 7, oΦIc 106 TEL.: +7 495 980 78 41
ДаТа поизВODCTВа 3aшнфpoваHA B 10-3нанOM cepинHOM HOMepe INHCTpyMeHTa, yKa3aHHOM Ha erO shInIbDnke. 1Я снрpa obo3нauaet roД, Hanpimep «4» obo3нauaet, уTO n3dJIne поиз-BeDEHO B 2014 roy. 2Я n 3Я снрpbI obo3нauaOT HOMep MecaBa B rOу npoIN3BODCTBa, Hanpimep «05» -MaJ
Cpok cIyK6bI n3dJIINn COCTaBnREt 7 let. He peKOMeHdyEeTcK 3KcNpyaTaUH N O HCTeHeHH 5 let XpaHeHH C DaTbI n3rOToBLeHH 6e3 npedBa-pnteJbHOI pOBepHN (daTy n3rOToBLeHH cm. Ha 3TNKeTke).
Opnirha hia nctpykci 3 eknpnyataii
He donyckatn BnInBy BiKpntoro BorHIO Ha akymyIaTOpHi 6loKn!
3a6bOpHeHO BnKOpNCToBvBaTH NOxKOJHeHi a6o DeΦopMOBaHi AkymyJIaTOpHI 6JOKH!
3a6bOpHeHO po3KpNBaTH aKymyJIaTOpHI 6JOKH!
3a6bOpHeHO TopKaTnC H N 3aKOpOuYBaTH KOHTaKTn aKymyJIaTOpHOrO 6JOKa!
3 HecnpabHoro Jiri-nioHHoro aKymyIaTOpHoro 6JOKa MoHe BNTiKaTHn cna6okncla JERKO3aMmCTa piHa!
KIO eIeKToI npOINBCa I NOTpANIB Ha KIPy, Heo6XiDHO HeraHNO IpOMHTu O DIAHHY BELIKOIO KIIbKICTHO BOHN. Y pa3i
YKPAIHCbHAcuk
NOTpanJIaHHeJIeKTpOJItyB OoyI Heo6xIDHO npOMtINixHcTOnO BODOIO TepMIHOBO 3BepHyTnCnDo Iikapra!
IHKUo IHCTpyMeHT NOsKoDKeHn, Heo6xIDHO BnHrTn 3 HbOro aKymyTAOPHn 6LOK.
Ipeep3diinChenHm 6ydb-RAKx pObit 3 peryIIOBaHHn, nepeoChaueHHn, TexHiHoro 06cIyROByBaHHn a6o NHeHn Heo6XiHO BnHrTn akymyIaTOpHn 6bok i3 IHCTpyMeHTa.
IpekehaiTecra, 0n iD yac BCTaHOBHeHH aKymyTAToPHorO 6loka IHCTpyMeHT BmKHeHn.
3a6bOpHeo TopKaTnCS iHCTpyMeHTaIbHOi Hacadn, 0o o6epTaetbcra!
Budajte Tnpcy Ta iHue cmiT Taibkn nicna NOBHOI 3ynHHKn IHCTpyMeHTa.
3aKpinitbO6pOJIbAHy DeTaIb TaK, 0o6 BOHa He 3CyBaIacra Ta He O6epTaIacra (HapnKlaIa, 3a DOnOMOrO CTpy6uHH).
CbitIOiDnHn lixtap (10): He nBtbc8 6e3nocepEhbo Ha cBITIOiO, 0c BITNTbca, uepe3 onTnHi npnlaDi.
3HHHeHHBnNBy nIy:
NONEPEDHEHHA — nII, yTbOpOEtbcra iIi qac wliybaHnnapeBOIO
Wlii fyBaIbHOIO uKypKOIO, PO3nNIOBaaHHa, Wlii fyBaHna,CBePdInHH Ta iHunx po6iT, MiCTNb XIMiHi peOBOHN, 0o CnpuHnHIOTp paK, BPOJKeHi BaN a6o iHwi yUkoDkeHHpeNPoDyHTNBHO CnCTeMn. PnHlaDi TaHX ximiuHnx peOBOH:
- CBNHeCb 3 φap6n, ξΟ MICTHTb CBNHeCb,
-MiHepaIbHn nn 36yDIBeBbHOI cERn, cEmeHTy Ta iHux peOoBH cERJHOI KnaKn, a TaKoK
- MnW'ank Ta xpom 3 ximiuHO o6pO6JeHoI DepeBHH.
CTynihpn3nky 3aIeKHTb BiT TORO, RAacto BN BnKOHOyeTe ueBnDpo6IT. Uo6 3MeHUNTHBnINB XIMiHNXpeOBHN: npauBOaTN Heo6XiHO B nPiMiueHHx 3 DoCTaTHbOIO BeHTNIAcIEIO Ta 3 BnKOpNCtAHNM 3aTBepdKeHNX 3ac06IB iNDuBiyaJbHOrO 3axNCTy, TaHX JPKpeCnipaTOP, PO3pOBeHn CneiaJbHO dJa FInbTpacii MIKPOCKONIHNX YACTINOHK.
LcTaHOK CTocyETbCnIy BiD iHUnx MaTepiAIB, HAnpHKnAD DeKnx BnID IB DepeBa (DepeBHHNn IIN dy6a abo 6yka), Metany, a36ecTy. IHwi BiDiomi 3axBOPUBAHNr — ue, HAnpHKnAD, anepriHi peakii, 3axBOPOBAHNn DnXaJIbHNx WJaxiB. He DonyckaTne NotpanJIaHHNn NIny BCEpeDnHy TiJa.
DToPmMyTeCb Bk3iBOK Ta HaioHaIbHOrO 3aKoHOdaBCTBa CTOCOBHO BaWoRo MaTepiAly, NepcoHaIy, Cfepn Ta Micu BnKOpncTaHHa (HaipnklaI, noIOKeHHra Ipo Oxopohy npaici, yTNIla3auio ToIo).
3a6e3neuYte yIOBIOBaHHaNly B Miciy TbOpENH, He dOnyckaTe NOro BiKlaDeHHa HnOBepxHax.
IcneiaJIbHnx po6IT BHKOpNCToByTe BiIOBIDHe npnla.3aBAnu cOMy MOHa 3MeHNi KIIbKICTb Nlly, OHeKOHTpOJBOBaHO NOTpanJIe B DOBIIJI.
BnKopncToByte BiNobiDiHi npncTroIy BnJaJIeHHI NIIy.
I3MeHHeHHBnByPiNly:
- He HanpaBnaIte Notik NobiTpra, 10 BNXOaNTb 3 IHCTpyMeHtA, Ha Ce6e, IIOdei, JKI 3NaXoJaTbcN o6n3y, Ta Ha CkyuHcHHeHH Nnly;
- BHKOPNCTOByTe BNTJHHN npncTpiTa/a6o OUYBaH NOBITP;
- HaneHHNm YINOM NPOBITpOHTe pOboye Micue Ta 3a6e3neuYte YnCTOTy 3a DOnOMOrOIO nHLOOCa. Pid Yac NiIMiTahHH Ta BNDyBaHHn PII 3dImaETbcr y NOBITpr.
-3axnchno Ondr Heo6xidHO OunchTu 3a DonomorOIO NIIococa a6o npaHH.3a6oponeH npOdyBaTH, Bn6NBaTH a6o YnCTHTu 1tKoTO 3axnchno Ondr.
TpaHcnpotyBaHHaIITiHIOHHx aKymyTAToPHNX 6JohIB:
TpahcnpTyBaHHaLiTi-iOHnHex aKymyIaTOpHnx 6IOkIB peryIIOCTbC3aKOHm npo He6e3neuHn BaHTaK (UN 3480 Ta UN 3481).PiJ qac BiIpaBLeHHa LiTi-iOHnHex aKymyIaTOpHnx 6LOkIB 3'AcYTe aKtyaJIbHi YHHHi HOpMn. 3a Notpe6n 3BepHIbC3 aIHopMaueIo Do CBOei TpaHCnpTHOi KOMpanii. CePTnphiIObAHy ynaKOBHy MOHa npnd6aTn B Metabo.
BidnpabJnTe aKymyIaTOPhi 6JIOKn IInwe, JNIO KOpNyC He NOnKOJHeHn Ta HemaC BNTOKy piHN. Ppi BiDnpabJIeHHi BnMItB aKymyIaTOPHn 6JOK 3 IHCTpyMeHTa. BKNBaTN 3axOAn IpOTn KOPOTKOro 3aMnKaHHa KOHTaKTIB (HaNPknA, i3OJIbOBaTN KJIeKIO CTpiKIO).
5. MaJIOnHKn
MaHONKn 3HaXoOJaTbcr y DoaTkY Do iHcTpkyi 3 ekCnIyatauii.
PONCHEHNAyMOBHNX N03HaYeHb:
6.Orna
MaJ.A
1Ubnko3aTnckHn npToH
2 BtyIka (KpyTHNI MOMENT, CbepdiHHy, ydapHe cBepdiHH)
3Перемнкay(1-7a/2-raшвдкICTb)
4Пелеремканнрamyобертанн (Встаноьенин habрamyобертанн) 3 o6oxбokibiHCTpymenta
5 PyKoTka
6 KhoNka pIpa036IOkyBaHHaKymyIaTOpHOro 6Ioka
7 KhoNka iHdkaTopa EMHOCTi
8 INdkaTOp EMHOCTI Ta CnHNaJIbHNI INDkaTOp
9 AkymyIaTOpHn6Jok
10 CbITIOIO
11HaTnckHn nepemKau
*3aJIeXHOBiKOMJIeKTAuii
7. EKcnpnyatacia
7.1 AHyMyJIaTOPHn 6JIOH, iHNHaTOp CMHOCTI Ta CNrHaJIbHn iHNHaTOp MaI.B
IpeD BnKOpNCtAHNm 3apJITb aKyMyJrTOPHn 6loK.
Ypa3i 3HnHexHHNtOyXHocTi 3apJITb aKymyIaTOPHn6IOK.
Bka3iBkn 0do 3apRJaHHaKymyIaTOpHoro 6loKa DnB. B iHCTpykci 3 ekCnlyaTaui 3apRdHoro npncTropo Metabo.
AkymyIaTOpHi 6IOKn MaOTb iHdkaTOp EMHOCTi Ta CnHaJIbHn IINKaTOp (8) (3aJeKHO BiD KOMPJIeKTAuii):
OnTmajbHa TemnepaTypa 36epiraHHa - BiD 10^ do 30^
7.2 BnMaHHBCTaHOBLeHH aHymyIaTOphoro 6loHa C
7.3 PeryIIOBaHHHaHpMaMHy 06eptaHH, 6JOKyBaHHdTpaHCnOpTyBaHH (6JOKyBaHH npOTn yBIMKHeHH) MaI.D
7.4 Bn6ip wBnKocti M E
YCTaHOBJIIOBaTn NepeMnKaU (3) y noTppi6He NOLOXKeHHra, TiIbKn KOJN eJeKtpoDbuRyH BIMKHeHn!
7.5 PeryIIOBaHHo 6MeHHeHHa KpyTHOROMOmeHTy,CBepnIHHa, ydaPHoro CBepnIHHa→ Man.F
7.6 YbIMKHeHHBIMKHeHH, HalaTByBaHHaCTOTn oBeptAHH A
YbIMHHHeHHaCTota 06eptaHHa:HaTnCHiTb Ha nepemHKau (11).HaTncHeHHaM Ha nepemHKaH MoKHa TaKoK 3MiHIOBaTu YaCTOTy 06ePTaHHa.
BmKHeHHa: BiNyCTiHaTnCKHn nepemHKauch (11). Bka3iBka: 3Byk, 50 BuHNKae npu BmKHeHHI IHCTpyMeHTa, O6yMOBJeHHI KOHCTpyKTNBHMN OCO6JIINBOCTAMN (MexaHI3M MOMeHTaJIbHOI 3yINHKn) i He BIIINBaE Ha pO6OTy i CTpOK ClyJx6n IHCTpyMeHTa.
7.7 WbndHO3aTnCHHn NaTPOH
Y pa3i BnKOpNCtAHH iHCTpyMeHTaJIbHOI HacaKn 3 XBOCTOBHKOM i3 M'AKORo MaTepiAny 3aTnCKHn
Mexahi3M Heo6xIDHO NiTAYBaTH NiCnHETPnBaIoro CBePdNHH.
Bha3iBHa IINCTpyMeHTIB 3 MapHyBaHHM SB...
- Tpick,Якни може 6утнчутно nicя BiДКрИВаHнЯ NaТpoHa (3yMOBNeHO KOHCTpyKcIeIO), BIMnKaeTbCЯОБepTaHHM BTyJKN y npOTnJIeKHomY HanpMky.
- 3aKpiinJIeHHI hCTpyMeHTaIbHOi HaCaJHn: NObepTaTn BtUky (2) B HAnpymKy «GRIP, ZU» (3aTncHyTn),doKn He 6yde nOdoJHaHo BiDyTHm MexaHiHn onip.
Ybarga! Ha ue MOMeHT IHcTpymeHTaNbHa Hacadha ige He 3aTncHyta! PpOIOBkyIte npokpyuBaTu i3 yCnllm (Pnp cBOMy MaC BiDyBaTncaKlaCaahH) Do yNopy - IInwe Tenepe IHCTpymeHTaNbHa Hacadka 3aTncHyTa HadiiHo.
HnueHHBCTaHOItb HCTpyMeHT BepTKaJIbHo 1WbNIO3aTtCKHM NaTPOHOM DOHN3y i NOBepHiTB BTyJHKy Do yOpny B HAnpymHy «GRIP, ZU» (3aTtchYTu), a NotIM Do yOpny B HAnpymKy «AUF, RELEEASE» (po36loKyBaTu). PnI, 0o HaKoNNuBCa, BcINPiTeBcra i3 WbNIO3aTtckHOrO naTPOHa.
7.8 BiKpyuBaHH naTpoHa M H
BCTaHOBJIeHH BnKOHyBaTu y 3BOpOTHi nocIIOBHOCTi.
8. YcyHeHHa HeCnpaBHOCTeH
8.1 BaratoФункцioHAьна систema KOHTpoIIO IHCTpyMeHtA
A KIIO IHCTpymeHT aBTOMaTHNO BIMNkaTbCRA, CE O3Haayc, 0 eJeKTPoHHN 6LOK aKTnByBaB peKHM cMo3axNCTy. LyHae nonepeDkyBaIbHN CnHaN (TpNBaIIN 3ByKOHN CnHaN). Bin npinnHReTBcMaKc. Ype3 30 cekyHd a6o nICJI BIDnyCKaHHa HaTnCKHO nepemkaua (11).
He3BaKaIOH Ha HABHicTb ciie 3axnchoi fynKci, npBnKoHaHH DeaKnx po6it MOJIINBE nepeBaHTaKeHHI HCTpyMeHTa i, JHKaclIDOK, Ioro NOsKOJKeHH.
PpnuHn i cnoo6n ycyHeHH HecnpaBHOcte
1. AkymyIaTOPHn 6JIOH MaJIHe PO3pIbBcA
MaI.A,B (eIekTpoHka 3axuae
aKymyJrTOpHn6bok BiD NOWKoDKeHHBhAcJIIOK rIb6OkoR o03pRJaHHA).
KaIO cBtIoioD (10) 6IIMae, aKymyJrTOpHn6bok MaJke p03pRJaHH. 3a noTppeBn
HaTNCHTb KHOHky (7) Ta nepeBipTe pIBeHb
3ap4y 3a DOnOMoroCbitIoioDa (10). KaIO aKymyJrTOpHn 6bok MaJke PO3pRdNBCa,
NoRo Heo6xIdHo 3ap4dHTn!
- Пи ТпВалOMу NepeBaHTaЖeHHI eJIeKTpoiHCTpyMeHTa CnpaцьОBye TENIOBn 3axNCT.
3aueKaIte,doKn eIeKToiHCTpyMeHT a6o aKyMyJIaTOpHIb 6bOK He OXOLOHyTb.
Bka3ibKa: kkuo aKymyIaTOpHn 6JIOK Ha dOTHK dyKe TeIIN, OXOLOdKeHHaKymyIaTOpHOrO
YKPAIHCbHAcuk
6loka MoJIInBe y 3apIaHOMy npIcTpoi «AIR COOLED».
Bka3iBka: iHCTpyMeHT OXOJOnDHyEeTbcra WBNiDe BpeHHMI XoIOCTOrO XOy.
3.ПиЗаHATo BnCOHcNlCTpyMy(ue BiID6yBaETbCra,HaNPnHlaD,IpiTpINBaIOMy 6LoKvBaHHi)eJIeKTpoIHCTpyMeHT BIMnKaETbCra.
BIMKHIb eIeKtpoIHcTpymeHT HaTNCHNM nepemnkaem (11).PpOIOBHyIte po6Ory B HopMaIbHOMy peKmI. 3aNo6iraTe 6IoKvBaHHIO B NOaJIbWOMy.
9. Ппладя
BnKOpNCToByBaTn TiIbKn OpurHaJIbHi aKymyJTopHi 6loKn Ta npUJaDЯ Metabo.
Повни acoptment npnlaДЯ ДИВ. Ha caNTi www.metabo.com a6o B KaTaN03i.
10. PemoHT
PemOH eJIeKtpoiHCTpyMeHTa NOBHHI 3diCHOBaTu TIlbKn KBaIiΦIKOBAhi faxIBci- eneKtpnKi!
Для ремонту eilektpoiHcTpymeHTa Metabo 3BepTaIteCbdopeioHaJIbHOro ppeIcTaBHnTBA Metabo.Adpecn nB. Na caTI www.metabo.com.
CnNcK 3aNaChnx YacTnH MoXHa 3aBaHTaXHTn Ha caTi www.metabo.com.
11. 3axnct IOBknla
DopmytecaHaiohaIbHnx npabn 6e3neHoYtIaui i nepepo6Kn BnKOpncTaHnxIHCTpymenti, naKyBaIbHnx MaTepiJIiB i npila.
PaKyBaIbHi MaTepiAIn Heo6xIdNo yTuNl3yBaTn BiIOBIDNo Do IxHbOro MapKyuBaHH 3rIHO 3 KOMyHaIbHmN npaBnAmN. OdaTHOBy IHOpMauiio HabeJeHo Ha caTI www.metabo.com y po3diJI «Cepbic»
3a6bOpHeNo yTuNl3yBaTn aKymyIaTOpHi 6IoKn pa30m 3 no6yToBnMn BiIxOdaMn! HecnpaBHi Yu BiIpaCuBoaHi aKymyIaTOpHi 6IoKn Heo6XiIdHo 3daBaTn dInlepoBi φipMn Metabo!
3a6oHHeNo BnHnDaTn aKymyIaTOpHi 6loKn y BOdoHMn!
TilbknIgKpaIH EC:3a6oPoHeO yTuJIi3yBaTH eNeKTpOInHCTpyMeHTn pa3OM 3 no6yTOBmN BiIXoJam! 3rJHO 3 EBPOneCbKOIO
DnpeKTHBOIO 2012/19/EC npo 36epirAHH, 36npaHH Ta nepepo6ky BiXxOiB eEeKTPnuHoro i eEeKTPoHHoro 6bIaNHaHH Ta BiNIOBIDHMn HauioHAJIbHMn HopMaMn BiINpauBoBaHi eEeKTPoiHCTpyMeHTn NiJyraIO TB po3dIbHi yTnIi3aui 3 MeTOIO IX NODaIbWoI ekONOrIHHO 6e3neuHOI nepepo6Kn.
IpeaTmKytNl3yBaTuAkymyTAToPHN6JIOK, po3pArTiB noRo B eJeKTPOIHCTpyMeHtI.BxNBaTu 3axoAnPOTn KOpOTHO 3amKahHn KOHTaKtIB (HaepnKaIad, i3OJIbOaTH NKeINKOIO CTpiKIO).
12. Texhichi xapaKtepncnkn
MaI.1.3aJIuHaeMo 3a co6oIO npaBO Ha TEXHiUH3MiHN.
U = Hanpyra aKymyIaTOpHoro 6Joka
n0 = YacToTa 06epTaHHBpeKIMi XOIOCTORO XOdy
Moment 3aTaryBaHH np3arBnHcyBaHHi rBHTiB:
M1 3aBnHcyBaHH B M'AKi MaTepiA (depeBnHa)
M3 = 3aBnHcyBaHHy y TBepdi MaTepiJi (MeTaJ)
M4 =peyIbOBAHm MOMeHT 3aTMyBaHHA
MaKc. diametp CBepeHnHa:
D1max=yctaJIi
S=MaHC.KiNbKICTb ydapiB
m = Maca (3 HaimeHIm aKymyIaTOPHM 6JIOKOM)
G = pi3b6a wnnHdJIa
D max =Дiana3OH 3aTnCKaHHcBepДINJBHOrO nATPOHa
Pe3yIbTaTn BmMipHOBaHb OTPMaHi 3riIDHO 3i CTaHdapTom EN 62841.
TemnepaTpa HABKOLINHbOro cepeOBuHa nIaceknlyaataii:
BID-20°C Do 50°C (npaue3daTHiCt b o6MeKeHa npi TemnepaTypi HnKHe 0°C).DOnyctima TemnepaTypa HABKOLINHbOro CepeDoBUNa nIac 36epiraHH: BID 0°C Do 30°C.
- NOCTIHH CTpyM
Ha Bka3aHI TexHicHi xapaKTepeNCTnKn NOIINPIOJTOBCa DOnyCKN, nepeD6aueHi YHHIMN CTahdapTaM.
3haeHHemicii ymy 3a donomorou cix 3na
3a donomoroi ux 3haeHb moXHa
OuiHOBATn i nopBHBoBATn emicio ymy pi3Hnx
eIeKtpoHCTpyMeTIB. 3aJeHHo BiD yMOB
EcknlyaTaui, CTaHy eJIeKTOIHCTpyMeHTa a60
iHCTpyMeHTaIbHnx HacaDOK fakTNue
HaBaHTaJehn MOKe 6yTu BnUe a60 HNKe.ДЯ
OuzHKn 3pa3KOBOrO pIBHra EMicii BpaxOBynte
nepePBn B po60Ti Ta fao3n po60Tu 3i 3HNKeHM
(ymoBm) HabaHTaJehnM. Bn3HaTe nepeiik
oprahi3auiHnx 3axOdiu ODO 3axNCTy
KOpNCtBuca 3 ypaXyBaHHm BiIDNOBIDHX 3HaueHb
EMicii yMy.
CymapHe 3HaueHnB Bi6pauii(BeKTopHa cyMa Tpbox HanpMki) po3paXOByeTbcra BiNObiDHO do cTaHndapTy EN 62841:
ah,ID =3HaueHnB i6paui (yaphe CbepeiHHB 6eToHi)
ah.D =3HaueHHBipaaii
(CBepdJIiHHBMeTaJI)
ah,S =3NaueHHB i6paui (3aRbHcyBaHH 6e3 ydapy)
Kh,... = KoephiicHT noxnbn (bi6paia)
PibeHb 3ByKOBOrO TnCKy 3a TINOM A:
LDA =piBHeH 3ByKOBOrTnCKy
LWA =piBHeb 3ByKOBOI NOyHKHOCTi
KpA, KWA=KoephiicHT noxnb (piBHeb 3BykoBOrO
TNUCKY)
IiD yac po60n pIBeHb 5yMy MoJHe nepeBnUyBaTH 80 d6(A).

PpauOBoTu B 3ac06ax 3axncty opraHIB cnIxy!

TOB "Metaabo YkpaHa"
Byl. 3opra Ha, 22
c.CBraToneTpIbCbKe
KniBcbka 06J.
08141, HnIB
www.metabo.com

Metabowerke GmbH
Metabo-Allee 1
72622 Nuertingen
Germany
www.metabo.com
metabo
PROFESSIONAL POWER TOOL SOLUTIONS