
City - Lamp BRENNENSTUHL - Free user manual and instructions
Find the device manual for free City BRENNENSTUHL in PDF.
| Product type | Outdoor LED projector with motion detector |
| Brand | Brennenstuhl |
| Model | City (SH 8005 PIR IP 44, LH 8005 PIR IP 44, LH 562405 PIR IP 44) |
| Power supply | 220–240 V~ 50/60 Hz |
| Rated power | 80 LEDs of 0.5 W (40 W total) |
| Protection type | IP44 |
| Protection class | I |
| Detection angle | 180° |
| Detection range | Up to 10 meters (adjustable) |
| Adjustable timer | From 10 s (±5 s) to 4 min (±1 min) |
| Light threshold adjustment | Day/night via LUX regulator |
| Operating temperature | -15°C to +40°C |
| Recommended mounting height | 1.8 m to 2.5 m |
| Features | PIR motion detector, continuous lighting mode (4 h) |
| Maintenance | Clean with a dry or slightly damp cloth |
| Safety | Do not look into the LED beam; installation by a qualified electrician |
| Spare parts | Non-replaceable LEDs; original Brennenstuhl protective cover |
| Included accessories | Wall plugs, screws, connection terminal |
Frequently Asked Questions - City BRENNENSTUHL
User questions about City BRENNENSTUHL
0 question about this device. Answer the ones you know or ask your own.
Ask a new question about this device
Download the instructions for your Lamp in PDF format for free! Find your manual City - BRENNENSTUHL and take your electronic device back in hand. On this page are published all the documents necessary for the use of your device. City by BRENNENSTUHL.
USER MANUAL City BRENNENSTUHL
GB Operating Instructions....8
City SH 8005 PIR IP44
City LH 8005 IP44, City LH 562405 IP44
City LH 8005 PIR IP44, City LH 562405 PIR IP44
A
B
C
natural_image
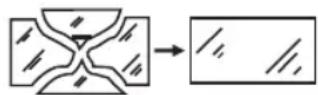
Diagram of two identical mechanical components with directional arrows indicating flow or movement (no text or symbols)D
DE
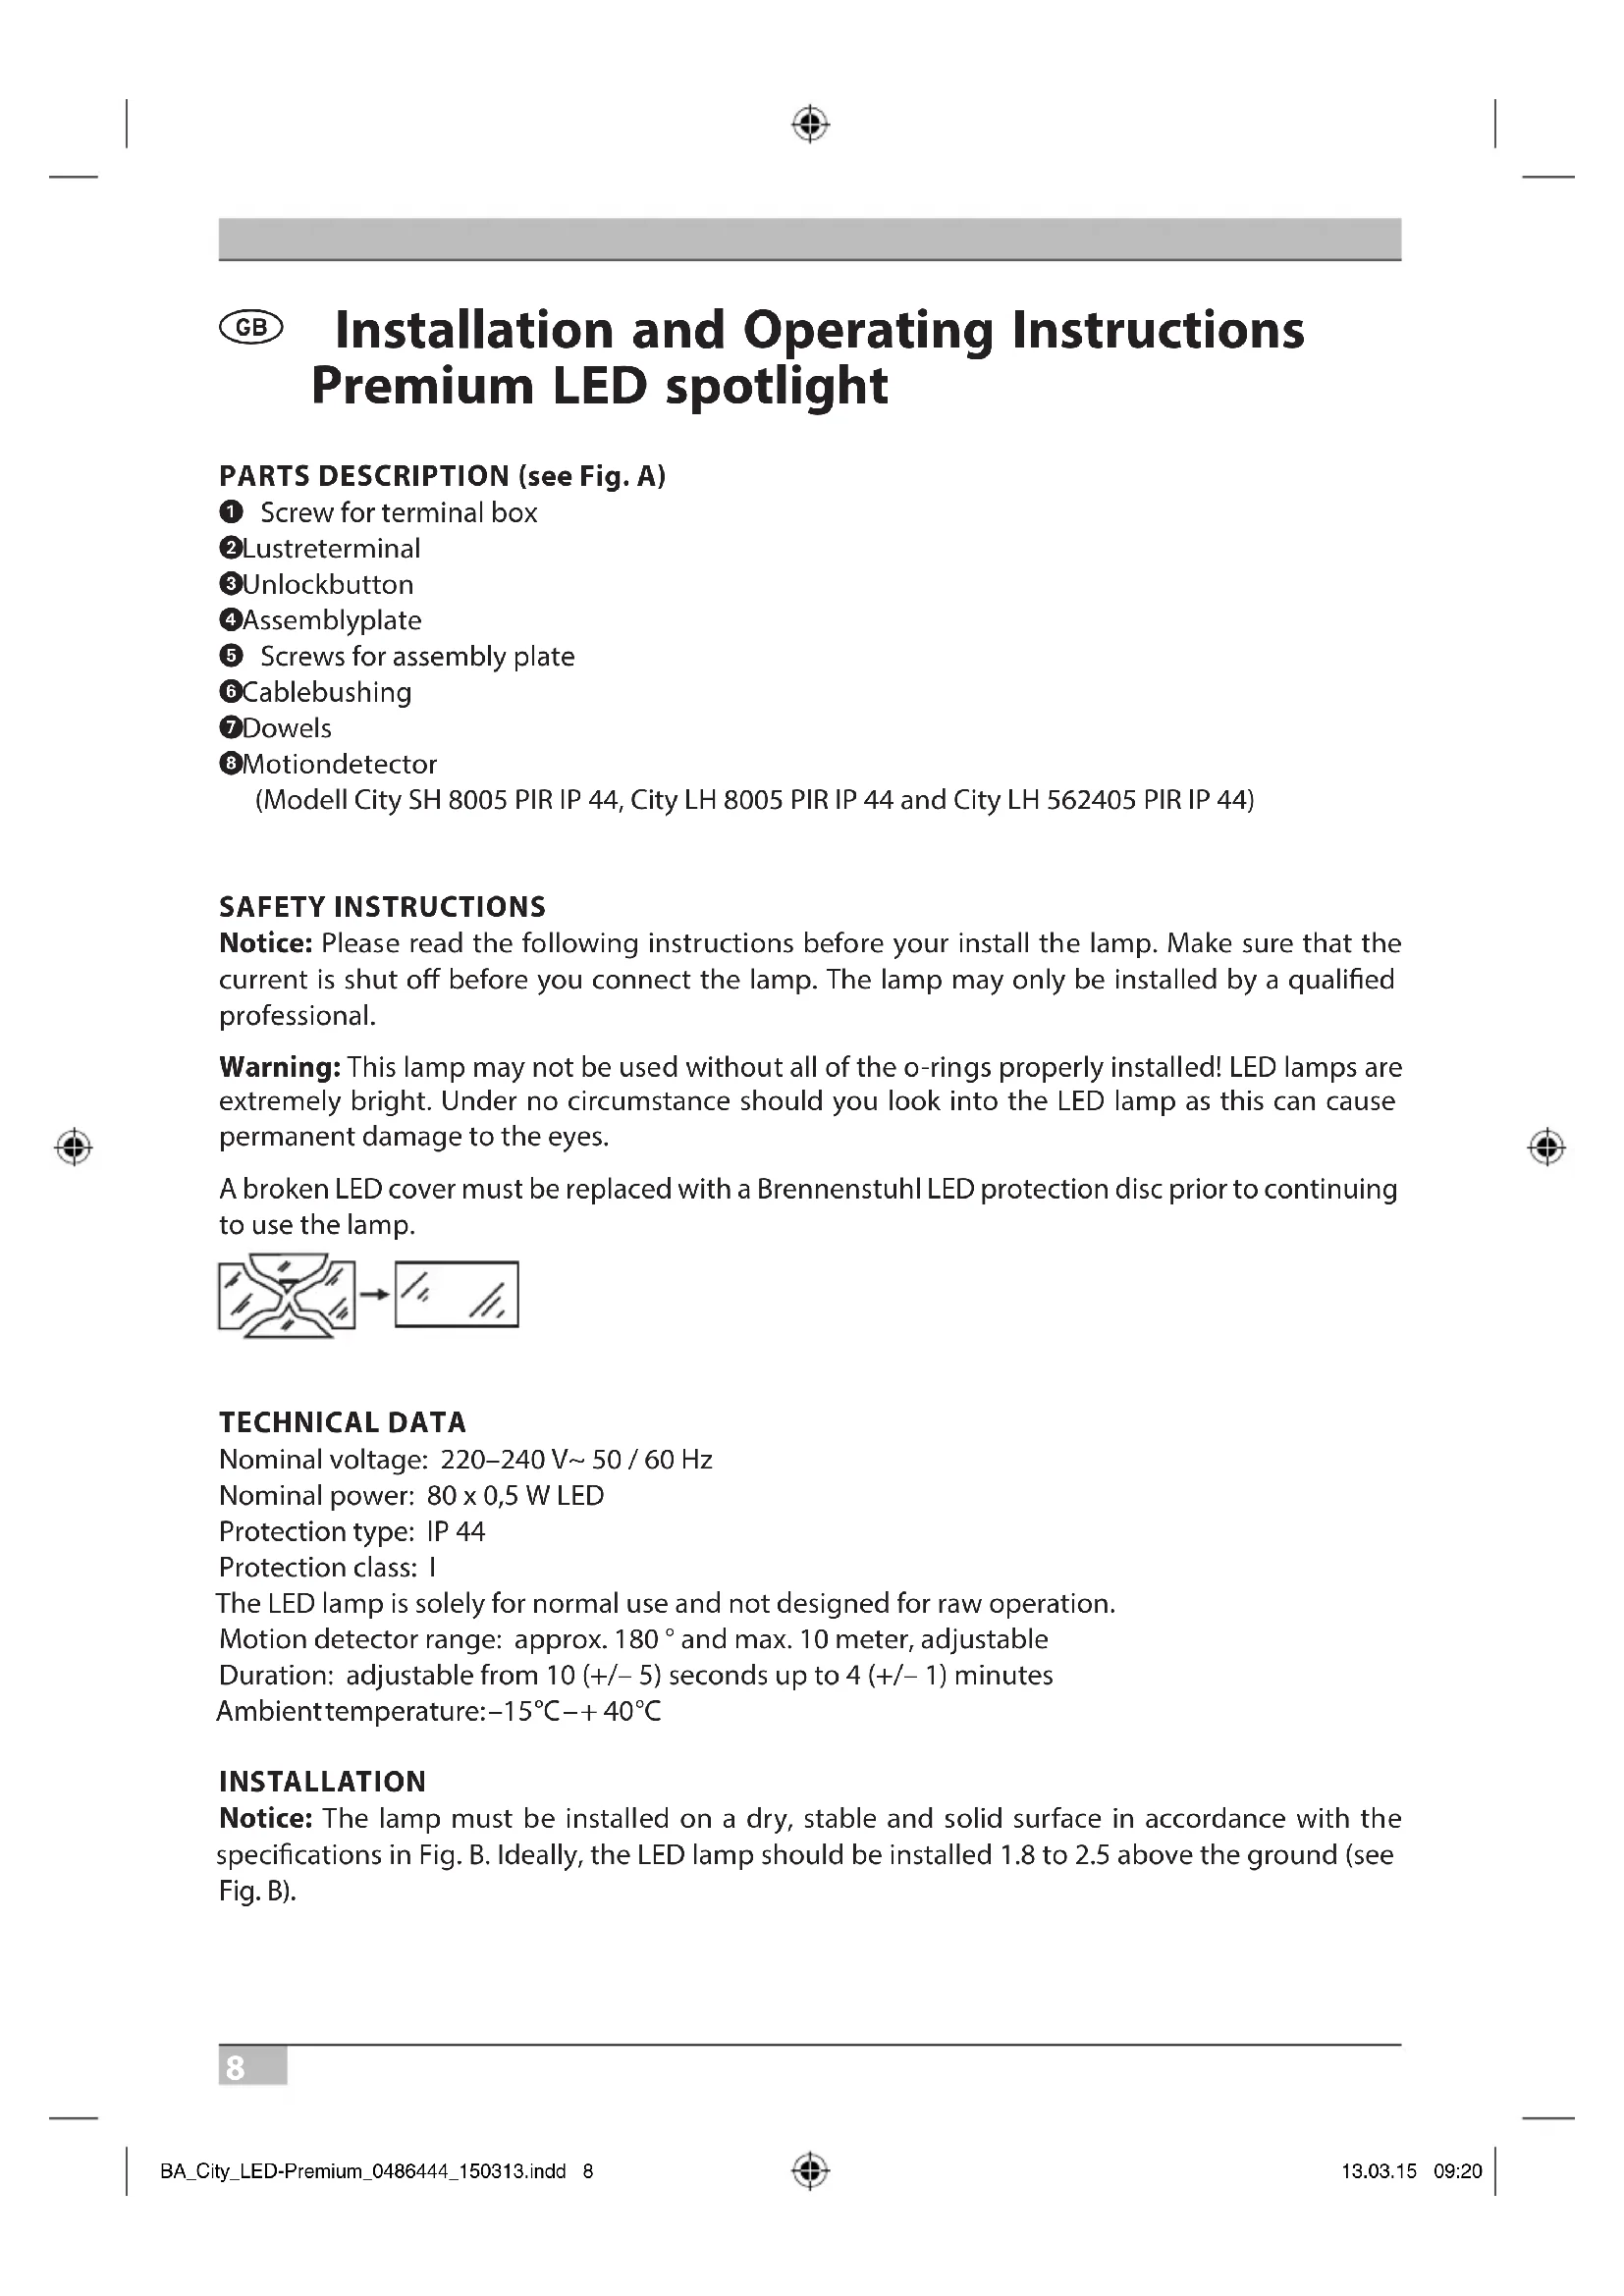
GB Installation and Operating Instructions Premium LED spotlight
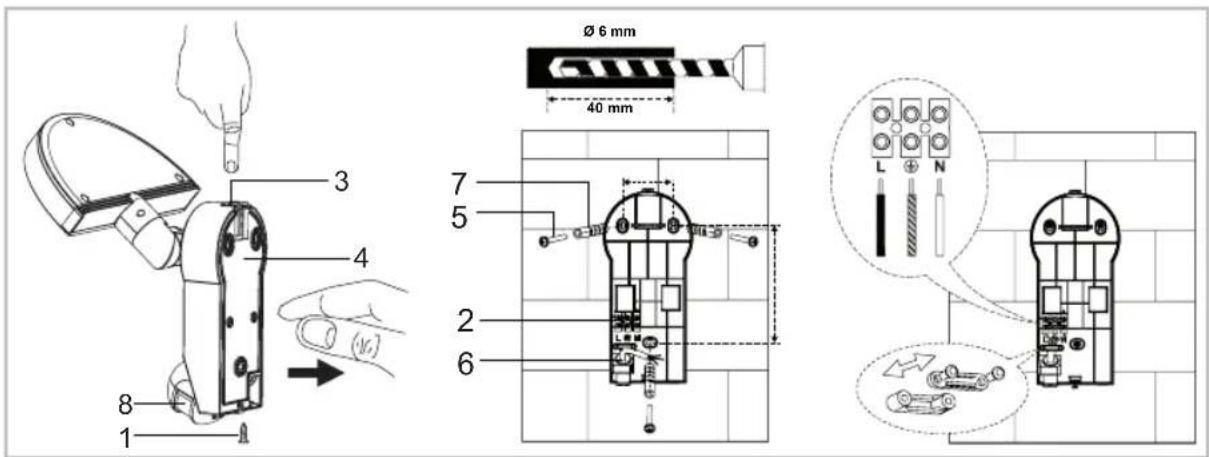
PARTS DESCRIPTION (see Fig. A)
① Screw for terminal box
②Lustreterminal
③Unlockbutton
④Assemblyplate
⑤ Screws for assembly plate
6 Cablebushing
⑦Dowels
8Motiondetector
(Modell City SH 8005 PIR IP 44, City LH 8005 PIR IP 44 and City LH 562405 PIR IP 44)
SAFETY INSTRUCTIONS
Notice: Please read the following instructions before your install the lamp. Make sure that the current is shut off before you connect the lamp. The lamp may only be installed by a qualified professional.
Warning: This lamp may not be used without all of the o-rings properly installed! LED lamps are extremely bright. Under no circumstance should you look into the LED lamp as this can cause permanent damage to the eyes.
A broken LED cover must be replaced with a Brennenstuhl LED protection disc prior to continuing to use the lamp.
TECHNICAL DATA
Nominal voltage: 220–240 V\~ 50 / 60 Hz
Nominal power: 80 x 0,5 W LED
Protection type: IP 44
Protection class: I
The LED lamp is solely for normal use and not designed for raw operation.
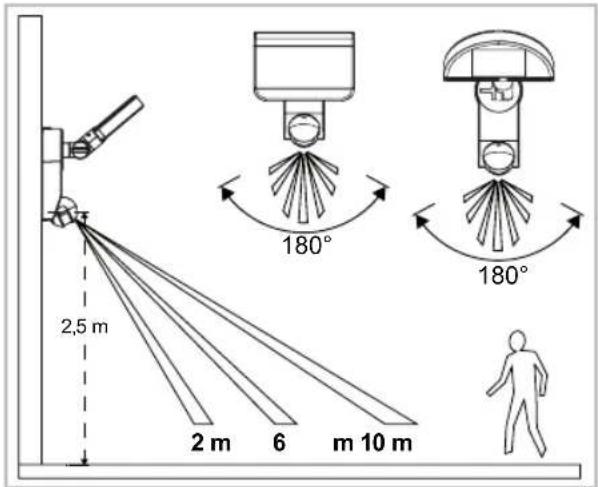
Motion detector range: approx. 180° and max. 10 meter, adjustable
Duration: adjustable from 10 (+/- 5) seconds up to 4 (+/- 1) minutes
Ambient temperature: -15^ - + 40^
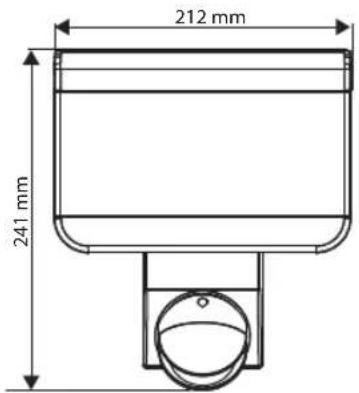
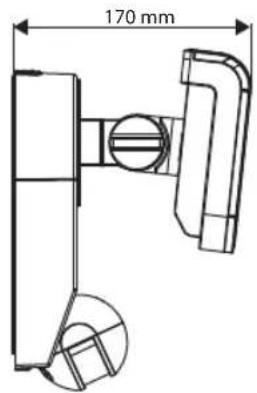
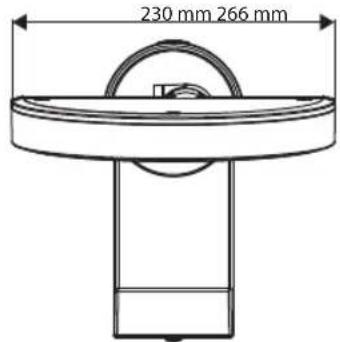
INSTALLATION
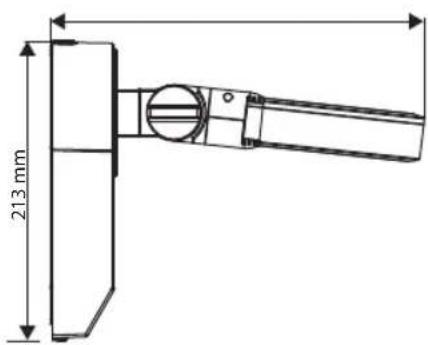
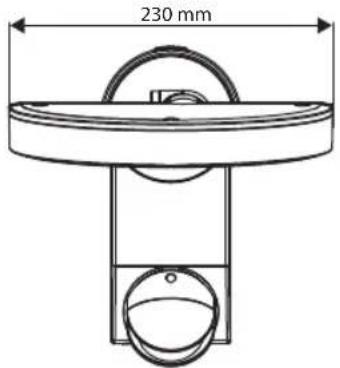
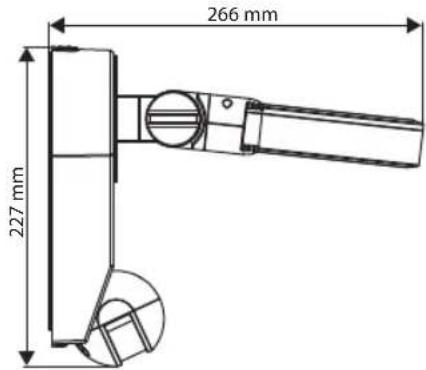
Notice: The lamp must be installed on a dry, stable and solid surface in accordance with the specifications in Fig. B. Ideally, the LED lamp should be installed 1.8 to 2.5 above the ground (see Fig. B).
Install the lamp (see Fig. A)
Release the screw ① on the terminal box, press the unlock button ③ and remove the assembly plate ④. Use the assembly plate to mark the positions of the screw holes on the assembly surface.
Important: Make sure not to drill into any hidden lines. Guide the power cable through the cable bushing ⑥ on the assembly plate and attach it to the wall using the screws ⑤ and dowels ⑦. Make sure the gasket is seated correctly. Attach the power cable to the lustre terminal ② in accordance with Fig. A (N = blue cable, ⏻ = green / yellow cable, L = brown cable).
Reattach the body of the lamp to the assembly plate. To do this, press the unlock button ③ and slide the lamp onto the assembly plate until the unlock button ③ locks back into place. Secure the connection by screwing it to the terminal box ①.
Set the desired direction of the light and tighten the screws. Switch the main power supply on.
Only for model City SH 8005 PIR IP 44, City LH 8005 PIR IP 44 and City LH 562405 PIR IP 44
The motion detector should not be directed at heat sources such as grills, air conditioners, other outside lighting, moving cars and exhaust shafts in order to avoid annoying false triggering. For the same reason, the motion detector should not be installed in areas with strong electromagnetic interference. Do not direct the device at reflective surfaces such as smooth white walls, swimming pools, etc.
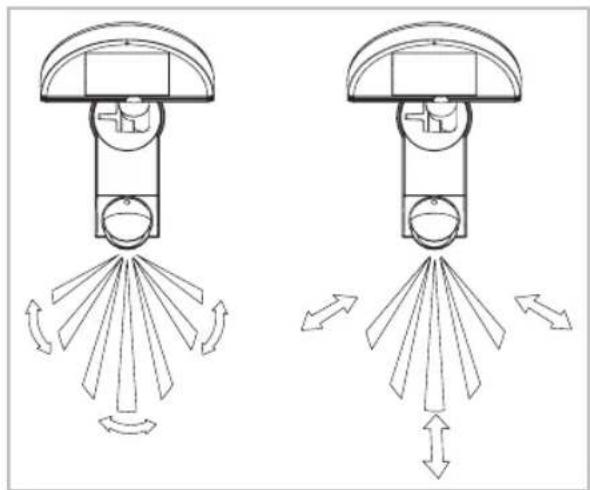
The technical specifications for the sensor range (max. 10 meter at 180 °) can vary slightly depending on the installation height and location. The sensor range on the device can also change if the temperature changes. Before you select the installation location for the device, you should know that the motion detector reacts most sensitively to movements that run straight across its range and least sensitively to movements that run directly toward or away from the motion detector (see Fig. C). If the movement is directly toward or away from it, this means a significant reduction of the sensor range (see Fig. C).
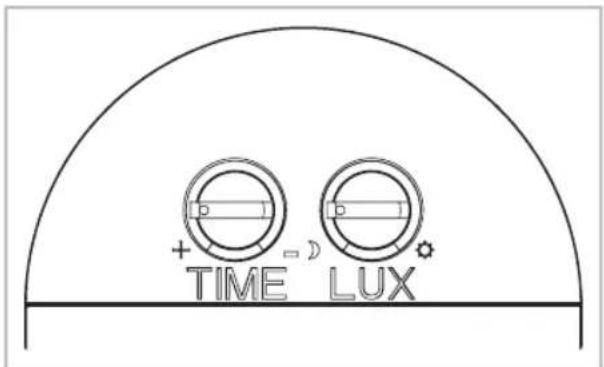
There are two controllers on the motion detector (see Fig. D)
Time setting (TIME):
The length of the duration that the lamp remains on after activation can be set to between 10 (+/- 5) seconds and 4 (+/- 1) minutes. By turning the TIME controller from (+) to (−), the duration is shortened.
Notice: If the light has been triggered by the motion detector, the duration restarts with each detection.
Light setting (LUX):
The LUX controller has an integrated sensor device (photocell) that recognises daylight and darkness. Symbol (*) means that the motion detector is triggered during the day and at night and when set at the (C) symbol, it only reacts at night.

Operating Instructions Premium LED spotlight
Setting the controllers (see Fig. D)
Set the LUX controller to the (*) symbol and wait for a few seconds. Make sure that the TIME controller is set to minimum (−). The lamp will now turn on and remain on for several seconds.
Adjust the motion detector vertically so that it captures the desired area. Have a person walk across the area to be detected and change the sensor angle until the lamp turns on from the movement (see Fig. C). Set the TIME controller to the desired time.
To set the LUX threshold, at which the light should automatically turn on at night, turn the LUX controller from daylight to night. Notice: If the light needs to be turned on earlier, e.g., at dusk, wait for the desired light level, then slowly turn the LUX controller toward the daylight position while someone walks through the centre of the sensor range. Let the controller go when the light turns on.
Continuous light function
By installing a power switch (wall light switch) in the power supply line, models with motion detectors can be set to remain continuously lit:
1. Switching on continuous light:
Quickly turn the switch ON and OFF twice (within 2 sec.). The lamp will be set to remain continuously lit for 4 hours. Then it will automatically switch back to motion sensor mode.
2. Switching off continuous light:
Turn the switch ON and OFF once. The lamp will switch off and go into motion sensor mode.
MAINTENANCE AND CLEANING
The LED lamp does not contain any components that require maintenance. The LEDs cannot be replaced. To clean, use only a dry or lightly moistened cloth and do not use any cleaning solvents, acidic cleaning agents, etc.
DISPOSAL
Dispose of electrical devices in an environmentally responsible manner!

Do not dispose of electrical devices with household rubbish
In accordance with Directive 2012/19/EU on waste electrical and electronic equipment, used electrical equipment must be collected separately and reused or recycled in an environmentally responsible manner. Please contact your local authorities for available disposal options for your worn-out device.
TROUBLESHOOTING AND USER INSTRUCTIONS
Problem Possible cause Possible solution
| Light does not go on from motion within the sensor range. | 1.Nopower.Check all connections and fuses/switches. | |
| 2. Lighting close up is too bright. | Redirect the motion detector or change the device's location. | |
| 3. Controller set incorrectly. Adjust sensor angle or controller. | ||
| The light goes on for no apparent reason (false trigger) | 1. Heat sources such as air conditioners, ventilation openings, heating equipment outlets, grills, other outdoor lighting or moving cars activate the motion detector. | Adjust the sensor head away from these sources. |
| 2.Animals/birds or pets. Readjusting the sensor head can be helpful. | ||
| 3. Reflections from swimming pools or reflective surfaces. | Readjust the motion detector. | |
Notice: Under cold weather conditions, all devices with PIR sensors are more sensitive than in warm weather.
MANUFACTURER
INDICATIONS DE SÉCURITÉ
VEILIGHEIDSWAARSCHUWINGEN
POPIS SÚČIASTOK (p. obr. A)

- DE
- GB Installation and Operating Instructions Premium LED spotlight
- PARTS DESCRIPTION (see Fig. A)
- SAFETY INSTRUCTIONS
- TECHNICAL DATA
- INSTALLATION
- Install the lamp (see Fig. A)
- Only for model City SH 8005 PIR IP 44, City LH 8005 PIR IP 44 and City LH 562405 PIR IP 44
- Time setting (TIME):
- Light setting (LUX):
- Operating Instructions Premium LED spotlight
- Setting the controllers (see Fig. D)
- Continuous light function
- Switching on continuous light:
- Switching off continuous light:
- MAINTENANCE AND CLEANING
- DISPOSAL
- Do not dispose of electrical devices with household rubbish
- TROUBLESHOOTING AND USER INSTRUCTIONS
- MANUFACTURER
- INDICATIONS DE SÉCURITÉ
- VEILIGHEIDSWAARSCHUWINGEN
- POPIS SÚČIASTOK (p. obr. A)
Brand : BRENNENSTUHL
Model : City
Category : Lamp