WR 2000D - Welding machine Weller - Free user manual and instructions
Find the device manual for free WR 2000D Weller in PDF.
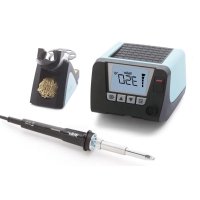
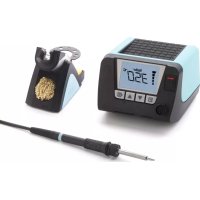
| Technical Features | Weller WR 2000D - Soldering station with digital temperature control, 200 W power, adjustable temperature from 50 to 450 °C. |
|---|---|
| Usage | Ideal for precision soldering applications, especially in electronics and printed circuit board assembly. |
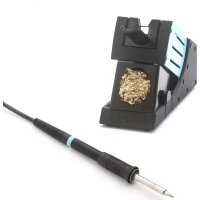
| Maintenance and Repair | Regularly check the soldering tips and replace them if necessary. Clean the station and accessories to ensure optimal performance. |
| Safety | Use protective gloves and safety glasses. Avoid direct contact with hot surfaces. |
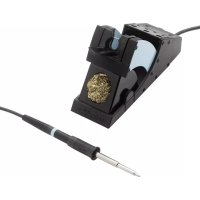
| General Information | Compatible with various Weller accessories, 2-year warranty, lightweight for easy handling. |
Frequently Asked Questions - WR 2000D Weller
Download the instructions for your Welding machine in PDF format for free! Find your manual WR 2000D - Weller and take your electronic device back in hand. On this page are published all the documents necessary for the use of your device. WR 2000D by Weller.
USER MANUAL WR 2000D Weller
PICK UP (WR 3M) WR 2 WR 3M MENUEMENUE EXIT
WR 3MWHP 80 WSB 150 WSB 80 WST 82
Air connection nipple for hot air tools
WR 3M max. 3 x13 TIP
Pick Up max. 2 x WVP WR 3M
Switching the channel on/ off
Select ixed temperature
Select ixed temperature
Fourvariantsarepossiblebyconnectingthe3.5mmjacksocket differently: a Hard-grounded supplied without plug. b Equipotential bonding with plug, equaliser at centre contact. c Floating with plug d Soft-grounded with plug and soldered resistor. Ground- ed through selected resistor. Carrying out a rmware update (WR 3M) Notice The control unit is equipped with a Mini USB port. To use the USB port, Weller provides software on so you can carry out a software update („Firmware Updater“) on your control unit. Care and maintenance Warning! <Before doing any work on the machi- ne, pull the plug out of the socket. Warning! Use original replacement parts only. Warning! Risk of burns Onlyreplacesoldertipswhencold Replace and clean suction nozzles onlywhenhotandusingthesuitable tool Onlyreplacehotairnozzlesusing the suitable tool Onlycleanorreplacesolder collection tubes when cold Cleantheoperatorpanel,ifdirty,usingasuitable cleaning cloth. Filter change Checkthelterregularlyforcontamination,and replaceitifnecessary. Warning! Failuretousealterwillcauseirreparabledama- ge to the vacuum pump. Check before starting soldering whether a main lterisinserted. Contaminated lters must be treated as special waste. Dispose of replaced equipment parts, lters or old devices in accordance with the rules and regulations applicable in your country. Wear suitable protective gear. For your safety EN47 Standby Temp. (STANDBY) Menu access - 1 - After activating the Setback function or after pushing the ECO button (WR 2), the temperature is automa- ticallyreducedtoStandbytemperature.Thedisplayashestheactualtemperature.<STANDBYappears onthedisplay. Setback time (SETBACK) Menu access - 1 - If the soldering tool is not in use, the temperature isreducedtoStandbytemperatureonexpirationof the preset Setback time. SETBACKappearsonthedisplay. ToexitStandbymode,pushthe„UP/DOWN“ buttons or ECO (WR 2). Dependingonthetoolinuse,thengerswitchor thesafetyrestdeactivatesStandbymode. Option Description 0 min Deactivated (Default setting) ON After placing the soldering iron into thesafetyrest,thetemperatureis immediatelyreducedtostandby level. 1-999 min SetbacktimeIndividuallyadjustable AUTO OFF time (automatic switch-off time) Menu access - 1 - If the soldering tool is not in use, the soldering tool is switched off on expiration of the AUTO-OFF time. Theactualtemperatureashesonthedisplayand serves as residual-heat indicator. „OFF“ appears onthedisplay.Aashingdashappearsonthe displaybelow50°C(122°F). Option Description 0 min Deactivated (Default setting) 1-999 min AUTO-OFF time, can be set indivi- dually. Temperature-Offset (Offset) Menu access - 1 - Theactualsoldering-tiptemperaturecanbeadaptedbyenteringatemperatureoffsetaround±40°C(± 72 °F). Temperature window (WINDOW) Menu access - 1 - Starting from a set, locked temperature, it is possible to set a temperature window of ± 1-99 °C (±1-180 °F) using the WINDOW function. To use the WINDOW function, the repair station must be interlocked. Temperature units (°C/°F) Menu access - 1 - Option Description ° C Celsius ° F Fahrenheit Parameter menu EN48
Parameter menu Max. hot air duration (HAP On) Menu access - 1 - Theon-timeofthehotairowoftheHAP200 can be limited in increments of 1 to between 0 and 60 sec. The set time is then identical for all 3 channels. Thefactorydefaultiss(„OFF“),i.e.airowsonly as long as the button on the hot air tool or the optional footswitch is pressed. Option Description OFF Nodurationdened(Defaultsetting) 1-60 s Individuallyadjustable Vacuum pre-feed (VAC On) Menu access - 1 - In order to prevent the pump from starting prema- turelyortoensureadenedsoldering-jointprehe- atingtime,itispossibletosetanONdelay. Option Description 0 sec OFF: vacuum pre-feed function is OFF (Default setting)
1- 9 sec ON: vacuum pre-feed time, indivi-
dually Vacuum run-on (VAC Off) Menu access - 1 - To prevent the desoldering iron from becoming clogged, it is possible to set a vacuum run-on time. (factorysetting2s) Option Description 0 sec OFF: vacuum run-on function is OFF (Default setting)
1- 5 sec ON:vacuumrun-ontime,individually
adjustable lock function Menu access - 1 - Afterthelockhasbeenactivated,onlythe following buttons on the soldering station are enabled:
WR 2:┌1┐,┌1·2┐,┌2┐,ECO,AIR
WR 3M:┌1┐,┌2┐,┌3┐┌1·2·3┐,PickUp,AIR All other settings are disabled until the repair station is unlocked again. Notice If you want only one temperature value to be selectable, the control keys xed temperature keys) must be set to the same temperature value. Locking the soldering station Selectmenuoption.„OFF“appearsonthedisplay. Thekeysymbolisashing. Set the desired three-digit locking code (between 001 and 999) using the UP / DOWN buttons. WR 2:Pressbutton┌2┐for5seconds. WR 3M:Pressbutton┌3┐for5seconds. The code is stored. Thekeysymbolisdisplayed. Unlocking the soldering station
Parameter menu Pressure gauge threshold (LEVEL) Menu access - 2 - Thisfunctioncanbeusedtodenethemainte- nance interval of the desoldering tool. This is done bysettingthevalueinmbaratwhichtheelectric pressure gauge issues a warning signal when the intakesystemiscontaminated(LEDofthevacuum pump switches from green to red). The set value is dependent on the suction nozzles used. Adjustable -400 mbar to -800 mbar factorysetting -600mbar
value with the UP or DOWN button. The status LED switches back and forth between red and green. Use the UP button to increase vacuum by50to80mbar,thenpinchthevacuumtube and check whether the LED switches from green to red. Station code (Remote ID) Menu access - 2 - WR 3M A station code (Remote ID) can be assigned to eachstation,allowingthestationtobeclearly identiedviatheUSBport. Option Description 0-999 Individuallyadjustable Calibration (Factory Calibration Check FCC) Menu access - 2 - You can use the FCC function to check the temperature precision of the repair station and even out possible deviations. For this purpose, the soldering-tip temperature must be measured with an external temperature meter and a temperature measuring tip assigned to the soldering tool. The corresponding channel must be selected prior to calibration.
1. Insert the temperature sensor (0.5 mm) of the
external temperature meter into the temperature measuring tip.
100 °C / 210 °F is selected. b) Press the UP button. -> Calibration point 450 °C / 840 °F is selected. The soldering tip is now heated up. The control indicatorashesassoonasthetemperatureis constant.
the adjusted value. WR 3M: Pushthe┌1·23┐(Set)buttontocon- rmtheadjustedvalue. The temperature deviation is now reset to 0. Calibration at 100 °C / 210 °F / 450 °C / 840 °F is now complete.
6. Use the UP or DOWN button to set the
difference between the value indicated on the external meter and the value indicated on the repair station. Maximum possible temperature adjustment ± 40 °C (± 70 °F). WR 2: Pushbutton┌2┐toexitthemenu option (EXIT). WR 3M: Pushbutton┌3┐toexitthemenu option (EXIT).
7. WR 2: ExitMenu2withbutton┌2┐.
WR 3M: ExitMenu3withbutton┌2┐. Resetting calibration to factory settings
taneously.„FSE“(FactorySettingEnabled) appearsonthedisplay. Therepairstationisnowresettothefactory calibration.50 Parameter menu Activation / Deactivating the special button (SP Button) Menu access - 2 - WR 2 After activating the special button, it can be used as a shortcut back to Menu 1. The function previ- ouslyselectedissavedwhenthemenuisexited with the special button. Option Description OFF Deactivated (Default setting) ON Special button activated Activation / Deactivating the ECO button (ECO) Menu access - 2 - WR 2 After activating the ECO button, it can be used tosetallchannelstoStandbymode.Thegreen LED lights up and the channels are set to the set standbytemperature.Ifasafetyrestisinuse,the function is reset when the tool is removed from the holder. Option Description OFF Deactivated (Default setting) ON ECO button activated Button lock HAP 200 (HAP LOC) Menu access - 2 - WR 3M Thisfunctioncanbeusedtoadjustthefactory button presets of the WXAHP tool. TheHAP200isswitchedonthersttimethe button is pressed and switched off the next time the button is pressed. Option Description OFF Deactivated (Default setting) ON HAP LOC activated Perform. Mode Menu access - 2 - The function determines the heating characteris- tics of the soldering tool to achieve the set tool temperature. Option Description LO Slow heating HI rapid heating EN51 Resetting to factory settings (FSE) Select the menu option FSE in menu 1. WR 2:Pressandholddownbutton┌2┐. 1Openspecialfunctionsmenu„1“(pushUP&DOWNbuttonssimultaneouslyfor2sec.) 2.Pressandholddownbutton┌2┐. 3.ThenpresstheUPandDOWNbuttonssimultaneously.FSEappearsonthedisplay. (FactorySettingEnabled). Therepairstationisnowresettothefactorysettings. Resetthecalibrationvaluestothefactorysettings 1.Openspecialfunctionsmenu„2“(pushUP&DOWNbuttonssimultaneouslyfor4sec.)
RUUK declaration of conformity We hereby declare that the products described herein comply with the following guidelines: