WP 120 - Welding machine Weller - Free user manual and instructions
Find the device manual for free WP 120 Weller in PDF.
Download the instructions for your Welding machine in PDF format for free! Find your manual WP 120 - Weller and take your electronic device back in hand. On this page are published all the documents necessary for the use of your device. WP 120 by Weller.
USER MANUAL WP 120 Weller
WP 200 T0052919999N7 WVP WRK Air Pick Up ON / OFF I / O Vac Air Vac HAP 200 HAP 1 DSX 80 DXV 80 DSX 120 WMRP WMRT WP 120 WP 200 WSP 150 WP 80 WP 65 WR 3M5 WP 65 WP 120 WP 80 WP 200 OFF
tial bonding | User groups | Care and maintenance| Warranty | Technical Data | Symbols
DEUTSCH13 Read these instructions and the accompanying safety information carefully before starting up the device and starting work with the device. Keep these instructions in a place that is accessible to all users. Please adhere to the operating instructions of the connected devices. Before using the device, please read these operating instruc- tions and the enclosed safety instructions carefully. Failure to comply with the safety instructions may result in danger to life and limb. Safety information This appliance can be used by children aged from 16 years and above and persons with reduced physical, sensory or mental capabilities or lack of experi- ence and knowledge if they have been given supervision or instruction concer- ning use of the appliance in a safe way and understand the hazards involved. Children shall not play with the appli- ance. Cleaning and user maintenance shall not be made by children without super
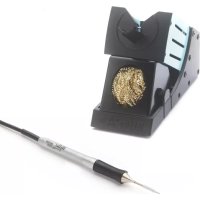
vision. Keep other persons well away from your workplace. The work area is out of bounds for children and unauthorized persons. Never allow other persons to touch the soldering tool or cable. Please be sure to read and follow the operating instructions for your Weller Supply Unit. Always place the soldering tool in the safety rest while not in use. WARNING! Electrical shock Protect yourself against electric shocks. The handles on soldering tools with an antistatic design are conductive.
- Avoid touching earthed objects such as pipes, heaters, stoves and refrigerators.
- Do not use the soldering tool in a damp or wet environment.
- Never work on voltage-carrying parts. WARNING! Risk of burns
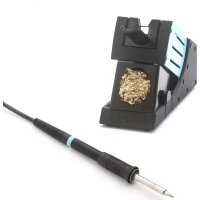
- Always place the soldering tool in the safety rest while not in use. Make sure the safety holder is stable.
- Do not touch the hot soldering tips and keep them away from inflammable objects.
- Only replace solder tips when cold Risk of burning through liquid solder. Protect yourself against solder splashes.
- Wear appropriate protective clothing to protect yourself against burns. Protect your eyes by wearing eye protection.
- When working with adhesives, special attention must be paid to the warning information provided by the adhesive manufacturer. WARNING! Fire hazard Covering the soldering iron or the safety holder poses a re hazard.
- Always keep objects well away from the soldering iron and safety holder.
- Keep all combustible objects, liquids or gases well away from the hot soldering tool. Store your soldering tool in a safe place. When not in use, units and tools should be stored in a dry, high or locked area out of the reach of children. Make sure that unused soldering tools are free of voltage and de-pressurised. Do not use the cable for purposes other than those for which it is intended. Never carry the unit by the cable. Do not use the cable to pull the plug out of the socket. Protect the cable against heat, oil and sharp edges.. Be alert. Pay attention to what you are doing.Be smart when using the unit. Do not use the soldering tool if you are having difculty concentrating. Avoid abnormal posture. Arrange your work station in an ergonomically correct way. Avoid bad posture when using the unit, as this can lead to postural problems. The soldering tool must be operated only in perfect technical working order. Safety devices must not be deactivated. Faults and defects must be repaired immediately. Before using the unit / tool, safety devices must be carefully checked to make sure that they are functioning properly and in the manner intended. Check that moving parts are func- tioning properly and are not sticking, and whether parts are damaged. All parts must be correctly tted and must satisfy all the requirements necessary to guarantee troublefree operation of the unit.
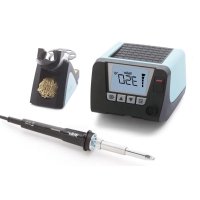
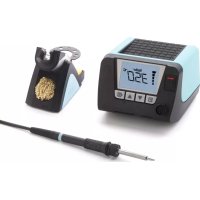
ENGLISH Use the correct tool. Use only accessories or auxiliary devices which are included in the list of accessories or approved for use by the manufacturer. Use WELLER acces- sories or auxiliary devices on original WELLER equipment only. The use of other tools and accessories can pose a risk of injury to you. Secure the tool.Use clamping fixtures to hold the workpiece. Use a solder fume extraction unit. If appliances for connecting solder fume extraction units are available, ensure that they are connected and used properly. Specified Conditions Of Use Use the soldering iron exclusively for the purpose indicated in the Operating Instructions of soldering and desoldering un- der the conditions specied here.The soldering iron may only used in combination with Weller Supply Units. This device may only be used at room temperature and indoors. Protect against moisture and direct sunlight. The manufacturer accepts no liability for any other use deviating from the operating instructions or for unau- thorised modications to the device. Operating guidelines Tip change
- Allow the soldering iron to cool down.
- Hold the soldering iron with the tip pointing slightly downwards.
- Hold the soldering iron rmly by the rear handle and unscrew the tip holder by turning it clockwise.
- Pull the tip holder forwards.
- The soldering tip is now loose in the tip holder. Do not place the soldering tip / measuring tip on the cleaning sponge or plastic surfaces. Keep the heat transfer surfaces of the heating element and soldering tip clean. Antistatic plastics are provided with conductive llers to prevent static charges, which also reduces the insulating properties of the plastic. The operating instructions for the supply unit used apply in addition to these operating instructions. Use only original Weller soldering tips! Equipotential bonding The required equipotential bonding to the soldering tip can be established viathe supply unit used. Theconnection op- tions for an equipotential bonding cableare described in the operating instructions for the supply unit. User groups Due to differing degrees of risk and potential hazards, sever- al work steps may only be performed by trained experts. Work step User groups Default soldering para- meters Specialist personnel with technical training Replacing electrical repla- cement parts Electricians Default maintenance intervals Safety expert Operation Replacing electrical repla- cement parts Technical trainees under the guidance and supervision of a trained expert Care and maintenance WARNING! Before doing any work on the machine, pull the plug out of the socket. Leave the unit to cool down. Check all connected cables and hoses on a regular basis. If power tools are damaged, they must be immediately removed from use. Only replace the soldering tips when they are cold. The soldering tool must be left switched off in the safety rest for at least 3 minutes until the soldering tip has cooled down. Keep the heat transfer surfaces of the soldering tip and heating element clean. The heating element must not come into contact with soldering tin. Repairs must always be referred to a Weller-trained specialist. Please contact our Customer Service: technical-service@ weller-tools.com Use original replacement parts only.15 Warranty Claims by the buyer for physical defects are time-barred after a period of one year from delivery to the buyer. This does not apply to claims by the buyer for indemnication in accordance with §§ 478, 479 BGB (German Federal Law Gazette). We shall only be liable for claims arising from a warranty furnished by us if the quality or durability warranty has been furnished by use in writing and using the term „Warranty“. The warranty shall be void if damage is due to improper use and if the device has been tampered with by unauthorized persons. Subject to technical alterations and amendments. For more information please visit www.weller-tools.com. Technical Data Soldering iron WP 65 WP 80 WP 120 WP 200 Heating output 65 W 80 W 120 W 200 W Heater voltage 24 24 24 24 Temperature range 100 °C - 450 °C 212 °F - 850 °F 50 °C - 350 °C 120 °F - 660 °F 50 °C - 350 °C 120 °F - 660 °F
WSR 201 XHT WSR 202 Subject to technical alterations and amendments. Symbols Read the operating instructions! Warning! Risk of burns Caution! ESD-compatible design and ESD-compatible workstation Equipotential bonding Soldering CE mark of conformity British Conformity Mark Disposal According to local regulations, retailers may have an obligation to take back waste electrical and electronic equipment free of charge. Your contribution to the re-use and recycling of waste electrical and electronic equipment helps to reduce the demand for raw materi
als. Waste electrical and electronic equipment contains valuable, recyclable materials, which can adversely impact the environment and human health if not disposed of in an environmentally compatible manner. Dispose of replaced equipment parts or old devices in accordance with the rules and regulations applicable in your country.
WP 65 WP 80 WP 120 WP 200
WT 1, WT 1H, WR 3M, PU 81, WR 2 WT 1, WT 1H, WR 2, WR 3M, PU 81 WT 1H, WR 3M, WR 2 WD 3M, WR 3M
WP 65 WP 80 WP 120 WP 200
WT 1, WT 1H, WR 3M, PU 81, WR 2 WT 1, WT 1H, WR 2, WR 3M, PU 81 WT 1H, WR 3M, WR 2 WD 3M, WR 3M
WP 65 WP 80 WP 120 WP 200