WXMP 55 W - Welding machine Weller - Free user manual and instructions
Find the device manual for free WXMP 55 W Weller in PDF.
Download the instructions for your Welding machine in PDF format for free! Find your manual WXMP 55 W - Weller and take your electronic device back in hand. On this page are published all the documents necessary for the use of your device. WXMP 55 W by Weller.
USER MANUAL WXMP 55 W Weller
The data specified above only serves to describe the product. No statements concerning a certain condition or suitability for a certain application can be derived from our information. The given information does not release the user from the obligation of own judgement and verification. It must be remembered that our products are subject to a natural process of wear and aging. © This document, as well as the data, specifications and other information set forth in it, are the exclusive property of Cooper Tools GmbH. Without their consent it may not be reproduced or given to third parties. Subject to modifications. Printed in Germany.
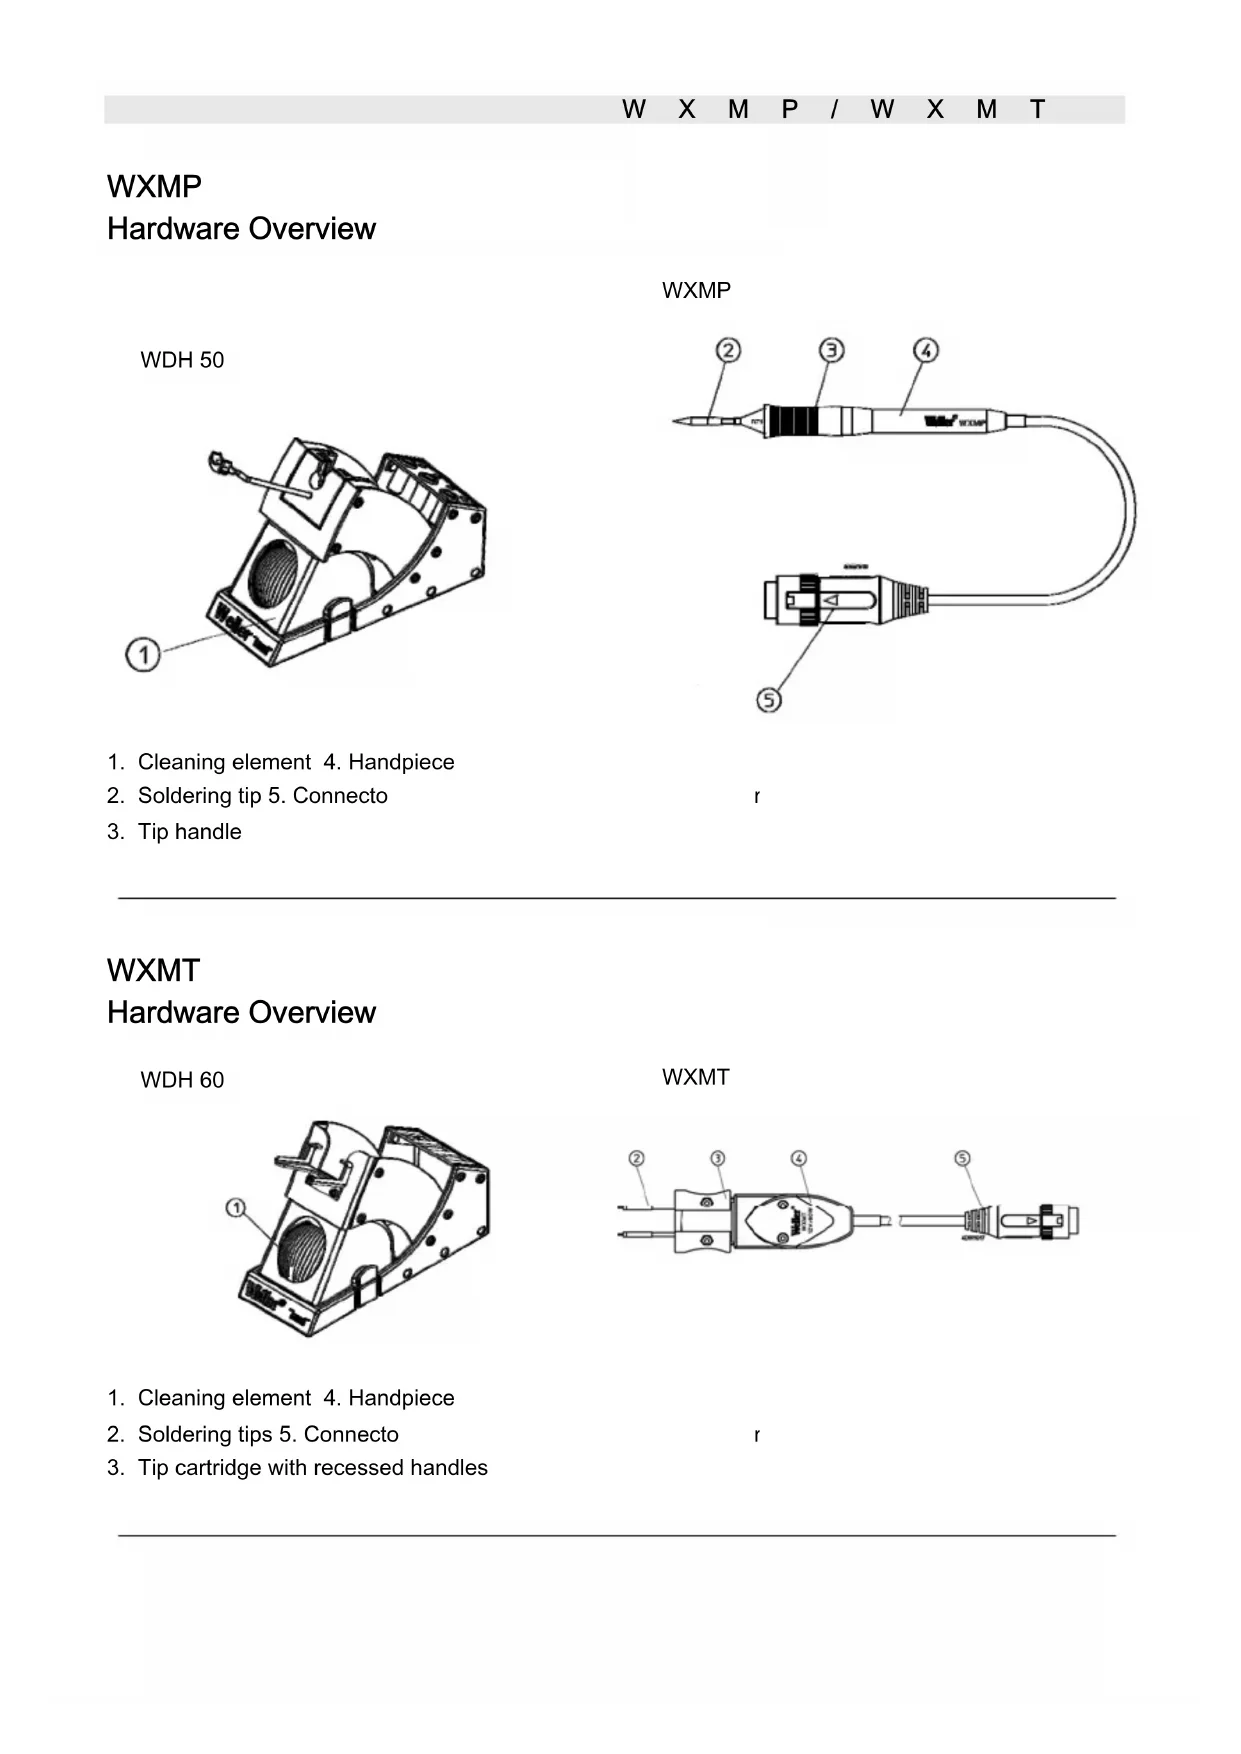
WXMP/WXMT Operating InstructionsWXMP/WXMT WXMP Hardware Overview
WXMT Hardware Overview
3. Tip cartridge with recessed handles
WDH 60WXMP/WXMT 3-10
- DE EN FR IT ES PT NL SV DK FI GR TR CZ PL HU SK SL EE LV LT Table of Contents 1 About these instructions p. 3
- 2 For your safety p. 3
- 3 Included in delivery p. 5
- 4 Device description p. 6
- 5 Commissioning the device p. 7
- 6 Changing WXMP soldering tips p. 7
- 7 Changing the WXMT tip cartridges p. 8
- 8 Accessories p. 9
- 9 Disposal p. 9
- 10Warranty 1 About these instructions Thank you for placing your trust in our company by purchasing the Weller WXMP soldering iron or the Weller WXMT desoldering tweezers. The device has been manufactured in accordance with the most rigorous quality standards which ensure that it operates perfectly. These instructions contain important information which will help you to start up, operate and service the WXMP soldering iron and the WXMT desoldering tweezers safely and correctly as well as to eliminate simple faults or malfunctions yourselves. Z Prior to putting the WXMP soldering iron and the Weller desoldering tweezers WXMT into operation, please carefully read these operating instructions and the safety instructions enclosed. Z Keep these instructions in a safe place where they are easily accessible for all users. p. 10
1.1 Directives taken into consideration
The Weller WXMP soldering iron and WXMP desoldering tweezers conform to the EU Declaration of Conformity as per the Basic Safety Requirements of Directives 2004/108/EC and 2006/95/EC.
1.2 Applicable documents
− Operating instructions for your supply unit − Operating instructions for the WXMP/WXMT − Safety information booklet accompanying these instructions 2 For your safety − The WXMP soldering iron and the WXMT desoldering tweezers have been manufactured in accordance with the state of the art, as well as recognised safety rules and regulations.4-10 WXMP/WXMT There is nevertheless a risk of personal injury and damage to property if the safety information set out in the accompanying safety booklet and the warnings presented in these instructions are not observed. − Always pass on the WXMP soldering iron or WXMT desoldering tweezers on to third parties along with these operating instructions. − The manufacturer is not liable for damages arising from improper use of the tool or unauthorised modifications. State of California warning: When used for soldering and similar applications, this product produces chemicals known to the State of California to cause cancer and birth defects or other reproductive harm.
2.1 Note the following:
General information − Always put the WXMP soldering iron and the WXMT desoldering tweezers into the safety rests provided for them. − Remove all flammable objects from the vicinity of the hot soldering tool. − Always wear suitable protective clothing when using the WXMP or WXMT. − Never leave the hot WXMP or WXMT unattended. − Do not work on electrically live parts. − Always wear eye protection when working with soldering and desoldering applications. − Read and follow the operating instructions for the Weller WX supply unit in use. Handling soldering / desoldering tips − Do not place or leave the hot soldering/desoldering tips on the worktop or on plastic surfaces. − Coat the tinned soldering/desoldering tips in solder once they have heated up in order to remove any oxide layers formed during storage or contamination from the soldering/desoldering tips. − Ensure the soldering/desoldering tips are kept well wetted during intervals between soldering and desoldering and prior to storage of the device. − Do not use aggressive fluxing agents. − Always make sure that the soldering/desoldering tips are properly seated. − Select the lowest possible working temperature. − Select the largest possible soldering/desoldering tip shape for the application (roughly as large as the soldering pad). − Coat the soldering/desoldering tips well to ensure that there is efficient heat transfer between the soldering/desoldering tips and the soldering area. − Switch off the system if you do not intend to use the soldering/desoldering tool for prolonged periods.WXMP/WXMT 5-10 DE EN FR IT ES PT NL SV DK FI GR TR CZ PL HU SK SL EE LV LT − Coat the tips in solder before placing the soldering / desoldering tool in the safety rest. − Apply the solder directly to the soldering area, not to the soldering/ desoldering tips. − Do not apply excessive force to the soldering/desoldering tips. − Always make sure that the soldering irons or the desoldering tweezers are seated properly in the safety rest.
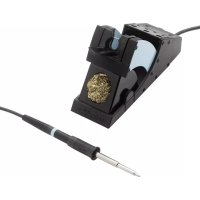
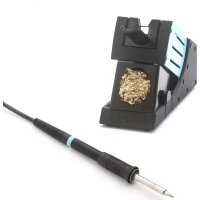
Use the WXMP soldering iron or WXMT desoldering tweezers only for the purpose indicated in the operating instructions of releasing, accommodating and setting down chip components under the conditions specified here. Intended use of the WXMP soldering iron or WXMT desoldering tweezers also includes that you − adhere to these instructions, − observe all other accompanying documents, − comply with national accident prevention guidelines applicable at the place of use. The manufacturer will not be liable for unauthorised modifications to the device. 3 Included in delivery WXMP soldering iron handpiece (packed) T0052920399: − Handpiece WXMP with cable T0058765706 − Operating instructions of WXMP/WXMT − Safety information booklet Also included with WXMP soldering iron set T0052920499: − WDH 50 safety rest T0051515699 − RT 3 chisel tip 40 W T0054460399 − Operating instructions of WDC 2 WXMT desoldering tweezers handpiece (packed) T0051317799: − Handpiece WXMT with cable T0058765707 − Operating instructions of WXMP/WXMT − Safety information booklet Also included with WXMT desoldering set T0051317899: − WDH 60 safety rest T0051516999 − RTW 2 soldering tip pair 0.7 x 0.4 mm, 45°, T0054465299 − Operating instructions of WDC 26-10 WXMP/WXMT 4 Device description
4.1 Soldering iron WXMP
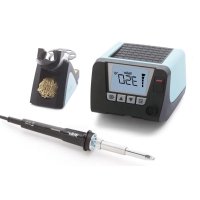
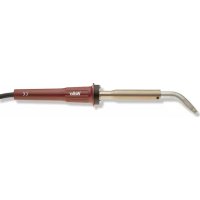
The WXMP is a powerful 40 W (55 W with RT 11) fine soldering iron with integrated heating system in the soldering tip. Thanks to a plug- in system, the soldering tip can be changed without tools. The WXMP is equipped with a usage detector and can be automatically switched to standby mode or switched off when not in use. For details of setting the standby temperature and the switching times, please refer to the operating instructions of the WX supply unit in use. Note The WXMP soldering iron by Weller may only be used with Weller WX supply units.
4.2 Desoldering tweezers WXMT
The WXMT desoldering tweezers by Weller have been developed for the re-working and repair of electronic SMD precision tools. The soldering/desoldering tip set can be replaced easily and quickly without tools. The tips are pre-calibrated and require no further alignment. The built-in heating elements (2 x 40 W) ensure that the desired soldering tip temperature is reached very quickly and precisely. The WXMT desoldering tip comes equipped with a usage detector and can be automatically switched to standby mode or Off when not in use. For details of setting the standby temperature and switching times, please refer to the operating instructions of the WX supply unit in use. Note The WXMT desoldering tweezers may only be operated with WX supply units
Heating wire integrated in tip cartridge Thermocouple integrated in tip cartridge WXMP Heating output 40 W (55 W with RT 11) Voltage (heater) 12 V Heat-up time (approx.) 3s (50°C to 380°C) (120°F to 660°F) Connection 6 pin connector, polarity protected with lock Weight 26 g incl. tip cartridge without cord Tip type Supply unit RT series Weller WX stationsWXMP/WXMT 7-10 DE EN FR IT ES PT NL SV DK FI GR TR CZ PL HU SK SL EE LV LT WXMT Heating output 80 W (2 x 40 W)Voltage (heater) 12 VHeat-up time (approx.) 3s (50°C to 380°C) (120°F to 660°F)Connection 7 pin connector, polarity protected with lock Weight 42 g incl. tip cartridge without cord Tip type Supply unitRTW series Weller WX stations 5 Commissioning the device WARNING! Risk of burns The soldering tips of the soldering iron and desoldering tweezers become very hot during soldering and desoldering. There is a risk of burns from touching the tips. Z Do not touch the hot soldering tips and keep them away from inflammable objects.
1. Carefully unpack the WXMP soldering iron or WXMT desoldering
tweezers. 2. WXMP: Place the soldering iron into the safety rest (WDH 50). WXMT: Place the tweezers into the safety rest (WDH 60).
3. Insert the connecting plug (5) into the socket on the power supply
unit and lock the plug into the socket by turning it clockwise.
4. Check to make sure that the mains voltage matches the voltage
specified on the rating plate of the WX supply unit. 5. Switch on the supply unit and set the desired temperature. 6. Once the tool has reached the desired temperature, coat the soldering tip in solder. 6 Changing WXMP soldering tips WARNING! Risk of burns The soldering tip becomes hot during soldering and desoldering processes. There is a risk of burns from touching the soldering tip. Z The soldering tool must be switched off and stand at least 3 min. in the safety rest (WDH 50) until the soldering tip has cooled off. Only replace the soldering tips when they are cold.8-10 WXMP/WXMT Replacing a used soldering tip 1. Place the soldering tool into the safety rest. 2. Switch off the supply unit. 3. Wait three minutes until the soldering tip has cooled off.
4. Hold the soldering iron by the handpiece and pull the soldering tip
off of the tool by the tip handle (3). CAUTION! Danger of malfunction The soldering tip must be inserted completely. Use of a soldering tip that has not been fully inserted can cause the tip to malfunction. Z For this reason, make sure that the soldering tip is inserted as far as it will go in a single motion. Inserting a new soldering tip
5. Hold the soldering iron by the handpiece (4) and insert the tip into
the soldering tool by the tip handle (3). 6. Switch on the supply unit and set the required temperature. Note If different types of soldering tip are used, it is recommended that the tips be placed into the metal sockets provided on the back of the WDH 50 rest. 7 Changing the WXMT tip cartridges WARNING! Risk of burns The tips become very hot during soldering and desoldering. There is a risk of burns from touching the tips. Z The tweezers must be switched off and stand at least 3 min. in the safety rest (WDH 60) until the soldering or desoldering tips have cooled off. Soldering/desoldering tips may only be replaced after they have cooled off. Replacing used tip cartridges 1. Place the tweezers into the safety rest. 2. Switch off the supply unit.
3. Wait three minutes until the soldering/desoldering tips have
4. Hold the desoldering tweezers (4) by the handpiece and pull the
tip cartridge (3) out of the handpiece by the recessed handles. CAUTION! Danger of malfunction The tip cartridge must be inserted completely. Use of a tip cartridge that has not been fully inserted can cause the tip cartridge to malfunction. Z Make sure that the tip cartridge is inserted as far as it will go in a single motion.WXMP/WXMT 9-10 DE EN FR IT ES PT NL SV DK FI GR TR CZ PL HU SK SL EE LV LT Inserting a new tip cartridge
6. Grip the new trip cartridge by the recessed handles and insert it
into the handpiece (4).
7. Switch on the supply unit and set the desired temperature.
8.1 RT soldering tips for WXMP soldering iron
See the table RT soldering tips for WXMP soldering iron in the section in the back and at www.weller.eu
8.2 WXMP replacement parts and accessories
Order no. Description T0058765706 Handpiece WXMP with cable T0051515699 Safety rest WDH 50 T0054460399 RT 3 soldering tip 40 W T0058751816 Clip which attaches to the side of the rest and holds two RT tips T0051384199 Metal wool for cleaning element for WDC 2
8.3 RTW soldering/desoldering tips for desoldering
tweezers WXMT See the table RTW soldering/desoldering tips for WXMT desoldering tweezers in the section in the back and at www.weller.eu
8.4 WXMT replacement parts and accessories
Order no. Description T0058765707 Handpiece WXMT with cable T0051516999 Safety rest WDH 60 T0054465299 RTW 2 soldering tip pair 0.7 x 0. 4 mm, 45° T0051384199 Metal wool for cleaning element for WDC 2 9 Disposal Dispose of replaced equipment parts, filters or old devices in accordance with the rules and regulations applicable in your country.10-10 WXMP/WXMT 10 Warranty Buyer's claims for defective goods expire one year from receipt of the goods. This does not apply to claims by the buyer for indemnification pursuant to §§ 478 and 479 of the German Civil Code (BGB). We only accept claims under warranty for the quality or durability of goods if we have expressly stated in writing that such a warranty has been granted by us. In addition, for the USA and Canada: Cooper Tools warrants to the original purchaser and any subsequent owner (“Buyer”) that Weller soldering and desoldering products will be free from defects in material and workmanship for a period of one year from date of purchase, provided that no warranty is made with respect to products which have been altered, subjected to abuse or improperly used, installed or repaired. Use of non-Cooper Tools components will void this warranty if a non-Cooper Tools component is defective (or is the source of the defect). Cooper Tools will repair or replace products found to be defective not caused by a part, component or accessory manufactured by another company, during the warranty period. Contact Cooper Tools with dated proof of purchase and return to Cooper Tools, 1000 Lufkin Road, Apex, NC 27539. All costs of transportation and reinstallation shall be borne by the Buyer. IN NO EVENT SHALL COOPER TOOLS BE LIABLE FOR
INCIDENTAL OR CONSEQUENTIAL DAMAGES. COOPER TOOLS
LIABILITY FOR ANY CLAIMS ARISING OUT OF THIS WARRANTY SHALL NOT EXCEED THE PURCHASE PRICE OF THE PRODUCT. THE PERIOD OF ALL IMPLIED WARRANTIES APPLICABLE TO THIS PRODUCT INCLUDING ANY IMPLIED WARRANTY OF MERCHANTABILITY OR FITNESS, OR FITNESS FOR A PARTICULAR PURPOSE IS LIMITED TO 12 MONTHS FROM THE DATE OF PURCHASE BY THE USER. Some states do not allow the exclusion or limitation of incidental or consequential damages, so the above limitation or exclusion may not apply to you. Some states do not allow limitation on how long an implied warranty lasts, so the above limitation may not apply to you. This warranty gives you specific legal rights, and you may also have other rights, which vary from state to state. Subject to technical alterations and amendments. Operating instructions are available for download at www.weller.eu.EN
WDH 60WXMP/WXMT 3-11
WDH 60WXMP/WXMT 3-10
WDH 60WXMP/WXMT 3-10
WDH 60WXMP/WXMT 3-10
Measuring tip 005 44 613 99 Subject to technical change without notice!WXMT Soldering/Desoldering Tips RT soldering/desoldering tips for WXMT Model Type description Dimension Order no. inch mm Degree RTW 1 tip set Point tip ∅ 0.0157 ∅ 0,4 45° 005 44 651 99 RTW 2 tip set Chisel tip
USTRALIA Cooper Tools A company of Apex Tool Group, LLC. P.O. Box 366 519 Nurigong Street Albury, N. S. W. 2640 Phone: +61 (2) 6058-0300 Fax: +61 (2) 6021-7403 CANADA Cooper Hand Tools A company of Apex Tool Group, LLC. 164 Innisfil Barrie Ontario Canada L4N 3E7 Phone: +1 (705) 728 5564 Fax: +1 (705) 728 3406 CHINA Cooper Hand Tools A company of Apex Tool Group, LLC. 18th Floor, Yu An Building 738 Dongfang Road Pudong, Shanghai 200122 China Phone: +86 (21) 5111-8300 Fax: +86 (21) 5111-8446 USA Cooper Tools A company of Apex Tool Group, LLC. P.O. Box 728 Apex, NC 27502-0728 North-East Phone: +1 (919) 362-7540 Fax: +1 (800) 854-5137 West Coast (South-West) Phone: +1 (919) 362-1709 Fax: +1 (800) 846-7312 All other USA inquires Fax: +1 (800) 423-6175 South Phone: +1 (919) 362-7541 Fax: +1 (800) 854-5139 Midwest Phone: +1 (919) 362-7542 Fax: +1 (800) 854-5138
Weller is a registered Trademark and registered Design of Apex Tool Group, LLC. © 2010, Apex Tool Group, LLC. T005 57 207 00 / 09.2010