iZi Twist iSize - Car seat BESAFE - Free user manual and instructions
Find the device manual for free iZi Twist iSize BESAFE in PDF.
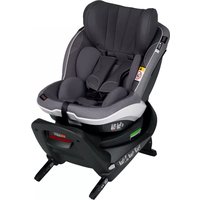
| Brand | BeSafe |
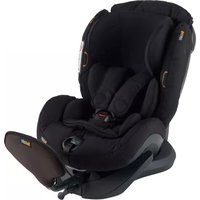
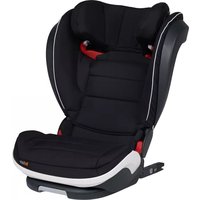
| Model | iZi Twist iSize |
| Category | Child car seat |
| Safety standard | i-Size (UN/ECE Regulation No. 129) |
| Orientation | Rear-facing only (between 61 and 105 cm) |
| Child height | 61 to 105 cm |
| Max child weight | 18 kg |
| Seat weight | Approx. 12 kg (estimate) |
| Dimensions (W x D x H) | Approx. 60 x 45 x 65 cm (estimate) |
| Rotation | 360° rotation with lock in rear-facing position |
| Installation system | ISOFIX + support leg |
| Support leg | Yes, adjustable with floor contact indicator and bubble level |
| Side protection | SIP+ (Side Impact Protection) removable, door side |
| Headrest adjustment | Yes, by handle (10 positions) continuous |
| Harness adjustment | Height-adjustable shoulder straps with retaining magnets |
| Cover | Removable and machine washable (30°C, delicate cycle) |
| Care | Clean with a soft cloth, avoid harsh products. Wash cover according to instructions. |
| Warranty | 24 months (excluding cover and straps) |
| Lifespan | 7 years maximum (recommended to replace after an accident) |
| Spare parts | Available from the manufacturer (cover, straps, ISOFIX connectors, etc.) |
| Reparability | Must be carried out by the manufacturer or an approved professional |
Frequently Asked Questions - iZi Twist iSize BESAFE
User questions about iZi Twist iSize BESAFE
0 question about this device. Answer the ones you know or ask your own.
Ask a new question about this device
Download the instructions for your Car seat in PDF format for free! Find your manual iZi Twist iSize - BESAFE and take your electronic device back in hand. On this page are published all the documents necessary for the use of your device. iZi Twist iSize by BESAFE.
USER MANUAL iZi Twist iSize BESAFE
Thank you for choosing BeSafe IZI Twist-I Size It is important that, record this user's marina. CC-0082 installing your seat. Intersect install on could order your this.
Vital Information
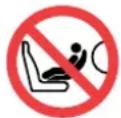
- The child seat: MUST NOT be replaced in a short, cross-sleeve seat with an ACTIVATED CARD.
- Two seat can only be placed in a car seat per week with the exception of the following rules: according to IASHE No 14 or other equivalent standards.
- For the suitable purposes in the car seat, the vehicle behind.
- Because the car seat is fitted with whether the car seat model is as appropriate for the children's use, the seat should be fitted on a website www.buseservice.com. Your car seat, if present, in the same contact file or file for further information.
- ID: Twist-Fit Set is approved near-fitting for children with a child seat.
- When driving with a child sitting in the seat, the seat must be the inner front of sitting direction of the vehicle by the seat of the seat, relative to the side of a chair to its sliding in. In case it is not intended to be used in this way, the seat must be in the middle of the seat.
- The harness straps must always be locked when the child sits.
- The harness straps must be tightly fastened to the front and back of the seat and to the lateral part of the seat. Harnesses can rotate and electrically actuate such as pushers.
- Prohibit any part of the child's body when it is exposed to fire.
- The four suitors must always be able. Must show that "the four suitors are all wearing their own equipment" and that they are standing in front of the seat and that the seat is positioned from vehicle to the spirit lived in the middle. The occupants of a school should always show green light.
- The parents of children who are under five years should not be allowed to drink alcohol while in the spirit lived in the middle. The occupants of a school should always show green light.


undetermined if you were to have another decision, the text may not be able to protect your child from the lives to which it was designed. The text may not be able to protect your child from being under watch by luggage, seat or other discerning eyes.
- Make sure to lighten the frames extremely well so that you can no longer make a fool of the shells. When you honor the frames, make sure that the frames are properly cleaned and that they are not damaged.
- DO NOT attempt to disturb, disturb, meddle or do any part in the seat. Worry will be evident if non-particular parts or accessories are used.
- Never leave your child unattended in the seat.
- Do not use the seat while you are in the seat. Inform about how to release your child in case of emergency.
- Make sure to suture or other effects are properly secured. Always use luggage may cause injuries. Infermier aids or aids in case of injury may be replaced by an original freeze tower.
- Do not use any aggressive cleaning instruments. Ensure that you may not damage the entire seat. Always use a seatbelt.
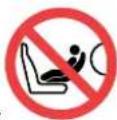
- Side exhausts that this one's subject is not the right or shall be turned off.
- DO NOT use any other seats for more than 2 years. Even in going, the quality of the material may change.
- DO NOT use a frame. It has no need be designed for human use and cannot be used for children.
- What type of seat is supposed to be there? If the seats are the child seat, might it hurt the infants? We recommend using a restraint protection cover in these places to avoid marks or distraction to the interior of the vehicle, especially in situations where the seat is mounted on the floor.
- It instructs us to eat either this car manufacturer or the retailer.
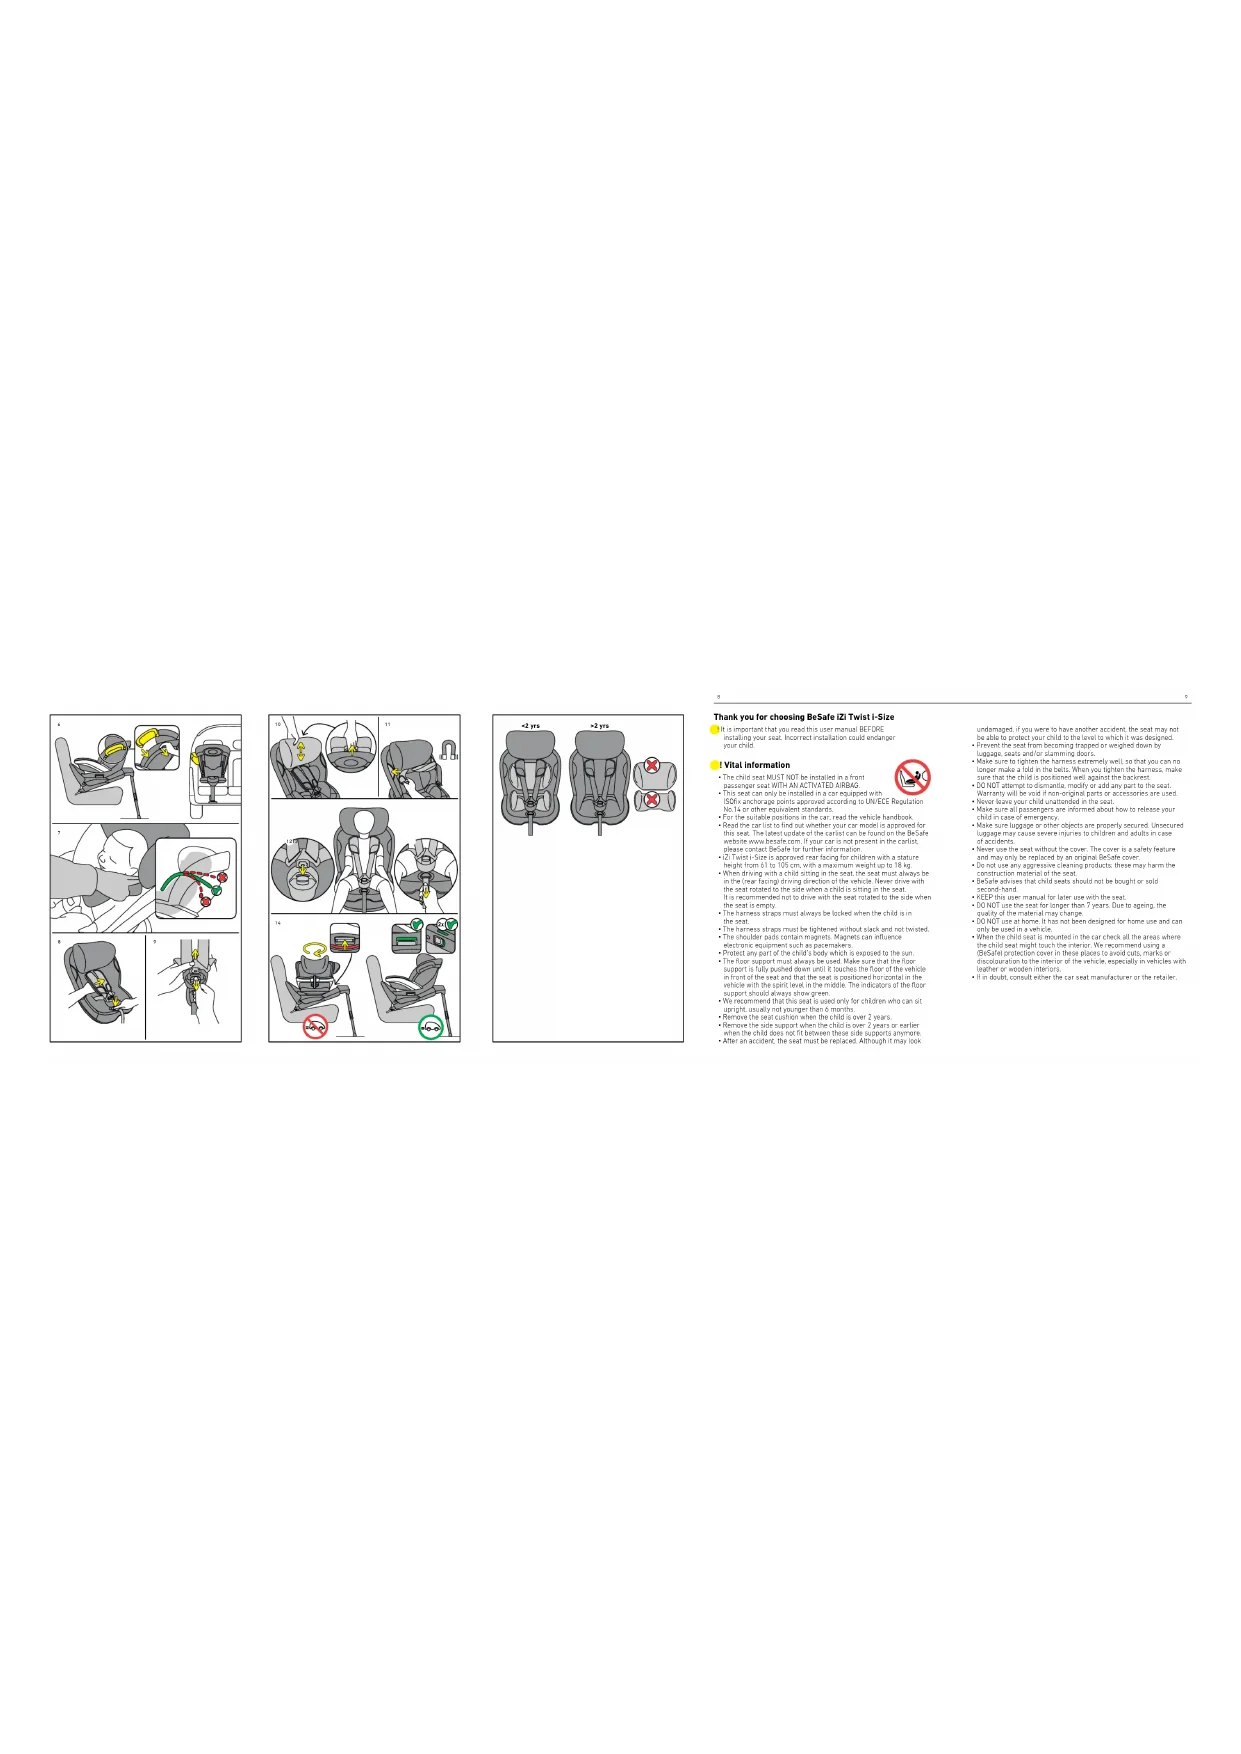
Preparing to install
Adjustable headrest (1a)
Shoulder straps (1b)
- Seat cushion (1c)
Harness buckle (1d)
Side support (1e)
Central adjuster (1f)
- Reclining handle (1g)
- Release handle headrest (1h)
Spirit level (1i)
Floor support (1j)
- Floor support height indicator (1k)
- Height adjuster floor support (11)
Rotation release handle (1m)
- Switch for ISOfix connectors (2x) (1n)
ISOfix connectors (2x) (1o)
- ISOfix release switch (1p)
ISOfix indicators (2x) (1q)
ISOfix car anchorage (2x) (1r)
Installation
- When installing in the back seat of the vehicle, push the front seat of the vehicle forward as far as possible and adjust the back rest into an upright position (if it can be adjusted).
- When installing in the front seat of the vehicle, adjust the back rest into an upright position.
- Position the vehicle on a horizontal surface when installing the seat.
- When the base is lifted the floor support should fall downwards from underneath the base. Do this outside the car.
- Push down the switch for the ISOfix connectors at both sides to release the ISOfix connectors. (2)
- Position the base on the vehicle seat. Click the ISOfix connectors on to the ISOfix anchorages on the vehicle seat. Make sure that both ISOfix indicators are green. (3)
- Push the seat towards the backrest of the vehicle seat until it touches the backrest. (4)
- The ISOfix connectors will have resistance sliding in, in the most outward positions, before they are connected with the ISOfix anchorage of the vehicle.
- Tip: once the ISOfix connectors are installed, the seat can be
Twisted towards the door of the vehicle to get a better view on the installation display.
- Remove the yellow cap from the floor support. Adjust the floor support, so it is in contact with the floor of the vehicle. (5)
- The height indicator of the floor support shows green when the floor support is in contact with the floor. (5)
- Lift the base at the front side (near the spirit level) and extend the floor support till the spirit level is in the middle, indicating a horizontal position of the base. (5)
- Tip: place one foot onto the bottom end of the floor support while lifting the base to make adjusting the length at this step easier.
- The alarm sound stops when the floor support indicators show green and it is in contact with the floor and (not for all models) when the spirit level shows a horizontal position of the seat. (5)
- When having the child seat installed rear facing in the back, it is recommended to position the front vehicle seat in a way that it is close to the touchpoint with the child seat. Make sure that the child seat can still rotate freely.
When having the child seat installed rear facing on the passenger seat in the front, it is recommended to position the passenger seat in a way that the dashboard is close to the touchpoint with the child seat. Make sure that the child seat can still rotate freely.
- Tip: If you feel like the base has too much side movement, you can install the seat tighter against the vehicle seat backrest. Make the support leg short, grab the base and push it against the vehicle backrest with more force. Move it side to side until you hear one more 'click' per side, then lift the base into horizontal position again
- The seat is delivered with removable SIP+ (side impact protection +). This extra side impact protection should be used on the door side of the vehicle. It can be connected by slotting between the seat shell and the fabric. The seat already offers high level integrated side impact protection. This extra side impact protection improves the protection in the side impact still further. (Not on all models) (6)
- Tip: For an optimal height of the SIP+, position it between the two raised dots on the side of the seat shell.
- Do not use the SIP + on the seat when the space between seat and door of the vehicle is too small, which might lead to a situation where the seat is not positioned correctly on the vehicle seat. (6)
Removal of the seat from the vehicle
- To remove the seat from the vehicle, turn the seat rear facing and push the seat upwards while adjusting the floor support to its shortest length.
- Release the ISOfix connectors out of the seat by pushing down the switch for the ISOfix connectors on both sides. Pull the ISOfix release switch on both sides to disconnect from the ISOfix car anchorage.
Positioning of the child
- Twist the seat towards the door while you pull the rotation release handle upwards.
- Check that the shoulder strap slots are level with your child's shoulders. (7)
- While pressing the button of the central adjuster, pull the shoulder straps away from the seat with a flat hand. Make sure to pull the straps evenly so that they stay at the same length. (8)
- Open the harness buckle. (9)
- The height of the shoulder straps and the headrest can be adjusted by pulling the release handle upwards at the back of the headrest and pulling the headrest up or down. (10)
- Position the shoulder straps over the marking at the sides of the seat to use the magnets to keep the harness open while you position the child. (11)
- When the child is positioned, place the shoulder straps over the child's shoulders and close the buckle: CLICK! (12)
- Pull the harness strap through the central adjuster in the direction of the arrow straight up/forwards. Continue pulling until the harness is a comfortable but a firm fit. (13)
- Turn the seat against the driving direction before driving and check if the release handles show green and the seat is locked into the driving direction. (14)
Removing and refitting the cover
- Do take care when you remove the cover, as re-fitting the cover is done in reverse.
- The cover of the headrest can be taken off separately by disconnecting the beads at the back and pulling off the fabric towards the front.
! Warning: potential misuse
- The child seat MUST NOT be installed in a front passenger seat WITH AN ACTIVATED AIRBAG.
- The floor support must always be used. Make sure that the floor support is fully pushed down and that the seat is positioned horizontal with the spirit level in the middle.
- Never drive with a child in the seat if the seat is rotated to the side.
Make sure the indicators are green before you drive.
Guarantee
- Should this product prove faulty within 24 months of purchase due to materials or manufacturing fault, except covers and harness straps, please return it to the original place of purchase.
- The guarantee is only valid when you use your seat appropriately and with care. Please contact your retailer, they will decide if the seat will be returned to the manufacturer for repair. Replacement or return cannot be claimed. The guarantee is not extended through repair.
The guarantee expires: when there is no receipt, when defects are caused by incorrect and improper use, when defects are caused by abuse, misuse or negligence.
Takk for at du valgte BeSafe iZi Twist i-Size
- 转转圈圈,卡卡地里都来来有理有据,百日千金,百日千金,百日千金,百日千金,百日千金,百日千金,百日千金,百日千金,百日千金,百日千金,百日千金,百日千金,百日千金,百日千金,百日千金,百日千金,百日千金,百日千金,百日千金,百日千金,百日千
- 皂fix 空格 10000000000000000000000000000000000000000000000000000000000000000000000000000000
卡西尼德?
IpiroTOBka DO BCTaHOBJIeHHA
- PerynboBaHn NiIroJIiBnK (1a)
-Плесовпеми(2шТ) (1b)
·Ioduuka cndiHHa (1c) - PpKa nleHOBnx pEmHIB (1d)
- BiHa nDCTaBka (1e)
- CHTpaIbHn peYJITOp (1f)
BaxjIb perynIOBaHHH Haxnny (1g)
PyuKa po36IoKyBaHHra NiIroJIiBnKa (1h)
CnnproBni pBeHb (1i)
Onopa B niiNory (1j) - INdkaTOp BnCOTn BCTaHOBJIeHHN Onpn B NiIIOrY (1k)
- PerylTop BVcotn Hixk onopn B niDory (11)
Baxinb3BilbHeHHnOBopoTy (1m)
-Перемкан крпльень IOfix (2) (1n) - KpinneHHRA ISOfix (2) (1o)
-Перемкau po36лokувань ISOfix (1p) - INdukatopn ISOfix (2) (1q)
KpinneHHHAISOfixBabTOMo6i(2) (1r)
BctaHOBLeHHra 6a3n
- PnBCTaHOBLeHHHa 3aHcNcNINH TaHcNOpTHoro 3acOby, HACKINKUe MOXJINBO, NOCyHbTe NepeHcNcINHARABOMOJIBApePei i BiDperyIIOHTe 3aHIOu cactHy y BepTKKaIbHOMy NOLOKeHHI (AkoNo rno MoKHa HanaTuBaTH).
2.ПиусановиabTOKpicnaHa nepeHc cnIHn ABTOMOJIЯ Heo6xjINO bCTaHOBHTCnNkY KpICNA y BepTKaJIbHe NOJKeHHA.
3.Пи Всановлени сдднг nomicitb abTomobil ha ropnOHTaJIbHI pIBHIOBepxHi. - Pn niiHnTti 6a3n onop a NiIIOry NOBHHa BNnactn BnH3 3-niD 6a3n. 3pO6iTb ue 3OBHI ABTOMO6IIra.
- HataHcHtB ha nepemnkaay dny 3'edhybaui ISofix 3 o6ox 60kib, 06 ix 3bInbHHTN.(2)
-
Po3awyte niCTabky Ha cniiHHi ABTomobiHa 3aikcyTe KpiIeHHA ISOfix B Tockax KpInJIeHHA ISOfix Ha cniiHHi ABTomoBiHa.06nDaIHdkatopn ISOfix nobHHi 6yTu 3eJeHMn. (3)
-
PnTNCiHb CnHky KpiCna Do CnHKn CnDInHr ABTOMO6Ia, NOKN BOHn He TOpKHybCg OHe OOnHO. (4)
8.3'eHyBaYi ISOfix 6ydyb CTiKIMn y 6blwocti 30BhiuHix no3ui nepeD Tm, kBOHn 6ydyb 3'cDnHaHi 3 KpInJeHHM ISOfix ABTomO6iHa - Nopada: nicra BCTaHOBHeHn 3'EnHyBaiv ISOfix, cnDHH MoKHa NOBepHyTn Do DBepei ABToMObin, uo6 Kpaue Baunr Dncnny yCTaHOBKn.
- 3nHimtB KOBTy KpuuKy 3 onOpn B niiNory. HanaUryte onopy B niiNory ABTOKpCiJa, uo6 BOHa KOHTaKtyBaJa 3 niiIoroBO ABTomO6iJa. (5)
- 3eJenH KOnip iHnKaTOpa BnCOTn BCTaHOBHeHH HIXKn DJIa ONOpn B nIDNory BkA3y C HA Te, Oo HIXKa BnnpactbCn B nIDNory ABtOMobina. (5)
- NiDHiMItbOchOBy 3 nepeHbOi CTOpOHn (6iHa cnIpTOBOro pIBH) Ta noIOBXKTe niCTaBky DoTn, DOKn CNIpTOBnPiBEh He 6yHe 3hAxOAnTbc NocepeHnH, Noka3yOuH rOpN30HTaJIbHe NIOJKeHH OCHOBn. (5)
- Nopada: noknaTb odhy Hory Ha HnKHi Kineueb onopn dny niJnorn iud nniHOMy ochoBn, 0o6 noJeWHTn peryIIOBaHHdoBxHn.
14.CnHAn TpBOrn npnnnHaTcBcK, KOJI nHnKaToPOn oNOp B niNnOry CBITbC3eNEHM KOBopOM, ONOpa TOpKaeTbcr NiNnOrn ABTomoBilA cnptobn pBeH noKa3ye rOpuOHTaIbHe noNoKeHHKpCiJa (He DnRA BCIX MoJeJ).5)
15.ПиHAЯьнocIДNTAryO CnIHH, BCTaHOBJIeHOrO B NOLOKeHHIOBnUHm H3aIpeKOMeHdyTcBcP O3TaWbATn NpeHc CnIHHABTOMOBINr TAKIM YHOM, 06OBHO He byo NO Bn3bKO Do TOOKNDOINKY 3DITAHm CnIHHHM. NEPEKOHAIteCg, 0o DITaYe CnIHHHBCE Ye MoKe BILbHO OeptaTncR. KaQIo DITaYe CnIHHHBCTaHOBJIeHO B NOLOKeHHI O6NIuHm Ha3aI NaCakKpCbkOMy CnIHHI cpepy, Ioro PEKOMeHdyTcBcPo3TaWbATn TaKIM YHOM, 06NaHeNBnpIIaIB He blya 6bn3bKO Do TOTKn DITaHR CnIHHM. PeKOHaiTeCg, 0o DITaYe CnIHHHB Ce Ye MOKe BILbHO OeptaTncR
16.ПИКаЗкa:ЯкwoBam3daeTbcS,иOбa3a3aHAnTo pyxacTbC,BN MoKTe BCTAHOBHTn CnDInHH 6NnXyde Do CnDInHH aBTo.3P06iTb onOpHy HORY KOPOTWIO, BXonITbc8 3a b3ay Ta WTOBXHItb II NO HanpMyI O CINHKn CnDInHH aBTO, npNKJIabuN 6JIbwe CnII. PyxaTe ii 3i CTopoHN B CTopoHy,doNOKn He noCyte ue ODNH "KlK" 3 KOKHOI CTopoHN,NepeKoHaTEc8,soBa3aB Tropn3OHTaNbHOMy nOLOXKeHi. - ABToKpICNo NOCTaBnEbC3 3HIMHO CnCTeMoIO SIP + (3axnCT BiD 60koBOrO yIapy +).LeydoATKOBI 3axnCT BiD 60koBOrO yIapy IOBnHE BkOpNCTOBByBaTnC3 60ky DBepeB AToMObiJI.BIH MoKe BCTaBnTnC MIX KOPnyCOM CnDiHHI i O6bNkoIO.ABToKpICNo 3aBKn
3a6e3neyu BnCOKn pIBEh BbyOBOHOro 3axNCTy BiD 6iHnx ydapib. LdaDAtKOBa CnTeMa 3ae3neyu 6e 6lbwn 3axNCTy pa3i bivoro ydapy. (He nBcix moJeNe) (6)
- Nopada: Ддя onTmamlbHoi BucOTn SIP+, BCTaHOBITb Ioro MIX KdOMa nIDHrTMn Kpankamn Ha 6oJI KopnyC cnDINHn.
19.He BnKOpNCToByTe CnCTeMy SIP ^+ ,AaKIO BiCTaHb MIX KpIClOM i DBepmAbOTOMoJIg 3aHaTTO MaJa -Ce MOKe Ipn3BecTn Do CTahy, KOJI N KpICNo 6yIe Po3TaWObHe HEnpaBnIbHm YHOM Ha ABOTOMoBIbHOMcNiDHHi. (6)
3nattkpcla3abTomobina
1.L063HnKpICNo 3 aBtOMo6Ia, NoBepHItb KpICNo 3aHbOc CTOpOHIO Ta NotARhItb CnIHHH DOrOpN, TM YacOM CKNaJaOuOnOpY B NIOIgry Do HAIKOPOTUoi DOBKNHN.
2.3HIMITb 3'cHyBaui ISOfix 3 Kpicna,HaTnChyBwn Ha nepemKau Dnra 3'cHyBauiB ISOfix 3 oObo 60kIB.BitrHITb BmNKau ISOfix 3 oOx 60kIB,io6 Bi'dcHATn Ioro BID aBtOMoibHoIro KpInneHHA ISOfix.
PozmiüeHHN dHTHn
- Nobephitb kpiicno do dbepen, oHouacno notarhywn Baxinb nobopoty bropy.
2.Полженгп levoorpo pemeH6e3neKn:Ipepeipte,ибОТвориДЯп levoBOrpo peH6e3neKn 3HaxOДЛncbHa OJHOMy pIBHi 3п leuMaBaoiDiNTINH.(7)
3.Пидимпь pibeHь пьових ремeнов 6e3neки,HaTnckaHOnHa KhoNky ceHTpaIbHoro peryIaToPA.(8) - Biikpnite npkky nneohoro peMeHa. (9)
- Bucoty nneohnx pemehi i nirolnbHnka moKHa biDpernyIOBATn Notarhybwn pyk ypo3noKyBaHHBropy Ha 3aHi CTopoHi nirolnbHnka i nepeimctnbnirolnbHbropy abo BHn3.(10)
- P03micritb nneObi pemeHn Hn MapkyBaHHm 3 6okiB KpiCna DnBnKopncTahnn MaHnTiB, 0o6 pemeHi He MoRn 3actiHyTuCn, noKn Bn 6ydeTe po3miuYBaTu dHTNuH. (11)
- NICIA TORO, RIK DITINHA NOCAJKEHa B ATOKpicIO, BCTAHOBiTB nneoyoI pemeHHa nneuyi DITINHn I 3akpniTe npxky: KnaI (12)
- NotarHITbIeOOBmpeMihBpe3eHTpaIbHm peryIaTOp y HAnpMky 3eJeHOi cTpIKn PnMo BBex/Bnepd, IpOoDBKyuTe HAryBaTN peMHb Do TIN nip, NOKn PmIHb He CTAHe Tyro, ane B ToJKe xac KOMfOpTHo HATrHyTn.(13)
- Npeep 3doio nobephitb kpcio y Hanpymky pyxy, Ta nepebipte,
4n BaKeJI 3BJIbHeHH nOKa3yOt b3eNeHn KOJIp, a CnDInHH 3a6NoKoBaHO y HAnpMky pyxy. (14)
3HRTTa HADraHHy 0xHa
3BepHb yBary Ha Te, Rk BN 3HimaTe yOxon. HAdraHHaOxna 3diCHIOEbCBy 3BOPOTNI NOCIIOBHOCTI.
QoxoIiDroIIBHnKa MoXHa 3HrTn OkpMo, BiEHNbWn rAaKn i3 3BOpOTHO 60ky i NotarHyBwN TkAHHy HAnpMky Bnepeid.
! Ybara: MoxxnBe HnpabNbHe BnKOpncTahnn
3A50POHReTbCBAcTaHOBnOBaTuKpicNoHa nepehboMy nacaxncpcbKOmy cnDHHi 3 YBIMKHEHOIO NOyUkIO 6E3NEKN.
OnopaB niDnory noBNHb BnKOpHCTOByBaTNC 3aBKn.
IpekoHaIEcC, oO npOA nobHCTIO BnCyHyTA BnN3 i
BOHa TpKaTcBcNiDnOR TpaHCnopTHOro 3ac06y, nepekoHaTEcR 10
CINIHnPo3TaWObAHO ROpN3OTaHBo B TpaHCnopTHOMy 3ac06i, 3
6ByNb6aUKO CnPiTOBOrO pIBHO no cepdHi.
HikonHe 13iTb i3 dntuHO y kpcni, kuo kpicno noepeHyTe h6ik.
- RaKIO BnKOpNCTOByETbC KpINNeHnI ISOfix: nepw HIX NoHNHaTpyx, nepeBipTe iHnKaTopn 6e3neKn pyxy. BOH nobHHi 6ytN 3eJeHmN.
Tapahtia
- Rkio npotraom 24 micuiB i3 daTn npinbHaH B uboMy Bnpo6i Bydytb BnBnEhi DepeKtn MATEpiAIB a60 BuROToBneHHa (Kpim TeKTNIIO Ta peMeHIB 6e3neKN), 6yNb Jnacka, NoBepHtB Bnpi6 npodaio.
- Pokyneb Mae npaBo Ha rapaHTIO Nnue 3a yMOBn D6aHnBoro Ta HaneKHO BnKOpNC7AHN KpCna. Byd nacka, 3BepHITBCa Do npOdaBua. PpOaBeUb Bu3Haaue, Yu cnij NopeBHyn KpcIO BnpoBnKoBI dN BnPapBHeN He DeEeTtB. IpTeHsII BiDnOcHo 3aMHeHnx abo OpeBHeHnx BnpoBIB He npnMaTObc. PicJy ycHHeH N DeEeTtB rapaHTiHn TepmH He npoDbXcyTbcra.
- FapaHTiHa BnPiB 3Ptpauee YHHHCTb HAcTyHnHX BnAaKax: RaIO BIDcyTHIcHK aPiuBaHHraNPO6y; RaIO dePeKTN cPiuHHeHO HeHaeXHHM BnKOpNCtAHm; RIO DePeKTN eHacJIikOM HenpRaBnHOrO BnKOpNCtAHm aBO HeDgAoNcti.

Zahvaljujemo Vam na odabiru BeSafe iZi Twist i-Size-a
Tn nn nnnn noon noon noon noon noon noon noon no
y
NININNNO
.1749 110000000000000000000000000000000000000
-10nnn nn nnnnnnnnnnnnnnnnnnnnnnnnnnnnnnnnnnnnnnnnnnnnnnnnnnnnnnnnnnnnnnnnnnnnnnnnnnnnnnnnnnnnnnnnnnnnnnnnnnnnnnnnnnnnn
nnnnn nn nnnn nn nn nn nn nn nn nn nn nn nn nn nn nn nn nn nn nn nn nn nn nn nn nn nn nn nn nn nn nn nn nn nn nn nn nn nn nn nn nn nn nn nn nn nn nn nn nn nn nn nn nn nn nn nn nn nn nn nn nn nn nn nn nn nn nn nn nn nn nn nn nn nn nn nn nn nn nn
.
- nnnn nn nn nn nn nn nn nn nn nn nn nn nn nn nn nn nn nn nn nn nn nn nn nn nn nn nn nn nn nn nn nn nn nn nn nn nn nn nn nn nn nn nn nn nn nn nn nn nn nn nn nn nn nn nn nn nn nn nn nn nn nn nn nn nn nn nn nn nn nn nn nn nn nn nn nn nn nn nn nn nn nn nn nn nn nn nn nn nn nn nn nn nn nn nn nn nn nn nn
.
#
n 24- n n n n n n n n n n n n n n n n n n n n n n n n n n n n n n n n n n n n n n n
wnn nn nnnnnnnnnnnnnnnnnnnnnnnnnnnnnnnnnnnnnnnnnnnnnnnnnnnnnnnnnnnnnnnnnnnnnnnnnnnnnnnnnnnnnnnnnnnnnnnnnnnnnnn
nnn nnnn nn nnnn
thnna
.
(7) n n no y no n no n no n no n no n no n no n 2
- npnnn nn nnnnnnnnnnnnnnnnnnnnnnnnnnnnnnnnnnnnnnnnnnnnnnnnnnnnnnnnnnnnnnnnnnnnnnnnnnnnnnnnnnnnnnnnnnnnnnnnnnnnnnnnnnnnnnnnn
(8).
- 5
n 1000000000000000000000000000000000000000000
(10) non nnonnTIN
wnunn nnnn nn nnnn nn nnnn nn nnnn
(11) ninn nn nn nn nn nn nn nn nn nn nn nn nn
7
(12)
/7y 1977,7n nn nnnnnnnnnnnnnnnnnn
(13)nnnnnnnnnnnnnnn nn nnnn
n nn nnnnnnnnnnnnnnnnnnnnnnnnnnnnnnnnnnnnnnnnnnnnnnnnnnnnnnnnnnnnnnnnnnnnnnnnnnnnnnnnnnnnnnnnnnnnnnnnnnnnnnnnnnnnnnnnnnnnnnnnnnnnnnnnnnnnnnn
(14) nynn nn no
yinnnnn nn
nnnnnnnnnnnnnnnnnnnnnnnnnnnnnnnnnnnnnnnnnnnnnnnnnnnnnnnnnnnnnnnnnnnnnnnnnnnnnnnnnnnnnnnnnnnnnnnnnnnnnnnnnnn
n nn n nn nn nn nn nn nn nn nn nn nn nn nn nn nn nn nn nn nn nn nn nn nn nn nn nn nn nn nn nn nn nn nn nn nn nn nn nn nn nn nn nn nn nn nn nn nn nn nn nn nn nn nn nn nn nn nn nn nn nn nn nn nn nn nn nn nn nn nn nn nn nn nn nn nn nn nn nn nn nn nn nn nn nn
.
(5)
(5)nnn nn nnnnnnnnnnnnnnnnnnnnnnnnnnnnnnnnnnnnnnnnnnnnnnnnnnnnnnnnnnnnnnnnnnnnnnnnn
ynnn nn nnnn (oyn) oon nn nn nn nn 12
(5)
n nn nnnn nn nn nn nn nn nn nn nn nn nn nn nn nn nn nn nn nn nn nn nn nn nn nn nn nn nn nn nn nn nn nn nn nn nn nn nn nn nn nn nn nn nn nn nn nn nn nn nn nn nn nn nn nn nn nn nn nn nn nn nn nn nn nn nn nn nn nn nn nn nn nn nn nn nn nn nn nn nn nn nn nn
.000000000000
yannnnn nn nnnnnnnnnnnnnnnnnnnnnnnnnnnnnnnnnnnnnnnnnnnnnnnnnnnnnnnnnnnnnnnnnnnnnnnnnnn
(5).170n 170n 170n 170n (a)nn n nn n nn nn nn nn nn nn nn nn nn nn nn nn nn nn nn nn nn nn nn nn nn nn nn nn nn nn nn nn nn nn nn nn nn nn nn nn nn nn nn nn nn nn nn nn nn nn nn nn nn nn nn nn nn nn nn nn nn nn nn nn nn nn nn nn nn nn nn nn nn nn nn nn nn nn nn nn nn nn nn nn nn nn nn nn nn nn nn nn nn nn nn
TnKoynnnnnnnnnnnnnnnnnnnnnnnnnnnnnnnnnnnnnnnnnnnnnnnnnnnnnnnnnnnnnnnnnnnnnnnnnnnnnnnnnnnnnnnnnnnnnnnnnnnnnnnnnnnnnnnnnnn
yin nynn nn ynnn nn ninn nn no nnnn nn no nnnnn nn no nnnnn nn no nnnnn nn no nnnnn nn no nnnnn nn no nnnnn nn no nnnnn nn no nnnnn nn no nnnnn nn no nnnnn nn no nnnnn nn no nnnnn nn no nnnnn nn no nnnnn nn no nnnnn nn no nnnnn nn no nnnnn nn no nnnnn nn no nnnnn nn no nnnnn nn no nnnn nn no nnnn nn no nnnn nn no nnnn nn no nnnn nn no nnnn nn no nnnn nn no nnnn nn no nnnn nn no
nnn nn nnnn nn nnnn nn nnnn nn nnnn nn nnnn nn nnnn nn nnnn nn nnnn nn nnnn nn nnnn nn nnnn nn nnnn nn nnnn nn nnnn nn nnnn nn nnnn nn nnnn nn nnnn nn nnnn nn nnnn nn nnnn nn nnnn nn nnnn nn nnnn nn nnnn nn
n nnnn nn nnnn nnnn nnnn nnnn nnnn nnnn nnnn nnnn nnnn nnnn nnnn nnnn nnnn nnnn nnnn nnnn nnnn nnnn nnnn nnnn nnnn nnnn nnnn nnnn nnnn nnnn nnnn nnnn nnnn nnnn nnnn nnnn nnnn nnnn nnne
(6)().
(6)
nannnnn
| (1a) | |
| (1b) | |
| (1c) | |
| (1d) | |
| (1e) | |
| (1f) | ### |
| (1g) | ### |
| (1h) | ### |
| (1i) | ### |
| (1j) | ### |
| (1k) | ### |
| (1l) | ### |
| (1m) | ### |
| (1n) | (2x) ISOfix ### |
| (1o) | (2x) ISOfix ### |
| (1p) | ISOfix ### |
| (1q) | (2x) ISOfix ### |
| (1r) | (2x) ISOfix ### |
o'o2n nnn
| 1. |
| 2. |
| 3. |
| 4. |
| 5. |
| (2). |
| (3). |
| (4). |
172
.
nnnnnnnnnnnnnnnnnnnnnnnnnnnnnnnnnnnnnnnnnnnnnnnnnnnnnnnnnnnnnnnnnnnnnnnnnnnnnnnnnnnnnnn
yipn .nnn nn nnnn nn
nnnnnnnnnnnnnnnnnnnnn
y 19nnn nn nnnn nn nn nn nn nn nn
BeSafe 10
.
ninnnnnnnnnnnnnnnnnnnnnnnnnnnnnnnnnnnnnnnnnnnnnnnnnnnnnnnnnnnnnnnnnnnnnnnnnnnnnnnnnnnnnnnnnnnnnnnnnnnnnnnnnnnnnnnnnnnn
.
nunnnnnnnnnnnnnnnnnnnnnnnnnnnnnnnnnnnnnnnnnnnnnnnnnnnnnnnnnnnnnnnnnnnnnnnnnnnnnnnnnnnnnnnnnnnnnnnnnnnnnnnnn
y
y
,ann nn n (BeSafe) an 100 unnnn nn nn
yN 11111111111111111111111
nnnnnnnnnnnnnnnnnnnnnnnnnnnnnnnnnnnnnnnnnnnnnnnnnnnnnnnnnnnnnnnnnnnnnnnnnnnnnnnnnnnnnnnnnnnnnnnnnnnnnnnnnnn
BeSafe iZi Twist i-Size-nnwn
17nn p0n nnn npnn


.7yS
.
.
.27
NO
ISOfix nnnn nn nnnn nn nnnn nn nnnn nn nnnn nn nnnn nn nnnn nn nnnn nn nnnn nn nnnn nn nnnn nn nnnn nn nnnn nn nnnn nn nnnn nn nnnn nn nnnn nn nnnn nn nnnn nn nnnn nn nnnn nn nnnn nn nnnn nn nnnn nn nnnn nn nnnn
.
on
BeSafe: w
www.besafe.com
.0nnn nBeSafe
61 67
1877nnpun n0 105
n nn no n no n no n no n no n no n no n no n no n no n no n no n no n no n no n no n no n no n no n no n no n no n no n no n no n no n no n no n no n no n no n no n no n no n no n no n no n no n no n no n no n no n no
.
NOONOINN
12, 107
.
wnnnn n nn n nn n nn n nn
yynnnn nnny nnnn nn nnnnnnnnnnn
n nn nnnn nn nnnn nn nnnnnnnnnnnnnnnnnnnnnnnnnnnnnnnnnnnnnnnnnnnnnnnnnnnnnnnnnnnnnnnnnnnnnnnnnnnnnnnnnnnnn
.
n nnnn nn nnnn nnnn nnnn
.
nnnnnnnnnnnnnnnnnnnnnnnnnnnnnnn
, nTn nn nnnn nn nnnn nn nnnn
1.70 Tn nn nnnn nn nnnn nn nn
n nn nnnn nn nnnn nn nnnn nn
nnnnnnnnn
nno nniin iZi TumTwist-n nn
ninnh
nnn nn nnnn nn nnnn nn nnnn nn nnnn nn
nynnynn by ywn knon ny on npnn nnnn pinn
wnnnn nnnn nn nnnn qnnn nn nnnn qnnn nn nnnn

a
a 200000000000000000000000000000000000000000000000000000000000000000000
alaiolllpsswll ool:
oJusJ no saoaJI aillj
gog 20 clll gale blaovvll lalj jywnnngmgl y. oylwll no aall allj
1g jgb mcl aunill aolll bany aowoi cogll so yogai lai
gco w sull aolll jaoiwl gl
swilll Jc ISOfix ooi paaow .uill llc tllgll
.ogjwll g ISOfix ooi no jnl
- 0000000000000000000000000000000
Jabl a
(8)sjpall buall ojj jlc bao all go clll lllll
· 100000000000000000000000000000000000000000000000000000000000000000000
10
(11) jabll gog nac agiao aojil clall sbl
jabll gog oagolll lllnlaa glbll gog
loic gl, jllgog pac ac ailllll go alanall ao 2000 hob: jull gl
gall alj go sall bll olj go waa alla c
go gog go pahll any go jaiw plill/ajio h
(13) uug po 5
1000000000000000000000000000000000000000000000000000000
JaJl
24 1111111111111111111111111111111111
a aaaee baae eae aee aee aee aee aee aee aee aee aee aee aee aee aee aee aee aee aee aee aee aee aee aee aee aee aee aee aee aee aee aee aee aee aee aee aee aee aee aee aee aee aee aee aee aee aee aee aee aee aee aee aeee
aJll aolcll awoioe iOj0jAaJll aoLc glai joo 11 (5).aunjill
(buall jjoo o jol) oolll jolil y 00gogall oclal .12
ooll buall joloo gog aolc oog
(5)
Laiu aui jill aoel glawll ojbl lce 1000 s2113
J 1 J 0gbl Oa Jgbll bfo 0s o 0cIall gogai
Jg 14
(1)gall jie gbi 5g woll bio jia ybby loicag aill (5) agi gog soaall
golgo jbl 10000 ic 15
s25u.1abll 2000 awwoloo yguyy yoloill 0jll 2000 ayjy jglgall llo jll jl jalbll 2000
0g ool 1u 2000 Lc 15u 1go Jabll 2000 uuiic
aaoo no o jol oolloguoy
pOg jolly aoll jog glll J 1
olaljll jlll pailll gngnssgnoo lolso jil
(6) (jlll)
(+SIP) + _j = 1^n_i = 1^n_j = 1^n_i = 1^n_j = 1^n_i = 1^n_j = 1^n_i = 1^n_j = 1^n
200000000000000000000000000000000000000000
aolwall clls l+ (SIP) jlll pollg o
gog 000000000000000000000000000000000000000000000
(6)
J 1
(1a)
(1b)
(1b)
(1c)
(1c)
(1d)
(1d)
(1e)
(1e)
(1f)
(1f)
(1a)
(1a)
(1g) (1b)
(1g) (1b)
(1i)
(1)
(1i) (1j)
(1)
(1) (1)
(1)
(1)
100000000000000000000000000000000000000
(10)
(10)
(1m)
{Im}
(1n)
(1n)
(10)
(10)
(1p)
(1p)
(1q)
(1q)
(1r)
·bui
(2x)
m = 32 ;
·a·b
·
·si
clilwllglj
y
buJl juo
·
aJll aolcl gljI J
aJill aolcc gljll pio
jg j
ISOfix (2X 100
(2)ALL) ISOfix
ISOfix Jg
(2) 空 空 ISOfix
(2) ∑ALL) ∑JLWJLYISOfix JLWJPO
dclu
oJusu oolooa oolao oJusu oolao oolao oJusu oJusu 1
Jaaalll aaiall jgj gaoaogglgglgglg
1 111 111 111 111 111 111 111 111 111 111 111 111 111 111 111 111 111 1
aagall algol yll l 100yll aalll lccil
Lw Sog5 sla ulw ly bww, wggsy sla calw as yis wu 2 (7).
1g j 38.
Jggslae,0o Jua 1s000000000000000000000000000000000000000000
1 4
0a g 000000000000000000000000000000000000000000000000000000000000
j 1
(12)g:Jj 8
0aiiai jI .gl/ll iu w u aai 1 1 1 1 1 1 1 1 1 1 1 1 1 1 1 1 1 1 1 1 1 1 1 1 1 1 1 1 1 1 1 1 1 1 1 1 1 1 1 1 1 1 1 1 1 1
g jilj g jol j 1005 jai jg jgl j 9
jai j jai jai iai lai aai jai ai aai jai jai jai jai jai jai jai jai jai jai jai jai jai jai jai jai jai jai jai jai jai jai jai jai jai jai jai jai jai jai jai jai jai jai jai jai jai jai jai jai jai jai jai jai jai jai jai jai jai jai
jgl 200 g jolj
wogg jgglc oonj jz ccl jw gjz jolp
.2gw polj
glgglw y dylg 9 golg s0g j
.15 15 1 120 00 00 00
Jgj gj j 10 5
glj jilw, ggsg 5u wai jaoa jaoj.11 (5).
1J 5uJg2iJ (jIjSj) Jai jy Caa 0.12
Jain cai aei g jb wq jai jui 5j (5).
jg ggs 1Juii Jy jgluul cww sgi y jgslaial.13
aui jgb jlgui jcui li u w aui jiojaag
iiis piui i oai jui
j j j j j j j j j j j j j j j j j j j j j j j j j j j j j j j j j j j j j j j j j j j j j j j j j j j j j j j j j j j j j j j j j j j j j j j j j j j j j j j j j j j j j j j
aagggi ggeacg jg sgsj 15
laan y waa o li aas uui sl ags ay gogc gai
jiaaa gilgu ggsn aabgswy jy jy
g g g g g g g g g g g g g g g g g g g g g g g g g g g g g g g g g g g g g g g g g g g g g g g g g g g g g g g g g g g g
gog 12u uaw u yu wu uug a uu g uu u u u u u u u u u u u u u u u u u u u u u u u u u u uu uuuu
c+g 17
aLg 100
abw, gai jaoj 100
aBoloo. aS o pOJ yuD yuD uDy Ddy dy ddy ay) .gW So yuD yuD yuD yuD uDy Ddy dy ddy ay. (6) (LpO pOJ
aabai gao jg +SIP sIy glaj yiaaij 18 .jlaiaai aai Sgi y a
jI.1J 1J JJJg jg jg jg jg jg jg jg jg jg jg jg jg jg jg jg jg jg jg jg jg jg jg jg jg jg jg jg jg jg jg jg jg jg jg jg jg jg jg jg
(6)
jbi jy jwl ool
| (1a) | |
| (1b) | (2x) |
| (1c) | |
| (1d) | |
| (1e) | |
| (1f) | |
| (1g) | |
| (1h) | |
| (1i) | |
| (1j) | |
| (1k) | |
| (1l) | |
| (1m) | |
| (1n) | |
| (1o) | |
| (1p) | |
| (1q) | |
| (1r) |
iuni
g j 1
j g j 1
j 1
j 1
j 1
j 1
j 1
eogoo 1j jin oalg jggs gno jn npolai .auiuui
jol jol 3
JU JU UJU UJU UJU UJU UJU UJU UJU UJU
JUuJUwUJUJUOgUJUOgUJSLooiiJIO (2).jiguJUoogjU SLuUu
blao golg ISOfix slagis 5g jg gdo gdo jg 1 qy 0g a6 a6 Jola liabai jia gdo gdo gdo gdo gdo gdo (3) .jw ISOfix
J 4.2g wao g
a a a a a a a a a a a a a a a
ilqii jai 0000000000000000000000000000000000000000000000000000000000
aabaa aaiiiaaiiaalga 0a oiaa a
.00 Jblulal .jol jiljgljlaabjloai
.1jbl 1iwiJ,1jbl
sla jgj clalol jw waw oow jgl .jigw nnwjj g 1696
.
.igwugjog
J 7 jui j
. 100
.1g 100000000000000000000000000000000000000
Joo lao jI BeSafe iZi Twist i-Size uljbla
a 1
jolalawcwwwcljui julaoallho
gglag g jglj jj jj jj j j j j j j j
1j 1
gaaa aagaaa aagaaa aagaaa aagaaa
J 1
14630000000000000000000000000000000000000000000000000000000000000
a a
yww. Besafe.com . (BeSafe)
105 61 aaiiie 16205 5u wccag jua zi Twist i-Size
1 2345678901234567890123456789012345678901234567890123456789012345678901234567890123456789012345678901234567890
a
a aaa a aas
Jg j 500 Ljui iuiu luii jiu uuiu
jabooolgogao ay jai jil yj uaaa aowu g o1g jolg jgb. gogao ay jia jil ay duyawu g wgyoao ay jia yj glj aowwosyuy bwg cwwo jj gocw oal jjo gogao joi jgi jujuaaui jai jai gslsiu ayi a
aiggu 45 aolaoiwl jlggs lboo jin jil j45 pio g o qgi
cwl o0 6jl jiu yllgsoq lgj wu a6 xuiwu yoiw uog
yjayl jolal jaiu uu uu2jl jiuuyu uu uu
oojlaqj uu uu cwl jua5 uu uu 2 uuu uu
HTS BeSafe AS
NO-3535 Krøderen
Norway
Visit us: besafe.com
f facebook.com/BeSafe
@besafeinternational