
HDM1028 - Drill Ferm - Free user manual and instructions
Find the device manual for free HDM1028 Ferm in PDF.
| Brand | Ferm |
| Model | HDM1028 |
| Type | Impact drill (hammer drill) |
| Supply voltage | 230-240 V ~ |
| Frequency | 50 Hz |
| Power consumption | 850 W |
| No-load speed | 900 rpm |
| Impact rate | 4000 impacts/min |
| Max drilling diameter (concrete) | 26 mm |
| Max drilling diameter (steel) | 13 mm |
| Max drilling diameter (wood) | 40 mm |
| Weight | 4.6 kg |
| Sound pressure level (LpA) | 87.9 dB(A) |
| Sound power level (LwA) | 98.9 dB(A) |
| Vibration (drilling concrete) | 17.812 m/s² |
| Vibration (chiseling) | 16.377 m/s² |
| Protection class | II (double insulation) |
| Chuck type | SDS |
| Auxiliary handle | Yes, adjustable |
| Dust collector | Yes |
| Functions | Drilling, hammer drilling, chiseling |
| Maintenance | Regular cleaning, replacement of carbon brushes |
| Safety | Use hearing protection, safety glasses, gloves; unplug before maintenance |
Frequently Asked Questions - HDM1028 Ferm
User questions about HDM1028 Ferm
0 question about this device. Answer the ones you know or ask your own.
Ask a new question about this device
Download the instructions for your Drill in PDF format for free! Find your manual HDM1028 - Ferm and take your electronic device back in hand. On this page are published all the documents necessary for the use of your device. HDM1028 by Ferm.
USER MANUAL HDM1028 Ferm
Thank you for buying this FERM product. By doing so you now have an excellent product, delivered by one of Europe's leading suppliers. All products delivered to you by Ferm are manufactured according to the highest standards of performance and safety. As part of our philosophy we also provide an excellent customer service, backed by our comprehensive warranty. We hope you will enjoy using this product for many years to come.
1. SAFETY WARNINGS

WARNING
Read the enclosed safety warnings, the additional safety warnings and
the instructions. Failure to follow the safety warnings and the instructions may result in electric shock, fire and/or serious injury. Save the safety warnings and the instructions for future reference.
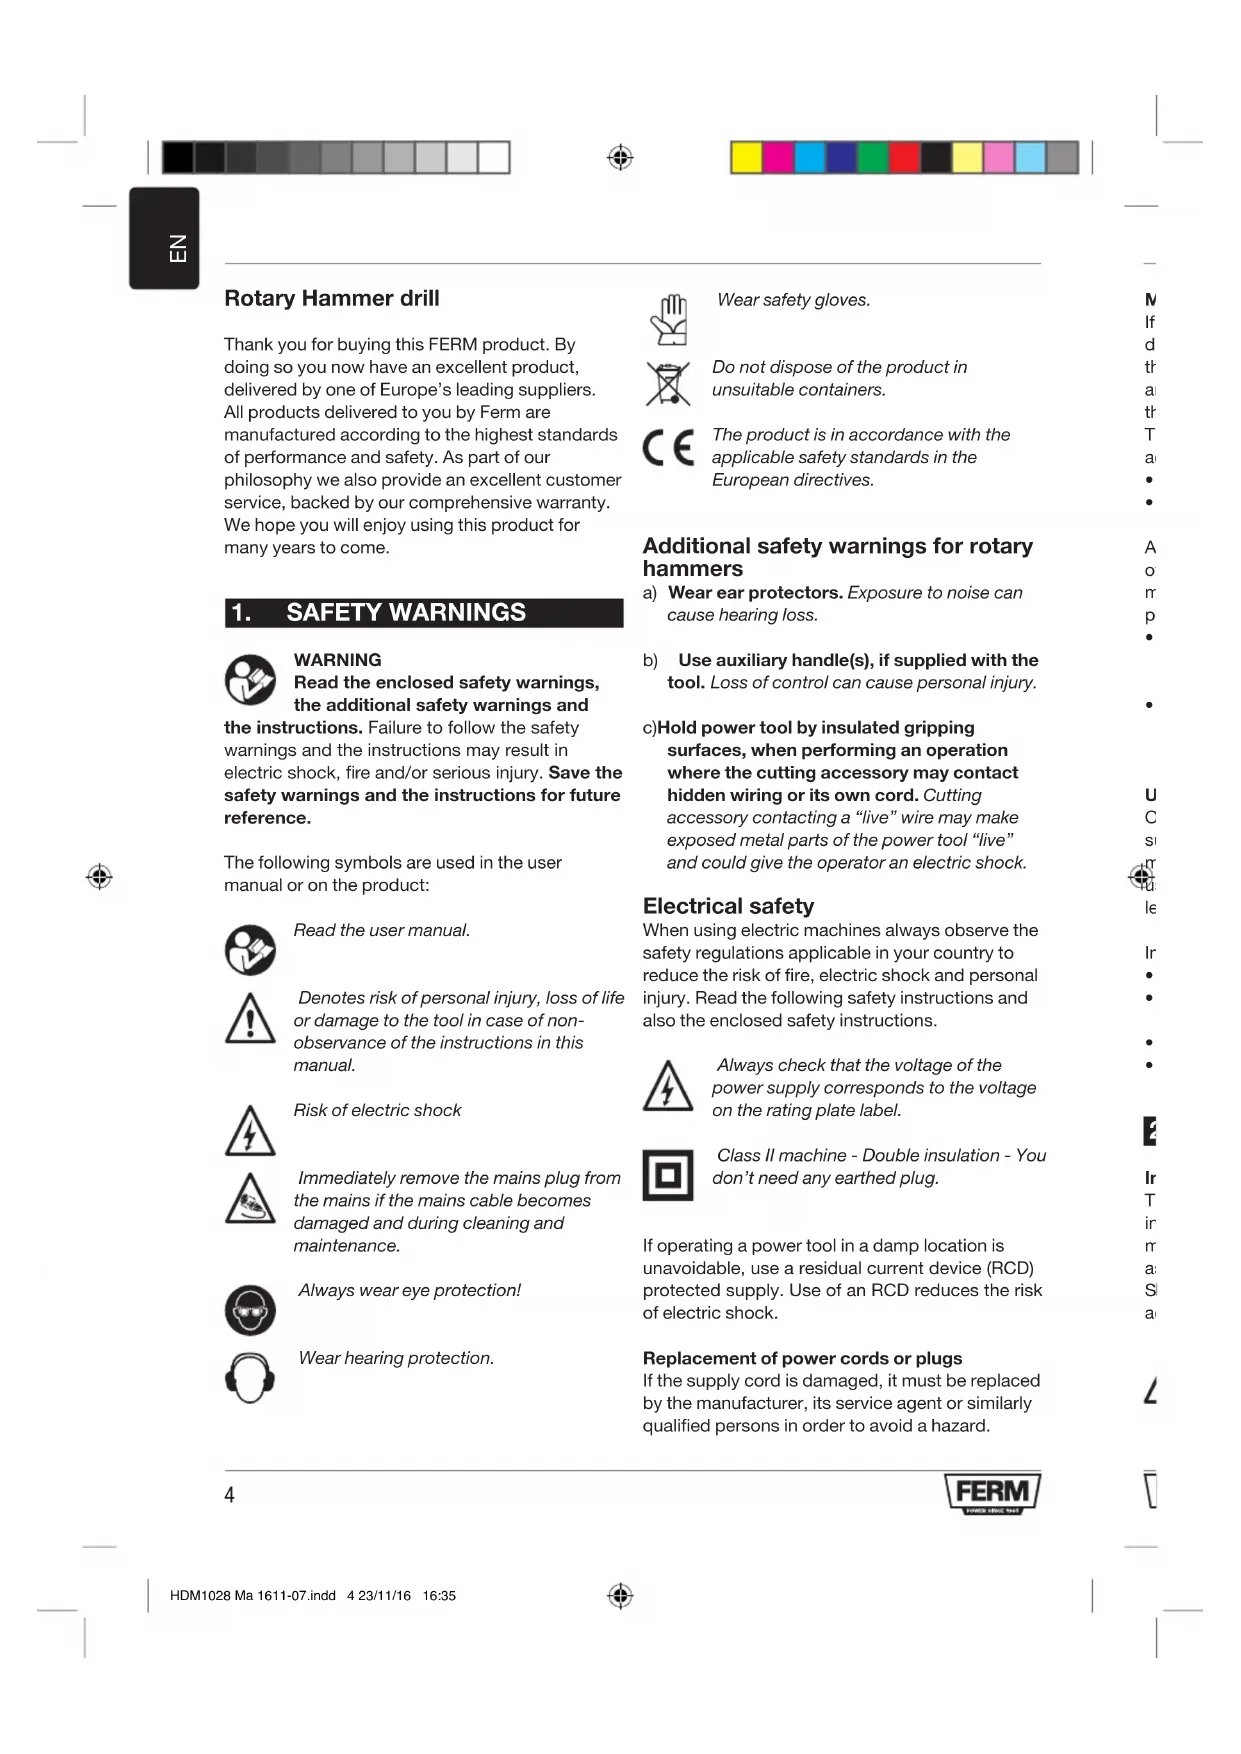
The following symbols are used in the user manual or on the product:

Read the user manual.

Denotes risk of personal injury, loss of life or damage to the tool in case of non-observance of the instructions in this manual.

Risk of electric shock

Immediately remove the mains plug from the mains if the mains cable becomes damaged and during cleaning and maintenance.

Always wear eye protection!

Wear hearing protection.

Wear safety gloves.

Do not dispose of the product in unsuitable containers.

The product is in accordance with the applicable safety standards in the European directives.
Additional safety warnings for rotary hammers
a) Wear ear protectors. Exposure to noise can cause hearing loss.
b) Use auxiliary handle(s), if supplied with the tool. Loss of control can cause personal injury.
c)Hold power tool by insulated gripping surfaces, when performing an operation where the cutting accessory may contact hidden wiring or its own cord. Cutting accessory contacting a "live" wire may make exposed metal parts of the power tool "live" and could give the operator an electric shock.
Electrical safety
When using electric machines always observe the safety regulations applicable in your country to reduce the risk of fire, electric shock and personal injury. Read the following safety instructions and also the enclosed safety instructions.

Always check that the voltage of the power supply corresponds to the voltage on the rating plate label.

Class II machine - Double insulation - You don't need any earthed plug.
If operating a power tool in a damp location is unavoidable, use a residual current device (RCD) protected supply. Use of an RCD reduces the risk of electric shock.
Replacement of power cords or plugs
If the supply cord is damaged, it must be replaced by the manufacturer, its service agent or similarly qualified persons in order to avoid a hazard.
Mains plug replacement (UK only)
If the moulded 3-pin plug attached to the unit is damaged and needs replacing, it is important that it is correctly destroyed and replaced by an approved BS1363/13A fused plug and that the following wiring instructions are followed. The wires in the mains cable are coloured in accordance with the following code:
- blue neutral
brown live
As the colours of the wires in the mains cable of the unit may not correspond to the coloured markings identifying the terminals in the plug, proceed as follows:
- The wire which is coloured blue must be connected to the terminal which is marked with the letter N or coloured black.
- The wire which is coloured brown must be connected to the terminal which is marked with the letter L or coloured red.
Use of extension leads
Only ever use approved extension leads that are suitable for the power rating of the machine. The minimum core thickness is 1.5mm^2 . Whenever using a reel extension lead, always fully unroll the lead.
Immediately switch off the machine when:
- Excessive sparking of the carbon brushes.
- Interruption of the mains plug, mains lead or mains lead damage.
Defect switch.
Smoke or stench of scorched isolation.
2. MACHINE INFORMATION
Intended use
This rotary hammer is intended for drilling holes in masonry such as brick, concrete and similar material. Furthermore, the machine can be used as a demolition hammer in combination with the SDS cold chisels provided. The machine is on no account intended for other purposes.

Not suitable for construction site usage
Technical specifications
Mains voltage 230-240 V ~
Mains frequency 50Hz
Power input 850 W
No-load speed 900/min
Impact rate 4000 /min
Max. Drill diameter
Concrete 026mm
-Steel 013mm
-Wood 040mm
Weight 4.6kg
Sound pressure (_PA) 87.9dB(A) K=3 dB(A)
98.9dB(A) Acoustic power (L_WA) K=3 dB(A)
Vibration
17.812m/s² Hammer drilling concrete a HHD K=1.5m/s²
16.377 m/s² Chiseling a, Cheq K=1.5m/s²
Vibration level
The vibration emission level stated in this instruction manual has been measured in accordance with a standardized test given in EN60745. It may be used to compare one tool with another and as a preliminary assessment of exposure to vibration when using the tool for the applications mentioned.
- Using the tool for different applications, or with different or poorly maintained accessories, may significantly increase the exposure level.
- The times when the tool is switched off or when it is running but not actually doing the job, may significantly reduce the exposure level.
Protect yourself against the effects of vibration by maintaining the tool and its accessories, keeping your hands warm and organizing your work patterns.
Description
The numbers in the text refer to the diagrams on pages 2-3
Fig. A
- On/off switch
- Drill selection switch
- Hammer selection lever
- Chuck
- Locking sleeve
- Main grip
- Auxiliary grip
- Carbon brush cover
- Lubrication point
3. ASSEMBLY

Before assembly, always switch off the machine and remove the mains plug from the mains.
Mounting and removing the accessory Fig.B

Do not use blunt drill bits or chisels. Immediately sharpen or replace blunt drill bits or chisels.
Mounting
- Apply a few drops of oil to the shaft of the accessory.
- Slide the locking sleeve (5) to the rear.
- Insert the accessory into the chuck (4).
- Secure the accessory by turning it counterclockwise until it locks into place.
- Release the locking sleeve (5).
Removing
- Slide the locking sleeve (5) to the rear.
- Remove the accessory from the chuck (4).
- Release the locking sleeve (5).
Mounting and removing the auxiliary grip Fig. C
Mounting
- Loosen the auxiliary grip (7) by turning it counterclockwise.
-
Mount the auxiliary grip (7) by sliding it over therequired operating mode. Refer to the table below chuck (4).
The drill selection switch and the hammer selection lever must be set according to the
required operating mode. Refer to the table below to set the required operating mode. -
Tum the auxiliary grip (7) to the required position.
- Tighten the auxiliary grip (7) by turning it clockwise.
Removing
- Loosen the auxiliary grip (7) by turning it counterclockwise.
- Remove the auxiliary grip (7).
- Tighten the auxiliary grip (7) by turning it clockwise.
Mounting and removing the dust collector Fig. D
The dust collector prevents dust from entering the machine when drilling into ceilings.

Immediately replace a damaged dust collector.
Mounting
If necessary, remove the accessory from the chuck (4).
- Slide the dust collector (15) over the shaft of the accessory.
- Insert the accessory with the dust collector (15) into the chuck (4).
Removing
- Remove the accessory with the dust collector (15) from the chuck (4).
- Remove the dust collector (15) from the accessory.
4. USE
Switching on and off
Fig. A
To switch on the machine, press the on/off switch (1).
- To switch off the machine, release the on/off switch (1).
Setting the operating mode
Fig. A & E
Setting Operating mode
Fig. E
A Demolition hammer / Chisel
B Hammer drill
C Drill
- Tum the drill selection switch (2) and the hammer selection lever (3) to the required position.
Hints for optimum use
- Clamp the workpiece. Use a clamping device for small workpieces.
- Firmly hold the machine by the grip.
- Set the operating mode.
- Switch on the machine.
- Do not apply too much pressure on the machine. Let the machine do the work.
- Switch off the machine and wait for the machine to come to a complete standstill before putting the machine down.
5. CLEANING AND MAINTENANCE

Before cleaning and maintenance, always switch off the machine and remove the mains plug from the mains.
Clean the machine casings regularly with a soft cloth, preferably after each use. Make sure that the ventilation openings are free of dust and dirt. Remove very persistent dirt using a soft cloth moistened with soapsuds. Do not use any solvents such as gasoline, alcohol, ammonia etc. Chemicals such as these will damage the synthetic components.
Checking and replacing the carbon brushes Fig.A
The carbon brushes must be checked regularly. If the carbon brushes are worn, the machine will start to run unevenly.

Only use the correct type of carbon brushes.
- Remove the carbon brush holders (8) using a screwdriver.
Clean the carbon brushes.
In case of wear, replace both carbon brushes at the same time.
- Mount the carbon brush holders (8) using a screwdriver.
After mounting the new carbon brushes, let the machine run at no load for 15 minutes.
Defects
The machine should be regularly inspected for the following possible defects and repaired if necessary.
- Damage to power cord.
- Broken on/off trigger assembly.
Short circuiting.
Damaged moving parts.
Faults
Should a fault occur, e.g. after wear of a part, please contact your seller or the service address on the warranty card. Separate you find an exploded view showing the parts that can be ordered.
WARRANTY
The warranty conditions can be found on the separately enclosed warranty card.
ENVIRONMENT

Faulty and/or discarded electrical or electronic apparatus have to be collected at the appropriate recycling locations.
Only for EC countries
Do not dispose of power tools into domestic waste. According to the European Guideline 2012/19/EC for Waste Electrical and Electronic Equipment and its implementation into national right, power tools that are no longer usable must be collected separately and disposed of in an environmentally friendly way.
The product and the user manual are subject to change. Specifications can be changed without further notice.

Bohrhammer
2 INFORMATIONS RELATIVES A LA MACHINE
Utilisation prévue
Specifications techniques
- azimuthneutro
- marrón tension
17,812m/s² boring i betong a Hd K=1,5m/s²
Meisling a,h,Cheq 16,377 m/s2 K=1,5m/s2
Vibrasjonsniva
5. RENGJØRING OG VEDLIKEHOLD

2. INFORMACE O NARADI
Urcené pouziti
PnBHeHbIe HNKe 3NaCKn NcNoJIb3yIOrCB DaHHOM pyKOBoDCTBe NHn Ha npOdyKTe:

PpOHTte pyKOBOCTBO NOIb3OBaTeIa.

YKa3bIbAeT Ha pUck NOBpeKdEHHa HNCTpyMeHTa, TpaBM UINCMEPTN B CInyae HecO6JIIODeHn IHNCTpyKcni, npINBeDEHHbIX B DaHHOM PYKOBOJCTBe N0JIb3OBaTeJIa.

OnacHocTb npaKeHn 3JIeKTpNuecknM TOKOM.

B clyuae nobpejdeHn Ka6eJnNTaHn, a taKKe BO Bpem OunchKn n TexHueckoro o6cIyKbAHnKa6eNb NtTaHn Heo6xOJIMo OTKIOHTb OT p03eTkn.

Bcerda nCnoJb3yIte 3aunTHbIe OcKn!

UcnnoIb3yIte cpeIcTba 3aunITbI OT Wyma.

Ucnonb3ynte 3aunTnble nepuatkn.

Bb6paBbAte n3dJeNTe TOnbKO B npEHa3NaueHbIe In8 3TOrO KOHTeHepbl.


JaHHoe n3dJIne COOTBeTCTByeT npIMHeHmblc TcAaPTam 6e3oNaCHOCTu EBPOeNCKux DnpeKTHB.
DOnOHHTeHbHaTExHka 6e3onacHOCTnIJI npOpopatopOB
a) NcnoIb3yIte 3auNTy dnyuwe.LUym BbICOKO INHTeHCNBHOCTu MOKeT PnVBecTu K NOBpeXdEHIO CNYa.
b) Ecnn B KOMnIeKtauNo 3JeKtpoHCTpyMeHTa BXOJrT DOnONHITeNbHbIe pyKoRTkn, NcnoJIb3yIte ux. ITopeyynpaBHeHnHaNd 3JeKtpoHCTpyMeHTom MoXeT npUBeCTN K TpaBMe.
c)BoBpemBaINHHeHHpa6OuHX onepaun, rde cyueCTbyeT Bo3MOXHOCTb cOpNKOCHOBEHN KpeNEXKHOJ DeTann COCKpbIToH 3JIeKTPoPBOOdko nn KaBelem NITAHn H3dEHN, 3JIeKTPoHCTpymEnTH Heo6xODIMo depKaTb TOnbKO 3a n30InpOBaHHbIe NOBepxHOCTn pyKoTOK. B clyae ecnn pexkyuee npncno6JeHne cOpNKOCHTcRc KaBelem NoTOKOM, MeTaIIuYeCKNe DEtAnl 3JIeKTPoHCTpyMeHtataKke Bydyr HaxOuNTbcra NoTOKOM, n, KaK CLeIcTBVe, MOyr Nopa3ntb OpeaTopa 3JIeKTPuuecknM TOKOM.
3JIeKTpuecka 6e3onacHocTb
Bo Bpem nCnoB3oBaHn 3NeKtpOnHcTpyMeHa T Bcerda co6IouaTe npabunla TexnKn 6e3OanachocT, DeiCTbYIOuine B BaWei cTpaHe, YTO6bl CHN3uTB pUCK BO3HNKHOBeHn NOXapa, NopaxHen H3NeKTPnuEcknM TOKOM INOlyueHn TpaBM. IpOHTaTe CneDyIOune IHCTpykUnn IO
TEXHnke 6e3oNaChOCTn, a TaKxpe npIlaeraemble INHCTpyKcunn NO TEXHnke 6e3oNaChOCTn.

y6eHNTecbBTOM,HTO HApJKeHne NCTOUYKANITAHNCOOTBETCTBYET HApJKeHNO,yKa3aHHOMyHaTaJIuYKe CTEXHNUeCKMnDaHHbIMN.

I3dennie II Klaacca -BBOHnHa n3OJauN B 3a3eMneHHo Po3eTke HeT Heo6xoUmoCTn.
Ecnn nCnoB3OBAHne 3JNEKTPoHnCTpyMeHTa B yCNOBnX BnAKnHO OkpyKaIOUe CpeDbI HEn36ExHo, Heo6xOdmo NcNoJIb3OBA Tb NCTouHnK TOKa, 3aunuehhbl yCTpoiCTBOM 3aunTHORO OTKJIOUeHnry (Y3O).PnpmeHnne Y3O CHnkaet pNCK nopaxHeHn 3JNEKTPnuueckm TOKOM.
3aMeHa Ka6eIe NITaHnN IuTeKepeOB
B clyae noBpeKdEHHa6eI nHTAHn erO heoXoIMo 3aMeHnTb y npOn3BODnteJI, areHTa no o6cLyKuBaHnIO nnLnU, mEoiux COOTBeTCTByIOUy KBAJINΦnKaUIO.
3aMeHa uTeKepa nHTAHnra (ToJIbKO dIy BeNko6pTuHn)
B clyae noBpeKdEHH 3-KoHTaKTHO ra3bema nHTAHn erO Heo6XoDmIO 3aMeHHTb Ha uTekep c npedoxpaHntelem C ceTnΦkATOM BS 1363/13A c co6JIODeHem INHCTpykui ni oCoEINHeHIO. IpoBOda B kaBeJe nHTAHn KoIupOBaHbI NO UBeTy CneDuOuIM O6pa3OM:
CINHn6e3 HapnxKeHnA
KopuHeBbI NOI HanpXeHHeM
B cnly toro, yTO npObOa Ka6eI nITaHnHE MOrTy COOTBeTCTBOBaTb CBETOBbIM 0603NaueHHeM KJIeMM pa3bema nITaHn, DeICTByTe CJeDyUOuM O6pa3OM:
CINHn npOBoH eo6xoDIMO noDCoeHNHTb K KJIeMMe, 6O3HaueHHo 6yKBOi N JIn OKpaueHHo B cepHyI LBeT.
KopuHHeBbI npoBoID Heo6xOaMo NOcOeHNHTb K KJIeMMe, O6o3HaeyHHo8 KyKBOI Lnn OkpaWeHHo B KpacHbI CBET.
IcnoJb3OBAHne ydnnHnTeNei
NcnoIb3yInTe TOnIbKO Te yDnHInTeIN, KOTOpble COOTBETCTBYOT KNaCCy MOuHOCn DaHHORO
HnCTpyMeHTa. MInHMajbHaT OJIuHa JxJbI coCTaBnAeT 1,5 MM. Ppi NcNoB3OBAHN CBopaYBaEMo yDInHNTeI NOIHOCTBIO pa3BopaYBaTe npBOd.
HemeJeHHOOTKIOUaTe HNCTpyMeHT B CNeDyUoXnCnyax.
B Cnyuae cnIbHoro nckpeHn yroIbHbIX uetok.
Bcnyae npepbibaHn nTaHn nn noBpeXdeHn Ka6eJn TaHn.
- DepeKT BbIKNoaTeJra.
Bcnyae noBHeHnIbIMa nIIN 3anaxa naJeHOH u3OJIaUN.
2. CBENEHINOB 3JEKTPONHCTPYMEHTE
Ppeonaraemoe nOJb30BaHne
DaHHbI nepfopatop npedHa3HaueH nIbBicBepnBaHnO rTBeCtN B KaMeHHbIXMaTePnAax, TaKnx KAK KnpnHy, 6eToH n T.Д.БoJee TorO, DaHHbI uHCTpyMeHT MoXeT 6bITb NcNoJIb3OBaH B KaYeCTBe OT60HOroMOlOTKa C NcNoJIb3OBaHnEM YKOMnJIeKTObAHbHXpyHbIX 3y6uIN SDS. 3Anpeuaetc npImeHrTbNHCTpyMeHT dIraDpynX ceJeI.

He dny cTPONTeNbHbIX cIeNei.
LINΦpBIBTEKCTEOTHOCTCRK CXEMAMHa cTpaHuaX2-3
Pnc.A
- BbIKJIouaTeIb BKJ./BbIKJ.
- BbIKIOuATEB bIbOpa CBepna
- Pbyar Bb6opa ydapHoro deCTBnA
- 3axmmno natpoH
- CtonopnHaMy
- OchOBHa pyKoRTka
- BcnoMoraTeBna pyKoTka
8.ДерхаTeNbу罗ЛьноюцETKn - ToKa Cma3Kn
3. CBOPKA

Ipeepc6bOpKOBcerdaBbIKIOaHMeMaUNHy n3BNEkaTe BUNKy CetEBORO shypa n3 po3eTKn.
YcTaHOBka n ChrTne npHaIeXHOCTH
Pnc.B

He nolb3yutecb tybIMu Cbeplamnnn nn DOnotamn. HemeJeHNO 3aToHTe nn 3ameHNTe TynbcBepna nn DOnota.
YctaHOBka
HaheCnTe HeckoKo Kaenb MaCna Ha XBOCTOBIK PnHnAdNExKHOCHTN.
CdbnHbTe cTOnOpHyIO MyfTy (5) Ha3aI.
Bctabte npnHaJneXHocTb B 3aXmHOI natpoH (4).
3akpenTe npnHaIeJxHocTb, NOBepHyB ee npOTuBaCBOB CTpeKN Do ee fNkcaun Ha MeCTe.
Ocna6bTe cTOnOpHy MyfTy (5).
CHTne
CdbnHbTe cTOnOpHyo MyfTy (5)Ha3aI.
- N3BLeKeNTe npHaIaJIeXHoCTb n3 3aXmHOro naTpoHa (4)
Ocna6bTe cTOnOpHy MyfTy (5).
YCTAHOBKa IN CHTNE BCNOMORAteNbHOI
pykortkn
Pnc.C
YctaHOBka
- Ocna6bTe BCnOMoRaTeJbHyO pyKoTky (7), NOBepHyB ee npOTuB yacOBou CTpeJIKN.
- YctaHOBtBE BcNOMoRatEJIbHyIO pyKoTky (7) HADBnHb ee Ha 3aJxMHOI NaTPOH (4).
- NObepHnTe BCnOMoTaTeIbHyIO pyKoTky (7) B Tpe6yEmoe NOJoxKeHne.
3aTnHTe BcNOMORAteIbHyo pyKoRTKy (7), NOBepHyB ee no yacoboi cTpeJIke.
CHTne
Ocna6bTe BcnoMOraTeJbHyIO pyKoTky (7), NOBepHyB ee npOTnB yacOBn CTpeJIke.
- CHIMITE BCNOMORAteNbHyO pyKoRTky (7).
3aTnHTe BCnOMoratEnbHyo pyKoTky (7), NOBepHyB ee no yacobOi CTpeIke.
YctahOBKa n ChrTne nbIeScOpHnKa
Pnc.D
IbIe6OpHnK npedOTBpaaet nonaHaHe nblIN B MaunHy npu CBepHeHH OTBepCTN B NOTONkax.

HemeJeHno 3aMeHnTe NOBpeKdHbI nbIeScOpHnK.
YCTAHOBKa
- PnHHeO6XoDMOCtN, n3BJeKeNTe npHaJNeJxHOCTb n3 3aXmHOrO naTpoHa (4).
HaBnHbTe nbIe6bOpHK (15) Ha BaI npHaADJeXHOCTN.
BcTaBbTe npHaJNeXHoCTb C nbIeSc6OpHnKOM (15) B 3aXmHOn NaTPOH (4).
CHRTHe
I3BJIeKInTe npHaJnEJXHOCTb C nbIEc6OpHnKOM (15) n3 3aXmHOro naTpoHa (4).
CHIMITE nblnc6opHK (15) c npHaadJeKHOCTN.
4. INCIOJIb3OBAHNE
BkIIOUeyHne n OTKIOUoyHne
Pnc.A
- Yo6bbl BKIOHTb MaUNHy, HAXMNTe BblKlHOHaTeJIb BkJI./BbIKI. (1).
- TTo6bI BByIKIOUHTb MaUHHy, OTNcyTNEBbIKIOHaTeJIb BKJL./BbIKJ. (1).
HactpoKapeKMa pa6Obl pnc.A&E
IpeeknouateBb6opa Cbeprna n pbyar Bb6opa ydapHoro DeNCTBn HEOxOIMO yctaHOBtB COOTBeTCTBN C Tpe6yEmbIM peKUMOM pa60tI. Iyra yCTaHOBKn Tpe6yEMORO peKUMa pa60tI 6paTntecb K Ta5nue HnKe.
HactpoKa Pekm pa60TbI
Pnc.E
A OToBnMoJIoTOK /DJIOTO
B Nepopopatop
C DpeNB
- NobebpHnTe nepeKIOuOaTeIb BbIbopa CbePJa (2) n pbHaR BbIbopa ydapHO Ro JeICTBnra (3) BV Tpe6yemoe noJokKeHne.
Iopcka3kn no ONTmAbHOMy NCNoB3OBAHIO
3axmTe 3arotOBky. JnKpeIeHnMeJkux 3arotOBOK nCNOJb3yNT Ctpy6uHy.
Kpenko depknte MaunHy 3a pykortky.
- YctaHObKa pexkma pa60Tbi.
BkHIOHTeMaunHy.
He haxmuaTe Ha MaunHy CnMkOM CnIbHO. Nycb MaunHa paOtae cama.
BbIKJIOHTe MaunHy n nepeTem, KaK OYCTNTb DOxNITec b ee NOHOr OCTaHOKN.
5. UNCTKA N TEXHINUECKOE OBCJNYXINBAHNE

IpeepoocTKOuOBcnyKbAHMeB BcerdaOTKnIOaHTe 3JKeKTponHCTpyMeHT OT 3JKeKTponTuHa.
Perynpho OunuTe KOpnyc 3NeKtpOnHCTpyMeHTa MrgkO TpAnkO, XeNaTeJbHO, NocLe KaKdOrO NcNoJIb3OBaHNr. Y6eDNTecb, YTO BeHTnIaUIOHHbE OTBepCTnY nCTbI OT bIIN Ipr3N. Dn ydaJeHnO cO60 CInbHbIX 3aRpa3HeHn INcNoJIb3yIte MmKyIO TpAnky CMbInbHO neHoi. He nCNoJIb3yIte pactBopnteIN, Takne KaK 6eH3IN, cNPT, aMMnak nT. d. XmMueckne BSeEcTBa NOBpejrt CNHTeTIueckne KOMNOHeHTbl.
PnoBepka n 3aMeHa yrolbHbIX ueTOK Pnc.A
YrOJIbHbIe 1eTKn Heo6xOJIMo peyJnApHO npOBepaTb.Ecnn yrOJIbHbIe 1eTKn n3HOWeHbI, MaunHa HaHT pa60TaTb HepaBHomepHo.

VcnoB3yTe TOnbKO yronbHble UeTKN DOJXHOrO TnA.
- CHIMMTE ĀdρχaTei yrònbHbIX ΚeTOK (8) c
- NOMOJIbIO OTBepTKI.
BbHCTNTe yroIbHbIe IcETKn.
B Cnyae n3HocA Bcerda 3aMeHnTe o6e yroIbHbIe UETK ONDOBpeMeHHO. - YctaHOBtTe DepKataEn yroIbHbIX UeTOK (8) c NOMOuBIO OTBePTKN.
- Iocne yctaHOBKn HOBbIX yROJIbHbIX 3anyCTnTE MaunHy Ha XOIOCTOM XOy npimepHo Ha 15 MNHT.
depeKtbI
HCTpymEnTdoJKeH peryIaRHO noDBepraTbcra npOBepkam Ha Hauuue CneIyuOux DepeKTOB, KOtOpBie B clyae obHapUkeHn Heo6xOIMO ydaJIaTb.
- NobpeckdeneHna Kaebn nTuHaHn.
- NoBpeKdEHHb BblkHouaTeIb.
KopoTkoe 3ambikaHne.
Поврждени DBNXYuXxCЯст.
HencnpaBHOCTM
B cnyae HencnpaBHOCTn, HAnpMep, n3Hoc a
TeTale, o6paTntecb K npOaBuY nI N IO ONDOM
n3 aDpeCob, yKa3aHHbIX Ha rapaHTNIMHom JnCTe.
IpeueHb TeTale, DoCTyINbIX IJIra 3aKa3a,
npuBeHe OHJelHo.
TAPAHTN
TapaHTnHbIe yCIOBnI npINBeHbHa OTdJIbHOM rapaHTnHOM JNCTe.
OKPYXAIOLUAR CPEDA

HeucnpabHbIe 3Jektpueeckne H3JektpoHHbIe U3JeNnHa Heo6xOaHMo CdaBaTb B COOTBcTCTByIOuNe IyHKtbl yTuINu3auu.
ToIbKO dIa cTpaH EbponeNcKOrO 3KOHOMueCKORo COO6eCTBa
He Bb6paBbAte 3JekTpOHcTpymEtbl B
0bHbIe MyCOpHbIe KOp3HbI. B COOTBeTcTBn
c EbponeckOupeKTHBO8 2012/19/EC o6
ytIN3aun OTpa6oTaHHoro 3JekTpueckoro n
3JekTpOHoro 06OpyDobAHnN ee peaIN3aun
B TocydapCTBeHHOM 3aKHOdaTeJIbCTBe
3JekTpOHCTpymEtbl, KOtOpBie 6oJIbWe
HE MOrTy INoONb3OBaTbcN O Na3HaueHInO
Heo6xOdIMO NOdBepraTb YtIN3aun
dpYkceTBHeHHbIM N OTOHOseHIO K OkpyKaIOUe
cpeE cnoocobm.
Bn3dne n pykoBoCTBO noIb3ObaTeIa MOryt 6bItb BHeceHb N3MeHeHHa. CneuФнkaun MOryt 6bItb N3MeHeHb 6e3 npedBaPteJIbHOro ONOBueHHa.
DECLARATION OF CONFORMITY HDM1028 - ROTARY HAMMER
(EN) We declare under our sole responsibility that this product is in conformity with directive 2011/65/EU of the European parliament and of the council of 9 June on the restriction of the use of certain hazardous substances in electrical and electronic equipment is in conformity and accordance with the following standards and regulations:
(DE) Der Hersteller erklart eigenervertontlich, dass thise Produkt der Direktive 2011/65/EU des Europäischen Parliaments und des Rats vom 8. Juni 2011 über die Einschränkung der Anwendung von bestimmten gefährlichen Stoffen in elektrischen und elektronischen Geräten entspricht. den folgenden Standards und Vorschriften entspricht:
(NL) Wij verwäkanten onder unsere volledige verantwoordelidigkeit dat dit product vloodet aan de conform Richteil 2011/65/EU van het Europees Parlementen de Raad van 8 Juni 2011 betreffende bepeking van het grabuik van bepaalde gevaarlijke stoffen in elektrische en elektronische apparatusen in overeinstemming is met de volgende standardaen en regulieringen:
(FR) Nous déclarons sous notre seule responsabilité que ce produit est conforme aux standards et directives suivants: est conforme à la Directive 2011/65/EU du Parlement Européen et du Conseil du 8 juin 2011 concernant la limitation d'utilisation de certaines substances dangereuses dans l'équipment électrique etlectronique.
(ES) Declaramos bajo esta exclusiva responsabilidad que este producto cumple con las cuales nominas y estandarias de funcionalement: se enquirya conforma con la Directa 2011/65/UE del Parliamento Europeo y el Consejo de 8 de junio de 2011 sobre la restricción del uso de determinadas sustancias pelligrosas en los equipos electrécicos y electrónicos.
(PT) Declaramos por esta total responsabída-de que este produits está em conformidade e cumpre as normas e regulamianções que se seguem; está em conformidade com a Directa 2011/65/EU do Paramento Europeu e com o Conselho de 8 de Junho de 2011 no que respeira a restruição de享用ação de determinadas substancias porigosas existentes em equipamento eletrico e电子rico.
(ITT) Dichiariamo, sotto la nostra responsabilità, che quello prodotto è conforme alla normativa e ai regolamenti seguito: è conforme alla Direitta 2011/65/UE del Parliamento Europeo e di Consiglio dell'8 giugno in 2011 sulla limitazione dell'uso di determinata sostanza per collocne nelle appearacchiatione electrliche ed ellettroniche.
(SV) Vi garantierar pa eget ansvar attenna produkt uppyller och foljer foljande standarder och bestammelser; uppyller direktiv 2011/65/EU From Europejska parliamentet et OG-radet fran den 8 Juni 2011 om begrundsningen av anvandning av farliga subsontans i elektrisk och elektronisk utrustning.
(FI) Vakutamme yksinomaan omalla vastuillamme, etta tama tuote tayttaa seuraavat standardit ja saadokset: tayttaa Europoan parlementin ja neuvoston 8. kesakutua 2011 paviatyn direktivin 2011/65/EU vaatimukset koskien vaarallisten aineiden ketyton rajolusta sakhj - je elektronislasl salteissa.
(NO) Vi erklarer under vart eget ansvar at dette produkt er i samsvar med folgende standarder og regler; er i samsvar med EU-direktivet 2011/85/EU fra Europa-parliamentet og Europa-rädet. pr. 8 Juni 2011, om begrensning i brunken av visse farlige slofter i elektrisk og elektroniskut suIytr.
(DA) Vi erkräder unter egen entsamt, at dette produit oder iv orenstemmelse med folgende standarder og bestemmelse: or iv orenstemmelse med direktiv 2011/65/EU fra Europa-Parliamentet og Radel et 8. Juni 2011 om begrensning af anvendelsen at visso farlige stoffer i elektrik og elektroniknisk udstry.
(HU) Feleosesegunk teljes tradutan kijentjuk, hagy ez a teremek letjes meritekben mogelaf o alabbi szabavzynoknak es olafrosknak: je v soulen sa smoric 2011;65/EU Evropskeho parlementa a Rady EU ze dne 8. cervna 2011, ktera se tykə amozhen poufizi urcylch nebepezcnych latk e elektrickych a elektronickych zaifzenich.
(CS) Na nasi vistnizi zodpovednost prohnsuijame. Ze je tete vnyebroje ve soudlai našedlujcimi standarda yano marmi: Je v sultade n smoru 2011/65EU Eurospesko partamentu a Radz 8.2 june 2011 tskajcejoša os obmedzenia použivania urlothyne nebezpacnech laskov elekrikom a elektronikorn kovyabent.
(SK) Vyhlasujeme na nasu vyhradnu zodpovednost, ze tento vyrobok je v rhode a sullade n snaslecujičimi normai a predispimi; ye v suldare s normou 2011/65/EU Europske ho parlementu a Rady z 8. juna 2011 tykajucej sa obmedzenia použivania určitych nebezpěcnych lák o elektrickom a elektronickov ybvéen.
(SL) S polino odgovostmoi izjavljamo, da ja ta izdelek v skladni da odgovista naslednji jism standardom terpediprisom: ye v skladni zdektivo 2011/65/EU Evropeska tegparta manta in Svota z dne 8. junji 2011 oOMEjevanju uporabe dolocenih novami snov v elektricii in elektronski upremi.
(PL) Deklanjemy na wasnja odpwiedzialnoze, za ten produkt spelwnia wymogji zawrto w nastepujachnormach i przypeisach: jest zgodny z Dyrketywq 2001/65UE Paramentu Europejskiego I Rady z dna 8 czerwca 2011 r. sprawwa agrizcnian stoswania niedtorki niebepiecznych shouldn? w sprzecie elektryczyni i elektronicznym.
(LT) Prisidmami visa atsakombye deklarunam, kad lis gaminis attlinka 2emiau paminetius standartius arba unostatus: attlinka 2011 m. birzeli 8 d. Europus Parlemento I rarybos direktvyq 2011/65/EB del tam tikru pavojingu medlagu naudjoimo elektros ir elektronische irangejo arprojiboim.
(LV) Ir atbilstofoa Elopas Parlamento un Padomes 2011, gada 8, Jurija Direktival 2011/85/ES par dazu bistamu viu Izmanloans ana Ierobezoanse elektriskas un elektronikska iekartas.
(ET) Agpalvojam ar visu attilibtu, ka bis produkti r saskana un atbilst sekojsiem standarifen um nolikumiri: ir atbilstosa Eiropas Parlementa un Padomes 2011, gade 8. jünija Direktival 2011/65/ES par da zu bistamu viile Izmantoanas ierobežoansu elektrikas un elektroniskas iekartas.
(RO) Declarare prin aceaste c a raspunderea deplina c producul acesta este in conformitate cu urmatoarele standarde sau directive:Este in conformitate cu Directiva 2011/65/UE a Parlementulr Europeana g a Consiluln din 8 iunie 2011 cu privire la intercizere utilizani anumitor substantie pericuoloase la echipamentele olectrice ei olectronico.
(HR) Izavljumemo pod viastitom odgovornu su daje strojemukladan sa lijedesim standardima iii standardiziranim Dokumentinia i u skuldu sa odredbama: uskliadeno s Direktvom 2011/65/EU europskog parliamenta i vijeka izdanom 8. lipna 2011. oograničenji kurištenja odredenih opasnih tvar i elektrfnjnl elektronikovi opremi.
(SRL) Pod punomodgovoroscu izjavljemo de ja usaglasen sa sledecim standardaria il normama: usaglasen da direktiv 2011/65/Eu Vropskog parlamenta i Saveta od 8.juna,2011,Godina z restrickju upotrebe odreienih opasnih materija u elektrichnoj i elektronskoj opremi.
(RU) NIO CBOO OTBCTBHEHOBCH 3A BANHME, YTO DAHNO KADNE COOTBCTBYET CNDyouWM CTAHDPAMN HOPMAM. COOTBCTBYET Tpe6oBAHMM DnepKTHBb 2011/65/EU EbponeKcKO pntpMaTHeu MoBaTe 08 Hmua 2011.70 ORpaHnHnHnIO NOLOBAHMA ONPcDEeHNbI OHaONbIX BeueCTB 3ENxPTnHexCM INeIKTKPOHOM OOBpyOAHIN
(UK)Ha CBOI ANACHY BINOIBNHICTB AABREMO. UO DAhe O6NAHANBAIINIOBIAE. HACTYNIM TcAHTAPAM IHOOPATMAH: AAGOBONBIH BMOH DApIOBNITM 2011/65/ CC CBoPENCKBOI NAPAMENTy Ta PaDN BID 8 YepHHa 2011 POKY HAOBMEHN BIKOPCHTAHRII DAAHX HO630NIH XPOOBH B ENKTKPHOMHY Ta E9KTPOHOMY BNOADNHHI
(EL) Anawouue utuovua at to npoiov aut ouupwveke knpaioucnpakkow KavovouoKau npoturra Oupoppovetru aoy 2011/65/E8 tou Eupatmikou KavovououKau kaou Eupouououou 8n 8n lauvou 2011 yau TepropiaqTx xpaTg oipvivek Etniokovou oune n eekpiKpKa Ka nekxpoviko eoA
EN 60745-1, EN 60745-2-6, EN 55014-1, EN 55014-2, EN 61000-3-2, EN 61000-3-3
2006/42/EC, 2014/30/EU, 2011/65/EU, 2012/19/EC
Zwolle, 01-11-2016
H.G.F Rosberg
CEO FERM B.V.
FERM B.V. - Lingenstraße 6 - 8028 PM - Zwolle - The Netherlands


WWW.FERM.COM©2016 FERM B.V.
1611-07


- SAFETY WARNINGS
- WARNING
- Additional safety warnings for rotary hammers
- Electrical safety
- Replacement of power cords or plugs
- Mains plug replacement (UK only)
- Use of extension leads
- MACHINE INFORMATION
- Intended use
- Technical specifications
- Vibration
- Vibration level
- Description
- Fig. A
- ASSEMBLY
- Mounting and removing the accessory Fig.B
- Mounting
- Removing
- Mounting and removing the auxiliary grip Fig. C
- Mounting and removing the dust collector Fig. D
- USE
- Switching on and off
- Setting the operating mode
- Fig. A & E
- Setting Operating mode
- Fig. E
- Hints for optimum use
- CLEANING AND MAINTENANCE
- Checking and replacing the carbon brushes Fig.A
- Defects
- Faults
- WARRANTY
- ENVIRONMENT
- Only for EC countries
- Bohrhammer
- INFORMATIONS RELATIVES A LA MACHINE
- Utilisation prévue
- Specifications techniques
- Vibrasjonsniva
- RENGJØRING OG VEDLIKEHOLD
- INFORMACE O NARADI
- Urcené pouziti
- DOnOHHTeHbHaTExHka 6e3onacHOCTnIJI npOpopatopOB
- 3JIeKTpuecka 6e3onacHocTb
- 3aMeHa Ka6eIe NITaHnN IuTeKepeOB
- 3aMeHa uTeKepa nHTAHnra (ToJIbKO dIy BeNko6pTuHn)
- IcnoJb3OBAHne ydnnHnTeNei
- CBENEHINOB 3JEKTPONHCTPYMEHTE
- Ppeonaraemoe nOJb30BaHne
- Pnc.A
- CBOPKA
- YcTaHOBka n ChrTne npHaIeXHOCTH
- Pnc.B
- YctaHOBka
- CHTne
- YCTAHOBKa IN CHTNE BCNOMORAteNbHOI
- pykortkn
- Pnc.C
- YctahOBKa n ChrTne nbIeScOpHnKa
- Pnc.D
- CHRTHe
- INCIOJIb3OBAHNE
- BkIIOUeyHne n OTKIOUoyHne
- HactpoKapeKMa pa6Obl pnc.A&E
- HactpoKa Pekm pa60TbI
- Pnc.E
- Iopcka3kn no ONTmAbHOMy NCNoB3OBAHIO
- UNCTKA N TEXHINUECKOE OBCJNYXINBAHNE
- PnoBepka n 3aMeHa yrolbHbIX ueTOK Pnc.A
- depeKtbI
- HencnpaBHOCTM
- TAPAHTN
- OKPYXAIOLUAR CPEDA
- ToIbKO dIa cTpaH EbponeNcKOrO 3KOHOMueCKORo COO6eCTBa
- DECLARATION OF CONFORMITY HDM1028 - ROTARY HAMMER
- EN 60745-1, EN 60745-2-6, EN 55014-1, EN 55014-2, EN 61000-3-2, EN 61000-3-3
Brand : Ferm
Model : HDM1028
Category : Drill