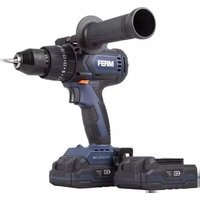
CDM1138 - Drill Ferm - Free user manual and instructions
Find the device manual for free CDM1138 Ferm in PDF.


| Product Type | Drill |
| Brand | Ferm |
| Model | CDM1138 |
| Power Supply | Corded electric |
| Power Consumption | 700 W |
| No-Load Speed | 0-2800 rpm |
| Chuck Type | Keyless, 13 mm |
| Drilling Capacity (Steel) | 13 mm |
| Drilling Capacity (Wood) | 38 mm |
| Weight | 1.5 kg |
| Dimensions (L x W x H) | 250 x 200 x 70 mm |
| Main Functions | Drilling, screwdriving |
| Variable Speed | Yes |
| Reverse Rotation | Yes |
| Auxiliary Handle | Included |
| Depth Stop | Included |
| Sound Pressure Level | 82 dB(A) |
| Vibration Level | 8.5 m/s² |
| Cleaning and Maintenance | Clean with dry cloth; check carbon brushes regularly |
| Safety Precautions | Use safety goggles; disconnect before maintenance |
| Spare Parts | Carbon brushes, chuck, switch |
| Repairability Index | 7.5 / 10 |
Frequently Asked Questions - CDM1138 Ferm
User questions about CDM1138 Ferm
0 question about this device. Answer the ones you know or ask your own.
Ask a new question about this device
Download the instructions for your Drill in PDF format for free! Find your manual CDM1138 - Ferm and take your electronic device back in hand. On this page are published all the documents necessary for the use of your device. CDM1138 by Ferm.
USER MANUAL CDM1138 Ferm
natural_image
Blue FERM electric drill putter with attached power cord and base (no visible text or symbols)CDM1138
EN Original instructions 04
NL Vertaling van de oorspronkelijke gebruiksaanwijzing 12
RO Traducere a instructiunilor originale 21
SR Prevod originalnog uputstva 29
BS Prevod originalnog uputstva 29


Thank you for buying this FERM product. By doing so you now have an excellent product, delivered by one of Europe's leading suppliers. All products delivered to you by Ferm are manufactured according to the highest standards of performance and safety. As part of our philosophy we also provide an excellent customer service, backed by our comprehensive warranty. We hope you will enjoy using this product for many years to come.
1. SAFETY INSTRUCTIONS

Read the enclosed safety warnings, the additional safety warnings and the instructions. Failure to follow the safety warnings and the instructions may result in electric shock, fire and/or serious injury. Save the safety warnings and the instructions for future reference.
The following symbols are used in the user manual or on the product:

Denotes risk of personal injury, loss of life or damage to the tool in case of non-observance of the instructions in this manual.

Risk of electric shock

Variable electronic speed

Rotation, left/right

Do not use in rain

Indoor use only

Class II machine - Double insulation - You don't need any earthed plug.

Max temperature 40^ C

Do not throw the battery into fire

Do not throw the battery into water

Do not dispose of the product in unsuitable containers.

Separate collection for Li-ion battery.

Time-lag miniature fuse-link.

The product is in accordance with the applicable safety standards in the European directives.
GENERAL POWER TOOL SAFETY WARNINGS

WARNING!
Read all safety warnings and all instructions. Failure to follow the warnings and instructions may result in electric shock, fire and/or serious injury.
Save all warnings and instructions for future reference.
The term “power tool” in the warnings refers to your mains-operated (corded) power tool or battery-operated (cordless) power tool.
1) Work area safety
a) Keep work area clean and well lit. Cluttered or dark areas invite accidents.
b) Do not operate power tools in explosive atmospheres, such as in the presence of flammable liquids, gases or dust. Power tools create sparks which may ignite the dust or fumes.
c) Keep children and bystanders away while operating a power tool. Distractions can cause you to lose control.
2) Electricalsafety
a) Power tool plugs must match the outlet. Never modify the plug in any way. Do not use any adapter plugs with earthed (grounded) power tools. Unmodified plugs
and matching outlets will reduce risk of electric shock.
b) Avoid body contact with earthed or grounded surfaces, such as pipes, radiators, ranges and refrigerators. There is an increased risk of electric shock if your body is earthed or grounded.
c) Do not expose power tools to rain or wet conditions. Water entering a power tool will increase the risk of electric shock.
d) Do not abuse the cord. Never use the cord for carrying, pulling or unplugging the power tool. Keep cord away from heat, oil, sharp edges or moving parts. Damaged or entangled cords increase the risk of electric shock.
e) When operating a power tool outdoors, use an extension cord suitable for outdoor use. Use of a cord suitable for outdoor use reduces the risk of electric shock.
f) If operating a power tool in a damp location is unavoidable, use a residual current device (RCD) protected supply. Use of an RCD reduces the risk of electric shock.
3) Personalsafety
a) Stay alert, watch what you are doing and use common sense when operating a power tool. Do not use a power tool while you are tired or under the influence of drugs, alcohol or medication. A moment of inattention while operating power tools may result in serious personal injury.
b) Use personal protective equipment. Always wear eye protection. Protective equipment such as dust mask, non-skid safety shoes, hard hat, or hearing protection used for appropriate conditions will reduce personal injuries.
c) Prevent unintentional starting. Ensure the switch is in the off-position before connecting to power source and/or battery pack, picking up or carrying the tool.
Carrying power tools with your finger on the switch or energising power tools that have the switch on invites accidents.
d) Remove any adjusting key or wrench before turning the power tool on. A wrench or a key left attached to a rotating part of the power tool may result in personal injury.
e) Do not overreach. Keep proper footing and balance at all times. This enables better control of the power tool in unexpected situations.
f) Dress properly. Do not wear loose clothing or jewellery. Keep your hair, clothing and gloves away from moving parts. Loose clothes, jewellery or long hair can be caught in moving parts.
g) If devices are provided for the connection of dust extraction and collection facilities, ensure these are connected and properly used. Use of dust collection can reduce dust related hazards.
h) Do not let familiarity gained from frequent use of tools allow you to become complacent and ignore tool safety principles. A careless action can cause severe injury within a fraction of a second.
4) Power tool use and care
a) Do not force the power tool. Use the correct power tool for your application. The correct power tool will do the job better and safer at the rate for which it was designed.
b) Do not use the power tool if the switch does not turn it on and off. Any power tool that cannot be controlled with the switch is dangerous and must be repaired.
c) Disconnect the plug from the power source and/or the battery pack from the power tool before making any adjustments, changing accessories, or storing power tools. Such preventive safety measures reduce the risk of starting the power tool accidentally.
d) Store idle power tools out of the reach of children and do not allow persons unfamiliar with the power tool or these instructions to operate the power tool.
Power tools are dangerous in the hands of untrained users.
e) Maintain power tools. Check for misalignment or binding of moving parts, breakage of parts and any other condition that may affect the power tool's operation. If damaged, have the power tool repaired before use. Many accidents are caused by poorly maintained power tools.
f) Keep cutting tools sharp and clean.
Properly maintained cutting tools with sharp cutting edges are less likely to bind and are easier to control.
g) Use the power tool, accessories and tool bits etc. in accordance with these
instructions, taking into account the working conditions and the work to be performed. Use of the power tool for operations different from those intended could result in a hazardous situation.
h) Keep handles and grasping surfaces dry, clean and free from oil and grease. Slippery handles and grasping surfaces do not allow for safe handling and control of the tool in unexpected situations.
5) Battery tool use and care
a) Recharge only with the charger specified by the manufacturer. A charger that is suitable for one type of battery pack may create a risk of fire when used with another battery pack.
b) Use power tools only with specifically designated battery packs. Use of any other battery packs may create a risk of injury and fire.
c) When battery pack is not in use, keep it away from other metal objects, like paper clips, coins, keys, nails, screws or other small metal objects that can make a connection from one terminal to another. Shorting the battery terminals together may cause burns or a fire.
d) Under abusive conditions, liquid may be ejected from the battery; avoid contact. If contact accidentally occurs, flush with water. If liquid contacts eyes, additionally seek medical help. Liquid ejected from the battery may cause irritation or burns.
e) Do not use a battery pack or tool that is damaged or modified. Damaged or modified batteries may exhibit unpredictable behaviour resulting in fire, explosion or risk of injury.
f) Do not expose a battery pack or tool to fire or excessive temperature. Exposure to fire or temperature above 130 °C may cause explosion. NOTE The temperature „130 °C“ can be replaced by the temperature „265 °F“.
g) Follow all charging instructions and do not charge the battery pack or tool outside the temperature range specified in the instructions. Charging improperly or at temperatures outside the specified range may damage the battery and increase the risk of fire.
6)Service
a) Have your power tool serviced by a qualified repair person using only identical replacement parts. This will ensure that the safety of the power tool is maintained.
b) Never service damaged battery packs.
Service of battery packs should only be performed by the manufacturer or authorized service providers.
Additional safety warnings for drills and screw drivers
a) Wear ear protectors when impact drilling.
Exposure to noise can cause hearing loss.
b) Use auxiliary handle(s), if supplied with the tool. Loss of control can cause personal injury.
c) Hold power tool by insulated gripping surfaces, when performing an operation where the cutting accessory may contact hidden wiring or its own cord. Cutting accessory contacting a "live" wire may make exposed metal parts of the power tool "live" and could give the operator an electric shock.
d) Do not use a battery pack or tool that is damaged or modified. Damaged or modified batteries may exhibit unpredictable behaviour resulting in fire, explosion or risk of injury.
e) Do not expose a battery pack or tool to fire or excessive temperature. Exposure to fire or temperature above 130 °C may cause explosion. NOTE The temperature „130 °C“ can be replaced by the temperature „265 °F“.
f) Follow all charging instructions and do not charge the battery pack or tool outside the temperature range specified in the instructions. Charging improperly or at temperatures outside the specified range may damage the battery and increase the risk of fire.
g) Apply pressure only in direct line with the bit and do not apply excessive pressure. Bits can bend causing breakage or loss of control, resulting in personal injury.
For the charger
Intended use
Charge only CDA1130 type rechargeable battery packs. Other types of batteries may burst causing personal injury and damage.
a) The appliance is not to be used by persons (including children) with reduced physical,
sensory or mental capabilities, or lack of experience and knowledge, unless they have been given supervision or instruction
b) Children being supervised not to play with the appliance
c) Do not recharging non-rechargeable batteries!
d) During charging, batteries must be placed in the well ventilated area!
Residual risks
Even when the power tool is used as prescribed it is not possible to eliminate all residual risk factors. The following hazards may arise in connection with the power tool's construction and design:
a) Health defects resulting from vibration emission if the power tool is being used over longer period of time or not adequately managed and properly maintained.
b) Injuries and damage to property to due to broken accessories that are suddenly dashed.

Warning! This power tool produces an electromagnetic field during operation. This field may under some circumstances interfere with active or passive medical implants. To reduce the risk of serious or fatal injury, we recommend persons with medical implants to consult their physician and the medical implant manufacturer before operating this power tool.
Power cord replacement
If the supply cord is damaged, it must be replaced by the manufacturer, its service agent or similarly qualified persons in order to avoid a hazard.
2. MACHINE INFORMATION
Intended use
The machine is intended for driving in and loosening screws as well as for drilling in wood, metal, ceramic and plastic and for impact drilling in brick, brickwork and masonry.
Technical specifications
| Model No CDM1138 | |
| Charger CDA1129 | |
| Input of charger | 230-240V~ 50HzMax. 65W |
| Output of charger 21.5V DC 2.4A | |
| Rechargeable battery pack 20V Li-ion=2.0Ah | |
| Battery charging time 1 hour | |
| Chuck capacity 13 mm | |
| Torque settings | 25 + Drill mode + Impact drill mode |
| No load speed | |
| Position 1: | 0-550 /min |
| Position 2: | 0-2000 /min |
| No load impact rate | |
| Position 1: | 0-8250 /min |
| Position 2: | 0-30000 /min |
| Sound pressure level L_PA | 78.9 dB(A) K=3 dB(A) |
| Sound power level L_WA | 89.9 dB(A) K=3 dB(A) |
| Hand-arm vibration a_h (Impact drilling in concrete) | 7.7 m/s ^2 K=1.5 m/s ^2 |
| Hand-arm vibration a_h,D (Drilling into metal) | <2.5 m/s ^2 K=1.5 m/s ^2 |
Vibration level
The vibration emission level stated in this instruction manual has been measured in accordance with a standardized test given in EN62841; it may be used to compare one tool with another and as a preliminary assessment of exposure to vibration when using the tool for the applications mentioned.
- Using the tool for different applications, or with different or poorly maintained accessories, may significantly increase the exposure level.
- The times when the tool is switched off or when it is running but not actually doing the job, may significantly reduce the exposure level.
Protect yourself against the effects of vibration by maintaining the tool and its accessories, keeping your hands warm, and organizing your work patterns.
Description
The numbers in the text refer to the diagrams on pages 2 - 3
- Machine
- Battery
- Battery unlock button
- Battery LED indicators
- Battery LED indicators button
- Charger
-
Charger LED indicators
-
Chuck
- Gear selection switch
- Direction switch
- On / off switch
- Torque adjustment ring
- Operation mode ring
- Work light
- Side handle
- Side handle clamp
- Belt hook
3. OPERATING

Before any work on the power tool, remove the battery.

The battery must be charged before first use.
Removing the battery from the machine Fig. D
- Hold the machine (1) firmly with one hand
- Push down the battery unlock button (3) located on the rear side of the battery (2) with the other hand.
- Keep pushing this button (3) down and slide the battery backwards out of the machine, like shown in Fig. D.
Inserting the battery into the machine
Fig. D

Ensure that the exterior of the battery is clean and dry before connecting to the charger or machine.
- Hold the machine (1) firmly with one hand
- Insert the battery (2) into the base of the machine as shown in Fig. D.
- Push the battery further forward until it clicks into place.
Checking the battery charging status Fig. A
- To check the battery charge status, push and hold the button (5) on battery.
- The battery has 3 LED lights (4) indicating the charge level, the more lights that burn, the more charge the battery has left.
- When the lights are not burning it means the battery is empty and must be charged immediately.

When the machine is not being used over a longer period of time it is best to store the battery in charged condition.
Charging the battery with the charger Fig. E
- Take the battery (2) from the machine.
- Turn the battery (2) to upside down position and slide it onto the charger (6) as shown in Fig. E.
- Push the battery (2) until it is fully pushed into the slot.
- Plug the charger (6) into an electrical outlet and wait for a while. The LED indicators (7) on the charger will lighten up and show the charger status.
The charger has 2 LED indicators (7) which indicate the status of the charging process:
| Red LED Status | Green LED status | Charger status |
| Off Off No power | ||
| Off On | Standby mode:- No battery is inserted or,- Battery inserted but charging has finished | |
| On Off Battery charging in Progress | ||
- Fully charging the battery may take up to 60 minutes.
- After the battery is fully charged remove the charger plug from the outlet and remove the battery from the charger.
- The battery can be stored or directly installed on the machine.

Lithium-Ion cells can be stored for a long period without losing much of their charge. When the machine is not being used over a longer period of time it is best to store the battery in charged condition.
Assembling the side handle (15)
Fig. C
The side handle (15) can be mounted on the left or right side of the machine and will provide extra control when drilling or screw driving.

Only tighten the handle by hand. Do not overtighten; this may damage the handle or its holder
- Turn the side handle's (15) handgrip anticlockwise a few times so the holder can be moved over the chuck and placed on the metal part just behind the torque adjustment ring (12).
- Make sure the small gap of the handle aligns with the notch of the metal part on the machine, as shown on figure C.
- Turn the handle clockwise to fix it in position.
Fitting and removing drills or screwdriver bits Fig. A

Always remove the battery before mounting an accessory.
The drill chuck (7) is suitable for drills and screwdriver bits with round shaft as well as hexagonal shaft.
- Hold the machine firmly with one hand.
- Open the drill chuck (7) by rotating the chuck with your other hand in clockwise direction until it is opened far enough for the bit to slide in.
- Insert the shaft of the drill or screwdriver bit.
- Tighten the drill chuck again by firmly rotating the chuck (7) counterclockwise.
- Check if the bit is centered well by shortly activating the machine's on/off switch.
Adjusting the gears Fig. B

Never switch gears when the motor is running, this will damage your machine.

Never put switch in the middle between both positions, this will damage your machine.
The machine has 2 drill speeds, which can be adjusted by sliding the gear switch (9) forward or backwards. The number on the gear switch (9) shows which position is chosen.
- Position 1: For slow drilling, large drilling diameter or screw driving. The machine has high power at a low speed.
- Position 2: For fast drilling or small drilling diameter.
Adjusting the direction of rotation Fig. A
- Set the direction switch (10) to „←“ position in order to drive screws or to use it for drilling.
- Set the direction switch (10) to „→“ position in order to remove screws.
Switching the machine on and off Fig. A
The on/off switch (11) is used for activating the machine and adjusting rotation speed.
- Pressing the on/off switch (11) will activate the machine, the further the switch is being pushed, the faster the drill will turn.
- Releasing the on/off switch (11) will stop the machine.
- Move the direction reversing switch (10) to the middle position to lock the movement of the on/off switch.

Only lay down the machine when it has stopped running completely. Do not place it on a dusty surface as particles of dust could get into the mechanism.
Adjusting the torque and activating the impact (hammer) mode
Fig. B
The machine has 25 different torque settings and a special drill mode to set the power being transmitted to the chuck. Next to that, a hammer mode is available for impact drilling in masonry and other stone-like materials.
Adjusting the torque setting for Screw driving By rotating the torque adjustment ring (12), screws can be driven to a predetermined depth, which is ideal for repetitive work. The higher the number, the more torque will be transmitted.
- Select a low setting for small screws or soft work material.
- Select a high setting for large screws, hard work materials and when removing screws.
- You should preferably choose a setting as low as possible when driving screws. Select a higher setting if the motor slips before the screw is fully tightened.
Adjusting the torque setting for Drilling
- For drilling, turn the torque adjustment ring (13) to the setting for drilling (◆). The motor will
not slip and all power will be available for drilling.
- Make sure the gear switch (9) is set to position 2 to get maximum drill speed.
Adjusting the torque setting for impact drilling
The impact (hammer) function can be used for drilling in masonry and other stone-like materials. This function enables faster drilling in masonry and stone-like materials.
- For impact drilling, turn the torque adjustment ring (13) to the setting for impact drilling (☐). The impact function will be activated when drilling into the material.
- Make sure the gear switch (9) is set to position 2 to get maximum drill speed.

Ensure that the direction switch (10) is always set to, "during drilling.

The machine is equipped with electronic overload protection function. When the machine gets overloaded it will shut down automatically. When this happens, please wait for a few seconds to let the overload protection reset itself.
Work light (14)
Fig. A
The machine is equipped with a work light to illuminate the work location.
- It automatically switches on when the on/off switch (11) is being pressed.
- It automatically switches off when the on/off switch (11) is released again.
Belt hook (17)
Fig. A
The machine is equipped with a belt hook for hanging the machine to your belt during use.

Always switch the direction switch (10) to middle position to avoid accidental startup of the machine.
- The belt hook (17) can be assembled on the left or right side of the machine.
- It can easily be mounted by attaching it with the screw mounted on the machine.
- It can be removed by simply removing the screw on the hook and taking it off.
Optimum use
When driving screws into wood, metal and other materials:
- Before using the appliance check if the drill or screw bit is properly fitted and centered inside the drill chuck.
- Screw bits are available in several shapes and dimensions. When unsure, always try if the bit fits on the screw head without any free play before using the machine.
- Make sure the machine is not running when it contacts the screw. A rotating bit may slip. This could result in damage to the work piece.
When drilling into wood, metal and other materials:
- With small diameter drills use a high drill speed. For large diameter drills use a low drill speed.
- For hard materials, select a low drill speed, for soft materials select a high drill speed.
- Fix the work piece properly, preferably by using a clamp or vice.
- During drilling draw back the drill out of the hole frequently so swarf or drill dust will be removed.
When drilling in metal:
- Use a metal drill (HSS). For the best results you should cool the bit with oil.
- Metal (HSS) drills can also be used drilling into plastic.
When drilling in stone or masonry:
- Always use drills for concrete or masonry drilling
- Apply force to the machine to let the hammer action work at its best, but always make sure the machine maintains its rotation speed. Machine will wear out faster, and drilling will take more time.
- When drilling pull back the drill every few seconds. Drill dust is being removed out of the hole and drilling is done faster.
4. MAINTENANCE

Before cleaning and maintenance, always switch off the machine and remove the battery pack from the machine.
Clean the machine casings regularly with a soft cloth, preferably after each use. Make sure that the ventilation openings are free of dust and dirt. Remove very persistent dirt using a soft cloth moistened with soapsuds. Do not use any solvents such as gasoline, alcohol, ammonia, etc. Chemicals such as these will damage the synthetic components.
FERM products are developed to the highest quality standards and are guaranteed free of defects in both materials and workmanship for the period lawfully stipulated starting from the date of original purchase. Should the product develop any failure during this period due to defective material and/or workmanship then contact your FERM dealer directly.
The following circumstances are excluded from this guarantee:
- Repairs and or alterations have been made or attempted to the machine by unauthorized service centers.
• Normal wear and tear. - The tool has been abused, misused or improperly maintained.
• Non-original spare parts have been used
This constitutes the sole warranty made by company either expressed or implied. There are no other warranties expressed or implied which extend beyond the face hereof, herein, including the implied warranties of merchantability and fitness for a particular purpose. In no event shall FERM be liable for any incidental or consequential damages. The dealers remedies shall be limited to repair or replacement of nonconforming units or parts.
Only for EC countries
Do not dispose of power tools into domestic waste. According to the European Guideline 2012/19/EC for Waste Electrical and Electronic Equipment and its implementation into national right, power tools that are no longer usable must be collected separately and disposed of in an environmentally friendly way.
The product and the user manual are subject to change. Specifications can be changed without further notice.
Faulty and/or discarded electrical or electronic apparatus have to be collected at the appropriate recycling locations.
ACCU COMBI-BOORMACHINE, KOOLBORSTELLOOS
CDM1138
Checking the battery charging status
Fig. A
- To check the battery charge status, push and hold the button (5) on battery.
- The battery has 3 LED lights (4) indicating the charge level, the more lights that burn, the more charge the battery has left.
- When the lights are not burning it means the battery is empty and must be charged immediately.

Kada se mašina ne koristi duži period, najbolje je da se akumulator skladištuje u napunjenom stanju.
CE
DECLARATION OF CONFORMITY CDM1138 - CORDLESS COMBI DRILL BRUSHLESS
(EN) We declare under our sole responsibility that this product is in conformity with directive 2011/65/EU of the European parliament and of the council of 8 June on the restriction of the use of certain hazardous substances in electrical and electronic equipment is in conformity and accordance with the following standards and regulations:
(DE) Der Hersteller erklärt eigenverantwortlich, dass dieses Produkt der Direktive 2011/65/EU des Europäischen Parlaments und des Rats vom 8. Juni 2011 über die Einschränkung der Anwendung von bestimmten gefährlichen Stoffen in elektrischen und elektronischen Geräten entspricht. den folgenden Standards und Vorschriften entspricht:
(NL) Wij verklaren onder onze volledige verantwoordelijkheid dat dit product voldoet aan de conform Richtlijn 2011/65/EU van het Europees Parlement en de Raad van 8 juni 2011 betreffende beperking van het gebruik van bepaalde gevaartlijke stoffen in elektrische en elektronische apparatuur en in overeenstem ming is met de volgende standaarden en reguleringen:
(FR) Nous déclarons sous notre seule responsabilité que ce produit est conforme aux standards et directives suivants: est conforme à la Directive 2011/65/EU du Parlement Européen et du Conseil du 8 juin 2011 concernant la limitation d'usage de certaines substances dangereuses dans l'équipement électrique et électronique.
(ES) Declaramos bajo nuestra exclusiva responsabilidad que este producto cumple con las siguientes normas y estándares de funcionamiento: se encuentra conforme con la Directiva 2011/65/UE del Parlamento Europeo y del Consejo de 8 de junio de 2011 sobre la restricción del uso de determinadas sustancias peligrosas en los equipos eléctricos y electrónicos.
(PT) Declaramos por nossa total responsabilidade-de que este produto está em conformidade e cumpre as normas e regulamentações que se seguem: está em conformidade com a Directiva 2011/65/EU do Parlamento Europeu e com o Conselho de 8 de Junho de 2011 no que respeita à restrição de utilização de determinadas substâncias perigosas existentes em equipamento eléctrico e electrónico.
(IT) Dichiariamo, sotto la nostra responsabilità, che questo prodotto è conforme alle normative e ai regolamenti seguenti: è conforme alla Direttiva 2011/65/UE del Parlamento Europeo e del Consiglio dell'8 giugno 2011 sulla limitazione dell'uso di determinate sostanze pericolose nelle apparecchiature elettriche ed elettroniche.
(SV) Vi garanterar på eget ansvar att denna produkt uppfyller och följer följande standarder och bestämmelser: uppfyller direktiv 2011/65/EU från Europeiska parlamentet och EG-rådet från 8 juni 2011 om begränsningen av användning av farliga substanser i elektrisk och elektronisk utrustning.
(FI) Vakuutamme yksinomaan omalla vastuullamme, että tämä tuote täyttää seuraavat standardit ja säädökset: täyttää Euroopan parlamentin ja neuvoston 8. kesäkuuta 2011 päivätyn direktiivin 2011/65/ EU vaatimukset koskien vaarallisten aineiden käytön rajoitusta sähkö- ja elektronisissa laitteissa.
(NO) Vi erklærer under vårt eget ansvar at dette produktet er i samsvar med følgende standarder og regler: er i samsvar med EU-direktivet 2011/65/EU fra Europa-parlamentet og Europa-rådet, pr. 8 juni 2011, om begrensning i bruken av visse farlige stoffer i elektrisk og elektronisk utstyr.
(DA) Vi erklærer under eget ansvar, at dette produkt er i overensstemmelse med følgende standarder og bestemmelser: er i overensstemmelse med direktiv 2011/65/EU fra Europa-Parlamentet og Rådet af 8. juni 2011 om begrænsning af anvendelsen af visse farlige stoffer i elektrisk og elektronisk udstyr.
(HU) Felelősségünk teljes tudatában kijelentjük, hogy ez a termék teljes mértékben megfelelazalábbiszabványoknakéselőírásoknakjevsouladusesměrnici2011/65/EUEvropskéhoparlamentuaRadyEUzedne8.června2011,kterásetýkáomezeni použitiurčitýchnebezpečnýchlátekvelektrickýchchaelektronickýchzařízenich.
(CS) Na naši vlastní zodpovědnost prohlašujeme, že je tento výrobek v souladu s následujícímistandardyanormami: Jevsúladesnormou 2011/65/EÚEurópskeho


- CDM1138
- SAFETY INSTRUCTIONS
- GENERAL POWER TOOL SAFETY WARNINGS
- Save all warnings and instructions for future reference.
- 3) Personalsafety
- 4) Power tool use and care
- 6)Service
- Additional safety warnings for drills and screw drivers
- For the charger
- Intended use
- Residual risks
- Power cord replacement
- MACHINE INFORMATION
- Vibration level
- Description
- OPERATING
- Removing the battery from the machine Fig. D
- Inserting the battery into the machine
- Fig. D
- Checking the battery charging status Fig. A
- Charging the battery with the charger Fig. E
- Assembling the side handle (15)
- Fig. C
- Fitting and removing drills or screwdriver bits Fig. A
- Adjusting the gears Fig. B
- Adjusting the direction of rotation Fig. A
- Switching the machine on and off Fig. A
- Adjusting the torque and activating the impact (hammer) mode
- Fig. B
- Adjusting the torque setting for Screw driving By rotating the torque adjustment ring (12), screws can be driven to a predetermined depth, which is ideal for repetitive work. The higher the number, the more torque will be transmitted.
- Adjusting the torque setting for Drilling
- Adjusting the torque setting for impact drilling
- Work light (14)
- Fig. A
- Belt hook (17)
- Optimum use
- MAINTENANCE
- Only for EC countries
- ACCU COMBI-BOORMACHINE, KOOLBORSTELLOOS
- Checking the battery charging status
- CE
- DECLARATION OF CONFORMITY CDM1138 - CORDLESS COMBI DRILL BRUSHLESS
Brand : Ferm
Model : CDM1138
Category : Drill