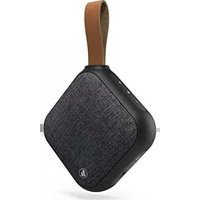
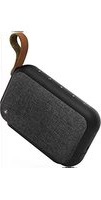
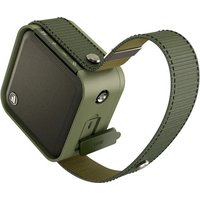
Pocket Clock - Docking station HAMA - Free user manual and instructions
Find the device manual for free Pocket Clock HAMA in PDF.
| Product type | Bluetooth docking station with alarm clock radio |
| Brand | Hama |
| Model | Pocket Clock |
| Dimensions | 105 x 35 x 107 cm |
| Weight | 252 g |
| Power supply | 5 V, 1000 mA via micro USB |
| Battery type | Lithium-Ion, 3.7 V, 2000 mAh |
| Charging time | Approximately 3 hours |
| Battery life | Approximately 4 h (Bluetooth) / 6 h (AUX/USB/microSD) |
| Connections | 3.5 mm jack (AUX), micro USB, USB Type-A reader, microSD slot |
| Bluetooth version | Bluetooth v4.2 + A2DP V1.2, AVRCP V1.4, HFP V1.5 |
| Bluetooth range | Less than 10 m |
| Max music power | 3 W |
| Frequency response | 180 Hz - 20 kHz |
| Impedance | 4 Ω |
| Alarm | Programmable alarm with hour and minute settings, auto-stop after 4 min |
| FM radio | Automatic station scan, memory, 3.5 mm antenna included |
| Hands-free function | Answer, reject, end a call via dedicated button |
| Audio playback | Bluetooth, AUX (3.5 mm cable included), microSD, USB (drive), MP3 |
| Cleaning and maintenance | Slightly damp non-lint cloth, avoid harsh detergents |
| Safety instructions | Protect from humidity, overheating; do not open; integrated non-removable battery; do not modify |
| Warranty | Warranty exclusion for improper installation or use |
| Customer service | Hama GmbH & Co KG, tel. +49 9091 502-115 (German/English) |
Frequently Asked Questions - Pocket Clock HAMA
User questions about Pocket Clock HAMA
0 question about this device. Answer the ones you know or ask your own.
Ask a new question about this device
Download the instructions for your Docking station in PDF format for free! Find your manual Pocket Clock - HAMA and take your electronic device back in hand. On this page are published all the documents necessary for the use of your device. Pocket Clock by HAMA.
USER MANUAL Pocket Clock HAMA
MobileBluetooth ^® Speaker POCKET CLOCK
OperatingInstructions
D
Bedienungsanleitung
F
Moded'emploi
E
Instruccionesdeuso
RUS
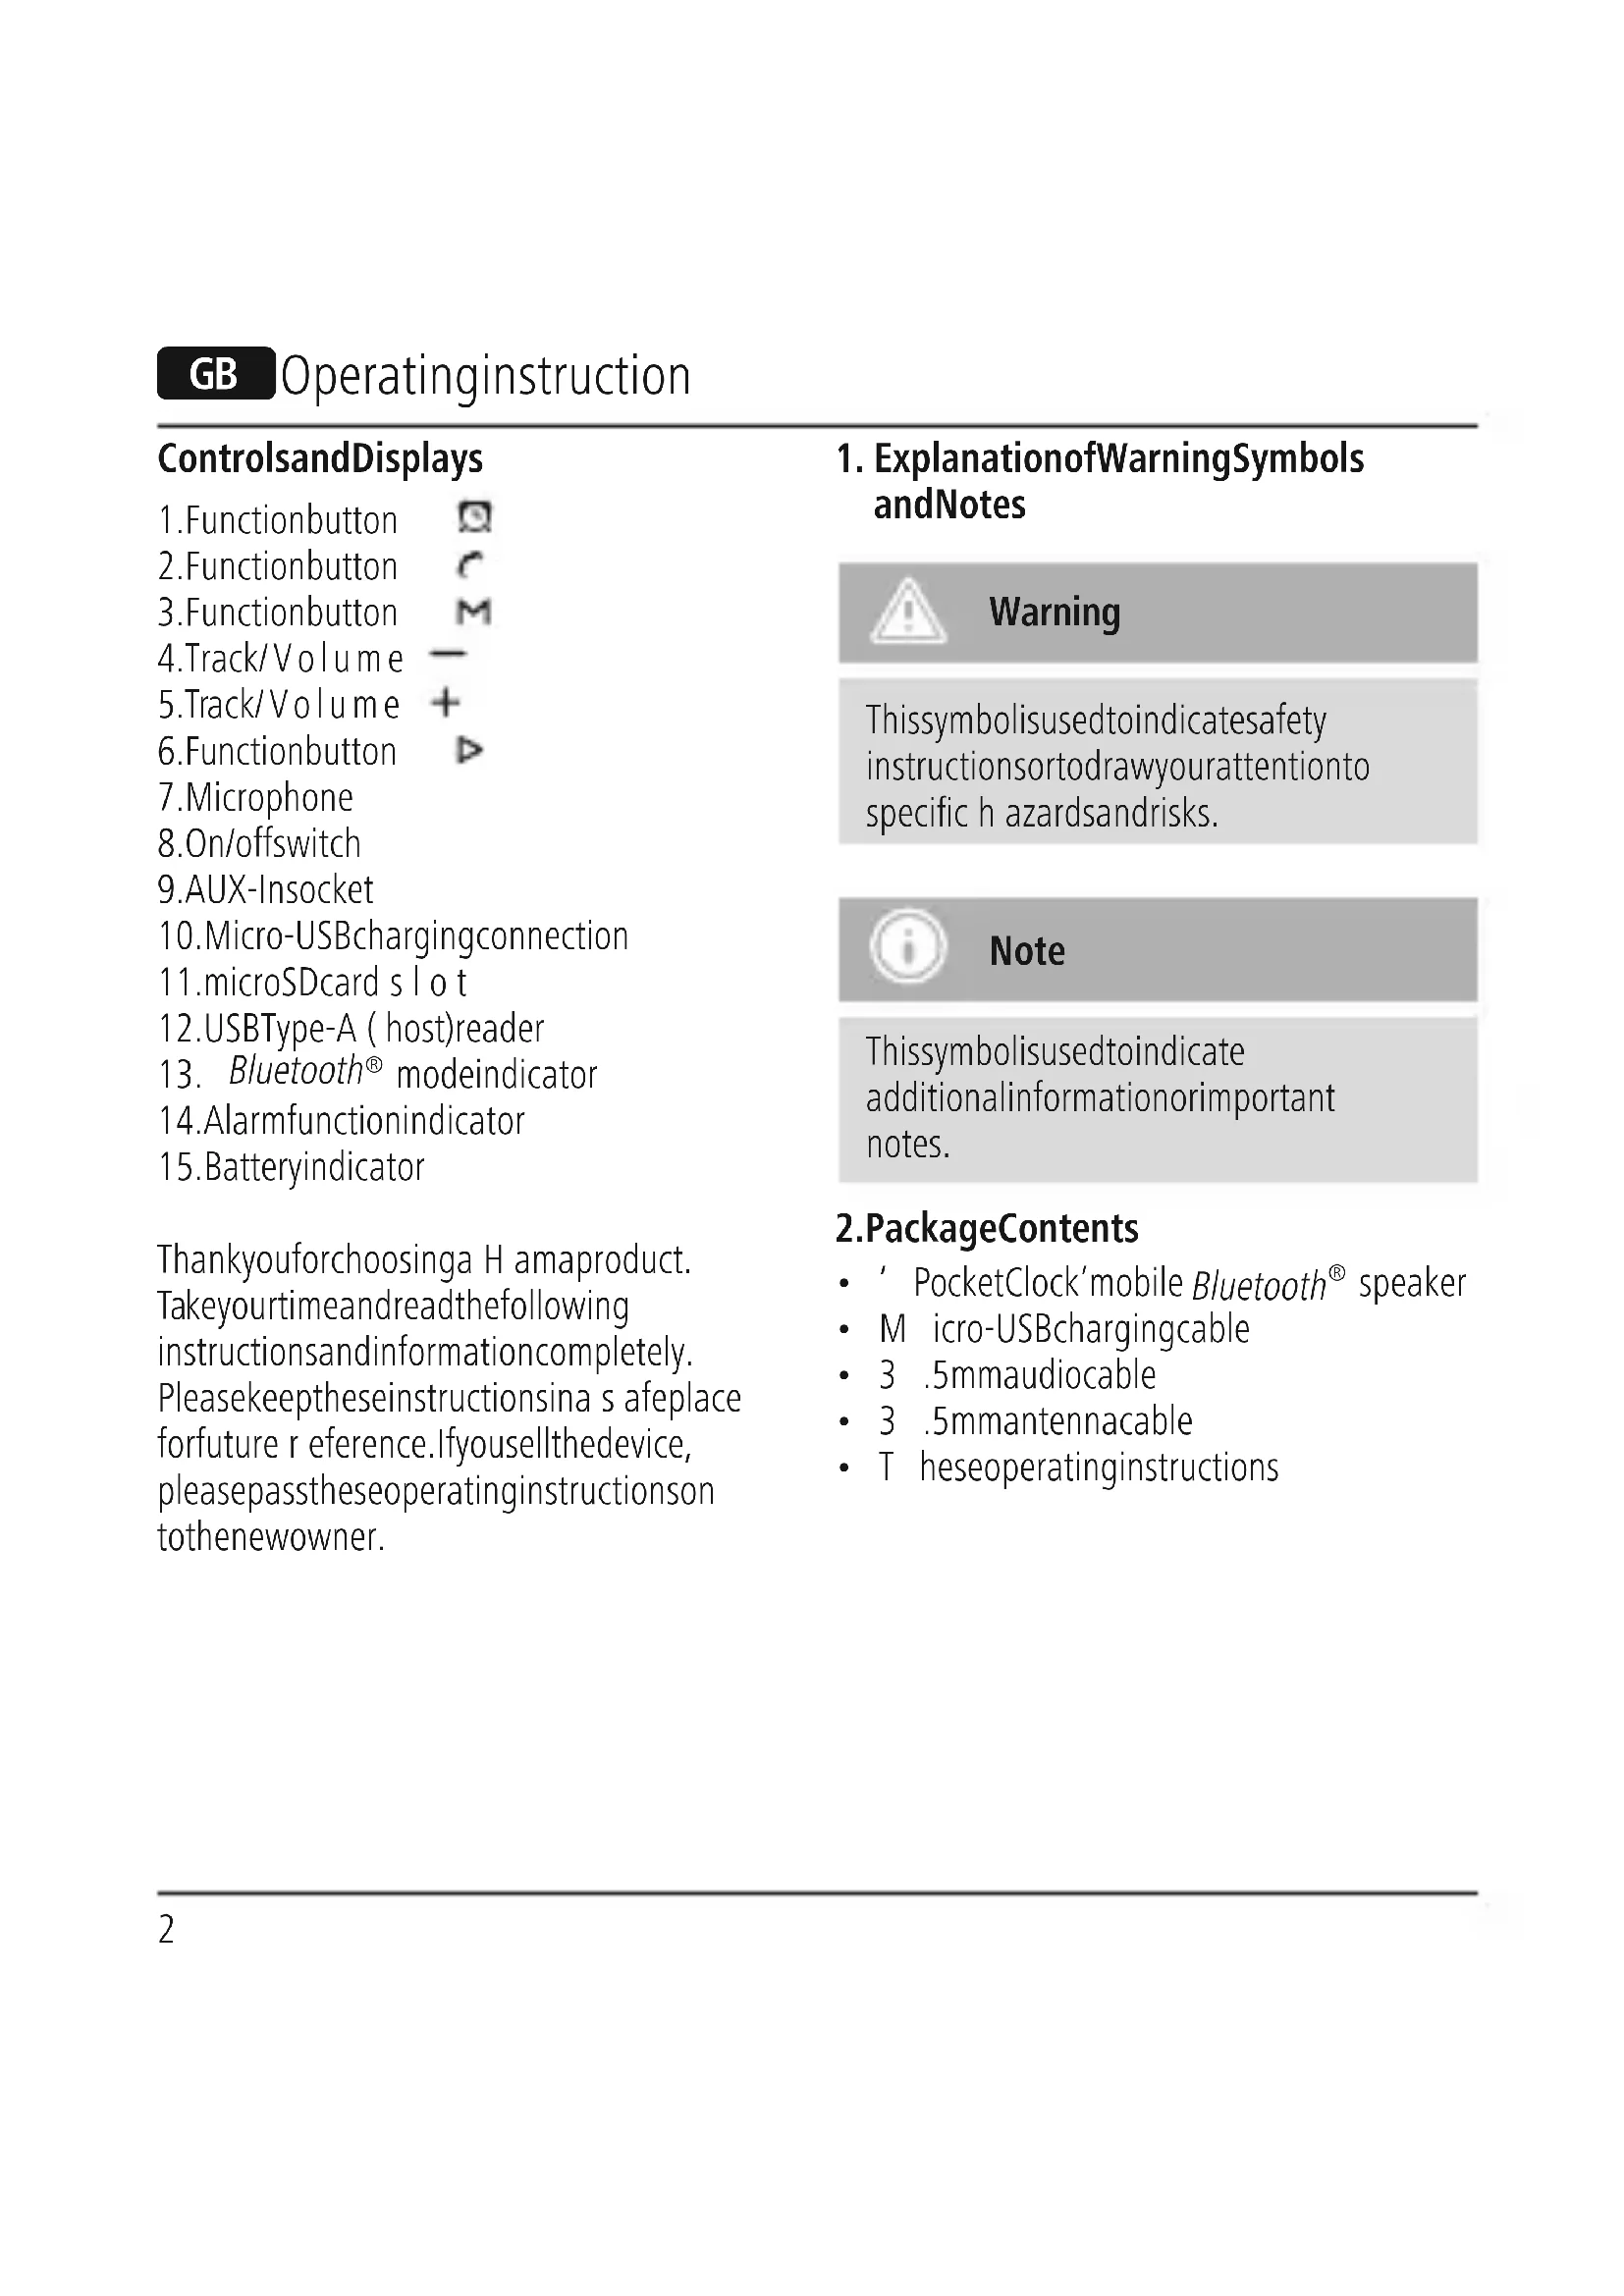
GB Operatinginstruction
ControlsandDisplays
- Functionbutton
2.Functionbutton
3.Functionbutton - Track/Volume
-
Track/Volume
6.Functionbutton -
Microphone
-
On/offswitch
9.AUX-Insocket
- Micro-USBchargingconnection
11.microSDcard slot
12.USBType-A (host)reader
-
Bluetooth® modeindicator
-
Alarmfunctionindicator
-
Batteryindicator
Thankyouforchoosinga H amaproduct. Takeyourtimeandreadthefollowing instructionsandinformationcompletely. Pleasekeeptheseinstructionsina s afeplace forfuture r eference.Ifyousellthedevice, pleasepasstheseoperatinginstructionson tothenewowner.
1. ExplanationofWarningSymbols andNotes

Warning
This symbol is used to indicate safety instructions to draw your attention to specific hazards and risks.

Note
This symbol is used to indicate additional information or important notes.
2.PackageContents
- ' PocketClock'mobile Bluetooth® speaker
• M icro-USBchargingcable
• 3 .5mmaudiocable
• 3 .5mmantennacable
• Theseoperatinginstructions
3. SafetyNotes
- T heproductisintendedforprivate,non-commercialuseonly.
- P rotectheproductfromdirt,moisture andoverheating,andonlyuseitina dry environment.
- D o n otusetheproductintheimmediate vicinityofheatersorotherheatsourcesor indirectsunlight.
- D on otusetheproductinareaswhere theuseofelectronicdevicesisnot permitted.
- S incethebatteryisintegratedandcannot beremoved,youwillneedtodispose oftheproductasa w hole.Dothisin compliancewiththelegalrequirements.
- D o n otdroptheproductanddonot exposeittoanymajorshocks.
- D o n otattempttoserviceorrepairthe productyourself. L eaveanyandallservice worktoqualifiedexperts.
- D o n otopenthedeviceorcontinueto operateitifitbecomesdamaged.
- Keep the packaging material out of thereof child renduet other risk of suffocation.
- Be considerate. Loudvolumescanhavea detrimentaleffectonyoursurroundings.
-
D isposeofpackagingmaterial immediatelyaccordingtolocally applicableregulations.
-
Do not modify the product in any way. Doing so void the warranty.
- Keep this product, as all electrical products, out of there a chof children!
- Donotoperatetheproductoutsidethe powerlimitsgiveninthespecifications.
4.Switchingontheproduct
4.1 Switching on the product
- S lidetheOn/offswitch(8)totheON positiontoswitchthespeakeron.
- The device emits a sound to confirm that itsreadyforuse;thedisplaylightsup.
4.2 Switchingofftheproduct
- S lidetheOn/offswitch(8)totheOFF positiontoswitchthespeakeroff.
- T hedisplaylightinggoesout.

Note- A utomaticshutdown
- Notethatthespeakerwill automaticallyturnoffafter10minutes withoutaction(noaudioplayback/no Bluetooth® function).
4.3 Batterycharging function

Warning– re chargeable battery
- Only uses suitable charging devices with USB connections for charging.
- As a rule, donotusecharging devices or USB connection that are defective and donottry to repair them yourself.
- Avoidstoring, chargingorusing batteriesinextremetemperatures.
-
Whenstoredovera longperiodof time, batteriesshouldbecharged regularly(atleasteverythreemonths).
-
ConnecttheincludedMicro-USBcharging cabletothespeaker'sMicro-USB port(10).
- Connect the unused plug on the Micro-USB cable to an available USB port on your computer or another suitable USB device. Pleasereferto the operating instructions for the charger used.
- The batteryindicator(15)flashes duringcharging. Whenthebatteryisfully charged, the batteryindicator(15) showsfullandisconstantlylit.
- P leasechargethespeakerforatleast4 hoursbefore u singitforthefirsttime.

Note- Charging
- It takes about 3 hours to fully charge the battery.
- Thespeaker's batterycanbecharged whetherthespeakerisonoroff.
- T heactualbatterylifevariesdepending onuseofthedevice,thesettingsand theambientconditions(rechargeable batterieshavea l imitedservicelife).
4.4 Audioplaybackviatheincluded audiocable(3.5mmjack)
• Ensure that the speaker is turned off.
- C onnectyourmobileterminaldevice (MP3player, smartphone,etc.)andthe AUXinput(9)ofthespeakerusingthe included3.5mmaudiocable.
- Setthevolumeonyourterminaldevice toa lowlevel.
- S witchonthespeakerasdescribedin 4.1 Switchingontheproduct .
- S tartandcontrolaudioplaybackonthe connectedterminaldeviceaccordingly.
- I f t hedevidedoesnotautomaticallystart inAUXmode, press the function button(3)repeatedlyuntilthe device usesthedesiredsourcefor playback.
- Press and hold the Track/Volume + button(5)toincreasethevolume.
- Press and hold the Track/Volume — button(4)toreducethevolume.
- Briefly press the ▶ function button (6) topause playback.

Note
- Thespeakerisonlysuitableforthe playbackofMP3files.
4.5 Bluetooth ^® Pairing

Note
- Checkwhetheryourmobiledevice (MP3player, m obilephone,etc.)is Bluetooth® -capable.
- If not, you can only us the speaker with the included audiocable.
- Notethatthemaximumrangefor Bluetooth® is10metreswithout obstaclelessuchaswalls,people,etc.
-
Makesure that your Bluetooth® -capableterminaldevice is on and Bluetooth® isactivated.
-
Makesure that your Bluetooth® -capableterminaldevice is visible for other Bluetooth® devices.
- Makesure that the speaker is located within the Bluetooth® rangeofmax. 10 metres.
- S witchonthespeakerasdescribedin 4.1 Switchingontheproduct .
- T hedeviceemitsanacousticsignal; the Bluetooth® modeindicator (13)beginstoflash.Ifthedevicedoes notautomaticallystartin Bluetooth® mode,pressthefunctionbutton (3)repeatedlyuntilanacousticsignal sounds.Thedevicethensearches automaticallyfora c onnection.
- O pentheBluetooth® settingsonyour terminaldeviceandwaituntil'Pocket Clock'appearsinthelistof Bluetooth® devicesfound.
- S elect'PocketClock' and wait until the speaker is listed as connected in the Bluetooth® settings on your terminal device. An acoustic signal confirms that
- c onnectionwassuccessful.
- The Bluetooth® modeindicator(13) stopsflashingandisnowconstantlylit.

Note- Bluetooth® password
Someterminaldevicesrequirea password in order to connect to another Bluetooth ^® device.
- If your terminal device requests a password for connection to the speaker, enter 0000.

Note
- Thespeakeralwaysstoresthelast eightterminaldevicespaired.
- Thespeakerwillautomaticallyconnect tothelastterminaldevicepairedwhen itisswitchedonthenexttime.
4.6 Automatic Bluetooth ^® connection (aftersuccessfulpairing)
- M akesure that your Bluetooth®-capable terminal device is on and Bluetooth® is activated.
- M akesure t hatthespeakerislocated withinthe Bluetooth® rangeofmax. 10metres.
- S witchonthespeakerasdescribedin 4.1 Switchingontheproduct .
- A ftera c onnectionhasbeenestablished automatically, t h Bluetooth® mode indicator(13)stopsflashingandis constantlylit.Anacousticsignalconfirms thatconnectionwassuccessful.

Note— C onnectionimpaired
Afterthespeakerandterminaldevice havebeenpaired, a connection isestablishedautomatically. If the Bluetooth® connectionisnot establishedautomatically, checkthe following:
- Checkthe Bluetooth® settingsofyour terminaldevicetoseewhether'Pocket Clock'isconnected.Ifnot,repeatthe stepslistedunder Bluetooth® pairing.
- Checkwhetheryourterminaldevice andthespeakerare lessthan10 metresapart. Ifnot, movethemcloser together.
- Checkwhetherobstaclesare imp airing therange.Ifso,movethedevices closertogether.
4.7 Audioplayback(via Bluetooth®)
Startandcontrolaudioplaybackonthe connectedterminaldeviceaccordingly.
Alternatively, a udio playbackcanalsobe controlledonthespeaker(iftheconnected devicesupportsthisfunction).
- P ressthe> functionbutton(6)tostart orpauseaudioplayback.
- Briefly press the Track/Volume + button(5)toplaythenexttrack.Briefly press the Track/Volume — button (4) to playtheprevioustrack.
- Press and hold the Track/Volume + button(5)toincreasethevolume.
- Press and hold the Track/Volume — button(4)toreducethevolume.
4.8 Audioplayback(viamicroSDcard)
You can, alternatively, start audio playback directly from a microSDcard.
- To do so, insert a microSD card with your audiofilesintotheslotforthemicroSD card s lot(11).
- I f t hedevisedoesnotautomaticallystart inmicroSDmode, pressthe function button(3)repeatedlyuntilanacoustic signalsounds.
- T rackselectionandvolumecontrolin thismodeworkinthesamewayas described in 4.7 Audioplayback(via Bluetooth®)
4.9 Audioplayback(viaUSBdevice)
You can, alternatively, start audio playback directly from a USB storage device (for example, USBstick).
Todos, inserta U SBstoragedevicewith your audio files into the USB Type-A (host) reader(12).
- I f t hedevidedoesnotautomatically startinUSBmode, pressthefunction button(3)repeatedlyuntilanacoustic signalsounds.
Trackselectionandvolumecontrolinthis modeworkinthesamewayasdescribedin
4.7 Audioplayback(viaBluetooth®).
4.10 Audioplayback(viaFMradio)
- Connectthe3.5mmantennacable (supplied)totheAUXinput(9)ofthe speakertoimprovesignalreception.
- S witchonthespeakerasdescribedin 4.1 Switchingontheproduct
- P ressthefunctionbutton(3)repeatedly untilFMisshownonthedisplay.
- S tartandcontrolaudioplaybackonthe connectedterminaldeviceaccordingly.
-
P ressthefunctionbutton(6)tostart theautomaticstationsearch.
-
T hedevicenowsearchesforradio stationsinthereceptionrangeand storesthem. This processcantakea few minutes. Oncethestationsearchhas finished, you can select a radio station.
- P ressthefunctionbutton(6)tostart thestationsearchagainifnecessary.
- Briefly press the Track/Volume + button(5)toswitchtothenextradio station.
- Briefly press the Track/Volume — button(4)toswitchtotheprevious radiostation.
Volumecontrolinthismodeworksin thesamewaysdescribedin 4.7Audio playback(viaBluetooth®).
5. Hands-freefunction
You can use the speaker as a hands-free set for your mobile phone. For this function, themobilephonemustbeconnectedtothe speakervia Bluetooth ^® .
- P ressthefunctionbutton(2)onceto answeranincomingcall.
- Pressthefunctionbutton(2)twice torejecttheincomingcall.
- Ifyouwouldliketoenda call, press the functionbutton(2)once.

Note- Callquality
- To increase the call quality, make sure that you are n earthespeaker with yourmobilephoneduringthecall.
6. Manually setting the time/alarm
6.1 Manuallysettingthetime
- P ressthe functionbutton(1) to beginsettingthetimemanually. The hoursdisplaybeginstoflash.
- S etthefollowinginformationinthe orderlisted:
- hour, minute
- To select the individual values, press the Track/Volume + button (5) or the Track/Volume — button (4) and confirm each selection by pressing the function button(6).
- P ressthefunctionbutton(1)toexit thesettings.
- T hesettingswillautomaticallycloseif there is no entry for 30 seconds.
6.2 Manually setting the alarm
- Set the current time as described in 6.1 Manually setting the time
- A ftersettingthetime, pressthe functionbutton(6). The hours display beginstoflash.
- Press the Track/Volume + button (5) or the Track/Volume — button (4) to select the hour for the alarm time and confirm your selection by pressing the function button(6). The minutes display begin to inst of flash.
- R epeatheprocesstosettheminutes forthealarmtime. Confirm theselected minutesbypassing the function button(6).
- T henpresssthefunctionbutton(6)to activate/deactivatethealarm.
- Use the Track/Volume + button (5) or the Track/Volume — button (4) to select ON/OFF and thereby activate/deactivate the alarm.
- W henthealarmisactivated, is shown in the display.
- P ressthefunctionbutton(1)toexit thesettings.
- P ressanybuttontostopthealarm. Otherwise, it will stop automatically after 4 minutes.
7. Factorysettings
Toresetthespeakertothefactorydefault settings,proceedasfollows:
- P ressandholdthe ▷functionbutton (6)forabout6 seconds.
- All settings you made are deleted.

Note
- Resettingtothefactorydefault settingscansolvesomeproblemsand malfunctions.
- However, a llsettingsmadepreviously (time, alarmtimes, etc.) are permanentlydeleted.
8. Care and Maintenance
Onlycleanthisproductwitha s lightlydamp, lint-freeclothanddonotuseaggressive cleaningagents.
9.WarrantyDisclaimer
HamaGmbH& C o K G a ssumesnoliability andprovidesnowarrantyfordamage resultingfromimproperinstallation/mounting,improperuseoftheproduct orfromfailure t o o bservetheoperating instructionsand/orsafetynotes.
10. Service and Support
PleasecontactHamaProductConsultingif youhaveanyquestionsaboutthisproduct.
Hotline:+499091502-115(German/English)
Furthersupportinformationcanbe
foundhere:
www.hama.com
11. Service and Support
| PocketClockmobile Bluetooth® speaker | |
| Frequency180Hz-2 0 kHz | |
| Max.musicoutput3W | |
| Inpedance4Ω | |
| Range< 1 0 m | |
| Bluetooth® Technology | Bluetooth® v4.2+ A 2 DP V1.2,AVRCPV1.4, HFPV1.5 |
| Size105x 3 5 x 1 07cm | |
| Weight252g | |
| Connections | 3.5mmauxCableMicro-USBMicro-SDcard slotUSBType-A reader |
| Chargingvoltagemax.5V --- 1000mA | |
| Battery | |
| Typ | Lithiumion,3.7V,2000mAh |
| Chargingtime~ 3 h | |
| Playback | ViaBluetooth:~ 4 hViaAUX/USB/microSD:~ 6 h(dependingonvolumeandaudiocontent) |
12. Recycling Information
Noteonenvironmentalprotection:
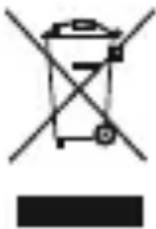
Aftertheimplementationofthe EuropeanDirective2012/19/EU and2006/66/EUinthenational legalsystem,thefollowing applies:Electricandelectronic
devicesaswellasbatteriesmustnotbe disposedofwithhouseholdwaste.
Consumersare o bligedbylawtoreturn electricalandelectronicdevicesaswellas batteriesattheendoftheirservicelivesto thepubliccollectingpointssetupforthis purposeorpointofsale.Detailstothisare definedbythenationallawoftherespective country. T hissymbolontheproduct,the instructionmanualorthepackageindicates that a product is subject to these regulations. Byrecycling,reusingthematerialsorother
formsofutilisingolddevices/Batteries, you are m akinganimportantcontribution to protectingourenvironment.
13. Declaration of Conformity

Hereby, H amaGmbH& C o K G declaresthattheradio equipmenttype[00173167,
00173168,00173169]isincompliancewith Directive2014/53/EU. ThefulltextoftheEU declarationofconformityisavailableatthe followinginternetaddress:www.hama.com->00173167,00173168, 00173169->Downloads.
| Frequencyband(s) | 2402MHz~2480MHz |
| Maximumradio-frequency powertransmitted | -1.24dBm |
4.7 Lectureaudio(via Bluetooth®)
4.10 Lectureaudio(viaradioFM)
Lecture a udio(via Bluetooth®).
informationsconcernantl'assistance:
www.hama.com
12. Pokynyk likvidaci
Hotline:+499091502-115(Alm/Ing)
86652Monheim/Germany
www.hama.com
CE
The B bluetooth® word mark and logos are registered trademarks owned by Bluetooth SIG, Inc. and any use of such marks by Hama GmbH & Co KG is under license. Other trademarks and trade names are those of their respective owners.
All listed brands are trademarks of the corresponding companies.
Errors and omissions excepted, and subject to technical changes.
Our general terms of delivery and payment are applied.