Soldier-S - Docking station HAMA - Free user manual and instructions
Find the device manual for free Soldier-S HAMA in PDF.
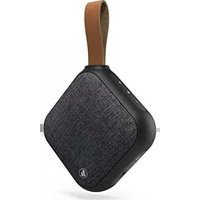
| Product type | Mobile Bluetooth speaker |
| Brand | Hama |
| Model | Soldier-S |
| Dimensions (W x D x H) | 85 x 85 x 40 mm |
| Weight | 210 g |
| Battery type | Lithium-ion 3.7 V, 1950 mAh (typ. 2000 mAh) |
| Charging power supply | Micro USB, 5 V / 0.8 A |
| Charging time | Approximately 3 hours |
| Bluetooth playback time | Up to 14 hours (depending on volume and content) |
| Bluetooth version | Bluetooth 5.0 |
| Supported Bluetooth profiles | A2DP V1.2, AVRCP V1.0, HFP V1.6 |
| Bluetooth range | Up to 10 m (without obstacles) |
| Max music power | 5 W |
| Sound system | Mono |
| Impedance | 4 Ω |
| Waterproof rating | IPX7 (submersible up to 1 m) |
| Main functions | Hands-free kit, Multi-Connect (multiple speakers), playback and volume controls |
| Care and cleaning | Slightly damp, lint-free cloth; avoid harsh detergents |
| Safety | Do not open, do not expose to heat, keep out of reach of children |
| Non-replaceable built-in battery | Yes, recycle the device at end of life |
Frequently Asked Questions - Soldier-S HAMA
User questions about Soldier-S HAMA
0 question about this device. Answer the ones you know or ask your own.
Ask a new question about this device
Download the instructions for your Docking station in PDF format for free! Find your manual Soldier-S - HAMA and take your electronic device back in hand. On this page are published all the documents necessary for the use of your device. Soldier-S by HAMA.
USER MANUAL Soldier-S HAMA
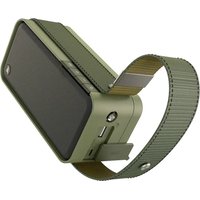
natural_image
Technical line drawing of a rectangular device with a curved cable extending from its side (no text or symbols)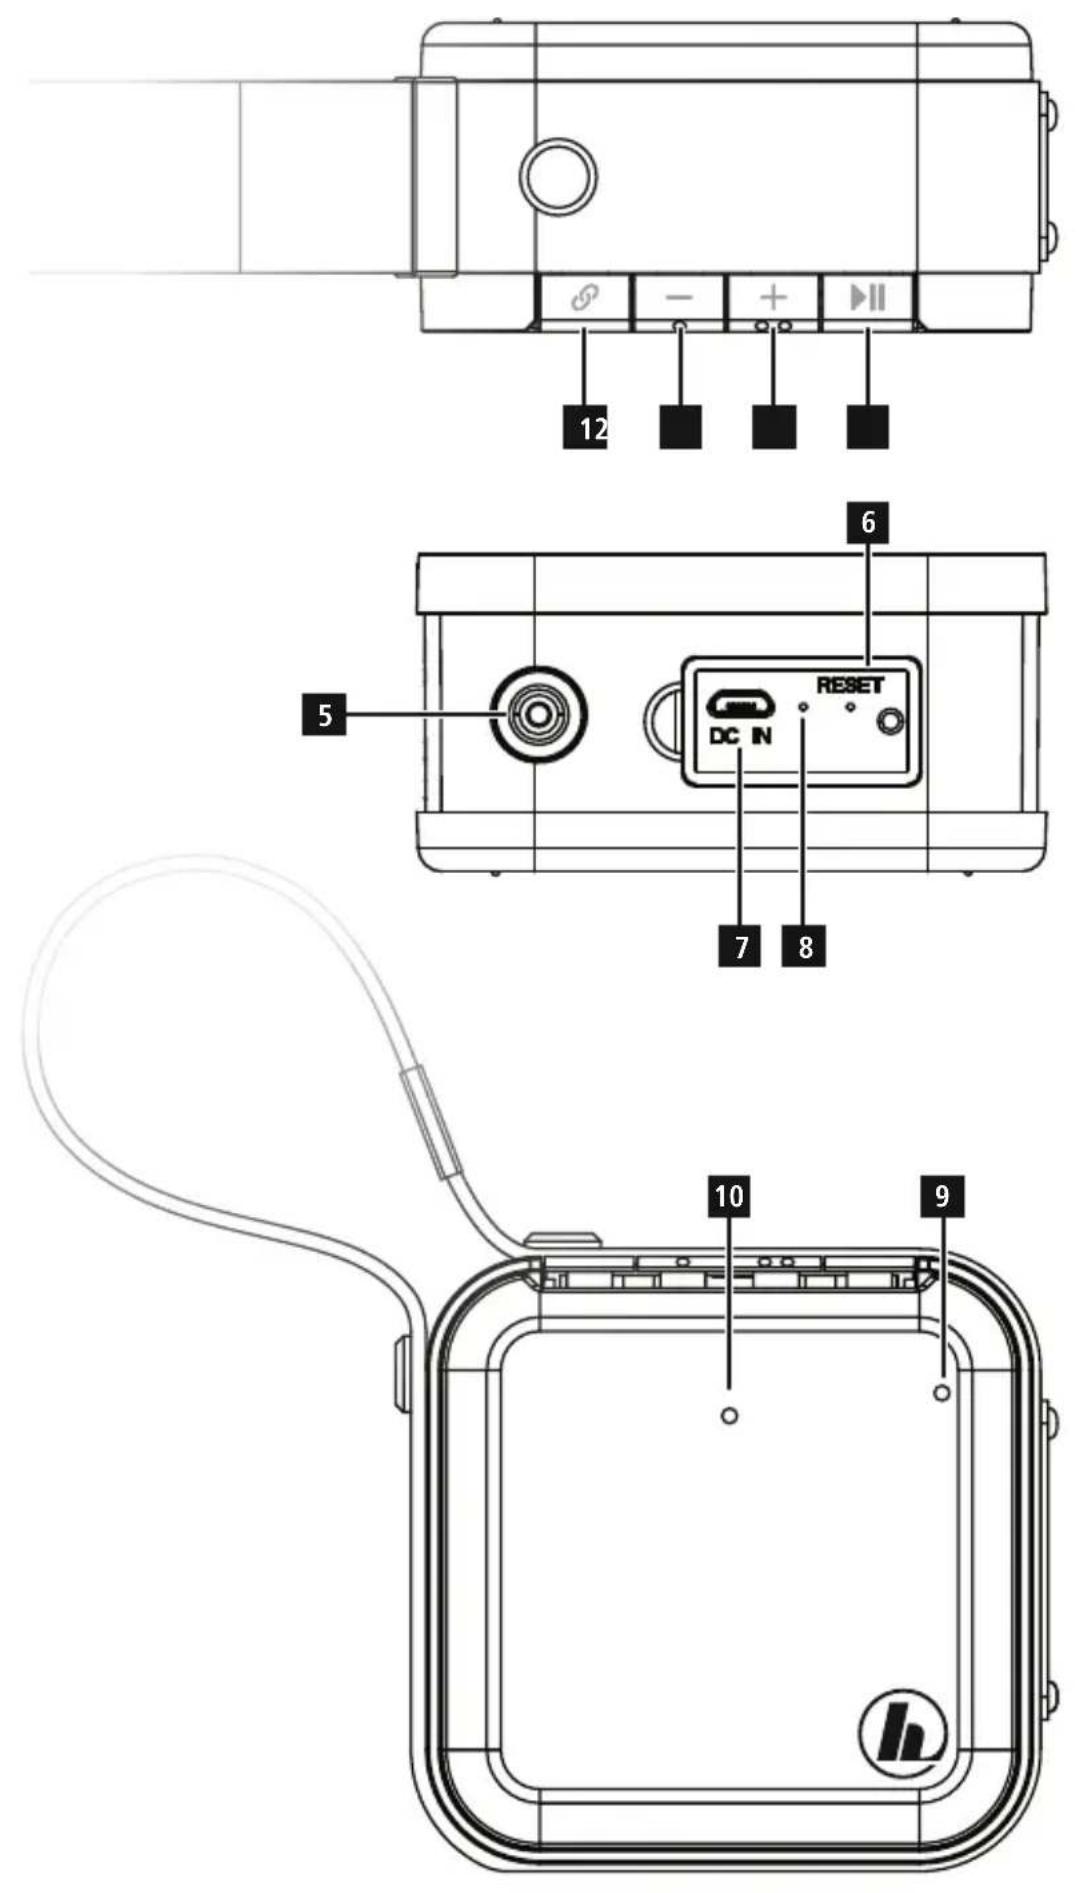
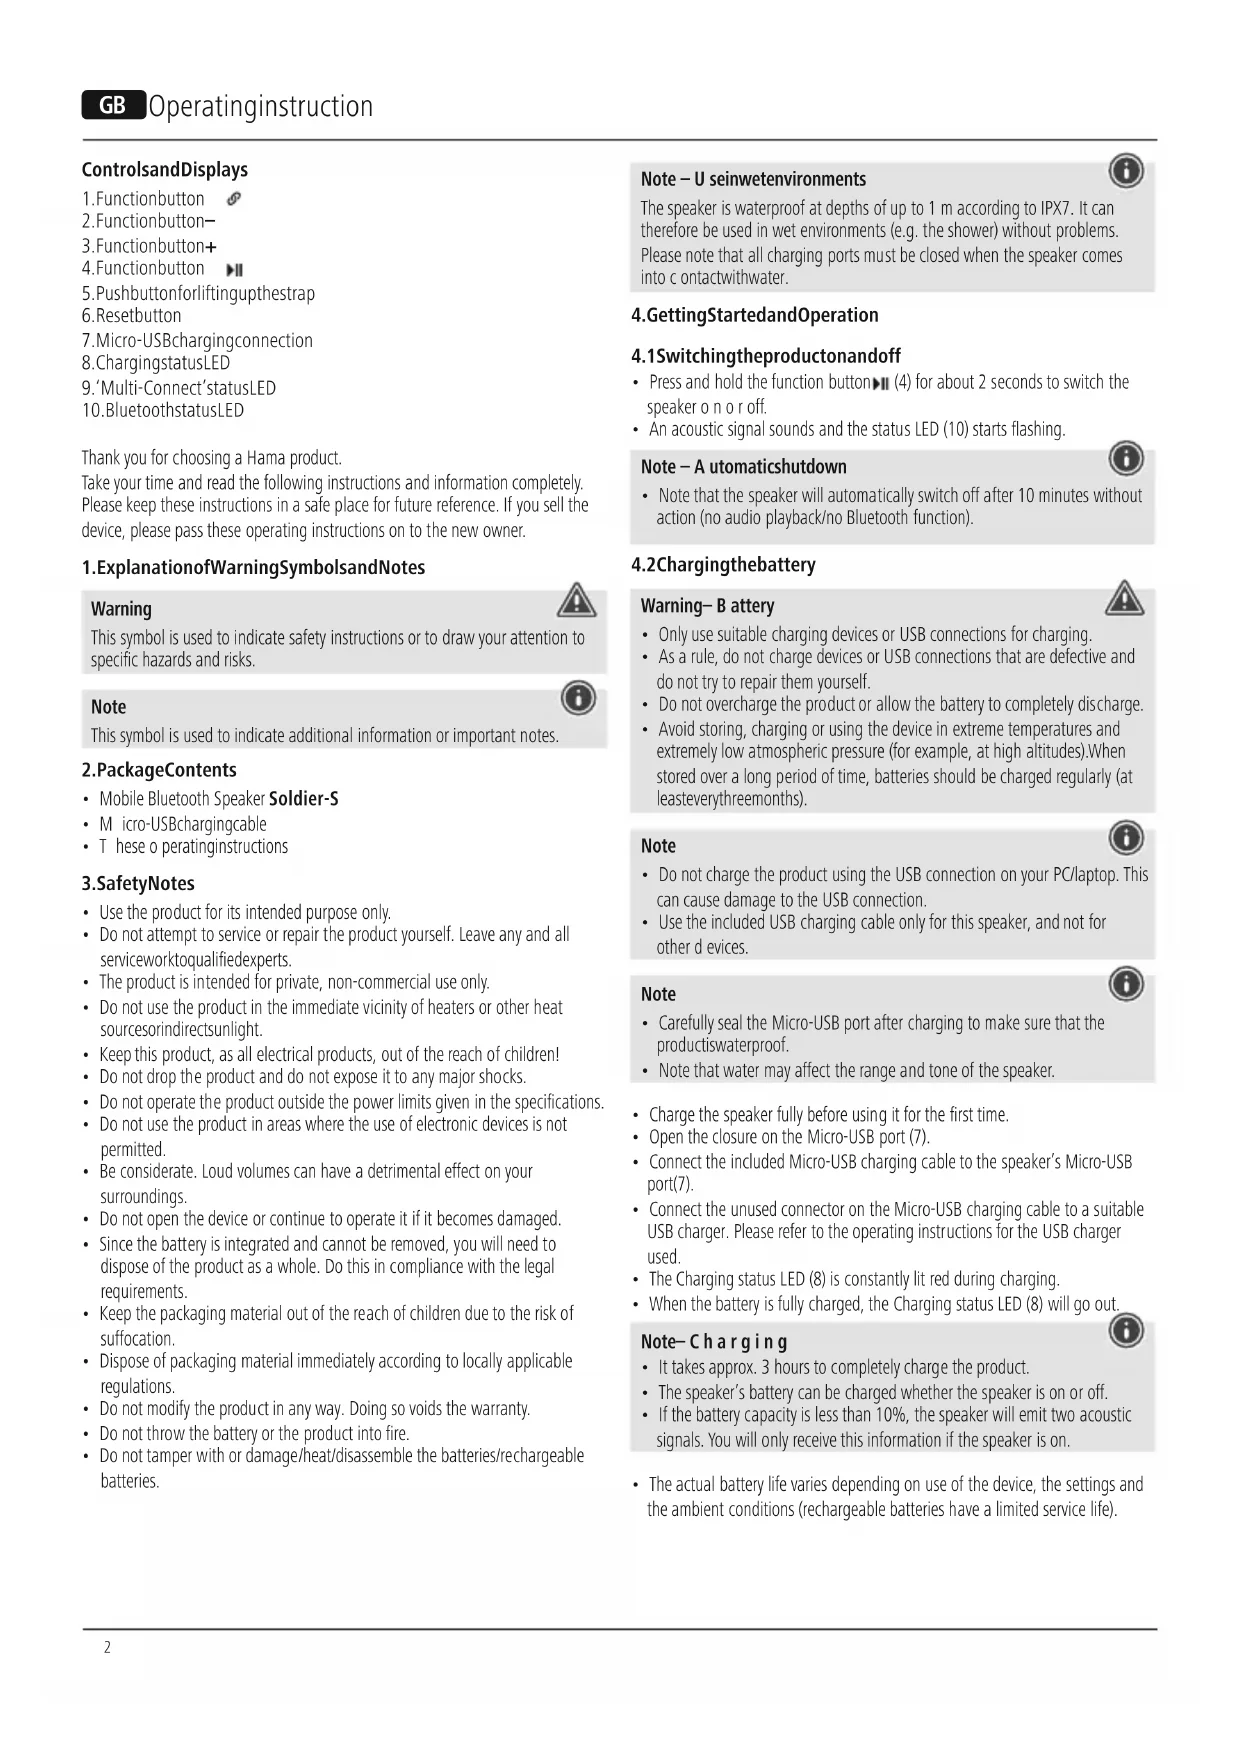
ControlsandDisplays
- Functionbutton
2.Functionbutton-
3.Functionbutton+
4.Functionbutton
5.Pushbuttonforliftingupthestrap - Resetbutton
- Micro-USBchargingconnection
8.ChargingstatusLED - 'Multi-Connect'statusLED
- BluetoothstatusLED
Thank you for choosing a Hama product.
Take your time and read the following instructions and information completely. Please keep these instructions in a safe place for future reference. If you sell the device, please pass these operating instructions on to the new owner.
1. ExplanationofWarningSymbolsandNotes
Warning

This symbol is used to indicate safety instructions or to draw your attention to specific hazards and risks.
Note

This symbol is used to indicate additional information or important notes.
2.PackageContents
• Mobile Bluetooth Speaker Soldier-S
- M micro-USBchargingcable
• These operating instructions
3.SafetyNotes
• Use the product for its intended purpose only.
- Do not attempt to service or repair the product yourself. Leave any and all serviceworktoqualifiedexperts.
• The product is intended for private, non-commercial use only.
- Do not use the product in the immediate vicinity of heaters or other heat sourcesorindirectsunlight.
- Keep this product, as all electrical products, out of the reach of children!
- Do not drop the product and do not expose it to any major shocks.
- Do not operate the product outside the power limits given in the specifications.
- Do not use the product in areas where the use of electronic devices is not permitted.
- Be considerate. Loud volumes can have a detrimental effect on your surroundings.
- Do not open the device or continue to operate it if it becomes damaged.
- Since the battery is integrated and cannot be removed, you will need to dispose of the product as a whole. Do this in compliance with the legal requirements.
- Keep the packaging material out of the reach of children due to the risk of suffocation.
- Dispose of packaging material immediately according to locally applicable regulations.
- Do not modify the product in any way. Doing so voids the warranty.
- Do not throw the battery or the product into fire.
- Do not tamper with or damage/heat/disassemble the batteries/rechargeable batteries.
The speaker is waterproof at depths of up to 1 m according to IPX7. It can therefore be used in wet environments (e.g. the shower) without problems. Please note that all charging ports must be closed when the speaker comes into contact with water.
4. Getting Started and Operation
4.1 Switching the product on and off
- Press and hold the function button▶(4) for about 2 seconds to switch the speaker o n o r off.
• An acoustic signal sounds and the status LED (10) starts flashing.
Note - A utomaticshutdown

- Note that the speaker will automatically switch off after 10 minutes without action (no audio playback/no Bluetooth function).
4.2 Chargingthebattery
Warning-B artery

- Only use suitable charging devices or USB connections for charging.
- As a rule, do not charge devices or USB connections that are defective and do not try to repair them yourself.
- Do not overcharge the product or allow the battery to completely discharge.
- Avoid storing, charging or using the device in extreme temperatures and extremely low atmospheric pressure (for example, at high altitudes). When stored over a long period of time, batteries should be charged regularly (at least every three months).
Note

- Do not charge the product using the USB connection on your PC/laptop. This can cause damage to the USB connection.
- Use the included USB charging cable only for this speaker, and not for other devices.
Note

-
Carefully seal the Micro-USB port after charging to make sure that the productiswaterproof.
• Note that water may affect the range and tone of the speaker. -
Charge the speaker fully before using it for the first time.
- Open the closure on the Micro-USB port (7).
- Connect the included Micro-USB charging cable to the speaker's Micro-USB port(7).
- Connect the unused connector on the Micro-USB charging cable to a suitable USB charger. Please refer to the operating instructions for the USB charger used.
• The Charging status LED (8) is constantly lit red during charging. - When the battery is fully charged, the Charging status LED (8) will go out
Note-Charging

- It takes approx. 3 hours to completely charge the product.
- The speaker's battery can be charged whether the speaker is on or off.
- If the battery capacity is less than 10%, the speaker will emit two acoustic signals. You will only receive this information if the speaker is on.
- The actual battery life varies depending on use of the device, the settings and the ambient conditions (rechargeable batteries have a limited service life).
4.3 Bluetooth pairing
Note

- Check whether your mobile device (MP3 player, mobile phone, etc.) is Bluetoothcapable.
- Note that the maximum range for Bluetooth is 10 metres without obstacles suchaswalls,people,etc.
- Make sure that you Bluetooth capable terminal device is on and Bluetooth is activated.
-
Make sure that the speaker is located within the Bluetooth rangeofmax. 10metres.
-
S witchonthespeakersasdescribedin andoff. 4.1 Switching the product on
- The status LED (10) begins to flash. The speaker searches for a connection.
- Open the Bluetooth settings on your terminal device and wait until Hama Soldier-S appears in the list of Bluetooth devices found.
- Select Hama Soldier-S and wait until the speaker is listed as connected in the Bluetooth settings on your terminal device. An acoustic signal confirms that connection w assuccessful.
• The Bluetooth status LED (10) lights up and remains lit.
Note – Bluetoothpassword

- Some terminal devices require a password in order to connect to another Bluetooth device.
- If your terminal device requests a password for connection to the speaker, enter0000.
4.4 AutomaticBluetoothconnection(aftersuccessfulpairing)
- Make sure that your Bluetooth capable terminal device is on and Bluetooth isactivated.
• Make sure that the speaker is located within the Bluetooth range of max. 10 metres. - S witchonthe s peakersasdescribedin 4.1 Switching the product on andoff.
• After successful connection, the status LED (10) will light up in blue. An acoustic signal confirms that connection was successful.
Note - Connection impaired

- After the speaker and terminal device have been paired, a connection is established automatically. If the Bluetooth connection is not established automatically, check the following:
- Check the Bluetooth settings of your terminal device to see whether Hama Soldier-S is connected. If not, repeat the steps listed under Bluetooth pairing.
- Check whether your terminal device and the speaker are less than 10 metres apart. If not, move them closer together.
- Check whether obstacles are impairing the range. If so, move the devices closer together.
4.5 Audioplayback (viaBluetooth)
Start and control audio playback on the connected terminal device accordingly. Alternatively, audio playback can also be controlled on the speaker (if the connected devices support this function).
- P ressthe▶(4) function button to start or pause audio playback.
- Briefly press the + (3) function button, to increase the volume.
- Briefly press the - (2) function button, to reduce the volume.
- Hold down the + (3) function button, to skip to the next track.
- Hold down the – (2) function button, to go back to the previous track.
4.6Hands-freefunction
You can use the speaker as a hands-free set for your mobile phone. For this function, the mobile phone must be connected to the speaker via Bluetooth.
- Press the function button▶(4) once to answer an incoming call.
- Press and hold the function button ▶ (4) again to continue the call.
- During a call, press the function button▶(4) once to end the call.
Note - Call quality

- To increase the call quality, make sure that you are near the speaker with yourmobilephoneduring t hecall.
5.ConnectionofmultiplespeakersviaMulti-Connect
- You can connect any number of speakers of the Soldier series ('S' or 'L') to one another via Bluetooth.
• One speaker should be switched on. To connect this speaker to another speaker, proceed as follows:
Note

The speaker switched on first is the 'master' in the group. All other speakers you add are referred to as 'slaves'.
- Switch on the speaker that you want to add (see 4.1Switchingon/off).
- Press the function button (1) for this slave. A signal tone should sound. A connection to the master is being set up.
- If the connection was successful, the Multi-Connect status LED (9) of the slave is constantly litorange.
• The Bluetooth status LED (10) of the master is constantly lit blue. - To remove a slave from the group, briefly press the function button (1) for thisslave.
- If you simultaneously press the - (2) and + (3) function buttons for a slave, this slave becomes the master in the group.
6.CareandMaintenance
- Only clean this product with a slightly damp, lint-free cloth and do not use aggressive c leaningagents.
7.WarrantyDisclaimer
Hama GmbH & Co KG assumes no liability and provides no warranty for damage resulting from improper installation/mounting, improper use of the product or from failure to observe the operating instructions and/or safety notes.
8. Service and Support
Please contact Hama Product Consulting if you have any questions about this product.
Hotline:+499091502-115(German/English)
Further support information can be found here:
www.hama.com
9.TechnicalData
| MobileBluetoothSpeakerSoldier-S | |
| BluetoothTechnologyBluetoothv5.0 | |
| SupportedprofilesA2DPV1.2,AVRCPV1.0,HFPV1.6 | |
| Frequency80Hz-16kHz | |
| Range<10m | |
| Max.musicoutput5W | |
| Chargingvoltage5V | == 0.8A |
| SoundSystemMono | |
| Impedanc4Ω | |
| Distortion(THD)≤4% | |
| Size85x85x40mm | |
| Weight210g | |
| ConnectionsMicro U S B | |
| Battery | |
| Type | Lithium-Ion,3.7V, 1950mAh/7.2WhTyp.2000mAh/7.4Wh |
| Chargingtime | ~3h |
| Playback | ViaBluetooth:~14h(dependingonvolume and audio content) |
11. Declaration of Conformity
CE Hereby, Hama GmbH & Co KG declares that the radio equipment type [00173187] is in compliance with Directive 2014/53/EU. The full text of the EU declaration of conformity is available at the following internetaddress:
www.hama.com->00173187->Downloads.
| Frequency band(s) | 2402 MHz ~ 2480 MHz |
| Maximum radio-frequency power transmitted | 9.63 dBm |
www.hama.com ->00173187 ->Downloads.
4.5 Lectureaudio(viaBluetooth)
Avertizare—Acumulator

Hotline:+499091502-115(ty/eng)
Du hittar mer support-information här:
www.hama.com
9.Tekniskadata
| Bluetooth Sstereohögtalare Soldier-S | |
| BluetoothteknologiBluetoothv5.0 | |
| ProfilersomstödsA2DPV1.2,AVRCPV1.0,HFPV1.6 | |
| Frekvens80Hz- 1 6 kHz | |
| Räckvidd< 10 m | |
| Max.uppspelningseffekt5 W | |
| Laddspänning5V | == 0.8 A |
| LjudsystemMono | |
| Impedans4Ω | |
| DistorsionTHD≤4% | |
| Mått85x 8 5 x 40mm | |
| Vikt210g | |
| AnslutningarMicro U S B | |
The Bluetooth word mark and logos are registered trademarks owned by Bluetooth SIG, Inc. and any use of such marks by Hama GmbH & Co KG is under license. Other trademarks and trade names are those of their respective owners.
All listed brands are trademarks of the corresponding companies. Errors and omissions excepted, and subject to technical changes. Our general terms of delivery and payment are applied.