
Origo 4100 - Cooker DOMETIC - Free user manual and instructions
Find the device manual for free Origo 4100 DOMETIC in PDF.
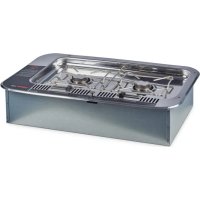



| Product type | Double burner alcohol stove |
| Brand | Dometic |
| Model | Origo 4100 |
| Number of burners | 2 |
| Dimensions (L x W x H) | 623 x 377 x 150 mm |
| Weight | 8 kg |
| Fuel type | Denatured alcohol |
| Tank capacity | 1.2 L per tank |
| Burner power | 2,000 W |
| Burn time | Approximately 4.5 h |
| Boiling time (1 L water) | 10 min |
| Main functions | Cooking, continuous flame control, absorption operation |
| Maintenance and cleaning | Clean with soft cloths, remove the grid and eliminate grease and oil |
| Safety | Use only denatured alcohol; do not smoke; keep a fire extinguisher within reach; do not leave unattended; ventilate well |
| Spare parts and accessories | Glass lid, pot support, cutting board |
| Repairability | Manufacturer's warranty; contact the specialized dealer for any repairs |
| Intended use | Vehicles and boats |
| Material | Stainless steel |
Frequently Asked Questions - Origo 4100 DOMETIC
User questions about Origo 4100 DOMETIC
0 question about this device. Answer the ones you know or ask your own.
Ask a new question about this device
Download the instructions for your Cooker in PDF format for free! Find your manual Origo 4100 - DOMETIC and take your electronic device back in hand. On this page are published all the documents necessary for the use of your device. Origo 4100 by DOMETIC.
USER MANUAL Origo 4100 DOMETIC
Please read this instruction manual carefully before first use, and store it in a safe place. If you pass on the product to another person, hand over this instruction manual along with it.
Table of contents
1 Explanation of symbols. 7 2 General safety instructions 7 3 Scope of delivery 10 4 Accessories 10 5 Intended use 10 6 Technical description 10 7 Mounting the stove. 11 8 Using the stove 13 9 Cleaning and maintaining the stove. 15 10 Guarantee 15 11 Disposal. 16 12 Technical data. 16
1 Explanation of symbols

WARNING!
Safety instruction: Failure to observe this instruction can cause fatal or serious injury.

CAUTION!
Safety instruction: Failure to observe this instruction can lead to injury.

NOTICE!
Failure to observe this instruction can cause material damage and impair the function of the product.

NOTE
Supplementary information for operating the product.
2 General safety instructions
The manufacturer accepts no liability for damage in the following cases:
- Damage to the product resulting from mechanical influences
- Alterations to the product without express permission from the manufacturer
- Use for purposes other than those described in the operating manual
Please observe the following basic safety information when using electrical devices to protect against:
- Electric shock Fire hazards
- Injury
2.1 General safety

WARNING!
- Use denatured alcohol only. Do not use other fuels such as gasoline, diesel, methanol, propane or charcoal lighter.
- Danger of asphyxiation!
Before starting the device, ensure that the area is sufficiently ventilated.
- Place a class A fire extinguisher (for alcohol fires) in reaching distance. Ensure the fire extinguisher is regularly checked by qualified personnel.
- People (including children) whose physical, sensory or mental capacities or whose lack of experience or knowledge prevent them from using this product safely should not use it without the supervision or instruction of a responsible person.
- Electric devices are not toys
- Keep electrical appliances out of reach of children or infirm persons.
- Do not let them use the appliances without supervision.

NOTICE!
- Use the stove only as intended.
2.2 Safety precautions when handling denatured alcohol

WARNING!
- Keep inflammable substances apart from heating and cooking devices and other light and heat sources.
- Store alcohol in suitable containers only and in sufficient distance from the stove.
- Eliminate all sources of sparks or flames where the alcohol is stored or filled-in.
- Never fill the canisters while still in the stove. Never pour fuel through the burner openings in top of the stove (fig. 1, page 2).
- Overfilling, spilt alcohol and hot objects can cause severe burns.
- Denatured alcohol burns with almost invisible flame, so great damage can arise before you notice the danger.

NOTICE!
- Mop up any spilt alcohol immediately to prevent uncontrollable burning.
- Do not smoke when handling alcohol or when operating the stove.
- Fill the canister to the maximum capacity only. Alcohol expands in the canister when heated. Overfilled alcohol can cause uncontrollable burning inside the stove.
2.3 Operating the device safely

CAUTION!
- Use long matches or long lighters to light the burner.
- Quickly remove your hand as soon as the burner ignites.
- Wear proper clothing when operating the stove.
- Do not wear hanging garments which can catch fire.

NOTICE!
- Let the stove cool down to ambient temperature before you touch it with bare hands.
- Keep the area surrounding the stove and interior parts free of grease, fat, alcoholic substances, plastic or inflammable cloths (for instance curtains, towels, kitchen utensils).
- Use only pots and pans with a maximum diameter of 23 cm.
- When cooking ensure that pans and pots are securely in position. Recommended is the use of pot holders (fig. 2, page 2, accessory).
- Be careful when heating grease or oil. Grease and oil catch fire when exposed to great heat.
- Use only dry pot cloths to prevent the formation of steam. Do not use towels or the like instead of pot cloths as these can catch fire.
- Never leave the stove unattended when cooking. Pots boiling over can cause smoke and fires.
- Move the burner control (fig. 2 1, page 2) to the off position before removing the pot.
- Do not use the stove to heat the environment.
3 SCOPE OF DELIVERY
- Stove Gasket per canister
4 ACCESSORIES
Description Ref. no.
2000 4100
Glass Lid 9103303990 9103303989
Pot Holder 9103303981 9103303981
Cutting Board 9103303987 9103303986
5 Intended use
The Origo stoves are designed for use in vehicles or boats.
6 Technical description
6.1 Function
The stove is made of stainless steel and uses the absorption principle. The canister has a capacity of 1.2 l. Denatured alcohol is used as fuel.
Alcohol is absorbed into a non-flammable material in the canister. They are not equipped with fuel valve or fuel lines, which can develop leaks, or with other such components requiring regular service.
6.2 Specifications for the device variants
Various stove versions are available.
2000: single-burner unit 4100: double-burner unit
To define your device see the Ref.no. on the type plate.
6.3 Operating elements
Operating elements for operation with denatured alcohol (fig. 2, page 2):
No. Description
1 Control, continuously adjustable
- Control set fully to right: burner closed
- Control set fully to left: burner open
| 2 | P | o | t | h | o | l | d | e | r | (accessory) |
7 Mounting
You can fit the stove into the countertop of your kitchen.
7.1 Selecting the installation location
When selecting the installation location, observe the following instructions:
- Select a well-ventilated location for the device.
- Avoid draft at the installation location.
If you fit the stove in an open cockpit or other open areas, mount an additional wind protection.
- Do not operate the device in spaces where danger of explosion is present.
7.2 Installing the stove

NOTICE! Danger of damaging the device!
Before drilling any holes, make sure that no electrical cables or other parts of the vehicle can be damaged by drilling, sawing and filing.
Cut a rectangular hole into the countertop (dimensions see following table):
Model Dimensions in mm
2000 345 x 320
4100575 x 320
Open the top and remove the canisters. Place the stove in the middle of the cutout. Mark the drill holes.
Use the drill holes at the rim of the stove as template.
Pre-drill the holes into the countertop where marked.
Fasten the stove by screwing flat head screws through each drill hole at the rim. Place a class B-1 fire extinguisher in reaching distance.
8 Using the stove
8.1 Filling with denatured alcohol

WARNING! Danger of injury!
Never pour fuel through the burner openings in the top of the stove (fig. 1, page 2).
Overfilling, spilt alcohol, and hot objects can cause severe burns.
Ensure all burners are turned off: - operation with denatured alcohol: slide the control fully to the right. Ensure the stove is cooled down to room temperature. If applicable, remove the cutting board or lift the glass lid (both accessory). Pull the latch forward (fig. 4, page 3) and lift the stovetop.
Check the canister opening to ensure there is no fire or glow. Take out the canister. Hold the canister tilted down (fig. 5, page 3). Fill the denatured alcohol through the wire mesh into the opening of the canisters.
The maximum capacity per canister must not exceed 1.2 l.
Check the fuel level by tilting the canister vertically (fig. 6, page 3).
Keep it in this position for 20 seconds to make sure it is not overfilled. In addition, in case of accidental overfilling, you can get rid of the surplus fuel.
- The maximum fuel level is reached when the fuel is visible at the bottom of the opening.

NOTE
The stove will operate even if the canister is not filled to the maximum capacity.
Wipe any spilt alcohol off the outside of the canister. Replace the canister.
Close the stovetop and secure it with the latch.
8.2 Lighting the stove

CAUTION! Danger of injury!
Use long matches or long lighters to light the burner.
Quickly remove your hand as soon as the burner ignites.
Slide the control fully to the left. The burner is open. Light the stove by placing a long match or a long lighter to the burner opening (fig. 7, page 4). Adjust the flame so it does not extend beyond the edge of the pot. Choose the desired power setting via the control.

NOTE
If the stove hasn't cooled down from previous use, the burner may ignite but immediately extinguish. In this case, blow air into the burner opening to dissipate vapour.
Afterwards, light the stove as described above.
8.3 Extinguish the flame
Slide the control fully to the right. The burner is closed.
Wait about five seconds. Slide the control fully to the left to make sure the flame is extinguished.
The burner is open. Slide the control fully to the right. The burner is closed.
8.4 Covering the canister with a gasket
To prevent the evaporation of denatured alcohol, the burners are covered with rubber gaskets when the stove is not to be used for a long period.
Ensure the stove is cooled down to room temperature. If applicable, remove the cutting board or lift the glass lid (both accessory). Pull the latch forward (fig. 4, page 3) and lift the stovetop. Place the gasket over the canister opening. Close the stovetop and secure it with the latch.

NOTE
Remove the gaskets before using the stove.
9 Cleaning and maintaining the stove

NOTICE!
Do not use any sharp or hard objects for cleaning since they may damage the device.
Remove the grate from the stovetop. Therefore slide the retainer off the hole and lift the grate (fig. 8, page 4).
Clean the stovetop. In particular remove carefully sticky grease and oil.
10 Guarantee
The statutory warranty period applies. If the product is defective, please contact your retailer or the manufacturer's branch in your country (see the back of the instruction manual for the addresses).
For repair and guarantee processing, please include the following documents when you send in the device:
- A copy of the receipt with purchasing date
- A reason for the claim or description of the fault
11 Disposal
Place the packaging material in the appropriate recycling waste bins wherever possible.
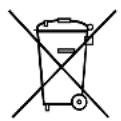
If you wish to finally dispose of the product, ask your local recycling centre or specialist dealer for details about how to do this in accordance with the applicable disposal regulations.
12 Technical data
| Origo2000 Origo | 4100 | |
| Ref. no.: 9103303884 9103303890 | ||
| Number of burners: 1 2 | ||
| Burning duration: approx. 4.5 h | ||
| Power of burner: 2000 W | ||
| Cooking time for 1 l water: | 10 min | |
| Canister capacity: | 1.2 l | |
| Dimensions (L x W x H): | 396 x 377 x 150 mm | 623 x 377 x 150 mm |
| Weight: | 5.8 kg | 8 kg |
6 Technical description
6.1 Operation
2 Grab handle (accessories)
The manufacturer accepts no liability for damage in the following cases:
Observe the following basic safety rules when using electrical appliances to protect against:
- Electric shock; fire; injury.
2.1 General safety instructions for handling

WARNING!
Place the hob in the center of the prepared cutout. Mark the drilling holes.
Use the hole at the edge of the hob as a template.
Drill the holes at the marked locations on the work surface. For fixing the hob, insert the screws into the edge holes with a Phillips screwdriver. In the immediate vicinity of the hob, install a circuit breaker class B-1.
8 Raising the hob
8.1 Filling with denatured alcohol

WARNING! Flammable!
Never fill the fuel tanks directly over the stove. Never pour alcohol through the burner opening in the lid (Fig. 1, page 2).
Overfilled fuel tanks and spilled alcohol can cause serious burns if they come into contact with hot surfaces.
Make sure that all fuel tanks are disconnected:
- Working with the stove: Turn the regulator knob to the right
Make sure the stove has cooled to room temperature. If necessary, remove the drip tray and lift the glass lid (these are additional accessories). Pull the latch forward (Fig. 4, page 3) and lift the cooking surface. Turn the fuel tank opening to ensure there is no open flame or embers. Insert the fuel tank. Tilt the fuel tank down (Fig. 5, page 3). Pour denatured alcohol through the wire mesh into the fuel tank opening. Do not exceed the maximum fill volume, which is 1.2 L for each fuel tank. After filling, tilt the fuel tank to the right, holding it in a horizontal position (Fig. 6, page 3). Hold it for 20 seconds in this position to ensure it is not overfilled. In addition, remove any spilled denatured alcohol if you accidentally filled too much. The maximum fill level is reached when the alcohol is visible at the lower edge of the opening.

NOTE
The stove works even when the fuel tank is not filled to the maximum level.
Clean the fuel tank from any accidentally spilled denatured alcohol. Reinstall the fuel tank in place. Close the cooking surface and secure it with the latch.
8.2 Lighting the stove

CAUTION! Risk of burns!
To light the stove, use only very long matches or a suitable lighter.
As soon as the burner ignites, quickly move your hand away.
Turn the regulator knob to the left. The burner is open. Light the stove by holding a lit long match or lighter to the burner opening (Fig. 7, page 4). Adjust the flame so that it does not extend beyond the edge of the pot. Set the regulator to the desired power level.

NOTE
If the stove has not completely cooled down from previous use, the flame may ignite but then immediately go out. In this case, blow air into the burner opening to introduce vapor from the appliance.
Then perform the five steps as described above.
8.3 Fuel adjustment
Turn the regulator to the right. The burner is closed. Wait approximately five seconds. Turn the regulator back to the left to verify that the flame is extinguished. The burner is open. Turn the regulator to the right. The burner is closed.
8.4 Fuel tank closure with seal
To prevent evaporation of denatured alcohol, the fuel tank is covered with rubber seals when the stove is not used for an extended period.
Make sure the stove has cooled to room temperature. If necessary, remove the divider plate or lift the glass lid (one or the other - additional accessories). Pull the latch forward (Fig. 4, item 3) and lift the burner surface. Press the seal onto the opening of the fuel tank. Close the burner surface and secure it with the latch.

NOTE
Do not forget to remove the seals again when reusing the stove.
9 Cleaning the stove

CAUTION!
Do not use sharp or hard objects for cleaning, as this may damage the device.
Remove the burner grate. To do this, pull the clip out of the opening and lift the grate with the burner plate (Fig. 8, page 4). Clean the burner plate. In particular, thoroughly remove any accumulated fat or oil.
10 Warranty
The warranty period is set by law. If the product is defective, contact the sales organization or the manufacturer's representative in your country (addresses are on the back of the instructions).
For repair or warranty service, the following documents must also be sent:
- KONNU CyeTa C DaToN NOKyKN,
- npuHny peKnaMaunn nn OncnpaBHOCTn.
11yttnn3aun
IIO BO3MOXHOCTN, BbIKNbIBaIte yNaKOBOUHbIMaTePnAIN B MyCOP, NOJnxaun BTOpNUHOn nepepa6oTKe.
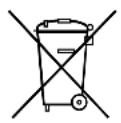
EcnBbIOKoHuaTeNbHO BbIBOaIte npOdyKT n3 3KcPiyaTaun,TO NOnyUHTe INOpMaUIO B6nxaMWeM UENTpe NO BToPnHOr NepepaOTke ININ B TOpROBO CETN O COOTBeTCTByUx INpeDnCaHnx NO yTnIn3aUn.
12 Texнчесné xapaКтерптукн
dometic.com/sales-offices


- TABLE OF CONTENTS
- EXPLANATION OF SYMBOLS
- WARNING
- CAUTION
- NOTICE
- NOTE
- GENERAL SAFETY INSTRUCTIONS
- GENERAL SAFETY
- DANGER OF ASPHYXIATION
- ELECTRIC DEVICES ARE NOT TOYS
- SAFETY PRECAUTIONS WHEN HANDLING DENATURED ALCOHOL
- OPERATING THE DEVICE SAFELY
- SCOPE OF DELIVERY
- ACCESSORIES
- INTENDED USE
- TECHNICAL DESCRIPTION
- FUNCTION
- SPECIFICATIONS FOR THE DEVICE VARIANTS
- OPERATING ELEMENTS
- NO. DESCRIPTION
- MOUNTING
- SELECTING THE INSTALLATION LOCATION
- INSTALLING THE STOVE
- NOTICE! DANGER OF DAMAGING THE DEVICE
- MODEL DIMENSIONS IN MM
- USING THE STOVE
- FILLING WITH DENATURED ALCOHOL
- WARNING! DANGER OF INJURY
- LIGHTING THE STOVE
- CAUTION! DANGER OF INJURY
- EXTINGUISH THE FLAME
- COVERING THE CANISTER WITH A GASKET
- CLEANING AND MAINTAINING THE STOVE
- GUARANTEE
- DISPOSAL
- TECHNICAL DATA
- OPERATION
- GENERAL SAFETY INSTRUCTIONS FOR HANDLING
- RAISING THE HOB
- WARNING! FLAMMABLE
- CAUTION! RISK OF BURNS
- FUEL ADJUSTMENT
- FUEL TANK CLOSURE WITH SEAL
- CLEANING THE STOVE
- WARRANTY
- YTTNN3AUN
- TEXНЧЕСNÉ XAPAКТЕРПТУКН
Brand : DOMETIC
Model : Origo 4100
Category : Cooker