
Cadac 2Cook3 Pro Deluxe - Cooker DOMETIC - Free user manual and instructions
Find the device manual for free Cadac 2Cook3 Pro Deluxe DOMETIC in PDF.


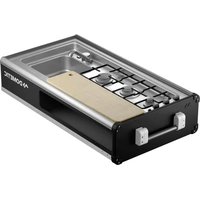
| Product type | Portable gas stove |
| Brand | Dometic |
| Model | Cadac 2Cook3 Pro Deluxe |
| Fuel | Butane/propane gas (screw-on cartridge) |
| Number of burners | 2 |
| Maximum power | ~3 kW (1.5 kW per burner) |
| Dimensions (W x D x H) | 45 x 30 x 10 cm |
| Weight | 3 kg |
| Main material | Stainless steel |
| Main features | Gas cooking, integrated grill, flame regulation |
| Safety | Flame detection (thermocouple safety) |
| Care and cleaning | Clean the grates and burners after each use; avoid water on the injectors |
| Spare parts | Available from the manufacturer (grates, burners, cartridge) |
| Repairability | Yes, easy component replacement |
| Use | Outdoors or well-ventilated indoor areas |
Frequently Asked Questions - Cadac 2Cook3 Pro Deluxe DOMETIC
User questions about Cadac 2Cook3 Pro Deluxe DOMETIC
0 question about this device. Answer the ones you know or ask your own.
Ask a new question about this device
Download the instructions for your Cooker in PDF format for free! Find your manual Cadac 2Cook3 Pro Deluxe - DOMETIC and take your electronic device back in hand. On this page are published all the documents necessary for the use of your device. Cadac 2Cook3 Pro Deluxe by DOMETIC.
USER MANUAL Cadac 2Cook3 Pro Deluxe DOMETIC

MODEL No: 203P1

MODEL No: 203M1
EN Explanation of Symbols 2 Figure Reference Guide 4 User Instructions DE Symbolerklärung 2 Bildreferenzhandbuch 4 Benutzerhinweise 17 DA Forklaring af symboler 2 Billedreferencevejledning 4 Brugervejledning 1 23 ES Explicación de los símbolos 2 Guía de referencia de imagen 4 Instrucciones para el usuario 29 FR Explication des symboles 2 Guide de référence des images 4 Mode d'emploi 35 IT Spiegazione dei simboli 2 Figura Guida di riferimento 4 Istruzioni per l'utente 41 NL Verklaring van symbolen 2 Figuurreferentiegids 4 Gebruikersinstructies 47 NO Forklaring av symboler 2 Figur Referanseguide 4 Brukerveiledning 53 PL Objąśnienie symboli 2 Przewodnik rysunkowy 4 Instrukcje dla użytkownika 58 sv Förklaring av symboler 2 Bildreferensguide 4 Användarinstruktioner 64 SL Razlaga simbolov 2 Slika Referenčni vodnik 4 Navodila za uporabo 69 FI Symbolien selitykset 2 Kuvan viiteopas 4 Käyttöohjeet 74 TR Sembollerin açıklaması 2 Şekil Referans kılavuzu 4 Kullanıcı talimatları 79

EN Recycling packaging material. Place the packaging material in the appropriate recycling waste bins wherever possible. DE Verpackungsmaterial recyclen. Geben Sie das Verpackungsmaterial nach Möglichkeit in die entsprechenden Wertstofftonnen. DA Genbrug af emballagemateriale! Anbring emballagematerialet i de relevante genbrugsaffaldsbeholdere, hvor det er muligt. ES ¡Reciclado de material de embalaje. Coloque el material de embalaje en los contenedores de residuos de reciclaje apropiados siempre que sea posible. FR Recyclage des matériaux d'emballage. Dans la mesure du possible, placez le matériel d'emballage dans les poubelles de recyclage appropriées. IT Riciclaggio del materiale da imballaggio. Collocare il materiale di imballaggio negli appositi contenitori per rifiuti per il riciclaggio, ove possibile. NL Verpakkingsmateriaal recyclen. Deponeer het verpakkingsmateriaal waar mogelijk in de daarvoor bestemde afvalbakken. NO Resirkulering av emballasjemateriale. Plasser emballasjematerialet i riktige søppelkasser for resirkulering der det er mulig. PL Recykling materiałów opakowaniowych. W miarę możliwości umieść materiał opakowaniowy w odpowiednich pojemnikach na odpady recyklingowe. sv Återvinning av förpackningsmaterial. Placera förpackningsmaterialet i lämpliga återvinningskärl där det är möjligt. SL Recikliranje embalaže. Embalažni material odložite v ustrezne zabojnike za recikliranje odpadkov, kjer koli je to mogoče. FI Pakkausmateriaalit kierrätykseen. Sijoita pakkausmateriaali sopiviin kierrätysastioihin aina kun mahdollista. TR Ambalaj malzemelerinin geri dönüşümü. Ambalaj malzemesini mümkün olan her yerde uygun geri dönüşüm atık kutularına koyun.

EN
Safety instruction:
Indicates a hazardous situation that, if not avoided, may result in death or serious injury.
DE
203P1C-15




K = Plancha grill
203P1-10


203M1-20

203M1-10
2
3


3 CONT.


FRA system
iii
6
| 203-100 | 8640 | 203-200 | |||
| 203-900 | 98326 | 203-300 | |||
| 203-500C | |||||
7
| 202-SP004 | 202-SP011 | 202-SP012 | |||
| 203P-SP001 | 202-SP020-V2 | 203P-SP002 (203P1) 203P-SP042 (203M1) | |||
| 203P-SP003 | 203P-SP005 | 203P-SP008 | |||
| 203P-SP015 | 203P-SP011 | 203P-SP037 (203P1) | |||
| HM6-073 (Jet 0.73 28-30 mbar) HM6-069 (Jet 0.69 37mbar) HM6-064 (Jet 0.64 50mbar) | 203P-SP009 (30mbar) | 203P-SP034 | |||
| 203P-SP014 (203P1) 203P-SP060 (203M1) | 203P-SP010 (50mbar) | 202P-SP070 (30mbar) 202P-SP071 (50mbar) | |||
| 203P-SP017 (203P1) | 203-SP058 | 203P-SP006 (30mbar) 203P-SP080 (50mbar) |
CAUTION
Provide ample ventilation. This gas appliance consumes air (oxygen). Do not use this appliance in an unventilated space to avoid endangering your life. If still more gas appliances and/or occupants using gas are added to the space, additional ventilation must be provided.
IMPORTANT
Read these instructions carefully so as to familiarise yourself with the appliance before fitting the appliance to a gas cylinder. Retain these instructions for future reference.
| Country of Use | BE, CH, CY, CZ, ES, FR, GB, GR, IE, IT, LT, LU, LV, PT, SK & SI | PL | BE, CY, DK, EE, FR, FI, HU, IT, LT, NL, NO, SE, SI, SK, RO, HR, TR, BG, IS, LU, MT, & ZA | AT, CH, DE & SK | |
| Appliance Catagories | I3+(28-30/37) | I3B/P(37) | I3B/P(30) | I3B/P(50) | |
| Allowable gasses | Butane-G30 Propane-G31 Butane-G30, Propane-G31 or their mixture | ||||
| Gas Pressure | 28-30mbar 37mbar 37mbar | 28-30mbar (2.8kPa for South Africa) | 50mbar | ||
| Jet Number | 0.73 0.69 0.73 0.64 | ||||
| Nominal Usage | Butane - 160 g/h per burner (160g/h x 2 = 320g/h in total) | Butane - 160 g/h per burner (160g/h x 2 = 320g/h in total) | Butane - 160g/h per burner (160g/h x 2 = 320g/h in total) | Butane - 160g/h per burner (160g/h x 2 = 320g/h in total) | |
| Gross nom. heat input | 2.2kW per burner (2.2kW x 2 = 4.4kW in total) | 2.2kW per burner (2.2kW x 2 = 4.4kW in total) | 2.2kW per burner (2.2kW x 2 = 4.4kW in total) | 2.2kW per burner (2.2kW x 2 = 4.4kW in total) | |
| Country Name and Abbreviations | ||||
| AE = United Arab Emirates AL = Albania AT = Austria BE = Belgium CH = Switzerland | ||||
| CZ = Czech Republic DE = Germany DK = Denmark ES = Spain FI = Finland | ||||
| FR = France | GB = United Kingdom | GR = Greece | HR = Croatia | IT = Italy |
| JP = Japan | KR = Korea | NL = Netherlands | NO = Norway | PL = Poland |
| PT = Portugal | RO = Romania | RU = Russia | RS = Serbia | SI = Slovenia |
| SK = Slovakia SE = Sweden TR = Turkey ZA = South Africa | ||||
I 3B/P (50) Appliance category: (AT, DE, CH, SK)
I3B/P(50): 50mbar Butane configurations regulator or 50mbar Propane configurations regulator or 50mbar butane/propane mixture configurations regulator.
Screw a hose with the correct threaded fittings on each end, onto the left hand 1/4" BSP thread of the valve. Attach a suitable 50mbar low-pressure regulator on the end of the hose. The hose assembly used must comply with DIN 4815 part 2 or equivalent.
I 3B/P (30), I 3+ (28-30/37) Appliance categories: (DK, FI, NO, NL, SE, AT, DE, BE, ES, FR, IE, IT, PT, GB, CH)
Push an approved hose onto the valve tailpiece until it is properly seated. On the other end, attach a suitable low pressure regulator.
I3B/P(30): 30mbar Butane configurations regulator or 30mbar Propane configurations regulator or 30mbar butane/propane mixture configuration regulator.
13+(28-30/37): 30mbar Butane configurations regulator or 37mbar Propane configurations regulator.
Again making sure that the hose is properly seated. The type of hose used shall comply with the relevant EN standard and locate requirement.
I3B/P(37) Appliance category: (PL)
Push an approved hose onto the valve tailpiece until it is properly seated. On the other end, attach a suitable low pressure regulator.
I3B/P(37): 37mbar Butane configurations regulator or 37mbar Propane configurations regulator or 37mbar butane/propane mixture configuration regulator.
Again making sure that the hose is properly seated. The type of hose used shall comply with the relevant EN standard and locate requirement.

Safety information
These instructions are for your safety and to help you avoid risk of injury and/or damage. All warranties will become void if you do not follow these instructions.
• This appliance complies to BS EN 484 and SANS 1539:2017. - Gas appliances require ventilation for efficient performance and to ensure the safety of users and other persons in close proximity, do not use the appliance in an unventilated area. It is intended for outdoor use only. - The room where this appliance is used should have a window or a door that can be opened or partially open during use. If there is no window or door available for room ventilation, extra ventilation must be installed for your safety. - Ensure that the appliance is used in a well-ventilated area. • WARNING: ACCESSIBLE PARTS MAY BE VERY HOT. KEEP YOUNG CHILDREN AWAY. - Read these instructions carefully before using the appliance. • FOR OUTDOOR USE ONLY!
Assembly and use (IMAGE SECTION 2 and 3)
- Do not use the appliance if it has damaged or worn seals.
- Do not use an appliance that is leaking, damaged or which does not operate properly.
- Handle the appliance with care, do not drop it. • Always operate the appliance on a firm level surface.
- Ensure that the assembled product is stable and does not rock.
- This appliance is not suitable for installation or connection to a reticulated gas supply.
- This appliance must be kept away from flammable materials during use. Minimum safe distances are: Above the appliance 120cm. At the rear and sides 60cm.
- When using a pot, the minimum recommended pot size is 180mm and maximum recommended size is 250mm. The minimum pot size when using the coffee pot stand is 60mm.
- Do not use any cooking surface or pot that is larger than the recommended size. Our cooking surfaces have been specifically designed to allow gas combustion to escape and the closure of this space could affect the performance of this appliance.
- Do not modify this appliance, any modification may be dangerous. Do not use it for anything for which it has not been designed.
- Do not move the appliance during use.
- Never leave the appliance unattended when lit.
- During use, parts of the appliance will become hot (particularly the burner). Avoid touching hot parts with bare hands. The use of gloves is recommended.
- Ensure your pot stands/cooking surfaces are correctly placed when using your appliance.
Hose
- This appliance must only be used with an approved hose and regulator. (A 2.8kPa hose and regulator is included in South Africa only). The hose must be checked for wear or damage before every use and before connecting to the gas container.
- Do not use the appliance if it has a damaged or worn hose. Replace the hose.
- Do not twist or pinch the hose.
- The hose length should be no less than 0.8m and shall not exceed 1.5m. Replace when the hose is damaged or shows signs of brittleness or cracks.
Gas Container
- Gas is supplied to the unit via a hose and regulator. (hose and regulator is included with this unit in South Africa only) The hose and regulator can be connected to a gas cylinder or a Power Pak which is a unit that takes two or more gas cartridges.
- It could be hazardous to attempt to fit other types of gas cylinders or gas cartridges (used in conjunction with the Power Pak). This appliance must only be used with an approved hose and regulator.
- Only to be used with a gas cylinder that does not exceed 500mm in height (not including the regulator) and 400mm in width.
- Ensure that the gas container is fitted or changed in a well-ventilated location, preferably outdoors, away from any sources of ignition such as naked flames, pilots, electric fires, and away from other people.
- Keep gas containers away from heat and flame. Do not place on a stove or any other hot surface.
- Refillable containers are to be used only in the upright position so as to ensure proper fuel withdrawal. Failure to adhere to this may cause liquid discharge from the gas container resulting in dangerous operating conditions.
- Do not try to remove the gas container whilst the appliance is in operation.
- The gas container must be disconnected from the appliance after use or when in storage.
Light back
- In the event of light back (where the flame burns back and ignites inside the burner or venturi housing), immediately turn off the gas supply by firstly closing the control valve on the gas cylinder and then the appliance valve. After the flame is extinguished, remove the regulator and check the condition of the seal; replace the seal if in doubt. Re-light the appliance.
- Should the flame persistently light back, return the product to your authorized repair agent.
Leaks
- If there is a gas leak on your appliance (smell of gas), immediately turn off the gas supply by turning the control knob clockwise to the OFF “●” position and take it into a flame-free location where the gas leak may be detected and stopped. If you wish to check for gas leaks on your appliance, do it outside. Do not try to detect gas leaks using a flame; use soapy water.
How to check the appliance is connected to the gas supply in a sound fashion
- It is important that all gas connections have been correctly connected to prevent any gas leaks.
- The correct way is to smear the joint, i.e. where the gas container connects to the appliance, with soapy water. Turn the appliance control knob slightly anti-clockwise to turn the gas on. If bubbles form, then there is a gas leak. Immediately turn the gas off and disconnect the gas supply from the appliance. Check that all the connections are properly fitted. Check that the seal is in place and in good condition before connecting the gas supply. Re-check with soapy water after refitting the gas supply.
- If a gas leak persists, return the product to your local dealer for inspection/repair.
Fitting and changing the gas supply (IMAGE SECTION 3)
Connecting the gas supply
- Before connecting the appliance to a gas supply, ensure that the rubber seal on the regulator is in position and in good condition.
- Before connecting the hose and regulator to the appliance, check that the appliance control knob is in the OFF “●” position.
- Carry out this check each time you fit the appliance to a gas cylinder.
- Blow out any dust from the gas supply opening to prevent possible blockage of the jet. • Fit an approved hose and regulator to the appliance.
- Ensure that the gas supply (gas cylinder/gas cartridge) is fitted in a well-ventilated location away from any source of ignition, such as naked flames and away from other people.
- Do not twist or pinch the hose. Ensure that it is routed away from the stove body so as to prevent deterioration / damage to the hose caused by heat.
- Make sure that the gas cylinder is kept upright at all times, connect to the cylinder by screwing on hand tight until fully engaged.
- Ensure that a complete gas seal has been made (check for the smell of gas around the connection joint). Do not check for leaks with a naked flame. Use warm soapy water only, applied to the joints and connections of the appliance. Any leakage will show up as bubbles around the leakage area.
- If you cannot rectify the gas leak do not use the appliance. If you are in doubt, contact your nearest stockist.
Disconnecting and changing the gas supply
- After use, turn the appliance control knob to the OFF "●" position and close the gas supply.
- When you need to replace your empty cylinder, make sure that the gas is closed at the cylinder valve.
- Do not smoke while changing the cylinder.
- Remove the regulator from the empty cylinder.
- Attach the regulator to the full cylinder, refer to the instructions above on how to connect the gas supply.
- Apply the same care and checking procedures as if fitting a new gas cylinder.
How to check if your gas cylinder is empty
- The easiest way to check if you are low on gas is by picking up your gas cylinder.
- If you think your gas cylinder is feeling a little lighter than you'd like, weighing the bottle is a great way to see how much gas is left. Most cylinders will have the empty weight stamped on either the neck or foot ring, and if the weight indicated on the stamp and the weight of your cylinder are the same, you're out of gas. You can then approximate the amount of gas you have left by the difference in weight.
Operating the appliance (IMAGE SECTION 4)
- When operating this appliance, please take care to ensure that all parts are in good working order and that you have checked for any gas leaks before lighting the appliance with every use.
- Cooking surfaces can simply be placed and are ready to use. No assembly required.
- PLEASE NOTE: Please ensure all protective packaging and plastic are removed from the appliance before use.
- The appliance is designed for use with cooking vessels of not less than 180mm in diameter and not greater than 250mm in diameter. The minimum pot size when using the coffee pot stand is 60 mm.
Precautions to observe before lighting.
- Use this appliance only on a firm level surface. • After prolonged storage, inspect the appliance for any insects and webs, which may affect gas flow.
Lighting the appliance using the piezo
- It is recommended to remove any cooking surfaces when trying to light the appliance. This way it will be easy to see the burner when it is lit.
- To light up the appliance using the piezo igniter, push and turn the control knob 90° in an anti-clockwise direction, then press the piezo button to ignite the gas. If the gas does not ignite on the first spark, turn the control knob back to its OFF "●" position. Try again, by pushing and turning the control knob anti-clockwise and push the piezo button to ignite the gas. If the gas has not ignited in the first two to three seconds you should close the control valve by turning the control knob back to its OFF "●" position.
- Wait approximately thirty seconds to let any accumulated gas within the burner escape. Repeat the above process if necessary until the flame ignites. The flame should normally light up within the first one to two seconds.
Lighting up using a BBQ lighter
- When starting cold, the appliance may be lit from the top prior to fitting the desired cooking surface. When lighting up a hot appliance, it is recommended that this be done by sticking a barbecue lighter through one of the vent holes underneath the burner, until it is in line with the burner (DO NOT place the BBQ lighter through the large hole directly underneath the burner). Ignite the BBQ lighter. Whilst the BBQ lighter is lit, push and turn the control knob anti-clockwise to light the burner.
General
- Once the appliance is lit, the flame intensity may be adjusted by turning the control knob anti-clockwise to reduce the flame or clockwise to increase the flame.
- When cooking food with a high fat content, flaring may occur if the selected heat setting is too high. Should this happen, turn the heat down until the flaring ceases.
- Do not move the appliance when in use. It is unsafe practice to move the appliance whilst lit and may cause flaring.
- After use, first close the control valve on the gas cylinder (where applicable). When the flame has extinguished, close the control valve on the appliance.
GreenGrill cooking
Most CADAC | Dometic cooking surfaces feature GreenGrill non-stick ceramic coating which is PFOA-free and non-toxic, allowing for healthier cooking.
To prepare the cooking surface
- To prepare the cooking surface Before first use, it is recommended that you prepare the cooking surface to prevent food from sticking. Apply a thin layer of cooking oil over the entire cooking surface and heat it over medium heat for 2-3 minutes. Allow the cooking surface to cool before washing it in warm soapy water. Re-apply a thin layer of oil to the cooking surface. It is now ready for use.
Cleaning your cooking surface
• Always allow cooking surfaces to cool completely before immersing in water. Clean your cooking surface with warm, soapy water and a soft sponge. Avoid the use of scouring pads. • To loosen stubborn stains or residues, soak the cooking surface for a few minutes in warm water before attempting to wash.
Maintenance
- After cleaning, we recommend spreading a small amount of oil on the cooking surface before storing to protect the surface against air and moisture.
- Most cooking surfaces are supplied with a convenient storage bag. Place the oiled cooking surface in a plastic bag before storing it in its bag to keep the bag clean and free of any residue.
NOTE
- GreenGrill coating conducts heat better than regular (PTFE) non-stick coatings. Therefore, we recommend using only 75% of the usual power setting. • To avoid damage to your cooking surface, never leave it on the heat source without a coating of oil.
- We recommend frying with sunflower or rapeseed oil due to their high burning points. The use of olive oil is not recommended due to its lower burning point, which can cause ingredients to stick or burn. Tip: bring meat or fish to room temperature before frying to prevent sticking.
- The CADAC | Dometic Soft Soak and Soft Soak Brush (sold separately) are ideal cleaning products for GreenGrill cooking surfaces, aiding in soaking and removing stubborn food residue.
Cooking options
These are the available cooking options. (Use windshields in case of windy conditions.) Grilling: This cooking option is ideal for fat-free grilling of chicken, sausages, chops, kebabs, fish, or vegetables. For this type of cooking, use the grill plate. Caution: Please note that when cooking fatty meats, some fat will splatter onto the unit, which may cause flare-ups. Please use caution when handling such meats. The cooking temperatures are easily adjusted to suit your own requirements by turning the control knob to regulate the degree of heat. Frying: This option is ideal for stir-fries, fish, breakfast, pancakes, prawns, paella, and vegetables. For this type of cooking, use the flat grill. Please note that being a shallow pan, it is not suitable for deep-frying. The easy-clean surface encourages the minimum use of fat for healthy cooking. Boiling: For this type of cooking, place the pot stand in its locator grooves, ensuring that it is properly seated. Place a suitable pot (not less than 180mm diameter and not more than 250mm diameter). One liter of water will boil in approximately 6 minutes depending on the conditions, size of pot used, etc. Note: When using small-sized pots, do not attempt to use pots with plastic handles as these can get extremely hot. Paella: This cooking option is ideal for preparing paellas, risottos, pasta dishes, traditional breakfasts, etc. The Paella Pan (optional accessory) is made from high-quality pressed aluminum, which allows for excellent heat distribution and retention. Coffee: This option is ideal for brewing a hot cup of coffee. Ideal for anytime, anywhere. (The Coffee Pot Stand comes standard on selected models only.)
Cleaning the appliance
- It is recommended to clean your appliance after every use. This will prolong the life of your appliance.
- Allow the appliance to cool down before you clean it.
- Use a damp cloth wrung out in a solution of soapy water to clean exterior surfaces. To clean the stove body, simply wipe with a damp cloth using a little detergent, if necessary. DO NOT IMMERSE IN WATER as this will allow water to get into the burner tube, causing the appliance to malfunction.
- Make sure that no water gets onto the burners or pilot/light area. Wipe the appliance completely dry before use. Do not use abrasive cleaners as they may damage the surfaces.
- Clean the appliance after each use. After cleaning, recondition the cooking surface with a light wipe of oil.
- Do not use any high-pressure steam equipment or a water jet to clean the appliance.
- Note: For stubborn stains, CADAC oven cleaner may be used.
Storage
Always allow the unit to cool down and be cleaned before storing.
- Turn off the gas supply to the appliance, disconnect and remove the gas supply from the appliance.
- Never store an appliance with the gas supply connected; this is an unsafe practice.
- Store the appliance and gas supply in a well-ventilated area away from combustible material. Storage of cylinders should preferably be outdoors and must NOT be in a basement.
Maintenance and troubleshooting
- If you clean and maintain your appliance on a regular basis, the life of your appliance will extend and the possibility of problems will decrease.
- We recommend the service of your appliance to be every twelve (12) months by a service agent to ensure continued efficient operation. • This appliance must only be serviced by an authorized person.
- Check your gas hose and connections regularly for any signs of leaks and every time the gas cylinder is re-filled or fitted to the appliance with every use.
Troubleshooting
In the case of a spattering flame or jet blockage:
- Clean your burner ports in case of an over spill. • We recommend to clean or replace the jets every six (6) months to ensure continued efficient operation of your appliance.
- Should the appliance operate abnormally after storage and all checks have not isolated the problem, the jet may be blocked. A blocked jet would be indicated by a weaker yellowish flame or no flame at all in extreme cases. Under these circumstances it will be necessary to remove and check and thoroughly clean out any foreign matter which may have gathered in the appliance. This may be done by removing the jet using standard tools and blow any dirt from the jet, alternatively, you may purchase new jets from your local store. Do not attempt to clean the jet mechanically.
Replacing a Blocked Jet: (IMAGE SECTION 5)
- Your appliance is fitted with a specific size jet to regulate the correct amount of gas.
- Should the hole in the jet become blocked, this may result in a small flame or no flame at all. Do not attempt to clean the jet with a pin or other such device as this may damage the orifice, which could make the appliance unsafe. • To replace the jet: Remove any cooking surfaces, close the lid and turn the appliance upside down. i) Gently unscrew the bottom panel by removing the screws. ii) Unscrew the screw for the affected burner(s), carefully loosen and drop the burner as illustrated to expose the jet. Note that the burner is connected to the piezo cable, after replacing the jet and reassembling, check that this cable is still connected. iii) The jet (L) can now be seen on the valve, remove the jet using a suitable spanner. Do not use pliers on the jet as this may damage the jet, making it unusable or impossible to remove. Screw the new jet into the valve. Do not over-tighten as this may damage the jet.
Reverse the above procedure to re-assemble the unit.
Accessories (IMAGE SECTION 6)
A variety of compatible accessories are available. Contact your local supplier for availability.
Spares (IMAGE SECTION 7)
Always use genuine spares as they have been designed to give optimum performance. Contact your local supplier for assistance.
Warranty
The statutory warranty period applies. If the product is defective, please contact your retailer or the manufacturer's branch in your country (see www.cadacinternational.com/support).
For repair and warranty processing, please include the following documents when you send in the product:
• A copy of the receipt with purchasing date, - A reason for the claim or description of the fault.
Note that self-repair or non-professional repair can have safety consequences and might void the warranty.
CAUTION
FRA system: (IMAGE SECTIONS 3)
Accessories (IMAGE SECTIONS 6)
114 Deanfield Court, Link59 Business Park
Clitheroe, Lancashire, BB71QS
United Kingdom
Tel: +44 (0) 333 2000363
Email: info@cadacuk.com
YOUR LOCAL DEALER:
www.cadacinternational.com/support


- EN
- SAFETY INSTRUCTION
- DE
- CONT
- CAUTION
- IMPORTANT
- I 3B/P (50) APPLIANCE CATEGORY: (AT, DE, CH, SK)
- I 3B/P (30), I 3+ (28-30/37) APPLIANCE CATEGORIES: (DK, FI, NO, NL, SE, AT, DE, BE, ES, FR, IE, IT, PT, GB, CH)
- I3B/P(37) APPLIANCE CATEGORY: (PL)
- SAFETY INFORMATION
- ASSEMBLY AND USE (IMAGE SECTION 2 AND 3)
- HOSE
- GAS CONTAINER
- LIGHT BACK
- LEAKS
- HOW TO CHECK THE APPLIANCE IS CONNECTED TO THE GAS SUPPLY IN A SOUND FASHION
- FITTING AND CHANGING THE GAS SUPPLY (IMAGE SECTION 3)
- CONNECTING THE GAS SUPPLY
- DISCONNECTING AND CHANGING THE GAS SUPPLY
- HOW TO CHECK IF YOUR GAS CYLINDER IS EMPTY
- OPERATING THE APPLIANCE (IMAGE SECTION 4)
- PRECAUTIONS TO OBSERVE BEFORE LIGHTING
- LIGHTING THE APPLIANCE USING THE PIEZO
- LIGHTING UP USING A BBQ LIGHTER
- GENERAL
- GREENGRILL COOKING
- TO PREPARE THE COOKING SURFACE
- CLEANING YOUR COOKING SURFACE
- MAINTENANCE
- NOTE
- COOKING OPTIONS
- CLEANING THE APPLIANCE
- STORAGE
- MAINTENANCE AND TROUBLESHOOTING
- TROUBLESHOOTING
- REPLACING A BLOCKED JET: (IMAGE SECTION 5)
- ACCESSORIES (IMAGE SECTION 6)
- SPARES (IMAGE SECTION 7)
- WARRANTY
- FRA SYSTEM: (IMAGE SECTIONS 3)
- ACCESSORIES (IMAGE SECTIONS 6)
- YOUR LOCAL DEALER
- WWW.CADACINTERNATIONAL.COM/SUPPORT
Brand : DOMETIC
Model : Cadac 2Cook3 Pro Deluxe
Category : Cooker