
SKS101 - Cooker DOMETIC - Free user manual and instructions
Find the device manual for free SKS101 DOMETIC in PDF.
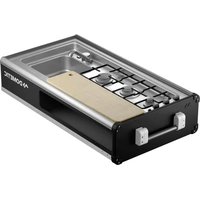


| Product Type | Cooker |
| Brand | Dometic |
| Model | SKS101 |
| Energy Type | Gas |
| Number of Burners | 2 |
| Burner Power | Approx. 1.5 kW per burner |
| Ignition | Automatic piezo ignition |
| Dimensions (approx.) | 400 x 330 x 110 mm |
| Cut-out Size (approx.) | 370 x 300 mm |
| Weight (approx.) | 5.2 kg |
| Cooktop Surface | Enameled steel |
| Control Type | Rotary knobs |
| Flame Control | Adjustable lowering to simmer |
| Safety Features | Thermocouple flame failure safety |
| Cleanability | Removable pan supports and drip tray |
| Maintenance | Regular cleaning of burner caps and jets |
| Spare Parts | Available through Dometic service centers |
| Compatible Gas Types | Butane or propane (G30/G31) |
| Installation | Recessed countertop installation |
| Application | Caravans, motorhomes and boats |
Frequently Asked Questions - SKS101 DOMETIC
User questions about SKS101 DOMETIC
0 question about this device. Answer the ones you know or ask your own.
Ask a new question about this device
Download the instructions for your Cooker in PDF format for free! Find your manual SKS101 - DOMETIC and take your electronic device back in hand. On this page are published all the documents necessary for the use of your device. SKS101 by DOMETIC.
USER MANUAL SKS101 DOMETIC

SKL101, SKS101

Slide out kitchen
Installation Manual
Please read this instruction manual carefully before installation and first use, and store it in a safe place. If you pass on the product to another person, hand over this instruction manual along with it.
Table of contents
1 Explanation of symbols....3
2 Safety and installation instructions ....4
3 Scope of delivery ....5
4 Intended use 6
5 Preparing the installation ....6
6 Technical data....12
1 Explanation of symbols

WARNING!
Safety instruction: Failure to observe this instruction can cause death or serious injury.

CAUTION!
Safety instruction: Failure to observe this instruction can lead to injury.

NOTICE!
Failure to observe this instruction can cause material damage and impair the function of the product.

NOTE
Supplementary information for operating the product.
2 Safety and installation instructions
Please observe the prescribed safety instructions and stipulations from the vehicle manufacturer and service workshops.
The manufacturer accepts no liability for damage in the following cases:
• Faulty assembly or connection
• Damage to the product resulting from mechanical influences
• Alterations to the product without the express permission of the manufacturer
• Usage for purposes other than those described in this manual

WARNING!
• If the slide out kitchen has visible damage, contact the manufacturer.
NOTICE!
- Hose and gas lines must not be kinked.
- Hose lines must be installed in such a way that they are accessible at all times and that they are not kinked or twisted when being pushed in or out.
- Hose lines must be protected from mechanical, chemical and thermal influences.
2.1 Safety when handling liquefied petroleum gas

WARNING!
- Keep flammable substances away from heating and cooking devices, and other light and heat sources.
- Compare the pressure information on the type plate with the pressure information on the propane gas cylinder.
• Never store liquefied petroleum gas cylinders in unventilated areas. - Keep liquefied petroleum gas cylinders away from direct sunlight. The temperature may not exceed 50 °C.
- If you smell gas:
- Do not operate any electrical devices or switches, and avoid using open flames that can ignite the gas.
- Close the valve on the gas cylinder and keep it closed until the fault has been rectified.
• Never attempt to find a gas leak with an open flame.
3 S c o p e o f d

No. in fig. 1 Description
| 1 Slide out kitchen | ||||||
| 2 Bottle opener | ||||||
| 3 | C | u | p | h | o | l |
| 4 Cutting board | ||||||
| 5 Serving tray (only SKL101) | ||||||
| 6 Accessory adapter | ||||||
| - Tap with flexible water hose | ||||||
| - Installation manual | ||||||
| - Operating manual | ||||||
| - Cooktop manual (MO9923) and sink components | ||||||
4 Intended use
The slide out kitchen for the outside area is intended for installation in trailers and mobile homes. It is solely for the preparation of food in the outside area of the trailer or mobile home.
The slide out kitchen has to be connected to gas via an external gas bottle or a quick connector on the external wall of the vehicle. The slide out kitchen has to be disconnected from gas each time it is stowed. A permanent gas connection to the slide out kitchen is prohibited!
5 P r e p a r i n g

NOTE
The slide out kitchen is pre-assembled with extendable slides and delivered with mounting brackets.
The individual elements of the slide out kitchen are covered with a protective film. This is only to be removed by the end customer.
▶Remove the packing of the slide out kitchen.
▶Check whether the slide out kitchen has been damaged.
▶Contact the manufacturer in case of damage.
5.1 Installation


▶ Create a drilling template to mark-up and drill holes to suit M8 bolts (fig. 2 to fig. 3).

▶ Mount the device as shown (fig. 4).
▶ Fit M8 bolts with locking washers from underneath (not supplied) (fig. 4). The length of the bolts should be at least 30 mm longer than the floor thickness.
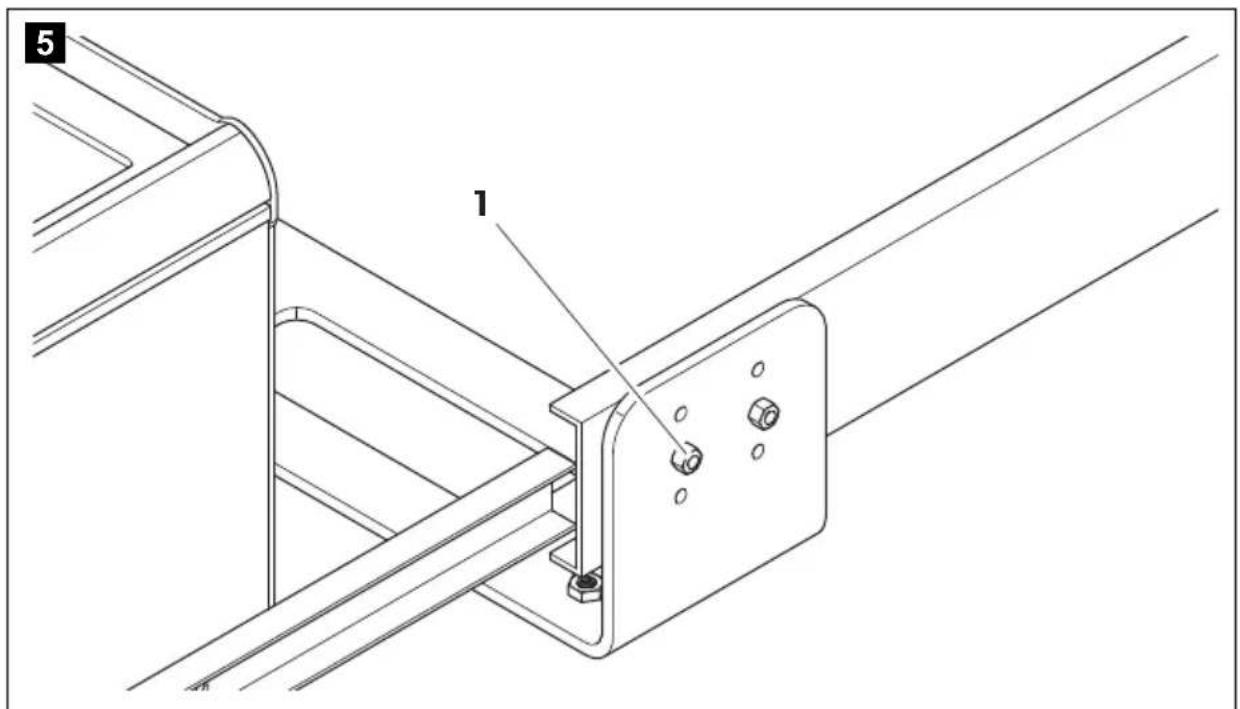
▶ Adjust the height as needed by using the height adjustment (fig. 5 1).

▶ Verify the smooth sliding of the slide out kitchen (fig. 6). Ensure that slider locks are fully engaged when kitchen is extended and locking release tabs (fig. 6 1) are releasing the slider locks correctly.

NOTE
- Slider locks are working correctly if the kitchen does not slide back into cavity when you give it a light push.
- If the slider locks on one or both sides do not engage, fully extend the kitchen. Pull it outwards until a click is heard when the slider locks engage.
- Ensure the correct disengaging of slider locks as follows:
- Check if the locking release tabs can be pushed down easily with no resistance.
- Push back the kitchen into the cavity with a light push.
5.2 Connecting the gas supply
The gas supply may only be installed by a tested and certified gas plumber.

WARNING!
The female gas connection provided can only be connected to a rigid connection. For use with a flexible hose, install a copper pipe to the base plate of the slide out kitchen and fix it rigidly (fig. 7, page 10).

NOTE
• For the gas connection the following additional parts are required:
- male gas adaptor
- copper piping
- pipe mount
- hose fitting
- flexible gas hose at required length, depending on the mounting application
• Make sure that the hose line
- is not crushed or kinked
- is a safe distance from the burner.

▶Observe the following:
- Use the opening at the rear of the slide out kitchen to route and service all external plumbing and wiring.
- Connect the slide out kitchen to LPG only.
- Ensure that the connection to the gas supply is serviceable by the user. It must require detachment before closing the slide out kitchen.
▶ Connect the rigid pipe as shown (fig. 7 1, page 10).
▶ Connect the flexible hose as shown (fig. 7 2, page 10).
5.3 Connecting the water supply

NOTE
The water supply can be permanently connected.
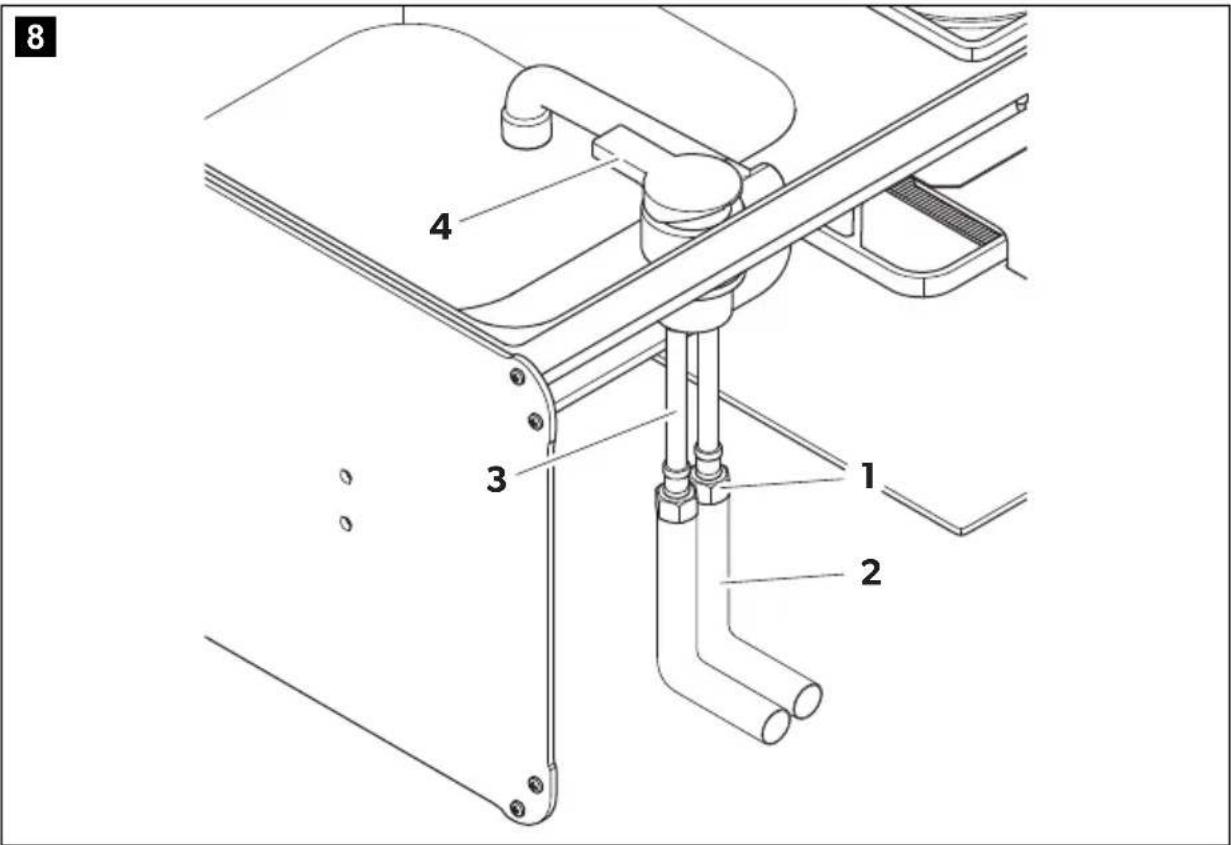
fig. 8
▶ Install the tap (4) to the sink using a rubber seal either side.
▶ Attach the flexible water hose (3) to the tap.
▶ Connect an additional extension hose (2) to the flexible water hose using male fittings (1).
5.4 Connecting to a 12 V---power supply
For the electrical connection, wires are attached to the inner wall of the slide out kitchen.
▶ Connect the cooktop igniter wires via a joiner or a plug to a 12 V---power source.
6 Technical data
| SKL101 SKS101 | ||
| Ref. no.: 9600006441 960001 | 9015 | |
| Nominal gas consumption: 16 MJ/h | ||
| Gas category: Category I | 3, universal LPG | |
| Connection pressure: AT, DE, EE, LT, LV, MT, PL: 30 mbarBE, CH, ES, FR, GB, GR, IE, IT, LU:28 – 30/37 mbarCY, CZ, DK, FI, HU, IS, NL, NO, SE, SI, SK: 28 – 30 mbarAUS, NZ: 27.5 mbar | ||
| Number of burners: 3 | ||
| Burner output in total: 16.9 MJ/hBurner 1: 3.8 MJ/hBurner 2: 5.9 MJ/hBurner 3: 7.2 MJ/h | ||
| Cooking time for 1 l of water: | approx. 10 min (depending on the ambient conditions and pot used) | |
| Dimensions: | fig. 9, page 13 | fig. 10, page 14 |
| Weight (excluding accessories): | 44 kg | 34 kg |
| Inspection/certification: |  | |
Dimensions
SKL101

No. in fig. 9 Description
1 Slide out kitchen and sliding fore-rails (inner): 597 mm
Including fixation brackets and nuts: 630 mm
2 Slide out kitchen only: 1515 mm
Including fixation bracket and rails (closed): 1667 mm
Including fixation bracket and rails (extended): 3267 mm
3 Slide out kitchen only: 288 mm
Height adjustments including fixation and bracket:
First height adjustment: 314 mm (A)
Second height adjustment: 334 mm (B)
Third height adjustment: 354 mm (C)
SKS101
10

No. in fig. 10 Description
1 Slide out kitchen and sliding fore-rails (inner): 597 mm
Including fixation brackets and nuts: 630 mm
2 Slide out kitchen only: 1075 mm
Including fixation bracket and rails (closed): 1220 mm
Including fixation bracket and rails (extended): 2366 mm
3 Slide out kitchen only: 234 mm
Height adjustments including fixation and bracket:
First height adjustment: 260 mm (A)
Second height adjustment: 280 mm (B)
Third height adjustment: 300 mm (C)
SKL101, SKS101
Access doors Door opening
Dometic 658 x 364 mm
Coast2Coast 612 x 346 mm
Thetford 630 x 330 mm
dometic.com
YOUR LOCAL DEALER
dometic.com/dealer
YOUR LOCAL SUPPORT
dometic.com/contact
dometic.com/sales-offices


- TABLE OF CONTENTS
- EXPLANATION OF SYMBOLS
- WARNING
- CAUTION
- NOTICE
- NOTE
- SAFETY AND INSTALLATION INSTRUCTIONS
- PLEASE OBSERVE THE PRESCRIBED SAFETY INSTRUCTIONS AND STIPULATIONS FROM THE VEHICLE MANUFACTURER AND SERVICE WORKSHOPS
- SAFETY WHEN HANDLING LIQUEFIED PETROLEUM GAS
- INTENDED USE
- P R E P A R I N G
- INSTALLATION
- CONNECTING THE GAS SUPPLY
- CONNECTING THE WATER SUPPLY
- FIG
- CONNECTING TO A 12 V---POWER SUPPLY
- TECHNICAL DATA
- DIMENSIONS
- SKL
- NO. IN FIG. 9 DESCRIPTION
- SKS
- NO. IN FIG. 10 DESCRIPTION
- SKL101, SKS
- ACCESS DOORS DOOR OPENING
Brand : DOMETIC
Model : SKS101
Category : Cooker