
X12CD - Shredder HAMA - Free user manual and instructions
Find the device manual for free X12CD HAMA in PDF.
| Product type | Document shredder |
| Brand | Hama |
| Model | X12CD |
| Dimensions (W x H x D) | 36.2 x 19.5 x 45.2 cm |
| Net weight | 5.549 kg |
| Power supply | 220-240 V~, 50 Hz |
| Max. power | 529 W |
| Paper capacity (80 g/m²) | 12 sheets |
| CD/DVD/Blu-ray capacity | 1 piece |
| Paper insertion width | 220 mm |
| CD/DVD insertion width | 120 mm |
| Paper cut size | 4 x 40 mm |
| Paper bin volume | 21 liters |
| CD/DVD bin volume | 0.8 liter |
| Max. noise level | 72 dB |
| Max. operating time | 2 minutes |
| Rest time | 30 minutes |
| Protection class (DIN66399) | 2 |
| Security level (DIN66399) | P-4 / T-4 / E-3 |
| Functions | Forward/reverse, auto stop |
| Maintenance | Dry cloth cleaning, roller oiling |
| Safety | Safety circuit, automatic detection |
Frequently Asked Questions - X12CD HAMA
User questions about X12CD HAMA
0 question about this device. Answer the ones you know or ask your own.
Ask a new question about this device
Download the instructions for your Shredder in PDF format for free! Find your manual X12CD - HAMA and take your electronic device back in hand. On this page are published all the documents necessary for the use of your device. X12CD by HAMA.
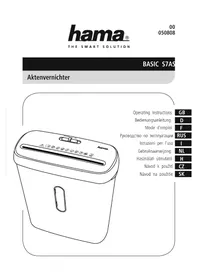
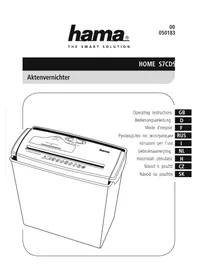
USER MANUAL X12CD HAMA
natural_image
Line drawing of a portable water heater with control panel and buttons (no text or symbols)OperatingInstructions
Bedienungsanleitung
Moded'emploi
Instruccionesdeuso
Gebruiksaanwijzing
Istruzioniperl'uso
Instrukcjaobsługi
Használatiútmutató
Manualdeutilizare
Návodk p oužití
Návodnapoužitie
Manualdeinstruções
Bruksanvisning
- Devicehead
- Intakeshaftforpaperandplasticcards
- Connectingcable(backofthedevice)
- IntakeshaftforCDs/DVDs/Blu-rays
5.Warningsymbols
6.Viewingwindow - Wastecontainer
8.Sliderswitch -
"" position(Backwards)
-
"" p edition(Off)
-
"①" position (Automatic start / stop function for the paper and plastic cards intake shaft)
- "">/◎" position (Forwards function for the CD/DVD/Blu-Ray intake shaft + the paperandplasticcardsintakeshaft)
13.StatusLED:Ready - StatusLED: Overheating
1. Introduction
1.1 Foreword
Thankyouforchoosinga H amaproduct.
Take your time and read the following instructions and information completely. Please keep these instructions in a safe place for future reference. If you sell the device, please pass theseoperatinginstructionsontothenewowner.
Note— Importance of the operating instructions

Failure to observe the operating instructions when using the product constitutes incorrectuseorwilfulmisuseandisnotpermitted.

Note
This device is a new, unused product.
Anycuttingresiduepresentmayhavebeenleftoverfromqualityassurancetestsduring production.
1.2 Explanationofwarningsymbolsandnotes
Riskofelectricshock

This symbol indicates a risk of electric shock from touching product parts carrying hazardous voltage.

Warning
This symbol is used to indicate safety instructions to draw your attention to specific hazards and risks.

Note
This symbol is used to indicate additional information or important notes.
1.3 Packagecontents
- "HomeX12CD"shredder
• T heseoperatinginstructions
2.Safety
2.1 Correctuse
• The product is intended for private, non-commercial use only.
- Usetheproductonlyfortheintendedpurpose.
• The product is intended only for use inside buildings.
- Protect the product from dirt, moisture and overheating and use it in dry rooms only.
- Donotusetheproductintheimmediatevicinityofheaters,otherheatsourcesorindirectsunlight.
- Do not use the product in a damp environment and avoid splashing water.
- Do not operate the product outside the power limits specified in the technical data.
- Do not operate the product continuously, as it is not designed for this.
- Do not use the product in areas in which electronic products are not permitted.
- Donotdropheproductanddonotexposeittoanymajorshocks.
• This product is not intended for use by persons, including children, with limited physical, sensory or mental abilities or lacking in experience or knowledge, unless they are supervised by a person responsible for their safety or have been instructed on how to use the product.
- As with all electrical products, this device should be kept out of the reach of children.
- Keep the packaging material out of the reach of children due to the risk of suffocation.
- Disposeofpackagingmaterialimmediatelyinaccordancewiththelocallyapplicable regulations.
- Do not modify the product in any way. Doing so voids the warranty.
• Only usethearticleundermoderate climatic conditions.
• Alwayspulldirectlyontheplugwhendisconnectingthecable,neveronthecableitself.
Note

Theproductisonlyintendedforvolumesgeneratedbyhouseholds.
Warning

Anyuseispermittedonlywiththepapercontainerprovided.
The following materials may and may NOT be shredded:
| Paper | √ |
| Paperwithstaples | √ |
| MagneticstripandlDchipcards | √ |
| CDs,DVDs,Blu-Rays | √ |
| Continuous paper, sticky labels, slides, newspaper, cardboard, paper clips, laminate,plastic(withtheexceptionoftheobjectsstatedearlier) | × |
2.2 Basicsafetyinstructions
Pleasenotethefollowingsafetyinstructionsinordertousethedevicesafely.
- Check the device before use for any visible external damage. Do not put a damaged device into operation.
- People who, as a result of their physical, mental or motor capacities, are unable to operate the devices safely must only use the device under supervision or after instruction by a responsible person.
- Faulty components must only be replaced with original spare parts. Only these parts are guaranteed to meet the required safety standards.
- Protect the device against moisture and the penetration of liquids or objects. In the eventofcontactwithliquid,disconnectthedevicefromthepowersupplyimmediately.
Warning - risk of cutting on the cutting rollers

Donottouchthecuttingrollers.
Riskofelectricshock

- Donotopenthedeviceorcontinuetooperateitifitbecomesdamaged.
- Do not use the product if the AC adapter, adapter cable or power cable is damaged.
- Do not attempt to service or repair the product yourself. Leave any and all service worktoqualifiedexperts.
2.3 Explanation of symbols used on the product label
Warning- riskofinjury
Notethewarningsymbolsinordertoavoidinjuriesordamagetothedevice.


Generalwarningsymbol
Before commissioning, read the enclosed operating instructions. You must comply with the safety instructions at all times.
- This device is not intended for use by children.
- Avoidtouchingtheintakeopeningwithhands,clothing orhair.
- Unplugthedeviceifitisnotgoingtobeusedfora prolongedperiod.
Childrenmustbesupervisedwhenusingthedevice.
Donotinsertpaperclipsintotheintakeshaft.
Donotreachintotheintakeshaft.
Keepclothingawayfromtheintakeshaft.
Keep jewellery, e.g. necklaces, away from the intake shaft.
Keephairawayfromtheintakeshaft.
Donotuseanyaerosolproductsonornearthedevice.
Insertnomore than12sheetsofpaperatanyonetimeinto theintakeshaft(see7.TechnicalData).
IntakeshaftforCDs/DVDsandBlu-Rays.OnlyinsertoneCD/DVDorBlu-Rayata timeintotheintakeshaft.
Intakeshaftforcreditcards. Onlyinsertonecreditcardata timeintotheintakeshaftforcreditcards.
2.4 Safetydevice
The device is equipped with a safety switch and can only be operated if the device head (1) is correctly placed on the waste container(7).
Warning
Any tampering with or modification of the safety features can result in serious injury and is not permitted.

3. Installation/ Setup
Warning

- Only operate the product from a socket that has been approved for the device. The socketmustbeinstalledclosetotheproductandmustbeeasilyaccessible.
- Disconnect the product from the power supply using the On/Off switch – if this is not available, unplug the power cord from the socket.
- If using a multi-socket power strip, make sure that the total power consumption of all connected devices does not exceed the power strip's maximum throughput rating.
- If you will not be using the product for a prolonged period, disconnect it from mainspower.
Note

- Set the product up on a level, horizontal and sufficiently stable surface.
- Route all cables so that there is no risk of tripping.
- Donotbendorcrushthecable.
- Protect the connecting cable from hot surfaces and sharpedges.
- Connect the power pack to a properly installed and easily accessible mains socket.
4.Operation

Note
- Be aware that the thickness of paper increases when it is folded, leading to the device's maximum page capacity being exceeded.
• Always wait until one cutting operation is finished before starting the next one. - Do not use the device continuously for more than 2 minutes at a time.
- Emptythecontainerregularlyinorderavoiddamagingthedevice.
4.1 Switchingthedeviceon
- Movethesliderswitch(8)tothe" 🔒" p osition(11).
• ThestatusLEDReady(13)lightsupsolidgreen.
• The device is now ready for use.
4.2 Switching the device off
- Move the slider switch (8) to the "O" position (10).
4.3 Shreddingpaper
- Insert the paper into the centre of the intake shaft (2). The cutting rollers switch on automatically.
- Letgoofthepaper. Oncethecuttingprocessiscomplete, thedeviceswitchesitself offagain.
4.4Shreddingplasticcards
- Insert the plastic card into the centre of the intake shaft (2). The cutting rollers switch onautomatically.
- Letgooftheplasticcard. Oncethecuttingprocessiscomplete, thedeviceswitches itselfoffagain.
• The cutting rollers are switched on and operate constantly.
- Insert the CD, DVD or Blu-Ray into the centre of the intake shaft (4).
- LetgooftheCD,DVDorBlu-Ray.
- After the cutting process, move the slider switch (8) to the "O" position (10) to switch the device off or to the "①" position (11) to shred paper or plastic cards in the intake shaft(2).
4.6 Forwards/ b ackwardsmode

Note
These modes are designed to release any blockages of the cutting mechanism.
- Movethesliderswitch(8)tothe" << " p osition(9).Therollersonthecuttingmechanism nowrotateinthereversedirection.
- Move the slider switch (8) alternately to the ">>/◎" position (12) and the "<" position (9). Repeat this process around three times.
- Then switch the device off - as described in 4.2 Switching the device off - and disconnectthemainsplug.
- Removetheblockedcutmaterialcarefullyfromtheintakeshaft(2).
- Reconnect the device - as described in 3. Installation/Setup - to the power supply.
Note

- Forwards mode can be used if the material to be shredded has not been drawn in all the way, e.g. if the sensor was unable to detect it. This may occur especially with small quantities of paper.
- Move the slider switch (8) to the "\/@" position (12) until the paper to be shreddedhasbeenpulledallthewayin.
5.CareandMaintenance
Danger-r iskofdeathfromelectricshock
Disconnect the mains plug from the socket before starting any cleaning work.

Warning - risk of cutting on the cutting rollers
Donottouchthecuttingrollers.

Warning- d amagetothedevicefrommoisture
Ensure, when cleaning, that no moisture penetrates the device in order to avoid irreparable damagetoit.

5.1 Emptyingthecontainer
- Switch the device off - as described in 4.2 Switching the device off - and disconnect themainsplug.
- Liftthedevicehead(1)offthewastecontainer(7).
• Emptythecontainer(7). - Placethedevicehead(1)backonthewastecontainer(7)
- Reconnect the device - as described in 3. Installation/Setup - to the power supply.
5.2Cleaningthedevice
- Switch the device off - as described in 4.2 Switching the device off - and disconnect themainsplug.
- Clean the device with a dry cloth. In cases of heavy soiling, the cloth can be dampened a little.
- Allow the device to completely afterwards.
- Reconnect the device - as described in 3. Installation/Setup - to the power supply.
5.3 Cleaning/ oilingthecuttingrollers
Note

- Oilthecuttingrollersaftereachemptyingofthewastepaperbasketinorderto prolongtheshredder'sservicelife.
- You can find an appropriate selection of cleaning products at www.hama.com.
- Switch the device on - as described in 4.1 Switching the device on.
5.3.1 CleaningwithHamacleanersforshredders(itemnumber:113820)
- ApplytheHamacleanerforshredders(itemnumber:113820)inseveralstripsontoa pieceofDINA4-sizepaper.
- Insert the paper into the centre of the intake shaft (2). The cutting rollers switch on automatically.
- Oncethecuttingprocessiscomplete, thedeviceisreadyforoperationagain.
5.3.2 Cleaningwithcleaningpaper
- Insert the cleaning paper into the centre of the intake shaft (2). The cutting rollers switch onautomatically.
- Oncethecuttingprocessiscomplete, thedeviceisreadyforoperationagain.
6.Troubleshooting
| ErrorPossiblecauseRemedy | ||
| Thecuttingrollersdonot switchonautmatically whenmaterialtobe shreddedisinserted. | Thesliderswitch(8)isin the" position(10). | Movethesliderswitch(8) tothe" " position(11). |
| Theconnectingcable (3)isnotconnected correctly. | Ensure t hatthemains plugisinthemains socket. | |
| Thesocketisnotlive.Checkthedomesticfuses. | ||
| Thedeviceisfaulty. | N otifyCustomerServices. | |
| ThestatusLED: Overheating(14)islit upred. | Thedevicehasbecome toohot. | Switchthedeviceoffand allowittocooldownfor atleast30minutes. |
7.Technicaldata
| Inputvoltage220-240V~ | |
| MainsFrequency50Hz | |
| Max.powerconsumption529W | |
| Dimensions (W x H x D) | 36.2 x 19.5 x 45.2 cm |
| Weight(net) | 5549g |
| Weight(gross) | 6343g |
| Basketcapacityforpaperandplasticcards | 21litres |
| BasketcapacityforCDs/DVDs/Blu-Rays | 0.8litres |
| Max.noiselevel | 72dB |
| Max. cutting performance - paper (70 gsm) | 13 sheets (DIN A4 paper)* |
| Max. cutting performance - paper (80 gsm) | 12 sheets (DIN A4 paper)* |
| Max.cuttingperformance- C Ds/DVDs/Blu-Rays/plasticcards | 1 |
| Max.cuttingspeed | 2.0m/minute |
| Max. feed width for paper / plastic cards | 220 mm |
| Max.feedwidthforCDs/DVDs/Blu-rays | 120mm |
| Cutting size for paper / plastic cards | 4 mm x 40 mm |
| Max.constantoperationtime | 2 min u t e s |
| Nominalidleperiod | min.30minutes |
| Protectionclass(asperDIN66399) | 2 |
| Safety levels (as per DIN 66399) | P-4 / T-4 / E-3 |
* Thicker paper, moisture or any voltage other than that permitted may reduce the performance.
8.WarrantyDisclaimer
Allothetechnicalinformation, data and instructions regarding operation contained in these operating instructions was up to date at the time of printing and provided based on previous experience and the best of four knowledge.
Hama GmbH & Co KG assumes no liability and provides no warranty for damage resulting from improper installation/mounting, improper use of the product or from failure to observe the operating instructions and/or safety notes.
Maschinenaufbau
7.Conteneurdedéchets
8.Sélecteur
- Position" ( Arrére)
- Voyantd'étatLEDsurchauffe
1. Introduction
1.1 Préambule
Cd's, dvd's, Blu-rays

4.5Cd's/dvd's/Blu-raysversnipperen
• Schuifdeschuifschakelaar(8)inpositie" >>/◎" (12).
SchedechipconstrisciamagneticaeID

CD,DVD,Blu-ray

After the implementation of the European Directive 2012/19/EU and 2006/66/EU in the national legal system, the following applies:
Electric and electronic devices as well as batteries must not be disposed of with household waste. Consumers are obliged by law to return electrical and electronic devices as well as batteries at the end of their service lives to the public collecting points set up for this purpose or point of sale. Details to this are defined by the national law of the respective country.
This symbol on the product, the instruction manual or the package indicates that a product is subject to these regulations.
By recycling, reusing the materials or other forms of utilising old devices/Batteries, you are making an important contribution to protecting our environment.
F Remarquesconcernantlaprotectiondel'environnement:
86652Monheim/ Germany
Service& Support

www.hama.com

+499091502-0
D GB
CE
EAC
All listed brands are trademarks of the corresponding companies. Errors and omissions excepted, and subject to technical changes. Our general terms of delivery and payment are applied.


- Introduction
- Foreword
- Note— Importance of the operating instructions
- Note
- Explanationofwarningsymbolsandnotes
- Riskofelectricshock
- Warning
- Packagecontents
- 2.Safety
- Correctuse
- Basicsafetyinstructions
- Warning - risk of cutting on the cutting rollers
- Explanation of symbols used on the product label
- Warning- riskofinjury
- Safetydevice
- Installation/ Setup
- 4.Operation
- Switchingthedeviceon
- Switching the device off
- Shreddingpaper
- 4.4Shreddingplasticcards
- Forwards/ b ackwardsmode
- 5.CareandMaintenance
- Danger-r iskofdeathfromelectricshock
- Warning- d amagetothedevicefrommoisture
- Emptyingthecontainer
- 5.2Cleaningthedevice
- Cleaning/ oilingthecuttingrollers
- CleaningwithHamacleanersforshredders(itemnumber:113820)
- Cleaningwithcleaningpaper
- 8.WarrantyDisclaimer
- Maschinenaufbau
- Préambule
- 4.5Cd's/dvd's/Blu-raysversnipperen
- F Remarquesconcernantlaprotectiondel'environnement:
- EAC
Brand : HAMA
Model : X12CD
Category : Shredder