
PAS30-240PRS - Vacuum Cleaner BOSCH - Free user manual and instructions
Find the device manual for free PAS30-240PRS BOSCH in PDF.


 FR
FR
 BG
BG
 CS
CS
 DA
DA
 DE
DE
 EL
EL
 EN
EN
 ES
ES
 ET
ET
 FI
FI
 HU
HU
 IT
IT
 KK
KK
 KO
KO
 LT
LT
 LV
LV
 MK
MK
 NL
NL
 NO
NO
 PL
PL
 PT
PT
 RO
RO
 RU
RU
 SK
SK
 SL
SL
 SV
SV
 TR
TR
 UK
UK
| Product type | Wet and dry vacuum cleaner |
| Brand | Bosch |
| Model | PAS30-240PRS |
| Tank volume (gross) | 30 liters |
| Net volume for liquids | 19 liters |
| Non-woven filter bag volume | 20 liters |
| Weight | 8.9 kg |
| Rated power input | 1300 W |
| Rated voltage | 220-240 V ~ |
| Frequency | 50-60 Hz |
| Vacuum (vacuum cleaner) | 240 hPa |
| Vacuum (turbine) | 265 hPa |
| Air flow (vacuum cleaner) | 35 L/s (125 m³/h) |
| Air flow (turbine) | 67 L/s (240 m³/h) |
| Protection class | I (with earth connection) |
| Protection rating | IPX4 |
| Sound pressure level | 73 dB(A) |
| Vibrations (a_h) | 0.2 m/s² |
| Bluetooth | Bluetooth 5.4 (Low Energy) |
| Bluetooth range | 7 m (max.) |
| Transmitter module power supply | CR2032 battery (3 V) |
| Permissible ambient temperature | -5 °C to +50 °C |
| Main functions | Wet/dry vacuum, blower function, automatic start via Bluetooth transmitter module, power tool socket (max 2000 W), manual filter cleaning |
| Delivery contents | Suction hose (23), floor nozzle (28), crevice nozzle (26), suction tube (27), suction adapter (24), suction elbow (25), non-woven filter bag (38), transmitter module (41), swivel castors, fixed wheels |
Frequently Asked Questions - PAS30-240PRS BOSCH
User questions about PAS30-240PRS BOSCH
0 question about this device. Answer the ones you know or ask your own.
Ask a new question about this device
Download the instructions for your Vacuum Cleaner in PDF format for free! Find your manual PAS30-240PRS - BOSCH and take your electronic device back in hand. On this page are published all the documents necessary for the use of your device. PAS30-240PRS by BOSCH.
USER MANUAL PAS30-240PRS BOSCH
Safety instructions for dust extractors

Read all the safety information and instructions. Failure to observe the safety information and follow instructions may result in electric shock, fire and/or serious injury.
Save all warnings and instructions for future reference.
This dust extractor is not intended for use by children or persons with physical, sensory or mental impairments. It should not be used by persons who have insufficient experience and knowledge. Otherwise, there is a risk of operating errors and injuries. Supervise children. This will ensure that children do not play with the dust extractor.
WARNING
Do not vacuum any harmful substances, e.g. beech or oak wood
Only use the dust extractor if you have been adequately informed about how to use it. Thorough instruction on how to use the equipment prevents accidental misuse and injuries.
Only use the dust extractor if you have been adequately informed about how to use it. Thorough instruction is required.
struction on how to use the equipment prevents accidental misuse and injuries.
WARNING
The dust extractor is suitable for vacuuming dry substances, and
can also be used to vacuum liquids when taking appropriate measures. The penetration of liquids increases the risk of an electric shock.
Do not use the dust extractor to vacuum combustible or explosive liquids, such as petrol, oil, alcohol or solvents. Do not vacuum hot, burning or explosive dust. Do not operate the dust extractor in areas subject to explosion hazards. Dust, vapours and liquids can ignite or explode.
WARNING
Only use the socket for the purpose stipulated in the operating
manual.
WARNING
If you notice a foam or water leak, switch off the dust extractor im
mediately and empty the container. Otherwise, the dust extractor can become damaged.
NOTE: The dust extractor must only be stored in order to be used. NOTE: Clean the liquid fill level sensors regularly and check whether they are damaged. Otherwise, the equipment may not function properly. If operating the dust extractor in a damp location is unavoidable, use a residual current device (RCD). Use of an RCD reduces the risk of electric shock. Always check the dust extractor, cable and plug before use. Do not use the dust extractor if you discover any damage. Do not open the dust extractor yourself. It should be repaired exclusively by a qualified professional using only genuine spare parts. Damaged dust extractors, cables and plugs increase the risk of electric shock. Do not crush the cable or run the device over it. Do not pull on the power cable to pull the plug out of the socket or to move the dust extractor. Damaged cables increase the risk of an electric shock. Pull the plug out of the socket before cleaning or performing maintenance on the dust extractor, making tool adjustments, changing accessories or putting away the dust extractor. This safety measure prevents the dust extractor from being started accidentally. Ensure that the workplace is well ventilated. The dust extractor should be repaired exclusively by a qualified professional using only genuine spare parts. This will ensure that the safety of the dust extractor is maintained. Before using the equipment for the first time, check that the vacuum hose is in perfect condition. Leave the vacuum hose fitted to the dust extractor while doing this so that no dust escapes accidentally. Otherwise, you may end up inhaling dust particles. Do not sit on the dust extractor. You can damage the dust extractor this way.
Take care when using the power cable and the vacuum hose. Improper use of these can put other people at risk. - Do not clean the dust extractor by spraying a jet of water directly at it. Water entering the top of the dust extractor will increase the risk of electric shock. Connect the dust extractor to a properly earthed power supply system. The plug socket and extension cable must have a fully functioning protective conductor. ▶ Products sold in GB only:
Your product is fitted with a BS 1363/A approved electric plug with an internal fuse (ASTA approved to BS 1362). If the plug is not suitable for your socket outlets, it should be cut off and an appropriate plug fitted in its place by an authorized customer service agent. The replacement plug should have the same fuse rating as the original plug. The severed plug must be disposed of to avoid a possible shock hazard and should never be inserted into a mains socket elsewhere.
Do not leave the dust extractor running permanently; it is not designed to be used as an extraction unit.
WARNING
Only use the socket for the purpose stipulated in the operating
manual.
The dust extractor has a plug socket with a protective earth contact (5) that can be used to connect an external power tool. Observe the maximum permitted connected load of the connected power tool.

WARNING


Ensure that the coin cell is kept out of the reach of children. Coin cells are dangerous.
- Coin cells must never be swallowed or inserted into any other part of the body. If you suspect that someone has swallowed a coin cell or that a coin cell has entered the body in another way, seek medical attention immediately. Swallowing coin cells can result in severe internal burns and death within 2 hours. Ensure that coin cell replacement is carried out properly. There is a risk of explosion.
- Only use the coin cells listed in this operating manual. Do not use any other coin cells or other forms of electrical power supply. Do not attempt to recharge the coin cell and do not short circuit the coin cell. The coin cell may leak, explode, catch fire and cause personal injury.
- Remove and dispose of drained coin cell correctly. Drained coin cell may leak and damage the product or cause personal injury. Do not overheat the coin cell or throw it into fire. The coin cell may leak, explode, catch fire and cause personal injury.
Do not damage the coin cell and take the coin cell apart. The coin cell may leak, explode, catch fire and cause personal injury. Do not allow damaged coin cells to come into contact with water. Leaking lithium may mix with water to create hydrogen, which could cause a fire, an explosion, or personal injury.
The Bluetooth® word mark and logos are registered trademarks owned by Bluetooth SIG, Inc. Any use of such marks by Robert Bosch Power Tools GmbH is under license.
Symbols
The following symbols may provide you with important information pertaining to the use of your dust extractor. Please take note of these symbols and their meaning. Knowing what these symbols mean will help you to use your extractor more effectively and more safely.
Symbols and their meaning
AUTOSTART

Automatic start/stop function
Extracts dust that accumulates from working power tools; the dust extractor switches on automatically and off again with a time delay. Bluetooth® connection to the Auto-Start Remote is activated.
0
Switching Off
1
Extraction
Extracting dust deposits
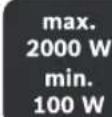
Permitted connected load of the connected power tool (country-specific)
Button for manual filter cleaning

Product Description and Specifications
Please observe the illustrations at the beginning of this operating manual.
Intended use
The wet/dry dust extractor is suitable for extracting dry and damp materials as well as aqueous liquids in standard household quantities and compositions. The blowing function is designed to blow out air.
The dust extractor is intended exclusively for private use in mixed operation.
Long-term vacuuming of homogeneous, harmful substances and the extraction of ash are not permitted. Specialised dust extractors or extraction systems of the corresponding suitability must be used for this.
The plug socket must only be used in dry conditions during operation.
Product Features
The numbering of the product features refers to the representation of the dust extractor on the graphic pages.
(1) Drainage opening for liquids (2) Container (3) Hose socket for extraction function (4) Mode selector switch (5) Plug socket for power tool (6) Paring button (7) Status indicator (8) Carrying handle (9) Holder for extraction accessories (10) Button for manual filter cleaning (11) Top part of dust extractor (12) Extra bracket for dust extractor accessories (13) Catch for top part of dust extractor (14) Wheel (15) Castor brake (16) Castor (17) Cable holder (18) Hose socket for blowing function (19) Holder for floor nozzle (20) Holder for suction tubes (21) Earthing chain (22) Holder for vacuum hose (23) Vacuum hose (24) Dust extraction adapter (25) Curved nozzle (26) Crevice nozzle (27) Suction tube (28) Floor nozzle (29) Floor nozzle insert (30) Adapter for vacuum hose holder (31) Snap fastener (32) Release buttons for floor nozzle insert (33) Castor holders (34) Fastening pin for castor (35) Wheel mount (36) Fastening pin for wheel (37) Washer (38) Fleece filter bag
(39) Connection flange (40) Protective film on the coin cell (41) Auto-Start remote (42) Status indicator for Auto-Start remote (43) Auto-Start Remote fastening hook (44) Start/stop button for Auto-Start remote (45) Rubber band (46) False air intake (47) Filter holder handle (48) Filter holder (49) Filter (50) Fill level sensor
Technical Data
| Wet/dry dust extractor PAS30-240PRS | ||
| Article number | 3603 CE7 3.. | |
| Frequency Hz 50-60 | ||
| Rated power input W 1300 | ||
| Container volume (gross) I 30 | ||
| Net volume (liquid) I 19 | ||
| Volume of fleece filter bag I 20 | ||
| Vacuum pressure | ||
| -Dust extractor A) | hPa 240 | |
| -Turbine hPa 265 | ||
| Flow rate | ||
| -Dust extractor A) | l/s | 35 |
| m³/h | 125 | |
| -Turbine l/s | 67 | |
| m³/h | 240 | |
| Weight B) | kg 8.9 | |
| Protection class /I | # | |
| Protection rating IPX4 | ||
| Mains plug Switzerland protection rating | IP20 | |
| Permitted ambient temperature during operation | °C -5 ... +50 | |
| Data transmission | ||
| Bluetooth® | Bluetooth® 5.4 (Low Energy) | |
| Power supply for Auto-Start remote | CR 2032 (3 V lithium battery) | |
| Operating frequency range | MHz | 2402-2480 |
| Max. transmission power | mW | < 30 |
Wet/dry dust extractor PAS30-240PRS
Max. signal range
A) Measured with vacuum hose (23) B) Measured with mains connection cable, vacuum hose, curved nozzle and mounted wheels C) The signal range may vary greatly depending on external conditions, including the Auto-Start remote used. The Bluetooth® range may be significantly weaker inside closed rooms and through metallic barriers (e.g. walls, shelving units, cases, etc.).
The specifications apply to a rated voltage [U] of 230 V. These specifications may vary at different voltages and in country-specific models.
Automatic start/stop
| Rated voltage | Maximum power | Minimum power |
| 220-240 V | 2000 W 100 W |
A) Permitted connected load of the connected power tool (country-specific)
Noise/Vibration Information
Noise emission values determined according to EN 60335-2-69.
Typically the A-weighted sound pressure level of the dust extractor is 73 dB(A). Uncertainty K = 2 dB. The noise level when working can exceed the volume stated. Wear hearing protection!
Vibration values a_h (continuous vibrations), p_r (repeated shock vibrations) and uncertainty K determined according to EN 60335-2-69:
a_n = 0.2 m/s^2 (K = 0.5 m/s^2), p_F = 8.0 m/s^2 (K = 4.0 m/s^2)
Assembly
Pull the plug out of the socket before cleaning or performing maintenance on the dust extractor, making tool adjustments, changing accessories or putting away the dust extractor. This safety measure prevents the dust extractor from being started accidentally.
Fitting the Holder for the Vacuum Hose (see figure A)
Push the holder (22) for the vacuum hose all the way into the corresponding adapter (30).
Fitting the Extra Bracket for Dust Extractor Accessories (see figure B)
Slide the extra bracket for dust extractor accessories (12) onto the corresponding mount until it clicks into place.
Fitting the Vacuum Hose
Extraction Function (see figure C)
Insert the vacuum hose (23) into the hose adapter (3) and turn it clockwise as far as possible.
Blowing Function (see figure D)
The dust extractor has a blowing function. Do not blow exhaust air out into the open air. Only use the blowing
20|English
function with a clean hose. Dust can be hazardous to health.
Before using the blow-out function, check whether there are any deposits in the hose. Avoid stirring up deposited dust. Use safety goggles and a dust mask if there is a risk of dust being stirred up.
The blowing function is suitable for tasks where extraction is not possible due to excessive suction power, e.g. to remove small quantities of dried-out leaves from a flower bed.
Switch on the dust extractor for at least 5 seconds (mode selector switch (4) in position 1) to clean the vacuum hose (23) of dust deposits.
Turn the vacuum hose (23) anticlockwise as far as it will go and pull it out of the hose socket for the extraction function (3).
Insert the vacuum hose (23) into the hose socket for the blowing function (18) and turn it clockwise as far as it will go.
Fitting the Extraction Accessories
The vacuum hose (23) is equipped with a clip system which can be used to connect extraction accessories (dust extraction adapter (24), curved nozzle (25)).
Fitting the Dust Extraction Adapter or Curved Nozzle (see figure E)
- Fit the dust extraction adapter (24) or the curved nozzle (25) to the vacuum hose (23) until the two snap fasteners (31) on the vacuum hose audibly click into place.
- To remove it, press the snap fasteners (31) inwards and pull apart the components.
Fitting the Nozzles and Tubes
- Then attach the required extraction accessory (floor nozzle, crevice nozzle, suction tube, etc.) firmly to the curved nozzle (25) or to the dust extraction adapter (24).
Removing/Inserting the Insert for the Floor Nozzle (see figure F)
To remove, press the release buttons (32) on the floor nozzle (28). The insert (29) is released from the floor nozzle.
To insert, clamp a new insert into the floor nozzle (28).
Inserting/Removing Castors (see figure G)
Check the functionality of the roller brakes before using the dust extractor.
To insert, push the fastening pins (34) of the castors (16) all the way into the castor mounts (33).
To remove, release the castor brake (15) and pull the castors (16) out of the castor mounts (33).
Attaching/Removing Wheel (see figure H)
To attach, slide the washers (37) onto the fastening pins (36) and push the fastening pins (36) into the wheel mount (35) until they click into place.
To remove, squeeze the fastening pins (36) together and pull out the wheels (14).
Inserting/Changing the Fleece Filter Bag (dry extraction) (see figures I-J)
You can use a fleece filter bag (38) for dry extraction. This makes the dust easier to dispose of.
Open the catches (13) and remove the top part of the dust extractor (11).
To insert the fleece filter bag (38), position the bag over the connection flange (39) of the dust extractor.
To change the fleece filter bag (38), pull the full bag off the connection flange (39), remove it from the dust extractor, and insert a new fleece filter bag.
Hold the top part of the dust extractor (11) open and close both catches (13) until you hear them click into place.
Change a full fleece filter bag (38) in good time. Remove the fleece filter bag (38) before wet extraction.
Operation
Pull the plug out of the socket before cleaning or performing maintenance on the dust extractor, making tool adjustments, changing accessories, or putting away the dust extractor. This safety measure prevents the dust extractor from being started accidentally.
Starting Operation
Check the mains voltage! The voltage of the power source must correspond with the information on the type plate of the dust extractor. ▶ Products that are only sold in AUS and NZ: Use a residual current device (RCD) with a nominal residual current of 30 mA or less.
The dust extractor must categorically not be used in potentially explosive areas.
To ensure optimum suction power, you must always fully unwind the vacuum hose (23) from the top part of the dust extractor (11).
Do not use damaged filters (e.g. no cracks, small holes, etc.). Replace any damaged filters immediately.
Switching On and Off
To switch on the dust extractor, turn the mode selector switch (4) to position 1.
To switch on the Auto-Start function, turn the mode selector switch (4) to the AUTOSTART position. The status indicator (7) lights up. The dust extractor can be started automatically if it is connected to a power tool via Auto-Start Remote (41).
To switch off the dust extractor, turn the mode selector switch (4) to position 0.
Setting Up the Auto-Start Remote
Removing the Protective Film (see figure K)
Before using it for the first time, you must remove the protective film from the coin cell.
Open the housing of the Auto-Start Remote (41) with a screwdriver.
Pull out the protective film (40) and screw the housing of the Auto-Start Remote (41) back on.
Establishing a Connection to the Auto-Start Remote (see figure L)
Note: Upon delivery, the dust extractor is already connected to the Auto-Start Remote via Bluetooth®.
To be able to use the Auto-Start function, the dust extractor must be connected via Bluetooth® to the Auto-Start Remote (41).
The distance from the dust extractor to the Auto-Start Remote must not exceed 0.5 m.
Establishing a new connection (connecting to another Auto-Start Remote):
- Press and hold the pairing button (6) on the dust extractor for at least 3 s until the status indicator (7) begins rapidly flashing green.
- Then press the start/stop button (44) on the Auto-Start Remote (41) promptly and for at least 3 s. The status indicator (42) on the Auto-Start Remote (41) will light up green for 3 seconds.
Connection successfully established:
- The status indicator (7) on the dust extractor lights up green.
- The status indicator (42) on the Auto-Start Remote (41) flashes green once.
When a new connection is established, the old connection (if present) is automatically disconnected.
When the dust extractor is switched off, the connection to the Auto-Start Remote (41) is saved. Once the dust extractor is switched back on, it attempts to re-establish connection to the same Auto-Start Remote.
Connection cannot be established:
- The status indicator (7) on the dust extractor will flash green for 30 seconds and then go out.
- The status indicator (42) on the Auto-Start Remote (41) remains off.
Reconnecting to a known Auto-Start remote:
Turn the operating mode selector switch (4) on the dust extractor to the AUTOSTART position and press the pairing button (6). The status indicator (7) lights up continuously green.
If the dust extractor has already been connected to an Auto-Start Remote and this Auto-Start Remote is functional and within range, the connection to this Auto-Start Remote is automatically re-established.
If the Auto-Start Remote is not connecting to the dust extractor, check whether the coin cell is running low or try again to connect the Auto-Start Remote.
Note: If the coin cell is running low, the status indicator (42) on the Auto-Start Remote (41) quickly flashes green. Replace the coin cell with a new one (see "Changing the Coin Cell of the Auto-Start Remote (see figure N)", page 22).
Dry vacuuming
Extracting Dust that Accumulates from Working Power Tools (see figure M)
- Fit the dust extraction adapter (24).
- Insert the dust extraction adapter (24) into the extraction outlet of the power tool.
Note: When working with power tools that have a low air feed into the vacuum hose (e.g. jigsaws, sanders, etc.), the false air intake (46) of the dust extraction adapter (24) must be opened. This will improve the total output of the dust extractor and the power tool.
To do this, turn the ring above the false air intake (46) until the opening is at its maximum size.
The dust extractor has a plug socket with a protective earth contact (5) that can be used to connect an external power tool. Observe the maximum permitted connected load of the connected power tool.
To start the automatic start/stop feature of the dust extractor, turn the mode selector switch (4) to the AUTO-START position.
To start the dust extractor, switch on the power tool connected to the plug socket (5). The dust extractor will start automatically.
To stop dust extraction, switch the power tool off.
The automatic start/stop run-on function will run for up to 6 seconds longer in order to extract the remaining dust from the vacuum hose.
To switch off the dust extractor, turn the mode selector switch (4) to position 0.
Automatic Mode via Auto-Start Remote
With the Auto-Start function, you can automatically switch the dust extractor on and off with a cordless power tool using the Auto-Start remote (41):
- Turn the mode selector switch (4) to the AUTOSTART position. The status indicator (7) lights up to indicate that the function is switched on.
- Fit the Auto-Start Remote (41) on the power tool. To do so, tighten the rubber band (45) and attach the free end to the fastening hook (43). Cut the rubber band to the correct length, as necessary. Appropriate places are those at which the power tool generates sufficient vibration during operation. Never fasten the Auto-Start Remote to places which are required to operate the power tool (such as gripping surfaces, switches, displays).
- Connect the dust extractor to the Auto-Start Remote (41) (see "Establishing a Connection to the Auto-Start Remote (see figure L)", page 21).
- To switch on the dust extractor, switch on the connected power tool. The dust extractor will start automatically.
- To switch off the dust extractor, switch off the power tool. The extraction comes to an end after a run-on time of up to 6 s. During the run-on period, the residual dust is extracted from the vacuum hose.
Wet vacuuming
Do not use the dust extractor to vacuum combustible or explosive liquids, such as petrol, oil, alcohol, or solvents. Do not vacuum hot, burning, or explosive dust. Do not operate the dust extractor in areas subject to explosion hazards. Dust, vapors, and liquids can ignite or explode. The dust extractor must not be used as a water pump. The dust extractor is designed for vacuuming air and vacuuming water mixtures. Before wet extraction, make sure that the drainage opening for liquids (1) is firmly closed. Pull the plug out of the socket before carrying out any work on the dust extractor.
Steps to Take before Wet Extraction
Open the catches (13) and remove the top part of the dust extractor (11).
Before wet extraction, remove the fleece filter bag (38).
Turn the catch of the drainage opening for liquids (1) anticlockwise. Empty the container (2) via the drainage opening for liquids (1) and turn the catch clockwise until it is firmly secured.
Clean the filter (49).
Make sure that the fill level sensor (50) is clean.
Replace the top part of the dust extractor (11) and close the catches (13).
During and After Wet Extraction
The dust extractor is equipped with a fill level sensor (50). Extraction is stopped when the maximum fill level is reached.
Turn the catch of the drainage opening for liquids (1) anticlockwise. Empty the container (2) via the drainage opening for liquids (1) and turn the catch clockwise until it is firmly secured.
Once the work is complete, remove the top part of the dust extractor (11) and leave it to dry thoroughly to prevent mold from forming.
Clean the fill level sensor (50) with a soft cloth.
Manual Filter Cleaning
You should clean the filter at the latest when the suction power is no longer sufficient.
How often filter cleaning needs to be carried out will depend on the type and quantity of dust that has been extracted. With regular use, the maximum conveying capacity will be maintained for longer.
Turn on the dust extractor (mode selector switch (4) to position 1).
Use the palm of your hand to close the nozzle or vacuum hose opening.
Press the manual filter cleaning button (10) three times in succession. The filter is cleaned by a strong air flow.
Maintenance and Service
Maintenance and Cleaning
Pull the plug out of the socket before cleaning or performing maintenance on the dust extractor, making tool adjustments, changing accessories or putting away the dust extractor. This safety measure prevents the dust extractor from being started accidentally. To ensure safe and efficient operation, always keep the dust extractor and the ventilation slots clean.
In order to avoid safety hazards, if the power supply cord needs to be replaced, this must be done by Bosch or by an after-sales service centre that is authorised to repair Bosch power tools.
Wear a dust mask when servicing and cleaning the dust extractor. Clean the housing of the dust extractor occasionally with a damp cloth. Do not use compressed air to clean the dust extractor. The filter or other components may become damaged.
Changing the Coin Cell of the Auto-Start Remote (see figure N)
Caution: The coin cell must always be replaced with a coin cell of the same type. There is a risk of explosion. - Remove and dispose of drained coin cell correctly. Drained coin cell may leak and damage the product or cause personal injury.
Open the housing of the Auto-Start remote (41) with a screwdriver.
Carefully remove the coin cell and insert a new coin cell. Pay attention to the markings for correctly inserting the coin cell. Screw the housing for the Auto-Start remote (41) back on.
Cleaning/Changing the Filter (see figures O-P)
The suction power is dependent on the condition of the filter. Therefore, the filter (49) should be cleaned regularly. Replace any damaged filters immediately.
- Start manual filter cleaning (see "Manual Filter Cleaning", page 22) and then switch off the dust extractor.
- Open the catches (13) and remove the top part of the dust extractor (11).
- Open the handle (47) of the filter holder (48) and pull out the filter holder (48).
- Remove the filter (49) from the filter holder (48). If the filter is dry:
Tap the filter (49) on the side of a suitable waste bin. Ensure that you do not damage the flaps on the filter in the process.
If the filter is very dirty, brush the flaps of the filter with water and a soft brush.
or
If the filter is wet:
Rinse the filter (49) under running water and then leave it to dry thoroughly.
or
Replace the filter (49) if it is damaged.
- Place the clean and dry filter (49) into the filter holder (48) ①.
- Insert the filter holder (48) into the top part of the dust extractor 2 and close the handle (47) of the filter holder (48) until it engages.
- Check that the filter (49) and filter holder (48) are fitted correctly and securely. Put the top part of the dust extractor (11) back on and close both catches (13) until you hear them click into place.
Cleaning the container
Wipe the container (2) from time to time using a non-abrasive off-the-shelf cleaning product and leave it to dry.
Cleaning the Fill Level Sensor (see figure Q)
Clean the fill level sensor occasionally (50).
Open the catches (13) and remove the top part of the dust extractor (11).
Clean the fill level sensor (50) with a soft cloth.
Put the top part of the dust extractor (11) back on and close the catches (13).
Faults
Regularly emptying the container (2) will ensure optimum suction power.
If the suction power is insufficient, check:
- Is the top part of the dust extractor (11) positioned correctly?
- Is the hose system blocked?
- Are the suction tubes (27) firmly joined together?
- Is the container (2) full?
- Is the fleece filter bag (38) full?
- Is the filter (49) clogged with dust?
If sufficient suction power is not achieved after following these steps, please contact a Bosch customer service agent.
If the dust extractor overheats, it will automatically turn off. Proceed as follows:
- Turn the mode selector switch (4) to position 0.
- Make sure that the container (2) and fleece filter bag (38) are empty and that the vacuum hose (23) and the filter (49) are not clogged. Leave the dust extractor to cool down for 60 minutes.
- Remove the mains plug from the plug socket and insert it back into the plug socket.
If the dust extractor cannot be switched on afterwards, the fuse protecting the dust extractor may have melted. Contact a Bosch customer service agent to have the fuse replaced.
Storage and Transport (see figure R)
- Wrap the vacuum hose (23) around the top part of the dust extractor (11) and push the vacuum hose into the holder (22).
- Wrap the power cable around the cable holder (17).
- Insert the suction tube (27) into the suction tube holder (20), the curved nozzle (25), the dust extraction adapter (24) and the crevice nozzle (26) into the holders for extraction accessories (9) or (12).
- Insert the floor nozzle (28) into the holder (19).
- Carry the dust extractor by the carrying handle (8).
- Store the dust extractor in a dry room and secure it so that it cannot be used by unauthorised persons.
- Apply the castor brake (15) to hold the castors (16) in place.
After-Sales Service and Application Service
Great Britain
Tel. Service: (0344) 7360109
GB Importer:
Robert Bosch Ltd.
Broadwater Park
North Orbital Road
Uxbridge
UB95HJ
You can find the link to our service addresses and warranty conditions on the last page.
In all correspondence and spare parts orders, please always include the 10-digit article number given on the nameplate of the product.
Disposal
The dust extractor, batteries, accessories and packaging should be recycled in an environmentally friendly manner.
Do not dispose of dust extractors or batteries with household waste.
Only for EU countries and United Kingdom:
Electrical and electronic equipment or used batteries that are no longer suitable for use must be collected separately and disposed of in an environmentally friendly manner. Use the designated collection systems. Incorrect disposal may cause harmful effects on the environment and human health, due to the potential presence of hazardous substances.
French
Remove the fleece filter bag (38) for wet vacuuming.
66 | Danish
Turn the lock for the liquid drain openings (1) counterclockwise. Empty the container (2) via the liquid drain openings (1), and turn the closures clockwise to secure them.
Clean the filter (49).
Make sure that the level sensor (50) is clean.
Clean the vacuum cleaner cabinet occasionally with a damp cloth. Clean the filter (49) regularly.
Button for manual filter cleaning
Only for EU countries:
Replace a full fleece filter bag (38) in good time. Remove the fleece filter bag (38) for wet vacuuming.
Use
Remove the fleece filter bag for wet vacuuming (38).
Waste electrical and electronic equipment
AUTOSTART

Automatic start/stop
The appliance is intended for household and similar use, such as in staff kitchens in shops, offices, and other working environments.
The appliance can be operated automatically and can be operated manually. The Bluetooth connection to the unit is enabled.
0
1
Deactivated
On
Activation of the connected appliance
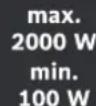
Check the type plate of the connected electrical appliance (special waste)

Electric hand-held blender
Blender jug
Refer to the images at the front of the operating instructions.
Time display
The appliance is suitable for drying and dehumidifying and is also suitable for drying laundry in combination with household quantities and habits. The function is suitable for dehumidification.
The appliance is intended exclusively for private use.
Improper use, endangering the health and safety of the appliance are not permitted. Use special appliances or installations for this purpose.
The information shown in the displayed elements refers to the representation of the appliance on the graphic pages.
Clean the filter (49).
Check that the dirt container (50) is clean.
Then fit the upper part of the vacuum cleaner (11) and close the locks (13).
During each wet vacuuming
Keep button cells out of the reach of children. Button cells are dangerous.
Button cells must not be swallowed or inserted into any other body openings. If you suspect that a button cell has been swallowed or inserted into another body opening, seek medical attention immediately. Swallowing a button cell can lead to severe internal burns and death within 2 hours. Replace the button cell only in the manner described. There is a risk of explosion. Use only the button cells specified in this operating manual. Do not use other button cells or other power sources. Do not attempt to recharge the button cell and do not short-circuit it. The button cell may lose its seal, explode, catch fire, or cause injury. Remove and dispose of discharged button cells in accordance with regulations. Discharged button cells may lose their seal and damage the product or cause injury. Do not heat the button cell and do not throw it into fire. The button cell may lose its seal, explode, catch fire, or cause injury.
Do not damage the button cell and do not disassemble it. The button cell may lose its seal, explode, catch fire, or cause injury. Do not allow a damaged button cell to come into contact with water. The released contents may react with water, causing fire, explosion, or injury.
The Bluetooth® word mark and graphic logo (figurative mark) are registered trademarks owned by Bluetooth SIG, Inc. Any use of this word mark/graphic logo is only under license from Robert Bosch Power Tools GmbH.
Symbols
The following symbols may be important for the operation of your vacuum cleaner. Please remember these symbols and their meaning. Correct understanding of the symbols will help you to use the vacuum cleaner better and more safely.
Symbol and its meaning
AUTO-START

Automatic switching on/off
Dust extraction, which is generated when working with power tools; the vacuum cleaner switches on and off automatically with a time delay. Connection via Bluetooth is pre-installed.
0
Switching off
1
Dust extraction
Extraction of deposited dust
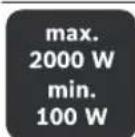
Indication of the maximum permissible total connected power of the connected electrical tool (depending on the country)

Manual filter cleaning button
Product and service description
Please follow the figure references at the beginning of the operating instructions.
Intended use
The vacuum cleaner is suitable for wet/dry vacuuming of dry and wet materials, as well as common liquids in household quantities and compositions. The function is suitable for vacuuming.
The vacuum cleaner is intended solely for private household use in combined mode.
Continuous vacuuming of harmful, hazardous to health materials, as well as cleaning of ash, is not permitted. For this purpose, special vacuum cleaners suitable for extraction must be used.
Component parts shown
The numbering of the component parts is made according to the illustration on the page with illustrations.
(1) Suction opening (2) Container (3) Hose connection (for suction) (4) Operating mode switch (5) Socket for power tool (6) Coupling button (7) Status indicator (8) Carrying handle (9) Accessory holder for suction.
(10) Filter cleaning button (11) Upper part of the vacuum cleaner (12) Additional accessory holder for suction (13) Latch for fixing the upper part of the vacuum cleaner (14) Wheel (15) Parking brake (16) Guide roller (17) Cable holder. (18) Blow hose (suction mode) (19) Nozzle holder (20) Suction tube holder (21) Locking buttons (22) Suction hose holder (23) Suction hose (24) Air outlet adapter (25) Curved nozzle. (26) Crevice nozzle (27) Suction tube (28) Floor nozzle (29) Insert for floor nozzle (30) Fastening of suction hose holder (31) Release button (32) Unlocking button for floor nozzle insert (33) Fastening of guide rails (34) Fastening screws for guide roller (35) Wheel fastening
134|Russian
(36) Wheel fastening screws (37) Washer (38) Filter bag made of non-woven material (39) Connecting flange (40) Protective cover for heating element (41) Transmission module (42) Status indicator of transmission module (43) Fastening hook of transmission module (44) Start/Stop button of transmission module (45) Rubber element (46) Air intake opening (47) Filter handle (48) Filter holder (49) Filter (50) Dust container.
Technical data
Turn on the vacuum cleaner for at least 5 seconds (operating mode switch (4) in position) to clean the suction hose (23) from dust deposits.
Turn the suction hose (23) counterclockwise until it stops and disconnect it from the hose connection for suction mode (3).
Insert the suction hose (23) into the blow hose (18) and turn it clockwise until it stops.
Installing accessories for dust removal
The suction hose (23) is equipped with a locking system for connecting accessories for dust removal (air outlet adapter (24), curved nozzle (25)).
Installing the air outlet adapter or curved nozzle (see Fig. E)
- Install the air outlet adapter (24) or curved nozzle (25) onto the suction hose (23) so that the locking buttons (31) of the suction hose engage with a click. - To release, press the buttons (31) and separate the parts.
- Attach the required accessory (floor nozzle, crevice nozzle, or extension hose, etc.) to the suction tube (25) or to the exhaust air connector (24).
Removal/installation of the insert for the floor nozzle (see Fig. F)
To remove, press the release button (32) on the floor nozzle (28). The insert (29) is released from the floor nozzle.
To install, insert a new insert into the floor nozzle (28) until it clicks into place.
Installation/removal of the guide rollers (see Fig. G)
Before using the vacuum cleaner, check the function of the roller brakes. To install, insert the retaining pins (34) of the guide rollers (16) into the guides of the guide rollers (33). To remove, press the release buttons of the guide rollers (15) and pull the rollers (16) out of the guides (33).
Installation/removal of the wheel (see Fig. H)
To install, place the washers (37) on the retaining pins (36) and insert the pins (36) into the wheel hub (35) until they click into place.
To remove, press the retaining pins (36) and pull out the wheels (14).
Installation/replacement of the filter bag made of non-woven fabric (dry cleaning) (see Fig. I-J)
For dry vacuuming, you can install a filter bag made of non-woven fabric (38). This makes disposal of dust easier.
Open the catches (13) and remove the upper part of the vacuum cleaner (11).
To install the filter bag made of non-woven fabric (38), place it over the connecting flange (39) of the vacuum cleaner.
To replace a full filter bag made of non-woven fabric (38), remove it from the connecting flange (39) by pulling it towards you, take the bag out of the vacuum cleaner, and install a new one.
Install the upper part of the vacuum cleaner (11) and close both latches (13) until they click into place with a distinct sound.
Replace the fine dust filter bag (38) in a timely manner. Remove the fine dust filter bag (38) before it becomes too full.
Working with the appliance
Before cleaning and maintenance of the vacuum cleaner, its adjustment, replacement of accessories, or before storing it, unplug the appliance from the power outlet. This precaution prevents unintentional starting of the vacuum cleaner.
Switching on the appliance
Pay attention to the mains voltage! The voltage of the power source must correspond to the data on the rating plate of the vacuum cleaner.
The vacuum cleaner must not be used in potentially explosive areas.
Always fully unwind the power cord before using the vacuum cleaner. Insert the plug into the socket (23).
Use only filters that are not damaged (no cracks, holes, etc.). If the filter is damaged, replace it immediately.
Press the On/Off button (6) on the vacuum cleaner and hold it for at least 3 seconds until the status indicator (7) flashes green quickly.
At that moment, press the Start/Stop button (44) on the remote module (41) and hold it for at least 3 seconds.
The status indicator (42) on the remote module (41) lights up green for 3 seconds.
Successful connection:
- The status indicator (7) on the vacuum cleaner lights up green. The status indicator (42) on the remote module (41) flashes green once.
When establishing a new connection, the old connection (if it exists) is automatically disconnected.
The connection with the transmitting module (41) is stored in the vacuum cleaner's memory. After
repeated switching on, the vacuum cleaner attempts to restore the connection with the same transmitting module.
Establishing a connection is not possible:
- The connection indicator (7) on the vacuum cleaner flashes green for 30 seconds and then goes out. - The status indicator (42) on the transmitting module (41) remains off.
Repeated connection with a known transmitting module:
Turn the mode switch (4) on the vacuum cleaner to the AUTOSTART position and press the pairing button (6). The status indicator (7) lights up continuously green.
If the vacuum cleaner is already connected to a transmitting module and this transmitting module is ready for operation and within range, the connection with this transmitting module will be established automatically.
If the connection between the vacuum cleaner and the transmitting module is not established, check whether the battery is discharged, or try to establish the connection with the transmitting module again.
Note: When the battery is discharged, the status indicator (42) on the transmitting
module (41) flashes green quickly. Replace the battery with a new one (see Replacing the battery in the transmitting module (see Fig. N), page 138).
Dry vacuuming
Vacuuming dust from power tools (see Fig. M)
- Mount the extraction adapter (24). Insert the extraction adapter (24) into the extraction hose of the power tool.
Note: When working with power tools that supply little air to the extraction hose (e.g., jigsaws, sanders, etc.), it is necessary to open the air inlet opening (46) on the extraction adapter (24). This improves the performance of the vacuum cleaner and the power tool.
To do this, turn the ring over the air inlet opening (46) to fully open the opening.
The socket is protected by a contact (5). An external power tool can be connected to it. Please note the maximum permissible power consumption of the connected power tool.
To switch on/off automatically, turn the mode switch (4) to the AUTOSTART position.
To switch on the vacuum cleaner, switch on the power tool connected to the socket (5). The vacuum cleaner starts automatically.
Switch off the power tool to stop vacuuming.
The automatic on/off function ensures the vacuum cleaner operates for
about 6 seconds after it is switched off, to remove any remaining dust from the suction hose.
To switch off the vacuum cleaner, turn the mode switch (4) to the 0 position.
Automatic mode via the transmitter module
The automatic start function allows the vacuum cleaner to be switched on and off automatically using the transmitter module (41) together with the power tool:
- Turn the mode switch (4) to the AUTOSTART position. The indicator light signals that the function is activated. - Attach the transmitter module (41) to the power tool. To do this, press the rubber strap (45) and secure the free end to the hook (43). If necessary, cut the rubber strap to the required length. Suitable places are where the power tool creates vibrations during operation. Do not attach the transmitter module in places that are used for controlling the power tool (for example, on gripping surfaces, switches, indicators). - Connect the vacuum cleaner to the transmitter module (41) (see Connecting the vacuum cleaner to the transmitter module (see Fig. L), page 136). - To switch on the vacuum cleaner, switch on the connected power tool. The vacuum cleaner starts automatically. - To switch off the vacuum cleaner, switch off the power tool. Vacuuming stops after a delay of up to 6 seconds. During the delay, remaining dust is removed from the suction hose.
Vacuuming up liquids
Do not vacuum up flammable or explosive liquids, such as petrol, oil, alcohol, or solvents. Do not vacuum up glowing or burning dust. Do not use the vacuum cleaner in rooms with a high risk of explosion. Dust, vapors, or liquids may ignite or explode. It is not recommended to use the vacuum cleaner as a water pump. The vacuum cleaner is intended for vacuuming dry dust-air mixtures. Before wet vacuuming, make sure that the liquid filter (1) is tightly closed. Before starting maintenance or adjustment work, disconnect the mains plug from the socket.
Wet vacuuming
Open the catches (13) and remove the upper part of the vacuum cleaner (11).
Before wet vacuuming, remove the filter bag made of non-woven fabric (38).
Turn the drain valve (1) counterclockwise. Empty the container (2) through the drain opening (1), then close the valve clockwise.
Clean the filter (49).
Make sure the level indicator (50) is clean.
Install the upper part of the vacuum cleaner (11) in place and close the latches (13).
Timely cleaning of the dust container
Clean the dust level sensor (50). After reaching the maximum fill level, suction is automatically stopped.
Turn the drain valve (1) counterclockwise. Empty the container (2) through the drain opening (1), then close the valve clockwise.
After finishing work, to prevent the formation of deposits, remove the upper part of the vacuum cleaner (11) and let it dry.
If necessary, clean the level indicator (50) with a soft cloth.
When servicing the vacuum cleaner, always wear a dust mask.
From time to time, wipe the vacuum cleaner body with a damp cloth.
Do not clean the vacuum cleaner with compressed air. The filter or other components may be damaged.
Replacing the battery cell of the transmitter module (see fig. N)
Attention: Always replace the battery cell with a battery cell of the same type. There is a risk of explosion. Remove and dispose of discharged battery cells in accordance with regulations. Discharged battery cells may leak and damage the product or cause injury.
Open the housing of the transmitter module (41) with a screwdriver. Carefully remove the old battery cell and insert a new battery cell. Pay attention to the marking for correct installation of the battery cell.
Level sensor cleaning (see Fig. Q)
Clean the level sensor (50) if necessary.
Open the catches (13) and remove the upper part of the vacuum cleaner (11).
Clean the level sensor (50) with a soft cloth.
Place the upper part of the vacuum cleaner (11) back into position and close the catches (13).
Malfunctions
Regular emptying of the container (2) ensures optimal suction power.
If suction power is insufficient, check the following:
- Is the upper part of the vacuum cleaner (11) correctly installed? - Is the hose clogged? - Is the suction hose (27) tightly connected? - Is the container (2) full? - Is the filter bag made of non-woven fabric (38) full? - Is the filter (49) clogged with dust?
If, after performing the above steps, the suction power is still not sufficient, contact the Bosch Service Center.
If the vacuum cleaner overheats, it switches off automatically. Perform the following steps:
- Turn the mode selector (4) to position 0. - Make sure that the container (2) and the filter bag made of non-woven fabric (38) are empty and that the suction hose (23) and the filter (49) are not clogged. - Allow the vacuum cleaner to cool down for about 60 minutes. - Unplug the power cord from the outlet and plug it back in.
If the vacuum cleaner still does not switch on after this, its thermal fuse may have blown. To replace the fuse, contact the Bosch Service Center.
Storage and transport (see Fig. R)
- Wind the suction hose (23) around the upper part of the vacuum cleaner (11) and secure it with the hose retainer (22). - Wind the power cord around the cord holder (17). - Insert the suction tubes (27) into the holder (20), the curved nozzle (25), the crevice nozzle (24), and the upholstery nozzle (26) into the accessory holder (9) and (12). - Insert the floor nozzle (28) into the holder (19). - Carry the vacuum cleaner by the handle (8). - Store the vacuum cleaner in a dry place and protect it from unauthorized use.
Lower the brake lever (16) and then lower the brake lever (15).
Consultation on the subject of product use
Kazakhstan
List of consumer consultation and complaint acceptance points:
LLP "Robert Bosch"
050012, Almaty,
Republic of Kazakhstan
st. Murabaeva, 180
BC "Germes", 7th floor
Tel.: +7 (727) 3318600
Tel.: 88000700270
Links to the addresses of service centers and warranty conditions can be found on the last page.
For all product inquiries and spare parts orders, be sure to indicate the 10-digit product number according to the factory plate of the product.
In case of power tool failure during the warranty period due to the manufacturer's fault, the owner has the right to free warranty repair, subject to the following conditions:
No mechanical damage; - No signs of violation of the requirements of the operating instructions; - Availability of the operating instructions with the seller's and buyer's signatures and purchase date; - Compliance of the serial number of the power tool with the serial number in the warranty card; - No traces of unqualified repair.
It is not distributed:
Any damage associated with force majeure circumstances; - normal wear and tear of the power tool, as well as all electrical components.
The warranty does not cover repairs required due to normal wear and tear that shortens the service life of such parts and the tool, such as carbon brushes, contacts, wires, etc.:
- natural wear and tear (complete depletion of resource); - equipment and its parts that fail due to improper installation, unqualified use, improper application, violation of operating and storage rules; - malfunctions resulting from overloading the power tool. (Unconditional signs of tool overload include: increased brightness of the work surface, deformation, melting of parts and components of the power tool, darkening or charring of the insulation of the power tool wires due to high temperature.)
Disposal
The device, accessories and packaging should be disposed of in an environmentally safe manner.
Do not dispose of the device or accessories with household waste!
Only for EU countries:
Electrical and electronic devices, used batteries/accumulators that are not intended for further use must be collected separately and disposed of in an environmentally safe manner. Use the provided waste collection systems. Due to the possible content of hazardous substances, improper disposal may cause harm to the environment and health.
Ukrainian
Safety instructions for the power tool

Read all safety warnings and instructions. Failure to follow the safety instructions and instructions may result in electric shock, fire and/or serious injury.
serious injuries.
Keep all warnings and instructions for future reference.
This power tool is not intended for use by persons with reduced physical, sensory or mental capabilities, or lack of experience and knowledge, unless they have been given supervision or instruction concerning use of the appliance by a person responsible for their safety. Children should be supervised to ensure that they do not play with the power tool.
Do not use the vacuum cleaner to pick up flammable or combustible materials, e.g., ash, soot, or coal dust,
fine dust, or asbestos. These may be carcinogenic. Be aware of the relevant laws and regulations regarding the disposal of such materials in your country.
Use the vacuum cleaner only as described in this manual. Improper use of the vacuum cleaner may result in injury or damage.
The vacuum cleaner is intended for dry vacuuming only. Do not use it to pick up liquids or wet materials.
140|Ukrainian
Also, do not use the vacuum cleaner outdoors. There is a risk of electric shock if the vacuum cleaner is exposed to rain or moisture.
Do not use the vacuum cleaner to pick up flammable or combustible liquids, such as gasoline, oil, alcohol, or solvents. Do not use the vacuum cleaner in areas where there are flammable gases, vapors, or liquids that could ignite or explode.
Use the vacuum cleaner only for its intended purpose as described in the operating instructions.
Do not immerse the vacuum cleaner in water or other liquids, and do not spill liquids on it. Otherwise,
the vacuum cleaner may be damaged.
WARNING! The vacuum cleaner is not suitable for use in wet or damp conditions. WARNING! Regularly check the power cord and plug for damage. They may adversely affect the functionality of the vacuum cleaner. In a wet environment, use a residual current device (RCD). Using an RCD reduces the risk of electric shock. Before each use, check the vacuum cleaner, cord, and plug. Do not use the vacuum cleaner if any damage is found. Do not open the vacuum cleaner yourself; repairs should only be carried out by qualified personnel using original spare parts. Damage to the vacuum cleaner, cord, or plug increases the risk of electric shock. Do not pull the cord to disconnect the plug from the outlet, and do not pinch or crush the cord. Do not place the cord near heat sources, and do not pull the cord around sharp edges. Damage to the power cord increases the risk of electric shock. Unplug the vacuum cleaner before performing maintenance or cleaning, before changing accessories, or when not in use. These safety precautions reduce the risk of accidental starting of the vacuum cleaner. Follow the maintenance instructions in this manual. Repairs should only be carried out by qualified personnel using original spare parts. This ensures that the safety features of the vacuum cleaner are maintained.
Before using the vacuum cleaner, check its condition. Do not use it if it is damaged or has a faulty plug. Do not use it on a wet surface. Do not use it to pick up liquids. Be careful when using it with the hose and nozzle. Do not use it to pick up burning or smoking objects. Do not use it to pick up flammable or combustible liquids. Do not use it near water. Do not immerse the vacuum cleaner in water. Do not use it with a damaged cord or plug. The plug and socket must be in good condition. Do not use the vacuum cleaner as a step ladder.
WARNING
Use the socket only as intended in the instruction manual.
The vacuum cleaner has an integrated socket with a protective contact (5). It is intended for connecting an external power tool. Observe the maximum permissible power consumption of the connected power tool.

WARNING


Keep button cells out of the reach of children. Button cells are dangerous.
Button cells must not be swallowed or inserted into any part of the body. If you suspect that a button cell has been swallowed or inserted into any part of the body, seek medical attention immediately. Swallowing a button cell can cause serious internal injuries and death within 2 hours. Dispose of used button cells safely. There is a risk of explosion. Use only the button cells specified in the instruction manual. Do not use any other button cells or other power sources. Do not attempt to recharge non-rechargeable button cells. Do not short-circuit button cells. Button cells may leak, explode, catch fire, or cause injury. Dispose of discharged button cells properly according to regulations. Discharged button cells may leak
and damage the product or cause injury.
Do not heat the button cell and do not throw it into fire. The button cell may leak, explode, catch fire, or cause injury. Do not damage the button cell, do not disassemble it. The button cell may leak, explode, catch fire, or cause injury. Do not allow the button cell to come into contact with water. Moisture may cause a reaction with the water, resulting in leakage, explosion, or injury.
The Bluetooth word mark and logos are registered trademarks owned by Bluetooth SIG, Inc. Any use of such marks by Robert Bosch Power Tools GmbH is under license.
SYMBOLS
The following symbols may appear when using the vacuum cleaner. Please familiarize yourself with the symbols and their meanings. Following the symbols will help you use the vacuum cleaner correctly and safely.
Symbol and meaning

Automatic start and stop
The tool is switched on automatically and switches off again after the set delay time. The Bluetooth module can transmit the activation.
Switching on
1 OPERATING MODE Operating mode, to osv
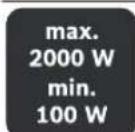
Data on the maximum permissible total power consumption of the power tool (depending on the country)

Button for activating the manual filter cleaning mode
The numbering of the depicted components refers to the illustration on the page with the overview.
(1) Exhaust outlet (2) Container (3) Operating mode switch (4) Mode selector switch (5) Socket for power tool (6) Steam button (7) Status indicator (8) Handle for carrying (9) Tool holder for accessories
(10) Button for activating the blowing function (11) Hinge of the cover (12) Additional holders for accessories (13) Lock of the cover hinge (14) Castor wheel (15) Guide rollers (16) Parking aid (17) Cable holder (18) Connection piece, blowing function (19) Holder for the floor nozzle (20) Holder for the suction hose (21) Earth terminal (22) Holder for the suction hose (23) Suction hose (24) Adapter for the cover (25) Upholstery nozzle (26) Crevice nozzle (27) Suction tube (28) Floor nozzle (29) Use of the floor nozzle (30) Fastening of the tool holder
142|Ukrainian
(31) Pressure button (32) Release button for the floor nozzle (33) Fastening of the guide rollers (34) Fixing screw for the castor wheel (35) Fastening of the castor wheel (36) Fixing screw for the castor wheel (37) Washer (38) Non-woven filter bag (39) Connection flange (40) Protective film for the motor protection element (41) Transmission module (42) Status indicator of the transmission module (43) Fastening screw for the transmission module (44) Button for the transmission module function (45) Rubber strip (46) Air inlet with cover (47) Filter handle (48) Filter holder (49) Filter (50) Fill level sensor
Technical data
Installing the castor wheel (see Fig. M)
To install, place the washer (37) on the fixing screw (36) and insert the fixing screw (36) into the fastening of the castor wheels (35) until a clear click is heard. To remove, loosen the fixing screw (36) and pull off the castor wheels (14).
Installing/replacing the non-woven filter bag (dry vacuuming) (see Fig. I-J)
For dry vacuuming, you can insert the non-woven filter bag (38). This makes disposal easier. Open the locks (13) and remove the cover (11). To install, place the new non-woven filter bag (38) on the connection flange (39) of the cover. To replace, remove the full non-woven filter bag (38) from the connection flange (39), take it out of the cover, and install the new non-woven filter bag. Install the cover (11) and close both locks (13) so that a characteristic click is heard. Dispose of the full non-woven filter bag (38) properly. Before vacuuming, remove the non-woven filter bag (38).
Work
Before inserting the plug into the socket, before performing any maintenance or cleaning work, adjust the device, change accessories, or before storing the device, unplug it. These precautionary measures reduce the risk of accidental starting of the device.
Operation
Pay attention to the mains voltage! The voltage in the power source must match the data on the rating plate.
The device must not be used in explosive atmospheres.
To ensure maximum efficiency of the device, the air inlet (23) must be kept free and unobstructed, and the device (11) must not be covered.
Use only an undamaged filter (without tears, do not remove it). If the filter is damaged, replace it immediately.
Switching on/off
To switch on the device, turn the rotary switch (4) to position 1.
Switching on with automatic start: Turn the rotary switch (4) to
Before first use, remove the protective film from the display element.
Open the cover of the gearbox (41) using a screwdriver.
Remove the protective film (40) and attach the gearbox housing (41).
Connecting the gearbox (see Fig. L)
Insert. In the delivery state, the device is already connected to the gearbox via Bluetooth.
The sensor is automatically recorded. The sensor must be connected via the Bluetooth transmitter module (41).
The distance from the sensor to the transmitter module must not exceed 0.5 m.
Installing a new sensor (sensor to another transmitter):
- Press and hold the Pairing button (6) on the sensor for at least 3 seconds. The status indicator (7) will start blinking green.
While holding the button, press the button on the transmitter (41) for at least 3 seconds. The status indicator (42) on the transmitter will light up green.
Establishing a connection was successful:
- The status indicator (7) on the sensor lights up green. - The status indicator (42) on the transmitter (41) blinks green.
If an existing connection is established, the old connection (if any) is automatically disconnected.
When the sensor is turned off, the connection with the transmitter (41) is saved. After turning the sensor on again, it will attempt to reconnect to the same transmitter.
Establishing a connection fails:
- The status indicator (7) on the sensor blinks green and then goes out. - The status indicator (42) on the transmitter (41) lights up red.
Reconnecting to another transmitter:
Turn the sensor's switch (4) to the START position and press the pairing button (6). The status indicator (7) will light up green. If the sensor was already connected to a transmitter, that transmitter is ready for operation and is in the coverage area, the connection to that transmitter will be restored automatically.
If the transmitter is not connected to the sensor, check whether the indicator element is discharged, or try to connect the transmitter again.
Note. If the indicator element is discharged, the status indicator (42) on the transmitter (41) will blink red. Replace the indicator element with a new one (see "Replacing the indicator element of the transmitter" (see Manual), page 146).
Connecting the vacuum cleaner to the mains-powered electric tool (see fig. M)
- Mount the vacuum adapter (24). - Insert the vacuum adapter (24) into the exhaust pipe of the electric tool.
Note: When working with electric tools that generate a small amount of dust, the vacuum adapter (24) must be opened with the shutter (46) on the adapter (24). This improves the overall productivity of the vacuum cleaner and the electric tool.
To do this, turn the ring on the air intake shutter (46) until the opening is maximum.
The mains socket must be protected by a contact (5). It must not be switched on with the electric tool.
Connect to the maximum permissible power consumption of the electric tool.
To switch on the automatic start and stop of the vacuum cleaner, turn the mode selector switch (4) to the AUTOSTART position.
To switch on the vacuum cleaner, switch on the electric tool at the socket (5). The vacuum cleaner starts automatically.
Switch off the electric tool, the vacuum cleaner stops.
The automatic start and stop function continues to work for up to 6 seconds after switching off, to vacuum the remaining dust from the vacuum hose.
To switch off the vacuum cleaner, turn the mode selector switch (4) to the OFF position.
Automatic start/stop with the remote control module
Using the automatic start function, you can automatically switch the vacuum cleaner on and off with the battery-powered electric tool using the remote control module (41):
- Turn the mode selector switch (4) to the AUTOSTART position. If the status indicator (7) lights up, this signals that the function is switched on. Install the remote control module (41) on the electric tool. Press the trigger (45) briefly to switch it on. Press the trigger again to switch it off. Do not install the remote control module in places where the electric tool is used in a way that is not intended. Never cover the remote control module in places where it is not necessary for controlling the electric tool (e.g., on the handle, switch, or indicator). - To switch on the vacuum cleaner, switch on the electric tool. The vacuum cleaner starts automatically. - To switch off the vacuum cleaner, switch off the electric tool. The vacuum cleaner stops after a delay of up to 6 seconds. During the delay, the vacuum cleaner vacuums the remaining dust from the vacuum hose.
Bonore biDCMOKtyBaHHa
He BCMOKTyIe NINOCMOKOM rOpOci a6o BV6yXoH6e3neHi pIDHH, HApnPKnAd, 6e3HH, ONHBy, cNHPt, POzHHNK. He BCMOKTyIe rApuHnn, nII, nII, IIO rOpHTb, Ta BV6yXoH6e3neHn nII. He BHKOpNCTOBMyTe NINOCMOK y npMlueHHx, de icHyc He6e3NeKa BV6yXy. nII, napn a6o pIDHH MOKyTb 3aropATnca a60 BV6yxAtn.
HINOCMOK He Do3BONaTebCBAHKOpNCBOByBaTH BAKOCTI NOMN DnB OBDH. HINOCMOK npna3haeHH nB BIDCMOKTyBaHH BOHO-NOBITRPAHO CYMIUI. IpeepBONORHM npH6pAHNMpeBipraTe,io6 Bnyncknn OTBip npi pDHH (1) 6yB iinbHO 3akpHTM. Peped Bcima po6oTaMn BHTaRyTe MepeXHH mTeTncB BiDCMOKtYBa4a 3 pOeTKH.
Ii neped BonorH np6npaHHAM
BIDKpHne 3amKn (13) i3HIMitb KpnuKy (11) NnOCMOka.
Ipeed BOIOrHM npHbpaHHM 3HIMITb HETKaHNn NOIOTHNNFJIbTpByaBbNMIWOK (38).
NoBepHtB 3AMOK BUNYCKHO O TBOPy DnI pIDIN (1) npOTn ROHNHHKOBOO CTPIKN. CnpOxHtB KOHTeHep (2) uepe3 3NHBH N OTBIP DnI pIDIN (1) i NOBepHtB 3AMOK DnI 3aBHNHYBaHH 3a ROHNHHKOBOO CTPIKIO.
Ouncttbfipnbtp49
Ipepeipe, uu nctn ceHcOp cTany 3anOBHeHH (50).
BcTaHOBIb KPNK Ky NINOCMOKa (11) 3HOBy i 3aKpnTe 3aMKn (13).
Pid yac i nicn Koxhoro BonoRor npnbpanna
Плносмокобаднани сенcodom CTaHy 3anOBHeHHA (50).
Ypa3iDcraHHeHHMaKcMmAbHOro pIBHa3anOBHeHHBCMOKtYBaHH3yINHReTbCra.
PObepHb3aMOK BnyncKHOOTBOPy dny piinH (1) npotroDOnHHNKOBOCTpIKN.CnpoxKHt b KOteHep (2) cepes3NBH NTBPdN pINH (1) i NobepHb 3amok dna 3aBHNyBaHHHa ROHNHKOBIO CTpIKOIO.
Pnichn,3HIMtB KPNsKy NIOcMOKa (11)i do6pe ii npocuitb.
Replace the filter when the fill indicator (50) is dirty.
Cleaning the filter
Clean the filter when it is dirty, otherwise the suction power may be insufficient.
The cleaning frequency of the filter depends on the type of liquid. With regular cleaning, maximum suction power is maintained for a long time.
Remove the dirt container (see section (4) Operation).
Check the openings of the nozzle or the suction hose for blockages.
Press the filter cleaning button (10) 3 times. The filter is cleaned with a strong air flow.
Maintenance and service
Maintenance and cleaning
Pull the plug out of the socket before performing maintenance or cleaning, before attaching or removing accessories, or before storing the appliance. These precautionary
Safety measures reduce the risk of accidental starting of the appliance.
For safe operation, keep the suction openings clean. If the cable needs to be replaced, this must be done by Bosch or a Bosch-approved service center to avoid hazards. When servicing or cleaning the appliance, wear protective goggles. Wipe the appliance housing occasionally with a damp cloth. Do not clean the appliance with strong air flow. The filter or other components may be damaged.
Replacing the battery pack (see section N)
Warning: Use only the specified battery pack for this appliance. There is a risk of explosion. Dispose of used battery packs according to the instructions. Used battery packs may lose capacity and damage the product or cause injury.
Open the drive module (41) using a screwdriver.
Check the miniature element of life and insert a new miniature element of life. Pay attention to the markings for correct installation of the life element.
Press the housing of the transmission unit (41).
Cleaning/replacement of the filter (see manual O-P)
The filter should be checked periodically for its condition. Therefore, regularly clean the filter (49).
Removing the filter
-Start the cleaning filter (see "Cleaning the filter", page 145) and then turn off the pump. -Open the clamps (13) and remove the cover (11) of the pump. Open the handle (47) of the filter holder (48) and remove the filter holder (48) 2. Remove the filter (49) from the holder (48) of the filter. -Dry filter: Select the filter (49) according to the appropriate spare part. Be careful not to damage the filter plates. In case of heavy contamination, clean the filter plates with water and a soft brush.
Or
Water filter: rinse the filter (49) with running water, then dry it thoroughly. 46c
Replace the damaged filter (49).
Install a clean and dry filter (49) into the holder (48) of the filter.
Install the holder (48) of the filter into the cover of the pump ② and fold the handle (47) of the filter holder (48) 8, until a clicking sound indicates fixation. - Check the filter (49) and the holder (48) of the filter for correct installation. - Install the cover of the pump (11) again and tighten the clamps (13) until a characteristic click is heard.
Cleaning the housing
Clean the housing (2) with a mild cleaning agent and let it dry.
Cleaning the fill level sensor (see manual Q)
Periodically clean the fill level sensor (50).
Bend the hook (13) under the curve (11) of the nozzle.
Clean the filter, it will be filled (50) with soft cloth.
Install the curve of the nozzle (11) and close the hook (13).
Malfunction
Regular cleaning of the container (2) guarantees optimal suction power of the nozzle. If suction power is insufficient, check: - Is the nozzle (11) installed correctly? - Is the filter changed? - Are the suction tubes (27) clogged? - Is the container (2) full? - Is the mesh filter (38) clogged? - Is the filter (49) dirty?
If after cleaning the suction power still remains insufficient, contact the Bosch service center.
If the nozzle is interrupted by an automatic shutdown, it is triggered. Perform the following steps: - Turn the mode selector switch (4) to position 0. - Check that the container (2) and the mesh filter (38) are empty, and also that the suction hose (23) and filter (49) are not clogged. - Let the nozzle cool down for 60 minutes. - Unplug the power cord, then plug it back in.
If the nozzle still does not turn on, it is possible that the thermal fuse has blown, protecting the nozzle. To replace the fuse, contact the Bosch service workshop.
Storage and maintenance
- Wind the suction hose (23) around the nozzle curve (11) and insert the suction hose holder (22).
- Wind the cord around the cord holder (17). Insert the suction tubes (27) into the tube holders (20), the nozzle (25), the suction adapter (24), and the nozzle holder (26) into the accessory holder (9) or (12).
- Insert the crevice nozzle (28) into the holder (19). - For carrying the nozzle, use the carrying handle (8). - Store the nozzle in a dry place and keep it away from unauthorized use. - To fix the swivel castors (16), press the pedal for the swivel castors (15).
Service and free consultation on product use
Ukraine
Tel.: +380 800 503 888
Instructions for service, address and warranty terms are on the last page.
For any questions or complaints regarding parts, please indicate the 10-digit order number on the product label and packaging.
Recycling
Please dispose of batteries, electronic components, and packaging materials in accordance with environmental regulations.
It is forbidden to dispose of batteries and electronic components in household waste!
For Ukraine:
Electrical and electronic devices or used accumulators/batteries that are no longer used must be collected separately and disposed of in an environmentally safe manner. Use the designated collection systems. Improper disposal may harm the environment and health due to hazardous substances contained in the waste.
Kazakhstan
Eurasian Economic Union (EEU) member states have established requirements for the product labeling.
The product labeling must contain the single mark of circulation on the market of the EEU member states. The mark is applied to the product and/or to the packaging.
The mark is applied to the product body and packaging in accordance with the requirements of the EEU member states.
The mark is applied to the product body.
The mark is applied to the product and packaging in accordance with the requirements of the EEU member states.
The device is designed for measuring temperature and humidity. The device is not intended for use in aggressive environments (where there is a risk of explosion). The device is equipped with a sensor (built-in sensor) for measuring temperature and humidity.
The device is intended for measuring the parameters of the environment and technological processes.
If the housing is damaged, the device must be replaced. If the housing is cracked, the device must be replaced. If the housing is deformed, the device must be replaced. If the housing is broken, the device must be replaced. If the housing is leaking, the device must be replaced. If the housing is damaged, the device must be replaced.
Device components
- Temperature and humidity sensor - Device housing
Device operation and maintenance
The device is ready for operation after installation.
Storage
The device must be stored in a dry place. The storage temperature must be between -50 and +50 degrees Celsius. The device must be protected from direct sunlight. The device must be stored in its original packaging. The device must be stored in accordance with GOST 15150-69 (section 1).
Transportation
The device must be transported in its original packaging. The device must be protected from mechanical impacts. The device must be transported in a way that prevents it from being dropped or knocked over. The device must be transported in accordance with GOST 15150-69 (section 5).
Possible malfunctions

Possible malfunctions and their remedies are listed in Table 1. Technical malfunctions and their remedies are listed in Table 2.
If the device is not working properly, contact the manufacturer. For repairs, contact the manufacturer or authorized service centers.
Before cleaning, check the cabinet, and ensure that the necessary parts are available. If there is a defect, do not use it and contact the manufacturer.
Keep away from children. Do not allow children to play with the device.
WARNING
Danger of injury from rotating parts, blades, or belts
Do not wear loose clothing, ties, or asbestos insulation. These parts can be carcinogenic. If you have long hair, tie it back before using the device.
Use the device only for its intended purpose. Do not use it for any other operations. The manufacturer is not liable for damage caused by improper use.
WARNING
Danger of injury from rotating parts and hot surfaces
Liquids are heated to boiling. Do not touch the container while it is hot.
Do not use the device with gasoline, alcohol, or other flammable liquids. Do not use it near flammable materials. Do not use the device if it has a damaged cord. If the device or its parts are damaged, do not use it.
WARNING
Connect the plug only to a properly grounded outlet.
WARNING
If the device or its cord is damaged, unplug it immediately and
contact the manufacturer. Do not attempt to repair the device yourself.
WARNING! The appliance may be hot during operation. WARNING! Do not touch the hot surfaces, they may cause burns. If necessary, use protective gloves. If the power cord is damaged, it must be replaced by the manufacturer, its service agent, or similarly qualified persons to avoid a hazard. Do not pull the cord to disconnect the plug. Do not immerse the appliance, cord, or plug in water or any other liquid. Do not use the appliance near water. Do not touch the appliance with wet hands. Do not use the appliance if the cord or plug is damaged. If the cord is damaged, it must be replaced by the manufacturer or a qualified person. Do not let the cord hang over the edge of a table or counter. Do not place the appliance on or near a hot gas or electric burner, or in a heated oven. Do not use the appliance for anything other than its intended use. This appliance is not intended for use by persons (including children) with reduced physical, sensory, or mental capabilities, or lack of experience and knowledge, unless they have been given supervision or instruction concerning use of the appliance by a person responsible for their safety. Children should be supervised to ensure that they do not play with the appliance.
Do not allow the cord to hang over the edge of a table or counter.
Always unplug the appliance when not in use and before cleaning. Allow it to cool before putting on or taking off parts. Do not operate the appliance with a damaged cord or plug, or after the appliance malfunctions or has been damaged in any manner. Return the appliance to the nearest authorized service facility for examination, repair, or adjustment. Do not use the appliance outdoors. Do not let the cord touch hot surfaces. Do not place the appliance on or near a hot gas or electric burner, or in a heated oven. Use extreme caution when moving an appliance containing hot oil or other hot liquids. To disconnect, turn any control to off, then remove plug from wall outlet. Do not use the appliance for other than intended use. The use of accessory attachments not recommended by the appliance manufacturer may cause injuries. Do not immerse the appliance in water or any other liquid. If the appliance falls into water, unplug it immediately and do not reach into the water. Do not use the appliance with wet hands. The appliance must be used on a flat, stable surface. Do not place the appliance on a hot surface.
WARNING
Only connect the appliance to a properly installed
socket with a maximum load.
Connect the plug (5) to a socket that is easily accessible. This allows you to disconnect the appliance from the power supply quickly in case of an emergency. Pay attention to the maximum permissible connected load.

WARNING


Do not touch the heating elements with your hands. The heating elements are hot.
The heating elements may remain hot for a long time after use. If the heating elements are hot or have been left on, do not touch them. The heating elements can be switched on for up to 2 hours. When cleaning the heating elements, be careful not to burn yourself. There is a risk of burns. Only use the heating elements as described in this manual. Do not use the heating elements for any other purpose. Do not place any objects on the heating elements. Do not cover the heating elements with metal foil or other materials. Do not use the heating elements if they are damaged. If the heating elements are damaged, have them replaced by a qualified person.
The battery can be charged, discharged, or stored. The battery must be protected from moisture and direct sunlight. The battery can be charged, discharged, or stored. Do not short-circuit the battery and do not dispose of the battery in fire. The battery can be charged, discharged, or stored. Do not immerse the battery in water. If the battery is damaged, it may cause fire, explosion, or other hazards.
The Bluetooth® word mark and logos are registered trademarks owned by Bluetooth SIG, Inc. and any use of such marks by Robert Bosch Power Tools GmbH is under license. Other trademarks and trade names are those of their respective owners.
Battery
The battery is supplied partially charged. To ensure full battery capacity, fully charge the battery before first use. Read the operating instructions.
Battery and charging
AUTO-START

Automatic shut-off
The electric type of the crane is controlled by a control panel; the crane types are mounted, and the installation is carried out in accordance with the instructions. The modular design allows for easy installation of the crane.
0
Theta
1
Copy
Control panel copy
max. 2000 W min. 100 W
The control panel for the crane is equipped with a control lever for the crane's operation (see figure 6).

Cyrillic Latin Tazalau Tumeci
Tazalau Gobyinau Koldanu
Smoke/air duct cleaning device. The device is designed for cleaning ventilation ducts and chimneys, as well as smoke and air ducts. The device is equipped with a control function and a control panel.
Read the instruction manual carefully before use.
Direct, indirect effects of the device must be taken into account when using it. For this purpose, it is necessary to provide protective measures against possible hazards.
The socket must be installed only in a dry place.
Corresponding components
The corresponding components are shown in the figures in the instruction manual.
(1) Liquid level indicator (2) Container (3) Control panel (4) Condenser coil (5) Electrical connection cable (6) Control device (7) Control indicators (8) Power switch (9) Water supply hose
(10) Water tank cleaning device (11) Air filter (12) Water supply hose connection (13) Air filter cover (14) Condenser (15) Drain valve (16) Drain hose (17) Switch (18) Control panel, control function (19) Power supply connection (20) Protective cover (21) Heating element (22) Protective cover for air intake (23) Air intake (24) Water pipes (25) Complete set (26) Condenser set (27) Protective cover (28) Power supply (29) Power supply indicator (30) Protective cover for air intake
150|Kazakh
(31) Battery (32) Power supply indicator for charging (33) Drain valve (34) Drain hose connection (35) Condenser connection (36) Condenser connection hose (37) Safety valve (38) Pressure switch (39) Pressure gauge (40) Heating element protection (41) Control module (42) Control module indicators (43) Control module connection (44) Control module connection cable (45) Resistor (46) Water level sensor (47) Control device switch (48) Control device (49) Control (50) Filling valve
Technical specifications
| ДыМьл/Курак ЭдICENН таЗалayra арhanfahшансорьш | PAS30-240PRS | |
| БнIM Немір | 3 603 CE7 3.. | |
| Жиінік Гі 50-60 | ||
| HOMнанды ТУТынылaitын Куат | Вт 1300 | |
| Контунер көлөмі (бpyтTO) n 30 | ||
| Таза көлөмі (сүйыктбік) n 19 | ||
| Тokымалы сүгі кабын Көлөмі | n | 20 |
| Төмэнгі Кысыm | ||
| - Шансорьш A) | rПа 240 | |
| - Турbethа rПа 265 | ||
| Шыfcын | ||
| - Шансорьш A) | n/c | 35 |
| M³/car | 125 | |
| - Турbethа n/c | M³/car | 67 |
| 240 | ||
| Салмafы B) | Кг 8,9 | |
| Корfaнbic Класы /I | ④ | |
| Корfaнbic дэржeci IPX4 | ||
| Шьевцарияльк куат | IP20 | |
| ашасынын祛Корfaнbic Класы |
Smoke/air duct cleaning device PA530-240PRS
| ЖуMbIC KeziHderi pyKcat етINrten KoprUaHaN opTa TemnepaTypacbI | °C -5 ... +50 |
| Дерект徳Тасымалдay | |
| Bluetooth® Bluetooth® 5.4 | (Low Energy) |
| ТаразКьш модундin Куат КeЗi | CR2032 (3-BлNTи БаТарЕсы) |
| Опeraцяалык чиiniКтер Дианазоны | МГС 2402-2480 |
| Мakc.Tapatу Куаты | MBT <30 |
| Мakсималыс bсгнан КашыКтыFbfcI | M 7 |
A) With air intake (23) and exhaust B) With exhaust connection, air intake, complete set and mounting elements C) The device can be connected to Bluetooth for remote control. It is possible to control the device from a distance using a smartphone or other device (phone, tablet, etc.) via Bluetooth.
The device [U] 230 B can be connected to the mains. The connection to the mains must be made in accordance with the regulations.
| Агоматы typde lcke kocy/ToKtaty KypbInfbCbrA | ||
| HominaLbI KepHeY | MakcHmAnDbI KyaT | MnHmAnDbI KyaT |
| 220-240 B | 2000 Br | 100 Br |
A) The connection to the mains must be made with a plug that is suitable for the socket outlet (see the figure).
The device must be connected to the mains.
The device must be connected to the mains in accordance with EN60335-2-69.
The amplitude of the vibration is high when the device is in operation. The vibration level is 73 dB(A). The distance from the device is 2D. When the device is in operation, it is possible to exceed the limit. Keep your hands away!
The device must be connected to the mains in accordance with EN60335-2-69. The following values apply: a (acceleration), p (pressure) and the distance d:
a1 = 0.2 m/s2 (K = 0.5 m/s2), pF = 8.0 m/s2 (K = 4.0 m/s2)
Installation
Do not install the device in a place where it can be exposed to water or moisture. Do not install the device in a place where it can be exposed to water or moisture. Do not install the device in a place where it can be exposed to water or moisture.
Install the device in accordance with the instructions (see the figure).
Install the device in accordance with the instructions (22) and (30) as shown in the figure.
Install the device in accordance with the instructions (see the figure).
Install the device in accordance with the instructions (12) as shown in the figure.
Install the device in accordance with the instructions.
Install the device in accordance with the instructions (see the figure).
The filter (23) with the gasket (3) can be installed, they are designed for high pressure.
Function of the oil pump (see figure D)
The oil pump is installed in the crankcase. Before installation, check the oil level. It is possible to install the oil pump only in one position. If the oil pump is installed incorrectly, it may be damaged. Check the oil level. If necessary, add oil to the required level.
The oil pump function is designed to supply oil to the engine components that require lubrication (for example, the crankshaft, camshaft, and valve train).
To remove the filter (23), turn it counterclockwise by at least 5 seconds (see figure (4), item 1).
The filter (23) is designed for high pressure, it is installed with the gasket (3) on the oil pump.
The filter (23) is installed on the oil pump with the gasket (18), they are designed for high pressure.
Installing the oil pressure switch
The oil pressure switch (oil pressure sensor (24), oil pressure switch (25)) can be installed in the filter (23) housing.
If the oil pressure sensor or oil pressure switch is not installed, see figure E.
- Install the oil pressure sensor (24) or oil pressure switch (25) into the filter (23) by tightening it with a torque of 31 Nm. - To remove, loosen the bolts (31) and pull the parts apart.
Installing the oil pressure switch
- Before installing the oil pressure switch, check the O-ring, the sealing ring, and the oil pressure switch for damage.
Tighten the oil pressure switch (25) or oil pressure sensor (24) to the specified torque.
Installing/removing the oil pressure switch (see figure F)
Remove the safety valve (28) from the cylinder (32). Open the valve (29) to release the safety pressure.
To open, turn the safety valve (28) counterclockwise.
For installation/removal (see figure G)
Before starting work, check the compressor's oil level.
To open, turn the locking knobs (16) counterclockwise and remove the locking screws (34) from the locking knobs (33).
To close, insert the locking knobs (15) into the locking knobs (16) and tighten the locking knobs (33) by turning them clockwise.
For oil filling/draining (see figure H)
To open, remove the oil filler plug (37) and pour oil into the oil filler opening (36) until it reaches the oil level mark (35).
Remove the oil filler plug (36) and pour in the oil (14) until it reaches the mark.
For adjusting the idle speed (see figures I-J)
To check the idle speed, the idle speed screw (38)
should be turned. The engine should be at operating temperature.
Remove the air filter (13) and clean the filter element (11).
To adjust, turn the idle speed screw (38) counterclockwise (39).
To adjust, turn the idle speed screw (38) clockwise.
The device is designed for operation in accordance with the requirements of the technical regulations (39) and the manufacturer's instructions.
The device must be operated in accordance with the instructions (11) and the safety requirements (13) specified in the manual.
The device (38) must be used only for its intended purpose. The device (38) must not be used in explosive atmospheres.
Warning
Before starting work, read the instructions carefully and follow all safety instructions. Failure to follow the instructions may result in injury.
Warning symbol
Be careful! When using the device, observe the safety instructions and warnings.
The device must not be used in areas where there is a risk of explosion.
Before using the device, read the instructions (23) and the safety instructions (11) carefully.
Do not use the device if it is damaged (cracked, broken, etc.). Replace damaged parts immediately.
Operation
Before operating the device, check that all safety devices are in place and functioning properly.
Automatic operation: The device switches to automatic mode when the safety devices are in place.
AUTOSTART is activated. The indicator lights (7) are on. If the device is connected to the power supply, it will start automatically.
Before operating the device, check that all safety devices are in place and functioning properly.
Remove the protective cap (see figure).
Before starting work, the protective cap must be removed.
Remove the protective cap (41) from the housing.
Turn the protective cap (40) counterclockwise and remove it from the housing of the protective module (41).
Starting the device with the protective module (see figure)
The device can be started with the protective module only if the Bluetooth® function is activated.
To use the automatic pipe cutting function, the device must be started with the protective module (41) via Bluetooth®.
The distance between the device and the protective module must not exceed 0.5 m.
Starting the device without the protective module (starting without the protective module):
Press the device's ON/OFF button (6) until the indicators (7) light up green, then release it within 3 seconds.
Press and hold the ON/OFF button (44) on the protective module (41) for at least 3 seconds. The indicators (42) on the protective module (41) will light up green.
Starting the device with the protective module:
The indicators (7) on the device light up green. The indicators (42) on the protective module (41) light up green once.
If the device was started without the protective module, the old settings (if any) must be deleted automatically.
The pump operating modes are set using the control buttons (41). The settings are saved in the pump's memory. The pump operating mode is set according to the instructions.
The pump operating modes are as follows:
- The pump is switched on using the ON/OFF button. The pump starts after 30 seconds. The pump operating mode (41) is selected using the button (42).
To set the pump operating mode: Press the MODE button repeatedly until the desired mode is selected. The pump will start automatically (AUTOSTART) after 6 seconds. The indicator (17) will light up.
If the pump is not used for a long time, it may be necessary to prime it. To do this, fill the pump with water and then start it. The pump will operate normally.
If the pump is not used for a long time, the impeller may become stuck. To free it, turn the pump on and off several times.
If the impeller is stuck, the pump will not start. The indicator (42) will flash. To free the impeller, turn the pump on and off (see "Freeing the impeller").
Freeing the impeller (using the O-ring)
Disconnect the pump from the power supply. Remove the screws (49) and take off the cover.
Turn the impeller by hand.
- To free the impeller, use a screwdriver (see "Freeing the impeller", page 153). Then switch the pump on. Press the buttons (13) and (11) simultaneously. Remove the cover (48) and the impeller (47). - Remove the impeller (49) from the impeller housing (48). - To reinstall the impeller: Place the impeller (49) in the housing and press it down. Do not close the impeller housing.
After cleaning, rinse the impeller housing with clean water and reassemble.
Maintenance
Cleaning the pump:
Remove the pump (49) from the water, then clean it with a brush.
3aKbIMdaIaNfAH cyarHl (49) anMaTbIpbIbIa.
-Ta3aXHEKpyrakcy3riHi(49)cy3riYCTafblbHa(48) calblHb3 1 -Cy3ri yctafbiuBH (48)waHcOpfbiuTBiH, XOFaFb6oNirHe opHaTbH ②, cy3ri yCTaFbUuBHBiH (48) TyTKacBH (47) TipenreHwe kaBbH3. -Cy3ri (49) MeH cy3ri YCTaftbIbHbIH (48) dypbic api 6epik opHaTbIFaHbIH TEKcepiHj3. -ⅢaHcOpfblWbH JxOFarPbI 6nirH (11) KaTaNr3in, eki KaNkblWbI (13) WepTy Dbl6bcIMeH TipenetIHne Jka6bl3.
KonteHepiTa3anaHbI3
KotheHepdi (2) cTbapTbI bckanah6aTbIH Ta3anay KpaBImeH ta3an Kan kentipij3.
Tontbipy dehenreHH daunrH ta3anay (Q cypetin kapaHbI3)
TOnbpy DeHReHH DaTuHIN (50) KyyEnI Type Ta3anAn TPyblHbI3.
KankbIITapdbI (13) aIbIN, WaHCOPFbiWtBih KOfApFbl 6enirH (11) WbIFapbn anbHb3.
TOnTbpy DeHReHHiH DaTuHriH (50) KymcaK Wy6peKeNeh Ta3aHaB13.
UHaHcOpFbIuTbIHxOfApFbI6eNirIN(11)KIRi3In, KaNkblTapBbI (13)Ka6bIbIa.
Akaynap
KoHTeHepDIn (2) Kyyeni Tpyde aflbIybl OHTaHbI copy KyaTbHa Kenin 6pepi.
Copy KyatbI JxetKiKiCi3 Bonca, TEmeHderineepi TeKcepiHa:
- 6a?
- Is the charger plugged in? -If the filter (27) is dirty, is it blocked? -Is the container (2) full? Is the water tank (38) full? -Is the hose (49) connected?
If it is not possible to purchase a copy, Bosch will provide a replacement part.
If the filters are damaged, the appliance may not operate properly. Please note:
- The accessories must be clean and dry. -Do not use without a container (2) and water tank (38) being at least 50% full, and the filter (23) and hose (49) must be attached.
- Let the filters dry for 60 minutes.
- Remove the plug from the socket, then insert it into another socket.
If the appliance still does not work, it may be necessary to replace the appliance. For replacement, contact Bosch service.
Cleaning and maintenance (see figure)
Place the filter (23) into the filter holder (11), insert the filter holder (22). -Insert the float (17). -Place the filters (27) into the designated slots (20), the water tank (25), the water inlet (24), and the water outlet (26) into the designated holders (9) and (12). -Insert the water tank (28) into the holder (19). -Do not operate the appliance without the water tank (8) in place. -Do not use the appliance without the filter, as this may cause damage. -Press the start button (16) to start the appliance.
Contact service for repairs and maintenance
KAZAKHSTAN
Service contact information:
Republic of Kazakhstan
Muratbaev K-ci, 180
"RepMec" 50.7 Ka6aT
Tel.: +7 (727) 3318600
Tel.: 88000700270
Please contact the service center for all questions regarding the device.
For any questions regarding the operation of the device, please contact the manufacturer's technical support service.
If the device is used improperly or in violation of the requirements set forth in this manual, the following may occur:
- mechanical damage; - malfunction of the control panel; - malfunction of the control panel, its components and connections; - electric shock or fire hazard; - failure of the safety devices. The following are prohibited: - use of the device without grounding;
- operation of the device without proper grounding. To prevent electric shock, fire, or injury, do not use the device in the following cases: - if the device or its power cord is damaged; - if the device has been dropped or the housing is cracked; - if the device has been exposed to moisture or liquids. If any of these conditions occur, unplug the device and contact a qualified service technician.
Inspection
Inspect the device, batteries, and accessories for damage before each use.
Do not use the device if the batteries or housing are damaged!
For devices with batteries:
Inspect the device, batteries, and accessories for damage before each use. Do not use the device if the batteries or housing are damaged. If the device is damaged, contact a qualified service technician.
Româna
Leakage current test. Leakage current increases the risk of electric shock.
Do not vacuum up flammable or explosive substances, e.g. benzene, oil, alcohol, solvents. Do not vacuum burning, smoldering, or explosive dust. Do not work with the vacuum cleaner in rooms with increased risk of explosion. Dust, vapors, or liquids may ignite or explode.
WARNING: Read the operating instructions before using the appliance.
If the appliance is not working properly, unplug it and contact the service center.
Do not use the vacuum cleaner if it is damaged.
WARNING! The vacuum cleaner must only be used in closed rooms. WARNING! Check the power cord and the plug regularly for damage before use. If they are damaged, the vacuum cleaner may be damaged. If the vacuum cleaner is used in a dusty environment, use a suitable dust filter. Using a suitable dust filter reduces the risk of electric shock. Before each use, check the vacuum cleaner, the power cord, and the plug. Do not use the vacuum cleaner if you notice any damage. Do not attempt to repair the vacuum cleaner yourself; have repairs carried out only by qualified personnel using original spare parts. A damaged vacuum cleaner, power cord, or plug increases the risk of electric shock. Do not pull or squeeze the power cord. Do not pull the cord to unplug the plug from the socket or to move the vacuum cleaner. A damaged power cord increases the risk of electric shock.
Before carrying out technical maintenance or cleaning the vacuum cleaner, before adjusting the settings, changing accessories, or storing the vacuum cleaner, unplug the cord from the socket. This precaution prevents accidental starting of the vacuum cleaner. Ensure good ventilation of the work area. Have the vacuum cleaner repaired only by qualified personnel using original spare parts. This ensures the safety of the appliance. Before switching on, make sure that the cord and plug are in good condition. Do not pull the plug out of the socket by the cord. Do not use the vacuum cleaner if the cord or plug is damaged. Do not place the vacuum cleaner on top of the cord. Be careful when using the vacuum cleaner near the cord and plug. Do not use the vacuum cleaner with a wet hand. Do not immerse the vacuum cleaner in water. Water entering the appliance increases the risk of electric shock. Connect the vacuum cleaner only to a properly grounded outlet. The plug and, if applicable, the extension cord must have a proper protective conductor. Do not use the vacuum cleaner as a permanent vacuum source.
WARNING: Read the operating instructions before using the appliance.
The vacuum cleaner is equipped with a pre-filter (5). You can switch on the connected power tool in it. Observe the rated power for the maximum power of the connected power tool.

WARNINGS


Button batteries must not get into the hands of children. Button batteries are dangerous.
riangleright Button batteries must never be swallowed or inserted into any other part of the body. If in doubt, the button battery may have been swallowed or inserted into another part of the body. Seek medical advice immediately. Swallowing a button battery can cause severe internal burns and death within 2 hours.
Risk of button battery leakage for competent disposal of the operation. There is a risk of explosion. Use only the button batteries specified in this operating manual. Do not use other button batteries or other power sources. Do not attempt to recharge the button battery and do not short-circuit the terminals. The button battery can leak, explode, ignite, and cause injury to people. Dispose of exhausted button batteries according to the regulations. Exhausted button batteries can leak and damage products or cause injury. Do not overheat the button battery and do not throw it into fire. The button battery can leak, explode, ignite, and cause injury to people. Be careful not to damage the button battery and do not disassemble it. The button battery can leak, explode, ignite, and cause injury to people. Do not allow a damaged button battery to come into contact with water. In case of leakage of the electrolyte or contact with water, hydrogen gas may be released, which can cause fire, explosion, or injury.
The Bluetooth® word mark and logos (figures) are registered trademarks and property of Bluetooth SIG, Inc. Any use of these marks/figures by Robert Bosch Power Tools GmbH is under license.
SYMBOLS
The symbols below may be important for the correct operation of your vacuum cleaner. Familiarize yourself with the symbols and their meaning. Correct interpretation of the symbols will help you use the vacuum cleaner more safely.
SYMBOL MEANING

Start/stop automatic
Suction of dust during operation with power tools; the vacuum cleaner switches on automatically and switches off again after a certain time.
Bluetooth® connection activated.
Switching off

Suction
Suction of dry dust
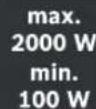
The inlet opening for the tool is located on the back of the device.
Symbols and their meanings
Button for filter cleaning
Product description and accessories
Please pay attention to the instructions at the beginning of the operating manual.
Intended use of the tool
The vacuum cleaner for wet/dry vacuuming is suitable for vacuuming dry, non-flammable dust, as well as liquids. The blower function is suitable for blowing away dust.
The vacuum cleaner is intended for private use only, in a domestic environment.
Continuous vacuuming of hazardous substances, such as asbestos, is not permitted. Use special vacuum cleaners or vacuum cleaners with appropriate classification.
The contact can only be used in a dry environment.
Illustrated components
The numbered components refer to the illustrations on the graphic pages of the vacuum cleaner.
(1) Exhaust air outlet (2) Container (3) Filter for wet function (4) Power switch (5) Contact for tool (6) Cord wrap (7) Status indicator (8) Handle for carrying (9) Accessory holder for the vacuum cleaner
(10) Button for filter cleaning (11) Top part of the vacuum cleaner (12) Lower holder for accessories of the vacuum cleaner (13) Clips for securing the top part of the vacuum cleaner (14) Water hose (15) Suction hose (16) Control hose (17) Holder for storage bag (18) Filter for blower function (19) Holder for crevice nozzle (20) Holder for upholstery nozzle
(21) Replacement filter (22) Holder for wet nozzle (23) Wet nozzle (24) Adapter for vacuuming (25) Floor nozzle (26) Nozzle for joints (27) Tube for vacuuming (28) Nozzle for floor (29) Floor nozzle insert (30) Seat for wet nozzle (31) Pressing cap (32) Button for releasing the floor nozzle insert (33) Accessory for hose (34) Clamp for hose (35) Hose connection (36) Clamp for hose connection (37) Extension hose (38) Bag with filter (39) Filter bag (40) Protective cap for water nozzle "cap" (41) Transmitter module (42) Indicator for the state of the transmitter module (43) Hook for securing the transmitter module (44) Button for start/stop of the transmitter module (45) Rubber pad (46) Opening for exhaust air (47) Filter holder (48) Filter holder (49) Filter (50) Sensor for fill level
Pairing with the transmitter module (see figure L)
Lock: The vacuum cleaner is already paired with the transmitter module via Bluetooth.
In order to use the automatic start function, the vacuum cleaner must be paired with the transmitter module (41) via Bluetooth®.
The distance between the vacuum cleaner and the transmitter module must not exceed 0.5 m.
Establishing a connection (pairing with another transmitter module):
-Press the power button (6) on the vacuum cleaner for at least 3 seconds until the status indicator (7) starts flashing green rapidly. -Press the start/stop button (44) on the transmitter module (41) for at least 3 seconds. The status indicator (42) on the transmitter module (41) lights up green for 3 seconds.
The connection has been established successfully:
-The status indicator (7) on the vacuum cleaner lights up green. -The status indicator (42) on the transmitter module (41) flashes green slowly.
When a connection is established, an existing connection (if any) is automatically terminated.
The connection between the vacuum cleaner and the transmitter module (41) is terminated. After the next switch-on, the vacuum cleaner will attempt to re-establish the connection with the last transmitter module.
Establishing the connection is not possible:
-The status indicator (7) on the vacuum cleaner flashes green for 3 seconds and then goes out. -The status indicator (42) on the transmitter module (41) remains off.
Repeating the pairing with a known transmitter module:
Switch off the appliance using the mode switch (4) on the vacuum cleaner, position AUTO START, then press the power button (6). The status indicator (7) lights up continuously green.
If the vacuum cleaner is connected to the remote control module and this remote control module works in the range, the connection to the remote control module will be restored automatically.
If the remote control module is not connected to the vacuum cleaner, check if the batteries are weak or replace them and reconnect the remote control module.
Note: When the batteries are weak, the status indicator (42) on the remote control module (41) will flash green. Replace the batteries with new ones (see battery replacement on the remote control module (see figure N), page 169).
Dry vacuuming
Vacuuming dust from power tools (see figure M)
- Mount the vacuum adapter (24). - Insert the adapter for vacuuming (24) into the tool holder of the power tool.
Note: When working with power tools, to ensure sufficient air supply to the dust extraction, the air vent (46) on the vacuum adapter (24) must be opened. This improves the suction power of the vacuum cleaner and the power tool.
For this, turn the ring on the air vent (46) until it is fully open.
The vacuum cleaner has a built-in socket with a pre-wired cable (5). You can connect the power tool to it. Follow the instructions for maximum power of the connected power tool.
To activate the automatic start/stop function of the vacuum cleaner, turn the operating mode selector (4) to the AUTOSTART position.
To turn on the vacuum cleaner, start the power tool via the socket (5). The vacuum cleaner turns on automatically.
Switch off the power tool to stop the vacuuming.
The delayed shut-off function of the automatic start/stop continues for about 6 seconds to vacuum the remaining dust from the power tool.
To turn off the vacuum cleaner, turn the operating mode selector (4) to position 0.
Automatic operation via remote control module
Dust extractor auto-start. The dust extractor switches on automatically when the power tool (41) is switched on.
-Turn the mode selector switch (4) to the "AUTO-START" position. The status indicator (7) lights up to show that the function is enabled. -Mount the power tool (41) on the dust extractor. To do this, press the release button (45) and attach the free end of the hose to the power tool. Cut the hose to the required length if necessary. Suitable places are those where the power tool generates sufficient operating time. Never attach the power tool to places that are not required for working with the power tool (e.g., handles, switches, grips). -Connect the dust extractor hose to the power tool (see "Connecting to the power tool", page 167). -To switch on the dust extractor, switch on the connected power tool. The dust extractor starts automatically. -To switch off the dust extractor, switch off the power tool. The suction continues for a short time, up to 6 seconds. After this time, the suction stops and the dust is extracted with the suction hose.
Wet vacuuming
Do not vacuum flammable or explosive liquids with the dust extractor, e.g., benzene, oil, alcohol, solvents. Do not vacuum burning, smoldering, or explosive dust. Do not work with the dust extractor in rooms with a risk of explosion. Dust, vapors, or fumes can ignite or explode. Do not use the dust extractor outdoors. The dust extractor is intended for vacuuming dust and water mixtures. Ensure that the wet vacuuming is performed with the filter (1) correctly installed. Before performing any work on the dust extractor, disconnect it from the power supply.
Working steps for wet vacuuming
Remove the catch (13) and lift off the upper part of the dust extractor (11).
For wet vacuuming, insert the filter bag (38) into the container.
Turn the outlet for liquids (1) clockwise to close it. Empty the container (2) through the outlet for liquids (1), then turn the closure counterclockwise to open it.
Clean the filter (49).
Make sure that the fill level sensor (50) is clean.
Replace the upper part of the dust extractor (11) and close the catch (13).
When wet vacuuming
The dust extractor is equipped with a fill level sensor (50). When the maximum fill level is reached, the dust extractor switches off.
Turn the outlet for liquids (1) clockwise to close it. Empty the container (2) through the outlet for liquids (1), then turn the closure counterclockwise to open it.
Disassemble the dust extractor (11) after wet vacuuming to allow any remaining liquid to dry thoroughly.
The plug must be inserted into the socket (50) with the cord.
Cleaning the filter
Clean the filter when the suction power is no longer sufficient.
Regularly check and clean the filter to ensure optimal dust collection. The filter should be cleaned periodically.
Turn off the vacuum cleaner (switch (4) to position 1).
Close the dust container opening and remove the filter unit.
Press the button for cleaning the filter (10) three times in succession. The filter is cleaned from the inside out.
Maintenance and service
Cleaning and maintenance
Before performing technical maintenance or cleaning the vacuum cleaner, before adjusting settings, replacing accessories, or leaving the vacuum cleaner, unplug the cable from the outlet. This precaution prevents accidental activation of the vacuum cleaner. To work efficiently and safely, keep the vacuum cleaner and ventilation openings clean.
If the power cord needs to be replaced, it must be done by Bosch service or an authorized service center to ensure the safety of the Bosch power tool.
For technical maintenance and cleaning of the vacuum cleaner, wear a dust mask.
Periodically clean the vacuum cleaner housing with a damp cloth. Do not clean the vacuum cleaner with a steam jet. The filter and other components may be damaged.
Replacing the battery type "Coin" in the remote control module (see Fig. N).
Attention: Only replace the button battery with another of the same type. There is a risk of explosion. Remove and dispose of used button batteries according to regulations. Used button batteries may leak and damage the product or cause injury.
Open the housing cover (41) with a screwdriver.
Carefully remove the battery, following the instructions. Follow the markings for correct battery placement.
Close the housing cover (41).
Cleaning/replacing the filter (see "Filter, O-P")
The cleaning interval depends on the condition of the filter. Therefore, clean the filter (49) regularly. Replace a damaged filter without delay.
- Perform a thorough cleaning of the filter (see "Thorough cleaning of the filter", page 169) and then follow the vacuum cleaner instructions.
170|Bulgarian
- Open the latches (13) and remove the upper part of the vacuum cleaner (11). - Insert the filter holder (47) onto the filter frame (48) and pull out the filter frame (48). - Remove the filter (49) from the filter holder (48). - Cleaning the filter: Rinse the filter (49) under running water. Be careful not to damage the filter parts.
For thorough cleaning, study the filter parts with water and a soft brush.
Wet filter:
Rinse the filter (49) under running water until the water runs clear.
Replace the damaged filter (49).
- Insert a clean, dry filter (49) into the filter holder (48). - Insert the filter holder (48) into the upper part of the vacuum cleaner (11) and press the latch (47) onto the filter holder (48) until it clicks into place. - Check the filter (49) and the filter holder (48) for correct and secure placement. - Close the upper part of the vacuum cleaner (11) and secure the latches (13) so that they engage.
Cleaning the container
Periodically empty the container (2) with a mild detergent, especially if it contains solid particles. Allow it to dry.
TouncBaHe Ha ceH3opa 3a CTeneHTa Ha 3anbNahe (Bx.ΦnR.Q)
PouncBaTe OT BpeMe Ha BpeMe ceH3opa 3a CTeneHTa Ha 3aIbIbaHe (50).
OTBOPeTe CkO6Hte (13) n CbAnTe TropHaT auct Ha npaxoCMyKaUkata (11).
IouncBaTe ceH3opa 3a CTeneHTa Ha 3aTbNahe (50) C MeKa KbPna.
IocTaBeTe roHaT aCt Ha npaxOcMyKaUkata (11) n 3aTBopeTe ck6Hrte (13).
Повреди
PeIOBHOTo H3npa3BaHe HA KOHTeHepa (2) rapaHTnpa ONTmAlHa MOUHOCT Ha H3CMyKBAHe.
PnHaMaJIeHa MoUHOCHT Ha CMyueHe npoBepeTe:
-Далу roрнata уacnt ha npaxocmykaqukata (11) e npabnno noctabeHa? Дали снстема OT Маркуни He e zanyuHa? -Crno6eHHnCa3dpaBoeHa3aDpyTaTpb6Hte(27)? -3aBnBHeHnE KOHTeHepbT (2)? -ДалнTop6aTacФнТbpOtФnC(38)eпьнHa? -Данифнгьрт(49)e3aipbctehcn npax?
Ako CneT TOBa He Ce DOCTHHe MOUHOCCTHa HA N3CMYKBAHE, O6bPHeTe Ce KbM KIneHTCKaTa CNyXkBa Ha Bosch.
Pn nperepaBaHe npaxocmykaKaTa aBtOMaTHUHO ce n3KJIouBa. NocTbneTe no cIeHnHaunH:
He BCncybajte MaTepnjAnu TETnNo 3dpabjeTo,Ha np. npaB oD6ykoBO HIN Daabo DpBO,KaMeH,
a36ect.OBHe MaTeHnJAH BaxaT 3a KaHeporeHH. HΦopMnpajTe ce 3a BaXeKHTe OpeBn/3aKOHn BO Baata 3emJa BO BpCKa CO nOCTanyBaBeTo Co YecTHNK npab wTO CE wTeTHN No 3dpaBJeto.
Kopnctete ro BCncyBaOT cmo cako HmATE DOBONHOHOpmaa3a Kopnctebeto. DetanHITe HNCTpyKunna ha MannyBaat onachocta od norpeuHa ynotpe6a n nobpei.
PNEy-PNEYBAHbE
Before use, check the device for damage, and follow the additional measures.
Before using the device, check the tightness. Failure to observe the tightness may increase the risk of electric shock.
Do not use the device in the presence of flammable or explosive liquids, e.g., gasoline, oil, alcohol, solvents. Do not use the device near flammable or explosive vapors. Do not use the device in a simple room due to the risk of explosion. The device, the plug, and the
The device can be used or stored.
CONNECTION
Use the connector only for the purposes specified in the instructions for use.
CONNECTION
The device operates as long as the battery is fully charged or the power supply is connected.
Check the connector. Never operate the device if it is damaged.
WARNING! The device must be stored only in an indoor space. WARNING! Regularly clean the sensors for the level of the liquid and check that they are not damaged. Never operate the device if the function may be impaired. Since the use of the device in a humid environment can be dangerous, use a residual current device (RCD) to prevent electric shock. The use of an RCD reduces the risk of electric shock. Before each use, check the device, the cable, and the plug. Do not use the device if it is damaged. Do not open the device yourself and leave it for repair to qualified personnel who use only original spare parts.
The device, the cable, and the plug increase the risk of electric shock.
Do not bend or pinch the cable. Do not pull the cable to unplug the connector or to move the device. The cable increases the risk of electric shock. Unplug the connector before cleaning or maintaining the device, before adjusting the supply, before replacing parts or accessories. These measures prevent unintentional starting of the device. Ensure good lighting of the work area. The device may only be repaired by qualified personnel with original spare parts. Only in this way will the safety of the device be maintained. Before use, check that the power cord is in perfect condition. When installing the power cord, make sure it does not leak. Never operate the device if the cord is damaged. Do not use the device as a ladder. You may damage the device. Use the power cord and the power supply carefully. Be careful not to put other people in danger. Do not clean the device with a direct water jet. Water entering the device increases the risk of electric shock. Connect the device to a properly grounded power supply. The plug and the power cord must have a functional protective conductor. Do not use the device as a permanent installation.
CONNECTION
Use the connector only for the purposes specified in the instructions for use.
The device has a built-in sound signal (5). You can use it to connect an external electrical device.
BHHMaBaJTe Ha MaKcHMaIHO Do3BoJeHaTa npHKnUHa MOK Ha eNeKTpNCHOT alaT WTO Ce npKnUyBa.


WARNING


Bndete cnrypHn, deka decaTHe Doaafat Bo donnp co konuectata
6aTePnJa. KonueCTIne 6aTePnN ce ONaCHN.
HmKoraw nporontybajte rn konuecthe 6atepnn He CTabajte r n dpyrntOBpO nO TeNoTo. DOKONky noCTOn comHeBaBeJeKa konuectata 6atepnja e nporontaHa Hn E BMETHATA BO dpyr den OTeNoTo, BeDnaw No6apaje MeHNHCkA NOMoi. IporontyBaBeTo Ha KonuecTa 6atepnja MoKe Bo pok oJ 2 yaca da NobeDe Do cepno3HN BHTpeuHN NtROpeHnNn CmPT. Pn3aMeHa KaonuecTa 6atepnja, npOBepe Taann e npabHIO 3ameHeTa. Hnky, nocToOn onachOCT od ekcnno3na. KopHeTe rCaMo KOnueCTHe 6aTeHn HabeDeHn BO OBA yNaTcBO 3a KopHeTeHe. He KopHeTe npu T KOnueCTn 6aTeHn nI npyro cHa6dyBaBe co ctpya. He ce 6nhybajte NOBTOPO da ja nonHnte koncctata 6atepnja H he ja npemocTybajte. Koncctata 6atepnja MOKe da npoteue, da ekcnlonpa, da ce 3anaN da nOBpeu nnua. PpOnHcHO OCTpaHete Tn HcpneTn Hcnpa3HeHTe KOnueCTn 6aTePHN. Hcnpa3HeNTe KOueCTn 6aTePHN MOKe Da IpoTeuAT n CO Toa Da rO OHTeTaT pOnH3BOoT INH Da IOBpeDaT Nua. He ja nperebajte Konuectata 6aTepuja n He ja pnaje BO oran. Konuectata 6aTepuja moKe da npoteue, da ekcnloHpa, da ce 3aapann da nobpein nnua. He ja owTeTybajte konuectata 6atepnja Hne ja packnonybajte. Konuectata 6atepnja moke da npoteue, da eknpnoipa, da ce 3anaH da noBpeH nua. Konucta 6aTePnJa He ja DOBeyBaJte BO KOtAeTcBOda. NHTmOTItoNCTeKyBa MoKe CO BODa da Co3dae BOOpOIO nC Toa Da IOBeDe Do IoXkap, EKCnNo3nJa nnIIN Do IOBpeHnIuua.
BepaHnOT KnR Bluetooth KaKo n NorOa Tce peHcTppaHn TpROBcKn MapKn H ce conCTBeHoCT Ha Bluetooth SIG, Inc. Cekoja yNtpe6a Ha oBoj BepaEn Knr/noro ce h3BpyBa co Robert Bosch Power Tools GmbH NnueHa.
O3HaKn
CneHnTe 03HaKnCe OJ rOJIeMo 3HaueHe 3a KOpNCteHbTo Ha Baunot BCncyBaay. 3anamTeTe H 03HaKnTe HNBHOto
3hauehe. BnCTHHckata HHTepnpetaJa Ha 03HaKHe Bn NOMara noo6po N no6e36eHNo da ro KOpHCTHe BCNCyBaOT.
O3HaKN HMBHO 3Nauehe
AUTOSTART

CTapt/cton abTomatnka
BcncyBaHepaB OeEKeTpHuHa aata Hto pa6oTa;
BCnCyBaOT ABtOMaTcKN Ce BknyuBa IN NOBTOPO ONDIOKeHO Ce NCKNYUBA.
Bluetooth® NOBp3yBaHbETo CO MoDyNt Ha npedabATENoT eAKTHBnPaHO.
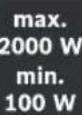

The appliance is intended for connection to the household electrical supply (depending on the country).
Description of the product
Read the instructions in the preceding part before operating.
Intended use
The steam/dry iron is intended for ironing damp or dry fabrics, as well as for ironing with steam. The steam function is intended for ironing.
The iron is intended exclusively for private use in a household environment.
Continuous ironing of clothes, textiles and fabrics is not allowed. For this, use a special iron or a device suitable for this purpose.
The appliance can be used in all environments during operation.
Component illustration
The numbering of the individual components is shown on the illustration on the following page.
(1) Opening for filling with liquids (2) Soleplate (3) Steam regulator, ironing function (4) Temperature control knob (5) Iron lock button
(6) Hose for suction (7) Status indicator (8) Hose holder (9) Holder for suction hose
(10) Hose for manual cleaning of the filter (11) Hot air outlet (12) Filter holder for suction (13) Filter cover (14) Handle (15) Handle for changing the filter (16) Filter change handle (17) Filter holder (18) Air inlet for the motor (19) Filter holder (20) Filter holder for suction (21) Suction regulator (22) Suction tube holder (23) Suction tube (24) Suction hose adapter (25) Dust bag (26) Dust bag for the motor (27) Exhaust filter (28) Motor filter (29) Filter for the motor protection (30) Air inlet for the motor (31) Hose (32) Release button for the dust bag compartment (33) Filter change handle (34) Button for the filter change handle (35) Filter handle (36) Button for the handle (37) Nozzle (38) Upholstery nozzle (39) Crevice nozzle (40) Protective cap for the battery compartment (41) Transmitter module (42) Status indicator on the transmitter module (43) Button for attaching the module to the transmitter (44) Start/Stop button on the transmitter module (45) Rubber seal (46) Ventilation opening (47) Filter holder (48) Filter (49) Filter
(50) Fill level sensor
Technical data
| Всислава ча влажно/cувовсислава chу�ы | PAS30-240PRS | |
| Б Proj на哪儿 | 3 603 CE7 3.. | |
| Φразковшиja Hz 50-60 | HOMINAHA JAUHNA W 1300 | |
| Волуmen Ha садот (бруто) | 30 | HeTo BOLUMEN (TeuchocT) | 19 | |
| Волуmen Ha патHEнaФИПЕР В�ЕКИЧА | I | 20 |
| ПOTПРNTИСOK | ||
| - BCISCVBAU A) | hPa 240 | |
| - TupySHA hPa 265 | KOLINCHINHa Na npotok | |
| - BCISCVBAU A) | l/s m³/h | 35 125 |
| - TupySHA l/s | m³/h | 67 240 |
| Текин备案 | kg 8,9 | |
| Класа на заштITA /I | ④ | |
| Вид на заштITA IPX4 | IP20 | |
| Класа на заштITA, мразжени рпклuyок, Швацарija | IP20 | |
| Дозвoleна okolna Temпература прп работа | °C -5 ... +50 | |
Data transfer
| Bluetooth®Bluetooth® 5.4 | (Low Energy) | |
| Снибуаные сесянaja на мodyлот на predecessorпot | CR2032 (3-V-6batERYa od litутум) | |
| Оncер на долуна Фре荫ецima | MHz | 2402-2480 |
| Маск. щашина на Incрараclude | mW | < 30 |
| мakсимален oncesг на сигнадOTC) | m | 7 |
A) Measured with the suction hose (23) B) Measured with the supplied cable, suction tube, crevice nozzle and mounted handle C) The Bluetooth range may vary depending on the ambient conditions, including the transmitter and the receiver. In enclosed spaces with metal barriers (e.g. elevators, cabinets, corridors, etc.), the Bluetooth range may be significantly reduced.
Operating voltage for the charger [U] of 230 V. This voltage may vary depending on the country and the local power grid.
Start/stop automatic
Nominal
Voltage
Maximum
Length
Minimum
Length
220-240V2000W100W
A) The permitted length of the extension cable for the connected electrical appliance (depending on the country)
Information about the brush/selected brush
The values for the brush are determined according to EN 60335-2-69.
The sound pressure level of the vacuum cleaner, assessed with uncertainty A, is typically 73 dB(A). Uncertainty K = 2 dB. The sound level during operation may exceed the stated values. Wear hearing protection! Vibration values a (continuous vibration), p (repeated shock vibration) and uncertainty K are determined according to EN 60335-2-69:
a _ h = 0, 2 m / s ^ 2 (K = 0, 5 m / s ^ 2), ρ_ f = 8, 0 m / s ^ 2 (K = 4, 0 m / s ^ 2)
Installation
Remove the plug from the socket before cleaning or maintaining the vacuum cleaner, before adjusting the device settings, or before replacing parts. The safety measures require careful handling of the vacuum cleaner.
Installing the brush for hard floors (see figure A)
Insert the brush (22) for hard floors into the floor nozzle (30) until it clicks into place.
Installing the additional brush for vacuuming (see figure B)
Attach the additional brush for vacuuming (12) to the front position; it should click in.
Installing the hard floor brush
Vacuuming function (see figure C)
Insert the hard floor brush (23) into the floor nozzle (3) and turn it to the end in the direction of the clock hands.
Function adjustment (see figure D)
The vacuum function is intended for vacuuming. Do not vacuum hot air in an open space. Use the vacuum function only with a clean filter. This may make it dangerous to health. Before using the vacuum function, check that there is no pressure in the filter. Avoid damaging the pressure hose. Use protective glasses for pressure if there is a risk of pressure escaping.
The vacuum function is suitable for tasks where vacuuming with a vacuum cleaner is not possible, e.g., to remove small amounts of dust from clothing.
Turn the vacuum cleaner to setting 5 (switch to operating mode (4) in position 1) to vacuum the filter (23) from the pressure hose.
Remove the filter for vacuuming (23) completely and clean it with a soft brush. Then insert it into the holder for the vacuum function (3).
Insert the vacuum hose (23) into the holder for the vacuum function (18) and turn it clockwise until it stops.
Mounting the vacuum accessory
The vacuum hose (23) is equipped with a locking system, with which the vacuum accessory (vacuum adapter (24) or floor nozzle (25)) can be attached.
Mounting the vacuum adapter or floor nozzle (see figure E)
Insert the vacuum adapter (24) or the floor nozzle (25) onto the vacuum hose (23) until both locking tabs (31) of the vacuum hose engage. - For disassembly, press the tabs (31) inward and pull off the component.
Mounting the floor nozzles
Place the desired vacuum accessory (floor nozzle, crevice nozzle, upholstery nozzle, etc.) onto the floor nozzle (25) or onto the vacuum adapter (24).
Inserting/removing the filter bag for the floor nozzle (see figure F)
To insert, press the release button (32) on the floor nozzle (28). The filter bag (29) is released from the floor nozzle.
To insert, push the new filter bag into the floor nozzle (28).
Inserting/removing the crevice nozzle for the vacuum cleaner (see figure G)
Procedure for replacing the fuel filter on the tractor using the service tools.
Note: Insert the attachment pins (34) into the replacement bracket (16) until the end of the replacement bracket (33).
Caution: When replacing the bracket (15), remove the attachment for
replacement of the bracket (16) from the replacement bracket (33).
Removal/Insertion of the tractor (see figure H)
Note: Press the locking pins (37) on the locking devices (36) and insert the locking devices (36) into the tractor bracket (35) until they click.
Caution: Press the locking devices (36) and remove the tractor (14).
Replacement/Insertion of the fuel filter (dry service) (see figures I-J)
For dry service, you can insert the fuel filter (38). This ensures proper sealing.
Open the caps (13) and remove the top part of the service unit (11).
Note: Pull the fuel filter (38) out of the connection piece (39) of the service unit.
For replacement, remove the old fuel filter (38) from the connection piece (39), pull it out of the service unit, and insert a new fuel filter.
Insert the top part of the service unit (11) and close the caps (13), so that it clicks into place.
Replace the fuel filter (38) in time. Remove the fuel filter (38) before the next service.
Use
Before connecting the connector, before putting it into operation or servicing it, before replacing parts or adjusting, disconnect the power supply. These measures for prevention apply to the unexpected start of the device.
Commissioning
Pay attention to the electrical voltage! The voltage of the power supply must correspond to the voltage indicated on the rating plate of the device.
The device must not be used in areas where there is a risk of explosion.
To ensure optimal capacity and operation, always fully extend the supply hose (23) from the top of the device (11).
Use only an undamaged filter (without holes, tears, etc.). Replace it with a new filter if it is damaged.
Switching on/off
To switch on the remote control, turn the operating mode selector (4) to position 1.
To switch on the automatic
To start, turn the operating mode selector (4) to the AUTOSTART position. The status indicator (7) lights up. The remote control starts automatically as long as the transmitter module (41) is connected to the power supply.
To switch off the remote control, turn the operating mode selector (4) to position 0.
Installing the transmitter module
Remove the protective cover (clip K)
Before first use, you must remove the protective cover from the connected battery.
Open the cover of the transmitter module (41) by turning it.
If the speaker is not connected, press the button on the transmitter (41).
Restore the connection with the transmitter module (see figure L).
Note: In the factory state, the speaker is connected to the transmitter module via Bluetooth®.
To use the auto-start function, the speaker must be connected via Bluetooth to the transmitter module (41).
The distance from the speaker to the transmitter module must not exceed 0.5 m.
Restoring the connection (pairing with another transmitter module):
- Press the pairing button (6) on the speaker for at least 3 seconds, until the status LED (7) starts flashing green rapidly.
- Press and hold the start/stop button (44) on the transmitter module (41) for at least 3 seconds. The status LED (42) on the transmitter module (41) lights up green for 3 seconds.
Connection restoration successful:
- The status LED (7) on the speaker lights up green.
- The status LED (42) on the transmitter module (41) flashes green once.
When a new connection is established, the old connection (if any) is automatically terminated.
When the speaker is turned off, the connection with the transmitter module (41) is lost. When the speaker is turned on again, the connection with the same transmitter module is automatically restored.
Connection restoration is not possible:
- The status LED (7) on the speaker flashes green for 30 seconds and then turns off.
The indicator on the status (42) on the module of the transmitter (41) will remain lit.
The transmitter module is now connected to the receiver.
They will check the operating mode (4) on the receiver and set it to the AUTOSTART position and press the pairing button (6). The indicator on the status (7) will light up steady green.
If the receiver was already connected to some transmitter module and the transmitter is in function and in range, then the connection to this transmitter module will be restored automatically.
If the transmitter module does not connect to the receiver, check that the battery in the remote control is not weak, or try again to connect the transmitter module.
Note: If the battery in the remote control is weak, the indicator on the status (42) on the transmitter module (41) will blink green rapidly. Replace the battery in the remote control with a new one (see, replace the battery in the transmitter module (see section I), page 177).
Suction of solid materials
Suction with an electric power tool (see section M)
- Mount the adapter for suction (24). - Insert the adapter for suction (24) into the suction connection of the electric power tool.
When working with electric power tools, if the air flow in the suction hose is low (e.g., due to clogged filters, etc.), the air vent (46) on the adapter for suction (24) must be open. This will improve the performance of the receiver and the electric power tool.
To do this, turn the ring on the air vent (46) until it is open as much as possible.
The receiver has a built-in socket (5). You can connect an external electric power tool to it. Pay attention to the maximum permitted connection power of the electric power tool that is connected.
To put the start/stop automatic of the receiver into use, turn the rotary switch for selecting the operating mode (4) to the AUTOSTART position (automatic start).
To put the receiver into use, switch on the electric power tool connected to the socket (5).
The receiver starts automatically.
To switch it off, turn it to the 0 position.
The function for delayed switch-off is used to automatically switch off the device after a certain time, in order to switch off the device automatically.
To switch it off, turn the switch to the operating mode (4) to position 0.
Automatic start with the remote control
With the function for automatic start with the help of the remote control (41), you can switch the device on and off with the remote control:
-Turn the switch to the operating mode (4) to position AUTOSTART. The indicator light of the status (7) signals the switched-on function. -Mount the remote control (41) on the electrical device. For this, press the retaining clip (45) firmly and hook the free end onto the holder (43). Pull the retaining clip as needed to the appropriate length. Suitable places are where the electrical device generates enough heat during operation. Never place the remote control in places that are not necessary for the operation of the electrical device (e.g. racks, switches, displays). -Start the device with the remote control (41) (see "Starting with the remote control (see Figure L)", page 175). -To switch on the device, connect the electrical device. The switch-off starts automatically. -To switch off the device, disconnect the electrical device. The switch-off will occur after a period of 6 seconds. During the switch-off period, the remaining heat is switched off.
Switching off wet materials
Do not switch off or on flammable or explosive substances, e.g. gasoline, oil, alcohol, solvents. Do not switch off or on liquids, flammable or explosive materials. Do not use the switch-off in a room where there is a risk of explosion. Dust, vapors or gases can ignite or explode. The switch-off must not be used as a water pump. The switch-off is intended for switching off metal from air and water. Before switching off, make sure the outlet for liquids (1) is firmly closed. Before each switch-off, remove the power plug from the socket.
Work steps before starting wet switching off
Open the valves (13) and fill the switch-off device (11).
Before switching off, remove the filter (38).
Turn the cap of the outlet for liquids (1) counterclockwise in the direction of the arrow on the clock.
Empty the container (2) through the outlet for liquids (1) and turn the cap clockwise in the direction of the arrow on the clock.
Clean the filter (49).
Check that the sensor for the fill level (50) is clean.
Close the top cover (11) and lock it with the latch (13).
During this time, the appliance will dry the laundry.
The drying process is determined by the selected dryness level (50). When the maximum dryness level is reached, the drying process stops automatically.
Turn the knob for the condensate outlet (1).
Turn the knob for the timer.
Clean the condensate outlet and turn the knob for the timer.
After finishing the work, remove the top cover (11) to prevent the supply of water and leave it to dry well.
If necessary, clean the dryness level sensor (50) with a soft cloth.
Manual cleaning of the filter
When the drying time is not sufficient, you should clean the filter.
How often the filter should be cleaned depends on the type and amount of laundry. With normal use, the maximum capacity is quickly reached.
Turn the program selector (for selecting the operating mode) to position 1).
Close the water inlet valve or the condensate outlet.
Remove the filter (10) for manual cleaning and then replace it. The filter will be cleaned by the air flow.
Maintenance and service
Remove the battery from the device.
Remove it from the connector, before cleaning or servicing the device, before adjusting the supply of the device, replacing parts or performing maintenance. General precautions to prevent unintentional start of the device.
Clean the device and the ventilation openings with a dry cloth, so that it can work well and safely.
If you need to use an extension cable, use only an approved one from a Bosch service agent or an authorized Bosch dealer, to avoid safety hazards.
The device is protected against direct splashing of water.
Wipe the device housing with a damp cloth.
Do not clean the device with compressed air. The motor or other components may be damaged.
Replacing the battery of the transmitter (see figure N)
Warning: Always replace the battery with one of the same type. Otherwise, there is a risk of explosion.
Properly dispose of old or exhausted batteries. Exhausted batteries may leak and damage the product or cause injury.
Open the battery compartment of the transmitter (41) by turning it.
Remove the battery carefully and insert a new battery. Pay attention to the correct polarity when inserting the battery.
Close the battery compartment of the transmitter (41) again.
Cleaning/Replacing the filter (see figures O-P)
The suction power depends on the condition of the filter. Therefore, clean the filter (49) regularly.
Béngha 3aemeheTe ro oUteTehnofHnItep.
-AkTNBnpaJTe ro paHOTo UcHteHe HaΦnItePOT (BnIN "MaHyEnHO UcHteHe HaΦnItePOT", CtpaHnua 177) nnotoA Ncknye Ta npaBOcMyKaIkata.
-OTBOpTe Tn KaNaUte (13) nH3BaTeTo ro rOpHnOt den OJ BCNCyBaOH (11).
-ⅠOuHnHTe ja paKaTata (47)Ha dpxkaOT 3a φnntep (48) 1N H3BneueTe ro dpkaOT 3a φnntep (48)
-ИЗвадеюфпгетор(49)ODДржачOTHaФнтетор(48).
- Ncwyte ro fntepot: notyKHTe ro fntepOT (49) HAD COODBETEH CAd 3a OTnAD. BHHMABAJTe Da He rN OWTETHe pe6pTaHa fNTepOT.
PnTeuKa HeuHcToTHja, HcHcTe Te H pe6paTa Ha fHTepOT CO BOa H Meka YeTKa. H
AkoΦnntepoBnaxKeH: Icnnakhte roΦnntepoT (49) no npotoHa Boda nnoToa octabeTe ro da ce HcyuHn do6po. Hn 3aMeHete ro OwTeHnO TΦnTep (49).
-CTABETe ro uCTHOT n CYBΦHTep (49) BO DpXaOHT HaΦHTepoT (48) 0.
-CTABETO DpkaOT HaΦnITepoT (48) BO TOPHNOt DeN Ha BCNCyBaOH ② n CnyHTeJa paKaTa (47) HaDpkaOH TaΦnITepoT (48),doKeHa Ce BKnON.
-Провете ro Фнгелот (49)и джаут ha фнгелот (48)дан e парвно ngцьрто noctавен.
-CTaBete ro tropnoT den Ha BCnCyBaHT (11) noBtOpH No 3aTBopTe r n DbTa 3aTbOpau (13), Taka uTo Ke ce BKNONAT 3ByHO.
178 | Srpski
UcTeBeHa caaDT
H36pHwTe ro caTOr (2) OaBpeMe-HabpeMe co BOoBuHaeHO Hea6pa3nBHO CpeiCTBO 3a YnCTHe N OCTaBeTe Ro da ce HcyuH.
Check the sensor for water level (see figure Q)
Then clean the water level sensor (50).
Open the taps (13) and remove the top of the suction hose (11).
Clean the water level sensor (50) with a soft brush.
Put the top of the suction hose (11) back on and close the taps (13).
Faults
Regular maintenance of the device (2) guarantees optimal performance of the suction.
If the suction length is insufficient, check: - Is the suction hose (11) correctly positioned? - Is the filter system clogged? - Is the suction hose (27) kinked? - Is the device (2) tilted? - Is the filter (38) full? - Is the filter (49) clogged with dirt?
If the suction length cannot be achieved despite this, contact the Bosch service department.
When overheating, the thermal cut-out switches off automatically. Proceed as follows: - Turn the switch for selecting the operating mode (4) to position 0. - Make sure that the device (2) is switched off, the filter (38) is empty, the suction hose (23) is empty, and the filter (49) is not clogged. - Leave the suction device to cool down for 60 minutes. - Then switch it on again and repeat the procedure.
If the thermal cut-out cannot be switched on again, the thermal cut-out may be defective. Contact the Bosch service department to replace the thermal cut-out.
Storage and transport (see figure)
- Wind the suction hose (23) around the top of the suction device (11) and insert the suction hose into the holder (22). - Wind the power cord around the cable holder (17). - Place the suction hose (27) in the hose holder (20), the large nozzle (25), the suction tube (24), and the nozzle for crevices (26) in the holders for the suction accessories (9) or (12). - Place the small nozzle (28) in the holder (19). - Carry the suction device using the carrying handle (8).
- Place the suction device in a dry room and protect it from unauthorized use. - To lock the wheels for changing direction (16), press the brake on the wheels for changing direction (15).
Service department and advice when using
Northern Macedonia
Tel.: 02/2467610
You can find the addresses for service on the last page.
For all proper claims on the reserve device, you can find the 10-digit specification number on the product.
Disposal
The appliance, batteries, and accessories must be disposed of in an environmentally friendly manner.
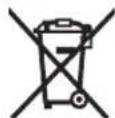
Do not dispose of the appliance and batteries in the household waste!
Only for EU countries:
Electrical and electronic equipment and batteries must not be disposed of with household waste. They must be collected separately and disposed of in an environmentally friendly manner. Use the appropriate collection systems. Incorrect disposal can be harmful to the environment and human health. The crossed-out wheeled bin symbol indicates that the product must be disposed of separately.
Serbian
Safety instructions for the vacuum cleaner

Read all warnings and instructions.
Failure to follow the safety instructions and instructions may result in electric shock, fire, and/or serious injury.
Keep all warnings and instructions for future reference.
This vacuum cleaner is not intended for use by children or persons with reduced physical, sensory, or mental capabilities, or lack of experience and knowledge. Otherwise, there is a risk of incorrect handling and injury. Supervise children. This will ensure that children do not play with the vacuum cleaner.
WARNING: Do not vacuum materials that are harmful to health, e.g., beech or oak wood dust, coarse stone dust, asbestos.
These substances are considered carcinogens. Inform yourself about the applicable regulations/laws in your country regarding work with dust that is hazardous to health.
Use the vacuum cleaner only if you have received sufficient information about its use. Careful instruction reduces errors and injuries.
WARNING: The vacuum cleaner is intended only for vacuuming dry materials, but thanks to appropriate measures it can be used for vacuuming liquids. Liquid ingress increases the risk of electric shock.
Do not vacuum flammable or explosive liquids, e.g., gasoline, oil, alcohol, solvents. Do not vacuum hot, burning, or explosive dust particles. Do not use the vacuum cleaner in rooms where there is a risk of explosion. Dust, vapors, or liquids can ignite or explode.
WARNING: Use the socket only in the manner specified in the operating instructions.
WARNING: Immediately switch off the vacuum cleaner as soon as foam or liquid comes out of it, and
empty the container. Otherwise, the vacuum cleaner can be damaged.
CAUTION! The vacuum cleaner may only be used indoors. CAUTION! Regularly clean the liquid level sensors and check them for damage. Otherwise, functions may be impaired. If operation of the vacuum cleaner in a humid environment cannot be avoided, use a residual current device (RCD). The use of an RCD reduces the risk of electric shock in case of a fault. Before each use, check the vacuum cleaner, cable, and plug. Do not use the vacuum cleaner if you notice damage. Have repairs carried out only by qualified personnel using only original spare parts. Damaged vacuum cleaners, cables, and plugs increase the risk of electric shock. Make sure not to run over or crush the cable. Do not pull the cable to unplug the plug from the socket or to move the vacuum cleaner. Damaged cables increase the risk of electric shock. Pull the plug out of the socket before starting maintenance or cleaning of the vacuum cleaner, before making adjustments to the device, before changing accessory parts, or before leaving the vacuum cleaner. This precaution prevents unintentional starting of the vacuum cleaner. Ensure good ventilation of the work area. Have repairs carried out only by qualified personnel using only original spare parts. This ensures that the safety of the vacuum cleaner is maintained. Before commissioning, check the suction hose for proper condition. When doing so, leave the suction hose on the vacuum cleaner so that unwanted dust does not fall out. Otherwise, you could inhale dust. Do not use the vacuum cleaner as a seat. The vacuum cleaner could be damaged.
Be careful when using the mains cable and suction hose. The vacuum cleaner may endanger other people. - Do not clean the vacuum cleaner with a direct jet of water. Water penetrating the upper part of the vacuum cleaner increases the risk of electric shock. Connect the vacuum cleaner to a power supply with a properly grounded outlet. The socket and extension cable must have a proper protective conductor. Do not use the vacuum cleaner as a permanent suction device.
WARNING Use the socket only in the manner specified in the instructions for
use.
Emptying the container
Open the latches (13) and remove the upper part of the vacuum cleaner (11). Before emptying, remove the filter bag (38) if fitted.
Turn the liquid drain cap (1) counterclockwise. Empty the container (2) through the liquid drain (1) and turn the cap clockwise to close.
Clean the filter (49).
Make sure the fill level sensor (50) is clean.
Put the upper part of the vacuum cleaner (11) back on and close the latches (13).
bglgj gaggl ablll abgagg aalall jgl qall 2g adablaI ypaLw.
ab g aaiug bag u mgo uauaaio 1cblall jaoa aolj lal
p0gj jil, lll pall sic. aalw alla j 2 g, ablwl glc yo bawll 9 d3 wu wu wu wu .aag uq Jauill
aall lll 5g
Jbai
jsslll jy. wlo Jsw dgo jll lal lww ala awl ykcl lo sall abwll no gll
yJU 1uou uu uuuu uuuu
b9 uaiol psswI UJ 0saaol j
J
abwU (5) yjgo augg uao cuj j du ayuqS ooc uogguo gai i ciAs ooagawall sgaal uogll ojj aoggall uuyj
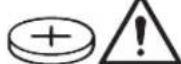
#
1J 1
∴ (2)
baaia aagg ggbjJ jol (3)
| PAS30-240PRS | ###/###/###/###/###/###/###/###/###/###/###/###/###/###/###/###/###/###/###/###/###/###/###/###/###/###/###/###/###/###/###/###/###/###/###/###/###/###/###/###/###/###/###/###/###/###/###/###/###/###/### | ||
| 3603 CE7 3.. | ###/###/###/###/###/###/###/###/###/###/###/###/###/###/###/###/###/###/###/###/###/###/###/###/###/###/###/###/###/###/###/###/###/###/###/###/###/###/###/###/###/###/###/###/###/###/###/###/###/ | ||
| j#50-60 | ###/###/###/###/###/###/###/###/###/###/###/###/###/###/###/###/###/###/###/###/###/###/###/###/###/###/###/###/###/###/###/###/###/###/###/###/###/###/###/###/###/###/###/###/###/###/###/###/###/ ### | ||
| 1g1300 | ###/###/###/###/###/###/###/###/###/###/###/###/###/###/###/###/###/###/###/###/###/###/###/###/###/###/###/###/###/###/###/###/###/###/###/###/###/###/###/###/###/###/###/###/###/###/###/###/### | ||
| jJ30 | (a) (a) (a) (a) (a) (a) (a) (a) (a) (a) (a) (a) (a) (a) (a) (a) (a) (a) (a) (a) (a) (a) (a) (a) (a) (a) (a) (a) (a) (a) (a) (a) (a) (a) (a) (a) (a) (a) (a) (a) (a) (a) (a) (a) (a) (a) (a) (a) (a) (a) (a) (a) (a) (a) (a) (a) (a) (a) (a) (a) (a) (a) (a) (a) (a) (a) (a) (a) (b) (b) (b) (b) (b) (b) (b) (b) (b) (b) (b) (b) (b) (b) (b) (b) (b) (b) (b) (b) (b) (b) (b) (b) (b) (b) (b) (b) (b) (b) (b) (b) (b) (b) (b) (b) (b) (b) (b) (b) (b) (b) (b) (b) (b) (b) (b) (b) (b) (b) (b) (b) (b) (b) (b) (b) (b) (b) (b) (b) (b) (b) (b) (b) (b) (b) (b) (b (b) (b) (b) (b) (b) (b) (b) (b) (b) (b) (b) (b) (b) (b) (b) (b) (b) (b) (b) (b) (b) (b) (b) (b) (b) (b) (b) (b) (b) (b) (b) (b) (b) (a) (a) (a) (a) (a) (a) (a) (a) (a) (a) (a) (a) (a) (a) (a) (a) (a) (a) (a) (a) (a) (a) (a) (a) (a) (a) (a) (a) (a) (a) (a) (a) (a (a) (a) (a) (a) (a) (a) (a) (a) (a) (a) (a) (a) (a) (a) (a) (a) (a) (a) (a) (a) (a) (a) (a) (a) (a) (a) (a) (a) (a) (a) (a) (a) (a) ( |
230
(22)
.(17)山LJUolUgUgUJUJU
Lol (27) 10000000000000000000
Lgog (25) aiaaill dgaillg (20) 1
Jolg (26) ggaWl aogg (24) bawll
.(12)g(9)IaowUgj
(19) 28 a
.8) 1JUaoo no abgWl Jd2 -
sloqiooogolsoaabgllog
a gawal jc pI saw
So 156 (16) aagill c
.(15)dugul
pIsswKl oJgog jUjll ao
U
+212529314327:
- (S) δ ω (41) w j g j ωω bj
(O-Pjglj)jla/
g 1. jilal l a lge bai w i g
(49) aaiio ojg jilll aui
jgl jl l
-(buiU,jbi)julu
g(232aoull,“julU 15g
aabwJ
-(g)
.(11)abgU
wlg ① (48) jilal Jola (47) uao
jLJ (48) jilJI Jol
(48) jull llo (49) jull gl
-: jul
Lgogc49julluiy
julilalw jolj0sc lgcj
julil jw cbbu p yswl lwwll aLg
.aaclolwjgLlJy
gj
:uj j
4jgl jglo (49) jolll Jue
.1
g
.(49) 1015 jill
-(49)
(48)
-(48)
(48) jIJI Jola (47) 1g abg
Legal Information and Licenses
LEGAL INFORMATION AND LICENSES
1 Open Source Components
1.1 CMISI v5 - Apache 2.0
Copyright © 2009-2016 ARM Limited. All rights reserved.
Licensed under the Apache License, Version 2.0 (the "License"); you may not use this file except in compliance with the License. You may obtain a copy of the License at
http://www.apache.org/licenses/LICENSE-2.0.
Unless required by applicable law or agreed to in writing, software distributed under the License is distributed on an "AS IS" BASIS, WITHOUT WARRANTIES OR CONDITIONS OF ANY KIND, either express or implied. See the License for the specific language governing permissions and limitations under the License.
1.2 FreeRTOS v10.2.1 - MIT
Copyright © 2019 Amazon.com, Inc. or its affiliates. All Rights Reserved.
Permission is hereby granted, free of charge, to any person obtaining a copy of this software and associated documentation files (the "Software"), to deal in the Software without restriction, including without limitation the rights to use, copy, modify, merge, publish, distribute, sublicense, and/or sell copies of the Software, and to permit persons to whom the Software is furnished to do so, subject to the following conditions:
The above copyright notice and this permission notice shall be included in all copies or substantial portions of the Software.
THE SOFTWARE IS PROVIDED "AS IS", WITHOUT WARRANTY OF ANY KIND, EXPRESS OR IMPLIED, INCLUDING BUT NOT LIMITED TO THE WARRANTIES OF MERCHANTABILITY, FITNESS FOR A PARTICULAR PURPOSE AND NONINFRINGEMENT. IN NO EVENT SHALL THE AUTHORS OR COPYRIGHT HOLDERS BE LIABLE FOR ANY CLAIM, DAMAGES OR OTHER LIABILITY, WHETHER IN AN ACTION OF CONTRACT, TORT OR OTHERWISE, ARISING FROM, OUT OF OR IN CONNECTION WITH THE SOFTWARE OR THE USE OR OTHER DEALINGS IN THE SOFTWARE.
1.3 SHA256 v10.2.0 - BSD 2-Clause
Copyright © 1992-2015 The FreeBSD Project. All rights reserved.
Redistribution and use in source and binary forms, with or without modification, are permitted provided that the following conditions are met:
- Redistributions of source code must retain the above copyright notice, this list of conditions and the following disclaimer.
- Redistributions in binary form must reproduce the above copyright notice, this list of conditions and the following disclaimer in the documentation and/or other materials provided with the distribution.
THIS SOFTWARE IS PROVIDED BY THE AUTHOR AND CONTRIBUTORS "AS IS" AND ANY EXPRESS OR IMPLIED WARRANTIES, INCLUDING, BUT NOT LIMITED TO, THE IMPLIED WARRANTIES OF MERCHANTABILITY AND FITNESS FOR A PARTICULAR PURPOSE ARE DISCLAIMED. IN NO EVENT SHALL THE AUTHOR OR CONTRIBUTORS BE LIABLE FOR ANY DIRECT, INDIRECT, INCIDENTAL, SPECIAL, EXEMPLARY, OR CONSEQUENTIAL DAMAGES (INCLUDING, BUT NOT LIMITED TO, PROCUREMENT OF SUBSTITUTE GOODS OR SERVICES; LOSS OF USE, DATA, OR PROFITS; OR BUSINESS INTERRUPTION) HOWEVER CAUSED AND ON ANY THEORY OF LIABILITY, WHETHER IN CONTRACT, STRICT LIABILITY, OR TORT (INCLUDING NEGLIGENCE OR OTHERWISE) ARISING IN ANY WAY OUT OF THE USE OF THIS SOFTWARE, EVEN IF ADVISED OF THE POSSIBILITY OF SUCH DAMAGE.
1.4 ECC - BSD 2-Clause
Copyright © 2013, Kenneth MacKay. All rights reserved.
Redistribution and use in source and binary forms, with or without modification, are permitted provided that the following conditions are met:
- Redistributions of source code must retain the above copyright notice, this list of conditions and the following disclaimer.
- Redistributions in binary form must reproduce the above copyright notice, this list of conditions and the following disclaimer in the documentation and/or other materials provided with the distribution. THIS SOFTWARE IS PROVIDED BY THE COPYRIGHT HOLDERS AND CONTRIBUTORS "AS IS" AND ANY EXPRESS OR IMPLIED WARRANTIES, INCLUDING, BUT NOT LIMITED TO, THE IMPLIED WARRANTIES OF MERCHANTABILITY AND FITNESS FOR A PARTICULAR PURPOSE ARE DISCLAIMED. IN NO EVENT SHALL THE COPYRIGHT HOLDER OR CONTRIBUTORS BE LIABLE FOR ANY DIRECT, INDIRECT, INCIDENTAL, SPECIAL, EXEMPLARY, OR CONSEQUENTIAL DAMAGES (INCLUDING, BUT NOT LIMITED TO, PROCUREMENT OF SUBSTITUTE GOODS OR SERVICES; LOSS OF USE, DATA, OR PROFITS; OR BUSINESS INTERRUPTION) HOWEVER CAUSED AND ON ANY THEORY OF LIABILITY, WHETHER IN CONTRACT, STRICT LIABILITY, OR TORT (INCLUDING NEGLIGENCE OR OTHERWISE) ARISING IN ANY WAY OUT OF THE USE OF THIS SOFTWARE, EVEN IF ADVISED OF THE POSSIBILITY OF SUCH DAMAGE.
1.5 Bignum (Multi-precision integer)/ RSA v2.6.0 - Apache 2.0
Copyright © 2006-2015, ARM Limited. All rights reserved.
Licensed under the Apache License, Version 2.0 (the "License"); you may not use this file except in compliance with the License. You may obtain a copy of the License at http://www.apache.org/licenses/LICENSE-2.0.
Unless required by applicable law or agreed to in writing, software distributed under the License is distributed on an "AS IS" BASIS, WITHOUT WARRANTIES OR CONDITIONS OF ANY KIND, either express or implied. See the License for the specific language governing permissions and limitations under the License.
2 Generic License Text
2.1 Apache-2.0
Apache License
Version 2.0, January 2004
http://www.apache.org/licenses/
TERMS AND CONDITIONS FOR USE, REPRODUCTION, AND DISTRIBUTION
1. Definitions.
"License" shall mean the terms and conditions for use, reproduction, and distribution as defined by Sections 1 through 9 of this document.
"Licensor" shall mean the copyright owner or entity authorized by the copyright owner that is granting the License. "Legal Entity" shall mean the union of the acting entity and all other entities that control, are controlled by, or are under common control with that entity. For the purposes of this definition, "control" means (i) the power, direct or indirect, to cause the direction or management of such entity, whether by contract or otherwise, or (ii) ownership of fifty percent (50%) or more of the outstanding shares, or (iii) beneficial ownership of such entity.
"You" (or "Your") shall mean an individual or Legal Entity exercising permissions granted by this License.
"Source" form shall mean the preferred form for making modifications, including but not limited to software source code, documentation source, and configuration files.
"Object" form shall mean any form resulting from mechanical transformation or translation of a Source form, including but not limited
to compiled object code, generated documentation, and conversions to other media types.
"Work" shall mean the work of authorship, whether in Source or Object form, made available under the License, as indicated by a copyright notice that is included in or attached to the work (an example is provided in the Appendix below). "Derivative Works" shall mean any work, whether in Source or Object form, that is based on (or derived from) the Work and for which the editorial revisions, annotations, elaborations, or other modifications represent, as a whole, an original work of authorship. For the purposes of this License, Derivative Works shall not include works that remain separable from, or merely link (or bind by name) to the interfaces of, the Work and Derivative Works thereof. "Contribution" shall mean any work of authorship, including the original version of the Work and any modifications or additions to that Work or Derivative Works thereof, that is intentionally submitted to Licensor for inclusion in the Work by the copyright owner or by an individual or Legal Entity authorized to submit on behalf of the copyright owner. For the purposes of this definition, "submitted" means any form of electronic, verbal, or written communication sent to the Licensor or its representatives, including but not limited to communication on electronic mailing lists, source code control systems, and issue tracking systems that are managed by, or on behalf of, the Licensor for the purpose of discussing and improving the Work, but excluding communication that is conspicuously marked or otherwise designated in writing by the copyright owner as "Not a Contribution". "Contributor" shall mean Licensee and any individual or Legal Entity on behalf of whom a Contribution has been received by Licensee and subsequently incorporated within the Work. 2. Grant of Copyright License. Subject to the terms and conditions of this License, each Contributor hereby grants to You a perpetual, worldwide, non-exclusive, no-charge, royalty-free, irrevocable copyright license to reproduce, prepare Derivative Works of, publicly display, publicly perform, sublicense, and distribute the Work and such Derivative Works in Source or Object form. 3. Grant of Patent License. Subject to the terms and conditions of this License, each Contributor hereby grants to You a perpetual, worldwide, non-exclusive, no-charge, royalty-free, irrevocable (except as stated in this section) patent license to make, have made, use, offer to sell, sell, import, and otherwise transfer the Work, where such license applies only to those patent claims licensable by such Contributor that are necessarily infringed by their Contribution(s) alone or by combination of their Contribution(s) with the Work to which such Contribution(s) was submitted. If You institute patent litigation against any entity (including a cross-claim or counterclaim in a lawsuit) alleging that the Work or a Contribution incorporated within the Work constitutes direct or contributory patent infringement, then any patent licenses granted to You under this License for that Work shall terminate as of the date such litigation is filed. 4. Redistribution. You may reproduce and distribute copies of the Work or Derivative Works thereof in any medium, with or without modifications, and in Source or Object form, provided that You meet the following conditions: (a) You must give any other recipients of the Work or Derivative Works a copy of this License; and (b) You must cause any modified files to carry prominent notices stating that You changed the files; and (c) You must retain, in the Source form of any Derivative Works that You distribute, all copyright, patent, trademark, and attribution notices from the Source form of the Work, excluding those notices that do not pertain to any part of the Derivative Works; and (d) If the Work includes a "NOTICE" text file as part of its distribution, then any Derivative Works that You distribute must include a readable copy of the attribution notices contained within such NOTICE file, excluding those notices that do not pertain to any part of the Derivative Works, in at least one of the following places: within a NOTICE text file distributed as part of the Derivative Works; within the Source form or
documentation, if provided along with the Derivative Works; or, within a display generated by the Derivative Works, if and wherever such third-party notices normally appear. The contents of the NOTICE file are for informational purposes only and do not modify the License. You may add Your own attribution notices within Derivative Works that You distribute, alongside or as an addendum to the NOTICE text from the Work, provided that such additional attribution notices cannot be construed as modifying the License.
You may add Your own copyright statement to Your modifications and may provide additional or different license terms and conditions for use, reproduction, or distribution of Your modifications, or for any such Derivative Works as a whole, provided Your use, reproduction, and distribution of the Work otherwise complies with the conditions stated in this License.
- Submission of Contributions. Unless You explicitly state otherwise, any Contribution intentionally submitted for inclusion in the Work by You to the Licensee shall be under the terms and conditions of this License, without any additional terms or conditions. Notwithstanding the above, nothing herein shall supersede or modify the terms of any separate license agreement you may have executed with Licensee regarding such Contributions.
- Trademarks. This License does not grant permission to use the trade names, trademarks, service marks, or product names of the Licensor, except as required for reasonable and customary use in describing the origin of the Work and reproducing the content of the NOTICE file.
- Disclaimer of Warranty. Unless required by applicable law or agreed to in writing, Licensee provides the Work (and each Contributor provides its Contributions) on an "AS IS" BASIS, WITHOUT WARRANTIES OR CONDITIONS OF ANY KIND, either express or implied, including, without limitation, any warranties or conditions of TITLE, NON-INFRINGEMENT, MERCHANTABILITY, or FITNESS FOR A PARTICULAR PURPOSE. You are solely responsible for determining the appropriateness of using or redistributing the Work and assume any risks associated with Your exercise of permissions under this License.
- Limitation of Liability. In no event and under no legal theory, whether in tort (including negligence), contract, or otherwise, unless required by applicable law (such as deliberate and grossly negligent acts) or agreed to in writing, shall any Contributor be liable to You for damages, including any direct, indirect, special, incidental, or consequential damages of any character arising as a result of this License or out of the use or inability to use the Work (including but not limited to damages for loss of goodwill, work stoppage, computer failure or malfunction, or any and all other commercial damages or losses), even if such Contributor has been advised of the possibility of such damages.
- Accepting Warranty or Additional Liability. While redistributing the Work or Derivative Works thereof, You may choose to offer, and charge a fee for, acceptance of support, warranty, indemnity, or other liability obligations and/or rights consistent with this License. However, in accepting such obligations, You may act only on Your own behalf and on Your sole responsibility, not on behalf of any other Contributor, and only if You agree to indemnify, defend, and hold each Contributor harmless for any liability incurred by, or claims asserted against, such Contributor by reason of your accepting any such warranty or additional liability.
END OF TERMS AND CONDITIONS
3 WARRANTY DISCLAIMER
This product contains Open Source Software components which underly Open Source Software Licenses. Please note that Open Source Licenses contain disclaimer clauses. The text of the Open Source Licenses that apply are included in this manual under "Legal Information and Licenses".
238 | Legal Information and Licenses
Service Contacts
Service Contacts
Service Contacts
https://www.bosch-pt.com/serviceaddresses
Guarantee Conditions
Guarantee Conditions
Guarantee Conditions
Guarantee Conditions

https://www.bosch-pt.com/guarantee/202507
- SAFETY INSTRUCTIONS FOR DUST EXTRACTORS
- SAVE ALL WARNINGS AND INSTRUCTIONS FOR FUTURE REFERENCE
- WARNING
- THE DUST EXTRACTOR IS SUITABLE FOR VACUUMING DRY SUBSTANCES, AND
- ONLY USE THE SOCKET FOR THE PURPOSE STIPULATED IN THE OPERATING
- IF YOU NOTICE A FOAM OR WATER LEAK, SWITCH OFF THE DUST EXTRACTOR IM
- MANUAL
- ENSURE THAT THE COIN CELL IS KEPT OUT OF THE REACH OF CHILDREN. COIN CELLS ARE DANGEROUS
- SYMBOLS
- SYMBOLS AND THEIR MEANING
- AUTOMATIC START/STOP FUNCTION
- SWITCHING OFF
- EXTRACTION
- PRODUCT DESCRIPTION AND SPECIFICATIONS
- INTENDED USE
- PRODUCT FEATURES
- TECHNICAL DATA
- WET/DRY DUST EXTRACTOR PAS30-240PRS
- AUTOMATIC START/STOP
- NOISE/VIBRATION INFORMATION
- ASSEMBLY
- FITTING THE HOLDER FOR THE VACUUM HOSE (SEE FIGURE A)
- FITTING THE EXTRA BRACKET FOR DUST EXTRACTOR ACCESSORIES (SEE FIGURE B)
- FITTING THE VACUUM HOSE
- EXTRACTION FUNCTION (SEE FIGURE C)
- BLOWING FUNCTION (SEE FIGURE D)
- ENGLISH
- FITTING THE EXTRACTION ACCESSORIES
- FITTING THE DUST EXTRACTION ADAPTER OR CURVED NOZZLE (SEE FIGURE E)
- FITTING THE NOZZLES AND TUBES
- REMOVING/INSERTING THE INSERT FOR THE FLOOR NOZZLE (SEE FIGURE F)
- INSERTING/REMOVING CASTORS (SEE FIGURE G)
- ATTACHING/REMOVING WHEEL (SEE FIGURE H)
- INSERTING/CHANGING THE FLEECE FILTER BAG (DRY EXTRACTION) (SEE FIGURES I-J)
- OPERATION
- STARTING OPERATION
- SWITCHING ON AND OFF
- SETTING UP THE AUTO-START REMOTE
- REMOVING THE PROTECTIVE FILM (SEE FIGURE K)
- ESTABLISHING A CONNECTION TO THE AUTO-START REMOTE (SEE FIGURE L)
- CONNECTION SUCCESSFULLY ESTABLISHED
- CONNECTION CANNOT BE ESTABLISHED
- RECONNECTING TO A KNOWN AUTO-START REMOTE
- DRY VACUUMING
- EXTRACTING DUST THAT ACCUMULATES FROM WORKING POWER TOOLS (SEE FIGURE M)
- AUTOMATIC MODE VIA AUTO-START REMOTE
- WET VACUUMING
- STEPS TO TAKE BEFORE WET EXTRACTION
- DURING AND AFTER WET EXTRACTION
- MANUAL FILTER CLEANING
- MAINTENANCE AND SERVICE
- MAINTENANCE AND CLEANING
- CHANGING THE COIN CELL OF THE AUTO-START REMOTE (SEE FIGURE N)
- CLEANING/CHANGING THE FILTER (SEE FIGURES O-P)
- CLEANING THE CONTAINER
- CLEANING THE FILL LEVEL SENSOR (SEE FIGURE Q)
- FAULTS
- STORAGE AND TRANSPORT (SEE FIGURE R)
- AFTER-SALES SERVICE AND APPLICATION SERVICE
- GREAT BRITAIN
- GB IMPORTER
- DISPOSAL
- ONLY FOR EU COUNTRIES AND UNITED KINGDOM
- FRENCH
- DANISH
- ONLY FOR EU COUNTRIES
- USE
- WASTE ELECTRICAL AND ELECTRONIC EQUIPMENT
- DEACTIVATED
- BLENDER JUG
- TIME DISPLAY
- DURING EACH WET VACUUMING
- SYMBOL AND ITS MEANING
- AUTOMATIC SWITCHING ON/OFF
- DUST EXTRACTION
- PRODUCT AND SERVICE DESCRIPTION
- COMPONENT PARTS SHOWN
- RUSSIAN
- INSTALLING ACCESSORIES FOR DUST REMOVAL
- INSTALLING THE AIR OUTLET ADAPTER OR CURVED NOZZLE (SEE FIG. E)
- REMOVAL/INSTALLATION OF THE INSERT FOR THE FLOOR NOZZLE (SEE FIG. F)
- INSTALLATION/REMOVAL OF THE GUIDE ROLLERS (SEE FIG. G)
- INSTALLATION/REMOVAL OF THE WHEEL (SEE FIG. H)
- INSTALLATION/REPLACEMENT OF THE FILTER BAG MADE OF NON-WOVEN FABRIC (DRY CLEANING) (SEE FIG. I-J)
- WORKING WITH THE APPLIANCE
- SWITCHING ON THE APPLIANCE
- SUCCESSFUL CONNECTION
- ESTABLISHING A CONNECTION IS NOT POSSIBLE
- REPEATED CONNECTION WITH A KNOWN TRANSMITTING MODULE
- VACUUMING DUST FROM POWER TOOLS (SEE FIG. M)
- TO SWITCH ON/OFF AUTOMATICALLY, TURN THE MODE SWITCH (4) TO THE AUTOSTART POSITION
- AUTOMATIC MODE VIA THE TRANSMITTER MODULE
- VACUUMING UP LIQUIDS
- TIMELY CLEANING OF THE DUST CONTAINER
- REPLACING THE BATTERY CELL OF THE TRANSMITTER MODULE (SEE FIG. N)
- LEVEL SENSOR CLEANING (SEE FIG. Q)
- MALFUNCTIONS
- STORAGE AND TRANSPORT (SEE FIG. R)
- CONSULTATION ON THE SUBJECT OF PRODUCT USE
- KAZAKHSTAN
- UKRAINIAN
- SAFETY INSTRUCTIONS FOR THE POWER TOOL
- SYMBOL AND MEANING
- AUTOMATIC START AND STOP
- SWITCHING ON
- INSTALLING THE CASTOR WHEEL (SEE FIG. M)
- INSTALLING/REPLACING THE NON-WOVEN FILTER BAG (DRY VACUUMING) (SEE FIG. I-J)
- WORK
- SWITCHING ON/OFF
- CONNECTING THE GEARBOX (SEE FIG. L)
- ESTABLISHING A CONNECTION WAS SUCCESSFUL
- ESTABLISHING A CONNECTION FAILS
- RECONNECTING TO ANOTHER TRANSMITTER
- CONNECTING THE VACUUM CLEANER TO THE MAINS-POWERED ELECTRIC TOOL (SEE FIG. M)
- AUTOMATIC START/STOP WITH THE REMOTE CONTROL MODULE
- BONORE BIDCMOKTYBAHHA
- II NEPED BONORH NP6NPAHHAM
- PID YAC I NICN KOXHORO BONOROR NPNBPANNA
- CLEANING THE FILTER
- CLEANING THE HOUSING
- MALFUNCTION
- STORAGE AND MAINTENANCE
- SERVICE AND FREE CONSULTATION ON PRODUCT USE
- UKRAINE
- RECYCLING
- FOR UKRAINE
- EURASIAN ECONOMIC UNION (EEU) MEMBER STATES HAVE ESTABLISHED REQUIREMENTS FOR THE PRODUCT LABELING
- THE DEVICE IS INTENDED FOR MEASURING THE PARAMETERS OF THE ENVIRONMENT AND TECHNOLOGICAL PROCESSES
- DEVICE COMPONENTS
- DEVICE OPERATION AND MAINTENANCE
- STORAGE
- TRANSPORTATION
- POSSIBLE MALFUNCTIONS
- BATTERY
- BATTERY AND CHARGING
- AUTOMATIC SHUT-OFF
- THETA
- COPY
- TAZALAU GOBYINAU KOLDANU
- CORRESPONDING COMPONENTS
- KAZAKH
- THE DEVICE MUST BE CONNECTED TO THE MAINS
- INSTALLATION
- INSTALL THE DEVICE IN ACCORDANCE WITH THE INSTRUCTIONS (SEE THE FIGURE)
- INSTALL THE DEVICE IN ACCORDANCE WITH THE INSTRUCTIONS
- INSTALLING THE OIL PRESSURE SWITCH
- IF THE OIL PRESSURE SENSOR OR OIL PRESSURE SWITCH IS NOT INSTALLED, SEE FIGURE E
- INSTALLING/REMOVING THE OIL PRESSURE SWITCH (SEE FIGURE F)
- FOR INSTALLATION/REMOVAL (SEE FIGURE G)
- FOR OIL FILLING/DRAINING (SEE FIGURE H)
- FOR ADJUSTING THE IDLE SPEED (SEE FIGURES I-J)
- WARNING SYMBOL
- REMOVE THE PROTECTIVE CAP (SEE FIGURE)
- STARTING THE DEVICE WITH THE PROTECTIVE MODULE (SEE FIGURE)
- STARTING THE DEVICE WITH THE PROTECTIVE MODULE
- THE PUMP OPERATING MODES ARE AS FOLLOWS
- KONTEHEPITA3ANAHBI
- TONTBIPY DEHENREHH DAUNRH TA3ANAY (Q CYPETIN KAPAHBI3)
- AKAYNAP
- CLEANING AND MAINTENANCE (SEE FIGURE)
- CONTACT SERVICE FOR REPAIRS AND MAINTENANCE
- SERVICE CONTACT INFORMATION
- INSPECTION
- FOR DEVICES WITH BATTERIES
- ROMÂNA
- WARNING: READ THE OPERATING INSTRUCTIONS BEFORE USING THE APPLIANCE
- IF THE APPLIANCE IS NOT WORKING PROPERLY, UNPLUG IT AND CONTACT THE SERVICE CENTER
- WARNINGS
- SYMBOL MEANING
- START/STOP AUTOMATIC
- SUCTION
- SYMBOLS AND THEIR MEANINGS
- PRODUCT DESCRIPTION AND ACCESSORIES
- INTENDED USE OF THE TOOL
- ILLUSTRATED COMPONENTS
- PAIRING WITH THE TRANSMITTER MODULE (SEE FIGURE L)
- THE CONNECTION HAS BEEN ESTABLISHED SUCCESSFULLY
- ESTABLISHING THE CONNECTION IS NOT POSSIBLE
- REPEATING THE PAIRING WITH A KNOWN TRANSMITTER MODULE
- VACUUMING DUST FROM POWER TOOLS (SEE FIGURE M)
- AUTOMATIC OPERATION VIA REMOTE CONTROL MODULE
- WORKING STEPS FOR WET VACUUMING
- WHEN WET VACUUMING
- CLEANING AND MAINTENANCE
- REPLACING THE BATTERY TYPE "COIN" IN THE REMOTE CONTROL MODULE (SEE FIG. N)
- CLEANING/REPLACING THE FILTER (SEE "FILTER, O-P")
- BULGARIAN
- TOUNCBAHE HA CEH3OPA 3A CTENEHTA HA 3ANBNAHE (BX.ΦNR.Q)
- ПОВРЕДИ
- PNEY-PNEYBAHBE
- CONNECTION
- O3HAKN
- O3HAKN HMBHO 3NAUEHE
- CTAPT/CTON ABTOMATNKA
- DESCRIPTION OF THE PRODUCT
- COMPONENT ILLUSTRATION
- INFORMATION ABOUT THE BRUSH/SELECTED BRUSH
- INSTALLING THE BRUSH FOR HARD FLOORS (SEE FIGURE A)
- INSTALLING THE ADDITIONAL BRUSH FOR VACUUMING (SEE FIGURE B)
- INSTALLING THE HARD FLOOR BRUSH
- MOUNTING THE VACUUM ACCESSORY
- MOUNTING THE VACUUM ADAPTER OR FLOOR NOZZLE (SEE FIGURE E)
- MOUNTING THE FLOOR NOZZLES
- INSERTING/REMOVING THE FILTER BAG FOR THE FLOOR NOZZLE (SEE FIGURE F)
- INSERTING/REMOVING THE CREVICE NOZZLE FOR THE VACUUM CLEANER (SEE FIGURE G)
- REMOVAL/INSERTION OF THE TRACTOR (SEE FIGURE H)
- REPLACEMENT/INSERTION OF THE FUEL FILTER (DRY SERVICE) (SEE FIGURES I-J)
- COMMISSIONING
- TO SWITCH ON THE AUTOMATIC
- INSTALLING THE TRANSMITTER MODULE
- REMOVE THE PROTECTIVE COVER (CLIP K)
- RESTORE THE CONNECTION WITH THE TRANSMITTER MODULE (SEE FIGURE L)
- CONNECTION RESTORATION SUCCESSFUL
- CONNECTION RESTORATION IS NOT POSSIBLE
- THE TRANSMITTER MODULE IS NOW CONNECTED TO THE RECEIVER
- SUCTION OF SOLID MATERIALS
- SUCTION WITH AN ELECTRIC POWER TOOL (SEE SECTION M)
- AUTOMATIC START WITH THE REMOTE CONTROL
- SWITCHING OFF WET MATERIALS
- WORK STEPS BEFORE STARTING WET SWITCHING OFF
- DURING THIS TIME, THE APPLIANCE WILL DRY THE LAUNDRY
- MANUAL CLEANING OF THE FILTER
- REMOVE THE BATTERY FROM THE DEVICE
- REPLACING THE BATTERY OF THE TRANSMITTER (SEE FIGURE N)
- CLEANING/REPLACING THE FILTER (SEE FIGURES O-P)
- SRPSKI
- UCTEBEHA CAADT
- CHECK THE SENSOR FOR WATER LEVEL (SEE FIGURE Q)
- STORAGE AND TRANSPORT (SEE FIGURE)
- SERVICE DEPARTMENT AND ADVICE WHEN USING
- NORTHERN MACEDONIA
- SERBIAN
- SAFETY INSTRUCTIONS FOR THE VACUUM CLEANER
- KEEP ALL WARNINGS AND INSTRUCTIONS FOR FUTURE REFERENCE
- WARNING: DO NOT VACUUM MATERIALS THAT ARE HARMFUL TO HEALTH, E.G., BEECH OR OAK WOOD DUST, COARSE STONE DUST, ASBESTOS
- EMPTYING THE CONTAINER
- LEGAL INFORMATION AND LICENSES
- OPEN SOURCE COMPONENTS
- CMISI V5 - APACHE
- FREERTOS V10.2.1 - MIT
- SHA256 V10.2.0 - BSD 2-CLAUSE
- ECC - BSD 2-CLAUSE
- BIGNUM (MULTI-PRECISION INTEGER)/ RSA V2.6.0 - APACHE
- GENERIC LICENSE TEXT
- APACHE
- APACHE LICENSE
- DEFINITIONS
- WARRANTY DISCLAIMER
Brand : BOSCH
Model : PAS30-240PRS
Category : Vacuum Cleaner