
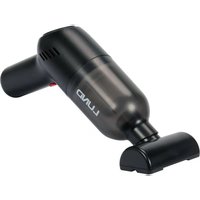
67081 - Vacuum Cleaner Lund - Free user manual and instructions
Find the device manual for free 67081 Lund in PDF.

| Product type | Upholstery cleaner (for furniture, sofas and carpets) |
| Brand | Lund |
| Model | 67081 |
| Power supply | 220-240 V ~ 50/60 Hz |
| Rated power | 600 W |
| Vacuum pressure | 15 kPa |
| Clean water tank capacity | 1.5 L |
| Dirty water tank capacity | 0.8 L |
| Insulation class | II |
| Protection rating | IPX4 |
| Weight | 3.78 kg |
| Usage type | Household use only |
| Main functions | Simultaneous spraying, brushing, suction |
| Included accessories | Flexible hose, brush holder, small brush, large brush, multifunction nozzle, window cleaning nozzle, self-cleaning element |
| Maintenance and cleaning | Empty and rinse tanks after each use; clean the sponge filter; use the self-cleaning function |
| Safety | Do not vacuum dry dust, flammable liquids, hot objects; do not use without dirty water tank; stop if noise or leak |
| Spare parts and repairability | Contact an authorized service center for repairs; do not disassemble yourself |
| Warranty | See the terms and conditions provided with the appliance |
Frequently Asked Questions - 67081 Lund
User questions about 67081 Lund
0 question about this device. Answer the ones you know or ask your own.
Ask a new question about this device
Download the instructions for your Vacuum Cleaner in PDF format for free! Find your manual 67081 - Lund and take your electronic device back in hand. On this page are published all the documents necessary for the use of your device. 67081 by Lund.
USER MANUAL 67081 Lund
- switch
- handle
- power cable holder
- power cable
- clean water tank
- small brush
- dirty water tank
- brush holder
- fl exible hose
- large brush
- multifunctional tip
- window cleaning tip
- self-cleaning element
- hose holder
DE
Read the operating instruction
This symbol indicates that waste electrical and electronic equipment (including batteries and storage cells) cannot be disposed of with other types of waste. Waste equipment should be collected and handed over separately to a collection point for recycling and recovery, in order to reduce the amount of waste and the use of natural resources. Uncontrolled release of hazardous components contained in electrical and electronic equipment may pose a risk to human health and have adverse effects for the environment. The household plays an important role in contributing to reuse and recovery, including recycling of waste equipment. For more information about the appropriate recycling methods, contact your local authority or retailer.
PRODUCT CHARACTERISTICS
A washing vacuum cleaner designed to remove local dirt from upholstery, sofas and carpets. Thanks to its efficient internal system, it effectively sprays water, brushes and sucks dirt, ensuring quick and effective cleaning. Equipped with separate tanks for clean and dirty water, a flexible hose and practical tips. The lightweight design and long power cord facilitate work in various conditions, including hard-to-reach places. An additional tip allows the vacuum cleaner to be used as a window washer. The product has been designed for home use only and is not to be used in commercial applications. The correct, reliable and safe operation of the tool depends on proper use, therefore:
Before using this product, read the entire manual and keep it.
The supplier is not liable for any damage resulting from failure to comply with the safety regulations and recommendations of this manual.
PRODUCT EQUIPMENT
The product is delivered complete, but requires preparation before first use, described later in the instruction manual. The product is supplied with: a fl exible hose and cleaning brushes and tips.
TECHNICAL DATA
| Parameter Unit of measurement Value | ||
| Catalogue number 67081 | ||
| Mains voltage [V~] 220 - 240 | ||
| Network frequency [Hz] 50/60 | ||
| Rated power [W] 600 | ||
| Working vacuum [kPa] 15 | ||
| Clean water tank capacity [l] | 1.5 | |
| Dirty water tank capacity | [l] | 0.8 |
| Insulation class | II | |
| Degree of protection | IPX4 | |
| Mass | [kg] | 3.78 |
GENERAL SAFETY CONDITIONS
The appliance can be used by children aged 8 years and older and by persons with reduced physical, sensory or mental abilities, as well as by persons with a lack of experience and knowledge, provided they are supervised, have been given instructions on safe use and understand the risks. Children must be supervised to ensure that they do not play with the appliance. Cleaning and maintenance should not be carried out by children without supervision. The vacuum cleaner is mainly designed for wet work. Do not suck up large amounts of dust. Do not suck up dry dust, dust (such as flour, plaster, printer toner), sand, stones, waste, metals (such as needles, pins), plastic bags, stockings or other objects that can easily get into the interior of the appliance. Do not suck up infectious dust or liquids of unknown chemical composition. Before starting work involving the suction of water or wet dirt, follow the instructions in this manual. Failure to comply with them may result in electric shock, which may consequently pose a threat to the health and life of the user and bystanders. The device must not be used in places where flammable materials are used, or near an open flame. It is forbidden to suck up wet impurities other than water. Sucking up paints, oils, solvents, petrol and other flammable substances may lead to irreversible damage to the vacuum cleaner or its components, and may also pose a risk of electric shock, fire or explosion. Never use the device without a properly installed dirty water tank. The vacuum cleaner tank should be reg
EN
cularly emptied and cleaned. Never suck up hot, glowing or burning objects. This may lead to fire or explosion and expose the user to serious injury or death. The maximum temperature of the sucked up impurities must not exceed 40 degrees Celsius. The device is designed for use in closed rooms and should not be exposed to water, including precipitation. Before connecting the power cord plug to the device, make sure that the parameters of the mains supply correspond to the parameters shown on the device's rating plate. Before each use, check the condition of the device, including the condition of the power cord and plug. If you notice any defects, do not use the device, disconnect it from the power supply immediately. Do not connect or disconnect the device with wet hands. Clean the plug regularly. Make sure that it is fully inserted into the socket before starting work. Do not use overloaded sockets or damaged extension cords. Damaged cables and wires must be replaced by a specialist workshop. The degree of protection given in the technical data table will be ensured if the device is connected to a socket with at least the same degree of protection. Before starting maintenance on the device, make sure that the power cord plug has been disconnected from the mains socket. The device should be stored in a place inaccessible to unauthorized persons, especially children. Also during operation, make sure that the device is in a place inaccessible to unauthorized persons, especially children. Carry the device using the handle, do not move the device by pulling on the power cable. It is forbidden to use the vacuum cleaner with a damaged, bent or blocked hose. Do not block the air outlet, as this may cause the device to overheat. In the event of excessive noise, unpleasant odour, foam, blockage or liquid leaking from the device, stop working immediately, clean the dirty water tank and other working elements and check the patency of the ventilation holes. In the event of blocking the spray hole or suction hole, stop working immediately and remove the cause of the blockage. Do not sit on the device or use it as a platform. Do not tilt the device with water in the tank to avoid flooding the device and the ground. Do not disassemble, repair or modify the structure of the device yourself. For repairs, contact an authorised service centre of the manufacturer.
The product should be unpacked, completely removing all packaging elements and protections for the duration of transport. It is recommended to keep the packaging, it may be helpful in later transport and storage of the product.
Note! Before starting preparations, make sure that the power cord plug has been disconnected from the wall outlet.
Prepare the product for operation as shown in the following illustrations:
(II) - Open the clean water tank by turning the cover counterclockwise, then remove the accessories.
(III) - Attach the brush holder and power cord holder to the device housing.
(IV) - Place the hose holder in the appropriate position and move it from right to left. The holder will be properly secured when you hear a locking sound.
(V) - Insert the hose into the socket on the appliance. Make sure the locking cap is properly secured.
(VI) – Pour the appropriate amount of water into the clean water tank.
WARNING! Do not exceed the maximum fi II level marked on the tank.
(VII) - Align the solid circle mark on the reservoir cover with the empty circle mark on the reservoir, then turn the cover clockwise until you hear a locking sound. Place the reservoir into the device.
(VIII) - Install the appropriate brush according to your preferred application.
(IX) - Wrap the hose around the base of the appliance and place its end in the holder.
The vacuum cleaner is ready to use.
Working with a washing vacuum cleaner
NOTE! Before wet cleaning, check the colour fastness and water resistance of the material by testing it in an inconspicuous area of the surface to be cleaned.
EN
The method of operation of the washing vacuum cleaner is presented in the following illustrations:
(X) - Select the appropriate cleaning tip for the surface type and attach it to the hose handle.
(XI) - Connect the power cable plug to the electrical outlet and then press the switch to start the vacuum cleaner.
(XII) - The flexible hose handle is equipped with a spray button. Pressing the button will cause water or cleaning solution to be distributed on the cleaned surface and dirty water will be sucked out. Releasing the button will turn off the spray function. When used for the first time, it may take several dozen seconds for the liquid to be pumped out before it starts to come out of the nozzle of the cleaning tip.
(XIII) - Move the brush back and forth to remove dirt.
(XIV) – If any liquid is spilled, remove any excess before working with water or cleaning solution.
(XV) - Place the brush over the dirt and place it on the surface to suck out the dirty water.
(XVI) - IMPORTANT! Tilting the cleaning tip too much forwards or backwards may result in incorrect water suction. The suction inlet of the tip should be parallel to the surface being cleaned.
(XVII) - After finishing work, turn off the device by pressing the switch. Wrap the hose around the base and place its end in the holder, and then proceed with cleaning and maintenance.
Note! Empty and clean the dirty water tank after each use to avoid unpleasant odors.
Cleaning with detergent
To remove stubborn stains, use only mild detergents designed for washing fabrics that do not contain bleach, solvents, corrosive, abrasive or flammable substances. Mix water with detergent in the appropriate proportions, fill the tank to the maximum level mark and then fit the clean water tank into the machine. To do this, as shown in the following illustrations:
(XVIII) - Open the sealed filler hole and fill the clean water tank.
(XIX) - Add detergent to the tank.
NOTE! It is recommended to test the detergent on an inconspicuous area of the surface to be cleaned first to ensure that it does not discolour or damage the material.
Using the device as a window washer
The method of preparing the window cleaning device is shown in the following illustrations:
(XX) - Connect the window cleaning nozzle to the fl exible hose handle.
XXI) - Connect the vacuum cleaner to the power supply, turn it on using the switch, place the nozzle on the glass, and then press the spray button.
(XXII) - Gently press the tip against the glass surface to suck out the water.
Cleaning, maintenance and storage
To extend the life of your washing vacuum cleaner and avoid blockages and operating problems, follow these recommendations: Cleaning should be carried out after turning the device off and waiting a short time.
WARNING! Never clean the device or its components while it is connected to the power supply. Before starting cleaning and maintenance activities, disconnect the power cord from the power outlet.
The device can be cleaned by wiping the housing with a slightly damp, soft cloth. The power cord should only be cleaned with a dry cloth.
To avoid unpleasant odours of damp, empty and dry both tanks thoroughly after each use.
(XXIII) - Press the brush release button and pull to disconnect the nozzle from the hose.
(XXIV) - Make sure there is enough water in the clean water tank. Place the self-cleaning element in the holder, turn on the device and press the spray button.
XXV) - Remove the clean water tank from the appliance.
(XXVI) – Pour the water out of the tank.
XXVII) - Reinstall the empty clean water tank into the unit and press the spray button to empty any remaining water from the system.
XXVIII) - Remove the brush cover and rinse it under running water. To reinstall the cover, place it in place and press it until you hear a click.
XXIX) - Disconnect the dirty water tank from the appliance.
(XX) - Empty the dirty water tank after each use or when the water level reaches the maximum mark. The built-in float will cut off the suction when this level is reached.
(XXXI) - Open the dirty water tank and remove the cover with the filter.
(XXII) - Remove the small foam filter and rinse it under running water. Make sure it is completely dry before reinstalling.
Tip: You can place it near a radiator to speed up drying.
(XXXIII) - Clean all components only with warm water. Do not use dishwashing liquids or other chemicals.
(XXXIV) - Reinstall the dirty water tank into the appliance.
Troubleshooting
| Fault Possible causes Recommended actions | ||
| No reaction after turning on the device -The plug is not connected properly. - The power cable is damaged. | Turn off the device, connect the plug correctly or contact an authorized service center. | |
| No water or very little water when pressing the spray button | - The spray nozzle is blocked - The handle or pump is damaged | Remove the brush, rinse the spray nozzle or contact an authorized service center. |
| No suction or weak suction power - The device is not switched on - The dirty water tank is full - The hose is damaged or leaking - The sponge filter is dirty or damaged | Turn on the appliance. Empty the dirty water tank. Check the condition of the hose and replace if necessary. Clean or replace the sponge filter. | |
PRODUKTMERKMALE
Pa6oTa C MOHcIM TbJIeCOCOM
IIPIMEYAHNE! Ipea BnaKHO y6OpKO npOBepbTe cToIKoCTb CBeTa N BoOcTOIKoCTb MaTePnAna, nPoTeCTnpOBab erO Ha He3aMeTHOM yUacTke OUYIaEMoN IOBepxHocTN.
PpHnnpa6oTbMOUeeroNbIeNcoa npedctabneHa cJeDyUxnx pucyHKax:
(X)-BbIbepnTe YnCTaYIO HacaNky, COOTBeTCTByIOUyIO TIny NOBepxHOCTN, IN pRKnpeINe ee K pyKoTKe WJNaHra.
(XI) -ПОДКПЮЧNTe BИЛКу Ka6eЯ ПИТАня K эЛeКтчecко рo3eTke, a 3aTeM HaxMITE BBKlIOHаTeJIb, YTOБbl BKJIIOHHTb nbIJIeCoc.
(XII) - Гбая руковка уланга ошашина Кногков пасьлени. Нжате Кногков письдет К паспеденив Воры ИИпчгяпсю pactьра по очидаим NOВерхон'tа Гязая BODа Будот OTКУЧА. OTNYССКЕ Кногков OTКЛЮЧТ Функциюпасьлени. Рп по лрвом Иснольбовни может NOTpe6obatbс HeCKOЛБКО DeCErTKOB CekyHД, YTOБы кИДКOCtB OTKauJALacb,пожддем сона начETНБ bIXODNTb IN 3 COПА NaCCTRAJIEG HAKOHENKA.
(XIII) -Дигайтse utkny Bnepei n ha3a, yTo6bl ydaJIInb rpr3b.
(XIV) - Ecn npoJnacb KaKaJ-NIO BO KJNIOKcTb, YdAnTe N3NIuIKN NepeD TeM, Ka paBoTaB C BOOn IIN UIn UIn CTaUM pAcTBOpOM.
(XV)-IIOIOXKeIe 电KHa Ipr3b NocTaBbTe ee Ha NOBepxHOCTb, YTO6bl BbICOCaTb Ipr3Hyo BOy.
(XVI) - BAXKHO! CnIuKOM 6oJIbwoi HAKIOH YIcTJUeRo HAKOHeuHnKa BnepeI IIN Ha3aD MoKeT pNpBecTN K HeIpaBnBHomy BCacbBaHnIO BObl. BcacbBaIOoee OTBepCTNe HAKOHeuHnKa DoJXHo 6bITb npaJIJIeBHO OUYIaEMO NOBepxHOCTN.
(XVII) - После okончаня paobtby bblknIOHnTe yctpoIcTBo, haxab Ha bblknIOuTaIb. O6epHnTe IJIaHr BOKpyr ochOBaHnI NOMeCTIte erO KOHeC B DePkaTeIb,пocLte YerO npICTyIaNTE K UcIcTKe I O6cnYKINBaHNIO.
PpmeHn! OnpoKnIe n OunuaiTe pe3epByap Innr p3HO BODBI NOcne KaJIOrO NcIOB3OBAHn, TTo6bl N36eKaTb He npraTHbIX 3anaXOB.
UcMka MOUUM cpedcmBOM
Iyanaenna ctoKnX nTeH NcnoB3ynte ToIbKO MmKe Me MOUuue CpeCTBa, npEHa3NaeHHBe dNra CTnPK TkaHe, He coepKaunne O6eINBateTn, pactBopntene, eKnx, abpa3uHBix mN neKOBocnnameHouxsc BceCTB. Cmeuaite Body cMOUum CpeCTBOM B COOTBetCTByuux nponOpunx, 3aONHnte 6ak DO MAkCmAbhoN OTMeKN, a 3aTeM yctahOBnTE 6ak dNpyhctO B0bl B MaunHy. Iner 3TORO BbINOHNTE CnEDyUuue NeCTBnA, KAK NOKa3aHO HA CnEDyUuNX PNCYHKAX:
(XVIII) - Otkpoite repMeTHHoe 3aINBHOe OTBepCTne 3aONHHTe 6ak YnCTO BDOI.
(XIX) -Добавытme моюшee cpeДСТВОВбak.
PIMMEUHNE! PekomeHyETc CHaHaI npOTecTnPoBaT MoIOuEE CpeCTBO Ha He3aMeTHOM yAcTKe OUYuaEMoN NOBepxHOCTN, YTO6bI y6eNTbcra, YTO OHO He oEocuBETn H He NOBpeNT MaTePnA.
IcnoIb3o3aHue ycmpoucmba 6 Kauecmee Mouuzka OKOH
Cnoc6 nOIOIROTOBKn yCTponCTBa IIN MbITbI KOH NOKa3AH Na CneJeYUoxn pncyHKax:
(XX) - )
(XXI)-IOKNIHOTeNbIEcOC K NCTOCHNY NITAHN, BKIOHTe erC NOMOUBBbIKHOATeN, NOMECTITE HACADKY Ha CTEKNO, a 3aTEM HAKMTTE KHONKY paCNblHeHNA.
(XXII)-OcToPOxHNO pINK MTe KOHN K CTeknHHo NOBepxHOCTN, YTObbl BbICocAtb Body.
Yucmka, o6cnykuabaHue u xpaHeHue
TTObI npOINITb cPOK cnJxkbI BaWero MOIOeRIO nbIEcOca N 36exKaTb 3acopOB IN pObIe B paBote, CneDyIte CneDyUoM peKOMHeHaunrA:
UcTky cIeMyET npoBOntB nocJIe BbIKIOueHn yCTpoiCTBa n He6OJIbWOrO OxNJaHn.
BHIMAHHE! HnKoIa He YcHCTnTe yCtPoINCTBO NnE rO KOMNHeHTbI, NOKa OHO NpIKJIuOeHO K nCTouHNy PNTAHn. Ipeep HaaylOM OHCTKN N o6cIyKunBaHHr OTCoeDHNTE WHyp NITAHn O TPO3ETKn.
YcTpoIcTBMOXHO YnCTNtB, npOTnpaK KOpNc CJIeRka BnaJxHOn MmKo TkAhbIO. Hyp nITaHnra CJeDyET YnCTNtB ToJIbKO cyXO TKAHIO.
Ttobn36eKaTb HnepnAaTHoro 3anaxa cbipocTN, onopoxHnTe n TuaTeBHO BbicyuNbaTe oBa baka nocne kaxdoRo nCnoJIb
RU
3OBaHnI.
(XXIII) - HaxmTe KhoNky Ocbo6oxJeHnI 9eTKn I NotAHnTe, YTO6bI OTcoEduHnTb HacAdKy ot WlaHaTRA.
(XXIV) - Y6eIntecb, yTo B pe3epByape InT NCTO BODbl DOCTaTOH BObl. IomeCTte camoouuaIOUncra 3neMeHT B depkaTeNb, BKJIOHTe YCTPOINCTBO HAKMTTE KONKY paCblHeHn.
(XXV) -Изгелкite pezeерbyap Дячстоь boыи зпрбopa.
(XXVI)-BbIeTe Body n3 6ka.
(XXVII) - YcTaHOBnTe nycToB bak dIa NcToB BoDbl o6paTHo B yCTpoNCTBO H aXMMTE KHOKNy paCnblJeHnry, YTObI cINTB OCTABWIOOBAYIO3 CNTEMbl.
(XXVIII) - CHINMITE Kpbilky ueTkn npomOte ee noi npoToHou BOIOy. TTObI yCTaHOBtB Kpbilky Ha MeCTO, NOMECTITE ee HA MecTO n HAXMITE Ha Hee, NOKA HE YCJIbILNITE ueJTHOK.
XXIX) -OTcoeHNHtepe3epByapIgrra3HOBoblOT np6opa.
(XX) - OnopoknHrepe3epByap nI rpr3HO BOnbl nOce KaJDOrIO NcNOJIb3OBAHnI INN KOrda yPOBeHb BObl DOCTURHT MaKcIMaHbON OTMeKN. BcTPOEHbIN nonlaBOK OTKIOHT BCacbIBaHne, KOrda 3OT yPOBeHb 6yDet DOCTURHT.
(XXI) - OTKpoIte pe3epByap IJRA rpr3HOBbI NCHMITE KpbIuKy C pINbTpOM.
(XXII) - CHMnTe He6oBbOoi neHHbI ΦHbTp I npOMoIe ero nOd npOTouHO BDOI. Pepe I nobTOpHOn yCTaHOBKO y6eIMTEcB, YTO OH NONHOCTbIO BBICOX.
Cobet: yto6bI yckOpntb BbcIbxAHne, MoXHO pa3MeCTnTB erO Bo3Je 6aTapeN.
(XXXIII) - OuHuaTe BCE KOMNoHEHTbI ToJIbKO TeIIOB BDOJ. He IcnoJIb3yIte MOIOUe CpeCDTBA IJIa NocyDbI INI INI dpyrne XIMIKaTbI.
PRODUKTA RAKSTUROJUMS
Mazgajoss puteklsucejs, kas paredzets lokalu netirumu nonemsanai no mikstajam mebelem, divaniem un paklajiem. Pateicoties efektivajai ieksejai sistmai, tas efektivi izsmidzina uteni, birst un iesuc netirumus, nodrosinot atru un efektivu tirisanu. Aprikots ar atseviskam tvertnem tiram un netiram utiden, elastigu sluteni un practiskiem uzgaliem. Vieglais dizains un garais strvas vads atviegdo darbu dazados apstklos, tostarp gruti sasniedzamas vietas. Papildu uzgalis lauj puteklsuceju izmantot ka logu mazgataju. Produtos ir paredzets tikai lietoisanai majas un nav paredzets komercialiem nolukiem. Pareiza, uzticama un drosa instrumenta darbiba ir atkariga no pareizas lietoisanas, tapec:
CHARACTERISTIQUES DU PRODUIT
WERKING VAN HET APPARAAT
XAPAKTEPNUH NA IPOYKTA
PpaxocMykaKa 3a nouCTBaHe, PpeHa3NaHe Ha npMaHn 3aMpcBaHn OTo TaNucepna, DnBaHn KInm. BlaOpaHne Ha eOpKaChata Cn BbTpeSha CnCTema, TRe ePeKTHBHO npbCk Boga, NouchTa C YeTKa N 3acMyKBa Mpbcotna, ocIpyraBaiKn 6bp3o n epeKTHBNO nouCTBaHe. ObopydaHa c otJeHH pe3epBoapn 3a uNcTa N Mpbcha Boga, TBKBa Mapkyu npakTuHn HApaiHn. JeKnT DN3aH N bJrnnT 3axpaHbaq Ka6e yNecHBat pa6oTaT B pa3JIuHn YcNoBn, BKIOUHTenHO Ha TpydnoocTbnH MeCTa. DOnbHNteHn HApaiHnk N03BOJRA npaxocMyKaYkata Da ce N3NON3Ba KATO MNyHa 3a Ip03Opz. IpoykbTe npoeKtpanh Camo 3a DomaHa yNtpeBa n He e npedHa3NaeH 3a Tbprockn npinoxeHn. IpaBnHa, HadeXHa n Be3onacHa pa6oHa Na HNCTpyMeNTA 3abnc OT npabnHaT My yNtpe6a, CneoBateHn:
Ppei Da n3nO3BaTe TO3n npOdyKT, npOyTeTe yIIOTo pBKOBOCTBO nTO 3ana3eTe.
OCTaBnKbT He Hocn OTROBOPHO 3a KaKBnTO n da e ueTN, PpON3TuAun ot HecnpaBaHe Ha npabnata 3a 6e3oNaHOCt n npenopbknte Ha TOBA pbKOBOcTB0.
ПОДУКTOBO OБОРУДBAHE
IpoNyKbT ce DoCTABa KOMNJIeKToBaH, HO n3NcKBa NIOJrTOBka IpeEi NpBba yNoTpe6a, ONuCAHa NO-HaTaTBK B pBkoBOdCTBOTO 3a yNoTpe6a. IpoNyKbT ce DoCTABa C: rBKBa Mapky u YeTKn HakpaHnU 3a NoHCTBaHe.
TEXHNUECKI DAHHN
J 1 J 1 J 1 J 1 J 1 J 1 J 1 J 1 J 1 J 1 J 1 J 1 J 1 J 1 J 1 J 1 J 1 J 1 J 1 J 1 J 1 J 1 J 1 J 1 J 1 J 1 J 1 J 1 J 1 J 1 J 1 J 1 J 1 J 1 J
jieshi jieshi
Jalll 1211
(1) - jlaal all al jy p a lal al jie oj y jia jia (V)- jai bge jai jai jai jai jai jai jai jai jai jai jai jai jai jai jai jai jai jai jai jai jai jai jai jai jai jai jai jai jai jai jai jai jai jai jai jai jai jai jai jai jai jai jai jai jai jai jai jai jai jai jali Jlill) - dall qabill wll slll 11111111111111111111111111111111111111111111111
Jaaa aae aee aee aee aee aee aee aee aee aee aee aee aee aee aee aee aee aee aee aee aee aee aee aee aee aee aee aee aee aee aee aee aee aee aee aee aee aee aee aee aee aee aee aee aee aee aee aee aee aee aee aae ae aaeee
jlll jlll lalil (XX)-nall paae aaiy 1000000000000000000000000000000000000000000000000000000000000000000000000
AR
(XXVII)-jz jz jz (XXVIII) - 10000000000000000000000000000000000000000000000000000000000000000000000000000000000000000000000000
10 × 20 = 800
- DE
- PRODUCT CHARACTERISTICS
- PRODUCT EQUIPMENT
- TECHNICAL DATA
- GENERAL SAFETY CONDITIONS
- EN
- Cleaning with detergent
- Using the device as a window washer
- Cleaning, maintenance and storage
- Troubleshooting
- PRODUKTMERKMALE
- Pa6oTa C MOHcIM TbJIeCOCOM
- UcMka MOUUM cpedcmBOM
- IcnoIb3o3aHue ycmpoucmba 6 Kauecmee Mouuzka OKOH
- Yucmka, o6cnykuabaHue u xpaHeHue
- RU
- 3OBaHnI.
- PRODUKTA RAKSTUROJUMS
- CHARACTERISTIQUES DU PRODUIT
- WERKING VAN HET APPARAAT
- XAPAKTEPNUH NA IPOYKTA
- ПОДУКTOBO OБОРУДBAHE
- TEXHNUECKI DAHHN
- AR
Brand : Lund
Model : 67081
Category : Vacuum Cleaner