USER MANUAL Precision XP801T KRUPS
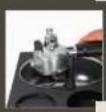
natural_image
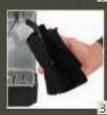
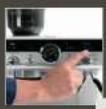
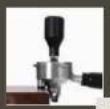
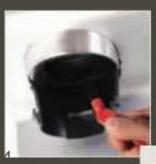
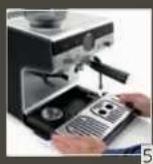
Modern coffee machine with black and silver casing, showing internal components and base tray (no visible text or labels)
B Interface

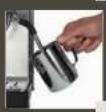
natural_image
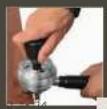
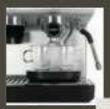
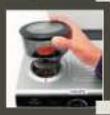
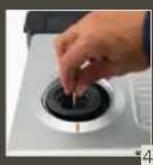
Exterior view of a KRUPS portable stove with a cooking pot on top (no visible text or symbols)
C Accessories

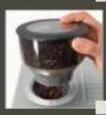
natural_image
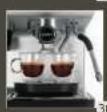
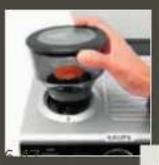
Product photo of a coffee maker setup with various kitchen utensils and accessories (no visible text or labels)


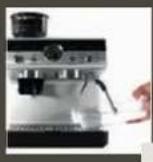

DESCRIPTION
A Overview
A1 Water Tank
A2 Bean Hopper
A3 Coffee Grinder Outlet
A4 Brewing Head
A5 Steam Wand
A6 Hot Water Outlet
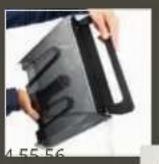
A7 Drip Tray Grid
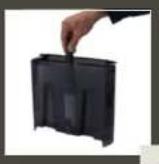
A8 Drip Tray
A9 Cup Warmer
A10 Accessories storage
B Interface
B1 Power button
B2 Grinding level selector
B3 Ground coffee quantity dial
B4 1 or 2 cups button
B5 Start/Stop grind button
B6 Recipes and cleaning dial:
Espresso / Lungo / Americano /
Hot Water / Steam / Calc
B7 Pre-infusion time button
B8 Temperature button
B9 Start/Stop brew button
B10 Manometer
B11 Lack of water indicator
B12 "Calc" Descaling indicator
C Accessories
C1 Portafilter
C2 Tamper
C3 Small cup support
C4 Water filter insertion support accessory
C5 Water filter
C6 Milk pitcher
C7 2-cup single wall filter
C8 1-cup single wall filter
C9 2-cup dual wall filter
C10 1-cup dual wall filter
C11 Cleaning pin
C12 Cleaning brush
C13 Blind sieve
C14 Dosing funnel
C15 Tamping & knocking box station
C16 Cleaning towel
TECHNICAL SPECIFICATIONS
■ Pump: 15 bar
■ Power: 1380-1550 W
■ Voltage: 220-240 V
■ Safety devices against overheating
■ Dimensions: 428 x 312 x 414 mm

IMPORTANT!
This appliance is designed to operate at 220-240 V alternating current only.
This appliance is designed for DOMESTIC USE ONLY
SETTING UP THE MACHINE

IMPORTANT! Do not place heating elements on the appliance.

IMPORTANT! The safety instructions are part of the appliance.
Please read them carefully before using your new appliance.
All machines have been tested; you may have some coffee residue and water drops on the appliance.
Before the first use of the machine or when it has not been used for a long time, you should follow below steps to rinse and warm up the internal pipes of the machine.
-
Check and ensure that all accessories are complete and not damaged.
-
Remove the orange plug under the water tank (58).
-
Insert a water filter in the water tank by using its filter insertion accessory (55).
-
Fill the water tank with clean water, and water level should not exceed the "MAX" position (2).
-
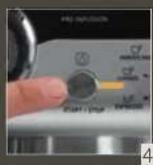
Plug into the main socket (4). Press POWER button (5).
-
Place a container with a minimum capacity of 500ml/17.5 oz under the hot water outlet (6).
-
Select HOT WATER (7) and press START/STOP BREW (8) button to clean hot water hydraulic circuit. Delivery and stops automatically.
-
Insert one of the filters in the portafilter (9) (no ground coffee is placed at this moment) and insert the portafilter under the brewing head (anti-clockwise) to lock it tightly (25).
-
Place the container under the portafilter (6).
-
Select LUNGO (10) and Press START/STOP BREW (8) button to clean coffee hydraulic circuit.
Hot water will come out from the portafilter. Delivery stops automatically.
-
Place the container under the steam wand (6).
-
Select STEAM (11) and wait for the machine to be pre-heated until the indicator becomes fixed white and press START/STOP BREW (8) button and deliver steam for a few seconds to rinse the steam circuit. Press again the button to stop the delivery.
The appliance is ready for use.
Note: Do not extend any parts of your body closed to portafilter and steam wand to avoid scalding during operation.
MAKING COFFEE
a) Grinding
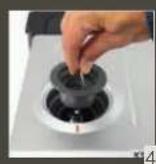
This product has a function of grinding coffee beans. Before using this function, please make sure that your grinder is well installed on the machine:
- Align the arrow marked on the bean hopper with the orange index on the machine (12).
- Then turn clockwise the bean hopper to fix it on the machine (13).
-
Put coffee beans in the bean hopper (14). It is best to grind only a quantity of beans sufficient for immediate use, so that the coffee will always be fresh.
-
For your first grind, start with the 10 (13). If this is too fine or too coarse, adjust the level according to personal taste and the type of coffee beans used. To do so, align the grinding setting marked on the bean hopper with the orange index on the machine.
-
Adjust coffee ground quantity by turning COFFEE QUANTITY selector (15). For your first grind, turn the dial to the middle setting. If you have too much quantity or too few, adjust the quantity according to personal taste and the type of coffee beans used. To do so, turn the dial anticlockwise for less quantity of ground coffee or turn it clockwise for more.
Note: In the beginning, it is normal to make a few attempts before finding the optimal settings. We suggest you start with the recommended settings, then adjust them if necessary, following the suggestions in section "Adjusting your espresso results".
- Choose your filter and insert it in the portafilter (16).
- Single wall filters are dedicated for fresh whole coffee beans, this is recommended.
- Dual wall filters are dedicated for pre-ground coffee (for example decaffeinated). It will help to create a good crema.
-
It's recommended to insert the funnel on the portafilter to avoid coffee powder spilling out. You can also grind and tamp without funnel (16).
-
Insert the portafilter (with or without the funnel) into the coffee grinder outlet (20).
-
Select 1 cup or 2 cup by pressing CUPS button, depending on the filter you chose (18).
Note: If the lights above the 1 or 2-cup selection button are turned off, it is because your RECIPES AND CLEANING dial is on Hot Water, Steam or Calc. Please turn it to Espressos, Lungo or Americano (10).
-
Press START/STOP GRIND button (19) to start grinding. The grinder will automatically stop after reaching the set grinding quantity. You can also press START/STOP GRIND button to stop halfway.
Note: Do not leave the portafilter under the grinder coffee outlet when not used.
b) Tamping
-
After grinding, remove the portafilter from the bracket.
-
Place the pad (under of the portafilter) on the edge of your countertop to have better stability (24).
-
Use the tamper and apply it firmly to compact the ground coffee. It should be flat and evenly tamped to avoid bad coffee extraction. To make it flat, refer to the horizontal line of your tamper base, it should be parallel to the top of your portafilter (24).
c) Brewing
-
Insert the portafilter with tamped ground coffee into the brewing head and lock it tightly (25)
-
Select pre-infusion time from 2, 5, 8 seconds (26).
Note: The longer the pre-infusion time, the better the aromas will be from your coffee.
-
Select coffee preparation temperature from Low, Middle, High (27).
-
Select the desired beverage (52).
-
Place a cup (or 2 cups) on the drip tray according to your selection (28). For Americano, please choose a sufficiently large cup to fit for both coffee outlets and hot water outlet.
-
Once light indicator of the START/STOP BREW button becomes fixed white, press START/STOP BREW button to start brewing (8). Delivery of the coffee will stop automatically. You can also press START/STOP BREW button to stop halfway.
-
Do not forget to eject the coffee cake after the extraction (31).
Note: If you want to make a second coffee just after, you must wait 30 sec for the pre-heating of the machine.
ADJUSTING YOUR ESPRESSO RESULTS
a) Extraction
| CORRECT EXTRACTION | UNDER EXTRACTION | OVER EXTRACTION |
| Manometer | 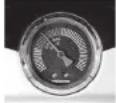 | 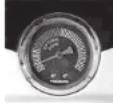 | 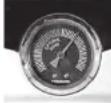 |
| Result | 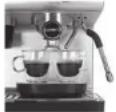 | 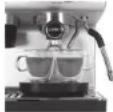 | 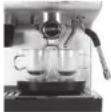 |
| Result• Flow slow like warm honey• Crema is golden brown with a fine mousse texture• Espresso is dark brown | Flow starts after 1–3 secsFlow fast like waterCrema is thin and paleEspresso is pale brownTastes weak and watery | Flow starts after 8 secsFlow drips or not at allCrema is dark and spottyEspresso is very dark brownTastes bitter and burnt | |
| Solution / | | Grind FinerTamp stronger, using 15 kilos of pressure.Increase the coffee quantity | Grind CoarserTamp using 15 kilos of pressure. The top edge of metal cap on the tamper should be level with the top of the filter basket AFTER tamping.Reduce the coffee quantity |
Note: Each variety of coffee beans can behave differently during grinding and this is the reason why setting the quantity at the beginning might require extra care.
TIPS: When you change your grinding fineness, we recommend to make a grinding flush, to avoid a mix of fineness between your previous and new settings. To remove the "old" ground coffee, just press START/STOP GRIND button (19), let the ground coffee come out for 2 seconds and press the button again to stop the grinding.
b) Flavor
Note: Coffee beans varieties as well as roasting colors require their own specific temperature setting for the best extraction. For example, a lower temperature is preferred for Robusta coffee beans than Arabica; the same is applicable to beans with a darker roasting color or to freshly roasted beans than those degassed over time.
| Temperature level | LOW MID HIGH | | |
| Corresponding light | | | |
| Coffee Beans Roasting Range | DARK DARK to | MEDIUM MEDIUM to | LIGHT |
| Impact on flavor | Enhances sourness | Balanced Enhances bitterness |
The longer the pre-infusion time, the better the aromas will be from your coffee.
c) Temperature is low
To make sure your first coffee is hot enough, we recommend you to make a "flush" before making a coffee. Insert a filter in the portafilter but without adding ground coffee in it (25). Insert the portafilter under the coffee brewing head, press START/STOP BREW button (8). Some hot water comes out from the coffee spouts. After a few seconds press again the button to stop the flow. This operation helps to warm internal circuit and the portafilter before coffee extraction. You can also warm your cup by using HOT WATER function before coffee extraction.
PROGRAMMING BEVERAGE QUANTITES
a) Changing beverage quantities
You can adjust coffee quantity of 1 or 2 cups.
- Prepare the machine to deliver 1 or 2 cups of the beverage you want to make (portafilter inserted filled with 1 or 2 cup filter with ground coffee).
- Turn the recipes dial to select the beverage being programmed (10), then press and hold the START/STOP BREW button during 3s (8). After 3 seconds, the indicator flashes white and you can release it. Delivery of coffee starts.
- When you reach the quantity you wished, press the START/STOP BREW button (8), the new coffee volume is saved.
| Recipe | Default volume | Programmable volume |
| Espresso | 30 ml | From 20 ml to 60 ml |
| Espresso x 2 | 60 ml | From 40 ml to 120 ml |
| Lungo | 70 ml | From 60 ml to 100 ml |
| Lungo x 2 | 140 ml | From 120 ml to 200 ml |
| Americano* | 120 ml (Espresso: 60 ml + Hot water: 60 ml) | From 20 ml to 60 mlFrom 20 ml to 150 ml |
| Americano* x 2 | 240 ml (Espresso: 120 ml + Hot water: 120 ml) | From 40 ml to 120 mlFrom 40 ml to 300 ml |
| Hot water | 250 ml | From 20 ml to 300 ml |
Note: Americano is made by 1 espresso followed by hot water. You can make only 1 cup of Americano at once, not possible to make 2 cups at once, because of only 1 hot water outlet. However, you can make a double dose americano if you select 2 CUPS and you put only one big cup.
b) Restoring default settings
- Press and hold the POWER button (5) + TEMPERATURE button (27). All lights flash 2 times. Whole machine has been restored to factory settings.
MAKING HOT WATER
- Select HOT WATER on the recipes and cleaning dial (7).
- Place a cup on the drip tray under the hot water outlet.
- Once light indicator of the START/STOP BREW button (8) becomes fixed white, press START/STOP BREW button to start brewing. Delivery of the coffee will stop automatically. You can also press START/STOP BREW button to stop halfway.
MAKING MILK BEVERAGES
a) Frothing milk
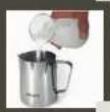
- Fill your milk pitcher with the milk quantity that you want to froth (32), bearing in mind that the milk doubles or triples in volume. 120ml/4.2 oz could be a good start. The best froth results will be achieved using whole cow's milk at refrigerator temperature (3·5°C/37.4 - 41 °F).
- Select STEAM on the recipes cleaning dial (11): indicator light flashes, meaning the machine is heating up. When the light becomes fixed, immerse the steam wand in your milk pitcher (34).
- Press START/STOP BREW button to start steaming (8).
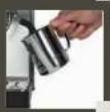
- After few seconds, move the pitcher down to have the end of the wand just on the surface of the milk (35). Be careful not to remove the wand completely from the milk. There you will see the froth creation. When you have enough milk froth, immerse the steam wand again for a few seconds in the milk to heat it up (36).
- Press again on the button START/STOP BREW button to stop the frothing (8).
- Remove the milk pitcher from the machine.
TIPS:
- Before frothing, you can make a quick flush, meaning that you activate a few seconds the steam in order to remove the condensed water from previous usage. Orientate the steam nozzle towards the drip tray before doing so.
- Be sure to use fresh cold milk every time.
• Whole milk is recommended for best results.
• The result of you froth depends on the nature of the dairy or vegetable beverages used.
• After foaming milk, eliminate unwanted bubbles by swirling the pitcher gently and tapping the bottom of the pitcher on a flat surface.
b) Cleaning the steam wand
Do not forget to clean the wand after each frothing.
-
Take a wet towel and wipe the outside of wand to remove residual deposits of milk (37). Warning: do not touch directly the steam wand just after frothing, it can be hot.
-
Release steam for a few seconds to clean the inside of wand (make sure your wand is orientated toward the drip tray) (38).
-
Wait until the steam wand has cooled down. To ensure the wand works efficiently over time, use the cleaning pin to free the hole of any obstruction.
Note: Coffee brewing, hot water and steam function cannot work at the same time, only one function can work at once.
If you select a coffee recipe just after using the steam function, the machine starts cooling down automatically to make sure your next coffee recipe is not burned. You will hear the intermittent pump sound, light is flashing and some water goes into the drip tray. Once indicator light becomes fixed white, you can press START/STOP BREW button to extract your coffee. During this automatic function of the machine, the grinding functions are still available.
TAMPING & KNOCKING BOX STATION
If you have the Precision + version, you should find the tamping and knocking box station.
-
This station will help you to get a stable tamping (59).
-
This station will help you to easily eject your coffee cake (31).
Note: The bottom part of the station can be flipped over to rest securely on the edge of a table.
CLEANING
a) The Appliance
Unplug before each clean let the appliance cool down first.
■ Machine: Clean the outside of the appliance with a damp sponge when you think it necessary. Do not use solvents or abrasive detergents to clean the coffee machine.
■ Water tank: Rinse the inside of the tank regularly. When a fine white layer appears in the tank, descale the appliance (refer to the section on descaling).
- Drip tray: Clean the drip tray and its grid using water and a little mild detergent. Rinse and dry.
- Portafilter, filters: Using a damp cloth, clean the filter holder mount regularly in order to remove possible coffee residues stuck to the surface. In order to prolong the useful life of the watertight seal on the brewing head, do not put the filter holder back in place if the coffee machine is not to be used for extended periods. To remove any deposits that could block the flow of your 1 or 2 cup filter, you may use the needle. Filters are dishwasher safe.
■ Steam wand: To prevent milk from drying inside the nozzle, please clean it after each use. To do this, follow the steps for foaming the milk, replacing milk with water. Use a towel to clean the outside of the grinder.
Summary of parts x cleaning method:
 | | | | | | |
 | XX OK XX | | | | |
 | OK | OK | OK XX | | |
 | X OK | OK XX | | | |
 | X OK | OK XX | | | |
 | XX OK X OK | | | | |
 | X OK | OK XX | | | |
 | OK | OK | OK | OK | X | |
 | XX OK | OK X | | | |
 | OK | OK XXX | | | |
b) The Coffee Grinder
Regularly cleaning the grinder and the grinder outlet with the cleaning brush is important to ensure long life of your machine.
IMPORTANT: When cleaning the grinder, please make sure there are no beans in the bean hopper. To remove the last beans in the grinder, press the START/STOP GRIND button (19), wait for the last coffee ground to go out and press again the button to stop.
WARNING: Please unplug the machine before cleaning the grinder (4)
-
Rotate the bean box anti-clockwise to remove the bean box, by aligning the following arrow marked on the bean hopper with the orange index on the machine (12).
-
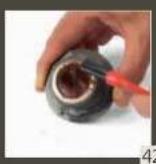
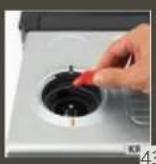
Turn the internal grinding wheel anti-clockwise and take it out (41). Use the cleaning brush to clean the grinding wheel and remove the ground coffee in the gears (43). Please note that the grinding wheel cannot be directly rinsed with water (only with the brush).
-
Use the cleaning brush to clean the grinding chamber and the ground coffee channel (44).
-
Do not install the grinding wheel at this time, re-install the empty bean hopper (46).
-
Plug the machine, press the power button and press the START/STOP GRIND button (19), let the grinder run to sweep out the coffee ground residue in the grinding chamber. (If coffee ground inside is not removed completely, please repeat step 3 and 4).
-
Turn off and unplug the machine.
-
Remove the bean hopper anti-clockwise (4).
-
Install the grinding wheel securely in position (45).
-
Install the bean hopper back on the machine (46)
Cleaning is completed.
c) The brewing head
Daily cleaning
After your coffee extraction, clean your coffee brewing head with a flush: remove your portafilter, remain on coffee recipes on the 'Recipes Dial' and press the START/STOP BREW button (8). Press again after a few seconds to stop.
You can also clean the brewing head with brush after each extraction.
Regular cleaning:
Please rinse the coffee brewing head regularly as following steps:
-
Insert 2-cup single wall filter into the portafilter (9).
-
Put the blind sieve in the filter so that the holes of the filter are hidden (47).
-
Insert the portafilter into the brewing head (25).
-
Select Espresso, then press START/STOP BREW (8) button to start rinsing process (about 30 seconds), rinsed water goes directly into the drip tray.
-
Rinsing process stops automatically. Remove the portafilter and the blind sieve. Empty the portafilter if some hot water remains.
-
Empty the drip tray when it is full (48).
-
START/STOP BREW indicator becomes orange fix, press the START/STOP BREW button to return normal (8).
d) The water circuit
Please clean the coffee and steam water circuit once every 3 months:
-
Remove and empty the drip tray (48), then reposition it in the machine.
-
Insert 2-cup filter into the portafilter (9).
-
Put the blind sieve in the filter so that the holes of the filter are hidden.
-
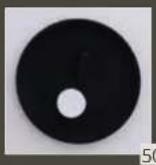
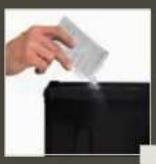
Place one KRUPS cleaning tablet* on the blind sieve (50).
-
Insert the portafilter into the brewing head (25).
-
Select CALC on the RECIPES AND CLEANING DIAL (51).
-
Press START/STOP BREW button (8) and hold down for 3 seconds to start cleaning process. The water used for cleaning goes directly into the drip tray. It lasts about 3 minutes.
-
Remove the portafilter. Check if the tablet is dissolved completely. If not, please repeat the point 5, 6 and 7.
Note: *The KRUPS Cleaning Tablet XS3000 can be purchased on the Krups official website or other retailers.
DESCALING THE MACHINE
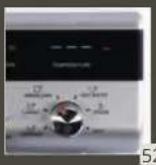
When the CALC indicator red light is on, you need to descale your machine. You can start descaling at any time. Make sure the portafilter is not inserted to the machine.
-
Remove and empty the drip tray (48), then reposition it in the machine.
-
Empty the water tank (54). Remove the filter if present (you can re-insert it at the end of the descaling process) (55).
-
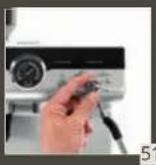
Put the KRUPS Descaler* into the water tank (56) and add 500ml / 17.5 oz of water. Put a container (1L / 34 oz) on the drip tray under the coffee outlet, hot water outlet and under the steam wand (6).
-
Turn the RECIPES AND CLEANING dial to CALC.
-
Press the START/STOP BREW button to start descaling process (8).
-
Water comes out from each outlet (Brewing head for 2 min 30 sec, Hot water outlet for 2 min 30 sec, Steam outlet for 2 min 30 sec). This cycle repeats automatically one more time.
-
START/STOP BREW button indicator is blinking white. The Descaling is finished now, proceed to rinsing.
-
Empty the container (57). Remove the water tank, empty out any residual descaler solution (54), rinse under running water and fill with fresh water (1L/34 oz). Put the water tank and the container back on the machine.
-
Press START/STOP BREW button (8).
-
Water comes out from each outlet (Brewing head for 30 sec, Hot water outlet for 30 sec, Steam outlet for 30 sec). This cycle repeats automatically one more time.
-
Once finished rinsing process, START/STOP BREW button light and Power button light become fixed white.
-
Empty the container (57), remove the water tank, fill with fresh water and reposition it in the machine. If present, re-set water filter.
-
Turn the RECIPES AND CLEANING dial to one of the beverages.
The machine is now ready for use.
To exit DESCALING MODE halfway, press the POWER button (9). This does not clear the descaling alert.
Note: *The KRUPS Descaler can be purchased on the Krups official website or other retailers.
GUARANTEE
This appliance carries a manufacturer's 2 year guarantee. This appliance has been designed for domestic use only. Any commercial use, inappropriate use or failure to comply with the instructions, the manufacturer accepts no responsibility and the guarantee will not apply. For any after-sales problem or for spare parts, please contact an approved service centre. No repairs on the coffee machine will be covered by the guarantee in case of:
- No descaling carried out.
- Limescale build-up.
Accessories cleaned in a dishwasher. (Dishwashing safe only for drip tray grill, steam nozzle tube, filter cups.)
EXPLANATION OF INDICATION LIGHTS
| LIGHTS | EXPLANATION OF INDICATOR LIGHTS | OPERATION |
| All indicators flash once Turning the machine on No action | |
| The Start/Stop Grind indicator is solid in orange. | The bean box is not in place Install the bean box in place | |
| The Start/Stop Grind indicator flashes in white slowly. Other lights remain unchanged | Grinding process is on going | |
| The lack of water light is flashing | Water needs to be added Add water in the water tank | |
| The water tank is not in place Install the water tank | |
| 1 CUPS light is on One cup is currently chosen To change, press the button (18) | |
| 2 CUPS light is on Two cups is currently chosen To change, press the button (18) | |
| Pre-infusion 5s (or 2s or 8s) light is on | 5 seconds (or 2 seconds, 8 seconds) is currently chosen | To change, press the button (26) |
| TEMPERATURE 2 lignes are lit Middle temperature is currently chosen. 1 line = lower temperature 2 lines = midle temperature 3 lines = higher temperature | To change, press the button (27) |
| TEMPERATURE light is off | Either HOT WATER function, STEAM function or CALC is chosen. | To, choose select coffee recipes with the recipes and cleaning dial |
| 1 CUPS (or 2 CUPS) light is off Either HOT WATER function, STEAM function or CALC is chosen. | To, choose select coffee recipes with the recipes and cleaning dial |
| LIGHTS | EXPLANATION OF INDICATOR LIGHTS | OPERATION |
| Pre-infusion time light is off | Either HOT WATER function, STEAM function or CALC is chosen. | To, choose select coffee recipes with the recipes and cleaning dial |
| The Start/Stop Brew indicator flashes in white slowly | Machine is pre-heating for the coffee brewing, the steam or the hot water function | Please wait until the indicator turns in solid white |
| Machine is cooling down after the usage of steam or hot water function | |
| CALC light is ON in red | Machine requires a descaling | Start descaling process |
TROUBLESHOOTING
| PROBLEM | CAUSE | SOLUTION |
| The machine does not grind the coffee. | The bean box is not in place. | Install the bean box in place (12). |
| Lack of beans or not enough beans in the bean box. | Add the beans (14). |
| The bean or ground coffe is stuck in the Grinder. | Remove the beans and clean the grinder (43). |
| Changing to a different type of bean. | | - You are recommended to pour only the amount of beans to be used into the beans box- To empty the box, remove remaining beans, grind all the remaining beans in the container until completely empty.- Add new type of coffee beans.- Re-adjust coffee ground quantity if necessary (15) |
| After grinding, the amount of coffee in the filter does not give the desired dose. | The quantity of ground coffee needs adjusting. | - Adjust the quantity of coffee with the dial (more or less (15)).- Adjust the grinding finess with the bean box settings (finer or coaser) (13).- If you are using the 1 cup filter, make sure the 1 cup light is on (18). |
| PROBLEM CAUSE SOLUTION |
| The portafilter cannot be inserted to the brewing head. | The ground coffee has not been tamped correctly or the quantity is excessive. | Refer to the Tamping section in the user manual.Put less ground coffee in the filter. |
| The machine fails to produce espresso or very little epsresso comes out. | No water in the tank,(The lack of water light is flashing). | Fill the tank (2). |
| Water in the tank was running out during the brewing. | Fill the tank. The launched recipe will resume (2). |
| The water tank is not properly in place and the valves at the bottom are not open. | Press down lightly on the tank to open the valves at the bottom. |
| Coffee ground too finely. Adjust the grinding level to coaser (13). |
| Too much ground coffee. Reduce the ground coffee quantity (15). |
| Coffe ground tamped too strongly | Reduce the tamping force. |
| Limescale in the water circuit. | Descale the machine as described in the user manual. |
| The espresso coffee drips from the edges of the portafilter instead of from the holes. | The portafilter is not correctly in place. | Insert the portafilter correctly (25). |
| The coffee spout gasket has lost flexibility or is dirty. | Contact a customer services center to have it replaced. |
| Blockage in the coffee filter. - R | Inse the filter under running water.- Adjust the grinding settings to coarser (13). |
| The espresso crema is too thin, pale and delivered from the spout too fast. | The machine settings are not appropriate. | See instructions in section "Adjust your espresso results" in the user manual. |
| The espresso crema is too dark and spotty (delivered from the spout too low). | The machine settings are not appropriate. | See instructions in section "Adjust your espresso results" in the user manual. |
| My coffee is not hot enough. | Machine is not heated enough. | See instructions in section "Adjust your espresso results" in the user manual. |
| Coffee preparation temperature setting is low. | See instructions in section "Adjust your espresso results" in the user manual. |
| PROBLEM CAUSE SOLUTION | |
| There is water in the drip tray. | This water comes from the internal circuits of the machine and is a normal consequence of their operation. | Empty and clean the drip tray on a regular basis (48). |
| After making 1st coffee, I can't launch 2nd coffee coffee just after. | Machine needs around 30 seconds between the cups in order to ensure good temperature of coffee. | You can use the grinder during this waiting time. |
| Manometer doesn't move. Coffee brewing pressure is too low. | To increase the pressure, (1) Grinder finer (13)(2) Increase the ground coffee quantity(3) Tamp stronger. |
| I don't find Tamping station. Tamping station (& KRUPS branded towel) comes only with Precision+ (XP804T). | |
| I can't choose '1 CUP or 2 CUP', 'Preinfusion time' nor 'Temperature'. | Either Hot water function, Steam function or CALC is chosen. | Select coffee recipes (Espresso, Lungo, Americano). Not possible to change the temperature for these functions (52). |
If it is not possible to determine the cause of the fault, consult an approved service centre. Never disassemble the appliance! (if the appliance is disassembled, this will void the guarantee).
ELECTRICAL OR ELECTRONIC PRODUCT END OF LIFE

We participate in the protection of the environment!
① Your product contains a number of materials that can be reused recycled.
Take it to a collection point or an approved service centre so that it can be dealt with appropriately.
ОПИСАНИЕ
A Общ преглед
| | | | | |
| XX OK XX | | | | |
| OK OK OK XX | | | | |
| X OK OK XX | | | | |
| X OK OK XX | | | | |
| XX OK X OK | | | | |
| X OK OK XX | | | | |
| OK OK OK OK X | | | | |
b) Кафемелачката
| | | | | |
 | XX OK XX | | | | |
 | OK OK OK XX | | | | |
 | X OK OK XX | | | | |
 | X OK OK XX | | | | |
 | X X OK X OK | | | | |
 | X OK OK XX | | | | |
 | OK OK OK OK X | | | | |
 | X X OK OK X | | | | |
 | OK OK XX X | | | | |
b) Mlýnek na kávu
JUSTERING AF ESPRESSORESULTATER
a) Ekstraktion
| | | | | |
 | X | X | OK | X | X |
| OK | OK | OK | X | X |
 | X | OK | OK | X | X |
 | X | X | OK | X | OK |
 | X | OK | OK | X | X |
| OK | OK | OK | OK | X |
 | X | X | OK | OK | X |
 | OK | OK | X | X | X |
b) Kaffekværnen
AFKALKNING AF MASKINEN
| | | | | |
 | X X OK X X | | | |
| OK OK OK XX | | | |
 | X OK OK XX | | | |
 | X X OK X OK | | | |
 | X OK OK XX | | | |
 | OK OK OK OK X | | | |
 | X X OK OK X | | | |
 | OK OK X X X | | | |
b) Mahlwerk
- Dual wall filters are dedicated for pre-ground coffee (for example decaffeinated). It will help to create a good crema.
| | | | | |
 | XX OK XX | | | | |
 | OK OK OK XX | | | | |
 | X OK OK XX | | | | |
 | X OK OK XX | | | | |
 | XX OK X OK | | | | |
 | X OK OK XX | | | | |
 | OK OK OK OK X | | | | |
| D=0.1 | XX OK OK X | | | |
| D=0.2 | OK OK XX X | | | |
b) Ο μύλος καφέ
| | | | | |
 | X X OK X X | | | |
 | OK OK OK X X | | | |
 | X OK OK X X | | | |
 | X OK OK X X | | | |
 | X X OK X OK | | | |
 | X OK OK X X | | | |
 | OK OK OK OK X | | | |
 | X X OK OK X | | | |
 | OK OK X X X | | | |
| | | | | |
 | X | X | OK | X | X |
 | OK | OK | OK | X | X |
 | X | OK | OK | X | X |
 | X | OK | OK | X | X |
 | X | X | OK | X | OK |
 | X | OK | OK | X | X |
 | OK | OK | OK | OK | X |
 | X | X | OK | OK | X |
 | OK | OK | X | X | X |
b) Kahvimylly
MERKKIVALOJEN SELITYS
VALOT (JA KUVAT) MERKKIVALOJEN SELITYS TOIMINTA
| | | | | |
 | XX OK XX | | | | |
 | OK OK OK XX | | | | |
 | X OK OK XX | | | | |
 | X OK OK XX | | | | |
 | XX OK X OK | | | | |
 | X OK OK XX | | | | |
 | OK OK OK OK X | | | | |
 | XX OK OK X | | | | |
| OK OK XX | | | | |
b) Le moulin à café
| | | | | |
 | XX OK XX | | | | |
 | OK OK OK XX | | | | |
 | X OK OK XX | | | | |
 | X OK OK XX | | | | |
 | XX OK X OK | | | | |
 | X OK OK XX | | | | |
 | OK OK OK OK X | | | | |
 | XX OK OK X | | | | |
| OK OK XX X | | | | |
b) Mlinac za kavu
| | | | | |
 | XX OK XX | | | | |
 | OK OK OK XX | | | | |
 | X OK OK XX | | | | |
 | X OK OK XX | | | | |
 | XX OK X OK | | | | |
 | X OK OK XX | | | | |
 | OK OK OK OK X | | | | |
 | XX OK OK X | | | | |
| OK OK XX X | | | | |
b) A kávédaráló
| | | | | |
| XX OK XX | | | | |
| OK OK OK XX | | | | |
| X OK OK XX | | | | |
| X OK OK XX | | | | |
| XX OK X OK | | | | |
| X OK OK XX | | | | |
| OK OK OK OK X | | | | |
b) Il macinacaffè
| | | | | |
| XX OK XX | | | | |
| OK OK OK XX | | | | |
| X OK OK XX | | | | |
| X OK OK XX | | | | |
| XX OK X OK | | | | |
| X OK OK XX | | | | |
| OK OK OK OK X | | | | |
| XXOK | OKX | | | |
| OK | OKXXX | | | |
b) De koffiemolen
De reiniging is voltooid.
c) De percolatorkop
HET APPARAAT ONTKALKEN
B9 Knapp for å starte/stoppe brygging
B10 Manometer
B11 Vannmangelindikator
B12 «Kalk» Avkalkingsindikator
C Tilbehør
JUSTERE ESPRESSORESULTATENE
a) Ekstraksjon
| RIKTIG EKSTRAKSJON | UNDEREKSTRAKSJON | OVEREKSTRAKSJON |
| Manometer | 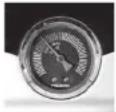 | 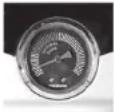 | 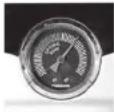 |
| Resultat |  |  |  |
| RIKTIG EKSTRAKSJON | UNDEREKSTRAKSJON OVEREKSTRAKSJON |
| Resultat • Renner | sakte som varm honning• Cremaen er gyllenbrun med en fin mousselignende tekstur.• Espressoen er mørkebrun | Flyten starter etter 1-3 sekunder.Renner fort, som vann.Cremaen er tynn og lys.Espressoen er blek brun.Svak og vassen smak. |
| Løsning / | | Mal finereTamp hardere. Bruk trykk på 15 kilo∅k kaffemengden. |
 | | | | | |
 | XX OK XX | | | |
 | OK | OK | OK XX | | |
 | X OK | OK XX | | | |
 | X OK | OK XX | | | |
 | XX OK X OK | | | |
 | X OK | OK XX | | | |
 | OK | OK | OK | OK | X |
 | XX OK | OK X | | | |
 | OK | OK XXX | | | |
b) Kaffekvernen
This appliance carries a manufacturer's 2 year guarantee. This appliance has been designed for domestic use only. Any commercial use, inappropriate use or failure to comply with the instructions, the manufacturer accepts no responsibility and the guarantee will not apply. For any after-sales problem or for spare parts, please contact an approved service centre. No repairs on the coffee machine will be covered by the guarantee in case of:
| | | | | |
 | XX | OK | XX | | |
 | OK | OK | OK | X | X |
 | X | OK | OK | X | X |
 | X | OK | OK | X | X |
 | X | X | OK | X | OK |
 | X | OK | OK | X | X |
 | OK | OK | OK | OK | X |
 | X | X | OK | OK | X |
 | OK | OK | XXX | | |
b) Młynek do kawy
| | | | | |
 | X | X | OK | X | X |
 | OK | OK | OK | X | X |
 | X | OK | OK | X | X |
 | X | OK | OK | X | X |
 | X | X | OK | X | OK |
 | X | OK | OK | X | X |
 | OK | OK | OK | OK | X |
 | X | X | OK | OK | X |
 | OK | OK | X | X | X |
b) O moinho de café
| | | | | |
 | XX OK XX | | | | |
 | OK OK OK XX | | | | |
 | X OK OK XX | | | | |
 | X OK OK XX | | | | |
 | XX OK X OK | | | | |
 | X OK OK XX | | | | |
 | OK OK OK OK X | | | | |
 | XX OK OK X | | | | |
| OK OK X XX | | | | |
b) Râşniţa
| | | | | |
| XX OK XX | | | | |
| OK OK OK XX | | | | |
| X OK OK XX | | | | |
| X OK OK XX | | | | |
| XX OK X OK | | | | |
| X OK OK XX | | | | |
| OK OK OK OK X | | | | |
| XX OK OK X | | | | |
| OK OK XX X | | | | |
б) Кофемолка
| | | | | |
 | XX OK XX | | | | |
 | OK OK OK XX | | | | |
 | X OK OK XX | | | | |
 | X OK OK XX | | | | |
 | XX OK X OK | | | | |
 | X OK OK XX | | | | |
 | OK OK OK OK X | | | | |
 | XX OK OK X | | | | |
 | OK OK XX X | | | | |
b) Mlynček na kávu
- Izberite filter in ga vstavite v portafilter (16).
- Enostenski filtri so namenjeni svežim celim kavnim zrnom, kar je priporočljivo.
- Dvojni filtri so namenjeni za predhodno zmleto kavo (na primer brezkofeinsko). Tako boste dobili odlično peno.
| | | | | |
 | XX OK XX | | | | |
 | OK OK OK XX | | | | |
 | X OK OK XX | | | | |
 | X OK OK XX | | | | |
 | XX OK X OK | | | | |
 | X OK OK XX | | | | |
 | OK OK OK OK X | | | | |
 | XX OK OK X | | | | |
 | OK OK X XX | | | | |
b) Mlinček za kavo
| X OK OK XX | | | |
| XX OK X OK | | | |
| X OK OK XX | | | |
| OK OK OK OK X | | | |
| XX OK OK X | | | |
| OK OK XX X | | | |
b) Mlin za kafu
| | | | | |
| XX OK XX | | | | |
| OK | OK | OK XX | | |
| X OK | OK XX | | | |
| X OK | OK XX | | | |
| XX OK X OK | | | | |
| X OK | OK XX | | | |
| OK | OK | OK | OK | X |
| XX OK | OK X | | | |
| OK | OK XXX | | | |
b) Kaffekvarnen
| | | | | |
 | X | X | OK | X | X |
 | OK | OK | OK | X | X |
 | X | OK | OK | X | X |
 | X | OK | OK | X | X |
 | X | X | OK | X | OK |
 | X | OK | OK | X | X |
 | OK | OK | OK | OK | X |
 | X | X | OK | OK | X |
 | OK | OK | X | X | X |
b) Кавомолка


