C&A HP CB2 - Industrial machine MSW - Free user manual and instructions
Find the device manual for free C&A HP CB2 MSW in PDF.

User questions about C&A HP CB2 MSW
0 question about this device. Answer the ones you know or ask your own.
Ask a new question about this device
Download the instructions for your Industrial machine in PDF format for free! Find your manual C&A HP CB2 - MSW and take your electronic device back in hand. On this page are published all the documents necessary for the use of your device. C&A HP CB2 by MSW.
USER MANUAL C&A HP CB2 MSW
natural_image
Technical line drawing of a robotic arm with articulated joints and base mount (no text or symbols)
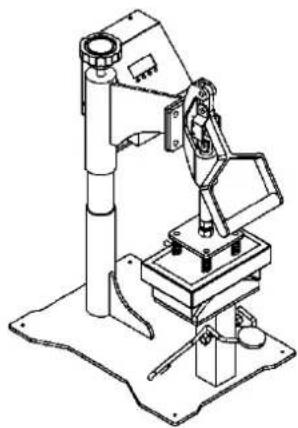
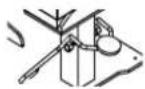
Netzschalter

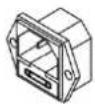
Netzstecker

Hut-
Heizpresse

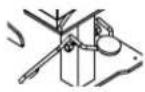
Druckknopf

Zugfeder

Steuerung
This User Manual has been translated for your convenience using machine translation. Reasonable efforts have been made to provide an accurate translation; however, no automated translation is perfect nor is it intended to replace human translators. The official User Manual is the English version. Any discrepancies or differences created in the translation are not binding and have no legal effect for compliance or enforcement purposes. If any questions arise related to the accuracy of the information contained in the User Manual, please refer to the English version of those contents which is the official version.
Technical data
| Parameter description Parameter value | |
| Product name | Cap Heat Press |
| Model | MSW-C&A HP CB2 |
| Rated voltage [V~] / frequency [Hz] | 230/50 |
| Rated power [W] | 360 |
| Max. temperature [°C] | 250 |
| Protection rating IP | IP21 |
| Dimensions [width x depth x height; mm] | 410 x 305 x 700 |
| Weight [kg] | 11.8 |
Please read this manual before use and follow its guidance.
Keep this manual for future reference.
Thank you for choosing our heat press machine. Please read the user manual carefully before using the product. This machine uses the principle of heat transfer printing to heat transfer various color photos, personalized patterns, finished products, etc. to cotton, linen, chemical fibre, metal, ceramics, glass and other planar materials.
WARNING
- Check the voltage before using it.
- Keep children away from the machine.
- Shut down the machine and disconnect the power supply. Don't forget to wear insulation gloves if the device is still in high temperature.
- Do not open the machine to modify the inside of the machine.
- During use, avoid body contact with hot parts to prevent burns.
- When pressing down the handle, if it is difficult to press down because the pressure is too large, please rotate the pressure nut counterclockwise to reduce the pressure and increase the distance between the heating plate and the workbench.
- When the handle is pressed down, the pressure regulating nut does not need to be over-tightened. It can be felt with obvious resistance.
- Do not let minors touch the machine unsupervised, even when not in use!
- Do not attempt to heat press products that are not heat resistant.
natural_image
Technical line drawing of a mechanical robotic arm with articulated joints and base mount (no text or symbols)
Power switch

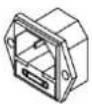
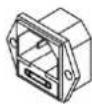
Power plug

Hat heat press

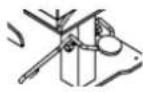
Pressure knob

Tension spring

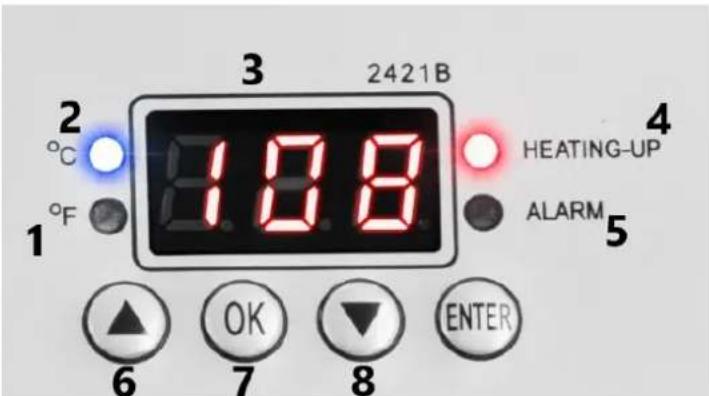
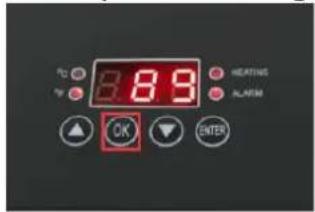
Controller
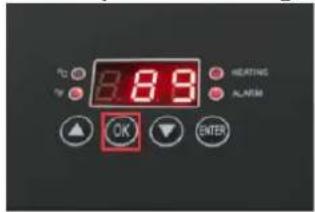
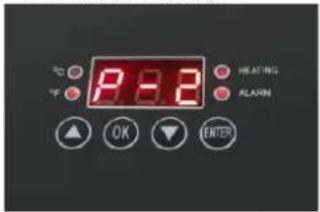
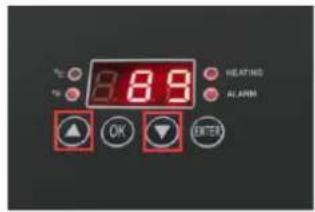
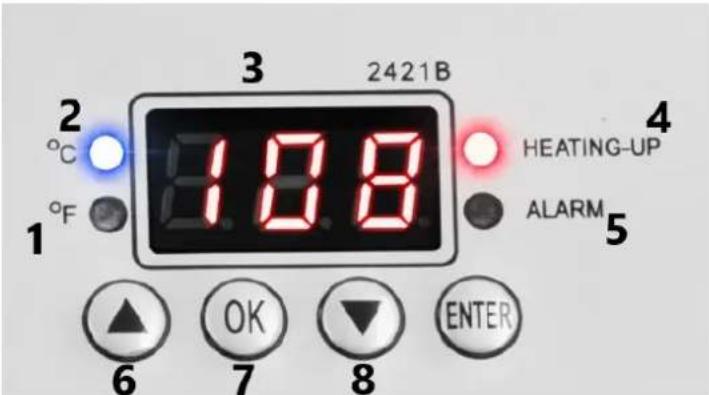
1 – Fahrenheit unit indicator light.
2 – Celsius unit indicator light.
3 - Display.
4 - Heating control light.
5 - Alarm control light.
6 - Button for increasing the entered values.
7 - Button for confirming the entered values.
8 - Button for decreasing the entered values.
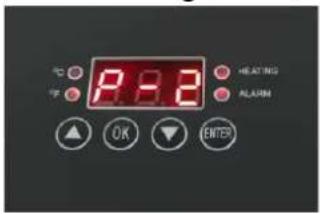
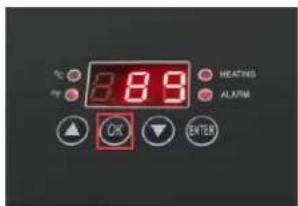
1. Temperature setting
① Press OK button
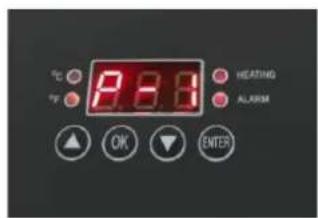
② The display will show "P-1"

③ Press arrows “△” or “▽” to set the desired temperature
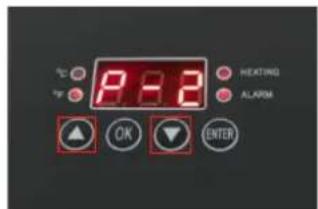
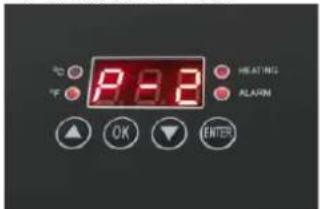
2. Time setting
④ Press OK button after setting the temperature
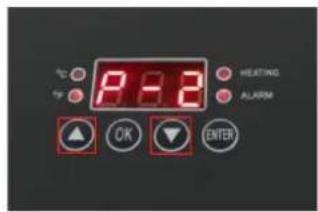
⑤ The display will show "P-2"
⑥ Press arrows “△” or “▽” to adjust the desired time. Press SET button for 2-3 seconds to save setting
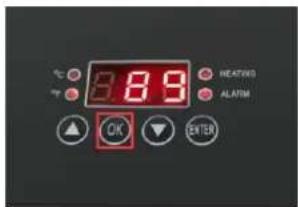
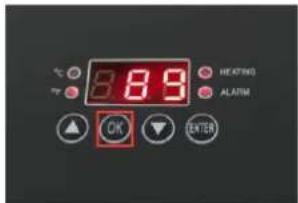
3. Changing temperature units
a) Press and hold the "OK" key.
b) Display shows "P-3"
c) Press "△" or "▽" to switch between Fahrenheit and Celsius.
d) Hold the "OK" key to save the settings.
4. Pressure adjustment
Place the material on working table and adjust the pressure by using the knob.
Clockwise rotation to increases pressure.
Counterclockwise rotation to reduce pressure.

flowchart
graph TD
    A["−"] --> B((★))
    B --> C["+"]
Note: The parameters above are for reference only, please test to find the best parameters for your own product.
5. Suggested settings
| Material | Usual Temperature | Time | Temperature |
| Cotton Clothing | 320–360°F(160–180°C) | 30 Sec. | Use heat transfer paper with the image in reverse format.Ensure that clothing parts which are not heat-resistant (such as plastic buttons) do not touch the heated platen.Print with high pressure. |
| Linen Fabric | |||
| Chemical Fiber Fabric | 300–320°F (150–160°C) | 20 Sec. | ·Use heat transfer paper with the image in reverse format. ·Ensure that clothing parts which are not heat-resistant (such as plastic buttons) do not touch the heated platen. ·Print with medium pressure. |
| Pillows | 340°F (190°C) | 50 Sec. | ·Use heat transfer paper with the image in reverse format. ·Ensure that clothing parts which are not heat-resistant (such as plastic buttons) do not touch the heated platen. ·Print with high pressure. |
| Typical White Non-Cotton Fabric |
NOTE
Operational time and temperature will vary for different materials.
For best results, read the following table and try a small sample to get the right time and temperature before printing in large quantities.
6. Work with the device
- Place the material on the work surface and adjust the pressure knob to obtain the correct pressure required.
- Connect the power plug and turn on the power switch.
- Set the required time and temperature.
- The temperature of the heating plate will start to rise, when it reaches the temperature you set, put the material on the worktable, and press down the handle to close the plate.
- When times up, machine alarm, take out your product.
-
Please turn off the machine and disconnect the power when not in use.
-
Troubleshooting
| Fault | Possible Cause | Solution |
| Fails to count down and the temperature heated up as normal | The pressure is not appropriate. | Re-adjust the pressure knob and press the handle until hearing a “click” sound and displaying the “Time Counting” icon. |
| Fails to heat up or does not heat up to the temperature displayed. | Heating device problem or damaged relay. | 1.Check heating attachment connections.2.Replace the heating element. |
| Lack of color, faded image. | Because of the insufficient temperature and/or press time. | Adjust the temperature or increase the heating time.Make sure the design is firmly secured flush against the materials. |
| Darkened, deep color, blurred image | The temperature was too high or pressed for a long time. | Set a lower temperature or time. Try more to get the suitable temperature and time for your materials. |
| Temperature control meter does not control the temperature, the temperature keeps rising. | Damaged relay Replace the relay |

natural_image
Technical line drawing of a mechanical robotic arm with articulated joints and base mount (no text or symbols)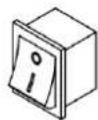
Wyłącznik
zasilania

Wtyczka
zasilania

Prasa do kapeluszy
natural_image
Technical line drawing of a mechanical robotic arm with articulated joints and base mount (no text or symbols)
Vypínač
napájení

Napájecí
zástrčka
natural_image
Technical line drawing of a robotic arm with articulated joints and base mount (no text or symbols)natural_image
Technical line drawing of a mechanical robotic arm with articulated joints and base mount (no text or symbols)natural_image
Technical line drawing of a mechanical robotic arm with articulated joints and base mount (no text or symbols)⑤ La pantalla mostrará "P-2"

natural_image
Technical line drawing of a mechanical robotic arm with articulated joints and base mount (no text or symbols)
Hálózati kapcsoló

Hálózati
csatlakozó

Kalap hőprés

Nyomásgomb

Feszítő rugó

Vezérlés
A VEZÉRLÓPANEL MÜKÖDTETÉSE

natural_image
Technical line drawing of a mechanical robotic arm with articulated joints and base mount (no text or symbols)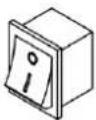
Strømafbryder

Strømstik
⑤ Displayet vil vise "P-2"

Drej mod uret for at reducere trykket.

flowchart
graph TD
    A["-"] --> B["+"]
    B --> C["Feedback Loop"]
    C --> A
natural_image
Technical line drawing of a mechanical robotic arm with articulated joints and base mount (no text or symbols)
natural_image
Technical line drawing of a mechanical robotic arm with articulated joints and base mount (no text or symbols)
Aansluiting
voeding
Stekker

Hoed
hittepers

Drukknop
Trekveer

Beheerder
HOE HET CONTROLLERPANEEL TE BEDIENEN
natural_image
Technical line drawing of a mechanical robotic arm with articulated joints and base mount (no text or symbols)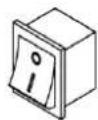
Strømbryter
Strømplugg

Hattevarmepresse

Trykkknapp
Spennfjær

Styring
HVORDAN BETJENING AV KONTROLLPANELET

1 – Fahrenheit-enhetsindikatorlampe.
2 – Celsius-enhetsindikatorlys.
3 - Display.
4 – Kontrolllys for varme.
5 - Alarmkontrolllys.
6 – Knapp for å øke de angitte verdiene.
7 – Knapp for å bekrefte de angitte verdiene.
8 – Knapp for å redusere de angitte verdiene.
- Temperaturinnstilling
⑤ Displayet vil vise "P-2"

natural_image
Technical line drawing of a mechanical robotic arm with articulated joints and base mount (no text or symbols)
Strömbrytare

Strömkontakt

Hattvärmepress

Tryckknapp

Spännfjäder

Kontroller
HUR MAN ANVÄNDER KONTROLLPANELEN

1 – Fahrenheit-enhetsindikatorlampa.
2 – Celsius-enhetsindikatorlampa.
3 - Display.
⑤ Displayen visar "P-2"

natural_image
Technical line drawing of a mechanical robotic arm with articulated joints and base mount (no text or symbols)natural_image
Technical line drawing of a mechanical robotic arm with articulated joints and base mount (no text or symbols)
Vypínač
napájania

Napájacia
zástrčka
③ Stlačením šípok „△“ alebo „▽“ nastavte požadovanú teplotu
2. Nastavenie času
⑥ Stlačením šípok „△“ alebo „▽“ nastavte požadovaný čas. Na uloženie nastavenia stlačte tlačidlo SET na 2-3 sekundy
natural_image
Technical line drawing of a mechanical robotic arm with articulated joints and base mount (no text or symbols)
Ключ за
захранване

Щепсел

Топлинна
преса за
шапки

Копче за
налягане
Опъваща
пружина
Контролер
② Дисплеят ще покаже „P-1“
natural_image
Technical line drawing of a mechanical robotic arm with articulated joints and base mount (no text or symbols)natural_image
Technical line drawing of a mechanical robotic arm with articulated joints and base mount (no text or symbols)
Prekidač
napajanja

Utikač za
napajanje
④ Pritisnite gumb OK nakon postavljanja temperature
⑤ Zaslon će prikazati "P-2"

⑥ Pritisnite strelice “ △ ” ili “ ▽ ” za podešavanje željenog vremena. Pritisnite tipku SET 2-3 sekunde za spremanje postavki
3. Promjena jedinica temperature
a) Pritisnite i držite tipku "OK".
b) Zaslon prikazuje "P-3"
c) Pritisnite “△” ili “▽” za prebacivanje između Fahrenheit i Celzija.
d) Držite tipku "OK" za spremanje postavki.
4. Podešavanje tlaka
Stavite materijal na radni stol i podesite pritisak pomoću gumba.
natural_image
Technical line drawing of a mechanical robotic arm with articulated joints and base mount (no text or symbols)
Maitinimo
jungiklis

Maitinimo
kištukas
⑤ Ekrane bus rodoma „P-2“
natural_image
Technical line drawing of a mechanical robotic arm with articulated joints and base mount (no text or symbols)
Comutator de alimentare
Fişă de alimentare
⑤ Afişajul va afişa „P-2”

natural_image
Technical line drawing of a mechanical robotic arm with articulated joints and base mount (no text or symbols)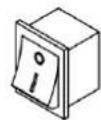
Stikalo za
vklop

Napajalni vtič

Toplotna
stiskalnica za
klobuke

Gumb za
pritisk

Natezna
vzmet

Krmilnik
KAKO UPRAVLJATI NADZORNO PLOŠČO
1 – indikatorska lučka enote Fahrenheit.
2 – Indikatorska lučka enote Celzija.
3 - Zaslon.
② Na zaslonu se prikaže "P-1"

③ Pritisnite puščice “△” ali “▽”, da nastavite želeno temperaturo
2. Nastavitev časa
④ Po nastavitvi temperature pritisnite gumb OK

⑤ Na zaslonu se prikaže "P-2"
⑥ Pritisnite puščice “ △ ” ali “ ▽ ”, da prilagodite želeni čas. Pritisnite gumb SET za 2-3 sekunde, da shranite nastavitev
For the disposal of the device please consider and act according to the national and local rules and regulations.
CONTACT
expondo Polska sp. z o.o. sp. k.