PCL 20 - REV 10-2008 - Laser level BOSCH - Free user manual and instructions
Find the device manual for free PCL 20 - REV 10-2008 BOSCH in PDF.
| Product type | Cross-line laser level |
| Brand | BOSCH |
| Model | PCL 20 - REV 10-2008 |
| Maximum working area | 10 m |
| Leveling accuracy (line) | ±0.5 mm/m |
| Plumb beam accuracy (up) | ±0.5 mm/m |
| Plumb beam accuracy (down) | ±1 mm/m |
| Self-leveling range | ±4° |
| Leveling time | 4 seconds |
| Laser class | 2 (IEC 60825-1) |
| Laser type | Line: 635 nm, <2 mW; Plumb: 650 nm, <2 mW |
| Power supply | 4 LR6 (AA) 1.5 V batteries or KR6 (AA) 1.2 V rechargeable batteries |
| Battery life | Approx. 40 hours |
| Dimensions (L × W × H) | 123 × 67 × 110 mm |
| Weight | 0.5 kg |
| Operating temperature | +5 °C to +40 °C |
| Storage temperature | -20 °C to +70 °C |
| Max. relative humidity | 90% |
| Tripod thread | 1/4" |
| Operating modes | Cross lines, horizontal, vertical, plumb beam, without leveling |
| Self-leveling | Yes, with green/red indicator |
| Included accessories | Protective case, wall mount, vision glasses (optional) |
| Maintenance | Clean with a soft, damp cloth, without solvents |
Frequently Asked Questions - PCL 20 - REV 10-2008 BOSCH
User questions about PCL 20 - REV 10-2008 BOSCH
0 question about this device. Answer the ones you know or ask your own.
Ask a new question about this device
Download the instructions for your Laser level in PDF format for free! Find your manual PCL 20 - REV 10-2008 - BOSCH and take your electronic device back in hand. On this page are published all the documents necessary for the use of your device. PCL 20 - REV 10-2008 by BOSCH.
USER MANUAL PCL 20 - REV 10-2008 BOSCH
Power Tools Division
70745 Leinfelden-Echterdingen
Germany
www.bosch-pt.com
1 609 929 R07 (2008.10) T / 73 WEU
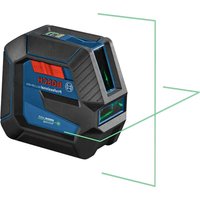
PCL 20

BOSCH
Working safely with the measuring tool is possible only when the operating and safety information are read completely and the instructions contained therein are strictly followed. Never make warning labels on the measuring tool unrecognisable.
SAVE THESE INSTRUCTIONS.
- Caution - The use of other operating or adjusting equipment or the application of other processing methods than those mentioned here, can lead to dangerous radiation exposure.
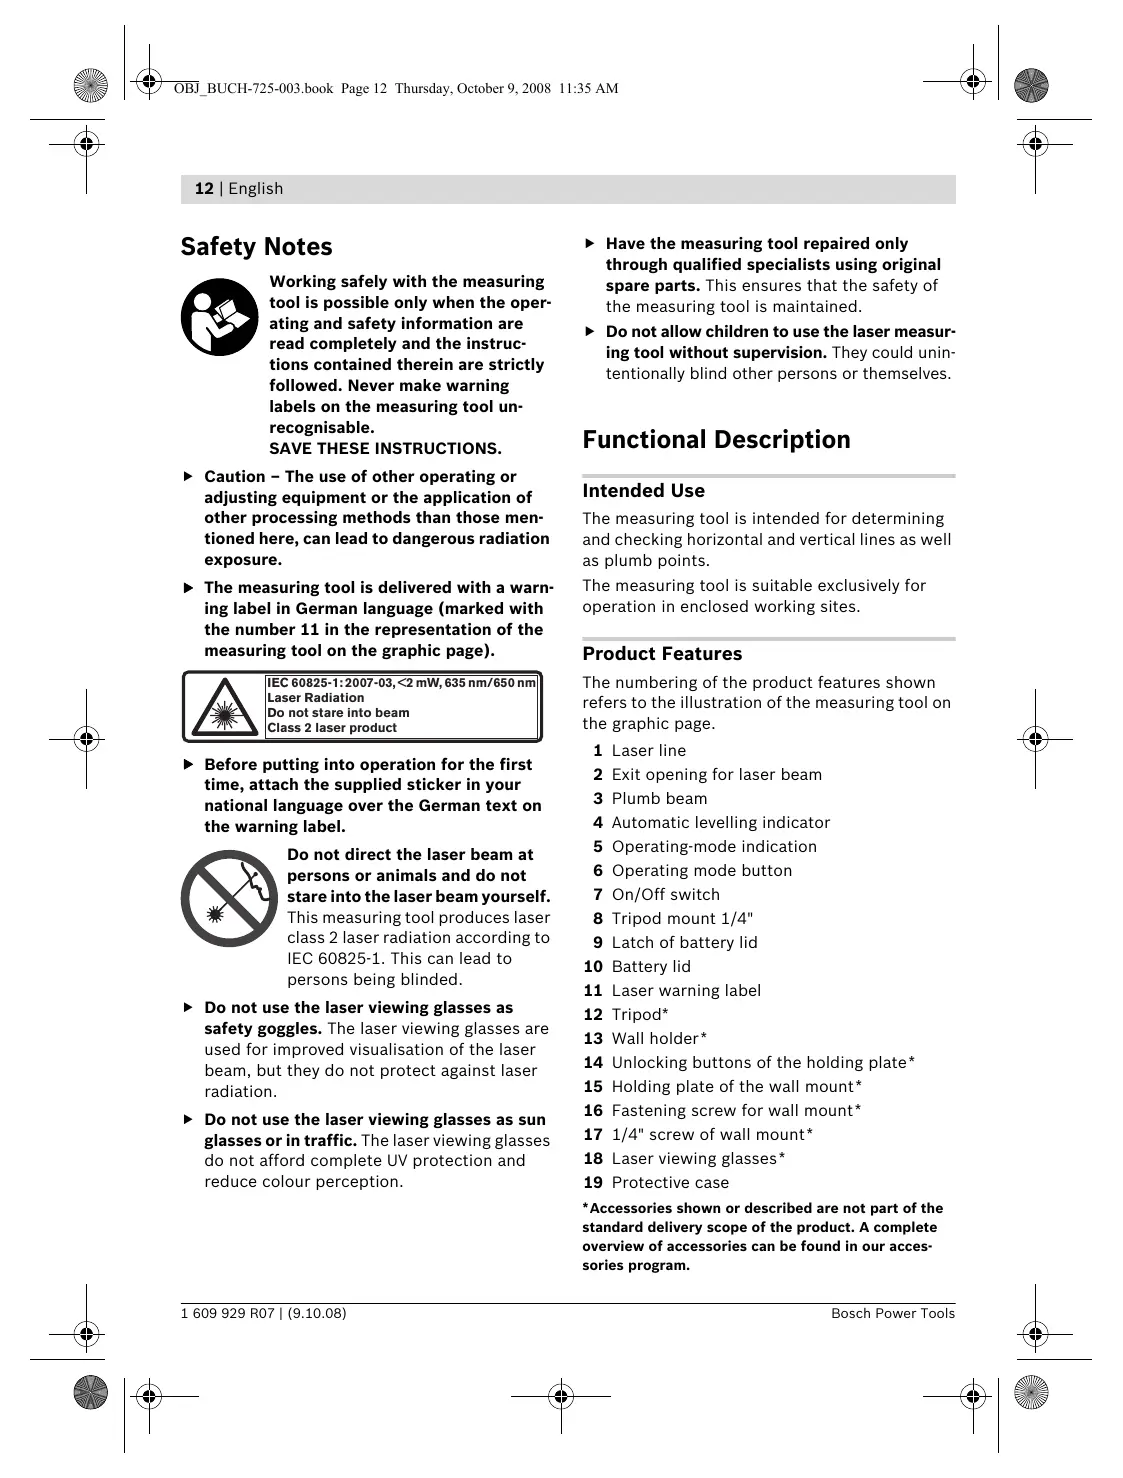
The measuring tool is delivered with a warning label in German language (marked with the number 11 in the representation of the measuring tool on the graphic page).

IEC 60825-1:2007-03, < 2mW 635 nm/650 nm] Laser Radiation
Do not stare into beam
Class 2 laser product
Before putting into operation for the first time, attach the supplied sticker in your national language over the German text on the warning label.

Do not direct the laser beam at persons or animals and do not stare into the laser beam yourself.
This measuring tool produces laser class 2 laser radiation according to IEC 60825-1. This can lead to persons being blinded.
- Do not use the laser viewing glasses as safety goggles. The laser viewing glasses are used for improved visualisation of the laser beam, but they do not protect against laser radiation.
- Do not use the laser viewing glasses as sun glasses or in traffic. The laser viewing glasses do not afford complete UV protection and reduce colour perception.
Have the measuring tool repaired only through qualified specialists using original spare parts. This ensures that the safety of the measuring tool is maintained.
Do not allow children to use the laser measuring tool without supervision. They could unintentionally blind other persons or themselves.
Functional Description
Intended Use
The measuring tool is intended for determining and checking horizontal and vertical lines as well as plumb points.
The measuring tool is suitable exclusively for operation in enclosed working sites.
Product Features
The numbering of the product features shown refers to the illustration of the measuring tool on the graphic page.
1 Laser line
2 Exit opening for laser beam
3 Plumb beam
4 Automatic levelling indicator
5 Operating-mode indication
6 Operating mode button
7 On/Off switch
8 Tripod mount 1/4"
9 Latch of battery lid
10 Battery lid
11 Laser warning label
12 Tripod
13 Wall holder
14 Unlocking buttons of the holding plate
15 Holding plate of the wall mount
16 Fastening screw for wall mount
17 1/4" screw of wall mount
18 Laser viewing glasses*
19 Protective case
*Accessories shown or described are not part of the standard delivery scope of the product. A complete overview of accessories can be found in our accessories program.
Technical Data
| Cross-line Laser | PCL 20 |
| Article number | 3 603 K08 2.. |
| Working range to approx. | 10 m |
| Levelling accuracy - Laser line - Plumb beam (upward) - Plumb beam (downward) | ±0.5 mm/m ±0.5 mm/m ±1 mm/m |
| Self-levelling range, typically | ±4° |
| Levelling duration, typically | 4 s |
| Operating temperature | +5 °C ... +40 °C |
| Storage temperature | -20 °C ... +70 °C |
| Relative air humidity, max. | 90 % |
| Laser class | 2 |
| Laser type - Laser line - Plumb beam | 635 nm, <2 mW 650 nm, <2 mW |
| C6(laser line) | 10 |
| Tripod mount | 1/4" |
| Batteries Rechargeable batteries | 4 x 1.5 VLR6 (AA) 4 x 1.2 VKR6 (AA) |
| Operating life time, approx. | 40 h |
| Weight according to EPTA-Procedure 01/2003 | 0.5 kg |
| Dimensions | 123 x 67 x 110 mm |
| Please observe the article number on the type plate of your measuring tool. The trade names of the individual measuring tools may vary. | |
Assembly
Inserting/Replacing the Battery
Use only alkali-manganese or rechargeable batteries.
To open the battery lid 10, press on the latch 9 and fold the battery lid up. Insert the batteries. When inserting, pay attention to the correct polarity according to the representation on the inside of the battery lid.
Always replace all batteries at the same time. Only use batteries from one brand and with the identical capacity.
- Remove the batteries from the measuring tool when not using it for extended periods. When storing for extended periods, the batteries can corrode and discharge themselves.
Operation
Initial Operation
Protect the measuring tool against moisture and direct sun irradiation.
- Do not subject the measuring tool to extreme temperatures or variations in temperature. As an example, do not leave it in vehicles for longer periods. In case of large variations in temperature, allow the measuring tool to adjust to the ambient temperature before putting it into operation.
- Avoid heavy impact to or falling down of the measuring tool. Damage to the measuring tool can impair its accuracy. After heavy impact or shock, compare the laser lines or plumb beams with a known horizontal or vertical reference line or with already checked plumb points.
- Switch the measuring tool off during transport. When switching off, the levelling unit, which can be damaged in case of intense movement, is locked.
Switching On and Off
To switch on the measuring tool, push the On/Off switch 7 to the "On" position. Immediately after switching on, the measuring tool sends out the two laser lines 1.
Do not point the laser beam at persons or animals and do not look into the laser beam yourself, not even from a large distance.
To switch off the measuring tool, push the On/Off switch 7 to the "Off" position. When switching off, the levelling unit is locked.
Do not leave the switched on measuring tool unattended and switch the measuring tool off after use. Other persons could be blinded by the laser beam.
14 | English
Operating Modes (see figures A-E)
After switching on, the measuring tool is in cross-line operating mode with automatic levelling.
To change the operating mode, press the "Mode" button 6 until the requested operating mode is indicated by the corresponding illuminated operating-mode indication 5.
The following operating modes are available:
Indica- Operating Modet tion

(green)
Cross-line operation with automatic levelling (see figure A): The measuring tool generates both a horizontal and a vertical laser line; their levelling is monitored.

(green)
Horizontal operation with automatic levelling (see figure B): The measuring tool generates a horizontal laser line; its levelling is monitored.

(green)
Vertical operation with automatic levelling (see figure C): The measuring tool generates a vertical laser line; its levelling is monitored.

(green)
Plumb beam with automatic leveling (see figure D): The measuring tool generates two plumb beams running vertically upward and downward; their leveling is monitored.

(red/green)
Cross-line operation without automatic levelling (see figure E): The measuring tool generates two crossed laser lines that can be aligned as requested, and must not run vertical to each other.
Automatic Levelling
Working with Automatic Levelling (see figure F-G)
Position the measuring tool on a level and firm support, attach it to the wall mount 13 or to a tripod 12.
Select one of the operating modes with automatic levelling.
After switching on, the levelling function automatically compensates irregularities within the self-levelling range of ± 4^ . The levelling is finished as soon as the laser lines or plumb beams do not move any more. The indication 5 of the current operating mode lights up green.
If the automatic levelling function is not possible, e.g. because the surface on which the measuring tool stands deviates by more than 4^ from the horizontal plane, the automatic levelling indicator 4 lights up red and the laser is automatically switched off. In this case, bring the measuring tool to the level position and wait for the self-levelling to take place. As soon as the measuring tool is within the self-levelling range of ± 4^ again, the operating-mode indication 5 lights up green and the laser is switched on.
When not within the self-levelling range of ± 4^ , working with automatic levelling is not possible, because it cannot be assured that the laser lines run at a right angle to each other.
In case of ground vibrations or position changes during operation, the measuring tool is automatically levelled in again. To avoid errors, check the position of the laser lines or plumb beams with regard to the reference points upon re-levelling.
Working without Automatic Levelling
When automatic levelling is switched off, you can hold the measuring tool freely in your hand or place it on an inclined surface. The two laser lines no longer necessarily run vertical to each other.
Working Advice
Working with the Tripod (see figure H)
A tripod 12 offers a stable, height-adjustable measuring support. Place the measuring tool via the tripod mount 8 onto the 1 / 4'' male thread of the tripod and screw the locking screw of the tripod tight.
Working with the Wall Mount (Accessory)
With the wall mount 13, the measuring tool can be securely attached at any height.
Mounting the wall mount (see figure 1): For fastening to a wall, the holding plate 15 must be folded out. Press pushbuttons 14 on both sides of the holding plate (a), fold the holding plate up (b), lightly push it downward and allow it to latch (c). For height adjustment of the measuring tool, the holding plate 15 can be moved up or down within a range of 6cm . For this, press the pushbuttons 14 on both sides of the holding plate, slide the holding plate to the requested height and allow it to latch again. The scale on the side of the wall mount aids the height adjustment.
Fastening the wall mount (see figure J): Fasten the wall mount 13 as vertical as possible to a wall with the holding plate 15 folded up. Secure it safely against slipping off, e.g., with two fastening screws 16 (commercially available). Screw the 1/4 screw 17 of the wall mount into the tripod mount 8 of the measuring tool.
Using as a table stand (see figure K): In the plumb beam operating mode, the visibility of the bottom plumb beam 3 can be improved by not placing the measuring tool directly on a surface, but by inserting it in the folded together wall mount 13.
For this, place the wall mount as horizontal as possible onto a firm and level support. Press pushbuttons 14 at the holding plate 15 (a). Slide the holding plate to the stop against the upper end of the wall mount (b). Fold the holding plate downward (c). Screw the 1/4'' screw 17 of the wall mount into the tripod mount 8 of the measuring tool. Then, allow the holding plate to latch in the wall mount.
Turn the mounted measuring tool in such a manner that the bottom plumb beam 3 faces downward. If required, lightly fold up the holding plate again to loosen the 1/4 screw 17 for alignment of the measuring tool.
Laser Viewing Glasses (Accessory)
The laser viewing glasses filter out the ambient light. This makes the red light of the laser appear brighter for the eyes.
- Do not use the laser viewing glasses as safety goggles. The laser viewing glasses are used for improved visualisation of the laser beam, but they do not protect against laser radiation.
- Do not use the laser viewing glasses as sun glasses or in traffic. The laser viewing glasses do not afford complete UV protection and reduce colour perception.
Maintenance and Service
Maintenance and Cleaning
Store and transport the measuring tool only in the supplied protective case.
Keep the measuring tool clean at all times.
Do not immerse the measuring tool into water or other fluids.
Wipe off debris using a moist and soft cloth. Do not use any cleaning agents or solvents.
Regularly clean the surfaces at the exit opening of the laser in particular, and pay attention to any fluff of fibres.
If the measuring tool should fail despite the care taken in manufacturing and testing procedures, repair should be carried out by an authorized after-sales service centre for Bosch power tools. In all correspondence and spare parts orders, please always include the 10-digit article number given on the type plate of the measuring tool.
In case of repairs, send in the measuring tool packed in its protective case 19.

16 | English
After-sales Service and Customer Assistance
Our after-sales service responds to your questions concerning maintenance and repair of your product as well as spare parts. Exploded views and information on spare parts can also be found under:
www.bosch-pt.com
Our customer consultants answer your questions concerning best buy, application and adjustment of products and accessories.
Great Britain
Robert Bosch Ltd. (B.S.C.)
P.O.Box 98
Broadwater Park
North Orbital Road
Denham
Uxbridge
UB95HJ
Tel. Service: +44 (0844) 736 0109
Fax: +44 (0844) 736 0146
Australia, New Zealand and Pacific Islands
Robert Bosch Australia Pty. Ltd.
Power Tools
Locked Bag 66
Clayton South VIC 3169
Customer Contact Center
Inside Australia:
Phone: +61 (01300) 307 044
Fax: +61 (01300) 307 045
Inside New Zealand:
Phone: +64 (0800) 543 353
Fax: +64 (0800) 428 570
Outside AU and NZ:
Phone: +61 (03) 9541 5555
www.bosch.com.au
Disposal
Measuring tools, accessories and packaging should be sorted for environmental-friendly recycling.
Only for EC countries:

Do not dispose of measuring tools into household waste!
According the European Guideline 2002/96/EC for Waste Electrical and Electronic Equipment and its implementation into national right,
measuring tools that are no longer usable must be collected separately and disposed of in an environmentally correct manner.
Battery packs/batteries:
Do not dispose of battery packs/batteries into household waste, fire or water. Battery packs/ batteries should be collected, recycled or disposed of in an environmental-friendly manner.
Only for EC countries:
Defective or dead out battery packs/batteries must be recycled according the guideline 91/157/EEC.
Batteries no longer suitable for use can be directly returned at:
Great Britain
Robert Bosch Ltd. (B.S.C.)
P.O.Box 98
Broadwater Park
North Orbital Road
Denham
Uxbridge
UB 95HJ
Tel. Service: +44 (0844) 736 0109
Fax:+44 (0844)736 0146
Subject to change without notice.


Robert Bosch (France) S.A.S.
IEC 60825-1:2007-03, <2 mW, 635 nm/650 nm Laserstrailing
Ret ici bilkket ind i stralen Laserklasse 2
Bosch Service Center
Telegrafvej 3
2750 Ballerup
Tel. Service Center: +45 (4489) 8855
Fax: +45 (4489) 87 55
E-Mail: vaerktoej@dk.bosch.com
Bortskaffelse
Bosch Service Center
Telegrafvej 3
2750 Ballerup
Danmark
Tel.: +46 (020) 41 44 55
Fax: +46 (011) 187691
Avfallshantering
Endast for EU-lander:

Endast for EU-lander:
Bosch San. ve Tic. A.S.
Ahi Evran Cad. No:1 Kat:22
Polaris Plaza
80670 Maslak/Istanbul
Müsteri Danisman: +90 (0212) 335 06 66
Müsteri Servis Hatti: +90 (0212) 335 07 52