Plus Charge 00186332 - Alarm clock radio HAMA - Free user manual and instructions
Find the device manual for free Plus Charge 00186332 HAMA in PDF.

| Product type | Clock radio |
| Brand | Hama |
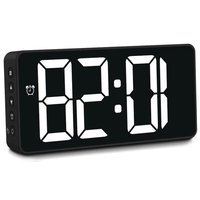
| Model | Plus Charge 00186332 (RCR110) |
| Power supply | Mains: 5V 2.5A adapter (100-240 V ~50/60 Hz) or 2 AAA (LR03) batteries as backup |
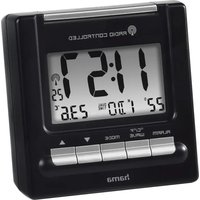
| Display | Date, time, temperature, humidity, day of week |
| Radio reception | DCF 77.5 kHz time signal |
| Number of alarms | 2 independent alarms (Alarm 1 and Alarm 2) |
| Snooze function | 5 minutes |
| Projection | On wall or ceiling; adjustable orientation 0°, 90°, 180°, 360° |
| Backlight | Permanent on mains (high/low/off brightness); temporary 8 s on batteries |
| USB charging port | Yes, 5 V / max 2.5 A (total power not to exceed 10 W) |
| Temperature range | -9 °C to +50 °C (14 °F to 122 °F) |
| Humidity range | 25% to 95% |
| Languages for days of the week | German, French, Spanish, Italian, Dutch, Danish, English |
| Time format | 12h / 24h |
| Time zone | Adjustable from -12 to +12 |
| Manual date/time setting | Yes |
| Automatic DCF search | Yes, daily between 1:00 and 5:00 |
| No-load power consumption | 0.1 W |
| Average efficiency in active mode | 80.2% |
| Backup batteries | Yes, to maintain settings in case of power outage |
| Package contents | Clock, power adapter, user manual |
| Safety | Indoor use only; do not open, do not expose to moisture, keep out of reach of children |
| Cleaning | Slightly damp lint-free cloth, without aggressive detergent |
| Warranty | Excluded in case of failure to follow instructions or improper use |
Frequently Asked Questions - Plus Charge 00186332 HAMA
User questions about Plus Charge 00186332 HAMA
0 question about this device. Answer the ones you know or ask your own.
Ask a new question about this device
Download the instructions for your Alarm clock radio in PDF format for free! Find your manual Plus Charge 00186332 - HAMA and take your electronic device back in hand. On this page are published all the documents necessary for the use of your device. Plus Charge 00186332 by HAMA.
USER MANUAL Plus Charge 00186332 HAMA
OperatingInstructions
Bedienungsanleitung
Moded'emploi
Instruccionesdeuso
Gebruiksaanwijzing
Istruzioniperl'uso
Instrukcjaobsługi
Használatiútmutató
Instrukcjaobsługi
Návodkpoužití
Návodnapoužitie
Manualdeinstruções
Bruksanvisning
natural_image
Technical line drawing of a mechanical device with a labeled component (no text or symbols present)Controlsanddisplays
- Display
2.Time
-
Radiosymbol
-
Alarmsymbol 1
-
Alarmsymbol2
-
Date
7.Dayoftheweek
8.Roomtemperature
9.Roomhumidity
- Projectionarm
11.SNOOZE/LIGHTbutton=activatethebacklight(approx.8 seconds)/stopthealarmfor5minutes
- TIMEbutton=settheTimemode
13.ALARMbutton=settheAlarmmode
-
UPbutton=increasethecurrentsetvalue/switchbetween 12and24-hourformat
-
DOWNbutton=reducethecurrentsetvalue(186381)/switchbetween12and24-hourformat
16.WAVEbutton=activate/deactivatemanualradiosignal reception
17.ON/OFFswitchforalarm1
18.ON/OFFswitchforalarm2
-
ROTATEbutton=rotatetheprojectionby0°,90°,180° or360°
-
Powersupplyunitconnectionsocket
21.Batterycompartment
22.USBchargingport
1. ExplanationofWarningSymbolsandNotes
Riskofelectricshock

This symbol indicates product parts energized with dangerous voltage of sufficient magnitudetoconstituteariskofelectric shock.
Warning

This symbol is used to indicate safety instructions to draw your attention to specific hazards and risks.
Note

This symbol is used to indicate additional information or important notes.
2.Packagecontents
- "PlusCharge" projectionalarmclock
- Powersupplyunit
• Theseoperatinginstructions
3. SafetyNotes
• The product is intended for private, non-commercial use only.
- Usetheproductforitsintendedpurposeonly.
- Protect the product from dirt, moisture and overheating, and only use it in a dry environment.
- Donotusetheproductintheimmediatevicinityofheatersor otherheatsourcesorindirectsunlight.
- Keep this product, as all electrical products, out of there each of children!
- Donotoperatetheproductoutsidethepowerlimitsgivenin thespecifications.
- Donotusetheproductinareaswheretheuseofelectronic devicesisnotpermitted.
- Donotusetheproductinmoistenvironmentsandavoid splashes.
- Donotplacetheproductnearinterferencefields, metalframes, computers, TVs, etc. Electronicdevicesandwindowframescan negativelyaffecttheproduct'sfunctionality.
- Donotdroptheproductanddonotexposeittoanymajor shocks.
- Donotmodifytheproductinanyway.Doingsovoidsthe warranty.
- Keep the packaging material out of thereach of child rendueto therisk of suffocation.
- Disposeofpackagingmaterialimmediatelyaccordingtolocally applicableregulations.
- Usetheitemonlyinmoderateclimaticconditions.
• Theproductisintendedforindooruseonly.
- Layallcablessothattheydonotposeatrippinghazard.
- Donotbendorcrushthecable.
- Alwayspulldirectlyontheplugwhendisconnectingthecable, neveronthecableitself.
Riskofelectricshock

- Donotopenthedeviceorcontinuetooperateitifitbecomes damaged.
- DonotusetheproductiftheACadapter, adaptercableor powercableisdamaged.
- Donotattempttoserviceorrepairtheproductyourself.Leave anyandallserviceworktoqualifiedexperts.
Warning-Batteries

- Wheninsertingbatteries, notethecorrectpolarity(+and-markings) and insertthebatteries accordingly. Failuretodo socouldresultinthebatteriesleakingoreexploding.
- Onlyusebatteries(orrechargeablebatteries)thatmatchthe specifiedtype.
- Beforeyouinsertthebatteries,cleanthebatterycontactsand thepolarcontacts.
- Donotallowchildrentochangebatterieswithoutsupervision.
- Donotmixoldandnewbatteriesorbatteriesofadifferent typeormake.
Warning-Batteries

- Removethebatteriesfromproductsthatarenotbeingused foranextendedperiod(unlessthesarebeingkeptreadyfor anemergency).
- Donotshort-circuitbatteries.
- Donotchargebatteries.
- Donotthrowbatteriesinafire.
- Keepbatteriesoutofthereachofchildren.
- Neveropen, damageorswallowbatteriesorallow themtoentertheenvironment. Theycancontaintoxic, environmentallyharmfulheavymetals.
- Avoidstoring, chargingorusingthedeviceinextreme temperaturesandextremelylowatmosphericpressure(for example,athighaltitudes).
4. GettingStarted
Warning

- Connect the product only to as ocket that has been approved for the device. Thesocket must be installed closet to the product and must be easily accessible.
- Disconnect the product from thenetwork using the power button—if this is not available, unplug the power cord from the socket.
- When using amulti-socketpowerstrip, makes sure that the sumpowerdrawofalltheconnecteddevices does not exceed its maximum throughputrating.
- If you will not be using the product for a long period of time, disconnect it from mains power.
4.1. Inserting the batteries/connecting the powersupply
- Connectthepowersupplyunittothepowersupplyunit connectionsocket(20)onthebackoftheradio-controlled alarmclock.
- Connectthepowercableoftheradio-controlledalarmclocktoa properlyinstalledsocket.
• Theradio-controlled alarmclockswitchesonautomatically.
• Alternatively, open the battery compartment(21), insert two AA Abatteries with the correct polarity and closet the battery compartment cover.
Note

- If the batteries are inserted correctly and you connect the powersupply unit to the alarm clock, theradio-controlled alarm clock will automatically switch to the external power supply.
• Sustainedprojectionisonlypossibleonmainspower
4.2.Replacingthebatteries
- Openthebatterycompartment(21)onthebackoftheproduct.
- Removeanddisposeofanyusedbatteries.Inserttwonew batteries(AAA).Ensurethatthepolarityofthebattery correspondstothesymbolsinthebatterycompartment.
• Closethebatterycompartment(21).
5.Operation

Note
HolddowntheUPbutton(14)ortheDOWNbutton(15)to selectvaluesfaster.
5.1. Settingdate/timeautomaticallyusingtheDCFsignal
- Once you have inserted the batteries or connected the power supply unit, the display is switched on an acoustic signals sounds and the alarm clock automatically starts searching for a DCF radiosignal. During these research, theradiosymbol(3) flashes. This process can take around 7 minutes.
- Whentheradiosignalisreceived, the date and time are automatically set.
| Display | Searchingforthe DCFsignal | |
 | DisplayflashingActive | |
 | Displaysteady (notflashing) | Successful– signalisbeingreceived |
| NotdisplayedInactive | ||
 | Weaksignalreception | |
Ifthestationstilldoesnotreceiveasignal,pressandholdthe WAVEbutton(16)forapprox.3secondstostartthemanualsearch fortheDCFsignal.Theradioicon(3)startstoflash.
Note-Timesettings
- Thesearchprocesstakesaround7minutes.Ifthesearch fails,itendsandisrepeatedatthenextfullhour.Theradio icon(3)goesout.
- Inthemeantime, however, you can set the time and the datemanually.
- TheclockautomaticallycontinuestosearchfortheDCFsignal onadailybasis(between 1amand5am)tocorrectany deviations. If the signal is received successfully, them manually settmeanddateareoverwritten.
- PresstheWAVEbutton(16)againtoendthemanualsearchfor theDCFradiosignal.
5.2.Manuallysettingthedate/time(104952)
- PressandholdtheTIMEbutton(12)forapproximately3seconds untilthedisplaybeginstoflash.
- Setthefollowinginformationintheorderlisted:
• AutomaticDCFsignalsearch(on/off)
• 12/24-hourformat
• Timezone(-12to+12)
• Hour - Minute
- Date
•Year
• Month
• Day
• Dayoftheweeklanguage
- Toselectindividualvalues, press the UP button(14) or the DOWN button(15) and confirm each selection by pressing the TIME button(12).
- PresstheTIMEbutton(12)immediatelytoadoptthesetvalue displayedandskipahead.
- If you donot make an entry for 20 seconds, Settings mode is exited automatically.
Note-Timezone
• The DCF signal can be received over long distances, but always transmit the current Central European Time in Germany. Makes sure you set the time difference in countries with another time zone.
- If you are in Moscow,forexample,thetimeis3 hours later thanin Germany.Thismeansthatyoushouldset+3forthe timezone.Theclockthenautomaticallysetsthetimeto3 hours aheadafterreceivingtheDCFsignaloraccordingtothe manuallysettime.
Note-Dayoftheweek
YoucanchoosefromGerman(GE), French(FR), Spanish(SP), Italian(IT), Dutch(DU), Danish(DA)and English(EN)forthe displayofthedayoftheweek.

5.3.Temperaturedisplay
- PresstheDOWNbutton(15)tochoosebetween°Cand°Ffor thetemperaturedisplay.
5.4.Alarmclock
Settingthealarmtime
- PressandholdtheALARMbutton(13)forapprox.3secondsto gotoAlarmmode.Thedisplaybeginstoflash.
- Setthefollowinginformationintheorderlisted:
- Alarm1(4):hours;minutes
• Alarm2(5):hours;minutes - PresstheUPbutton(14)ortheDOWNbutton(15)toselectthe hourforthealarmtimeandconfirmyourselectionbypressing theALARMbutton(13).Theminutesdisplaybeginstoflash.
- Repeat the process to set them minutes for the alarm time.
- PresstheALARMbutton(13)immediatelytoadoptthesetvalue displayedandskipahead.
- If you donot make an entry for 20 seconds, Settings mode is exited automatically.
Activating/deactivatingthealarm
- SettheON/OFFswitchforalarm1(17)or2(18)to"ON"to activatealarm1and/oralarm2orsetto"OFF"todeactivate alarm1and/oralarm2.
- If the alarm is activated, alarm 1 will be displayed instead of the date (6) or alarm 2 instead of the room temperature and humidity (8/9) together with the correspondings symbol
(4/5).
Stoppingthealarm/snoozefunction
- Whenthealarmistriggered, thealarmsymbol beginstoflashandanalarmsounds.
(4)or 2 (5)
- Pressanybutton(excepttheSNOOZE/LIGHTbutton(11)) tostopthealarm. Otherwise, it will stop automatically after 2 minutes.
Note—Snoozefunction
Whilethealarmsignalissounding, presstheLIGHT-SNOOZE button(1)toactivatethesnoozefunction.Thealarmsymbol(7) willbegintoflash.Thealarmsignalwillbestoppedfor5 minutes,afterwhichitwillsoundagain.

5.5.Backlight
- PresstheLIGHT/SNOOZEbutton(11)tolightupthedisplay.
- Duringbatteryoperation, the display is illuminated for approximately 8 seconds.
Note-Permanentbacklightmode
Permanentbacklightmodeisonlypossiblewhenpluggedinto mainspower.
- PresstheSNOOZE/LIGHTbutton(11)severaltimestochange thebrightnesslevel(high/low/off).
5.6.Projection
Activating/deactivating
Powerfrom → batteries:
- PresstheLIGHT-SNOOZEbutton(11)toprojectthedisplayonto thewallorceilingfor8seconds.
Powerfrom → powersupplyunit:
- PressandholdtheSNOOZE/LIGHTbutton(11)for approximately3secondstoactivatesustainedprojection.
- PressandholdtheSNOOZE/LIGHTbutton(11)for approximately3secondstodeactivatesustainedprojection.
Projectionsetting
- Turntheprojectionarm(10)forward/backtoprojectthedisplay ontothedesiredwall/ceiling.
- PresstheROTATEbutton(19)againtorotatetheprojectionby 0°, 90°, 180° or 360°.
6. Chargingfunction
Warning-Connectingterminaldevices
- Beforeconnectingaterminaldevice, checkwhetherthe poweroutputofthechargercansupplysufficientpowerfor thedevice.
- Ensure that the total power of all connected terminal devices does not exceed 10W
- Pleaserefertotheinstructionsintheoperatingmanualof yourterminaldevice.

Note
Thechargingfunctionisonlypossiblewhenpluggedintomainspower.
- ConnectyourterminaldevicetoaUSBchargingsocket(22)on thealarmclockusingasuitableUSBcable.
• Thechargingprogressisdisplayedonyourterminaldevice. - DisconnecttheterminaldevicefromtheUSBchargingsocket ifyouwanttointerruptchargingoriftheterminaldeviceis fullycharged.
7. Care and Maintenance
Onlycleanthisproductwithaslightlydamp,lint-freeclothanddo notuseaggressivecleaningagents.Makesurethatwaterdoesnot getintotheproduct.


Note

Disconnect the device from the powers supply before cleaning it or if it is not going to be used for a long period of time.
8.WarrantyDisclaimer
HamaGmbH&CoKGassumesnoliabilityandprovidesno warrantyfordamageresultingfromimproperinstallation/mounting, improperuseoftheproductorfromfailuretoobservetheoperating instructionsand/orsafetynotes.
9. TechnicalData
RCR110radio-controlledalarmclock

| Powersupply5.0V | 2xAAAbatteries Powersupplyunit: In:100-240V ~50/60Hz Out:5V ~2.5A |
| Measuringrange fortemperature | -9°C-+50°C/14°F-+122°F |
| Humidity measuringrange | 20%-95% |
10.DeclarationofConformity
CE Hereby, Hama GmbH & Co KG declare that the radio equipment type [00186332] is incompliance with Directive 2014/53/EU. The full text of the EU
declarationofconformityisavailableatthefollowinginternet address:www.hama.com->00186332->Downloads.
Frequencyband(s)77.5kHz
Activation/Désactivation
Activeren/deactiverenwekker
Activeren/deactiveren
Stroomvoorziening → batterijen:
SpecificationsinaccordancewithRegulation (EU)2019/1782
| Manufacturer'snameortrademark,commercialregistrationnumberandaddress | Hama,HRA12159,DresdnerStr.9,86653Monheim |
| ModelidentifierHX12R-0502500-AGInputvoltage100–240V | |
| InputACfrequency50/60Hz | |
| Outputvoltage/Outputcurrent/Outputpower | 5.0VDC/2.5A/12.5W |
| Averageactiveefficiency80.2% | |
| Efficiencyatlowload(10%)77.5% | |
| No-loadpowerconsumption0.1W |
D (EU)2019/1782

86652Monheim/Germany
Service&Support
www.hama.com
+499091502-0
D | GB
CE


PAP
RaccoltaCarta