PGPA 40-Li A1 - Water pump PARKSIDE - Free user manual and instructions
Find the device manual for free PGPA 40-Li A1 PARKSIDE in PDF.
User questions about PGPA 40-Li A1 PARKSIDE
0 question about this device. Answer the ones you know or ask your own.
Ask a new question about this device
Download the instructions for your Water pump in PDF format for free! Find your manual PGPA 40-Li A1 - PARKSIDE and take your electronic device back in hand. On this page are published all the documents necessary for the use of your device. PGPA 40-Li A1 by PARKSIDE.
USER MANUAL PGPA 40-Li A1 PARKSIDE
text_image
PDF ONLINE www.lidl-service.com
natural_image
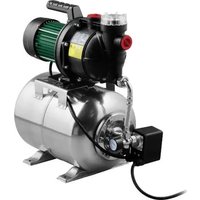
Black Parkside industrial pump device with visible ports and mounting base (no text or symbols on body)
Akku-Gartenpumpe 40 V / Cordless Garden Pump 40V / Pompe de jardin sans fi l 40 V PGPA 40-Li A1
DE AT CH
Cordless Garden Pump 40V
Translation of the original instructions
NL BE
Accu-tuinpomp 40 V
Before reading, unfold the page containing the illustrations and familiarise yourself with all functions of the device.
FR BE
GB / MT Translation of the original instructions Page
Service-Center......16
Importeur ......16
Original EG-
Intended purpose......17
General Description......18
Scope of Delivery....18
Functional description....18
Overview....18
Technical Data....18
Charging times 19
Performance data....19
Notes on Safety 19
Symbols on the equipment 20
Symbols in the manual....20
General notes on safety 20
Additional safety instructions ..... 21
Initial Operation....22
Mount carrying handle 22
Inserting/removing the battery......22
Checking the charge level of the
battery....22
Setting up 22
Connecting the lines....22
Filling the garden pump 23
Checks before putting into
operation....23
Switching on/off....24
Setting the pump stages 24
Error message 24
Cleaning/Maintenance ......24
General cleaning instructions......24
Drain garden pump 25
Storage....25
Waste Disposal and
Environmental Protection ......25
Spare Parts/Accessories 26
Guarantee 26
Repair Service....27
Service-Center......27
Importer 27
Translation of the original
EC declaration of conformity ....205
Exploded Drawing ......220
Introduction
Congratulations on the purchase of your new device. With it, you have chosen a high quality product.
During production, this equipment has been checked for quality and subjected to a final inspection. The functionality of your equipment is therefore guaranteed. It cannot be ruled out that residual quantities of water or lubricants will remain on or in the equipment/hose lines in isolated cases. This is not a fault or defect and it represents no cause for concern.

The operating instructions constitute part of this product. They contain im-nt information on safety, use and dis-
Before using the product, familiarise yourself with all of the operating and safety instructions. Use the product only as described and for the applications specified. Keep this manual safely and in the event that the product is passed on, hand over all documents to the third party.
Intended purpose
The garden pump is intended for use in private homes and gardens. The unit is suitable for service water supply and the irrigation of gardens. It is solely intended for pumping clear and rain water up to temperatures of no more than 35^ C.
Any other use, not expressly authorised in these instructions (e.g. for transporting foodstuffs, salt water, motor fuels, chemical products or water with abrasive materials), may cause damage to the equipment and represent a serious risk for the user.
The garden pump is not suitable for continuous duty. Continuous operation reduces the durability and shortens the guarantee
GB MT
period. This equipment is not suitable for commercial use.
Commercial use will invalidate the guarantee.
The operator or user is responsible for accidents or damage to other people or their property.
The manufacturer shall not be liable for damages caused by use other than for which the equipment is intended or by incorrect operation.
The device is part of the X 20 V TEAM series from Parkside and can be operated using batteries of the X 20 V TEAM series from Parkside. The batteries may only be charged using chargers of the X 20 V TEAM series from Parkside.
General Description

An illustration of the most important functional components can
be found on the front fold-out page.
Scope of Delivery
Carefully unpack the appliance and check that it is complete:
- Battery garden pump
- Adapter 1¼" (42 mm)
- Carrying handle + mounting screw
- Instruction Manual

The battery and charger are not included in delivery.
Functional description
The garden pump is equipped with three pumping stages. After connecting the suction and pressure hoses and fi lling the garden pump with water, it will output a defi ned volume of clear water.
The built-in thermal protection switch will switch off the garden pump if it is overloaded. After cooling down, the motor starts up again by itself.
Overview
1 Drain screw
2 Covering cap
3 Suction connector
4 Filler screw
5 Covering cap
6 Pressure connection
7 Carrying handle
7a Mounting screw
8 Control panel
8a On/Off switch
8b Warning triangle/error message
8c Mode switch
9 Main switch
10 Cover
11 Device housing
12 Adapter
13 Battery
13a Release button
13b Charge level indicator
14 Charger
Technical Data
Battery
garden pump......PGPA 40-Li A1
Motor voltage U......40 V = (2x 20V)
Max. pressure (pmax)....2.6 bar
Suction lift 8 m
Max. discharge rate....3000 l/h*
Max. discharge head (Hmax) ..... 26 m
Max. water temperature (Tmax) ..... 35 °C
Suction connector.....G 1"(33.3 mm)
Pressure connection ......G 1" (33.3 mm)
Weight (incl. accessories)......2.72 kg
Safety class....I
Degree of protection....IPX4
Sound pressure level (L_pA) 54.1 dB; K_pA = 3 dB Sound power level ( L_WA ) measured 66.2 dB; K_WA = 2.5 dB guaranteed 85 dB For use with smart batteries (Smart PAPS 204 A1/Smart PAPS 208 A1) Operating frequency/ Frequency band....2400 - 2483.5 MHz Max. transmission power ....≤ 20 dBm
* when using 8 Ah batteries, Smart PAPS 208 A1
Charging times
The device is part of the X 20 V TEAM series from Parkside and can be operated using batteries of the X 20 V TEAM series. Batteries of the X 20 V TEAM series may only be charged using chargers of the X 20 V TEAM series.
We recommend that you operate this device with the following batteries only: PAP 20 B1, PAP 20 B3, Smart PAPS 204 A1, Smart PAPS 208 A1 We recommend charging these batteries with the following chargers: PLG 20 A3, PLG 20 A4, PLG 20 C1, PLG 20 C3, PDSLG 20 A1, Smart PLGS 2012 A1
| Charging time (min.) | PAP 20 A1 PAP 20 B1 | PAP 20 A2 | PAP 20 A3 PAP 20 B3 | Smart PAPS 204 A1 | Smart PAPS 208 A1 |
| PLG 20 A1 PLG 20 A4 PLG 20 C1 | 60 90 | 120 120 240 | |||
| PLG 20 A2 45 60 80 80 165 | |||||
| PLG 20 A3 PLG 20 C3 | 35 45 | 60 50 120 | |||
| PDSLG 20 A1 35 45 60 50 120 | |||||
| Smart PLGS 2012 A1 | 35 40 | 40 50 55 | |||
Performance data
| Max. pressure (bar) | |||
| Battery type | ECO | I | II |
| 2 Ah | 0.9 | 1.7 | 2.6 |
| 4 Ah | 0.9 | 1.8 | 2.6 |
| 8 Ah | 0.9 | 1.8 | 2.6 |
| Delivery rate (l/min) | |||
| Battery type | ECO | I | II |
| 2 Ah | 40 | 48 | 50 |
| 4 Ah | 41 | 48 | 50 |
| 8 Ah | 41 | 50 | 50 |
| Use time (min) | |||
| Battery type | ECO | I II | |
| 2 Ah | 78 | 37 | 18 |
| 4 Ah | 155 | 80 | 40 |
| 8 Ah | 300 | 145 | 70 |
i Tighter suction hoses can reduce the output.
Notes on Safety
This section deals with the general safety regulations for working with the equipment.
Symbols on the equipment

Caution! Not suitable for pure sand water!

Familiarise yourself with all operating elements before starting work, especially functions and modes of action. Ask a specialist if necessary. Read and comply with the operating instructions for the device!

Warning : Protect the pump from running dry. Risk of overheating!
Information of the acoustic power level L_WA in dB

Electric appliances should not be disposed of in the domestic garbage.

This device is part of the X 20 V TEAM series
Symbols in the manual

Warning symbols with information on damage and injury prevention

Hazard symbol with information on the prevention of personal injury caused by electric shock

Instruction symbols with information on preventing damage

The device is not suitable to be connected to a drinking water supply system.

Help symbols with information on improving tool handling
General notes on safety
- This appliance can be used by children aged from 8 years and above and persons with reduced physical, sensory or mental capabilities or lack of experience and knowledge if they have been given supervision or instruction concerning use of the appliance in a safe way and understand the hazards involved. Children shall not play with the appliance. Cleaning and user maintenance must not be carried out by children unless they are older than 8 years and are supervised.
- Always disconnect the device from the power supply before assembling, disassembling or cleaning it.
- The device must not be used at altitudes over 2000 m.
Working with the equipment:

Caution: to avoid accidents and injuries:
- People who are unfamiliar with the operating instructions are not permitted to use the equipment. Local regulations or bylaws may determine the minimum age for using the device.
- Should there be people in the water, do not operate the equipment.
• Take appropriate measures to keep children away from the equipment whilst it is running. - Do not use the equipment in the vicinity of fl ammable liquids or gases. Non-observance will result in a risk of fire or explosion.
- Do not use for water containing abrasive particles such as sand. The dispensing of aggressive, abrasive (grinding effect), corrosive, combustible (e.g. motor fuels) or explosive liquids, salt water, cleaning agents and foodstuffs is not permitted. Liquid temperature not to exceed 35 °C.
- Store the equipment in a dry place and out of reach of children.

Caution! To avoid damage to the equipment and any possible person injury resulting from this:
- Do not work with damaged or incomplete equipment, or with equipment that has been converted without the approval of the manufacturer. Before initial
operation, have a specialist check that the required electrical protection measures are in place.
- Do not carry or fi x the equipment by the cable or pressure line.
- Protect the equipment from frost and from running dry.
- Use only original accessories and do not carry out conversion work on the equipment.
- Please read the notes in the operating instructions on the topic of "Cleaning/Maintenance" and "Storage". Any measures above and beyond these, particularly opening the equipment, are to be carried out by an electrician. In the case of repairs, always contact our service centre.
Additional safety instructions
- If there is a risk of fl ooding, make sure that the garden pump is placed in an area that is safe from fl ooding.
- Do not use any accessories that are not recommended by PARKSIDE. This can result in electric shock or fi re.

Observe the safety information and notes on charging and proper use as shown in the instruction manual for your
battery and charger from the (Parkside) X 20 V Team series. A detailed description of the charging process and further information can be found in the separate operating instructions.
Initial Operation
Mount carrying handle
Fix the carrying handle (7) to the garden pump using the fi xing screws (7a).
Inserting/removing the battery

Make sure that the device is switched off.
- Lift the cover (10) on the device housing (11).
- To insert the batteries (13) into the device, push the batteries along the guide rail into the device. You will hear it click into place.
- To remove the batteries (13) from the device, press the release button (13a) on the battery and pull the battery out.
Checking the charge level of the battery
The battery charge status indicator (13b) signalises the state of charge of the battery (13).
Press the button for the charge level indicator (13b) on the battery.
The charge level of the battery is indicated by illumination of the corresponding LED light.
3 LEDs illuminated (red, orange and green): Battery charged 2 LEDs illuminated (red and orange): Battery partially charged 1 LED illuminated (red): Battery needs to be charged
Charge the battery (13) when only the red LED on the battery charge level indicator (13a) is illuminated.
Setting up
- Place the unit on a firm, horizontal, non-fl ooding surface.
- Always put up the garden pump at a point higher than the water surface you wish to pump water from.
Where this is impossible, install a low pressure-resistant shut-off implement between the appliance and the suction hose (available from specialist retailers).
Connecting the lines
Use a suction line (min. 3/4'' ) on the suction side (19 mm) plastic hose with spiral stiffener and backfl ow stop) and fi t a pre-fi lter between the garden pump and suction hose. - Do not use connection systems with quick couplings on the suction side. - Do not use the suction hose as a pressure line.
All adapters are screwed hand-tight to the garden pump without tools.
Connecting the suction line
- Remove the covering cap (2) from the suction connection (3).
-
Screw the adapter (12) hand-tight onto the suction connection (3).
-
Fill your suction line with water.
-
Connect your suction line to the adapter (12).
-
The suction line should be equipped with a suction valve. If the suction valve cannot be used, a non-return valve should be fitted in the suction line.
- The suction line must be laid rising from the water intake point to the device. Avoid laying the suction line above the pump height in all circumstances; air bubbles in the suction line retard and prevent the suction process.
- The suction line and pressure line must be installed in such a way that they do not exert any mechanical pressure on the device.
- The suction valve should be sufficiently deep in the water to prevent the device from running dry when the water level drops.
- A leaky suction line prevents the water from being sucked in by sucking in air.
Connecting the pressure line
- Remove the covering cap (5) from the pressure connection (6).
2 Connect your pressure line to the pressure connection (6). - The pressure line should be at least 3/4" (19 mm) and can be connected directly or via an adapter to the pressure connection G 1" (approx. 33.3 mm) of the garden pump.
- A 1/2" (13 mm) garden hose can also be used as a pressure line with the appropriate fittings. The delivery rate is reduced by the narrower pressure line.
- During the suction process, the shut-off devices in the pressure line (spray noz-
zles, valves, etc.) must be fully opened so that the air present in the suction line can escape freely.
Filling the garden pump

If there is air in the suction line, the function of the garden pump is not guaranteed.
The garden pump must be filled with water before each use.
Caution: Avoid the garden pump running dry! Danger of overheating!

Do not touch an overheated garden pump! There is a risk of burns!
When switching on the garden pump, make sure that the pump and suction hose are completely filled with water to prevent the garden pump from running dry. Running dry will damage the device.
- Open the filler screw (4) on the device.
- Fill up with water to the filling point and screw the filler screw (4) back in.
Checks before putting into operation
- Make sure that the garden pump is filled with water, see "Filling the garden pump".
- Check the suction line.
The suction of the suction line must be located in the water.
- Check the pressure line. The end of the pressure line should already be located at the irrigation position.

The device is not suitable for connection to the drinking water supply.
Switching on/off
Dry run protection: In the event of running dry, the garden pump will switch off automatically after 20 seconds.
Overload protection: The device will switch off automatically if overloaded. To restart, let the device cool down and then switch it on again.
Switching on:
- Main switch (9) in "I" position.
- Press the on/off switch (8a)
After a suction period, the garden pump starts pumping in ECO mode.
Switching off:
- Press the on/off switch (8a)
- Main switch (9) in "0" position.
Setting the pump stages
The pump stages are set via the MODE switch (8c).
The selected pump setting is stored by the garden pump.
i Selecting the pump stages increases the maximum delivery pressure, but at the same time reduces the maximum battery life.
ECO Up to 90% longer use time. Less pressure with less delivery rate
I Irrigation with medium delivery pressure
II Irrigation with full delivery pressure
The delivery rate and use time of the garden pump can be found in the table (see "Performance data").
Error message
Warning triangle fl ashes:
• After 20 seconds, when the garden pump runs empty or dry. Idle alarm. Garden pump switches off.
- 6x, batteries too hot.
Garden pump switches off.
- 6x, battery level too low.
Garden pump switches off.
- 4x, short circuit
Garden pump switches off.
Cleaning/Maintenance
Clean and maintain your equipment regularly. This will guarantee its performance and long durability.

Remove the battery from the device before carrying out any adjustments, maintenance or repair work.

Ask our service centre to carry out any work that is not described in these instructions. Use only original parts.

Never direct the water jet against the appliance, nor clean the appliance under flowing water. This could give rise to the danger of electric shock and damage the appliance!
General cleaning instructions
- Keep the motor fins and motor housing clean. To do so, use a damp cloth or a brush. Do not use any detergents or solvents.
- Remove fl uff and fi brous particles, which have accumulated in the pump housing, by rinsing it with water.
- In case the unit clogs up, remove the suction and pressure hoses. Flush water through the threaded hole on the pump in order to remove the foreign body.
Any measures above and beyond these, particularly opening the equipment, are to be carried out by an electrician. In the case of repairs, always contact our service centre.
Drain garden pump
If there is a danger of frost or longer periods of non-use (e.g. winter) the garden pump must be completely emptied.
- Open the drain screw (1) and empty the water from the device.
- Rinse the device with clear water.
Storage
- Keep the equipment clean, dry and out of the reach of children.
- Before longer storage periods (e.g. winter) drain the garden pump (see "Draining the garden pump"). Otherwise, start-up diffi culties may occur due to deposits and residues.
Waste Disposal and Environmental Protection
Remove the battery from the device and recycle the device, battery, accessories and packaging in an environmentally-friendly manner.
Electrical devices must not be disposed of with domestic waste. The crossed out waste bin symbol means that this device must not be disposed of with household waste after its service life.
Directive 2012/19/EU on waste electrical and electronic equipment: Consumers are legally obliged to recycle electrical and electronic equipment in an environmentally sound manner at the end of its life. In this way, environmentally friendly and resource-saving recycling is ensured. Depending on the implementation in national law, you may have the following options:
- Return to a shop,
- Hand over to an offi cial collection point,
- Return to the manufacturer/distributor.
This does not affect accessories enclosed with the old devices or tools without any electrical components.
Do not throw batteries into domestic waste, fi re (risk of explosion) or water. Damaged batteries can harm the environment and your health if poisonous fumes or liquids escape.
Dispose of the batteries according to local standards. Defective or used batteries must be recycled in accordance with Directive 2006/66/EC. Hand in the batteries at a used battery collection point where they are recycled in an environmentally friendly manner. For more information, please contact your local waste management provider or our service centre.
Dispose of batteries in a discharged state. We recommend covering the contacts with an adhesive strip to protect against short circuits. Do not open the battery.
Spare Parts/Accessories
Spare parts and accessories can be obtained at www.grizzlytools.shop
If you have issues ordering, please use the contact form. If you have any other questions, contact the "Service-Center" (see page 27).
| Position instruction manual | Position exploded drawing | Description | Order No. |
| A 12 | 1-3 | Adapter | 91110120 |
Guarantee
Dear Customer,
This equipment is provided with a 3-year guarantee from the date of purchase. In case of defects, you have statutory rights against the seller of the product. These statutory rights are not restricted by our guarantee presented below.
Terms of Guarantee
The term of the guarantee begins on the date of purchase. Please retain the original receipt. This document is required as proof of purchase.
If a material or manufacturing defect occurs within three years of the date of purchase of this product, we will repair or replace – at our choice – the product for you free of charge. This guarantee requires the defective equipment and proof of purchase to be presented within the three-year period with a brief written description of what constitutes the defect and when it occurred.
If the defect is covered by our guarantee, you will receive either the repaired product or a new product. No new guarantee period begins on repair or replacement of the product.
Guarantee Period and Statutory Claims for Defects
The guarantee period is not extended by the guarantee service. This also applies for replaced or repaired parts. Any damages and defects already present at the time of purchase must be reported immediately after unpacking. Repairs arising after expiry of the guarantee period are chargeable.
Guarantee Cover
The equipment has been carefully produced in accordance with strict quality guidelines and conscientiously checked prior to delivery.
The guarantee applies for all material and manufacturing defects. This guarantee does not extend to cover product parts that are subject to normal wear and may therefore be considered as wearing parts (e.g. suction hose kit, prefi lter or fan wheel) or to cover damage to breakable parts (e.g. switches). This guarantee shall be invalid if the product has been damaged, used incorrectly or not maintained. Precise adherence to all of the instructions specified in the operating manual is required for proper use of the product. Intended uses and actions against which the operating manual advises or warns must be categorically avoided.
The product is designed only for private and not commercial use. The guarantee will be invalidated in case of misuse or improper handling, use of force, or interventions not undertaken by our authorised service branch.
Processing in Case of Guarantee
To ensure quick handling of you issue, please follow the following directions:
- Please have the receipt and item number (IAN 419724_2204) ready as proof of purchase for all enquiries.
- Please find the item number on the rating plate
- Should functional errors or other defects occur, please initially contact the service department specified below by telephone or by e-mail. You will then receive further information on the processing of your complaint.
- After consultation with our customer service, a product recorded as defective can be sent postage paid to the service address communicated to you, with the proof of purchase (receipt) and specification of what constitutes the defect and when it occurred. In order to avoid acceptance problems and additional costs, please be sure to use only the address communicated to you. Ensure that the consignment is not sent carriage forward or by bulky goods, express or other special freight. Please send the equipment inc. all accessories supplied at the time of purchase and ensure adequate, safe transport packaging.
Repair Service
For a charge, repairs not covered by the guarantee can be carried out by our service branch, which will be happy to issue a cost estimate for you.
We can handle only equipment that has been sent with adequate packaging and postage.
Attention: Please send your equipment to our service branch in clean condition and with an indication of the defect.
Equipment sent carriage forward or by bulky goods, express or other special freight will not be accepted.
We will dispose of your defective devices free of charge when you send them to us.
Service-Center
GB Service Great Britain Tel.: 0800 404 7657
E-Mail: grizzly@lidl.co.uk
IAN 419724_2204
MT Service Malta Tel.: 80062230
E-Mail: grizzly@lidl.com.mt
IAN 419724_2204
Importer
Please note that the following address is not a service address. Please initially contact the service centre specified above.
Service Réparations ....42
Service-Center......42
Importateur 42
1 led brandt (rood):
Service-Center......67
Importer 67
Service-Center....91
Dovozca....91
Service-Center......116
Importador ......116
Pooblaščeni serviser:
Tel.: 080 080 917
E-Mail: grizzly@lidl.si
(Birotehnika, Hodošček Renata s.p., Lendavska ULICA 23, 9000 Murska Sobota)
Garancijski list
Razina snage zvuka (L _WA )
Service-Center......203
Εισαγωγέας......203
| GB MT Translation of the original EC declaration of conformity | |
| We hereby confi rm that the Cordless Garden Pump model PGPA 40-Li A1 Serial number 000001 - 015500 conforms with the following applicable relevant version of the EU guidelines: | |
| 2006/42/EC • 2014/30/EU • 2000/14/EC & 2005/88/EC 2011/65/EU* & (EU) 2015/863 Device incl. smart battery Smart PAPS 204 A1/Smart PAPS 208 A1: 2014/53/EU | |
| In order to guarantee consistency, the following harmonised standards as well as national standards and stipulations have been applied: | |
| EN 60335-1:2012/A15:2021 • EN IEC 60335-2-41:2021/A11:2021 EN 62233:2008 • EN IEC 63000:2018 EN 55014-1:2017/A11:2020 • EN IEC 55014-1:2021 EN 55014-2:1997/A2:2008 • EN IEC 55014-2:2021 Device incl. smart battery Smart PAPS 204 A1/Smart PAPS 208 A1: EN 301 489-1 V2.2.3:2019 • Draft EN 301 489-17 V3.2.5:2022 EN 300 328 V2.2.2:2019 • EN 50663:2017 | |
| We confi rm the following in accordance with the 2000/14/EC emissions guideline: Sound power level: guaranteed: 85 dB measured: 66,2 dB Compliance evaluation process carried out in accordance with Appendix V / 2000/14/EC | |
| This declaration of conformity is issued under the sole responsibility of the manufacturer: | |
| [CrS6HC] Grizzly Tools GmbH & Co. KG Stockstädter Straße 20 63762 Großostheim GERMANY 10.12.2022 |  Christian Frank Documentation Representative Christian Frank Documentation Representative |
* The object of the declaration described above satisfies the provisions of Directive 2011/65/EU of the European Parliament and the Council of 8 June 2011 on limiting the use of certain harmful substances in electrical and electronic appliances.

text_image
100% FSC www.fsc.org RECYCLED Aus Recycingmaterial FSC® C142184