
POWX13800 - Stapler PowerPlus - Free user manual and instructions
Find the device manual for free POWX13800 PowerPlus in PDF.
| Product type | Electric stapler / nailer |
| Brand | PowerPlus |
| Model | POWX13800 |
| Power supply | 220-240 V / 50 Hz |
| Rated power | 50 W |
| Strike rate | 30 strokes/min |
| Staple size | 15-25 mm |
| Nail size | 15-32 mm |
| Strike force | Adjustable (depth wheel) |
| Protection class | II (Double insulation) |
| Sound pressure level | 80 dB(A) |
| Sound power level | 92 dB(A) |
| Vibrations | 2.1 m/s² (uncertainty K=1.5) |
| Net weight | Approximately 1.5 kg |
| Intended use | Fixing wood, metal mesh, felt, film, cardboard, fabric onto wood or other materials |
| Maintenance | Regular cleaning of ventilation slots and magazine |
| Safety | Mandatory wearing of safety glasses and gloves; unplug before loading |
| Warranty | 36 months |
| Spare parts | Contact authorized PowerPlus after-sales service |
Frequently Asked Questions - POWX13800 PowerPlus
User questions about POWX13800 PowerPlus
0 question about this device. Answer the ones you know or ask your own.
Ask a new question about this device
Download the instructions for your Stapler in PDF format for free! Find your manual POWX13800 - PowerPlus and take your electronic device back in hand. On this page are published all the documents necessary for the use of your device. POWX13800 by PowerPlus.
USER MANUAL POWX13800 PowerPlus
natural_image
Yellow power tool with black handle and metallic rail, no visible text or symbols on the device itself.
NL NEDERLANDS VERTAALDE VERSIE VAN DE ORIGINELE HANDLEIDING
FR FRANÇAIS TRADUCTION DU MODE D'EMPLOI D'ORIGINE
EN ENGLISH ORIGINAL INSTRUCTION MANUAL
natural_image
Technical line drawing of a mechanical assembly with rotating components and directional arrows (no text or symbols)POWERPLUS®
HIGH QUALITY TOOLS
POWX13800

natural_image
Technical line drawing of a mechanical assembly with no visible text or symbolsFig. 3

natural_image
Technical line drawing of a mechanical device with no visible text or symbolsFig. 4
1 TOEPASSINGSGEBIED 2
2 BESCHRIJVING (FIG. A) 2
3 INHOUD VAN DE VERPAKKING 2
4 TOELICHTING VAN DE SYMBOLEN 2
5 ALGEMENE VEILIGHEIDSVOORSCHRIFTEN ....3
5.1 Werkplaats....3
5.2 Elektrische veiligheid ....3
5.3 Veiligheid van personen....3
5.4 Zorgvuldige omgang met en gebruik van elektrisch gereedschap....4
5.5 Service....4
6 SPECIFIEKE VEILIGHEIDSVOORSCHRIFTEN VOOR NIET/NAGELAPPARATEN....4
7 MONTAGE....5
7.1 Nieten/nagels laden (Fig. 1)....5
8 GEBRUIK 5
8.1 Instelling slagkracht (Fig. 2)....5
8.2 In- en uitschakelen (Fig. 3)....5
8.3 Een niet of nagel schieten (Fig. 4)....6
9 PROBLEEMOPLOSSING 6
10 TECHNISCHE GEGEVENS 7
11 GELUID 7
12 ONDERHOUD 7
13 GARANTIE 8
14 MILIEU....8
15 CONFORMITEITSVERKLARING 9
NAGEL-/NIETPISTOOL POWX13800
1 TOEPASSINGSGEBIED
2 BESCHRIJVING (FIG. A)
09/07/2021, Lier - Belgium
09/07/2021, Lier - Belgium
1 APPLICATION....2
2 DESCRIPTION (FIG. A) 2
3 PACKAGE CONTENT LIST....2
4 SYMBOLS 2
5 GENERAL POWER TOOL SAFETY WARNINGS ....3
5.1 Working area....3
5.2 Electrical safety....3
5.3 Personal safety .... 3
5.4 Power tool use and care....4
5.5 Service....4
6 SPECIAL SAFETY INSTRUCTIONS FOR ELECTRIC STAPLERS.
4
7 ASSEMBLY 4
7.1 Loading staples/nails (Fig. 1)....5
8 OPERATION....5
8.1 Hammer force preselection (Fig. 2)....5
8.2 Switching on/off (Fig. 3)....5
8.3 Firing a staple or nail (Fig. 4)....5
9 TROUBLESHOOTING 6
10 TECHNICAL DATA....6
11 NOISE....6
12 MAINTENANCE 6
13 WARRANTY....7
14 ENVIRONMENT 7
15 DECLARATION OF CONFORMITY 8
NAIL/STAPLE GUN POWX13800
1 APPLICATION
The machine is used for fastening wood, wire netting, felt, film, cardboard and fabric to wood or similar materials. Additional uses are not approved.

WARNING! For your own safety, read this manual and the general safety instructions carefully before using the appliance. Your power tool should only be given to other users together with these instructions.
2 DESCRIPTION (FIG. A)
- Handle
- Cooling vents
- Nose
- Nail & Staple magazine
-
Trigger switch
-
Power cord
- ON/OFF switch
- Magazine lever
- Inner magazine
- Depth adjustment wheel
3 PACKAGE CONTENT LIST
- Remove all packaging materials.
- Remove remaining packaging and packing inserts (if included).
- Check that the package contents are complete.
- Check the appliance, the power cord, the power plug and all accessories for transportation damage.
- Keep the packing materials as long as possible till the end of the warranty period. Dispose it into your local waste disposal system afterwards.

WARNING! Packaging materials are not toys! Children must not play with plastic bags! There is a danger of suffocation!
1 pc nail/staple gun
Manual
300 pcs staples 16 mm
200 pcs nails 25 mm

If any parts are missing or damaged, please contact your dealer.
4 SYMBOLS
The following symbols are used in this manual and/or on the machine:
 | Denotes risk of personal injury or damage to the tool. |  | Read manual before use. |
 | In accordance with essential safety standards of applicable European directives. |  | Class II - The machine is double insulated; Earthing wire is therefore not necessary. |
 | Mandatory use of eye protection. |  | Wear gloves |
5 GENERAL POWER TOOL SAFETY WARNINGS
Read all safety warnings and instructions. Failure to heed warnings and follow instructions may result in electric shock, fire and/or serious injury. Keep safety warnings and instructions for future reference. The term "power tool" in the safety warnings refers to your mains-operated (corded) power tool or battery-operated (cordless) power tool.
5.1 Working area
- Keep working area clean and well lit. Untidy and dark areas can lead to accidents.
- Do not operate power tools in potentially explosive surroundings, for example, in the presence of inflammable liquids, gases or dust. Power tools create sparks which may ignite the dust or fumes.
- Keep children and bystanders at a distance when operating a power tool. Distractions can cause you to lose control of it.
5.2 Electrical safety

Always check that the power supply corresponds to the voltage on the rating plate.
- Power tool plugs must match the outlet. Never modify the plug in any way. Do not use adapter plugs with earthed power tools. Unmodified plugs and matching outlets will reduce the risk of a lethal electric shock.
- Avoid body contact with earthed surfaces such as pipes, radiators, kitchen ranges and refrigerators. There is an increased risk of a lethal electric shock if your body is earthed.
- Do not expose power tools to rain or wet conditions. If water gets inside a power tool, it will increase the risk of a lethal electric shock.
- Do not damage the cord. Never use the cord for carrying, pulling or unplugging the power tool. Keep the cord away from heat, oil, sharp edges or moving parts. Damaged or entangled cords increase the risk of a lethal electric shock.
- When operating a power tool outdoors, use an extension cable suitable for outdoor use. Using a cord suitable for outdoor use reduces the risk of a lethal electric shock.
- If operating a power tool in a damp location is unavoidable, use a power supply protected by a residual current device (RCD). Using an RCD reduces the risk of a lethal electric shock.
5.3 Personal safety
- Stay alert, watch what you are doing and use common sense when operating a power tool. Do not use a power tool when you are tired or under the influence of drugs, alcohol or medication. A moment of inattention when operating a power tool may result in serious personal injury.
- Use safety equipment. Always wear eye protection. Using safety equipment such as a dust mask, non-skid safety shoes, a hard hat, or hearing protection whenever it is needed will reduce the risk of personal injury.
- Avoid accidental starts. Ensure the switch is in the off position before inserting the plug. Carrying power tools with your finger on the switch or plugging in power tools when the switch is in the on position makes accidents more likely.
- Remove any adjusting keys or spanners before turning on the power tool. A spanner or key left attached to a rotating part of the power tool may result in personal injury.
- Do not reach out too far. Keep your feet firmly on the ground at all times. This will enable you retain control over the power tool in unexpected situations.
- Dress properly. Do not wear loose clothing or jewellery. Keep your hair, clothing and gloves away from the power tool. Loose clothes, jewellery or long hair can become entangled in the moving parts.
- If there are devices for connecting dust extraction and collection facilities, please ensure that they are attached and used correctly. Using such devices can reduce dust-related hazards.
5.4 Power tool use and care
- Do not expect the power tool to do more than it can. Use the correct power tool for what you want to do. A power tool will achieve better results and be safer if used in the context for which it was designed.
- Do not use the power tool if the switch cannot turn it on and off. A power tool with a broken switch is dangerous and must be repaired.
- Disconnect the plug from the power source before making adjustments, changing accessories, or storing power tools. Such preventive safety measures reduce the risk of starting the power tool accidentally.
- Store power tools, when not in use, out of the reach of children and do not allow people who are not familiar with the power tool or these instructions to operate it. Power tools are potentially dangerous in the hands of untrained users.
- Maintenance. Check for misalignment or jammed moving parts, breakages or any other feature that might affect the operation of the power tool. If it is damaged, the power tool must be repaired. Many accidents are caused by using poorly maintained power tools.
- Keep cutting tools sharp and clean. Properly maintained cutting tools with sharp cutting edges are less likely to jam and are easier to control.
- Use the power tool, accessories and cutting tools, etc., in accordance with these instructions and in the manner intended for the particular type of power tool, taking into account the working conditions and the work which needs to be done. Using a power tool in ways for which it was not intended can lead to potentially hazardous situations.
5.5 Service
- Your power tool should be serviced by a qualified specialist using only standard spare parts. This will ensure that it meets the required safety standards.
6 SPECIAL SAFETY INSTRUCTIONS FOR ELECTRIC STAPLERS
- Before inserting staples or nails the power plug should always be removed from the socket.
■ Never point the machine at persons or animals.
- Only use staples or nails which are suitable for the machine.
■ Before using the machine, ensure that the safety device is operating properly.
■ Never block the safety device.
- Switch the machine off when you take a break and when the work is completed.
■ Wear ear protectors.
- Do not activate the tool unless the tool is placed firmly against the workpiece. If the tool is not in contact with the workpiece, the fastener may be deflected away from your target.
- Do not use the tacker for fastening electrical cables. It is not designed for electric cable installation and may damage the insulation of electric cables thereby causing electric shock or fire hazard.
7 ASSEMBLY

Warning: This nailer/stapler is NOT suited for nailing or stapling into concrete, masonry, bricks or metal.

Warning: Do not fire if brad nails or staples are jammed in the nose (3) section.
7.1 Loading staples/nails (Fig. 1)
- Depress the magazine lever and pull the magazine out.
- Insert a row of staples/nails into the opening behind the nose piece.
- Push the loaded magazine back into the unit. It clips into place.

Note that the nail strip should be placed close to the bottom of the magazin. The nails may get stuck if the nail strip is placed in a wrong position.
8 OPERATION

When the unit is loaded with fasteners and you are ready to begin, plug the nailer/stapler power cord (6) into a power outlet.
Note: each time you fire the nailer / stapler, the safety (3) must be pressed firmly against the workpiece.
8.1 Hammer force preselection (Fig. 2)
- With the depth adjustment wheel preselection, it is possible to preselect the required hammer force. The required hammer force depends on the length of the staples or nails and on the strength of the material. The optimal hammer force setting, you can determine through practical testing. Turn the knob clockwise to increase the hammer force and turn it counter-clockwise to reduce the hammer force
8.2 Switching on/off (Fig. 3)
- To supply the tool with power, push the power switch to the "I" position.
- To turn off, push the power switch to the "O" position.
8.3 Firing a staple or nail (Fig. 4)
- Switch the on/off switch into the on position.
- Place the tacker against the workpiece so that the nose piece of the tacker is where you want the staple/nail to be located.
■ To fire the tacker squeeze the trigger.
■ Additional pressure applied to the front of the tool will prevent recoil and increase the force applied to the nails or staples. This is especially important for ensuring that the nail or staple is driven the whole way into a hard surface.
Remove all nails/staples from the magazine after each use.

The machine is designed only for intermittent operation and will warm up with the continues use. The tracking force is reduced as a result of heating up/ therefore, allow the machine to cool off after 15 minutes (max) continuous operation.
There is a contact switch in your staple gun. The contact switch enables the staple gun only to be started on contact with the material surface.
9 TROUBLESHOOTING
| Problem | Possible cause | Solution |
| Product does not start | Not connected to power supplyProduct switch not ONProduct cord or plug is defectiveOther electrical defect to the product | Connect to power supplySwitch ONCheck by a specialist electricianCheck by a specialist electrician |
| Product does not reach full power | Extension cord not suitable for operation with the productPower source has too low voltage | Use a proper extension cordConnect to another power source |
| Fasteners jam in tool | Wrong size fastenersDriver channel wornBent fastenersLoose magazine/nose screwsBroken/chipped driver | Use only recommended fastenersReplace nail/stapleDiscontinue using these fastenersTighten all screwsReplace nail/staple |
10 TECHNICAL DATA
| Rated voltage | 220-240 V / 50 Hz |
| Strike rate | 30 / min |
| Rated power | 50W |
| Staple/nail size | 15-25 mm /15- 32mm |
| Hammer force | Adjustable |
| Protection class | II |
11 NOISE
Noise emission values measured according to relevant standard. (K=3)
| Acoustic pressure level LpA | 80 dB(A) |
| Acoustic power level LwA | 92 dB(A) |

ATTENTION! Wear hearing protection when sound pressure is over 85 dB(A).
aw (Vibration):
2,1 m/s²
K = 1.5 ~m / s^2
12 MAINTENANCE
Apart from regular cleaning, the machine is essentially maintenance free. It should be kept free of wood dust and chips. This applies particularly to the ventilation slots and the magazine area.
13 WARRANTY
- This product is warranted as provided by law for a 36-month period effective from the date of purchase by the first user.
- This warranty covers all material or production flaws excluding : batteries, chargers, defective parts subject to normal wear & tear such as bearings, brushes, cables, and plugs, or accessories such as drills, drill bits, saw blades, etc. ; damage or defects resulting from maltreatment, accidents or alterations; nor the cost of transportation.
- Damage and/or defects resulting from inappropriate use also do not fall under the warranty provisions.
- We also disclaim all liability for any bodily injury resulting from inappropriate use of the tool.
- Repairs may only be carried out by an authorised customer service centre for Powerplus tools.
- You can always obtain more information at the number 00 32 3 292 92 90.
- Any transportation costs shall always be borne by the customer, unless agreed otherwise in writing.
- At the same time, no claim can be made on the warranty if the damage of the device is the result of negligent maintenance or overload.
- Definitely excluded from the warranty is damage resulting from fluid permeation, excessive dust penetration, intentional damage (on purpose or by gross carelessness), inappropriate usage (use for purposes for which the device is not suitable), incompetent usage (e.g. not following the instructions given in the manual), inexpert assembly, lightning strike, erroneous net voltage. This list is not exhaustive.
- Acceptance of claims under warranty can never lead to the prolongation of the warranty period nor commencement of a new warranty period in case of a device replacement.
■ Devices or parts which are replaced under the warranty therefore remain the property of Varo NV - We reserve the right to reject a claim whenever the purchase cannot be verified or when it is clear that the product has not been properly maintained. (Clean ventilation slots, carbon brushes serviced regularly, etc.).
- Your purchase receipt must be kept as proof of date of purchase.
- Your appliance must be returned undismantled to your dealer in an acceptably clean state, (in its original blow-moulded case if applicable to the unit), accompanied by proof of purchase.
14 ENVIRONMENT
Should your appliance need replacement after extended use, do not dispose of it with the household refuse, but in an environmentally safe way.
Please dispose of used motor oil in a manner that protects the environment. We suggest you take it in a sealed container to your local service station for recycling.
Do not throw it into the refuse or pour it on the ground
15 DECLARATION OF CONFORMITY


VARO N.V. - Vic. Van Rompuy N.V.- Joseph Van Instraat 9 - BE2500 Lier - BELGIUM, declares that,
product: Nail/staple gun
trade mark: POWERplus
model: POWX13800
is in conformity with the essential requirements and other relevant provisions of the applicable European Directives, based on the application of European harmonized standards. Any unauthorized modification of the apparatus voids this declaration.
European Directives (including, if applicable, their amendments up to the date of signature);
2011/65/EU
2006/42/EC
2014/30/EU
European harmonized standards (including, if applicable, their amendments up to the date of signature);
EN60745-1:2009
EN60745-2-16:2010
EN55014-1:2017
EN55014-2:2015
EN IEC 61000-3-2 : 2019
EN61000-3-11:2000
Keeper of the Technical Documentation : Philippe Vankerkhove, VARO – Vic. Van Rompuy N.V.
The undersigned acts on behalf of the company CEO,

Philippe Vankerkhove
Regulatory Affairs – Compliance Manager
09/07/2021, Lier - Belgium
09/07/2021, Lier - Belgium
09/07/2021, Lier - Belgium
Regulatory Affairs – Compliance Manager
09/07/2021, Lier - Belgium
09/07/2021, Lier - Belgium
1 BRUKSOMRÅDE 2
2 BESKRIVELSE (FIG. A) 2
3 PAKKENS INNHOLD 2
4 SYMBOLFORKLARING 2
5 GENERELLE SIKKERHETSADVARSLER 3
5.1 Arbeidsplassen .... 3
5.2 Elektrisk sikkerhet 3
5.3 Personsikkerhet....3
5.4 Vær nøyaktig og omhyggelig når du omgås elektroverktøy 4
5.5 Service....4
6 SPESIELLE SIKKERHETSREGLER FOR SPIKER-/KRAMPEPISTOLER 4
7 MONTERING 4
7.1 Lasting av spiker/nagler (Fig. 1)....5
8 BRUK....5
8.1 Forvalg av slagkraft (Fig. 2)....5
8.2 Slå på/av (Fig. 3)....5
8.3 Skyte ut spiker eller nagler (Fig. 4)....5
9 FEILS∅KING....6
10 TEKNISKE DATA....6
11 ST∅Y 6
12 VEDLIKEHOLD 6
13 GARANTI....7
14 MILJ∅ 7
15 SAMSVARSERKLÆRING 8
SPIKER-/KRAMPEPISTOL POWX13800
1 BRUKSOMRÅDE
09/07/2021, Lier - Belgium
1 ANVENDELSE 2
2 BESKRIVELSE (FIG. A) 2
3 MEDF∅LGENDE INDHOLD 2
4 SYMBOLER....2
5 ALMINDELIGE SIKKERHEDSANVISNINGER FOR EL-VÆRKT∅J
3
5.1 Arbejdsområde....3
5.2 Elektrisk sikkerhed 3
5.3 Personlig sikkerhed....3
5.4 Omhyggelig håndtering og anvendelse af el-værktøjer 4
5.5 Service....4
6 SÄERLIGE SIKKERHEDSHENVISNINGER FOR EL-
SÖMPISTOLER....4
7 SAMLING 4
7.1 Ladning af klammer/søm (Fig. 1)....5
8 BETJENING 5
8.1 Forvalg af hammerkraft (Fig. 2)....5
8.2 Tænding/slukning (Fig. 3)....5
8.3 Affyring af klammer eller som (Fig. 4)....5
9 FEJLFINDING 6
10 TEKNISKE DATA....6
11 ST∅J....6
12 VEDLIGEHOLDELSE 7
13 GARANTI....7
14 MILJ∅ 7
15 KONFORMITETSERKLÆRING....8
S∅M-/KLAMMEPISTOL POWX13800
1 ANVENDELSE
Regulatory Affairs (afdelingen for juridiske anliggender) – Compliance Manager 09/07/2021, Lier - Belgium
3 FÖRPACKNINGSINNEHÅLL
09/07/2021, Lier - Belgium
09/07/2021, Lier - Belgium
09/07/2021, Lier - Belgium
1 PRIMENA 2
2 OPIS (SL. A) 2
3 SPISAK SADRŽAJA PAKOVANJA 2
4 SIMBOLI 2
5 OPŠTA BEZBEDNOSNA UPUTSTVA ZA ELEKTRIČNE ALATE .3
5.1 Radna oblast 3
5.2 Električna bezbednost....3
5.3 Lična bezbednost....3
5.4 Korišćenje i održavanje električnog alata ....4
5.5 Servisiranje 4
6 SPECIJALNE BEZBEDNOSNE INSTRUKCIJE ZA ELEKTRIČNE KLAMERICE....4
7 SKLAPANJE 5
7.1 Punjenje spajalicama/ekserima (Sl. 1)....5
8 RAD 5
8.1 Izbor udarne sile (Sl. 2)....5
8.2 Uključivanje / isključivanje (Sl. 3)......5
8.3 Ispaljivanje spajalice ili eksera (Sl. 4)....5
9 UTVRĐIVANJE I OTKLANJANJE PROBLEMA 6
10 TEHNIČKI PODACI 6
11 BUKA....7
12 ODRŽAVANJE 7
13 GARANCIJA....7
14 ŽIVOTNA SREDINA....8
15 IZJAVA O USKLAĐENOSTI....8
PIŠTOLJ ZA EKSERE/SPAJALICE POWX13800
1 PRIMENA
Ova mašina se koristi za pričvršćivanje drveta, žičane mreže, filca, filma, kartona i tekstila na drvo ili sličan materijal. Dodatne upotrebe nisu dozvoljene.

09/07/2021, Lier - Belgium
09/07/2021, Lier - Belgium
1 POUŽÍVANIE 2
2 POPIS (OBR. A) 2
3 OBSAH BALENIA 2
4 SYMBOLY 2
5 VŠEOBECNÉ BEZPEČNOSTNÉ VAROVANIA PRE ELEKTRICKÉ NÁRADIE....3
5.1 Pracovná plocha ....3
5.2 Elektrická bezpečnost......3
5.3 Osobná bezpečnost......3
5.4 Používanie elektrického náradia a starostlivost' oň....4
5.5 Servis....4
6 ŠPECIÁLNE BEZPEČNOSTNÉ POKYNY PRE ELEKTRICKÉ SPONKOVAČE 4
7 MONTÁŽ....5
7.1 Naplnenie sponkami/klincami (obr. 1)....5
8 PREVÁDZKA....5
8.1 Predvol'ba sily kladiva (obr. 2)....5
8.2 Zapnutie/vypnutie (obr. 3)....5
8.3 Vystrelenie sponky alebo klinca (obr. 4) ....5
9 RIEŠENIE PROBLÉMOV....6
10 TECHNICKÉ ÚDAJE....6
11 HLUK....6
12 ÚDRŽBA....7
13 ZÁRUKA 7
14 ŽIVOTNÉ PROSTREDIE....7
15 VYHLÁSENIE O ZHODE 8
KLINCOVAČKA/SPONKOVAČKA POWX13800
1 POUŽÍVANIE
09/07/2021, Lier - Belgium
1 UPORABA....2
2 OPIS (SLIKA A)....2
3 VSEBINA ŠKATLE....2
4 SIMBOLI 2
5 SPLOŠNA VARNOSTNA OPOZORILA ZA ELEKTRIČNO
ORODJE....3
5.1 Delovno mesto....3
5.2 Električna varnost....3
5.3 Osebna varnost....3
5.4 Uporaba in nega električnega orodja....4
5.5 Servisiranje 4
6 DODATNA VARNOSTNA NAVODILA ZA ELEKTRIČNE
ZABIJALNE STROJE ....4
7 SESTAVLJANJE....5
7.1 Loading staples/nails (Fig. 1)....5
8 UPORABA....5
8.1 Hammer force preselection (Fig. 2)....5
8.2 Switching on/pff (Fig. 3)....5
8.3 Firing a staple or nail (Fig. 4)....5
9 TROUBLESHOOTING 6
10 TEHNIČNI PODATKI....6
11 HRUP 6
12 VZDRŽEVANJE....7
13 GARANCIJA....7
14 OKOLJE 7
15 IZJAVA O SKLADNOSTI 8
ZABIJALNI STROJ ZA ŽEBLJE/SPONKE POWX13800
1 UPORABA
Stroj je namenjen zabijanju lesa, pletene žice, filca, folij, kartona in blaga na les ali podobne materiale. Drugi načini uporabe niso odobreni.

- Do not use the tacker for fastening electrical cables. It is not designed for electric cable installation and may damage the insulation of electric cables thereby causing electric shock or fire hazard.
7 SESTAVLJANJE

Pozor: Ta zabijalni stroj za sponke/žeblje NI primeren za zabijanje žebljev/sponk v beton, omet, opeko ali kovino.

7.1 Loading staples/nails (Fig. 1)
- Depress the magazine lever and pull the magazine out.
- Insert a row of staples/nails into the opening behind the nose piece.
- Push the loaded magazine back into the unit. It clips into place.

Note that the nail strip should be placed close to the bottom of the magazin. The nails may get stuck if the nail strip is placed in a wrong position.
8 UPORABA

8.1 Hammer force preselection (Fig. 2)
- With the depth adjustment wheel preselection, it is possible to preselect the required hammer force. The required hammer force depends on the length of the staples or nails and on the strength of the material. The optimal hammer force setting, you can determine through practical testing. Turn the knob clockwise to increase the hammer force and turn it counter-clockwise to reduce the hammer force
8.2 Switching on/pff (Fig. 3)
- To supply the tool with power, push the power switch to the "I" position.
- To turn off, push the power switch to the "O" position.
8.3 Firing a staple or nail (Fig. 4)
- Switch the on/off switch into the on position.
- Place the tacker against the workpiece so that the nose piece of the tacker is where you want the staple/nail to be located.
- To fire the tacker squeeze the trigger.
■ Additional pressure applied to the front of the tool will prevent recoil and increase the force applied to the nails or staples. This is especially important for ensuring that the nail or staple is driven the whole way into a hard surface.
Remove all nails/staples from the magazine after each use.

The machine is designed only for intermittent operation and will warm up with the continues use. The tracking force is reduced as a result of heating up/ therefore, allow the machine to cool off after 15 inutes (max) continuous operation.
There is a contact switch in your staple gun. The contact switch enables the staple gun only to be started on contact with the material surface.
9 TROUBLESHOOTING
| Problem | Possible cause | Solution |
| Product does not start | Not connected to power supplyProduct switch not ONProduct cord or plug is defectiveOther electrical defect to the product | Connect to power supplySwitch ONCheck by a specialist electricianCheck by a specialist electrician |
| Product does not reach full power | Extension cord not suitable for operation with the productPower source has too low voltage | Use a proper extension cordConnect to another power source |
| Fasteners jam in tool | Wrong size fastenersDriver channel wornBent fastenersLoose magazine/nose screwsBroken/chipped driver | Use only recommended fastenersReplace nail/stapleDiscontinue using these fastenersTighten all screwsReplace nail/staple |
10 TEHNIČNI PODATKI
| Nazivna napetost | 220-240 V / 50 Hz |
| Moč zabijanja | 30 / min |
| Nazivni tok | 50W |
| Velikost sponk/žebljev | 15-25 mm / 15-32 mm |
| Hammer force | Adjustable |
| Razred zaščite | II |
11 HRUP
09/07/2021, Lier - Belgium
09/07/2021, Lier - Belgium
natural_image
Simple line drawing of a rounded rectangular shape with a small arrow on top (no text or symbols)Philippe Vankerkhove
09/07/2021, Lier - Belgium
09/07/2021, Lier - Belgium
1 ПРЕДНАЗНАЧЕНИЕ НА ЕЛЕКТРОИНСТРУМЕНТА....2
2 ОПИСАНИЕ (ФИГ. А) 2
3 СПИСЪК НА СЪДЪРЖАНИЕТО НА ОПАКОВКАТА....2
4 СИМВОЛИ 2
5 ОБЩИ ПРЕДУПРЕЖДЕНИЯ ЗА БЕЗОПАСНОСТ ПРИ
ИЗПОЛЗВАНЕ НА ЕЛЕКТРОИНСТРУМЕНТИ....3
5.1 Работна зона....3
5.2 Електробезопасност .... 3
5.3 Лична безопасност .... 3
5.4 Използване и грижи за електроинструмента....4
5.5 Сервизно обслужване ....4
6 СПЕЦИАЛНИ ИНСТРУКЦИИ ЗА БЕЗОПАСНОСТ ЗА
ЕЛЕКТРИЧЕСКИ ПИСТОЛЕТ ЗА ПИРОНИ И ТЕЛЬБОД......5
7 СГЛОБЯВАНЕ....5
7.1 Зареждане на скоби/пирони (Фиг. 1)....5
8 РАБОТА....5
8.1 Предварителен избор на ударната сила (Фиг. 2)......6
8.2 Включване/изключване (Фиг. 3)......6
8.3 Забиване на скоба или пирон (Фиг. 4)......6
9 ОТСТРАНЯВАНЕ НА НЕИЗПРАВНОСТИ ......6
10 ТЕХНИЧЕСКИ ДАННИ ....7
11 ШУМ 7
12 ПОДДРЪЖКА....7
13 ГАРАНЦИЯ 8
14 ОКОЛНА СРЕДА....8
15 ДЕКЛАРАЦИЯ ЗА СЪОТВЕТСТВИЕ ......9
ПИСТОЛЕТ ЗА ПИРОНИ И ТЕЛЬБОД
POWX13800
1 ПРЕДНАЗНАЧЕНИЕ НА ЕЛЕКТРОИНСТРУМЕНТА
09/07/2021, Lier - Belgium

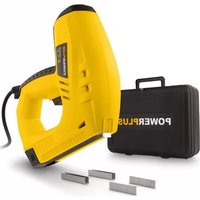
natural_image
Open black plastic case containing a yellow electric shaver with cable, no visible text or symbolsvaro
WWW.VARO.COM
DESIGNED AND MARKETED BY VARO
©copyright by varo
VARO - VIC. VAN ROMPUY nv
JOSEPH VAN INSTRAAT 9 - 2500 LIER - BELGIUM
OFFICES:


- NAGEL-/NIETPISTOOL POWX13800
- TOEPASSINGSGEBIED
- BESCHRIJVING (FIG. A)
- NAIL/STAPLE GUN POWX13800
- APPLICATION
- DESCRIPTION (FIG. A)
- PACKAGE CONTENT LIST
- SYMBOLS
- GENERAL POWER TOOL SAFETY WARNINGS
- Working area
- Electrical safety
- Always check that the power supply corresponds to the voltage on the rating plate.
- Personal safety
- Power tool use and care
- Service
- SPECIAL SAFETY INSTRUCTIONS FOR ELECTRIC STAPLERS
- ASSEMBLY
- Loading staples/nails (Fig. 1)
- OPERATION
- Hammer force preselection (Fig. 2)
- Switching on/off (Fig. 3)
- Firing a staple or nail (Fig. 4)
- NOISE
- MAINTENANCE
- WARRANTY
- ENVIRONMENT
- DECLARATION OF CONFORMITY
- SPIKER-/KRAMPEPISTOL POWX13800
- BRUKSOMRÅDE
- S∅M-/KLAMMEPISTOL POWX13800
- ANVENDELSE
- FÖRPACKNINGSINNEHÅLL
- PIŠTOLJ ZA EKSERE/SPAJALICE POWX13800
- PRIMENA
- KLINCOVAČKA/SPONKOVAČKA POWX13800
- POUŽÍVANIE
- ZABIJALNI STROJ ZA ŽEBLJE/SPONKE POWX13800
- UPORABA
- SESTAVLJANJE
- UPORABA
- Switching on/pff (Fig. 3)
- HRUP
- ПИСТОЛЕТ ЗА ПИРОНИ И ТЕЛЬБОД
- POWX13800
- ПРЕДНАЗНАЧЕНИЕ НА ЕЛЕКТРОИНСТРУМЕНТА
Brand : PowerPlus
Model : POWX13800
Category : Stapler