
TB1 - Blender AENO - Free user manual and instructions
Find the device manual for free TB1 AENO in PDF.
| Product type | Stationary blender with heating function |
| Brand | AENO |
| Model | TB1 (ATB0001 / ATB0003) |
| Dimensions (L × W × H) | 230 × 200 × 420 mm |
| Net weight | 4.7 kg |
| Power supply | 220-240 V ~, 50/60 Hz, 800 W max, standby <0.5 W |
| Bowl capacity | 1.75 L (cold liquids max 1750 ml, hot max 1400 ml) |
| Maximum blade speed | 35,000 rpm |
| Number of automatic programs | 8 (Plant-based milk, Fruits/Vegetables, Baby food, Smoothie, Porridge, Grinding, Cream soup, Steam) |
| Number of speeds | 9 (manual adjustment) |
| Delayed start | Up to 24 hours |
| Heating function | Yes (for hot programs) |
| Safety protections | Overheat protection, automatic shutdown |
| Noise level | ≥ 82 dB at 1 m |
| Power cord length | 1 m |
| Motor base material | ABS plastic, polypropylene |
| Bowl material | Borosilicate glass |
| Blade material | Stainless steel |
| Color | White |
| Maintenance and cleaning | Self-cleaning with warm water and detergent; do not immerse the motor base |
| Spare parts and repairability | Blade, bowl, lid, accessories available; contact customer service |
| Package contents | Motor base, bowl, lid with cap, pusher, brush, measuring cup, quick start guide; model ATB0001 includes steam container |
| Operating conditions | -10 °C to +35 °C, RH ≤ 80% non-condensing |
Frequently Asked Questions - TB1 AENO
User questions about TB1 AENO
0 question about this device. Answer the ones you know or ask your own.
Ask a new question about this device
Download the instructions for your Blender in PDF format for free! Find your manual TB1 - AENO and take your electronic device back in hand. On this page are published all the documents necessary for the use of your device. TB1 by AENO.
USER MANUAL TB1 AENO
natural_image
Line drawing of a modern blender with digital display and control buttons (no text or symbols on the device itself)User Manual
Table Blender
TB1, TB3
(Models: ATB0001,
ATB0003)
v 1.0.2 | 14.04.2025
ENG....11
ARA 18
BOS....23
BUL 30
CES....38
DEU 46
ELL 54
EST 61
FRA 68
HRV 76
HUN....83
HYE 91
ITA....98
KAT....106
KAZ....114
LAV....122
LIT 129
NLD 136
POL 144
POR 152
RON....160
RUS 168
SLK 176
SLV 184
SPA....191
SRP 199
UKR 206
UZB 214

4 aeno.com/documents

B
C


flowchart
graph LR
    A["ON OFF"] --> B["Cleaning"]
    A --> C["Function"]
6 aeno.com/documents
D
aeno.com/documents 7
E

natural_image
Technical line drawing of a mechanical assembly with hands and a central component, no text or symbols present8 aeno.com/documents

natural_image
Line drawing of a blender with handle and lid, showing internal structure and control buttons (no text or symbols)aeno.com/documents 9
F
G


natural_image
Illustration showing a kitchen appliance being cleaned with a water tap while pouring liquid into a blender (no text or symbols)10 aeno.com/documents
ENC The AENOTM Table Blender is designed for grinding food, making beverages and hot meals.
Technical Specifications
Power supply (input): 220–240 V (AC), 50/60 Hz, 800.0 W (max.). Standby power consumption: < 0.5 W. Jar capacity: 1.75 L. Blade rotation speed: up to 35,000 rpm. Number of automatic programs: 8. Number of speeds: 9. Delayed start: up to 24 h. Heating function. Overheating protection. Noise level (at a distance of 1 m): ≥ 82 dB. Control: manual. Power cord length: 1 m. Color: White. Motor base material: ABS plastic, polypropylene. Jar material: borosilicate glass. Blade material: stainless steel. Dimensions (L×W×H): 230×200×420 mm. Net weight: 4.7 kg. Operating conditions: temp. -10...+35 °C, RH up to 80 % (non-condensing). Storage conditions: temp. -10...+40 °C, RH up to 80 % (non-condensing).
Scope of Supply (see Fig. A)
ATB0001 model: AENOTM Table Blender, steaming container, measuring cup, tamper, brush, Quick Start Guide.
ATB0003 model: AENO™ Table Blender, measuring cup, tamper, brush, Quick Start Guide.
Device Elements and Accessories (see Fig. A)
1 – lid plug, 2 – lid, 3 – jar, 4 – blade, 5 – jar base, 6 – handle, 7 – control panel with display, 8 – motor base, 9 – power cord, 10 – tamper, 11 – brush, 12 – measuring cup, 13 – steaming container *.
* For ATB0001 model only.
Limitations and Warnings
ATTENTION! Risk of electric shock.
ATTENTION! Exercise caution when handling the sharp blade, be careful while emptying the jar and cleaning. Do not touch moving parts during operation.
If you experience any issues or difficulties while using your AENO™ device, please email support at support@aeno.com or chat with us at aeno.com/service-and-warranty. Our specialists will help you solve the problem, and you will not have to spend time and effort visiting the store.
aeno.com/documents 11
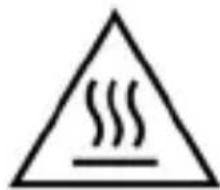
ATTENTION! Some parts of the device can become hot and cause burns! Do not touch the jar and lid of the device until they have cooled down completely or without protective equipment.
ATTENTION! Do not exceed the maximum level for hot ("Soup") (1,400 ml) and cold (1,750 ml) liquids (see Fig. B), this may cause overflow.
ATTENTION! Long plant stems can get wrapped around the blade during operation and damage the motor of the device. When using the blender to chop plant stems, pre-cut them so that the pieces are no more than 1 cm long.
ATTENTION! Do not use the blender to chop meat with bones and (or) cartilage, fruits with pits, nuts in their shells. Remove bones, cartilage, pits, and shells beforehand to avoid damaging the blade.
This device is not intended for use by children under the age of 16 or by persons with reduced physical, mental or intellectual abilities unless they have sufficient experience and knowledge of how to use the device and are supervised by a person responsible for their safety. The device is intended for domestic use only. Do not use the device outdoors. Do not let children play with the device and its accessories. Do not drop or throw the device. Do not use a damaged device. If the device has been transported or stored at low temperatures, leave it at room temperature for 2 hours before use. Make sure that the rated voltage and frequency indicated in the technical specifications correspond to the parameters of the electrical network. Handle the device with dry hands only. Do not leave the device unattended while it is plugged in. Unplug the device after use and before cleaning. Unplug the device by grasping the plug, not the power cord. Do not immerse the device, the power plug or the cord (9) in water or other liquids. Make sure that the power cord is not twisted, bent, pressed against anything, or in contact with hot, sharp objects or heat sources. Do not store the motor base (8) and jar (3) in the refrigerator. Do not open the lid (2) until the blade (4) has stopped completely. Do not add sugar to the jar as it may stick to the bottom. Do not use chemically aggressive detergents, abrasive pastes, products containing acids and solvents, or metal sponges to clean the device. For a detailed description of the device, its modes and features, see the full user manual available at
aeno.com/documents.
12 aeno.com/documents
Automatic Programs (see Fig. C)
 | Plant Milk |  | Fruits/Vegetables |
 | Baby Food |  | Smoothie |
 | Porridge |  | Grind |
 | Cream Soup |  | Steam |
Note. The heating function is not used for "Fruits/Vegetables", "Smoothie" and "Grind" programs.
Functions of the Device Buttons (see Fig. C)
| Button | Function |
| Tap once | |
| ON/OFF | Enable/disable standby mode |
| Start a program | |
| Function | Switch between automatic programs |
| Speed + | Increase blade rotation speec |
| Speed- | Decrease blade rotation speed |
| Time + | Increase program run time/delayed start time |
| Time - | Decrease program run time/delayed start time |
| Manua | Go into the manual programsetting mode |
| Preset Time | Go to adjusting the delayed start time |
| Tap and hold | |
| ON/OFF | Stop a running program |
| Cleaning | Blade rotates in the self-cleaning mode |
aeno.com/documents 13
Preparing for Use
- Carefully open the package and take out the device and its accessories. Remove any packaging materials.
- Place the motor base on a dry, flat, stable surface at least 15 cm away from other objects and devices.
- Clean the base and the lid with its plug (see "Cleaning the Motor Base" and "Cleaning the Lid and Its Plug").
- Clean the inside of the jar using the supplied brush (11) and some dishwashing detergent. Then rinse the inside under running water and wipe dry.
- Wipe the outside of the jar with a soft cloth dampened with water. Then wipe dry.
Using the Device
- Prepare ingredients: peel and/or wash produce if necessary; remove bones and cartilage from meat, nutshells; chop large ingredients.
- Place desired ingredients (including liquids) in the jar of the blender.
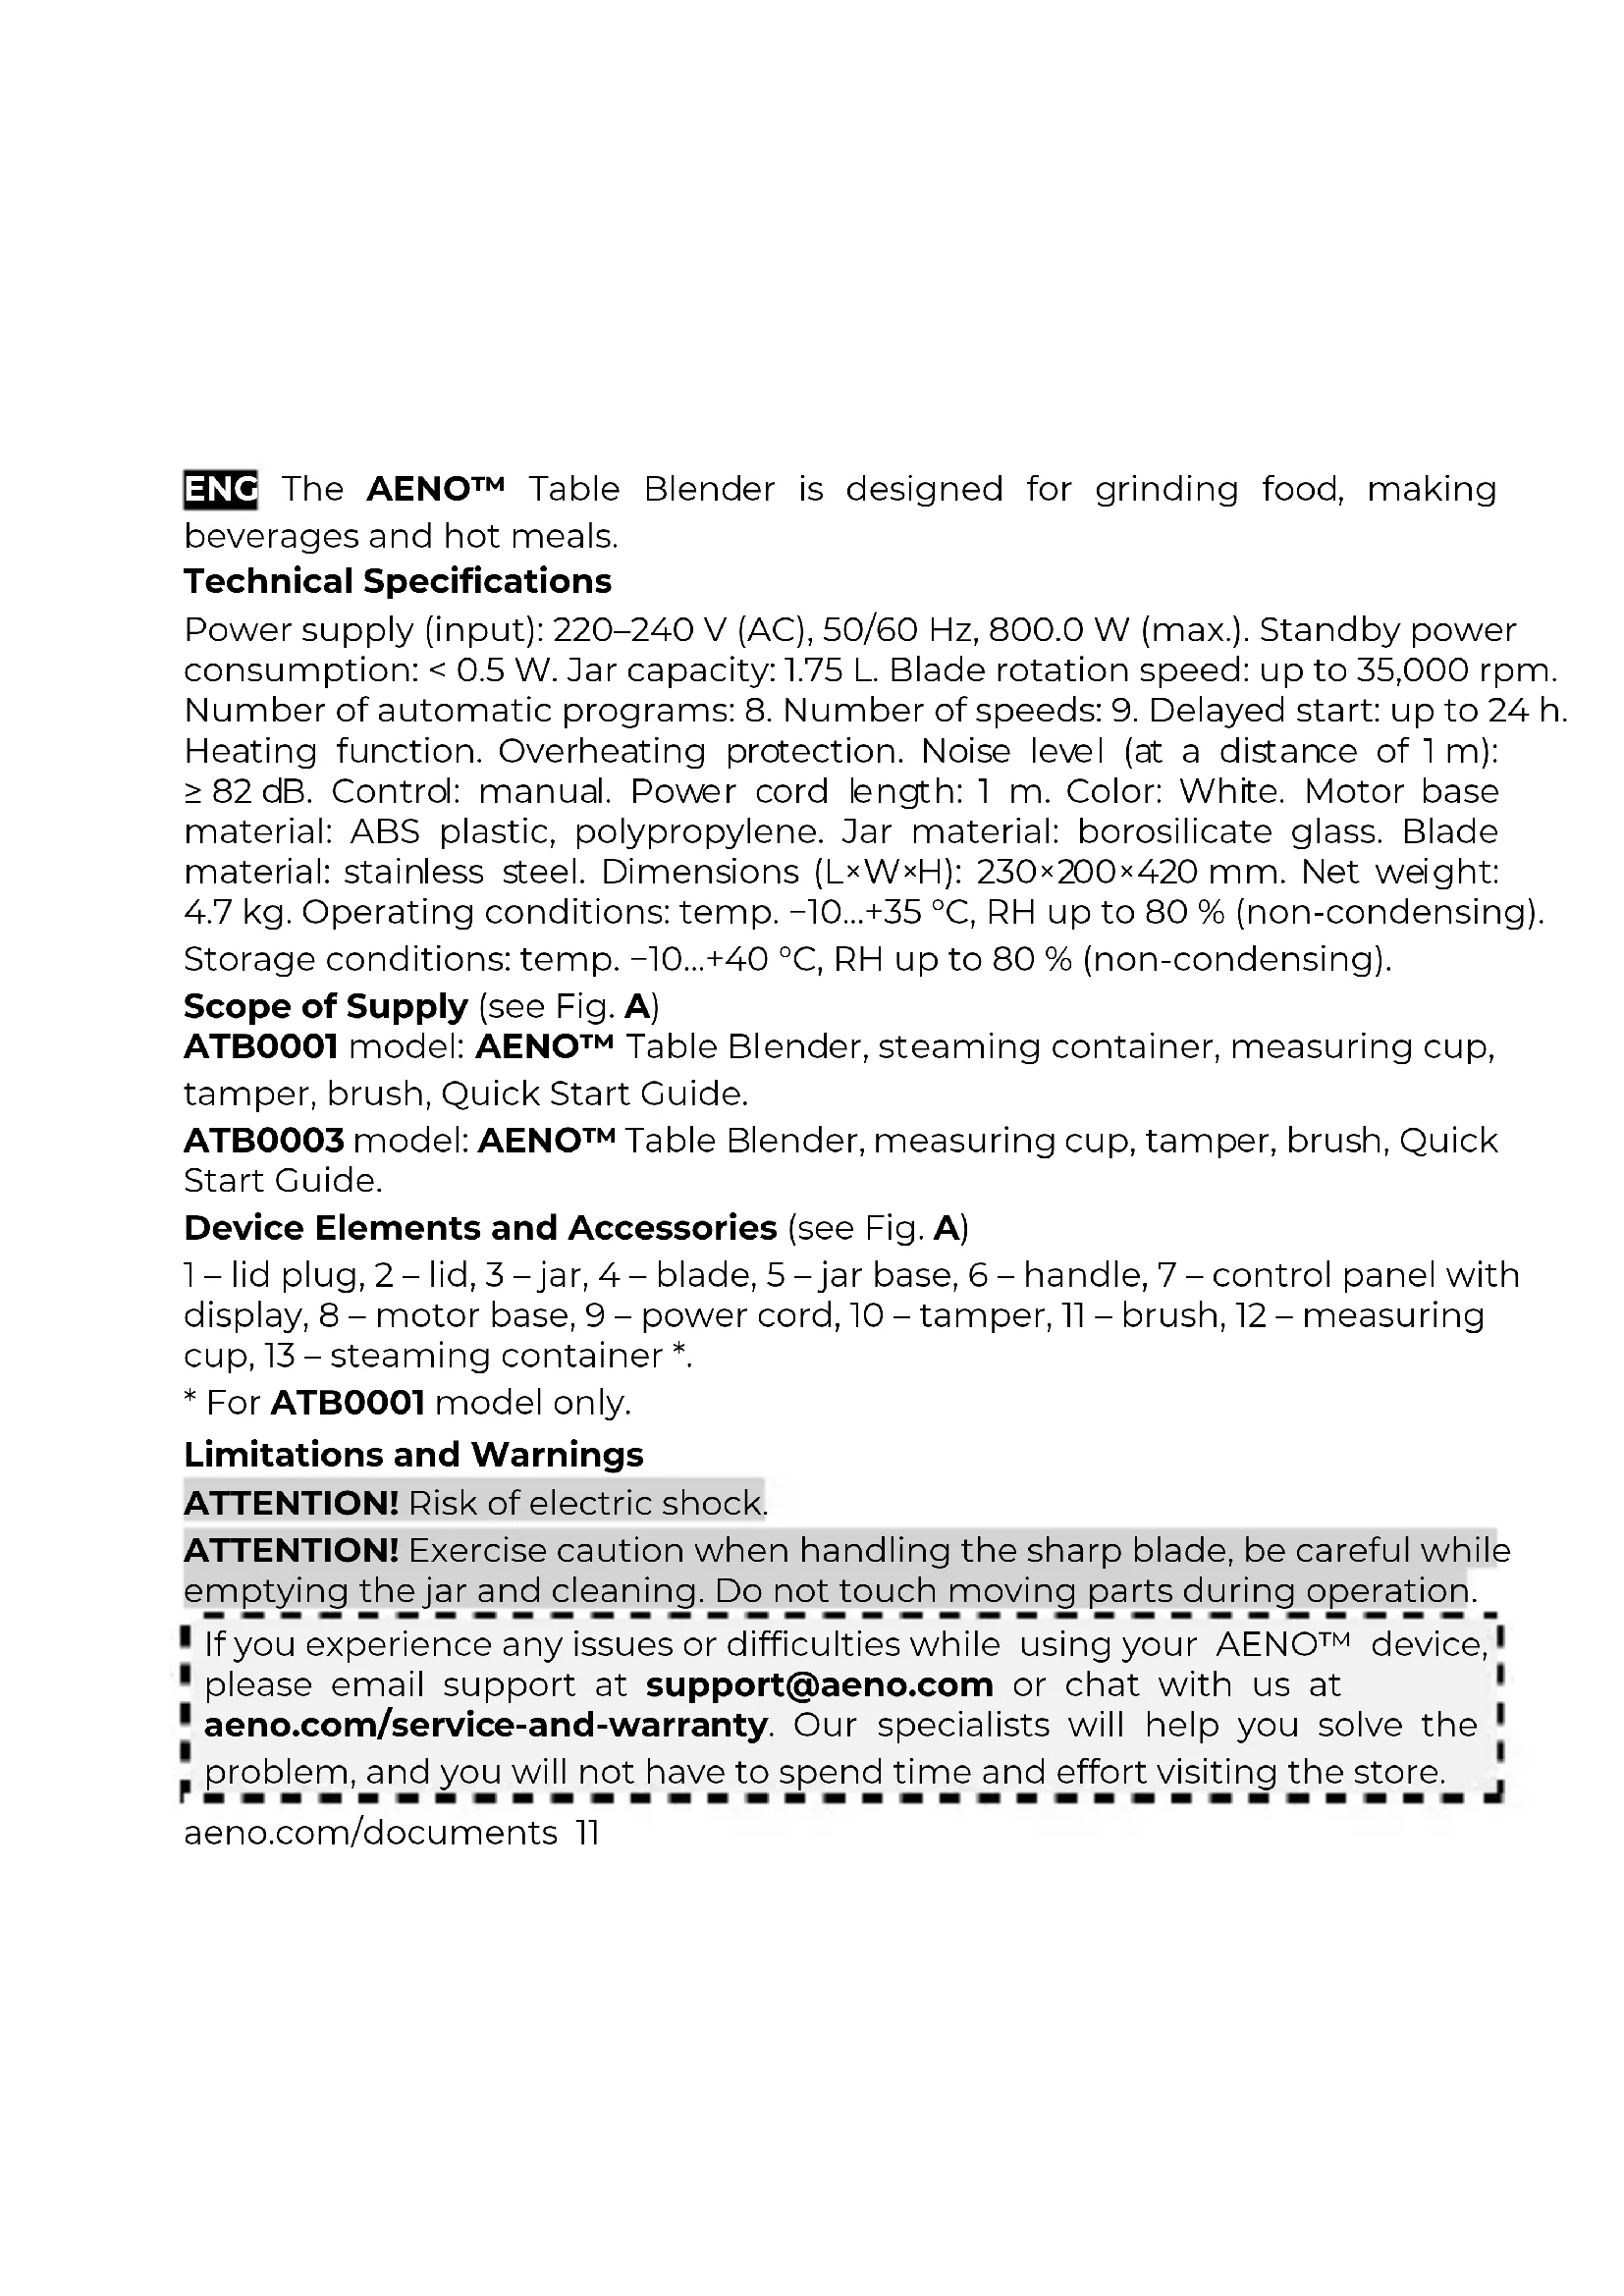
- Place the jar on the motor base as shown in Figure D.
- Insert the plug (1) into the lid (see Fig. E) and close the lid (see Fig. F).
- Insert the plug of the power cord into the socket. You will hear a beep and “--:--” will appear on the display of the control panel (7).
- Tap the "ON/OFF" button to put the device into standby mode. The display will show "00:00" and the icons and names of all automatic programs will appear.
- Select the desired automatic program (see "Selecting an Automatic Program") or set the program manually (see "Manual Program Setup").
- Tap the "ON/OFF" button to start the program.
Note. If you want to stop a running program, tap and hold the "ON/OFF" button for 3 s.
14 aeno.com/documents
Note. To add ingredients to the jar while a program is running, remove the lid plug by turning it counterclockwise and pulling it upwards. Add ingredients through the opening in the lid. Use the tamper (10) to push the ingredients towards the blade.
-
Wait for the program to finish. The display will show "End".
-
Tap the "ON/OFF" button and unplug the device.
-
Remove the jar from the motor base, open the lid and remove the contents of the jar.
Note. After a program with a heating function is finished, use an oven mitt (not supplied) to remove the lid or wait for it to cool down completely.
- Clean the device (see "Cleaning and Maintenance").
Selecting an Automatic Program
Use the “Function” button to select the desired program. The icon and the name of the selected program will appear on the display.
Manual Program Setup
- Tap the "Manual" button. The display will show the menu for setting the blade rotation speed.
- Set the desired blade rotation speed using the "Speed +" and "Speed -" buttons.
- Tap the "Manual" button again. The display will show the menu for selecting the program run time.
- Set the desired time using the "Time +" and "Time -" buttons.
Using the Device With a Steaming Container (ATB0001 Model Only)
- After preparing the device for use, pour the necessary amount of water into the jar.
- Place the steaming container (13) in the jar.
- Place the desired products in the container.
- Follow steps 3–12 in the "Using the Device" section while selecting the Steam program.
aeno.com/documents 15
Delayed Start
- Follow steps 1–6 in the "Using the Device" section.
- Tap the "Preset Time" button. Next, use the "Time +" and "Time -" buttons to set the time after which the device will start to operate.
- Use the "Function" button to select the desired automatic program or set the program manually (see "Manual Program Setup").
- Tap the "ON/OFF" button. The selected program will start automatically after the set time.
Cleaning and Maintenance
ATTENTION! Do not immerse the motor base and the jar base (5) in water or other liquids (see Fig. G). This may result in damage.
ATTENTION! Clean the device only after unplugging it and letting it cool down completely.
ATTENTION! Clean the blade only with the supplied brush. Do not touch the blade with your hands.
Cleaning the Motor Base. Wipe the base with a soft cloth dampened with water. Then wipe dry.
Cleaning the Lid and Its Plug. Remove the plug. Using a soft sponge and some dishwashing detergent, wash the lid and plug, then rinse under running water. Then wipe dry.
Cleaning the Jar. Self-Cleaning Function
- Pour 500 ml of warm water into the jar and add a small amount of dishwashing detergent.
- Close the lid and insert the plug into the lid.
- Place the jar on the motor base and plug the device into a socket.
- Tap the "ON/OFF" button, and then tap and hold the "Cleaning" button. The blender blade will rotate as long as the "Cleaning" button is held down.
- Release the "Cleaning" button to complete the self-cleaning.
- Remove the jar and rinse the inside under running water. If necessary, use the supplied brush (11) to remove any remaining dirt on the blade and (or) the inside of the jar.
- Wipe the jar dry.
16 aeno.com/documents
Troubleshooting
“E1” error. Possible cause: the blender jar and (or) the lid is not installed or is installed incorrectly. Solution: place the jar on the motor base as shown in Figure D; close the lid as shown in Figure F.
"E2" error. Possible cause: short circuit of the sensor. Solution: contact an authorized service center.
“E3” error. Possible cause: overheating of the device. Solution: unplug the device and allow it to cool down completely.
Products are poorly blended. Possible causes: too many or too little products in the jar; not enough liquid in the jar. Solution: remove the excesses or add products to the jar; add some liquid into the jar.
The liquid pours out of the jar. Possible cause: too much liquid in the jar. Solution: observe the maximum level for hot (1,400 ml) and cold (1,750 ml) liquids.
ATTENTION! If none of the suggested solutions helped you eliminate the problem, contact the supplier or an authorized service center. Do not disassemble the device or attempt to repair it yourself.
ASBISC reserves the right to modify the device and to revise and change this document without prior notice to users.
The warranty period and service life are 2 years from the date of retail sale of the device.
Manufacturer: ASBISC Enterprises PLC, Iapetou, 1, Agios Athanasios, 4101, Limassol, Cyprus. Tel.: +48732080077, info@asbis.com, asbis.com. Made in China. All trademarks used herein are the property of their respective owners. The date of manufacture is marked on the package.
Up-to-date information about and a detailed description of the device, as well as connection instructions, certificates, and details about the companies that deal with quality and warranty claims are available at aeno.com/documents. This device complies with applicable safety requirements.
RoHS Directive. The device complies with the requirements of the Directive 2011/65/EU on the Restriction of Hazardous Substances (RoHS), including the requirements of the RoHS Directive 2015/863/EU.
aeno.com/documents 17
.aeno.com/service-and-warranty , Support@aeno.com
Sthuhlywui punlpwqptn
Uwnph unwnptpp u puqnwnphsutpp (untu uly. A)
1 – lquwhwnphsh hupngwly, 2 – lquwhwnphs, 3 – pəwu, 4 – nqufuwl, 5 – pəwuuh hhuip, 6 – pnfuwl,
7 – lqwnwllwpudwú ywhwáwú ltypwánú, 8 – 2wnpdhýwjhú pínlú, 9 – hnuwáph úwyníhu, 10 – hphý, 11 – junqwáwú, 12 – zuwhýs puódwú, 13 – qnlnp2nl úpnu wjuwnpwwuntínl hwiúwn lqnáuntjátín *:
* Uħwjū ATB0001 unmanned:
g_2g_1g_0g_3g_2g_3 ( d_2g_1s_2g_3g_2g_3 ): 220–240 3 (AC), 50/60 3, 800,0 3 ^8 ( d_2s_1 .) d_2m_bd_3s_2g_2g_3 g_2g_1g_3s_2g_2g_3 d_2m_am_aq_0b_0 g_2g_1g_3s_2 : < 0,5 3 ^8 . x 3 d 1 u d_2m_ag_2g_3 m_3 : 1,75 cm. q 3 s 1 u d_2m_bg_3 u b_0b_0d_3 g; 35000 d_2/f_0-d_2g . s_2g_1m_as_2g_2g_3 g_2g_1m_as_2g_2g_3 g_2g_1m_as_2g_2g_3s : 8. b_0h_bf_3s_2g_2g_3 g_2m_as_2g_2g_3s : 9. g_2p_as_2g_2g_3 g_2g_1s_2g_2 u: 24 u- d_2g . d_2m_as_2d_3 u g_2y_ bf_3 os. q 3 s 1 u g_2r_ bs_ 2s_ 1s_ 2s_ 1s_ 1s_ 1s_ 1s_ 1s_ 1s_ 1s_ 1s_ 1s_ 1s_ 1s_ 1s_ 1s_ 1s_ 1s_ 1s_ 1s_ 1s_ 1s_ 1s_ 1s_ 1s_ 1s_ 1s_ 1s_ 2s_ 1s_ 1s_ 1s_ 1s_ 1s_ 1s_ 1s_ 1s_ 1s_ 1s_ 1s_ 1s_ 1s_ 1s_ 1s_ 1s_ 1s_ 1s_ 1s_ 1s_ 1s_ 1s_ 2s_ 1s_ 2s_ 1s_ 1s_ 1s_ 1s_ 1s_ 1s_ 1s_ 1s_ 1s_ 1s_ 1s_ 1s_ 1s_ 1s_ 1s_ 1s_ 1s_ 1s_ 1s_ 1s_ 1s_ 2s_ 1s_ 2s_ 2s_ 2s_ 2 g_2g_1g_3g_3 g_2g_1g_3 g_2g_1g_3 g_2g_1g_3 g_2g_1g_3 g_2g_1g_3 g_2g_1g_3 g_2g_1g_3 g_2g_1^ g_2g_1 g_2 ^8 ^8 ^8 ^8 ^8 ^8 ^8 ^8 ^8 ^8 ^8 ^8 ^8 ^8 ^8 ^8 ^8 ^8 ^8 ^8 ^8 ^8 ^8 ^8 ^8 ^8 ^8 ^8 ^8 ^8 ^8 ^8 ^8 ^-6 ^8 ^8 ^8 ^8 ^8 ^8 ^8 ^8 ^8 ^8 ^8 ^8 ^8 ^8 ^8 ^8 .
o m g o u 3m 3m j o (ob. 6s b. A)
m g ATB0001: g s g g AENO^TM, g g m g g m s^2 s g m, ^2 m f, d f, s f, m b s g m m^2 g s g^m d g^2 b g.
m g ATB0003: g m AENO^TM, , , s, m b m s. m m o m o g g s m g s o g (o. s.A)
* Len pre model ATB0001.
ENG Recycling information. This symbol indicates that you must follow the Waste Electrical and Electronic Equipment (WEEE) and Waste Battery and Battery Regulations when disposing of the device, its batteries and accumulators, and its electrical and electronic accessories. According to the rules, this equipment must be disposed of separately at the end of its service life. Do not dispose of the device, its batteries and accumulators, or its electrical and electronic accessories together with unsorted municipal waste, as this will harm the environment. To dispose of this equipment, it must be returned to the point of sale or turned in to a local recycling facility. You should contact your local household waste disposal service for details.
KAT Ḋśśśśśśśśśśśśśśśśśśśśśśśśśśśśśśśśśśśśśśśśśśśśśśśśśśśśśśśśśśśśśśśśśśśśśśśśśśśśśśśśśśśśśśśśśśśśś Ś Ś Ś Ś Ś Ś Ś Ś Ś Ś Ś Ś Ś Ś Ś Ś Ś Ś Ś Ś Ś Ś Ś Ś Ś Ś Ś Ś Ś Ś Ś Ś Ś Ś Ś Ś Ś Ś Ś Ś Ś Ś Ś Ś Ś Ś Ś Ś Ś Ś Ś Ś Ś Ś Ś Ś Ś Ś Ś Ś Ś Ś Ś Ś Ś Ś Ś Ś Ś Ś Ś Ś Ś Ś Ś Ś Ś Ś Ś Ś Ś Ś Ś Ś Ś Ś Ś Ś Ś Ś Ś Ś Ś Ś Ś Ś Ś Ś Ś ŚŚŚŚŚŚŚŚŚŚŚŚŚŚŚŚŚŚŚŚŚŚŚŚŚŚŚŚŚŚŚŚŚŚŚŚŚŚŚŚŚŚŚŚŚŚŚŚŚŚŚŚŚŚŚŚŚŚŚŚŚŚŚŚŚŚŚŚŚŚŚŚŚŚŚŚŚŚŚŚŚŚŚŚŚŚŚŚŚŚŚŚŚŚŚŚŚŚŚŚŚ śṃṃṃṃṃṃṃṃṃṃṃṃṃṃṃṃṃṃṃṃṃṃṃṃṃṃṃṃṃṃṃṃṃṃṃṃṃṃṃṃṃṃṃṃṃṃṃṃṃṃṃṃṃṃṃṃṃṃṃṃṃṃṃṃṃṃṃṃṃṃṃṃṃṃṃṃṃṃṃṃṃṃṃṃṃṃṃṃṃṃṃṃṃṃṃṃṃṃṃṃ Municipal Council of the Secretary of the Secretary of the Secretary of the Secretary of the Secretary of the Secretary of the Secretary of the Secretary of the Secretary of the Secretary of the Secretary of the Secretary of the Secretary of the Secretary of the Secretary of the Secretary of the Secretary of the Secretary of the Secretary of the Secretary of the Secretary of the Secretary of the Secretary of the Secretary of the Secretary of the Secretary of the Secretary of the Secretary of the Secretary of the Secretary of the Secretary of the Secretary of the Secretary of the Secretary, and in respect to the Secretary of the Secretary of the Secretary of the Secretary of the Secretary of the Secretary of the Secretary of the Secretary of the Secretary of the Secretary of the Secretary of the Secretary of the Secretary of the Secretary of the Secretary of the Secretary of the Secretary of the Secretary of the Secretary of the Secretary of the Secretary of the Secretary of the Secretary of the Secretary of the Secretary of the Secretary of the Secretary of the Secretary of the Secretary of the Secretary of the Secretary of the Secretary of the Secretary of that
natural_image
Simple line drawing of a house with no text or symbols
Please contact our online support team if you have any questions or issues with your AENO device.
This is a better option than visiting the store and will save you time and effort

Get support


aeno.com/service-and-warranty
UKR Отримати підтримку BOS Dobijte podršku BUL Получаване на поддрыкка CES Ziskejte podporu DEU Support erhalten ELL Λήψη υποστήριξης EST Saama toetuse FRA Obtenir de l'aide HRV Tražite pomoć na HUN Támogatás megszerzése HYE Ugwulgnipiniu υπωλων ITA Ottieni supporto KAT ∂δαθηρασθημι δησθός KAZ Κολday any LAV Sanemt atbalstu LIT Gauti palaikymą NLD Ondersteuning krijgen POL Uzyskaj pomoc POR Obter apoio RON Obtineçi asistență RUS Получить поддержку SLK Ziskał podporu SLV Pridobite podpoło SPA Obtener apoyo SRP Tražite pomoć na UZB Qo'llab quvvatlash xizmatidan foydalanish الحصول على الدعم ARA


- Table Blender
- Technical Specifications
- Scope of Supply (see Fig. A)
- Device Elements and Accessories (see Fig. A)
- Limitations and Warnings
- aeno.com/documents.
- Preparing for Use
- Using the Device
- Selecting an Automatic Program
- Manual Program Setup
- Using the Device With a Steaming Container (ATB0001 Model Only)
- Delayed Start
- Cleaning and Maintenance
- Cleaning the Jar. Self-Cleaning Function
- Troubleshooting
- Sthuhlywui punlpwqptn
- Uwnph unwnptpp u puqnwnphsutpp (untu uly. A)
- o m g o u 3m 3m j o (ob. 6s b. A)
- Please contact our online support team if you have any questions or issues with your AENO device.
Brand : AENO
Model : TB1
Category : Blender