Bigkid 2 - Car seat Axkid - Free user manual and instructions
Find the device manual for free Bigkid 2 Axkid in PDF.

| Product type | Child car seat |
| Brand | Axkid |
| Model | Bigkid 2 |
| Category | Forward-facing car seat |
| Safety standard | ECE R44/04 |
| Child weight | 15 to 36 kg |
| Installation type | ISOFIX + 3-point seat belt |
| Orientation | Forward-facing |
| Headrest adjustment | Yes, via handle at the back |
| Backrest recline adjustment | Yes, via handle under the seat |
| ISOFIX connectors | 2 retractable connectors with green indicator |
| Lateral ASAP | Yes, on the door side (side impact protection system) |
| Belt guides | Red guides for diagonal, lap and central guide (Premium) |
| Cover | Machine washable at 30°C (delicate cycle) |
| Care | Clean with mild detergent, no harsh chemicals |
| Spare parts | Use exclusively original Axkid parts |
| Warranty | 24 months from date of purchase |
| Recycling | Recyclable materials, follow local regulations |
| Recommended age | Approx. 3 to 12 years (depending on weight and height) |
| Use with airbag | Prohibited if active, deactivate if child < 140 cm |
Frequently Asked Questions - Bigkid 2 Axkid
User questions about Bigkid 2 Axkid
0 question about this device. Answer the ones you know or ask your own.
Ask a new question about this device
Download the instructions for your Car seat in PDF format for free! Find your manual Bigkid 2 - Axkid and take your electronic device back in hand. On this page are published all the documents necessary for the use of your device. Bigkid 2 by Axkid.
USER MANUAL Bigkid 2 Axkid
UN regulation no. 44/4
Instruction Manual
15-36kg, Gr 2-3
1
2
3
4
5
10
11
12

Sverige/Norge
Axkid AB
www. axkid.com
info@axkid.com
Tel: (+46) 511 760 620
UK/Ireland
Axkid Ltd
www. axkid.com
info@axkid.com
Tel: (+44) 0781086 7644
France
Axkid AB
www. axkid.com
info@axkid.com
Tel (+33) 06 07 01 87 73
Deutschland
Axkid GmbH
www. axkid.com
kundenservice@axkid.com
Tel: + (49) 60-99 84 89 05
Espana/Portugal
Independent Marketing
www.infobebe.es
info@infobebe.es
(+34) 952561000
Polsc
Junior Andrzej Kwapinski
Horbaczewskiego 4-6
54-130 Wroclaw Dh Astra Sklep
Poland Tel. + (48) 713 549 723
Czech Republic
Domecek pro deti
www.domecekprodeti.cz
info@domecekprodeti.cz
(+42)0727981815
Romania
SC Baby Car seats
www. axkid.ro
maria@axkid.ro
(+40)0747354747
New Zealand
Clicksafe
www.clicksafe.co.nz/axkid
axkid @ clicksafe.co.nz
Tel: (+64) 212 504 215
Suomi
Lastentarvike
www.lastentarvike.fi
info@lastentarvike.fi
(+358) 09 852 05 100
Malaysia
SafenSound
www.safensound.com.my
may@safensound.com.my
(+60)358702284
Greece Eλλάδα
Serbia Cp6nja
LETO shop
www.letoshop.gr
christos@leloship.gr
(+30)2111026730
Eesti
GreenHansa OU
www.beebipood.ee
rrho@beebipood.ee
(+372) 53008000
Latvia
Muki
www.muki.lv
jurgis@muki.lv
(+371)29282898
Lietuva
Kotryna Group
www.kotrynagroup.com
kotryna@kotryna.nl
(+370)52132254
South Africa
Quality Imports SA & #Carseatfullstop
www.qualityimportssa.co.za
qualityimportssa@gmail.com
(+27) 117897119
Island
Leiftur
www.leifturis.com
kristmann@leifurt.is
(+354)8212537
GB 6-11
DE 12-17
PL 18-23
ES 24-29
SE 30-35
NO 36-41
DK 42-47
IS 48-53
GR 54-59
FR 60-65
CZ 66-71
PT 72-77
RO 78-83
EE 84-89
FI 90-95
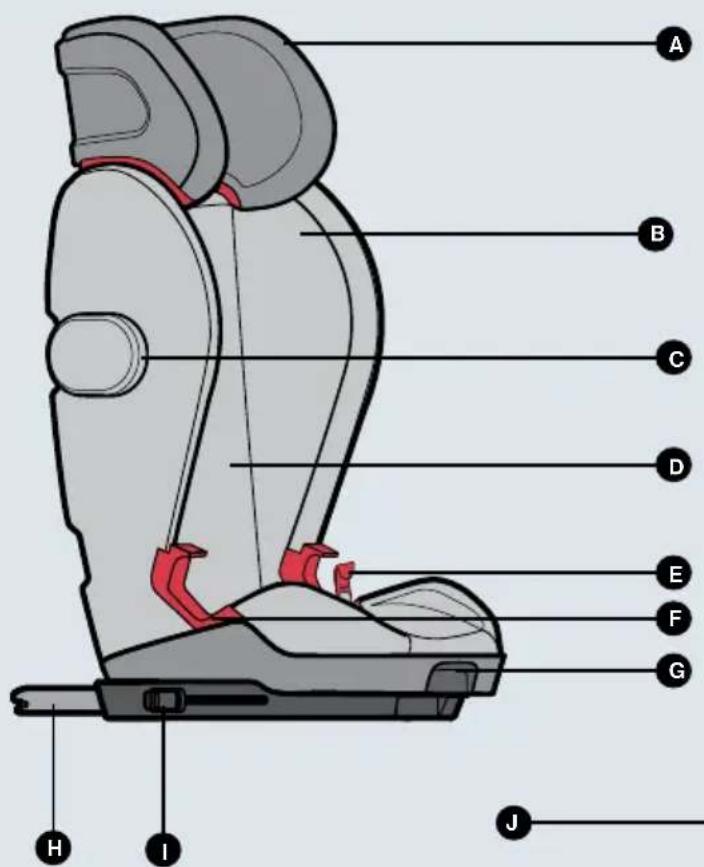
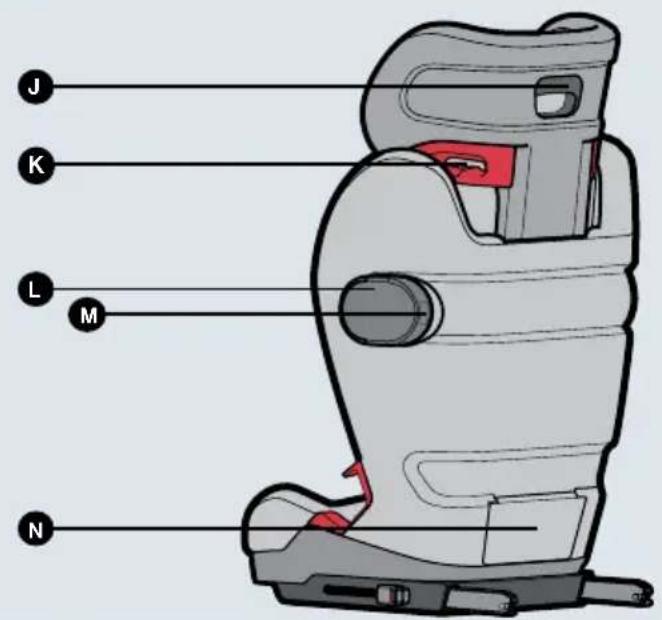
Parts


| A Headrest HISOFIX connector | |||
| B Side wings HISOFIX adjustment handle and indicator | |||
| C ASP attachment J Headrest adjustment handle | |||
| D Backrest K Shoulder belt guides | |||
| E Lap belt middle guide* L ASP | |||
| F | Lap belt side guides | M | ASIP removal button |
| G | Recline adjustment handle | N Manual compartment | |
*Bigkid 2 premium only
Table of content
Parts 6
Important information 7
Allowed and disallowed positioning of Axkid Bigkid 2 car seat 8
9
Restrainting your child in Axlid Bigkid 2 car seat 10
Seat adjustments 10
Removing Axkid Bigkid 2 car seat from the vehicle 11
Care and maintenance 11
Warranty 11
Thank you for choosing Axkid Bigkid 2
Read this instruction manual before installing Axkid Bigkid 2 car seat in your vehicle. For more information and installation videos visit www. axkid.com.
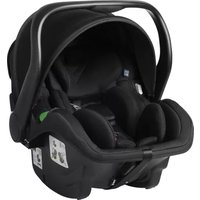
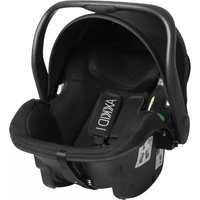
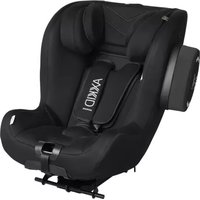
Axdid Bigkid 2 Premium is a forward-facing car seat approved for children between 15 to 36kg that features a lap belt middle guide and is approved according to ECE R44/04
Axkid Bigkid 2 is a forward-facing car seat approved for children between 15 to 36kg and is approved according to ECE R44/04
If in doubt, contact your retailer who can demonstrate a correct installation. An incorrect installation could endanger your child.
Important information
To maximize your child's safety, it is important that you keep the following in mind:
- The seat is ONLY to be used forward facing and for children weighing between 15 and 36kg
- The child should be a minimum of 140~cm in height to sit in front of an active airbag unless there are other recommendations from the car manufacturer. If you still wish to install Axkid Bigkid 2 in such seating position the airbag must be switched off according to the vehicle manufacturers instructions.
- Should you have an accident, no matter how small, your child car seat should always be replaced. It may have damage that is undetectable and could seriously jeopardize your child's safety. For this reason, Axkid does not recommend purchasing secondhand child car seats.
DO NOT use anything such as a cushion or coat to raise Axlid Bigkid 2 off the passenger seat. In the event of an accident, Axlid Bigkid 2 and the vehicle seat belts will not be able to protect your child as well as they should. - Avoid placing your child in direct sunlight for extended periods of time to avoid risk of the child overheating.
- Never leave your child unattended in the car.
Ensure any luggage or loose objects are secured in your vehicle as they may cause injuries to passengers in the event of a collision. - Ensure that Axkid Bigkid 2 does not become trapped by any moveable seats or doors within the vehicle.
To prevent injury due to deterioration, discontinue using a child seat if it is older than 8 years or has been in a crash. -
All passengers must be secured in their seats using a safety belt.
-
Read this instruction manual before installing Axkid Bigkid 2 in your vehicle. For more information and installation videos visit www. axkid.com.
- Keep this instruction manual for future reference.
DO NOT attempt use any part of this child car seat with any other child car seat. Ensure any luggage or loose objects (e.g. books, bags etc) are secured in your vehicle as they may cause injuries to passengers in the event of a collision.
DO NOT (except where described in this manual), attempt to disassemble or modify this child car seat or change the way the vehicle's seat belts are used.
DO NOT use Axkid Bigkid 2 in the home, or any other non-certified location. It has only been designed to be used in a car. Ensure that Axkid Bigkid 2 is always secured to the vehicle car seat - even when not in use. - The child car seat must not be used without the textile cover.
Notices
The child car seat must only be used in vehicles which are fitted with a three-point seat belt system that has been approved by regulation ECE-16 or similar.
- A correct fit is likely if the vehicle manufacturer has declared in the vehicle handbook that the vehicle is capable of accepting a 'Universal' child restraint for this group.
- The child car seat is a 'Universal' child restraint; it conforms to regulation ECE-R44/04 for general use in vehicles. It will fit most, but not all vehicle seats.
This child car seat has been declared 'Universal' under more stringent conditions than those applied to earlier designs, which do not carry the 'Universal' mark.
- Child car seats can mark vehicle seat upholstery. The manufacturer cannot be held responsible for damage or marking to vehicle seats.
- The following situations could be illegal and will void the warranty:
a. Any modifications or change of use of the child car seat that have not been authorized or advised by the manufacturer.
b. Any failure to fit the child car seat in strict accordance with the instructions. The manufacturer accepts no liability for issues arising from unauthorized modifications, uses or fitting.
- Do not use any load bearing points other than those described in this manual.
- Please keep this manual safe for any possible queries you may have in the future.
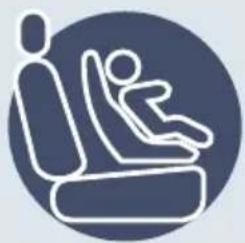
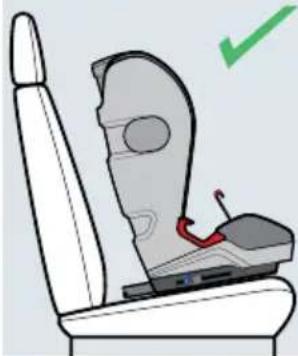
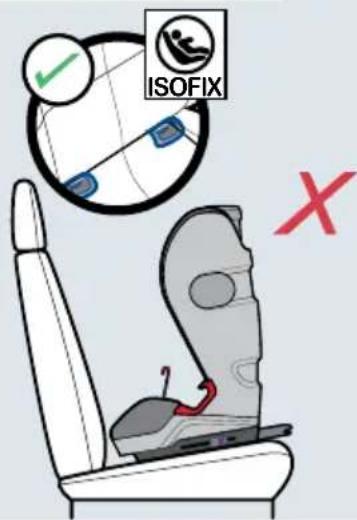
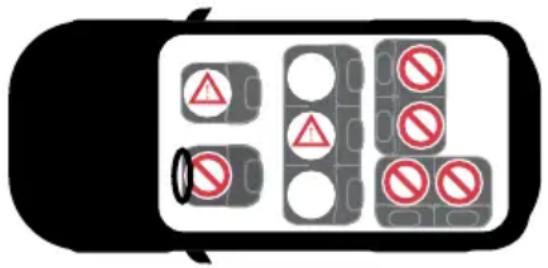
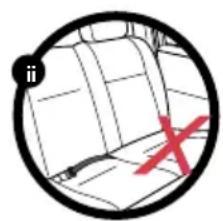
Allowed and disallowed positioning of Axkid Bigkid 2
The Axlk Bigkid 2 can be used on any forward-facing passenger seat which has a 3-point seat belt, approved to UN/ ECE Regulation No.16 or other equivalent standard. The Axlk Bigkid 2 cannot be used with a 2-point lap belt.
| Front passenger seat (no active airbag) YES | |
| Front passenger seat (active airbag) NO* | |
| Forward-facing seat with 3-point safety belt YES | |
| Seat with 2-point safety belt NO | |
| Side-facing seats NO | |
| Rear-facing seats NO |
IMPORTANT: The child should be a minimum of 140 cm in height to sit in front of an active airbag unless there are other recommendations from the car manufacturer. If you still wish to install Axkid Bigkid 2 in such seating position the airbag must be switched off according to the vehicle manufacturers instructions. It is important to always check if the vehicle's indicator light shows that the airbag is turned off.
IMPORTANT: Never use on rearward or side facing vehicle seats.
Installing Axkid Bigkid 2 car seat in the vehicle
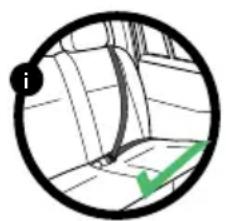
- Place the Axkid Bigkid 2 in a suitable forward-facing position equipped ISOFIX connection points. If the vehicle's seat back is adjustable, ensure it is in the upright position.
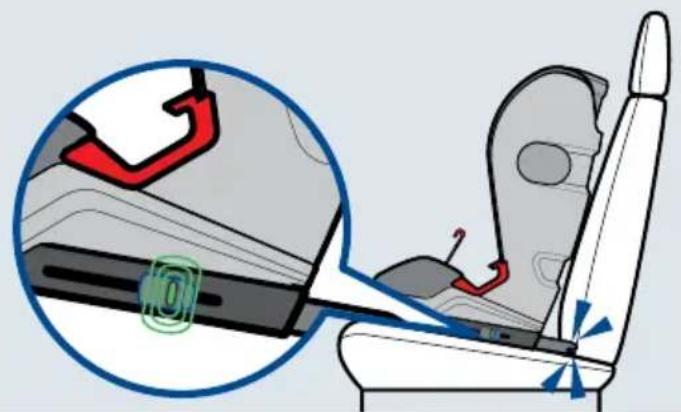
- Extend the ISOFIX connectors (H) by pushing the ISOFIX adjustment handle (J) and extending the sliders
- Insert the ISOFIX connectors (H) to the ISOFIX connection point in the car. Make sure that there is a "click" sound and a green indication on both ISOFIX indicators (H).
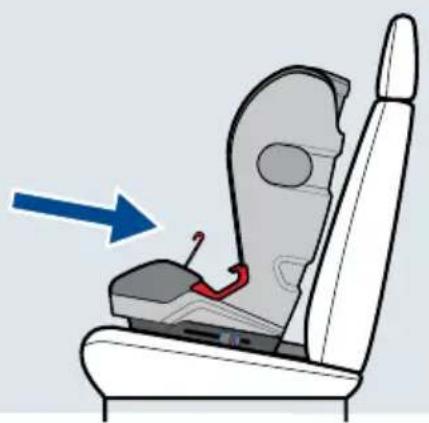
- Push the Axdid Bigkid 2 towards the vehicle seat back until there is no space between the vehicle seat back and the Axdid Bigkid 2.
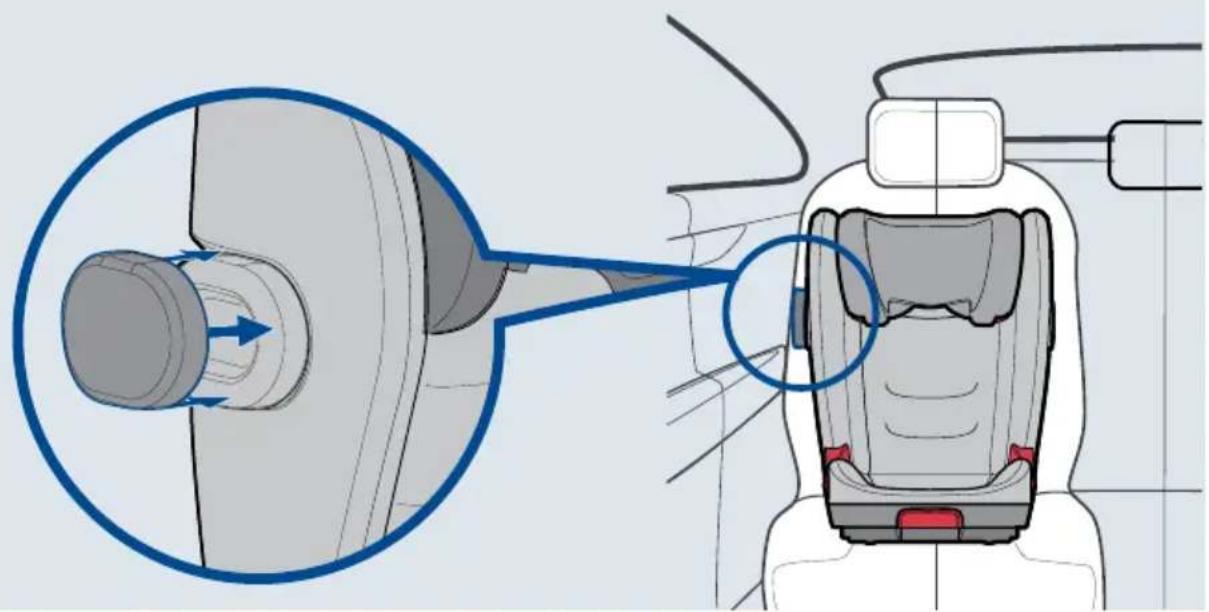
- Attach the ASIP (M) by locating the side ASIP attachment (C) on the side of the Axkid Bigkid 2 closest to the vehicle door. Press the ASIP button (N) and slide it into position.
Restraining your child in the Axkid Bigkid 2 car seat
GB
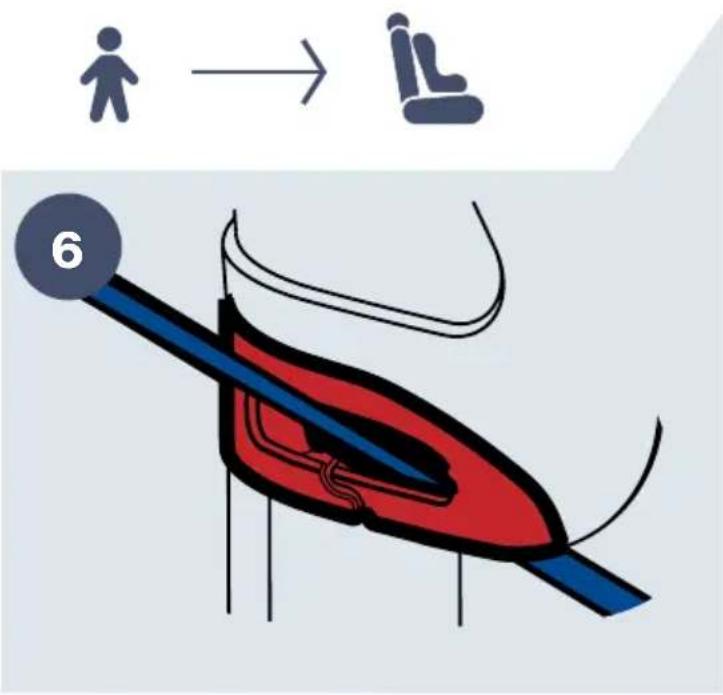
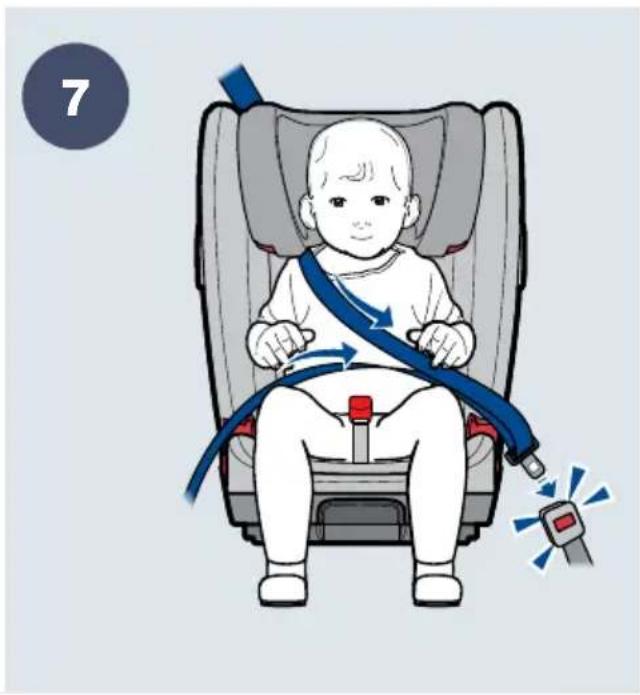
- Place your child in the AxD kid Bigkid 2, pull out the vehicle seat belt and slot the shoulder strap through the red shoulder belt guide (L) nearest the belt attachment.
- Pull out the vehicle seat belt in front of your child to the vehicle seat buckle. Lock the vehicle seat belt into the buckle ensuring it "CLICKS" into place.
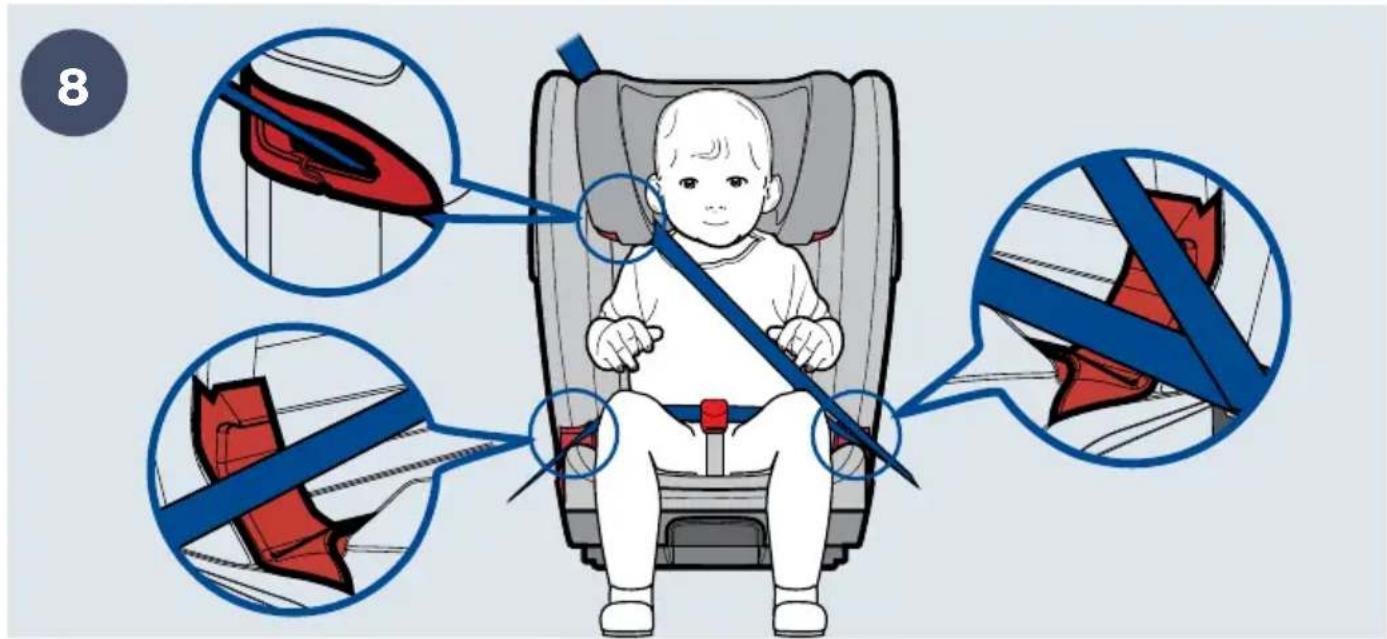
- Place the lap belt through the red side lap belt side guides (F)
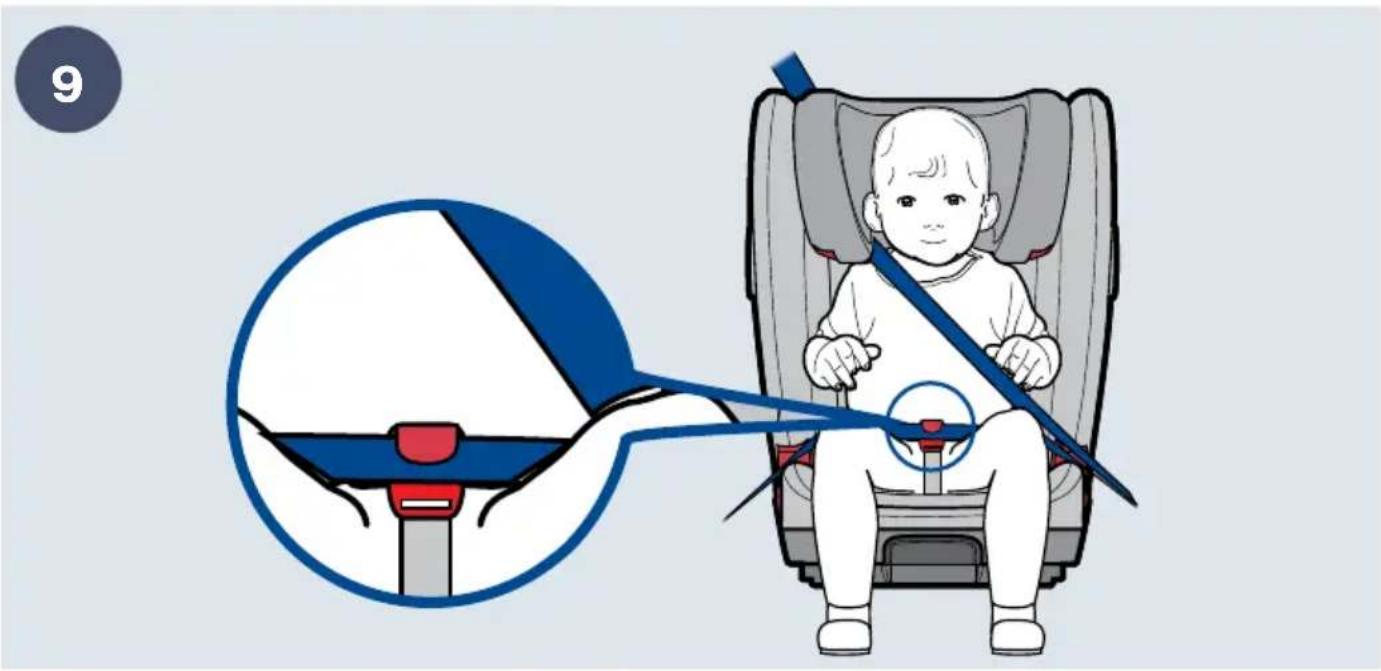
- Slot the lap belt into the lap belt middle guide (E). Although optional we strongly advise using the middle lap belt guide. (NOTE: The lap belt middle guide (E) is only available on the Bigkid 2 Premium version)
IMPORTANT: Tighten the vehicle seat belt by pulling the diagonal seat belt section, check that all slack has been removed from the vehicle seat belt.
Seat adjustments
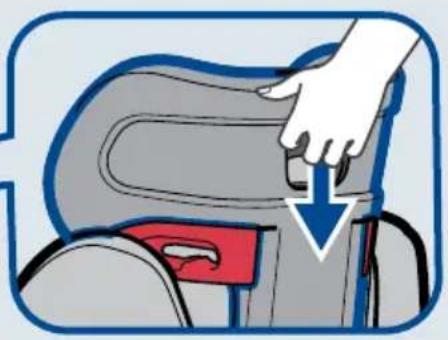
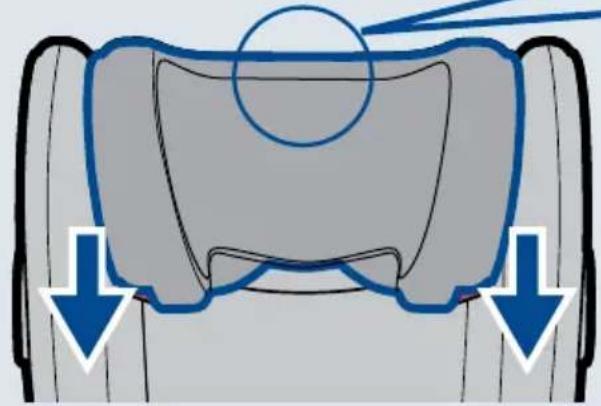
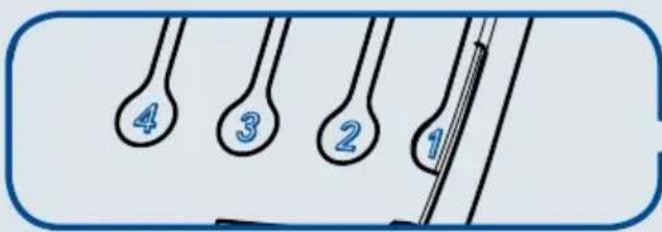
- To adjust the height of the Axkid Bigkid 2, squeeze the headrest adjustment handle (K) on the back of the headrest (A) and move the headrest up or down to one of its positions until the correct height is achieved.
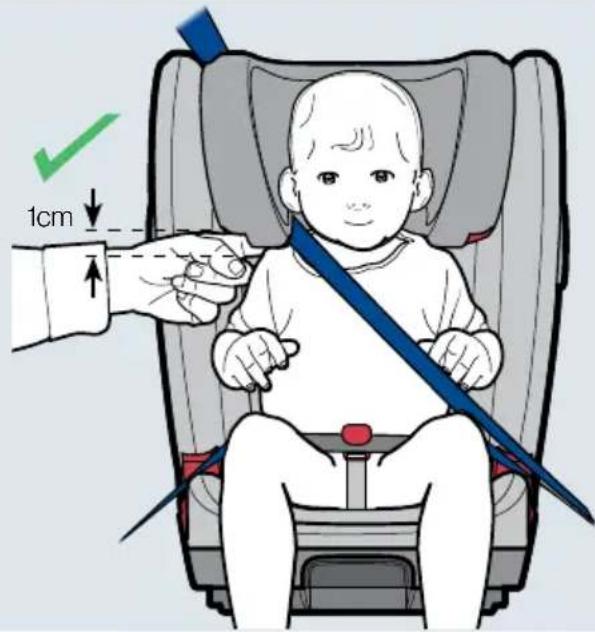
- The correct height of the headrest is when there is 1 cm between the child's shoulder and the lower edge of the headrest (A). Once the right fit is found release the handle and check the headrest to ensure it is locked into position.
- The recline of the Axkid Bigkid 2 backrest can be adjusted to enable different sitting positions. Pull the Recline adjustment handle (G) and pull the seat forward or backward relative to the base.
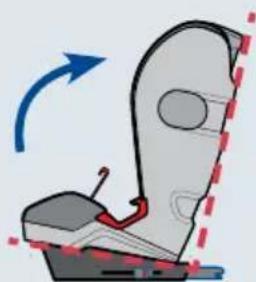
IMPORTANT: NEVER place your child in the Axkid Bigkid 2 whilst it is not fitted in a car. The Axkid Bigkid 2 should never be used free-standing as it may tip backwards
IMPORTANT: The lap belt is worn low over the hips. Check that the lap belt passes through both red lap belt side guides (F) and the lap belt middle guide (E). Check that the shoulder belt passes through the red shoulder belt guide (L) then diagonally across the child's chest and through the red lap belt side guide (F) nearest to the seat belt buckle. Finally, check that all slack has been removed from the vehicle seat belt.
IMPORTANT: Make sure the seat belt buckle is not wedged or interfering with the lap belt side guides (F)
WARNING: An unoccupied Axkid Bigkid 2 should be secured using a 3-point seat belt or the ISOFIX connectors if available.
IMPORTANT: DO NOT recline the child seat's backrest beyond the allowable adjustable range. If you hear a loud "click" whilst adjusting the backrest, then you have gone past the allowable range. Reclining the vehicle seat may adversely affect the position of the vehicle seat belt across the child and may result in death or serious injury during a crash. Refer to your vehicle owner's manual for adjusting the vehicle seat back with child seats.
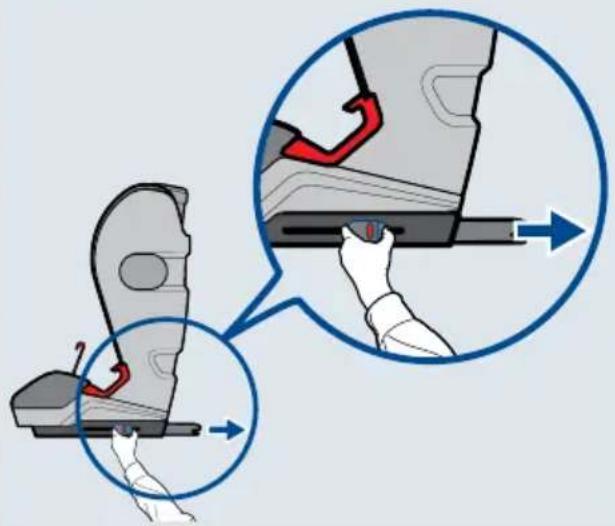
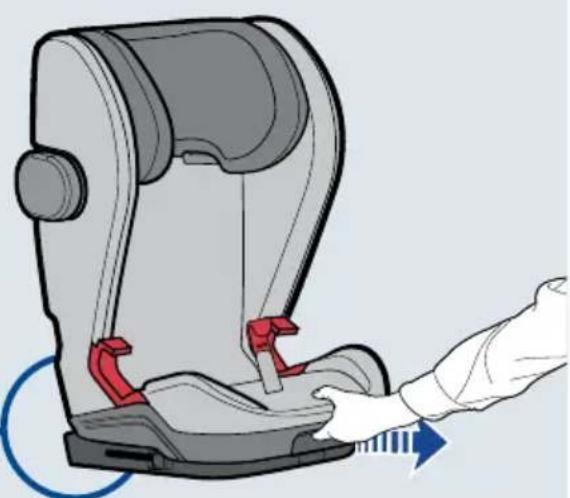
Removing Axkid Bigkid 2 car seat from your vehicle
To remove the Axkid Bigkid 2 from the vehicle, press both ISOFIX buttons to release the Axkid Bigkid 2 from the IsoFX connection points and lift the seat out of the vehicle. To remove the ASIP, push the button on the ASIP and remove.
Care and maintenance
The Axkid Bigkid 2 cover can be removed and washed in a washing machine at 30o C on the "Gentle Cycle" program. Do not put the cover in a dryer as this can damage the cover and the padding may separate from the fabric.
- Removing and refitting the seat covers.
- Raise the headrest to its highest position to allow for more room to work.
o Start with the base cover and remove the elastic loops from their hooks and remove the base cover.
Headrest cover: remove the elastic loops from their hooks and remove the head cover.
Side-wing covers: pull the cover from the top of the wing and then down and off.
Repeat on the other wing.
To refit the seat covers: reverse the above steps.
- Visit www.axkid.com to find videos explaining how to remove and attach the cover.
Any plastic parts of Axkid Bigkid 2 can be cleaned with mild detergent and water. Do not use aggressive chemicals containing solvents etc., as this can cause damage to the plastic and compromise the safety of the Axkid Bigkid 2.
All materials used in Axkid Bigkid 2 are recyclable and should be recycled as per your local legislation. Ask your local recycling center for advice when recycling this product.
- Do not make any modifications or alterations to Axkid Bigkid 2 other than those described in this instruction manual. Follow the instructions in this manual carefully. Any repairs must be carried out by the manufacturer or agent.
If the seat cover needs replacing, ensure only original products from Axlkd are used. If other products are used, the Axlkd Bigkid 2 safety system may be compromised and could lead to severe injury in case of an accident.
Warranty
Axkid Bigkid 2 is covered by a 24-month warranty from date of purchase. Ensure you save your receipt and bring it to your place of purchase if you have any warranty issues.
The warranty does not cover:
- Normal wear and tear
- Damage due to incorrect use, neglect, or accident
- If repairs have been carried out by a third party
All materials used have a very high UV-resistance rating. However, UV-light is very aggressive and will ultimately lead to fading of the seat cover. This is not covered by our warranty as it is considered normal wear and tear.
K componenten