T98 Ferrari 296 GTB - Game controller THRUSTMASTER - Free user manual and instructions

Find the device manual for free T98 Ferrari 296 GTB THRUSTMASTER in PDF.

THRUSTMASTER T98 Ferrari 296 GTB - Game controller
📄 778 pages English EN Download 💬 AI Question 11 questions ⚙️ Specs
Notice THRUSTMASTER T98 Ferrari 296 GTB - page 9
Pick your language and provide your email: we'll send you a specifically translated version.
Brand Thrustmaster
Model T98 Ferrari 296 GTB
Product type Racing wheel with pedal set
Compatible platforms PlayStation®4, PlayStation®5, PC (Windows® 10/11)
Rotation angle 240°
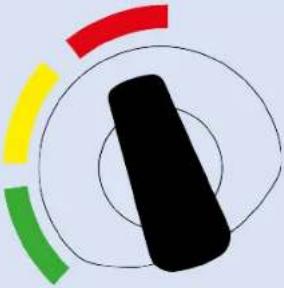
Manettino (driving assistance profiles) 3 positions: None, Medium, High
Gear shift paddles − and +
Buttons Directional, L2/R2, L3/R3, Action, MODE, SHARE/CREATE, PS, OPTIONS
Connectivity USB-A to console/PC, RJ12 port for pedal set
Power Via USB port of the console or PC
Operating temperature 15°C to 30°C
Recommended age 14 years and up
Safety Do not disassemble, do not expose to water or fire, keep out of reach of children, wear shoes while using the pedal set
Maintenance and cleaning Store in a dry place, away from dust and sunlight, do not twist cables
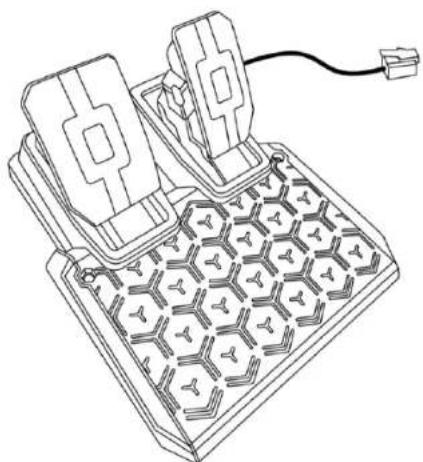
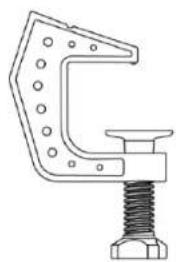
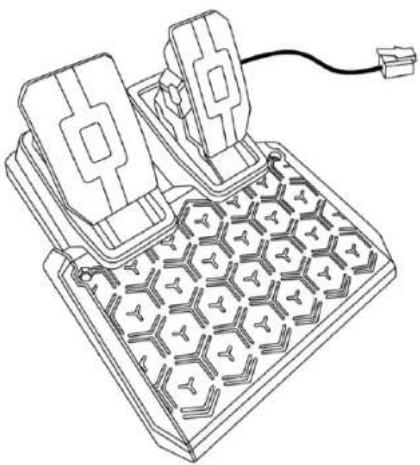
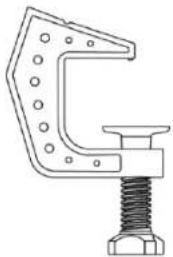
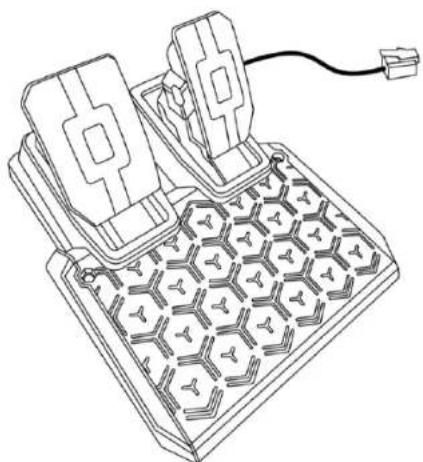
Box contents Wheel, pedal set, mounting bracket, documentation
Compatibility mode PlayStation® (blue LED), PC (green LED), Future mode (red LED)
Calibration Automatic: center the wheel before connecting, do not touch the pedals when starting up
Technical support Thrustmaster website (FAQ and online help)
Warranty period Not specified (check Thrustmaster website)

Frequently Asked Questions - T98 Ferrari 296 GTB THRUSTMASTER

How to calibrate the wheel and pedals?
Physically center the wheel before connecting the USB cable to the console or PC. Do not touch the pedals when connecting or starting the game. Once the game is started, press the pedals a few times for automatic calibration. If the problem persists, restart the console and reconnect the wheel.
What compatibility modes are available and how to change them?
Three modes: PlayStation® (blue LED), PC (green LED) and a future mode (red LED, inactive). To change, press the MODE button for 5 seconds until the LED flashes, then use the directional buttons to select the desired mode. Release to save.
What do the three driving assistance profiles (Manettino) mean?
The Manettino offers three levels: None (very sensitive wheel, good skill required), Medium (default, balanced) and High (less sensitive, suitable for everyone). You can change profile during gameplay.
How to install the wheel on a table or desk?
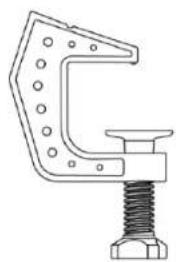
Place the wheel on the surface, insert the mounting bracket into the slot on the base aligning the notch, then tighten the clamping screw until perfectly stable. Beware of risk of pinching between the bracket and the table.
Is the wheel compatible with a cockpit or stand?
Yes, the pedal set can be attached to a compatible stand using the two mounting holes on each side (stand not included). The wheel attaches to a table or desk via the included bracket.
Why doesn't the red LED work?
The red LED corresponds to a future compatibility mode that is inactive. Do not select it for now. Use only the blue (PlayStation®) or green (PC) modes.
What are the important safety precautions?
Product intended for ages 14 and up. Never disassemble the device, do not expose it to water or fire. Do not place your fingers near the pedals during use. Always play with shoes. Disconnect the USB cable during prolonged inactivity.
How to maintain the wheel?
Keep the product in a dry place, away from dust and sunlight. Do not twist cables. Ambient temperature should be between 15°C and 30°C.
Is the wheel recognized as a controller or a wheel in games?
On PlayStation®4 and PlayStation®5, the T98 Ferrari 296 GTB is automatically recognized as a wheel for better responsiveness. In some games, use the wheel buttons to navigate menus to avoid interference with the controller.
What to do if the wheel does not work or seems poorly calibrated?
Turn off the console/PC, disconnect the wheel, reconnect all cables, restart and relaunch the game. Make sure the wheel is centered and the pedals are not pressed during connection. If the problem persists, contact Thrustmaster support.

User questions about T98 Ferrari 296 GTB THRUSTMASTER

1 question about this device. Answer the ones you know or ask your own.

Ask a new question about this device

Your email remains private: it is only used to notify you if someone answers your question.

How does the T98 Ferrari 296 GTB steering wheel rotation work?
Frequently Asked Questions - 29 d
Response Notice-Facile

The T98 Ferrari 296 GTB steering wheel offers a rotation of 240°, identical to a real Ferrari steering wheel. All your movements are directly reflected in the game.

Simple rotation

Turn the wheel naturally: sensitivity depends on your active assistance profile. For better gameplay, check in the game options (Controls / Steering Stops) that you have selected 240° or more.

Adjusting sensitivity with the Manettino

The small Manettino selector (3 positions) on the wheel controls the responsiveness:

  • None - Very sensitive, all movements reflected (mastery required)
  • Medium - Balanced driving by default, average initial sensitivity
  • High - Less sensitive, ideal for beginners or playing with a controller

You can change profiles during the game to find your preference.

Hand positioning

Always keep both hands properly positioned on the wheel without ever letting go completely to maintain full control.

Initial calibration

Before first use, physically center the wheel before connecting the USB. Do not touch the pedals when launching a game - they calibrate automatically after the first presses in-game.

Respond (be the first)

Download the instructions for your Game controller in PDF format for free! Find your manual T98 Ferrari 296 GTB - THRUSTMASTER and take your electronic device back in hand. On this page are published all the documents necessary for the use of your device. T98 Ferrari 296 GTB by THRUSTMASTER.

USER MANUAL T98 Ferrari 296 GTB THRUSTMASTER

Carefully read the instructions provided in this manual before installing the product, before any use of the product and before any maintenance. Be sure to follow the safety instructions. Failure to follow these instructions may result in accidents and/or damage. Keep this manual so that you can refer to the instructions in the future.

TABLE OF CONTENTS

  1. BOX CONTENTS......5
  2. FEATURES....6
  3. INFORMATION REGARDING USE OF THE RACING WHEEL 8
  4. INSTALLING THE RACING WHEEL ON A TABLE OR DESK....12
  5. INSTALLING THE PEDAL SET ON A SUPPORT OR IN A COCKPIT ....15
  6. INSTALLATION ...... 16

On a PlayStation®4 console....16

On a PlayStation®5 console....18

On PC* 20

Calibration of the racing wheel and pedals.23

Angle of rotation 25

  1. MAPPING FOR PLAYSTATION®4 CONSOLES OR PLAYSTATION®5 CONSOLES ....26
  2. MAPPING FOR PC 27
  3. COMPATIBILITY MODE......28 10.DRIVING SUPPORT PROFILES (DRIVE PROFILES) 31 11.COMPATIBLE GAMES....33
  4. AUTOMATIC EMULATION OF THE RACING WHEEL ON PLAYSTATION®4 CONSOLES OR PLAYSTATION®5 CONSOLES....34 13.FAQ AND TECHNICAL SUPPORT ....35

T98,

Ferrari 296 GTB

With the T98 Ferrari 296 GTB and its manettino dial offering three levels of driving support, you have a racing wheel that's perfect for all gamer profiles and all types of games.

This manual will help you install and use your T98 Ferrari 296 GTB under the best conditions. Before getting started racing, carefully read the instructions and the warnings: they will help you get the most enjoyment out of your product.

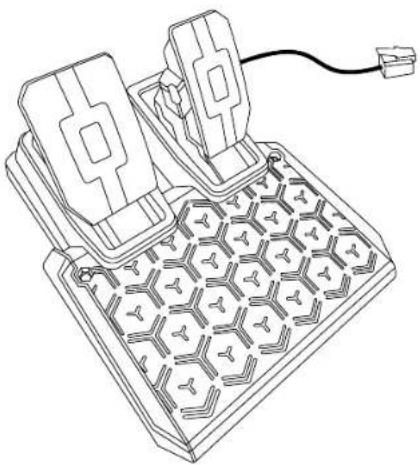
1. Box contents
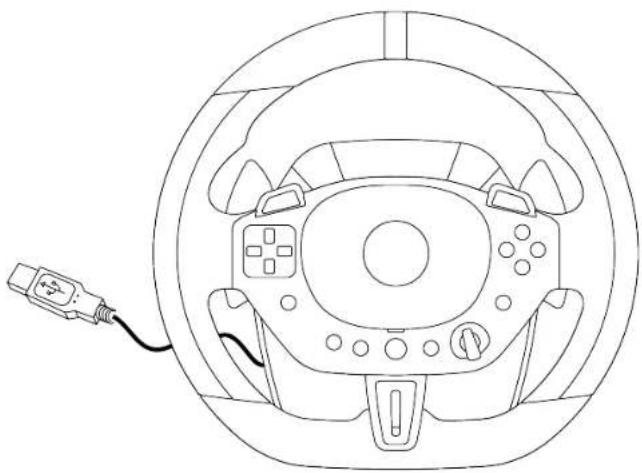
Top-down line drawing of a car steering wheel with a cable inserted, showing no text or symbols.

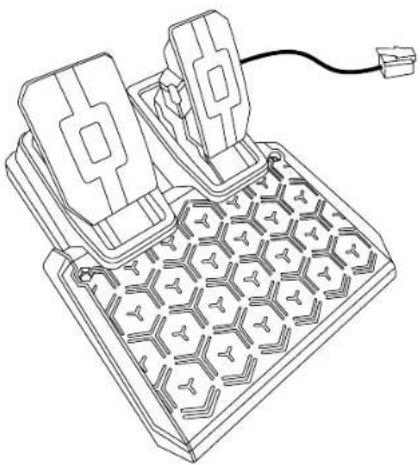
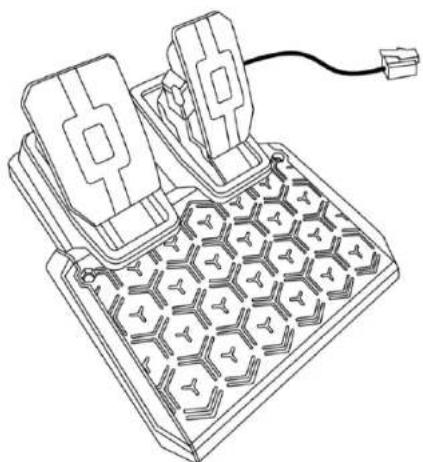
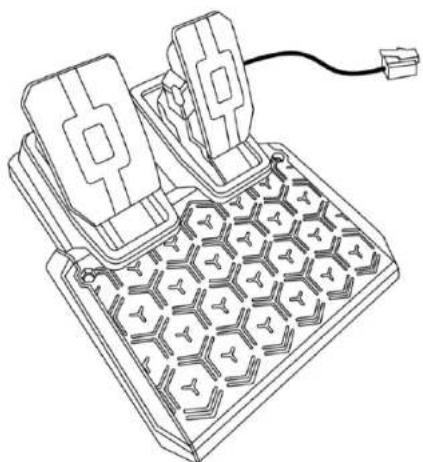
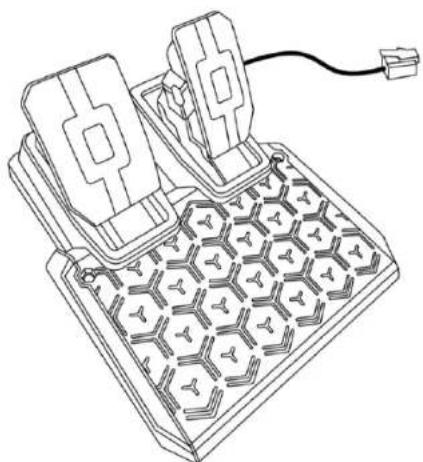
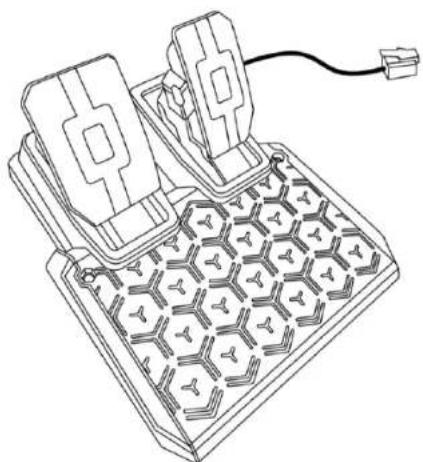
Line drawing of a mechanical device with hexagonal grid pattern and connected cable (no text or symbols).

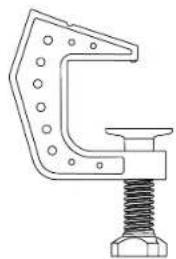
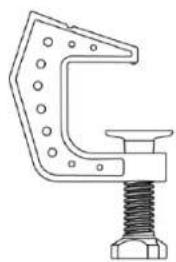
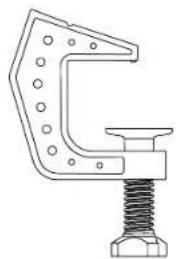
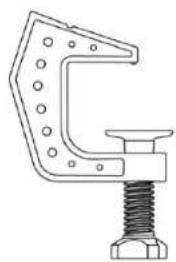
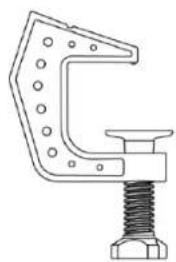
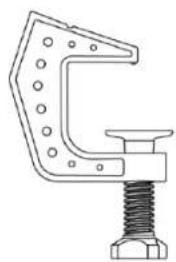
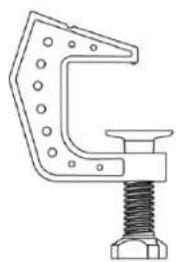
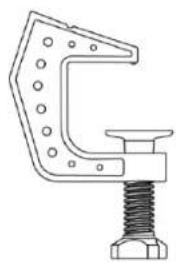
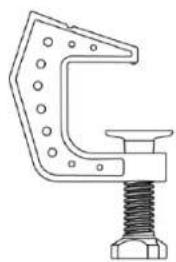
Technical line drawing of a mechanical clamp or bracket with a threaded spring (no text or symbols).

2. Features

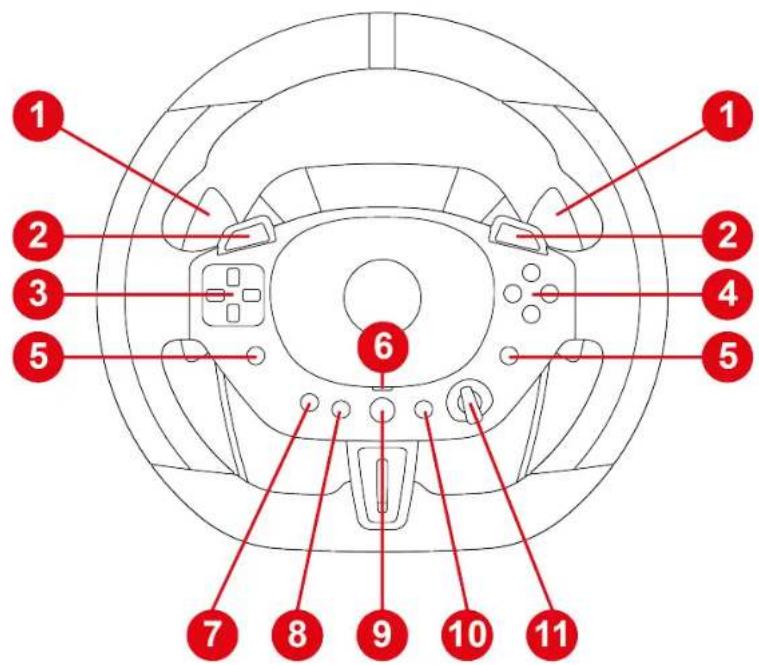
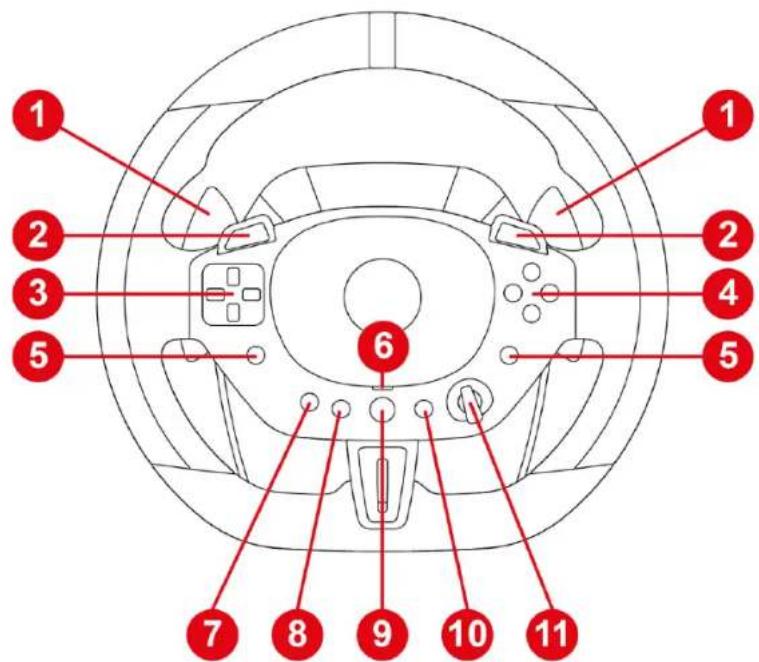
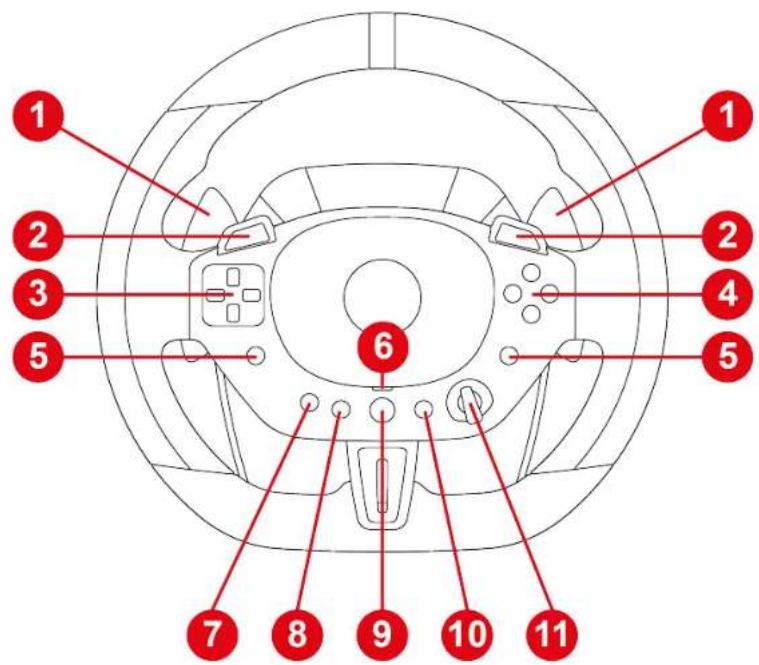
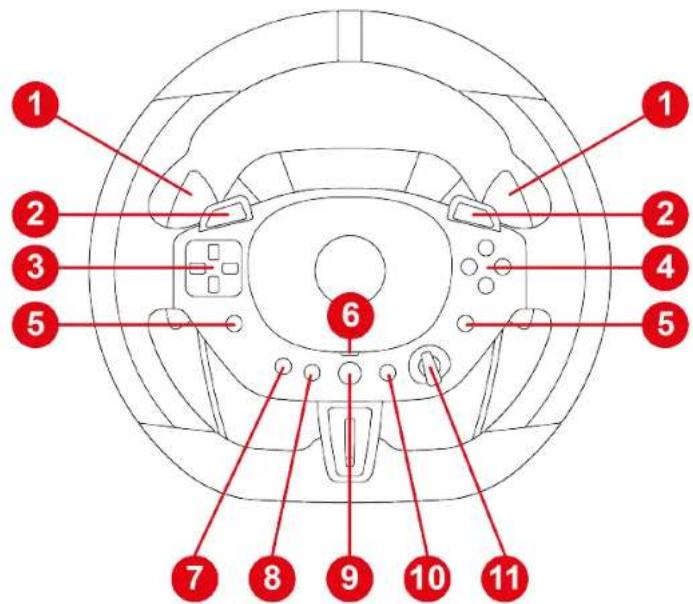
1 2 3 5 6 7 8 9 10 11

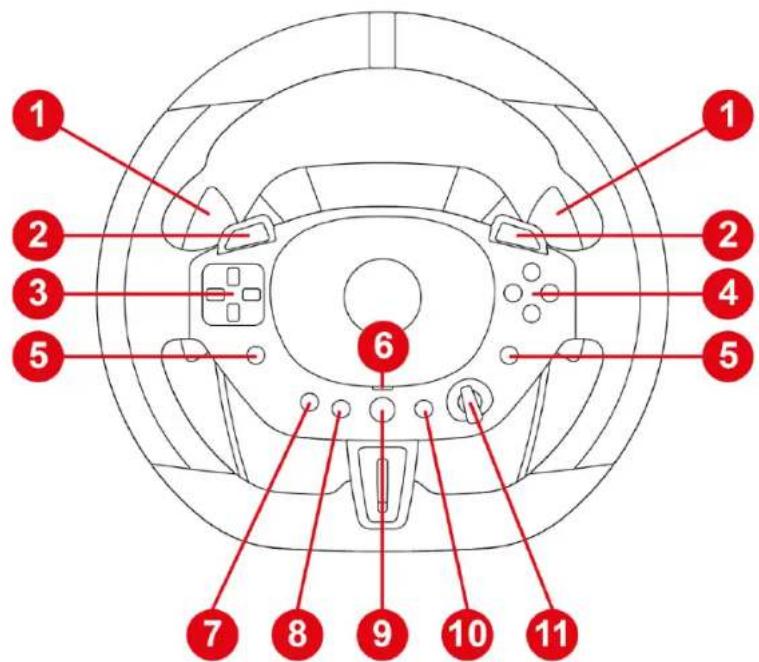
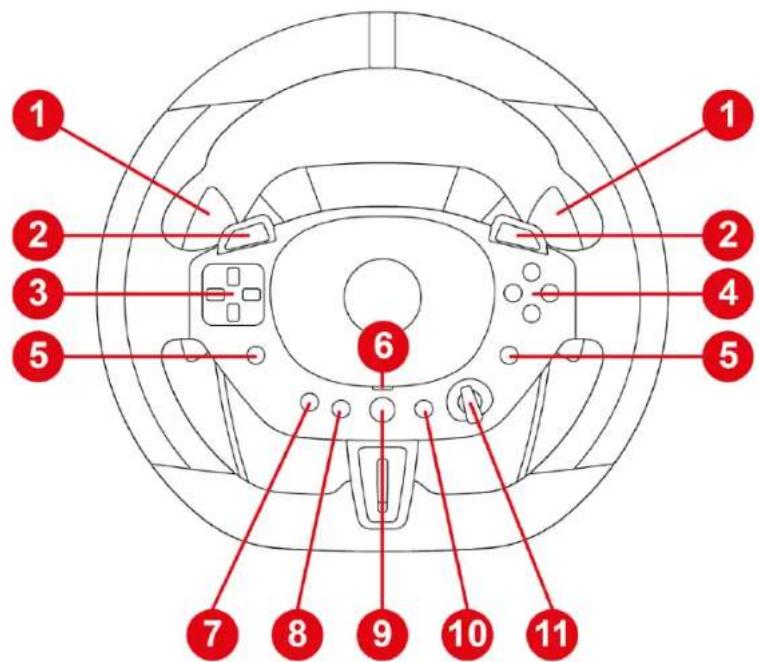
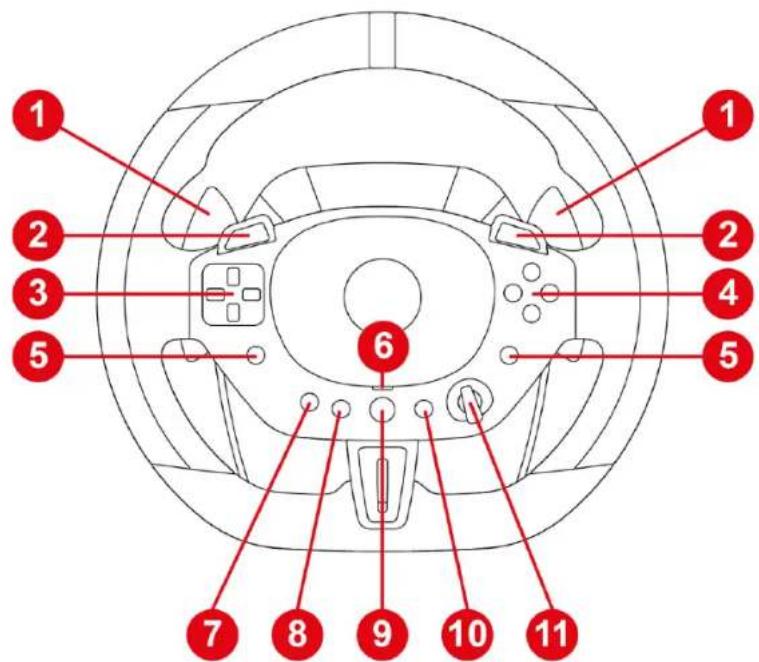
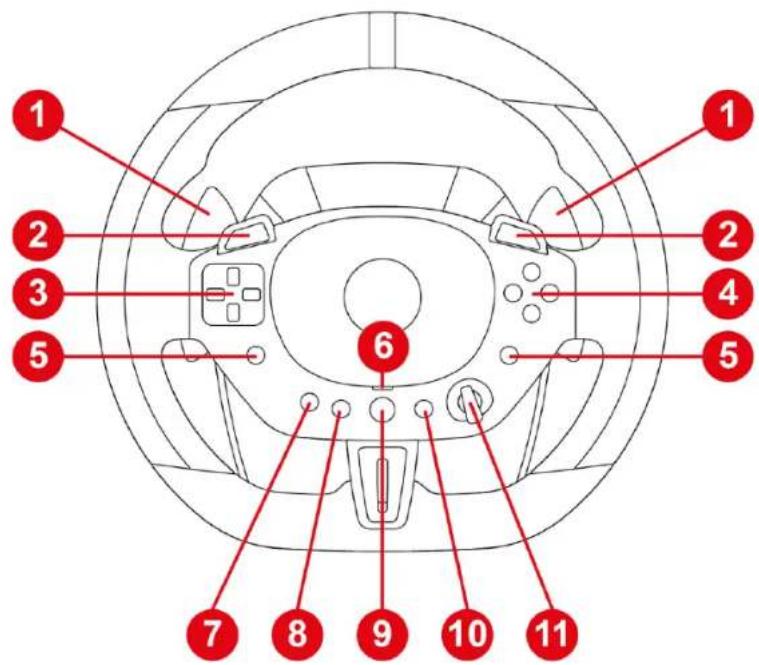
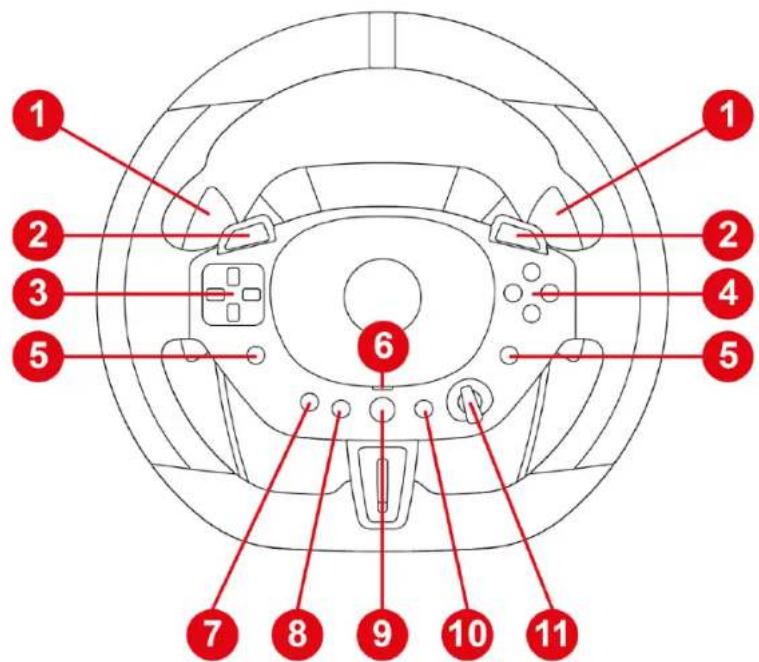
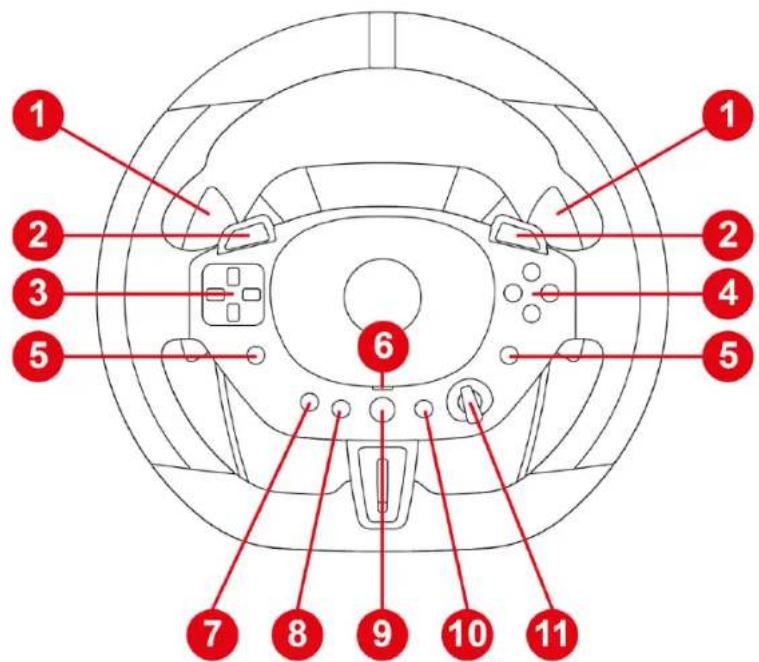
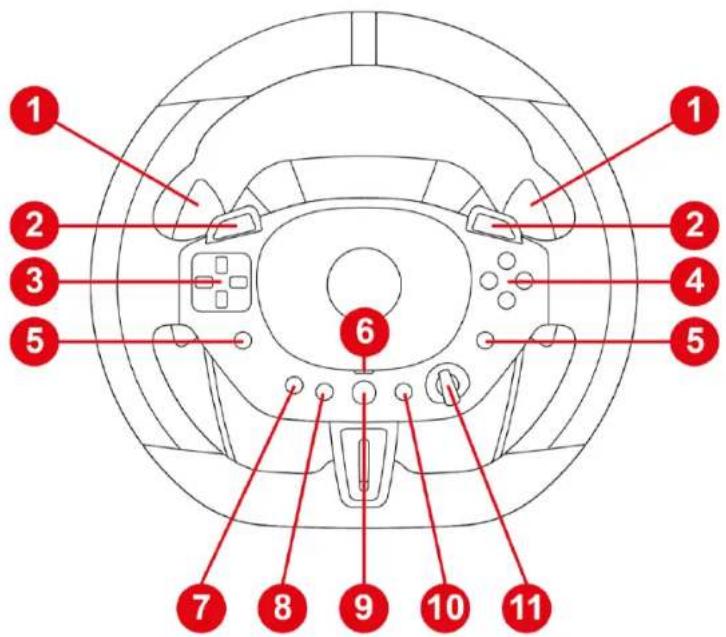
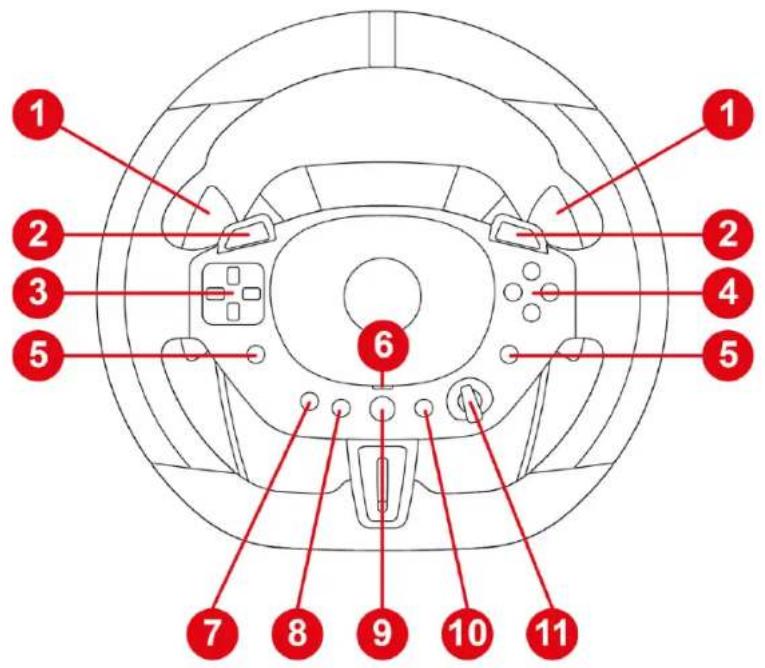
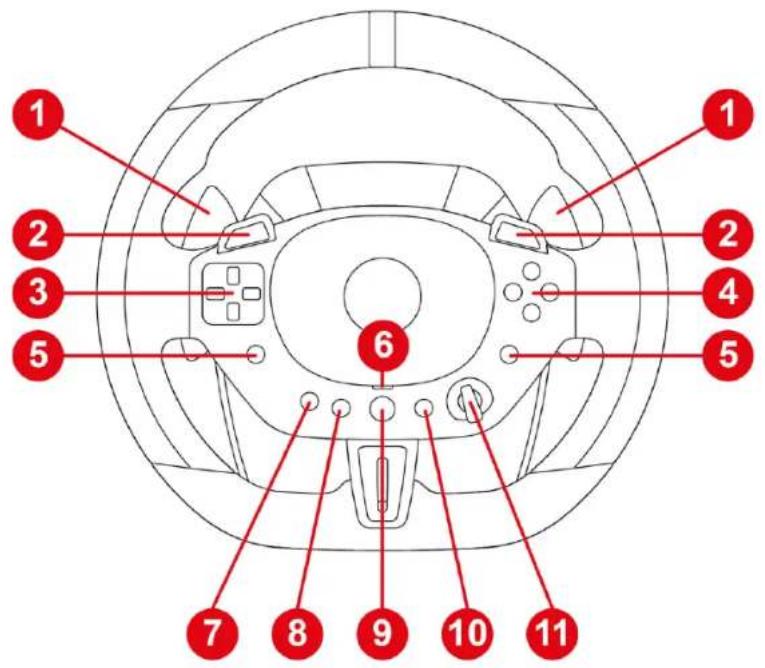
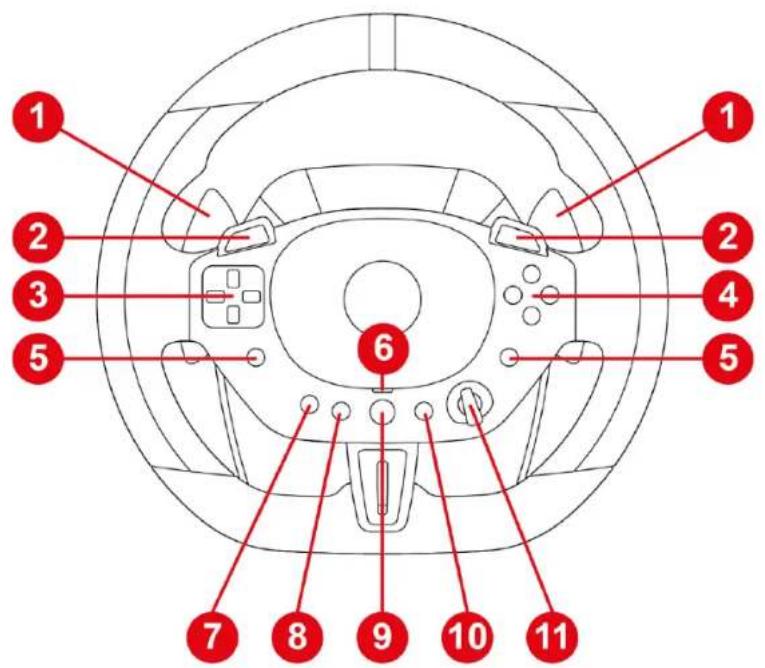
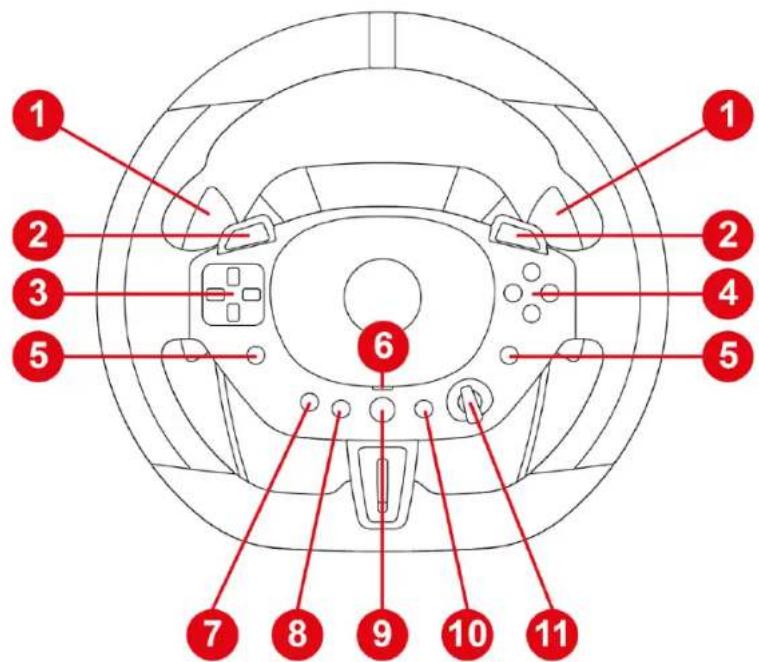
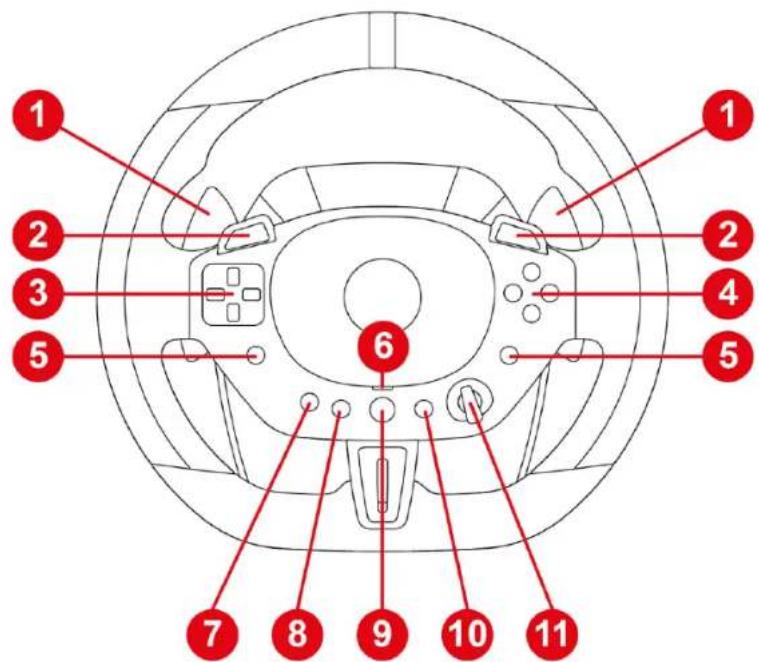
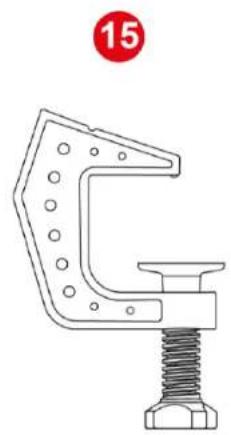
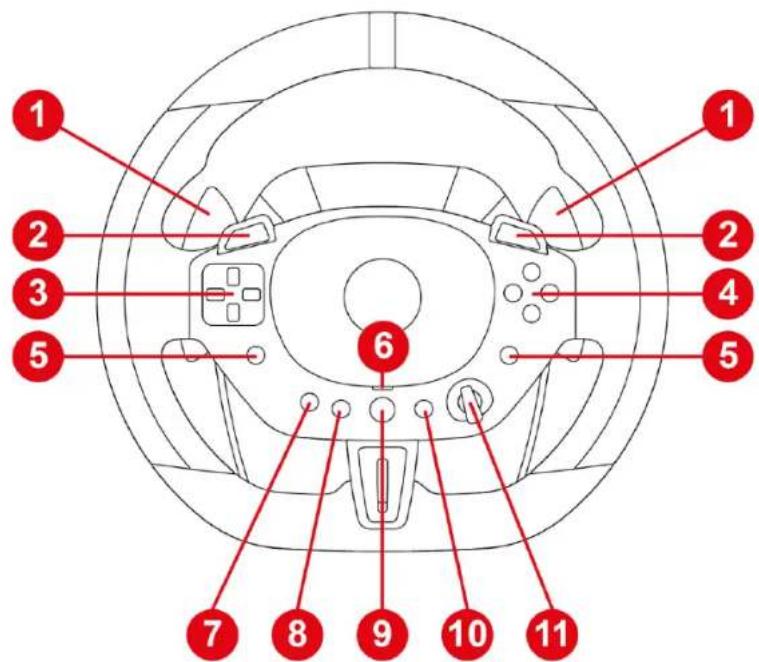
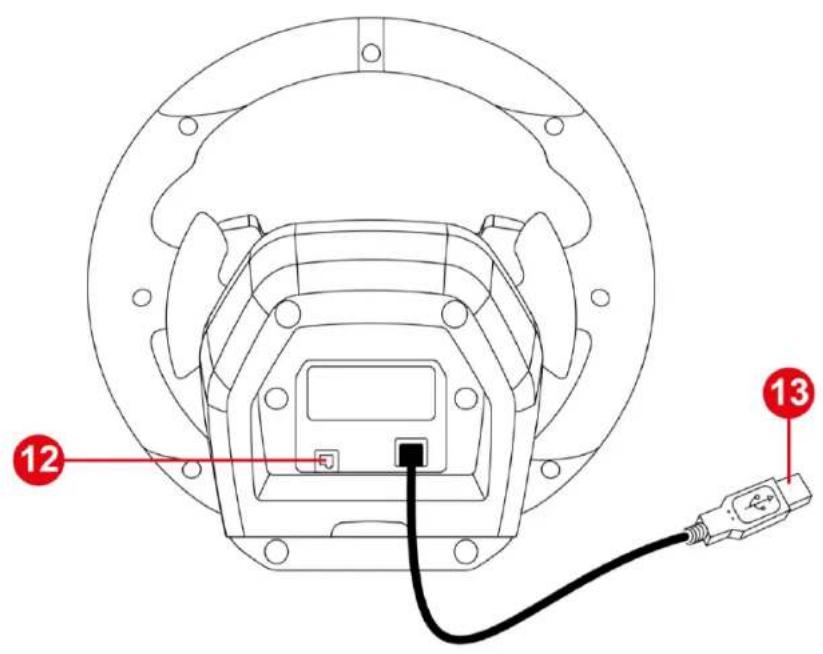
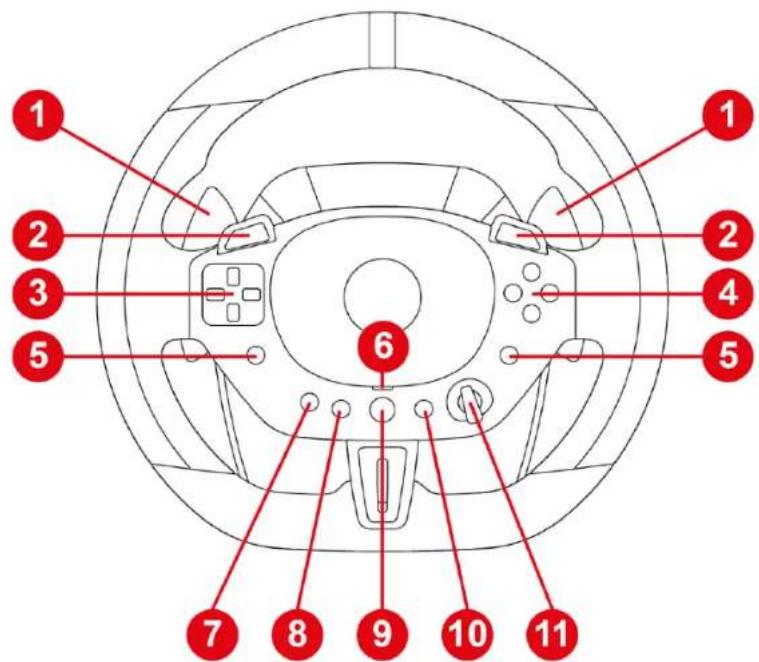
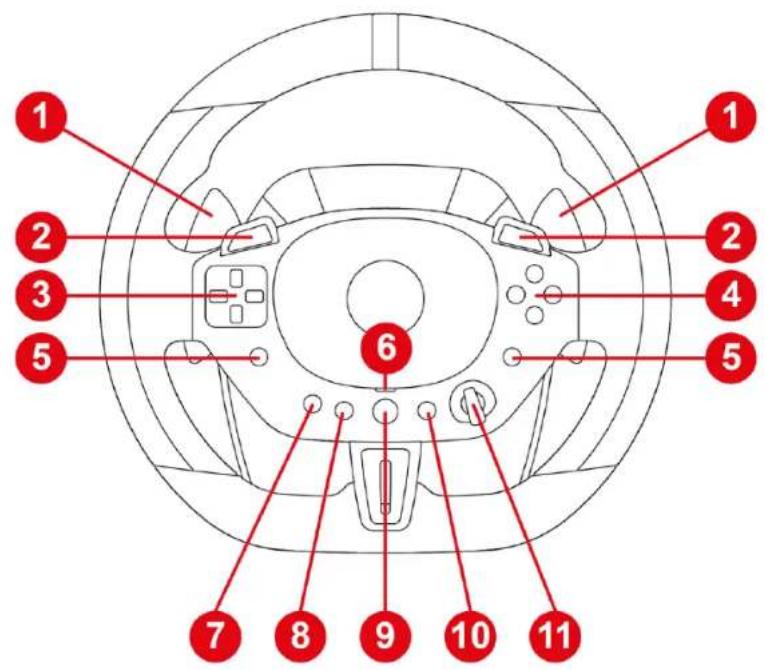
① Paddle shifters (− and +) ② L2 and R2 buttons 3 Directional buttons 4 Action buttons 5 L3 and R3 buttons 6 Compatibility mode LED (blue, red or green) ⑦ MODE button 8 SHARE button on PS4® consoles / CREATE button on PS5® consoles 9 PS button 10 OPTIONS button on PS4® consoles and PS5® consoles 11 3-position manettino dial (driving support profiles)
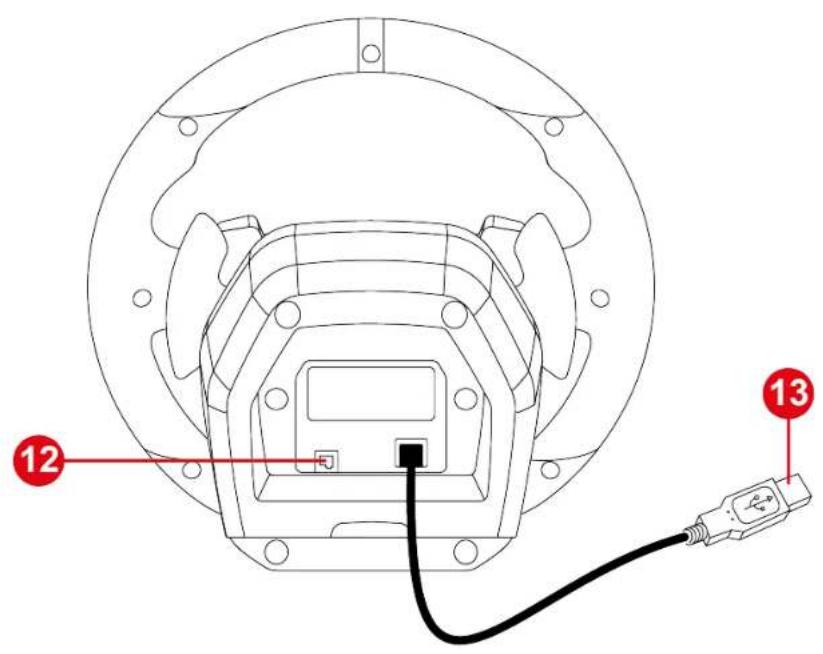
Technical diagram of a device with labeled components, showing internal wiring and connection points 12 and 13.

Technical line drawing of a mechanical device with no visible text or symbols.

Technical line drawing of a mechanical clamp or bracket with a bolt and threaded base (no text or symbols).

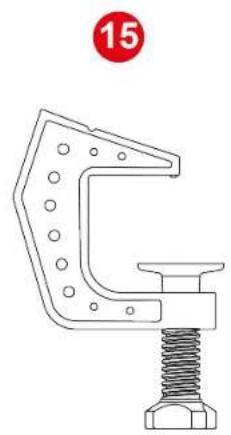
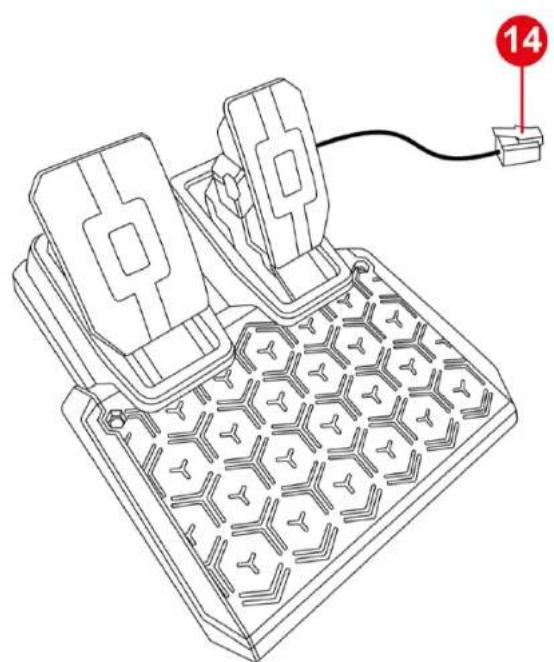
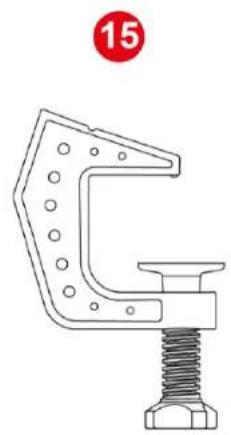
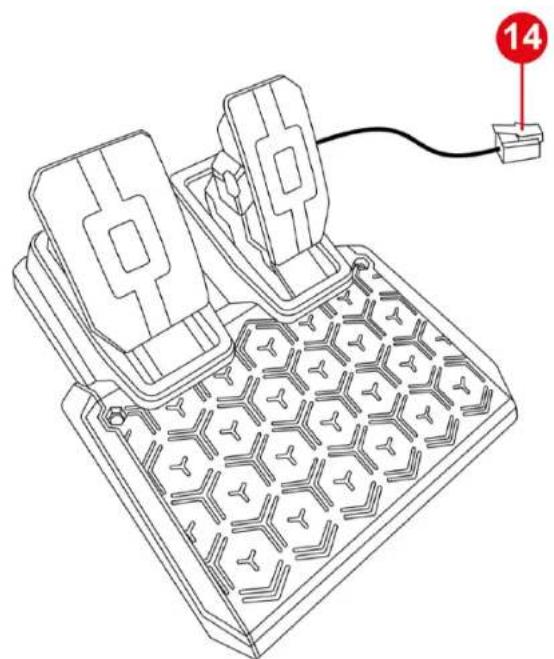
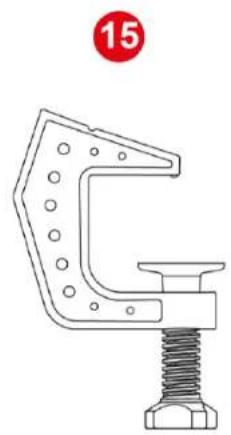
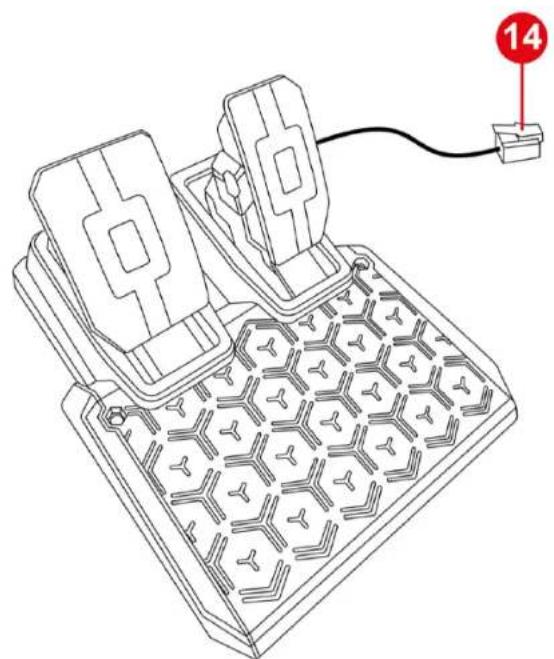
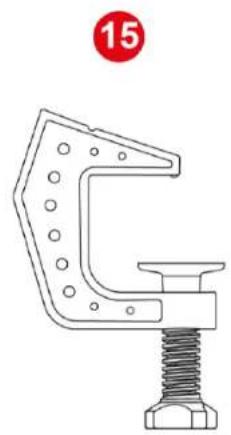
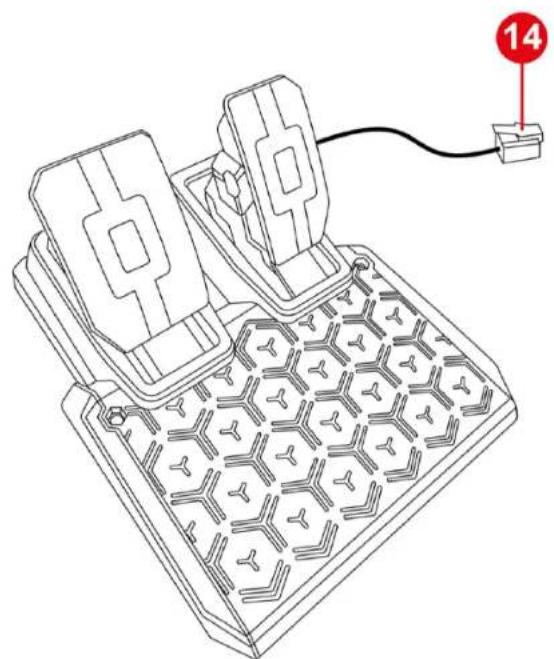
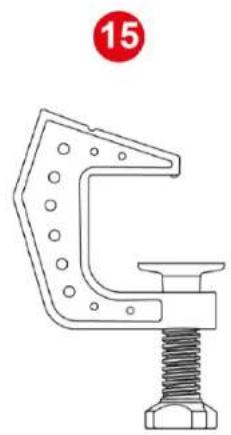
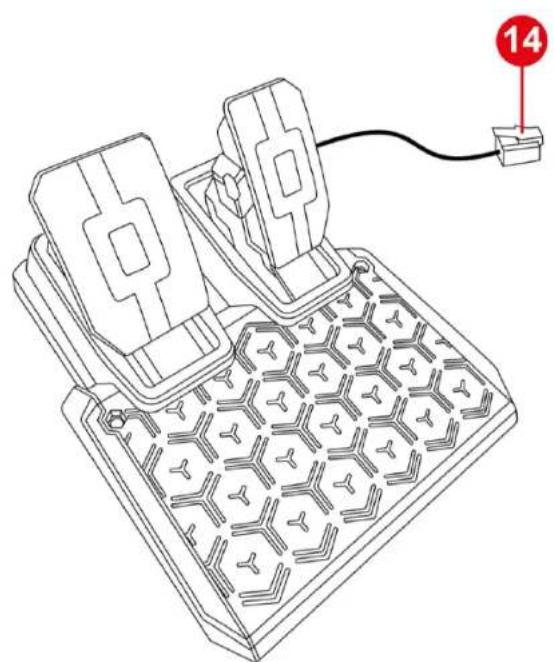
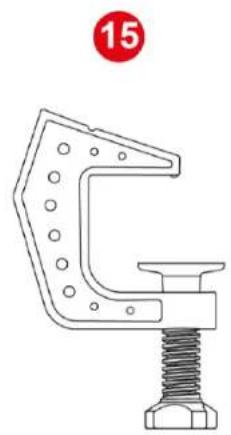
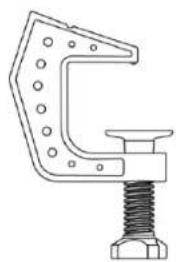
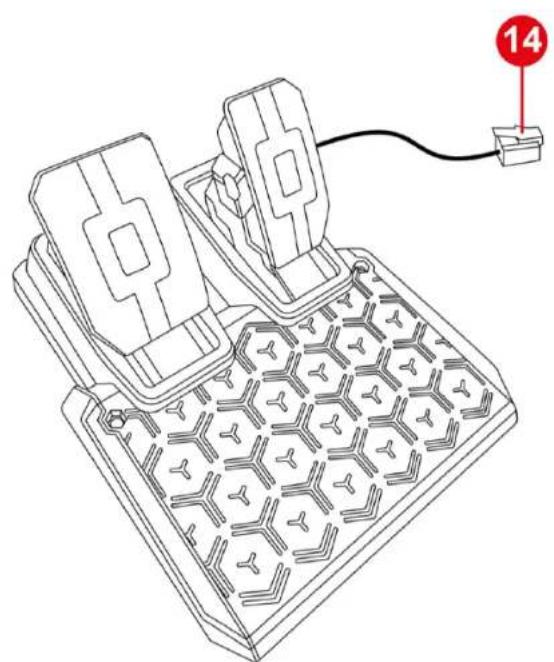
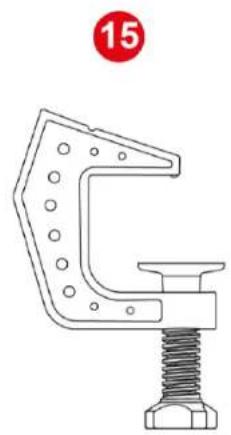
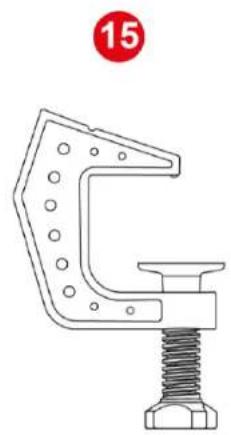
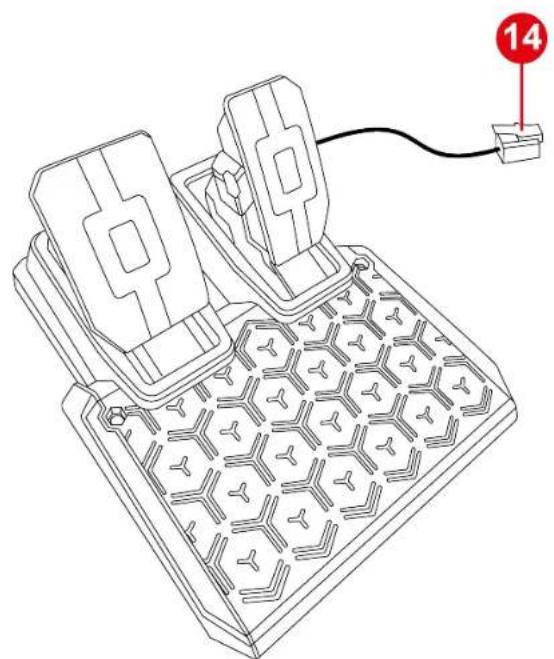
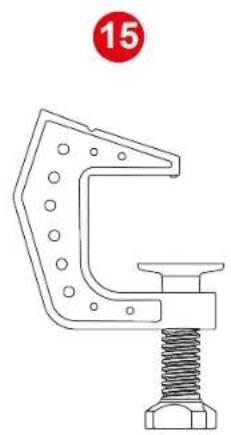
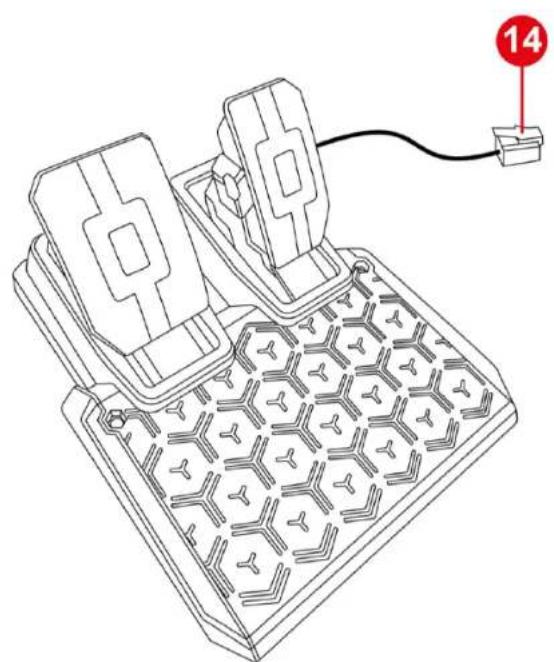
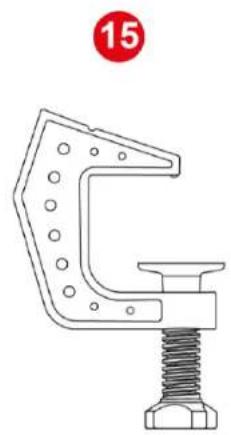
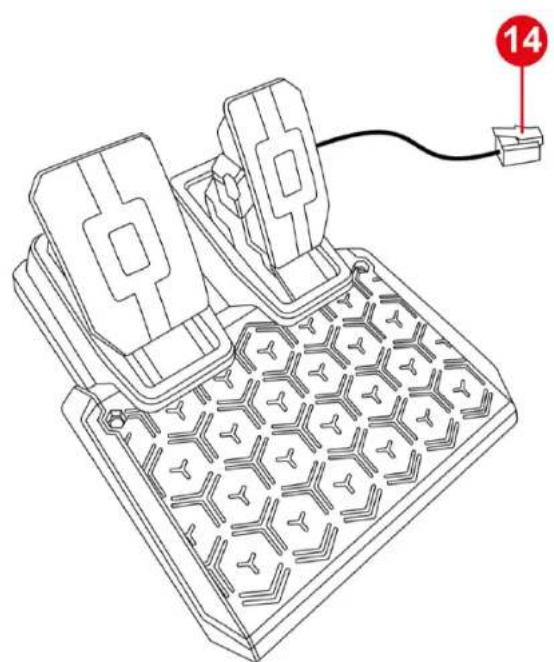
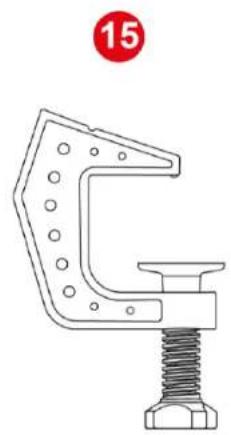
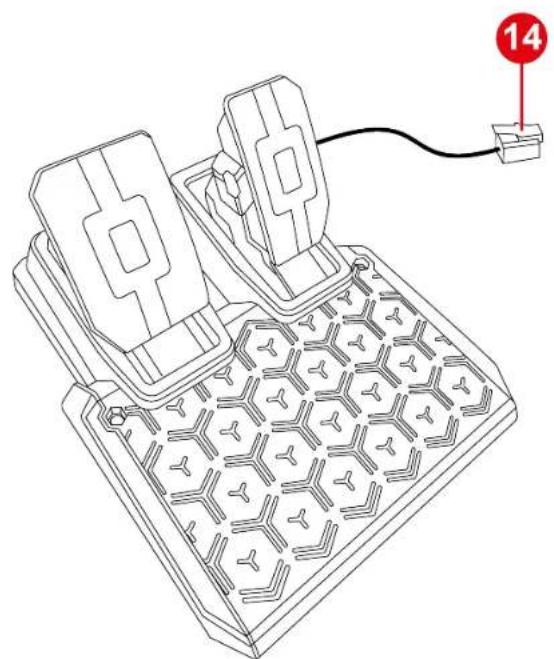
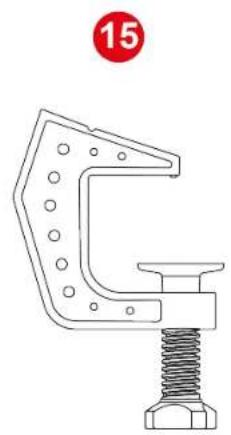
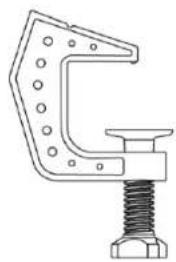
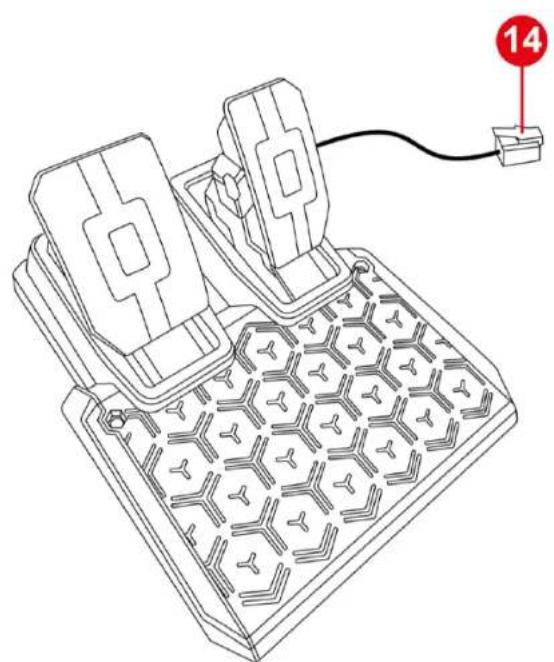
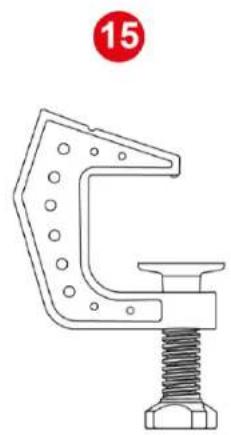
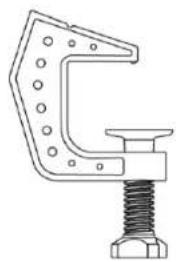
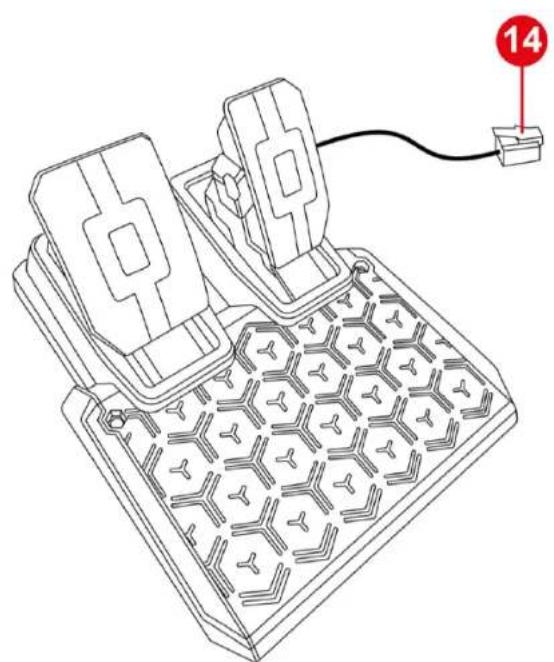
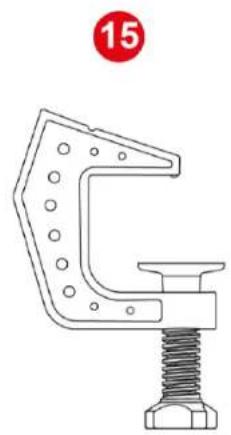
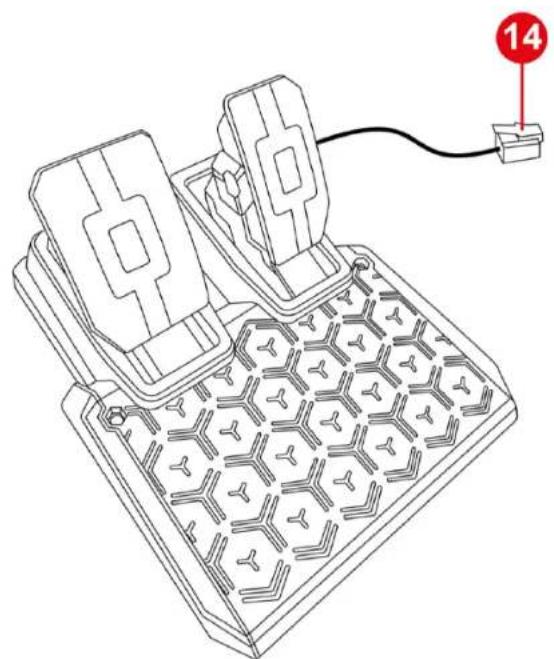
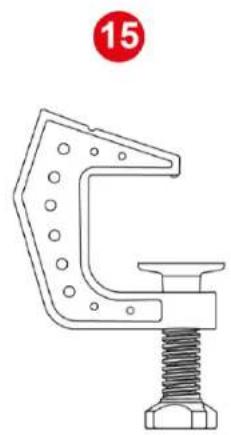
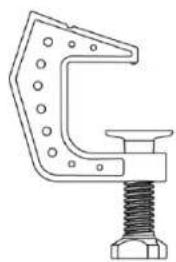
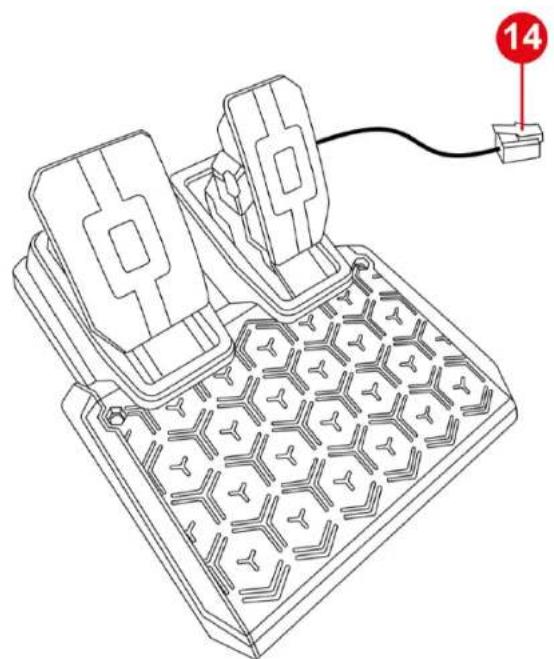
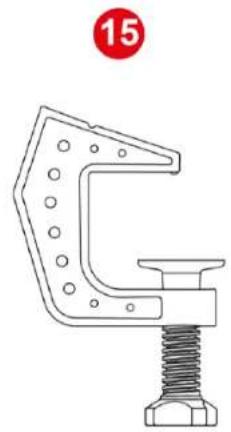
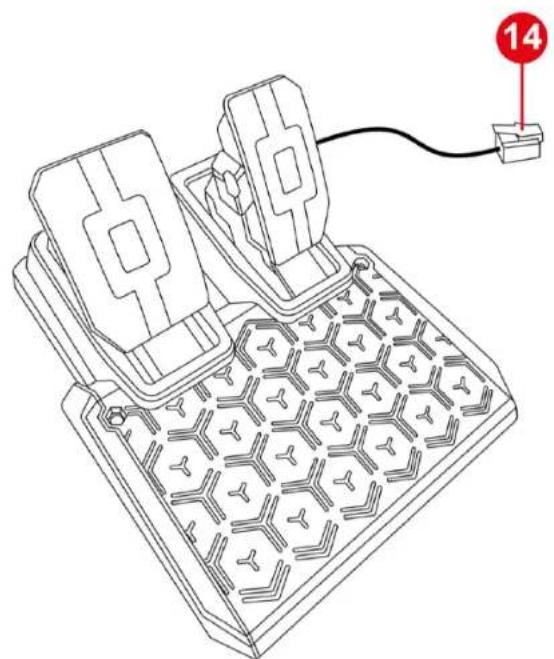
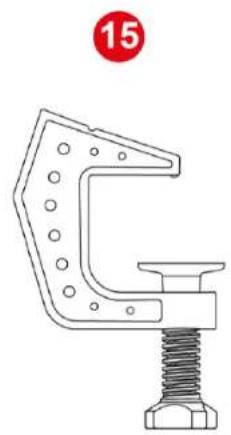
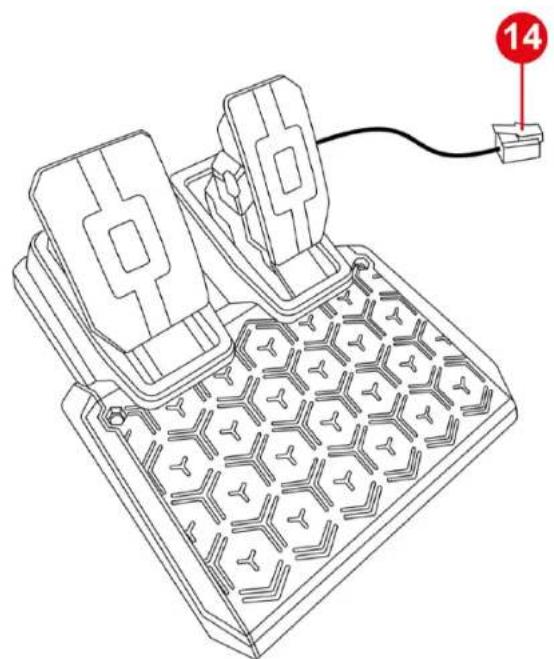
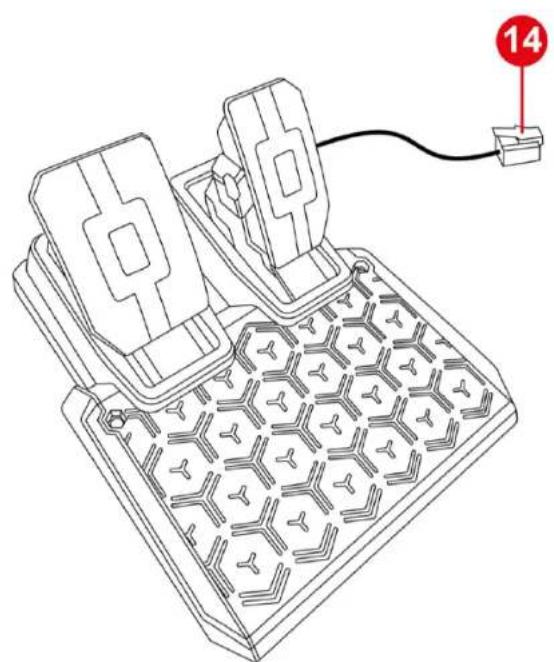
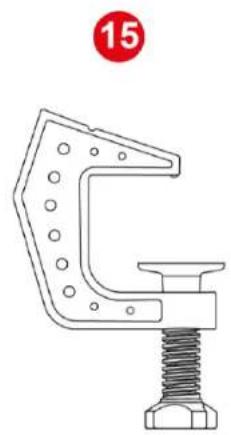
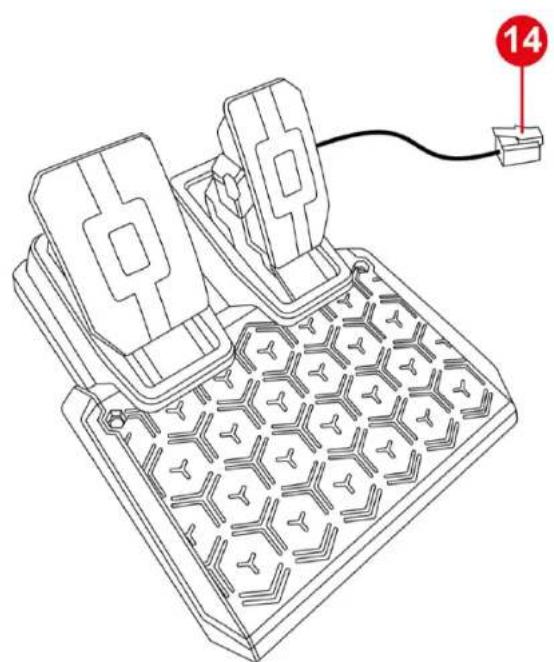
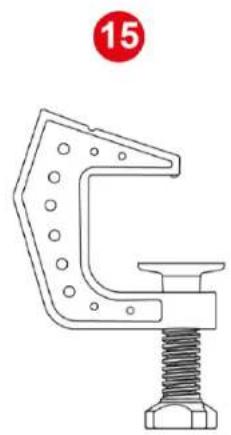
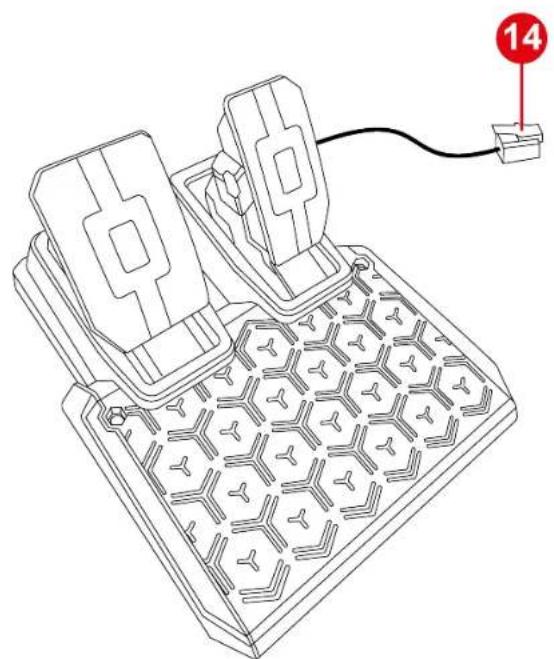
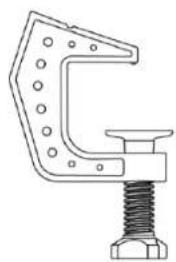
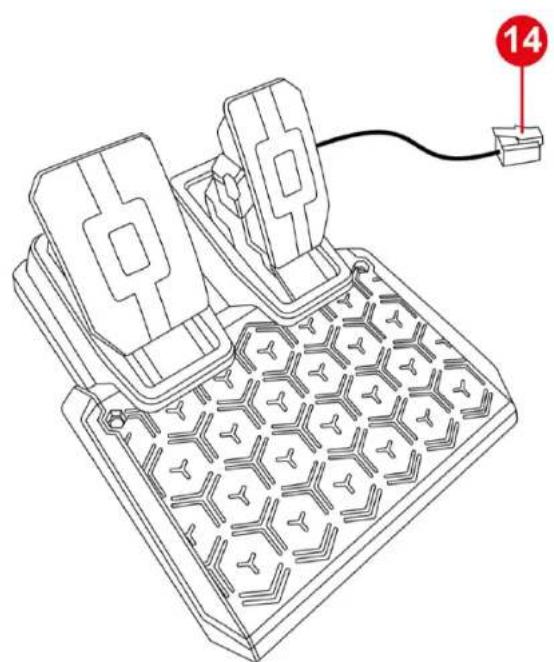
12 RJ12 port for pedal set 13 Racing wheel's USB connector 14 Pedal set's RJ12 connector 15 Mounting bracket

3. Information regarding use of the racing wheel

THRUSTMASTER T98 Ferrari 296 GTB - Information regarding use of the racing wheel - 1

Documentation

Before using this product, carefully read this documentation again and keep it for future reference.

THRUSTMASTER T98 Ferrari 296 GTB - Documentation - 1

Mechanical movements

You may notice small mechanical movements between the wheel rim and the base. This is perfectly normal. These movements ensure smooth wheel rim recentering, enhance your driving experience, and extend the product's lifespan.

THRUSTMASTER T98 Ferrari 296 GTB - Mechanical movements - 1

  • Keep the product in a dry location and do not expose it to dust or sunlight.
  • Use the product in an environment with a temperature between 15°C and 30°C.
  • Do not twist or pull on the connectors and cables.

- Do not spill any liquid on the product or its connectors.

- Do not short-circuit the product.

- Never dismantle the product; do not throw it onto a fire and do not expose it to high temperatures.

- Do not open up the racing wheel: there are no user-serviceable parts inside. Any repairs must be carried out by the manufacturer, its authorized representative, or a qualified technician.

- If you won't be using the racing wheel for an extended period of time, or if you'll be away from it, disconnect the USB cable.
Top-down schematic of a car dashboard with steering wheel (no text or labels).

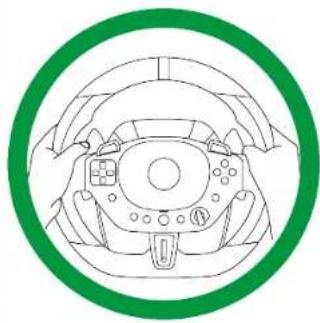
When using the product, always leave both hands correctly positioned on the wheel without ever completely letting go.

14+

Product to be handled only by persons 14 years of age or older, or under adult supervision for younger persons.

THRUSTMASTER T98 Ferrari 296 GTB - Mechanical movements - 4

Securing the gaming area

- Do not place any object in the gaming area which may disrupt the practice of the user, or which may provoke an inappropriate movement or an interruption by another person (coffee cup, telephone, keys, for example).

- Do not place any cables where people will be walking.

THRUSTMASTER T98 Ferrari 296 GTB - Securing the gaming area - 1

Pedal set compatibility

To avoid any malfunctions, we recommend that you only use the pedal set included with the T98 Ferrari 296 GTB racing wheel.

THRUSTMASTER T98 Ferrari 296 GTB - Pedal set compatibility - 1

Pedal set pinch hazard when playing

- Keep the pedal set out of children's reach.

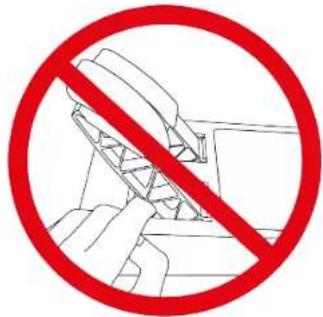
- During gaming sessions, never place your fingers (or other parts of your body) on or near the pedal arms.

Prohibition sign with red circle and diagonal line crossing over a diagram of hands holding a device, indicating no use or prohibition.

THRUSTMASTER T98 Ferrari 296 GTB - Pedal set pinch hazard when playing - 2

For safety reasons, never use the pedal set with bare feet or while wearing only socks on your feet. Thrustmaster® disclaims all responsibility in the event of injury resulting from use of the pedal set without shoes.

4. Installing the racing wheel on a table or desk

THRUSTMASTER T98 Ferrari 296 GTB - Installing the racing wheel on a table or desk - 1

Before each use, verify that the base is still properly attached to the support, as per this manual's instructions.

THRUSTMASTER T98 Ferrari 296 GTB - Installing the racing wheel on a table or desk - 2

Pinch hazard

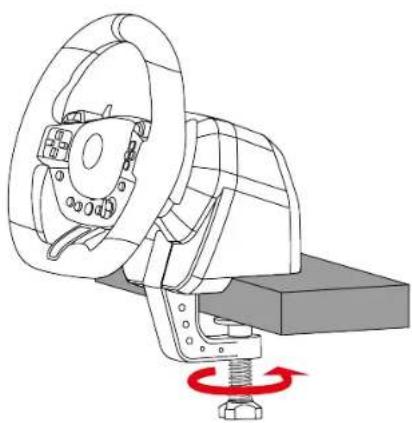
Never leave your finger between the mounting bracket and the table or desk when tightening the clamping screw.

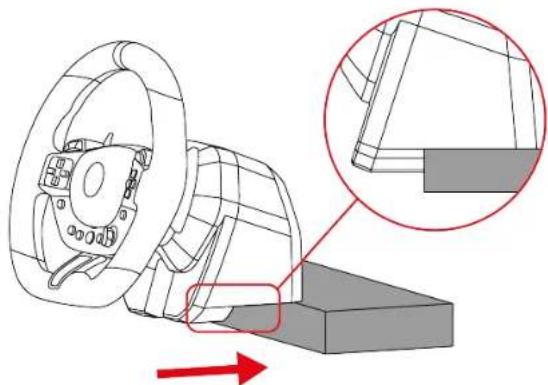
  1. Place the racing wheel on a table or desk.
Technical line drawing of a steering wheel and a mechanical bracket assembly (no text or symbols).

THRUSTMASTER T98 Ferrari 296 GTB - Pinch hazard - 2

When you are placing the racing wheel on a table or desk, be sure to hold it to prevent it from tipping forward.

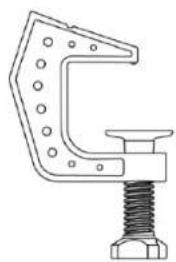
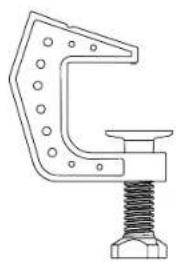
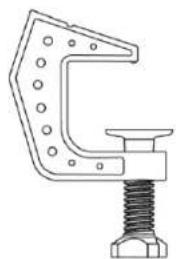
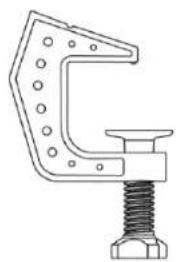
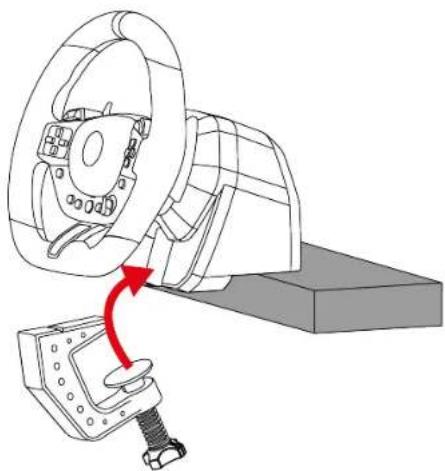
  1. Insert the mounting bracket into the slot on the inside of the base. Make sure that the notch on the bracket is properly positioned inside the base.

Mechanical assembly diagram showing a rotating component being inserted into a base, with a red arrow indicating rotation direction (no text or symbols present).

THRUSTMASTER T98 Ferrari 296 GTB - Pinch hazard - 4

  1. Tighten the clamping screw until the racing wheel is perfectly stable.
Mechanical assembly diagram showing a rotating component with a spring and nut (no text or symbols).

5. Installing the pedal set on a support or in a cockpit

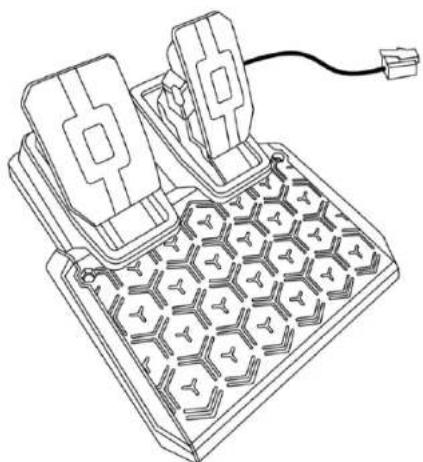
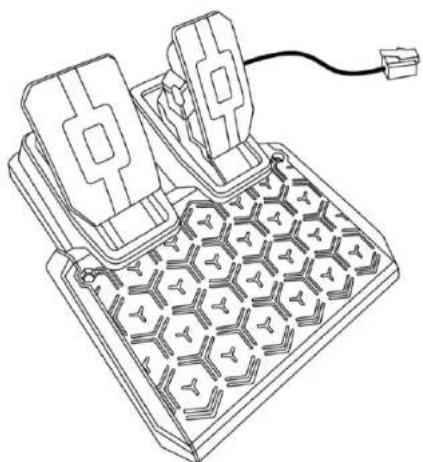
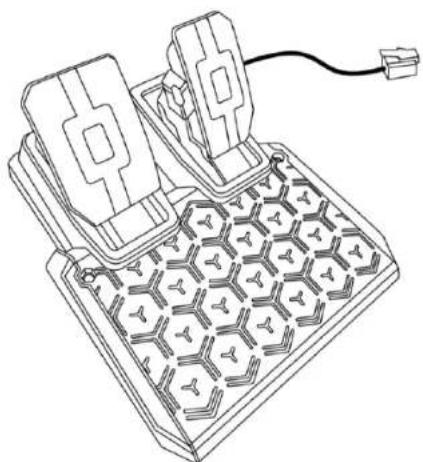
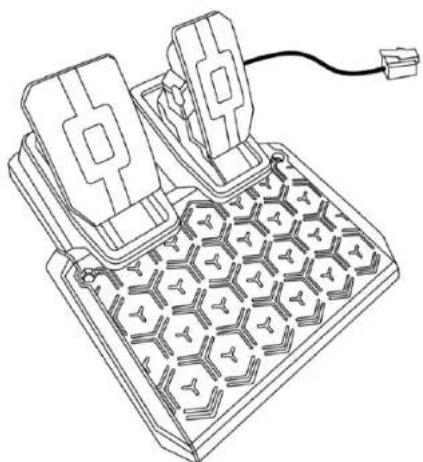
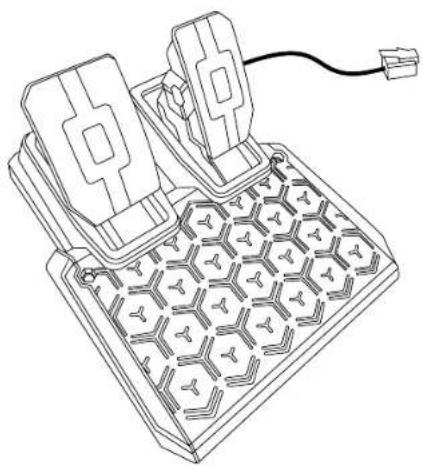
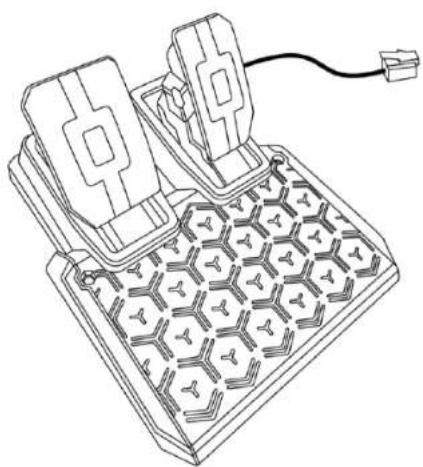
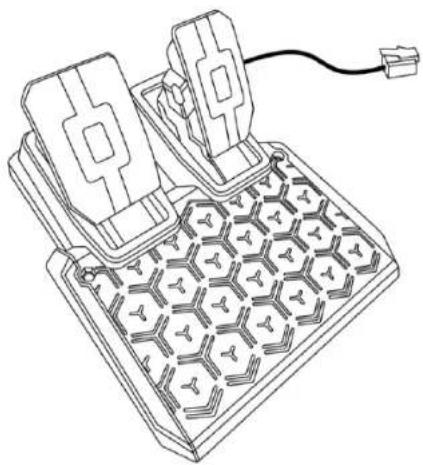
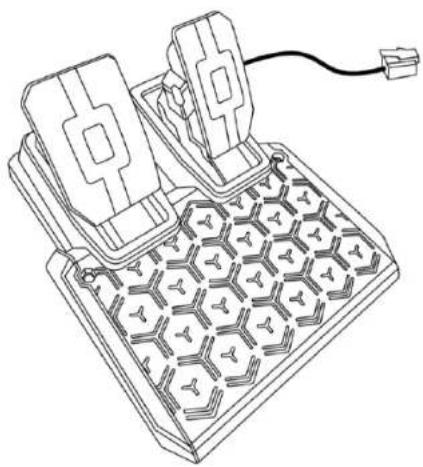
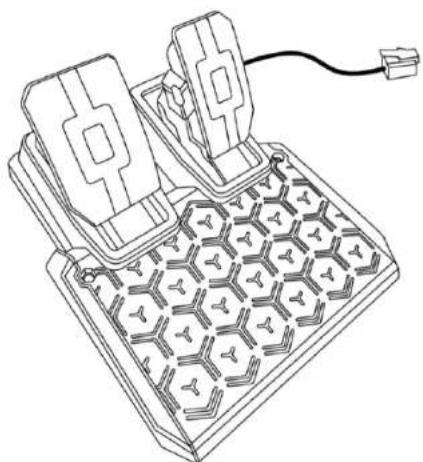
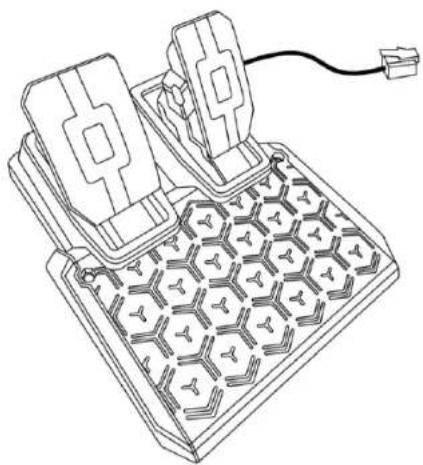
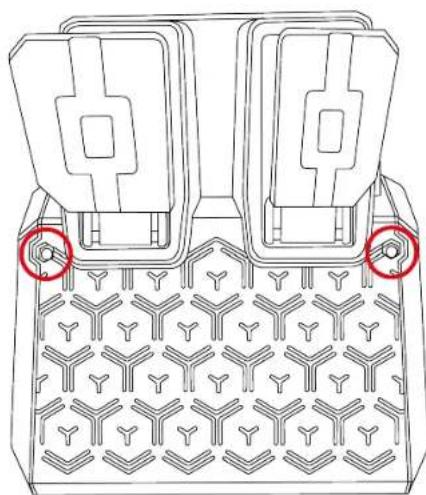
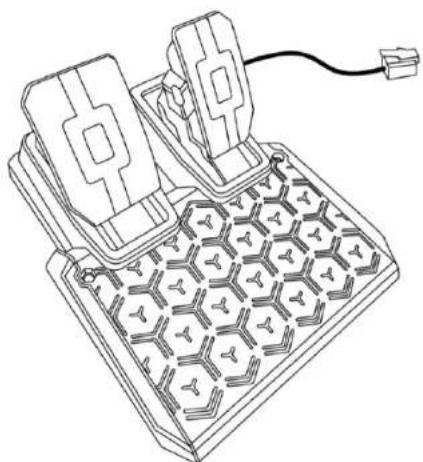
You can install the pedal set on different types of supports (sold separately) thanks to the two mounting holes — one located on each side of the pedal set.
Technical line drawing of a mechanical component with two flanged parts and a patterned base (no text or symbols).

6. Installation

On a PlayStation®4 console

*Not includedTHRUSTMASTER T98 Ferrari 296 GTB - On a PlayStation®4 console - 1
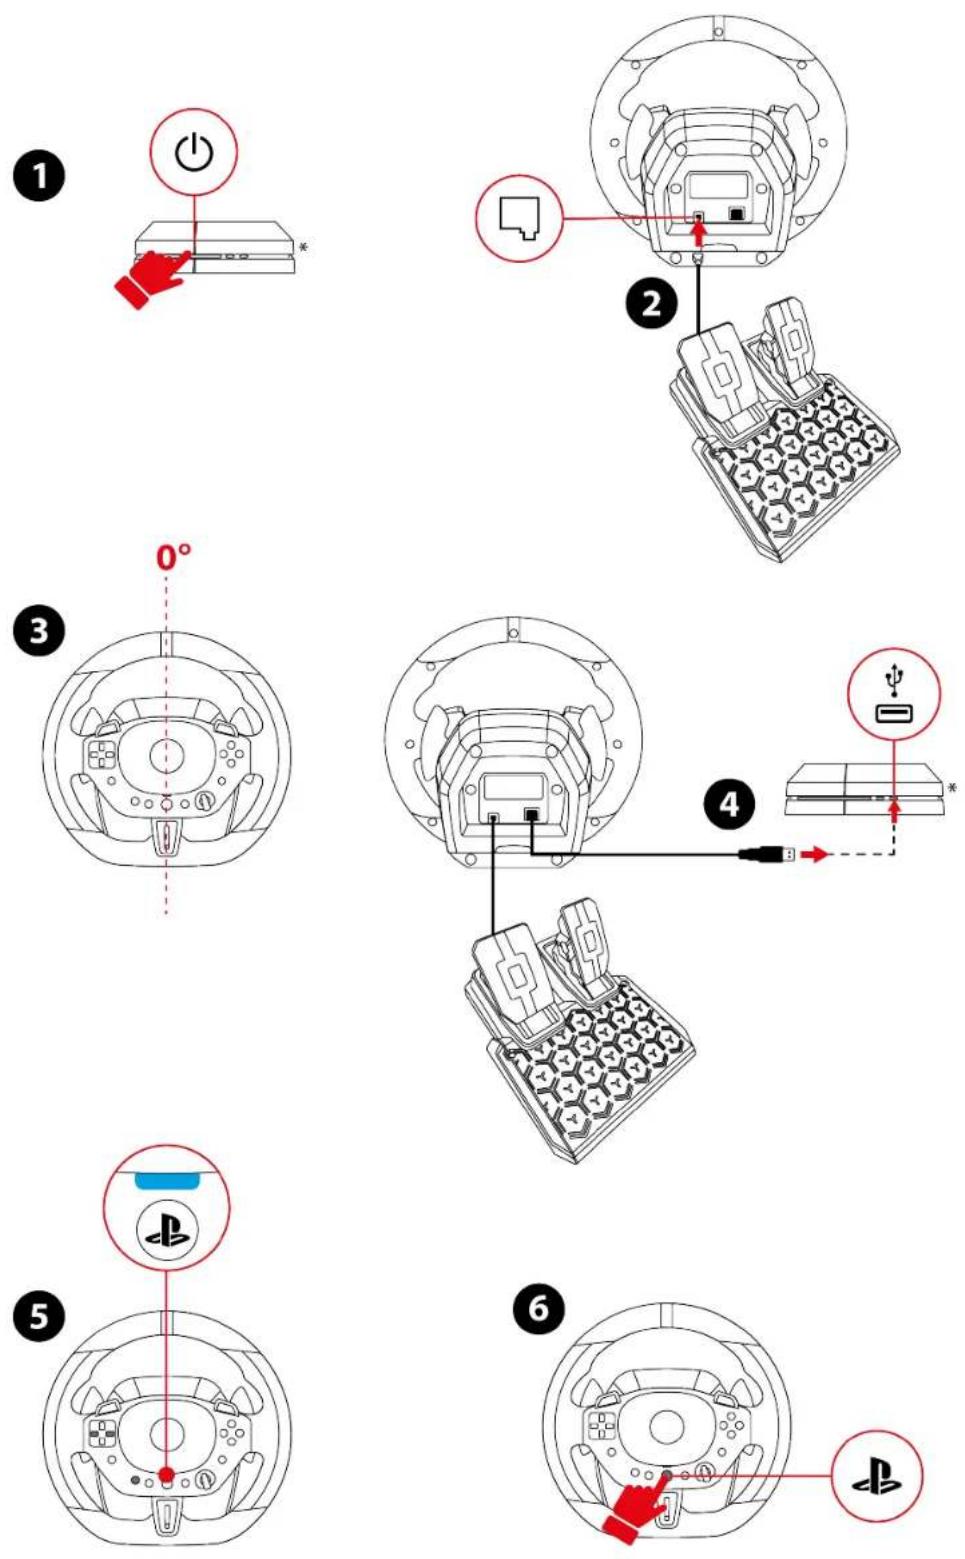
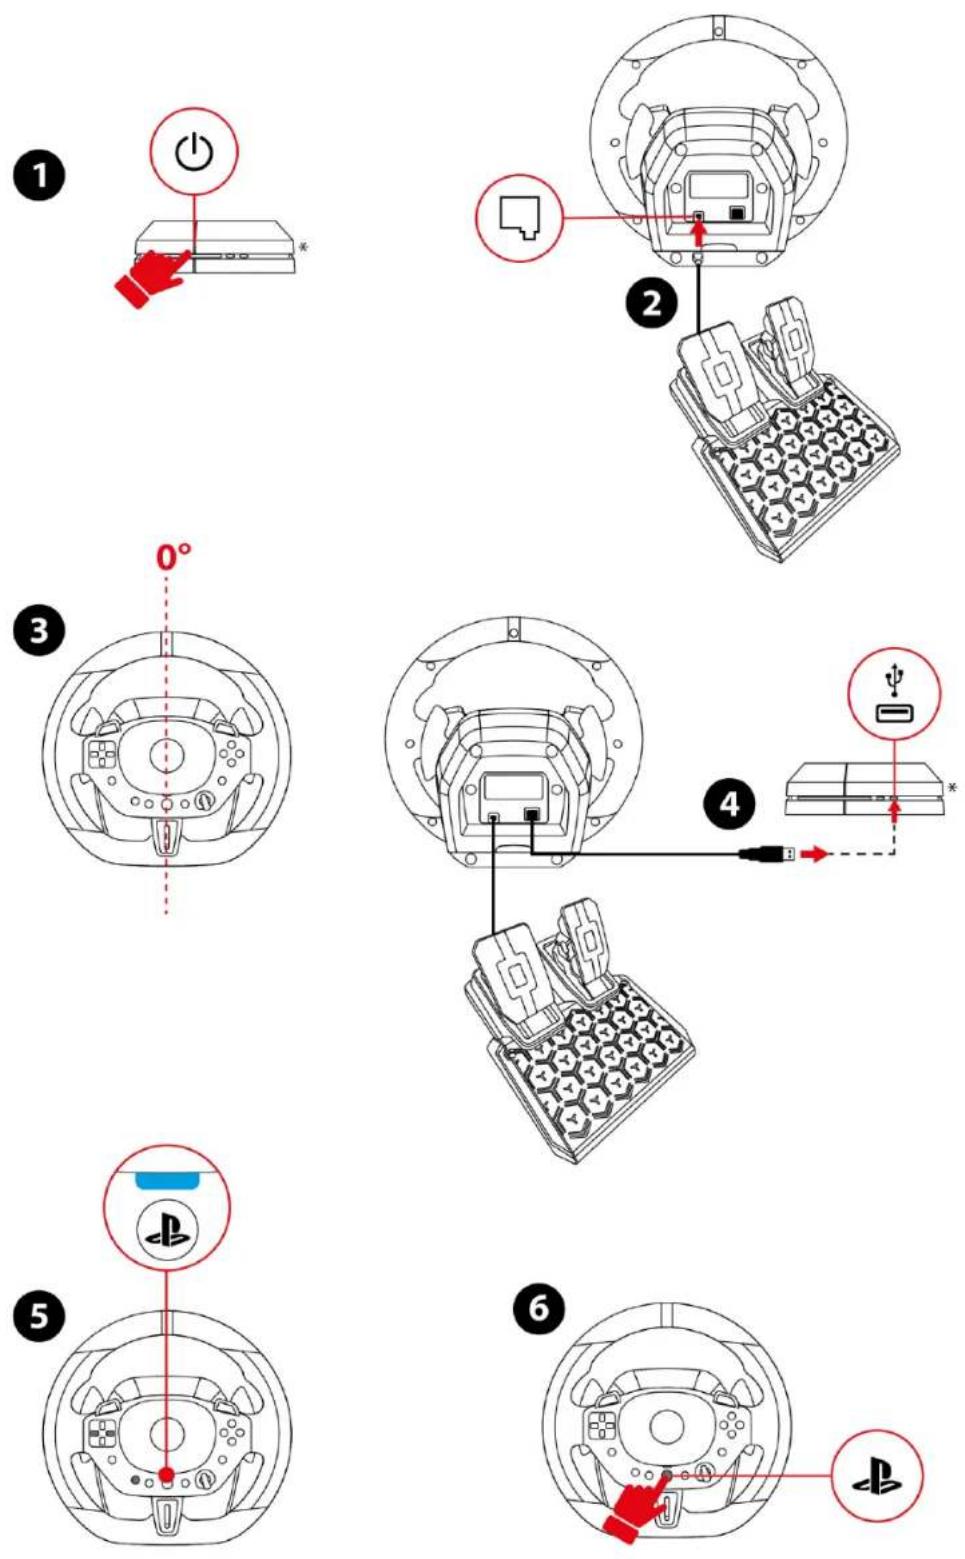
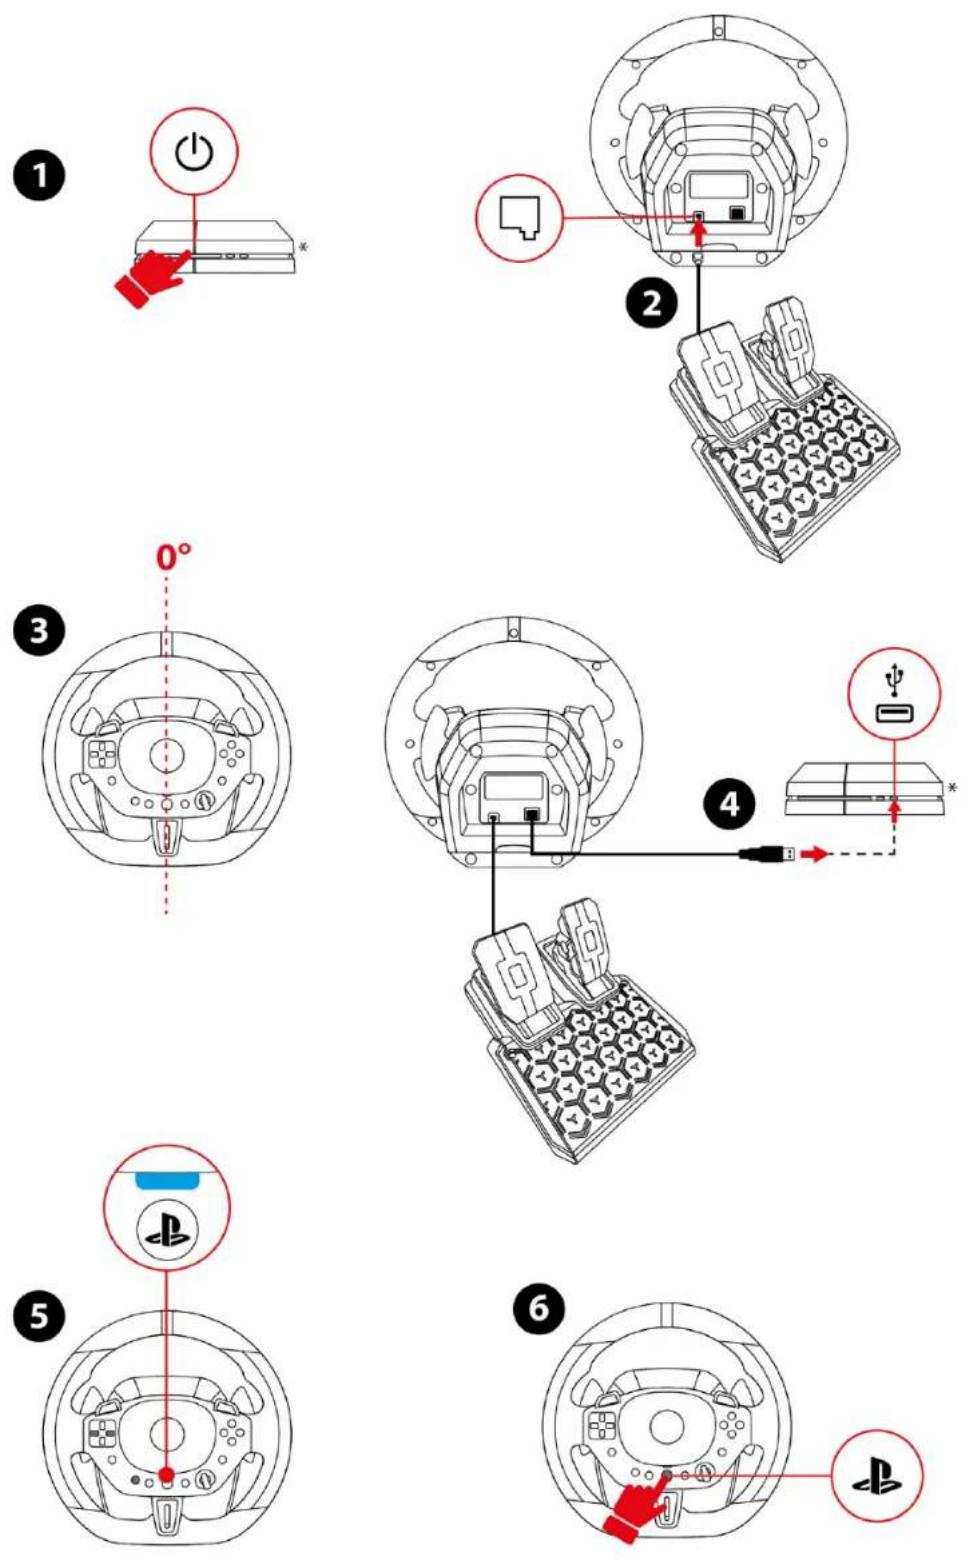
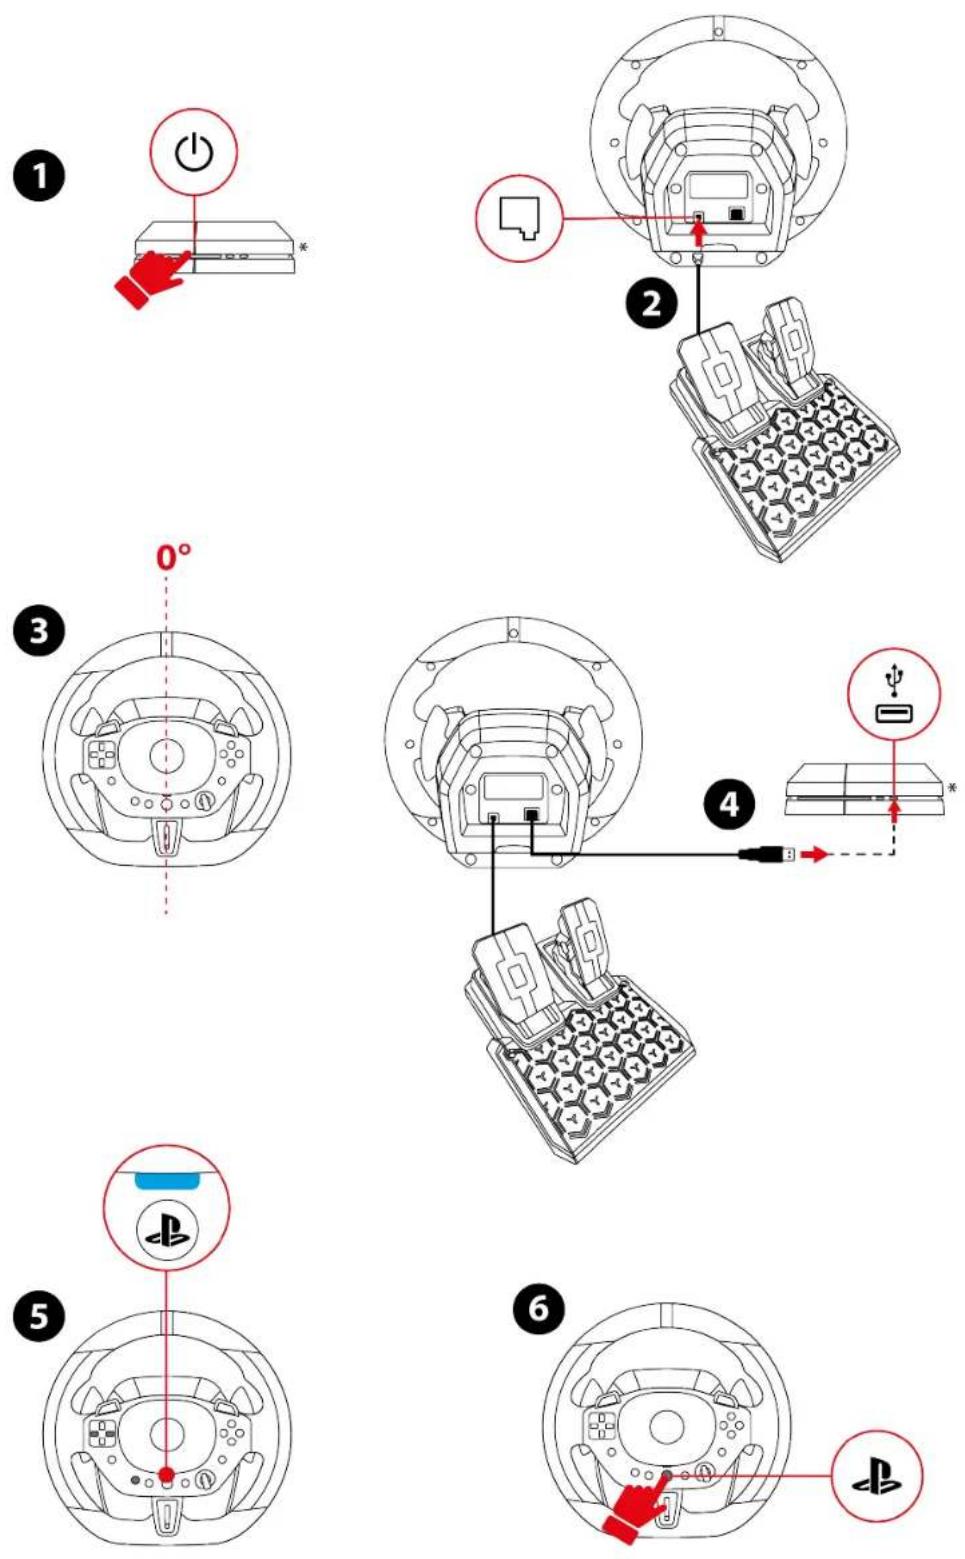
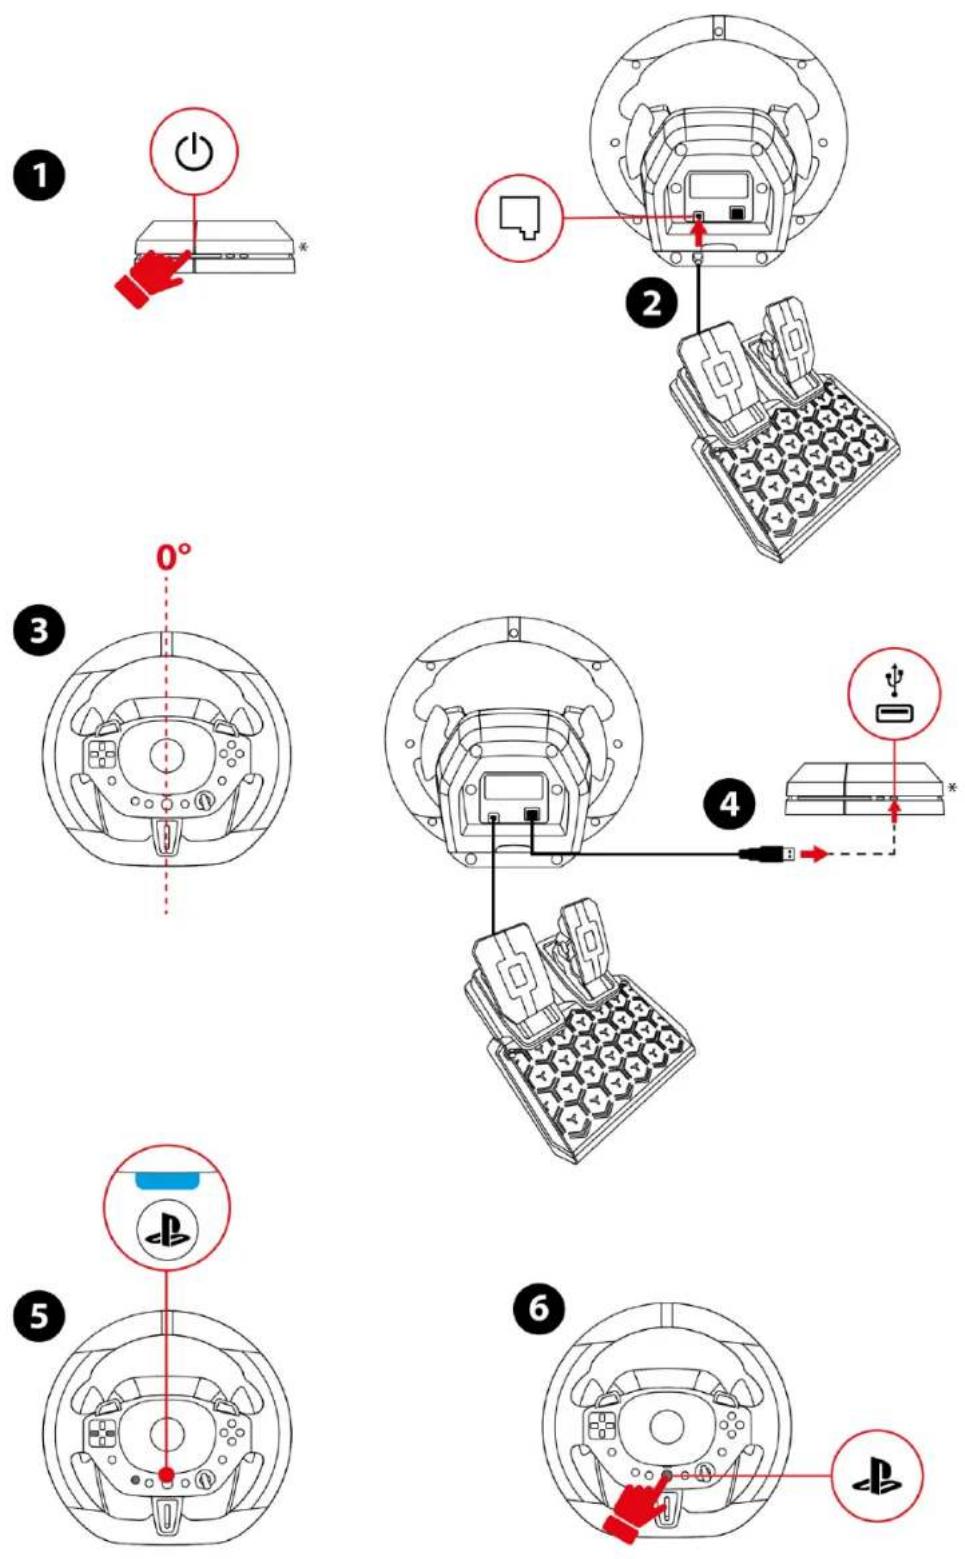
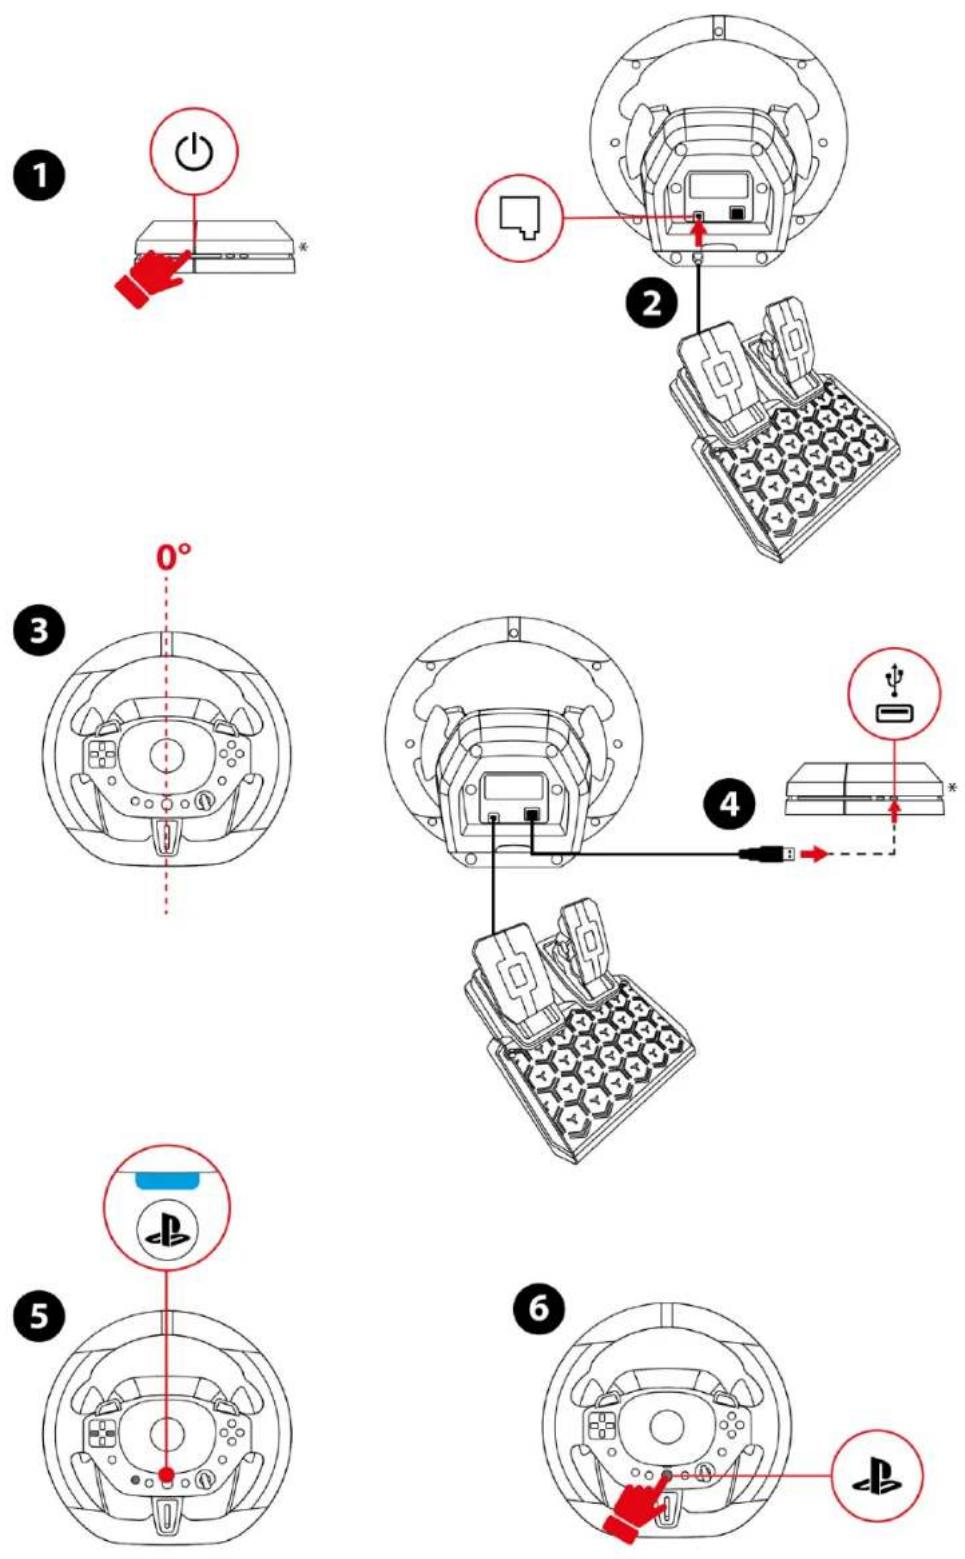
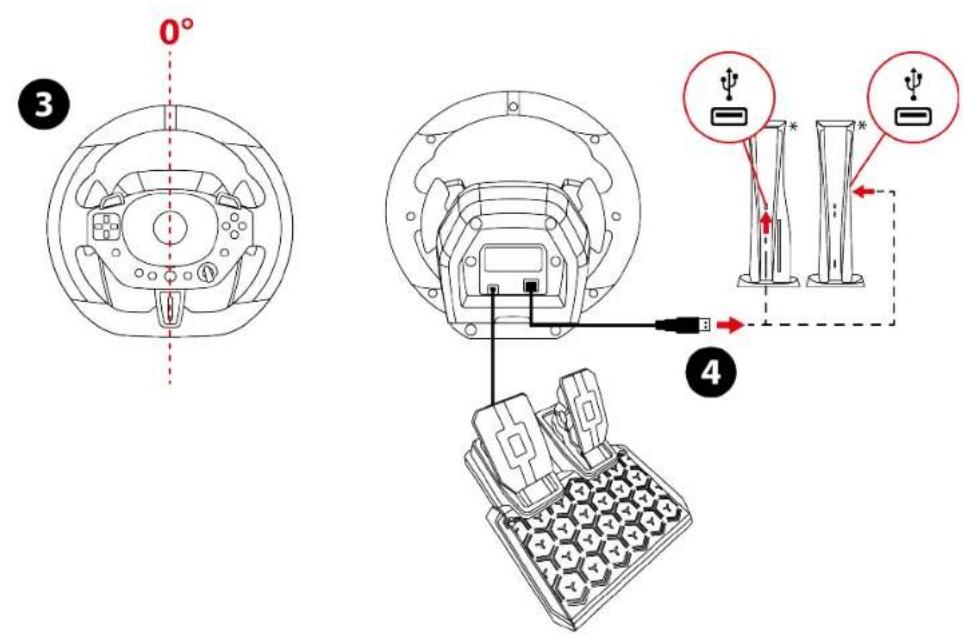
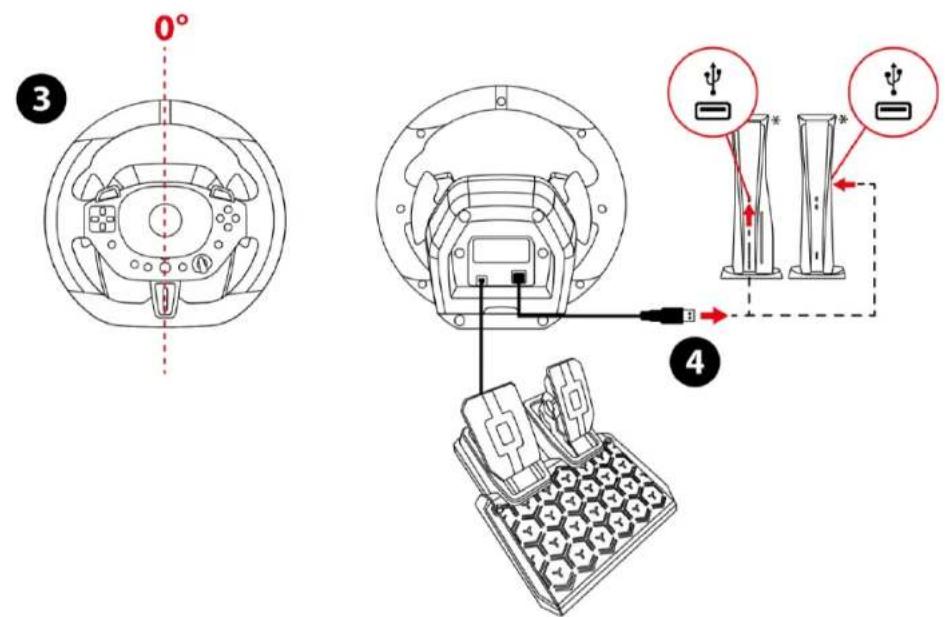
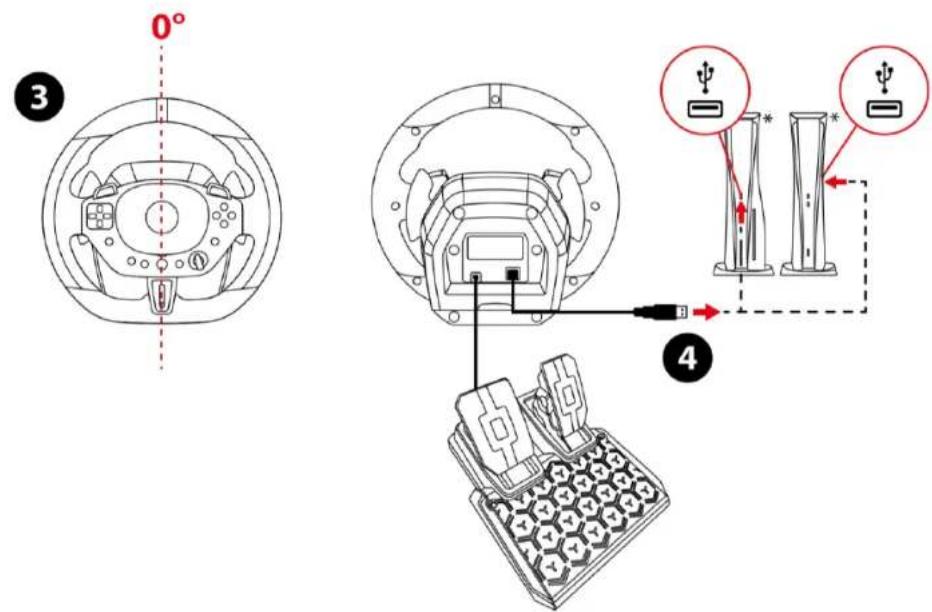
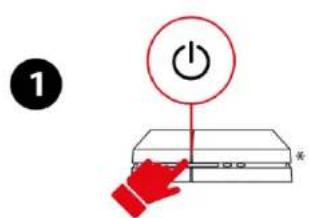
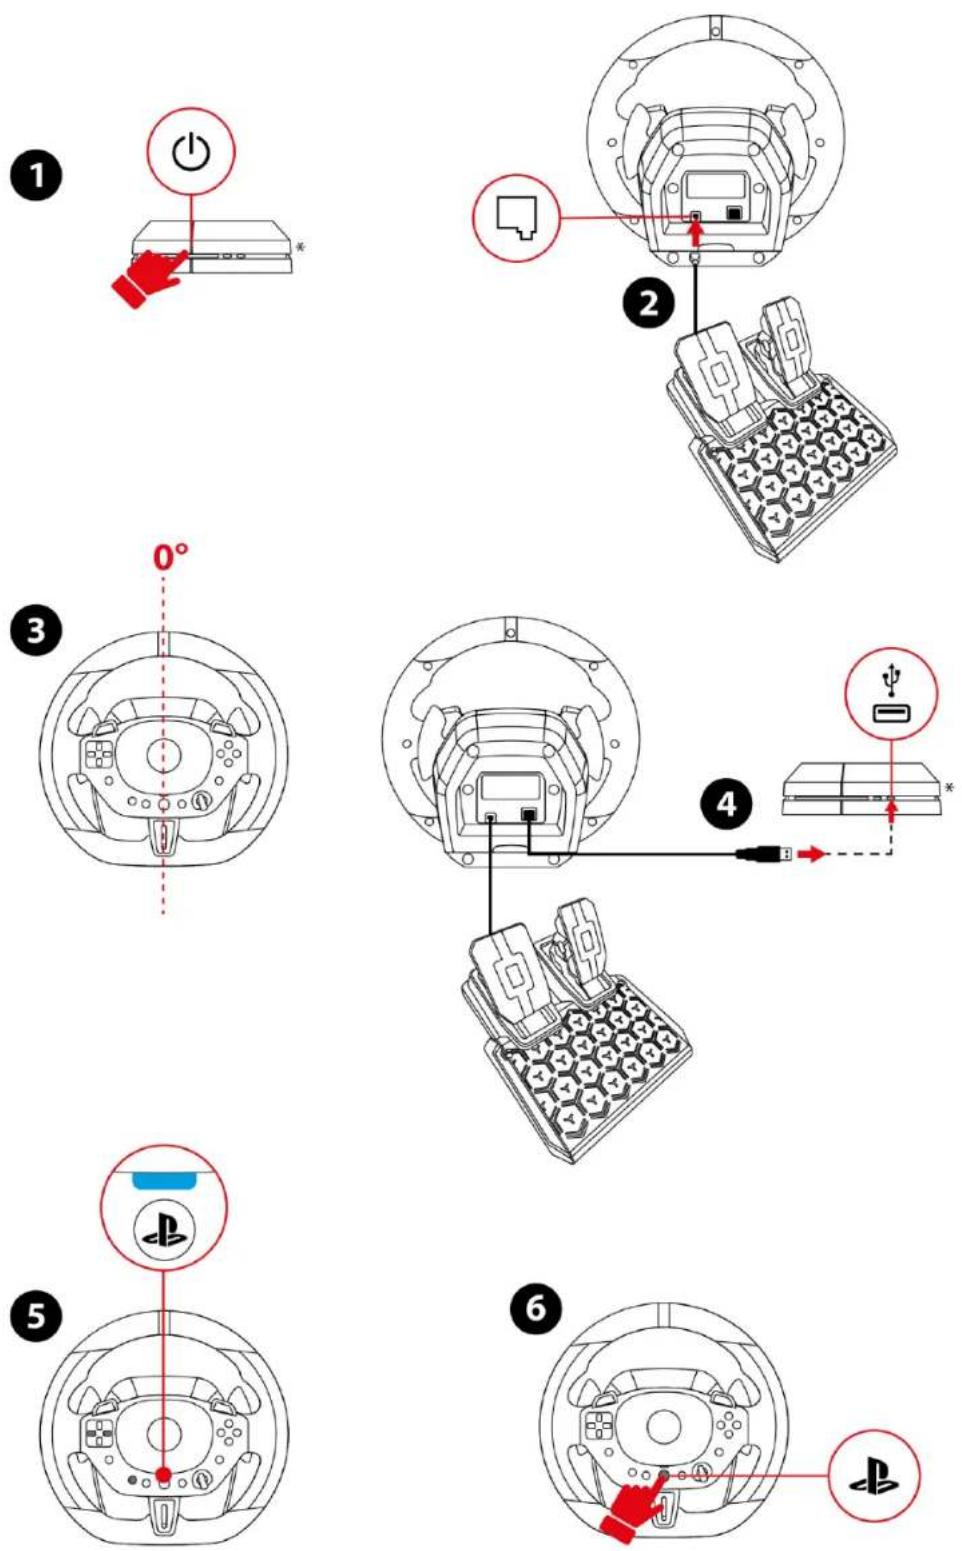
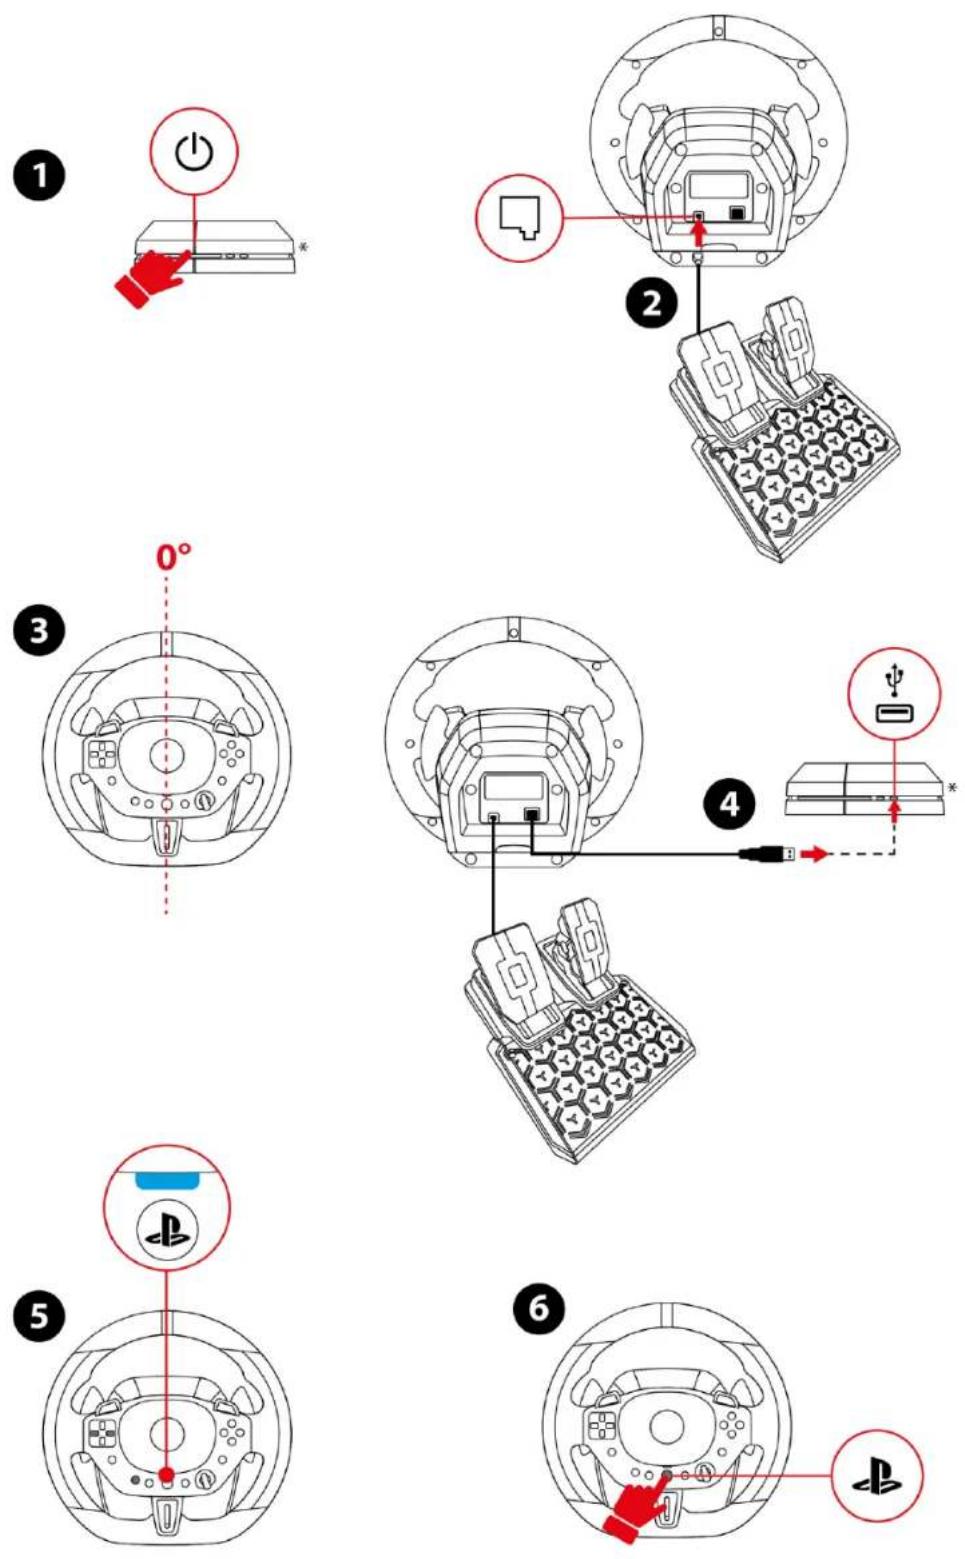
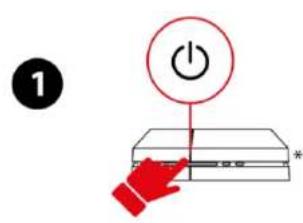
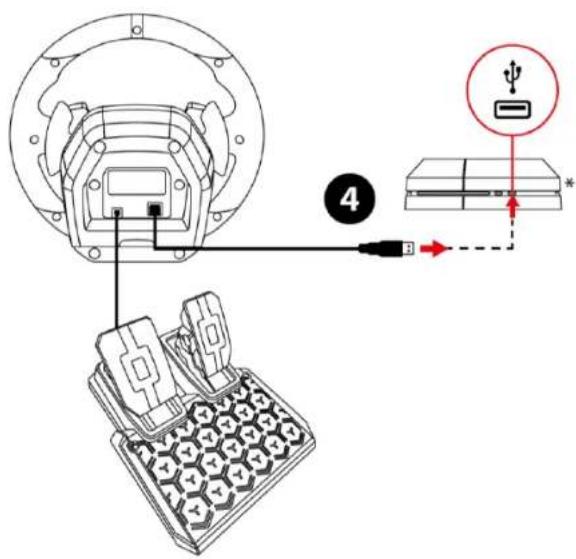
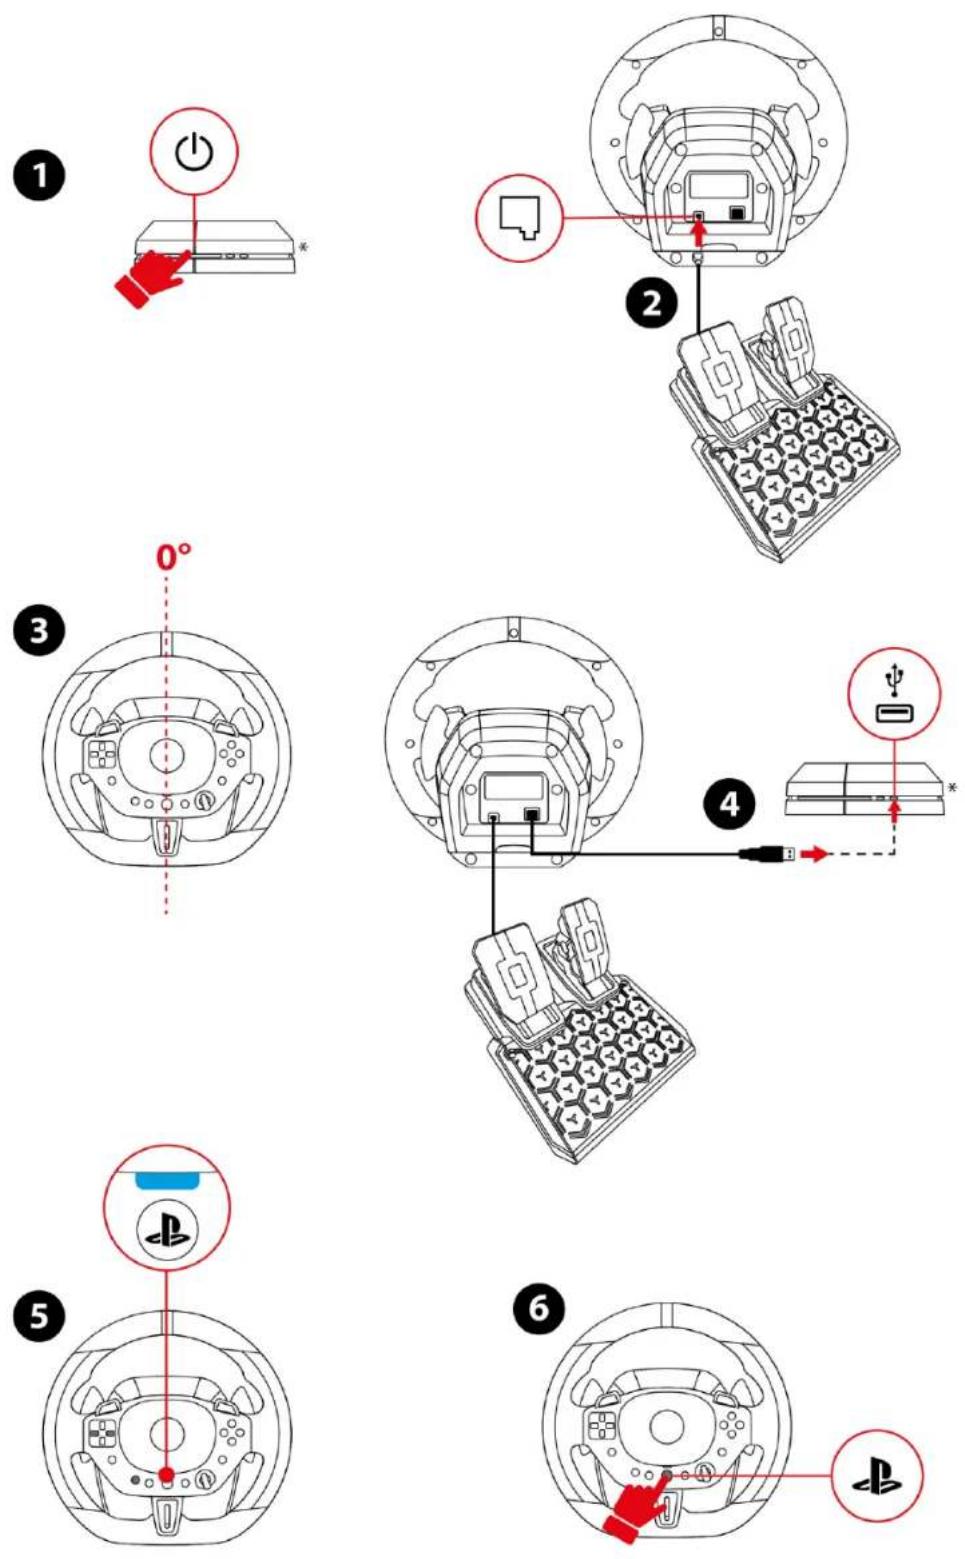
  1. Power on your PlayStation®4 console.
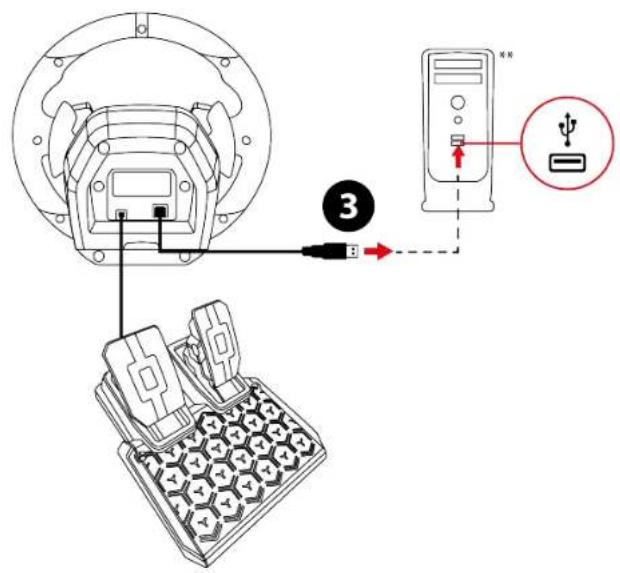
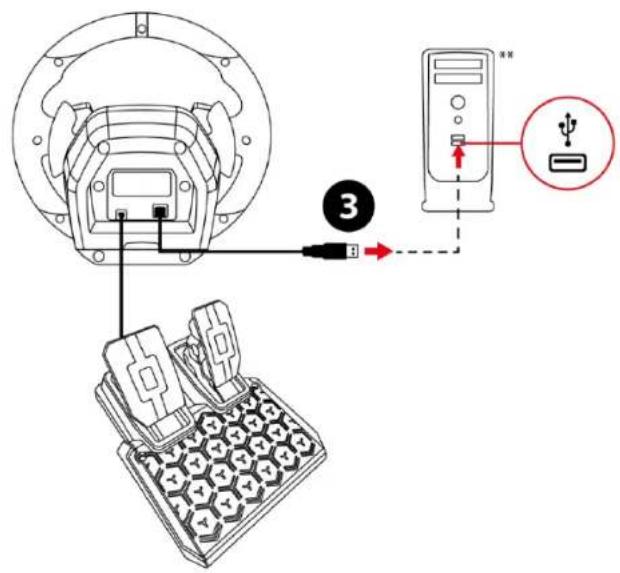
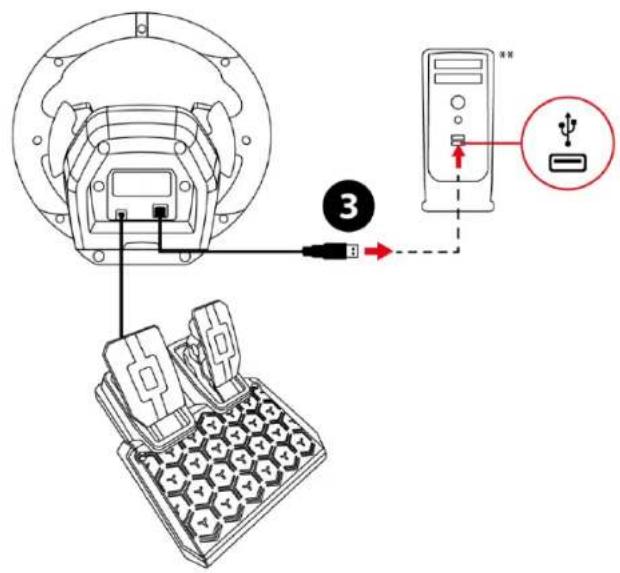
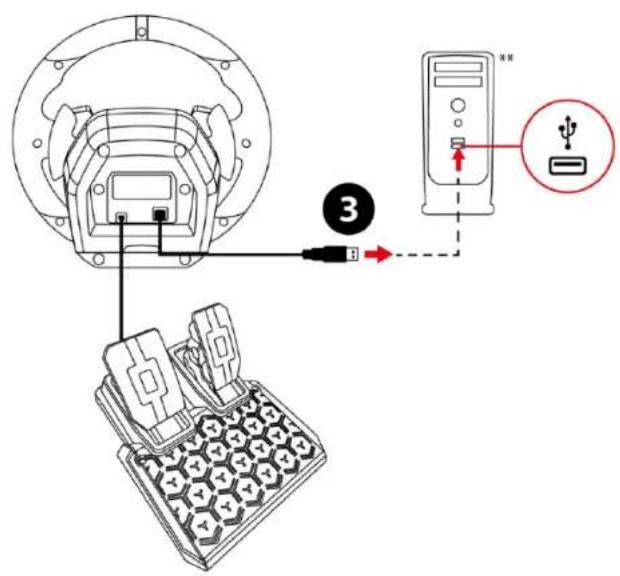
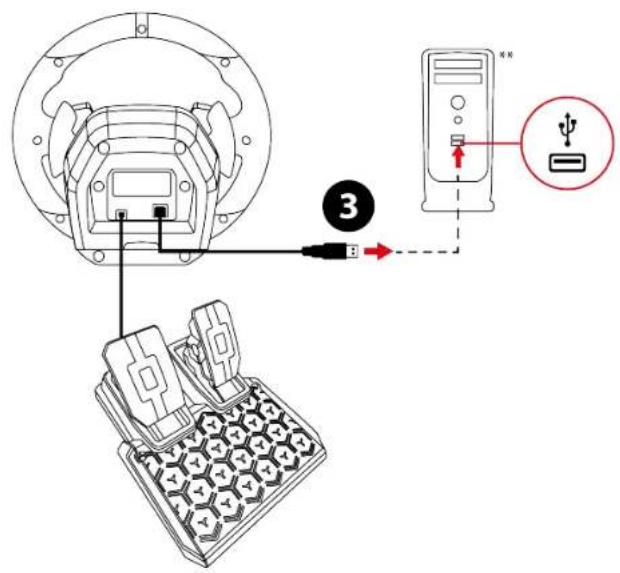
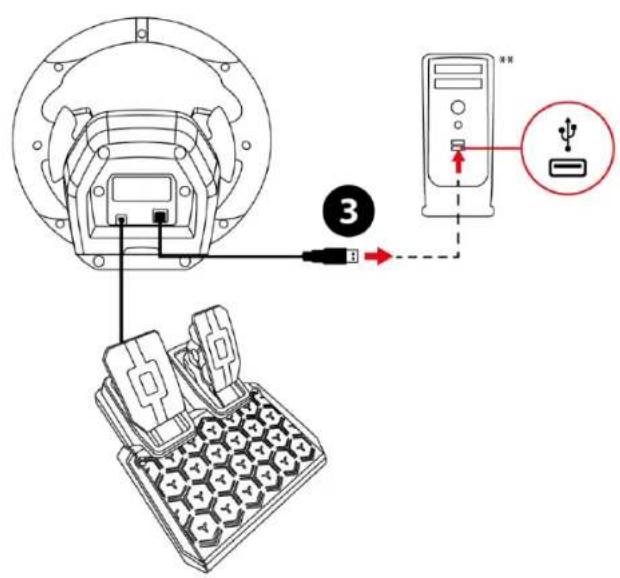
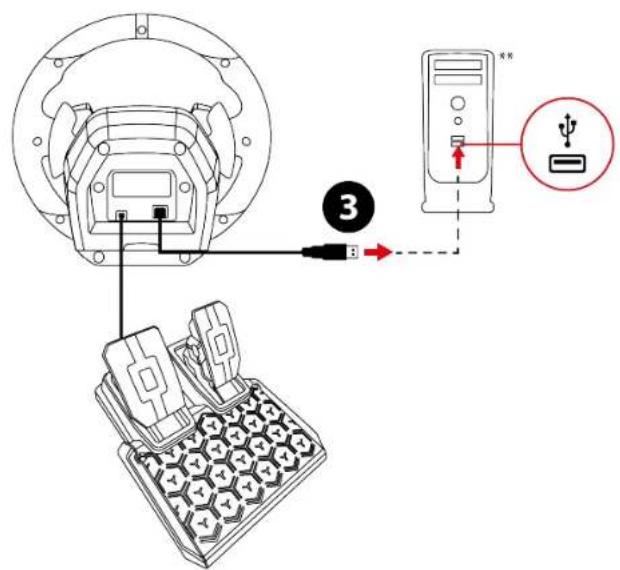
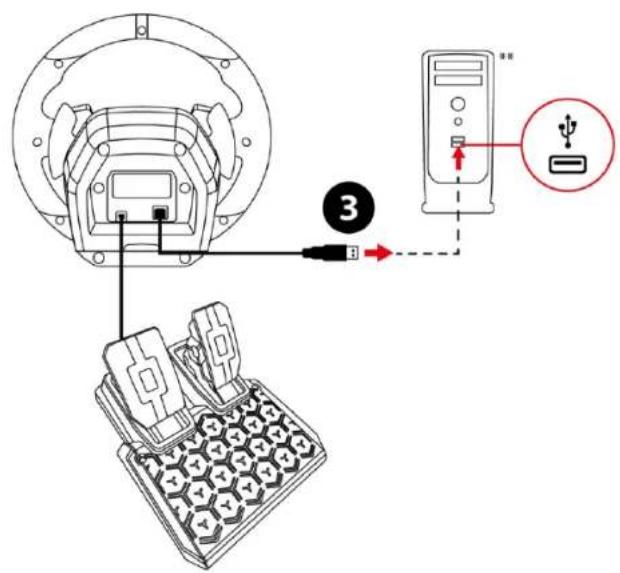
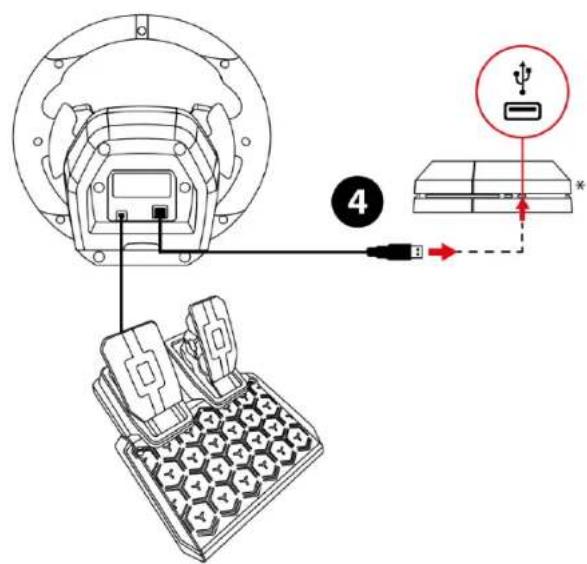
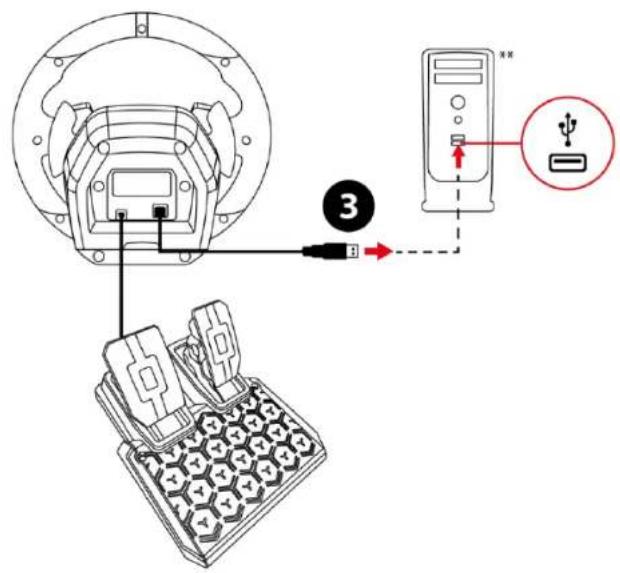
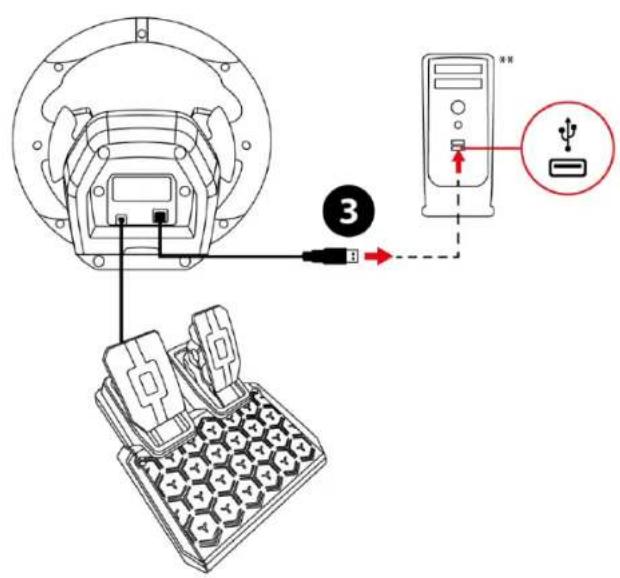
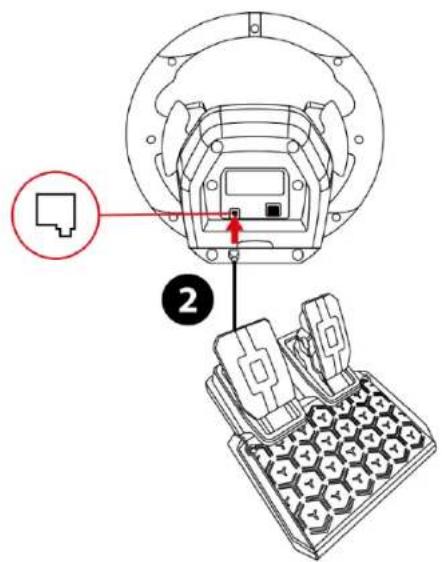
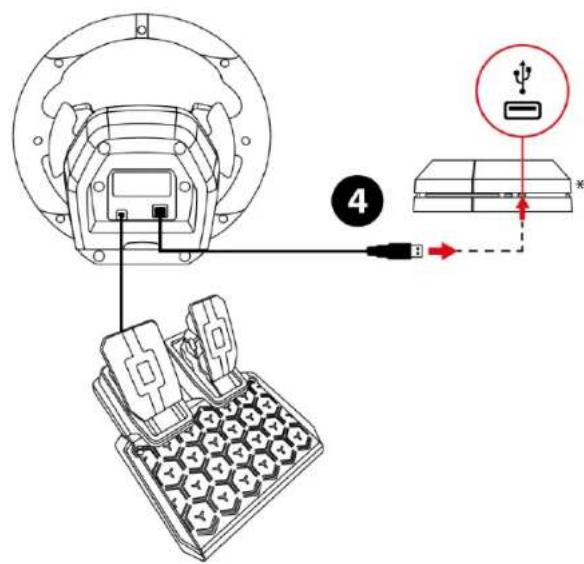
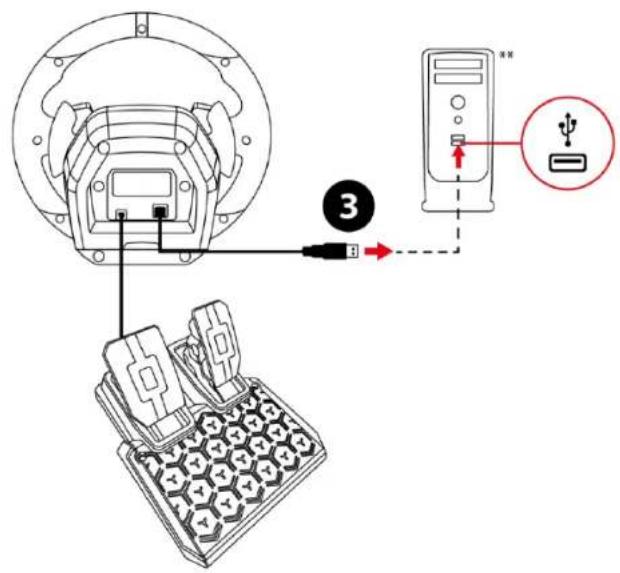
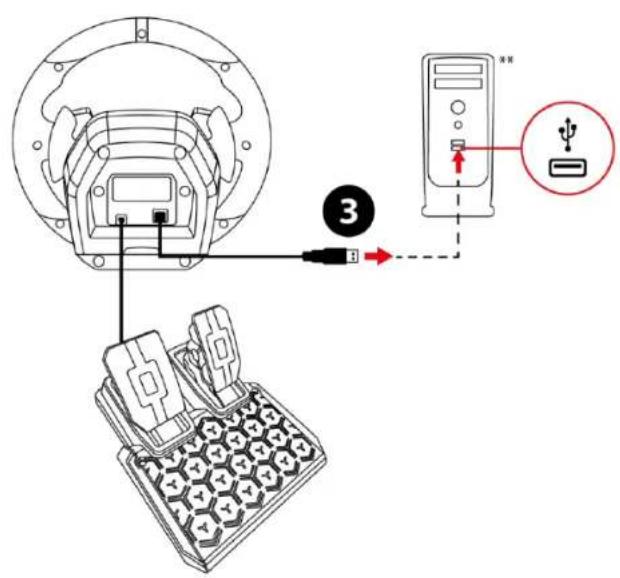
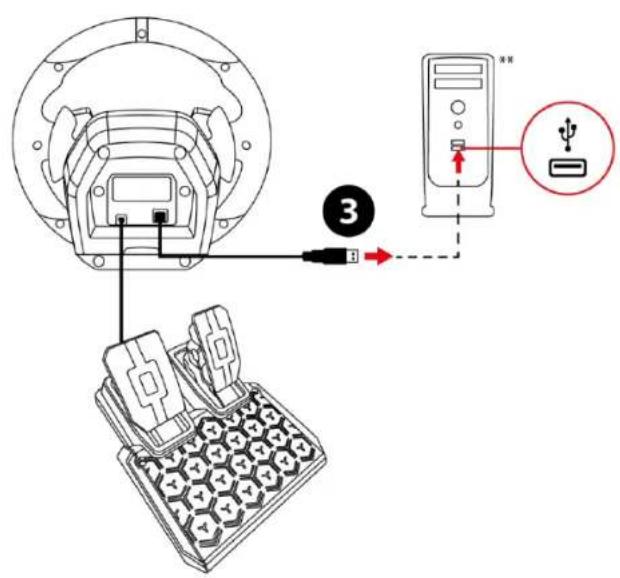
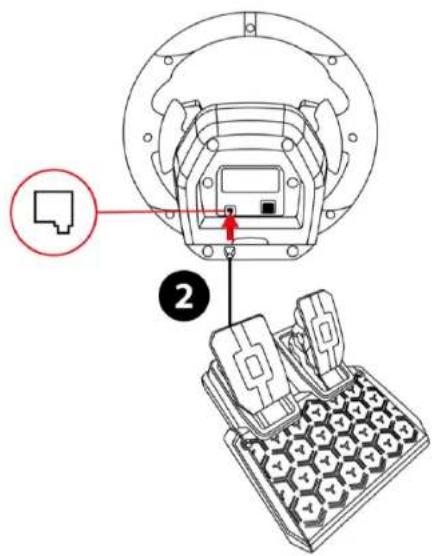
  2. Connect the pedal set to the RJ12 port on the racing wheel.
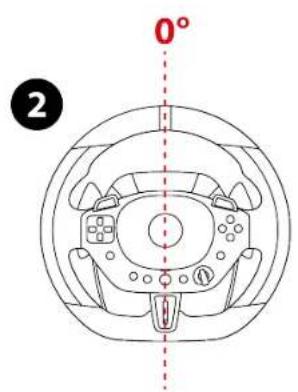
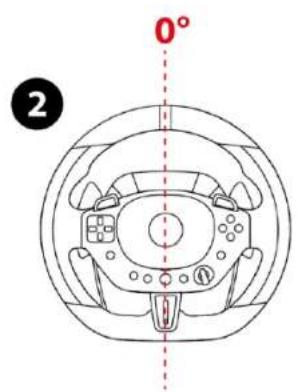
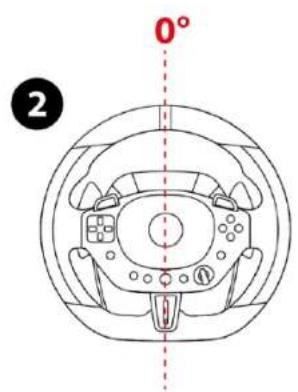
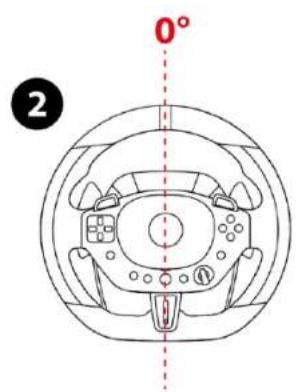
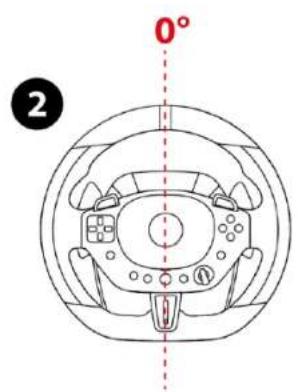
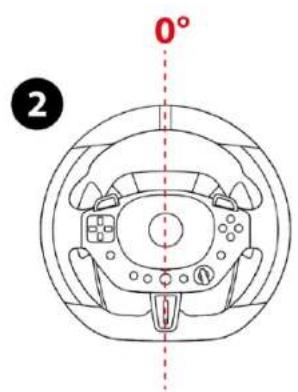
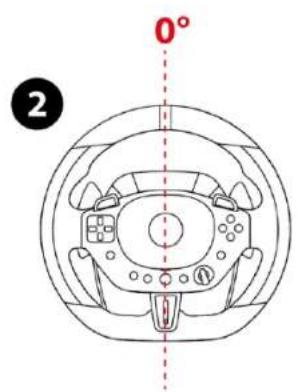
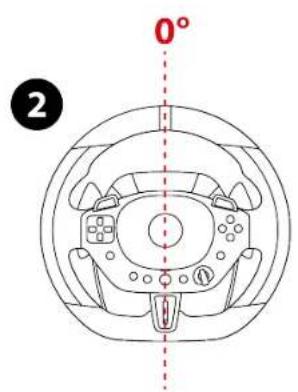
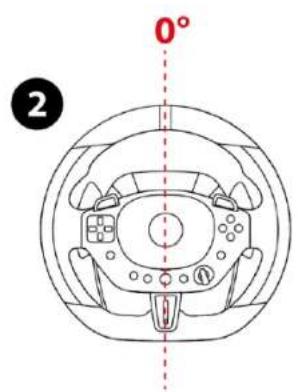
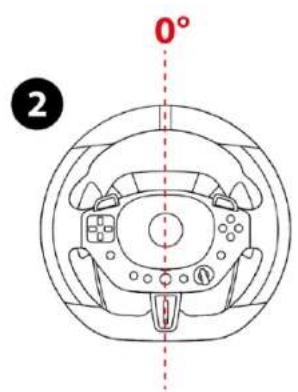
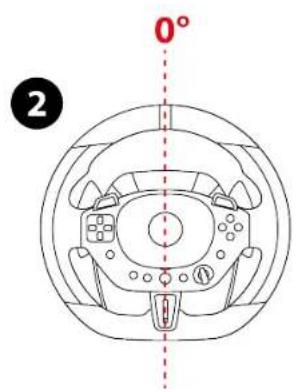
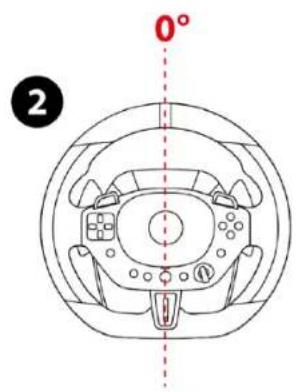
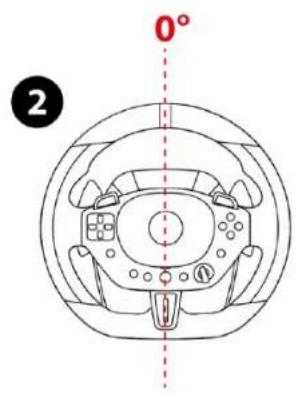
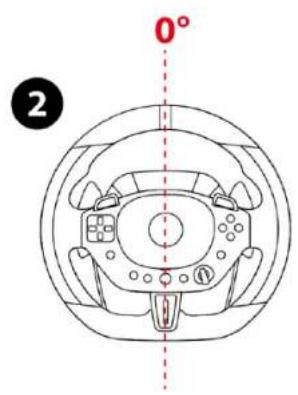
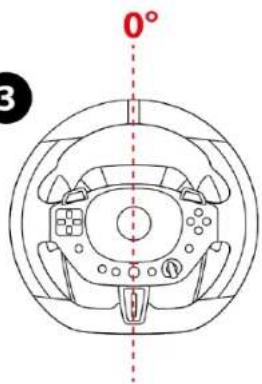
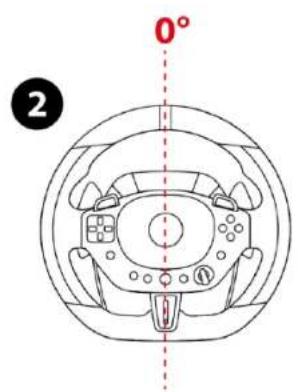
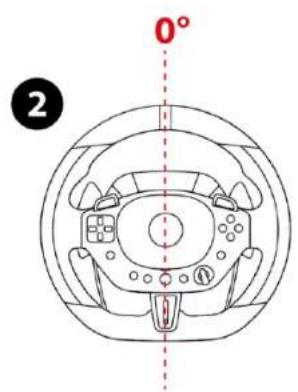
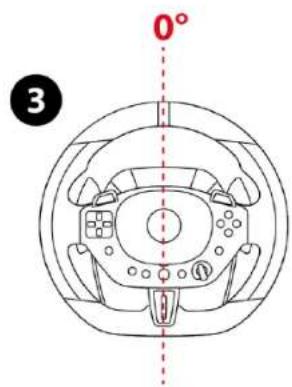
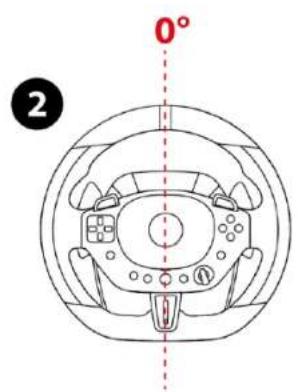
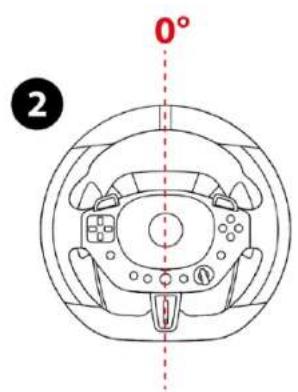
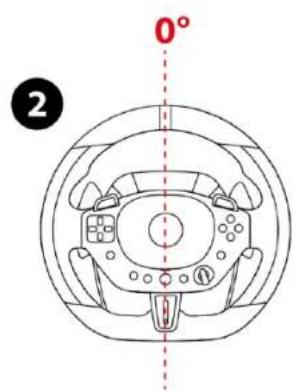
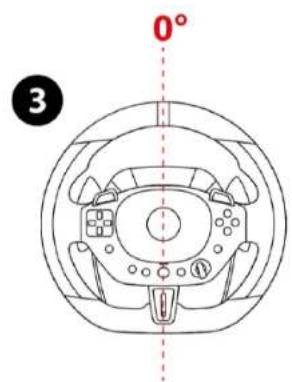
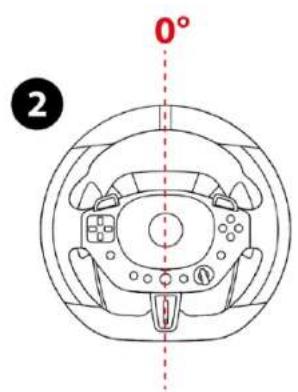
  3. Physically center the wheel rim.
  4. Connect the USB-A connector to a USB-A port on the PlayStation®4 console.
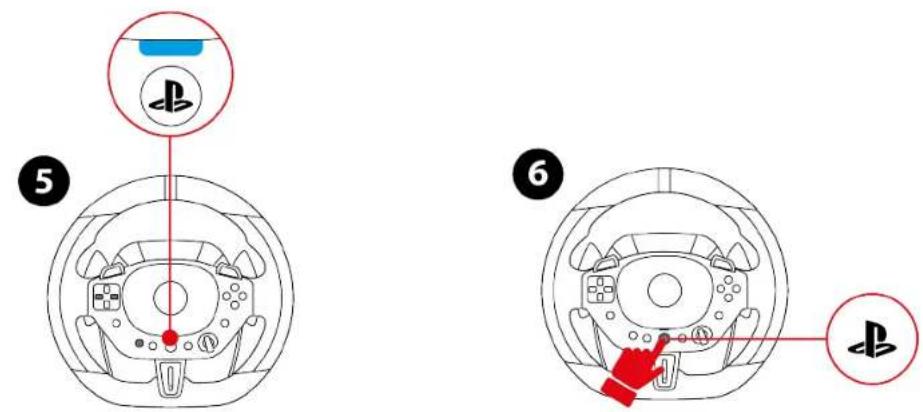
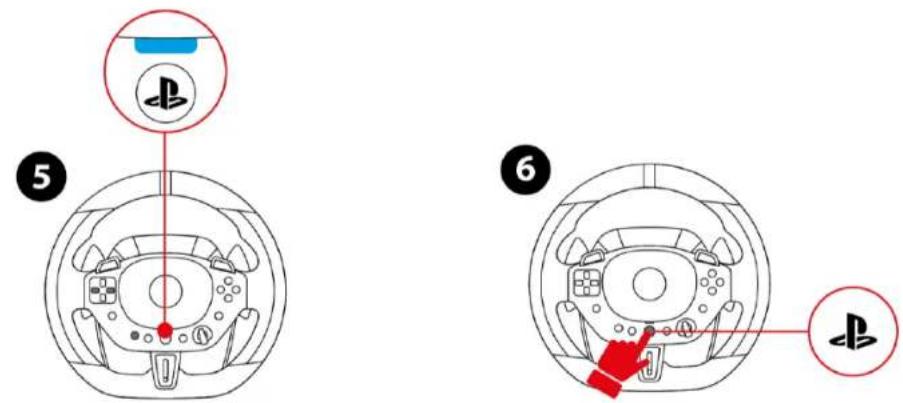
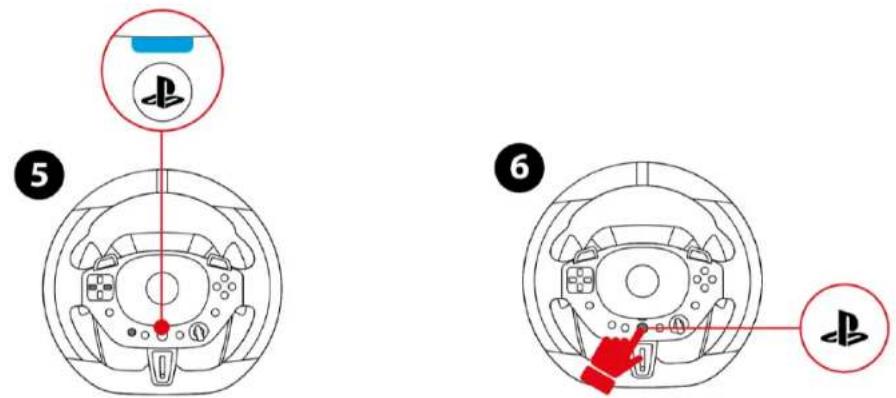
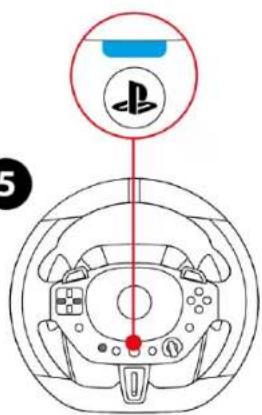
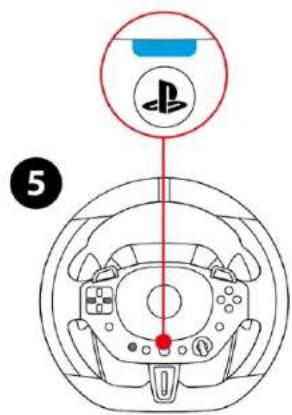
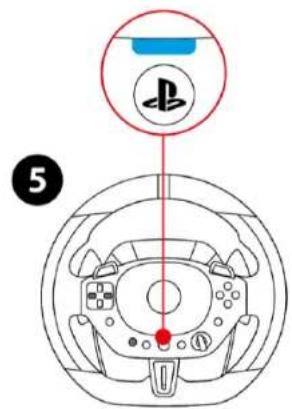
  5. If necessary, change the compatibility mode by following the procedure set out here. The LED should be blue.
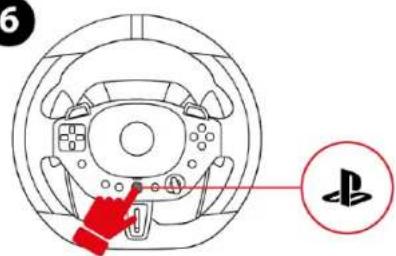
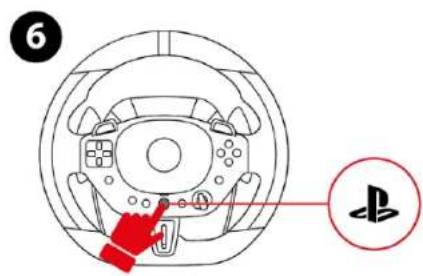
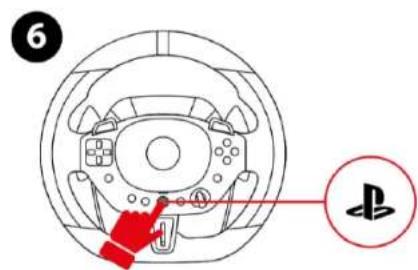
  6. Press the ⏻ button to connect the racing wheel to your profile.

You are now ready to play!

On a PlayStation®5 console

*Not includedTHRUSTMASTER T98 Ferrari 296 GTB - On a PlayStation®5 console - 1
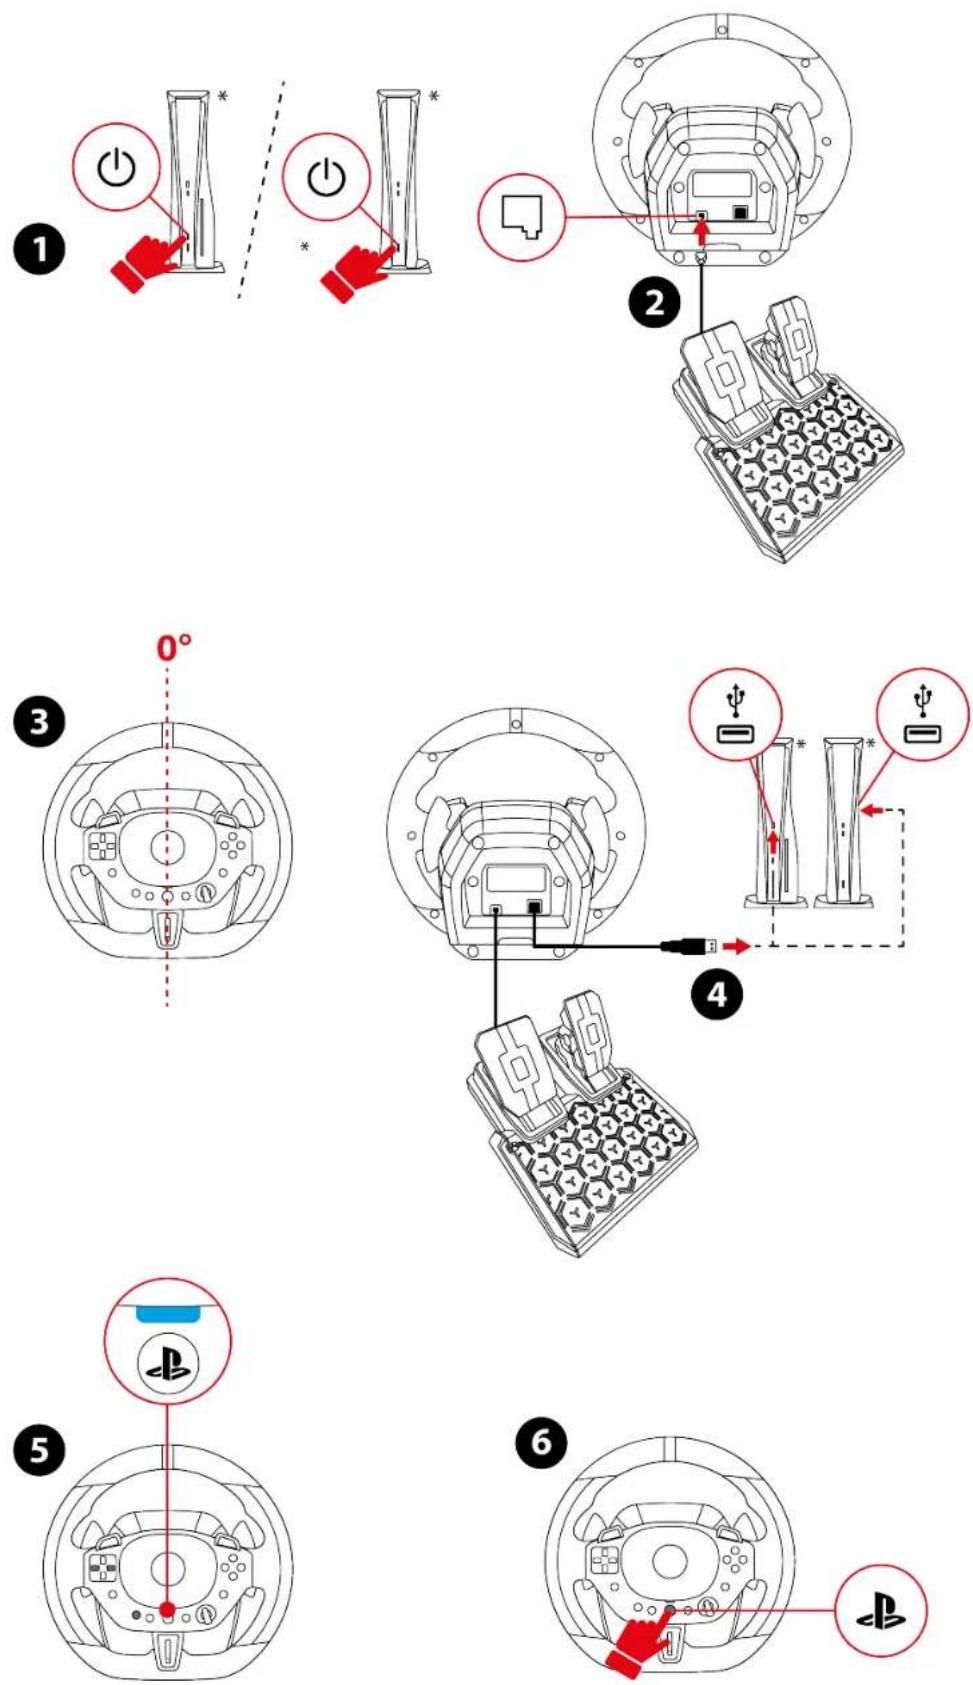
  1. Power on your PlayStation®5 console.
  2. Connect the pedal set to the RJ12 port on the racing wheel.
  3. Physically center the wheel rim.
  4. Connect the USB-A connector to a USB-A port on the PlayStation®5 console.
  5. If necessary, change the compatibility mode by following the procedure set out here. The LED should be blue.
  6. Press the ⏻ button to connect the racing wheel to your profile.

You are now ready to play!

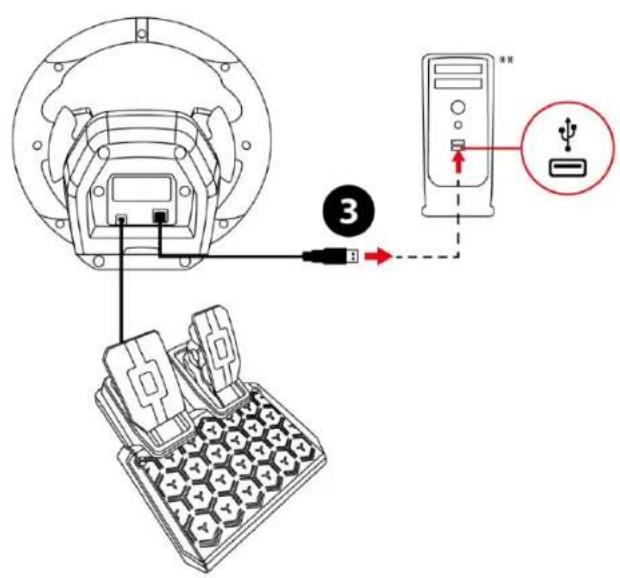
On PC*
Technical diagram showing a device component with labeled parts and a highlighted connection point.

0° 2

Diagram showing device connection with labeled components including a connector, switch, and computer interface.

*PC compatibility (Windows® 10/11) not tested or endorsed by Sony Interactive Entertainment.

**Not included

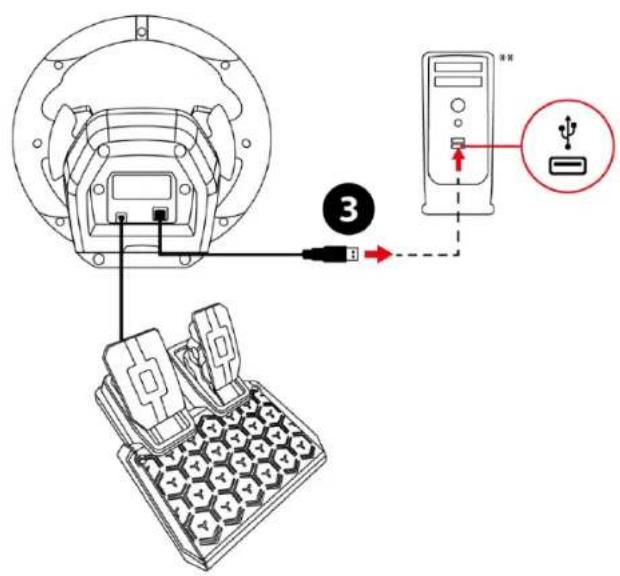
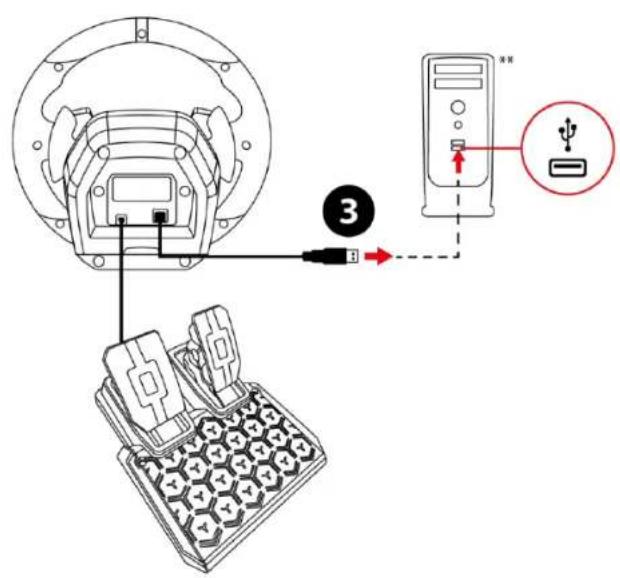
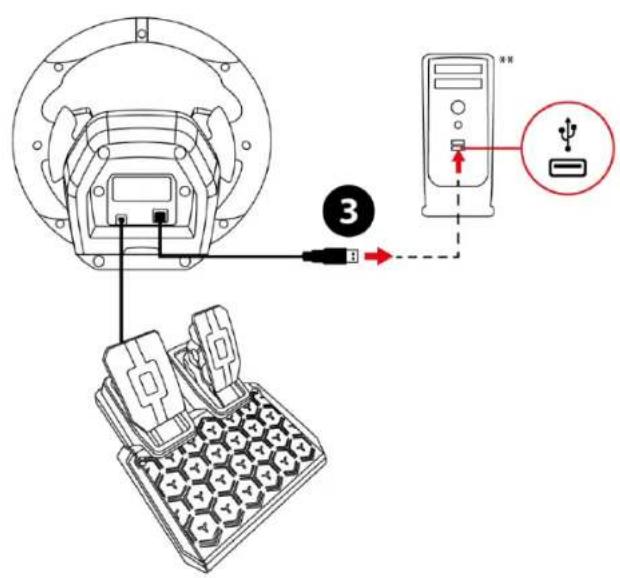
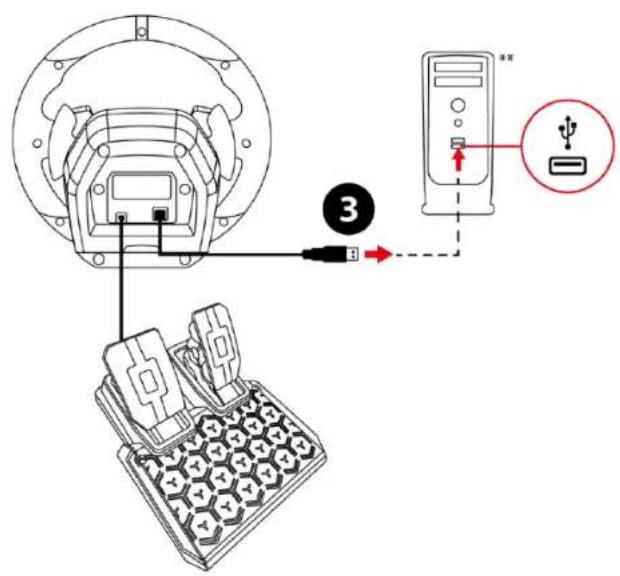
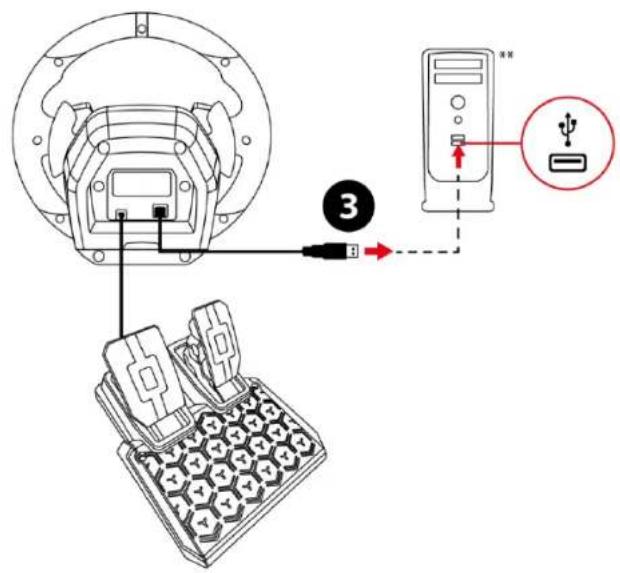
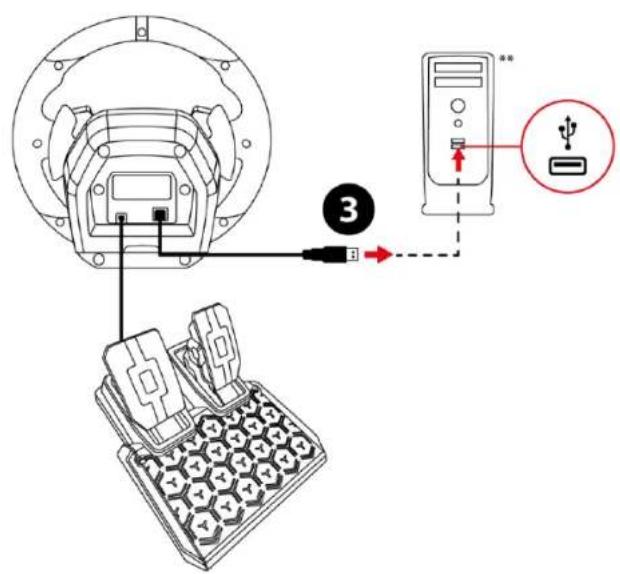
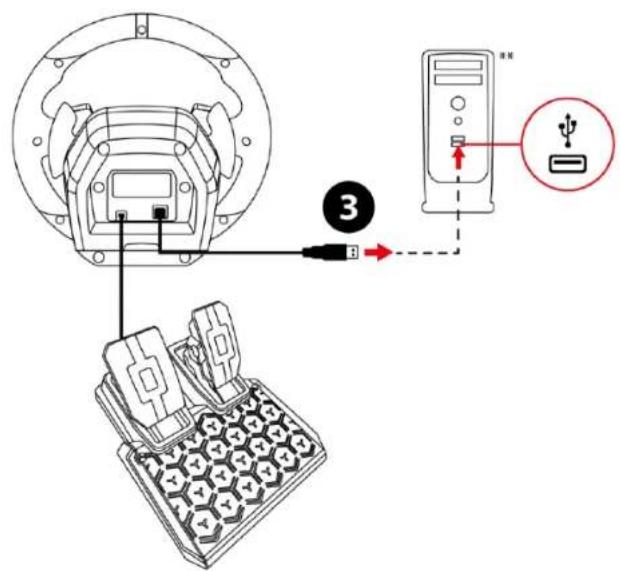
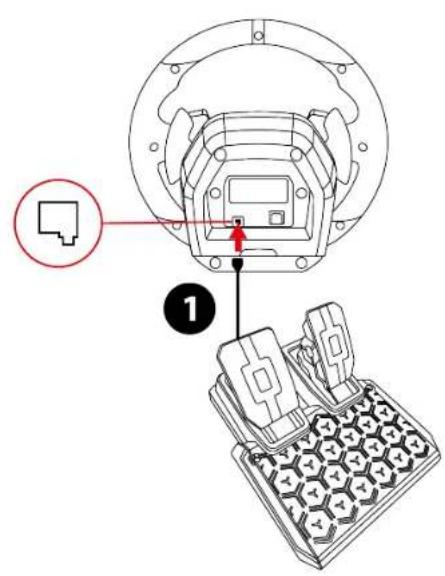
  1. Connect the pedal set to the RJ12 port on the racing wheel.
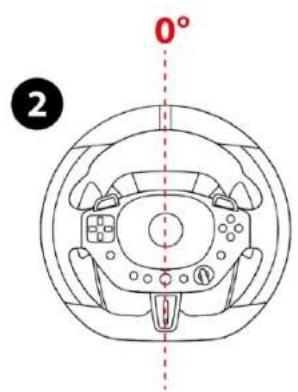
  2. Physically center the wheel rim.
  3. Connect the USB-A connector to a USB-A port on the PC.
  4. Press and hold the MODE button for 5 seconds, until the LED located above the ⏻ button starts flashing.
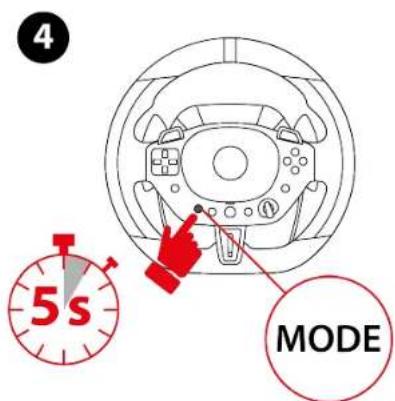
4 5 s MODE

  1. Without releasing the MODE button, use the directional buttons to select the PC compatibility mode (green LED).
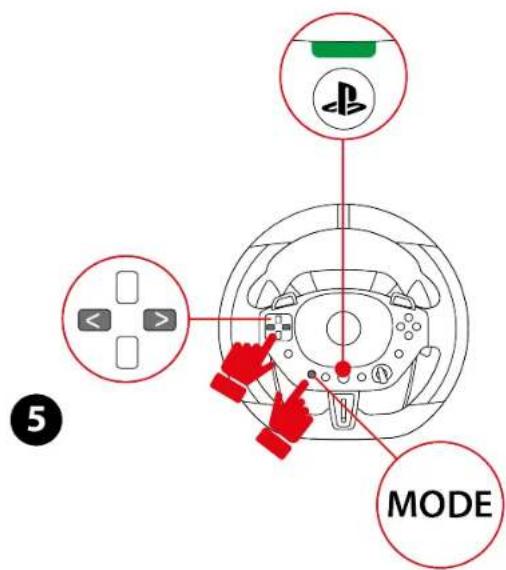
5 MODE

  1. Once the compatibility mode has been selected, release the buttons. Your selection is saved in the racing wheel's internal memory.

You are now ready to play!

Calibration of the racing wheel and pedals

THRUSTMASTER T98 Ferrari 296 GTB - Calibration of the racing wheel and pedals - 1

You must physically center the wheel rim before connecting the USB-A connector to a USB-A port on the PlayStation®4 console, PlayStation®5 console or PC.

THRUSTMASTER T98 Ferrari 296 GTB - Calibration of the racing wheel and pedals - 2

Never disconnect the pedal set from the racing wheel or connect it to the racing wheel when the PlayStation®4 console, PlayStation®5 console or PC is powered on. This could result in improper calibration.

THRUSTMASTER T98 Ferrari 296 GTB - Calibration of the racing wheel and pedals - 3

Always connect the pedal set before connecting the racing wheel to the PlayStation®4 console, PlayStation®5 console or PC.

Once the game has been started, the pedals are automatically calibrated after a few presses.

THRUSTMASTER T98 Ferrari 296 GTB - Calibration of the racing wheel and pedals - 4

Never press the pedals when powering on your PlayStation®4 console, PlayStation®5 console or your PC, starting a game, or changing the compatibility mode. This could result in improper calibration.

THRUSTMASTER T98 Ferrari 296 GTB - Calibration of the racing wheel and pedals - 5

If your racing wheel and/or pedal set do not function correctly, or if they seem to be improperly calibrated: power off your console or PC and completely disconnect the racing wheel. Then reconnect all cables, and restart your PlayStation®4 console, PlayStation®5 console or PC and your game.

Angle of rotation

The wheel rim's angle of rotation is 240°.
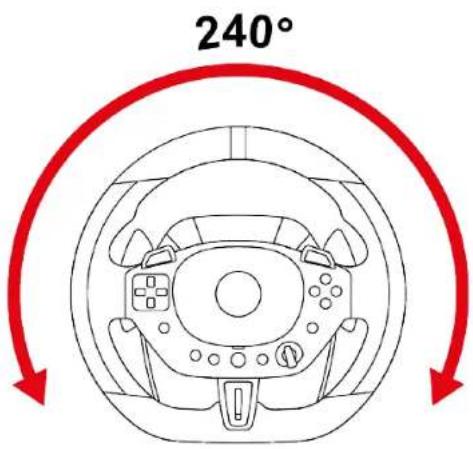
240°

In games where the angle of rotation can be changed manually, please keep the default value if it is greater than or equal to 240°, or select the highest possible value for better playability.

To change the angle of rotation, go to:

- OPTIONS / CONTROLS / STEER LOCK; or

- Settings / Controls / T98 Ferrari 296 GTB or Thrustmaster T80 or Thrustmaster Steering Wheel / Maximum Wheel Or Steering Rotation.

7. Mapping for PlayStation®4 consoles or PlayStation®5 consoles
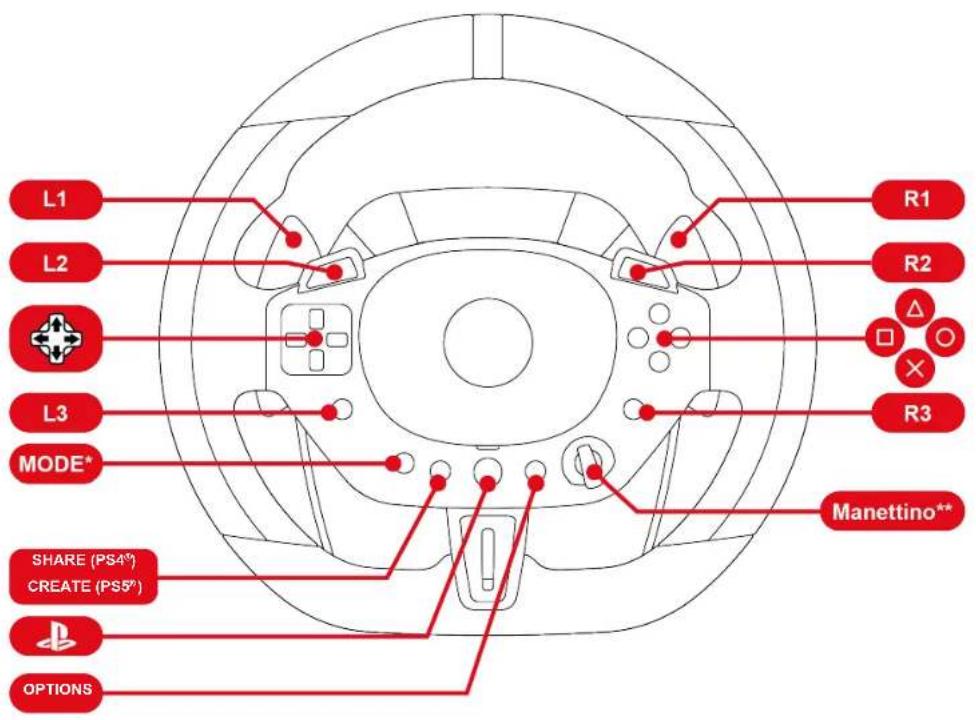
L1 L2 L3 MODE* SHARE (PS4°) CREATE (PS5°) OPTIONS R1 R2 △ O × R3 Manettino**

THRUSTMASTER T98 Ferrari 296 GTB - Mapping for PlayStation®4 consoles or PlayStation®5 consoles - 2

On PlayStation®4 consoles or PlayStation®5 consoles, the racing wheel is recognized with the following name in games: Thrustmaster T80 RACING WHEEL.

*MODE: please refer to the Compatibility mode section. **Manettino: please refer to the Driving support profiles section.

8. Mapping for PC
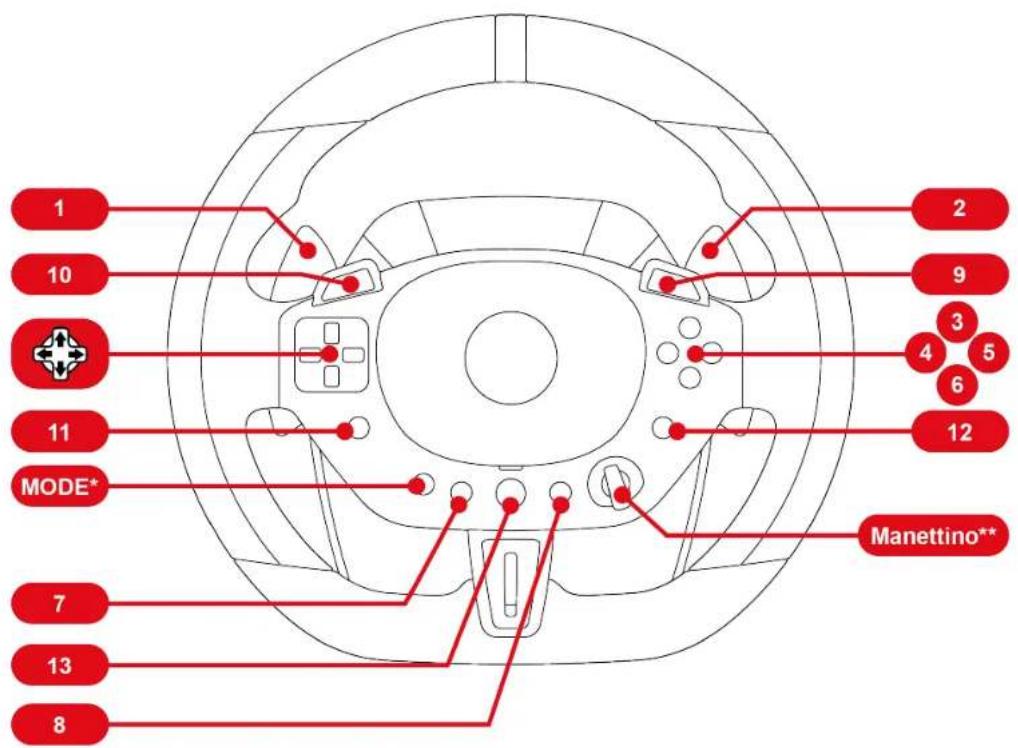
1 2 10 9 3 4 5 6 11 MODE* 12 7 13 8 Manettino**

THRUSTMASTER T98 Ferrari 296 GTB - Mapping for PC - 2

On PC, the racing wheel is recognized with the following name in games: T98 Ferrari 296 GTB or Thrustmaster T80.

*MODE: please refer to the Compatibility mode section. **Manettino: please refer to the Driving support profiles section.

9. Compatibility mode

The racing wheel has three compatibility modes:

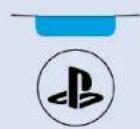
  • On PlayStation®4 consoles and PlayStation®5 consoles, select PlayStation mode (blue LED).
  • On PC, select PC mode (green LED).
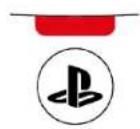
  • The red LED corresponds to an inactive mode. It will be available in the future.
LED colorMode
THRUSTMASTER T98 Ferrari 296 GTB - Compatibility mode - 1PLAYSTATION®Standard compatibility(default mode)
THRUSTMASTER T98 Ferrari 296 GTB - Compatibility mode - 2Future compatibility(inactive mode)
THRUSTMASTER T98 Ferrari 296 GTB - Compatibility mode - 3PC

THRUSTMASTER T98 Ferrari 296 GTB - Compatibility mode - 4

  • Do not select the red LED.
  • You must change the compatibility mode before starting your game.

To change the compatibility mode:

  1. Press and hold the MODE button for 5 seconds, until the LED located above the ⏻ button starts flashing.
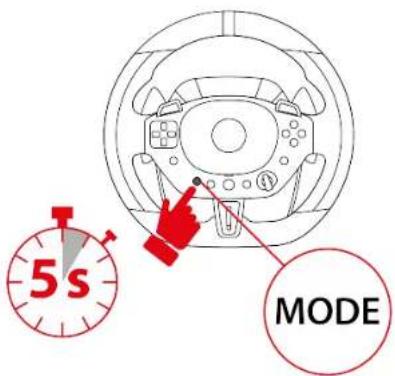
5 s MODE

  1. Without releasing the MODE button, use the directional buttons to select the compatibility mode of your choice.
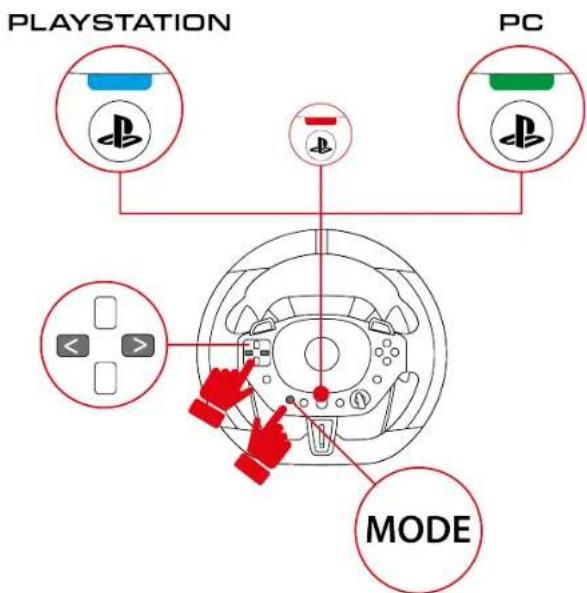
PLAYSTATION PC MODE

  1. Once the compatibility mode has been selected, release the buttons. Your selection is saved in the racing wheel's internal memory.
  2. On PlayStation®4 consoles and PlayStation®5 consoles, press the button to connect the racing wheel to your profile.
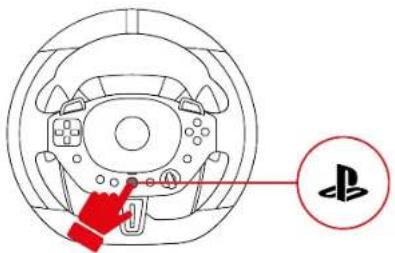
Diagram showing a hand pressing a button on a circular device with an icon labeled 'P' pointing to the button.

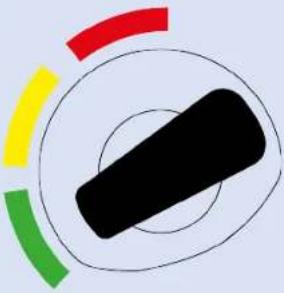
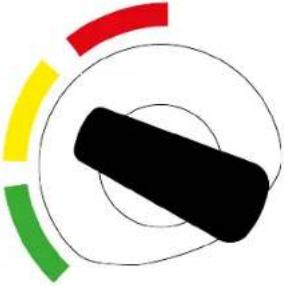
10. Driving support profiles (drive profiles)

The racing wheel features three driving support profiles, also called drive profiles. Each profile offers a greater or lesser level of support.

Use the manettino dial to select the driving support profile that suits you best.

THRUSTMASTER T98 Ferrari 296 GTB - Driving support profiles (drive profiles) - 1

You can even change the driving support profile while you're playing a game.

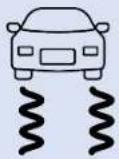
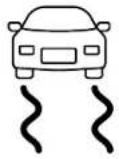
ProfileDriving support level
THRUSTMASTER T98 Ferrari 296 GTB - Driving support profiles (drive profiles) - 2NoneGood mastery of the racing wheel required.The racing wheel is very sensitive: all movements are reflected in the game.
THRUSTMASTER T98 Ferrari 296 GTB - Driving support profiles (drive profiles) - 3
THRUSTMASTER T98 Ferrari 296 GTB - Driving support profiles (drive profiles) - 4Medium (default mode)Driving suitable for intermediate-level gamers.At the beginning of the wheel rim's rotation, the wheel is quite sensitive: almost all movements are reflected in the game.
THRUSTMASTER T98 Ferrari 296 GTB - Driving support profiles (drive profiles) - 5
THRUSTMASTER T98 Ferrari 296 GTB - Driving support profiles (drive profiles) - 6HighDriving suitable for all gamers.At the beginning of the wheel rim's rotation, the wheel is not very sensitive: some movements are not reflected in the game.
THRUSTMASTER T98 Ferrari 296 GTB - Driving support profiles (drive profiles) - 7

11. Compatible games

The list of compatible games for PlayStation®4 consoles and PlayStation®5 consoles is available here:

https://support.thrustmaster.com/product/T98-ferrari-296-gtb

In the Games settings section, select PlayStation® Games list. This list is regularly updated.

12. Automatic emulation of the

racing wheel on PlayStation 4

consoles or PlayStation 5

consoles

In games for PlayStation®4 consoles and PlayStation®5 consoles, T98 Ferrari 296 GTB is recognized as a real racing wheel rather than a gamepad, for better responsiveness and enhanced precision.

THRUSTMASTER T98 Ferrari 296 GTB - Automatic emulation of the - 1

In some games, to avoid interference between the racing wheel and the gamepad, use the racing wheel's buttons to navigate through the interface of the game and of the console.

To change the mapping, go to the game's options menu and then select WHEEL SETTINGS.

To change the sensitivity of the wheel's steering, choose a different driving support profile using the manettino dial.

13. FAQ and technical support

Do you have questions regarding the T98 Ferrari 296 GTB racing wheel, or are you experiencing technical problems? If so, visit the Thrustmaster technical support website:

https://support.thrustmaster.com/product/T98-ferrari-296-gtb

QR code image containing encoded data, no visible human-readable text.

1. My wheel is not functioning correctly or seems improperly calibrated

  • Press the racing wheel's ⏻ button and sign in to your PlayStation™ Network account, in order to be able to use the wheel.
  • Power off your console or your PC, completely disconnect your racing wheel, reconnect all of the cables, restart your PlayStation®4 console, your PlayStation®5 console or your PC, and start up your game again.
  • Never move the wheel rim or press on the pedals when connecting your racing wheel, in order to avoid any calibration problems.
  • Never move the wheel rim or press on the pedals when the game is starting up, in order to avoid any calibration problems.

2. I can't configure my wheel

  • Go to your game's menu and select Options > Controller > Wheels. Then, select the most appropriate configuration.
  • Refer to your game's user manual or online help for more information.

THRUSTMASTER®

T98,

Ferrari 296 GTB

For PlayStation®5 consoles, PlayStation®4 consoles and PC*
Line drawing of a mechanical device with hexagonal grid pattern and connected cable (no text or symbols).

Technical line drawing of a mechanical clamp or bracket with bolts and a bolted base (no text or symbols).

2. Features

1 2 3 5 6 7 8 9 10 11

Technical line drawing of a mechanical device with a red circular indicator showing number 14, no text or symbols present.

Technical line drawing of a mechanical clamp or bracket with a bolted base and threaded spring (no text or symbols).

Technical line drawing of a mechanical component with a magnified inset showing a detail (no text or symbols).

Mechanical assembly diagram showing a rotating component being inserted into a housing (no text or symbols present).

Technical line drawing of a mechanical assembly with a rotating component (no text or symbols).

6. Installation

On PlayStation®4 console

*not suppliedDiagram showing a device component with labeled parts and a red annotation pointing to a speech bubble icon.
0° 2

Diagram showing connector connection with labeled parts including a device, switch, and cable connector.

THRUSTMASTER T98 Ferrari 296 GTB - On PlayStation®4 console - 4

On PlayStation®4 consoles or consoles

https://support.thrustmaster.com/product/T98-ferrari-296-gtb

https://support.thrustmaster.com/product/T98-ferrari-296-gtb

QR code image containing encoded data, no visible human-readable text.

Line drawing of a mechanical device with hexagonal grid pattern and connected cable, no text or symbols.

Technical line drawing of a mechanical clamp or bracket, no text or symbols.

2. Functions

1 2 3 5 6 7 8 9 10 11

Technical line drawing of a mechanical device with no visible text or symbols.

Technical line drawing of a mechanical clamp or bracket with a bolted base and threaded spring, no text or symbols.

Technical line drawing of a mechanical assembly with a magnified inset showing a detail, no text or symbols.

Mechanical assembly diagram showing a rotating component with a red arrow indicating rotation, no text or symbols present.

6. Installation

0° 2

Diagram showing device connection with labeled components including a connector, switch, and computer interface

10. Driving dynamics profiles (drive profiles)

https://support.thrustmaster.com/product/T98-ferrari-296-gtb

https://support.thrustmaster.com/product/T98-ferrari-296-gtb
QR code image containing encoded data, no visible human-readable text

Line drawing of a mechanical device with hexagonal grid pattern and connected cable (no text or symbols)

Technical line drawing of a mechanical clamp or bracket (no text or symbols)

2. Features

1 2 3 5 6 7 8 9 10 11

Technical line drawing of a mechanical device with no visible text or symbols

Technical line drawing of a mechanical clamp or bracket with a bolted base and threaded spring (no text or symbols)

Technical line drawing of a mechanical assembly with a magnified inset showing a detail (no text or symbols)

Mechanical assembly diagram showing a rotating component being inserted into a housing (no text or symbols present)

6. Installation

0° 2

Diagram showing device connection with labeled components including a connector, switch, and computer interface

10. Driving assistance profiles

(drive profiles)

https://support.thrustmaster.com/product/T98-ferrari-296-gtb

https://support.thrustmaster.com/product/T98-ferrari-296-gtb
QR code image containing encoded data, no visible human-readable text

(Options) > Controller > Wheels (Steering wheels).

Line drawing of a mechanical device with hexagonal grid pattern and connected cable (no text or symbols)

Technical line drawing of a mechanical clamp or bracket (no text or symbols)

2. Features

1 2 3 5 6 7 8 9 10 11

Technical line drawing of a mechanical device with no visible text or symbols

Technical line drawing of a mechanical clamp or bracket with a bolted base and threaded spring (no text or symbols)

Technical illustration of a mechanical assembly with a red arrow indicating direction.

Mechanical assembly diagram showing a rotating component being inserted into a housing.

6. Installation

On a PlayStation®4 console

*Not includedDiagram showing a device component with labeled parts and a red annotation pointing to a speech bubble icon.

0° 2

Diagram showing connector connection with labeled parts including a device, switch, and cable connector.

10. Assisted driving profiles

https://support.thrustmaster.com/product/T98-ferrari-296-gtb

https://support.thrustmaster.com/product/T98-ferrari-296-gtb

QR code image containing encoded data, no visible human-readable text.

Line drawing of a mechanical device with hexagonal grid pattern and connected cable.

Technical line drawing of a mechanical clamp or bracket.

2. Features

1 2 3 5 6 7 8 9 10 11

Technical line drawing of a mechanical device with a cable and numbered component (no text or symbols)

Technical line drawing of a mechanical clamp or bracket with a bolted base and threaded spring (no text or symbols)

Technical line drawing of a mechanical component with an inset close-up view showing a detail (no text or symbols)

Mechanical assembly diagram showing a clamping tool interacting with a motor or gear component (no text or symbols present)

Technical line drawing of a mechanical assembly with a rotating component (no text or symbols)

6. Installation

0° 2

Diagram showing connector connection to a device with labeled pins and cable, including a USB symbol and pin 3.

https://support.thrustmaster.com/product/T98-ferrari-296-gtb

https://support.thrustmaster.com/product/T98-ferrari-296-gtb
ferrari-296-gtb

QR code image containing encoded data, no visible human-readable text

Line drawing of a mechanical device with hexagonal grid pattern and connected cable (no text or symbols)

Technical line drawing of a mechanical clamp or bracket (no text or symbols)

2. Features

1 2 3 5 6 7 8 9 10 11

Technical line drawing of a mechanical device with a red circular indicator showing number 14 (no text or symbols on the device itself)

Technical line drawing of a mechanical clamp or bracket with a bolted base and threaded spring (no text or symbols)

Technical illustration of a mechanical assembly with a red arrow indicating direction (no text or symbols present)

Mechanical assembly diagram showing a rotating component being inserted into a housing (no text or symbols present)

Technical line drawing of a mechanical assembly with a rotating component (no text or symbols)

5. Installing the pedal set on a stand or cockpit

6. Installation

On a PlayStation®4 console

* Not includedDiagram showing a device component with labeled parts and a red annotation pointing to a speech bubble icon.

0° 2

Diagram showing connector connection to a device with labeled pins and cable, including a USB symbol and pin 3.

https://support.thrustmaster.com/product/T98-ferrari-296-gtb

https://support.thrustmaster.com/product/T98-ferrari-296-gtb
QR code image containing encoded data, no visible human-readable text.

Line drawing of a mechanical device with hexagonal grid pattern and connected cable (no text or symbols).

Technical line drawing of a mechanical clamp or bracket (no text or symbols).

Technical line drawing of a mechanical device with a red circular indicator showing number 14 (no text or symbols on the device itself).

Technical line drawing of a mechanical clamp or bracket with a bolted base and threaded spring (no text or symbols).

Technical illustration of a mechanical assembly with a red arrow indicating direction (no text or symbols present).

Mechanical assembly diagram showing a rotating component being inserted into a housing (no text or symbols present).

6. Installation

0° 2

Diagram showing connector connection with labeled parts including a device, switch, and cable connector.

https://support.thrustmaster.com/product/T98-ferrari-296-gtb

https://support.thrustmaster.com/product/T98-ferrari-296-gtb

QR code image containing encoded data, no visible human-readable text.

Line drawing of a mechanical device with hexagonal grid pattern and two clamps (no text or symbols).

Technical line drawing of a mechanical clamp or bracket with a threaded spring (no text or symbols).

2. Features

1 2 3 5 6 7 8 9 10 11

Technical line drawing of a mechanical device with no visible text or symbols.

Technical line drawing of a mechanical clamp or clamping device with a bolted spring and hex nut (no text or symbols).

Technical line drawing of a mechanical assembly with a magnified inset showing a detail (no text or symbols).

Mechanical assembly diagram showing a rotating component being inserted into a housing (no text or symbols present).

6. Installation

On PlayStation®4 console

*Not includedTechnical diagram showing a device component with labeled parts and a highlighted connection point.

0° 2

Diagram showing device connection with labeled components including a connector, switch, and computer interface.

https://support.thrustmaster.com/product/T98-ferrari-296-gtb

https://support.thrustmaster.com/product/T98-ferrari-296-gtb

QR code image containing encoded data, no visible human-readable text.

Line drawing of a mechanical device with hexagonal grid pattern and connected cable (no text or symbols).

Technical line drawing of a mechanical clamp or bracket with bolts and a bolt (no text or symbols).

2. Features

1 2 3 5 6 7 8 9 10 11

Technical line drawing of a mechanical device with a red circular indicator showing number 14 (no text or symbols on the device itself).

Technical line drawing of a mechanical clamp or bracket with a bolted base and threaded spring (no text or symbols).

14+

Technical illustration of a steering wheel assembly with a close-up view of the component (no text or symbols).

Mechanical assembly diagram showing a rotating component being inserted into a housing (no text or symbols).

Technical line drawing of a mechanical assembly with a rotating component (no text or symbols).

6. Installation

On PlayStation®4 console

*Not includedDiagram showing a device component with labeled parts and a red annotation pointing to a speech bubble icon.

0° 2

Diagram showing connector connection to a device with labeled pins and cable, including a USB symbol and pin 3.

https://support.thrustmaster.com/product/T98-ferrari-296-gtb

https://support.thrustmaster.com/product/T98-ferrari-296-gtb
QR code image containing encoded data, no visible human-readable text.

Line drawing of a mechanical device with hexagonal grid pattern and connected cable (no text or symbols).

Technical line drawing of a mechanical clamp or bracket (no text or symbols).

2. Elements

1 2 3 5 6 7 8 9 10 11

Technical line drawing of a mechanical device with a red circular indicator showing number 14 (no text or symbols on the device itself)

Technical line drawing of a mechanical clamp or bracket with a bolted base and threaded spring (no text or symbols)

Technical illustration of a mechanical assembly with a red arrow indicating direction (no text or symbols present)

Mechanical assembly diagram showing a rotating component with a red arrow indicating rotation (no text or symbols present)

6. Installation

On PlayStation®4 console

* Sold separatelyDiagram showing a device component with labeled parts and a red annotation pointing to a speech bubble icon.

0° 2

Diagram showing device connection with labeled components including a connector, switch, and computer interface

https://support.thrustmaster.com/product/T98-ferrari-296-gtb

https://support.thrustmaster.com/product/T98-ferrari-296-gtb
QR code image containing encoded data, no visible human-readable text

Line drawing of a mechanical device with hexagonal grid pattern and connected cable (no text or symbols)

Technical line drawing of a mechanical clamp or bracket with a bolt and nut (no text or symbols).

2. Features

1 2 3 5 6 7 8 9 10 11

Technical line drawing of a mechanical device with no visible text or symbols.

Technical line drawing of a mechanical clamp or clamping tool with a bolted spring and hex nut (no text or symbols).

Technical line drawing of a mechanical assembly with a magnified inset showing a detail (no text or symbols).

Mechanical assembly diagram showing a rotating component with a red arrow indicating rotation (no text or symbols present).

5. Attach the pedal set to a support or

cockpit

6. Installation

0° 3 4

Diagram showing two views of a PlayStation car with labeled buttons and a hand pointing to the screen, numbered 5 and 6.

* Not included

0° 2

Diagram showing device connection with labeled components including a connector, switch, and power outlet

https://support.thrustmaster.com/product/T98-ferrari-296-gtb

https://support.thrustmaster.com/product/T98-ferrari-296-gtb

QR code image containing encoded data, no visible human-readable text

Line drawing of a mechanical device with two clamps and a grid-patterned base, connected by a cable (no text or symbols)

Technical line drawing of a mechanical clamp or bracket (no text or symbols)

2. Features

1 2 3 5 6 7 8 9 10 11 1 2 4 5

Technical line drawing of a mechanical device with a cable and numbered component (no text or symbols)

Technical line drawing of a mechanical clamp or bracket with a bolted base and threaded spring (no text or symbols)

Technical line drawing of a mechanical component with a magnified inset showing detail (no text or symbols)

Mechanical assembly diagram showing a rotating component with a red arrow indicating rotation (no text or symbols present)

5. Install the pedal set onto a support or

6. Installation

0° 2

Diagram showing device connection with labeled components including a connector, switch, and USB port

10. Driving assistance profiles (drive

profiles)

https://support.thrustmaster.com/product/T98-ferrari-296-gtb

https://support.thrustmaster.com/product/T98-

ferrari-296-gtb

QR code image containing encoded data, no visible human-readable text

Line drawing of a mechanical device with two blocks and a connecting rod (no text or symbols)

Technical line drawing of a mechanical clamp or bracket (no text or symbols)

2. Features

1 2 3 5 6 7 8 9 10 11 1 2 4 5

Technical line drawing of a mechanical device with a cable and numbered component (no text or symbols)

Technical line drawing of a mechanical clamp or bracket with a bolted base and threaded spring (no text or symbols)

Technical line drawing of a mechanical component with a magnified inset showing detail (no text or symbols).

Mechanical assembly diagram showing a rotating component with a red arrow indicating rotation (no text or symbols present).

5. Mounting the pedal set to a support or cockpit

6. Installation

0° 3 4

Diagram showing two views of a PlayStation car interior with labeled buttons and a hand pointing to the screen.

* Not provided

0° 2

Diagram showing device connection with labeled components including a connector, switch, and USB port.

10. Driving assistance profiles (drive profiles)

https://support.thrustmaster.com/product/T98-ferrari-296-gtb

https://support.thrustmaster.com/product/T98-

QR code image containing encoded data, no visible human-readable text.

Line drawing of a mechanical device with hexagonal base and two clamps, connected to a cable (no text or symbols).

Technical line drawing of a mechanical clamp or bracket (no text or symbols)

2. Features

1 2 3 5 6 7 8 9 10 11 1 2 4 5

Technical line drawing of a mechanical device with no visible text or symbols

Technical line drawing of a mechanical clamp or bracket with a bolted base and threaded spring (no text or symbols)

Technical line drawing of a mechanical component with a magnified inset showing a detail (no text or symbols)

Mechanical assembly diagram showing a rotating component with a red arrow indicating rotation (no text or symbols present)

6. Installation

0° 3 4

Diagram showing two views of a PlayStation controller with labeled buttons and a hand pointing to the screen.

*Not included

0° 2

Diagram showing device connection with labeled components including a device, switch, and connector pin

*PC compatibility (Windows® 10/11) is Sony Interactive

https://support.thrustmaster.com/product/T98-ferrari-296-gtb

https://support.thrustmaster.com/product/T98-ferrari-296-gtb
QR code image containing encoded data, no visible human-readable text

1. The wheel functions are not working

properly or seem to be miscalibrated

Line drawing of a mechanical device with two blocks and a connecting rod (no text or symbols)

Technical line drawing of a mechanical clamp or bracket (no text or symbols)

THRUSTMASTER T98 Ferrari 296 GTB - properly or seem to be miscalibrated - 3

② R2 and L2 buttons

③ Directional buttons

4 Action buttons

5 R3 and L3 buttons

Technical line drawing of a mechanical device with a cable and numbered component (no text or symbols)

Technical line drawing of a mechanical clamp or bracket with a bolted base and threaded spring (no text or symbols)

Technical illustration of a mechanical assembly with a magnified inset showing a detail (no text or symbols present)

Mechanical assembly diagram showing a rotating component being inserted into a housing (no text or symbols present)

THRUSTMASTER T98 Ferrari 296 GTB - properly or seem to be miscalibrated - 8

  1. In

the cockpit

30° 3

Diagram showing a device assembly with labeled components and connection points, including a switch symbol and connector pin.

5Diagram of a car steering wheel with PSY logo and red indicator line, showing brand positioning

66 PSY

0° 2

Diagram showing device connection with labeled components including a connector, switch, and computer interface

Maximum Wheel Or Steering / (Thrustmaster

https://support.thrustmaster.com/product/T98-

ferrari-296-gtb

https://support.thrustmaster.com/product/T98-

ferrari-296-gtb

QR code image containing encoded data, no visible human-readable text

TABLE OF CONTENTS

  1. CONTENTS OF THE PACKAGE......5
  2. FEATURES......6
  3. INFORMATION REGARDING THE USE OF THE RACING WHEEL......8
  4. INSTALLING THE RACING WHEEL ON A TABLE OR DESK....12
  5. INSTALL THE PEDAL SET ON A SUPPORT OR IN A COCKPIT ....15
  6. INSTALLATION ...... 16

On a PlayStation®4 console....16

On a PlayStation®5 console 18

On PC* 20

Line drawing of a mechanical device with hexagonal grid pattern and connected cable (no text or symbols)

Technical line drawing of a mechanical clamp or clamping device (no text or symbols)

2. Features

1 2 3 5 6 7 8 9 10 11

Technical line drawing of a mechanical device with a cable and a numbered component (no text or symbols).

Technical line drawing of a mechanical clamp or bracket with a bolted base and threaded spring (no text or symbols).

Technical illustration of a mechanical assembly with a red arrow indicating direction (no text or symbols present).

Mechanical assembly diagram showing a rotating component with a red arrow indicating rotation (no text or symbols present).

6. Installation

0° 2

Diagram showing connector connection to a device with labeled pins and cable, including a USB symbol and pin 3.

https://support.thrustmaster.com/product/T98-ferrari-296-gtb

https://support.thrustmaster.com/product/T98-ferrari-296-gtb
QR code image containing encoded data, no visible human-readable text.

Line drawing of a mechanical device with hexagonal grid pattern and connected cable (no text or symbols).

Technical line drawing of a mechanical clamp or bracket (no text or symbols).

2. Features

1 2 3 5 6 7 8 9 10 11

Technical line drawing of a mechanical device with a cable and numbered component (no text or symbols).

Technical line drawing of a mechanical clamp or bracket with a bolted base and threaded spring (no text or symbols).

Technical illustration of a mechanical assembly with a red arrow indicating direction (no text or symbols present).

Mechanical assembly diagram showing a rotating component with a red arrow indicating rotation direction (no text or symbols present).

6. Installation

On PlayStation®4 console

1 *

Technical diagram showing a device component with labeled parts and a red annotation pointing to a small icon.

0° 3

Diagram showing connector pinout and cable connection with labeled components and directional arrows.

5

6 PS5

* Not included.

0° 2

Diagram showing device connection with labeled components including a connector, switch, and computer interface.

10. Driving assist profiles (drive profiles)

https://support.thrustmaster.com/product/T98-ferrari-296-gtb

Line drawing of a mechanical device with hexagonal grid pattern and connected cable (no text or symbols).

Technical line drawing of a mechanical clamp or bracket with bolts and a bolt (no text or symbols).

2. Features

1 2 3 5 6 7 8 9 10 11

1 Gear shift paddles (- and +) ② L2 and R2 buttons 3 Directional buttons 4 Action buttons 5 L3 and R3 buttons 6 Compatibility mode LED (blue, red, or green) 7 MODE button 8 SHARE button on PS4® consoles / CREATE button on PS5® consoles 9 PS button 10 OPTIONS button on PS4® and PS5® consoles 11 3-position manettino switch (driving assistance profiles)

Technical diagram of a device with labeled components, showing internal wiring and connection points 12 and 13.

Technical line drawing of a mechanical device with a cable and numbered component (no text or symbols).

Technical line drawing of a mechanical clamp or bracket with a bolted base and threaded spring (no text or symbols).

12 RJ12 port for pedal set 13 USB connector for racing wheel 14 RJ12 connector for pedal set 15 Mounting bracket

Technical illustration of a mechanical assembly with a magnified inset showing a detail (no text or symbols).

Mechanical assembly diagram showing a rotating component being inserted into a housing (no text or symbols).

6. Installation

On PlayStation®4 console

Diagram showing a device component with labeled parts and a red circle highlighting a speech bubble icon.

0° 2

Diagram showing connector connection to a device with labeled pins and cable, including a USB symbol and pin 3.

*PC compatibility (Windows® 10/11) is not tested or approved by Sony Interactive Entertainment.

10. Driving assistance profiles

https://support.thrustmaster.com/product/T98-ferrari-296-gtb

In Games settings, select

https://support.thrustmaster.com/product/T98-ferrari-296-gtb

QR code image containing encoded data, no visible human-readable text.

Line drawing of a mechanical device with hexagonal grid pattern and connected cable (no text or symbols).

Technical line drawing of a mechanical clamp or bracket with bolts and a bolt (no text or symbols).

2. Features

1 2 3 5 6 7 8 9 10 11

Technical line drawing of a mechanical device with a red circular indicator showing number 14, no text or symbols present.

Technical line drawing of a mechanical clamp or bracket with a bolted base and threaded spring, no text or symbols.

Technical line drawing of a mechanical assembly with a magnified inset showing a detail, no text or symbols.

Mechanical assembly diagram showing a rotating component being inserted into a housing, no text or symbols present.

6. Installation

On PlayStation®4 console

*Not includedDiagram showing a device component with labeled parts and a red circle highlighting a speech bubble icon.

0° 2

Diagram showing connector connection to a device with labeled pins and cable, including a USB symbol and pin 3.

https://support.thrustmaster.com/product/T98-ferrari-296-gtb

https://support.thrustmaster.com/product/T98-ferrari-296-gtb
QR code image containing encoded data, no visible human-readable text.

Line drawing of a mechanical device with a hexagonal grid pattern and two clamps, no text or symbols.

Technical line drawing of a mechanical clamp or bracket with a bolt and nut, no text or symbols.

2.

1 2 3 5 6 7 8 9 10 11 1 2 4 5

1 D'

R2-1 L2 כְרָה ②

③ III

הכלה 4

R3-1 L3 5

14+

Prohibition sign with red circle and diagonal line crossing over a mechanical component diagram.

THRUSTMASTER T98 Ferrari 296 GTB - 2. - 4

תְרָה

Mechanical assembly diagram showing a rotating component with a red arrow indicating rotation, no text or symbols present.

6. הַלְרָׁהִיּהֶתְּהִיּהֶתְּהֶתְּהֶתְּהֶתְּהֶתְּהֶתְּהֶתְּהֶתְּהֶתְּהֶתְּהֶתְּהֶתְּהֶתְּהTHRUSTMASTER T98 Ferrari 296 GTB - 2. - 6

① *

Technical diagram showing a device component with labeled parts and a red annotation pointing to a small icon.

0° 3

Diagram showing a device assembly with labeled components and connection arrows, including a USB symbol and connector pin.

5

6 P

הכלה

0° 2

Diagram showing connector connection to a device with labeled pins and cable, including a USB symbol and pin 3.

https://support.thrustmaster.com/product/T98-

ferrari-296-gtb

https://support.thrustmaster.com/product/T98- ferrari-296-gtb
QR code image containing encoded data, no visible human-readable text

Manual assistant
Powered by Anthropic
Waiting for your message
Product information

Brand : THRUSTMASTER

Model : T98 Ferrari 296 GTB

Category : Game controller