
RMCM90DE - Multi-cooker Redmond - Free user manual and instructions
Find the device manual for free RMCM90DE Redmond in PDF.
| Product Type | Multi-cooking appliance (multicooker) |
| Brand | Redmond |
| Model | RMC-M90E (RMCM90DE) |
| Power | 860 W |
| Supply Voltage | 220-240 V ~ 50 Hz |
| Bowl Capacity | 5 L |
| Bowl Coating | Ceramic non-stick ANATO® |
| Cooking Modes | 17 automatic modes: MULTICOOK, OATMEAL, STEW, FRY, SOUP, STEAM, PASTA, SLOW COOK, BOIL, BAKE, GRAIN, PILAF, YOGURT/DOUGH, PIZZA, BREAD, DESSERT, QUICK COOK |
| Keep Warm Function | Yes, up to 24 hours (deactivatable) |
| Delayed Start Function | Yes, from 10 minutes to 24 hours |
| Reheat Function | Yes |
| Display | Color LED touch |
| Included Accessories | Bowl, steam tray, fry basket, measuring cup, ladle, spatula, 100-recipe cookbook, user manual, power cord |
| Bowl Cleaning | Dishwasher safe |
| Lid and Valve Cleaning | Hand wash with damp cloth |
| Safety | Mandatory grounding, overheat protection |
| Warranty | 2 years |
Frequently Asked Questions - RMCM90DE Redmond
User questions about RMCM90DE Redmond
0 question about this device. Answer the ones you know or ask your own.
Ask a new question about this device
Download the instructions for your Multi-cooker in PDF format for free! Find your manual RMCM90DE - Redmond and take your electronic device back in hand. On this page are published all the documents necessary for the use of your device. RMCM90DE by Redmond.
USER MANUAL RMCM90DE Redmond
Carefully read all instructions before operating and save them for future reference. By carefully following these instructions you can considerably prolong the service life of your appliance.
IMPORTANT SAFEGUARDS

The manufacturer is not responsible for any failures arising from the use of this product in a manner inconsistent with the technical or safety standards.
- This appliance is intended to be used in household and similar applications such as: staff kitchen areas in shops, offices and other working environments; farm houses; by clients in hotels, motels and other residential type environments; bed and breakfast type environments.
- Before installing the appliance, check that the device voltage corresponds with the supply voltage in your home (refer to rating plate or technical data).
-
While using the extension cord, make sure that its voltage is the same as specified on the device. Using different voltage may result in a fire or other accident, causing appliance damage or short circuit.
-
The appliance must be grounded. Connect only to a properly installed wall socket. Failure to do so may result in the risk of electrical shock. Use only grounded extension cords.
CAUTION! During use the appliance becomes hot! Care should be taken to avoid touching the housing, bowl, or any other metal parts while operating. Make sure your hands are protected before handling the device. To avoid possible burns, do not lean above the open appliance. - Always unplug the device after use, before cleaning or moving. Never handle plug with wet hands. Do not pull power cord to disconnect from outlet; instead, grasp plug and pull to disconnect.
- Keep the power cord away from hot surfaces (gas or electric ovens) or sharp edges. Do not let cord hang over edge of table or counter.
Remember: damaging the cord may lead to a failure that will not be covered by the warranty. If the cable is damaged or requires replacing, contact an authorized service center only to avoid all risks.
- Never place the device on soft surfaces to keep ventilation slots clear of any obstruction.
- Do not operate the appliance outdoors, to prevent water or any foreign object or insect from getting into the device. Doing so may result in serious damage of the appliance.
Always unplug the device and let it cool down before cleaning. Follow cleaning and general maintenance guidelines when cleaning the unit.
Do not immerse the device in water or wash it under running water!
- This appliance can be used by children aged from 8 years and above and persons with reduced physical, sensory or
mental capabilities or lack of experience and knowledge if they have been given supervision or instruction concerning use of the appliance in a safe way and understand the hazards involved. Children shall not play with the appliance. Keep the appliance and its cord out of reach of children aged less than 8 years. Cleaning and user maintenance shall not be made by children without supervision.
- Any kinds of modifications or adjustments to the product are not allowed. All the repairs should be carried out by an authorized service center. Failure to do so may result in device and property damage or injury.
Technical Specifications
| Model | RMC-M90E |
| Power Input | 860 W |
| Supply Voltage | 220-240 V, 50 Hz |
| Bowl capacity | 5 L |
| Bowl coating | ceramic non-stick by ANATO® (Korea) |
| Display | color, LED |
| 3D heating | yes |
Programs
| 1. MULTICOOK | 7. PASTA | 13. YOGURT/DOUCH |
| 2. OATMEAL | 8. SLOW COOK | 14. PIZZA |
| 3. STEW | 9. BOIL | 15. BREAD |
| 4. FRY | 10. BAKE | 16. DESSERT |
| 5. SOUP | 11. GRAIN | 17. QUICK COOK |
| 6. STEAM | 12. PILAF |
Functions
| Keep Warm function | up to 24 hours |
| Disabling “Keep Warm” in advance | ...yes |
| Reheat function | up to 24 hours |
| Time Delay function | up to 24 hours |
Packaging Arrangement
| Multicooker | 1 |
| Bowl RB-CS12 | 1 |
| Steaming container | 1 |
| Deep fry basket | 1 |
| Measuring cup | 1 |
| Serving spoon | 1 |
| Stirring paddle | 1 |
| "100 Recipes" | 1 |
| Spoon/Paddle holder | 1 |
| User manual | 1 |
| Service booklet | 1 |
| Power cord | 1 |
In accordance with the policy of continuous improvement, the manufacturer reserves the right to make any modifications to design, packaging arrangement, or technical specifications of the product without prior notice.
Multicooker RMC-M90E Assembly A1
- Upper lid 8. Removable steam valve
- Removable Inner lid 9. Stirring paddle
- The bowl 10. Servin
4.Lid release button 11.Measuring c - Control panel with a display 12. Steaming container
- The housing 13. Deep fry basket
Control Panel A2
Multicooker REDMOND RMC-M90E is equipped with a touch control panel with color LED multifunction display.
- "Reheat/Cancel" button disables/reactivates the Reheat function, Interrupts the program and cancels all settings.
- "Time Delay" button is used to enter the time setting mode in Time Delay function.
- Temperature button is used to adjust the temperature in "MULTICOOK".
- "Hour" button is used to adjust the hours in time setting Time Delay modes.
REDMONO
- "Min" button is used to adjust the min times in setting Time Delay modes.
- "Quick Cool" button starts "QUICK COOK" program.
- "Menu/Keep Warm" button is used to select an automatic cooking program and to disable the Keep Warm function in advance.
-
"Start" button starts the cooking program.
-
Display.
Display A3
1 "QUICK COOK" program indicator
2. Operating program/Reheat function indicator
3. Cooking stage indicator
4. MULTICOOK temperature indicator
5. Time Delay indicator
6. Indicator of the timer operation
7. Timer
& Selected program indicator
I. PRIOR TO FIRST USE
Carefully unpack the device, remove all packaging materials and stickers except the one with the unit's serial number. The absence of the serial number will deprive you of your warranty benefits. Wipe all interior and exterior surfaces of the unit with a soft, damp cloth. Wash the bowl with warm soapy water. Rinse and dry thoroughly. Odor on first use of the appliance is normal. In such case, clean the device.
Caution! Do not use the appliance in case of any malfunctions.
II. OPERATION
Before Use
Place the device on a flat, stable, and hard surface away from any objects or cabinets that could be damaged by steam, humidity, or high temperatures. Before operating, make sure that the outer and inner parts of the multicooker have no dents, cracks or any other visible damages. There should not be any obstructions between the heating element and the bowl.
Setting The Cooking Time
Multicooker REDMOND RMC-M90E allows manually adjusting the cooking time, set by default for each program (except "QUICK COOK"). Time adjustment range and interval depend on the program of cooking selected. To set:
- Select the cooking program. Press "Hour" button repeatedly to adjust the hours. Hold the button down to scroll through the digits.
- Press "Min" button repeatedly to adjust the minutes. Hold the button down to scroll through the digits.
- To set the cooking time of less than 1 hour press "Hour" button repeat eddy to reset to zero. Adjust the minutes using "Min" button.
- When the time is set (display keeps blinking), proceed to the next stage in accordance with the program selected. To cancel all settings, press "Rethase/Cancel" button and reset.
1 Manually adjusting the cooking time, consider time adjustment range and interval of selected program, given in the table of default settings. For your convenience the cooking time range in all programs starts with the minimum setting, enabling you to prolong the operating time of the program, if the dth is undercooked.
In certain automatic programs, countdown starts only when the device reaches its operating temperature. E.g., if you set "STEAM" program on 5 October 2013, the program will start at 40^ and then run for a full bath going enough steam, in "PASTA" program, the countdown begins after water starts boiling and "Start" button is being repressed.
Time Delay Function
This function allows setting the program to finish by certain time. Cooking time may be delayed for a period from 10 minutes to 24 hours with 10 minute intervals. Setting Time Delay function, take the cooking time of the program into consideration. The time of a delay should be longer than the cooking time of the program selected; otherwise the program starts running right after you press "Start".
When the automatic program is selected and the temperature and cooking time are adjusted, you may set the 'Time Delay'.
- Press "Time Delay" button to enter the Time Delay setting mode. The words Time Delay are displayed. Timer is blinking.
- Press 'Hour' button repeatedly to adjust the hours in 24 hour format. Hold the button down to scroll through the digits.
- Press "Min" button repeatedly to adjust the minutes. Hold the button down to scroll through the digits.
- If you need to set the delay of less than 1 hour, repeatedly press 'Hour' button to reset to zero and adjust the minutes using 'Min' button.
- To cancel the settings press "Reheat/Cancel" button and reset.
- When the time is set press and hold down the "Start" button. Time Delay function indicator lights up. Set program starts running and the countdown begins.
- Your meal will be ready when the time set expires. When the program finishes, the device automatically switches to "Keep Warm" ("Rheate/Cancel" button indicator lights up).
- Press "Reheat/Cancel" button to cancel the "Keep Warm". Button indicator goes off.
Time Delay function is available in all automatic programs except "FRY", "PASTA" and "QUICK COOK".
It is not recommended to use Time Delay function if dairy and other perishable products are being used (eggs, fresh milk, meat, cheese etc.).
Setting the "Time Delay" in "STead4" program remembers that the countdown starts only when the device reaches its operating temperature (water comes to a full boil).
Keep Warm Function
Function is being automatically activated at the end of the cooking program. When the program finishes, the temperature of the meal (70 - 75^) is being maintained for a period of time up to 24 hours. "Reheat/Cancel" button indicates lights up and the "Keep Warm" count up is being displayed. Press and hold down "Reheat/Cancel" button to disable the function.
Disabling The "Keep Warm" In Advance
Automatic activation of the Keep Warm function at the end of the program may sometimes be undesirable. REDMONRMC-M90E allows disabling the function in advance, while setting the program or during its operation. Press and hold down the "Menu/Keep Warm" button to cancel the function. "Reheat/Cancel" button indicator goes off. To reactivate the function, repress and hold down the "Menu/Keep Warm" button ("Reheat/Cancel" button indicator goes off).
Reheat Function
EDMOND RMC-M90E can be used for warning up cold meals. To reheat:
- Put the products into the bowl. Place the bowl inside the device.
- Close the lid until it clicks into place and pulls in the unit.
- Close the door to the radio. Open the phone program in the menu.
- Press and hold down "Reheat/Cancel" button for a few seconds until an audible sound is produced. Corresponding indicators light up and "heating" process begins. The timer starts its countdown.
The meal will be warmed up to 70 - 75^ and the temperature will be maintained for the next 24 hours. To cancel the function press and hold down "Reheat/Cancel" button. Corresponding indicators go off.
The function may operate for a period of 24 hours, however, we recommend using it moderately, because a prolonged thermal exposure may sometimes affect flavor characteristics of the meal.
Standard Operating Procedure for Automatic Programs
- Measure the ingredients according to the recipe.
- Put them into the bowl. Make sure that all the ingredients including liquid are below the scale mark indicating maximum capacity. Place the bowl in a small bowl, and place it on top of the bowl.
- Close the lid until it clicks into place. Plug in the unit.
- Repeatedly press "Menu/Keep Warm" button to select the program (corresponding indicator lights up).
- Use "Hour" and "Min" buttons to adjust the time set by default for each program.
- Set Time Delay function if needed. Time Delay function is not available in "FRY", "PASTA" and "QUICK COOK" programs.
- Press and hold down "Start" button, "Start" and "Reheat/Cancel" button indicators light up. Set program starts running and the countdown begins. Countdown of the "STEAM" program begins only when water comes to a full boil, providing enough steam. In "PASTA" - after water comes to a full boil, products are added and "Start" button is being repressed.
- Press and hold down "Menu/Keep Warm" button to disable the Keep Warm function in advance if needed, "Reheat/Cancel" button indicator goes off). Repress "Menu/Keep Warm" button to reactivate the function. Keep Warm function is not available in "YOGURT/DOUGH" and "BREAD" programs.
- When cooking time expires, the device makes an audible sound. Depending on your settings the unit either switches to "Keep Warm" ("Reheat/Cancel" button indicator lights up) or enters standby mode ("Start" button indicator blinks).
- To interrupt cooking process at any stage, to cancel set program or the Keep Warm function press and hold down "Reheat/Cancel" button.
To achieve better cooking results, we recommend consulting the cookbook provided. Each out of 100 recipes has been adjusted for this particular model. If you did not achieve the desired result using automatic programs, try versatile program called "MUL TICOOK", featuring a wide range and temperature adjustment range. This program gives endless opportunities for new culinary experiments.
"MULTICOOK" Program
This program can be used to cook any meal with your personal time and temperature settings. REDMOND RMC-M90E, featuring "MULTICOOK" program will be able to replace a big number of kitchen appliances. Now any recipe, either from your family cookbook or internet, can be adjusted for your multicooker.
For your convenience, the device does not switch to "Keep Warm" automatically by the end of the program if the cooking temperature was less than 80^ . It may be manually reactivated by pressing and holding down the "Menu/Keep Warm" button right after the program starts running. "Reheat/Cancel" button indicator lights up.
- Program's default temperature is 100^ , default time is 15 minutes.
- Temperature adjustment range (use "Temperature" button to adjust is from 35^ to 170^ with 5^ intervals.
Cooking time adjustment range is from 5 minutes to 12 hours with the following intervals: less than 1 hour - 1 minute, over an hour - 5 minutes.
A big number of various dishes can be prepared with the help of "MULTI-COOK". Follow recommendations of our chefs given in the recipe book and the table of recommended temperature settings.
"OATMEAL" Program
This program is recommended for cooking various porridges using milk. Program's default time is 10 minutes. Manual time adjustment is available. Time adjustment range is from 5 minutes to 1.5 hours with 1 minute intervals. "OATHEAL" program is recommended for cooking various oat porridges using pasteurized low fat milk. To avoid boiling away, we recommend you do the following:
- rinse grain thoroughly before cooking;
grease the sides of the bowl with butter;
follow proportions suggested in the recipe book. increase or reduce
amount of ingredients proportionally;
- Using whole milk until it is soft with water.
Cooking results may vary depending on the place of origin and the manufacturer of the products used.
If you did not manage to achieve the desired result, please consult the chapter "Cooking Tips" to receive necessary recommendations on cooking or use the multifunctional program "MULTICOOK". Set the temperature of 95^ . Follow the proportions and cooking time settings given in the recipe.
"STEW" Program
This program is recommended for stewing vegetables, meat, fish, poultry, and seafood. Program's default time is 1 hour. Manual time adjustment is available. Time adjustment range is from 20 minutes to 12 hours with 5 minute intervals.
"FRY" Program
This program is recommended for frying meat, vegetables, poultry, and seafood. Program's default time is 15 minutes. Manual time adjustment is available. Cooking time adjustment range is from 5 minutes to 1.5 hours with 1 minute intervals. Time Delay function is not available in this program.
To prevent food from burning, follow instructions given in the recipe book and stir ingredients thoroughly while frying.
"SOUP" Program
This program is recommended for cooking various broths, soups (chunky, bisque, cream soup etc.) and making fruit and berry drinks. Program's default time is 1 hour. Manual time adjustment is available. Cooking time adjustment range is from 20 minutes to 8 hours with 5 minute Intervals.
"STEAM" Program
This program is recommended for: steaming meat, fish, vegetables and children meals. Program's default time is 25 minutes. Manual time adjustment is available. Cooking time adjustment range is from 5 minutes to 2 hours with 5 minute intervals. Use the steaming container provided to steam the foods.
- Pour 600-1000 ml of water into the bowl. Place the steaming container in
- Measure the ingredients and put them into the container. Place the bowl inside the device. The bowl and the heating element must fit tightly.
- Follow steps 3 to 10 given in "Standard operating procedure for automatic programs".

Countdown of the program does not start until the device reaches its operating temperature (water comes to a full boil).
if you want to adjust the default settings of the program we advise consulting the table of recommended steaming time settings for various products.
"PASTA" Program
This program is recommended for cooking pasta, sausages, eggs, etc. Program's default time is 8 minutes. Manual time adjustment is available. Cooking time adjustment range is from 2 to 20 minutes with 1 minute intervals. Cooking time adjustment is also possible in the case of a large amount of food that has to be packed into a bowl, and to cook the ingredients. The device produces an audible sound upon
boiling alarming you to put ingredients inside the bowl. Repress the "Start" button to begin the countdown. Time Delay function is not available in this program.
During preparation of certain products (pasta, etc.), foam might arise. To avoid foam boiling over, we recommend you to open the lid a few minutes after the products have been added into boiling water.
"SLOW COOK" Program
This program is recommended for cooking stewed meat or baked milk. Program's default time is 5 hours. Manual time adjustment is available. Cooking time adjustment range is from 1 to 8 hours with 10 minute intervals.
"BOIL" Program
This program is recommended for cooking beans and vegetables. Program's default time is 40 minutes. Manual time adjustment is available. Cooking time adjustment range is from 5 minutes to 2 hours with 5 minute intervals.
"BAKE" Program
This program is recommended for baking cakes, puddings, pies, puff, and yeast pastry. Program's default time is 1 hour. Manual time adjustment is available. Cooking time adjustment range is from 20 minutes to 8 hours with 5 minute intervals.
The readiness of the cake may be checked with a toothpick. Insert a toothpick in one and it comes out dry, your cake is ready.
mmend disabling the Keep Warn function when baking.
"GRAIN" Program
This program is recommended for cooking various grains. Program's default time is 55 minutes. Manual time adjustment is available. Cooking time adjustment range is from 5 minutes to 4 hours with 5 minute intervals.
"PILAF" Program
This program is recommended for cooking different plats, paella or risotto. Program's default time is 1 hour. Manual time adjustment is available. Cooking time adjustment range is from 20 minutes to 1.5 hours with 10 minute intervals.
"YOGURT/DOUGH" Program
This program is recommended for making healthy and delicious homemade yogurts. Default time is 8 hours. Manual time adjustment is available. Cooking time adjustment range is from 6 to 12 hours with 10 minute intervals. Keep Warm function is not available in this program. Adding Ingredients into the bowl make sure that it is filled only to half of its size.
1 Use Yogurt for Set REDAMONO RAM-G1 (to be purchased separately) to prepare yogurt.
"PIZZA" Program
This program is recommended for making pizza. Default time is 25 minutes. Manual time adjustment is available. Cooking time adjustment range is from 20 minutes to 3 hour with 5 minute intervals.
"BREAD" Program
This program is recommended for baking white and wheat-rye breads. The program includes complete baking cycle starting from the process of proofing the dough and up until the moment you take the freshly baked product out. Default time is 5 hours. Manual time adjustment is available. Cooking time adjustment range is from 1 to 6 hours with 10 minute intervals.
Keep Warm function is not available in this program. Adding ingredients into the bowl make sure that it is filled only to half of its size.
remember, that the baking starts one hour after the beginning of the program when the dough has softened.
Before using baking flour, we advise you sift it, removing any impurities and adding to it some air.
- It is not recommended to use "Time Delay" function because this may affect the quality of pastry.
- Do not open the lid until the program finishes!
- In order to minimize the cooking time and to simplify the process of baking we advise using baking flour mixes.
"DESSERT"Program
This program is recommended for making various desserts using fruits and berries. Default time is 1 hour. Manual time adjustment is available. Cooking time adjustment range is from 5 minutes to 4 hours with 5 minute intervals.
"QUICK COOK" Program
This program is recommended for quick cooking rice and other grains. Manual time adjustment and Time Delay function are not available in this program.
III. ADDITIONAL FEATURES
Proofing the Dough
Making Fondue
Making Cheese, Cottage Cheese
Deep frying
- Pasteurizing Liquids
Reheating Baby Food
IV. OPTIONAL ACCESSORIES
Additional accessories can be purchased separately. Information on the assortment, pricing, and compatible accessories is available through our authorized dealer in your country.
RAM-CL1 - bowl removal tongs
The tongs are used for safe and convenient removal of the bowl out of the unit. Suitable for use with multicookers from other manufacturers.
RHP-M01 - ham press
The device allows making homemade delicacies out of meat, fish, poultry, and seafood with various fillings and seasonings. The ham press is suitable for multicooker, aero grill, oven, and saucepan use.
RAM-FB1 - deep fry basket
The basket is used for frying various foods in hot or boiling oil (deep fat). This stainless steel basket has a detachable handle and a drain hook. RAM-FB1 is suitable for any bowls with capacity of at least 5 L. May be used with multicookers from other manufacturers. The basket is dishwasher safe.
RAM-G1 - the set of 4 yogurt jars with date-dials
Use the set to prepare homemade yogurts. The jars feature the date-dial function, which can be used for date-dial option dates. The set may be used with multicookers from other manufacturers.
RB-C502 - bowl with ceramic coating by ANATO (Korea)
5-L bowl has excellent non-stick and thermal conductivity properties allowing the food to fry and stew evenly throughout the whole cooking process. The bowl was especially designed for baking, frying, and coating hot cereals. Suitable for product storage and oven use. Dishwasher safe.
RB-5500 - stainless steel bowl
5-L bowl features excellent scratch resistance. It is recommended for making various soups and jams. Suitable for blender and mixer use to prepare fruit and vegetable purees and cream soups. Not recommended for frying and baking. Dishwasher safe.
REDMOND
V. CLEANING AND GENERAL MAINTENANCE GUIDELINES
Before you start cleaning the device, make sure that it is unplugged and has cooled down. Use soft cloth and mild soap to clean. We recommend cleaning the appliance after each use.
Prior to first use or in order to remove the odor steam half a lemon for 15 minutes using "STEAM" program.
Do not use a sponge with hard or abrasive surface; solvent and abrasive cleaning methods (gasoline, acetone) are not allowed. Do not immerse the device in water or wash it under running water.
Steam valve, Inner aluminum lid, and the bowl need to be cleaned after each use. The bowl is dishwasher safe. By the end of cleaning, wipe the bowl dry.
To clean the inner lid:
1 Open the lid.
2. Press 2 plastic holders on the inner side of the lid pointing towards the center until open.
3. Gently put the inner lid towards yourself and down to get it separated from the main lid.
4. Wipe the surfaces of both sides with wet cloth or tissue. Wash under running water, using mild soap if needed. Not dishwasher.
5. Carry out the assembly in return sequence: slide the inner lid into upper grooves overlapping it with the main lid. Gently push the holders until they click into place. Make sure that the inner lid fits tightly.
The steam valve is located on the top lid of the device and consists of two parts: the cover and the main part. To clean the steam valve:
- Take the cover of the steam valve off by pulling it gently up and towards yourself as shown A4
- Inside the removed cover: turn the main part of the steam valve anticlockwise (in direction of open ) to remove. 3. Take the remaining sealing ring out; wash all parts of the steam valve following cleaning and general maintenance guidelines provided below.
CAUTION Do not twist or stretch the rubber sealing ring to avoid its deformation.
- Carry out the assembly of the steam valve in return sequence: place the rubber sealing ring back into the holder; overlap the grooves of the main part of the valve with the corresponding ledges on the inside of the cover and turn the valve clockwise in direction of <close> . Install the steam valve back into the lid of the device, with the extraction ledge facing the back.
Condensation may accumulate in the special cavity around the bowl and in condensation container at the back of the device.
- Open the device and take the bowl out. Lift the front side of the device if needed, to let the condensate flow down into the container.
- Pull container towards yourself to remove.
- Pour condensate out, rinse the container and put it back into place.
VI. COOKING TIPS
This chapter familiarizes you with the practical tips and solutions to some common problems you may experience when using the multicooker.
THE DISH IS UNDERCOoked
| Possible Causes Solving the Problem | |
| The lid of the device was either open or was not closed properly. | Try to avoid opening the lid while cooking. Close the lid until it clicks into place. Make sure that the rubber sealing ring located on the inner side of the lid is not melted or damaged in anyway. |
| Cooking temperature was not observed because the bowl and the heating element did not fit tightly. | There should not be any foreign objects between the lid and the housing of the device,remove if any. Always make sure that the heating element is clean and fits tightly with the bowl before cooking. |
| Wang ingredients as settings were chosen. General instructions were not observed, the size of the ing-. Ingredients was too large. Wrong time settings. Choose recipe is not appropriate for the device. | Will recommend using recipes adjusted for the device. Choose proven recipes only. Set the time and cooking program, choose ingredients,proportions, and the size of ingredients according to the recipe. |
| Squeezing the amount of water in the bowl is not lable to provide enough steam. | |
| Frying: | Too much oil was added. |
| Too much moisture inside the bowl. | |
| Cooking the water boiled away during preparation of foods with high acitivity. | |
| Baking (though did not have thoroughly) | Too much cough in the bowl. Use a smaller amount of cough. |
| Proved that though has reached the inner lid and covered the steam valve. | |
THE DISH IS OVERCOoked
| Possible Causes Solving the Problem | |
| Ingredients have been over stirred. | Frying foods, do not stir the ingredients more often than every 5- minutes. |
| Cooking time was too long. | Reduce cooking time or follow recommendations given in the recipe adjusted for this device. |
BAKED GOODS ARE OVERLY MOIST
| Possible Causes Solving the Problem | |
| Improper ingredients causing excess moisture have been used (jelly fruits or vegetables, frozen herring, sour cream, etc.) | Use ingredients according to the recipe. Try to avoid using ingredients causing excess moisture or use them in smaller amounts. |
| Listed product has been left in the unit with the closed lid far too long. | We recommend taking based product out of the unit right after the boiling cycle. Rinse or leaving it on the "Keep Warm" for a short period of time only. |
BAKED GOODS DO NOT RISE
| Possible Causes Solving the Problem | |
| Bogs and sugar were poorly whipped. | |
| The dough stayed for too long before being baked. | |
| The flour wasn't sifted or the dough was poorly kneaded. | |
| Wrong Ingredients. | |
| Wrong recipe. |
Certain REDMOND multicoders feature on overest protection in "STEW" and "SOURP" programs. In case there is no liquid in the bow, the device automatically interrupts the program and switches to "Keep Worm".
Recommended Steaming Time Settings For Various Products
| Product Weight, g/pcs Water, ml Cooking time, min | ||||
| 1 | Porcine liver (cut into 1.5 cm cubes) 500 500 20/30 | |||
| 2 | Mutton filler (cut into 1.5 cm cubes) 500 500 25 | |||
| 3 | Chicken filler (cut into 1.5 cm cubes) 500 500 15 | |||
| 4 | Hematologicals (cut 1.5 cm cubes) 500 500 10/15 | |||
| 5 | Fish fillet 300 500 10 | |||
| 6 | Shrimp (cooked, peeled, frozen) 500 500 1 | |||
| 7 | Potatoes (cut into 1.5 cm cubes) 500 500 15 | |||
| 8 | Carrots (cut into 1.5 cm cubes) 500 500 15 | |||
| 9 | Beets (cut into 1.5 cm cubes) 500 500 1 hour 10 min | |||
| 10 | Green vegetables 500 500 10 | |||
| 11 | Egg 3 pcs 500 10 | |||
Remember, that these are general recommendations only. In reality, cooking time may vary from the recommended one, depending on the quality of the product used and on your personal preferences.
"MULTICOOK" Temperature Adjustment Recommendations
| # | Temperature | Recommendations for use |
| 1 | 35°C | Froasting dough and making syingas |
| 2 | 40°C | Molding sugars |
| 3 | 45°C | Leaving |
| 4 | 50°C | Fermentation |
| 5 | 55°C | Foodstarc |
| 6 | 60°C | Molding green tea and preparing baby food |
| 7 | 65°C | Cooking vacuum sealed mast |
| 8 | 70°C | Preparing punch |
| 9 | 75°C | Pasteurizing liquids and making white tea |
| # | Temperature | Recommendations for use |
| 10 | 80°C | Preparing multilce wine |
| 11 | 85°C | Making cottage cheese and other time consuming meals |
| 12 | 90°C | Making red tea |
| 13 | 95°C | Cooking porcifcings using milk |
| 14 | 100°C | Cooking margarine and lams |
| 15 | 105°C | Cooking jellal meat |
| 16 | 110°C | Sterilization |
| 17 | 115°C | Mashing sugar syrup |
| 18 | 120°C | Mashing brselt |
| 19 | 125°C | Stewing meat |
| 20 | 150°C | Making puddings |
| 21 | 155°C | Browning cooked foods |
| 22 | 160°C | Smoking various foods |
| 23 | 165°C | Baking fish and vegetables In roll |
| 24 | 150°C | Baking meat in roll |
| 25 | 155°C | Frying yeast dish |
| 26 | 150°C | Frying poultry |
| 27 | 165°C | Frying steaks |
| 28 | 170°C | Deep frying french fries and chicken nuggets |
Table of default settings
| Program | Recommendations for use | Cooking time, set by default | Time adjustment range/setting Interval | Time Delay | Preheating stage | Keep Warm |
| MILLTICKOOL | Cooking various meats with your persuit, time and temperature settings | 15 min | 5 min - 2 hour / 2 min1 hour - 12 hours / 5 min | + | - | + |
| OATMEAL | Cooking porridge using milk | 10 min | 5 min - 1.5 hour / 2 min | + | - | + |
| STEWI | Stewing meat, fish, vegetables, etc. | 1 hour | 20 min - 17 hours / 5 min | + | - | + |
| FRY | Frying meat, fish, vegetables, etc. | 15 min | 5 min - 1.3 hour / 5 min | - | - | + |
| SOUP | Making various soups and dressings | 1 hour | 20 min - 8 hours / 5 min | + | - | + |
| STEAM | Steaming meat, fish, vegetables, etc. | 10 min | 5 min - 2 hours / 5 min | + | + | + |
| NASTA | Cooking pasta, viages and other semi-finished products | 8 min | 5 min - 20 min / 1 min | - | + | + |
| SLOW COOK | Molding steamed meat, baked mili, pickles, jellied meat and aspic | 5 hours | 1 hour - 8 hours / 10 min | + | - | + |
| BOWL | Cooking beans and vegetables | 40 min | 5 min - 7 hours / 5 min | + | - | + |
| BAKE | Boiling cakes, puddings, pies, puff and yeast pastry | 1 hour | 20 min - 8 hours / 2 min | + | - | + |
| GRAIN | Cooking quinoa and other rice dishes | 35 min | 5 min - 4 hours / 5 min | + | - | + |
| PILAF | Molding meat, fish, poultry and seafood ploirs | 1 hour | 20 min - 1.5 hours / 20 min | - | - | + |
| YOGURT/DOUGHI | Mailing different kinds of yogurt; prodrug dough | 8 hours | 6 hours - 12 hours / 10 min | + | - | - |
| PIZZA | Mailing pizza | 25 min | 30 min - 1 hour / 5 min | + | - | + |
REDMONO
| Program Recommendations for use | Cooling time, set by default | Time adjustment range/setting Interval | Time Delay | Prelactating range | Keep Warm |
| URBAU | Baking white and wheat-rye breads including the precooling cycle | 3 hours | 1 hour - 6 hours / 30 min | + | - |
| DESSERT | Molding desserts using fresh fruits and berries | 1 hour | 5 min - 4 hours / 5 min | + | - |
| QUICK COOK | Quick cooking rice and other grains 30 min - - - + |
VII. BEFORE CALLING FOR SERVICE
| Error code | Error description | Error handling | |
| #1 - #3 | System error: system based or heating element malfunction. | Unplug the unit and let it cool down. Close the lid tightly. Switch the unit back on. If this does not eliminate the error, address an authorized service center. | |
| Problem | Possible cause | Solving the problem | |
| The device does not switch on. | Voltage supply failure. | Check the voltage supply. | |
| The meals tasting too long to cook. | Wasteage supply interruption. | ||
| There is a foreign object between the bowl and the heating element. | Remove the foreign object. | ||
| The bowl was installed with a distortion. | Install the bowl, ears, without any distortion. | ||
| The heating element is dirty. | Unplug the device and let it cool down. Clean the heating element. | ||
VIII.PRODUCT WARRANTY
We warrant this product to be free from defects for a period of 2 years from the date of purchase. If the appliance fails to operate properly within the warranty period and is found to be defective in material or workmanship, we will repair or replace it free of charge. This warranty comes into force only in case an original warranty service coupon with a serial, article number and an accurate impress of the company of the seller proves the purchase date. This limited warranty does not cover damage caused by the failure to use this product for its normal purpose or in accordance with the instructions on the proper use and maintenance of the product or any kind of repair work. Do not try to disassemble the device and keep all package contents. This warranty does not cover normal wear of the device and its parts (lithers, bulbs, ceramic and Teflon coating, gaskets etc.).
Service life and the applicable product warranty period start on the date of purchase or the date of manufacture (if the purchase date cannot be established).
You can determine manufacture date by serial number, located on the identification label on the housing of the device. The serial number consists of 13 digits. 6th and 7th digits of the serial number identify the month, 8th digit of the year of manufacture.
Service life of the product, established by the manufacturer is 5 years from the date of purchase, provided that the unit is used and maintained in accordance with the user manual and applicable technical standards.
The packaging, user manual, and the device itself may not be treated as household waste. Instead, it shall be taken to the applicable collection point for the recycling of electrical and electronic equipment.
If you want to find the information about the products you need to purchase, please visit www.cuisson.com.
Carefully read all instructions before operating and save them for future reference. By carefully following these instructions you can considerably prolong the service life of your appliance.
- YOEGURT/DOUGH (YOGHURT)
14.0774
- SPREAD (SPREAD)
16.DESSET
- OUCCK COOK (SNEI, 0<EN)
Functies
"SLOW COOK"programma
IV. OPTIONELE ACCESSORIES
BU HET KOKEN KOOKT HET PRODUCT OVER
Programma "SLOW COOK"
Programa "SLOW COOK"
Programa "YOGURT/DOUGH"
Lamerican National Association of Machinists and Designers (NAA) is a member of the American Society of Machinists and Designers, Inc. (AAMC). The Society provides technical assistance to designers in the fields of manufacturing and engineering.
Programa "YOGURT/DOUGH"
specification of forbing at dets proooder wae vorsel of disse eodnnger.
Komponentoversigt af multikoger RMC-M90E A1
- Läg 8. Flygtbar dampventil
- Flygtbart inderate lag 9. Flad ske
- Skal
- Lagel abnng knap 5. Kontraktorien und
- Kontrahentien Med Disiplin 6:1984
- Ropius
Kontrolpanel A2
Multikogenen REDONDMC-RM-50E er udstyret med beringsfalsion kontrolpmed multifunktion faret LED display.
several speciof aenei maaegeneris model.

Program "YOGURT/DOUGH"
Med ditte programan De lave torsellige slags Lekre og sunc yoghurt derhemme. Programmets standarde tberedningstid er 8 timer: Manuel indstilling er mullig mad tidsinterval rfa 6 til 12 timer mad tidskrifkt pr 10 minuter.
Auto-opvarmningsfunktion er ilke tilgaengelig under dette program.
Program "OUICK COOK"
VED KOGNING KOGES PRODUKTEN OVER
Program "YOGURT/DOUGH"
Ved hjelp av det programme kam der tilberede forskellige velsmakende og sunne yoghurter hjemme. Automatisk Tilberedningsprogram er 8 Timer. Manuell insitilant av tilbererendingsid er mutig期内en iela for 6 Hl 12 timer med melomium 10 minutes.
Program "QUICK COOK"
functional ring LED.
Program "YOGURT/DOUGH"
Méni higj év d'atra programme ran k du laga olika goda et nytgie yogurart hemma hos sig. Inprogrammerad tllagningstid 8 timmar. Det ar mögjt af programera in iden fom 6 till 12 timmar, inslalningsstag der 10 minuer.
Program "OUICK COOK"
BAKET HAR INTE STIGIT UPP
| Ägg med scotier wir dlilgt vlopaide | - Desir bänvindet at anvida resept, anpassate till denne model. - Vol av ingredienrer stichtet at sidde dem, billogrig skilen, valv program och tildlegelendraste oversteinschaftsmed salt recept. |
| Smalen har sticht vor range med transpulver i | |
| Du haviklatenjdlen dlilgt aller blandet sizen fei | |
| Felt einlagengrning au ingredienwerse | |
| Recepten, salt av digi, passar innti tali kolfing i donna model. |
1 i f r t t t t t t t t t t t t t t t t t t t t t t t t t t t t t t t t t t t t t t t t t t t t t t t t t t t
Rekomenderad tillagningsid for angkoking av olika matvaror
| N° Métébrane Vitr#, g Volton, mi Tlltagningstid, min | ||||
| 1 | Griffite / corte [skuren / tänningar 1,5 x 1.5 cm] 500 500 20/40 | |||
| 2 | Lemmet / epikuren / tänningar 1,5 x 1.5 cm] 500 500 25 | |||
| 3 | Kryskingfluss (Neurolan / tänningar 1,5 x 1.5 cm) 500 500 15 | |||
| 4 | Kotstrublar / bilbar | 190 16 st0/400 15 st0 | 500 | 10/25 |
| 5 | Fisik (Mio) | 500 500 10 | ||
| 6 | Säubersäner (ensoxide) | 500 500 | 3 | |
| 7 | Poratär skuren / tänningar 1,5 x 1.5 cm] | 500 | 500 | 15 |
| 8 | Monolter skuren / tänningar 1,5 x 1.5 cm] | 500 | 500 | 35 |
| 9 | Röchettär skuren / tänningar 1,5 x 1.5 cm] | 500 | 500 | 1 litrene 10 min |
| 10 | Strömsker [diptrystrata] | 500 500 10 | ||
| 11 | Agg | 3 or 500 10 | ||
Obs! Detta re al dmnoi rrokmoner. tlaagngstiden kon skla sig frn relomenderad pr gund ar metvaran skalitve och din smokprifensera.

Rekomendationer om hur man anvander olika temperaturlage i program "MULTICOOK"
Program "QUICK COOK"
Program de gâte rapié à orezului, terciuril fibiable din crupe. Regiarile: impuldiel de gétit si fonction "Time Delay" in acest program sunt inaccessible.
III. POSIBILITÄTI SUPLIMENTARE
Dospirea aluatului
Pregatirea fondue
Prajire in fruteuza
"YOGURT/DOUGH" program
E program seglsegel ve kildizdo zo jozj gohurtk zekstesi othon. A programbn lev zo ksekisi od i alapertelmetzten 8 ora. Lehet kezhati alzani a ksekisi od terjedemir 6 oratir 12 drai, az alkali tepes 10 pec.
"QUICK COOK" program
A rizs es a gabonabol keszitett porhanyos kasa qyors fozese.
A betso aluminium feedt tiscitasa
PDEHHTHEHRTECTO
- PnroTaHHe Ha oHIO
- TbpxHc HbB pHnToppa
- PnHrTOuHE Ha Hbapa, Cpehe
BACTDPOPK38HHA TCHNPOQVKM
3aTQHnHcHa
CTEPINHHPAHE HA NOCYDAI INPDEHETN 3A JNHHEXHRHEA
IV.ДОПБЛНТELНAKCECOAPN
Дунгштendнгндбссрсдддддддддддддддддддддддддддддддддддддддддддддддддддддддддддддддддддддддддддддддддддддддддддддддддддд ТDHСССССССССССССССССССССССССССССССССССССССССССССССССССССССCS
RAM-CL1 - mnnn 3a qawa
IpeHdHaHeHcMa 3a YDIOHO HbNnHae Ha Maia O MyntBapka. BbMoxK
RHP-M01-3a npnrothane wnyka
PnIeHAnaHaeN 3AeIbTnOeBa HuaNyka, pyHIn IyDyN NdyTeKAtceTcOf MeKc, PtNk dNpBc PcaanHnN OndpKaBn H bNHTmEe BHE MokTeTa DTo
PnONsBaB EMyhBapKa, bBb FpyHa, aeporpnHn H bTHFa ANDxDdAL
oBeHn Ane Ka.
RAM-FB1-KouHHua3aMbpcHe6b6pHnnpa
Hnbae 3a npnroBHe Ha paanmnnn BnD06e npdyckn B CnHnO CTnne
HIO HIO HIO HIO MIO (ppm) E NOO OIO 100236 200236 200236 200236 200236 200236 200236 200236 200236 200236 200236 200236 200236 200236 200236 20
RAM-G1-KOMnKeT 6pyKaHH 3a HoryrPt CMapKeH Ha KaNau (4 6p.)
IpoNnHHe H 3a pRTOBHe H aPbAINH NpyrHb. BypKaHHTe HMAI MaKeHHa H DaTa, noBcBnBaun d KaONTpHme pCoka H aRoHOCT. BeMooHc H eHIOHOBHe C MyTHNNH H aHpyrHb. BepDcEbe.
RB-CC502—ca 3e KepMHNOKIOHNbI, PBOHIOBACHToAEOOa (Kopen) BMEcTHcMCT: S mTnPA. O6OBaBA NOBHIEHbY cTOyOBVIOBc Km EHEAHHNcHIOE NOBpEXAHNA, pRbEbXOOHd HEBANAEHbU INTOPOPBOHOH CDOtEBA, bAHOrOApENHe H aTO8 XpHaHE He ZABBNb Km NobpXbIOcH, pBxIK e H zADyJbA Zc abpehnoHPO NOBpHE A hau pOcLb HApriIOBHeA, DaHEna QuaIe CnHbHnOe Ie KpOToBA TcNoKa-NeBcHBrNIOIOI pOcHc HnMIuHae, NpKHe H nIPOTBHe H MKNK HKLk, BbMOHOe E nIOBnOBeA H naue Dees MYTNbPbE 3a CTOpene H pNOKTHiN pIOPTBHeA H actIN BB CyPhHTA. BbMOHOe E mHIHe M nMIaMa HsIHHa.
RB-5500-CTOMaHeHaYaa
BMECTMOCT:5 HNIO,OBADABAO NOBHUEHAYI YOCTNOHBXCB KMI HEMKHEHOKE NOPEKDEKHNHO. PIPENOPA CEA se TPOHINOTBE RA PAHJAHNBO BIDAE CNYI, KOHNTDA, DAKNEO H XOHNIPOHIN. POXDOBIA E a 30 HONIOHIO B e HIE A HBNDEP, HIXEPCE A HYNKCHKUM KPNYEDNE PNOSEHNA H NPOTBOHAE h NIOKRAI 33 OHNODU, KPM-CYTN. He c npnopeo-ah 3 na pnpkeho. BbMxKOHO E mHaiee M BmHA MauHHa.
RML-M9OE
V. NOUHCTBAHE N IOIDPbXKA HA YPEDA
Pepn noHCTBHe Hya ypea y6eTe CE, He ypeBbE h E KINOHvOn OT eKNTPHcckAmpKwE HxE h E KTHNlHaHnHO HnO3NaBte Me NAPanu HnEcbpBnHnDEpeteHN 3a CboDe. PnpOpnsHTHe O da HnHnBaTe ypea BeHara CnD HnO3NaBHc.
| Псгнотаься на математICALе ратуroidу надлесь. | |
| • Виридени в ratuarapовпсь се сима obstruktural об碍лары ратуroidу (разим китун) • 如果 сима obstruktural na виридени в ratuarap уroidу, • Виридени в ratuarapовпсь ратуroidу obstetrics obstetrics obstetrics obstetrics obstetrics obstetrics obstetrics obstetrics obstetrics obstetrics obstetrics obstetrics obstetrics obstetrics obstetrics obstetrics obstetrics obstetrics obstetrics obstetrics obstetrics obstetrics obstetrics obstetrics obstetrics obstetcns obstetrics obstetrics obstetrics obstetrics obstetrics obstetrics obstetrics obstetrics obstetrics obstetrics obstetrics obstetrics obstetrics obstetrics obstetrics obstetrics obstetrics obstetrics obstetrics obstetrics obstetrics obstetrics obstetrics obstetrics obstrics obstetrics obstetrics obstetrics obstetrics obstetrics obstetrics obstetrics obstetrics obstetrics obstetrics obstetrics obstetrics obstetrics obstetrics obstetrics obstetrics obstetrics obstetrics obstetrics obstetrics obstetrics obstetrics obstetrics obstetrics obstotics obstetrics obstetrics obstetrics obstetrics obstetrics obstetrics obstetrics obstetrics obstetrics obstetrics obstetrics obstetrics obstetrics obstetrics obstetrics obstetrics obstetrics obstetrics obstetrics obstetrics obstetrics obstetrics obstetrics obstetrics obstetric obstetrics obstetrics obstetrics obstetrics obstetrics obstetrics obstetrics obstetrics obstetrics obstetrics obstetrics obstetrics obstetrics obstetrics obstetrics obstetrics obstetrics obstetrics obstetrics obstetrics obstetrics obstetrics obstetrics obstetrics obstetry obstetrics obstetrics obstetrics obstetrics obstetrics obstetrics obstetrics obstetrics obstetrics obstetrics obstetrics obstetrics obstetrics obstetrics obstetrics obstetrics obstetrics obstetrics obstetrics obstetrics obstetrics obstetrics obstetrics obstetrics obstic obstetrics obstetrics obstetrics obstetrics obstetrics obstetrics obstetrics obstetrics obstetrics obstetrics obstetrics obstetrics obstetrics obstetrics obstetrics obstetrics obstetrics obstetrics obstetrics obstetrics obstetrics obstetrics obstetrics obstetrics obstarcns obstetrics obstetrics obstetrics obstetrics obstetrics obstetrics obstetrics obstetrics obstetrics obstetrics obstetrics obstetrics obstetrics obstetrics obstetrics obstetrics obstetrics obstetrics obstetrics obstetrics obstetrics obstetrics obstetrics obstetrics obtetrics obstetrics obstetrics obstetrics obstetrics obstetrics obstetrics obstetrics obstetrics obstetrics obstetrics obstetrics obstetrics obstetrics obstetrics obstetrics obstetrics obstetrics obstetrics obstetrics obstetrics obstetrics obstetrics obstetrics obstetrics obtmetrics obstetrics obstetrics obstetrics obstetrics obstetrics obstetrics obstetrics obstetrics obstetrics obstetrics obstetrics obstetrics obstetrics obstetrics obstetrics obstetrics obstetrics obstetrics obstetrics obstetrics obstetrics obstetrics obstetrics obstetrics obstecs obstetrics obstetrics obstetrics obstetrics obstetrics obstetrics obstetrics obstetrics obstetrics obstetrics obstetrics obstetrics obstetrics obstetrics obstetrics obstetrics obstetrics obstetrics obstetrics obstetrics obstetrics obstetrics obstetrics obstetrics obstécns obstetrics obstetrics obstetrics obstetrics obstetrics obstetrics obstetrics obstetrics obstetrics obstetrics obstetrics obstetrics obstetrics obstetrics obstetrics obstetrics obstetrics obstetrics obstetrics obstetrics obstetrics obstetrics obstetrics obstetrics obostcns obstetrics obstetrics obstetrics obstetrics obstetrics obstetrics obstetrics obstetrics obstetrics obstetrics obstetrics obstetrics obstetrics obstetrics obstetrics obstetrics obstetrics obstetrics obstetrics obstetrics obstetrics obstetrics obstetrics obstetrics obestcns obstetrics obstetrics obstetrics obstetrics obstetrics obstetrics obstetrics obstetrics obstetrics obstetrics obstetrics obstetrics obstetrics obstetrics obstetrics obstetrics obstetrics obstetrics obstetrics obstetrics obstetrics obstetrics obstetrics obstetrics abnatic obstetrics obstetrics obstetrics obstetrics obstetrics obstetrics obstetrics obstetrics obstetrics obstetrics obstetrics obstetrics obstetrics obstetrics obstetrics obstetrics obstetrics obstetrics obstetrics obstetrics obstetrics obstetrics obstetrics obstetrics obsttics obstetrics obstetrics obstetrics obstetrics obstetrics obstetrics obstetrics obstetrics obstetrics obstetrics obstetrics obstetrics obstetrics obstetrics obstetrics obstetrics obstetrics obstetrics obstetrics obstetrics obstetrics obstetrics obstetrics obstetrics obstics obstetrics obstetrics obstetrics obstetrics obstetrics obstetrics obstetrics obstetrics obstetrics obstetrics obstetrics obstetrics obstetrics obstetrics obstetrics obstetrics obstetrics obstetrics obstetrics obstetrics obstetrics obstetrics obstetrics obstetrics obstetics obstetrics obstetrics obstetrics obstetrics obstetrics obstetrics obstetrics obstetrics obstetrics obstetrics obstetrics obstetrics obstetrics obstetrics obstetrics obstetrics obstetrics obstetrics obstetrics obstetrics obstetrics obstetrics obstetrics obstetrics obstetics obstetrics obstetrics obstetrics obstetrics obstetrics obstetrics obstetrics obstetrics obstetrics obstetrics obstetrics obstetrics obstetrics obstetrics obstetrics obstetrics obstetrics obstetrics obstetrics obstetrics obstetrics obstetrics obstetrics obstetrics obostics obstetrics obstetrics obstetrics obstetrics obstetrics obstetrics obstetrics obstetrics obstetrics obstetrics obstetrics obstetrics obstetrics obstetrics obstetrics obstetrics obstetrics obstetrics obstetrics obstetrics obstetrics obstetrics obstetrics obstetrics obustcns obstetrics obstetrics obstetrics obstetrics obstetrics obstetrics obstetrics obstetrics obstetrics obstetrics obstetrics obstetrics obstetrics obstetrics obstetrics obstetrics obstetrics obstetrics obstetrics obstetrics obstetrics obstetrics obstetrics obstetrics OBSTETICS Obstetrics Obstetrics Obstetrics Obstetrics Obstetrics Obstetrics Obstetrics Obstetrics Obstetrics Obstetrics Obstetrics Obstetrics Obstetrics Obstetrics Obstetrics Obstetrics Obstetrics Obstetrics Obstetrics Obstetrics Obstetrics Obstetrics Obstetrics Obstetrics Obstetrics Obstetcns obstetrics obstetrics obstetrics obstetrics obstetrics obstetrics obstetrics obstetrics obstetrics obstetrics obstetrics obstetrics obstetrics obstetrics obstetrics obstetrics obstetrics obstetrics obstetrics obstetrics obstetrics obstetrics obstetrics obstetrics |
ACTHE3AΓAPR
| • Hanaia febris hong kong/zhengzhi cangmuangpangipangwena la chaoté. • Hanaiai zhuang mupeng la huanhae e haipangduo. | Tcpan nhan-cho pao-tangtian, yao-pao ca, no huaiae e jiaoce nongtian a hao-tianmei huo-muoyue wu hao-pangduo. |
| Ou bie chen hou chengmen npuyangxie hou-mai xinpuoyangmian paenma. | Huanyuanqiu piocnepan hao-mai xinpuoyang mian hao-pangduo. |
| Bie xiaotianpoole npuyangmian vio co poote 30 roptane. | Hantianpoe apae la npuyangmian mian cangtai na npuyangmian paenma hao-tianpoee npuyangmian 40 ronpoate. |
| Papuyangmian cim axipuyangmian cuo mian kui huan, ce zu paipang- kate huo-xiaopuyangmian npuyangmian zu kuo-hao-pangduo. | Cupuyang mian obochongmian mian cunteru va huo-xia-pangduo - taekel, de tu npuyangmian qiu huo-xia-zhou-cakl. Taipangmuang mian puyangmian npuyangmian qiu huo-xia-zhou-cakl. Taipangmuang mian puyangmian taiku npuyangmian qiu huo-xia-zhou-cakl. Taipangmuang mian puyangmian taiku npuyangmian qiu huo-xia-zhou-cakl. Taipangmuang mian puyangmian |
REDMOND
| Hypokonademia: B. kowalevii H. hectora | Hematopoiesis: A. zeaenii Kozlowski | T. purpuratum: M. pteronyssinus L. trichiura Koala: M. trichiura |
| Hypokonademia: B. kowalevii E. pteronyssinus M. hectora (L. of C. krusei) | Cysticochlae: N. luteus | Hypokonademia: B. kowalevii E. pteronyssinus L. trichiura L. trichiura |
| Hypokonademia: B. kowalevii E. pteronyssinus M. hectora (L. of C. krusei) | Pipera: C. kowalevii E. pteronyssinus L. trichiura L. trichiura | Hypokonademia: E. kowalevii E. pteronyssinus L. trichiura L. trichiura |
PPOyKT H3r6HnΦOPMA HA HAPR3BAHE
VIII. TAPAHUOHHN 3AdbJXHEHn
Ha Daedho 3EaENe PnOeDcB Ta eepnHbN CPOK 2OaHHN OaTATDA H akyBnVae. Ip aephe AraPauHHeo NepHOA PNOBcDBeH B aEeBnKbA DaOTCPaHbNA CPEMOT, 3aAMHa H aactH NtHb ZAMHa H aIIOIO NcHdTe BcB KABHb DAcBcDcB, IEPnCpHbNtHbN T oHcDcTbHbN XeKcRtBDHb H MaTPRbHNb XcCpBHeBn EepHbHnB bCHBa CTOBtCMo B TOB CNYHOB, KORA D0TA H eKTHyUaTHcB cOpNDLbC cNeMTb H aMarHb HA NIOINHb HA pOaDABBa BpXyO pYrHbHA H aRaPauHbONH NtCT, DaEaHa TepuHbA eBaHbA cEMO bKO HsEAE Boe HcNEBnO bO hCBNBO bCtCTBcETNC BcHcyTPhyB NOcktnCaTbnB, HebeOepeHOthApHo, PaBnHObo H nopeEkeBu KaTO pESYITRTb H nEBpeHBO bOpBaeB, A taKa cTaO e PesBa TbNa MOnkXeTNKT H eKmEO. DaEaHa TepuHbA eBaHbA bAOPMaHO HOHOeBA H aEeBHe B KOHCMyhB (KoTIPrH, JAMnH, KepOMnHn H toEoHOBo H oPKrPTAH, YTOBtBN tN.H).
Cpokhta cnxmbata Ha hndaneto H cpokhta Ha dehctno H raepnHHTNE 3abnKHe Hc HbOoBt OT DeH H npdoXbATA NNT OT DATA HA npa507BnEHO HA KNDHTo (B CNYA, AOK DTATA H npdoXbTA He MOKe Da ce onpeD)
REDMOND RHP-M01 - £unka
Dizinjiran z a primpere lunke, rotala i drugh delikatuesa ome, perazi ili ribe sa dodatkom ranzir azina i najeva. Moztef coristiti: sunku u visenamenskom aparatu, u pecnici, aerogrilu ilu tavci odgovarajucg volumuna na stednjuka.
Supposeh ohrbe i u erea pre priproz yrochogjog. Pohare o suzonec hovn a hovn 10000000000000000000000000000000000000000000000000000000000000000000000000000000
REDMONB RD-C502 - nádoba karnickemiy povchrnovby Anato (Kóre) Objej: 5 litrov. Je vyskovi odolni voli Mechanikovemu podokolenki, ma vyníklujke neprigravne a tepelne vodite vistnostmi, a preto sa povtraviny neprilee na povrach u sva pvržanze a dusene v prichte celte proceu provpriy rovnomere. Tato nádoba bola specialna vvinutvi preteplu kvalitu pečenia, vvyprazanka a varenia mléchnych kali. Nádobu môsté potouši ab je multifunkčnéhohra preka presklodová potravin a prirovaru jedal v rúle. Je možné je umyvor' u vymvjace triadu.
REDMOND RB-SS00 - oscoya nadoba
Objekt: S'mr. Ivte, yIyso6 oIodna voiM chemicmu pokoldenmu. Opodzra sa na priopravu ruzhny poletveik, kompostov, chtenov a marmelad. neVhdna pre poultse tyclovno mixera, mixera d'aiaich kuchynsilyk spotspotrebic pri priopravze zeleninomya v ovochrye pya mirechov ploviacep. Neodporodza sa are pvzrtanie. ne Moje nu imuvay v umywaek de luka.
V. CISTENIE SPOTREBICA
Pred cisternim vvirobu su utiste, ze je odopjny z elektrickje siete a cipln yvchladod. Pouzite makku handru z naebazivny cistri di prostriedok na umyvanie iudovodze. Odopuromate cistri spotreloid hed po puzitzi.

Pri esteni nepaiaqie abrozwni prostriedy, spnagie s abrozieny gav chom a chemicity agrosive laky. Nikdy nepaiaqie telespo sosperebica do vady a neumreistuie no pod prud tcecs yedy.
Pred pryvm poufim aleba on ostradnene zapachpu vao rerent opoortcane v preehubei 15 min minutovary v nadoboe pal citrova n programme sSTEAM".
Nadobu, nəməre himi'okve kea parny ventil je potrebne dizt po kazdən pouziti. Nadobu je moze umyat vnuvaekr niadu. Po konceni cistenia nadobu vytbre je vonkajnovpochr do suha.
PreVyfistentle vnutomeho hInlikoveno veka.
- Otyorts yeko multifunkeneho hroca
2 Na vittornej strane VKe suosne stiace stereom ku streda dve plast tove zipadky. - Bez pozuita sity petiathne vintorné hlinikové kvo trochu k sebe a dole, aby sv olvničo chlvneho VKe.
- Vytrite povrch oboch viek vlikkou handrickou alebo obruskom. Ak je
REDMOND
to potrebné, umyte odmentovane veko pod tećucov dovou a pouzite prostrietiod na umyvanie riadu. Pouzite umyväcky ni je vchodne.
5. Spatn monta yvonakote v opaon moradri:vozte hulinokove kevo do hornjch zarezov, zavronaje ho s hlavnijm kevom a zakhna zatacta ne zaapadyk, kym se neozve zeklaptnute.Vutorné hulinokove kevo musi byt pevné zafixoyane.
Parny ventil je umestiny n v speciorn sedle na homom veke spotrebica sa z dvoch fcasti: vonkajieho disku a zakladne. Pre estenie ventil:
- Opatrine potiahnite vonkajsf disk za vystupok smerom hare a k sebe, ak je znazomene v scheme A4.
- Na vintornej strane disku otocte hlavnu ccast ventliu proti smeru hodinovych rucieik a nz na doraz a yberte
- OpatneVybeite gumicku ventilu Podla vysie uvedenych praviidet umyte vsetky casti ventilu.
POZOR! Any sa prediisio deformacion ventillovej gurniey, je zokdzone ju skrocat aebno notanovat.
4. Spütu montaVykonajv v opamnon poradi: vozte gurnicku na mesto a zarevnite zarezy hainvej osti ventilus 1s zoypadova/ucimi vystupkami n vutomirne straje diska o tocte v smere hodinovich rudicek. Umistesti parny ventil do otvrno va neke spotrebica (vonka'ski disk musby) nantomovan't'svystupkem pre vybratie stermon dozaduk).
Kondenzat vznikajci pri priprave [ja:d sa v toto type spotrebica sa zhromadzu [v osbitne] dutine v telesie spotrebica okado n odokta do nodizky na zadnji stare spontrebica.
- Ovpei Veko, yvperte nádòu. Àk je to nuthe, zháika povlzhite prednú āst multifunkného hnca, áy kondenzat opne odtkol do nadžrky
- Vyberte kontajner Jemnym tahom za vystupok smerom k sebe.
-
Vylejte kondenzat. Oplachnite kontaJner a vlozte ho spa t na mlesto.
-
Kondenzat, kory zostal v dutline okolo hadoby, obstrante pamocou kuchynskeho cbrisku.
VI. TIPY NA PRIPRAVU JEDAL
Chyby pri priprave a sposoby, ako Ich odstrantlt
Tato zest hinnjuky peictychy, ktoe zvnikaj pri prprajejdv multifunknyh hncoa pojeindova o ich mozni ch prinlach a spsoiboch, akio och ostraind.
JEDLO SA UPLNE NEDOVARILO
| Hozne prážiny problemu Spodosby réticemia | |
| Zabudil sté zavortem veke sputebica – alioe se no nezorbenti Utesne, takze teplice variearia neuboi distaloce vyskova. | Pocas prajovy jedia zhytobnene nestvivrajte veke multifunktu medro hirra. Zabuvajte veke zad do zaskopusti. Ustine sa, ze nac neaprešita tsehni zuzvorou nu vke sputebica z ha tseva vamglica na vukumon vise me je dekmavanski. |
| Nadeboda a vhyrvevoce tecese mail laptov kontakt, toke teplices variearia noltula dhat yskoc. | Nadeboda must by unilestrondo do tesea sputebica ravo ma smo din stene plohlaut k vytvolcneni diniska utistite sa, ze sa v procevnem prestore multifunktuhe frica menochazcu zblcne outare premedey. Zabnite rstedizentu vvyrelcvadeno diniu. |
| Neurowed eijer zhejek jedi. Tiota zhlyk nie si uvochne pre Vora vnyanay spodovipravy prepaoy sice vydilii zyp programu prayovy jedi. Ingridende si nacižane prilik nahrabe, boil potnocićne vridemepe vildněvych proteln. Nesprouvno sice nastavne (pie vydilii) cobi prayovny. Vom i vydbrу variant receptu, nie je vydhrnec pre pravnoj jedi vitora multifunktrum hinkl. | Ie ladne dupehoval vaidenets' receptivity (prispolsheva pro toto rup sputebica); Poudhajte receptivity, karyn mädrte nizska dlavovcrat. Volter turwir, spesbo zhitanta, pomer poulityny turwir, vyaer programmu a dady prayovny mus nadpopovadz zveznel' recepto. |
| Pit prirovice jedi va mare v radebo: e grilai male mye, itora je ruturi pre omegepterei dinastojehi histolympary. | Vadu da radyal v uhardm tripoje rallinej v objeme, koroj je odoroplatan' v rezeptare. Ak se me ste, stinulitule Hvidnu vedy v prehebu prayovia. |
| Program Ondarla | Przemny pręcny | Roznan ciez prciev / krok natavnienia | Ośrodko ziel. hul. | Ośrodko ziel nożne do zolezhne do zolezhne do zolezhne do zolezhne do zolezhne do zolezhne do zolezhne do zolezhne do zolezhne do zolezhne do zolezhne do zolezhne do zolezhne do zolezhne do zolezhne do zolezhne do zolezhne do zolezhne do zolezhne do zolezhne do zolekh do zolezhne do zolezhne do zolezhne do zolezhne do zolezhne do zolezhne do zolezhne do zolezhne do zolezhne do zolezhne do zolezhne do zolezhne do zolezhne do zolezhne do zolezhne do zolezhne do zolezhne do zolezhne do zolezhne do zolezhn do zolezhn do zolezhn do zolezhn do zolezhn do zolezhn do zolezhn do zolezhn do zolezhn do zolezhn do zolezhn do zolezhn do zolezhn do zolezhn do zolezhn do zolezhn do zolezhn do zolezhn do zolezhn do zolezhn do zolezhny do zolezhny do zolezhny do zolezhny do zolezhny do zolezhny do zolezhny do zolezhny do zolezhny do zolezhny do zolezhny do zolezhny do zolezhny do zolezhny do zolezhny do zolezhny do zolezhny do zolezhny do zolezhny do zolezhny do zolezhNY do zolezhNY do zolezhNY do zolezhNY do zolezhNY do zolezhNY do zolezhNY do zolezhNY do zolezhNY do zolezhNY do zolezhNY do zolezhNY do zolezhNY do zolezhNY do zolezhNY do zolezhNY do zolezhNY do zolezhNY do zolezhNY do zolezhNY do zolezhNA do zolezhNA do zolezhNA do zolezhNA do zolezhNA do zolezhNA do zolezhNA do zolezhNA do zolezhNA do zolezhNA do zolezhNA do zolezhNA do zolezhNA do zolezhNA do zolezhNA do zolezhNA do zolezhNA do zolezhNA do zolezhNA do zolezhNA do zolezhN do zolezhN do zolezhN do zolezhN do zolezhN do zolezhN do zolezhN do zolezhN do zolezhN do zolezhN do zolezhN do zolezhN do zolezhN do zolezhN do zolezhN do zolezhN do zolezhN do zolezhN do zolezhN do zolezhN do zolezh N do zolezh N do zolezh N do zolezh N do zolezh N do zolezh N do zolezh N do zolezh N do zolezh N do zolezh N do zolezh N do zolezh N do zolezh N do zolezh N do zolezh N do zolezh N do zolezh N do zolezh N do zolezh N do zolezh N do zolezhN do zolezh N do zolezh N do zolezh N do zolezh N do zolezh N do zolezh N do zolezh N do zolezh N do zolezh N do zolezh N do zolezh N do zolezh N do zolezh N do zolezh N do zolezh N do zolezh N do zolezh N do zolezh N do zolezhN do zolezhN do zolezhN do zolezhN do zolezhN do zolezhN do zolezhN do zolezhN do zolezhN do zolezhN do zolezhN do zolezhN do zolezhN do zolezhN do zolezhN do zolezhN do zolezhN do zolezhN do zolezhN do zolezh |
VII.PREDTYM,NEZSA OBRATITE NA SERVISNE STREDISKO
| Chybow hiddemia na dispiell | Mozna poruchy | Odzdramanie chyby |
| +1 - H3 | Systemova chyry, im'zne ziznane iudaratecho pomea odne cyhre eche prok. | Odo'otspotrskii (zelnikrski) idera, nachejte ho vychiznok steine zizvote who, zizpajne spuznji (Zusamico sido), akja na ristavnat problem'prokrny va, obrazte sa na autorizovani sredniksinski |
- Kattaki ng ouakeurh
- ATOPTUUJEVO EOUTEPIKO
SGTTK
3.如
4.10202020202020202020202020202020202020202020202020202020202020202020202020202020
ACCTOPOC - Dividend s/you us of you
- Prolβαμα
7.XueAnBoYinTaoLi - ATTENUATED PHASES OF THE
IivakacElambdaxouA2
I. PIPIN ANO THN IPIOTXPHSEH
AVIOTE TPOAETKIA TIV OUCKEUCA KAI EGYE To TPOIY OTTO KOUTI, APACIE TO CTA OUCKEUOTKA AUKA KAI BOPIAMIOKA autokoAANTA KCTOc cio to AUCKOANJI pe iepieke oipBIO.
H amouia ou taepaiak apqdo a tpoai autuota oao atepel ato To kaiokua yto my evynoufior.
KUKUITE TO TEPBIMIJA TNC OUKKEFIE ME EUV UPOI TNI. NIVWETE TO JIOA TE CEOTI VEPO KAI OAMOVI. STEVYWUTO KOKA. KATN IVTPION XHONJ UTOXPEI MBOVOTRA EUPAVONIS MEC TEPPEYKOCN TND EV OFAEIETA OE DUAIAOTUVA TNC OUKKEFIE. STIN TEPHTHADUUI KARAPATIE TNY OUKOUKI.
Pnnoo! Anayopoeiae va xepaonoeire tv oukai, davex exo
II. XPHSH THE ΠΟΑΥXYTPA
Piv aio nvi pwn evytoingn
TTOHOTNEI TO KUKEEIT OE MAKOKENETHEHENDVEE, EIO WOT E KOATOC APOTO TNO BYAIEV ATN MOAIBIDA APOV uM VNPETO E ETOA qI ME TY TATEOAPOA, DAKAAMTAKNT ENYXQATA, NAKTPOWKECK OUCKELE KAI KAAAYDAEVJEVA UAKTE TO ITOA EVDEXETU VUTOETDU YCNIE CTIO TVAUYANUPYKCAI IN BEPKOAPUA
Pnnp 0to paepeeja BaeBaeite To t eEutepke Ka opeo eoutekepe mepn Tc oukeuek Eevoyu unayekic 0poeC, Bioataeic Ke kai AAKA EAAIQA. MeTeO uoi taia Ka Kau Oepuevivikoo nOIOEoi EEPETIE vaBoKIOVAaAIAVaeKVEPA.
KaopoiouxovouayepaTOc
Eny taKoUPA REDMON RMC-M90E utpya Kuvomrauro auteauoL Kaopapoujov xpvovu npaoekurv vaKaBtpopaia (extc, oto to npoypaia QUICK COOKx).To Prna alaknyi KaTavo eucoc rou Kaopopoujov xpvovu eepnato ot emLevye To poypaia mopaekurv. Tia va allaoufe tvx povo:
REDMOND
Meo atro thy eitoyoi Tou poyopouotoc npaoekun cyoyntou Tmvtvcta TnTtckpO HuaorpuuIe Tc cagc. Eev kpatoeetote to TkTktpa TnTne yeaepae DeutrepoAetana aayaiy ToTuqgEtteyeiVotai.
- PAnovrto nAnpko eMinpu duoiio rTa deupeAeIIO. EAp kpoJeToE ToMnpo Tnaupeyia yepka DeupeAoEtni aAaayiy
- Eeviva aapatoipno tva Kaoepoiaou tvo xyofo Kaeuey iya Ayioe oioi oioa nai nai Tnkiopko eHou mepxov npIevdoivnncnTnv woy woy. Eneria Hoiotov to nai kopoia eMina Kaoipoi tva aepatoipnni taon Tnv Aettn.
3.Apou TEAEADTEPE TUY DIOBtuTO YOVOU TPOATKAEURs (O) OVOV CUvOoV ovoaooeBVEIe IOTIE OTOA OAOuO uOy To yAoApoTo TO UMOeAIOY TPOAPIOAO TPOATKAEURs. - La my akopouu vay kappoueuey uuyuoyu yonnto aynkopo 1reheat Canoei kui erut eoty tnpocpa taepaekc ex veok
TnVxuovkivipouwn Oxpovu npovokcev uAauovotve uyn o TzepoavpOauu npovukwai k to BuaAaymki npalMtuovno ano to cTuevyvo npovovau npovokcev uApovovae uYrnvAk evopoyanakovu
JIy IYI YI DIAO TIO TOI GAOIIO KIOIOKIOLOWU XOVOI IOI POIPOAUPATA OPAOKEUKG KENVAIOTIO TIO XOAVHILNIE PUC. ATOI MAI EMTPEJIa V OPAKINOUVA OIAOIKO KAOVKO BIDIANI TIO XEKTALIO TOI POYADAPORATC AO To yoiyto dev POKAIEva o PAOKAeuaotai MEOA sto ANAOXOYO.
Ze piauauua npovapua a n anipaoen mepanou rou KnoBhoaevou xoovn oanaekurk ckeivne oovr dav ouokne fronot onko bopoein Aakomnyck depoykaia. Ta napaeay, kav faaloua novo kpaouyou rou npovapaaue. y 5 actre oio npovaiya sSTEAM, oiv ne evaoi npovakoo
Kai vniopnip mianr np kaoepovov xpvov npaaonuric Ba Kexinnou uvo metnv Eon npov poaynoepnnpkoc maogmct aouo stn.
LIO pOyagoo PASTAs n ovimtoopn mepon tou katoipapovou xpovou kcvdei me ly ccon tou vpocu ka to devtuo npma o foAikpco *Start.
Prrn rnrnnrnnn nnnn nnne nnnn nnnn nnnn nnnn nnnn nnnn nnnn nnnn nnnn nnnn nnnn nnnn nnnn nnnn nnnn nnnn nnnn nnnn nnnn nnnn nnnn nnnn nnnn nnnn nnnn nnnn nnnn nnnn nnnn nnnn nnnn nnnn nnnn nnnn
Ipyonjogtoiagte to aaiopu cuiatni va to kovikivite yia my ouyovien kon my apalpeom Tov Tnpoue
Devuovrata vXo jnauoitai Tn Aenoupyia Time Delay) eanu) uO t npotvva empeaoTny
Mny avolyte To kmtk 10auxopac mepy n Taeik oakapauon Tou unipotr Ato auto eepatra in toingTou unnuovoueTupoivoc.
Tia kovoukoyanovovkau oamotodoeunovn Tsapokoeu npotovouvevo xonotopotaetre hoiyipohoyo yio tnpokaeukuyu
Póypαμα «DESSERT»
Uuuaia iia Tnauoekun uudapouu uithiupuun uio apoukai kui oua. 1ipuukuy o xpvoc npakue, 10 no poypu civ a 1 wpa. Yicpki kui duovitri xepokivniin, poqquon 100 xpvov nupakoeu, 10 e uoos 20 a 5 aeuc 4 uoe pe jmu a aauu 5 aeir.
Póypua
Elvai npoypaqa ypyopau paeyepaocpou, eBpuTuv payntu vtnptia
Tauto to npoypaqa eivai biadoeioc o pueuov napaokun k an leioupyia Time Delay
III. NPOSOETES AEITOYPIIES
·ΦgKwHnS
- Napaokun tou qovtu
TnVuaa aen apnoopa
- Napaakkeun tupotmhypatos, Tupov
- Nootepoon uypov npoi
*ZcTepaIraioKuVtpoiv
AIOCTIEIPWON TOW YUANIVW OKEUW KAI AYIKIPEVW NPOCWNIKNG PPOVIIOG
IV. NPOsQETA EAPTHMATA
PPOBETA EGEIPNATA YA IVI TAOUOPA MITOPATE VA OYPOEETXEXAPOTEA XETKIA JO TO DILTAOKAIC PPOBETAVOENIOVACIK,ATKIOHNGTOSKAI OUPADINAGTOSKIO JO TO VIOIEAO ING OCKEKNIGOACI ATEWQVBEIOTIOE ITOHO IODVAQOEIOYIOV
RAM-CL1-taumidya to μto
Pioepoei y aevy eayuyu ty mra ayuayua. Ymopex suvemotma vyn xnpaouaie ME. auoyeaa aan npoc
RHP-M01- e6iKO 6eOc vi npaoKeun tou qumov
PnpopoeTae Twaepaekkui ToCajtov, pao kai daaauayakownto KcKcs. Taoulekepi ndipu Te pcoooN- ktn dnoepoyu tmaapakokkai Kei ouyeyoi. Mitotitee va xpyntootei auto to okeos cte Taouwupia, oe Kuvokivki f ce kukloepkoik oqpovo tnt AIOX, otit KATOPAOA e KOTAAALO Okyo OTI KOHt MocKvua.
| To pioion EXE TO EXHIMA KOHIO TOY |
Program "YOGURT/DOUGH"
GAMINYS PRARADO SAVO PIRMINE FORMA
| Per dbhlal vortete produtus Kepant przost hlu bdu malbykne poteiai ne dbhlal mel kis 5-7 minutes. |
| Mastatis per litig maziva gamintin latig Sperminkite gamintin lalig sira latykiits rurig, prilatyke slam prinian mocnilai, ranlyng. |
KEPINYS DREGNAS
| Nucleotide nitrionux, periregny cagl degnes sorye turticlus produktus (sutronicus volatus carthodes, kateylos uogus, glistening in pax). | Allicutes kalixrae rancour yandruus producus. Translates crenudii genelyx crengi, producu/ayr aoe, iepu /i pramnna, macrinoe immmutu, paeum |
| Catenin palindra da iligia bilkitea canglia/immunare pachis. | Paspadistix f. daqgafidrix pfuma farni gaoqiu tepil f. kalixrae lisp, parganellans. Fornitale, paimingi in parturpali paiti diqalidimnifico peccere, eastjungm autemmatiam pedcylm. |
KEPINYS NEISKIO
| Bilgai libodini klaudinial su zukumal. | Pagadzebrina, kad otto maudomil podklint (pitaklil) slam pletiace modeulii receptiol. Produktka parrinmas panaclamos [apradanime bildu in properjis nuriati ristri rikemendijic. |
| Teha, kurjelje yia klaudinics meditagoc, stowja per ligat. | |
| Nereuspeite milig a tse bilingui ilumnire triq. | |
| Pocarete loki, nere iblau decanil sudeamnose calls. | |
| Poslirnakas receptas netika bitr maudoplas steu daugahrikle paudo modellu. |
REDMOND
Deugelye daugiafunky puoda REDMOND modehy, esant nepokanam skysciy kieki, programone STEW"ir_SOUPI sveikc npasos u no rrgino perkntio systema. Tokia alveju geminoino prograna susteboma, o daugifunko puoda veikinnu persyjungia f automatimatio pdsidyra refing.
TOIT EI VALMINUD LOPUNI
| Pohjusko volmikluk problemid Lahendamise vistke | |
| Unschnittse segeste soneit voce voce voce teile mite theistet, mitratae in alund valmtastime temperatur pfall-van Kunde | Viatimastime als feste ovage multideeta kiante erite voce valadseta.Sulcogene kabi lissipasunai. Vendaugte, et sonee naive tesestvo sallgemisi missi et tareng triing stekanevve oyiflenkummi eoi deo cemterming |
| Aunm je sojedizentarment an halv korsartiga, misteruta of alund valmtastime: temperatur pfall-van Kunde | Aunmae peh asotama osoeine kupssesie ginsel, pohlaja thoralt voceisukindiskeratia libides.Vendaugte, et multideeta boklarmetsi eloe kovoslasi elemente. Ange lasse sojen-dusztual malate diu |
| Toro konosicharantae veil vaid. Nimmutati konservatisati soon teile posti valub icvl vaid vaitale vauevalmisti-Programmi.Nimmutarien en litigatd Uige variae holskrdera, nikolac (inkustere sovapeneria infundi propresione.Sandirate valisl vialmestamase ap. | Soroviae en konsidende konsolidati (pemertel od soziale muzilga konsolidati) re- septe in Kauzage reseptie, mida vite bioprentel coodtids.Kanatalsante vailn, anke holskreda vils, disipanciu propulsianid, programmi valik je valmertame neq perovac vostrame vuidar reseptie |
| Tele posti valud resepti variante at sebl nimetazd multi-sapiens vanmianinaks | Vor kasteke amansasse kinlalit vaid reseptiv imputat redus. Xanthow koral controllige vesterat: valmertamine protessis |
| Aunvalmestamase: aureus on lihe olivvet un uun praviva theissace toplimene | Vor kasteke amansasse kinlalit vaid reseptiv imputat redus. Xanthow koral controllige vesterat: valmertamine protessis |
| Prakdimet | Valasche amunasse iliiat paju ralmcdl |
| Litige veoloik anumas | |
| Kernimilz: jajongl valljäreräte körpersenat happeunaga tudvallrhc ovoiinatm | M365 taktuulod volsalr crne valljäreräte cirrlt fördtum: libjcperser, pinn uniatmertirn im. bilgige teilpoed valutr rassep sooterd |
| Kijipatamivit: dalgn di kipse nui: dlji | Fange anumase vilksemas kogues togete. |
| Viter kipesis seranst valge, ploiele utter je pereu nouti erumasse, sujpiel ovadage lclm. Filospiri pange kipatamienl erumasse kveksemes umpeus toligent. |
TOIDUAINE ON ULE KEENUD
| Lusitania: Udoanea tigi volatil, ve valmisamutita seconemati (prozamdat), Kecetionratei bilai white swards | Suzana: konjutakate koreali [corredite] (sacreded melesigala kubandamedi) ruransite. Kruokunadarevali, mufu lokaivare vis, kessapaiman properimie, programmalkail vial valusamati mege aeg palastavara valia reseleite |
| Peste: kovistamiat iessi valints soitt ilidii kua autocosendusee altillit | Lilith kestoy autosopiatekneukstafniak laikumattirig ic el kawotvatr, Kull te kaukatajura meudiri oei vahtaal mertatluk fukumannen yasipalutinomme, vora seia sermae kalantaki kusals |
KEETMISEL KEEB TOIDUAINE VALA
| Pilinaputra leuromatizae pilim vilija | Pilinapustrelet is produced via polyside release (amine ketosyl) in inguinal est. Soolamana kocostana varid 1,5% ramosaena aperpatae kocostana pilina. Vajadusel varila pilina varid jangvega latjendica |
| Eme koreetnii pilinumanei todolemate vioid torecolour vallei (Fakstot pestad jnl). L.ligustud kocostamiene varikorede varil eylet valilev vallei valutud tokoane liup | Savoryon on katayukia kocostani (and imitated sesame mulligella kocotenandu) roseptea. Kocostanieta varilk. nade cichoria filiflora varil. sticopaninete vohokord perevor vostama rende soothyale. Tialterivand, lpha, kala i merawannid bulet at hauhailait lal pesta, kurl vest pahipulaks |
TOIT KÖRBEB PÖHJA
| Anima alli valvarepulastani od ceftriaxone midet valmatisnive pigtait. Anima korembemisztantike otri di ristud | Lanne valmatisnanti verdugge, et anum on hoofoiat pestud (korembemisztanti karte e lei sigrastati) |
| Toxtatmente othmen im tsepsidis umutatessovi oikouros | Sotentor cr nanatnts kortbentil (limnetzad seadne mueligo koshandusti respecie |
| Scadiste illa sture valmatisnate iα | Luhendige valmatisnate tegai voi [angige seadne antoe mades] [alo koho- nakei reedsete sovalisti] |
| Prasidimenti: Uristastine ralata annunasse il, il segnato voli ploso inhile valmatisstaticd vahinatini | Travallite pradimise kules valghe annunasse veil falmene - nil, et see kalaki polha croukse knilv. Uristose preolintinete kule bune anunste plevedtod talihedi peroceti da gade vi tanai aigant kimber poldsta |
| Hautarnsot: anumas el oio piliavalt velediliki | Litage annunasse rchikem vedeziku. Valmatisnate abi, oro avagae multikettti konti erlue valvetsa |
| Keetmetes anumnes on liasi vehe veteikle [aegimpta kostinamerte vahterd] | [angige veteikli] [kovlia koolichaiana digi riva kovikla] |
| Kupsetamisi: el matrindan anuma stoeplinda enne valmatisnate velga | Lanne kogia sticeponekiu, mbraghe anuma selmad [a ooni velga voi salmeco- iuga [el taasa valdoe oll amunzost] |
TOIDUAINE KAOTAS LOIKEVORMI
| Sequentile toluare annae builis seglii | lavatae pradimene korian seguei toto imate szejedarii kai ika 3-7 minuti tegiat |
| Sauhite fluit non vanei stamantier ija | Lithovigiie adsmantierare serge vi pigtige sedmunt antul monei peo kolarantint neturi i sncusti |
REDMOND
KUPSETIS TULINIISKE
"QUICK COOK" program
JlgljI pluuswulg gaoLalploo pue
JyI I jz Jz Jz Jz Jz Jz Jz Jz Jz Jz Jz Jz Jz Jz Jz Jz Jz Jz Jz Jz Jz Jz Jz Jz Jz Jz Jz Jz Jz Jz Jz Jz Jz Jz Jz Jz Jz Jz Jz Jz Jz Jz Jz Jz Jz Jz Jz Jz Jz Jz Jz
BMC-M90E
A1 RMC-M90E 1
| ### | 1 |
| ### | 2 |
| ### | 3 |
| ### | 4 |
| ### | 5 |
| ### | 6 |
| ### | 7 |
| ### | 8 |
| ### | 9 |
| ### | 10 |
| ### | 11 |
| ### | 12 |
| ### | 13 |
| ### | 14 |
J 1 J 1
| ### |
| ### |
| ### |
| ### |
| ### |
| ### |
| ### |
| ### |
| ### |
| ### |
| ### |
| ### |
| ### |
| ### |
| ### |
| ### |
| ### |
| ### |
| ### |
| ### |
| ### |
| ### |
| ### |
| ### |
| ### |
| ### |
gbs no sJlgljAaBbU L
clalge gI. Iolse y aIg aic Jll
blally jlgjll abjj
161 j14j1 pww waaeg !161 g
S OBC = S COD + S_ BOC
jUg(Jab)g)oJ
aOyOg Clogz0 aJ
Lacg Ls.5o Jgab1 Uis g
pgl jlgll Joooiuol 1
jBogio Jgogos
pGio JgJnJlAbI Gj
diue go uis g adigso. jagll zo
.iaugjUabUgeAol
.1Jg oJgJgJgJdUo
JdJgJadUgJgJgJgJgJgJgJgJgJgJgJgJgJgJgJgJgJgJgJgJgJgJgJgJgJgJgJgJgJgJgJgJgJgJgJgJgJgJgJgJgJgJgJgJgJg
REDMONO
"MaTuKeep Wam' iin
15
100
35-170°C (Temperature)
1
100"MLTICOOK
1
"OATMEAL
10 1
30 5
a
a
1.1 400000000000000000000000000000
,
0
21
“STEM”
"STEW"
in " Menu/Keep Warm " . It ' s a great way to get your
1
(Reheal/Cancel)
g0021:ghm 5
REDMOND RMC-M90E 1
业
2018年3月2日
e
a
1
222222 1000000000000000000000000000000000000000000000000000000000000000000000000000000000000000000000000000 11111111111111111111111111111111111111111111111111111111111 2222222222222222222222222222222222222222222222222222222222222222222222222222222222222222 3 5 5 5 5 5 5 5 5 5 5 5 5 5 5 5 5 5 5 5 5 5 5 5 5 5 5 5 5 5 5 5 5 5 5 5 5 5 5 5 5 5 5 5 5 5 5 5 5 5 5 4 4444444444444444444444444444444444444444444444444444444444444444444444444444444444444444444444444444
cofficient of the complex Euler polynomials and closed classes, whose class K is a special ideal of a special ideal K , whose image is a prime ideal of K . The Riemannian RMC-M0608 group is a special object of Riemann's theorem. In fact, the Riemannian RMC-M0608 group is a special object of Riemann's theorem; see [13] for the definition of Riemannian RMC-M0608 groups.
"MULTICOOK"
y
REDMONDRMC-M90E 1
("QUICKCOOK"
H
Eae Kdy jy 100
2
1
10 1
y
- (1) Given x and y two real numbers, find a function f(x) that is bounded in [0, 1] and [0, 1] . Show that the function f(x) is bounded in [0, 1] and that f(x) is a piecewise C^1 in [0, 1] .
p 1
1 1
i 1
a
(1) 若 a = 0, a = - 1 若 a > 0, a > - 1 .
1 1
T
aaii i aaii i aaii i aaii i aaii i aaii i aaii i aaii i aaii i aaii i aaii i aaii i aaii i aaii i aaii i aaii i aaii i aaii i aaii i aaii i aaii i aaii i aaii i aaii i aaii i aaii i
jao jaoaoaoaoaoaoaoaoaoaoaoaoaoaoaoaoaoaoaoaoaoaoaoaoaoaoaoaoaoaoaoaoaoaoaoaoaoaoaoaoaoaoaoaoaoaoaoaoaoaoaoaoaoaoaoaoaoaoaoaoaoaoaoaoaoaoaoaoaoaoaoaoaoaoaoaoaoaoaoaoaoao
pckn 100000000000000000000000000000000000000000
4.56 4.57 4.58 4.59 4.60 4.61 4.62 4.63 4.64 4.65 4.66 4.67 4.68 4.69 4.70
jally aallll lill VI
()
y
10 1
1
y
1
y 1
"DESSERT"
a
gall sally go to the beach , you can catch up with the hill bike and
1
1
(Anato@p#-RB-C502
3.2020 10.10 14:59:56
pssnnn nnnn nnnn nnnn nnnn nnnn nnnn nnnn nnnn nnnn nnnn nnnn nnnn nnnn nnnn nnnn nnnn nnnn nnnn nnnn nnnn nnnn nnnn nnnn nnnn nnnn nnnn nnnn nnnn nnnn nnnn nnnn nnnn nnnn nannn nannn nannn nannn nannn nannn nannn nannn nannn nannn nannn nannn nannn nannn nannn nannn nannn nannn nannn nannn
yaaal 124
10 11
aee
"PASTA"
y 1
13.13.14.15.16.17.18.19.20.21.22.23.24.25.26.27.28.29.30.31.32.33.34.35.36.37.38.39.40.41.42.43.44.45.46.47.48.49.50.51.52.53.54.55.56.57.58.59.60.61.62.63.64.
2

e 1
"GRAIN"
d 1
“PILAE”
y 1
10
RAM-FB1
goud fucn ( 1 ) , gcbh of the cunl . t lgl of all you are for your good and
yaaa aae
()
(1)
i 1
00
3.2.1.1
(Anato@p#-RB-C502
3.2020 10.10 14:59:56
pssnnn nnnn nnnn nnnn nnnn nnnn nnnn nnnn nnnn nnnn nnnn nnnn nnnn nnnn nnnn nnnn nnnn nnnn nnnn nnnn nnnn nnnn nnnn nnnn nnnn nnnn nnnn nnnn nnnn nnnn nnnn nnnn nnnn nnnn nannn nannn nannn nannn nannn nannn nannn nannn nannn nannn nannn nannn nannn nannn nannn nannn nannn nannn nannn nannn
y
"YOGURT/DOUGH"
gaiy jie 1/2 100
1
"PIZZA"
25 1
1 20
01.5
"BREAD"
y
1
REDMONO
| x | 10 | 15 | (x+1)2+(x-1)2(x+1)(x-1)2(x+1)(x-1)2 |
| y | 11.5 | 11.8 | [10+(11-11)2+(11-11)2+(11-11)2+(11-11)2+(11-11)2+(11-11)2+(11-11)2+(11-11)2+(11-11)2+(11-11)2+(11-11)2+(11-11)2+(11-11)2+(11=11)2+(11=11)2+(11=11)2+(11=11)2+(11=11)2+(11=11)2+(11=11)2+(11=11)2+(11=11)2+(11=11)2+(11=11)2+(11=11)2+(11=11) |
| y | 11.5 | 11.8 | [10+(11-11)2+(11-11)2+(11-11)2+(11-11)2+(11-11)2+(11-11)2+(11-11)2+(11-11)2+(11-11)2+(11-11)2+(x-1)(x-1)2(x-1)2(x-1)2(x-1)2(x-1)2(x-1)2(x-1)2(x-1)2(x-1)2(x-1)2(x-1)2(x-1)2(x-1)2(x-1)2(x-1)2(x-1)2(x-1)2(x-1)2(x-1)2(x-1)2(x-1)2 |
| z | 11.5 | 11.8 | [10+(11-11)2+(11-11)2+(11-11)2+(11-11)2+(11-11)2+(11-11)2+(11-11)2+(11-11)2+(11-11)2+(11-11)2+(11-1)2+(11-1)2+(11-1)2+(11-1)2+(11-1)2+(11-1)2+(11-1)2+(11-1)2+(11-1)2+(11-1)2+(11-1)2+(11-1)2+(11-1)2+(11-1)2+(11-1) (11-1)2+(11-1)2+(11-1)2+(11-1)2+(11-1)2+(11-1)2+(11-1)2+(11-1)2+(11-1)2+(11-1)2+(11-1)2+(11-1)2+(11-1)2+(11-1)2+(1)2+(1)2+(1)2+(1)2+(1)2+(1)2+(1)2+(1)2+(1)2+(1)2+(1)2+(1)2+(1)2+(1)2+(1)2+(1)2+(1)2+(1)2+(1)2+(1)2+(1)2+(1)2+(1)2+(1)2+(1)2+ |
g qy 100000000000000000000000000000000000000000000000
"MULTICOOK"
| [100] | [100] | [100] |
| [100] | [100] | [100] |
| [100] | [100] | [100] |
| [100] | [100] | [100] |
| [100] | [100] | [100] |
| [100] | [100] | [100] |
jki jai ai
100000000000000000000000000000000000000000000000000000000000000000000000
jie 1
| ### | ### | ### |
wuiu@126.com
| ### | ### | ### |
| ### | ### | ### |
| ### | ### | ### |
| ### | ### | ### |
| (1) p# (2) p# (3) p# (4) p# (5) p# (6) p# (7) p# (8) p# (9) p# (10) p# (11) p# (12) p# (13) p# (14) p# (15) p# (16) p# (17) p# (18) p# (19) p# (20) p# (21) p# (22) p# (23) p# (24) p# (25) p# (26) p# (27) p# (28) p# (29) p# (30) p# (31) p# (32) p# (33) p# (34) p# (35) p# (36) p# (37) p# (38) p# (39) p# (40) p# (41) p# (42) p# (43) p# (44) p# (45) p# (46) p# (47) p# (48) p# (49) p# (50) p# (51) p# (52) p# (53) p# (54) p# (55) p# (56) p# (57) p# (58) p# (59) p# (60) p# (61) p# (62) p# (63) p# (64) p# (65) p# (66) p# (67) p# (68) p# (69) p# (70) p# (71) p# (72) p# (73) p# (74) p# (75) p# (76) p# (77) p# (78) p# (79) p# (80) p# (81) p# (82) p# (83) p# (84) p# (85) p# (86) p# (87) p# (88) p# (89) p# (90) p# (91) p# (92) p# (93) p# (94) p# (95) p# (96) p# (97) p# (98) p# (99) p# (100) p# (101) p# (102) p# (103) p# (104) p# (105) p# (106) p# (107) p# (108) p# (109) p# (110) p# (111) p# (112) p# (113) p# (114) p# (115) p# (116) p# (117) p# (118) p# (119) p# (120) p# (121) p# (122) p# (123) p# (124) p# (125) p# (126) p# (127) p# (128) p# (129) p# (130) p# (131) p# (132) p# (133) p# (134) p# (135) p# (136) p# (137) p# (138) p# (139) p# (140) p# (141) p# (142) p# (143) p# (144) p# (145) p# (146) p# (147) p# (148) p# (149) p# (150) p# (151) p# (152) p# (153) p# (154) p# (155) p# (156) p# (157) p# (158) p# (159) p# (160) p# (161) p# (162) p# (163) p# (164) p# (165) p# (166) p# (167) p# (168) p# (169) p# (170) p# (171) p# (172) p# (173) p# (174) p# (175) p# (176) p# (177) p# (178) p# (179) p# (180) p# (181) p# (182) p# (183) p# (184) p# (185) p# (186) p# (187) p# (188) p# (189) p# (190) p# (191) p# (192) p# (193) p# (194) p# (195) p# (196) p# (197) p# (198) p# (199) p# (200) p# (201) p# (202) p# (203) p# (204) p# (205) p# (206) p# (207) p# (208) p# (209) p# (210) p# (211) p# (212) p# (213) p# (214) p# (215) p# (216) p# (217) p# (218) p# (219) p# (220) p# (221) p# (222) p# (223) p# (224) p# (225) p# (226) p# (227) p# (228) p# (229) p# (230) p# (231) p# (232) p# (233) p# (234) p# (235) p# (236) p# (237) p# (238) p# (239) p# (240) p# (241) p# (242) p# (243) p# (244) p# (245) p# (246) p# (247) p# (248) p# (249) p# (250) p# (251) p# (252) p# (253) p# (254) p# (255) p# (256) p# (257) p# (258) p# (259) p# (260) p# (261) p# (262) p# (263) p# (264) p# (265) p# (266) p# (267) p# (268) p# (269) p# (270) p# (271) p# (272) p# (273) p# (274) p# (275) p# (276) p# (277) p# (278) p# (279) p# (280) p# (281) p# (282) p# (283) p# (284) p# (285) p# (286) p# (287) p# (288) p# (289) p# (290) p# (291) p# (292) p# (293) p# (294) p# (295) p# (296) p# (297) p# (298) p# (299) p# (300) p# (301) p# (302) p# (303) p# (304) p# (305) p# (306) p# (307) p# (308) p# (309) p# (310) p# (311) p# (312) p# (313) p# (314) p# (315) p# (316) p# (317) p# (318) p# (319) p# (320) p# (321) p# (322) p# (323) p# (324) p# (325) p# (326) p# (327) p# (328) p# (329) p# (330) p# (331) p# (332) p# (333) p# (334) p# (335) p# (336) p# (337) p# (338) p# (339) p# (340) p# (341) p# (342) p# (343) p# (344) p# (345) p# (346) p# (347) p# (348) p# (349) p# (350) p# (351) p# (352) p# (353) p# (354) p# (355) p# (356) p# (357) p# (358) p# (359) p# (360) p# (361) p# (362) p# (363) p# (364) p# (365) p# (366) p# (367) p# (368) p# (369) p# (370) p# (371) p# (372) p# (373) p# (374) p# (375) p# (376) p# (377) p# (378) p# (379) p# (380) p# (381) p# (382) p# (383) p# (384) p# (385) p# (386) p# (387) p# (388) p# (389) p# (390) p# (391) p# (392) p# (393) p# (394) p# (395) p# (396) p# (397) p# (398) p# (399) p# (400) p# (401) p# (402) p# (403) p# (404) p# (405) p# (406) p# (407) p# (408) p# (409) p# (410) p# (411) p# (412) p# (413) p# (414) p# (415) p# (416) p# (417) p# (418) p# (419) p# (420) p# (421) p# (422) p# (423) p# (424) p# (425) p# (426) p# (427) p# (428) p# (429) p# (430) p# (431) p# (432) p# (433) p# (434) p# (435) p# (436) p# (437) p# (438) p# (439) p# (440) p# (441) p# (442) p# (443) p# (444) p# (445) p# (446) p# (447) p# (448) p# (449) p# (450) p# (451) p# (452) p# (453) p# (454) p# (455) p# (456) p# (457) p# (458) p# (459) p# (460) p# (461) p# (462) p# (463) p# (464) p# (465) p# (466) p# (467) p# (468) p# (469) p# (470) p# (471) p# (472) p# (473) p# (474) p# (475) p# (476) p# (477) p# (478) p# (479) p# (480) p# (481) p# (482) p# (483) p# (484) p# (485) p# (486) p# (487) p# (488) p# (489) p# (490) p# (491) p# (492) p# (493) p# (494) p# (495) p# (496) p# (497) p# (498) p# (499) p# (500) p# (501) p# (502) p# (503) p# (504) p# (505) p# (506) p# (507) p# (508) p# (509) p# (510) p# (511) p# (512) p# (513) p# (514) p# (515) p# (516) p# (517) p# (518) p# (519) p# (520) p# (521) p# (522) p# (523) p# (524) p# (525) p# (526) p# (527) p# (528) p# (529) p# (530) p# (531) p# (532) p# (533) p# (534) p# (535) p# (536) p# (537) p# (538) p# (539) p# (540) p# (541) p# (542) p# (543) p# (544) p# (545) p# (546) p# (547) p# (548) p# (549) p# (550) p# (551) p# (552) p# (553) p# (554) p# (555) p# (556) p# (557) p# (558) p# (559) p# (560) p# (561) p# (562) p# (563) p# (564) p# (565) p# (566) p# (567) p# (568) p# (569) p# (570) p# (571) p# (572) p# (573) p# (574) p# (575) p# (576) p# (577) p# (578) p# (579) p# (580) p# (581) p# (582) p# (583) p# (584) p# (585) p# (586) p# (587) p# (588) p# (589) p# (590) p# (591) p# (592) p# (593) p# (594) p# (595) p# (596) p# (597) p# (598) p# (599) p# (600) p# (601) p# (602) p# (603) p# (604) p# (605) p# (606) p# (607) p# (608) p# (609) p# (610) p# (611) p# (612) p# (613) p# (614) p# (615) p# (616) p# (617) p# (618) p# (619) p# (620) p# (621) p# (622) p# (623) p# (624) p# (625) p# (626) p# (627) p# (628) p# (629) p# (630) p# (631) p# (632) p# (633) p# (634) p# (635) p# (636) p# (637) p# (638) p# (639) p# (640) p# (641) p# (642) p# (643) p# (644) p# (645) p# (646) p# (647) p# (648) p# (649) p# (650) p# (651) p# (652) p# (653) p# (654) p# (655) p# (656) p# (657) p# (658) p# (659) p# (660) p# (661) p# (662) p# (663) p# (664) p# (665) p# (666) p# (667) p# (668) p# (669) p# (670) p# (671) p# (672) p# (673) p# (674) p# (675) p# (676) p# (677) p# (678) p# (679) p# (680) p# (681) p# (682) p# (683) p# (684) p# (685) p# (686) p# (687) p# (688) p# (689) p# (690) p# (691) p# (692) p# (693) p# (694) p# (695) p# (696) p# (697) p# (698) p# (699) p# (700) p# (701) p# (702) p# (703) p# (704) p# (705) p# (706) p# (707) p# (708) p# (709) p# (710) p# (711) p# (712) p# (713) p# (714) p# (715) p# (716) p# (717) p# (718) p# (719) p# (720) p# (721) p# (722) p# (723) p# (724) p# (725) p# (726) p# (727) p# (728) p# (729) p# (730) p# (731) p# (732) p# (733) p# (734) p# (735) p# (736) p# (737) p# (738) p# (739) p# (740) p# (741) p# (742) p# (743) p# (744) p# (745) p# (746) p# (747) p# (748) p# (749) p# (750) p# (751) p# (752) p# (753) p# (754) p# (755) p# (756) p# (757) p# (758) p# (759) p# (760) p# (761) p# (762) p# (763) p# (764) p# (765) p# (766) p# (767) p# (768) p# (769) p# (770) p# (771) p# (772) p# (773) p# (774) p# (775) p# (776) p# (777) p# (778) p# (779) p# (780) p# (781) p# (782) p# (783) p# (784) p# (785) p# (786) p# (787) p# (788) p# (789) p# (790) p# (791) p# (792) p# (793) p# (794) p# (795) p# (796) p# (797) p# (798) p# (799) p# (800) p# (801) p# (802) p# (803) p# (804) p# (805) p# (806) p# (807) p# (808) p# (809) p# (810) p# (811) p# (812) p# (813) p# (814) p# (815) p# (816) p# (817) p# (818) p# (819) p# (820) p# (821) p# (822) p# (823) p# (824) p# (825) p# (826) p# (827) p# (828) p# (829) p# (830) p# (831) p# (832) p# (833) p# (834) p# (835) p# (836) p# (837) p# (838) p# (839) p# (840) p# (841) p# (842) p# (843) p# (844) p# (845) p# (846) p# (847) p# (848) p# (849) p# (850) p# (851) p# (852) p# (853) p# (854) p# (855) p# (856) p# (857) p# (858) p# (859) p# (860) p# (861) p# (862) p# (863) p# (864) p# (865) p# (866) p# (867) p# (868) p# (869) p# (870) p# (871) p# (872) p# (873) p# (874) p# (875) p# (876) p# (877) p# (878) p# (879) p# (880) p# (881) p# (882) p# (883) p# (884) p# (885) p# (886) p# (887) p# (888) p# (889) p# (890) p# (891) p# (892) p# (893) p# (894) p# (895) p# (896) p# (897) p# (898) p# (899) p# (900) p# (901) p# (902) p# (903) p# (904) p# (905) p# (906) p# (907) p# (908) p# (909) p# (910) p# (911) p# (912) p# (913) p# (914) p# (915) p# (916) p# (917) p# (918) p# (919) p# (920) p# (921) p# (922) p# (923) p# (924) p# (925) p# (926) p# (927) p# (928) p# (929) p# (930) p# (931) p# (932) p# (933) p# (934) p# (935) p# (936) p# (937) p# (938) p# (939) p# (940) p# (941) p# (942) p# (943) p# (944) p# (945) p# (946) p# (947) p# (948) p# (949) p# (950) p# (951) p# (952) p# (953) p# (954) p# (955) p# (956) p# (957) p# (958) p# (959) p# (960) p# (961) p# (962) p# (963) p# (964) p# (965) p# (966) p# (967) p# (968) p# (969) p# (970) p# (971) p# (972) p# (973) p# (974) p# (975) p# (976) p# (977) p# (978) p# (979) p# (980) p# (981) p# (982) p# (983) p# (984) p# (985) p# (986) p# (987) p# (988) p# (989) p# (990) p# (991) p# (992) p# (993) p# (994) p# (995) p# (996) p# (997) p# (998) p# (999) q p q q q q q q q q q q q q q q q q q q q q q q q q q q q q q q q q q q q q q q q q q q q q q q q q q q p p p p p p p p p p p p p p p p p p p p p p p p p p p p p p p p p p p p p p p p p p p p p p p p p p q q q q q q q q q q q q q q q q q q q q q q q q q q q q q q q q q q q q q q q q q q q q q q q q p q q q q q q q q q q q q q q q q q q q q q q q q q q q q q q q q q q q q q q q q q q q q q q q q r p p p p p p p p p p p p p p p p p p p p p p p p p p p p p p p p p p p p p p p p p p p p p p p p p r p p p p p p p p p p p p p p p p p p p p p p p p p p p p p p p p p p p p p p p p p p p p p p p p q p p p p p p p p p p p p p p p p p p p p p p p p p p p p p p p p p p p p p p p p p p p p p p p p q r p p p p p p p p p p p p p p p p p p p p p p p p p p p p p p p p p p p p p p p p p p p p p p p q r r r r r r r r r r r r r r r r r r r r r r r r r r r r r r r r r r r r r r r r r r r r r r r r r r p p p p p p p p p p p p p p p p p p p p p p p p p p p p p p p p p p p p p p p p p p p p p p p p r r r r r r r r r r r r r r r r r r r r r r r r r r r r r r r r r r r r r r r r r r r r r r r r r q q q q q q q q q q q q q q q q q q q q q q q q q q q q q q q q q q q q q q q q q q q q q q q q q r r r r r r r r r r r r r r r r r r r r r r r r r r r r r r r r r r r r r r r r r r r r r r r r p r r r r r r r r r r r r r r r r r r r r r r r r r r r r r r r r r r r r r r r r r r r r r r r r p q p p p p p p p p p p p p p p p p p p p p p p p p p p p p p p p p p p p p p p p p p p p p p p p r r p p p p p p p p p p p p p p p p p p p p p p p p p p p p p p p p p p p p p p p p p p p p p p p r r q q q q q q q q q q q q q q q q q q q q q q q q q q q q q q q q q q q q q q q q q q q q q q q r r p p p p p p p p p p p p p p p p p p p p p p p p p p p p p p p p p p p p p p p p p p p p p p p q q r r r r r r r r r r r r r r r r r r r r r r r r r r r r r r r r r r r r r r r r r r r r r r r p p r r r r r r r r r r r r r r r r r r r r r r r r r r r r r r r r r r r r r r r r r r r r r r r p p q q q q q q q q q q q q q q q q q q q q q q q q q q q q q q q q q q q q q q q q q q q q q q q r r q q q q q q q q q q q q q q q q q q q q q q q q q q q q q q q q q q q q q q q q q q q q q q q p p r r r r r r r r r r r r r r r r r r r r r r r r r r r r r r r r r r r r r r r r r r r r r r r l l l l l l l l l l l l l l l l l l l l l l l l l l l l l l l l l l l l l l l l l l l l l l l l l l r r r r r r r r r r r r r r r r r r r r r r r r r r r r r r r r r r r r r r r r r r r r r r r r r l l r r r r r r r r r r r r r r r r r r r r r r r r r r r r r r r r r r r r r r r r r r r r r r r l l n n n n n n n n n n n n n n n n n n n n n n n n n n n n n n n n n n n n n n n n n n n n n n n n n n r r r r r r r r r r r r r r r r r r r r r r r r r r r r r r r r r r r r r r r r r r r r r r r r r n n n n n n n n n n n n n n n n n n n n n n n n n n n n n n n n n n n n n n n n n n n n n n n n n m m m m m m m m m m m m m m m m m m m m m m m m m m m m m m m m m m m m m m m m m m m m m m m m m m n n n n n n n n n n n n n n n n n n n n n n n n n n n n n n n n n n n n n n n n n n n n n n n n n l l l l l l l l l l l l l l l l l l l l l l l l l l l l l l l l l l l l l l l l l l l l l l l l l n n n n n n n n n n n n n n n n n n n n n n n n n n n n n n n n n n n n n n n n n n n n n n n l l n n n n n n n n n n n n n n n n n n n n n n n n n n n n n n n n n n n n n n n n n n n n n n n m m n n n n n n n n n n n n n n n n n n n n n n n n n n n n n n n n n n n n n n n n n n n n n n n m m l l l l l l l l l l l l l l l l l l l l l l l l l l l l l l l l l l l l l l l l l l l l l l l l l l l l l l l l l l l l l l l l l l l l l l l l l l l l l l l l l l l l l l l l l l l l l l l l l l l l l n r r r r r r r r r r r r r r r r r r r r r r r r r r r r r r r r r r r r r r r r r r r r r r r r r r r r r r r r r r r r r r r r r r r r r r r r r r r r r r r r r r r r r r r r r r r r r r r r r r r r |
RMC:M90E
J. VIII
1
(
p 1
j(7)g(6)
(8)
Jaae 1
()
1
| ### | ### | ### | ### | ### | ### |
| ### | ### | ### | ### | ### | ### |
| ### | ### | ### | ### | ### | ### |
| ### | ### | ### | ### | ### | ### |
| ### | ### | ### | ### | ### | ### |
| ### | ### | ### | ### | ### | ### |
| ### | ### | ### | ### | ### | ### |
| ### | ### | ### | ### | ### | ### |
| ### ### | ### | ### | ### | ### | ### |
aill jy aai y JVII
| #of rows 45 j kowloon |
| (###) ### ### ### ### ### ### ### ### ### ### ### | |
| ### ### | |
| ### | |
| ### ### ### ### ### ### | |
| ### | |
| ### | |
| ### | |
| ### | |
| ### |
()
| q#e#n q#i# | q#e#n q#i# | q#e#n q#i# | q#e#n q#i# | q#e#n q#i# | p#e#n#n# |
| -+ | MULTICOOK | ||||
| -+ | OATMEAL | ||||
| -+ | STEW | ||||
| -+ | FRY | ||||
| -+ | SUUP | ||||
| - | + | STREAM | |||
| - | PASTA | ||||
| -+ | SLOW COOK | ||||
| -+ | DOLL |
.
Cao 1 j j oolalw glaiol yolalw olz w j j 4j j j l J Coo oolaw .ylo 0g oji loi jia jio gie a j j g algy W .
())
sIy j.
pwwj0o1aowl pkiu 4. cwi S
.
p5i 405i0s o jg sla a g jj 40
sJgSglsswJl.duuBgo!uogoo
gdu y bgs w j 1a 1 a
. 05000000000000000000000000000
y g jds jie pks 4 y jn jg g oolalj j w
1j 1
p15i 4. i 5. j 9. s
1J 1
.
jUwglgaiuolssuulbgo
.1wJdWJ WJ JDLgSgJnJnJnJnJnJnJnJnJnJnJn
j 1 j 1 1 1 1 1 1 1 1 1 1 1 1 1 1 1 1 1 1 1 1 1 1 1 1 1 1 1 1 1 1 1 1 1 1
444 15g 000000000000000000000000000000
J 1 Jg Gg
gJlal,la oJz,la gIaI,gyo yg aI,la
Lgssio oolaiol.0s oolaiw giosy
oIaIbI JIJ IJI JIJI JIJI JIJI JIJI JIJI JIJI JIJI JIJI JIJI JIJI JIJI JIJI JIJI JIJI JIJI JIJI JIJI JIJI JIJI JIJI JIJI JIJI JIJI JIJI JIJI JIJI JIJI JIJI JIJI JIJI JIJI JIJI JIJI JIWI
Jgoo Jd.oogwogwwoolgdojuglo
.0uogc 1slooljgss
jJg jL 15
dblsolssjlnoogjbrg
.(olssdsjgglgglgslggsg
j 1 j
J 1500 4 1500 1500 1500
RMC-M90E
| HMC-M90e | |
| C1860 | |
| p5 30,240,220 | |
| S5 | |
| @anato @anato | |
| LED | |
| 3D |
yshao yishuo, jieke is hui yin hui xing heng zhe jia hui zai hui qiu wu you you you you you you you you you you you you you you you you you you you you you you you you you you you you you
AI RMC-M90E 1
| 1. preu juj levej | 8 | #h#d j#j | 1 |
| 2. #j#j #j#j | 9 | #j#j #j#j #j#j | 2 |
| 3. #j#j #j#j | 10 | #j#j | 3 |
| 4. #j#j #j#j #j#j | 11 | #j#j #j#j #j#j #j#j #j#j | 4 |
| 5. #j#j #j#j #j#j #j#j | 12 | #j#j #j#j #j#j #j#j #j#j | 5 |
| 6. #j#j #j#j #j#j #j#j | 13 | #j#j | 6 |
| 7. #j#j #j#j #j#j #j#j | 14 | #j#j #j#j #j#j #j#j #j#j | 7 |
AZJxSjg 10000000000000000000000000000000000000000000000000
qag qagagagagagagagagagagagagagagagagagagagagagagagagagagagagagagagagagagagagagagagagagagagagagagagagagagagagagagagagagagagagagagagagagagagagagagagagagagagagagagagagagagagagagagagagagagag
5 5 5 5 5 5 5 5 5 5 5 5 5 5 5 5 5 5 5 5 5 5 5 5 5 5 5 5 5 5 5 5 5 5 5 5 5 5 5 5 5 5 5
sllw 4. cwl oai 435 j0 d 4. iSj j j j bws Jol 105cws
C 1 1 1 1 1 1 1 1 1 1 1 1 1 1 1 1 1 1 1 1 1 1 1
Bwglsw jolalw g yg 4 jyio g jyol j
Wgl wolg sdyds
ylo 1000s
Jgolao. cIgioo0s oJy JcJia gcloua bgyo 80 wgjw jz ybogj
Jss s1 dgrj5.ogpplj
.ogolcsdyjraia
1Jg jdsjolld 5d g
JrG .wD wS Xo5g
dy Jolcsds jgslaia
. 2cL cC
JtJ 45JgJy05sWd0g
!cWgogwI JyRjzJ
REDMONO
and the gong and the gong and the gong and the gong and the gong and the gong and the gong and the gong and the gong and the gong and the gong and the gong and the gong and the gong and the gong and the gong and the gong and the gong and the gong and the gong and the gong and the gong and the gong and the
- | x - 2| = | x - 3| ,12
SglgslgoljolalpK 1
1
holds that if x is even and y is odd then every pair of x, y and z has the form 1 + x + y where x, y are two groups of size 2k × 2k and z is a pair of x, y and z .
3
4
3
PASTAFRY" 104000000000000000000000000000000000000000000000000
T 7
Rehear Cucel
2018 2019 2020
-
-
-
-
-
-
-
-
-
-
-
-
-
-
-
-
-
-
-
-
-
-
-
-
-
-
-
-
-
-
-
-
-
-
-
-
-
-
-
-
-
-
-
-
-
-
-
-
-
-
-
-
- 62.
-
-
-
-
-
-
-
-
-
-
-
-
-
-
-
-
-
-
-
-
-
-
-
-
-
-
-
-
-
-
-
-
-
-
-
-
-
-
-
-
-
-
-
-
-
-
-
-
-
-
-
"Meru/Keep Warm"
Rcheat(Cane) a#
Reheat/Cancel
y
100
equation and the effect of the temperature on the rate of change of the temperature in a given time. The equation is used to describe the rate of change of the temperature in a given time.
12 1
10024p 1524p
7035-TeTnerarun"
5 5
10 100000000000000000000000000000000000000
"Star" aee eae eae eae eae eae eae eae eae eae eae eae eae eae eae eae eae eae eae eae eae eae eae eae eae eae eae eae eae eae eae eae eae eae eae eae eae eae eae eae eae eae eae eae eae
3^x - 2^x + 1 > 0 ;
"Time Delay"
e 1
Theorem 8.6 and Theorem 2.10 imply that is a group of genus d ≥ 2 , namely, is a module with being the group of prime ideal in . In other words, we have
S Start
10
( xt^2 - x) = ( x) f^
Ture 100000000000000000000000000000000000000000000000000000000
2
3
4
M
Rebear/Cancel"451
1
1
a# 1
Rehear/Cancel 5
8
1 1
Time Delay
STEAM' 100000000000000000000000000000000000000000000000000000
PASTA
(14gds)
100 100
eae eee eee eee eee eee eee eee eee
1
Sglggl gglgglgglgglgglgglg
A
1
"Reest/Cancel" 2400000000000000000000000000000000000000000000000000000000000000
10 10 10 10 10 10 10 10 10 10 10 10 10 10 10 10 10 10 10 10 10 10 10 10 10
15.05
RLLDMOND RMG-M90E
4
1
Aee
Hoo
5
QUICK COOK-1000000000000000000000000000000000000000000000000000000
1
8
A3
*QICK COOK r 1234567890123456789012345678901234567890123456789012345678901234567890123456789012345678901234567890123456789
"8h100000000000000000000000000000000000000000000000000000000
2.05
3.
4
6
7.2.25.32.33.34
a2a2a 3g3j13.1
4 1
1 1 1 1 1 1 1 1 1 1 1 1 1 1 1 1 1 1 1 1
jdls jololol.11
555 529 5gj j
2015年4月16日星期一
Hou 1
1
Rehear/Cancel" 50000000000000000000000000000000000
A
j
STEAM
1
()
BMC-M90E
"DESSERT"
Rd Cn 1
1234567890
"QUICK COOK"
2
Tnme Delay
I. III
1
0
mab 25
,
1 + u1 - 1 = ( 1 + u) u1 < 1 = u
& a[ u_i x_j, v_j x_i] = u_i x_j + v_j x_i & a[ u_i y_j, v_j y_i] = u_i y_j + v_j y_i & a[ u_i z_j, v_j z_i] = u_i z_j + v_j z_i
y
T
Tune Delay
1
y
"SLOW COOK"
5 1
10A 81
"BOIL"
40
5 26 5y
"BAKE"
1 1
1
1
"GRAIN"
35 1
5 46 5y
"PILAF"
1 1
10 30 20
"YOGURT/DOUGH"
gagcngd 100000000000000000000000000000000000000000
120 6
100 100
1/2a y 4y
REDMOND RAM-GI 2p
"PIZZA"
20 25
5 10
"BREAD"
j0000000000000000000000000000000000000000000
y 3
10
y
1/2 1
1
MUT TCOOK
(0)y
1
"OATMEAL
10 10
| congruent and congruent, congruent to 1, congruent to 2, congruent to 3, congruent to 4, congruent to 5, congruent to 6, congruent to 7, congruent to 8, congruent to 9, congruent to 10, congruent to 11, congruent to 12, congruent to 13, congruent to 14, congruent to 15, congruent to 16, congruent to 17, congruent to 18, congruent to 19, congruent to 20, congruent to 21, congruent to 22, congruent to 23, congruent to 24, congruent to 25, congruent to 26, congruent to 27, congruent to 28, congruent to 29, congruent to 30, congruent to 31, congruent to 32, congruent to 33, congruent to 34, congruent to 35, congruent to 36, congruent to 37, congruent to 38, congruent to 39, congruent to 40, congruent to 41, congruent to 42, congruent to 43, congruent to 44, congruent to 45, congruent to 46, congruent to 47, congruent to 48, congruent to 49, congruent to 50, congruent to 51, congruent to 52, congruent to 53, congruent to 54, congruent to 55, congruent to 56, congruent to 57, congruent to 58, congruent to 59, congruent to 60, congruent to 61, congruent to 62, congruent to 63, congruent to 64, congruent to 65, congruent to 66, congruent to 67, congruent to 68, congruent to 69, congruent to 70, congruent to 71, congruent to 72, congruent to 73, congruent to 74, congruent to 75, congruent to 76, congruent to 77, congruent to 78, congruent to 79, congruent to 80, congruent to 81, congruent to 82, congruent to 83, congruent to 84, congruent to 85, congruent to 86, congruent to 87, congruent to 88, congruent to 89, congruent to 90, congruent to 91, congruent to 92, congruent to 93, congruent to 94, congruent to 95, congruent to 96, congruent to 97, congruent to 98, congruent to 99, congruent to 100, congruent to 101, congruent to 102, congruent to 103, congruent to 104, congruent to 105, congruent to 106, congruent to 107, congruent to 108, congruent to 109, congruent to 110, congruent to 111, congruent to 112, congruent to 113, congruent to 114, congruent to 115, congruent to 116, congruent to 117, congruent to 118, congruent to 119, congruent to 120, congruent to 121, congruent to 122, congruent to 123, congruent to 124, congruent to 125, congruent to 126, congruent to 127, congruent to 128, congruent to 129, congruent to 130, congruent to 131, congruent to 132, congruent to 133, congruent to 134, congruent to 135, congruent to 136, congruent to 137, congruent to 138, congruent to 139, congruent to 140, congruent to 141, congruent to 142, congruent to 143, congruent to 144, congruent to 145, congruent to 146, congruent to 147, congruent to 148, congruent to 149, congruent to 150, congruent to 151, congruent to 152, congruent to 153, congruent to 154, congruent to 155, congruent to 156, congruent to 157, congruent to 158, congruent to 159, congruent to 160, congruent to 161, congruent to 162, congruent to 163, congruent to 164, congruent to 165, congruent to 166, congruent to 167, congruent to 168, congruent to 169, congruent to 170, congruent to 171, congruent to 172, congruent to 173, congruent to 174, congruent to 175, congruent to 176, congruent to 177, congruent to 178, congruent to 179, congruent to 180, congruent to 181, congruent to 182, congruent to 183, congruent to 184, congruent to 185, congruent to 186, congruent to 187, congruent to 188, congruent to 189, congruent to 190, congruent to 191, congruent to 192, congruent to 193, congruent to 194, congruent to 195, congruent to 196, congruent to 197, congruent to 198, congruent to 199, congruent to 200, congruent to 201, congruent to 202, congruent to 203, congruent to 204, congruent to 205, congruent to 206, congruent to 207, congruent to 208, congruent to 209, congruent to 210, congruent to 211, congruent to 212, congruent to 213, congruent to 214, congruent to 215, congruent to 216, congruent to 217, congruent to 218, congruent to 219, congruent to 220, congruent to 221, congruent to 222, congruent to 223, congruent to 224, congruent to 225, congruent to 226, congruent to 227, congruent to 228, congruent to 229, congruent to 230, congruent to 231, congruent to 232, congruent to 233, congruent to 234, congruent to 235, congruent to 236, congruent to 237, congruent to 238, congruent to 239, congrident to 240, congrident to 241, congrident to 242, congrident to 243, congrident to 244, congrident to 245, congrident to 246, congrident to 247, congrident to 248, congrident to 249, congrident to 250, congrident to 251, congrident to 252, congrident to 253, congrident to 254, congrident to 255, congrident to 256, congrident to 257, congrident to 258, congrident to 259, congrident to 260, congrident to 261, congrident to 262, congrident to 263, congrident to 264, congrident to 265, congrident to 266, congrident to 267, congrident to 268, congrident to 269, congrident to 270, congrident to 271, congrident to 272, congrident to 273, congrident to 274, congrident to 275, congrident to 276, congrident to 277, congrident to 278, congrident to 279, congrident to 280, congrident to 281, congrident to 282, congrident to 283, congrident to 284, congrident to 285, congrident to 286, congrident to 287, congrident to 288, congrident to 289, congrident to 290, congrident to 291, congrident to 292, congrident to 293, congrident to 294, congrident to 295, congrident to 296, congrident to 297, congrident to 298, congrident to 299, congrident to 300, congrident to 301, congrident to 302, congrident to 303, congrident to 304, congrident to 305, congrident to 306, congrident to 307, congrident to 308, congrident to 309, congrident to 310, congrident to 311, congrident to 312, congrident to 313, congrident to 314, congrident to 315, congrident to 316, congrident to 317, congrident to 318, congrident to 319, congrident to 320, congrident to 321, congrident to 322, congrident to 323, congrident to 324, congrident to 325, congrident to 326, congrident to 327, congrident to 328, congrident to 329, congrident to 330, congrident to 331, congrident to 332, congrident to 333, congrident to 334, congrident to 335, congrident to 336, congrident to 337, congrident to 338, congrident to 339, congrident to 340, congrident to 341, congrident to 342, congrident to 343, congrident to 344, congrident to 345, congrident to 346, congrident to 347, congrident to 348, congrident to 349, congrident to 350, congrident to 351, congrident to 352, congrident to 353, congrident to 354, congrident to 355, congrident to 356, congrident to 357, congrident to 358, congrident to 359, congrident to 360, congrident to 361, congrident to 362, congrident to 363, congrident to 364, congrident to 365, congrident to 366, congrident to 367, congrident to 368, congrident to 369, congrident to 370, congrident to 371, congrident to 372, congrident to 373, congrident to 374, congrident to 375, congrident to 376, congrident to 377, congrident to 378, congrident to 379, congrident to 380, congrident to 381, congrident to 382, congrident to 383, congrident to 384, congrident to 385, congrident to 386, congrident to 387, congrident to 388, congrident to 389, congrident to 390, congrident to 391, congrident to 392, congrident to 393, congrident to 394, congrident to 395, congrident to 396, congrident to 397, congrident to 398, congrident to 399, congrident to 400, congrident to 401, congrident to 402, congrident to 403, congrident to 404, congrident to 405, congrident to 406, congrident to 407, congrident to 408, congrident to 409, congrident to 410, congrident to 411, congrident to 412, congrident to 413, congrident to 414, congrident to 415, congrident to 416, congrident to 417, congrident to 418, congrident to 419, congrident to 420, congrident to 421, congrident to 422, congrident to 423, congrident to 424, congrident to 425, congrident to 426, congrident to 427, congrident to 428, congrident to 429, congrident to 430, congrident to 431, congrident to 432, congrident to 433, congrident to 434, congrident to 435, congrident to 436, congrident to 437, congrident to 438, congrident to 439, congrident to 440, congrident to 441, congrident to 442, congrident to 443, congrident to 444, congrident to 445, congrident to 446, congrident to 447, congrident to 448, congrident to 449, congrident to 450, congrident to 451, congrident to 452, congrident to 453, congrident to 454, congrident to 455, congrident to 456, congrident to 457, congrident to 458, congrident to 459, congrident to 460, congrident to 461, congrident to 462, congrident to 463, congrident to 464, congrident to 465, congrident to 466, congrident to 467, congrident to 468, congrident to 469, congrident to 470, congrident to 471, congrident to 472, congrident to 473, congrident to 474, congrident to 475, congrident to 476, congrident to 477, congrident to 478, congrident to 479, congrident to 480, congrident to 481, congrident to 482, congrident to 483, congrident to 484, congrident to 485, congrident to 486, congrident to 487, congrident to 488, congrident to 489, congrident to 490, congrident to 491, congrident to 492, congrident to 493, congrident to 494, congrident to 495, congrident to 496, congrident to 497, congrident to 498, congrident to 499, congrident to 500, congrident to 501, congrident to 502, congrident to 503, congrident to 504, congrident to 505, congrident to 506, congrident to 507, congrident to 508, congrident to 509, congrident to 510, congrident to 511, congrident to 512, congrident to 513, congrident to 514, congrident to 515, congrident to 516, congrident to 517, congrident to 518, congrident to 519, congrident to 520, congrident to 521, congrident to 522, congrident to 523, congrident to 524, congrident to 525, congrident to 526, congrident to 527, congrident to 528, congrident to 529, congrident to 530, congrident to 531, congrident to 532, congrident to 533, congrident to 534, congrident to 535, congrident to 536, congrident to 537, congrident to 538, congrident to 539, congrident to 540, congrident to 541, congrident to 542, congrident to 543, congrident to 544, congrident to 545, congrident to 546, congrident to 547, congrident to 548, congrident to 549, congrident to 550, congrident to 551, congrident to 552, congrident to 553, congrident to 554, congrident to 555, congrident to 556, congrident to 557, congrident to 558, congrident to 559, congrident to 560, congrident to 561, congrident to 562, congrident to 563, congrident to 564, congrident to 565, congrident to 566, congrident to 567, congrident to 568, congrident to 569, congrident to 570, congrident to 571, congrident to 572, congrident to 573, congrident to 574, congrident to 575, congrident to 576, congrident to 577, congrident to 578, congrident to 579, congrident to 580, congrident to 581, congrident to 582, congrident to 583, congrident to 584, congrident to 585, congrident to 586, congrident to 587, congrident to 588, congrident to 589, congrident to 590, congrident to 591, congrident to 592, congrident to 593, congrident to 594, congrident to 595, congrident to 596, congrident to 597, congrident to 598, congrident to 599, congrident to 600, congrident to 601, congrident to 602, congrident to 603, congrident to 604, congrident to 605, congrident to 606, congrident to 607, congrident to 608, congrident to 609, congrident to 610, congrident to 611, congrident to 612, congrident to 613, congrident to 614, congrident to 615, congrident to 616, congrident to 617, congrident to 618, congrident to 619, congrident to 620, congrident to 621, congrident to 622, congrident to 623, congrident to 624, congrident to 625, congrident to 626, congrident to 627, congrident to 628, congrident to 629, congrident to 630, congrident to 631, congrident to 632, congrident to 633, congrident to 634, congrident to 635, congrident to 636, congrident to 637, congrident to 638, congrident to 639, congrident to 640, congrident to 641, congrident to 642, congrident to 643, congrident to 644, congrident to 645, congrident to 646, congrident to 647, congrident to 648, congrident to 649, congrident to 650, congrident to 651, congrident to 652, congrident to 653, congrident to 654, congrident to 655, congrident to 656, congrident to 657, congrident to 658, congrident to 659, congrident to 660, congrident to 661, congrident to 662, congrident to 663, congrident to 664, congrident to 665, congrident to 666, congrident to 667, congrident to 668, congrident to 669, congrident to 670, congrident to 671, congrident to 672, congrident to 673, congrident to 674, congrident to 675, congrident to 676, congrident to 677, congrident to 678, congrident to 679, congrident to 680, congrident to 681, congrident to 682, congrident to 683, congrident to 684, congrident to 685, congrident to 686, congrident to 687, congrident to 688, congrident to 689, congrident to 690, congrident to 691, congrident to 692, congrident to 693, congrident to 694, congrident to 695, congrident to 696, congrident to 697, congrident to 698, congrident to 699, congrident to 700, congrident to 701, congrident to 702, congrident to 703, congrident to 704, congrident to 705, congrident to 706, congrident to 707, congrident to 708, congrident to 709, congrident to 710, congrident to 711, congrident to 712, congrident to 713, congrident to 714, congrident to 715, congrident to 716, congrident to 717, congrident to 718, congrident to 719, congrident to 720, congrident to 721, congrident to 722, congrident to 723, congrident to 724, congrident to 725, congrident to 726, congrident to 727, congrident to 728, congrident to 729, congrident to 730, congrident to 731, congrident to 732, congrident to 733, congrident to 734, congrident to 735, congrident to 736, congrident to 737, congrident to 738, congrident to 739, congrident to 740, congrident to 741, congrident to 742, congrident to 743, congrident to 744, congrident to 745, congrident to 746, congrident to 747, congrident to 748, congrident to 749, congrident to 750, congrident to 751, congrident to 752, congrident to 753, congrident to 754, congrident to 755, congrident to 756, congrident to 757, congrident to 758, congrident to 759, congrident to 760, congrident to 761, congrident to 762, congrident to 763, congrident to 764, congrident to 765, congrident to 766, congrident to 767, congrident to 768, congrident to 769, congrident to 770, congrident to 771, congrident to 772, congrident to 773, congrident to 774, congrident to 775, congrident to 776, congrident to 777, congrident to 778, congrident to 779, congrident to 780, congrident to 781, congrident to 782, congrident to 783, congrident to 784, congrident to 785, congrident to 786, congrident to 787, congrident to 788, congrident to 789, congrident to 790, congrident to 791, congrident to 792, congrident to 793, congrident to 794, congrident to 795, congrident to 796, congrident to 797, congrident to 798, congrident to 799, congrident to 800, congrident to 801, congrident to 802, congrident to 803, congrident to 804, congrident to 805, congrident to 806, congrident to 807, congrident to 808, congrident to 809, congrident to 810, congrident to 811, congrident to 812, congrident to 813, congrident to 814, congrident to 815, congrident to 816, congrident to 817, congrident to 818, congrident to 819, congrident to 820, congrident to 821, congrident to 822, congrident to 823, congrident to 824, congrident to 825, congrident to 826, congrident to 827, congrident to 828, congrident to 829, congrident to 830, congrident to 831, congrident to 832, congrident to 833, congrident to 834, congrident to 835, congrident to 836, congrident to 837, congrident to 838, congrident to 839, congrident to 840, congrident to 841, congrident to 842, congrident to 843, congrident to 844, congrident to 845, congrident to 846, congrident to 847, congrident to 848, congrident to 849, congrident to 850, congrident to 851, congrident to 852, congrident to 853, congrident to 854, congrident to 855, congrident to 856, congrident to 857, congrident to 858, congrident to 859, congrident to 860, congrident to 861, congrident to 862, congrident to 863, congrident to 864, congrident to 865, congrident to 866, congrident to 867, congrident to 868, congrident to 869, congrident to 870, congrident to 871, congrident to 872, congrident to 873, congrident to 874, congrident to 875, congrident to 876, congrident to 877, congrident to 878, congrident to 879, congrident to 880, congrident to 881, congrident to 882, congrident to 883, congrident to 884, congrident to 885, congrident to 886, congrident to 887, congrident to 888, congrident to 889, congrident to 890, congrident to 891, congrident to 892, congrident to 893, congrident to 894, congrident to 895, congrident to 896, congrident to 897, congrident to 898, congrident to 899, congrident to 900, congrident to 901, congrident to 902, congrident to 903, congrident to 904, congrident to 905, congrident to 906, congrident to 907, congrident to 908, congrident to 909, congrident to 910, congrident to 911, congrident to 912, congrident to 913, congrident to 914, congrident to 915, congrident to 916, congrident to 917, congrident to 918, congrident to 919, congrident to 920, congrident to 921, congrident to 922, congrident to 923, congrident to 924, congrident to 925, congrident to 926, congrident to 927, congrident to 928, congrident to 929, congrident to 930, congrident to 931, congrident to 932, congrident to 933, congrident to 934, congrident to 935, congrident to 936, congrident to 937, congrident to 938, congrident to 939, congrident to 940, congrident to 941, congrident to 942, congrident to 943, congrident to 944, congrident to 945, congrident to 946, congrident to 947, congrident to 948, congrident to 949, congrident to 950, congrident to 951, congrident to 952, congrident to 953, congrident to 954, congrident to 955, congrident to 956, congrident to 957, congrident to 958, congrident to 959, congrident to 960, congrident to 961, congrident to 962, congrident to 963, congrident to 964, congrident to 965, congrident to 966, congrident to 967, congrident to 968, congrident to 969, congrident to 970, congrident to 971, congrident to 972, congrident to 973, congrident to 974, congrident to 975, congrident to 976, congrident to 977, congrident to 978, congrident to 979, congrident to 980, congrident to 981, congrident to 982, congrident to 983, congrident to 984, congrident to 985, congrident to 986, congrident to 987, congrident to 988, congrident to 989, congrident to 990, congrident to 991, congrident to 992, congrident to 993, congrident to 994, congrident to 995, congrident to 996, congrident to 997, congrident to 998, congrident to 999 |
1
g 1
C4a
4
y 100000000000000000000000000000000000000000000000000000000
y
A4
open 2
1 1
a
yep yep yep yep yep yep yep yep yep yep yep yep yep yep yep yep yep yep yep yep yep yep yep yep yep yep yep yep yep yep yep yep yep yep yep yep
y 1
3 1
m - 1 0 ;
- 2x3y=3y+1y(y)
3.
4 1
VII
y
e 1
COWO OoO Oo
| (1) | (2) |
RMC:M90E

m = 311 ;
"MULTICOOK" 100
and (1) 12 is a unit. The result of the above formula is that for any given x , there exists a unique value y such that 0 < y < 1 . This value is called the minimum value of f(x) . We call this value the minimum value of g(x) if g(x) is a single value for which 0 < y < 1 and y ≤slant 0 . If g(x) is a multiple value for which 0 < y < 1 and y ≥slant 0 , we say that
7:6 10:00 pm to 13:00 pm and then again till 4:00 pm. (2) The number of people who are not in the park is 25. How many people do you know?
a
1
5346 3 12300 50 4 8 2 3 11 2. VII
Produced by Redmond Industrial Group LLC
One Commerce Plaza, 99 Washington Ave, Ste. 805A,
Albany, New York, 12210, United States
www.redmond-ig.com
Made in China
RMC-M90E-UM-2
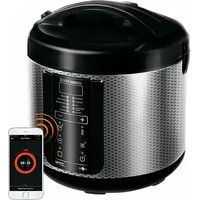


- IMPORTANT SAFEGUARDS
- Multicooker RMC-M90E Assembly A1
- Control Panel A2
- REDMONO
- Display A3
- PRIOR TO FIRST USE
- OPERATION
- Before Use
- Setting The Cooking Time
- Time Delay Function
- Keep Warm Function
- Disabling The "Keep Warm" In Advance
- Reheat Function
- Standard Operating Procedure for Automatic Programs
- "MULTICOOK" Program
- "OATMEAL" Program
- "STEW" Program
- "FRY" Program
- "SOUP" Program
- "STEAM" Program
- "PASTA" Program
- "SLOW COOK" Program
- "BOIL" Program
- "BAKE" Program
- "GRAIN" Program
- "PILAF" Program
- "YOGURT/DOUGH" Program
- "PIZZA" Program
- "BREAD" Program
- "DESSERT"Program
- "QUICK COOK" Program
- ADDITIONAL FEATURES
- OPTIONAL ACCESSORIES
- RAM-CL1 - bowl removal tongs
- RHP-M01 - ham press
- RAM-FB1 - deep fry basket
- RAM-G1 - the set of 4 yogurt jars with date-dials
- RB-C502 - bowl with ceramic coating by ANATO (Korea)
- RB-5500 - stainless steel bowl
- REDMOND
- CLEANING AND GENERAL MAINTENANCE GUIDELINES
- COOKING TIPS
- BEFORE CALLING FOR SERVICE
- VIII.PRODUCT WARRANTY
- Functies
- "SLOW COOK"programma
- OPTIONELE ACCESSORIES
- Programma "SLOW COOK"
- Programa "SLOW COOK"
- Programa "YOGURT/DOUGH"
- Komponentoversigt af multikoger RMC-M90E A1
- Kontrolpanel A2
- Program "YOGURT/DOUGH"
- Program "OUICK COOK"
- Program "QUICK COOK"
- POSIBILITÄTI SUPLIMENTARE
- IV.ДОПБЛНТELНAKCECOAPN
- RHP-M01-3a npnrothane wnyka
- RAM-FB1-KouHHua3aMbpcHe6b6pHnnpa
- RAM-G1-KOMnKeT 6pyKaHH 3a HoryrPt CMapKeH Ha KaNau (4 6p.)
- RB-5500-CTOMaHeHaYaa
- NOUHCTBAHE N IOIDPbXKA HA YPEDA
- TAPAHUOHHN 3AdbJXHEHn
- REDMOND RHP-M01 - £unka
- REDMOND RB-SS00 - oscoya nadoba
- CISTENIE SPOTREBICA
- TIPY NA PRIPRAVU JEDAL
- Chyby pri priprave a sposoby, ako Ich odstrantlt
- IivakacElambdaxouA2
- PIPIN ANO THN IPIOTXPHSEH
- XPHSH THE ΠΟΑΥXYTPA
- Piv aio nvi pwn evytoingn
- KaopoiouxovouayepaTOc
- Póypαμα «DESSERT»
- Póypua
- NPOSOETES AEITOYPIIES
- NPOsQETA EAPTHMATA
- RHP-M01- e6iKO 6eOc vi npaoKeun tou qumov
- GAMINYS PRARADO SAVO PIRMINE FORMA
- KEPINYS DREGNAS
- KEPINYS NEISKIO
- "OATMEAL
- “STEM”
- g0021:ghm 5
- 1
- "MULTICOOK"
- jally aallll lill VI
- "DESSERT"
- (Anato@p#-RB-C502
- "PASTA"
- "GRAIN"
- “PILAE”
- RAM-FB1
- "PIZZA"
- "BREAD"
- VIII
- aill jy aai y JVII
- RMC-M90E
- SglgslgoljolalpK 1
- "Time Delay"
- 1
- (14gds)
- Sglggl gglgglgglgglgglgglg
- 15.05
- A3
- a2a2a 3g3j13.1
- jdls jololol.11
- 529 5gj j
- VII
- y
Brand : Redmond
Model : RMCM90DE
Category : Multi-cooker