
CR 1182 - Radio CAMRY - Free user manual and instructions
Find the device manual for free CR 1182 CAMRY in PDF.
| Brand | Camry |
| Model | CR 1182 |
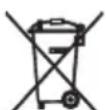
| Device type | Clock radio with CD player, Bluetooth, USB, DAB+ and FM |
| Power supply | 220-240 V ~ 50/60 Hz |
| Output power | 2 × 15 W (max 45 W) |
| Bluetooth | Version 5.0 |
| Connectivity | DAB+, FM, CD/MP3, USB, Bluetooth, AUX (RCA + 3.5 mm jack) |
| Presets | 20 for DAB, 20 for FM |
| Sleep timer | Yes, adjustable |
| Direct USB recording | From CD, DAB+, Bluetooth, AUX |
| USB track deletion | Yes |
| Auxiliary input | RCA (L/R) + 3.5 mm jack |
| Headphone output | 3.5 mm jack |
| Antenna | Telescopic antenna for DAB/FM |
| Display | LCD screen |
| Cleaning | Dry cloth only |
| Electrical class | Class II (double insulation) |
| Usage | Indoor only |
| Dimensions (approx.) | Not specified in the manual |
| Weight (approx.) | Not specified in the manual |
Frequently Asked Questions - CR 1182 CAMRY
User questions about CR 1182 CAMRY
0 question about this device. Answer the ones you know or ask your own.
Ask a new question about this device
Download the instructions for your Radio in PDF format for free! Find your manual CR 1182 - CAMRY and take your electronic device back in hand. On this page are published all the documents necessary for the use of your device. CR 1182 by CAMRY.
USER MANUAL CR 1182 CAMRY
SAFETY CONDITIONS IMPORTANT INSTRUCTIONS ON SAFETY OF USE PLEASE READ CAREFULLY AND KEEP FOR FUTURE REFERENCE
The warranty conditions are different, if the device is used for commercial purpose.
- Before using the product please read carefully and always comply with the following instructions. The manufacturer is not responsible for any damages due to any misuse.
- The product is only to be used indoors. Do not use the product for any purpose that is not compatible with its application.
- The applicable voltage is 220-240V, 50 / 60Hz . For safety reasons it is not appropriate to connect multiple devices to one power outlet.
- Please be cautious when using around children. Do not let the children to play with the product. Do not let children or people who do not know the device to use it without supervision.
- WARNING: This device may be used by children over 8 years of age and persons with reduced physical, sensory or mental capabilities, or persons without experience or knowledge of the device, only under the supervision of a person responsible for their safety, or if they were instructed on the safe use of the device and are aware of the dangers associated with its operation. Children should not play with the device. Cleaning and maintenance of the device should not be carried out by children, unless they are over 8 years of age and these activities are carried out under supervision.
- After you are finished using the product always remember to gently remove the plug from the power outlet holding the outlet with your hand. Never pull the power cable!!!
7.Never put the power cable, the plug or the whole device into the water. Never expose the product to the atmospheric conditions such as direct sun light or rain, etc.. Never use the product in humid conditions.
8.Periodically check the power cable condition. If the power cable is damaged the product should be turned to a professional service location to be replaced in order to avoid hazardous situations. - Never use the product with a damaged power cable or if it was dropped or damaged in any other way or if it does not work properly. Do not try to repair the defected product yourself because it can lead to electric shock. Always turn the damaged device to a professional service location in order to repair it. All the repairs can be done only by authorized service professionals. The repair that was done incorrectly can cause hazardous situations for the user.
- Never put the product on or close to the hot or warm surfaces or the kitchen appliances like the electric oven or gas burner.
11.Never use the product close to combustibles. - Do not let cord hang over edge of counter or touch hot surfaces.
13.Never leave the product connected to the power source without supervision. Even when use is interrupted for a short time, turn it off from the network, unplug the power. - In order to provide additional protection, it is recommended to install residue current
device (RCD) in the power circuit, with residual current rating not more than 30mA . Contact professional electrician in this matter.
- Avoid getting the device wet.
- The device may only be wiped with a dry cloth. Do not use water or cleaning fluids.
- The device should be kept in a dry room.
LOCATION OF CONTROLS
- POWER SWITCH 1. DISPLAY 2. CD TRAY
- CD TRAY OPEN/CLOSE 4. STANDBY/SOURCE 5. USB PORT
6.REPEAT/INFO 7.MENU/PROGRAM 8.SEARCH-/PREVIOUS TRACK
9.SEARCH+/NEXTTRACK 10.SCAN/PAUSE/PLAY 11.RECORD/DELETE - ENTER / STOP 13. PRESET 14. VOLUME CONTROL +/-
- POWER CORD 17.ANTENNA SOCKET 18.RCA AUX INPUT (L + R)
19.3.5mm JACK HEADPHONES OUT
POWER SOURCES
AC POWER: To power your radio, plug the AC power cord into into a wall AC power outlet. Check that the rated voltage of your appliance matches your local voltage. Note: If the display does not function properly or no reaction to operation of any control may due to the electrostatic discharge. Switch off and disconnect the AC cord then turn the power back on after a few seconds.
TO USE THE RADIO
- Set the Mains [POWER SWITCH] (0) to ON;
- Press the [POWER] button (4) to power ON;
- (The first time you power on the radio, the radio will scan the DAB radio stations automatically
. It will display and play the first station after the scan is done); - Select the desired audio source by turning the [MODE] knob (4);
- (Please see detailed instructions for each Source in the following chapters);
- Adjust the volume with the [VOLUME KNOB] (14) to the desired level;
- To power OFF the radio, press the [POWER] button (0).
NAVIGATE INTO THE MENU
- Press the [MENU] button (3) to access to the options;
- Use the [SKIP -/+] buttons (8/9) to navigate into the options;
- Press [ENTER] button (12) to select the options;
- Press [MENU] (3) to exit the menu.
FACTORY RESET
- Press [MENU] (3) to access to the menu;
- Use the [SKIP -/+] button(8/9) to navigate into the options and select "System";
- Confirm with the [ENTER] button (12);
- Use the [SKIP -/+] buttons (8/9) to select "Factory Reset";
- Confirm with the [ENTER] button (12);
- Use the [SKIP -/+] buttons (8/9) to select "yes";
- Confirm with the [ENTER] button (12).
SLEEP TIMER
The sleep timer switches the radio off automatically after an adjustable time.
DAB RADIO OPERATION
- Select "DAB"mode by turning the [MODE] knob (4);
- Use the [TUNE -/+] buttons (8/9) to select the desired radio station.
Note: In case there is No DAB Service, press the [SCAN] button (10) to start scan.
Note: For a better reception reorient the antenna (17).
FM RADIO OPERATION
- Select "FM"mode by turning the [MODE] knob (4);
- Press the [TUNE -/+] buttons (8/9) to manually select the frequency or press and hold (2 seconds) to scan the next/previous available station.
Note: For a better reception reorient the antenna (17).
STORE RADIO STATIONS AUTOMATICALLY:
Press the [SCAN] button (10) and the radio will automatically scan the radio. During the scanning process, the radio will save the scanned stations sequentially into the memory.
PRESET
There are 20 presets available for DAB and 20 presets for FM.
- Set the desired radio station frequency as explained previously;
- Press and hold the [PRESET] button (13);
- Choose the number of preset using the [TUNE -/+] buttons (8/9);
- Confirm with the [ENTER] button (12).
RECALL A PRESET STATION
- Press the [PRESET] button (13);
- Select the desired preset using the [TUNE -/+] buttons (8/9);
- Confirm with the [ENTER] button (14).
INFO
When the radio station is playing, press the [INFO] button (8) repeatedly to cycle through the information broadcasted by the radio.
CD-MP3 OPERATION
- Select "CD" mode by turning the [MODE] knob (4);
- Press [OPEN/CLOSE] (3) to open the [CD DOOR] (2) and place a CD with the label up in the CD compartment.
- Close the [CD DOOR] (2). Focus search is performed and playback will start automatically from the first track.
PROGRAMMING
Up to 99 tacks (MP3, 20 in CD) can be programmed and play in any order.
- Stop the playback by pressing [STOP] (12);
- Press [PROGRAM] (7), the display (1) will show the number of the track on the left side and the number of program on the right side.
- Select desired track by using [SKIP -/+] buttons (8/9);
- Press [PROGRAM] (7) to confirm desired track into the program memory;
- Repeat step 3 and 4 to enter additional tracks into the program memory.
- When all the desired tracks have been programmed, press [PLAY] (10) to play the disc in the order you have programmed.
Note: Press [STOP] (12) twice to terminate programmed play.
BLUETOOTH OPERATION
- Select "BT"mode by by turning the [MODE] knob (4);
- Connect your Bluetooth portable device to the ID Bluetooth tagged as "CR 1182";
- You can now transfer the music to the CR 1182 .
Note: Music control (play, pause, etc) must be done from your external device.
AUX-IN OPERATION
- Use one male RCA to male 3.5mm jack cable (not included) to connect any external audio device to the [AUX-IN SOCKET] (18);
- Select "AUX"mode by turning the [MODE] knob (4).
Note: Music control (play, pause, etc) must be done from your external device.
USB OPERATION
- Select "USB" mode by turning the [MODE] knob (4);
- Plug an USB stick into the [USB PORT] (5);
- Playback will start automatically from the first track. PROGRAMMING
The PROGRAMMING operation is the same as that of CD-MP3.
Notes:
Some mp3 player may not be able to play via the USB socket. this is not a maul function of the system.
To avoid damage to USB memory, remove it only when the radio is turned off.
The USB port is not designed for charging smart phones or other devices.
DIRECT USB ENCODING
Remark:
Recording speed is 1:1
No song title will be recorded during encoding mode.
To avoid damage to USB memory, remove it only when the radio is turned off.
ENCODE FROM DAB+, BLUETOOTH AND AUX:
- Plug the USB stick into the [USB PORT] (5);
- Perform normal playback of the source you want to encode & record;
- Press and hold the [RECORD] button (11) to start encoding. The display will show "REC";
- Once the record is finished, press the [STOP] button (12) to stop recording.
ENCODE FROM CD:
- Plug the USB stick into the [USB PORT] (5);
- Perform normal playback of the CD you want to encode & record;
- After focus search is completed, press and hold the [RECORD] button (11);
- Press repeatedly the [SKIP -/t] button (8/9) to select the desired encoding option:
REC-ONE: Select to record only the current track;
REC-FOLDER: Select to record the whole folder;
REC-ALL: Select to record all the tracks of the CD.
-
Press the [RECORD] button (11) to confirm;
-
The playback will stop and restart automatically and on the display (1) "REC"
will flash. Encoding is performing now;
- Press the [STOP] button (12) to finish recording.
Note: After completing of encoding, unit will stop playback and encoding automatically.
DELETE TRACKS FROM USB
-
Perform normal playback of the track you want to delete;
-
During playback of the track you want to delete, press the [DELETE] button (11).
-
Press repeatedly the [SKIP -/+] button (8/9) to select the desired encoding option:
DEL-ONE: Select to record only the current track;
DEL-FOLDER: Select to record the whole folder;
DEL-ALL: Select to record all the tracks of the CD.
- Press the [DELETE] button (11) to confirm.
Technical Data:
Input voltage: 220-240V 50/60Hz
Output Power: 2^*15W
Max Output power: 45W
Bluetooth - standard version 5.0

To protect your environment: please separate carton boxes and plastic bags and dispose them in corresponding waste bins. Used appliance should be delivered to the dedicated collecting points due to hazardous components, which may effect the environment. Do not dispose this appliance in the common waste bin.
DEUTSCH
FONCTIONNEMENT AUX-IN
PRISIMINKITE ISANKSTINES STOTES
- Paspauskite [PRESET] mygtuka (13)
- Pasirinkite norimai sankstin nustatymay mygtukais [TUNE - / +] (8/9);
- Patvirtinkite mygtuku [ENTER] (14).
INFO
Kai radijo stotis groja, pakartotinai paspauskite mygtuka [INFO] (8), kad perjungtumete cikla per radijo transliuojama informacija.
CD-MP3 VEIKIMAS
IStrinti jraus is USB
- Atlikite jprasta norimo istrinti takelio atkurima.
- Atkurdami takelj, kuri norite išrinti, paspauskite [DELETE] mygtuka (11).
- Pakartotinai paspauskite mygtuka [SKIP - / +] (8/9), noredami pasirinkti norimokodavimo parinkti:
Techniniali duomenys:
vesties [tampa: 220-240 V 50/60 Hz
I\ejimo galia:2^{*}15W$
KODE DAB+, BLUETOOTHI JA AUXIST
- NaHnOe To Koumu [AIAPPAH] (11) yia eBaiown
TeXViKa 6eDooEva:
Tao 220-240V 50 / 60Hz
IoXuc Eoou: 2*15W
Méviotn 1oxuc Outoput:45W
Bluetooth - Tukiik ekooon 5.0

OPOVticoue To quoiko TepiBaalov. Napakaloue va TETATE TIC oukeuaiec aTO xaprovi OTOV kado avakukwongn atoppmuawxaptiou. Tc oakouaceaTIOIauaiUAEvio (PE), aToppipTE Tc OTov kado avakukwongn TIAOTIKW.H OApueyn oukeun TpeTlEVA tappTTetAI TO KAATAANLO ANUEIO, Egaitiac wv ETIKIVDuvw vToiExIW TOU TEPIEXI KAI TA OTOA MTOEVA aTOTEAEouv aTeiYia To TEPiBaalov. H nEkptpkn oukeun TpeTtva aToppittETAI ME TETO ITO WT E VA TEPiOIEI N Etavaxpnoiotoinan Tnc. EAV OTN ouakeun Bpiokovta mTatapiec, autc TpeTNI VA aPapeoov kai va TETAXTOU SE XwpoTo Kaoo.
(MK) MaKeDoHcKn
UCJIOBNI 3A BE3BEHOC BAHN INHCTPYKUNI 3A BE3EINHOCT HA YNOTPEBA 3A YNOTPEBA,Be monime IPOUHTAJTE BHIMAHNE I CYBAE 3A INHNHA PEΦEPEHLNJIA
YcnoBnte 3a rapaunja ce pa3nunH,doKoIky ypeDTo ce KopnCTn 3a KomepuJauHn ceJI.
1.Пред унотpeба на пОНьОДТ,BE мОЛиме почитajTe BнIMaTeJHо И секогаш BO corлachocT co спеднibe упатCTba. ПОНьОДиТeЛOT He e OДrogОрeн 3a БИЮ КakBa StTeTa nopади КakBa БИЮ 3Ioунтpe6a.
2.ПроизвODOTТpe6а Да се Користсамо ВО 3aTВорецпростори. He користete ro ПроизвODOTЗа КAKВИ БИLO цELN StTO He се KOMпатибИнн CO HerOBaТа РIMeHa.
3. npimehyba hanoh 220-240 V, 50/60 Hz. Od 6e36eHocn npuHn He e cooDbetHo da ce noBp3aT NOBeKe ypeN Ha eDen HtKeep.
4. Be monime 6nndeTe npetna3nBn Kora kopncntte okony deca. He do3BOnyBajTe decaTata da cn irpaat co npon3BOJOT. He do3BOnyBajTe decaTata nnn nyreTo wTO he ro 3Haat ypeDTo da ro KopnCTat 6e3 Hnd3Op.
5.WARNING: Oboj ypei moke da ce kopnctn od ctpaHa ha deca na 8 roDHH n Iuca co HamaJIeHn fI3NcK, CEN3OpHn IIN MeHTaIIHn CnOCo6HOCTn, IIN Iuca 6e3 NCKyCTBO I 3HaEbe Ha ypeiOT, cAmO IOd HAD3OP Ha JInCe KOe e ODROBOPHO 3a HNBATA 6e36eHOCT, IIN aKO IM bInIO YkaxaHO Ha 6e36eHDO KOpNCTeHBe Ha ypeiOT n Ce CBecHN 3a ONaCHOCHTe NOBp3aHn CO HeROBOTO pa6oteHe. DeUaTa He TpeBa Da cn Irpaat Co ypeiOT. UInCTeHbeto n ODPJxBaHbeto Ha ypeiOT He TpeBa Da To BpWAT Deca, OCBeH aKO He CE Haad 8 roDHH n OBne AKTNBHOCTHn Ce BpWAT NOI HAD3Op.
6.OTkako Ke 3aBpHInTe co ynoTpe6a Ha npOn3BODOT, CekoraW 3anOMHeTe HeXHO da ro OTCTpaHInTe pNkIyUOKOT oD uTEKePOT 3a HanojYBaHbe wTO rO dpXn uTEKePOT CO CBOJaTa paka. HnkoraW He ro nobNekyBajTe Ka6eNoT 3a HanojYBaHbe !!!
7. Hnkoraaw He cTaBajTe ro KaBeJnt 3a HanojyBaHbe, npNKnyOKOT nIu ceJInot ypeD Bo
BODa. HnKoraaH He n3IoxyBaJTe rO npOn3BOoT Bo aTMocΦepcKn ycNoBn, KaKO uTo e DnpekTHa COHueBa CBETJIInHa IIN DoXd, NTH.. HnkoraaH He KopncTeTe rO npOn3BOoT BO BnaJHN yCNoBn.
8.IpnOnduHNO npOBepTe ja cocToj6aTa ha Ka6eNoT 3a HanojyBaHe. Dokonky e oWTeTeH Ka6eNoT 3a HanojyBaHe, npOn3BODOT Tpe6a Da ce CBPTn Ha npoPecnoHaHa NaokaJa 3a CepBnCnpaBe ITO Tpe6a Da ce 3aMeHN 3a Da ce N36erHaT OnaCHN CNTyaUIN.
9. Hnkoraaw He KopncTeTe ro npOn3BODOT co OwTeTeH kAbel 3a HanojyBaHe nIa aKO ToJ 6nI NCnyuTeH nIb OwTeTeH Ha Koj 6nIO dpyr Naunn IIN aKO He pa6oTn npabNlHo. He 6nIyBaJte Ce camn Da ro nonpaBnte OwTeTeHNO TpOun3BOd 6nIeJKn MoKe Da IOBeJe Do eNeKtpnueH ydp. Cekoraaw NcknyuBajTe ro OwTeTeH ypeD 3a npocceNoHaHn IokaunJa Ha ycLyrgn Co cen Da ro nCnpaBmE. Cnte nonpaBkn MoKat Da rN BpMaT cMo OBnaCTeH npocceNoHaJIz 3a ycLyrgn. NoppaBkata wTo e HanpaBeHa HenpaBnH0 MoKe da npedn3Bnka OnaChn CNTyaUznn 3a KOpNCHKOT.
10. HnKoraw He ro cTabajTe npOn3BODOT Ha nn 6bncky Do TOnnTe nn TOnnTe NOBpHnH nn KyjHcKe Te ypei KaO eNeKtpnHaTa neUka nn RopnHKoT Ha rac.
11.Never KopnCTn npOn3BOoT BO 6IIN3HnHa Ha rOpNBA.
12.He Do3BOnyBajTe Ka6eIOT Da BnCn Ha pad pa6oT Ha 6pojaOT nIN Da DonnpajTe TOnnn IOBpShHH.
13. HnKoraw He octabajTe ro npOn3BODOT NOBp3aH CO n3BOPOT Ha HanojyBaHe 6e3 HaD3Op. Dypn i Kora yNtpe6bata e npekHaTAta 3a KpaTko BpeMe, Ncknyute ja od MpeXaTa, Ncknyute ja ctpyjata.
14. Co龟Да ce obe36eДи ДОПИНТЕЛHA 3aHTNTa, ce npenopayBa DA ce HnCTaJInpa ypeД 3a CTpyJa Ha ocTATOUN (RCD) BO KOJOTO 3a HANOjYBaHbe, co pejTnHr Ha npeocTaHaTa CTpyJa He NOBeKe od 30 mA. KoHTaKTIpajTe npoPecnoHaJeH eJeKTPnUap BO OBA npaShaHbe.
15.ИЗбэрHyвajTe Да ce HabлajХи уpeДOT.
16. YpeIOT MOKe Ia ce n36pNIe cAmO co cyBa KpNa. He KopnCTeTe BODa INI TeuHocTn 3a YnCTeHe.
17. YpeodTpe6a da ce cyBa BO cyBa npoctopnja.
JOKAUJHA KOHTPOJIN
- NOBEE HA MONTE
- OTBOPEH / 3ABPUJA 3A LUN-LUN
6.ODROBOP/MHΦO
CJIEIHAI - INPE6APYBA +E // CJEDHA INPABHA
- BheceTe / CTON
- COBETHN KOPD
-
HADBOPEUHIOCHOBNI 3,5 MM
-
OBE35EDYBA 2.E
4.CTAHIDN/IN3BOP -
MAHy/ΠPOΓPAMA
-
CKAH / ΠAY3A / ΠΟΓJIAC
13.ПИСТAT - AKTEHA COLJET
2.CODPINA L
5. USB nppta
8. INPE6APYBA--E//INPEBUNDAHA
- PEKOPD/ DEJE
- KOHTPOJIA HA BOJYM +/-
18.RCA AUX INPUT (L + R)
U3BOPHAMOOWI
HanojyBaHe Ha cTpyja: 3a HanojyBaHe Ha BaIIO T paIIO, BKnIyTe Ro Ka6eIOT 3a HanojyBaHe co HauImMeHnUHa cTpyja BO wallndHa cTpyja
H3JIe3. IpoBepTe DaJIH HOMHaJIHNOT HAnOH Ha BaJInOT anapat Ondrobapa Ha BaJInOT JIOKaJIeH HANOH.
BeJeuKa:AkO DnCnnejot He pa6oTn npaBnHNo HIn Hema peakunja Ha KOJ 6nlo
KoHTponata MoKe Ia Ce DoJn Ka eNeKTpoCTaTcKO npa3HeBe. NcknyteTo n NcknyteTo AC Ka6eIOT NOToa BknyteTo HanojyBaHbeto NOBtOPO No HeKoNky CeKHydN.
3A YNOTPEBA HA PAIIO
- NocTaBeTe rKoNHyBaTa [POWER SWITCH] (0) Ha ON;
2.Пи捜сichte ro konчeto [POWER](4)3a BknyBahe; - (Ппвnot nat kora Ke HanojyBaTe Ha paДио, paДиOTO Ke rN cKeHnpa paДиO cTaHnCITe DAB aBTOMATcKn
. Wille ja npikaxe n nyuTn npbata cTaHua oTKaKO Ke ce cKeHnpa);
4.ИЗберето саканотиьов на ayдно Бртенье на konчeto [MODE] (4); - (BnDte DeTaHn yNaTc7Ba 3a cekoj N3Bop Bo CneHnTe nofnaJa);
6.Пилагодente ja jaunha ta ha 3bykOT co [VOLUME KNOB] (14) Ha cakaHTo HnBO;
7.3a da ro ncknyte ra dio, npitncheTe ro konyeTo [POWER] (0).
HABUNPAJTE BO MEHY
1.Пи捜спесугкончсeto [MENU] (3)за писан do onциnte;
2.ИзберетгиКОПЧИБATASKIP-/+3aДа ce_ДВИЖИТЕ BO ONцIMTE;
3.Путисе.To konчeto [ENTER] (12) 3a da rn n36epeTe onuimnte;
4.Пи捜снеTe [MENU](3)3a Да ИЗлесеToOD MeHnTO.
1.Пи捜нс悔[EENU](3)За пиuctанДоMeHHTO;
2. KopncTeTe ro konHeTo [SKIP-/+] (8/9) 3a da OTnIeTe BO onuInTe n 36epete „CnCTem";
3. 3aunpctece co konyeto [ENTER] (12);
4. KopinCTe Tn KOnuHbata [SKIP-/-] (8/9) 3a da n36pepeTe, abpuKo peceTnpaHe;
5.BheceTe ro C co konyeTo [ENTER] (12)
6. KopncTeTe rKoNunBaTa[SKIP- / +] (8/9) 3a da n36peTe ,da";
7. NotBpDeTe co KonueTo [ENTER] (12).
Bpeme Ha cnehe
Tajmepot 3a cnnehe ro ncknyuBa paIIOTo aBtOMaTcKn no npinarOJINBO BpeMe.
OBPA3OBAHNE HA JAB PAJIO
- 136epete ro ,DAB, 3aBptete ro konyeto [MODE] (4);
- KopinCTe Tn KOnuHbTa[TUNE-/+] (8/9) 3a da ja n36peTe cakHaTa paAno cTahUa.
3a6eileuka: Bo cnyaj da Hema mpa3 Ha DAB Serv, npitncheTo KOunTeo [SCAN] (10) 3a da 3anoHHe Co cKeHnpaHe.
3abeneuka: 3a noobpa noBtropHa npeHacOyBaHe Ha aHTehata (17).
PEDINO ONEPAUINI
1.Изберетe „FM"mo coВртенье Ha konHTeTO [MODE] (4);
MaKcImaJIHa MoKHOCT Ha n3JIe3: 45Wa
Bluetooth - cTaHapdHa Bep3nja 5.0

Ce rpnKIMe 3a npnpoHnata cpeiHa. KapTOHcNte NaKOBKn MOJInme Da ce HameHaT 3a peuKNipapHe. POnIeTNIEHOBInTe Kecn (PE) da ce pPnat BO KOHTeHep 3a nnactika. NcOpncTeHNOT ypeD Tpe6a Da ce npede Bo COOdBETHNOT CKJaDnpaQKn PYHK, 6bnEjkn Hebe36bHNTE CoCTOJIKN KOn CE HaOrAat BO ypeD0T MoKAT Da 6bnat 3arpo3yBaHe 3a cpeiHaTa.
EneKtpuHnOypeBa da ce npdae Ha Naun KoJ Ke OHeBO3MOxN HcOBA NOBTOHa YnOTpeBa NCKOpNCTyBaHBe.
Iokolky BOpEIO TMA 6aTePN, TpeBa Da ce I3BaT N noceBHO da ce npedaT BO CKnAupaKNOT NyHKT.
(CZ)ČESKY
KOD Z DAB+, BLUETOOTH A AUX:
CBPOC K 3ABOДСКИМ HACTPOIKAМ
1.Haxmnte [MENU] (3)ДяdoctункMeHIO;
2.CnmoosbIO KhoNk SKIP-/+pepeiDteKnapaMeTpamN Bbl6epnte «CncTeMa»;
3.ПодтбердпerteHaжкатемКногкINENTER](12);
4.CnmooukhoonokSKIP-/+BbIepePeTe《FactoryReset》;
5.Повтевердпту Нжатем Кногки [ENTER] (12);
6.CnOmoBIO KHOHOK SKIP-/+ BbIepePte «da»;
7.Подтбердente ВьOD KнОнКой [ENTER] (12).
TAYMEP CHA
TaimepotKJIOueHnABOTMaTNUeCKN BbIKIOuayetpaio OHe3 3aDaHHoeBpeM.
PAIIO PABOTAC DAB
1.Bb6epnte pexim «DAB», noBopaunBaJ pyky [MODE] (4);
2.CnmoosbKhONOKTUNE-/+BbIepeHteHyxHyopaNaocTaHmIO.
PnmeaHne. Ecn DAB Serv ice oTcyTcByeT, HaxMnte KhONky [SCAN] (10), TTo6bl Haatb cKaHnpoBaHne.
PpmeaHne. IyUwero BocnpTna nepeOpnentpyte aHTeHHy (17).
FM PAIIO 3KCPJYATAUIN
-
BbIbepeIe peXIM «FM», nobOpaunBaJ pyUky [MODE] (4);
-
Haxmte KhoNk [TUNE - / +] (8/9), yTo6bI BpyHyIO Bbi6paTb YactOTy, IIN Haxmte
IydepKBAeTe (2 ckyHdb) dny cKaHnpoBaHn CJeDyUoWe / npdeBdyuwe DocTyHno CTaHm.
PpmeaHne: IyUeero npema nepeopnentpyte anTeHHy (17).
MARA3NH PADIIOCTAHUIN ABTOMATUQUECKN:
Haxmte Khoiky [SCAN] (10), npaio abTomatueckn npockaHpyet paio. B TeueHne
B npoece cKaHnpoBaHnpaIIOCTaHcNByeTIOcNeIOBaTeJIbHO COxpaHrTa KaHnpoBaHHbIe CTaHcN B
Obem namrtn.
PRESET
DocyNbI 20 npedyctahOBok nla DAB n 20 npedyctahOBok nla FM.
1.YctaHOBtTeKeJaemyuOCTOTypaNIOCTAHm,KAOKONCAHO Bblwe;
2. Haxmmte u ydepkmbaTe KhoNky [PRESET] (13);
3. BbIbepeTe HOMe npEyctaHOBKn C NMOOuB KHOIOK [TUNE - / + ] (8/9);
4.Подтбердente нажатием кноги [ENTER] (12).
Y3HATbIpeceTHyIOCTAHUHO
-
HaxmTe KhoNky [PRESET] (13);
-
Bb6epnte Hxky npedytaHOBky c nOmoIbIO KHOIOK [TUNE - / + ] (8/9);
-
NogTBepnITB BBOJ KHOHOKO [ENTER] (14).
NHΦOPMALIa
Korda paHIOCTaHnIgPaTe, HeCKoJIbKO pa3 HaxMMte KHOpy [INFO] (8) Iy cIKJIneCko nepeKIOueHnI
Uepe3 uHOpMaunIO, nepeaBaemyo npaio.
CD-MP3 PABOTA
-
BbIbepeItepeXIM «CD», noBopauNBA pyUky [MODE] (4);
-
HaxmTe [OPEN / CLOSE] (3), TTo6bl OTkpyb [CD DOOR] (2), INOMeCTnTe KOMNaKT-DnCK C 3TnKeTKoB BBepx B OTceK dIa KOMnKaT-DCNCKOB.
-
3aKpoIe [DBEpB CD] (2). BbInOnHReTcNtck fokyca, n HauHnaeTcB OcnpOn3BeDeHne
ABTOMATUeCKN C nepBOrTO TpeKa.
ПОНТРAMMIMOBAHINE
Moxho 3anporpammpoBaT b Bocnpn3BODHT do 99 TaKToB (MP3, 20 Ha CD) B IIObom npraKe.
HeKOTOpbIe mp3- npeepbI MOrY He BocnpoN3BOOHTbcra Ypeepa3bem USB. 3TO He MoN pVHKUcNCTeMbI.
Ytobni36exatb nobpejdeHn namrTn USB, n3BnekaTe ee ToIbKO npn BbIKIOeHHOM paHO.
IopT USB He npedHa3NaueH dIa 3apKn cMapToHOH IIN dpYnx yCTPOIcTB.
BpeXmE KoDnpoBaHnHa3BaHnne neChn He 6yDet 3aIncAoH.
TTo6bI n36eKaT nobpeJeHnnaMaTn USB, n3BNeKaIte ee ToJIbKO npn BbIKNoueHHOM paIIO.
KOJIEKC N3 DAB+, BLUETOOTH I AUX:
1.ПодклочиTe USB-нakоштьк [USB PORT] (5);
-
BbINOJIHnTe HopMaJIbHOe BOCPOn3BeDEHne NCTOCHNka, KOtOpB bI XOTnTe KoDnPOBaTb 3aNNCbBaTb;
-
Haxmnte u yedxmbaTe KhoNky [RECORD] (11), tO6bHaayt KoDnpoBaHne. Dncnne nokaeTc REC);
BbIXoHaMaMoUHocTb:2*15BT
MaKc.BbIXoHaHa MoUHocTb:45BT
Bluetooth - cTaHapTnaB Bepcna 5.0

3a60TcB o6 OkpykaUoie cpe..YnakOBky I3 KapToHa nepeaIte,NoXaJyIyIcTa,Ha MaKynatpy. POnIn3TIneHOBbIe MeuKn (PE) BbIKDaTb B pe3epByap dIy nIaCTMaCCbI. NsHOSeHHoe yCTpoiCtBO HApO nepeDaTb B COOTBeTCTBYIOUYO TOKY XpaHEnH, TAK KAc HAXOJaIueCBY CTOEONACBHe CoCTABNIOUne MOrTy ABnTcBcR YrPo3oN dIg OKpykaUoie cpebl. 3NeKtpnHeCKoe yCTpoiCTBO HApO nepeDaTb TakIM OpbzOM, YTObI OrpAHmHTb erO NobTPOHoe yNtpe5JeHne IcNOJIb3OBAHme. EcIN B yCTpoiCTBe HaxOJaTc6BaTapen, IN HaIO BbITaHyTB n nepeDaTb B ToUYkXPAHENr OTDeNbHO. YCTpoiCTBO He BbIKDaTb B pe3epByap dIy KomMyHaJIbHbIX OTxODOB!
(NL) NEDERLANDS
Pritisnite gumb [SCAN] (10) in radio bo samodejno prebral radio. Med.
Po postopku skeniranja bo radio shranjene postaje shranjeval zaporedno v spomin.
PRESSET
Na voljo je 20 prednastavitev za DAB in 20 prednastavitev za FM.
1. nasfavite Želeno frekvenco radijske postaje, kot je razloženo prej;
2. Pritisnite in drzite gumb [PRESET] (13) ;
3. z gumbom [TUNE- / +] (8/9) izberite stevilo prednastavlenih ;
4. Potrdite tipko [ENTER] (12).
PRIJAVITE PRESETNO POSTAVO
- Pritisnite gumb [PRESET] (13);
- Z gumbom [TUNE - / +] (8/9) izberite zeeleno prendastavitev;
- Potrdite tipko [ENTER] (14).
INFO
KOD Z DAB+, BLUETOOTH A AUX:
-
Pripojte USB kluc do [USB PORT] (5);
-
Vykonajte normalne prehravanie zdroja, ktory chcete kódovat a zaznamenat;
-
Stlacenim a podrzanim tlaclidla [ZAZNAM] (11) spustite kódovanie. Na displeji sa zobrazi „REC";
-
Po dokončeni záznamu stlačenim tlacidla [STOP] (12) záznam zastavte.
KODZCD:
-
Pripojte USB kluc do [USB PORT] (5);
-
Vykonajte normalne prehravanie CD, ktoré chcete kódovat' a nahravat';
-
Pó dokončeni vyhádávania zaostrenia stlăcte a podržte tlacidlo [ZAZNAM] (11);
-
Opakovany m stlacenim tlacdida [SKIP - / +] (8/9) vyberte pozadovanu moznost kódovania:
REC-ONE: Vyberte, ak chcete nahravat iba aktuñnu skladbu;
REC-FOLDER: Vyberte, ak chcete nahrat cely priecinok;
REC-ALL: Vyberte, ak chcete nahrat' vsetky skladby na CD.
-
Potvrdtte stlacenim tlacidla [ZAZNAM] (11);
-
Prehrávanie sa automaticky zastavi ā restartuje automaticky a na displeji (1) _REC
bude blikat'. Kodovanie teraz funguje;
- Nahravanie ukoncite stlačenim tlačidla [STOP] (12).
Poznamka: Po dokončeni kódovania zariädenie zastav prehravanie a kódovanie automaticky.
VYMAZAJTE TRACKY Z USB
-
Vykonajte normalne prehravanie stopy, ktoru chcete odstranit;
-
Pocas prehravania skladby, ktoru chcete vymazat', stla cate tlacidlo [VYMAZAT] (11).
-
Opakovanym stlacenim tlacdida [SKIP - / +] (8/9) vyberte požadovanú možnost kóvodania:
DEL'ONE: Vyberte, ak chcete nahravat iba aktualign skladbu;
DEL-FOLDER: Vyberte, ak chcete nahrat cely priecinok;
- Nomohy tactepa [TYHE-7+] (8/9) odaebne JxbeHy paHIO CTaHNUy.
HanomeHa: Ycnyajy da Hema DAb cepB leda, npntuCHnte TaCtep [CLAH] (10) da 6ncte 3anoJein cKeHpaHe.
HanomeHa: 3a boBn npJem npeymepuTe aHTeHy (17).
PAI PAIAΦM-a
1.OdahepeTe"ΦM"MOOkpeTaHbEmrym6aMODE;
- YHAnpeI npITncHnTe Tacepe [TYHE - / +] (8/9) Ia 6bcte pyuHO n3abpaII IN ppeKBHeUNjy ININ pPITNCHTe IN dpKInTe (2_cekynde) 3a cKeHnpaIbe cneJehe / npETxOJHe paCNOJOXNBE CTAHUe.
Hanomeha: 3a boI npIe mpeycmepe nte aHTeHy (17). YBATN PAIO CTAHUIE AY TOMATCKO:
PnntncnTe TacTe [CLAH] (10) npaio he ayTomatckn ckeHnpaTn paiao. Y toky
TOKOM CKeHnpaHa, paIIO he CKeHnpaTN CKeHnpaHe cTaHnue y3actOnHO y MEMOpuja.
PPECET
IocTyHNo je 20 noeewabaHa 3a DAb n 20 noeewabaHa 3a M
1.ПодеспгЕ Кжьенифрковию радно станице како ќ пани ќ objaшьено;
2.ПиNTСНITEиДрЖNTeТУКИ [ПЕСЕТ] (13);
3. Tomohy tactepa [TYHE - / +] (8/9) odaebpe 6poj yhanpei noedeheor 6poja ;
4. IotBpDnte noTbpDy dymetom [EHTEP] (12).
YI03HAJTE NPECETCTAHNILY
1.ПиNTCHNteДугмe ПPECET;
2. OdahepiTe XeJIbeHIO NOIeUaBAHBe NMOhoy Tactepa TYHE-7+;
3. IotBpDnte TnKOM [EHTEP] (14).
VHΦO
Kaicpepanjckca tahnca pe npodykyje, npntncnTe [HFO] TnKy (8) da 6ncte kpoxnnnytem nHopmaunja koje emntyje paio.
LJ-MN3 ONEPATNOH
- OdahepeHte HauHn "L" okpeTaHbEm dYrMeTa [MODE] (4);
2.ПиNTCHNTE [ОЕн /LIOCE] (3) Да оТВОпгe [LДДΟОP] (2) И CTаВИTe LД са НаленицOM ПеMa rOpe y ПпeТиЧу 3a LД. - 3aTbOpnte [LII IOOP] (2). IpTePaxnBaHe φokyca je n3BpIeH o n peIpoDyKuJa he noeTn ayTomatckn n3 npBe Hymepe.
ПОТРAMИРАБE
99 TaR0Ba (Mn3, 20 y L- y) moKe ce nporpaHmupatu nppepoDykoBAtu 6nlo Kojem peoocJe.
1.3ayctabntpe npodkyunj npntnckom Ha [CTO] (12);
2.ПиТСИЧЕ [ПОГРAM]7)ндспьу (1) he ce npka3aTn 6poj Hmepe Ha JeboJ cTpaHn 6poj nporpama Ha DechoJ cTpaHn.
- OdahepeTe XeIbeHy Hymepy nomohy [CKN-/-] tactepa (8/9);
4.ПиТСНITE [ПОГРAM] (7)да 6исте NOTВрдИп Зжь�н 3аис у рограмбков мемори;
he 6bceKaTn KoDnpaHBe ce Bpwn caa;
7.Пи捜нichte тиNKу [CTO](12)Дабистдовшпсн CHIMaBaBe.
HanomeHa: HakoI IOBpuETKa KoInpaHa, jeiHnIca he ayToMaTcN 3ayCTaBHTn peNpOdyKunjy I KOInpaHe.
136pniuTe TpOBUce ca YCb-a
- N3BpUHTe HopmAnHOp pe npOdyKuJy Hymepe KoJy JeJIte Da n36pnUWeTe;
2.3a Bpjieme pe npodykunje 3anca kojin jxennte o6pcatn e, npntncnTe Tnky [DEJETE] (11).
3.ПиТСнITE HeKoIиko nyTa TAcTeP [CKIN - / + ] (8/9)Да bIcTe n3a6paJIn XeJIbEny onUmpjy KoInpaHbA:
IJI-OHE: I3aBepnTe da 6ncte CHIMNIIN cmo TpeHyTHy Hymepy;
ENI-FOJIEP: 13a6epnte da 6ncte cHMMNn ceNy Many;
EN-ANI: 3a6epnte da 6nCTe CHMUNCBe 3anCe ca LII-a.
4.ПиТСИЧЕТаСТЕР[ДENETE](11)3a notbpyd.
TexHnUcNIOpaCn:
YJIa3Hn HAnOH:220-240B50/60X3
U3na3Ha cHa: 2*15B
MaK OyToNyt cHaRa: 45B
BnyeTOoTx-CTaHdApDHaBep3nJa5.0
3a 3aHTy JxNBOThe CpeDInHe: MOJIMo BAC da ODBoJTe KAPTOHcKe KyTJe n PJIaCTUHc Kece n OndOxKte INx y OndroBapajyhe KaTe 3a CmeHe. KopuShehn ypehaj TpeBa Da bye Ncnpuyen Ha HameHcKe cakynbAhe Taue 36or oWtpnx KOMNoHEtN, UTo MoKe yTuCaAtn Ha JXNBOTHy CpeDInHy. HeMoJTe Ondaratn Obaj ypehaj y 3ajeHNuKy Kopny 3a OTNaTke.
(DK) DANSKI
SIKKERHEDSBETINGELSER VIGTIGE INSTRUKTIONER VEDRØRENDE SIKKERHEDET TIL BRUG VENLIGST LAES OPLYSNINGER OG OPBEVAR FOR FREMTIDIG REFERENCE
PpIMtKa: JaKIO dncnne He npaioe HaneXHM YHOM aOo HemaekHOI peakui Ha poboty
KoHTpoNb MoKe BiID6yBaTnC3 a paxyHok eIeKtpocTaTnUHOro po3pAу. BImKHITb Ta BiD'EnHaIte Ka6eJIb 3MiHHoro cTpMy NOTIM yBIMKHITb XINJIeHnH Yepe3 KJIbKa cekyHd.
BVKOPNCTOBATI PADIIO
- BctaHObitb Mepexy [POWER SWITCH] (0) Ha YBIMKHEHO;
- Hatncitb KhoNky [POwer] (4), 106 yBimKHyTn XnBJIeHHa;
- (Першни ра3, Коли Ви BMнкае падio, радio санус радiocанцi DAB aBTOMATИHQ
Bih 6yde bioobpaxatn Ta BiDtBopIOBatn nepuy cTanhio nicJcKaHyBaHHa); - Bubepitb notpi6he dxepejo 3Byky, nobephyBwn peryIop [MODE] (4);
- (Byd nacka, DnBtbcr deTanbHi HcTpykui Inn KoxHoro Jxepena y HaCtynHnx rnaBax);
- BiDpeyIIOte ryHicTB [VOLUME KNOB] (14) do noTpi6Horo pIBHra;
- Ⅲo6 BmKHyTn paio, HATNCHTb KhONky [POwER] (0).
IOBEPHYNTCBA MEHIO
- Hatnchitb KhoNky [MENu] (3) dny do onui;
- BnKOpncToBnyTe KhoNKn [SKIP - / +] (8/9)ДЯп epexodydo napametpiB;
- Hatnchitb khonky [ENTER] (12), 06 Bn6paTn npaMeTp;
- Hatncihb [MENU] (3) Дявхody 3 MeHIO.
3ABODcKI HAJIaHTyBAHHI
- Hatncitb [MENU] (3) Дяdoctуну Do MeHIO;
- BnKopncToByte KhoNky [SKIP -7 +] (8/9) nny nepexoody do npamaTepiB Ta Bn6opy "CnCTema",
- 3BephiTbca 3a donomoroo kHonkn [ENTER] (12);
4.3a donomoroio kHonoK SKIP-7+ BnBepiTB "CknDaHn 3aOdy";
5.3HOby nIiTbepaIb KhoNky [ENTER] (12) ;
6.3a donomoroio kHonoK [SKIP-/+] (8/9) BnBepiTb "TaK";
7.Пидтверд Te Khoну [ENTER] (12).
CJIIN TAIMEP
Taimep chy abTomatnuho BmMkae paio nicra BCTahOBneHoro qacy.
DAIBPADIOONEPALCIAI
1.Obepitb“DAB”,noBepHyBwnpeyIaTOp[MODE](4);
2.3a donomoroio Khoonok [TUNE- · +] 8/9') Bn6epiB noTpi6Hy paiaocTaHciio.
PpIMtKa: KaHemae cepbicy DAB, HATNCHTb KhoNky [SCAN] (10), 06 po3noaTn cKahyBaHH.
Плпмітka: Дя Крацого пшиому поpeopieHTynte aHTehy (17).
ONEPAUFA FM-paio
1.Obepitb“FM”,noBepHyBwnperyJrTopMODE]4);
- NonepeHbO HATNCHTb KHONKn [TUNE-7+] (8/9), ⅢoB BpyHy Bn6paTu aactOtu a6o HAtnCHyI yTPMMyTe (2 cekyn), ⅢoB cKaHyBaTu HactTyHv / NonepeHIO HAIBHy CTAHIO.
Ipimitka. IJRA KpaUoro npuHMy nepeopieHTyTe anTeHy (17).
ABTOMATN3AUINIHPADIOCTAHII:
HaTnCHiB kHONkY [SCAN] (10) i paio abTomatnuHO cKaHy e paio. Nid Yac
Y npocci cKahyBaHHraio 6yde 36epiratn BiDcKaHOaHi cTahui nocniIOBHO B
PAM'ATb.
PPECET
€ 20 pèçét iB d'πA DAB i 20 pèçét iB d'πA FM.
1. BctaHObitb baxaHy qactoty paoctaHui, kN oRcHeo paHiue;
2. HataNCHiB i yTpmyTe KhoNky [PRESET] (13) ;
3.Bu6epitb kInbKictb nonepedhbo BcTaHOBJIeHux KlaBiw 3a DonomoroK HONOK [TUNE - / +] (8/9);
4.Переконайтесь у концi [ENTER] (12).
3HAHTI INPECETCTAHLIIO
- HatnchItb KhoNky [PRESET] (13);
2.Bu6epiB noTpi6Hy 3aHaHy FyHKUIO 3a DOnOMoHO KHOIOK [TUNE-/+] (8/9);
3.ПИТВЕРДБТЕ KHOПКУ [ENTER] (14).
IHΦO
KoII paioctaIy BIDTBPOEbC, HATnCKaIe KhoNky [INFO] (8), 06 nepeTn B pexm cikna
Yepe3 iHopmaio, 10 TpaHcHoeTbcra pao.
ONEPALIY CD-MP3
1.Bu6epitbpexim «CD», noBepHyBm peryIaTOp [MODE] (4);
- Hatachihb [OPEN / CLOSE] (3), 06b BiKpnu [CD DOOR] (2) i nomictn KOMnakT-Dnck 3 MtKOIO BROPy y BiDineHHI nA KOMnakT
ДИСКIB
- 3akpnnte [CD DOOR] (2). 3diuHcTebCnOwYk fokycy, i pO3noHHeTbcB ViDtBOpeHHA
ABTOMaTHUHO 3 Nepuoro Tpeky.
PPOPTPAMMYBAHH
I9 9TtB (MP3, 20 Ha CD) MoXHa 3anporpaYbTu Ta BiDtbOpnTu B 6yDb-ryKOMy npRky.
-
3yunHITbBIDTBOpEHHaTnCKaHHM [STOP] (12)
-
Hatachitb [PPOPTAMA] (7), Ha dncnnei (1) BiO6pa3ntbcra Hmep oipixk 3 JIBORO 60ky Ta KINbkictpnporpamn 3 npaboro 60ky.
3.Bu6epitb noptip6hnnTreK 3a donomoroio KhoNOK [SKIP - / +] (8/9);
-
Hatncihb [PROGRAM] (7) nian niTBepeKHeHn NotpioHoi DopixKn B nam'rti nporpaMn;
-
Nobtopitb kpkn 3 Ta 4, 0o6 BBeCTn DoaTkoBi 3anncn B nam'Ytb nporpaMn.
-
Konin Bci 6axahi Tpekn 3anporpamobai, Hatachitb [PLAY] (10), uob biTbOpTu DNCK y npaKy, kN BN 3anporpamybaaH.
PpIMtKa: Dbihi HATnCHITb [STOP] (12), 0o6 npinnHnT nporpaMOBaHe BiTbOpEHn.
EKCNIHYATALIY BLUETOOTH
- Bn6epitb pexum "BT", nobepHyBwn peryJrTOp [MODE] (4) :
TOpT USB He npn3HaueHm Ipn 3aprKn CmaprfoHIB nIHwN pnpctpoB.
Iiprme USB KoDyBaHHa
3ayBaXeHHa
UwDkiCTb 3anncy-1:1.
Y peKIMI KoDyBaHnHa 3Bv nichi He 6yde 3auncaHo.
Ioo yHnKHyT nookxgeHH na'ATi USB, BuaJIb II IINue ToDi, KOJI paIO BmKHeHO.
KOHTPOJIbYBATN 3 JAB+, BJyETOTY I AYKCY:
1.ПiДКЛHOTb USB-нakОПИУВaу До [USB PORT] (5);
-
BvkoHaTe 3BnuaHHe BiTbOpeHHaXepeHnA,Ke NpTpi6Ho KoDyBaTu Ta 3aNcCyBaTu;
-
Hatncihb i ytpmnyte khoNky [RECORD] (11), 06 opo3noatn KoDybanna. Ha dinCnei 3'ABNTbcra "REC";
-
Picra 3aBepWeHHaNcHATNCHTb KhoNky [STOP] (12), 0o6 3ynHHTn 3aNc.
BNIKOHATN 3 CD:
1.ПдклочьUSB-hakончувачdo[USBPORT](5);
-
BnKoHaIte 3BnauHHe BiTbOpEHr KOMNaKT-DnCKa, kNm NotpiBHO KoDyBaTu Ta 3anCyBaTu;
-
Iicnla 3aBepweHHH noWky KocyBaHH HaTnCHItb i yTpmyTe KHONkY [3AINCUTN] (11);
-
Nobtopno haTncHt b Khonky [SKIP- / + ] (8/9), 06b B6paTb 6aXaHy onuio KoDyBaHH:
REC-ONE: BnBepitbIy 3aIncy IiIe noTochN TpeK;
REC-FOLDER:BubepiB dny 3anyc Bcie i nanK;
REC-ALL: Bn6epiB dIy 3aIncy Bcix 3aInciB KOMpaKT-dIscKa.
5.Дяптбердженин�HaTCHiTB KhoNky [RECORD] (11);
- BiDtBOpENH npINHHeTBcTa aBTOMaTHUHO BiHOBNIOeTBcA bTOMaTHUHO Ta Ha DnCnIe (1) "REC"
MIROTnB.KoDyBaHHB BIKOHyeTbC3apa3;
- Hatnchitb Khonky [STOP] (12), 063aikHHTn 3anc.
PpIMtKa: Picn 3aBepWeHHKoDyBaHHN pncTpi npnnHHTb BiIDTBOpEHNa Ta KoDyBaHHA BtOMaTHNO.
3HЯТи TpeKeB iD USB
- BukohaTe HopMaJIbHe BiITbOpEHnI DOpIXKn, Iky Bu XOyTe BUnaIITn;
2.Пд.YacВiDtBOpEHnIopIKKny,ЯуВxOyTe3aJINuTInE,HaTnCHTb KhONky [DELETE] (11).
- Hatncihb kHonky [SKIP - 7+] (8/9), 06 Bn6paTn notpi6Hy onuio KoDyBaHHa:
DEL-ONE: BubepiB dIy 3aIncy TiIbKn NToUHn TpeK;
DEL-FOLDER:BubepiB dIa 3annyc BcieI nank;
DEL-ALL: Bn6epitb dny 3ancy Bcix 3anicB KOMnakT-dncka.
MaKcImaJIbHa BnXiHa nOTyXHICTb: 45BT
Bluetooth - cTAnDapTha Bepci 5.0

Y iHTepecax HABKONHbOTo cepEOBua.
Bynb nacka, BiDnaiTe KapToHHy ynaKOBky B Micce 360py Mykynatypn. NOniTneHObi miu (PE) BKNHyTN B CMITN K DnI PnactKy. BiDnpaCbObaHn npncptpi NobnHeh Bytn BiDnpabNeHn y BiNobIDHy Tochky 36epirAHn, TOMy IIO B npncptoi e Hebe3neHi ihrpeicHTn, kki MoxytB
CTaHOBTn 3arpo3y HABKOINHbOmy cepeOBnUy. EneKtpuHn npucptpi noTpio HO nobepHytn Tak, o6 obmexHTn Ioro NOBTOpe BnKOpncTahnHa. Ka y npucTpo i batepeKn, To nOtpiHo ix BNTaHTn i BiDaTu Do BiIDNoBDHO nyHTKy.
KARTA GWARANCYJNA
KOD Z DAB +, BLUETOOTH I AUX:

Ash Vacuum 25L 1200W
CR 7030
Retro radio
CR 1109

Steam Iron
CR 5029

Pressure cooker
CR 6409

Slow Cooker
CR 6410

Super silent vacuum cleaner
CR 7037


- SAFETY CONDITIONS IMPORTANT INSTRUCTIONS ON SAFETY OF USE PLEASE READ CAREFULLY AND KEEP FOR FUTURE REFERENCE
- LOCATION OF CONTROLS
- POWER SOURCES
- TO USE THE RADIO
- NAVIGATE INTO THE MENU
- FACTORY RESET
- SLEEP TIMER
- DAB RADIO OPERATION
- FM RADIO OPERATION
- PRESET
- RECALL A PRESET STATION
- INFO
- CD-MP3 OPERATION
- PROGRAMMING
- BLUETOOTH OPERATION
- AUX-IN OPERATION
- USB OPERATION
- Notes:
- DIRECT USB ENCODING
- Remark:
- ENCODE FROM DAB+, BLUETOOTH AND AUX:
- ENCODE FROM CD:
- DELETE TRACKS FROM USB
- DEUTSCH
- FONCTIONNEMENT AUX-IN
- CD-MP3 VEIKIMAS
- IStrinti jraus is USB
- (MK) MaKeDoHcKn
- UCJIOBNI 3A BE3BEHOC BAHN INHCTPYKUNI 3A BE3EINHOCT HA YNOTPEBA 3A YNOTPEBA,Be monime IPOUHTAJTE BHIMAHNE I CYBAE 3A INHNHA PEΦEPEHLNJIA
- (CZ)ČESKY
- CD-MP3 PABOTA
- (NL) NEDERLANDS
- PRESSET
- PRIJAVITE PRESETNO POSTAVO
- KODZCD:
- VYMAZAJTE TRACKY Z USB
- ПОТРAMИРАБE
- 136pniuTe TpOBUce ca YCb-a
- (DK) DANSKI
- SIKKERHEDSBETINGELSER VIGTIGE INSTRUKTIONER VEDRØRENDE SIKKERHEDET TIL BRUG VENLIGST LAES OPLYSNINGER OG OPBEVAR FOR FREMTIDIG REFERENCE
- BVKOPNCTOBATI PADIIO
- IOBEPHYNTCBA MEHIO
- 3ABODcKI HAJIaHTyBAHHI
- CJIIN TAIMEP
- DAIBPADIOONEPALCIAI
- ONEPAUFA FM-paio
- PPECET
- 3HAHTI INPECETCTAHLIIO
- KARTA GWARANCYJNA
- KOD Z DAB +, BLUETOOTH I AUX:
Brand : CAMRY
Model : CR 1182
Category : Radio