
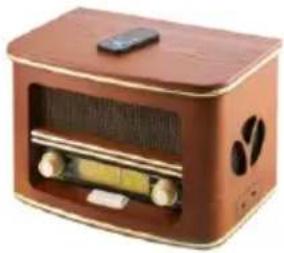
CR 1179 - Radio CAMRY - Free user manual and instructions
Find the device manual for free CR 1179 CAMRY in PDF.
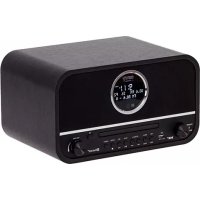
| Product type | DAB+/FM digital radio |
| Brand | Camry |
| Model | CR 1179 |
| Power supply | 5V 1A micro-USB mains adapter or 2000 mAh lithium-ion battery |
| DAB+ frequency range | Band III, 174-240 MHz |
| FM frequency range | 87.5-108 MHz |
| Number of presets | 20 DAB stations and 20 FM stations |
| Display | LCD with adjustable backlight |
| Main functions | Auto scan, manual tuning, dual alarm, sleep timer, alarm snooze |
| Inputs/Outputs | 3.5 mm headphone jack, micro-USB port (charging/power) |
| Menu languages | English (default), selectable |
| Time update | Automatic via DAB/FM or manual |
| Alarms | 2 independent alarms (buzzer, DAB or FM), with adjustable snooze |
| Sleep timer | Yes, adjustable |
| Factory reset | Yes, via the system menu |
| Maintenance and cleaning | Clean with a dry cloth only. Use a cleaning CD for the CD player (not built-in) |
| Safety | Do not expose to water or moisture. Disconnect after use. Use by children over 8 years old only under supervision. |
Frequently Asked Questions - CR 1179 CAMRY
User questions about CR 1179 CAMRY
0 question about this device. Answer the ones you know or ask your own.
Ask a new question about this device
Download the instructions for your Radio in PDF format for free! Find your manual CR 1179 - CAMRY and take your electronic device back in hand. On this page are published all the documents necessary for the use of your device. CR 1179 by CAMRY.
USER MANUAL CR 1179 CAMRY
SAFETY CONDITIONS IMPORTANT INSTRUCTIONS ON SAFETY OF USE PLEASE READ CAREFULLY AND KEEP FOR FUTURE REFERENCE
The warranty conditions are different, if the device is used for commercial purpose.
- Before using the product please read carefully and always comply with the following instructions. The manufacturer is not responsible for any damages due to any misuse.
- The product is only to be used indoors. Do not use the product for any purpose that is not compatible with its application.
- The applicable voltage is 230V , 50Hz . For safety reasons it is not appropriate to connect multiple devices to one power outlet.
- Please be cautious when using around children. Do not let the children to play with the product. Do not let children or people who do not know the device to use it without supervision.
- WARNING: This device may be used by children over 8 years of age and persons with reduced physical, sensory or mental capabilities, or persons without experience or knowledge of the device, only under the supervision of a person responsible for their safety, or if they were instructed on the safe use of the device and are aware of the dangers associated with its operation. Children should not play with the device. Cleaning and maintenance of the device should not be carried out by children, unless they are over 8 years of age and these activities are carried out under supervision.
- After you are finished using the product always remember to gently remove the plug from the power outlet holding the outlet with your hand. Never pull the power cable!!!
7.Never put the power cable, the plug or the whole device into the water. Never expose the product to the atmospheric conditions such as direct sun light or rain, etc.. Never use the product in humid conditions.
8.Periodically check the power cable condition. If the power cable is damaged the product should be turned to a professional service location to be replaced in order to avoid hazardous situations. - Never use the product with a damaged power cable or if it was dropped or damaged in any other way or if it does not work properly. Do not try to repair the defected product yourself because it can lead to electric shock. Always turn the damaged device to a professional service location in order to repair it. All the repairs can be done only by authorized service professionals. The repair that was done incorrectly can cause hazardous situations for the user.
10.Never put the product on or close to the hot or warm surfaces or the kitchen appliances like the electric oven or gas burner.
11.Never use the product close to combustibles. - Do not let cord hang over edge of counter or touch hot surfaces.
13.Never leave the product connected to the power source without supervision. Even when use is interrupted for a short time, turn it off from the network, unplug the power. - In order to provide additional protection, it is recommended to install residue current
device (RCD) in the power circuit, with residual current rating not more than 30mA .
Contact professional electrician in this matter.
- Avoid getting the radio wet.
- The radio may only be wiped with a dry cloth. Do not use water or cleaning fluids.
- Special discs for cleaning the CD player should be used regularly.
- The radio should be kept in a dry room.
Device Description (Dab Radio):
- LCD Display 2. Preset button 3. Previous / Scan 4. Next 5. Volume +/- Button 6. Sleep 7. Select / Snooze
- Menu/Info 9. DAB/FM 10. Power ON/OFF 11. Micro-USB 12. 3.5mm Headphone Jack.
First Setup:
- Make sure the device is fully charged. To do that connect the device by the Micro USB cable to a suitable power source.
- Press and hold the Power button (10) for 2 seconds.
- The first time the DAB Digital Radio
- When your DAB Digital Radio is using the power adapter, press the POWER (10) button to switch 'on' and 'standby'. Unplug the power adapter to turn off your Digital Radio completely.
- When your DAB Digital Radio is using batteries, Press and hold the POWER (10) Button for 2 seconds or switch 'off'.s switch, it will start up DAB mode. It will automatically scan for the available radio stations.
DAB/FM button
Switching to DAB/FM mode
- The first time the DAB Digital Radio is switched, it will start up DAB mode.
- If the device is in DAB mode, press the DAB/FM (9) button repeatedly until FM is shown on the display.
- Once in FM mode, your DAB Digital Radio will tune to the start of the available FM range (87.50MHz) or the last FM station listed.
- To manually change the FM frequency, make sure that you have not selected any other sub-menus. Turn the TU + / - (to change the frequency by 0.05MHz.
Changing the DAB display information
- If the DAB Digital Radio is in DAB mode, press MENU/INFO (8) button to select different info to show on the display, such as DLS (Dynamic Label Segment), signal strength, PTY (Program Type), ensemble, frequency, signal quality, bit rate codec, time, date.
- If the DAB Digital Radio is in FM mode, press the MENU/INFO (8) button to select different info to show on the display, such as radio text, PTY (Program Type), PS (Program Service), stereo/mono, time, date.
DAB mode - choosing menu options
- If the DAB Digital Radio is in DAB mode, press and hold MENU/INFO (8) button to enter the menu list to Press the Next/ Previous(3,4) button to select the option through the list of menu. Then, stop at your preferred option and Push the SELECT (7) button to confirm. The menu options are: full scan, manual tune, DRC, prune, system.
- Full scan - under menu list, press the Next/ Previous (3,4) button to select "Full scan" through the list of menu, Push SELECT (7) button to confirm and full scan starts automatically to Once a scan is completed, the radio returns to play the previously-selected station or first station on the station list.
Note: if no radio station found, it shows "No DAB Station". For better reception, extend the antenna or do the full scan again in another place. - Manual tune - as well as the normal method of scanning, you can also manually tune to a particular channel/frequency. This can be useful for adjusting your antenna to achieve the best possible reception and scanning a particular channel to update the station list. Under the menu list, press the Next/Previous (3,4) button to select "Manual tune" through the list of menu, Push Select (7) button to confirm. Then press the Next/ Previous (3,4) button to select a particular channel/frequency and then Push SELECT (7) button to confirm the setting to The display shows a live indication of the received signal strength on the selected frequency. Adjustments to your antenna will be manifested in the received signal strength displayed.
- Prune - this removes all invalid stations indicated in the station list with a '?' in front of the station name. Under menu list, press the Next/ Previous(3,4) button to select "Prune" through the list of menu, Push SELECT(7) button to confirm to Then press the Next/ Previous(3,4) button to select
, and Push SELECT(7) button to confirm
6.0. Time - if there are any DAB+ radio signal, the machine will automatically update the time, there is no signal, can also be set manually.
Set Time/Date: set hour / set minute / set month / set date>set year > saved
Auto-update options: update from Any / update from DAB/update from FM / no update
Set 12/24 hour: 12hour/24hour
Set date format: DD-MM-YYYY/MM-DD-YYYY Cycle through Time menu by Push the SELECT (7) button, select a particular option, and Push the SELECT (7) button changes.
6.1. Backlight - this radio display has a backlight which can be adjustable. You can select the time out of the display backlight of your radio. Under the system menu, press the Next/Previous (3,4) button to select "Backlight" through the list of menu, Push the SELECT
(7) button to confirm to 'High', 'Medium' or 'Low'.
6.2. Language - The language used for display messages can be selected from below options: English | Fricais Under the system menu, press the Next/ Previous(3,4) button to select "Language" through the list of menu, Push the SELECT(7) button to confirm. Cycle through the Language menu by press the Next/ Previous (3,4) button, select and stop at a particular language, Push the SELECT (7) button to confirm.
6.3. Factory Reset - This function clears all user-defined settings, replacing them with the original default values, so time/date, preferences/settings, DAB station list, and preset stations are all lost. Under the system menu, press the Next/ Previous(3,4) button to select "Factory Reset" through the list of menu, Push the SELECT(7) button to confirm to. Then, use the Next/ Previous(3,4) button to choose <Yes> and Push the SELECT(7) button to start the factory reset.
6.4. Software version - this is used to display the current software version.
Under the system menu, press the Next/ Previous button to select "Software version" through the list of menu, Push the SELECT button to confirm. Then, the existing SW version will be showed.
FM mode - choosing menu options
- If the DAB Digital Radio is in FM mode, press and holds the MENU/ INFO(8) button to enter the menu list too. Press the Next/ Previous(3,4) button to select the option through the list of menu. Then, stop at your preferred option and Push the SELECT(7) button to confirm. The menu options are scan setting, audio setting, system.
- Scan setting - by default, FM scans stop at any available station (All stations). This may result in poor quality audio from weak stations. Options: Strong stations only / All stations Under menu list, press the Next/ Previous(3,4) button to select a particular option in "Scan setting", then Push the SELECT(7) button to confirm the change to the new setting.
- Audio setting - by default, all stereo stations are reproduced in stereo. For weak stations, this may result in poor quality audio. The audio quality can be improved using mono. Options: Stereo allowed | Forced mono Under menu list, press the Next/ Previous(3,4) button to select a particular option in "Audio setting" then Push the SELECT(7) button to confirm the change to the new setting. It will automatically change to a new setting after 3 seconds.
PRESET button
Preset 20 DAB stations and 20 FM favorite stations
- Store a station to the preset list - to store a station, selected your desired radio station, then press and hold the PRESET(2) button for a second until the LCD display "Preset store #: (Empty)", or "#: saved radio station".
- Either press the Next/ Previous(3,4) button to select your desired station preset number, Push on the SELECT(7) button to confirm your selection, the display will show "Preset # Stored".
Recall a station from the Preset list
- To recall a preset station, press the "PRESET" button once, either rotate the Next/ Previous(3,4) button to select presets station that you have stored. When the display shows your desired preset number, Push SELECT (7) button to confirm.
Note: If you choose a preset that hasn't been allocated a station, then "Empty" will be displayed.
Next/ Previous button
Choosing radio stations or options
- If the DAB Digital Radio is in DAB mode, press the Next/ Previous(3,4) button to cycle through the radio station list when you are listening. Or press the Next/ Previous(3,4) button to cycle through the menu list for options.
- If the DAB Digital Radio is in FM mode, press the Next/ Previous(3,4) button to manually adjust the frequency by 0.05MHz. Or you can press and hold TU + / - (3,4) button to auto-scan station. Or press the Next/ Previous(3,4) button to cycle through the menu list for options.
VOLUME + / - button
adjusting volume
Turn the Volume dial to increase or decrease the volume.
SETTING ALARMS AND TIMERS
You can set two alarms, which can tune to a radio station or sound atone.
Note: Alarms only sound when is switched on or in standby mode, and connected to a power supply.
Alarms do not sound when is switched off.
Setting an alarm
- Press hold the Menu Button(8) for 2 seconds to view the main menu.
- Turn and press the Next/ Previous(3,4) button to select 'System' > 'alarm'.
- Press the Select(7) button to change the 'Alarm 1 wizard
- Pressing the Next/ Previous(3,4) Button to adjust the hours and minutes, press Select(7) to confirm each section.
- Press the Select button select 'Source'.
- Press the Next/ Previous(3,4) button to select Buzzer', 'FM' or 'DAB', then press the Select(7) Button to confirm.
- If you've chosen 'Digital Radio' or 'FM' radio, Press the Next/ Previous(3,4) button to select 'Preset'(2). To play the station you last listened to, turn and press the Select dial to select 'Last listened' or turn and press the Next/ Previous(3,4) button to choose a radio station from the preset list.
Note: Skip this step if you are setting a Tone alarm.
8. Press the Next/ Previous(3,4) button to select 'Daily'.'once'.'weekends'or 'weekdays'. then press the Select(7) Button to confirm.
9. Press the Next/ Previous(3,4) button select 'Volume'. Press the Select(7) Button to confirm.
10. Turn and press Select(7) to turn 'Alarm' to 'On'.
11. Turn and press Select(7) to turn 'Alarm saved'.
Setting the sleep timer
-
Press hold the Menu Button for 2 seconds to view the main menu.
-
Turn and press the Next/ Previous(3,4) button to select 'System' > 'Sleep'.
-
Turn and press the Next/ Previous(3,4) button to adjust the length of the sleep timer.
Canceling a sounding alarm
Press Standby(10) to cancel any sounding alarm or press Source to cancel and leave the radio on.
Snoozing a sounding alarm
To snooze a sounding alarm, press the Select/Snooze(7) Button. The display will show a countdown timer to show how long the alarm will snooze. To adjust the amount of time the alarm will be snoozed by, press the Continuous Select/Snooze(7) Button to change the snooze duration in 5-minute intervals up to 15 minutes, and then 30 minutes. To cancel a snoozing alarm press the Standby(10) button.
Frequencies Digital:
Band III 174-240 MHz, FM: 87.5-108 MHz
Receiving power supply
5V (1A) DC micro-USB (cable supplied)
Lithium-ion rechargeable battery
2000 mAh)
Inputs
5V DC (1A) Micro-USB power socket
Device is made in class II of insulation.
Device is compliant with EU directiv
Low voltage directive (LVD)
Electromagnetic compatibility (EMC)
Device marked CE mark on rating label

To protect your environment: please separate carton boxes and plastic bags and dispose them in corresponding waste bins. Used appliance should be delivered to the dedicated collecting points due to hazardous components, which may effect the environment. Electrical appliance must be returned in order to reduce its reuse and utilization. If the device contains batteries they should be delivered to dedicated points separately.
DEUTSCH
PexIM DAB -и36op Ha onuIN OJ MeHHTO
- Ako DAB Digital Radio e BO pexim DAB, npntchete ro n dpkete ro konyto MENU / INFO (8) 3a da Bne3eTO BO cnucokOT co MeHnja, 3a da PnTCHete ro konyeto CneDHO / PpeXoDHO (3,4) 3a da ja n36epete onujata npky cnucOKOT ha MeHnTO. IToOA, 3actaHete Ha cakaHaTa onuJa and PnTCHete ro konyeto SELECT (7) 3a da notBpDInTe. OnuHTe Ha MeHnTO ce ueIOcho CKeHnpaHe, paHNO MeCTeHe, DRC, uNCTeHe, cnCTeM.
- Lcnocho ckeHnpaBe - noi cncoKOT co MeHn, npTncHeTe ro konyeTo CneHNO / PpeTxOJHO (3,4) 3a da n36epete „Cenocho cKeHpaBe" npEky cncoKOT ha MeHnTO, PpTncHeTe ro konyeTo N35OP (7) 3a da n0Tbpnte n ceIOCHOTcKeHpaBe 3anOHyBa aBtOMaTcN iD o eHaaw cKeHnpaBeTo. 3aBpweHo, paNtOto ce Bpaka 3a da ja nyuHTnte npTeXoJHO n36paHaTa CTAHNu an npBaTa CTAHNu HA cncoKOT Ha CTaHnU.
3a6eneka: ako He e npohajdeHa paHIO cTahuca, ToJ ce npkKaxyBa,He DAB cTahuca". 3a noo6ap npnem, npoJnxTe ja anHeTaI INI NOBTOPO HAnpaBeTe ro CENoCHOTo cKehnpaHe Ha pyro MeTo. - PaHn MeoJna - KAKO HOpMaHnOT MeoHa CKeHnpaHe, NcTo Taka MoKeTe paHNO Da ce npNaRoDyBaTe Ha OndeH KaHAn / PpeKBeHnJa. Oba MoKe Da 6nDE KopNCHO 3a npNaRDoYBaHe Ha BaWata aHTeHa 3a Da ce NOCTnHE HajdoBpNt MOKeH pInem n CKeHnpaHe Ha OndeH KaHJI 3a Da ce axypnpa CnncOKOT Ha cTahnU. NOD CnncOKOT CO MeHn, npNTCHETe Ro KonHTe CNeHNO / PpeXoHNO (3,4) 3a da n3bepete ,PaHNO MeoJna" npEky CnncOKOT Ha MeHnTO, PpNTCHETe Ro KonHTe N3bepete (7) 3a da NOTBPnTe.
Itoa, npntncheTe ro konyeto CneHNO / IpetxOJHO (3,4) 3a da n36peTe oDpeHe KaHaI / pfpeKBeHUnja I noToa PnTncheTe ro CEIEKT (7) konyeto 3a da ja nOTBPdnte NOCTabkata Ha EkpaHOT NOKaKyBa KInBa INHdkauJa 3a npImeHaTa jaunHa Ha CnHAnot Ha n3bpaHATA pfpeKBeHUnja. IpnlaRdyBaHbata Ha BaWata aHTeHa Ke ce MaHnFecTnpaAT Bo npImeHaTa jaunHa Ha CnHAn npKKaXaHa. - Bynra - Oba rO tCPaHyBa CIne HeBaJIuDHH CTAHcN HaBeDeHN BO CnncOKOT HA cTAHcN CO ?' ppeI NMeTO Ha cTAHcN aTa. POnCnCOKOT CO MeH, nPnTnCHETe Ro KOnHTo CNeJHO / PpeTxOJHO (3,4) 3a da n36peTe "Prune" ppeky CnncOKOT Ha MeHtO, KOHcE PnTnCHETe SELECT (7) 3a da notBpndte Ha NoToa PnTnCHETe Ro KOnHTo CNeJHO / PpeTxOJHO (3,4) 3a da n36peTe < Da>, nPnTnCHETe Ro KonHTo N3BOP (7) 3a notBpda
6.0. Bpeme - ako nma paIIO cIHHaI DAB +, MaunHaT aBtOMaTcN Ke ITO axypnpa BpeMeTo, Hema cIHHaI, NCTO Taka MoKe da ce IOCTaBn paHIO.
* NocTabeBVPeme / DaTym: noCTabeTe yac / noCTaBeHa MNHyTa / noCTaBeH Meceu / DaTym Ha 3aDaHa> NoCTaBeHa RoDnHa> 3aUyBaHa
*OnuH3a ABToMaTcKO aKypnpaHe: aKypnpaHe oD CeKe /'aKypnpaHe oD DAB / aKypnpaHe oD FM / HeMa aKypnpaHe - Поставете 12/24 уac: 12 у. / 24у
* NocTabete foopmat Ha daTym: DD-MM-YYYY / MM-DD-YYYY LmKJlyc Hn3 MeHTo Time co npTuNcKaHe Ha KOHTeTO SELECT (7), n36epete OndpeHa OnuJa n npTuNchete ro KonTuTeO SELECT (7).
6.1. 3aHnHcO OCBeTnyBaBe - OBOJ paNIO dncInej IMa No3aHnHcKO OCBeTnyBaBe wTO MoKe Da CE npINarOdyBa.MoKeTe Da n36peTe Bpeme HADBOP OJ 3aHnHO TO OCBeTnyBaBe Ha ekpaHOT Ha BAweTo paNIO. NOD CnCTeMCKOTO MeH, PpITNCHe To KOJIeTO CJIeHNO / PpETxOJHO (3,4) 3a Da n36peTe "3aHnHcKO OCBeTnyBaBe" ppeKy cInCOKOT Ha MeHtO, PpITNCHe To KOJIeTO IV35OBP (7) 3a Da NOTBpDNTe Ha "BnCko", CpeHDo "nnn , Hncko".
6.2.Ja3IK-Ja3IKOTItoceKopnCTNaPnKaKByBaHeNopakMOKe Da ceH3BepeOcneHnBEonu:AHnncKn|FrancaisNoCnCTeMckToMeHn,PiNTnCHTe ro KOnHeTO CneHNO/ PpeTxoJHO(3,4) 3a da H3BepeTe "Ja3NK"Ppeky CnUCOKOTHa MeHnTO,PiPTnCHTe roKoHToSELECT (7) 3a da NotBpDnte.LnpKyInpajteHm3 MeHnTO Ja3NK co ppiTnCHyBaHe Ha KOnHeTO CneHNO/ PpeTxoJHO (3,4),H3BepeTe n3anpeTe Ha odpeDeH ja3IK,PiPTnCHTe ro KOnHeTO SELECT (7) 3a da NotBpDnte.
6.3. Factory Reset - Obaa Фуннкида Гп расчстува ситп постыдддддддддддддддддддддддддддддддддддддддддддддддддддддддддддддддддддддддддддддддддддддддддддддддддддд徳н
CTAHAPDNBVPEDHOCTN, TAKA WTO BPEMeTO /ДATYMOIT, NAPAMETPNTE / NOCTABKNTE, CINCOKOT HA CTAHN DAB IN PNETXODHO NOCTABEHNTCtAHNCEIg3r8beHN. ПОДССТEMCKOTO MeHN, PINTNCHETe FOKNHTO CNeDHO / PNETXODHO (3,4) 3a ДАИЗБЕРETe ,ФбPNUKpeceTIPaHBe"П配电у cINCOKOT Ha MeHnTO, PINTNCHETe FOKNHTO IV3BOP (7) 3a DA NOTBPNDTE. ПOTOA, KONCTeTe FO KNHTO CNeDHO /PNETXODHO (3,4) 3a DA IV3BepTe <Дa> IN PINTNCHETe FOKNHTO IV3BOP (7) 3a DA 3ANOHTe coФбPNUK peceTIPaHBe.
6.4. CofTBePcKa BeP3nJa - Oba ce KopnCTn 3a npKakyBaHe Ha TeKOBHata BeP3nJa Ha CoPfBePOT.
IOnCnCTeMckTo MeHn, PnITnCHete To KONHTo CJIeHNO / PpeTXOJHO 3a Da n36epTe ,CoPfBePcKa BeP3nJa" PpeKy CnICOKOT Ha MeHtO,
PpNTnCHete To KonHTo N35OP 3a da NotBpDnTE. NoToA, Ke 6nde npKakhaHa NoctojHata SW BeP3nJa.
FMpeXIM-1360pHaOnuHaMeHHTO
- Ako DAB Digital Radio e BO pexim FM, npntnche To ng npkxe To kOnye To MENU / INFO (8) 3a da Bne3e To BO cncokot co meHn. Pnntnche To KO nChTo CneIHO / PpeTXoJHO (3,4) 3a da ja H36epTe Ounjata npeky cncokot co meHn. Notoa, 3actaHete Ha cakaHaTa onuja n npntnche To kOnye To SELECT (7) 3a da NotBpNte. OnuNTe Ha MeHtO ce NoCTaByBaHe Ha CKeHnpaBe, NoCTaByBaHe Ha ayDIO, cnCTem.
- NocTaByBaHBe Ha cKeHnpaHe - no DnfoNT, FM cKeHnpa 3aHnpa Ha Koja 6NIO DoCTaHa CtaHnca (Cte CtaHnU). Oba MoKe da pe3yItnpa BO cna6 KBaJIInTe HA ayDnO oD cna6n CtaHnU.
Onu: Camo cnHn CtaHn / Cnte cTahnPi Ond Cnncokot Co MeH, npNTUCHE To KOnHeTo CneJHO / PpeXOJHO (3,4) 3a da n36epete oDpeHa onuja BO "noCTaByBaHe Ha CKeHnpaHe", noToa npNTUCHE To KOnHeTo SELECT (7) 3a da ja NotBpJte npomeHa TBO HObaT NOCTABKa .
- Aynio nocTabyBahe - no dinpoNT, cnte CTpeo CTaHnCi ce pe npOduuPaaT BO CTpeo. 3a Cna6n CTaHnCi, OBA MoKe da pe3yIITnpa BO ayuio cna6 KbaiiTeT. KbaInTeTOT ha ayuio MOKe da ce noDobpn co ynoTpe6a Ha MOHO. Onu: Do3BOJeHO CTpeo | PnucnJeH MOHO IOD CNICOKOT CO MeH, pntncheTe ro konHTo CneJHO / PpTeXoJHO (3,4) 3a da u36epete oDpeHa onuJa BO ,Aynio nocTabKa", notoa npitncheTe ro konHTo N35OP (7) 3a da ja notBpNte npomeHaT a BO HOBaTa NOCTABKa. ABToMaTcK Ke ce CmEH BO HOBA NOCTABKa No 3 CEkyHdN.
KoIue IIPUCET
OHaIpeD NoCTaBeHn 20 cTaHnDAB n 20 FM OMJIeHN cTaHn
- Cknaipajte ctaHnca BO npTeXoHNO nocTaBeHata JnCTa - 3a ChBaHe cTaHnca, n3bpaHa nocaKyBaHa paIIO cTaHnca, a noToa npInncheTe ro n dpKeTe ro konyeTo PREsE (2) 3a ceKynda,doKeKa IuD-ekpahOT ,Preset store # : ( Empty),nn,, #: 3auYBaHa paIIO cTaHnca".
2.Ии npntncheTo ro konyeTo CneHNO /IpeTxoHNO (3,4) 3a da ro n36epete NOcaKyBaHnOT 6poj 3a npTeXoHNO HameCTeHa CTAHUa, IpnTncHeTo ro konyeTo SELECT (7) 3a da ro notBpndte BaHnOT n36op, Ha ekpaHOT Ke ce nojabn "Odhanpe# # 3aCyBaHo".
Iontetete ce Ha ctaHuaTcO d CnncOKOT CO npeTXoDHO HamecteHa JInCTa
- 3a da ce notceTne Ha npetxoHNO noctabeHaTa ctaHua, npntncheTe ro konyeTo „PRESET" eHaaw, nIn 3aBpTeTe ro konyeTo CneHIO / IpnetxOJHO (3,4) 3a da n3bepete npetxOJHO noctabeHa ctaHua wTo cte ja 3auyBaJe. Kora dncnjeot Ke ro npinkaxe nocakybaHnot npetxOJHO noctabEn bpoj, npitncheTe ro konyeTo PnptncheTe ro SELECT (7) 3a da notbpnte. Beneuka: Ako od6epete npetxOJHO HameCTeHa ctaHua, toraaw ke ce npinkaxe „Ppa3eH".
CneIHO /npetXoHNO KOnue
OndoxyBaHe Ha 3ByK Ha 3ByK
3a da odnoxnte 3Bueh anapm, npTnchete ro konyeto Select / Snooze (7). EkpaHOT ke npKaxte Tajmep 3a o6pojBahe 3a da nokaxe KONky doJro Ke ce odnoxn aIapMOT. 3a da ja npnlarOOnTE BpeMeTpaehbeto Ha anapMOT, npTnchete ro konyeto Continuous Select /
Snooze (7) 3a da ro npomehnte BpeMeTpaeHbeto Ha oNIOKeHOCT BO INTEpBaJI N OI 5 MmHyTN Do 15 MmHyTN, a nOToa n 30 MmHyTN. 3a da otKaeTe anapMeH 3a npuDyUyBaHe, npNTncHe T RO konHTo Standby (10).
DinrtanHnΦpeKBeHcun: oncer III 174-240 MHz, FM: 87,5-108 MHz
Ппмане на habиюувае 5V (1A) DC МИКр-USB (obe36eДEN Ka6eJ)
BaTepeJaToMoKe Da ce noJIHc co JInTmJ-oh (2000 mAh)
Bneobv5V DC (1A) Mnkpo-USB npnkyoc 3a hanojybahe
UpeoTe Hapaben Bo II KnaHa Ha n3onaJia.
YpeI e BO cornaochCT co nipeKtNBte Ha EY: -nipeKtNaBa 3a Hn3OK HanOH (LVD)
EneKtpomarHeTha KOMnTaN6uHnOcT (EMC)
Ypeo 03haeHn CE O3naka Ha etnKeTaTa

3a da ce 3awntat BawaT aOKoHnBa MOINME OndeHN KyTN IN PAACTuH N Kecn n da paONarco HNB BO COOdBHTNte KaHTn 3a OTnadoU. KopnCTn anapatot Tpe6a da bnde npedaen Ha nocBeTeH coBpahe noEH npaH hazarous KOMNOHEHTN, KOJ MOKAT da BInjaat Ha JxIBOTHaTa cpeHnHa He fPajte oBOJ anapat Bo 3aedHnukata Kopna 3a OTnadoU.
EAAHNIKA
TENIKOI KANONEAΦAIA
NASTAVENI ALARMU A CASU
IpeekJIIOUeHnE BpeKIM DAB/FM
1.Пипьомпереклоченицфpoворо радно DAB on 3anycaet pekIM DAB.
2. Ecnn yctpOCTBO haxoNTcB pexkme DAB, haximaiTe KhoNky DAB / FM (9), noka ha dinclnee He oTo6pa3ntcF M.
3. B pexnme FM cnpoBoe paio DAB hactpontc H a hauano doctyHoro dnaana30Ha FM (87,50 Mf) nI HA nocneHIO FM-CTaHIO IIB CnUCKe.
4. 4TO6bI BpyHyIO n3MeHHTb YactOTy FM, y6eINTEcB, yTO BBi He BBi6paJIN HnKaKnx dpyrN X IOdMeHIO. NObepHNTe TU +/- (YTO6bI I3MeHHTb YactOTy Ha 0,05 MfU.
I3MeHHe HOpMaUm OTo6paKeHH DAB
- Ecni uHpOoe paIO DAB haoiTcB peKmE DAB, hXmIe KONky MENU / INFO (8), UTo6bI bIbpaTb dpyryu HnFopMaunIO nIOTobpaKeHHa Ha DCnPee, TaKyU Lkak DLS (cerMeHT dINHAMuecko MeTK), ypoBeHb CnHaJa, PTY (TN nporpaMMbI), aHcam6bl, Yactota, KaueCTBO CnHaHa, 6ntOBbIK OkeK, Bpem, Data.
- Ecnin uippoBoe paDIO DAB haoDITcB pexmme FM, haxMnte KhoNky MENU / INFO (8), yTO6bI bblpaTb dpTyU HnFopMaHIO dIaOTobpaKeHHa Hicnnee, taKyU kapanoteKT, PTY (tIN nporpammbi), PS (cnyk6ba nporpamM), cTepeo / MoHO, Bpem, data.
PekIM DAB - BbI6Op IyHKTOB MeHIO
- Ecπn ΚινφροBoe padno DAB haxoDntcB peKmme DAB, haxMnte n ydepkxBaIte KhONky MENU / INFO (8), yTo6bI BoiTn B cnncok MeHIO. HaxMnte KhoNky Next / Previous (3,4), yTo6bI BB6paTB onuHIO B cnNCke MeHIO. 3aTeM octahOBntecb Ha Bbl6paHHOM Bamn napameTpne n haxMnte KhoNky SELECT (7) dIra noDTBePckXdHn. OOnm MeHIO: noJIHoe cKaHnpobAHnne, pyHna HacTpoiKa, DRC, obpe3ka, cnCTema.
2.Понhoe cKaHIpOBaHnE -В снСКе MeHIO haxMITE KhoNkY «CneIyUOuI /пpebIdyuI» (3,4),чTOБы ВьбpaTb «Понhoe cKaHIpOBaHnE» B cnsKe MeHIO, haxMITE KhoNkY «SELECT» (7)Для поТВержденя,И NOJIHOe cKaHIpOBaHnE NaHETcR abTomatueckn. ПocJIte 3aBepseHnRA pAnIO BO3BpAuaeTcR K BOCnpOn3BeDeHIO paHee Bb6paHNo CTaHcUN NIN NEPBOI CTaHcUN B cNtscKe CTaHcUN. ПрIMeuaHnE:ecn pAnIOCTaHcUN He NaIdeHa, OTo6paXaTecR «He TcAunDAB」.Для lyuJero npIeMa BBITAHrTe aHTehHy IIN ChOBA BblONHIne PONHO cKaHIpOBaHnE B dpyrom MecTe. - Puchna Hactpoka - KAK IN pni OboHOM MeToe cKaHPOBAAHNA, Bbl TAKKc MEoTe BpyHyIO HAcPTbCnHaONpeJeHHN KaHAI / qactOTy. 3TO MOKeT 6bIb NOJIe3HO dIra HactpoKn BaWea ANTEHbI dIIN DOCTNKeHn HAnlyuWero BO3MOXHO rPiema n CKaHNPBOAHn ONpeJeHNHO KAHana dIra OboHOBHeHn CnCKA CTaHcNI. B CNICke MeHIO HaxMITE KHOKNY 江 aJee / Ha3aJ (3,4), YTO6b I b6paTB yHnA HACTPOKA》B cncske MeHIO, HaxMITE KHOKNY 江 b6paTB7) ⅡI NODTBeRkDHeH.N. 3aTe M HxMITE KHOKNY 江 Next/Previous 3,4), YTO6b I b6paTB KOHKPeTHbIKaHaN / qactOTy, a 3aTe M HxMITE KHOKNY 江 SELECT7), YTO6b I NODTBeRnTb HAcTPOKy. Ha DnCpIe e OT6pa3NTcN INDnKaUaHry UPOBn PrinHMAeMOrO CnHana Ha Bb6paHHoY qactOTE. HAcTPOKn BAWea ANTeHbI 6yDyT OTPaeHbIB NOKa3AHn yPOBn PInHMAeMOrO CnHana.
- ydaTb - ydaTReT BCE HeJeCTBnTeHbIe CTAHmU, yka3aHHbIe B CnncKe CTAHmC CO 3HaKOM «?». Npeep Ha3BaHmE mCTAHmN. B CnncKe MeHIO HaxMITE KONKY «Danee / Ha3aI» (3,4), YTO6bI Bb16paTb «CokpaueHme» B CnncKe MeHIO, HaxMITE KONKY «SELECT» (7), YTO6bI NOITBEpNDtB Bb16op. 3aTeM HaxMITE KONKY «Danee / Ha3aI» (3,4), YTO6bI Bb16paTb < Da> n HaxMITE KONKY SELECT (7) dIy IoNTBePxJDeHn
6.0.Bpem - ecn ecb kaok-16o padnochHan DAB +, annapat aBtOMaTHueckn 6HOBHT Bpem, CnHAn OTCyTCTByeT, eO TAKKe MOXHO yCTaHOBNT BpyHyIO.
*YcTaHOBnTb BpeM/ dAty: yCTaHOBnTb Yacbl / yCTaHOBnTb MmHytbl / yCTaHOBnTb MeCra / yCTaHOBnTb DaTy> yCTaHOBnTb RoD> COxpaHeHO
*IapametpbI abTOOBHbHeHn: oBHOJIeHne c IIO6oR / oBHOJIeHne c DAB / oBHOJIeHne c FM
6e3 06HOBHeHn - YctaHOBInTe 12/24 yaca: 12 yacob / 24 yaca
* YcTaHOBtE fOpMaT DaTbI: IIT-MM-ITM/ MM-ITL-ITR TLIKNIueckn NpeMeaacb NO MeHIO BpeMeHn, HaxMITE KhoNky SELECT (7), BBi6epuTE KOHKPeTHyO ONUIO HAXMITE KhoNky SELECT (7), UTO6bI IN3MeHHTb ee.
6.1. NocBtKa - y 3Toro paNo-dncnne er cTb noCBeTka, KOtopa MoKeT peYInpoBaTcB. Bbl moKeTe BbIpaTB Bpem BbIKHueHnnoCBETKn nCnpeR BaWero paNo. B CnteMHOM MeHO hAnMITE KhONky «CneNyUOaJ / PpeBlyUyaaJ (3,4), YTO6bl BblpaTB «PocBtKa» B cnscke MeHIO, HAnMITE KhONky «BbIbOP» (7), YTO6bl NoTBePdNtB «BbICOKN», «CpeHN» IIN «Hn3Kn’.
6.2. Raik - Raik, INONb3yEmbI dIy OTo6paXeHnco6uHnMoxHO bIbpaT u3 cNeUOxBapnaHTOB: aHJIckn | Francais B CnCTeMHOM MeHIO HaxMITE KNONKy «Next/Previous» (3,4), YTObI bIbpaTb «Language» B cnNcKe MeHIO, HaxMITE KNONKy «SELECT» (7) DnI NOITBepJKeHn. PpOKpyTIne MeHIO «RaIK, HaxAB KNONKy «Jaiee / Ha3aI» (3,4), BbIEpePte NocTaHOBITecb Ha onpeJeHHom RaBike, HaxMITE KNONKy «SELECT» (7) dIy NoITBepKdEHH.
6.3.C6poc K 3aBODCKM HAcTPOKAM -3a FyHKnO OCHMaET BCE NOb3OBaTeNbCKNe HAcTPOKNI, 3aMeHra NXCoHbIMN 3HaueHnA MNOYMOUHIO, POToMY BpeM / DaTa, PpeNoTeHnI / HAcTPOKNI, CnncOK CTaHcNI DAB N PpeDyCTaHOBNEHHbIe CTAHCNI TepaOTcR.B CnCTeMHOM MeHIO HAKMTe KONKY «DaJIee / Ha3aAD (3,4), YTO6bI BbIbpaTb «Factory Reset» B CnNCKe MeHIO, HAKMTe KONKy «SELECT» (7), YTO6bI NOITBePdNTb BbIbOp. 3aTeM C NOMOsbIO KONKN «DaJIee / Ha3aAD (3,4) BbIbepnte «Ja» N HAKMTe KONKy «SELECT» (7), YTO6bI NaHTb C6poc HAcTPOE K 3aBODCKM.
6.4.Bepn nporpamMHO oecneHn - nCnoB3yeTc dnn OTo6paKeHn TekyeBepn nporpamMHO oecneHn. B cncTeHMo MeHIO haxmTe KOnkY CNeDyUOa/ PpebIdyuaJ, YTObblbopaTb Bepcn IIO》B cnicke MeHIO, HaxmTe KhoNky BBIBOP》dIPOITBePckDeHn. 3aTeM 6ydt NokaHa cyueCTbyuOaBepcn IIO.
PexIM FM - Bb6op NYHKTOB MEHIO
-
Ecnnu npoe pao DAB haoiTcB peKme FM, haxmte u yepkBaute KhoNky MENU /INFO (8), TTO6bI BOITB Cnncok MeHIO. Haxmte kHONy «CneDyUOaA/ PpeBlyUOaA» (3,4), TTO6bI BbIbpaBt ONUIO B CnICKe MeHIO. 3aTeM OCTaHOBNTecb Ha BBipahHO Bamn onuH n Haxmte kHONky SELECT (7) dner noTBePckDeHHra. OnuH MeHIO: HAcTpOka cKaHIpOBaHHra, HAcTpOka 3Byka, cnCTema.
-
HactpoKa cKaHropOBaHn - no yMOJIuaHIO cKaHropOBaHne FM octaHaBnBaetc Ha JIO6oIooCTynHO CTAHu (Bce cTAHUN). 3TO MoKET npNBecT K HN3KOMy KaueCTBy 3BYka OT cNa6bIX cTAHUN. Oniun: ToJIbKO cINbHbIe cTAHUN / Bce cTAHUN B cINsKe MeHIO hAXMITE KHOJky «Jaanee» / «IpeDbluynn» (3,4), YTO6blBb6paTb onpeJeHHbI napamTp B «HactpoKax cKaHropOBaHnra, 3aTeM haxMITE KHOJky «BbIBOP» (7), YTO6bl NODTBepdntb N3MeHeHne HOBOHACtPOKn.
- HAcTpoKa 3Byka -No yMOnuHaHIO BCE CTpeoctaHcIMN BOCpON3BOJrTCB C TpeofoHueckOM pexKMe. JIra Cna6bIX cTaHcIM NTO MOKET PnIBeCTN K Hn3KOMy KaeeCTBY 3Byka. KaeeCTBO 3Byka MoXHO YJYuWHTC NOMOUsIO MOHO. OINUM: Ctepeo pa3peSeHo I PInHyDnteJIbHoe MHO B Cnncke MeHIO HaxMITE KHOKNY «Daane / Ha3aI» (3,4), UTO6bl BBi6paTB KOHKPeTHyIO ONUHO B «HaCTpoKn 3Byka», 3aTeM HaxMITE KHOKNY «SELECT» (7), UTO6bl NODTBePdNTB IN3MeHeHne HOBOH HAcTPOKn. OH ABtOMaTNUeCKN IN3MeHITcR Ha HOBbI napamTp ueep3 3cekyHdbI.
KHONKa PRESET
PpeynctahOBka 20 cTaNCHDAB u 20 IIO6bMbx paNocTaHm FM
- CoxpaHnTe cTAnu IIB cINsKe IpeDyCTaHOBOK - YTO6bI COxpaHnTB cTAnuIO, BbIePHTe HJXHyO paIIOCTaHUNo, 3aTeM HAXMnTE uJePknBaIte KhoNky PRESET (2) B TeueHne cekynbl, noka Ha JKK-dncnnee He oTo6pa3ntcA « Preset store #: (Empty)», nII# « #: coxpaHeHHa raIOocTaHUNA »
- JIb6o Haxmnte KhoNky «CneDyUOa/ IpeBlyUa/» (3,4), YTO6bI BbIbpaTb HxHbHn Homep IpeDyCTaHOBKn paAnocTaHcNn, HaxMnte KhoNky «SELECT» (7), YTO6bI NoTBePdntb CBoi BbIbOp, Ha DcNpIee OTo6pa3ntc «Preset # Stored».
Bb3OB cTahm n3 cnncka npedyctahOBok.
- TTo6bI Bb3BaTb PpeBapntBnHO HAcTpoEHHyO paAnocTaHcNIO, HaxMNTe KONKy «PRESET» OINH pa3, JIn6o NobepHnTe KONky CNeDyUoA / PpeBbDyuaa (3,4), TTo6bI Bb6paTb PpeBapntBnHO CoXpHaENHyO cTaNIO. Korda Ha DnCnnee OTo6pa3nTCa HyKbHm Homep PpeDyctAHOBKn, HaxMNTe KONky SELECT (7) dIra NoDTBePxDeHnR.
PnmeHne. Ecn Bb Bb6epe npeet, KOtOpBn He 6bl Ha3Naueh paNocTaHcun, NOBNTc coo6eHne «IycTo'. KOnka «CneDyUosa / PpeDbdyua
Bb6op padnoctanu nn onn
- Ecln cnpooe padno DAB haoiTcB peKmE DAB, hkmte KhoKy CJeHoua/ PpebIyua (3,4) nI npocmoTa cnckpaiaonctanu BO Bpem npocnyuBaHn. Nln HxMTe KhoKy CJeHoua/ PpebIyua (3,4), UTO6bl npocmotpeb CnncoknapameTPOB MeHO.
- Ecnnu npoe paio DAB haoiTcB pexnme FM, haxmte kHONky «CneDyUoia/ PpebIyuaa» (3,4), TTObblpyHyu Hactponb yactoty ha 0,05 M. IIN Bbl moKeTe haxatb u yepKnbTaB KHONky TU +/- (3,4) dIra ABtOMaTueCKoro cKaHnpOBaHn CTAHn. IIN HAXMTE KNONy «CneDyUOia/ PpebIyuaa» (3,4), TTObblpocMOTpeb cnICOK napaMeTPOB MeHO.
KhoNka VOLUME +/-peRyInpOBkA rPOMKOCTN
IobepHnTe peYyIaTOp rPOMKoCTn, UTO6bI yBEniunTh nIN yMeHbUnTb rPOMKOCTb.
YCTAHOBKA CINHAIIOB I TAMMEPOB
BbMOxETe yCTaHOBnTB Dba 6yDnIbHnKa, KOTOpbIE MOrY HAcTpOHTbcra Ha paAnocTaHcNIO IINI OTKJHOnuTb 3ByK.
PnmeHne. CnHaJIb 3ByaT TOIbKO TOrda, KOrDa OH N BkJIIOUeHb IIN HaXOJaTcB PexmE OxNJaHn I NOKJIIOUeHb K NCTOCHNY nITAHn.
AbapnHbIe.CnHaJIbI He 3ByuAT Pn BbIKJIOUeHN.
YcTaHOBKa 6yDnIbHnka
1. Haxmnte u ydepxmbaTe KONky MeHIO (8) B TeueHne 2 cekyHd, YTObbl OTKpbItb INaBHOe MeHIO.
2.ПовернITEинхмiteКногу«Cледуша/ПрдьИdya(3,4),YTO6bIВbIbpaTb«Cnctema>«БуДиNbHnK
3. Haxmte KhoNky Bb6opa (7), UTo6bI n3MeHnTb «MaTepe TpeBor1
4. Haxab KhoNy / CneDyUa/ PpeBdyuay (3,4), YTo6bI hAcTpoNTb Yacbl MNHyTb, HaxMITE Bb6paTb (7), YTO6bl NOdTBePdntb KaKdbI pa3deI.
5. HaxmTe KhoNky Bb6paTb, Bb6epnte «UcToHnK».
6. Haxmte KONky «Cleyuioa/ IpeBlyuiayra» (3,4), UTo6bI BbIbpaTb «3ymmep», «FM» nIn «DAB», 3aTeM Haxmte KONky «BbIbpaTb» (7) dnyoNTBepxdeHn.
7. Ecln Bbl BbIbpaHn paHIO «UncpoBoe paHIO» nH «FM», HaxMNTe KhoNky «CneDyUOaJ / PpeBdyUaJ» (3,4), UTO6bl BblbpaTb «PpeBapnteJIbHaj yCTaHOBA» (2). IINB OBCPON3BeDEHn CTAHcHn, KOtOpYb Bbl B NOCEHn pa3 CNYaHn, NOBepHNTe N HAXMNTe DnCK Bbl6opa, UTO6bl Bbl6paTb «IocneHn npocnyuHaHHbI», nH IOBepHNTe N HaxMNTe KhoNky «Daane / PpeBdyUaH» (3,4), UTO6bl Bbl6paTb paNoCTAHUIO LIns cNcKa ppeDyTaHOBok.
PpmeaHHe: nponyCTnte 3OT WAr, ecn Bby yCTaHaBnBaTe ToHaJIbHbI CNrHaI.
8.HaKMTe KHOKy CJIeDyUOaJ /IpeBdyUaJr (3,4),TO6bI BbIbpaTb EKeDHeBHO.《OnH pa3》.《BbIXoDhBiE》NIN 《ByHne dHn》. 3aTeM HaKMTE KHOKY BbIbopa (7)ДЯ NOITBePxJDeHnJ.
9. Haxmnte KhoNk Ky CneIyUoA/ PpeBbIyUaA (3,4) n BbIbepnte POMKocTb). Haxmnte KhoNk Ky BbIbopa (7) nIpaNTBepKdEHNr.
10. Nobepnite n Haxmnte Select (7), TTObbl BkJIOHHTb «Alarm» Ha «On»
11. NobeHNTE HaxMNTE «BbI6paTb» (7), YTO6bI BKNIOHTb «CoXpaHHeHne TpeBOrN».
YctaHObKa TaHMepa Cha
- Haxmnte n yedePknBaTe KhoNky MeHIO B TeueHne 2 cekyH, YTObI OTKpbITb rnaBHOe MeHIO.
2.ПовернITEинхмпTe KнОКу «Следуюа/Прдыduяa»(3,4),чToбblBb6paTb«CnTeMa»>«CπaŋpexmM»
- NOBEPHNTe HnaxMNTe KHOKy «CneDyUOaJ / PpeBldUaJ» (3,4), YTObI HaCTpOnTb JINITeNbHocTb TaIMepa OTKnIOueHn. OTMHe 3ByaSeI TpeBOrn
HaxMnte Standby (10), TTo6bI OTMeHnTb JIO6oB 3ByKOoB CNrHaN, INI HaxMnte Source, TTo6bI OTMeHnTb N OCTaBnTb paAnO BKJIOUeHHbIM.
DpeMJIET 3Byaun CnHajTpeBorN
OTo6bI OTIOKHTB 3ByKOBoCnHaJ, HaxMITE KONKY «Bb6paTb / OTIOXNTb» (7). Ha nCnJIeE OTO6pa3NtC TaIMep o6paTHOrO OTCHeTa, TTo6bI NOKa3aTb, KaK DOnIro 6yDet 3ByuAtb 6yDnIBHnK. YTo6bI OTpeRyINpOBaTb Bpem, B TeueHne KOTOPo 6yDnIBHnK 6yDet OKnAdbBaTcR, HaxMITE KONKY HePpePBIBHO Bb6opa / IOBTOpeHnR (7), YTo6bI N3MeHnTb IPOdoJXnTeNBHOCTb IOBTopa C 5-MNHyTHbIMN INTEpBaIamn Do 15 MInHyT, a 3aTeM Do 30 MInHyT. YTo6bI OTMeHnTb dpEmIoUmN 6yDnIBHnK, HaxMITE KONKY peKIma OxNiDaHnra (10).
Lundpoboe yactotbI: noJocai 174-240 Mf, FM: 87,5-108 M
Блok птуни 5B (1A) noctoarHoro ToKa micro-USB (kaebb B KOMnIeKTe)
Lithium-ioni-akku (2000 mAh)
Tulot 5V DC (1A) Micro-USB-pistorasiaan

Tlacidlo Next / Previous
BcTaHOBJIeHH6yDnIbHnIKBa Ta TaMepiB
Bn moxete BCTaHOBNTn DBA CnHaJIu TPNBOH, kI MOxyTb HaNauSToBYBaTNCr Ha paIOCTaHIO a60 3ByKOBNI CnHaJI.
PpIMITka.CnrHaii3aui3 3ByuHTb Nlwe ToDi, KOIN BOHa yBIMKHeHa a60 B pexmIo OCHyBaHH Ta NiKIOueHa Do IKepeJa XMBNeHHra.
CnHaJIu TPNBOH He CNpaCbOByOTb, KOJI BUMKHeHO.
BctaHOBJIeHHcHnHaIizaii
- HatnchItb ytpmmyouy KhoNky MeHIO (8) Ha 2 cekyn, uO6 nepeernyTu roIOBHe MeHIO.
- Nobephitb Ta Hatncitb Khoiky Dani / NopepeHn (3,4), 06 Bn6paTIN "CnCTema" > "CunHaniaiiaj."
- Hatncihb kHONky Select (7), 0o6 3MHHTn "MaNCTpa TpNBOrn 1"
- Hatnckaou KhoNky Next / Previous (3,4) dIy peYIOBaHn rOHN i XBNiH, HATNCiTb Select (7) nIaTBePdXeHn KoKHOrpo3Diny.
- Hatnchitb Khonky Select, BnbepiB "Jxpejo".
- HATNCHTB KONKy DaJI / PonepeHn (3,4), 106 Bn6paTn 3ymep , FM 'a6o' DAB , a notim HATNCITb KONKy Select (7) nIiTBePdxKeHH.
- RaBn Bn BnBpaHn pao "Digital Radio" abo FM", HATNCHTb KONky Next / Previous (3,4), 06 BnBpatn Preset"(2). 06 BiTbOpNTn paiaocTahuio, kY Bn CnyxanOCTaHHi Yac, NOBepHITcra T a HATNCHTb NCK BnBopy, 06 BnBpatn OCTaHHi npocTyxAHN", a6o NobepHITb I HATNCHTb KONky Dani / PonepeDna(3,4), 06 BnBpatn paiaocTahuio 3I cTnCKy nonepeDHX HanaWtBaHb. PpIMitka. IponyctItb uek POK, RaIO Bu BCTaHOBJIIOe CmHAnl PTOH.
- Hatncitb knonky Next / Previous (3,4), 06 Bn6patn "OoHra". "OuH pa3". "BuxiHi dHI" a6o "5yHdiH". NOTIM HATNCITb Knonky Select (7) nTBeKHeHH.
- Hatnchitb Khonky Dani / Nonepedna (3,4), BnepiB "TyuHicb". NpniTbpexHHahtncihb Khonky Select (7).
-
NobeprhTa haHtncHiB Select (7), 06 nepetbopntn "Alarm" Ha "On".
-
NObepHiTb Ta HATNCiHb Bn6paTu (7), 06 yBIMKHyTu "PonepeJxehn36epeXeHo"
BctaHOBneHH TaIMepa CHy
-
Hatncitb ytpmyou KhoNky MeH npTgrom 2 ckyH, uOb nepeJIryHyrToIIOBHe MeHIO.
-
NobeprhItb 1 HataHcHtB KHonky Dani / PonepeHry (3,4), 06b BbpaTn "CucTeMa"> "CoH"
-
NobephiB Ta haTnCHiB KhoNky Next / Previous (3,4), 06 BiDpeRyIbOBAtn DoBXnHy TaMepa Chy.
CkacyBaHH3ByKOBOrO CnHaJy
HaTnCHiB Pexm OiyBaHHa (10), 06 cKacyBaTH 6yDb-4Km 3ByKOBn CnHaj, a6o HaTnCHiB JKepeNo, 06 cKacyBaTH Ta 3aHnHTn paio yBIMKHeHM.
a a a a a a a a a a a a a a a a a a a a a a a a a a a a a a a a a a a
7- pia 2. jall . jball jall aal lal gai jali jali jali jali jali jali jali jali jali jali jali jali jali jali jali jali jali jali jali jali jali jali jali jali jali jali jali jali jali jali jali jali jali jali jali jali jali jali jali jali jali jali jali jali jali jali jali jali jali jali jalli
a 111
8 8
9- ylll jil 1j 1y j 1y j 1y j 1y j 1y j 1y j 1y j 1y j 1y j 1y j 1y j 1y j 1y j 1y j 1y j 1y j 1y j 1y j 1y j 1y j 1y j 1y j 1y j 1y j 1y j 1y
a 1
10- y jall aagall glll jll lglal 1j glal 1j glal 1j j j j j j j j j j j j j
-
3i jxu a yuall gao jy jyj yaiiy
-
aiiil 1
-
1abll Jai, auii jia duiu iay uaiy jai yaiui yaiui yaiui yaiui yaiui yaiui
-
Jlll jy jy y (RCD) 30
- DAB, jzjDAB, jzjDAB, jzjDAB, jzjDAB, jzjDAB, jzjDAB, jzjDLS
(gjzjyjg (sclalll jpy TY(jgl,cgl,cgl Joo joo joo joo joo joo joo
- DAB FM. JELI MENU / INFO (8)
PTY(gPS/(y
gDAB-aailll jll
- 1.1.1.1 DAB g DAB, jzjzjzjzjzjzjzjzjzjzjzjzjzjzj
/3.4) 2j 1 1 1 1 1 1 1 1 1 1 1 1 1 1 1 1 1 1 1 1 1 SELECT (7)
- yll / 1111 jz jz bizai, aaiilai jia - Jols (3:4) rj z dz biizai, aaiilai jia - Jols "Jols" dyil SELECT (7)
abaaal aai yjyabaaal ayaaal abaaal jayaaal ayaaal yjyaaal ayaaal ayaaal ayaaal ayaaal ayaaal ayaaal ayaaal ayaaal ayaaal ayaaal ayaaal ayaaal ayaaal ayaaal ayaaal ayaaal ayaaal ayaaal ayaaal ayaaal ayaaal ayaaal ayaaal ayaaal ayaaal ayaaal ayaaal ayaaal ayaaal ayaaal ayaaal ayaaal ayaaal ayaaa
3. yj jy jy jy jy jy jy jy jy jy jy jy jy jy jy jy jy jy jy jy jy jy jy jy jy jy jy jy jy jy jy jy jy jy jy jy jy jy jy jy jy jy jy jy jy jy jy jy jy jy jy j y j y j y j y j y j y j y j y j y j y j y j y j y j y j y j y j y j y j y j y j y j y j y j y j y j y j y j y j y j y j y j y j y j y j y j y j y j y j y j y j y j y
5. 1e bai, aiaiell aila jao. abaaal pala "aiaei ciaaiall ailie g iiaai laiai all aai ai iiaai - piia / (3.4) jj (3.4) jj (3.4) jj (3.4) jj (3.4) jj (3.4) jj (3.4)
6.0 15- DAB + . yjy jy jy jy jy jy jy jy jy jy jy jy jy jy jy jy jy jy jy jy jy jy jy jy jy jy jy jy jy jy jy jy jy jy jy jy jy jy jy jy jy jy jy jy jy jy jy jy jy jy jy
6.2 yj jyj jy j j j j j j j j j j j j j j j j j j j j j j j j j j j j j j j j j j j j j j j j j j j j j j j j j j j j j j j j j j j j j j j j j j j j j j j j j j j j j j j j j j j j j j j j j j j j j j j j j j j jjjjjjjjjjjjjjjjjjjjjjjjjjjjjjjjjjjjjjjjjjjjjjjjjj
6.3 1234567890123456789012345678901234567890123456789012345678901234567890123456789012345678901234567890123456789
6.4 jllgoljlll jld! jy 100 - joljlll jld!. jle bial, aillll lla Jn "jolilll jld! / jlll gie bial , pllll aillll jss SELECT pss . ddd. y. selll
1 jaiy jia" yj (V) 2
-
jlll / jlll rj xle biaial (3.4) 1211 1211, gilaal, cieellbina (7) aas u
-
juaal" jyaui jy xie biai".
-
12 1/(3.4)JJJI"FM"J"DAB"·jJ
-
1"FM" (3.4)
y / y 1 j 2 j 3 j 4 j 5 j 6 j 7 j 8 j 9 j 10 j 11 j 12 j 13 j 14 j 15 j 16 j 17 j 18 j 19 j 20 j 21 j 22 j 23 j 24 j 25
iia
aill aai baa jsi ci ul 12 oal all ola jolz: abdo.
- jll / jll j jle bai (3.4) 1200000000000000000000000000000000000000000000000000000000000000
S OBC = S COD + S_ BOC
-
/jlll jzle bai (3.4) 123 7
-
1234567890123456789012345678901234567890123456789012345678901234567890123456789012345678901234567890123456789
-
yie 5e bai j (7) qiai li " Jai
a 150
-
1
-
jll / jllj 3.4)
-
jlll / jlll jj k baiol w 1 (3.4) qill baiu jg - - pill Jbaiol
1
J 1
aaiiali gao
gac aill g y a glg s jgl gll g jgl lgl aal . (V) gac / 1234567890
a 10 g 0 s 0g 0g 0g 0g 0g 0g 0g 0g 0g 0g 0g 0g 0g 0g 0g 0g 0g 0g 0g 0g 0g
Anapmnte He 3ByaT Kora e n3KIOUoyeH
Hactpoika aIapMa
- HatncheTe n 3aPbXkTe 6yToHa 3a MeHIO (8) 3a 2 cekyHn , 3a da Bnnte rnaBHOTo MeHIO .
- 3aBbptete n HataChHe6byToHa Next / Previous ( 3,4), 3a da n36epete 'System' > 'alarm'.
- Hatnche 6yToHa Select(7), 3a da npomeHnte 'Alarm 1 wizard
- Hatachete 6ytoHa Next / Previous (3,4), 3a da perynapate yacobete n MInHyTne , Hatachete Select (7) 3a notbpxdene BCEK pa3den .
-
HatncheTe 6yToHa U36Op u36epeTe „U3TOuHnK".
-
Hatachete 6yToHa Next / Previous ( 3,4), 3a da n36epeTe Toraba 3ymep „FM" uIn „ DAB". Hatachete 6yToHa Select(7), 3a da notBbprnte .
- Ако умашибрано 'Digital Radio' улл FM' paДио, HaTиСHTe 6byToHa Next / Previous ( 3,4), 3a Да узБерete Preset '(2). 3a Да пс希erte станцята Ве постдно сушate, 3abbptete и habисHTe ДИSCka 3a u360p, 3a Да u36berete Last clywax улл_ 3abbptete и habисHTe 6byToHa Next / Previous ( 3,4), 3a Да узБерete paДиоctанцяот ot списька спpeДварNTeHNO 3адаDEнн HAcTpoIKN .
3a6eIexka : PpOyncHte Ta3n CtbnKa , aKO Bne ca 3aDaBaHe Ha ToHaIIHa aJapMa. - Hatnche 6ytoHa CneDbau / PpeiueH (3,4), 3a da n36epeTe , ExeDHeBHO . BeHNbX .' NOuHBn dHn nn " DeHNuHn dHn". TOraba HATnche 6ytoHa Select(7), 3a da NOTBbpDnte .
- HATNCHeTe 6yToHa CneiBaU / IpeDnIeH (3,4). n36epeTe ,O6em Ha 3Byka". HATNCHeTe 6yToHa Select(7), 3a Da NOTBbPdnte .
- 3aBbptete n haTncheTe Select(7), 3a da BkIIOUHTe „AInapMa" Ha „BkIIOUeHo".
- 3aBbptete HaTnchete Select(7), 3a Da BkIIOHTe ,AJaMaTa e 3ana3eHa "
HactpoKaHa CbHr TaMep
- Hatnchete n 3aDpbkTe 6yToHa 3a MeHIO 3a 2 cekyHdn, 3a da BnDnte rnaBHOTo MeHIO .
- 3aBbPteTe n HauTncHeTe 6yToHa Next / Previous ( 3,4), 3a da u36peTe 'System' > ' Sleep'.
- 3aBbptTe n HaTnchete 6yToHa Next / Previous ( 3,4), 3a da perynpaTe npOdbjKntJHocCTTa Ha 3acnBaHeTo TaImeP .
AnynipaneHa3ByuzaanapMa
HaTnchHe Te Standby (10), 3a Da OTMeHInTe BcKaKbN 3BbHeHe Ha aIapMa IIN HaTnCHeTe N3ToUHk, 3a Da OTMeHInTe N OCTaBnTe paAnOTo BKJIIOUeHo.
Otnarane Ha 3BbHraa anapMa
3a da otIooKHe 3ByuAa aIapMa , HaTnCHTe 6yToHa Select/ Snooze (7). DucnpeT ue nokaxe taHmep 3a o6paTHO OTbpoRABaHe, 3a da nokaxe KaK Dblro aIapMaTa ige dprMka . 3a da perylnpate BpeMeTO , ppe3 KoETo aIapMaTa ige 6bde OTIOKeHa , HaTnCHTe 6yToHa 3a HenpeKbcHAT n36op/ OTlaRaHe (7), 3a da npomeHnte OTlaraHTo IpoDbIxxITeNHOCT Ha INHTepBaJIn OT 5 MInHyTN Do 15 MInHyTN i CneD TOBa 30 MInHyTN . 3a da OTMeHnte OTIOKeHa aIapMa , HaTnCHTe 6yToHa Standby (10) .
YecToTn LcΦpOvBn: Band III 174-240 MHz, FM: 87,5-108 MHz
Пolyчаване мошноct зхранвае 5V (1A) DC micro-USB (ka6eJdoCTaBeHo)
Литугов-ионна перазекдаш ceбаеря (2000 mAh)
BxoIOBe 5V DC (1A) Micro-USB 3axpaHbau KOHTaKT

3a da 3aunnte OKoHnata cn cpea: MOJ, OTJeTe KAPTOHeHnTE KyTIN HaIIOHOBnTe TOp6uKIn I nI3XBpIeTe B CbOTBeTHnTe KOUHTe 3a OtnaDbu. N3no3BaHnT ypeD Tp6Ba Da 6bDe DoCTaBE Do CneuaHnTe NyKTOBe 3a CbnpaHe, KOINTOMarDa IOBnraT Ha OKoHnata cpea. He I3XbPnIeTe To3n ypeD B O6NKOBEN KoW 3a OTnaDbu.
KARTA GWARANCYJNA

Ash Vacuum 25L 1200W
CR 7030
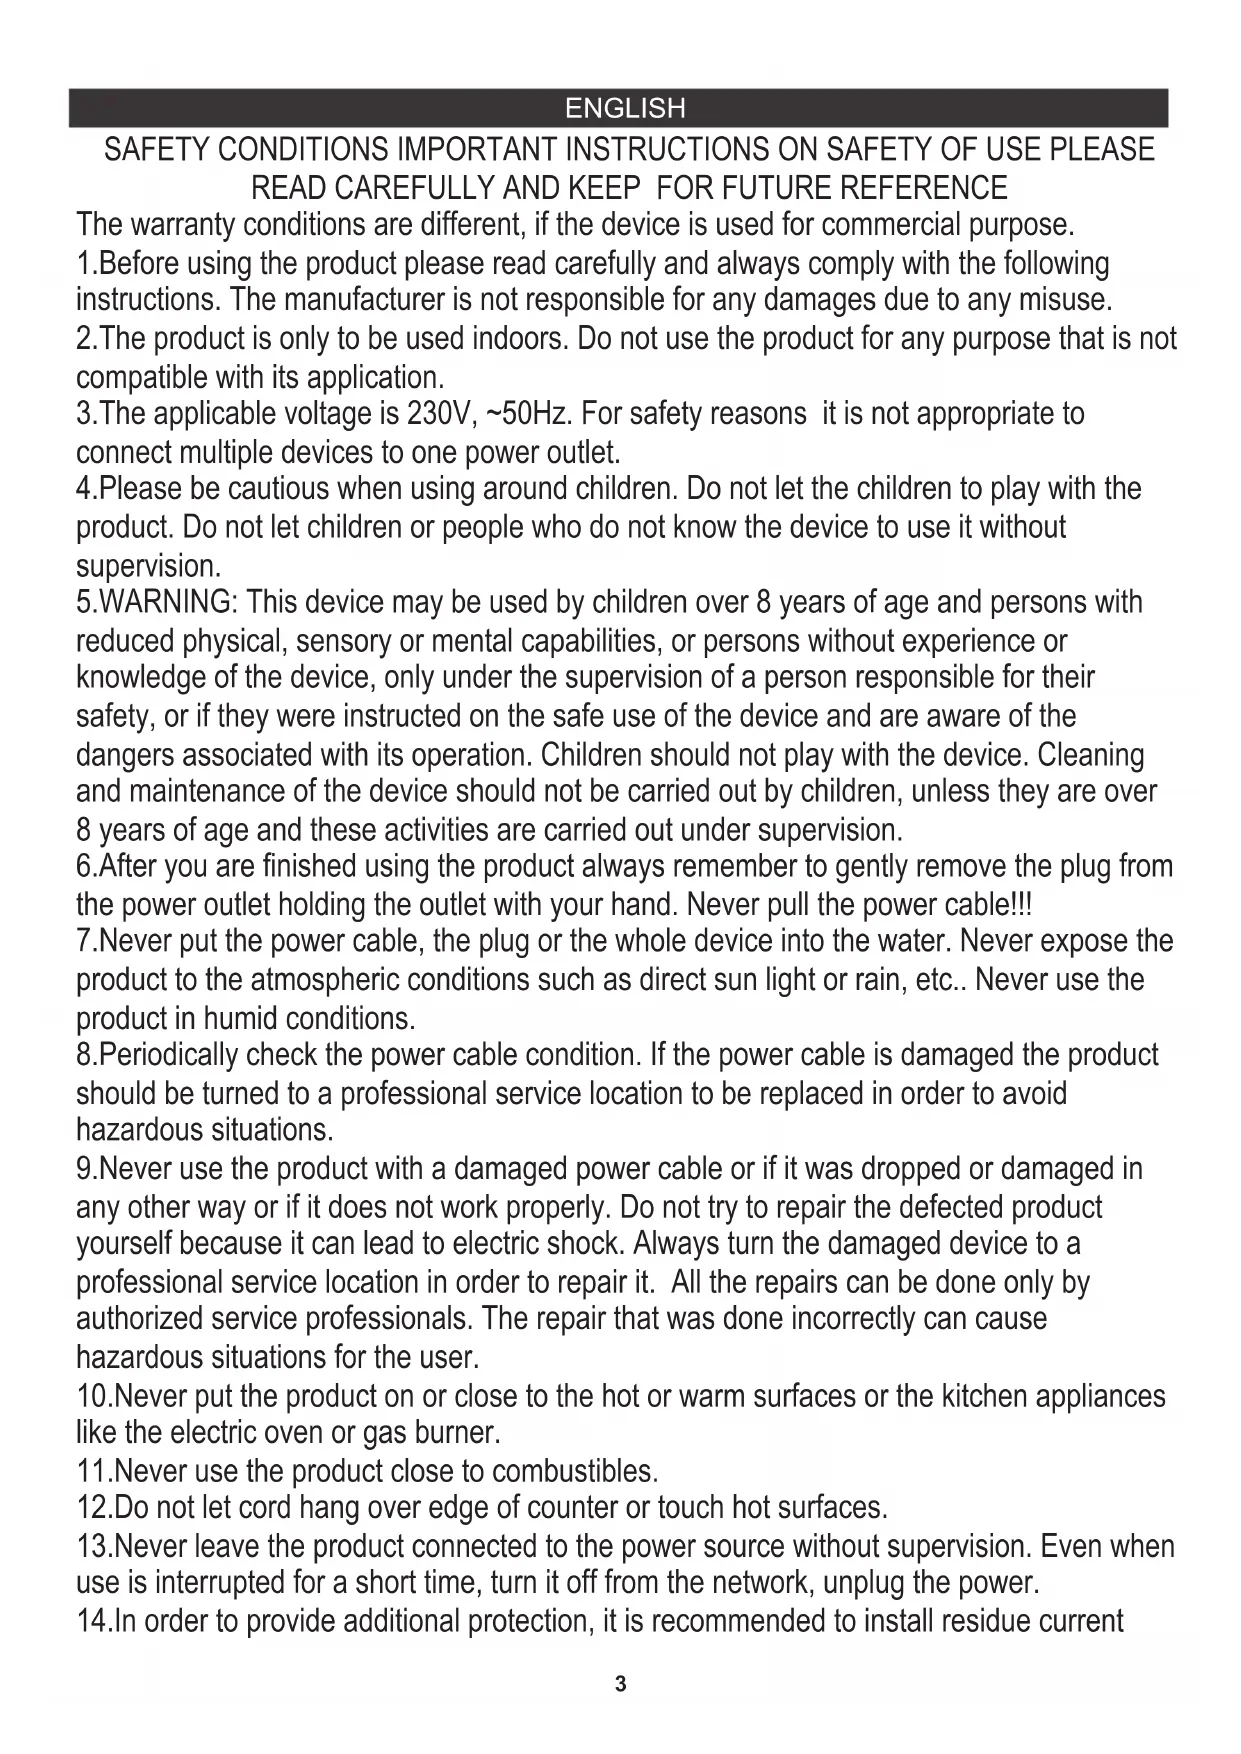
Retro radio
CR 1109

Steam Iron
CR 5029

Pressure cooker
CR 6406

Slow Cooker
CR 6410

Super silent vacuum cleaner
CR 7037
| AFTER SALE SERVICE NOTICE | |
| GB | If you want to buy spare parts or make any complaints, please contact the seller who issued the receipt directly. |
| DE | Wenn Sie Ersatzteile kaufen oder reklamieren möchen, wenden Sie sichitte direkt an den Verkauf, der die Quittung ausgestellt hat. |
| FR | Si vous souhaitez acheter des pièces de rechange ou faire des réclamations, veuillez contacter directement le vendeur qui a émis le reçu. |
| ES | Si desea comprar repuestos o presentation alguna queja, comuniquesse directamente con el vendedor que emitié el recibo. |
| PT | Se você quiser comprar peças de reposicao ou fazer alguma reclamação, entre em conta diretamente com o vendedor que emitiu o recibo. |
| LT | Jei norite sigtty atsarginiu daliu ar pateikti nusiskundimü, susisiekite tiesiogiai su kvitá išdavusiu pardaveju. |
| LV | Ja vêlaities iegādãties rezerves dalas vai izteikt pretenzijas, ludzu, szainieties tieši ar pärdevēju, kurz izsniédza Čeku. |
| EST | Kui soovite osta varuosi vii esitada pretensioone, vötle otse uhendust kvitungi valjastanud muñjaga. |
| HU | Ha potalkatrészeket szeretne vásárolni, vagy panaszt szeretne tenni, forduljon kozvetlenul a bizonylatot kiàllitó eladóhoz |
| BS | Ako Želite kupiti rezerve dijelove ili napravitre reklamaciju, obratite se direktno prodavaču koji je izdao račun. |
| RO | Ecnii Bvi xotiTE kyniTb zanactn iinni predejBvltb kajne-nibO preteHn, noxanyIcTa, cbrjntecb hnaprmyo c npodabvcm, bvdabvmmuček. |
| CZ | Chcete-li zakoupit náhradni dily nebo uplatnit jakoukoli reklamaci,kontaktujte prímo prodejce, ktery učtenku vystvil. |
| RU | Dacà doriti sá cumparați把这些chimb sau sá faceti vre reclamatione, ∀rugam sá contactati direct vánzátorul care a emis chitanta. |
| GR | Ecv θéλeTe VA ayopááte TE avtaLAAKTÍK à nva KAVETE OTTOIADNITOTE TAPATNOVA, ETIKOIUMVHTOE aTTEUθicç me Tov TTWNTI TOU EξδωTE TIV ATIDSEIŋ. |
| MK | Ako cakate da kynITE peserpBNi DeNoBn IINI da noDheCete kackBn δnlo nonnAki, KOCTAKTIpAJte dinpeKTHO co npodabayot koj ja n3dall cmetkata. |
| NL | Als u reserveonderdelen wilt kopen of een klacht wilt indienen, neem dan rechtsstreeks contact op met de verkoper die de bon heft afgegeben. |
| SL | Če Želite kupiti nadomestne delie ali vložti reklamacije, se obrnite neposredno na prodajalca, ki je izdal račun. |
| FI | Jos haluat ostaa varaosia tai tehdä valituksa, OTA yhteyttä suoraan kuitin antaneeseen myjän. |
| PL | W przypadku checi zakupu czeci zamiennych lub zgloszenia eventualnych reklamacji nalezykontaktowac sie bezposrednio ze sprzedawca, k'tory wystawl paragon. |
| IT | Se desideri acquistare pezzi di ricambio o presentare reclami, contatta direttamente il venditore che ha emesso la ricevuta. |
| HR | Se desideri acquistare pezzi di ricambio o presentare reclami, contatta direttamente il venditore che ha emesso la ricevuta. |
| SV | Om du vill kopa reservdelar ell ergora nagra reklamationer, vänligen kontakta saljaren som utfardat kvit tot direkt. |
| DK | Hvis du ansker at kobe resededele ell reklamere, bedes du kontakte saelgeren, som har udstedt kitteringen, direkte. |
| UA | Ящо вхоче рицбати зачauthи Або подати Бydь-укп ретензii, зberhítся Beznocepednbo do npodabvca, яйн BiNdavчek. |
| SR | Ako jeniTE da kynITE peserpBNe DeNoBn IINI da ynoKHTe peknAmauciyu, obpatITE ce dupeKTHO npodabuy konj je n3ddo payn. |
| SK | Aksichete kupit' nahradne diely alebo uplatnit akukofvek reklamáciu, kontaktujte priamo predajcu, ktory učtenku vystvil. |
| AR | Aksckate da zakynITE peserpBNi 查cti nii da haprabite onnakbaHn, mona, cbþkæte ce dupeKTHO c npodabvca, kɔiTo e n3dAn kacobata belezkxa. |
| BG | Aksckate da zakynITE peserpBNi 查cti nii da haprabite onnakbaHn, mona, cbþkæte ce dupeKTHO c npodabvca, kɔiTo e n3dAn kacobata belezkxa. |


- SAFETY CONDITIONS IMPORTANT INSTRUCTIONS ON SAFETY OF USE PLEASE READ CAREFULLY AND KEEP FOR FUTURE REFERENCE
- First Setup:
- DAB/FM button
- Changing the DAB display information
- DAB mode - choosing menu options
- PRESET button
- SETTING ALARMS AND TIMERS
- DEUTSCH
- FMpeXIM-1360pHaOnuHaMeHHTO
- KoIue IIPUCET
- EAAHNIKA
- TENIKOI KANONEAΦAIA
- PekIM DAB - BbI6Op IyHKTOB MeHIO
- PexIM FM - Bb6op NYHKTOB MEHIO
- BcTaHOBJIeHH6yDnIbHnIKBa Ta TaMepiB
- HactpoKaHa CbHr TaMep
- AnynipaneHa3ByuzaanapMa
- Otnarane Ha 3BbHraa anapMa
- KARTA GWARANCYJNA
Brand : CAMRY
Model : CR 1179
Category : Radio