CR 1180 - Radio CAMRY - Free user manual and instructions
Find the device manual for free CR 1180 CAMRY in PDF.
User questions about CR 1180 CAMRY
0 question about this device. Answer the ones you know or ask your own.
Ask a new question about this device
Download the instructions for your Radio in PDF format for free! Find your manual CR 1180 - CAMRY and take your electronic device back in hand. On this page are published all the documents necessary for the use of your device. CR 1180 by CAMRY.
USER MANUAL CR 1180 CAMRY
text_image
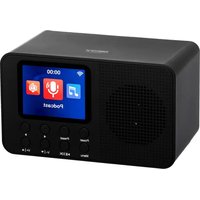
carry 11:20 Internet RadioCR 1180
text_image
DC IN 9 10ENGLISH
SAFETY CONDITIONS IMPORTANT INSTRUCTIONS ON SAFETY OF USE PLEASE READ CAREFULLY AND KEEP FOR FUTURE REFERENCE
The warranty conditions are different, if the device is used for commercial purpose.
- Before using the product please read carefully and always comply with the following instructions. The manufacturer is not responsible for any damages due to any misuse.
- The product is only to be used indoors. Do not use the product for any purpose that is not compatible with its application.
- The applicable voltage is 230V, \~50Hz. For safety reasons it is not appropriate to connect multiple devices to one power outlet.
- Please be cautious when using around children. Do not let the children to play with the product. Do not let children or people who do not know the device to use it without supervision.
5.WARNING: This device may be used by children over 8 years of age and persons with reduced physical, sensory or mental capabilities, or persons without experience or knowledge of the device, only under the supervision of a person responsible for their safety, or if they were instructed on the safe use of the device and are aware of the dangers associated with its operation. Children should not play with the device. Cleaning and maintenance of the device should not be carried out by children, unless they are over 8 years of age and these activities are carried out under supervision. - After you are finished using the product always remember to gently remove the plug from the power outlet holding the outlet with your hand. Never pull the power cable!!!
- Never put the power cable, the plug or the whole device into the water. Never expose the product to the atmospheric conditions such as direct sun light or rain, etc.. Never use the product in humid conditions.
- Periodically check the power cable condition. If the power cable is damaged the product should be turned to a professional service location to be replaced in order to avoid hazardous situations.
- Never use the product with a damaged power cable or if it was dropped or damaged in any other way or if it does not work properly. Do not try to repair the defected product yourself because it can lead to electric shock. Always turn the damaged device to a professional service location in order to repair it. All the repairs can be done only by authorized service professionals. The repair that was done incorrectly can cause hazardous situations for the user.
- Never put the product on or close to the hot or warm surfaces or the kitchen appliances like the electric oven or gas burner.
- Never use the product close to combustibles.
- Do not let cord hang over edge of counter or touch hot surfaces.
- Never leave the product connected to the power source without supervision. Even when use is interrupted for a short time, turn it off from the network, unplug the power.
- In order to provide additional protection, it is recommended to install residue current
device (RCD) in the power circuit, with residual current rating not more than 30 mA. Contact professional electrician in this matter.
- Avoid getting the device wet.
- The device may only be wiped with a dry cloth. Do not use water or cleaning fluids.
- The device should be kept in a dry room.
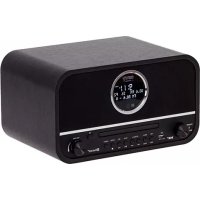
Device description
1.LCD Display 2.Power I Menu 3.MUTE
4.Preset 5.Left 6.Right
- Navigate 8. Volume 9. DC IN
10.Earphone socket
- Before Starting
1.1 Network Requirement
Before using the CR 1180, the following requirements are needed:
● A broadband connection in combination with a wired/wireless access point, router or similar network device.
- The network device needs to support WIFI (802.11b/g/n) wireless connection.
● A PC or smart phone with a network ready. This network has to be the same one as the CR 1180 equipped with.
- Getting stared
2.1 Get the network ready
For wireless LAN(WLAN) network connection:
Check if WLAN LINK/ACT light of the wired/wireless access point or router is illuminated. Consult the user guide of that for any questions.
Note: WiFi allows date transfer over short distances within up to 20 meters without the need of cabling between the devices, Any walls or ceilings may reduce the strength of the WiFi connectivity.
Therefore try to locate the CR 1180 and/or the access point within the distance above, and avoid any obstacles between two devices.
. Connect the power adaptor to the back of the CR 1180 and plug into DC IN socket
. When it is first time running the device, the system will ask you to set Language and Network Configurations.
. Select Yes to establish connection to the network
Select Yes(WPS)(Only for WPS routers). Then press the WPS button on your router.
If you answer 'Yes', the display goes to scanning for Wireless Network and shortly afterwards a list of available wireless networks will appear.
The number of bars in the wireless symbol in front the network name(SSID) shows the relative signal strength of the network.
The key symbol indicates that the network is password-protected.
If the device does not find any wireless networks, No wireless Networks found appears on the display, Change your location, if necessary and check your WLAN router. You can find the
SSID of your Access Point in the configuration of the Access Point(Router) .
Select your network and confirm with OK, If your WLAN is password-protected, you will be prompted to enter your password.
Enter the password using the buttons on the device.
when entering the password.
You can rotate reel to choose the code. if it is accidentally pressed 'right' to move a redundant entry, Pressed 'left' to correct.
The cursor indicates the current entry space.
buttons:
'Left' Go to previous entry space, entry can be overwritten
'Right' Go to next entry space, the last entry is saved
'UP / DOWN' Select number/letter
'Enter' Confirm entire entry
It may take a few seconds to establish the connection to the network.
Once the connection is established, the main menu appears with the main menu items:
- Internet Radio : Access to worldwide radio stations
— Media Centre: Access to your UPnP devices via software with streaming capability.
- Configuration : Various system settings
- Local Radio: Access to radio stations in a particular region (e.g. only German stations)
- My media U : Access to an online media library. This menu item only appears if the function has already been enabled under Configuration
Manage my media U.
. Press and hold the Power I Menu button to enter standby mode. The time, date and any active Alarm times display on the screen.
. If you have setup a network connection, and use CR 1180 again within the network, CR 1180 will automatically make the connection. In case you desire to change the network, enter configuration to setup the corresponding connection.
Rotate the UP/DOWN roll to input numbers/letters.
Once you are on the letter you want, press Right to move to the next entry.
When you are at the end the input, press Enter to confirm. You may press Left to move to previous entry.
Rotate the volume reel to adjust the volume.
3. Network
. Wireless Network Configuration
Enable / disable WiFi network. When you enable the WiFi network, the system will automatically.
Select you required router.
You may refer to the section 3, Getting Started for the network setting.
Wireless Network (WPS PBC)
If you are using a router with WPS/QSS button, you may set up the network connection simple via WPS function. Enter it go to press the WPS/QSS button on your router within 120 seconds. The connection between the router and CR 1180 will then be configured automatically.
. Manual Configuration
You can choose DHPC (which IP assigned automatically) or manually input IP address for wireless network connection.
When you select manual setting for wired connection, the following to be entered:
-
SSID (the name of Access Point);
-
IP Addresses;
-
Subnet Mask;
-
Default Gateway;
-
Preferred DNS Server;
-
Alternate DNS Server.
You may choose (Manage) specific network if you have setup more than one network connection within an area.
Check Network when Power On
Enable / disable WiFi network.
When you enable the WiFi network, the system will automatically search the available AP. Select you required AP. Enter WEP or WPA code to connect the WIFI.
If the wireless network connection is not existed or failed, the icon at the top left corner will have a cross on it.
- Date & Time
The date and time settings can only be made if the Internet radio is connected to a wireless network.
Setup the date and time: The internet radio takes the date and time automatically from a central server once a network connection has been established. However, you will need to change the time manually to account for the change from winter time to summer time.
Set time format display as 12 Hour or 24 Hour,
Set date format in the positions of YY (year), MM (month) and DD (day)
YY/MM/DD, DD/MM/YY or MM/DD/YY
Turn on/off the Daylight Saving Time (DST).
Confirm with OK or by pressing the reel.
With a wireless network connected ,GMT (+01:00) time is a time reference of time setting . Add or deduce the hour according to your time zone when you set the time.
Alarm
There are three independent alarms – 2 alarms of absolute time setting (Alarm 1 and Alarm 2) and 1 alarm for relative time setting (NAP Alarm). Select Alarm in the menu.
The first two alarms are similar to the normal alarm, turn on then set the time and set it alarms Every day, Once or every specific day of week.
Select Alarm time. Set the respective values using the UP/DOWN reel on the device and switch to the next entry field using the Right Confirm by pressing the reel.
Choose Sound to set the sound to Beep, Melody or Internet Radio . An alarm symbol will appear on the top of the display next to the time.
Note that the alarm source is from the favorite internet radio stations if Alarm Sound is set to be Internet Radio. It Can only set one / same station for alarm 1 and Alarm 2. When it reached the alarm time, if set the alarm source is internet Radio, the unit connects to the internet if the set network is available, Therefore there may be some delay from the alarm to the radio play. If no network is connection in one minute, the alarm will change to melody automatically.
After NAP Alarm is set, it alarms once in 5/10/20/30/60/90/120 minutes depending on which one you have set.
You may choose Alarm Volume to configure the volume of the alarms.
When the alarm(s) is /are set, there will be a clock icon at the bottom of the display. The clock icon with alarm time will also clearly display on the standby mode screen.
During alarm, press Power I Menu button to stop the alarm, Press the Enter button to enter to snooze mode. It will alarm again in 5 minutes.
Language
Select the Operating System Designated language: English /German/ French /Hungarian/ Czech/ Slovakian /Polish /Turkish.
- Weather
CR 1180 is able to display the current weather information under standby mode. Turn on Standby Display and set Temperature Unit(°C or °F) to get the weather displayed at the standby mode.
When it is turned on, the current time and the current weather will display in alternative 10 seconds. Internet Radio
After the connection of any station is succeeded, the bit rate and the format of the station will display on the playing screen.
Technical Data:
Adaptor:
Input: 220-240V 50/60 Hz 0,3A
Output: 5V 1A
Device
Input: 5V 1A
Output power: 3W
For Full manual explaining all details of the device please follow the below Link:
http://www.adler.com.pl/dane/manuals/cr_1180F.pdf
To protect your environment: please separate carton boxes and plastic bags and dispose them in corresponding waste bins. Used appliance should be delivered to the dedicated collecting points due to hazarsous components, which may effect the environment. Do not dispose this appliance in the common waste bin.
Hereby, Adler Sp. z o.o., Ordona 2a, 01-237 Warsaw, Poland declares that the radio equipment type radio CR 1180 is in compliance with Directive 2014/53/EU. The full text of the EU declaration of conformity is available at the following internet address:
. Retea wireless (WPS PBC )
3: Input AC frequency
4: Output voltage
5: Output current
6:Output power
7: Average active efficiency
8:Efficiency at low load (10 %)
9: No-load power consumption
1: Modellkennung
2: Eingangsspannung
1: identificator model
text_image
Grid of empty rectangular boxes with varying border styles and spacing, likely for a form or data visualization.cihazın təsviri
natural_image
Front view of a four-bladed industrial fan with visible blades and mounting base (no text or symbols)Velocity Fan CR 7306
natural_image
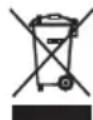
Exterior view of a white and black air purifier unit with blue vent and control panel (no visible text or symbols)Air Cooler CR 7905
natural_image
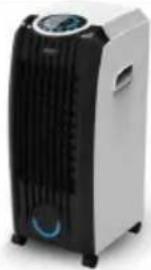
Exterior view of a modern stainless steel grating with control buttons (no visible text or symbols)Waffle maker CR 3025
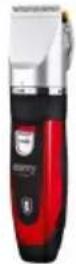
Hair Clipper
CR 2821
natural_image
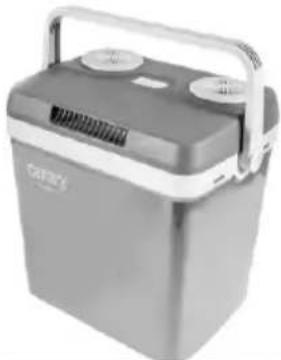
Exterior view of a gray portable energy storage unit with two circular ports and a handle (no visible text or symbols)Portable Cooler CR 93

natural_image
Close-up of a pair of electric shakers with visible cooling fans and ventilation grille (no text or symbols)Lint remover CR 9606

natural_image
Close-up of a blender with colorful liquid and a handle (no visible text or symbols)Blender CR 4058

natural_image
Folded beige fabric with a small digital thermometer placed on top (no text or symbols visible)Electric Blanket CR 7407

natural_image
Close-up of a steam iron with a green handle and black handle (no visible text or symbols)Travel Iron CR 5024

natural_image
Glass kettle with water bubbles, no visible text or symbolsElectric Kettle CR 1239
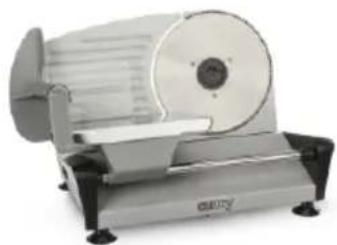
natural_image
Exterior view of a modern office building (no signage)Food Slicer CR 4702
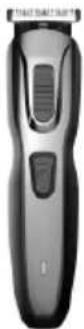
Trimmer CR 2921
natural_image
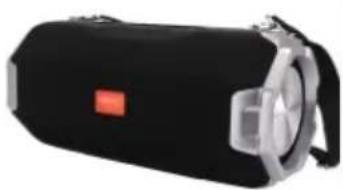
Black cylindrical device with silver casing and red square logo (no visible text or symbols)Bluetooth Speaker CR 1170

natural_image
Glass water heater with blue liquid inside, no visible text or symbolsKettle with temp. control CR 1289

natural_image
Black hair curling iron with threaded spool, isolated on white background (no text or symbols)Hair styler set CR 2024

natural_image
Black and gold hair dryer with a black body and golden handle (no visible text or symbols)Hair Dryer CR 2255
| AFTER SALE SERVICE NOTICE | |
| GB | If you want to buy spare parts or make any complaints, please contact the seller who issued the receipt directly. |
| DE | Wenn Sie Ersatzteile kaufen oder reklamieren möchten, wenden Sie sich bitte direkt an den Verkäufer, der die Quittung ausgestellt hat. |
| FR | Si vous souhaitez acheter des pièces de rechange ou faire des réclamations, veuillez contacter directement le vendeur qui a émis le reçu. |
| ES | Si desea comprar repuestos o presentar alguna queja, comuníquese directamente con el vendedor que emitió el recibo. |
| PT | Se você quiser comprar peças de reposição ou fazer alguma reclamação, entre em contato diretamente com o vendedor que emitiu o recibo. |
| LT | Jei norite ¡sigyti atsarginių dalių ar pateikti nusiskundimų, susisiekite tiesiogiai su kvitą išdavusiu pardavėju. |
| LV | Ja vēlaties iegādāties rezerves daļas vai izteikt pretenzijas, lūdzu, sazinieties tieši ar pārdevēju, kurš izsniedza čeku. |
| EST | Kui soovite osta varuosi või esitada pretensioone, võtke otse ühendust kviitungi väljastanud mūūjaga. |
| HU | Ha pótalkatrészeket szeretne vásárolni, vagy panaszt szeretne tenni, forduljon közvetlenül a bizonylatot kiàllító eladóhoz. |
| BS | Ako želite kupiti rezervne dijelove ili napraviti reklamaciju, obratite se direktno prodavaču koji je izdao račun. |
| RO | Если вы хотите купить запчасти или предъявить какие-либо претензии, пожалуйста, свяжитесь напрямую с продавцом, выдавшим чек. |
| CZ | Chcete-li zakoupit náhradní díly nebo uplatnit jakoukoli reklamaci, kontaktujte přimo prodejce, který účtenku vystavil. |
| RU | Dacă doriți să cumpărați piese de schimb sau să faceți vreo reclamație, vă rugăm să contactați direct vânzătorul care a emis chitanța. |
| GR | Eáv θέλετε να αγοράσετε ανταλλακτικά ή να κάνετε οποιαδήποτε παράπονα, επικοινωνήστε απευθείας με τον πτωλητή που εξέδωσε την απόδειξη. |
| MK | Ако сакате да купите резервни делови или да поднесете какви било поплаки, контактирајте директно со продавачот кој ja издал сметката. |
| NL | Als u reserveonderdelen wilt kopen of een klacht wilt indienen, neem dan rechtstreeks contact op met de verkoper die de bon heeft afgegeven. |
| SL | Če želite kupiti nadomestne dele ali vložiti reklamacije, se obrnite neposredno na prodajalca, ki je izdal račun. |
| FI | Jos haluat ostaa varaosia tai tehdä valituksia, ota yhteyttä suoraan kuitin antaneeseen myyjään. |
| PL | W przypadku chęci zakupu części zamiennych lub zgłoszenia ewentualnych reklamacji należy kontaktować się bezpośrednio ze sprzedawcą, który wystawił paragon. |
| IT | Se desideri acquistare pezzi di ricambio o presentare reclami, contatta direttamente il venditore che ha emesso la ricevuta. |
| HR | Se desideri acquistare pezzi di ricambio o presentare reclami, contatta direttamente il venditore che ha emesso la ricevuta. |
| SV | Om du vill köpa reservdelar eller göra några reklamationer, vänligen kontakta säljaren som utfärdat kvittot direkt. |
| DK | Hvis du ønsker at købe reservedele eller reklamere, bedes du kontakte sælgeren, som har udstedt kvitteringen, direkte. |
| UA | Якщо ви хочете придбати запчастини або подати будь-які претензії, зверніться безпосередньо до продавця, який видав чек. |
| SR | Ако желите да купите резервне делове или да уложите рекламацију, обратите се директно продавцу који је издао рачун. |
| SK | Ak si chcete küpit náhradné diely alebo uplatniť akúkolvek reklamáciu, kontaktujte priamo predajcu, ktorý účtenku vystavil. |
| AR | أو غيارقطعاء راش في ترゴب کنعتاذا شكويćiainment، لاصита فيرжи مباشرلاصياً رдумся يذلا بالبathing |
| BG | Ако искате да закупите резервни части или да направите оплаквания, моля, свържете се директно с продавача, който е издал касовата бележка. |