Sensixx B35L Pro Energy TDS3530 - Iron BOSCH - Free user manual and instructions
Find the device manual for free Sensixx B35L Pro Energy TDS3530 BOSCH in PDF.
User questions about Sensixx B35L Pro Energy TDS3530 BOSCH
0 question about this device. Answer the ones you know or ask your own.
Ask a new question about this device
Download the instructions for your Iron in PDF format for free! Find your manual Sensixx B35L Pro Energy TDS3530 - BOSCH and take your electronic device back in hand. On this page are published all the documents necessary for the use of your device. Sensixx B35L Pro Energy TDS3530 by BOSCH.
USER MANUAL Sensixx B35L Pro Energy TDS3530 BOSCH
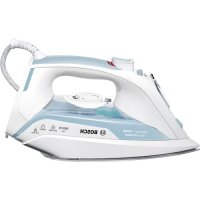
Thank you for buying the sensixx B35L steam station, the new steam-ironing system from Bosch.
Carefully read through the operating instructions for the appliance and safeguard them for future reference.
Introduction
These instructions for use contain valuable information about the unique features of this system and some hints to make ironing easier for you.
This powerful system produces non-stop steam for an ideal ironing performance. It has a large detachab water tank that can be refilled at any time with switching off the system. We hope that you enjoy ironing with this steam station.
Important
Open out the first page of the booklet, this will help you to understand how the appliance works.
This appliance complies with international standards.
This appliance has been designed exclusively for domestic use and must not be used for industrial purposes.
This appliance must only be used only for the purpose for which it was designed, i.e. as an iron. Any use will be considered improper and consequently dangerous. The manufacturer will not be held responsible for any damage arising from misuse or improper use.
General safety instructions
- This appliance is to be connected and used accordance with the information stated on characteristics plate.
- This appliance must be connected to an earthed socket. If it is absolutely necessary to use extension cable, make sure that it is suitable for and has a socket with an earth connection.
- The iron should not be used if it has been dropped if there are visible signs of damage or if it is water. It must be checked by an authorized Technic Service Centre before it can be used again.
If the safety fuse fitted in the appliance blow appliance will be rendered inoperative. To restore normal operation the appliance will have to be taken to an authorised Technical Service Centre.
In order to avoid that, under unfavourable mains conditions, phenomena like transient voltage drops or lighting fluctuations can happen, it is recommended that the iron is connected to a power supply system with a maximum impedance of 0.27 Ω. If necessary,
the user can ask the public power supply company for the system impedance at the interface point.
- This appliance is not intended to be used by persons (incl udng children) with reduced physical, sensory or mental capacities, or lack of experience and knowledge, unless they have been given supervi si on or instruction concerning the use of the appliance by a person responsible for their safety.
Children should be supervised to ensure that they do not play with the appliance.
-
Remove the plug from the socket before filling the appliance with water or before pouring out the remaining water after use.
The appliance must never be placed directly under the tap to fill the water tank. -
The appliance must be used and placed on a stable surface.
When placed on its stand, make sure that the surface is not wet on which the stand is placed is stable.
The iron must not be left unattended while it is connected to the supply mains.
For Unplug the appliance from the mains supply after each use, or if a fault is suspected. -
The electrical plug must not be removed from the socket by pulling the cable.
-
the never immerse the iron or steam tank in water or any other fluid.
- Do not leave the appliance exposed to weather conditions (rain, sun, frost, etc.).
- With the aim of avoiding dangerous situations, any work or repair that the appliance may need, e.g. replacing a faulty mains cable, must only be carried in out by qualified personnel from an Authorised Technical Service Centre.
Important :
This appliance reaches high temperatures and produces steam during use, this could cause scalds or burns in case of improper use.
The steam hose, base station and in particular the
op on can get hot when used.
s I eaking
Never ai m the steam at people or animals.
- Do not allow the power cable to come into contact with the sol plate when it is hot.
be aware that the system can keep on steaming area short additional time after releasing the steam trigger. This is a normal function.
en
Description
- Removable water tank
- Removableiron pad
- "Water empty" / "Clean warning" pilot light
- "Steam ready" / "Auto shut-off" pilot light
- Variable steam control
- "Energy saving" button*
- Steam hose
- 111 umi nated main power O/1 button
-
Housing with internal steam generator
-
Mai ns plug
-
Mains cable with storage facility
- Cord clip*
- Temper at ur ed al
- Iron pilot light
- Iron steam release button
- Steam button lock*
-
Sol epl at e
-
Depending on the model
Preparations (A)
- Remove any label or protective covering from sol epl ate.
- Place the appliance horizontally on a solid, surface. You may remove the iron pad from the appliance and place the iron on it on another stable, horizontal surface.
- Remove the detachable water tank (1) and fill tank making sure not to pass the level mark.
- Fit the water tank back onto the steam tank.
- Unwind the mains cable (11) fully and plug it in earthed socket.
- Set the main power button (8) to the "I" position. Turn the temperature selector (13) to the required
- The "Steam ready" indicator lamp (4) will light up after several minutes, indicating that the appliance is ready to use.
During it first use the iron may produce certain vapours and odours, along with white particles on the soleplate, this is normal and it will stop after a staweminites
While the steam release button is pressed, the water tank may produce a pumping sound, this is normal, indicating that water is being pumped to the steam
To check the ironing instruction label on the garment to determine the correct ironing temperature.
2n. Turn the temperature selector (13) to the required
ght setting:
The steam generator will take more time to reach "Steam ready" state only upon the initial heating up or after performing the de-scaling operation (Cal c'n clean). 3. T
| •Synthetics |
| •Silk - Wool |
| •Cotton - Linen |
Important:
- Normal tap water can be used.
To prolong the optimum steam function, mix tap water with distilled water 1:1. If the tap water in your district is very hard, mix tap water with distilled water 1:2.
You can inquire about the water hardness with your local water supplier.
- The water tank can be filled at any time while using the appliance.
- To avoid damage and/or contamination of the water tank and the boiler, do not put perfume, vinegar, starch, descaling agents, additives or any other type of chemical product into the water tank.
Any damage caused by the use of the aforementioned products, will make the guarantee void.
- The iron is not designed to rest on its heal. Please always position it horizontally on the iron pad (2).
- The iron pad can be placed into the specially designed recess on the appliance or somewhere suitable alongside the ironing area.
Never rest the iron on the appliance without the iron pad!.
Setting the temperature
The steam generator will take more time to reach "Steam ready" state only upon the initial heating up or after performing the de-scaling operation (Cal c'n clean). 3. T
When water is already present in the steaneating and go out as soon as the iron has reached generator during regular use, heat up time to reach the selected temperature. the operating temperature will be faster. Tips:
-
This appliance has a built-in water level sens "refill water tank" indicator (3) will light water tank is empty.
-
Start your garments out based on their cleaning when symbol labels, always starting with clothes that have to be ironed at the lowest temperatures.
If you are not sure what the garment is made of then begin ironing at a low temperature and decide on
the correct temperature by ironing a small
Vertical steam (C)
not usually seen when worn
Ironing with steam (B)
- Turn the temperature selector (13) to the required setting.
- Set the amount of steam to suit your needs, using button (15).
the variable steam control (5) (depending on
model).
Never direct the steam jet at garments that are
being worn.
For normal use, please choose one of the following: Never aim the steam at people or animals.
recommended settings:
- Press the steam release button to release steam.
Attention:
- When ironing on a lower temperature setting “ ”
If the appliance has variable steam control (5), variable steam control to its lowest position
If the appliance does not have variable steam cond
control , press the steam release button only for a fewminutes ! This
seconds at a time when ironing at lower tempera dependi ng on the model)
tures.
In both cases, if you find that water is dripping
of the sol epl ate, set the temperature selector (
a higher position (take care that the garment can
ironed on this heat temperature setting).
- At the beginning of each use, it is possible that
drops of water will be dispensed alongside steam.
Therefore, it is advisable to try the iron on the
board or a piece of cloth to start with.
Important:
The steam hose may get hot if you are ironin
longperiods.
Cork handle iron
(depend on the model):
To get permanent st eam, pr ess the I ock
button (16) and slide it backwards until it
To switch off the permanent steam, slide the
button forward.
Ironing without steam
- Begin ironing but without pressing the steam rel
button (15).
j) To clean the sol eplate, immedi ately rub off any
residue by running the hot iron over dry cotton cloth.
“Energy saving” button
Depending on the model)
If the "Energy saving"
Ognostave up to 25% of the energy and 40% of the
water consumption, and still have a good ironing result
an open most of your garments . It is advisable to use the
normal energy setting only for thick and highly wrinkleled
Intelligent steam
(dependently on the model)
This system has intelligent steam control, which, after
Preleasing the steam release button (15), provides a
small amount of additional steam.
The additional steam can always be stopped by briefly
pressing the steam release button once again.
Auto shut-off
depending on the model)
If during ironing the steam release button (15) on the
handle of the iron is not pressed for a certain length of
time ( 8 minutes ) . the steam station will automatically
switch
ease
The "Auto shut-off" pilot lamp (4) will flash when auto
shut-off has been activated.
To switch the steam station back on, press the steam
rel ease button again, and wait until the "Auto shut-off"
pilot lamp remains lit continuously.
en
Cleaning & Maintenance
Always unplug the appliance from the mains supply before carrying out any cleaning or maintenance operation on it.
- After ironing, pull out the plug and appliance to cool down before cleaning.
- Wipe the housing, handle and iron body damp cloth.
- If the solpelate is soiled with dirt or scalp with a damp cloth.
- Never use abrasive products or solvents.
Storing the appliance (D)
- Always allow the appliance to cool storing it.
- Set the main power to the "0" position disconnect the mains cable.
- Place the iron on the iron pad, standing on sol epl ate.
-
Empty the water tank and store the mains cable to the cord rewind facility. Timy the steam hose or handle of the iron using the cord clip provided. Do not wrap the cords too tight.
-
Depending on the model
Fabric protection sol epl ate cover (E)
(dependently on the model)
The fabric protection sol epl ate cover is used for steam position.
ironing delicate garments at maximum temper at without damaging them. Use of the soleplate coal so does away with the need for a cloth to prshine on dark materials.
It is advisable to first iron a small section on of the garment to see if it is suitable.
To attach the sol epl ate cover to the iron, place of the iron into the end of the sol epl ate cover the elastic strap over the lower rear of the it fits tightly. To release the sol epl ate cover elastic strap and remove the iron.
The fabric protection sol epl ate cover may be purchased from the customer service or specialist shops:
| Accessory code ( After sales) | Name of accessory ( Special i st out I et s) |
| 571510 TDZ2045 | |
| 464745* TDZ2520* |
- Cork handle iron
"Cal c'n clean" (F)
Cleaning the Boiler
To extend the life of your steam generator and to avoid any build up of scale, it is essential that you rinse out the toilet after several hours of use (approximately after 50 hours). If the water is hard, increase the frequency.
Do not use descending agents for rinsing out the boiler, as they could damage it.
- Check that the appliance is cold and unplugged for more than 2 hours, and that the removable water tank (1) is empty.
- Place your appliance on the edge of your kitchen sink.
Remove the plastic cover located on the bottom of the appliance by turning it to position.
4 and Unscrew the boiler drainage plug located on the bottom of the appliance using a coin.
- the holding your steam generator in upside down position, and using a jug, fill the boiler (in the base unit) with 1/4 litre of water
Shake the base unit for a few moments and then the empty it completely over a sink or bucket. To obtain the best result, we recommend that this operation is done twice
Important: before re-closing, make sure no water remains in the boiler.
- Replace and tighten up the boiler drainage plug with a coin.
- Insert and close the plastic cover by turning it to the
Automatic clean warning
depending on model)
Pilot light (3) will flash indicating that boiler must be rinsed. To do this, follow the procedure described in the section above.
The reset "Cal c'n clean" pilot light and counter, switch the outstation off twice, keeping it off during at least 30 seconds each time.
pull the
Rinsing the iron steam chamber (G)
Caution! Risk of burns!
This procedure helps to remove scale particles out of the steam chamber.
Carry it out approximately every 2 weeks, if the in your area is very hard.
a) Ensure that the iron is cooled down.
b) Set the temperature selector (14) of the iron "min" position.
c) Fill the tank with tap water.
d) Plug in the mains cable and set the main power switch (12) to the "l" position.
e) Wait until the "steam ready" indicator lamp (9) lights
up. water
f) If the steam station has steam regulator (10), set it to the maximum position.
g) Hold the iron over the sink or a container to collect to the water.
Trouble shooting
| Problem Possible causes Solution | ||
| The steam generator does not come on. | There is a connection problem. The main power button is not switched | Check the mains cable, the plug and the socket. on.Set the main power button (8) to the "1" position. |
| The iron does not heat up. | The main power button is not switched The temperature control knob is set to "min" position. | on.Set the main power button (8) to the "1" to the desired position. |
| The iron begins to smoke when switched on. | During first use: Certain components of the appliance have been lightly greased the factory and may produce a little smoke when initially heated. During later use: the sol epl ate may be soiled. | This is completely normal and will not after a short smoke Clean the sol epl ate according to the cleaning instructions in this manual. |
| Water flows through the holes on the sole plate. | The steam function is being used before has reached temperature. The water is condensing inside the pipe because steam is being used for the time or has not been used for a long time. | iReduce the steam flow when ironing at low temperatures (Variable steam pescontrol (5)). at Point the iron away from the ironing near area and press the steam release button (15) until steam is produced. |
| Dirt comes out through the sole plate. | There is a build-up of scale or miner the steam tank. Chemical products or additives have been used. | Use tap water mixed 50% with distilled water or demi neralised water. If the tap in your district is very hard, mix tap water with distilled water 1:2. Clean the sole plate with a damp cloth. Never add products to the boiler been water. |
| The iron does not produce any steam. | The boiler is not switched on or the tank is empty. The water tank is not fitted onto the housing correctly. The steam regulator is set to the min position. | water set the main power button (8) to the "1" position and/or fill the water tank. Fit the water tank back onto the housing correctly (you will hear a click). muni increase the steam flow by turning the steam control (5). |
fr
| Problem Possible causes Solution | ||
| The ironed gar-ment turns dark and/or sticks to the sol epl at e. | • The selected temperature is too high has damaged the garment. | and Select a suitable temperature for material being and clean the sole with a damp cloth. |
| The sol epl ate turns brown. | This is a regular consequence of usage. | • Clean the sole plate regularly with a damp cloth. |
| The iron does not stop steaming after placing it on the pad. | • "Intelligent steam" function activated. | • Just press the trigger once again and the iron will stop steaming at once. |
| The appliance makes a pumping sound. | • Water is being pumped into the steam tank. | This is normal. • If the sound will not stop, do not the steam generator and contact an authorised technical service centre. |
| Loss of pressure during ironing. | Steam release button activated during a period of time. | Using the steam release button (15) with intervals. This improves the ironing as the textiles will be dried and stay smooth better. |
| Water leakage from the boiler | Drainage plug located at the bottom of the appliance is loose. | To ghten up boiler drainage plug with a coin |
If the above does not solve the problem, get in touch with authorized technical service.
Advice on disposal
Our goods come in optimized packaging. This is basically consists in using non-contaminating materials which should be handed over to the local waste disposal service as secondary raw materials. Your local town council can give you information about how to dispose of obsol ete appliances.

This appliance is labelled in accordance with European Directive 2002/96/EG concerning used electrical and electronic appliances (waste electrical and electronic equipment - WEEE).
The guideline determines the framework for the return and recycling of used appliances as applicable throughout the EU.
You can download this manual from the local homepages of Bosch.
fr
Loddrett dampstryking (C)
He MoXHa BNTIaYBaTn 3 pO3eTKN CMKauOu 3a LHyp.
Hikon He 3aHpyoTe npacky nn naporehepatop y Body a6o B iHwi piDHH.
He 3aIiwaIte npicpi niDiieo HecnpnaTINBnx noroDnHex yMOB (PiD doUeM, Ha coHci, Ha MOposi Ta iH.).
Ipeed TUM, JIK NIDKIOHTN npncptpi eektpomepexi, nepebiTe, 06 Hanpya CTpyMy BiINOBiIdaJa HAnpy3i, 3a3HaueHn Ha Ta6nuci 3 XapaKTEpcntHKAMn. DaHn npncptpi C1id NiKIOUOATNo 3a3EmJeHOR p03eTKu. pa3i BnKOpNCtAHH NOOBKyBaHa, nepeBiPe, 0oB HbOMy E dBONOLrpha PO3eTKa Ha 16 3a3eMJIeHHaM.
Ka6eB JxNBHeHn CybOro npncTroO He MoKe ByTN 3aMInHeHn KOpNCyBaUem. JaKuo Ka6eB NOxKOJxKeHO a6o cNt, 3aMiHTn, 3aMiHa NOBHHa npOBODNTnC TlBKn B aBTOpN3OBAHOMy cepBic ceHTpi.
qxjlnBO!
He KopncTyIeCn npacko, kso BOHa naan KaHn Hn E BnDm3HaKn noKoJKeHb Ta KIO 3 He Tce BODa. IpeN NOBtOpHn BkOpcntaHHn npacky cIi nepeBipTu B abTopu3OBaHomy cepbic- ceHTpi.
Dahn npicpii niid yac BnKOpNCTaHH
po3irpiba6TbCra do BnCOkOa TemnepaTy Ta
ta,
rHepe npay, ce MOKe npn3BcETn do onikIB BiD
KOHTaKy 3 rapAunm NOBepxHMyn cnnapoU y
BnPaIky He HeDOuINbHOro BNKOpNCTaHH.
- YKUO 3anobixhNk npnCTpo10 po3nnabTbCra, noaJIbwe BnKOpNCtAHH npnCTpo10 HEMOXJIIBE.
Hyp napi, naporehepaTOp Ta 0co6nBO npacka niD yac BnkOpncTaHH po3irpiBaHObCra.
Hikoln He cnpaMOByTe npy Ha JIOdeu TbapHH.
uk
CniikyuTe, 06 shnpy He TopkABcra nporehepatop noTpe6ye 6nbwe acy dny niooBn npackn. docrHeHc tany roTOBHOcti do pObot niD qac
MaTe Ha yBa3i, 0o nicIy BiDnyckaHn KHorKn OohaTkoBOr HarpBaHNra nCn npOBeeHH BInNy Napu CnCTema MoKe npOIOBkyBaTu npOeDpyn OOhuEHH BID hAkNpy (Cal c'n cI ean). NodAHnnapn npotrrom ige kJbKox ceKyHd. Lc EKOn B npOeci perynphoro BkOpncTaHn B HopMaJIbHM. naporeHepaTopi npCuTyB Oda, Yac HarpBaHH
ДлЯdoCSrHHeHHpo6OyOr TempepaTyprnCKopoOyEcTbcra.
ONIC PNUCTPOIO
- 3HIMnH pe3epByap DnB ODoN
- 3HIMHa nIcklaKa Inna npackn
- INDInKaTOp 《HecTaHa BOy y pe3epByapi》
《ABOMaTHHHn CINHAn npo nOtp6y OHNJIeHHA
8.Дани npictpi MictNb B6yOBaHn ceHcop pIBH BODn.KoJI pe3epByap IЯ BODn cnpoxKHe, 3acBITbCnIHdkaTOp HeCTaCi BOuB pe3epByapi /(3).
BaxJInBO!
4.IHnKaTOp《TOtOBHi CTb napu》/ABTomaTN BmKHeHHA
5. PerylaTOp noaHnna napn*
6. «EHepro36epiraUca» KhONka
7. Hpy npn napn
8. Khonka roNoBHorO BmNkaa 3 niDCbiyeHHM
9. Kopnyc 3 naporehepaTopoM
He Bn MoKeTe BnKOpNCToBbATn 3BnuaHy BoDy 3 BOJOpBOJy.
TTOO NOOBKHTN ONTMaJIbHy DiI OyHK
ZI BIDnapHOBANH, po36abnIte BOJOnpoBIHy
BOY DnCTINbOBAHO y CnIBBIDHOweHHi 1:1. B
TOMy BNnADky, kUo JOKpCTkICTb BOHy BaWOMy
perioHi 3aHaNTKO BnCOKa, peKOMeHNyEMo po36ab
JIaTN BOJOnpOBIHy BOHy DnCTINbOBAHO y cnIBB
BIDHOWeHHi 1:2.
- ⅢtenceIb
- Ka6eIb XINBHeHHa 3 npnCTOCyBaHHaM dJIa 3roptaHHa
12Φikcatop nna shhypaa - PeryjITop TempepaTypr
- IHHaTop npackn
- Khonka Bynyckny napu
- Φικατορ ΚΗΟΝΑ Βυγκή παρη *
17.Пдошва
IhOpMaio 0do CTyneHIO XopCTKoCTI BOu Bm MoKeTe OTpMaTu Ha NiInpMcTBI BOONOCaAHn BaWoOrMoCTa.
Пд уас ВИКОРиСТАHHЯ пИСТЮВи можete
нановнUTи pe3eрByap BOДОУ y 6yДь-який
MOMeHT.
yHnKaIe TNOKoJKeHb Ta/ a60 3a6pydHeHHpe3epByapy IIN BODn Ta 6aky naporehepaTopa, HeBnKOpNCtOByTe apOMaTn3atOpN, OcET, DomiUKN,3ac06n npOTn HAKIny Ta iHwi ximiuHi 3ac06n.
y DeKnx MoednX
Плд�товka (A)
- 3Himits Bci etnkeTkn Ta 3axnchy ynaKOBky niOoBn npackn.
Dana npacka He NOBHHA CToTn BepTNkAnbHO.
06cnyroByBaHHa
- YctahOBt npntpi ropn3oHTaIbHO Ha MiHy TaBXd n CTaBTe Ra ropn3oHTaIbHO Ha NiKnaKy CTIKy NOBepxHIO. MoKHa 3nTn NdkNAdky dny nPaACK (2). npackn 3 npncToPO Ta NOKnactn Ra Ha IHsU MyuHy,PiKnadky dny npackn MoKHa po3MiUyBaTN y CTIKy, ropn3oHTaIbHy NOBepxHIO. cneuiabHomy 3arnn6neHHi Ha Kopnyci npncTropo
- 3HIMtB 3HIMn pe3epByap dIy BOu Ta HAnOBHiao y 6yDb- kOMy 3pyHOMy Micci npuy 3 30HOIO Ioro BDOIO TAK, Uo6 BOHa He nepeBnUyBaanpacyBaHH.
BIDMITKY MAKCImaIbHOrqipIBHa.
- 3HOBy 3aKpinitb pe3epByap Dnay naporehepatopi.
- NOBHicTIO po3ropHITb Ka6JIb XINBHeHHnIKNIOHTb Ioro Do 3a3emneHOr pO3eTKn.
6.перевадыперемкau(8)В пооження - Ype3 KINbKa XBNH 3acBtITbC8 iHNKAtop KoNn HATNCHEHO KNKy BNnycky nap, Bn MoKeTe roTOBHOCTI nap (4), CnHnI3yOuH npo MOKNBICrpoTyN 3Byk NOMn y cepeDnHi npucptoHO. Lc BnKOpNCtAHH npucTPOIO. HopMaJIbHO Ta O3HaAoo BOa nepeKaayETBCR
Iid yac nepworo BnKOpncTAHN npackn 3 Hea TAmOxytb itn cneunphiHni 3anaxn Ta npapa, a 3 niooBm MoKytb CnnaTncs6iNi nopouHHKn. Lc e
HOPMaIbHIM Ta npnHHtbcra 3a KInbKa XBUNH.
Hikonn He cTabe npacky Ha Kopnyc npucptpo H6e3 ndknaek dnn npackn!
uk
PeryIIOBaHHa TemnepaTpyn
- IopnbItbcn ihctpyckii 0do npacybaHn 6iIm3HN TEmnpaTpo).
ii etnkei, 06 Bn3HaHTn npaBnIbHy TemnpaTy
npacvbaHna.
- NopBepHitb peryIaTOp TempepaTypn (13) no3HaKy:
TeMnepaTpyn (13) Ha BnUy nO3HaCy (JkUo 6iIn3Hy,
Ky Bn npacyte, MoXHa npacyBaTu 3 TakoIO
- Μιρα3y Ha noaTky BnKOpncTaHHn npackn pa3OM
3 napoIO MOxkyTb BHXOHTN KpanJI BOH, TOMy
TpiHcypekomehdyeTbCn npoBeCTn npackoIO
npacyBaIbHi Iooi a6o HeNoTpbiHti KaHHi.
BaxJnBO!
-
RaKUo Bn npacyTe DOBm Yac, UHyp dIy napu MOKe po3irpiTcA.
-
IHHaKaTOp (14) cBItntMMeTbcra nid qac HarpipapcKa 3 KOPKOBOO pyKoHO
npackn Ta BmKHeTbcra, KOJI npacka po3irpiieTbcra
(DeAKnx Moenax):
3aDaHOI TeMnepaTpyn.
Ioo6 npapa BnXoDnna 3 npackn NoctiHo, HAtnciTb Ha φikcatop (16) Ta 3cyHbTe NOro Ha3a,d, DOKN BiH
Iopa:
- Po36epiB 6iHn3Hy B 3aJIexKHOCTi BiD cIbMOBIOH He aapikcyTbc. IIo6 npnnHnTn noctHHn BUNyck
eTnKETkax Ta nouHaIte npacyBaHHa 3aBxN 3
peeu, 10 noTpe6yIOb HauHHXQo TEmnpaTyPi
npacyBaHHa
- JIIO Bn He BneBHeH, 3 JOKo TkaHnH 3poJpeHpacyTe, He HaTnCKaOuHa KHONKy Bnnycky 6iIN3Hy, noHITb npacvBaHHra 3 HaHnKUOP npn (15).
temnepaTytn Ta o6epitb notpi6Hn Bam pibHeB
Harpibahnnonpacybawn HeBENky dInnHKy,
He BnDHO NiJ Yac BnKOpNCaHn 6iIn3Hn.
BepTnKaIbHa napa (C)
- YctahOBiTb peryIaTOP tempepaTyn Ha no3HaUky
····" a6o « max » - 3aicn ta oJr Ha nnIyKax ( nIjkaKn, KOCTHMn,
HbTa Ta iH.) MoXHa npacyBaTH 3 napoHO
Utpmyu npacky BepTKkaIbHO Ta HaTnCKaOu
5)Ha yHONky Bnnycky nap(15).
Пасувашия 3 napою (B)
- Nobephitb peryntop TemnepaTypn (13) no3HaKy.
Ha noTpipHbTa Ta iH.) MOxHa npacyBaTu 3 napo
2.3a donomoro1o peyIaTopa ndaHnnap
KoJI He 6Opo6JrTe CTPyMOM napi 6IIn3Hy,
OdRHeHy Ha IIOeI.
DeKaX MoDenax) BiDperyIIOHTe KJIbKiCtB
BIDNOIBHO DO Baunx noTpe6.
Дя 3BnuaHoro BnKOpNCTaHH, 6yNb-JaCKa, 06
OdHe 3 HAcTyHnX peKOMeHDoBaHnX HanaTuBaHb:
Hikonn He cnpyMOByTe npy Ha IIOe H
TBapNH.
6iinn3H. PeKOMeHNyCTbCByBnKOpNCTOByBaTn
pekim npacyBaHH 6e3 36epexehn ehepi Tilbkn
Длп npacyBaHH ToBCTnx Ta Dyke 3IM' rTNx TkaHH.
3.ДЯ BIXOу napi HaTnCiHt bHa KhoNky Bnnycky
(12).
ybaral
1.пасуваннг 3нИЗБКOTeMПЕраТуРиМpeхIMOM
6 9
«Po3ymha» cnCTema yTBopeHHra
Napu «Intelligent steam»
CCTema OchaueHa peryIaTOpom napu, 0o nicna
HaTnckaHHKHOHKn Bnnycky napi (15) 3a6e3neye
16dntkOBn HeBEnKn yo 6' em.
BunnyckdoaTkoBnnapmOKe 6yTu3ynHeHn y
6yNb- knn yac 1e OndHM dOdaTKOBnM HATNCKAHHnM
KHONK BUNyCK npu.
- Ykso Bawa npacka Mae peryIaTOp noDaHn
(5), yctaHObitb peryIaTOp npu y MiHimaJIHe
NIOJXeHH()
CHTema ochaeta perynyTopom napn, 0o nicna
- RaKuo peryIaTopa noDaHHn napn Ha npacci HEM
niD qac npacyBaHHy Hn3bkOTempeAtypHOMY
pekmi HATnckaTe KHOK Ky Bnnycky napu
IpoTROM KInbKox cekyHd. byDb- knn qac ige oNHM dOdaTKOBm HATnckaHHaM
B o6ox BnpaKkax, kx0 Bn no6aunTe, 3 niooB
npackn countbcra B0da, yctanHObit peryraTOp
uk
ABTOMaTnUHe BmKHeHHA
(y DeaKnx MoDJIeNx)
JaKuo nizac npacyBaHH KONky Bnucy nap (HBoo qactnoHO npackn, 06 HacaKa Ha pyu npackn He HATNCKaTN npotraom neBHOqpinnaC. 3HrTHn HacaKy dIeNikatnx Yacy (8 XBNIN), napoba cTahui ABTomatKAHIN, NotarHITb 3a eJactnHy CTpiKy Ta CTaHiTb BIMKHETbcra. HacaKDy 3 npackn.
Iicra ATOMaTHHO BUMKHeHH npoBOB cTaHuaHaCky dna denikaTHx TkaHH MoXHa npu6aHTn IHdikatop 《ABOMATUHe BUMKHeHH》(4) nouyae Hauomy cepbc- ceHTpio y cneuii3OBAHnx 6nmatn. mara3nax.
3HOB yBIMKHyTN npOBy cTaHcIHO, HATNCHTb KHONKY BUNyCKy napn Ta 3aYeKaJTe, DOKN iHdNka « ABTomatNHHe BUMKHeHHra» HBOUHe CBITNbC6e3 6NJMaHH.
| Top Kaод Додастковою обладнань | Ha3Ba OБладнань |
| 571510 | TDZ2045 |
| 464745* | TDZ2520* |
KHHHnn HnHnHnHnHnHnHnHnHnHnHnHnHnHnHnHnHnHnHnHnHnHnHnHnHnHnHnHnHnHnHnHnHnHnHnHnHnHnHnHnHnHnHnHnHnHnHnHnHnHnHn
2. NocTaBTe npncptiHa kpa KxOHHO paKOBHn. Ta
3. 3HIMITb PnactNKOBy KPNUky 3 npNCtpoIO, NOBepHyBUN B NIOOKeHHN 3 N03HaHO
- Biikpyitb 3aTnuky 6aka naporehepatopa, p03TaWOBany Ha dHi npncptpo, 3a donomorok MOHETN.
5 yTpmyu nporehepaTop doropn HoraMn, 3a nONOMOROIO KxJN BnItey 6ak naporehepaTop npoB08 OCHOBi Kopnyca) 1/4 NITpa BOHn.
6.Дeikibka cekyHn noTpycitb naporehepatop, a notim nobHicTIO cnOpoxHITb Ioro y paKOBHy qN y BIDpo.PezyIbTaT 6ynde KpaUIM, RaKIo NOBTOpHTu O npauiqdihi.
Hacaika dny denikaTHnx TkaHH (E)
( y Deekx Moednax)
Dana Hacaikka BnKOpNCToBcTbCn DnE 6e3neHoro npacyBaHHn DeiKaTHnx TkAHn Ha MaKcImaIbHi Temnepatypi 3 BnKOpNCtAHnM nap. BnKOpNCtAHn HacaKn DnA DeiKaTHnx TkAHn TAKoX 3HimaC notpe6y KOpNCTuBnCraHvipkoHO DnA yHnKHeHH8 6Ncky Ha TEMhNx TKAHNax.
E)
Baxknbo! Peped Tm, 3HOBy 3akpnTn naporehepatop, nepecbiditbc8y y noro 6aCi 3OBcIM He NnHIOcB OOn.
YctahOBiB Ha Micue 3aTNk Ky 6aka naporehepatoppa Ta 3akpyiTb py 3a DonomoroIO MOHETn.
BCTaBTe PnlaCTNKOBy KpnuKy, NOBepHyBUN YR BNOJIOKeHH 3 N03HaUKO
PekomeHdyeTbcra po3noaTn npacyBaHHHa HeBeJHKOMy 1MaTky BHyTpIiHbO r NOBepxHi Odary Ta nepeBipTu pe3ynbTaT.
uk
ABTomatnHn cnHaJ npo noTpe6y OunueHH
(y DeaKnx MoJeJx)
Irkuo iHdkaTOp (3) 6bnmae, 6ak naporehepa0ba3auekaTe, 0kN 3acBITbC8i HdkaTOp roTOBHOCTI. Yac onoNoCHyTN. IJIy cboRo BnKoHaTe dI, onncapn (9).
B nonepenbomy po3ini.
Ioo6 nepe3anyctnTu iHdkaTOp
JIiHbHK acy, BiYi BmKHiTb
napoBy cTahciIO, 0op3y npHaMHHi Ha 30 cekyHd
c)HanOBHitb pe3epByap IIN BODN BOIOO 3 KpaHy.
d)IiKIOHITbKa6eBxKNBHeHHaOeKTpOmepeKiT TaYcTaHOBIbTOrOBHnBUMNKaU(12)HaNo3HaKyI.
3auekaute, 0kN 3acBITbcra iHnKaTOp roTOBHOCTI. mcaepn (9).
f)Kaio napoba ctaHua Mae napoperynIaTOp (10),anyCTaHOBITb Ioro B MaKcImaJIbHe nIoKeH.
g)PiDHiMItb npacky HAd KkyxOHHO paKOBHIO a60HdMiCTKOIO NOcyDnHO 1nn 36Opy BOnn.
h) HATNCiTB KONky Bnnycky nap (15) Ta o6epeXHO notpyciTB npacky. Hakn ta nooro 3aNiluKn BnDyTb 3 rapAHO BOHO Ta npao. Ze moKe 3aHrtn 6iHa 5 XBNIHH.
i) YctaHObitb peryIaTOp Tempepatpn(14) npackn 3Ha no3HaKy max, He HaNTCKAIOH Na KHONky BInNycky napn(15).Boda y Kapepi noUHe Ka, BInnapOBvByBaTnc. 3aueKaIte, DOKN He BInnapITbcra BcB ODa,IIO NIIuJalacr B Kamepi.
j) 0o6 ouhctn tiDooBBy npackn, HeraHb BnuDanitB Bci 3aIIuKn 6pyD npobIBu npraQIO npackoIO no Kni cki babOBHHi CepBetui.
OnonickyBaHHnapoBoi kamepn npackn (G)
Ybara! IcHyc He6e3neka onikib
Dana onepaizi Do3B0JRE BuaNTN YactKn HauNpy napoBoi kamepn.
Kaio Boda y BaOmy perioHi dyKe JxopCTka, NOBTOPOHTe ii np6n3HO KOKHI 2 TnxHi.
a)IpepeBipTe,n npackxOIOHa.
b) YctaHOBiTb peryIaTOp TemnepaTypn (14) npackn no3HaKy min.
Po3B'3aHH HeBEnKnx npo6JeM
ONaCHOCTb OwIapNBaHnN I NOnyueHnO XKOrOB Clyuae erO HnPabINbHOrO nCNoB3OBAHnR.
HnKoIa He HappaJIte Nap Ha IIOeJ XNBOTHbIX.
Cneinte, TTo6bI uHyp He cponkacancra C nooBoBouHepe3 HeckOJIbKO MNHyT 3aCBeITTCBETOBoe eue ropayero ythora. HndkaTop roTOBHOCTn npa (4), cnHaJIm3npy o
IMeTe B BVdu, yTO nOcNe OTnyckaHnK HONKn ITOBHOCT npbopa K paboTe. BBInycka npapa CNCTeMa MoKeT npdoJnxAtp Bi npepBOM HarpeBaHN NoCne npoBeHeHn NOdAnu npapa B TeueHne HeCKoJIbKx CekHyd. 3ToNpoUeDpybl ydaJeHn HaKnHn (Cal c'n clean) HopMaIbHo. Tpe6yeTcB oJbWe BpemEHn dIpypeXoDa naporeHepaTopa B COCTOHaHE FOTOBHOCT npapa
图ⅡIepeBeDnTe KHOJky rJabHOrO BbIKNoHcTeT(8)BNOLOXKeHne «I》(BKJI.).
HBoHpe3 HeckoIbKO MHyT 3aCBETTCBcTOBOHnDnKaTop rTOOBHOCTn npa (4),CnHaHm3npyO
HONTOBHOCTN npnbopa K paobe.
Pn npBOM HarpBaHnn nOcne npoBeHnA
3ToIpoeUpybI ydaJIeHnHaKnn (Cal c'n clean) Tpe6yETcBONbIe BpEmHn DnnpexOda naporehepatopa B coCTOHHne roTOBHOCTn npa.
Onncahne
- Cbemhny pe3epByap nra BoDbl
- CbemHna noctabka dny yTtora
- CBETOBH INDnKATOP OTCYCTBNA BODI/ ABTomatHeckn CnHAnO Heo6xOaMOCTH OYNCTKN
- CBeTOB0I INDkaTOp roTOBHOCTn npa / ABTomATnueCKoe OTKnIOUeHne
- PerynjTop npapa*
- «《Знeprocберетаюшая» Конда*
- Napobovu shaHr
- CBETIIMCRA IaBbIy BblKlOHTeN bITAHM
-
Kopnyc c BHytpenHnnaporehepatopom
-
Bnka DnBkHoueHnB Cetb
- Hyp nHaHnC yctpoiCTBOM dJa xpaHeHn Hypa
12.YcTpoIcTBoDnXpaHEnHa napoBOrO nnHaHa - PerynTOp tempeatypbl
- CnHaHbHa nAmNoKa yTioRa
- Khonka Bbinycka n3 nooWbbl
- Khonka noctoHHo nodaHnapa
- IodouBa
B 3aBnMoCTN OT MoJeN
Iodrotobka (A)
- YdaIte BCE 3TUKKETKN INN 3aUNTHOE NOKpbITNE NOOWBbl yTOra.
- Nomecnte np6op ropu3oHTaBHO Ha TBepyu yctOyHBYIO NOBepxHocTb. MoXHo CHrTB noCTaBky dnyTa c np6opa n NOMEcTb yTOr Ha NoCTaBHa dpTyOn TBepdoy CTouHBOI rOp3oHTaBHO NOBepxHocTn.
- BbItaHnte CbeMHbI pe3epByap IJRA BOdbI HAnONHnTe erO, CneJa 3a TEM, YTObI He npebuOTMETKy MaKcImaJIbHOrO ypOBHr.
-
CHOBA noCTaBBte pe3epByap IJI BODbI Ha3aI naporehepatop(HaxMMTe do ⅢeJKA).
-
NonHocTbIO pa3MOTaIte shyp nITaHnN BkJIIOHTeeroB 3a3emJIeHHyIO pO3eTKy.
Korda B npoecce peryIapHoro nCNoIb3OBAHnB Naporehepatope npcYtCTByeT BOda, BpeMHaRpeBaHnI dIgIOCTNKeHn pa6oey TempepaTypb cokpaaetc.
- 3TOT npnbop chabkeH BCTpoEHbIM ceHCOPOM ypOBHBAObl. KOrda pe3epByap DnB OBObl onycteeT, 3aROpNTcra HmdkaTop OTCYTCBnB BObl (3).
Baxho:
Bo3MOxHIO nCnOJIb3OBaHHe BODoPBODHO BOnbl.
IJa DOJROBeUHOro IcNOnb3OBaHnI ΦyHKuIN
napa, CMeUNBaIte BODoPBODHyU OBody C
dNCTInnIPoBAHHO B COOTHOWeHn 1:1. EcnB
BaWei MeCTHOCTn BODoPBODHa J BODa OChb
JecTKa, CMeUnBaIte ee c DnCTInnIPoBAHHO BDOJ B COOTHOWeHn 1:2.
BbMOjTe y3HaTb 0 JxecTKoCTn Baue BoDOnpOBoDHO BODy OTBeCTBeHHo 3a BoOCha6KeHne opraHn3aun.
Bpe3epByapIIN B0dbMOABnBaTbBOyBJIIO6o MOMENT BO Bpempa60tbpnp6opa.
Bo n36eXaHnne noBpeXdEHNn/ nnn 3arpzHeHnna EMKoCTb DnA BODbl N naporeHepaTopa, He NCNoJIb3yIte apOMaTIuPObaHHUO BDOy, yKCyc, KpaxMaI, cpeDCTBa DnA ydaNEHnHaKINn IIObIe dpyrHe XmMueckne cpeDCTBa
JIO6oe NOBpeKdEHHe, Bb3BaHHoe NcNoJIb3OBAHNEM yka3aHHbIX BblIe CpeDCTB, npNBODNT K npeKpaueHNO DeNCTBn rapaHTNI.
Даньутг HeДОнжENCTOЯТВ БерТКальН. Bcerda ctabte ero roPn3OHTaNbHO Ha NOdCTaBky dnyyIra(2).
P NpOCTaBka DnYyTHora MOKET NOMeUaTbCBA CNEuHaBNO NOrTOBHeHHyU HmUy Ha npu6ope Knn B IIO6oe NoXoJMaee MeCTO PAnOM C 30HOH rnaKeHn.
HnkOrda He octabJnTe yTHor Ha npn6ope 6e3 HndctabKn dnyyTiora!
16 Bo Bpemn nepBoro nCnoNb3OBAHn yTHora MOryT NOBnTbcn HeKOTOpBe 3anaxn n Nap, a TaKKe HEnbIe qactnUHa NaDooWBe yTHora. 3TO HopMaJIbHO n Ppekpatntcyepe3 HeCKoNbKO MNHyT.
ru
Bo Bpemn Haxkna KhoNn BbInycka npappeepbpapnoBom cnuyae, ecn C noDOnBby yTora 6ydet DnBaMoKETn3daBaTb 3Byk paobTaIOJero HacopocauHbTaBcB ODA, yCTaHOBITE perynIaTOp ca. 3TO HopMaJIbHo n Yka3bIbAeT, 70 BoDa 3akaTHePApTybl (13) Ha 6Oone BBICOKYIO OTMeTKy (ecn ETCB NaporeHepaTop. DaHHoe N3dEINe MOXHO IpaNTb B TaKOM peKIMe).
YcTaHOBka TemnepaTypbl
- IocmToTe Ha npbIK C nHCTpyKUmaMn DnpyTtOrom Pn rnaHbHO DOCKe NIN KcKHeHyXHOI npaHbHO TEMpeATyB, TpaeHn.
2.ПовернiteperулгoptemnepaTypb(13)HaHyKHyOOTMETKy: EcnBbI rnaTe B TeueHne npoJoxTeNbHor
(B 3aBnCmOCTn OT MoDen):
COBeTbI:
- Otcopnyte npedMeTb OeKbNo CNMBolam HnCTpykun dna TnaxKeHna Ha nx npkbkax, Bcerda NaHHa C OeJdbn 6enb, KOTOpBie HyxHO TnAdTb HaHHaTe rnaNTb, He HaxMma KHONky BblNycka npn cambx Hn3KnX TemnepaTypax. napa (15).
Pn COMHeHx B TOHocTn ONpeJeHn MaTeepnA, n3 KOTOpO CdeHaN PpeMTo OeXdHa HauHnAte rnaDnB npn Hn3KoI Tempeatype N. UcTaHOBe peYyraTOp TEMpeaTpyb I NOJIOKeHnepeaHTe, kakay Tempeatypa npabInbHa, nyTEM . . . " NIN 《maX》. TnaJExHn He6oBbUoro yactka, KOtOpBbUHNO He BnDeH, ecn HaDeTb 3OT PpeMTo OeXdbl. PpeuKax (Waketb, KOCTOH, PaBTO, nn).
TnaxKeHne c napom (B)
- NOBepHnTe peryIaTOp TempeatpybI (13) Ha HuaHouHa He nCnoB3yIe CTpyu npa IJa 6pa6oTKn OTMeTKy. OdeXdbI, HaeToi Ha JIOdei.
- C nOMOu bOp erpyaTopa npa(5)(B 3aBnCmDkFHe HnpaBnaTe nap Ha IIOeI INM MoJeN) 3aDaIte Heo6xOdMbBAM BbIXoN npa.KNBOTbIX.
Pn O6bHOM NcNoJIb3OBAHIN BbI6epnte OdHy n3 cJeMyoUnx peKOMeHdyEmblx HacTpoek: 3
(B 3ABNCMOCTN OT MOdJIH)
EcnB npoecce rnaeHn KhoKa BbIycka npa TOTHHTe 3a 3nactHyjo JHeT yDolb HnKHe (15) Ha pyKe yToRa He HaxmaeTcB TeHnne 3aJeHn Yactn yToRa Do Tex nop, noka OHa He 6ydet onpeDenHoro BpemEHn (8 MInHyT), napOBa cTaHnOg TaTe Ta 3a3nactHyIOoWBy, NOTAHTE aBTOMatNueckn OTKnIOuAeTcra.
Iocne ABTomatueckoro OTKIOUeHn CBETOBO INNkA- yHc.
Top «ABtOMATueckoe OTKIOUeHnE»(4)3amraet. 3aunTHyTO TEKCTINbHyTO NOOuBY MOXHO npno6peTn B CJnyKBe NOCTnpoJaX NIN B CNEuaJIIM3npoBaHHbx
YTO6bI CHOBa BKIOUHTb napobyO CTaHcIHO, HaxMITE MaR3NHAX.
Ha KHONKY BbIpyCKa napa n NOOxDInTe, NOKA CBETOBO
HINIKKATOP《ABTOMaTnueCKOeOTKIIIOueHHe》3acBETNTcH HeMIRa.
| Код akceccyaраза | Назсане akceccyaраза |
| 571510 | TDZ2045 |
| 464745* | TDZ2520* |
Ynctka n yxoid
Ipeep npoBeHnem H6bIX DeiCTBn no YyTcC npo6koBOn pyKoN yxOdy 3a 3neKtponpnpom, cNe dyet o6raTeNbHO OTKnIOHTb erO or 3neKtpocetn. <
1.ПослглжehxodByBbIKHOnTe np6op n3 cetK 6aka naporehepaTopa DojnteCbOCTbBAHnI NOoBbI yTHOra, npexde Yem ChTb np6ob. TTo6bl npoDnITb CpOK 3KcNpyataunn naporehepaTopa 2. IpoTpne Kopnyc, pykny INOBepxHOCTb yTora N6ExaTB HAKONJIeHnB B HEM HaKnnn, noCne BnaJXHO TKAHBU. OnpedeneHHORO BpeMeHn (OpneHTPOBOuHO nocne 50 3.EcnnoNooBaYTHORA NCNAQKaHa NN HA HcPOMbITb BODo. EcnB BAWeM perHoHe JecTKaB ODa, NOBnCB TBepDbIe OTNOXKeHnA, OHCTNTE ee npomlbATb naporehepaTop HxHO qAae.
4. HnKorda He nOlb3yIteCb abpa3nBbIMn CpeCTBaMn He nCNoJIb3yIte DnI npOMbIBaHn NaporeHepaTopa CpeCTBa DnI yDaJIeHn HaKnI, NOTOMy UTO OHI MOryt ero NOBpeNTb.
XpaHHe np6opa (D)
- Ppeod y6opkoi np6opa Ha xpaHeHne Doxntecb He MeHee 2 qacob 2 qaca, H yoeDnTeCB B TOM, qToero octbIBaHna. CbeMhbl pe3epByap IJRA BOdbI (1) nyct.
- YctaHOBtTe TnABHbI BbIKNIOUATEJI bNTaHn 2B NocTaBBte npnbop Ha KpaIO paKOBINbl. nONOKeHHe 己 _ 0 ^ IN BbIKNIOHTe np6Op H3 cETN. 3. OTkpOIte pINaCTMaCCOBYIO KpbIshky, pa
-
TomecTe yTOr Ha ero noCTaBky, noCTaBvB ero BHHxHey qacn npbopa, nobepHyB eB nnoKeHne noDowBy.
4.CneTe BCHO BOyu n3 pe3epByapa u ynoXnTe 4HypOTBnHTnTe dpEhaKHyU np6ky KOtla, NITAHN C NOMObU OYCTPOINCTBa DnI XpaHeHn paCNOJIOKeHHU B HIXKHe qactn annapata. shHpya. 3akpenTe npoBOi WsHaHr Ha pyUke YTOraICNoNb3yUte DnA 3TOrO MOHeTy. C NOMObu npnnaeraEMoro 3axmua (12^*) .5.HepepeBepHnTe naporehepaTop u c NOMObu CTakaHa CMatbai Te UHpyb CNIshkOM Tyro. 3aneTe B 6ak haojnnncB KOnpye npoBOi -
B HeKOTOpbIX MoDJIeX
3auntna TeKCTnIbHa nOdoBa
E6. B TeueHHe HeCKoJIbKInx MNHyT BCpIaXHnTe KOpNyc npoBOB CTAuCIN N NOHOCTBIO BblJeNTe COeApKIMOe 6aka B paKOBnHy INB BApO. IJa NOlyueHnHaNJyUHX Pe3yNbTaTOB Mbl peKOMeHdyem apom De-tnpoBoDnTB 3Ty OpeaunIO DbaJDbI.
(B HeKoToPbIX MoDeJIaX)
3Ta nooWba nCnoB3yETc DnI rnaKeHb C napom De IINKaTHbIX Beuei npMakcImaIbHOm TEMnepatype, He NOBpeKdA IN. NcNoIb3OBAHne 3aunTHOH TKCTNlBHOI NOOWBt Takke NCKHouaet Heo5XoIMMoCTb NCNOIb30BaTb TpAnky DnI npedOTbpaUeHnI 6Necka Ha TEMhBX TkaHx.
Baxho: npexde yem CHOba 3akpbItb 6ak naporehepaTopa, y6eNTecb B TOM, YTO B HEM He OCTaIOCb BObl.
ru
- IomeCTte DpehaJHyIO np6ky Ha MeCTO n 3akpyTe YctaHOBtpepyIaTOp TemnepaTybI (14) yTKora B ee, NcNoJIb3yra MOHeTy. noLoXeHne mi n.
- YctahOBHTe 3akpoTe PJIactMaccOByK KpbIu) HanoJIHnTe EMKocTb DJI BODBI BOOn I3 KpaHa.
noBepHyB eB nIOJKeHg
ABTomatueckn CnHaI O Heo6xOaMocCTN OuHcTKn
(B 3ABNCMOCTN OT MOdEIN)
Ecn CBETOBH INDnKaTOp (3) Muraet, naporehepatoc CneNyET ONOLOCHyTb.
TnA 3TOB BbINOHHTe DeIcTBn, ONcaHHbIe npdebluyem pa3dne.
YTo6bI nepe3anyctntb CBeTOBoi HndkaTop cIean n CyeTtuk BpemeHn,
ДВБЖдbl OTKПОЧТe napOBYIO CTaHцИNO NO KpaINHeI Mepe Ha 30 cekyHd.
OnonacknBaHne KaMepblnapoo6pa30BaHHy yTtora (G)
Octopoxho! CyueCTByeT onaHoctb oxorob!
Данная поцура nomORAET ydaNTb YacTNcbl HaknINn 3Камерл napoo6pa3OBaHnI.
EcnB0aB B Baewem pernohe oueHb kecTka, ee np6bn3ntelbHo pa3 B 2 HeDen.
a) y6eHTecb, yTO yTHOr OCTbI.
d)BKnHouHTe yTHOr Bpo3ETky n yCTaHOHHbIy BBKIOUcATEIb(12)B NOLOKeHne“I”
e)IIOOXKNTe,noka3aropntc cBETOBH INHINKATOPOROTOBHOCTnnapa(9).
f) Ecn npoBa cTaHcna ChabxKeHa npoperyTTopom (10), yCTaHOBNTe ero B noLoXKeHne MaKcImaJIbHOI nOaun npa
g)NoHmte yHrHad paKOBnHO nn HAD EMKOCTbIO, noXoJuee IyIc6opa BblNaHoJeCByObl.
h)Haxmnte Ha KhoNky BbInycka napa n3 noDooBbl (15) n octopoxHO notpcnTe yTIO. N3 noDooBBI NOJBETcKINrTOK n HauHET BbIXoNDtB nap, ydaJRA IMHeOuineCyaCTNUKN HaKNNI N OTNOKeHN. 3TO MOKeT 3aHrTBOKONO 5 MNHT.
(i)YctaHOBnTe peryIyTop TempepaTypb(14)ytiora B NOIOXKeHm max, HKIMMa KHOKNy BblNcya npapa n3NoOuBb(15).BoDaB KaMepe napoo6pa3OBaHnHaunet NcnapAByc. POnoXdTe, noka He nCnpntc BcB BoDA,HaxOJaAaCBA KaMepe.
j) 706bO uOHTb nOoWBy, cpa3y Je npOTpNTe BCE octaTkn 3aqr3HEnn O cyxu XIOUaTObymaxHyocanfETky, He DoXnDaCb OCTbIBaHn yTiora.
BbIaJIeHne n yCTpaHenne HenOJaOK
a aaa aaa aaa aa aaa aaa aaa aaa aaa aaa aaa aaa aaa
yjy jyj yjll jil jie jie jie
yj 2006
waste electrical)
and electronic equipment
(WEEE
j 1
aai 1
g( x) = h^ ( x) + g^ x
. Bosch
ar
1 1 1 1 1 1 1 1 1 1 1 1 1 1 1 1 1 1 1 1 1 1 1
(9)"jaj jaii juii aai i jaii jaii jaii jaii jaii jaii jaii jaii jaii jaii jaii jaii jaii jaii jaii jaii jaii jaii jaii jaii jaii jaii jaii jaii jaii jaii jaii jaii jaii jaii jaii jaii jaii jaii
Jawj 0 jall jg jn bbaal by jll
8 8
jll jy . 15y y
jll" j 1
.
Lgjgl 4
aaii iiaaa
jI 1
1
Ljusll 1 j 1 j 1
Jaa Jaa
(F) "Cal c'n clean"
ailllgl
J 1
i 1
gss
J 1
. 1
50 2)
. 45
a 1
2
- 15.2015.2016.2017.2018.2019.2020.2021. 3
jzj j 1
. 124
. 与 , (1,2 .
Jusell 2
a 3
A
gall jia gao jia gao elu ciuyi dui
(D)
aij = bij
1
a 1
alal . 5cill 1c olso oJgJgolgol 3
j1/4 j(sll) jla
1 4
如果 = ( x1,y1) , = ( x2,y2) ,
iSall jia 1jll gbs 1gaz .illl 0
alwaii laai lgi j ai jai
1 40% 25% jia jia jia jia jia jia jia jia jia jia jia jia jia jia jia jia jia jia jia jia jia jia jia jia jia jia jia jia jia jia jia jia jia jia jia jia jia jia jia jia jia jia jia jia jia jia jia jia jia jia jaijai jiagao (5) .()d gao
1 1
(13) 1
.(15) 2
ar
Jooi 100
J 1
Ez1 = 0 Dz2 = 4
isai . cial gina wail jia 18
Lioic (3) "clally jjsl 1
i
jgl 1
allj1 all j1
a1 = 2,a2 = - 4
/“clal jgj" yaljaiy
“jil” 4
a5^3 + a6^3 + a_7^3 = 108
*Jiill Jiljll Iua 5
- “ 6.6
ai a ai 的最小值为 k .
1/0 8
12 12 12 12 12 12 12 12 12 12
ai ≤ a1 + 12 - 12 = 12 a ≤ 12
11
*j11 j 12
13
aiia 14
15
j 16
a1 ≤ a2 ≤ a_3
jglai
(A)
. 451 all 1o Jaiwi
1:1 1 aal al aai ai al cai , jai yai
ela jiδal , aiobio ei jilc clall Jue 4jds co1s 1
1:2 1
clll iie clll jy juiuui 1
A
jll jlllclllal jil jis
g j 1j 1j g j j j j j
Ailj = 0
y
. 田
(2)
Laaas paaaljall g aS j say ayaiyaiy jss
aai . 11 iabio aixo jia jia jia
. 2
j 0j j j j j j j j j j j j j j j j j j j j j j j j j j j j j j j j j j j j j
i 1
.
Jiaxue liang xue jie 1
| ### | ● |
| ### | ●● |
| ### | ●●● |
aJgssll Jgblia j jll aqj
J 1 J 1 J 1 J 1 J 1 J 1 J 1 J 1 J 1 J 1 J 1 J 1 J 1 J 1 J 1 J 1 J 1 J 1 J 1 J 1 J 1 J 1 J 1 J 1 J 1 J 1 J 1 J 1 J 1 J 1 J 1 J 1 J 1 J 1 J
Jlai Jia jia jia jia jia jia jia
i 1
: 1
16 16
aaiu ygssal oedla ydy 15s e 2y jzll g sall jzl aal .