
TDA302801P - Iron BOSCH - Free user manual and instructions
Find the device manual for free TDA302801P BOSCH in PDF.
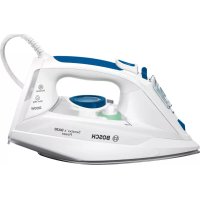



| Product type | Steam iron |
| Brand | Bosch |
| Model | TDA302801P |
| Dimensions (L x W x H) | Approx. 30 x 12 x 15 cm |
| Weight | Approx. 1.4 kg |
| Power supply | 220-240 V ~ 50/60 Hz, 2400 W |
| Water tank capacity | Approx. 300 ml |
| Soleplate | Smooth soleplate (material not specified) |
| Main functions | Steam ironing, steam shot, spray, vertical ironing, dry ironing |
| Steam control | Continuous steam regulator |
| Temperature control | Rotary selector with positions Synthetic, Silk-Wool, Cotton, Linen |
| Safety | Automatic shut-off (Auto Off), SensorSecure, anti-drip protection, auto stop |
| Descaling system | Self-Clean, Calc'nClean, anti-calc cartridge (accessory TDZ1101), descaling liquid |
| Care and cleaning | Clean soleplate with damp cloth, use Calc'nClean function every 3 months with descaling liquid |
| Cable length | Approx. 2 m |
| Use | Household use only |
| Country of origin | Not specified (estimated: Germany or China) |
| Included accessories | Measuring cup, descaling liquid (depending on version) |
| Warranty | 2 years (standard estimate) |
Frequently Asked Questions - TDA302801P BOSCH
User questions about TDA302801P BOSCH
0 question about this device. Answer the ones you know or ask your own.
Ask a new question about this device
Download the instructions for your Iron in PDF format for free! Find your manual TDA302801P - BOSCH and take your electronic device back in hand. On this page are published all the documents necessary for the use of your device. TDA302801P by BOSCH.
USER MANUAL TDA302801P BOSCH
Sensixx'x DA30

BOSCH
uk Operating instructions
ru Operating instructions
ro Operating instructions
ar
kz Operating instructions
| Index | |
| DEUTSCH6 | |
| ENGLISH12 | |
| FRANÇAISE | 18 |
| ITALIANO | 24 |
| NEDERLANDS | 30 |
| DANSK | 36 |
| NORSK | 42 |
| SVENSKA | 48 |
| SUOMI | 54 |
| ESPÁÑOL | 60 |
| PORTUGUES | 66 |
| ΕΥΑΗΝΙΚΑ | 72 |
| TÜRKÇE | 78 |
| POLSKI | 84 |
| MAGYAR90 | |
| ΥΚΑΙΗCbKA | 96 |
| ΡΥСΚΗ | 102 |
| ROMÁN108 | |
| العربية | 119 |
| KA3AK | 120 |
| KA3AK | SUOMI | NORSKSVENISKA DANSK FRANGAURIBIAIDIN O ENGLISH | DEUTSCH | |||
| i.### | ROMAN | YKPAIHChbka | MAGYAR | POLSKI | TURKGE | PORTUGUES |
Thank you for buying the Sensixx'x DA30 steam iron from Bosch.
Carefully read through the operating instructions for the appliance and safeguard them for future reference.
You can download this manual from the local homepages of Bosch.
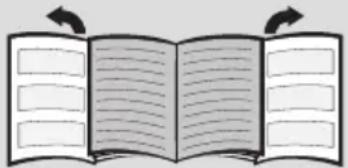
Open the leaflet sides
General safety instructions
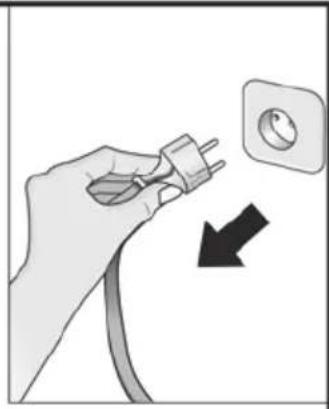
The iron must not be left unattended while it is connected to the supply mains. - Remove the plug from the socket before filling the appliance with water or before pouring out the remaining water after use.
The appliance must be used and placed on a stable surface.
- When placed on its stand, make sure that the surface on which the stand is placed is stable. The iron should not be used if it has been dropped, if there are visible signs of damage or if it is leaking water. It must be checked by an authorized Technical Service Centre before it can be used again.
- With the aim of avoiding dangerous situations, any work or repair that the appliance may need, e.g. replacing a faulty mains cable, must only be carried out by qualified personnel from an Authorised Technical Service Centre. This appliance can be used by children aged from 8 years and above and persons with reduced physical, sensory or mental capabilities or lack of experience and knowledge if they have been given supervision or instruction concerning use of the appliance in a safe way and understand the hazards involved. Children shall not play with the appliance. Cleaning and user maintenance shall not be made by children without supervision.
- Keep the iron and its cord out of reach of children less than 8 years of age when it is energized or cooling down.

CAUTION. Hot surface. Surface is liable to get hot during use.
Important notices
- This appliance has been designed exclusively for domestic use and must not be used for industrial purposes.
- This appliance must be used only for the purposes for which it was designed, i.e. as an iron. Any other use will be considered improper and consequently dangerous.
- The manufacturer will not be held responsible for any damage arising from misuse or improper use.
- This appliance reaches high temperatures and produces steam during use, this could cause scalds or burns in case of improper use.
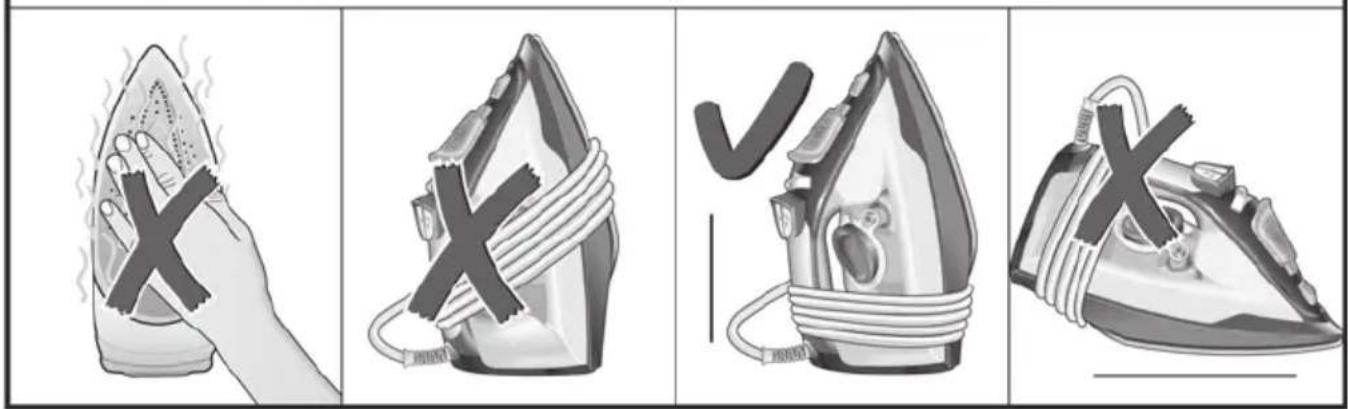
- Do not touch the soleplate! Hold the iron by its handle.
- Do not leave the supply cord hanging over the table or ironing board, to prevent the appliance from falling.
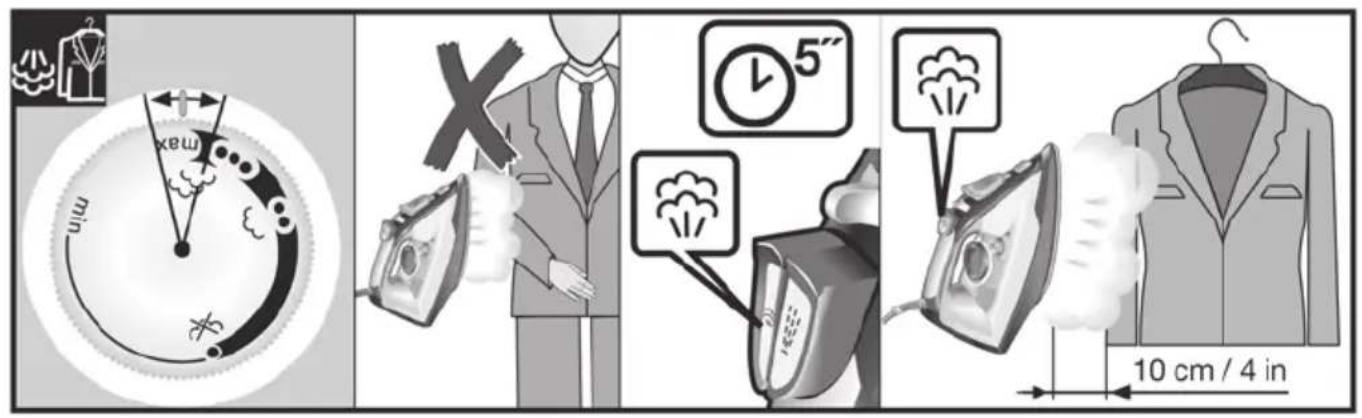
- Do not iron clothing while it is being worn!
- Never spray or aim the steam at persons or animals!
- Do not allow the power cable to come into contact with sharp edges or with the soleplate when it is hot.
- Never rest the iron in a horizontal position when the soleplate is hot. Rest it on its heel.
- Do not touch the appliance with wet hands when in operation.
- This appliance is to be connected and used in accordance with the information stated on its characteristics plate.
- This appliance must be connected to an earthed socket. If it is absolutely necessary to use an extension cable, make sure that it is suitable for 16A and has a socket with an earth connection.
- In order to avoid that, under unfavourable mains conditions, phenomena like transient voltage drops or lighting fluctuations can happen, it is recommended that the iron is connected to a power supply system with a maximum impedance of 0.28Ω . If necessary, the user can ask the public power supply company for the system impedance at the interface point.
- The appliance must never be placed directly under the tap to fill the water tank.
- Unplug the appliance from the mains supply after each use, or if a fault is suspected.
- The electrical plug must not be removed from the socket by pulling the cable.
- Never immerse the iron in water or any other fluid.
- Do not leave the appliance exposed to weather conditions (rain, sun, frost, etc.).
Advice on disposal
Our goods come in optimized packaging. This basically consists in using non-contaminating materials which should be handed over to the local waste disposal service as secondary raw materials. Your local town council can give you information about how to dispose of obsolete appliances.
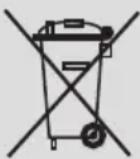
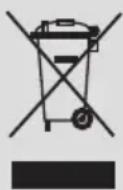
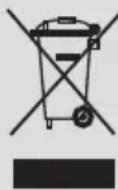
This appliance is labelled in accordance with European Directive 2012/19/EU concerning used electrical and electronic appliances (waste electrical and electronic equipment - WEEE).
The guideline determines the framework for the return and recycling of used appliances as applicable throughout the EU.
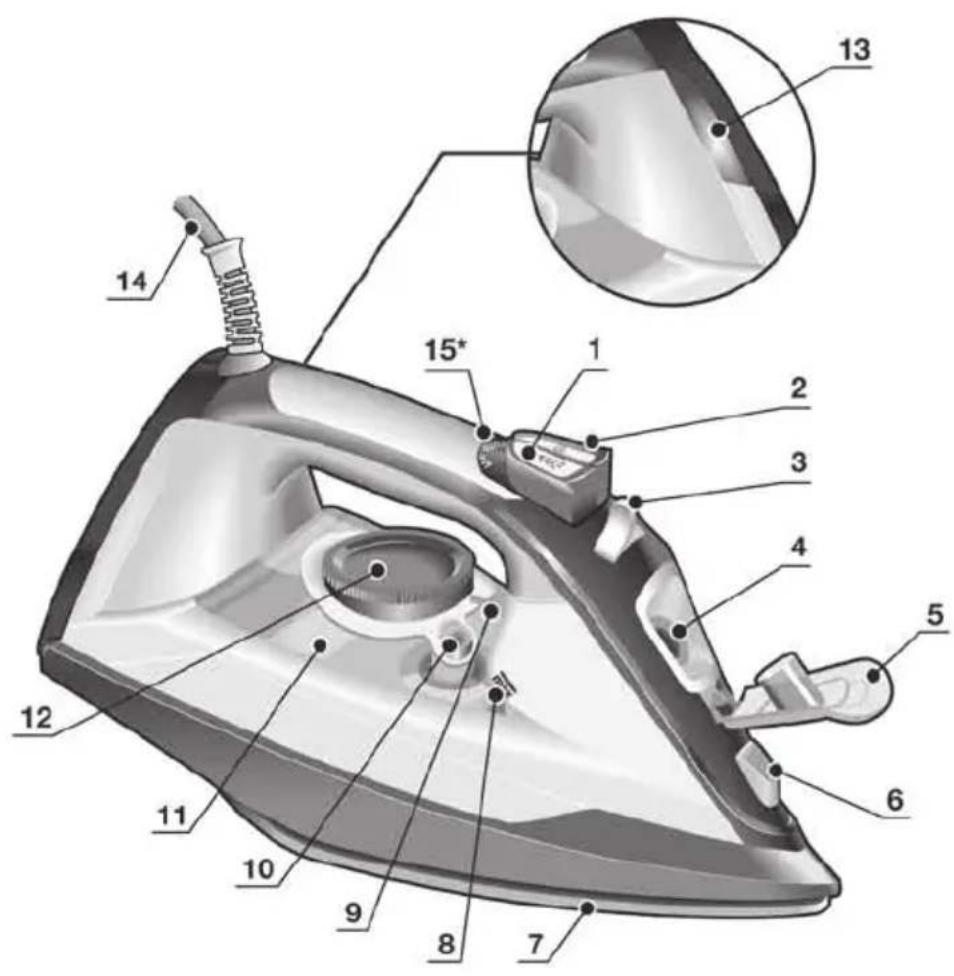
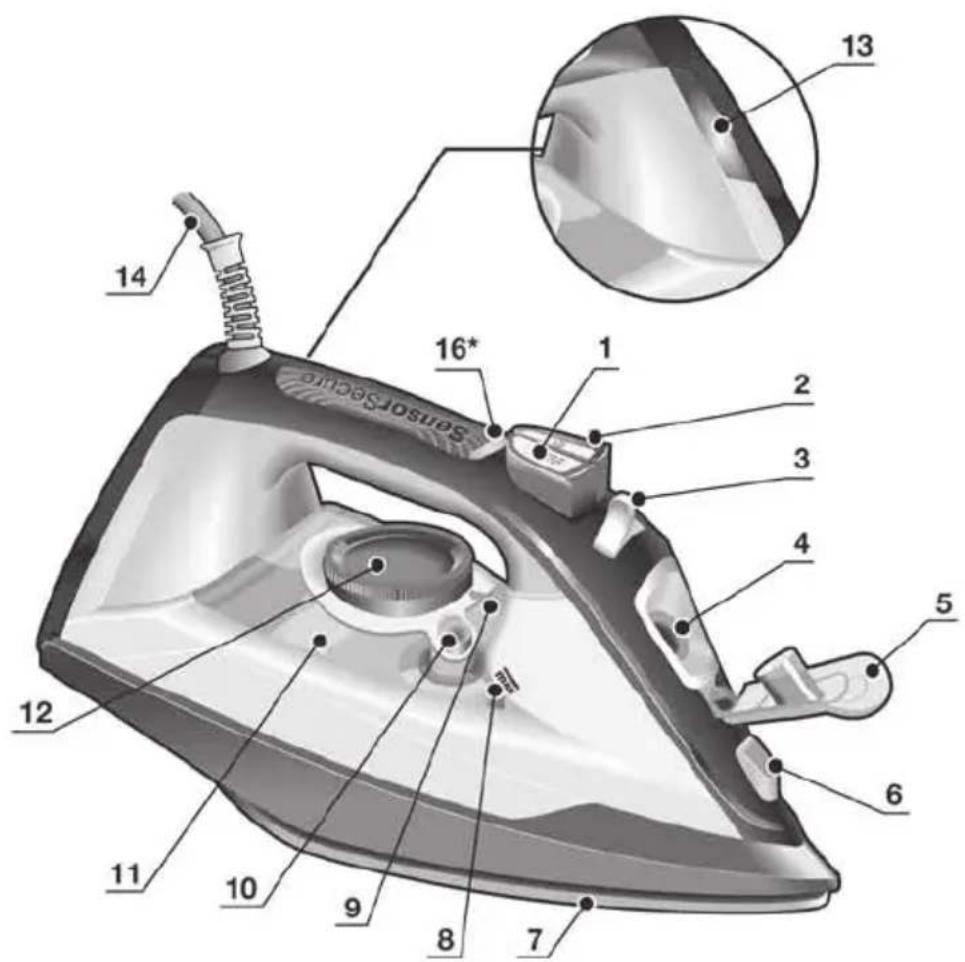
Description
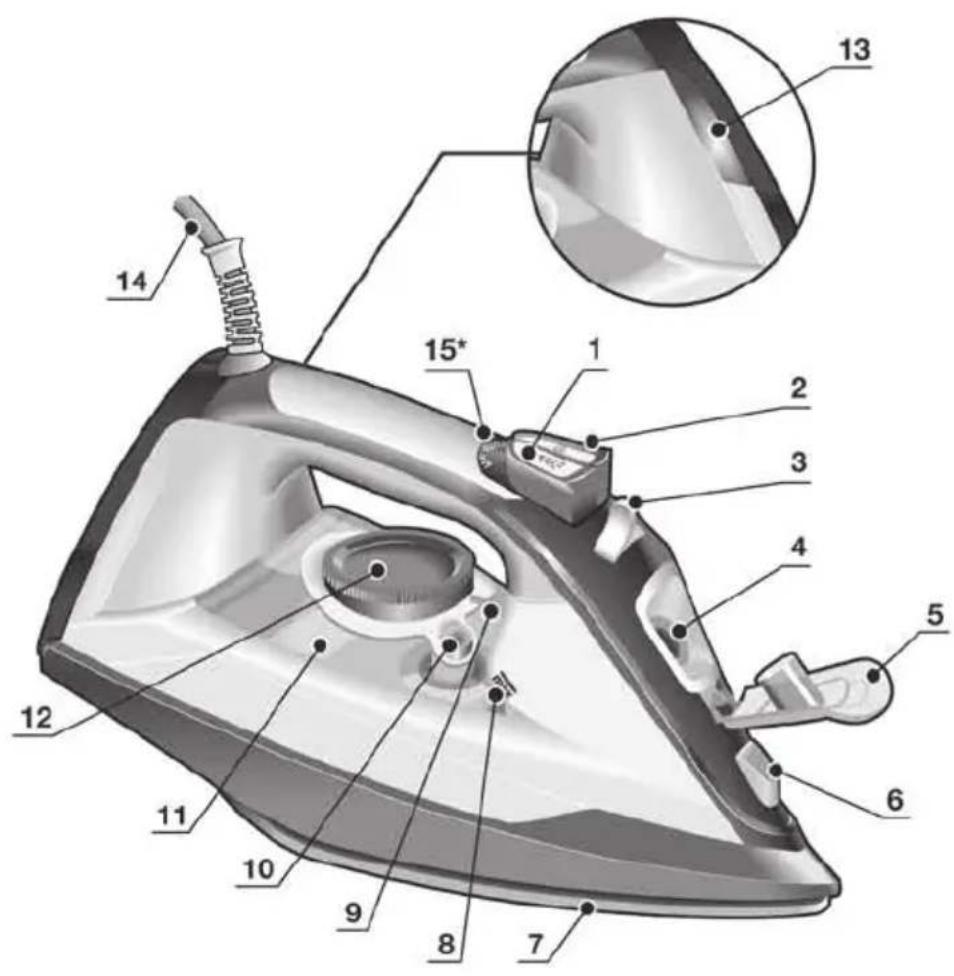
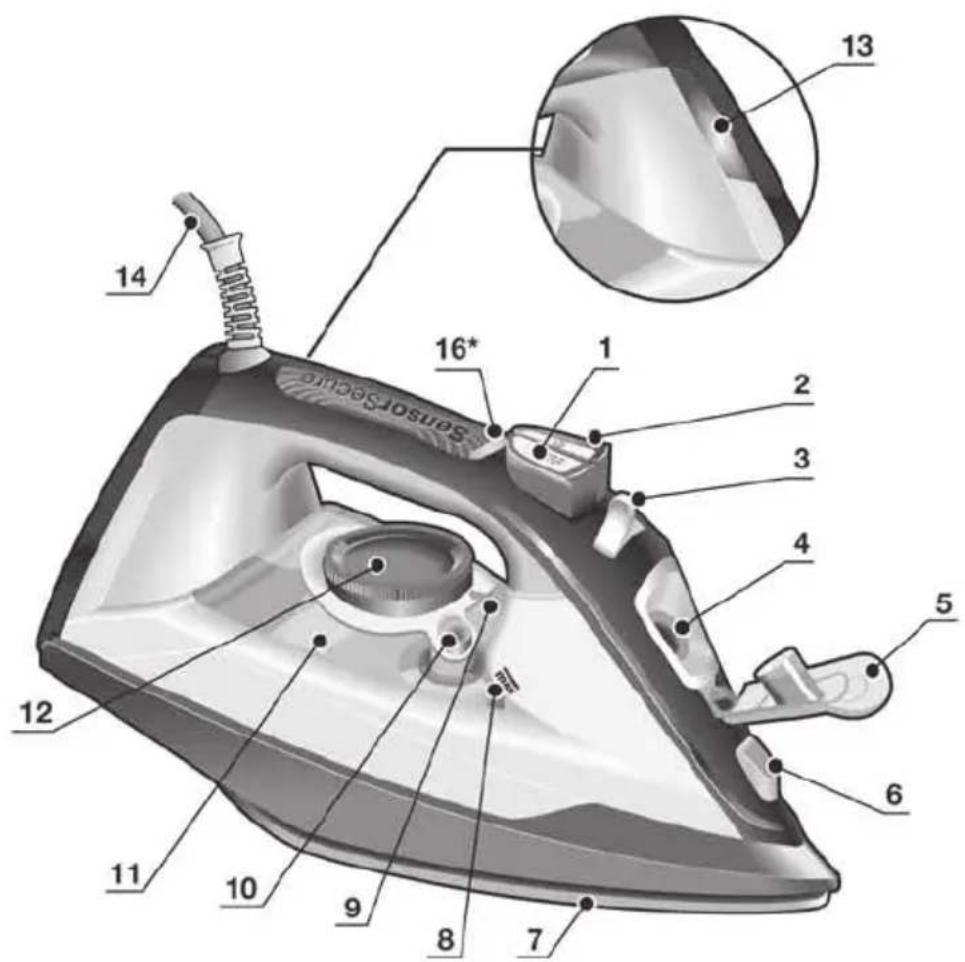
- Spray button
- Shot of steam button
- Steam regulator
- Water inlet
- Water inlet lid
- Spray nozzle
- Soleplate
- Level mark for maximum filling
- Temperature index
- "clean" button
- Water tank
- Temperature control
- Pilot light
- Power cord
- "auto off" indicator light *
- "SensorSecure" light *
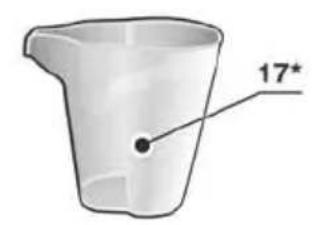
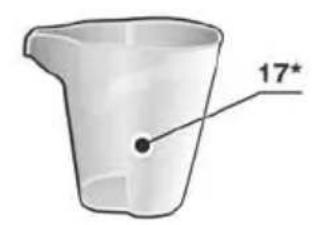
- Beaker *
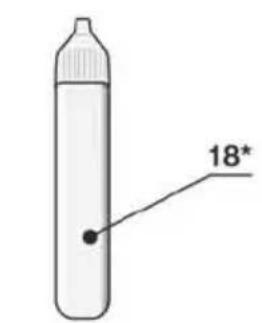
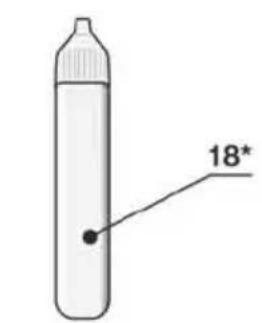
- Descaling liquid *
Before using your appliance for the first time
Remove any label or protective cover from the soleplate (7).
During its first use, the iron may produce certain vapors and odors that will disappear after a few minutes.
Using your appliance

1. Filling the water tank
See the leaflet sides
This appliance has been designed to use normal tap water.
- The addition of other liquids, (unless recommended by Bosch) such as perfume, will damage the appliance.
- Do not use condensation water from tumble dryers, air conditioning systems or similar.
Any damage caused by the use of the aforementioned products will make the guarantee void.

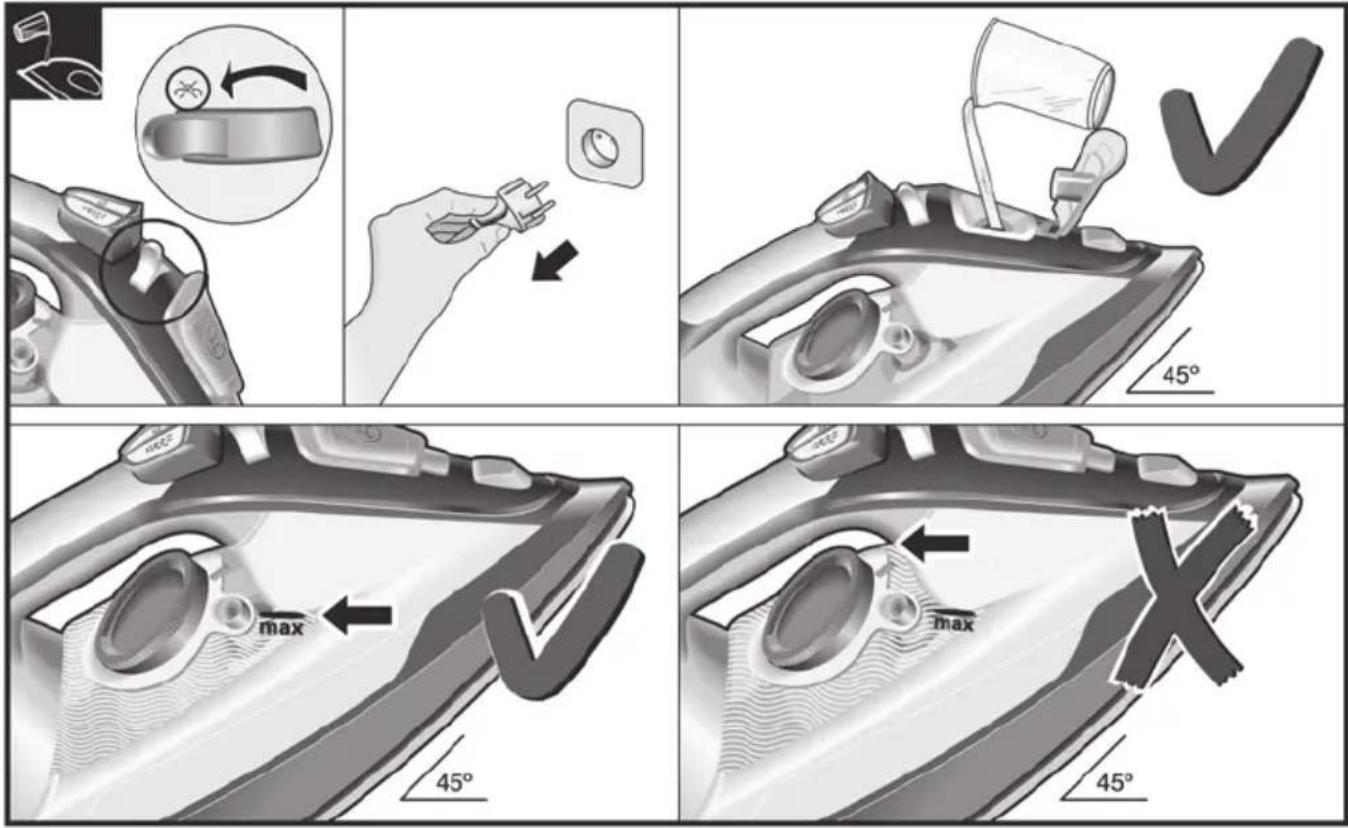
Set the steam regulator (3) to the position and unplug the iron from the mains!
- Open the water inlet lid (5).
- Fill the water tank (11). Never fill beyond the level mark for maximum filling (8).
- Close the water inlet lid.
To prolong the optimum steam function, you may mix tap water with distilled water 1:1. If the tap water in your district is very hard, mix tap water with distilled water 1:2.
You can inquire about the water hardness with your local water supplier.

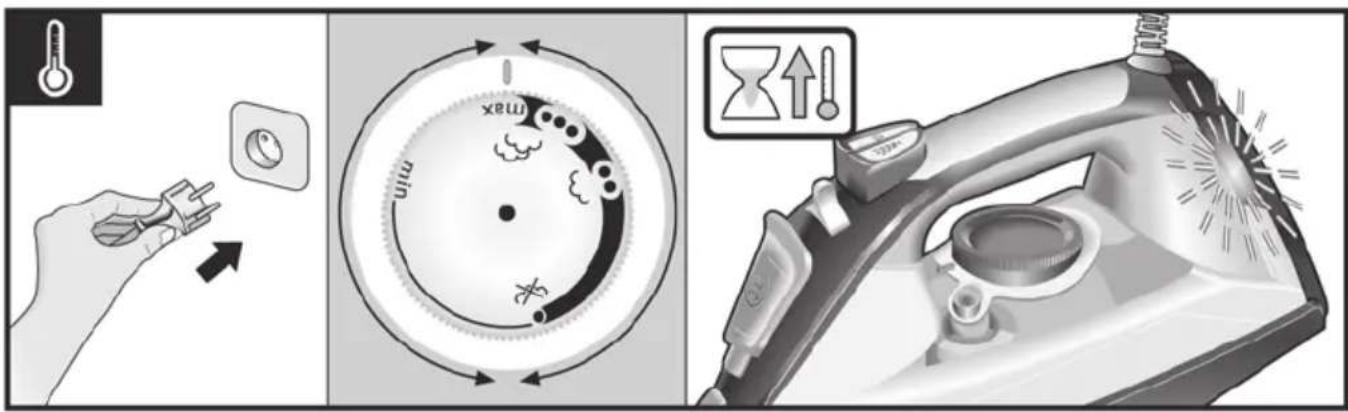
2. Setting the temperature
See the leaflet sides
The temperature control (12) adjusts the temperature of the soleplate (7).
Set the temperature control to the corresponding position by lining it up with the temperature index (9) on the iron.
Temperature Suitable for:
Synthetics
Silk-Wool
Cotton
max Linen
The pilot light (13) switches on while the appliance is heating up and switches off as soon as the set temperature is reached. If the temperature of the hot iron drops, you can continue ironing while the iron heats up again to the set temperature.

3. Ironing with steam
See the leaflet sides
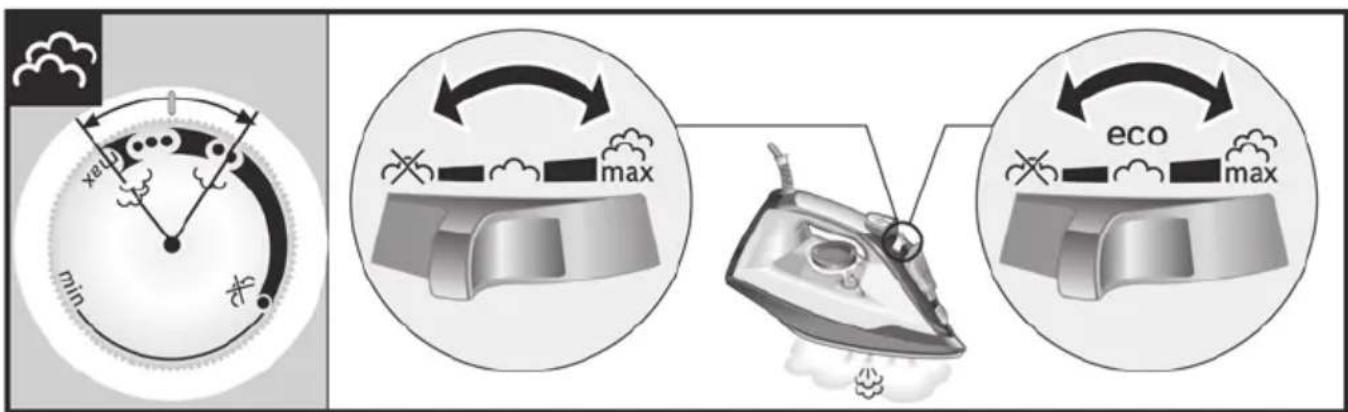
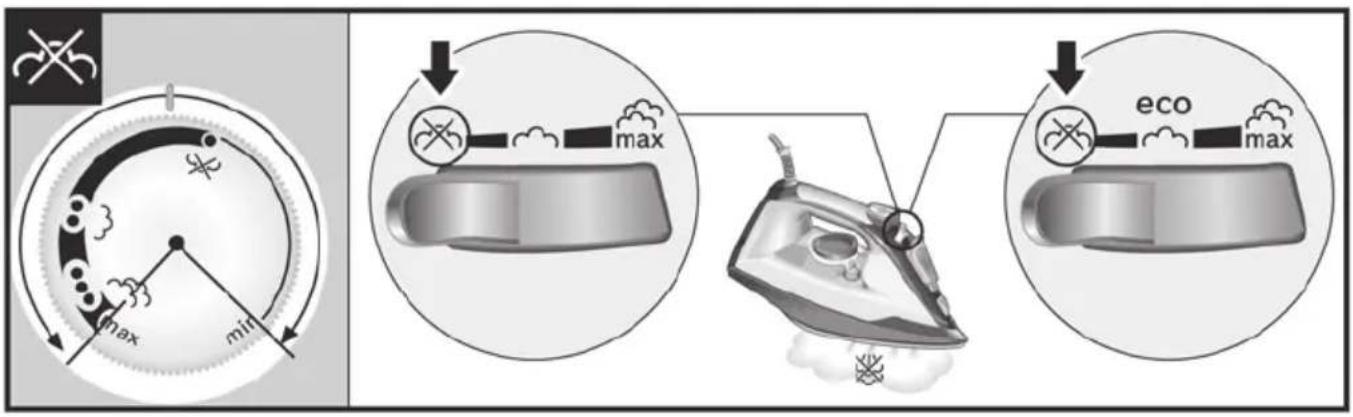
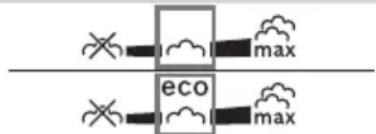
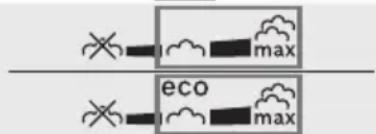
The steam regulator (3) is used to adjust the amount of steam produced when ironing.
Temperature control (12)
Recommended position of the steam regulator (3) *

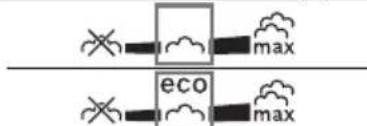

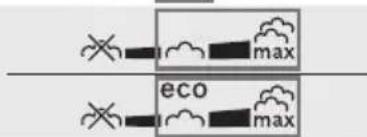
For better ironing results, iron the last strokes without steam to dry the garment.

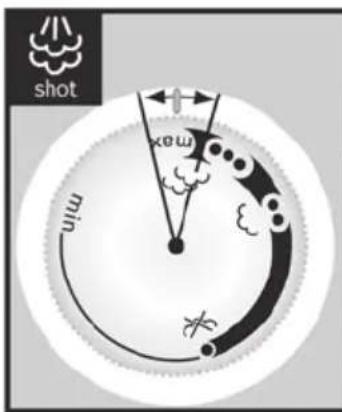
4. Shot of steam
See the leaflet sides
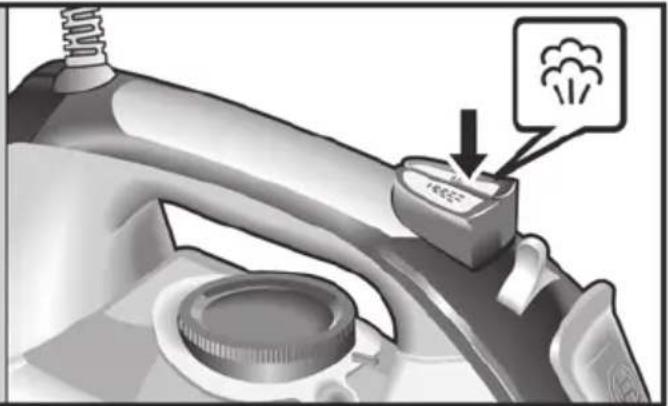
This can be used to remove stubborn wrinkles or to press in a sharp crease or pleat.
- Set the temperature control (12) to "max".
- Press the shot of steam button [3] (2) repeatedly with intervals of at least 5 seconds.

5. Vertical steam
See the leaflet sides
This can be used to remove creases from hanging clothes, curtains etc.
- Set the temperature control (12) to "max".
- Hang article of clothing on a clothes hanger.
- Operate the iron in a vertical position at a distance of 10 cm / 4 in, and press the shot of steam button [W] (2) repeatedly with pauses of at least 5 seconds.

6. Ironing without steam
See the leaflet sides
This enables the iron to be used for dry ironing.
Set steam regulator (3) to the position.

7. Drip protection *
See the leaflet sides
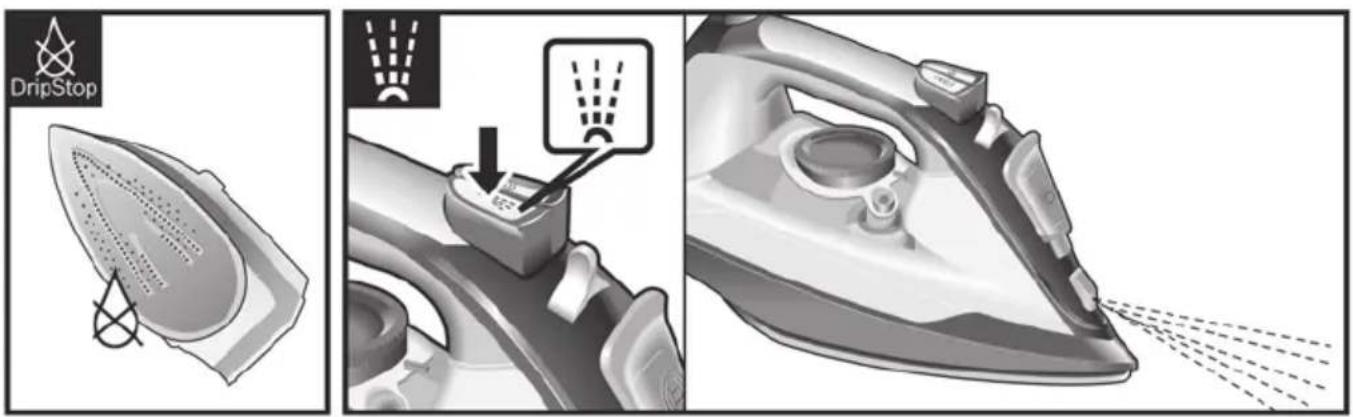
If the temperature is set too low, the steam is automatically switched off to avoid dripping.
There may be an audible click when this occurs.

8. Spray
See the leaflet sides
This can be used to remove stubborn wrinkles.
Do not use the spray function with silk.

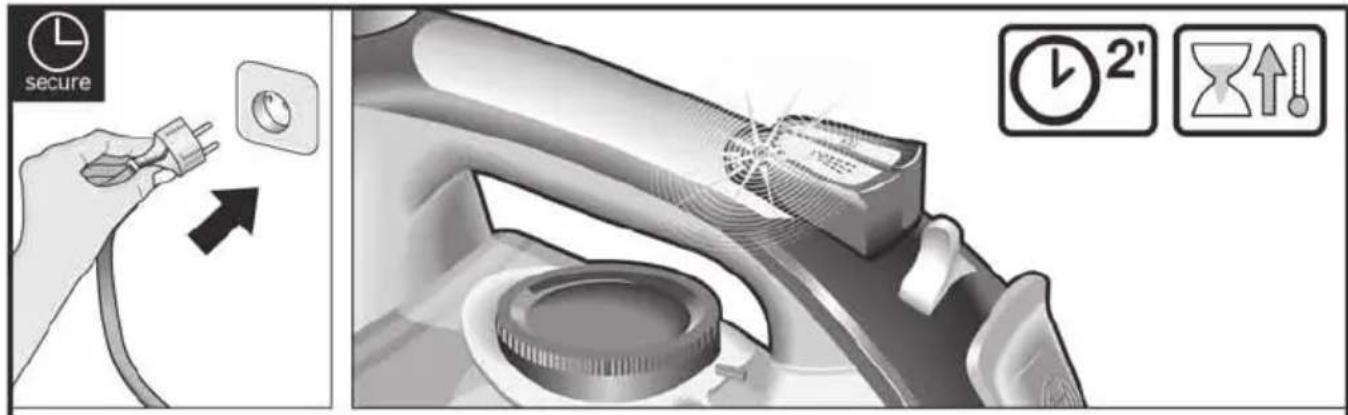
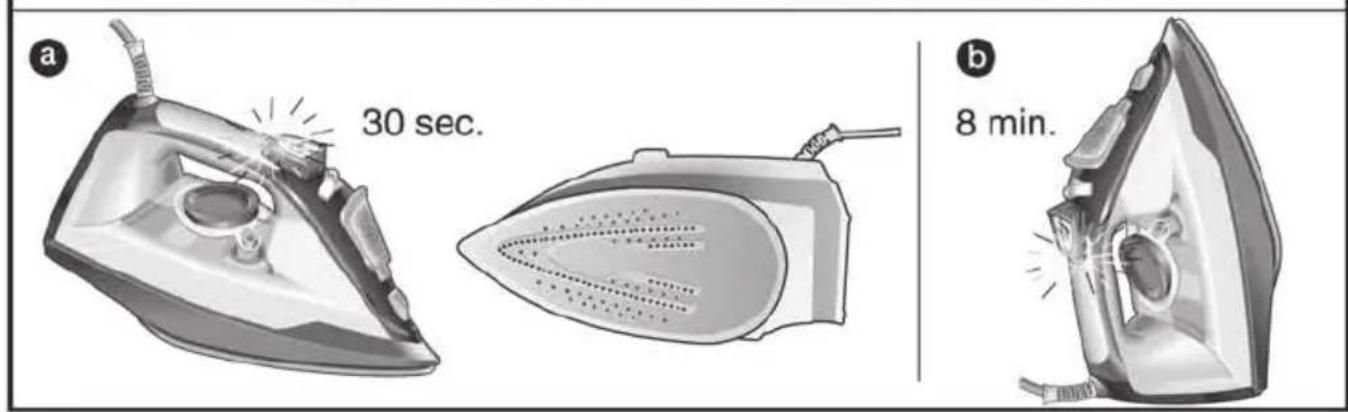
9. "secure" auto shut-off function *
See the leaflet sides
The "secure" auto shut-off function switches off the iron when it is left unattended, thus increasing security and saving energy.
If your iron is equipped with "secure" function, you can find the text "auto off" on handle.
- Plug in the iron.
- Initial heating up process: this function will be inactive for the first two minutes in order to give the appliance time to reach the set temperature.
- The safety circuit will switch the appliance off automatically and the indicator light (15*) will start flashing in the following cases:
a If the iron is not moved for 30 seconds while resting on its soleplate or on its side. b If the iron is not moved for 8 minutes while in the upright position.
- To reconnect the iron, just move it about gently.

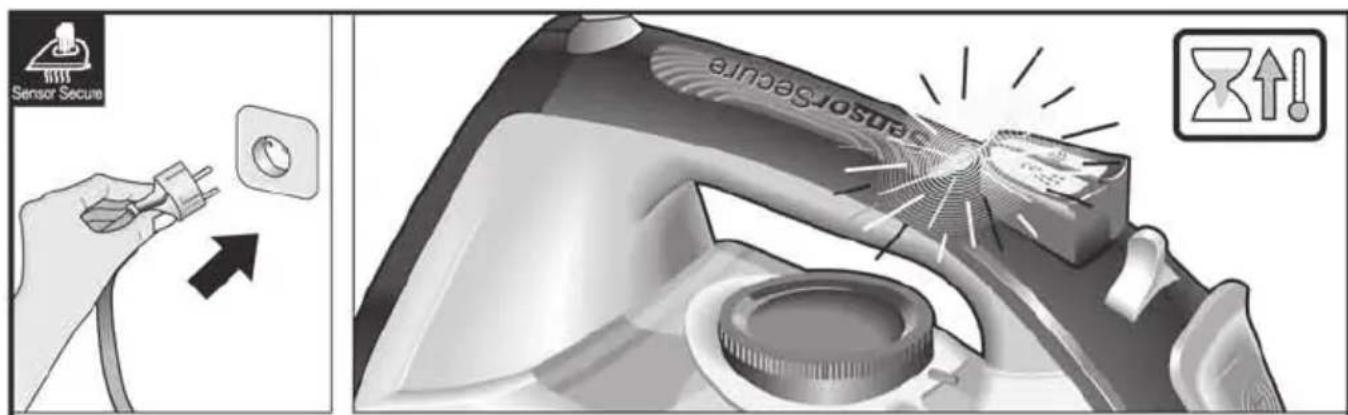
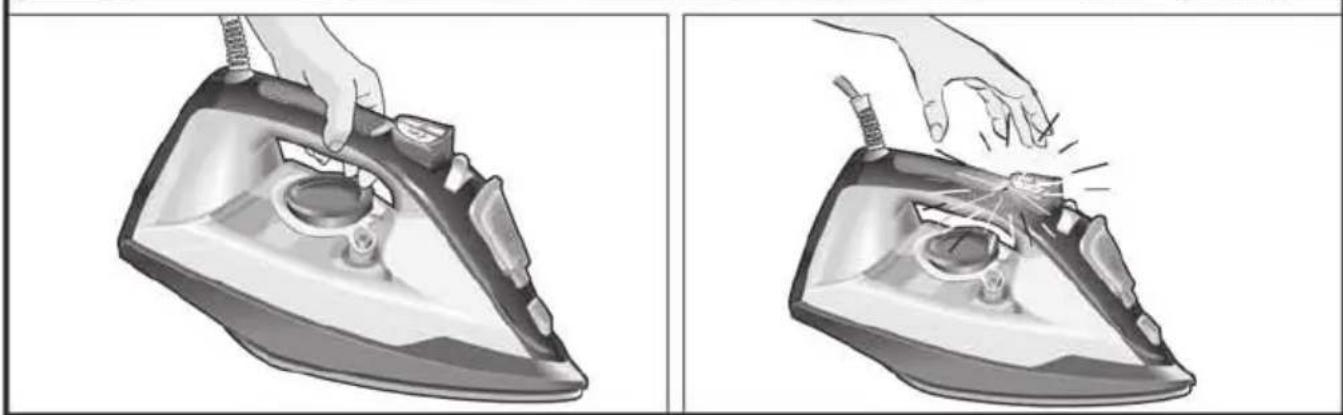
10. "SensorSecure" function *
See the leaflet sides
The "SensorSecure" function makes the iron heat up only while ironing.
Thus, safety and saving energy get increased.
- Plug in the iron.
- "SensorSecure" light (16*) flashes while resting, and will show a continuous light while ironing.
- If the iron is resting for more than 12 seconds, the iron will stop heating automatically.
- Once ironing is restarted, the iron will heat up again.
Initial heating up process: it is not necessary to grip the handle until the iron heats up to the set temperature. Once reached such temperature, the pilot light (13) goes off.

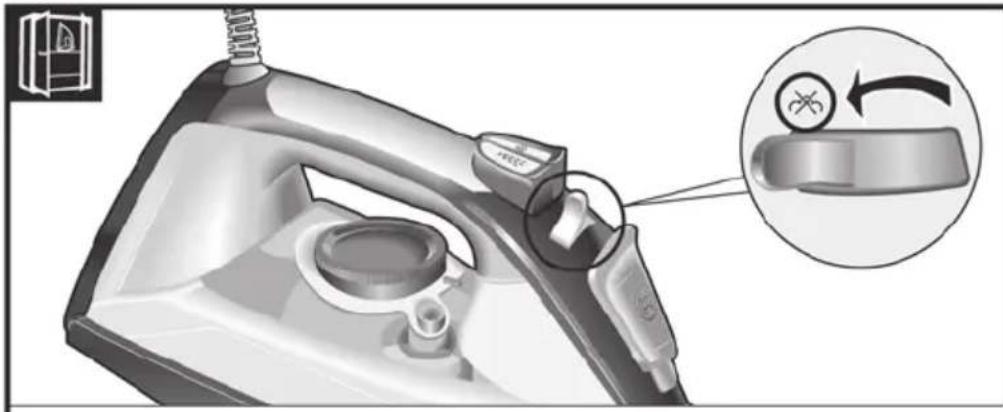
11. After ironing
See the leaflet sides
- Switch the steam regulator (3) from to "max" and back again several times (self-cleaning).
- Empty the tank. Hold the iron with the point down and shake lightly.
- Store standing on the rear, not on the base.
- Do not wrap the power cord (14) too tight!

Tips to help you save energy
Steam production consumes the most energy. To help minimise the energy used, follow the advice below:
- Start by ironing the fabrics that require the lowest ironing temperature. Check the recommended ironing temperature in the label on the garment.
- Regulate the steam according to the selected ironing temperature, following the instructions in this manual. Only use steam if necessary. If possible, use the spray function instead. Try to iron the fabrics while they are still damp and reduce the steam setting. Steam will be generated from the fabrics rather than the iron.
If you tumble dry your fabrics before ironing them, set the tumble drier on the 'iron dry' program.
- If the fabrics are damp enough, turn off the steam regulator (3) completely.
- Stand the iron upright during pauses. Resting it horizontally with the steam regulator on generates wasted steam.

Cleaning & Maintenance
See the leaflet sides

Attention! Risk of burns!
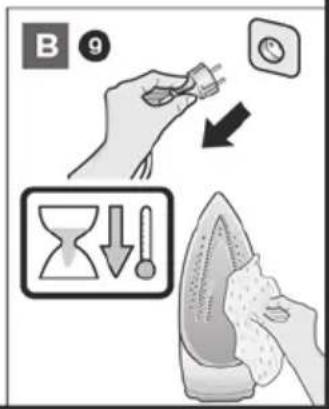
Always unplug the appliance from the mains supply before carrying out any cleaning or maintenance operation on it.
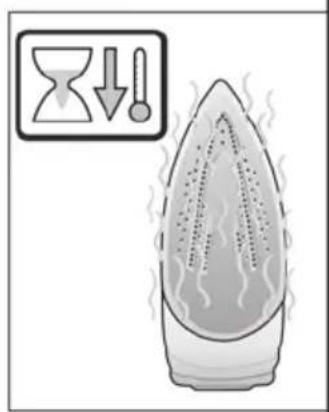
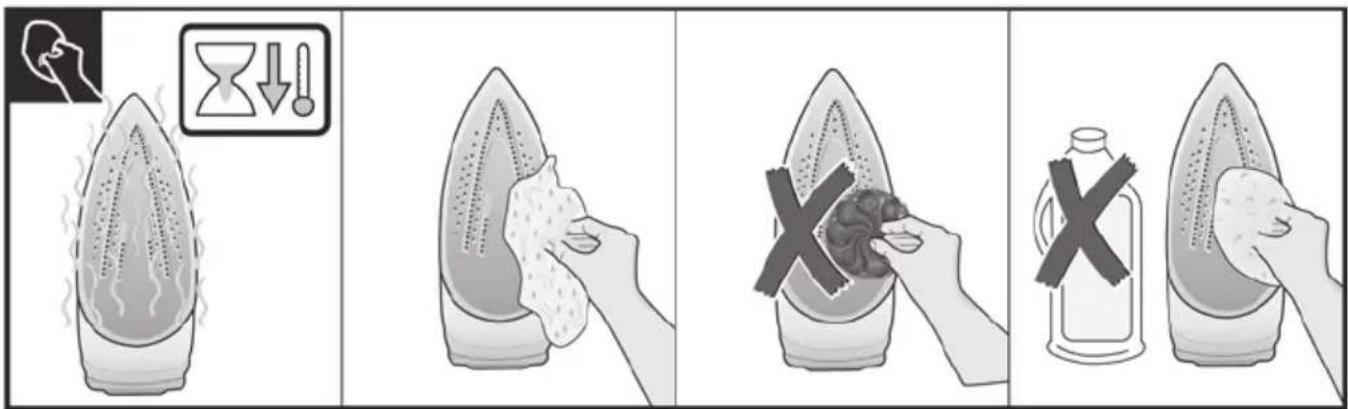
- If the iron is only slightly soiled, pull out the plug and allow the soleplate (7) to cool down. Wipe the housing and the soleplate with a damp cotton cloth only.
- If the cloth is synthetic, it may melt due to the high temperature on the soleplate, switch off the steam and rub off any residue immediately with a thickly folded, damp cotton cloth.
- To keep the soleplate smooth, you should avoid hard contact with metal objects. Never use a scouring pad, or chemicals to clean the soleplate.

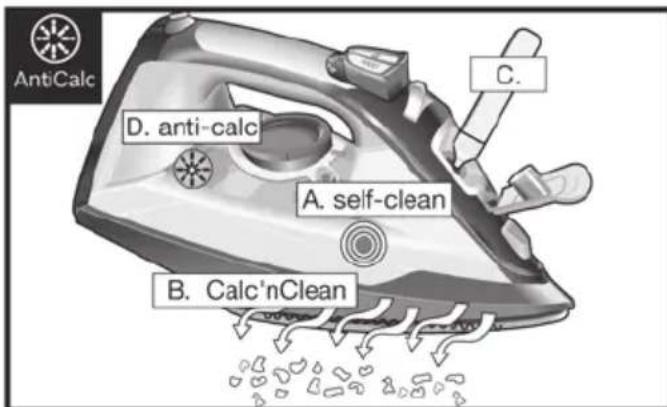
Multiple descending system
See the leaflet sides

Self-clean
Each time you use the steam regulator (3), the "self-clean" system cleans the mechanism of scale deposits.

Calc'nClean
The "Calc'nClean" function helps to remove scale particles out of the steam chamber. Use this function approximately every 2 weeks if the water in your area is very hard.
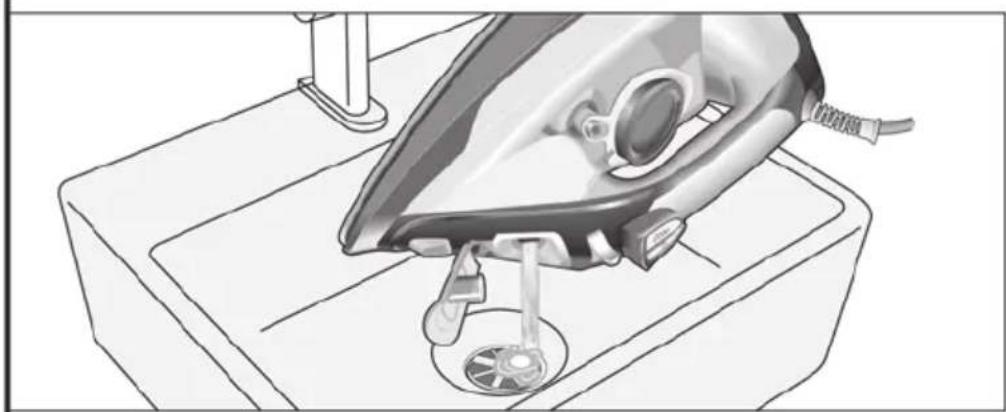
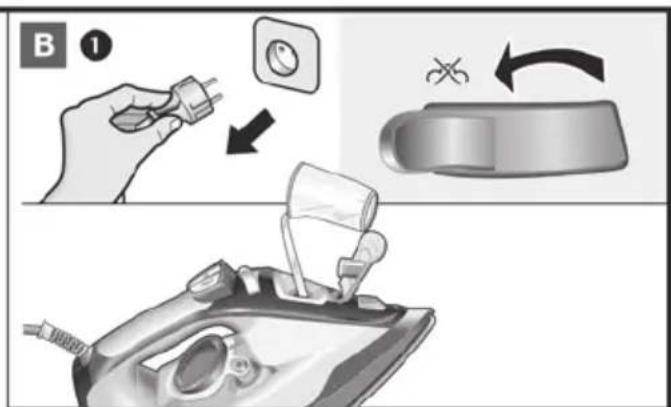
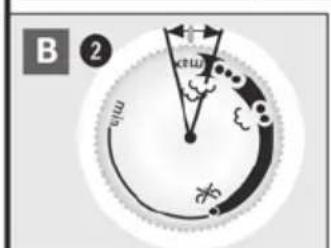
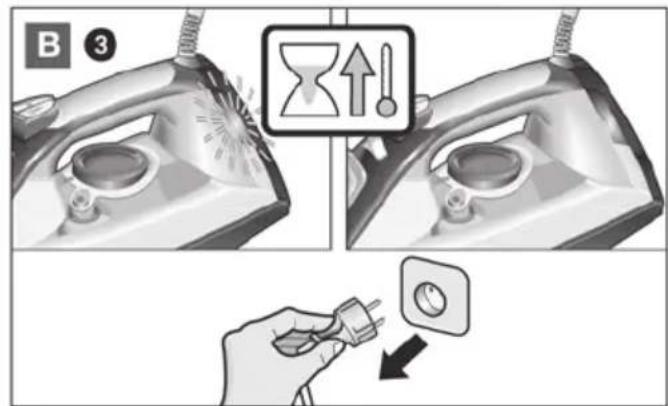
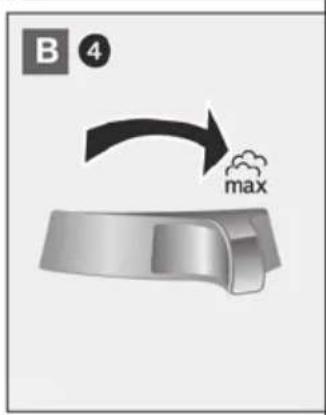
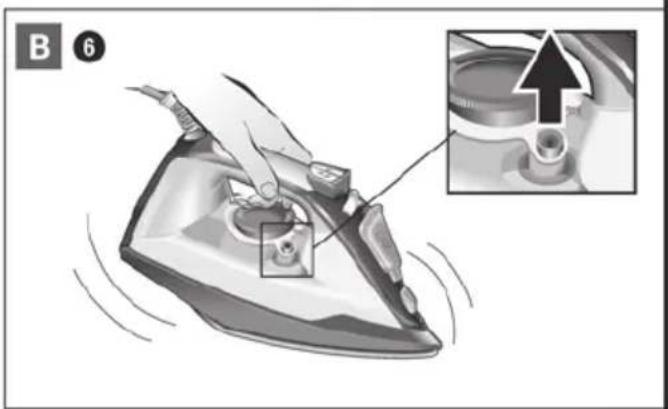
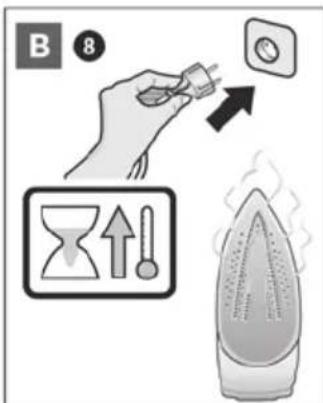
Unplug the iron from the mains socket, set the steam regulator (3) to the position and fill the water tank (11) with water. Set the temperature control (12) to the "max" position and plug in the iron. After the necessary warm-up period, the pilot light (13) goes out. Then, unplug the iron (very important!). 4 Set steam regulator to the "max" position. Hold the iron over a sink. Press the "clean" button (10) and shake the iron until approximately one third of the water capacity of the tank is evaporated. Boiling water and steam will come out, carrying scale or deposits that might be there. Release the "clean" button, and gently shake the iron for some seconds. Repeat the steps 5 and 6 three times until the tank is empty. Then plug the iron in and heat it up again until the remaining water has evaporated. Push the "clean" button a few times more to clean the valve. Unplug the iron and let the soleplate (7) cool down. Wipe the soleplate with a damp cotton cloth only.

"Calc'nClean" with descaling liquid *
For deep descaling, it is recommended to use the descaling liquid especially developed by Bosch. This procedure should be carried out every 3 months.
- Fill the water tank (11) with tap water mixed with a measure (25 ml) of the descaling liquid (18*)
- Then follow the procedure described above in section "Calc'nClean" (steps 2 to 9).
The descaling liquid may be purchased from our after-sales service or specialist shops.
Name of accessory: TDZ1101
D anti-calc*
The "anti-calc" cartridge has been designed to reduce the build-up of scale produced during steam ironing, helping to extend the useful life of your iron. Nevertheless the "anti-calc" cartridge cannot remove all of the scale that is produced naturally over time.

Troubleshooting
| Problem Probable cause Solution | ||
| The iron does not heat up. | 1. Temperature control (12) set to minimum. | 1. Turn to a higher position. |
| 2. The "secure" system has been activated ("auto off" indicator light 15* flashes). The iron is set to stand-by. | 2. To reconnect the iron, just move it about gently. | |
| 3. The "SensorSecure*" system has been activated ("SensorSecure" indicator light 16* flashes). The iron is set to stand-by. | 3. Grip the handle of the iron to re-start it. | |
| The clothes tend to stick. | 1. The temperature is too high. 1. Turn the temperature control (12) down and wait until the iron has cooled down. | |
| Water drips out of the soleplate (7) together with steam. | 1. Temperature control (12) setting is too low. | 1. Turn the temperature control to a higher setting (between "●" and "max") and wait until the pilot light (13) goes out. |
| 2. Steam regulator (3) is set too high in conjunction with a low temperature. | 2. Set the steam regulator (3) to a lower setting. | |
| 3. You have pressed the shot of steam button (2) repeatedly without waiting for 5 seconds between each press. | 3. Wait 5 seconds between each press of the shot of steam button. | |
| Steam does not come out. | 1. Steam regulator (3) is set to [×] position. | 1. Set the steam regulator to a higher position. |
| 2. The temperature is too low. Anti-drip system is activated. | 2. Set to a higher temperature if compatible with the fabric. | |
| Smoke comes out when connecting the iron for the first time. | 1. This may be caused by the lubrication of some of the internal parts. | 1. This is normal and will stop after a few minutes. |
| Excessive dripping or steaming. | 1. No proper closing of "Calc'nClean" system. | 1. Actuate a few times the "clean" button (10). |
| Deposits come out through the holes in the soleplate (7). | 1. Traces of lime scale are coming out of the steam chamber. | 1. Carry out a cleaning cycle (see "Calc'nClean" section). |
If none of the above solves the problem, get in touch with an authorised technical service.
2. Setting the temperature
Ironing board sides
The temperature selector (12) adjusts the temperature of the soleplate (7).
6. Dry ironing
Ironing board side
2. Setting the temperature
Temperature regulator (12)
Adjusting the temperature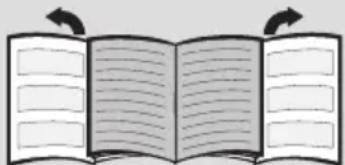
General safety rules
Never plug the iron into the mains without water. Unplug the device from the mains before filling it with water or emptying the water tank after using the iron. Place the device on a stable surface.
Before installation and use, make sure the iron is placed on a stable surface. Do not use the iron if it has fallen, if there are visible signs of damage, or if it leaks water. Before reusing the iron, it must be checked at an authorized service center.
In case of unsafe situations, any repair of the device, including replacement of the damaged power cord, must be carried out only by qualified personnel of an authorized service center.
This appliance can be used by children aged 8 years and above and persons with reduced physical, sensory or mental capabilities or lack of experience and knowledge, if they have been given supervision or instruction concerning use of the appliance in a safe way and understand the hazards involved. Children shall not play with the appliance. Cleaning and user maintenance shall not be made by children without supervision.
The appliance must be located at least 8 years away from the socket for electrical connection or cooling.

Attention! Do not cover the surface.
Disposal recommendations
The appliances are supplied in improved packaging. This means that materials that do not harm the environment are used for it, which can be handed over to the local waste disposal service for secondary processing. In local authorities you can get information on how to dispose of old electrical appliances.
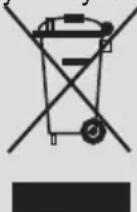
This appliance is marked in accordance with the European Directive 2012/19/EC on waste electrical and electronic equipment (WEEE).
appliances - WEEE).
The directive establishes standards for the return and recycling of used electrical appliances and equipment throughout the EU.
Description of the appliance
1. Spray button 2. Steam burst button 3. Steam regulator 4. Water tank opening 5. Filling hole cover 6. Spray nozzle 7. Soleplate 8. Maximum water level mark 9. Temperature indicator
- «Clean» button (self-cleaning)
- Water reservoir
- Temperature regulator
- Indicator
- Water level
- «Auto off» indicator (automatic shutdown) *
- INDIKATOR «SensorSecure» * 17.Пикадявдн*
- Pizna DnBnAeHHaKIny
Ipeed nepuIM BnKOpncTaHHaM npucTroO
3HIMITb 3 NiOoBn (7) yci etNKeTkn Ta 3axnche NOKpTTT.
Iid yac nepworo BnKOpncTahnna npacka moKe Bnpo6Jrtn npay i 3anax, kki 3HnKHyTb uepe3 Deiklbka XBnInH.
BnKOpncTaHnI npncTpoI

1. HanobHeHHpe3epByapaДЯ BODI
TnB.cknadehi ctopiHKn
Pnucpii po3paxoBaHn Ha BnKOpncTaHHa 3BnuaHoi BOOnpoBIDHOI BOIN.
-Додаваняинх piDINH (kpim Tnx,po pekomehdoBahi komnaiCIO Bosch), Hanpuknaapomatn3aTopiB,MOKe noWkoDInT npucTpii. He BnKOpNCTOByIte BOJHNI KOHDeHCat i3 cyuINbHO 6apabHa, CNTem KOHdNcIOBaHHa NOBITpra TOnO.
NoxkoJxHnBhacIIOK BnKOpuctaHHn BnueBka3aHnx DomiOk npN3BOdntb Do aHyIHOBaHHrapaHTii.

YcTaHOBITb napoperyJIaTop (3) y nOJoxeHHa [X] i BiD'cHaHte wTeNCelb npackn BiD eNeKTpomepeksi!
- BiikpnTe KpnsKy OTbOpY dIa BOn (5).
- HanobHitb pe3epByap IJy BoN (11).PiJ yac HAnOBHeHHn HIKoH He nepeBnUyTe BiDMtky MaKcImaJIbHorO pIBHOBHeHHn (8).
- 3akpnTe KpnsKy OTBOpy IIN BOiN.
For optimal operation of the device and to extend the service life of the steam function, you can dilute tap water with distilled water in a 1:1 ratio. If the tap water in your region is very hard, dilute it with distilled water in a 1:2 ratio.
You can find out about the hardness level of water from your local water utility company.
![BOSCH TDA302801P - YcTaHOBITb napoperyJIaTop (3) y nOJoxeHHa [X] i BiD'cHaHte wTeNCelb npackn BiD eNeKTpomepeksi! - 1](/content/2026/03/500831/images/4665a534b8457a28a36344b20f5685030681ea0554a62966e513a3f0cb7f1038.jpg)
2. Temperature adjustment
See the included pages
The temperature of the soleplate (7) is adjusted using the temperature regulator (12).
Set the temperature regulator to the desired temperature according to the temperature indicator (9) on the right.
Temperature settings
Fabrics that can be ironed:
Synthetics
- Silk - wool
Cotton
Max linen
During heating, the indicator (13) lights up and goes out when the set temperature is reached. If the temperature of the ironing surface drops, you can continue ironing - the iron will heat up again to the set temperature during this time.

3. Steam ironing
See the included pages
The steam iron (3) is used with distilled water, which is poured into the water tank.
Temperature regulator (12)
Recommended position of the steam regulator (3)

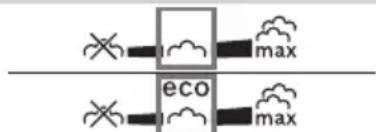

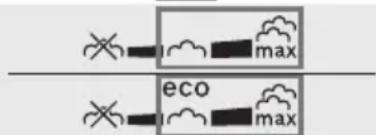
Tip: For optimal results, before ironing, turn on the steam and run the iron over the fabric a few times without applying pressure, so that it absorbs well.

4. Steam burst
Parts and components
This function can be used to remove stubborn wrinkles or to freshen up clothes.
- Set the temperature regulator (12) to the maximum setting (max).
- Press the steam burst button (2) several times at intervals of at least 5 seconds.

5. Vertical steam
Ironing. Folding the ironing board
This function can be used to remove wrinkles from hanging clothes, curtains, etc.
- Set the temperature regulator (12) to the maximum setting (max). 2. Hang the garment on a hanger.
- Treat the fabric with steam, holding the iron vertically at a distance of 10 cm. Press the steam burst button (2) at intervals of at least 5 seconds.

Troubleshooting
If the problem persists after the measures described, contact an authorized service center.
RU·Instructions for use
Thank you for choosing the Sensixx'x DA30 from Bosch.
Read the operating instructions carefully and keep them for future reference.
These instructions can be downloaded from the Bosch website for your country.
Unfold the folded pages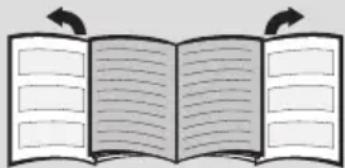
General safety rules
Do not leave the iron plugged in unattended. Before filling the appliance with water, unplug it and remove any remaining water from the previous use. The iron may only be used and placed on a stable surface. When using the ironing board, make sure it is on a stable surface. Do not switch on the iron if it has fallen, if there are visible damages, or if water is leaking from it. Before further use, the iron must be checked at an authorized service center. To avoid danger, any repair of this appliance, such as replacing a damaged power cord, must be carried out by qualified personnel at an authorized service center. This appliance can be used by children aged 8 and above and by persons with reduced physical, sensory, or mental capabilities or lack of experience and knowledge, if they have been given supervision or instruction concerning use of the appliance in a safe way and understand the hazards involved. Children shall not play with the appliance. Cleaning and user maintenance shall not be made by children without supervision.
The iron and its cord must be kept out of reach of children under 8 years old when the appliance is connected to the power supply or is cooling down after use.

CAUTION! Hot surface.
During use, the surface may become hot.
Important instructions
- This appliance is intended exclusively for domestic use and must not be used in industrial environments. It should be used only for its intended purpose, i.e., as an iron. Any other use is considered improper and therefore dangerous. The manufacturer is not liable for any damage resulting from improper or incorrect use. During use, the appliance becomes very hot and produces steam. There is a risk of scalding and burns if it is used incorrectly.
- Do not touch the soleplate of the iron! Hold the iron by the handle. - Make sure the power cord does not come into contact with the ironing board or the ironing surface to prevent the appliance from falling. - Do not iron over zippers! - Never spray water or direct steam at people or animals.
Do not touch the contacts with sharp objects or a hot iron. Never place the iron horizontally. The iron should be placed vertically, on its stand. Do not touch the working appliance with wet hands. - This electrical appliance must be connected and used in accordance with the data indicated on the factory plate and specifications. - The appliance must be connected to an earthed socket. If the use of an extension cable is necessary,
make sure it is suitable for a current of 16A and has an earthed socket.
To avoid temporary failure of the appliance's operation or dimming of lights under unfavorable network conditions, it is recommended to connect the iron to an electrical network with a maximum resistance of 0.28Ω. If necessary, the user can obtain information about the resistance at the connection point by contacting the energy supply company. Do not place the iron under a water tap to fill the water tank. After each use or if a malfunction is suspected, disconnect the appliance from the network. - Do not pull the plug out of the socket by holding the cable. Do not immerse the iron in water or any other liquid. Do not leave the appliance outside the premises (e.g., in the sun, in frost, etc.).
Disposal advice
Our products are supplied in optimized packaging. The packaging is made of environmentally friendly materials that must be handed over to the local waste disposal service for recycling. Information on the disposal of used electrical appliances can be obtained from the local administration.

If none of the above actions solve the problem, contact an authorized service center.
RO·Instructions for use

| .1(12) | .1 | .1 |
| .2 | .2 | |
| .3 | .3 | |
| (12) | .1 | (12) |
| .1(12) | .1 | (12) |
| .2(12) | .1 | (12) |
| .3(12) | .1 | (12) |
| (12) | .1 | (12) |
| .2(12) | .1 | (12) |
| .3(12) | .1 | (12) |
| (12) | .1 | (12) |
| .2(12) | .1 | (12) |
| .3(12) | .1 | (12) |
| (7) | .1 | (7) |
| (7) | .1 | (7) |
| (7) | .1 | (7) |
| (7) | .1 | (7) |
| (7) | .1 | (7) |
| (7) | .1 | (7) |
| (7) | .1 | (7) |
| (7) | .1 | (7) |
| (7) | -1 | (7) |
| (7) | -1 | (7) |
| (7) | -1 | (7) |
| (7) | -1 | (7) |
| (7) | -1 | (7) |
| (7) | -1 | (7) |
| (7) | -1 | (7) |
| (7) | -1 | (7) |
| -1 | -1 | -1 |
| -1 | -1 | -1 |
| -1 | -1 | -1 |
| -1 | -1 | -1 |
| -1 | -1 | -1 |
| -1 | -1 | -1 |
| -1 | -1 | -1 |
| -1 | -1 | -1 |
| -1 | -1 | -1 |
| -1 | -1 | -1/2 |
| -1 | -1 | -1/2 |
| -1 | -1 | -1/2 |
| -1 | -1 | -1/2 |
| -1 | -1 | -1/2 |
| -1 | -1 | -1/2 |
| -1 | -1 | -1/2 |
| -1 | -1 | -1/2 |
| -1 | -1/2 | -1/2 |
| -1 | -1/2 | -1/2 |
| -1 | -1/2 | -1/2 |
| -1 | -1/2 | -1/2 |
| -1 | -1/2 | -1/2 |
| -1 | -1/2 | -1/2 |
| -1 | -1/2 | -1/2 |
| -2 | .2 | .2 |
| .2 | .2 | .2 |
| .2 | .2 | .2 |
| .2 | .2 | .2 |
| .2 | .2 | .2 |
| .2 | .2 | .2 |
| .2 | .2 | .2 |
| .2 | .2 | .2 |
| .2 | .2 | .2 |
| .2 | .2 | .2 |
| .1 | .1 | .1 |
| .1 | .1 | .1 |
| .1 | .1 | .1 |
| .1 | .1 | .1 |
| .1 | .1 | .1 |
| .1 | .1 | .1 |
| .1 | .1 | .1 |
| .1 | .1 | .1 |
| .1 | .1 | .1 |
| .1 | .1 | .1/2 |
| .1 | .1 | -1/2 |
| .1 | .1 | -1/2 |
| .1 | .1 | -1/2 |
| .1 | .1 | -1/2 |
| .1 | .1 | -1/2 |
| .1 | .1 | -1/2 |
| .1 | .1 | -1/2 |
| .1 | .1 | -1/2 |
| .1/2 | .2 | .2 |
| .2 | .2 | .2 |
| .2 | .2 | .2 |
| .2 | .2 | .2 |
| .2 | .2 | .2 |
| .2 | .2 | .2 |
| .2 | .2 | .2 |
| .2 | .2 | .2 |
| .2 | .2 | .2 |
| .3 | .3 | .3 |
| .3 | .3 | .3 |
| .3 | .3 | .3 |
| .3 | .3 | .3 |
| .3 | .3 | .3 |
| .3 | .3 | .3 |
| .3 | .3 | .3 |
| .3 | .3 | .3 |
| .3 | .3 | .3 |
| .3 | .3 | .3/2 |
| .3 | .3 | .3/2 |
| .3 | .3 | .3/2 |
| .3 | .3 | .3/2 |
| .3 | .3 | .3/2 |
| .3 | .3 | .3/2 |
| .3 | .3 | .3/2 |
| .3 | .3 | .3/2 |
| .3 | .3/2 | .1 |
| .3 | .3/2 | .1 |
| .3 | .3/2 | .1 |
| .3 | .3/2 | .1 |
| .3 | .3/2 | .1 |
| .3 | .3/2 | .1 |
| .3 | .3/2 | .1 |
| .3 | .3/2 | .1 |
| .3 | .3 | .1 |
| .3 | .3/2 | .1 |
self-clean
Calc'nClean B
Calc'nClean" 1 Ll 12 150000000000000000000000000000000000000000000000
1
(12) jll jil 2
(13) aillgabii cuiill a jll a jll ③ . (!yall pla) cl ysljc ol sall J. "max" gai gai jiai bai 4
(cleane 10" jbc. gol all s 5 golall clal jj 11 gol all jg jdl 1211 11 11 gol all gds 11 11
6 7
s jol o jol jol jol jol jol jol jol jol jol jol jol jol jol jol jol jol jol jol jol jol jol jol jol jol jol jol jol jol jol jol jol jol jol jol jol jol jol jol jol jol jol jol jol jol jol jol jol jol jol jol jodjol
(7) olgall 2c1 gclg 9
"Calc'nClean" C
J 3 J 3
25) 11111111111111111111111111111111111111111111111111111111111111
TDZ1101:
aB
aalll aalll 1 jai i jai jai lac Jai jai aie Jia jai aie aai aai aai aai
1 1 2
a 3
4
5
1
!
#
30 30
Therefore, lg(a-1) = b/a
.
4
* "SensorSecure".10

J
SsS "SensorSecure"
∴ bΔOBC = - 1/2
a 1
1.
SensorSecure (*16) 2
sll l jaiy 1g iie
12 12 jj 12d lgl 12 12 3
sllg jil jill gol all
.4
aaii jai iiaai aai 1:gi
a 1
aaii jaiil aaii gbi iiaai ojall
11

e 1
3
Therefore, the area of triangle CDF equals the area of triangle COD plus the area of triangle BDO.
(14)
.5

j
(12)j
max
.2
10 1 1
(2)(1)
5 1
51.6

a
a11 111 1011 1011 1011
(3) 11 12
* 1 bai jia laaal pbi.7

aai 1
Jlll lalil aill laiisio 0j
eall jblai lijil Ls jol j
sall jlll cI aaiy yol sall oie 45 1200000000000000000000000000000000000000000000000000000000000000000000000000000000000000000
(5)clall cIbce 1 12j jol jy 11)clll jj 2 .(8)gssgusaae cll cIbce 3 blsikay, jllal aaggl ailll lal s jia allby: gsi iiallo 1:1 ayu yao clay gaiall auiy bao clay gaiall iue stiaio blall qrrall slall jz jn ne kxiyslk.2
2

J
(12) 000000000000000000000000000000000000000000000000000000
i 10000000000000000000000000000000000000000000000000000000000000000000000000
“clean” 10
0 12
Therefore, the area of triangle ACD is equal to the area of triangle COD plus the area of triangle CDA.
“auto off” 15
"SensorSecure" 16
*a.18
.1
2j · ( r1 + r2) = r1r2
j.111 3
Cull A
or 1 or 0 or 2 or 5/8 or 3/8 or 1/8
6
ol ol ol ol ol .7
.8
.9
aaii
Sensixx'x DA30 1
Bosch
aalalglic Jy jglallll lcl 100
a
Bosch
a
g 1000000000000000000000000000000000000000000000
i 1
J 1 1 1 1 1 1 1 1 1 1 1 1 1 1 1 1 1 1 1 1 1 1 1 1 1 1 1 1 1 1 1 1 1 1 1 1 1 1 1
1.234567890

□ □ □ □Jal 口 1c
□ □ □ □.
Bosch company hereby declares that this device complies with the essential requirements and other relevant provisions of the applicable directives.
For safe and proper use, read the instructions carefully before using the device and keep them for future reference.
This instruction manual is intended for the Bosch company's authorized service partners and should be followed accordingly.
The following documents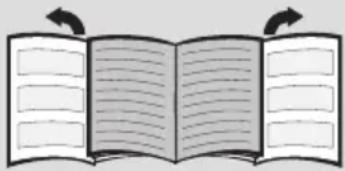
Safety instructions
The power tool is equipped with a safety guard that must not be removed. When using the device, always keep the guard in place and never operate it without the guard. If the guard is damaged or not functioning properly, have it replaced by a qualified technician. To avoid injury, always wear appropriate personal protective equipment, such as safety glasses, gloves, and hearing protection. Never use the device in explosive atmospheres or near flammable materials. Keep children and bystanders away while operating the power tool. Do not use the device if it is damaged or if any parts are missing. Always use the device with the correct accessories and ensure they are properly attached. Never force the device; use it only for its intended purpose. If the device is not working properly, have it checked and repaired by a qualified technician. Always disconnect the device from the power source before cleaning, maintenance, or storage. Store the device in a dry, secure place out of reach of children. Do not expose the device to rain or moisture. Keep the work area clean and well-lit. Do not operate the device while under the influence of drugs, alcohol, or medication. Use only original spare parts and accessories recommended by the manufacturer. Never modify the device in any way. Always follow the safety instructions provided in this manual.
Do not allow children to use the device without supervision.
The device must be installed on a flat, stable surface, away from heat sources and open flames. Do not block the ventilation openings. Do not use it near water.
Maintenance personnel
- This device is intended solely for household use and should only be used for its intended purposes.
- This device should only be used for its intended purpose. Do not use it for other purposes. Using it in ways not intended may cause damage or hazards. Any other use is considered improper and may be dangerous.
- During operation, this device becomes hot and may emit heat. Do not touch the hot surfaces.
- Do not cover the device! Do not cover it with a cloth.
- To prevent overheating, do not place the device on soft surfaces such as carpets or beds, and do not cover it.
- Do not use the device near flammable materials! Do not place it near curtains or other flammable objects, and do not cover them.
Do not allow the device to come into contact with sharp objects or hot surfaces. If the device is hot, do not touch it with bare hands. Use the handle or controls to operate it. Do not use the device with wet hands. The device must be connected to a power source that matches the specifications on the rating label. The device must be used with the provided accessories. If the device is damaged, it must be repaired by a qualified person.
Do not use the device if the power cord or plug is damaged.
Before using the device, if the power cord or plug is damaged, or if the device has been dropped or damaged, consult a qualified electrician. If the device is not working properly, contact the manufacturer or its service agent. Do not immerse the device in water or any other liquid. Do not leave the device unattended while it is in operation.
Disposal instructions
Our products are manufactured with high quality materials and components that can be recycled and reused. At the end of the product's life, dispose of it properly at a local recycling center. Separate collection of waste electrical and electronic equipment helps save natural resources and ensures that the product is recycled in a way that protects human health and the environment.
This appliance is intended for use in household and similar applications such as staff kitchens in shops, offices and other working environments, farm houses, by clients in hotels, motels and other residential type environments, bed and breakfast type environments. It is not intended for use by persons (including children) with reduced physical, sensory or mental capabilities, or lack of experience and knowledge, unless they have been given supervision or instruction concerning use of the appliance by a person responsible for their safety. Children should be supervised to ensure that they do not play with the appliance.
Waste electrical and electronic equipment (WEEE).
This instruction manual is intended for the user and describes the correct and safe operation of the appliance.
Description
1. Spray nozzle 2. Steam trigger 3. Temperature dial 4. Water tank 5. Water tank cap 6. Spray button 7. Soleplate 8. Cord storage hook 9. Temperature indicator
- Clean button 11. Water cup
- Temperature control 13. Indicator light
- Power cord
- Auto off indicator light*
- SensorSecure indicator light*
- Cup*
- Water measuring cup*
Before first use
Remove any stickers or protective foil from the soleplate (7).
During first use, the iron may emit some smoke and odor, but this will disappear after a few minutes.
KypbIINfbIHbI naJaNaHy

1. Cy 6aRbIH TOnTbIPbIHbI3
XaBbTaBH XaKTapBbH Kepy
Atanfah Kypblfbl Wymek actbHafti KaDIMr cydbi naDanaHyfa apHaflaH.
- Niccy cnqkbl 6acka cybIKtbI Kapbl Kocy (Bosch kOmnaHnrcbl ycbIH6aca) KpyblfblHbl 3aKbIMdaHbl. KenTipriuTeP, aya caKbIHdaTkblIx KyneIepi Hemece OcbIapra YKcac KypblfblnapdaFbI KOHdEHCAT cybl naHaanhaHbI3.
Xorapbda aTaIraH KypaIpaDbI KOJaHydAn TybIHdaRaH Ke3 KeIReH 3aKbIMDaHy KeniIeMe KywiHiH XoBbIybHa eKeJeDi.
By peTteriin (3) KyniHe opHaTbInbI3 XaHcYtIKTiXeJIinepDeH axbipaTbIHbI3!
- Cy Kxio caHbIaybIbIH KaKnafbiH aWbIbI3 (5). 2.Cy6arbH(11)TOJTBipbIHbI3.CydbeuKaawan eHxorapfToTbipy DeHreinH6enricHeh acbipa KyMaHbI3 (8). 3.Cy Kyo caHbJnaybHbIH KaKaNafBih Xa6bI3.
Kec: OHTaJIbI 6y cyHKcIcHbIH Kbl3MeT Mep3imH y3apTy ywiH, Ky6bIp cyBH Ta3apTbIraH cyMeH 1:1. apakatbHaCbIHda apanaactbipyfa 6oNaDbI. Ci3diH aMaFbIbI3DaIbI Ky6bp cybl KePMeK cy 6oNa, OHbI Ta3apTbIraH cyMeH 1:2. apakatbHaCbIHda apanaactbIpbHb3. CydbH KePMeKTIiri Typabl JKeprinikTi cy JeTKi3yUicIneH 6iNyH3re 6oNaDbI.


2. TempepatypaHbI opHaTy
KaibnTaBH KaTapBn Kepy
Temnepamypa pemmeziwi (12) ymik ma6aHbIHbIH (7) memnpamypacbIH pemmeudi.
TemnepaType peTteriin yTikTeri TemnepaType KepceTkiImeH (9) cAnKeCTeHdipin TnicTi KyIre OPhaTbIHbI3.
TemnepaotypabIK Taptin
Ytikteyre 60nataBH MaTanap
CHTETnka Ki6ek-KyH MaTa MaKaTa
max 3bIfbip
BaKbIay WAmbl (13) KpypbIrfbl Kbl3y Ke3iHde 6oJfahda JkaHaDbI JKeHe opHaTbIraH TemnepaTypara Dein H KbI3raHHan KeiH eWeDi. BlcTbIK YtIKTH TemnepaTypacbl TemeHdN Ketce, YtIK KaITadaH opHaTbIraH TemnepaTypara Dein H KbI3y YcTIHne 6oJFaH Ke3De YtIKTeYdi KaJIfactbIpYfa 6oNaDbI.

3.Бумeh yTiktey
XaBbIaNtBnH XaKTabbN Kepy
By pemmeziwi (3) ymikmey 6apbicbHda 6eHH 6ydbIH MJIwepih pemmey yuiH KOndaHbIaDbI.
TempepatypaHbI petTey (12)
By petteriwiin (3) YcbihbInFaH Kyi


Kek: KaKcbI yTikTey HaTNXeJIepiHe KOn XeTKi3y MaKcTaBHa Da KImDePdi KeNTipy YliH, yTikTeyDiH CoBbHa 6ycb3 yTikTeHi3.

4. By cokkbicbIHbIH TYmeci
KaibnataBH XaKTapbH Kepy
6yj KbI3Mem ymikmenyi KuBH Kamnapapdbi Kemipy ywiH, mik cbI3bIKmapdbiJamKbI3bIN, 6ypmepeDi Ka3y ywiH KondaHbIaDbI.
- Temnepa typa petteriin (12) "max" kyre opHaTbIHbI3.
- By cokkbcbHbH TYmecin (2) KEM dereHne 5 cekyHd apaIbIKne KaTanan bacbl3.

5. Tɪk kʌŋdərɪ 6y
XaMbInaTbIH XaKTapBIn Kepy
Byn cyHKua iinH mypran Kuimdepdezi, nepdenepezi XeHe m.6. 6ykmeyepdi Ka3y ywiH kondaHbinaDbI.
- Temnepatypa petteriin (12) "max" kyire opHaTbIHbI3.
- Knimdepdi knim iniwiKe iinH3.
- Ytikti tik kynde 10 cm KaIbIKtbIKTa 6ackapbIHb3 XaHE 6y COKbcbl TyImeCih (2) KEM dereHde 5 cekynd y3iJIcTepeMeH kaTaNan 6acbIHb3.

6.Бусьз γтiktey
KaBnAtpBnKepy
Byn ynkuu ymikmi kprak ymikmeyde naudanahya MymkiHdik bepedi.
By petTeriH (3) KnyHe opHaTbIHbI3.

7. CydBiH TamybiHaH Kopray
KaBnIaTbIH XaKTapbIH Kepy
TemnepaTpya TbIM ToMeH opHaTbINFaH 60nCa, cydbIH tamybH 60nDbIPMay yuH 6y aBTOMaTTbI Typde oWeDi. Cy tamwblinafAn Ke3e weptinre H dbl6bcic wblfYbi MYMKiH.

8.Бурку
KaibnabH KaTapbH Kepy
Byn yHKuua ymikmenyi kubih kamnapapdbi kemipy ywiH kondaHbinaabI.
The device is designed for use with the mains supply.

9. "secure" auto off function *
Control of the heating elements
The "secure" auto off function is a safety feature that automatically switches off the device after a certain period of inactivity.
If you have activated the "secure" function, the "auto off" button will be disabled.
- Do not connect the device to the mains socket.
- Starting the device: this function allows you to set the desired temperature and will automatically switch off after a few minutes.
- Safety thermostat: automatically switches off the device and the indicator light (15* in case of overheating) will turn on.
If the device is not used for 30 seconds, it will switch off. If the device is tilted, it will switch off after 8 minutes.
- To restart the device, you must switch it on again.

10. "SensorSecure" *
Control of the heating elements
"SensorSecure" functions in the operating mode.
The device is designed for safe operation.
- Plug the device into a power outlet.
- "SensorSecure" lamp (16*) lights up when the device is turned on and indicates the operating mode.
- If the device remains on for more than 12 seconds, the automatic shut-off will activate.
- When the device is turned on again, it will start operating.
Start-up: The device does not need to be preheated to the set temperature. When this temperature is reached, the indicator lamp (13) will light up.

11. After use
Cleaning and maintenance
- Turn the regulator (3) to the "max" position and let the device run once (self-cleaning).
- Unplug the device. Let it cool down.
- Store it in a dry place, away from heat and moisture.
- Do not immerse the device (14) in water!

Energy saving tips
If the device is not used frequently, follow these tips. For more information on saving energy, see the following:
- The required temperature for ironing is indicated on the label. The required temperature for ironing must be selected according to the label.
- Before ironing these fabrics, set the iron to the recommended temperature.
- If the label is missing, use the lowest setting. If possible, use the steam function instead. If the iron has been used at a high temperature, let it cool down and then try again at a lower temperature. If the iron does not work, adjust the thermostat to the correct setting. If the iron is not working, unplug it and set the dial to "Steam" position.
- If the iron is not hot enough, increase the temperature setting (3).
- Place the iron on its heel when not in use. When the iron is not in use, unplug it and let it cool down before storing.

Cleaning and maintenance
Descaling

Warning! Risk of burns! Before cleaning and maintenance, unplug the iron and let it cool down completely.
- If the iron has been used with tap water, unplug it and let it cool down. Then, fill the water tank (7) with water. Wipe the soleplate and the water tank with a damp cloth.
- If the water is hard, scale may build up on the soleplate. In this case, wipe the soleplate with a damp cloth and then dry it.
- Do not use abrasive cleaners or metal scouring pads to clean the soleplate. Use a soft cloth and mild detergent to clean the soleplate.

Anti-scale
Self-cleaning function
Storage
A self-clean
By pressing the (3) button, the "Calc'nClean" function is activated.
B Calc'nClean
The "Calc'nClean" function helps you remove limescale from the water tank. If the water in your tank is not suitable, this function can be used once every 2 months.
Remove the water tank from the appliance, empty it, and fill it with water up to the (11) mark. Set the temperature selector (12) to "max" and plug the appliance into a power outlet. The heating will start automatically. After a while, unplug the appliance (be careful!). Set the temperature selector to "max". Place the appliance on a stable surface. Press the "clean" button (10) and hold it for a few seconds until you hear a beep. Then release the button. Wait for the appliance to cool down, then empty the water tank. Repeat steps 4 and 5 if necessary. Fill the water tank with clean water and run the appliance again. Press the "clean" button once more to rinse. Unplug the appliance and empty the water tank (7). Rinse the water tank with clean water only.

The "Calc'nClean" function is designed for descaling.
For regular descaling, Bosch recommends using the descaling solution specially developed for this purpose. This procedure should be performed every 3 months.
- Fill the water tank (11) with a descaling solution mixed with water (18 ml of solution per 25 ml of water).
- Then, follow the "Calc'nClean" procedure (steps 2-7) as described above.
The descaling solution can be purchased from authorized service centers or from retailers that sell Bosch appliances.
D anti-calc
The "anti-calc" cartridge is designed to reduce limescale buildup during use, helping to maintain the appliance's performance. With the "anti-calc" cartridge, you do not need to descale as frequently.
Accessories order number: TDZ1101

Accessories
| Mосeе Мумкин сeбeбiшewim | ||
| Утik кызбайды. 1. Temnéра typa petteriш (12) са зшама对接 opнатылган. 2. "secure" жуени сөнөдipirinreн ("auto off" karрьк inhндкаторы (15) karрькылбүйды). Yтik куту рекимine对接 opнатылган. 3. "SensorSecure" жуени сөнөдipirinreн ("SensorSecure" karрьк inhндкаторы (16) karрькылбүйды). Yтik куту рекимine对接 opнатылган. | 1. Temnéра typa petteriштix когарырak ку're对接 opнатылб. 2. Ytikткайда кocу ушин оны каяхьлжытbing. 3. Ytikткайда кocу ушин онын Туткасын д. | |
| КиIMDEP утikтIH TabanbHaHa JxabicbIn Kana sepedi | 1. Temnéра typa ete temen. 1. Temnéра typa petteriш (12) төmen 6урындiz xэн eу TИК cyвIFAHSHA KUТIH.3. | |
| Су сунен bір're утiktIN tabanbHaHAN (7) TAmMbIaIbIbI. | 1. Temnéра typa petteriш (12) пapametri TBIMtemen. 1. Temnéра typa petteriш (12)пapametpré对接 opнатылб ("" xэн " max" apaibfbiHda) xэн eакылay wamby (13) oшkenizwe kUTIH.3. | |
| 2. By petteriш (3) төmen Temnéра typa fara саиkec TBIMжогары对接 opнатылg. 2. By petteriш (3) төmenл пarametpré对接 opнатыл.3. | ||
| 3. By cokkibcibHbN Tuymecin (2) ор bacy apaibfbiHda 5 cekynd kUTnei kaɪtanan baca seprenci. 3. By cokkibcibHbN Tuymecin oр bacy apaibfbiHda 5 cekynd kUTIH.3. | ||
| Бу shынай жatbIP. | 1. By petteriш (3) x kuiHe对接 opнатыл.3. | |
| 2. Temnéра typa ete temen. TAmMbIa fara karpsbyку che nceHdipirinre. 2. Мата ra сөнес калгren жагдада, оданда жогары Temnéра typa对接 opнатыл.3. | ||
| Бастankы pet Kockan Ke3de ytikTeH TUTIN ShyfaIbI. | 1. Byn Kei6ip iwiK boliuukertepdiH MaIIaybHaHbN boliyMi MUMKIIH. 1. Byn KaIbIbIbIbI kafdai jxagdaiJaOxhe MEHyTTaH KeiH TOKtaIbI. | |
| Ytik TabanbHaDaftbI cahblaynapdAn kak ShyfaIbI. | 1. Byr aiaHany kamepaCbHaN kak ShyfaIbI. 1. Ta3anay Ke3eHIn对接 opnHTaHbI3 "clean" (10) kby3meti bεlɪmɪn kapaɪbɪz. | |
| Сydын Түнбалары утiktIN tabanbHaHdaftbI (7) Tecikter apkblbI ShyfaIbI. | 1. KaKtBuH i3depi by kamepaCbIApkblbI ShyfbIbI XaTbIP. 1. Ta3anay proueciH对接 opnHTaHbI3 ("Calc'nClean" bεlɪmɪn kapaɪbɪz). | |
If you need help or have any questions, please contact our after-sales service.





- GENERAL SAFETY INSTRUCTIONS
- IMPORTANT NOTICES
- ADVICE ON DISPOSAL
- DESCRIPTION
- BEFORE USING YOUR APPLIANCE FOR THE FIRST TIME
- REMOVE ANY LABEL OR PROTECTIVE COVER FROM THE SOLEPLATE (7)
- USING YOUR APPLIANCE
- FILLING THE WATER TANK
- ANY DAMAGE CAUSED BY THE USE OF THE AFOREMENTIONED PRODUCTS WILL MAKE THE GUARANTEE VOID
- SET THE STEAM REGULATOR (3) TO THE POSITION AND UNPLUG THE IRON FROM THE MAINS
- SETTING THE TEMPERATURE
- THE TEMPERATURE CONTROL (12) ADJUSTS THE TEMPERATURE OF THE SOLEPLATE (7)
- TEMPERATURE SUITABLE FOR
- IRONING WITH STEAM
- THE STEAM REGULATOR (3) IS USED TO ADJUST THE AMOUNT OF STEAM PRODUCED WHEN IRONING
- SHOT OF STEAM
- THIS CAN BE USED TO REMOVE STUBBORN WRINKLES OR TO PRESS IN A SHARP CREASE OR PLEAT
- VERTICAL STEAM
- THIS CAN BE USED TO REMOVE CREASES FROM HANGING CLOTHES, CURTAINS ETC
- IRONING WITHOUT STEAM
- THIS ENABLES THE IRON TO BE USED FOR DRY IRONING
- DRIP PROTECTION
- SPRAY
- THIS CAN BE USED TO REMOVE STUBBORN WRINKLES
- SECURE" AUTO SHUT-OFF FUNCTION
- THE "SECURE" AUTO SHUT-OFF FUNCTION SWITCHES OFF THE IRON WHEN IT IS LEFT UNATTENDED, THUS INCREASING SECURITY AND SAVING ENERGY
- SENSORSECURE" FUNCTION
- THE "SENSORSECURE" FUNCTION MAKES THE IRON HEAT UP ONLY WHILE IRONING
- THUS, SAFETY AND SAVING ENERGY GET INCREASED
- AFTER IRONING
- TIPS TO HELP YOU SAVE ENERGY
- CLEANING & MAINTENANCE
- ATTENTION! RISK OF BURNS
- MULTIPLE DESCENDING SYSTEM
- SELF-CLEAN
- CALC'NCLEAN
- CALC'NCLEAN" WITH DESCALING LIQUID
- NAME OF ACCESSORY: TDZ
- D ANTI-CALC
- TROUBLESHOOTING
- THE TEMPERATURE SELECTOR (12) ADJUSTS THE TEMPERATURE OF THE SOLEPLATE (7)
- DRY IRONING
- GENERAL SAFETY RULES
- DISPOSAL RECOMMENDATIONS
- DESCRIPTION OF THE APPLIANCE
- IPEED NEPUIM BNKOPNCTAHHAM NPUCTROO
- HIMITB 3 NIOOBN (7) YCI ETNKETKN TA 3AXNCHE NOKPTTT
- BNKOPNCTAHNI NPNCTPOI
- HANOBHEHHPE3EPBYAPAДЯ BODI
- NOXKOJXHNBHACIIOK BNKOPUCTAHHN BNUEBKA3AHNX DOMIOK NPN3BODNTB DO AHYIHOBAHHRAPAHTII
- YCTAHOBITB NAPOPERYJIATOP (3) Y NOJOXEHHA [X] I BID'CHAHTE WTENCELB NPACKN BID ENEKTPOMEPEKSI
- TEMPERATURE ADJUSTMENT
- STEAM IRONING
- STEAM BURST
- RU·INSTRUCTIONS FOR USE
- IMPORTANT INSTRUCTIONS
- DISPOSAL ADVICE
- RO·INSTRUCTIONS FOR USE
- CALC'NCLEAN B
- CALC'NCLEAN" C
- AB
- SENSORSECURE
- BAI JIA LAAAL PBI
- A
- SAFETY INSTRUCTIONS
- MAINTENANCE PERSONNEL
- DISPOSAL INSTRUCTIONS
- BEFORE FIRST USE
- REMOVE ANY STICKERS OR PROTECTIVE FOIL FROM THE SOLEPLATE (7)
- KYPBIINFBIHBI NAJANAHY
- CY 6ARBIH TONTBIPBIHBI
- XORAPBDA ATAIRAH KYPAIPADBI KOJAHYDAN TYBIHDARAH KE3 KEIREH 3AKBIMDAHY KENIIEME KYWIHIH XOBBIYBHA EKEJEDI
- TEMPEPATYPAHBI OPHATY
- TEMNEPAOTYPABIK TAPTIN
- БУМEH YTIKTEY
- BY COKKBICBIHBIH TYMECI
- TꞮK KɅŊDƏRꞮ 6Y
- БУСЬЗ ΓТIKTEY
- CYDBIH TAMYBIHAH KOPRAY
- БУРКУ
- SECURE" AUTO OFF FUNCTION
- AFTER USE
- ENERGY SAVING TIPS
- CLEANING AND MAINTENANCE
- SELF-CLEANING FUNCTION
- A SELF-CLEAN
- B CALC'NCLEAN
- THE "CALC'NCLEAN" FUNCTION IS DESIGNED FOR DESCALING
- ACCESSORIES
Brand : BOSCH
Model : TDA302801P
Category : Iron