
Indego M+ 700 - Lawn mower BOSCH - Free user manual and instructions
Find the device manual for free Indego M+ 700 BOSCH in PDF.
| Product Type | Robotic lawn mower |
| Brand | Bosch |
| Model | Indego M+ 700 |
| Maximum mowing area | 700 m² |
| Cutting height | 30 - 50 mm (adjustable) |
| Navigation system | Logicut (systematic strip mowing) |
| Power supply | Rechargeable lithium-ion battery |
| Approximate runtime | 60 minutes |
| Charging time | Approximately 60 minutes |
| Dimensions (L x W x H) | 55 x 43 x 25 cm |
| Weight | 10 kg |
| Rain sensor | Yes |
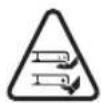
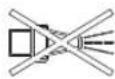
| Obstacle detection | Yes (bump and lift sensors) |
| Mulching function | Yes |
| Theft protection | PIN code |
| Noise level | 60 dB (A) |
| Warranty | 2 years |
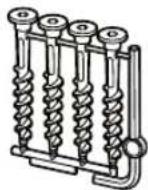
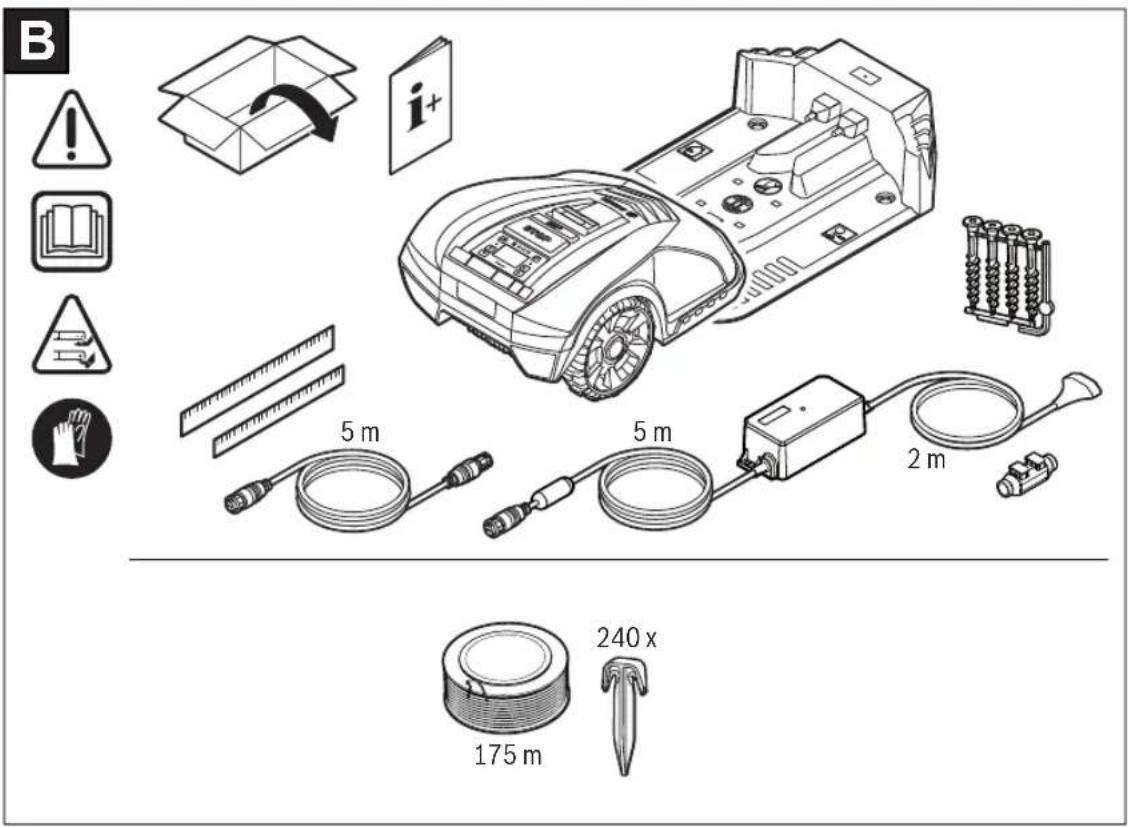
| Package contents | Lawn mower, charging station, boundary wire (240 m), fixing screws, user manual |
| Maintenance | Regular cleaning of blades and mower; replacement of blades if worn |
Frequently Asked Questions - Indego M+ 700 BOSCH
User questions about Indego M+ 700 BOSCH
0 question about this device. Answer the ones you know or ask your own.
Ask a new question about this device
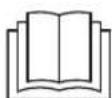
Download the instructions for your Lawn mower in PDF format for free! Find your manual Indego M+ 700 - BOSCH and take your electronic device back in hand. On this page are published all the documents necessary for the use of your device. Indego M+ 700 by BOSCH.
USER MANUAL Indego M+ 700 BOSCH
natural_image
Technical illustration of a robotic car with a barcode barcode and an open control panel (no text or symbols on the car itself)
natural_image
Blank white rectangle with a thin border (no text or symbols)
text_image
CE
natural_image
Pure geometric lines and shapes without any text, numbers, or symbols
natural_image
Empty white square with a gray horizontal bar and four corner markers (no text or symbols)
natural_image
Pure geometric diagram with no text, numbers, or symbols
natural_image
Empty white canvas with a gray horizontal bar and four corner markers (no text or symbols)
natural_image
Empty white square with a gray horizontal bar and four corner markers (no text or symbols)


text_image
Blank document page with placeholder text and a small icon of a crosshair above it.
natural_image
Pure horizontal lines with a vertical gradient bar on the right (no text or symbols)
natural_image
Pure horizontal lines without any text, numbers, or symbols


text_image
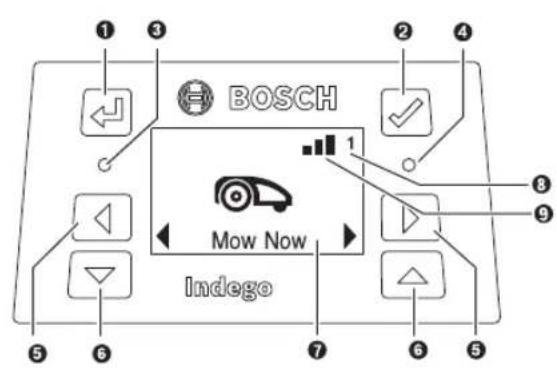
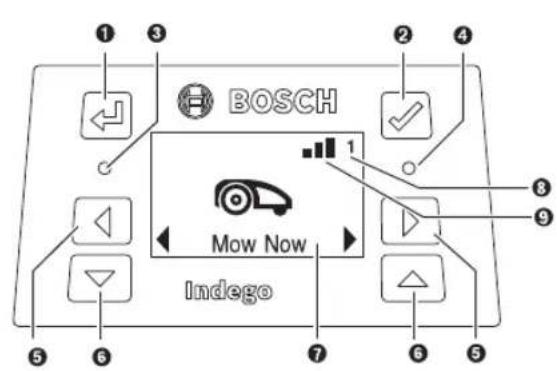
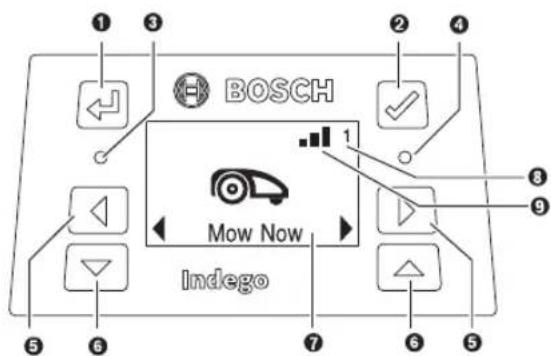
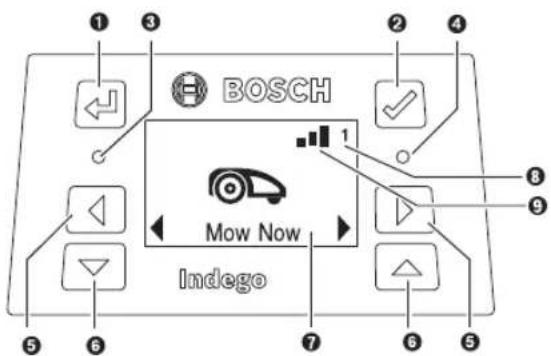
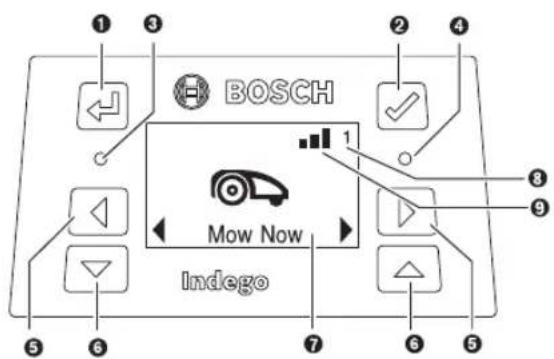
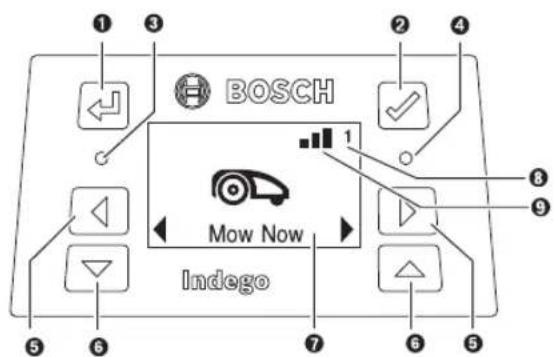
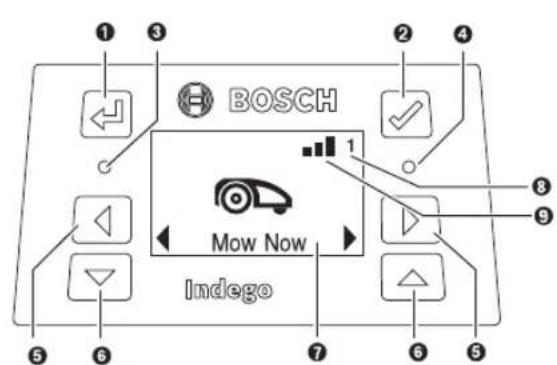
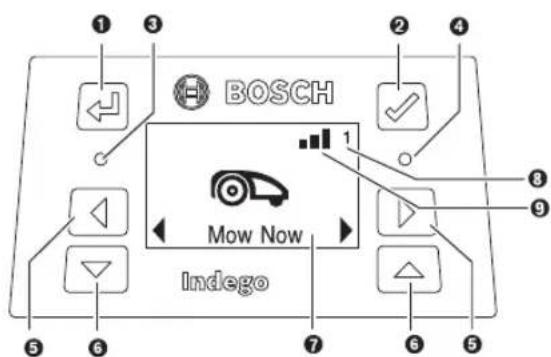
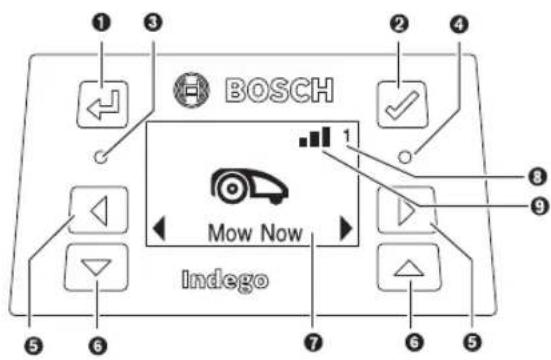
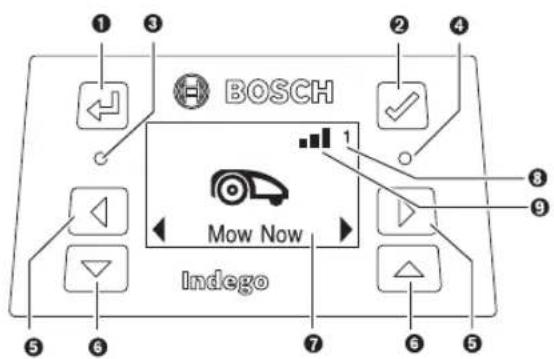
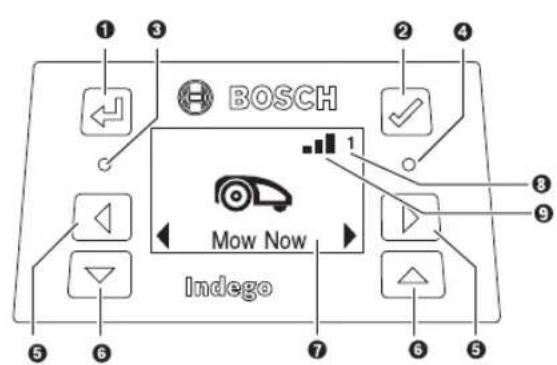
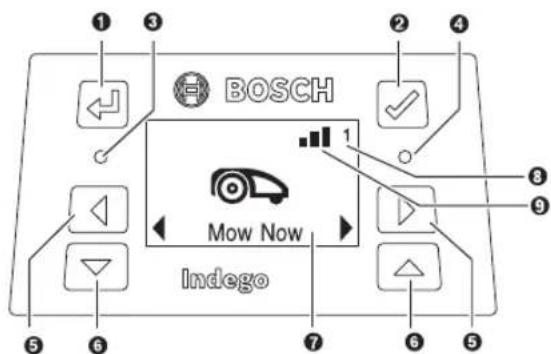
BOSCH Mow Now Indego


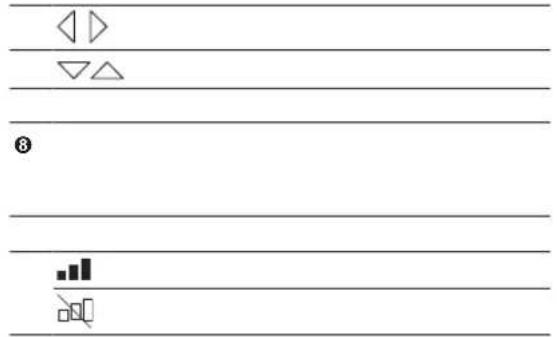
8


natural_image
Empty white canvas with a gray horizontal bar and four corner markers (no text or symbols)
text_image
Diagram showing a car icon and a calendar with horizontal lines, likely representing a timeline or calendar.
text_image
Diagram with labeled icons and horizontal lines, possibly representing a system or interface layout
text_image
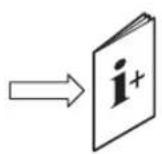
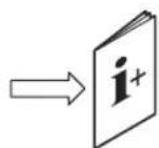
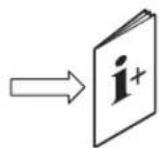
i + - - - - - - - - - - - - - - - - - - - - - - - - - - - - - - - - - - - - - - - - - - - - - - - - - - - -

natural_image
Pure horizontal lines with no text, numbers, or symbols, rendered in gray and black (no readable content)
natural_image
Pure geometric lines and shapes without any text, numbers, or symbols
text_image
Diagram showing a horizontal bar with three vertical bars and a top axis with a crosshair symbol, likely representing a technical or engineering schematic.

text_image
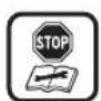
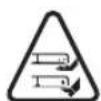
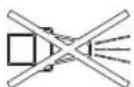
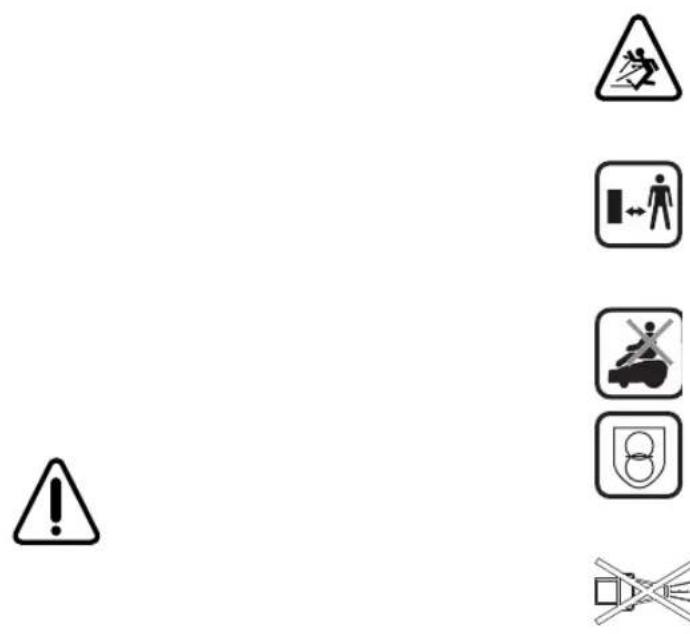
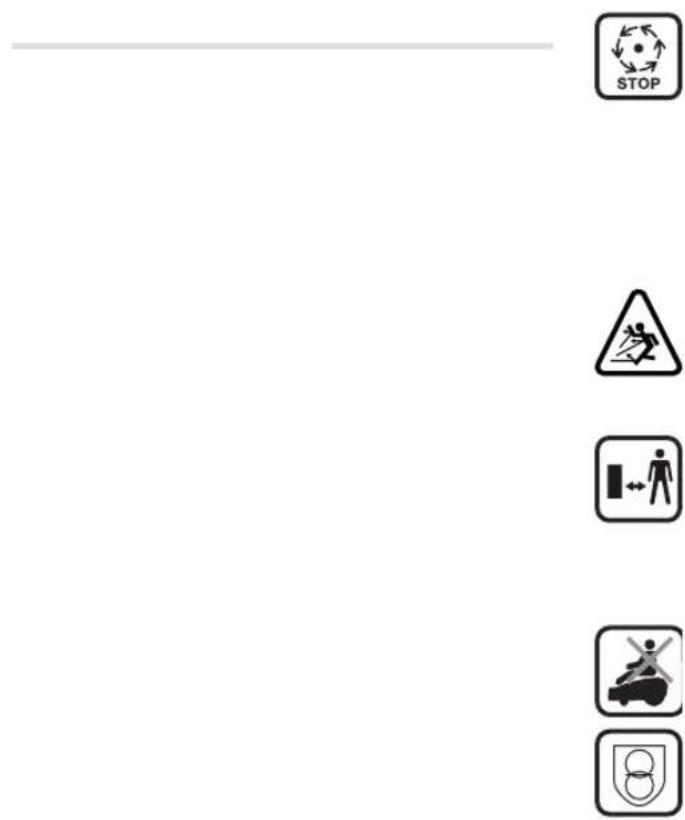
Warning sign icons with Chinese labels, including stop and hazard symbols
natural_image
Pure geometric diagram with no text, numbers, or symbols
natural_image
Empty white square with a gray horizontal bar and four corner markers (no text or symbols)

natural_image
Empty white square with a gray horizontal bar and four corner markers (no text or symbols)
text_image
Simple checklist with checkmark, cross, and shopping cart icon below
text_image
Blank document page with placeholder text and a small icon, likely a form or template for writing or drawing.
natural_image
Abstract geometric composition with horizontal lines and a vertical shaded rectangle (no text or symbols)
text_image
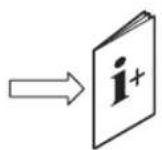
Image showing a QR code and an arrow labeled 'i+' pointing to it, with decorative icons below.
text_image
BOSCH Mow Now Indego


natural_image
Empty white canvas with a gray horizontal bar and four corner markers (no text or symbols)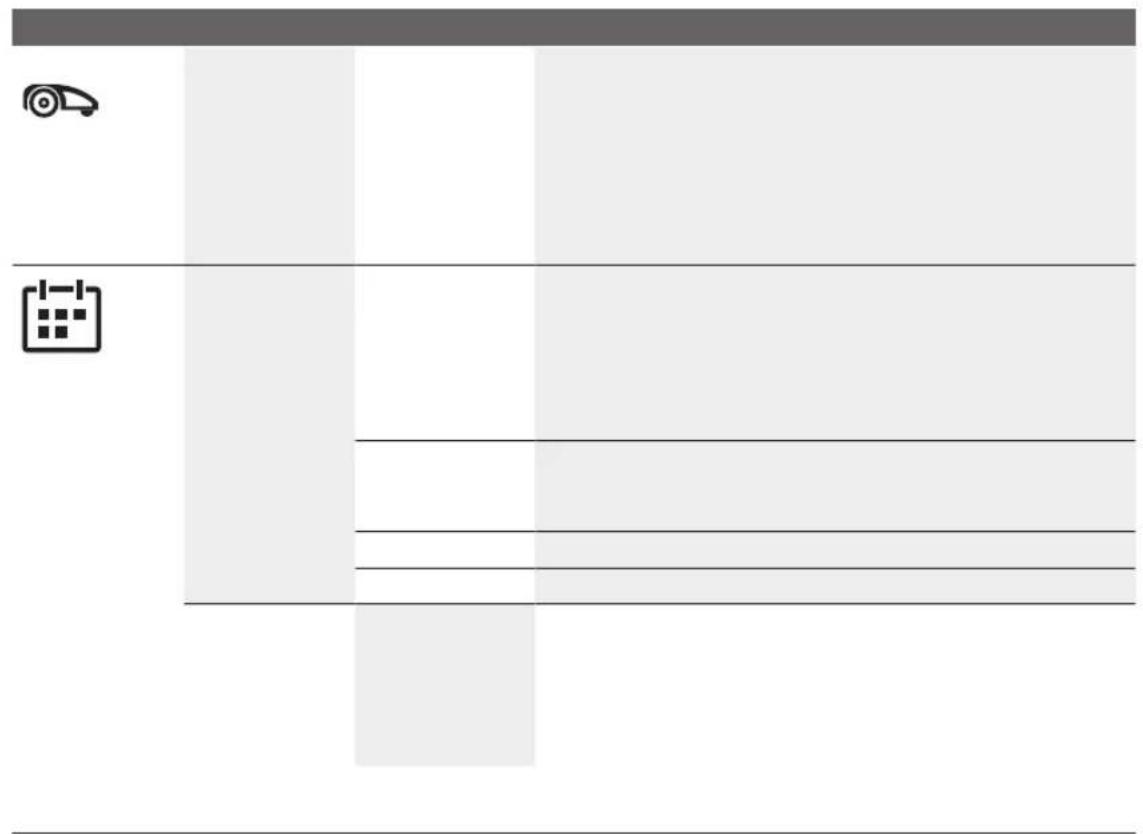
text_image
Diagram showing a car icon and a document icon with horizontal lines, likely representing a document or form.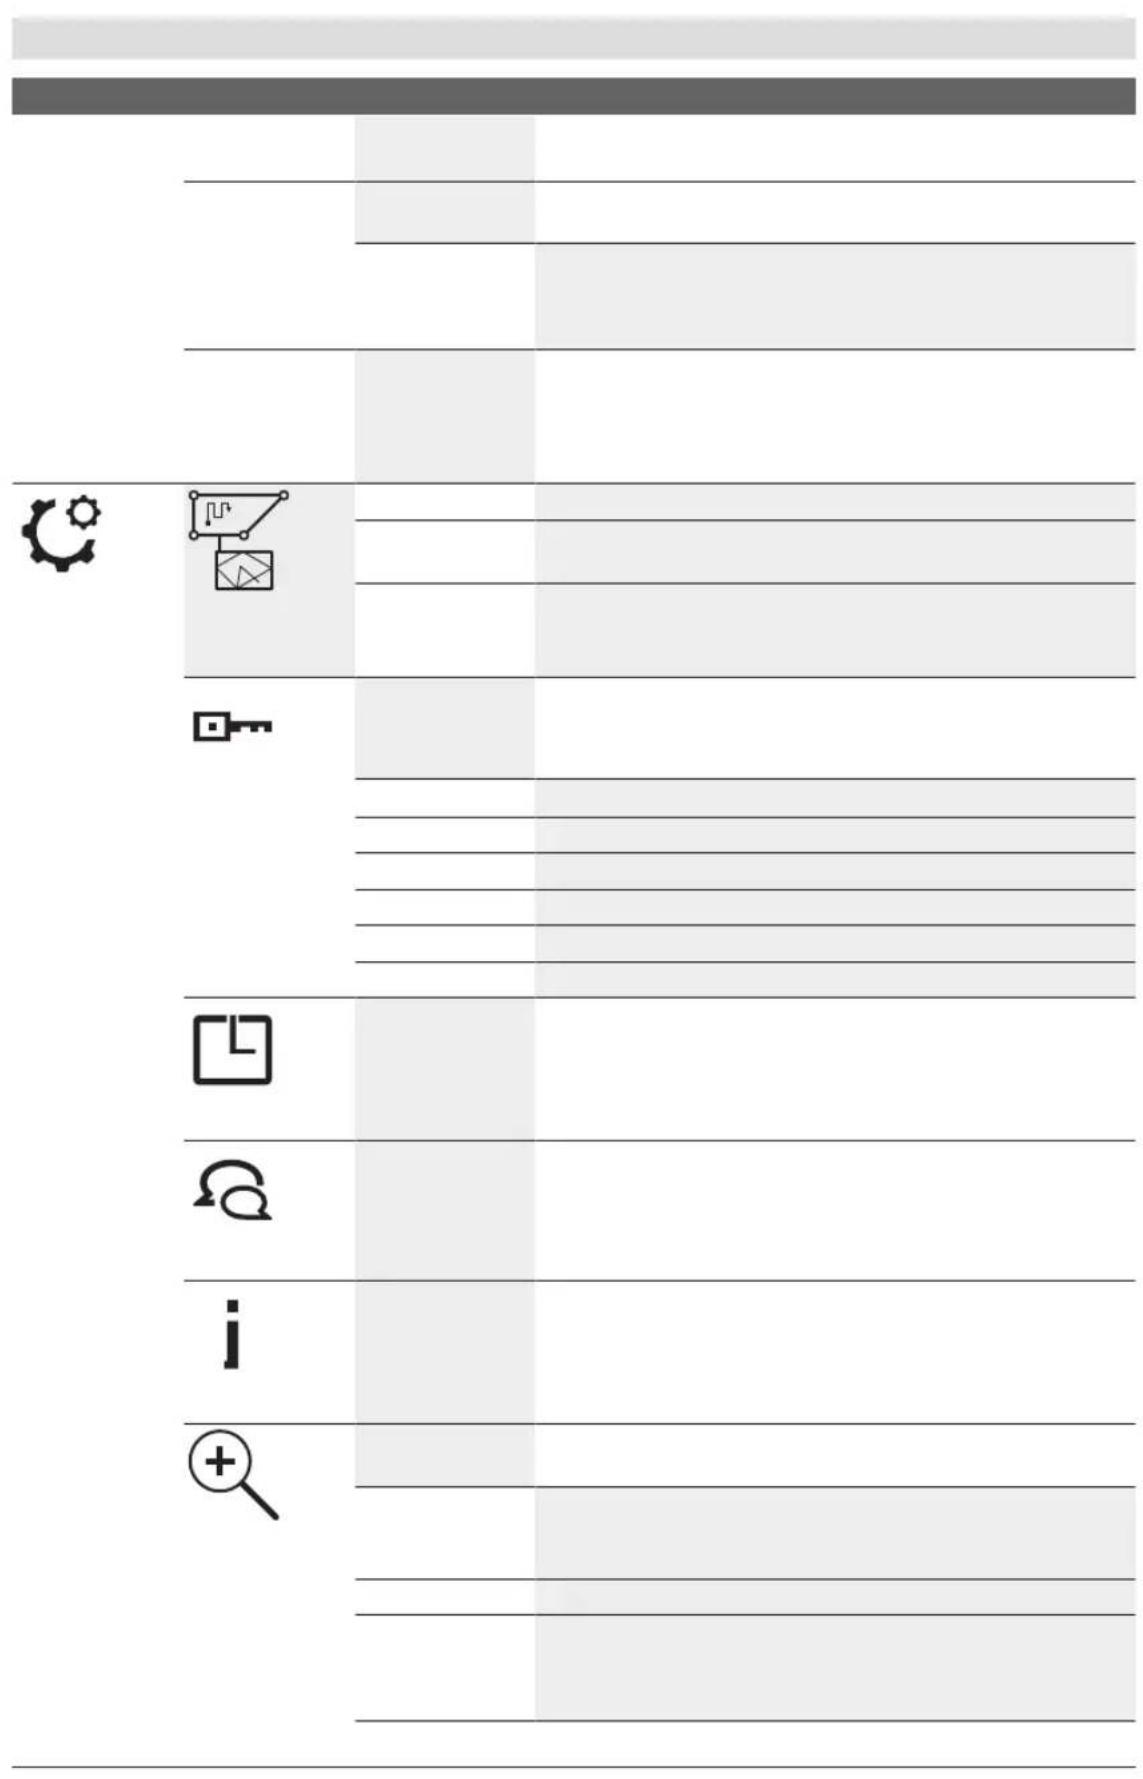
text_image
Document template with icons and text lines, including gear, key, lock, refresh, and magnifying glass symbols
natural_image
Pure technical diagram with horizontal lines and a wrench icon, no text or symbols present
bar
| Category | Value | | -------- | ----- | | Top | 100 | | Bottom | 50 | | Center | 25 | | Right | 10 |
natural_image
Pure horizontal lines with no text, numbers, or symbols, rendered in gray and black (no meaningful content)


natural_image
Pure geometric lines and shapes without any text, numbers, or symbols
natural_image
Empty white square with a gray horizontal bar and four corner markers (no text or symbols)
natural_image
Pure geometric diagram with no text, numbers, or symbols
natural_image
Empty white square with a gray horizontal bar and four corner markers (no text or symbols)


natural_image
Blank document page with horizontal lines and a gray header bar, no text or symbols present
natural_image
Pure geometric lines and shapes without any text, numbers, or symbols
text_image
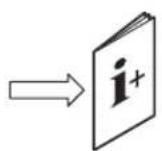
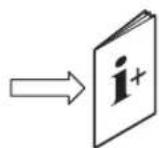
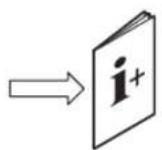
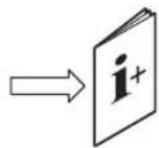
Image showing a QR code and an arrow pointing to a book labeled 'i+', with decorative icons below.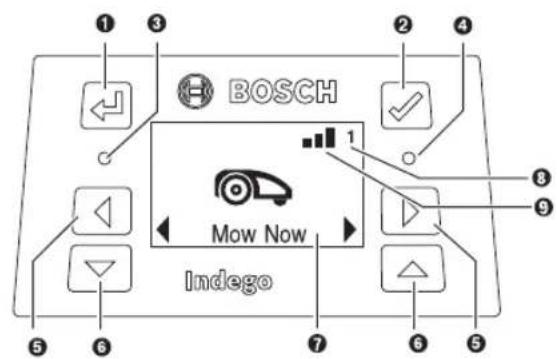
text_image
BOSCH Mow Now Indego


natural_image
Empty white square with a gray horizontal bar and four corner markers (no text or symbols)
natural_image
Pure diagram of a rectangular layout with no text, numbers, or symbols
text_image
Diagram with labeled icons and horizontal lines, likely representing a software interface or menu bar with icons for gear, key, download, refresh, and search.

natural_image
Pure horizontal lines with a shaded rectangular bar at the top, no text or symbols present
natural_image
Pure horizontal lines with no text, numbers, or symbols, rendered in gray and black (no readable content)


natural_image
Pure geometric diagram with no text, numbers, or symbols
natural_image
Empty white square with a gray horizontal bar and four corner markers (no text or symbols)

natural_image
Empty white square with a gray horizontal bar and four corner markers (no text or symbols)


natural_image
Blank document page with horizontal lines and a gray header bar, no text or symbols present
natural_image
Abstract geometric pattern with horizontal lines and a central gray bar (no text or symbols)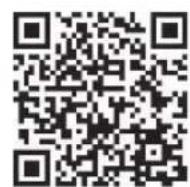

text_image
BOSCH Mow Now Indego


natural_image
Empty white canvas with a gray horizontal bar and four corner markers (no text or symbols)
natural_image
Pure diagram of a table with a printer icon and a calendar symbol, no text or labels present
text_image
Document template with icons and text lines, including gear, key, download, refresh, and search functions
text_image
Diagram showing a wrench icon and horizontal lines, likely representing a tool or layout design.


natural_image
Pure horizontal lines without any text, numbers, or symbols
bar
| Category | Value | | -------- | ----- | | Top | 100 | | Bottom | 50 |
bar
| Category | Value | | -------- | ----- | | Top | 100 | | Bottom | 50 |
natural_image
Pure geometric lines and shapes without any text, numbers, or symbols
text_image
NOM· ANCE® STOP


natural_image
Pure geometric lines and shapes without any text, numbers, or symbols
natural_image
Empty white square with a gray horizontal bar and four corner markers (no text or symbols)
natural_image
Empty white square with a gray horizontal bar and four corner markers (no text or symbols)

natural_image
Empty white square with a gray horizontal bar and four corner markers (no text or symbols)


natural_image
Blank lined paper document with no text, symbols, or markings visible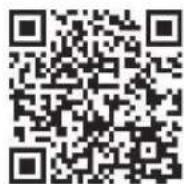
text_image
BOSCH Mow Now Indego


text_image
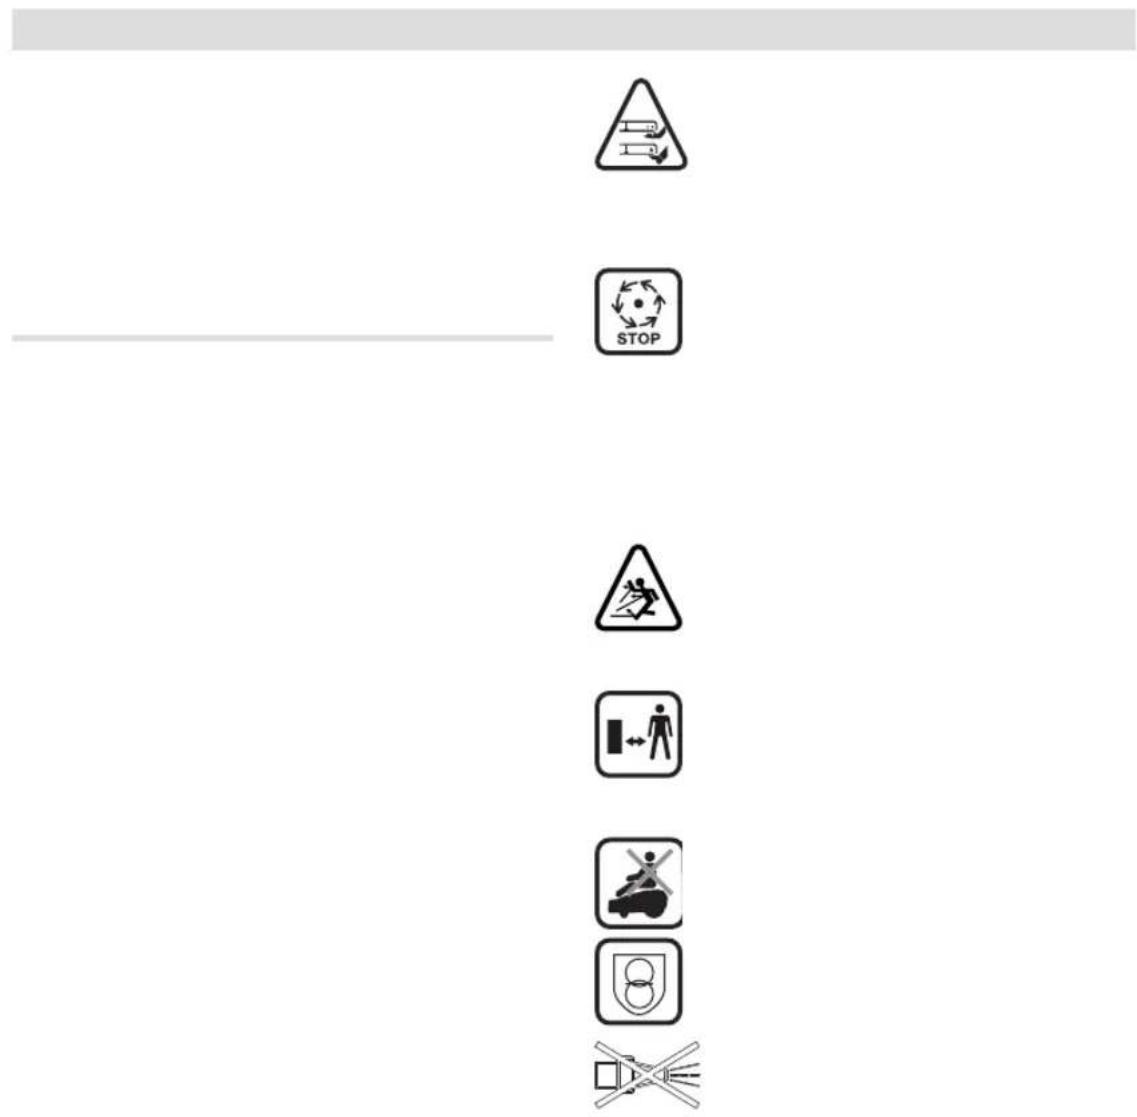
Diagram showing geometric shapes and symbols on lined paper, including triangles, squares, and rectangles with Chinese labels.
natural_image
Empty white square with a gray horizontal bar and four corner markers (no text or symbols)


natural_image
Simple diagram with a wrench icon and horizontal bars, no text or symbols present

bar
| Category | Value | | -------- | ----- | | Top | 100 | | Bottom | 50 |
natural_image
Pure horizontal lines with no text, numbers, or symbols, rendered in gray and black (no readable content)


natural_image
Pure geometric lines and shapes without any text, numbers, or symbols
natural_image
Empty white square with a gray horizontal bar and four corner markers (no text or symbols)

natural_image
Empty white square with a gray horizontal bar and four corner markers (no text or symbols)
natural_image
Empty white square with a gray horizontal bar and four corner markers (no text or symbols)


text_image
Blank document page with placeholder text and a small checkbox at the bottom right corner
natural_image
Abstract geometric composition with horizontal bars and a vertical bar (no text or symbols)
text_image
Image containing a QR code and an arrow pointing to an icon labeled 'i+', with decorative arrows below.
text_image
BOSCH Mow Now Indego


natural_image
Empty white square with a gray horizontal bar and four corner markers (no text or symbols)
natural_image
Simple diagram with car icon and calendar icon on left, no text or symbols present
text_image
Document template with placeholder text, icons, and a toolbar with gear, key, and document symbols


natural_image
Pure geometric lines and shapes without any text, numbers, or symbols
natural_image
Pure geometric diagram with horizontal lines and control points, no text or symbols present


natural_image
Empty white square with a gray horizontal bar and four corner markers (no text or symbols)
natural_image
Empty white square with a gray horizontal bar and four corner markers (no text or symbols)

natural_image
Empty white square with a gray horizontal bar and four corner markers (no text or symbols)

text_image
Simple UI element with checkmark, cross, and shopping cart icons below it

text_image
Blank document page with placeholder text and a small icon, likely a form or template for writing or drawing.
natural_image
Abstract geometric composition with two gray rectangles and a vertical light gray bar on white background (no text or symbols)
natural_image
Blank lined paper with a faint gray vertical line on the right side (no text or symbols)


text_image
BOSCH Mow Now Indego

natural_image
Empty white square with a gray horizontal bar and four corner markers (no text or symbols)
text_image
Document template with icons and a calendar icon, likely for a web form or template design.
text_image
Document template with icons and text lines, likely a form or template design
text_image
Diagram showing a tool with a magnifying glass and wrench, labeled with a plus symbol, against a plain background with horizontal lines.

natural_image
Pure horizontal lines with no text, numbers, or symbols, rendered in gray and black (no readable content)
natural_image
Pure geometric lines and shapes without any text, numbers, or symbols
natural_image
Pure geometric diagram with horizontal and vertical lines, no text or symbols present


natural_image
Empty white square with a gray horizontal bar and four corner markers (no text or symbols)

natural_image
Empty white square with a gray horizontal bar and four corner markers (no text or symbols)


text_image
Document layout with placeholder text, a horizontal bar, and two marked square boxes at the bottom.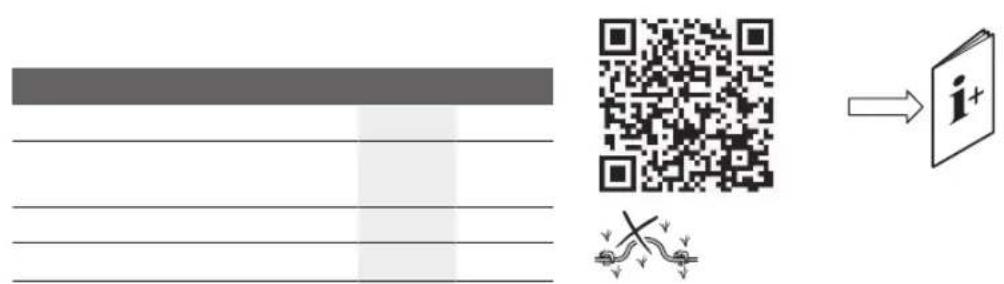
text_image
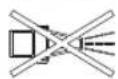
Diagram illustrating a QR code scanning into an i+ device, with a crossed-out arrow and warning symbol.
text_image
BOSCH Mow Now Indego
natural_image
Simple diagram with two arrows pointing left and right, separated by a horizontal line (no text or symbols)
text_image
Diagram showing three geometric symbols: two triangles and one double arrow, each aligned vertically on horizontal lines.
text_image
⑧ ___________________ ___________________
natural_image
Empty white square with a gray horizontal bar and four corner markers (no text or symbols)
natural_image
Pure diagram of a vehicle layout with no text, numbers, or symbols
text_image
Document template with icons and text lines, including gear, key, document, lock, refresh, and plus button
natural_image
Pure diagram of a wrench icon on a grid background, no text or symbols present


bar
| Category | Value | | -------- | ----- | | Top | 100 | | Bottom | 50 |
natural_image
Pure geometric lines and shapes without any text, numbers, or symbols


natural_image
Empty white square with a gray horizontal bar and four corner markers (no text or symbols)
natural_image
Pure geometric diagram with no text, numbers, or symbols
natural_image
Empty white square with a gray horizontal bar and four corner markers (no text or symbols)


natural_image
Blank lined paper document with no text, symbols, or markings visible

text_image
BOSCH Mow Now Indego


text_image
Diagram showing geometric shapes and symbols on lined paper, including triangles, arrows, and squares with a numbered label '8'
natural_image
Simple geometric diagram with intersecting lines and a central crosshair (no text or symbols)

natural_image
Simple diagram with a car icon and horizontal bars, no text or symbols present

text_image
Document template with placeholder text and icons for editing, viewing, and security functions
text_image
Screenshot of a software toolbar with icons for file, refresh, edit, search, and wrench, arranged vertically.


natural_image
Pure horizontal lines with no text, numbers, or symbols, rendered in gray and black (no readable content)
natural_image
Pure diagram of a horizontal bar with a shaded centerline and small geometric symbols at the bottom (no text or labels)


natural_image
Pure geometric lines and shapes without any text, numbers, or symbols
natural_image
Empty white square with a gray horizontal bar and four corner markers (no text or symbols)

natural_image
Empty white square with a gray horizontal bar and four corner markers (no text or symbols)


natural_image
Blank document page with horizontal lines and a gray header bar, no text or symbols present
natural_image
Abstract geometric pattern with horizontal lines and shaded rectangular blocks, no text or symbols present


text_image
BOSCH Mow Now Indego

natural_image
Empty white square with a gray horizontal bar and four corner markers (no text or symbols)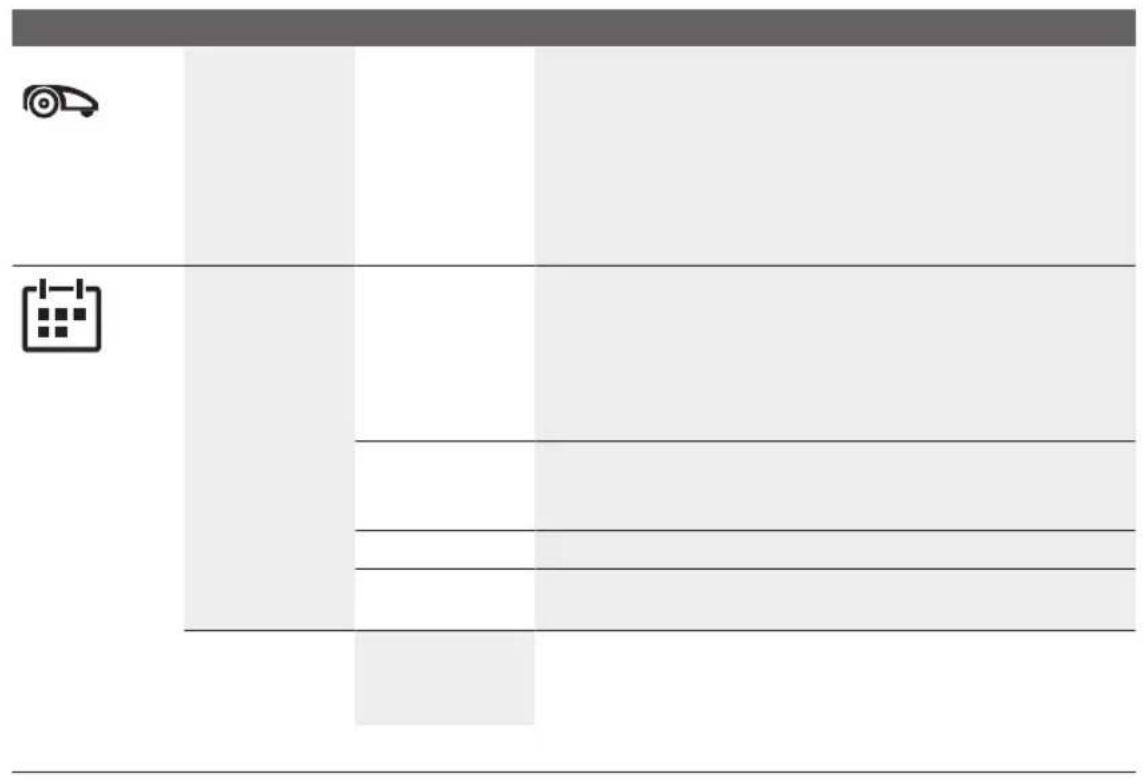
text_image
Diagram showing a car icon and a calendar icon with horizontal lines, likely representing a timeline or calendar.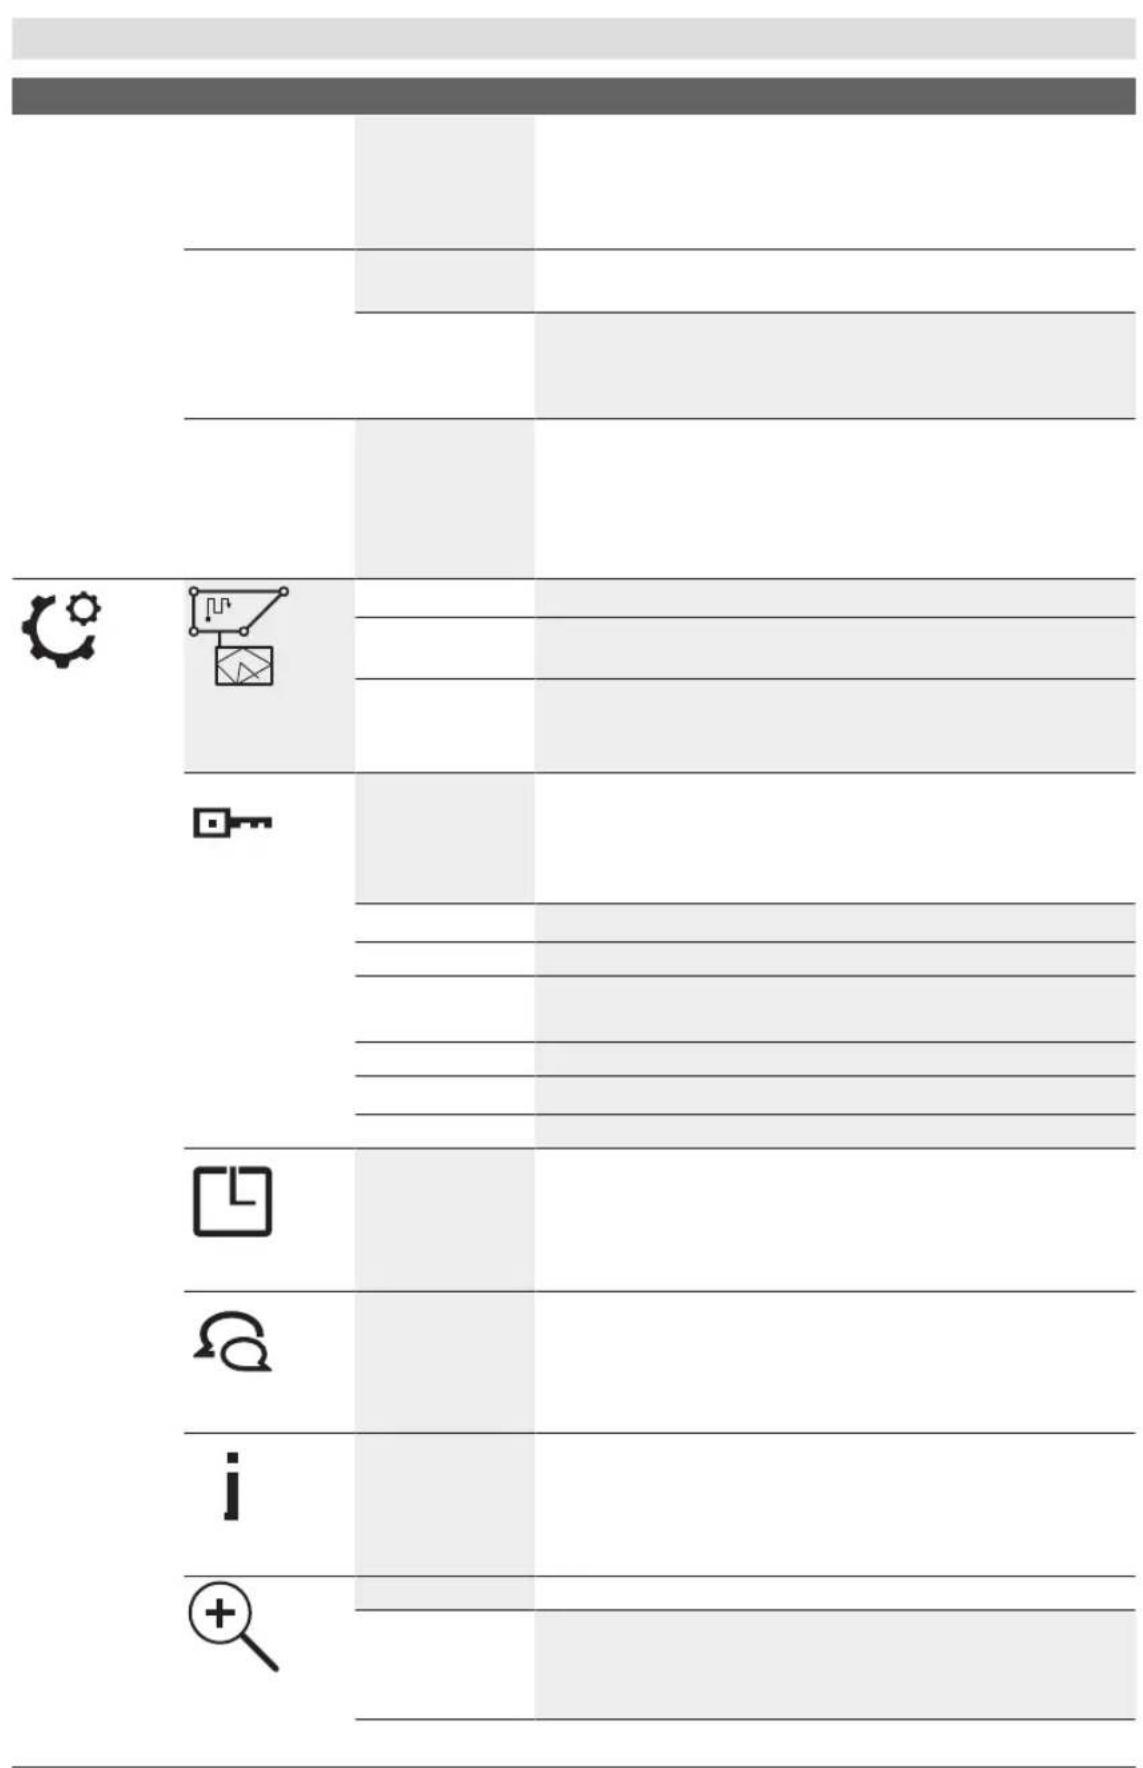
text_image
Document template with icons and text lines, including gear, key, email, and magnifying glass symbols
text_image
Diagram showing a tool labeled '工具' (tool) with a wrench icon, likely from a technical drawing or CAD software interface.

bar
| Category | Value | | -------- | ----- | | Top | 100 | | Bottom-Left | 50 | | Bottom-Right | 25 | | Middle-Left | 75 | | Middle-Right | 30 | | Bottom-Right | 15 |
natural_image
Pure horizontal lines with no text, numbers, or symbols, rendered in gray and black (no readable content)


natural_image
Empty white canvas with a gray horizontal bar and four corner markers (no text or symbols)
natural_image
Pure geometric diagram with no text, numbers, or symbols
natural_image
Empty white square with a gray horizontal bar and four corner markers (no text or symbols)


natural_image
Blank lined paper document with no text, numbers, or symbols visible


text_image
BOSCH Mow Now Indego

text_image
Diagram with geometric symbols and labeled lines, including arrows, triangles, and charts
natural_image
Empty white canvas with a gray horizontal bar and four corner markers (no text or symbols)
text_image
Document template with icons and text lines, likely a form or template design


bar
| Index | Value | |-------|-------| | 1 | 100 | | 2 | 95 | | 3 | 90 | | 4 | 85 | | 5 | 80 | | 6 | 75 | | 7 | 70 | | 8 | 65 | | 9 | 60 | | 10 | 55 | | 11 | 50 | | 12 | 45 | | 13 | 40 | | 14 | 35 | | 15 | 30 | | 16 | 25 | | 17 | 20 | | 18 | 15 | | 19 | 10 | | 20 | 5 |
natural_image
Pure diagram of a rectangular shape with horizontal lines and control points, no text or symbols present
natural_image
Pure geometric diagram with no text, numbers, or symbols
natural_image
Empty white square with a gray horizontal bar and four corner markers (no text or symbols)
natural_image
Empty white square with a gray horizontal bar and four corner markers (no text or symbols)

natural_image
Empty white square with a gray horizontal bar and four corner markers (no text or symbols)


natural_image
Blank lined paper document with no text, symbols, or markings visible

text_image
BOSCH Mow Now Indego
text_image
Diagram showing geometric shapes and symbols on lined paper, including triangles, squares, and rectangles with a numbered label '8'
natural_image
Empty white square with a gray horizontal bar and four corner markers (no text or symbols)
natural_image
Pure diagram of a vehicle layout with no text, numbers, or symbols
text_image
Document template with icons and text lines, including gear, key, folder, and email symbols
text_image
Diagram showing a tool with a magnifying glass and wrench, labeled with a plus sign and horizontal lines.


natural_image
Pure horizontal lines with no text, numbers, or symbols, rendered in gray and black (no readable content)
natural_image
Pure geometric diagram with horizontal lines and markers, no text or symbols present
natural_image
Pure diagram of horizontal lines with a shaded rectangular area, no text or symbols present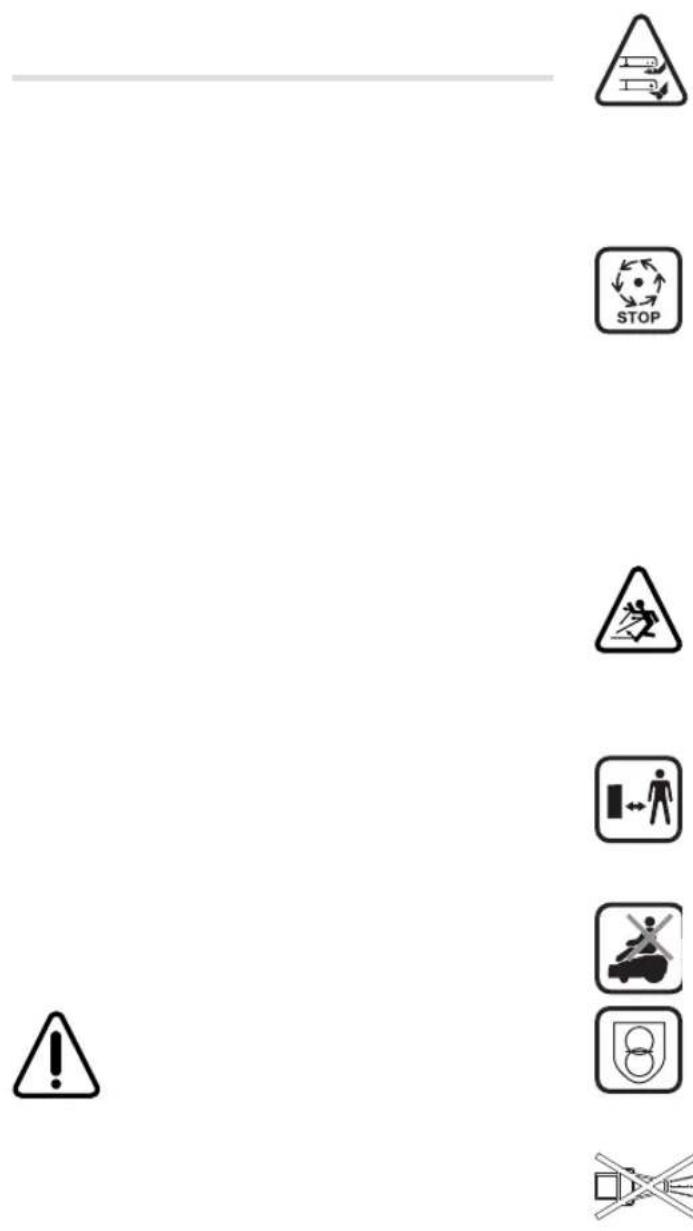

natural_image
Pure geometric lines and shapes without any text, numbers, or symbols
natural_image
Empty white square with a gray horizontal bar and four corner markers (no text or symbols)
natural_image
Pure geometric diagram with no text, numbers, or symbols
natural_image
Empty white square with a gray horizontal bar and four corner markers (no text or symbols)


natural_image
Blank lined paper document with no text, symbols, or markings visible


text_image
BOSCH Mow Now Indego

text_image
Technical diagram with labeled geometric symbols and reference lines, including arrows, checkmark, and various line styles.
natural_image
Empty white square with a gray horizontal bar and four corner markers (no text or symbols) | |||
 | |||
 |  | ||
 |


bar
| Category | Value | | -------- | ----- | | Top | 100 | | Bottom | 50 | | Center | 25 | | Right | 10 |
bar
| Category | Value | | -------- | ----- | | Top | 100 | | Bottom-Left | 50 | | Bottom-Right | 25 | | Middle-Left | 75 | | Middle-Right | 50 | | Bottom-Right | 25 |
natural_image
Pure geometric diagram with no text, numbers, or symbols
text_image
Diagram showing various hazard warning symbols and icons, including stop signs, traffic signs, safety signs, and warning symbols.
natural_image
Pure geometric diagram with no text, numbers, or symbols
natural_image
Empty white square with a gray horizontal bar and four corner markers (no text or symbols)
natural_image
Empty white square with a gray horizontal bar and four corner markers (no text or symbols)

natural_image
Empty white canvas with a gray horizontal bar and four corner markers (no text or symbols)


natural_image
Blank document page with horizontal lines and a gray header bar, no text or symbols present
natural_image
Pure geometric lines and shapes without any text, numbers, or symbols

text_image
BOSCH Mow Now Indego
natural_image
Simple diagram with two arrows pointing left and right, separated by a horizontal line (no text or symbols)
text_image
Diagram showing two horizontal lines with symbols: a left-pointing triangle and a right-pointing triangle, likely representing geometric or directional indicators.
text_image
⑧
natural_image
Empty white square with a gray horizontal bar and four corner markers (no text or symbols)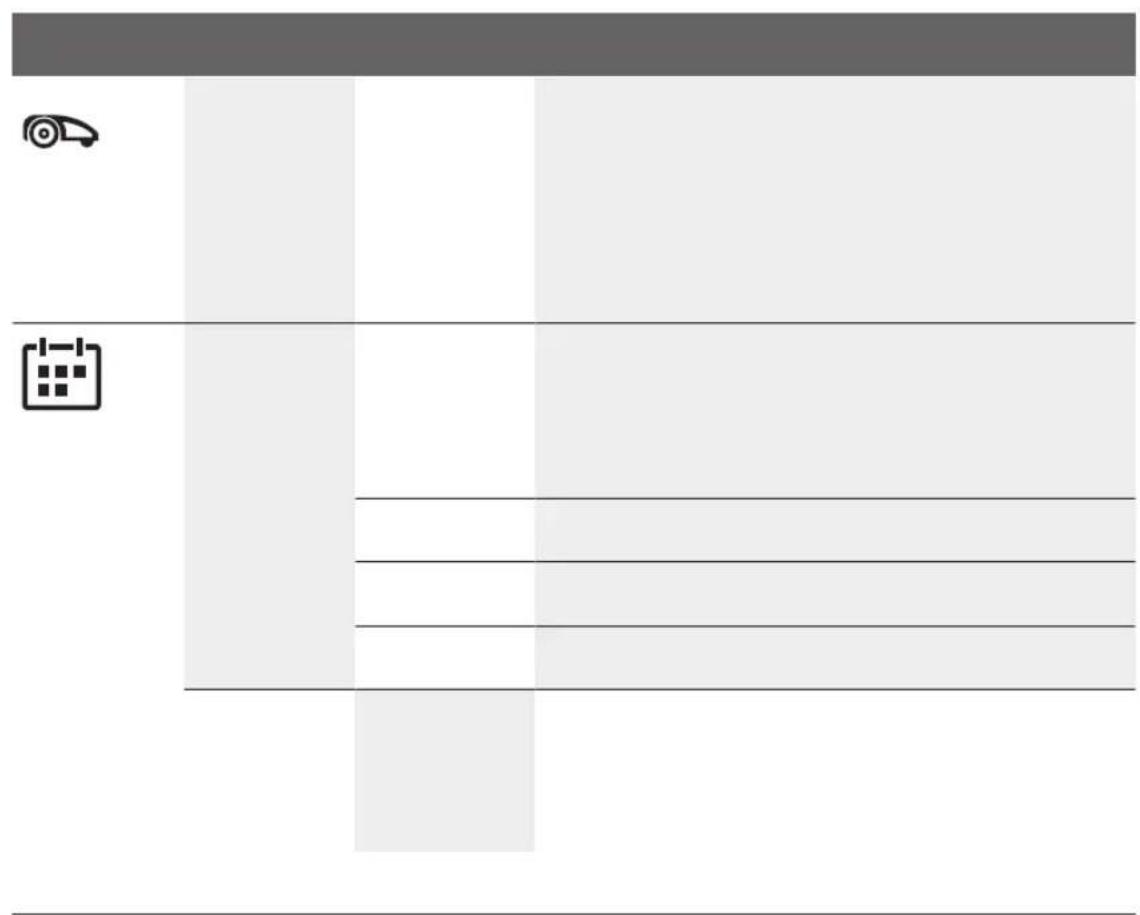
text_image
Diagram showing a car icon and a calendar with horizontal lines, likely representing a vehicle or calendar system.
text_image
Diagram with labeled icons and horizontal lines, likely representing a system or control interface layout
text_image
Diagram showing a wrench and a target symbol with alignment markers, likely illustrating a technical or engineering concept.

natural_image
Pure horizontal lines with no text, numbers, or symbols, rendered in gray and black (no readable content)
natural_image
Pure horizontal lines with no text, numbers, or symbols, rendered in gray and black (no meaningful content)
natural_image
Pure geometric lines and shapes without any text, numbers, or symbols


natural_image
Pure geometric lines and shapes without any text, numbers, or symbols
natural_image
Empty white square with a gray horizontal bar and four corner markers (no text or symbols)

natural_image
Empty white square with a gray horizontal bar and four corner markers (no text or symbols)


natural_image
Abstract geometric pattern with horizontal lines and shaded rectangular blocks, no text or symbols present

text_image
BOSCH Mow Now Indego


natural_image
Empty white canvas with a gray horizontal bar and four corner markers (no text or symbols)
text_image
Document template with icons and a calendar icon, likely for a web form or settings interface.
text_image
Document template with icons and text lines, likely a form or template design
text_image
Diagram showing a magnifying glass over a document with a wrench, and a tool icon, likely illustrating a software interface or search process.
natural_image
Pure horizontal lines without any text, numbers, or symbols
natural_image
Pure horizontal lines with no text, numbers, or symbols, rendered in gray and black (no meaningful content)
natural_image
Pure horizontal lines with no text, numbers, or symbols, rendered in gray and black (no readable content)


natural_image
Empty white canvas with a gray horizontal bar and four corner markers (no text or symbols)

natural_image
Empty white square with a gray horizontal bar and four corner markers (no text or symbols)


natural_image
Blank lined paper document with no text, numbers, or symbols visible


text_image
BOSCH Mow Now Indego
text_image
Diagram showing geometric shapes and symbols on lined paper, including triangles, arrows, and squares with a numbered label '8'
natural_image
Empty white square with a gray horizontal bar and four corner markers (no text or symbols) |  | |
 | ||


natural_image
Pure horizontal lines with no text, numbers, or symbols, rendered in gray and black (no meaningful content)
natural_image
Pure geometric diagram with horizontal lines and control points, no text or symbols present


natural_image
Empty white square with a gray horizontal bar and four corner markers (no text or symbols)
natural_image
Empty white square with a gray horizontal bar and four corner markers (no text or symbols)

natural_image
Empty white square with a gray horizontal bar and four corner markers (no text or symbols)


natural_image
Blank document page with horizontal lines and a gray header bar, no text or symbols present
natural_image
Abstract geometric pattern with horizontal lines and shaded rectangular blocks, no text or symbols present
text_image
BOSCH Mow Now Indego


natural_image
Empty white square with a gray horizontal bar and four corner markers (no text or symbols)
natural_image
Simple geometric diagram with intersecting lines and a central crosshair (no text or symbols)
natural_image
Simple diagram with a car icon and two vertical bars, no text or symbols present
text_image
Document template with icons for file, folder, and security symbols


natural_image
Pure horizontal lines with no text, numbers, or symbols, rendered in gray and black (no meaningful content)
natural_image
Pure horizontal lines with no text, numbers, or symbols, rendered in gray and black (no meaningful content)

natural_image
Pure geometric diagram with no text, numbers, or symbols
natural_image
Empty white square with a gray horizontal bar and four corner markers (no text or symbols)
natural_image
Empty white square with a gray horizontal bar and four corner markers (no text or symbols)

natural_image
Empty white square with a gray horizontal bar and four corner markers (no text or symbols)


natural_image
Blank lined paper with a single dark gray bar and four small square markers at the bottom (no text or symbols)


text_image
BOSCH Mow Now Indego
text_image
Diagram showing geometric shapes and symbols on lined paper, including triangles, squares, and rectangles with numbered labels ⑧.
natural_image
Empty white square with a gray horizontal bar and four corner markers (no text or symbols)
natural_image
Pure diagram of a rectangular block with horizontal and vertical lines, no text or symbols present
text_image
Diagram with labeled icons and horizontal lines, likely representing a software interface or menu bar with icons for tools like gear, key, download, and search.
text_image
Diagram showing a wrench and a target symbol above a grid, likely representing a tool or interface layout.


natural_image
Pure horizontal lines and geometric shapes without any text, numbers, or symbols
bar
| Category | Value | | -------- | ----- | | Row 1 | 1 | | Row 2 | 2 | | Row 3 | 3 | | Row 4 | 4 | | Row 5 | 5 | | Row 6 | 6 | | Row 7 | 7 | | Row 8 | 8 | | Row 9 | 9 | | Row 10 | 10 |
natural_image
Pure geometric lines and shapes without any text, numbers, or symbols


natural_image
Empty white square with a gray horizontal bar and four corner markers (no text or symbols)
natural_image
Empty white square with a gray horizontal bar and four corner markers (no text or symbols)

natural_image
Empty white square with a gray horizontal bar and four corner markers (no text or symbols)


natural_image
Blank document page with horizontal lines and a gray header bar, no text or symbols present
natural_image
Pure horizontal lines and a vertical arrow symbol without any text, numbers, or labels
natural_image
Simple gray rectangle with a small white square in the bottom-right corner (no text or symbols)
natural_image
Solid gray rectangular shape with no text, symbols, or discernible features.
text_image
BOSCH Mow Now Indego


natural_image
Empty white square with a gray horizontal bar and four corner markers (no text or symbols)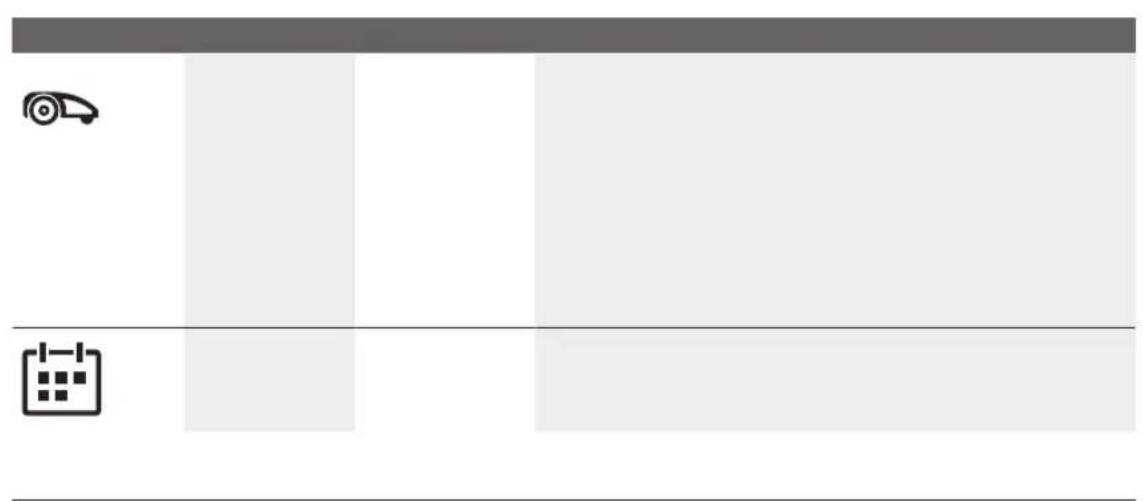
natural_image
Pure graphical interface elements without any text, numbers, or symbols
text_image
Document template with placeholder text and icons for security, navigation, and key functions


natural_image
Pure horizontal lines with no text, numbers, or symbols, rendered in gray and black (no meaningful content)
natural_image
Pure geometric lines and shapes without any text, numbers, or symbols


natural_image
Pure geometric lines and shapes without any text, numbers, or symbols
natural_image
Empty white square with a gray horizontal bar and four corner markers (no text or symbols)

natural_image
Empty white square with a gray horizontal bar and four corner markers (no text or symbols)


natural_image
Blank lined paper document with no text, numbers, or symbols visible

text_image
BOSCH Mow Now Indego


natural_image
Empty white square with a gray horizontal bar and four corner markers (no text or symbols)
natural_image
Pure diagram of a vehicle layout with no text, numbers, or symbols
text_image
Diagram with labeled icons and horizontal lines, likely representing a software interface or menu bar with icons for tools like gear, key, document, and search.

bar
| Row | Column 1 | Column 2 | Column 3 | Column 4 | Column 5 | Column 6 | Column 7 | Column 8 | Column 9 | Column 10 | |-----|----------|----------|----------|----------|----------|----------|----------|----------|----------|-----------| | 1 | 1.0 | 0.8 | 0.6 | 0.4 | 0.3 | 0.2 | 0.1 | 0.05 | 0.03 | 0.01 | | 2 | 0.9 | 0.7 | 0.5 | 0.3 | 0.2 | 0.1 | 0.05 | 0.03 | 0.02 | 0.01 | | 3 | 0.8 | 0.6 | 0.4 | 0.2 | 0.1 | 0.05 | 0.03 | 0.02 | 0.01 | 0.005 | | 4 | 0.7 | 0.5 | 0.3 | 0.1 | 0.05 | 0.03 | 0.02 | 0.01 | 0.005 | 0.002 | | 5 | 0.6 | 0.4 | 0.2 | 0.05 | 0.03 | 0.02 | 0.01 | 0.005 | 0.002 | 0.001 | | 6 | 0.5 | 0.3 | 0.1 | 0.03 | 0.02 | 0.01 | 0.005 | 0.002 | 0.001 | 0.0005 | | 7 | 0.4 | 0.2 | 0.05 | 0.02 | 0.01 | 0.005 | 0.002 | 0.001 | 0.0005 | 0.0002 | | 8 | 0.3 | 0.1 | 0.03 | 0.01 | 0.005 | 0.002 | 0.001 | 0.0005 | 0.0002 | 0.0001 | | 9 | 0.2 | 0.05 | 0.02 | 0.01 | 0.003 | 0.001 | 0.0005 | 0.0002 | 0.0001 | 0.00005 | |10 | 1 | - | - | - | - | - | - | - | - | - |
natural_image
Pure geometric lines forming a vertical rectangle with horizontal and vertical segments, no text or symbols present.
natural_image
Pure technical diagram with horizontal bars and geometric symbols, no readable text or labels
natural_image
Pure geometric lines and shapes without any text, numbers, or symbols
natural_image
Empty white square with a gray horizontal bar and four corner markers (no text or symbols)
natural_image
Empty white square with a gray horizontal bar and four corner markers (no text or symbols)

natural_image
Empty white square with a gray horizontal bar and four corner markers (no text or symbols)


natural_image
Blank lined paper document with no text, numbers, or symbols visible
natural_image
Pure geometric lines and shapes without any text, numbers, or symbols


text_image
BOSCH Mow Now Indego


natural_image
Empty white square with a gray horizontal bar and four corner markers (no text or symbols)
text_image
Document template with icons and blank sections, likely a template or checklist design
text_image
Document template with placeholder text and icons for security, navigation, key, and document symbols
text_image
i + - - - - - - - - - - - - - - - - - - - - - - - - - - - - - - - - - - - - - - - - - - - - - - - - - - -


natural_image
Pure geometric lines and shapes without any text, numbers, or symbols
natural_image
Pure geometric diagram with horizontal lines and markers, no text or symbols present
natural_image
Pure geometric lines and shapes without any text, numbers, or symbols


natural_image
Pure geometric diagram with no text, numbers, or symbols
natural_image
Empty white square with a gray horizontal bar and four corner markers (no text or symbols)

natural_image
Empty white square with a gray horizontal bar and four corner markers (no text or symbols)


natural_image
Blank lined paper with a single gray bar and four small square markers at the bottom (no text or symbols)
natural_image
Blank document page with horizontal lines and a vertical gray bar on the right (no text or symbols)
text_image
BOSCH Mow Now Indego


natural_image
Simple diagram with two arrows pointing left and right, separated by a horizontal line (no text or symbols)
text_image
Diagram showing geometric shapes and symbols on lined paper, including triangles, arrows, and squares with a numbered label '8'
natural_image
Simple geometric diagram with intersecting lines and a central crosshair (no text or symbols)
natural_image
Completely blank white image with no visible content, text, or symbols.
natural_image
Completely blank white image with no visible content, text, or symbols.
natural_image
Blank white image with no visible content, text, or symbols.
natural_image
Blank white image with no visible content, text, or symbols.
natural_image
Blank white image with no visible content, text, or symbols.
natural_image
Completely blank white image with no visible content, text, or symbols.
natural_image
Pure horizontal gray bar on white background (no text or symbols)
natural_image
Simple line drawing of a car silhouette and two gray rectangular blocks (no text or symbols)
natural_image
Simple crosshair target symbol with concentric circles and intersecting lines (no text or labels)
text_image
Document template with icons for file, edit, and viewing functions
text_image
Diagram with labeled icons including a wrench, magnifying glass, and tools like a gear and a plus sign, arranged in a grid-like layout.


natural_image
Pure horizontal lines with no text, numbers, or symbols, rendered in gray and black (no meaningful content)
natural_image
Pure horizontal lines with no text, numbers, or symbols, rendered in gray and black (no meaningful content)
natural_image
Pure diagram of a horizontal bar with a cross symbol at the bottom, no text or labels present


natural_image
Pure geometric lines and shapes without any text, numbers, or symbols
natural_image
Empty white square with a gray horizontal bar and four corner markers (no text or symbols)

natural_image
Empty white square with a gray horizontal bar and four corner markers (no text or symbols)


natural_image
Blank document page with horizontal lines and a gray header bar, no visible text or symbols
text_image
BOSCH Mow Now Indego


natural_image
Empty white square with a gray horizontal bar and four corner markers (no text or symbols)
natural_image
Empty white square with a gray horizontal bar and four corner markers (no text or symbols)
text_image
Document template with icons and text lines, likely a form or template design


natural_image
Pure horizontal lines with no text, numbers, or symbols, rendered in gray and black (no meaningful content)
natural_image
Pure geometric lines and shapes without any text, numbers, or symbols


natural_image
Pure geometric lines and shapes without any text, numbers, or symbols
natural_image
Empty white canvas with a gray horizontal bar and four corner markers (no text or symbols)

natural_image
Empty white square with a gray horizontal bar and four corner markers (no text or symbols)


natural_image
Abstract geometric pattern with horizontal lines and shaded rectangular blocks, no text or symbols present


text_image
BOSCH Mow Now Indego


natural_image
Empty white square with a gray horizontal bar and four corner markers (no text or symbols)
natural_image
Simple diagram with car icon and calendar icon on left, no text or symbols present
text_image
Document template with placeholder text, icons, and a gear symbol, likely for editing or writing exercises.
text_image
i + - - - - - - - - - - - - - - - - - - - - - - - - - - - - - - - - - - - - - - - - - - - - - - - - - - -
bar
| Category | Value | | -------- | ----- | | Top | 100 | | Bottom-Left | 50 | | Bottom-Right | 25 | | Middle-Left | 75 | | Middle-Right | 30 | | Bottom-Right | 10 |
natural_image
Pure horizontal lines with no text, numbers, or symbols, rendered in gray and black (no meaningful content)
natural_image
Pure geometric diagram with horizontal and vertical lines, no text or symbols present


natural_image
Empty white square with a gray horizontal bar and four corner markers (no text or symbols)


natural_image
Empty white square with a gray horizontal bar and four corner markers (no text or symbols)
natural_image
Blank document page with horizontal lines and a gray header bar, no text or symbols present


text_image
BOSCH Mow Now Indego
text_image
Technical diagram with labeled geometric symbols and alignment indicators, likely from an engineering or CAD software interface.
natural_image
Empty white square with a gray horizontal bar and four corner markers (no text or symbols)
text_image
Document template with icons and text lines, likely a form or template for editing or viewing services.


bar
| Category | Value | | -------- | ----- | | Top | 100 | | Bottom | 50 | | Center | 100 | | Right | 100 |
natural_image
Pure technical diagram with horizontal bars and small icons, no readable text or symbols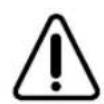


natural_image
Empty white square with a gray horizontal bar and small black crosshair markers at corners (no text or symbols)
natural_image
Empty white square with a gray horizontal bar and four corner markers (no text or symbols)
natural_image
Pure geometric lines and shapes without any text, numbers, or symbols
natural_image
Empty white square with a gray horizontal bar and four corner markers (no text or symbols)
natural_image
Empty white square with a gray horizontal bar and four corner markers (no text or symbols)


text_image
Blank document page with placeholder text and a small icon of a crosshair above it.
natural_image
Abstract geometric pattern with horizontal lines and a vertical shaded rectangle (no text or symbols)
natural_image
Blank lined paper with a single gray bar at the top (no text or symbols)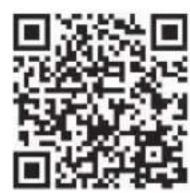


text_image
BOSCH Mow Now Indego


natural_image
Empty white square with a gray horizontal bar and four corner markers (no text or symbols)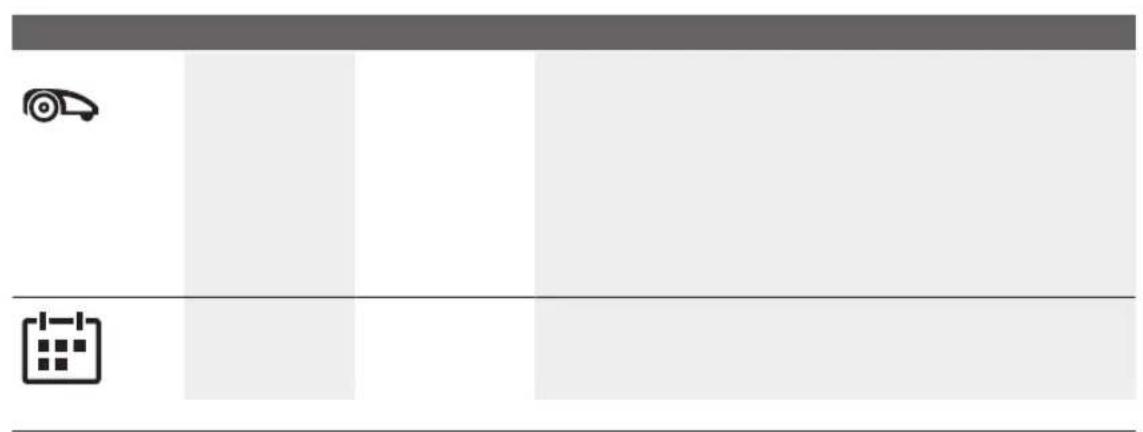
natural_image
Minimalist diagram with icons and a grid layout, no readable text or symbols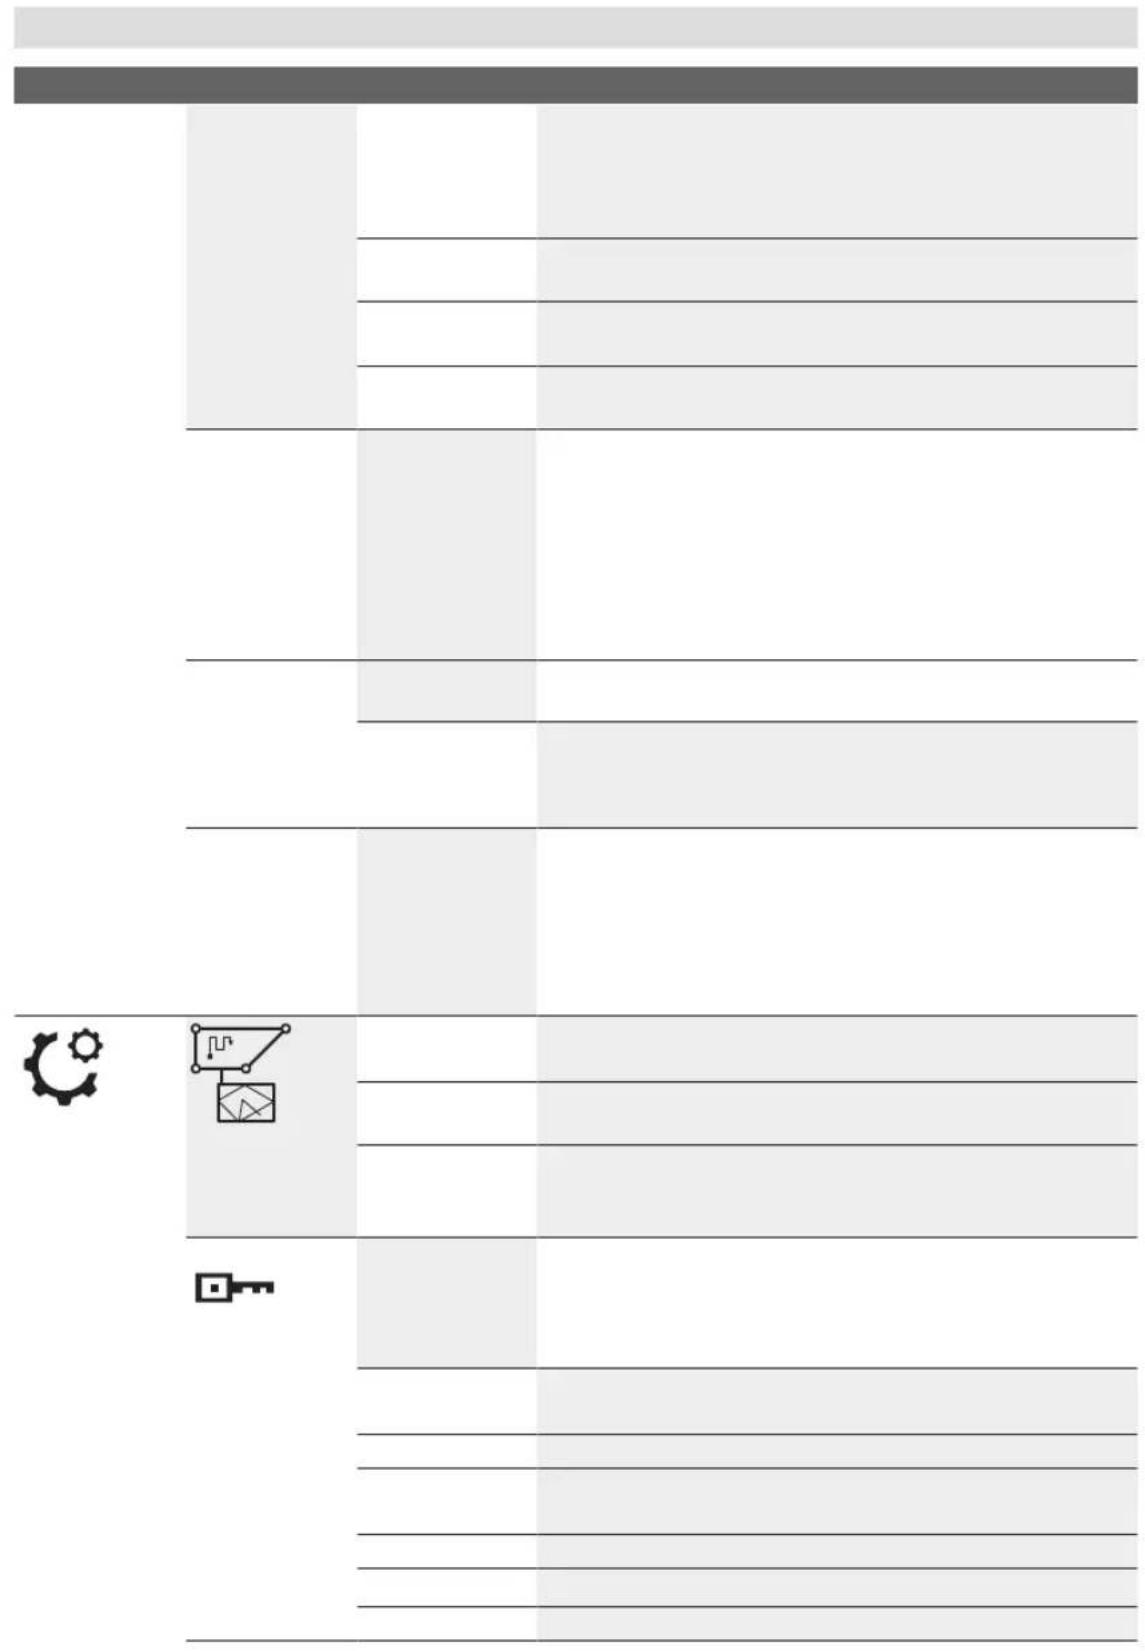
text_image
Document template with placeholder text, icons, and a gear symbol, likely for technical or engineering purposes.


natural_image
Pure horizontal lines with no text, numbers, or symbols, rendered in gray and black (no readable content)
natural_image
Pure geometric lines and shapes without any text, numbers, or symbols


natural_image
Empty white square with a gray horizontal bar and four corner markers (no text or symbols)
natural_image
Pure geometric diagram with no text, numbers, or symbols
natural_image
Empty white square with a gray horizontal bar and four corner markers (no text or symbols)


natural_image
Blank lined paper document with no text, symbols, or markings visible

text_image
BOSCH Mow Now Indego
text_image
Technical diagram with labeled geometric symbols and reference lines, including arrows, checkmark, and various line styles.
natural_image
Empty white square with a gray horizontal bar and four corner markers (no text or symbols)
text_image
Document template with icons and blank sections, likely a template or checklist design
text_image
Diagram with labeled icons and a vertical bar, likely representing a UI or data entry interface
natural_image
Simple diagram with a wrench icon and horizontal bars, no text or symbols present

bar
| Category | Value | | -------- | ----- | | Top | 100 | | Bottom-Left | 50 | | Bottom-Right | 25 | | Bottom-Left | 10 | | Bottom-Right | 5 | | Center | 100 | | Center-Left | 50 | | Center-Right | 25 | | Center-Left | 10 | | Center-Right | 5 |
natural_image
Pure diagram of horizontal lines with control points and arrows, no text or symbols present
A

natural_image
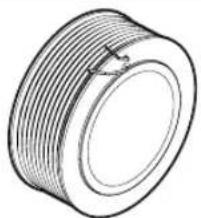
Technical line drawing of a threaded mechanical component (no text or symbols)100 m
F016800373
4x
F016800432

3x
F 016 800 321

text_image
F 016 800 F 016 800 F 016 800 F 016 800F 016 800 554
F 016 800 555
F 016 800 556
F 016 800 557
F016800558
F 016 800 559
natural_image
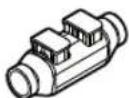
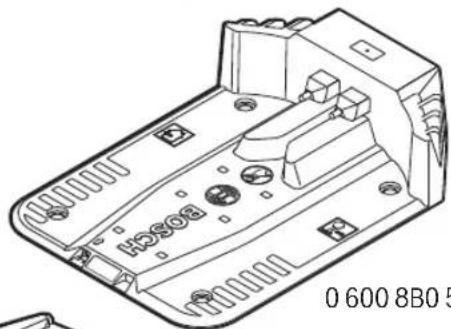
Line drawing of a mechanical device with no visible text or symbols0 600 8B0 500
natural_image
Line drawing of a Bosch car body (no text or symbols on the diagram itself)F 016 800 469
1x
F 016 800 468
F016800314
F016800292
20x
F 016 800 485
100 x
F 016 800 484
natural_image
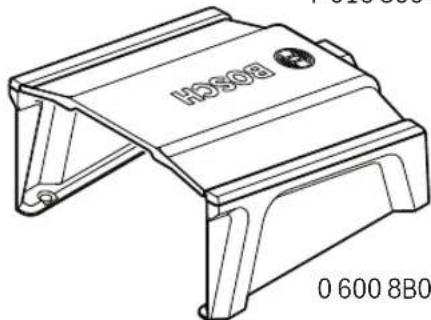
Technical line drawing of a mechanical component with mounting holes and internal features (no text or symbols)06008B0501
1 600 A00 5B0
natural_image
Simple line drawing of a mechanical lever or support structure (no text or symbols)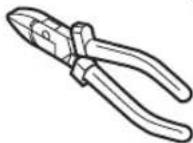
natural_image
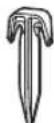
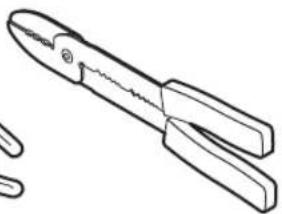
Line drawing of a pair of pliers (no text or symbols)
text_image
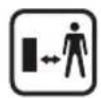
B i+ 5 m 5 m 2 m 175 m 240 x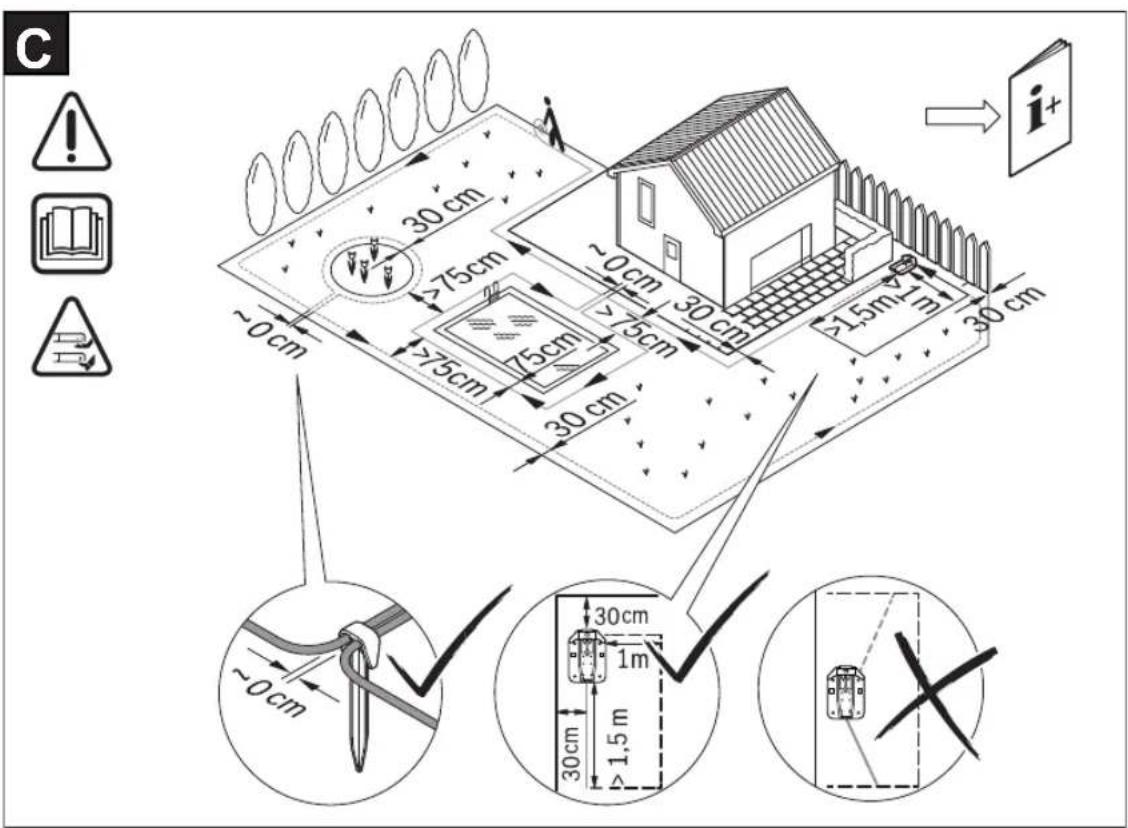
text_image
C 30 cm ~0 cm 75 cm 75 cm 30 cm 30 cm ~0 cm 30 cm 30 cm i+ 30 cm 30 cm 30 cm 1 m 30 cm 1.5 m ~0 cm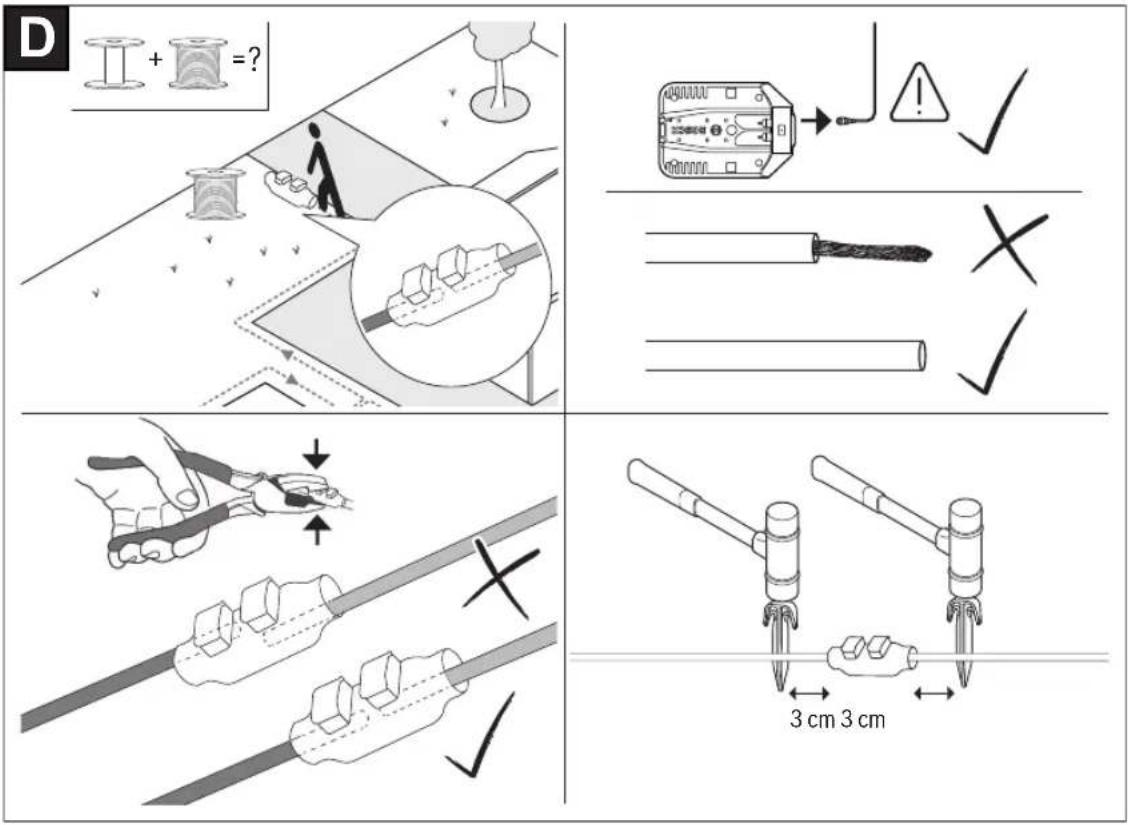
text_image
D + = ? ✓ ✓ ✓ ✓ ✓ ✓ ✓ ✓ ✓ ✓ ✓ ✓ ✓ ✓ ✓ ✓ ✓ ✓ ✓ ✓ ✓ ✓ ✓ ✓ ✓ ✓ ✓ ✓ ✓ ✓ ✓ ✓ ✓ ✓ ✓ ✓ ✓ ✓ ✓ ✓ ✓ ✓ ✓ ✓ ✓ ✓ ✓ ✓ ✓ ✓ ✓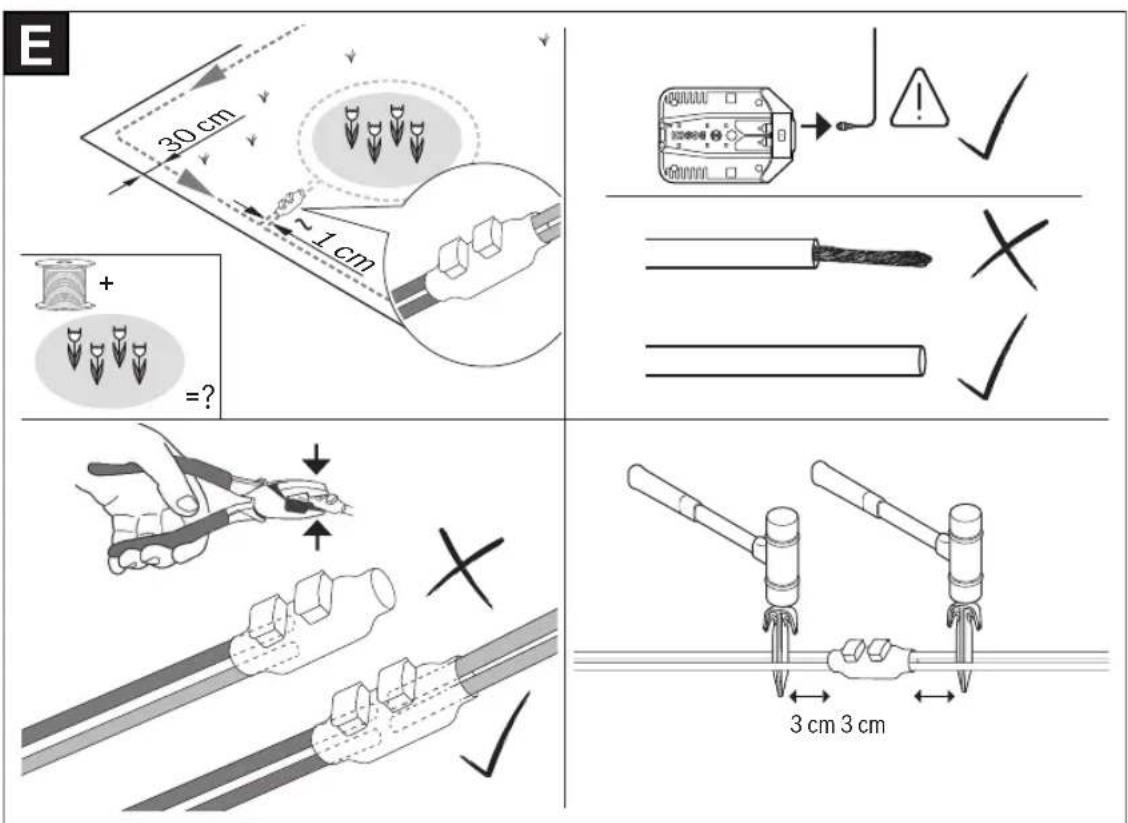
text_image
E 30 cm ~1 cm =? ✓ ✓ ✓ ✓ ✓ ✓ ✓ ✓ ✓ ✓ ✓ ✓ ✓ ✓ ✓ ✓ ✓ ✓ ✓ ✓ ✓ ✓ ✓ ✓ ✓ ✓ ✓ ✓ ✓ ✓ ✓ ✓ ✓ ✓ ✓ ✓ ✓ ✓ ✓ ✓ ✓ ✓ ✓ ✓ ✓ ✓ ✓ ✓ ✓ ✓ ✓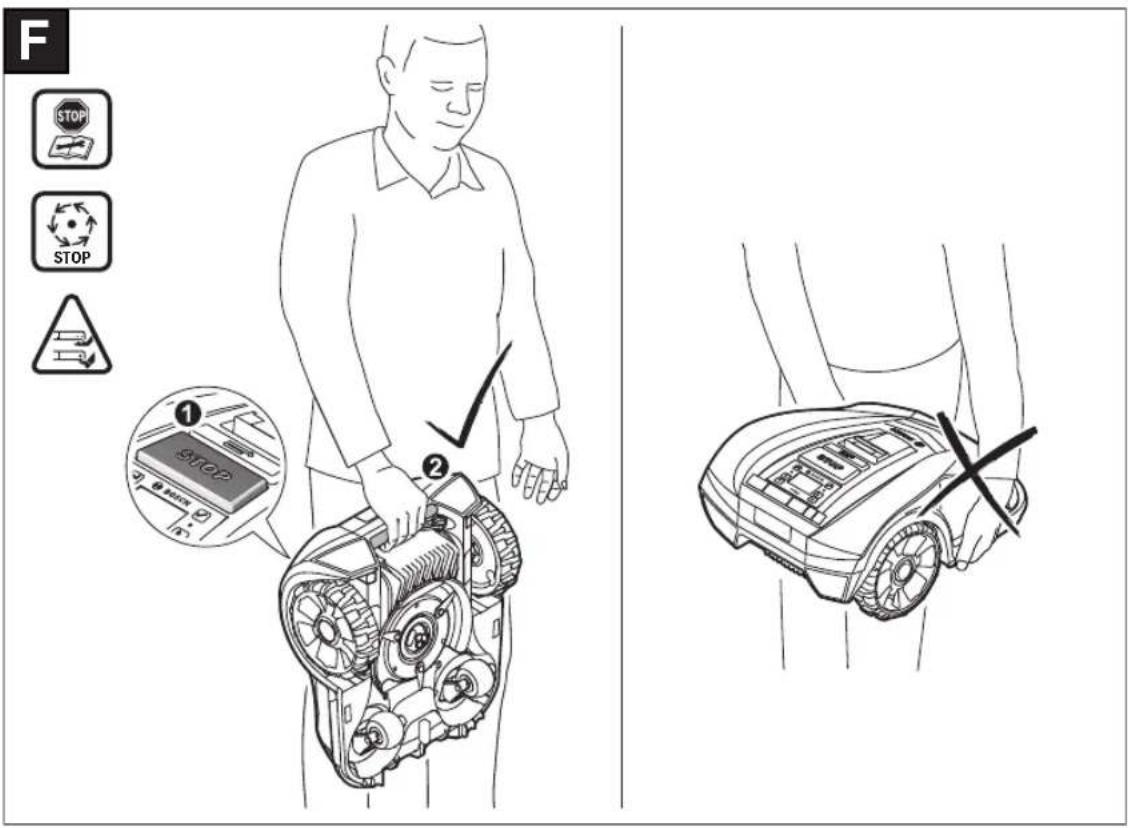
text_image
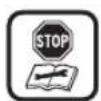
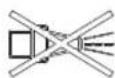
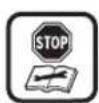
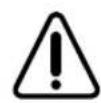
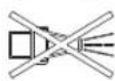
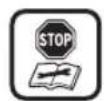
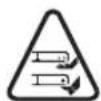
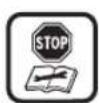
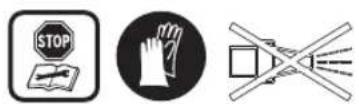
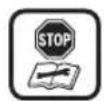
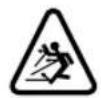
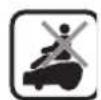
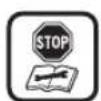
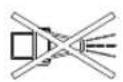
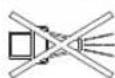
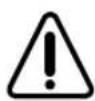
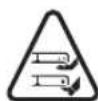
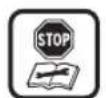
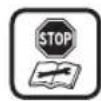
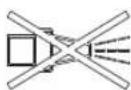
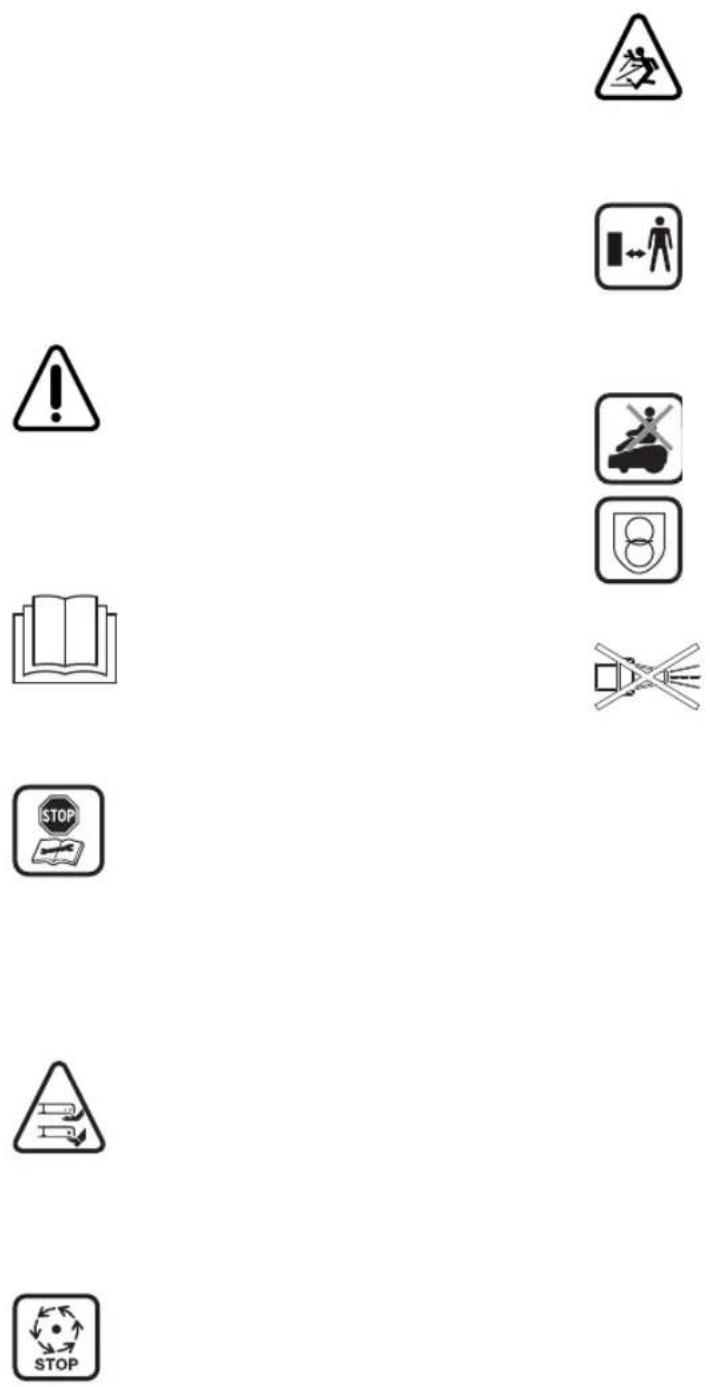
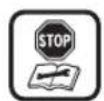
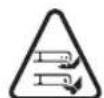
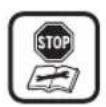
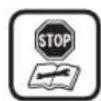
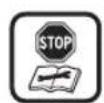
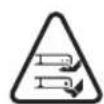
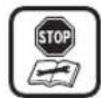
F STOP STOP STOP ① ② STOP2 Switch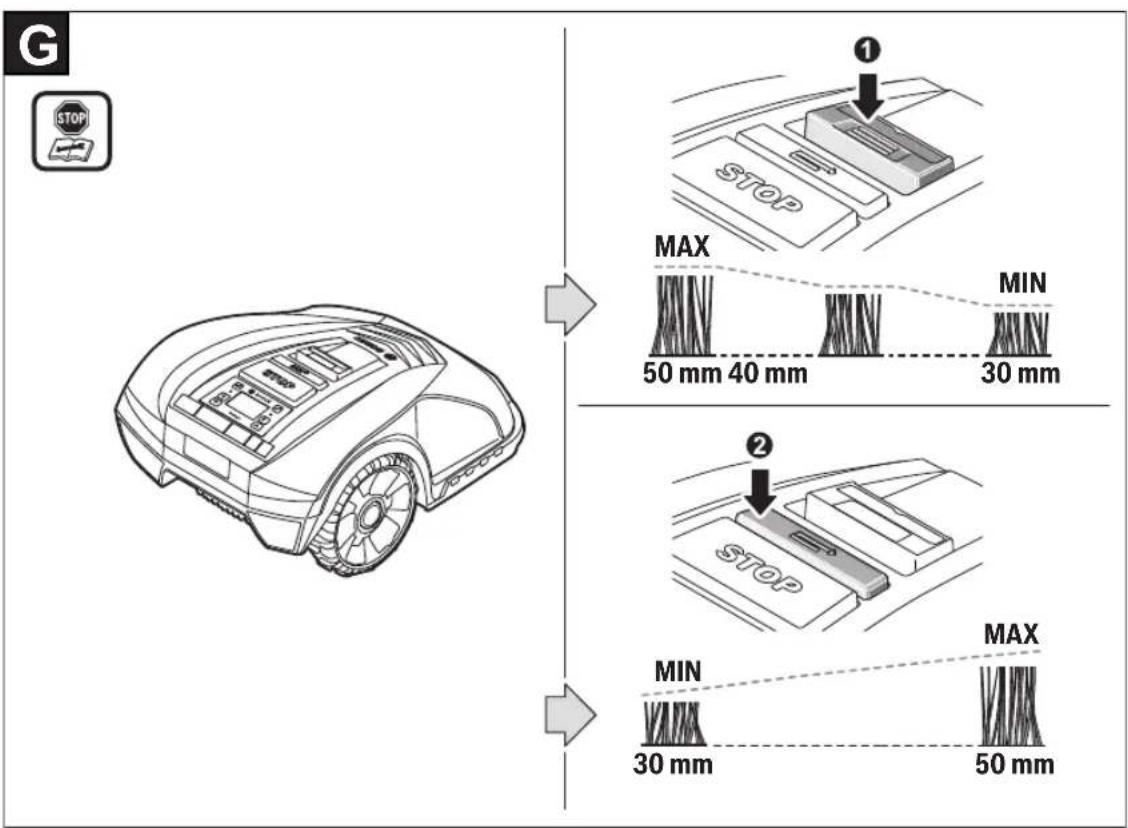
text_image
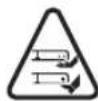
G STOP MAX 50 mm 40 mm MIN 30 mm MIN 30 mm MAX 50 mm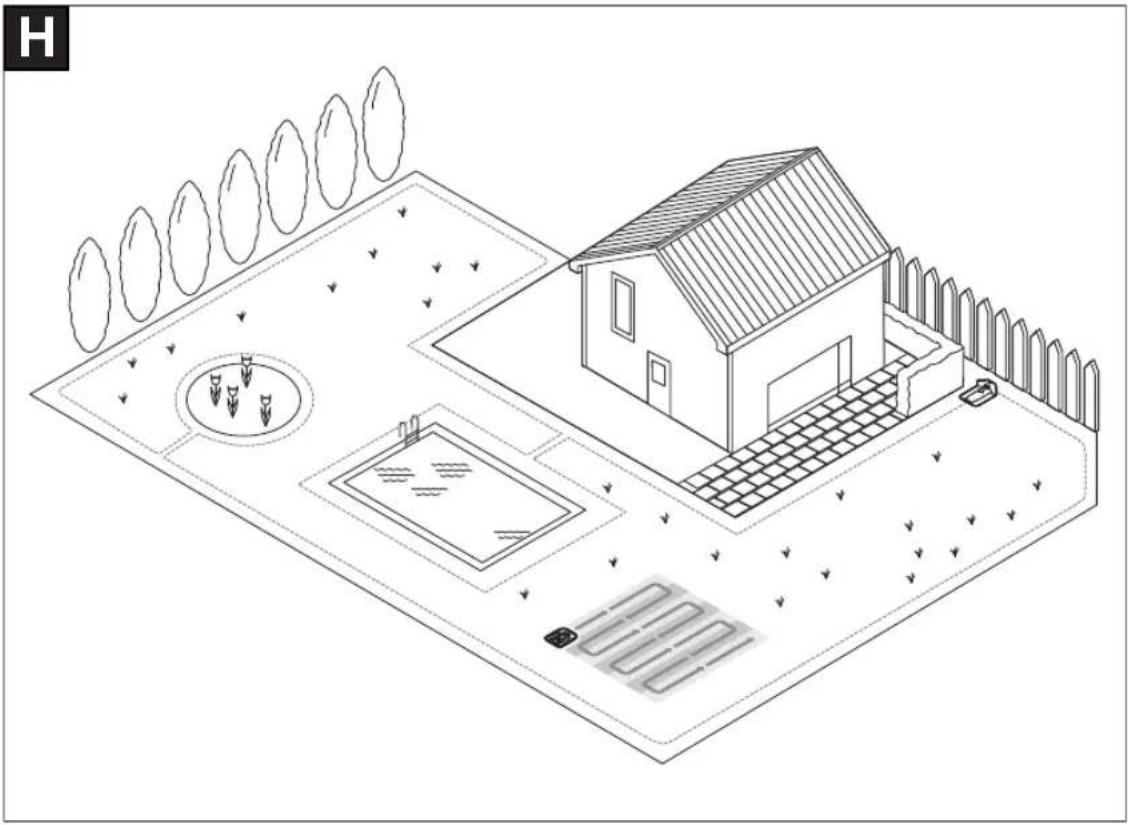
natural_image
Isometric line drawing of a rural settlement with a house, water feature, and surrounding trees (no text or symbols)
text_image
Diagram of a car interior with labeled parts and directional indicators for stop controls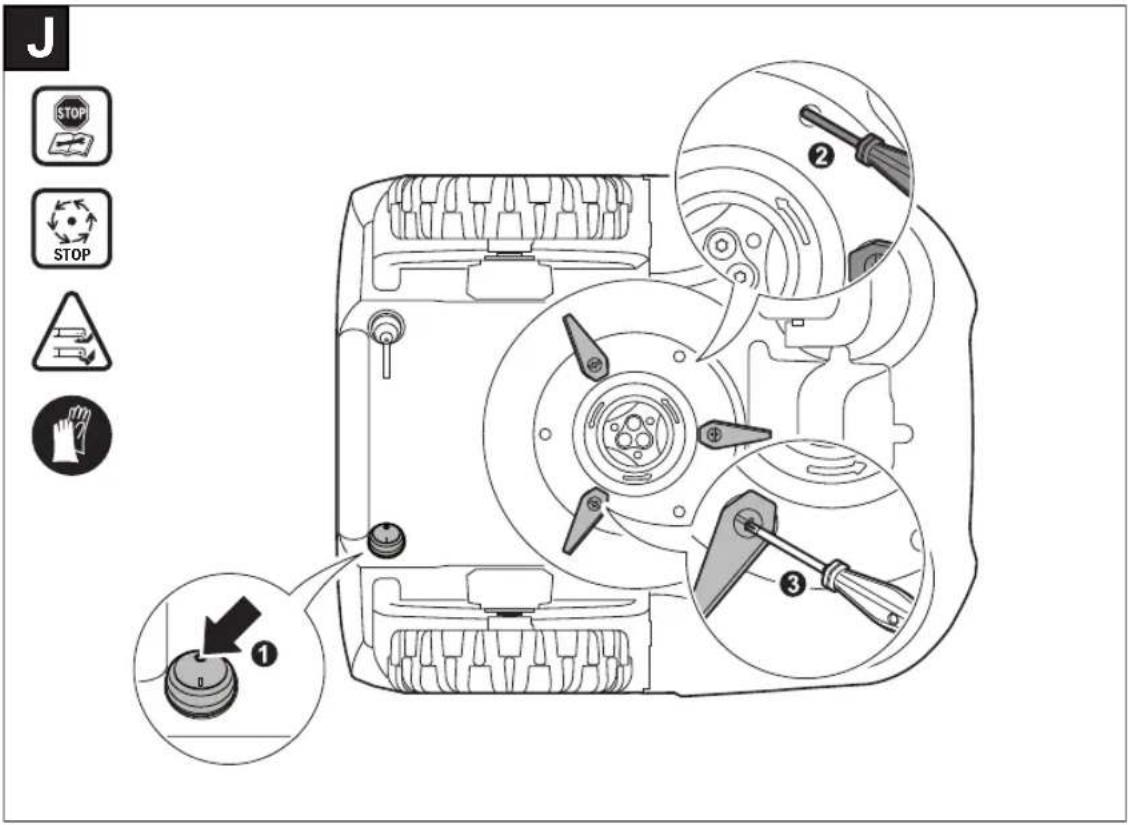
text_image
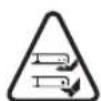
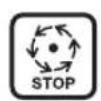
J STOP STOP 1 2 3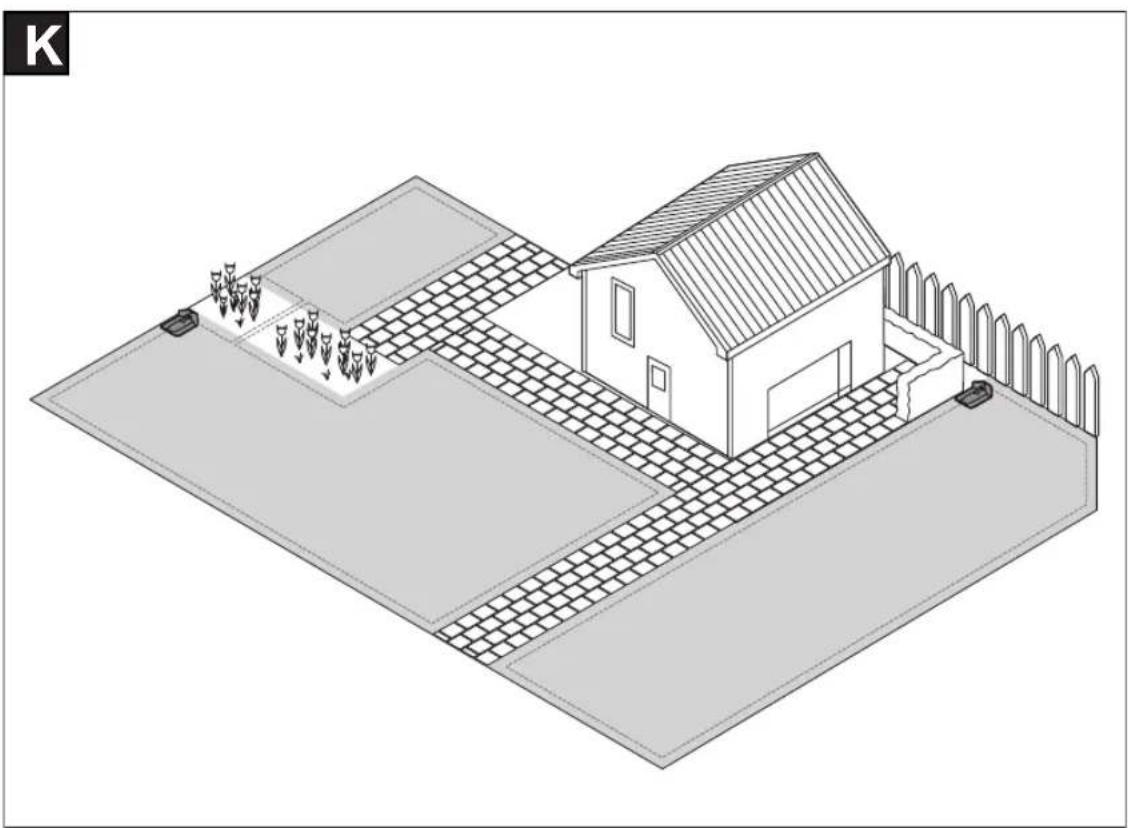
natural_image
Isometric architectural rendering of a house with tiled roof and adjacent courtyard (no text or symbols)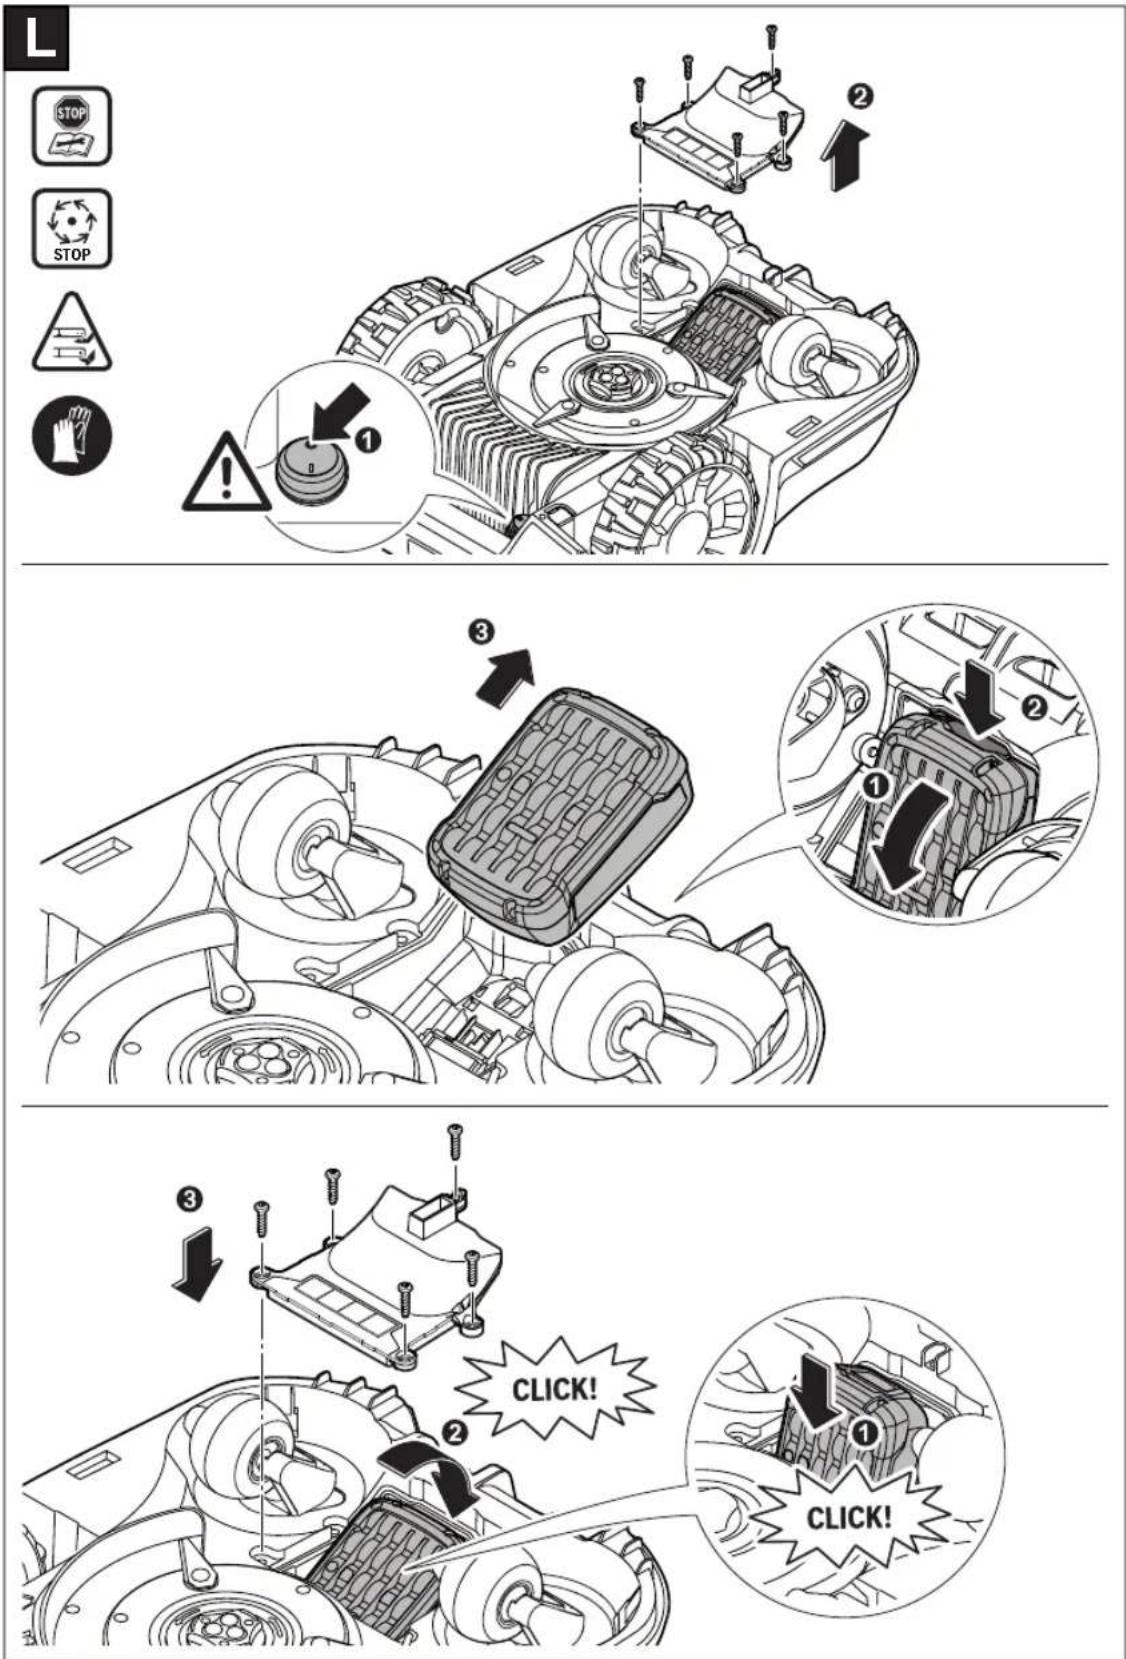
text_image
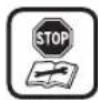
L STOP STOP WARNING 1 2 3 1 2 3 2 1 CLICK! CLICK!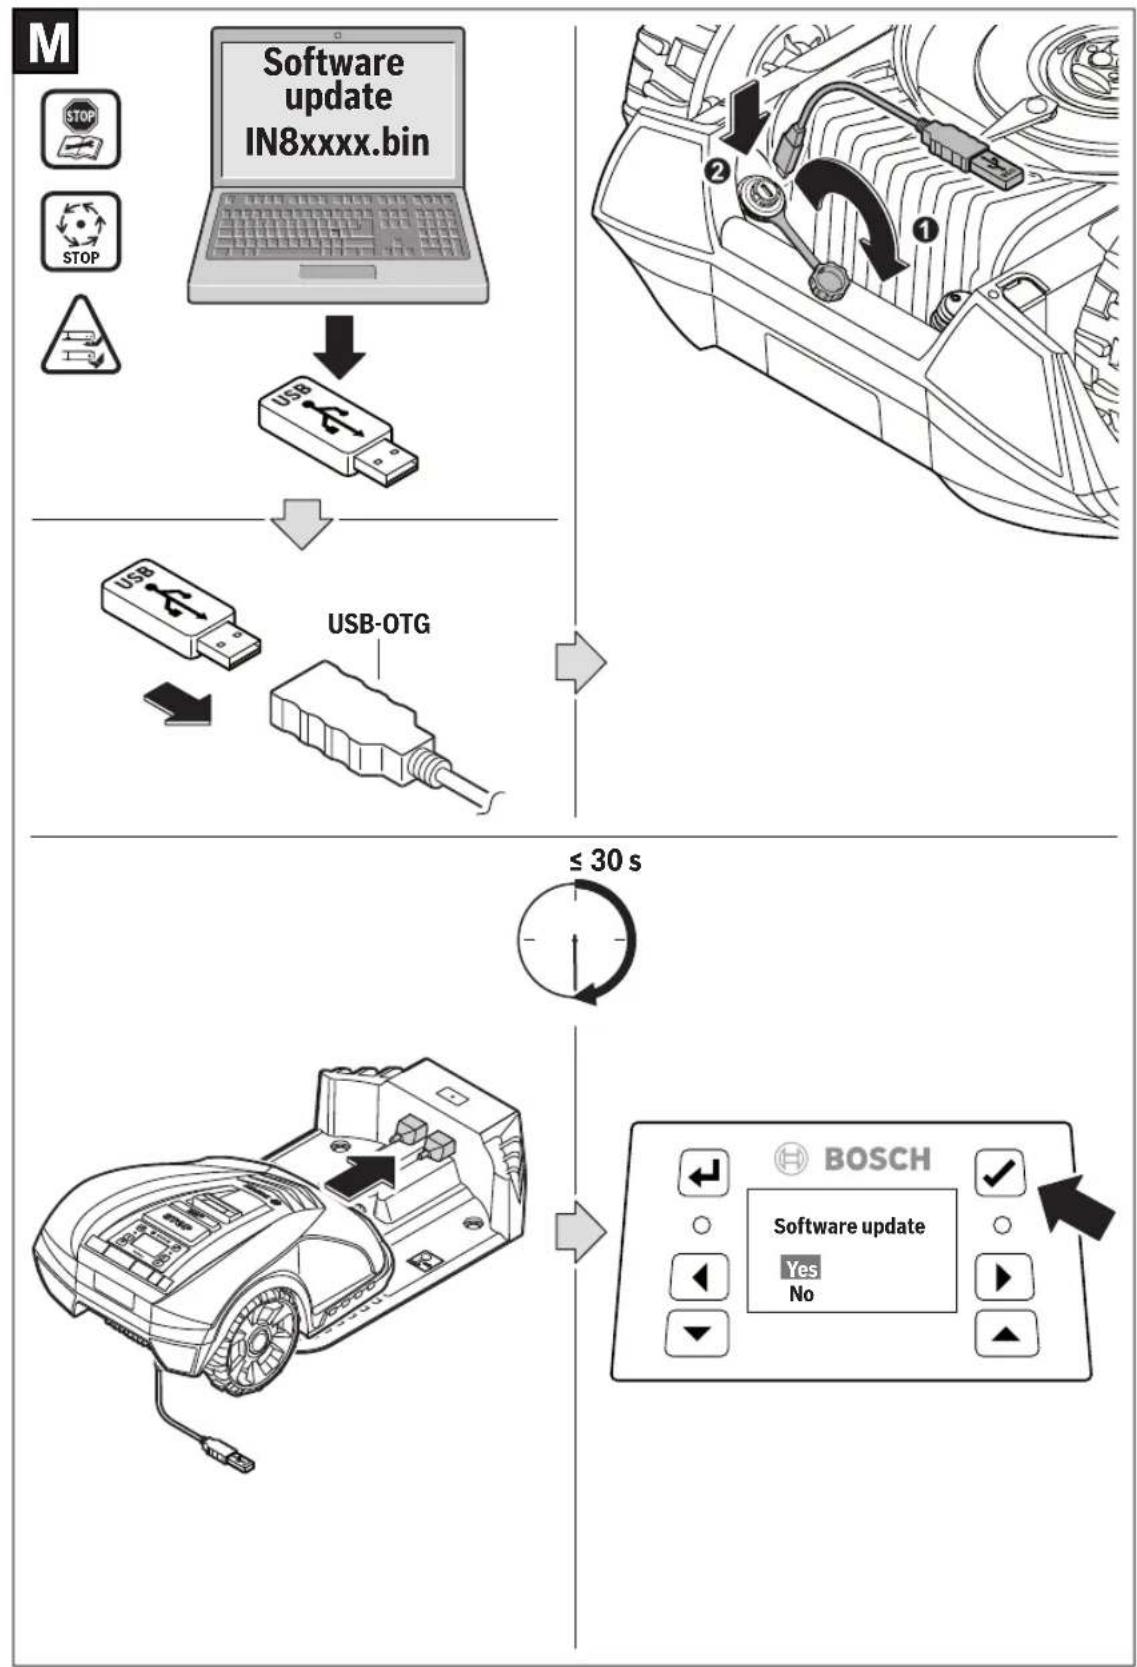
flowchart
graph TD
    A["Software update IN8xxxx.bin"] --> B["USB"]
    B --> C["USB-OTG"]
    C --> D["≤ 30 s"]
    D --> E["BOSCH"]
    E --> F["Software update Yes No"]
text_image
M ≤ 10 min BOSCH Software update BOSCH Software update ① ②N
text_image
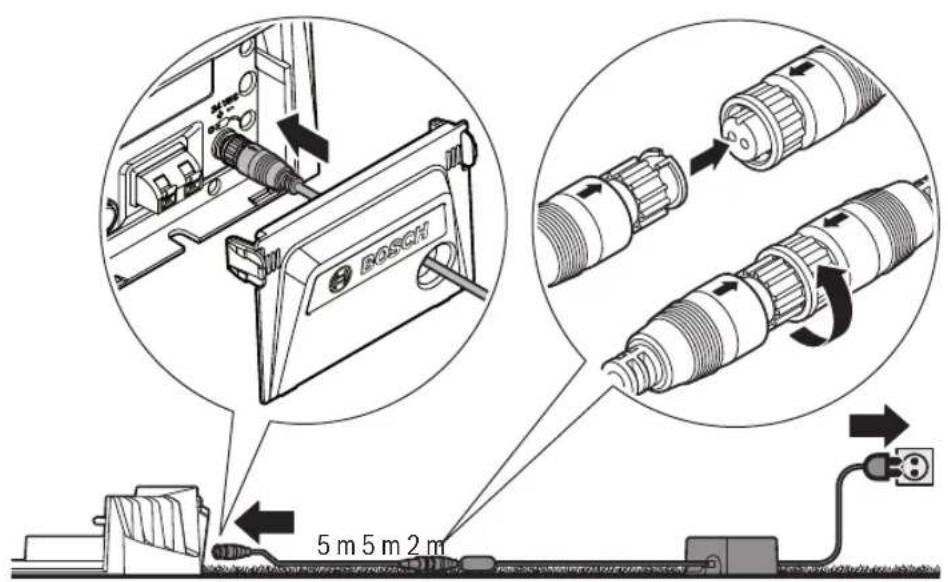
BOSCH 5 m 5 m 2 m
natural_image
Empty white square with a gray horizontal bar and four corner markers (no text or symbols)CE
CE
CE
text_image
CECE

text_image
CECE
CE

BOSCH
jaw Sea i.v. h.w.