
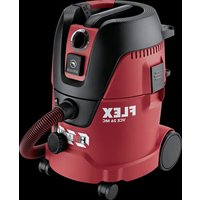
VCE 35 L AC - Vacuum Cleaner Flex - Free user manual and instructions
Find the device manual for free VCE 35 L AC Flex in PDF.
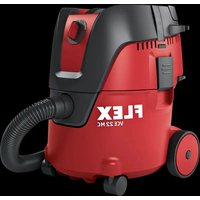
| Product type | Industrial wet and dry vacuum cleaner |
| Brand | Flex |
| Model | VCE 35 L AC |
| Dimensions (L × W × H) | 520 × 380 × 580 mm |
| Operating weight | 12.5 kg |
| Power supply | 220-240 V, 1~ 50-60 Hz |
| Maximum power | 1380 W |
| Nominal power | 1200 W |
| Tank capacity (dry) | 34 L |
| Tank capacity (liquid) | 19 L |
| Air flow (vacuum) | 53 L/s |
| Vacuum pressure | 240 hPa |
| Protection class | IPX4 |
| Dust class | L (harmful non-carcinogenic dust) |
| Sound pressure level | 69 dB(A) |
| Vibration (hand-arm) | < 2.5 m/s² |
| Suction hose connection | C-DN/C-ID 35 mm |
| Power cable length | 7.5 m |
| Power tool socket | 100-2200 W (max. 2200 W) |
| Automatic filter cleaning | Yes, every 15 seconds (deactivatable) |
| Antistatic system | Yes, via grounded connections |
| Automatic liquid shut-off | Yes for conductive liquids |
| Max. ambient temperature | +40 °C |
| Included accessories | Suction hose, universal adapter, floor nozzle, suction tube (depending on kit) |
Frequently Asked Questions - VCE 35 L AC Flex
User questions about VCE 35 L AC Flex
0 question about this device. Answer the ones you know or ask your own.
Ask a new question about this device
Download the instructions for your Vacuum Cleaner in PDF format for free! Find your manual VCE 35 L AC - Flex and take your electronic device back in hand. On this page are published all the documents necessary for the use of your device. VCE 35 L AC by Flex.
USER MANUAL VCE 35 L AC Flex
Please read and comply with these original instructions prior
to the initial operation of your appliance and store them for later use or subsequent owners.
Before the initial start-up it is definitely necessary to read the safety indications no. 59562490!
- The non-compliance of the operating and safety instructions may lead to damages of the appliance and to dangers for the operator and other persons.
In case of transport damage inform vendor immediately
Contents
Environmental protection . . . EN 1
Danger or hazard levels . . . . EN 1
Proper use EN 1
Device elements EN 2
Symbols on the machine. . . . EN 2
Safety instructions. EN 2
Start up EN 3
Operation EN4
Transport. EN 5
Storage EN5
Maintenance and care . . . . . EN 5
Troubleshooting EN 6
Disposal EN 7
Warranty EN 7
Accessories and Spare Parts. EN 7
EC Declaration of Conformity. EN 8
Technical specifications . EN 9
Environmental protection

The packaging material can be recycled. Please do not throw the packaging material into household waste; please send it for recycling.
Old appliances contain valuable materials that can be recycled; these should be sent for recycling. Batteries, oil, and similar substances must not enter the environment. Please dispose of your old appliances using appropriate collection systems.
Danger or hazard levels
△DANGER
Immediate danger that can cause severe injury or even death.
WARNING
Possible hazardous situation that could lead to severe injury or even death.
CAUTION
Pointer to a possibly dangerous situation, which can lead to minor injuries.
ATTENTION
Pointer to a possibly dangerous situation, which can lead to property damage.
Proper use
WARNING
The appliance is suited for the extraction of dry, non-combustible, harmful dusts on machines and appliances; dust class L according to EN 60 335-2-69. Restriction: No carcinogenic substances may be vacuumed up.
- The machine is meant for dry and wet cleaning of floors and walls.
- This appliance is suitable for commercial use, e.g. on construction sites, in workshops, hotels, schools, hospitals, factories, stores, offices and letting businesses.
Device elements
1 Electrodes
2 Suction hose
3 Cable hook
4 Air outlet, working air
5 Suction head lock
6 Universal adapter
7 Air inlet, motor cooling air
8 Dirt receptacle
9 Suction head
10 Steering roller
11 Suction support
12 Floor nozzle (not included in the delivery)
13 Suction pipe (not included in the delivery)
14 Carrying handle
15 Filter cover
16 Elbow (not included in the delivery)
17 Suction force regulator (continuous)
18 Rotary switch for suction output (minmax)
19 Indicator lamp
20 Socket
21 Automatic filter dedusting
22 Main switch
23 Flat fold filter
24 Filter deducting
25 Floor nozzle holder
26 Holder for crevice nozzle
27 Holder for suction pipes
28 Power cord
29 Nameplate
Symbols on the machine

WARNING: This appliance contains harmful dust. The emptying and maintenance, including the removal of the dust bag, may only be executed by trained personnel wearing suitable protection equipment. Do not switch on until the complete filter system has been installed.
| Flat fold filter | |
| Order No. 337 | .692 |
| Paper filter bag | |
| Order No. VCE | 35: 296.961 VCE 45: 340.758 |
| Disposal bag | |
| Order No. 340 | .766 |
Safety instructions
△WARNING
- When the outgoing air is carried back into the room, a sufficient ventilation rate L in the room must be ensured. To comply with the required limit values the carried back volume flow must be 50% of the fresh air volume flow (room volume V_R × ventilation rate L_w ) at maximum. Without a specific ventilation system the following applies: L_w = 1h^-1 .
- Only persons trained in the use of the machine and the handling of substances for which the machine is to be used including training in the safe disposal of the sucked-in material may use the machine.
- This appliance contains harmful dust. Evacuation and maintenance work, including the disposal of the dust collection containers, may only be performed by specialists who wear the appropriate protective equipment.
- Do not use the appliance without the complete filtering system.
- Please follow the safety regulations applicable to the materials that are to be treated.
Start up
The appliance allows 2 operating modes:
1 Industry vacuum cleaner mode (socket not used)
2 Dedusting mode (socket used)
Connect the suction hose and insert the suction nozzle or connect to the dust-generating device depending on the operating mode.
WARNING
The flat pleated filter must always be in place while vacuuming.
WARNING
Do not vacuum without the filter elements; otherwise, the suction motor can get damaged and this can be hazardous to health on account of increased release of fine dust particles.
Anti-static system
Static charge is deflected by providing earthing to the connection nozzles. This prevents the formation of sparks and current shocks with attachments with electrostatically grounded accessories included in the delivery.
Dry vacuum cleaning
- The device is equipped with a paper filter bag with a locking slide, VCE 35 - order no. 296.961 (5 pc) or VCE 45 - order no. 340.758 (5 pc).
- The appliance is equipped with a disposal bag with locking slide and locking strip, order no. 340.766 (10 pc).
Note: You can use this appliance to vacuum all types of dust up to dust class L. It is statutorily necessary to use a dust collection bag (see Filter systems for order number).
Note: The appliance is suited as industrial vacuum cleaner to take up dry, non-combustible dusts with AGW values greater than or equal to 1mg / m^3 .
- When vacuuming up fine dust, a paper filter bag or a disposal bag must additionally be used.
Installing the paper filter bag
Illustration A
Release and remove the suction head.
Fit the paper filter bag.
Insert and lock the suction head.
Install disposal bag
Illustration B
Release and remove the suction head.
Mount the disposal bag.
Place the disposal bag over the container.
Insert and lock the suction head.
Changeover from wet to dry vacuum cleaning
ATTENTION
Please note the following when switching from wet to dry vacuum cleaning:
If you vacuum dry dust while the filter element is still wet the filter will become obstructed and may be damaged beyond repair.
Dry the wet filter properly before use or replace it with a dry one.
Change the filter, if required, according to instructions under the section "Maintenance and Care".
Note: For permanent wet vacuum cleaning it is advisable to use a PES flat pleated filter (see filter systems).
Wet vacuum cleaning
WARNING
No dusts hazardous to health should be sucked in during wet vacuuming.
Removing the paper filter bag
Illustration C
Release and remove the suction head.
Pull the paper filter bag out towards the back.
Pull up the locking slide and tightly close the paper filter bag upon removal.
Dispose of the used paper filter bag according to the statutory provisions.
Insert and lock the suction head.
- When vacuuming up wet dirt, the paper filter bag must always be removed.
Removing the disposal bag
Illustration D
Release and remove the suction head.
Pull the disposal bag up.
Pull the opening of the disposal bag out toward the back over the suction support and seal it tightly.
Tightly seal the disposal bag with closure strips underneath the opening.
Remove the disposal bag.
Dispose of the used disposal bag according to the local provisions.
Insert and lock the suction head.
- To vacuum wet dirt, always remove the disposal bag.
General
- If wet dirt is vacuumed with the upholstery or crevice nozzle (option) or if water is sucked up from a container it is recommended to deactivate the "automatic filter deducting" function.
- If the maximum liquid level is reached the appliance will turn off automatically.
In case of non-conductive liquids (such as emulsion drilling fluids, oils, and greases) the appliance is not turned off when the container is full. The filling level must be continuously monitored and the container must be emptied in time. - After completion of the wet vacuuming: Clean the flat pleated filter using the filter deducting unit and allow the filter to dry sufficiently. Clean the electrodes using a brush. Clean the container with a damp rag and dry it.
Clip connection
Illustration E
The suction hose is equipped with a clip system. All C-35/C-DN-35 accessories can be connected.
Operation
Turning on the Appliance
Plug in the mains plug.
Switch on the appliance at the main switch.
Adjust the suction output
Set the suction output (min-max) at the rotary switch.
Regulating the suction power
Regulate the suction force on the suction force regulator (continuous).
Working with electrical power tools
△DANGER
Risk of injury and damage! The socket outlet is only for the connection of power tools to the vacuum cleaner. Any other use of the socket outlet is not permitted.
Connect the mains plug of the electric power tool to the vacuum cleaner.
Switch on the appliance at the main switch.
Indicator lamp is on; vacuum cleaner is in the standby mode.
Note: The vacuum cleaner is turned on and off automatically with the electric power tool.
Note: The vacuum cleaner starts automatically within 0.5 seconds and continues to run for 15 seconds after the power tool has been switched off.
Note: Please refer to "Technical specifications" for the power connection specifications of the power tools.
Illustration F
Adjust the universal adapter to the connection of the electric power tool.
Illustration
Remove the elbow from the suction hose.
Insert the universal adapter on the suction hose.
Illustration H
Connect the universal adapter to the electric tool, cut to the required diameter if necessary.
Automatic filter cleaning
The appliance has an innovative filter cleaning system that is particularly effective with fine dust. The flat pleated filter is automatically cleaned every 15 seconds through an air jet (pulsating sound).
Note: Automatic filter deducting is switched on at the factory.
Note: The automatic filter deducting function can only be switched on/ off when the appliance is switched on.
- To switch off automatic filter cleaning:
Activate the switch. Indicator lamp in the switch goes off. - To switch on automatic filter cleaning:
Press the switch again. Indicator lamp in the switch glows green.
Turn off the appliance
Switch off the appliance at the main switch.
Pull out the mains plug.
After each operation
Empty the container.
Vacuum and wipe the appliance inside and outside with a damp cloth.
Storing the Appliance
Illustration 1
Store the suction hose and the mains cable as shown in the illustration.
Place the appliance in a dry room and secure it from unauthorized use.
Transport
CAUTION
Risk of injury and damage! Observe the weight of the appliance when you transport it.
Remove the suction pipe with the floor nozzle from the holder. Hold the appliance at the handle and at the suction pipe to transport it.
When transporting in vehicles, secure the appliance according to the guidelines from slipping and tipping over.
Storage
CAUTION
Risk of injury and damage! Note the weight of the appliance in case of storage.
This appliance must only be stored in interior rooms.
Maintenance and care
△DANGER
First pull out the plug from the mains before carrying out any tasks on the machine.
Dust extracting machines are safeguards for the prevention or elimination of hazards defined in the regulations of BGV A1.
In order to carry out maintenance work, the user must disassemble, clean and service the unit, in so far as this is possible without endangering maintenance personnel and other persons. Suitable precautions include decontamination before the unit is disassembled. Precautions must be taken for local filtered forced air ventilation at the place where the unit is disassembled, the cleaning of the maintenance surface and suitable protection of the personnel.
- The outside of the unit should be cleaned thoroughly and any harmful substances removed. Alternatively, a sealed coating may be applied before the unit is removed from the danger area. All unit parts are to be considered contaminated when they are removed from the danger area.
- In the framework of maintenance and repair work all contaminated objects that cannot be cleaned satisfactorily must be disposed of. Such objects must be disposed of in impermeable bags in accordance with the valid provisions for the disposal of such waste.
WARNING
Safety equipment for preventing hazards must be serviced and maintained regularly. This means that the manufacturer's staff or persons trained by the manufacturer must check the equipment for proper functioning at least once a year, i.e. check for leaks, filter damage, functioning of the controlling elements, etc.
ATTENTION
Risk of damage! Do not use detergents containing silicone to clean.
- No outside help is required for carrying out basic maintenance and cleaning.
- The appliance surface and the inside of the container should be cleaned regularly using a damp cloth.
WARNING
Risk due to dust hazardous to health. Always use disposal clothing and P2 or higher breath-safe masks while carrying out maintenance tasks (such as changing filters).
Exchanging the flat pleated filter
Open filter door.
Take out the flat folded filter.
Dispose off the used flat-folded filter in a dust-tight bag according to the statutory provisions.
Remove the dirt that has accumulated on the pure air side.
Insert new flat-folded filter.
Press the filter foam rim down onto the edge.
Close the filter door, it must lock into place.
Replacing the paper filter bag
Illustration C
Release and remove the suction head.
Pull the paper filter bag out towards the back.
Pull up the locking slide and tightly close the paper filter bag upon removal.
Dispose of the used paper filter bag according to the statutory provisions.
Fit new paper filter bag.
Insert and lock the suction head.
Replacing the disposal bag
Illustration D
Release and remove the suction head.
Pull the disposal bag up.
Pull the opening of the disposal bag out toward the back over the suction support and seal it tightly.
Tightly seal the disposal bag with closure strips underneath the opening.
Remove the disposal bag.
Dispose of the used disposal bag according to the local provisions.
Attach the new disposal bag.
Place the disposal bag over the container.
Insert and lock the suction head.
Cleaning the electrodes
Release and remove the suction head.
Clean the electrodes with a brush.
Insert and lock the suction head.
Troubleshooting
△DANGER
First pull out the plug from the mains before carrying out any tasks on the machine.
Note: In case of a failure (e.g. filter breakage) the appliance must be turned off immediately. The failure must be remedied before the appliance is put into operation again.
Suction turbine does not run
Check the receptacle and the fuse of the power supply.
Check the power cable, the power plug, the electrodes and the receptacle of the device.
Turn on the appliance.
Suction turbine turns off
Empty the container.
Suction turbine does not start again after the container has been emptied
Turn off the appliance and wait for 5 seconds, turn it on again after 5 seconds.
Clean the electrodes as well as the space between the electrodes with a brush.
Suction capacity decreases
Remove blockages in the suction nozzle, suction tube, suction hose, or flat pleated filter.
Replace filled paper filter bag.
Replace the filled disposal bag.
Ensure the filter cover properly locks into place.
Replace the flat pleated filter.
Test the electrical tool connection.
Dust comes out while vacuuming
Illustration J
Check/correct the correct positioning of the flat fold filter.
Replace the flat pleated filter.
Automatic shut-off (wet vacuum cleaning) does not react
Clean the electrodes as well as the space between the electrodes with a brush.
Continuously check the filling level in case of non-conductive liquid.
Automatic filter cleaning is not working
Suction hose is not connected.
Automatic filter cleaning cannot be switched off
Inform Customer Service
Automatic filter cleaning cannot be switched on
Inform Customer Service
Customer Service
If malfunction can not be fixed, the device must be checked by customer service.
Disposal
At the end of its lifetime the appliance is to be disposed of according to the statutory provisions.
Warranty
The warranty terms published by the relevant sales company are applicable in each country. We will repair potential failures of your appliance within the warranty period free of charge, provided that such failure is caused by faulty material or defects in manufacturing. In the event of a warranty claim please contact your dealer or the nearest authorized Customer Service centre. Please submit the proof of purchase.
Accessories and Spare Parts
- Only use accessories and spare parts which have been approved by the manufacturer. The exclusive use of original accessories and original spare parts ensures that the appliance can be operated safely and trouble free.
- At the end of the operating instructions you will find a selected list of spare parts that are often required.
Cleaning kit
Order No. 369.845
| Name Order No. | Piece | |
| Elbow (plastic, AS) | 398.446 1 | |
| Suction pipe (metal) | 385.514 2 | |
| Crevice nozzle (spare part) | 385.530 1 | |
| Floor nozzle 300. | 659 1 |
Insert the rubber lips of the floor nozzle (wet vacuuming).
Illustration K
Remove the brush strips.
Install the rubber lips.
Note: The structured side of the rubber lips must point outwards.
EC Declaration of Conformity
We hereby declare that the machine described below complies with the relevant basic safety and health requirements of the EU Directives, both in its basic design and construction as well as in the version put into circulation by us. This declaration shall cease to be valid if the machine is modified without our prior approval.
Product: Wet and dry vacuum cleaner
Type: VCE 35 L AC
Type:VCE 45 L AC
Relevant EU Directives
2006/42/EC (+2009/127/EC)
2004/108/EC
2011/65/EU
Applied harmonized standards
EN 55014-1: 2006+A1: 2009+A2: 2011
EN 55014-2: 1997+A1: 2001+A2: 2008
EN 60335-1
EN 60335-2-69
EN 61000-3-2: 2006+A1: 2009+A2: 2009
EN 61000-3-3:2013
EN 62233: 2008
EN 50581
Applied national standards
The undersigned act on behalf and under the power of attorney of the company management.

Klaus Peter Weinper
Technical specifications
| VCE 35 L AC VCE 45 L AC | |||
| Mains voltage V 220-240 220-240 | |||
| Frequency Hz 1~ 50-60 1~ 50-60 | |||
| Max. performance W 1380 1380 | |||
| Rated power W 1200 1200 | |||
| Container capacity I 34 43 | |||
| Filling quantity (liquid) I 19 30 | |||
| Air volume (max.) | |||
| - Suction device | l/s | 53 | 53 |
| - Turbine | l/s | 74 | 74 |
| Negative pressure (max.) | |||
| - Suction device | hPa | 240 | 240 |
| - Turbine | hPa | 254 | 254 |
| Power connection data of the power tools | W 100-2200 | 100-2200 | |
| Type of protection | -- IPX4 | IPX4 | |
| Protective class | -- I | I | |
| Suction hose connection (C-DN/C-ID) | mm | 35 35 | |
| Length x width x height | mm | 520 x 380 x 580 | 520 x 380 x 695 |
| Typical operating weight | kg | 12,5 | 13,5 |
| Max. ambient temperature | °C | +40 | +40 |
| Values determined to EN 60335-2-69 | |||
| Sound pressure level \(L_{pA}\) | dB(A) | 69 69 | |
| Uncertainty \(K_{pA}\) | dB(A) | 1 | 1 |
| Hand-arm vibration value | m/s2 | <2,5 | <2,5 |
| Uncertainty K | m/s2 | 0,2 | 0,2 |
| Power cord | H07RN-F 3x1,5 mm² | |
| Part no.: | Cable length | |
| EU | 297.534 | 7.5 m |
2006/42/CE (+2009/127/CE)
2004/108/CE
2011/65/UE
2006/42/CE (+2009/127/CE)
2004/108/CE
2011/65/UE
2006/42/CE (+2009/127/CE)
2004/108/CE
2011/65/UE
2006/42/CE (+2009/127/CE)
2004/108/CE
2011/65/UE
2006/42/EF (+2009/127/EF)
2004/108/EF
2011/65/EU
Stille inn sugeytelse
2006/42/EF (+2009/127/EF)
2004/108/EF
2011/65/EU
Anvende overensstemmende normer
EN 55014-1: 2006+A1: 2009+A2: 2011
EN 55014-2: 1997+A1: 2001+A2: 2008
EN 60335-1
EN 60335-2-69
EN 61000-3-2: 2006+A1: 2009+A2: 2009
EN 61000-3-3: 2013
EN 62233: 2008
EN 50581
CnMBoJIbI Ha npI6ope

IPEyIeHHeB: B daHOM ycmpoUcme haxodumc onacna dny 3dopobb pyb. OnopoxHeue u mexHu-yeckoe obcnyxuaHue, e mom yucne, ydaHue nbinec6bOpHo2o Meuka, doJxHO npobodumc monbko cneuauucmamu, Hocaymu nOdxohue ee aumhoe chaPjXeHue. He bKnouamb do noHou ycmaHOeKu pfunbpovabHou cucmembl.

OtperynipoBaTb cnIy BCacbIBaHna
OTPeryIInpoBaTb BCaCbIBaHOuMoUHOCtB NeryIaTOpOM MOuHOCTN BCaCbIBAHnA (6ecctyneHcuTo)
Pa6ota c 3JIeKTpNuecknMn HnHCTpyMeHTaMn
ONACHOCTb
Onachocmb noyuheHua mpaem u nopeXdeHu! Po3emka npedha3naeHa molbKO dny npam2o noknoueHua 3neKmpuYeckux uncmpymehmo K nbinecocy. JIO6oe dpyzoe uCnoIb30aHue po3emku He donyckaemca.
BCTaBnTb ceTeByIO BnIky əJIeKtpnueCKORO INHCTpyMeHTa B nbIneCOC.
→ПриборOTКИюаeТсЯпи ПOMOUsI rIaBHorO BbIKIIOUaTeJIa.
KoHTpOJIbHЯ JAmNoUka 3aRopaETcra, NblneCOC HAXODITcRA B COCTOHN ITOBHOCTN.
Yka3aHne: Iblncoc BkIIOyaeTcN BblKIOyaeTcA BtOMaTnueCKN 3JeKTpUeCKIM HHTpyMeHTOM.
Yka3aHHe: 3ana3dbBaHne pa3roHa coCTabJyET y nbIeCoc a Do 0,5 cekyHdbI, BpeMa pa6oTbI no INepuN - do 15 cekyHd.
Yka3aHHe: IOpTe6JIeMaJ MOUHOCTb 3JIeKTpNueeCKnX INHCTpyMeHTOB yKa3aHa B pa3dJe "TexHnueeCKne daHHbIe".
PncyHok
Pa3Mep yHnBepcaJbHoro aJaNTepa no-DoHaTb nOpa3Mep y3Ja nOdkIoue-HNRAJIeKTPnueeCKOr INHCTpyMeHTa,
PncyHok G
→ ChЯтб co BCacbBaIOUeRo IJIaHra KoJIeHo.
YcTaHOBnTb Ha BCaCbIBaIOUeM IJIaHRe yHNBepCaJbHbI aJaNTep,
PncyHok H
BcacbBaOuza Typ6nHa He pa6oTaet
Пюверпьштеньбуную розтуиnpededoxpaHITb cnCTeMbI 3JIeKТponntAHn.
→Поверпь ceTeBoi Ka6eIb, wTen-ceIbHyIO BnIKy, 3NeKtpOdBi N wTen-ceIbHyIO po3eTKy yCTpoiCTBa.
BknouHTb annpaT.
BcacsbBaHouza Tpy6nHa OTKJIOnyaeTcR
OnycToWntb 6aK.
Pocne onyctoWeHna 6aka BcacbIBaHouza Typ6nHa He 3anyckaetcra
→ BbIKHouHTb npu6op nnoOxdaTb 5 ceKyHd, nocJe yero cHOBa BKHouHTb npu-6op.
OuHuaTb 3JekTpOdbI, a TaKxe npocCTpaHCTBO MeJy 3JekTpOdaMn C NO-MoUbIO UeTKN.
MoocbBcacbBaHnya
YdaNTb Mycop n3 BCacbIBaIOoero coINa, BCacbIBaIOoee Tpy6Kn, BCacbIBaIOoero IJHaHra IIN cKnaDyatoTOO nnbTpa.
3aMeHHTBaAnOpHeHHbIb6yMaXHbIMnIbTpOBAhBbIM MeWOK.
3aMeHnTb 3aNoJIHeHHbI MeJOK dJa c6opa oTxoJIOB.
→ПраВильно 3akpbItb KpbIuKу Фильтpa TaK,чTo6bl OHa 3aФИКСИРОВАЛаСь.
→ 3aMeHnTb cKnaDuaTbI ΦnIbTp.
Пюверпь подкючени щлжтуческоюнстурмента.
BoBpeMa YnCTKn n3 npnbopa BbIeJraTeTc nblb
PucyHok J
ABTOMaTnueckoe OTKJIIOUeHne (YnCTka BO BnaXHom pexKIme) He cpa6aTbIBaeT
OuHuaTb 3JneKtpoDbI, a TaKKe npocCTpaHCTBO MeJxy 3JneKtpoDaMn C NoMoUbIO UeTKN.
→Пи рабoteс He npobOJaшenKoCtBIO NOCTOARHNO KOHTpOJInpOBaTb ypoBeHB 3aNoJIHeHnI.
A B T O M A T N U C E C K A Y N C T K A Φ N J B T P a H e B b I O N J H R E T C R
BcacbBaHmIshnHe noKJIIOueH.
A B T O M A T N U C E C K A Y N C T K A Φ N J B T P a H e B bI K I N O U Y aE T C R
NocTaBnTb B n3BeCTHOCTb cepBnCHyIO cnyx6y.
A B T O M A T N U C E C K A Y N C T K A Φ N J B T P a H e B K J I O U C A E T C R
NocTaBnTb B n3BeCTHOCTb cepBnCHyIO cnyx6y.
CepBnchna cIyK6a
Ecnn HencnpaBnocTb He ydaetcnyctpaHtB, np6op Heo6xOIMO OTnpaHTb Ha npOBepky B cepBnchyocnyk6y.
yTnIn3aun
IIO OKOHuaHnO cpoKa cnJx6bl npi6op CneDyET yTINN3InPOBaTb B COOTBeTCTBnC Tpe6oBaHnMn 3aKOHoDaTeJIbCTBa.
TapaHTnA
B KaKdoi cTpaHe DeIcTByIO T COOTBeTCTBENHO rapaHTnHbIe ycIOBnA, I3DaHHbIe yNoJIHOMOeHHo OPraHn3aCnei C6bIta HauWe npOdykUuN B DaHHo CTpaHe. Bo3MOXhIbe HeNCnpaBHocTN pIn6Opa B TeueHne rapaHTnHOrO cPoka Mbl YcTpaHReM 6ecnPaTHO, ecn npUnHa 3akIouaETcR B DeΦeKTax MaTePnaJOB nIN OUn6kax npN 13ROTOBLeHN. B Cnyuae BO3HKnHOBeHn NpeTeH3n B TeueHne rapaHTnHOrO cPoka npoc6Ba o6paatbcra, Ime npN ce6e Yek O NOKynke, B TOPROByO OpraHn3aCNUO, npo
dabwyo Bam npnbop nnn B 6nnaowyuynoHOMOeHHyo cnxk6y cepBnchoro o6cnyKBAHNA.
Data BbInycka OTo6paXaETcHa 3aBODCKoT Ta6nue K 3aKoInpOBAHHOM BVNe. Pn 3tOM OTdEINbHbIE UΦpbl NMeIOT CneDuouee 3NaueHHe::
Приимер: 30190
3 roB BbInycka
0 CTOnEtne BbInycka
1 DecaTnIeTne BbInycka
9 BTOPA CnDpa Mecaa BBInycka
0 nepBaIuΦpa MeCya BbInycka
TakIM 06pa3OM, B daHHOM npImpe KoJ 30190 O3Haayet DaTy BbInycka 09/(2)013.
PpHaJJIeXHoCTn 3aNaChbIe DeTaJIH
Pa3pe7aetcNcNoJb30BaTbToJbKOTe npHAnJNeKHOCTn 3aIacHbIe YacTn, NcNoJb3OBaHne KOToPbIX 6blIO Oo- 6peHo n3rOToBHTeJIem. NcNoJb3OBaHneOpHnHaJIbHbIX npHAnJNeKHOCTe I 3aIpaCTe rapaHTnpyET Bam HadEckHyIO n 6ecpe6oHy o pa6Otpa.
Bb6op Han60onee yacto Heo6xOIMbIX 3aIyacteBbl HainDeTe B KOHcE NHCTpyKuIN NO 3Kcnnyataun.
MoIoumKoMnJIeKT
No 3aka3a 369.845
HaCTOaM MbI 3aABJarem, YTO HnKeyKa-3aHHbI npi6op nO CBOe KOHcEaHm IN KOHCTpyKuIN, a TAKKe B OcyUeCTBHeHOM IN DOnyUeHHOM HAMN K IpOdaKe NcNoJIHeHn OTBeueaET COOTBEcTByIOUm OCHOBHBIM Tpe6oBaHnM NO 6e3OnacHOCTn IN 3dOpOBbIO corNaCHO dIpeKTnBam EC. Ppi BHeCeHN N3MeHeHn, He CoIaNcoBaHHbIX C HAMN, DaHHoe 3aABJeHne TepReT CBOHO cnly.
2006/42/ES (+2009/127/ES)
2004/108/ES
2011/65/EU
Zadevne ES-directive:
2006/42/ES (+2009/127/ES)
2004/108/ES
2011/65/EU
2006/42/WE (+2009/127/WE)
2004/108/WE
2011/65/UE
Directive EG respectate:
2006/42/CE (+2009/127/CE)
2004/108/CE
2011/65/UE
Norme armonizate utilize:
EN 55014-1: 2006+A1: 2009+A2: 2011
EN 55014-2: 1997+A1: 2001+A2: 2008
EN 60335-1
EN 60335-2-69
EN 61000-3-2: 2006+A1: 2009+A2: 2009
EN 61000-3-3:2013
EN 62233: 2008
EN 50581
Norme de aplicare nationale:
Semnatarii actiona in numele 日 prin imputernicirea conducerii societa.


2006/42/ES (+2009/127/ES)
2004/108/ES
2011/65/EU
2006/42/EZ (+2009/127/EZ)
2004/108/EZ
2011/65/EU
Primijenjene uskladene norme:
EN 55014-1: 2006+A1: 2009+A2: 2011
EN 55014-2: 1997+A1: 2001+A2: 2008
EN 60335-1
EN 60335-2-69
EN 61000-3-2: 2006+A1: 2009+A2: 2009
EN 61000-3-3: 2013
EN 62233: 2008
EN 50581
Primijenjeni nacionaln standardsi:
Potpisnici rade po nalogu i uz ovlastenje uprising naseg poduzeca.
2006/42/EZ (+2009/127/EZ)
2004/108/EZ
2011/65/EU
Primenjene uskladene norme:
EN 55014-1: 2006+A1: 2009+A2: 2011
EN 55014-2: 1997+A1: 2001+A2: 2008
EN 60335-1
EN 60335-2-69
EN 61000-3-2: 2006+A1: 2009+A2: 2009
EN 61000-3-3:2013
EN 62233: 2008
EN 50581
Primenjeni nacionaln standards:
Potpisnici daju ovu izjavu po nalogu i uz ovlascenje uprave našet preduzeça.

Klaus Peter Weinper
No 3a npb4- 340.766 Ka
Yka3aHna 3a 6e30nacHOCT
△NPEDYNPEXDEHNE
Ako ompabomeHua b3dyx ce ombeKda obpamHo 6 nomeueHemu, mo e nomeueHemu mpr6ea da e haIuHa cmeen 3a o6MaHa Ha eb3dyx L. 3a da ce cna3m Heo6xodumme apanHu cmoHocmu, epbuauzmae ce obpa-mHO obemH nomok moKe da eb3nU3a MakcumaHno Ha 50% om o6emHua noMOK Ha npceH eb3dyx (obem Ha nome-ueno V_R x cmeneH Ha o6MaHa Ha eb3dyx L_W) Be3 oc6eHu Meopnpura mu no npoeemprahe baxu: L_W = 14^-1
- 3no3eaHe Ha ypea u Ha cy6cmauume, 3a Koumo mpaea da ce u3no38a, EKnUoyumEnHO no cu2ypHnmu Memod Ha omcmpaHaBe He Ha noemua Mamepuan caMo om obyuH nepcoHaI.
To3u ypecbpbka onaceh 3paebmo npax. Ppouecume Ha u3npa3bahe u nooepbxxka, bKnIOUumEnHO omcmpaHraeaHemo Ha pe3epboapa 3a cb6upaHe Ha npax Mozam da 6bdam u38bpwBaHu camo om cneuaanucmu, HoceuCbombemHo 3auumHo obopydahe.
- Ypeda da He ce ekcnnoamupa 6e3 nbnHama unmpaucuOHha cucmema.
- Ppuioxehume pa3nope6u 3a 6e30-nachocm, Koumo ce omHacm KbMpemupaHume Mamepuanu,mpraea da ce cna38am.
Пускан eКсплоataця
UpeBt no3BoJBa 2 BnJa peJxIM:
1 Pexim n3cmykBaHe Ha nHdyctpnaJIeH npax (KOHTaKTbT He e 3aET)
2 Pexim o6e3npaasaBaHe (KoHTaKTbTe 3aeT)
Да ce nodBbpxe Mapkya 3a BCMyKBa-Heи сюpeД BnDa Ha peKIma Da ce Cha6dN CДIO3a 3a ИЗмYKBaHe ИЛп Дa ce nodBbpxe KbM obpa3yBaunЯ npax ypeД.
△PENEYNPEXDEHNE
Ipu u3cmykeaHe Hukoza da He ce omcmpaHrea nnockua unmbp.
△PENEYNPEXDEHNE
He u3cmykeaume 6e3 fumtbpeH eIeMeHm, mbu kamo 8 npomueh cnyau BCMykameHnurnM Momop ue ce noepdu u ue Hacmbnu onachocm 3a 3dpaeMo npadu nouweHue Ha pa3npocmpaHeHuemo Ha fun npax!
ANTNCTaTnUHa CNCTema
Ipe3 3a3eMeHnna npncbEduHHteJeH uyeep ce OTBeJdaT cTaTHNHTe 3apAIn. IToTO3n Haunn CbC CbDpbXaUNTe Ce B O6emaHa DoCTaBka, eJIeKTPoCtATuHNO 3a3eMeHNpnuHaJNeJxHOCTn Ce ppeOToBpaTЯBaT o6pa3yBaHeTo Ha NCKPN I TOKOBn ydApN.
Cyxo n3cMyKBaHe
- YpeiBt e o6opyDbaH c xapTneHa fnn-TbPHa TOp6nUka Cbc 3aTBapA uu6bp, VCE 35 - No 3a nopbyka 296.961 (5 6poj) pecn. VCE 45 - No 3a nopbyka 340.758 (5 6poj).
- YpeBt e obopydBaH c Top6nUka 3a cb6npaHe cbc 3aTbapu, uN6bp nJeHTa 3a 3aTbapAHe, No 3a nopbyka 340.766 (10 6poJ).
Yka3aHne: C To3n ypei MoRaT Da ce BCMyKBaT BCNUKn BnIOBe npax Do KnaC Ha 3aIpaWeHocL. N3noJ3BaHeTo Ha TOp-6uKa 3a Cb6upaHe Ha npaxa (No 3a no PbUka BnK ,ΦNITbPHn CnCTeMn") ce npenopbUba CbIpaCHO 3aKoHa.
Yka3aHHe: YpeIbTe nOxOJa 3a INDyCTpnaJIHa npaxOCMyKaUka 3a BCMyKBaHe Ha cyX, He Bb3PnAmEHm npax cbc AGW cToiHOCTn PO-TOJEMn IIN paBHN Ha 1 Mr/M3.
-ПрииИЗСМУКВанеHaФинпрахДОЛНHTeJIHоТрЯбВада ceИЗПОЛЗВaХapTHeHaФиNTьрHA Top6Ичka ИПТop6Ичka 3aCb6Иранe.
MOnTnpaHe Ha xapTneHa ФиNTbPHa Top6nUka
Φnrypa A
BcmykaTeHaTa rnaBa da ce ocbo6oNi da ce cBaJI.
NocTaBete xapTneHaTa fNtbpHa Top6nUka.
BcmykaTeHaTa rnaBa da ce nocTaBn I da ce 6Iokupa.
MOnTnpaHe Ha Top6nUka 3a c6b6npaHe
Φnrypa B
BcmykaTeHaTa rnaBa da ce ocbo6oNi da ce cBaJI.
NocTabeTe Top6nukkata 3a cb6npaHe.
Haxny3eTe Top6nukata 3a c6bnpaHe Ha pe3epBoapa.
BcmykaTeHaTa rIaBa da ce nocTaBn I da ce 6Iokupa.
Преевklюване OT MOKpo Ha cyxo n3cmyKBaHe
BHIMAHHE
Ipu npEeKluOeAHe om MOKpo Ha cyxo u3cMyKeAHe umaume npeduod cneHomo:
U3cmykehaHemHa cyx npax npu 6naKeH u m b p e h enemeHm 3aOpbcmba u m b pa u moke da zo Hapabu Hezodeh 3a ynompe6a.
MokpnT qnIbP da ce n3cuyn do6pe npEyn ynoTpe6a nn da ce cMeHn cbc cyx.
Pn Heo6xOaMocT da ce cMeHn fNtba, ONcaHo e B ToUka "rpnKu n PoIdpbXkA".
Yka3aHHe: Pn noCToHHO MOKpo n3cMyKBaHe ce npenopbUba n3no3BaHe Ha nIOcBk fNtbp PES (BnXTe fNtbpHn cncTemn).
Mokpo n3cmyKbaHe
△PENEYNPEXDEHNE
Ppu MOKpo u3cMykeaHe He mpy6ea da ce eoema 3acmpawaau, 3dpaeMo npax.
OtcTpaHЯBaHe Ha xapTneHa φnITbPHa Top6nUka
Φnrypa C
BcmykaTeHaTa rIaBa da ce ocB06oNi Da ce cBaII.
I3BaTe XapTneHaTa nITbPHa TOp-6nUka Ha3aI.
N3dtpnaTe 3aTbapraunHaN6bpHarope n npn N3BaJdaHeto Ha xapTneHaTaΦnTTbPNa TOp6uKa r 3aTbOpTe PJIbTHO.
OTcTaPaHeTe n3NoJ3BaHaTa xapTneHaΦnTTbPNa TOp6uKa KaTO OTnaBk Cb-rraCHO 3aKOHOBnTe PpeDnscHn.
BcmykaTeHaTa rIaBa da ce nocTaNn da ce 6Jokupa.
-ПиИЗмУКВаHeHaMOKpN3aMbpcBaHnIЯОБe3OJaCInTeJIHaTаФИЛТьрНaTop6uKaBnHaRn Tpr6BaДa ceOTcTpahЯBa.
OtctpaHЯBaHe Ha Top6nUka 3a c7b6npaHe.
Φnrypa D
BcmykaTeJIHaTaJIaBa Da ce ocBo6oNi Da ce cBaII.
Издьрnaite harope top6nukata 3a cb-6иранe.
→ N3dbpnaIte OTbopa Ha Top6nukata 3a cb6npaHe Ha3aI npe3 BCMykATEHnHaKpaHHNK I a3aTBopTe PbTHO.
3aTBOpTe Top6nukKaTa 3a Cb6npaHe NtBTHO C JeHTaTa 3a 3aTBaprHe NOd OTBopa.
→ N3BaJeTe Top6nUkKaTa 3a Cb6npaHe.
OTCTpaHTe N3NoJ3BaHaTa Top6nUka 3a Cb6upaHe KaTo OTNaBk CbIpaCHO 3aKOHOBITE PpeDnCahn.
BcmykaTeHaTa rIaBa da ce nocTaBn I da ce 6Iokupa.
-ПрииИЗмуКВаHeHaMOKрn3aMbpcЯВаняТорБичКATA3aCbБираHeВинагиТрЯбВаДа ceOTCTpaHЯВa.
O6u n oJoxeHn
-Прии3cmyKBaHeHaMOKpn3aMbpcraBnHnCДIO3aTa3aMeKa Me6eNИIgN (OIIu),peCn.Korato npeDmHo ce N3-CMyKBa BOdaOTcbd,ce npenOpbYBa da ce IN3KJIouHnФyHKUraT"ABTomaTNUHO NOHCtBaHe HaΦnITbpa".
-Прп дocгаге Ha MaKC.НИВОHa TeuHOCTTa ypeДьT ИЗКЛЮЧБа aBToMaTnH.
- Прн He npOBODIMN TeuHocT (HaNP. emyIcnI npn npo6NBaHe, Macna n Ma3HNH) ypeIbT He n3KIOUvBa npn nbJeH pe3epBoap. HnBOTO Ha 3a- nbJBAHe Tp8Ba Da ce npOBepRa HenpeKbChato n pe3epBoapa Da ce n3npa3Ba CBOEBpeMeHHO.
Cnei npKIOUbaHe Ha MOKpOTo n3-CmykBaHe: POnuCTeTe PnOcKnr QnI-TbP C NouNCTBaHTo Ha QnITbPa N OCTaTabeTe QnITbPa Da N3cbXHe DoCTaTbUHO. POnuCTeTe eNeKTpoDnte C YeTaKa. POnuCTeTe pe3epBoapa C BJaXHa Kbpna I rO noDCyWeTe.
Bpb3ka c knnn
Φnrypa E
BcmykaTeHnT Mapkye o6OpyDbaH cbc cnCTema cKnI. Morat da ce npncbeHN HrT BCnKn npHaJnxHoCTn C-35/C-DN35.
06cnyxbahe
BknuBaHe Ha ypeDa
Bknjuye Te uencena B eJeKtpueckaTa mpeka.
→ CbpxKeTe ypeDa KbM rnaBnra npeKbcBa.
Да ce Habстpon MoшноТа на BCMyKBaHe
MoHOCTTa Ha BCMyKBaHe (MnH-MaKC) da ce Hactpon OT BbptTuaCe pepyIa-Top.
PeryiipaHe Ha cnlaTa n3cMyKBaHe
PerynpaTe cnIaTa Ha n3cMyKBaHe ot perynatopa Ha n3cMyKbaUaTa cIHa (6e3CTeNeHeH).
Pa6oTa c eJeKtpnueckn HhCTpyMeHTN
ONACHOCT
Onachocm om HapaHaahe u nopepa! UeIcIbme npedHa3NaueH cAmo 3a dupekmHo c6bp36aHe Ha eIekmpuuecku uHcmpymHuMn npaxocMykaKama. BcaKa dpya ynompeba Ha uencela e hedonycumma.
Μεncena ha eileKTpuecknHaHCTpyMeHT da ce nbXHe B npaxocMykaKaTa.
→ CbpxeTe ypeDa KbM rnaBnra npeKbcBa.
KoHTpOHaTaNamnaCBETn, npaxocMykaKaTa ce Hamnpa B pexm Standby.
Yka3aHne: PpaxOcMyKaUKaTa Ce BKJIIOuBa n N3KJIIOUbA aBtOMaTnUHO C eJekTpueCKNIA HCTpyMeHT.
Yka3aHHe: IpxaxocmykaqkaTa nMa 3a6abYe npn noTeTnHe do 0,5 cekyHn n nocIeBauch xoD ot do 15 cekyHn.
Yka3aHne: KOHCymipaHaTa MOUHOCT Ha eJIeKTpueCKTe INHCTpyMeHTN BIXTe B TexHnueckn DaHHN.
Φnrypa F
→AanTnpaTe yHnBepcaHnna aanTep KbM n3BOda Ha eNeKtpnuecknna HnCTpyMeHT.
Φnrypa G
Да ce OTCpaHи N3BnTaTачacT Ha CMyKaTeJIHHa MapKyu.
→ MoHTnpaIte yHnBepcaJIHnA aIaITeP Ha cMyKaTeJIHnA MapKyu.
Φnrypa H
→ CbpxeTe yHnBepcaJHnA aanTep KbM eJekTpnueCKn INHCTpyMeHT, npN Heo6xOaIMocT OTpeXeTe Do Heo6xo- dImnA daMaTebp.
A B T O M A T N U H O N O U N C T B A H e H a nTbpa
YpeT pa3noIara c noUcTbaHe Ha qnIbpa OT HOB BnD,OCOBeHO eKacHo npi qnH npax. Pn TOBa nlockna qnITbp ce NOuCTBa aBTOMaTnUHO Ha BCEKN 15 ceKynOT Bb3dUWeH NOTOK (nyncpaWym).
Yka3aHne: ABTomaTnHOTO NOUcTbaHe HaΦnTTbpa e BkIIOueHo Φa6pNHO.
Yka3aHHe: IV3KJIIOUyBaHETo/BKJIIOUyBaHeTo Ha aBTOMaTHUHOTO NOUcTBAHe Ha qNITbPa e Bb3MOxHO cAmO npN BKJIOueH ypeI.
- ɪn3kʌŋoʊBaHe Ha aBtOMaTmUHOTO nOuNCTBaHe Ha φnɪŋTbpa:
3aDééçTbaIte wαITepa. KoHTpOηHaTa IaMna B wαITepa n3racBa.
BkIIOUbaHe Ha aBTOMaTnHOTo no-uctBaHe Ha qNTbpa:
OTHOBO 3aDcEiCTBaIe IaJItepa. KoHTpOJHaTApAMNa B IaJItepa CBETn 3eJIeHO.
I3KJIIOUcTe ypeDa
N3KIOUeTe ypeDa OT rnaBnI npekbcBaY.
→ N3dIbprnaIte uencena.
Cleid Bcya ynoTpe6a
N3npa3HeTe pe3epBoapa.
→ПоиntВанTeуpeДаOTBБТрЕИOTBbHпocpeДCTBOMИЗCMyKBAHeИИ3TpNBaHeCВлajxHaКbpna.
CbxaHneHa ypeDa
Фигура
BcmykaTeHnmaKyuMpeXOBnKa6en ce cBxpaHbAT BCOTBeTCTBne C cnrypata.
YpeiBt Da ce CbXpaHra B cyxo NOME- UeHne I Da ce Ocnpyn npOTNB HeKOM- nTeHTHa ynotpe6a.
TpaHcnpT
△PENEIA3JINBOCT
Onachoc om HapaHbaHe u nopeda! Ppu mpaHcnpm umaume nped eud meanomo Ha ypeda.
→ CbaIeTe BcMyKaTeJIHaTa Tpb6a c no-IOBaTAtIO3a OT IbPkaUa. 3a HocHe XBaHete UpeDa 3a IpbXkKaTa 3a HocHe N 3a BcMyKaTeJIHaTa Tpb6a.
→ПиТранспорВаВTomоБиИNOCnIpyРЯВaIteурdaCbrIaCHOBaJIuHInTeДиpeKTHBINIpOTNBПb3raHeипpeO-6pbUaHe.
CbXpaHHeHne
△PENEIA3JINBOCT
Onachocm om hapaHbAhe u noepda! Ppu cbxpanHeue umaume nped eud meJnomo Ha ypeDa.
CbxaheHneTo Ha To3n ypeI e N03BOJeHO camo BbB BbTpeuHn NOMEueHn.
PnXn n POndprbXka
ONACHOCT
Ipedu bcuku deu hocmu no ypda moa da ce u3knouu da ce u3baDu uencela. OTCpaHraBauTe npax Maunn ca npedna3n npncno6bneHna 3a npedOTbpaTBAhe nI NOTcpaHraBaHe Ha onaCHOCTN NO CMscbna Ha FeepaHnOTo cdpxKeHne 3a INOpMaun B 3dpaBeOna3BaHeTo n 3a-nta Ha notpebnteNTe A1.
-
3a noDpBxKka OT cTpaHa Ha noTpe6nTeIypeDa Tp8Ba Da ce pa3rIo6n, Da ce nouchTu Ida ce noDbpxKa, DOKOJI-KOTO TOBa e Bb3MOxHO Da ce H3BbPUn 6e3 TOBa Da npedn3BnKBA onachocT 3a nepcoHana No noDpBxxKata N dpyuNnua. NoDxOJaUnte npedna3Hm Mepo-nprrnCbDbpxKat OTcTaPAHBAHe Ha OTPoBte npedn pa3rNo6BaHeto. NoTprnxTe Ce 3a qniltpupaHe Ha npHy-dNTeHHTO OTcPaHRAbe Ha OTPoBte Ha MeCTOTO, KbDeTo ce pa3rNo6Ba ypeDa, NouchBaHe Ha NOBbPxHOCTtete npi noDpBxxKata n noDxOJaUa 3aun-Ta Ha nepcoHana.
-
OTPOBITE OT BbHUNITE YacTN Ha ypeDa ce OTCTpaHЯВAT NO MeToDA Ha N3-CMYKBAHe H N36bpcBaHe Do cyXO, INIc Ce TpeTnpaT CynlbTHraBau CpeDCTBa npEi Da ce N3HeCaT OT OnaChata Oblact. BcNkN YacTN Ha ypeDa Tpr6Ba Da ce pa3rIeJkDaT KaTO 3aMbpcEH, KOrato Ce N3HeCaT OT OnaChata Oblact.
-При npOBexdane Ha DeHocHTe no noIdpbJka n nonpaBka Tp6Ba da ce n3XBbPJIaT BCNUKn 3aMbpcEHnpEd- metn, KOnTO He ca MoJIn Da 6bDaT no- yncTeHN 3aIOBOJNTeJHo. TaKIBa npEdMeTn Tp6Ba Da ce OTcPaHraBt B HeNPONyCKINB Top6N, B cBoTBET- CTBne C BaIIndHnte pa3Nope6n 3a OT- CTpaHraBaHe Ha TAKIBa OTNaDbuN.
△PENEYNPEXDEHNE
IpeDn3Hume npucnocoblenu 3a npedommbamhahe Ha onacnocmu mpa6ba da ce noodbpxkam pedoBHO. Toba 03na4aba, ye MuHumym bEdhJx 2oDuUHO mexHukama Ha 6e3oNacHocm Ha maxhama fynKcua mr6ba da ce npoepeBa om npou3-8oDumela unu omopuzupaHo om Hezo luue, Hnp. xepmemuHocmma Ha ypeDa, yepexdaHua funmbpa, fynkuuma Ha KOHmpolHume npucnocoblenu.
BHIMAHNE
Onachocm om yepexdahe! 3a noucmeaHe He u3non3eaume npenapamu 3a nod p_bx_k a,cbobpxauu cunkoH.
- ObnuaHnTe DeHocTn NO NODpBxKkata MoKeTe Da N3BbPUnTe n camn.
- NOBbpxHocTtHa Ha ypea n BbTppeHnTa cTpaHa Ha pe3epBoapa Tp6Ba da ce NOUcTBaT peoBHO C BnaJHa KbpNa.
△PENEYNPEXDEHNE
Onachocm npadu onaceh 3a 3paemo npax. Ppu deuHocmu no nodpBkama (Haep. cMaHa Ha fummbp) da ce hocu peCnupamop P2 uuu c no-uecoK kayecmeo u o6neKno 3a eHOKpamHa ynompe6a.
CmHa Ha IIOCKnIΦnITbP
OTBopeTe Kanaka Ha qntbpa.
→ CbaJte nIocknAΦNITbP.
I3noI3BaHnI pIOcbK qINITbP OTCpaHeTe B npaxOHnpOyCKaEMa 3aTBopeHa Top6a, CbIacHO 3aKOHOBtPe pa3-nopeD6n.
I3npHaHaTaMpbcOTnOcTpaHeTe OTKbM cTpHaTa 3a YnCT Bb3dYx.
Da ce nocTabN HOB nIOc bK cHJTbp.
→ПиТиСHTeРb6a3aЯHaHaФИNTbpa 134no HaOJy KbMpb6a.
3aTBOpTe KaNaKaHa 0nTbpa, Tp8Ba Da ce yye 0nKcnpaHeTo.
CmHa Ha xapTneHa fNITbPHa Top6nUka
Φnrgypa C
BcmykaTeHnHaTa rnaBa da ce ocbo6oNi Da ce cBaan.
→Изва对接хартinueнотафпгьра Тор-6ичka Ha3a.
→ N3dbpnaTe 3aTbapraunia shnbp harope n npn n3BaXdaHeto Ha xaptneHaTaΦnTTbPHa TOp6uKa a 3aTbOpete PJIbTHO.
OTCTpaHete n3NoJ3BaHaTa xapTneHaΦnITbPHa TOp6uKa KaTO OTNaIbK Cb-rraCHO 3aKOHOBtE PpeDnicaHna.
NocTaBete HOBa xapTneHa T b P h a Top6nUka.
BcmykaTeHnHaTa rnaBa da ce nocTaBn I da ce 6Iokupa.
CmHa Ha Top6nUka 3a Cb6npaHe
Φnrypa D
BcmykaTeHaTa rIaBa da ce ocboDoN n da ce cBaHn.
Издьрnaite Harope Top6nukaTa 3a cb-6иранe.
→ N3dbpnaIte OTbopa Ha Top6nukata 3a cb6npaHe Ha3aI npe3 BCMykATEHnHaKpaHHNK I a3aTBopTe PbTHO.
3aTBopete Top6nukatBa c6bupaHe nIbTHO C JeHtata 3a 3aTBaprHe NOd OTBopa.
→ N3BaJeTe Top6nUkKaTa 3a Cb6npaHe.
OTCTpaHTe n3NoJ3BaHaTa Top6nUka 3a Cb6npaHe KaTO OTNaIbK CbIJaCHO 3aKOHOBIne IpeDnicaHn.
Пoctabete HOBa TOp6nUka 3a c6bnpaHe.
Haxny3eTe Top6nukata 3a c6bnpaHe Ha pe3epBoapa.
BcmykaTeHaTa rnaBa da ce nocTaBn I da ce 6noKnpa.
NouchteBaHe Ha eJneKtpoDHTe
BcmykaTeHaTa rnaBa da ce ocbo6oNi da ce cBaJI.
→Поунстете щелковдпесутka.
BcmykaTeHaTa rnaBa da ce nocTaBn I da ce 6noKnpa.
Помоц пи Нeн3празвhoeТN
ONACHOCT
Ipeu bcuku deu hocmu no ypea moa da ce u3knouu da ce u3ea du uencena.
Yka3aHHe: Ako Bb3HNKHe HEn3npaBHOCT (Ha np. cUyBaHe Ha qnIbpa), ypeIbT BeHara Tpr6Ba Da ce n3KnIOuN. Ipei NOBTOPOnyckaHe B DeIcTBne Tpr6Ba Da ce OTCTpAHn HEn3npaBHOCTTa.
CmykateJIHaTa Typ6nHa He pa6oTn
Пювере Te KOHTaKta I npeДпа3nteЯ Na eNeKTpo3aXpaHBaHeTo.
→Проверетe Мржовя кабел,Мржовя сеньсel,еЕктудпги Контakта на урEDA.
Da ce BkIIOU ypeTbT.
Bcmykbaaata Typ6nHa n3KJIIOUvBa
13npa3HeTe pe3epBoapa.
Bcmykbaaata Typ6nHa He NoterIy OTHOBO CneI n3npa3BaHe Ha pe3epBoapa
Да ceизключуpeдаидa ceизчaka5 cekyн,在,след 5 cekyн,在а ceвклочи OTHOBO.
Почисте eнктpoДNTe IMMeKdINHTo npoctpaHCTBO Ha eNkTpoDNTe CчETka.
CmykaTeJIHaTa CnJa HamaJIyBa
Da ce otctpaHrT 3anyuBaHnraTa OT BCMyKaTeJIHaTa IIO3a, BCMyKaTeJIHaTAtpIb6a, BCMyKaTeJIHnMa MapKyuIINI NIO-CKNqΦIITbp.
CmeHeTe HantbJIHeHaTa XapTneHa _NITbPNa Top6nka.
CmeHete HaIbJIHeHaTa Top6nUka 3a cb6npaHe.
Φиксирaite npabuHNo KaNaKa Ha φилТьра.
→CMaHa Ha nIOcknФuNTbP.
Поберете ИЗв形象 на селковунспунштрумент.
I3JIIN3aHe Ha npax npn I3cMyKBaHe
Φnrypa J
→Проверетe/Kopинupaite KopeкTHOTOMOHTaXHNO NOLOXKeHne Ha ПLOCKINФИNTbp.
→ CmHa Ha nIocKna qnIITbp.
ИзклочвацаТа aВТOMaТиКа (MOKpo ИЗСМУКВанe) He pearupa
→Поунсте eнжтpoДиTe n MeждИНHOTo npoctpaHCTBO Ha eNekTpoDnte CчETka.
→ HnBTo Ha 3aIbJbAHe npi eIeKtpuYeCKn HEnpOBOIMN TeHOCTN da ce npoBepraBa HenpeKbCHaTO.
A B T O M A T N U H O T O N O U N C T B A H e h a n
→ BcMykaTeJIHHaT MapKyu He e Cbbp3aH.
ABTOMaTHOTo NOUcTBaHe Ha cnITbpa He MoKe Da ce N3KlHouN
→ YBeDomeTe cepBn3a.
A B T O M A T N U H O T O N O U N C T B A H E H a nTbpa He Mo Xe Da Ce B K J I O U N
→ YBeDomeTe cepBn3a.
Cnyx6a 3a pa6oTa c KIneHTn
Ako nobpeaTa He moKe da 6bJe ot- cTpaHeHa, ypeDa da ce npOBepn ot cepBn3a.
OTCTpaHЯBaHe KaTO OTnpaIbK
CbIacHO 3aKoHOBnTe pa3npe6n B Kpa Ha cPoka Ha ekCnloatauia ypeDa da ce OTCTpAH KaTO OTNaDbK.
TapaHcH
BbB Bcya Ka CtpaHa BaxaT rapaHcnoHnTe YcNoBna, Ny6NkYBaHn OT OToPn3npaHata OT Hac DnCTpN6ByTopcka QnnpMa. EBeHTyAaHn NOBpeDn Ha Baunu ypeD nze OTcTaHnM B pAMKInTe Ha rapaHcnoHHn CpOK 6e3nnatHO, Ako ce Kacae 3a DeΦeKT B MaTeprnAnTe nn npn POn3BOdCTBO. B raPaHcNoHeh CnyaH Ce o6bpHeTe KbM DnCTpN6ByTopa nn Hau-6n3KnO TOpu3npaH cepBn3, KaTO npeDCTaBnTe KacOBaTa 6eJnxKa.
PpHnHaIeJXHoCTN np3epBn Yactn
Morat da ce n3noJ3BaT cAmo npHaJnEJXHOCTN IN pe3epBHN YactN, KOITO caNo3BOJeH N OT ppon3BOJNTeJI. OpiuHaJIHHTe INpHaJNEXKHOCTN IN opuHaJIH N pe3epBHN YactN DaBaT rapaHcIa 3a TOBa, ypeDbT da MoKe da ce n3-NOJ3Ba cnrypho n 6e3 NOBpeDi.
CnncbKaHa HaHaeCTO Heo6xOaMnte pe3epBHN Yactn Ue Hamepnte B KpaHa yNbTbaHeTo 3a ekcnnoatauia.
KOMnJIeKT 3a NOUcTbaHe
No 3a npb4ka 369 845
Iorna TaTexHicHe 6cyroByBaHHa UK6
DOnOMora y BInaIky HEnoJa- DOK UK 7
YtNiI3aui. UK 8
TapaHTia UK 8
Ppniladny 3anaChi detaJI . UK 9
3aBa npB ViINObHicTb CBpo- necbKoro cnIBTOBapnCTBa ... UK 9
Texhi xi xapaktepcntkn. UK 10
3axnct HaBkoJnHbOTo cepeDoBnua
MaTepiAnu ynaKOBn nidaHOTbcra nepepo6ci dny nobtopHoro BnKOpncTahn. Bydb lacka, He BnKndaIte naKyBaJIbHi MaTepiAn pa3om i3 domaunHcMittm, BiDaaiTe ix dna Ha nepepo6ky.
CTapi npnctpoi MicTb ciHIMaTepiann, lo MOxTyB BnKOpNCToByBatncra NOBtOPO. Batapei, MaTnIO Ta CXoXi MaTepiAn He NobHHI NotpanNTu HaBkoJIuNHe cepeOBnue. Tomy,6ybJnacka, ytni3ynte cTapi npnctpoi 3a DonomoroCneuaJIbHNxCnCTem 360py cmTTA.
CTyniHb He6e3neKn
△HE6E3NEKA
Дя He6e3neku,Яka 6e3nocepeHbO 3a- epoxye ma npu3eodumb do mxxkux mpaem Yu cmepmi.
△NONEPENKEHNA
ДяnomenuHO moKnueoi He6e3neuHoi cumyaui, zo moKe npu3becmu do mKkuxmpaem Yu cmepmi.
OBEPEXHO
Bkaieka uodo nomenuHo He6e3neuHoi cumyaui, kA moKe cnpuuHmu ompuMaHHa neKux mpaM.
YBAFA
Bka3iBa 0oDo moKlueoI nomeHuiHo He-6e3neHiu cumyaui, uO MoKe cnpuHuMu MamepiJIbHI 3bumku.
PpabnIbHe 3aCTocyBaHHa
△NONEPENKEHNA
Leu npucmpiu npu3nauho dna BCMokmyBaHHa cyx02o, He2opuOzo, ukiDnubOzo dna 3doopo8' nuny 3Maushn ma o6naDaHaHn;Knac nuny L 3zioHO EN 60 335-2-69. O6mexHHa: 3abopohembcra ECMokmyeamu npucmpoeKanuepoeHHux peyoBuH.
- Lcen nnooc npn3haeHn dna BOIoro Ta cyxoro ounueHH naIOni cTIN.
- Lcien npncpti npndaTHn IJKomepUHIO BnKOpNCtAHN, HApNKJaH a6yIDBeNbHnx MaHaDnHKax, MaICTepHx, roTeJAX, SKoJax, JIkapHx, 3aBOdax, KpaMHnucx, ophiacx Ta opEnDoBaHnx npMIMeHHx.
Elenentn npnaNy Cn
1EneKtpoDi
2 BcMoKtUoyuN uHaHr
3 RaKn dJa Ka6eIIO
4 OTrbipIyBnucky nobitpy,po6oye no-BiTPy
5ΦikcaizjraTOLOBKNBCMOKTyBaHHa
6 YHIBePcAaBn aanTep
7Повитрозабир,在OBITРДЯoxoJOD-KeHHa DBnryHa
8CMKicTbIJIa6pydy
9 FroNoBKa BCMOKTyBaHHa
10 CnpraMoBvBaJIbHn BaIeIb
11 YcmoKtYBaJIbHn naTppy6ok
12ΦopcyHkaIЯ quHHeHHaPiJnOrn(He BXoINTbdoKOMnKeKTyNoCTaHaHHa
13 BcMoKtYBaJIbHa Tpy6ka (He BXoIITb Do KOMnJIeKTy NocTaayHЯ)
14 PyuKa
15 Kpnuka qinbTpa
16 KoliHo (He BXoNTb Do KOMnJIeKTy nocTaayHna)
17 PeryjIaTOP cIIIN BCMOKTyBaHnra (6e3-ctyniHuacto)
18 Perynatop hactpoobHHn notyxhocti BCMOKTyBaHHn (MiH-MaKC)
19 KoHTpoJIbHi JIaMnI
20 Po3eTka
21 ABTomatnue OunuHn HnTpy
22 TOnOBHn BmNkau
23Плоский сдадч actифьтр
24 OuicTka pInbTp
25 Tpimau Hacaikn Jny nIiNor
26 TpmaHacaKdJnCTNKIB
27 TpMaay IJIy BCMOKTyBaJIbHOI Tpy6Kn
28 MepexeBn ka6eJb
29 3aBoDcbKa Ta6nUka
OJIHnHa pncTpoi

IIOPEJKEHHa:Leu npuaod mi-cmumb He6e3neHu dna 3dopeo' nul. CnpoxHeHma mexHicHe obcnyoey-BAHHa y momy uucn, budaneHn Miuka dna nuny, noBuHNO npoBodumbcn nuwe faxiemu, zo Hocmb iDnoBiohe 3axu-Che cnpadxhen. He BMukamu do nobHO2O EcmahOBJIeHHa pInbmpyeaIbHOi cuMemu.
IIOCKN CKJaDuaCTn IINbTp
No 3aMOB-JIeHHJ
337.692

PAnepobnΦiNbTpOBAJIbHnMiWOK
No 3amOB-JeHHa
VCE 35:296.961
VCE 45:340.758
Miwok dny 360py BiXoDiB
No 3aMOB-JeHHJ
340.766
Ppabnla 6e3nekn
△NONEPEJXEHH
-Якwo noBimpa,wo buxodumb 3 npu-cmpoio,3HOey noBepmaembcra do npuMiueHnra, cIio 3a6e3neyu mu docamHiu piEhb bEmunauy L y npumiueneHi.ДЯ mo2O, uO6 npumpumyeamucb apanuHux 3naueHb, o6'EMHa eumpa-ma ma cKnadamu mKcumym 50% npumouho noBimpr (ob'em npuMiueHnRA V_R x piBHe noBimpnozo 6-MInHy L_w) .Be3 cneuaJIbHuX bEmunayuiHux 3axodie: L_W = 1h^-1
BukopucmaHn npunaody ma peyobun, uo nompi6hi dny po6omu npunaody, ekIouaIouu 6e3neHy ymuIiaqio buKopucmaHux Mamepiianie, Moke 3diUcHIObAmu nuwe niOsoMoBHeHu nepcoHaI 3i CneuaJIbHM OCHAueHNrM.
- Léu npunad Micmumb ukiDnueu dna 3dopoe' nui. BunopoxHeHma ob-cny2ooyeAHn npuna, eKnioaouu 3hympe3epeyapy dna 3bopy nuy, maomb npoeodumucb minbku cne-uaicmamu y eidnoeiHomy 3axuchomy oya3i.
- 3a6opohrembcyaukopumannnpu-cmpoio6e3no8hoicumemu pInbmpa-
Heo6xio hO cnidyamu npaunam mexniku 6e3neku, kci cmocyombcma-mepianie, uo BCMOKmyombcra.
BcTaHOBHTn CnIy BCMOKTyBaHHa
Hactpoitn cnny BcmoKtyBaHHa (MIn. -MaKC.) 3a dONOMORO pUKN HAcTPOOBAHHa.
BidperyIIOBaTn cnIy BCMOKTyBaHHa
BidperyIIOBaTn CnIy BCMOKTyBaHHpeRyIaTOPoM CNIIN BCMOKTyBaHHa (6e3ctyniHacto)
BnKOpncTaHNe eJekTpoiHcTpymeHTiB
△HE6E3NEKA
He6e3neKa ompumHaHa mpaem ma yuKoJKeHb! Lp o3emKa npu3HaueHa buKlIOUHO dna npraMo2O nIDKnIOUeHH eJeKmpoiHcmpymie do nunococa. Inwe BuKOpucMaHH po3emku He donyckaembcra.
BCTaBnTn wTeNceIb eJekTpOiHcTpymeHTy B NINOCOC.
YbIMKHyTN npnCTpii chepe3 roJOBHmBMnKaU.
KoHTpOJIbHa Jama rOpNTb, npUJa3HaxO-DITbC8 B CTAHI rOTOBHOCTI.
Bka3iBa:ПиLOOC BmKaeTbcra i BmNKaetbca eJIeKtpnHIM iHCTpyMeHTOM aTOMaTHUHO.
Bka3iBka: 3ani3HeHHa PO3roHy nIIOcOcy CTaHOBnTb do 0,5 cekyHnn, yac po6OTn 3a iHepuieio -do 15 cekyHd.
Bka3iBka: CnoxmbaHa nOtjxHicTb eJekTpunHnx iHctpymeHTIB 3a3haueHa B po3diNi "Texhi DaHi".
MaJIHOHOK F
3'εdHaTn yHiBepcaIbHn aIaIaTeP 3 eIeKtpoiHcTpymEHTOM.
MaHIOHOK
3HЯТи KOJIiHO Ha BCMOKTyBaJIbHOMy IJNaHroBi.
BcTaHOBnTuHyIePcaJIbHn aanTepeHa BCMOKTyBaJIbHOMy IJNaHroBi.
MaHIOHOK H
BcmoKtYBaJIbHa Typ6iHa He npaIoc
→ IpebeipuTn 7TeNceBHy po3eKy Ta 3a-nobixHnk cnCTEmn eJeKTPOXNBHeHHa.
→ IpeBipuTn MepeKn Kabe, wTeNceJbHy BnIKy, eNeKTpOAn Ta wTeNceJbHy po3eTKy npNCtpoI.
→ Bkniouitb npncpti.
BcmoKtUBaJIbHa Typ6iHa BiDKIIOuAcTbcra
BunopoxHHTn pe3epByap.
PicnaycnoeHHa 6aka BCMOKTyBaJIbHa Typ6iHa He 3anyckaTbcra
BIMKHyTn npnla i noyekaTn 5cekyH, nicra yoro 3HOBy yBIMKHyTn npnla.
OuHCTnTne eJekTpOa, a TaKoX npocTip MIXeJekTpOaMn 3a DOnOMoroU uit- KN.
3Hn3nlaacb cnla BCMOKTyBaHHa
→ BndaJIHTn cMIITB BCMOKTyBaJIbHOrO conIa, BCMOKTyBaJIbHOI Tpy6Kn, BCMOKTyBaJIbHOrO IHaHra a6o CKnaDyactoro fInbTpA.
3aMHNTn 3anOBHeHn nanepOBn _IbTpyBaJIbHn MiWOK.
3amHHTn 3anOBHeHm MiOOK dJa 36Opy BiXoDiB.
→PpaBnIbHO 3aΦikCyBaTn KpNtka φiNb-tpa.
→ 3amHITb cKauaactn φIbTp.
IpeBipuTnPiKluOeHHeJeKTpoinCTpyMeHTy.
Pn BcMOKtYBaHHi BHXoNDtB NJI
MaHIOHOK J
IpeBipuTn npaBnIbHicTb BCTaHOBJIeHHr cKnadUacToRo IJbTpY a6o BHe-CTN BnnpaBJeHHr.
3aMiHITbcknlaqactnΦIbTp.
A B T O M A T N U H E B i D K N I O U C E H N H (C h i s e H N Y y B O N O R O M y p e x n m i) H c n p a c b o B y c
OuHCTnTNe eJekTPOdN, a TaKoX npocTIp MIX eJekTPOdaMn 3a DOnOMOrOu uItKn.
→Ppi po6oTi 3 HeinpobiDHOIO pIDHIOU cnId noCTiHNO KOHTpOJIbAaTI pIBeHb 3aONBHeHHa.
He BnKohyEcTbcra aBtOMaTnUHe cnIeHna pfIbTpTa
BcMoKtYBaJIbHnI IJNaHr He nIDKnIOueHnI.
A B T O M A T N U H E Y N U S E H N H F i N b T P a H E B U M N K a C T b C R
3BepHyTnca Do cIyK6n NiITpIMKn Ko-pnCTyBauiB.
A B T O M A T N U H E Y N U E H N H E F I N B T P A H E B M N K A C T b c a
3BepHyTnCra Do cIyK6n NiITpIMKn KOpNCTyBauiB.
Cnyk6a nIDtpmKn KopncTyBauiB
KIO NOsKOJKeHHe MoXHa ycHyTn, Heo6xIaHO nepeBipuTu npucTpiy cny6i 06cnyroByBaHH KJIeHTiB.
YtNiI3aCiJ
3riiHO 3aKoHHMn HopMaMn npJnayTuJIi3yETbcra nicJra3aKiHueHnCtPOky BnKOpNCtAHn.
TapaHTi
YKOxHi KpaHl DiIOb yMOBn rapaHTi,HaDaHOI BiINOBiHOI OphiMOIO-npOaBcEM. HenoJaKn Bpo60ti npncTPOMu MN ycBaem 6e3PnAtho npOTAROM TepmiHy dII rapaHTi, JaKIO BOHN BnKlnKaHI 6paKOM MaTepiAly YN NOMIKAMN BnROTOBHeHHy. Y BnPaKy YnHHocTI rapaHTi 3BepTiTbcra Do npOdaBzra Hn BaXn ABTOpn3OBaHn cepBicHni ceHTp 3 DOkymeHTaJIbHm NiTBepeHHM NOKyKN.
PpnilaIaIy 3anacHi deTaJI
-Пицьому6уdtybВNKOPNCTOBYBaTncbЛишeTiKOMnJIeKTyUoyiTa3anachiЧa-CTHIN,単нHaJaIOTbcB BInpo6HnKOM.ОригIHJIbHI KOMnJIeKTyUoyi Ta 3anachiЧаCTHIN 3amOBJIAOTbcrno rapaHTII,単o6 moXHa 6yIo 6e3neuHo Ta 6e3 nepeWKOD BVNKOPNCTOBYBaTn npicTpir.
- AcopTmEHT 3aIacHnx YacTHN, 10o Ya- cTo Heo6XiDiHi, MoXHa 3HaIeTN B KInci IHCTpyKuii no ekCnnyataui.
KOMnJIeKT dIa OuNueHHe
No 3amOBJIeHHra 369.845
| Познayaшия № 3amOB- leння | Штук |
| Колино (пла-стек, AS) | 398.446 1 |
| Всмokтуваьна труба (metал) | 385.514 2 |
| Насада даястikов (запашиа частина) | 385.530 1 |
| Сою по поу | 300.659 1 |
BctaHOBtI rymoBi kpaIKn fOpcyHKn IJy uuueHHn iDIOr (uueHHy y BOJorOMy peKmI)
MaJIIOHOK K
3HATN 1iTKn.
BctaHOBntn rymoBi ry6kn.
Bka3iBka: CtpyKtypoBaHa cTOpOHa rymOBnx r60k MaE dNbNTncb Ha3OBHi.
3aЯВа пи ВiДповiДнИстБ CBpОЕncbKOrO cnIBTOBapnCTBa
LIMM NIOBIDOMJREMO, 10 HNCHy3a3Ha-ueHa MaunHa Ha OCHOBI CBOeI KOHCTpyKuTt Ta KOHCTpyKTNBHO BnKOHaHHa, a TAKoX y BnPyUeHOi Y npOdaX MoJeI, BiNobJaCneCiAIBHM OCHOBHMM BnMOram 5oDo 6e3NeKn Ta 3axNcTy 3DopOB'ny PpeDcTabLeHnx HNxue DnpeKTHB CC. Y BnPaAnky Hey3-roJKeHOi 3 HAMN 3MiHN MaunHn cIaBA BTPaayc CBOIO cnly.
BidiobiHa DnpeKtNa BC
2006/42/EC (+2009/127/EC)
2004/108/EC
2011/65/EC
PpNklaadhi rapMoHizyUoyi HOpMn
EN 55014-1: 2006+A1: 2009+A2: 2011
EN 55014-2: 1997+A1: 2001+A2: 2008
EN 60335-1
EN 60335-2-69
EN 61000-3-2: 2006+A1: 2009+A2: 2009
EN 61000-3-3:2013
EN 62233: 2008
EN 50581
3anponoHObaHHaioHaJIbHi HOpMn
Ti, xTo NiDnncajnca IIOTb 3a 3aNITOM Ta DOpyuHnM KepiBnTBA.


YnOBHOBaKeHn CnIBpo6iTnK NO BeDeHHIO DOKymeHToo6iry:
E. Ruhle


- Contents
- Environmental protection
- Danger or hazard levels
- △DANGER
- WARNING
- CAUTION
- ATTENTION
- Proper use
- Device elements
- Symbols on the machine
- Safety instructions
- △WARNING
- Start up
- Anti-static system
- Dry vacuum cleaning
- Installing the paper filter bag
- Illustration A
- Install disposal bag
- Illustration B
- Changeover from wet to dry vacuum cleaning
- Wet vacuum cleaning
- Removing the paper filter bag
- Illustration C
- Removing the disposal bag
- Illustration D
- General
- Clip connection
- Illustration E
- Operation
- Turning on the Appliance
- Adjust the suction output
- Regulating the suction power
- Working with electrical power tools
- Automatic filter cleaning
- Turn off the appliance
- After each operation
- Storing the Appliance
- Illustration 1
- Transport
- Storage
- Maintenance and care
- Exchanging the flat pleated filter
- Replacing the paper filter bag
- Replacing the disposal bag
- Cleaning the electrodes
- Troubleshooting
- Suction turbine does not run
- Suction turbine turns off
- Suction turbine does not start again after the container has been emptied
- Suction capacity decreases
- Dust comes out while vacuuming
- Illustration J
- Automatic shut-off (wet vacuum cleaning) does not react
- Automatic filter cleaning is not working
- Automatic filter cleaning cannot be switched off
- Automatic filter cleaning cannot be switched on
- Customer Service
- Disposal
- Warranty
- Accessories and Spare Parts
- Cleaning kit
- EC Declaration of Conformity
- Stille inn sugeytelse
- CnMBoJIbI Ha npI6ope
- OtperynipoBaTb cnIy BCacbIBaHna
- Pa6ota c 3JIeKTpNuecknMn HnHCTpyMeHTaMn
- ONACHOCTb
- PncyHok
- PncyHok G
- PncyHok H
- BcacbBaOuza Typ6nHa He pa6oTaet
- BcacsbBaHouza Tpy6nHa OTKJIOnyaeTcR
- Pocne onyctoWeHna 6aka BcacbIBaHouza Typ6nHa He 3anyckaetcra
- MoocbBcacbBaHnya
- BoBpeMa YnCTKn n3 npnbopa BbIeJraTeTc nblb
- PucyHok J
- ABTOMaTnueckoe OTKJIIOUeHne (YnCTka BO BnaXHom pexKIme) He cpa6aTbIBaeT
- A B T O M A T N U C E C K A Y N C T K A Φ N J B T P a H e B b I O N J H R E T C R
- A B T O M A T N U C E C K A Y N C T K A Φ N J B T P a H e B bI K I N O U Y aE T C R
- A B T O M A T N U C E C K A Y N C T K A Φ N J B T P a H e B K J I O U C A E T C R
- CepBnchna cIyK6a
- yTnIn3aun
- TapaHTnA
- Приимер: 30190
- PpHaJJIeXHoCTn 3aNaChbIe DeTaJIH
- MoIoumKoMnJIeKT
- Norme de aplicare nationale:
- Yka3aHna 3a 6e30nacHOCT
- △NPEDYNPEXDEHNE
- Пускан eКсплоataця
- △PENEYNPEXDEHNE
- ANTNCTaTnUHa CNCTema
- Cyxo n3cMyKBaHe
- MOnTnpaHe Ha xapTneHa ФиNTbPHa Top6nUka
- Φnrypa A
- MOnTnpaHe Ha Top6nUka 3a c6b6npaHe
- Φnrypa B
- Преевklюване OT MOKpo Ha cyxo n3cmyKBaHe
- BHIMAHHE
- Mokpo n3cmyKbaHe
- OtcTpaHЯBaHe Ha xapTneHa φnITbPHa Top6nUka
- Φnrypa C
- OtctpaHЯBaHe Ha Top6nUka 3a c7b6npaHe.
- Φnrypa D
- O6u n oJoxeHn
- Bpb3ka c knnn
- Φnrypa E
- 06cnyxbahe
- BknuBaHe Ha ypeDa
- Да ce Habстpon MoшноТа на BCMyKBaHe
- PeryiipaHe Ha cnlaTa n3cMyKBaHe
- Pa6oTa c eJeKtpnueckn HhCTpyMeHTN
- ONACHOCT
- Φnrypa F
- Φnrypa G
- Φnrypa H
- A B T O M A T N U H O N O U N C T B A H e H a nTbpa
- I3KJIIOUcTe ypeDa
- Cleid Bcya ynoTpe6a
- CbxaHneHa ypeDa
- Фигура
- TpaHcnpT
- △PENEIA3JINBOCT
- CbXpaHHeHne
- PnXn n POndprbXka
- BHIMAHNE
- CmHa Ha IIOCKnIΦnITbP
- CmHa Ha xapTneHa fNITbPHa Top6nUka
- Φnrgypa C
- CmHa Ha Top6nUka 3a Cb6npaHe
- NouchteBaHe Ha eJneKtpoDHTe
- Помоц пи Нeн3празвhoeТN
- CmykateJIHaTa Typ6nHa He pa6oTn
- Bcmykbaaata Typ6nHa n3KJIIOUvBa
- Bcmykbaaata Typ6nHa He NoterIy OTHOBO CneI n3npa3BaHe Ha pe3epBoapa
- CmykaTeJIHaTa CnJa HamaJIyBa
- I3JIIN3aHe Ha npax npn I3cMyKBaHe
- ИзклочвацаТа aВТOMaТиКа (MOKpo ИЗСМУКВанe) He pearupa
- A B T O M A T N U H O T O N O U N C T B A H e h a n
- ABTOMaTHOTo NOUcTBaHe Ha cnITbpa He MoKe Da ce N3KlHouN
- A B T O M A T N U H O T O N O U N C T B A H E H a nTbpa He Mo Xe Da Ce B K J I O U N
- Cnyx6a 3a pa6oTa c KIneHTn
- OTCTpaHЯBaHe KaTO OTnpaIbK
- TapaHcH
- PpHnHaIeJXHoCTN np3epBn Yactn
- KOMnJIeKT 3a NOUcTbaHe
- 3axnct HaBkoJnHbOTo cepeDoBnua
- CTyniHb He6e3neKn
- △HE6E3NEKA
- △NONEPENKEHNA
- OBEPEXHO
- YBAFA
- PpabnIbHe 3aCTocyBaHHa
- Elenentn npnaNy Cn
- OJIHnHa pncTpoi
- Ppabnla 6e3nekn
- △NONEPEJXEHH
- BcTaHOBHTn CnIy BCMOKTyBaHHa
- BidperyIIOBaTn cnIy BCMOKTyBaHHa
- BnKOpncTaHNe eJekTpoiHcTpymeHTiB
- BcmoKtYBaJIbHa Typ6iHa He npaIoc
- BcmoKtUBaJIbHa Typ6iHa BiDKIIOuAcTbcra
- PicnaycnoeHHa 6aka BCMOKTyBaJIbHa Typ6iHa He 3anyckaTbcra
- 3Hn3nlaacb cnla BCMOKTyBaHHa
- Pn BcMOKtYBaHHi BHXoNDtB NJI
- A B T O M A T N U H E B i D K N I O U C E H N H (C h i s e H N Y y B O N O R O M y p e x n m i) H c n p a c b o B y c
- He BnKohyEcTbcra aBtOMaTnUHe cnIeHna pfIbTpTa
- A B T O M A T N U H E Y N U S E H N H F i N b T P a H E B U M N K a C T b C R
- A B T O M A T N U H E Y N U E H N H E F I N B T P A H E B M N K A C T b c a
- Cnyk6a nIDtpmKn KopncTyBauiB
- YtNiI3aCiJ
- TapaHTi
- PpnilaIaIy 3anacHi deTaJI
- KOMnJIeKT dIa OuNueHHe
- BctaHOBtI rymoBi kpaIKn fOpcyHKn IJy uuueHHn iDIOr (uueHHy y BOJorOMy peKmI)
- 3aЯВа пи ВiДповiДнИстБ CBpОЕncbKOrO cnIBTOBapnCTBa
- 3anponoHObaHHaioHaJIbHi HOpMn
Brand : Flex
Model : VCE 35 L AC
Category : Vacuum Cleaner