MSM7800 - Blender BOSCH - Free user manual and instructions
Find the device manual for free MSM7800 BOSCH in PDF.
User questions about MSM7800 BOSCH
0 question about this device. Answer the ones you know or ask your own.
Ask a new question about this device
Download the instructions for your Blender in PDF format for free! Find your manual MSM7800 - BOSCH and take your electronic device back in hand. On this page are published all the documents necessary for the use of your device. MSM7800 by BOSCH.
USER MANUAL MSM7800 BOSCH
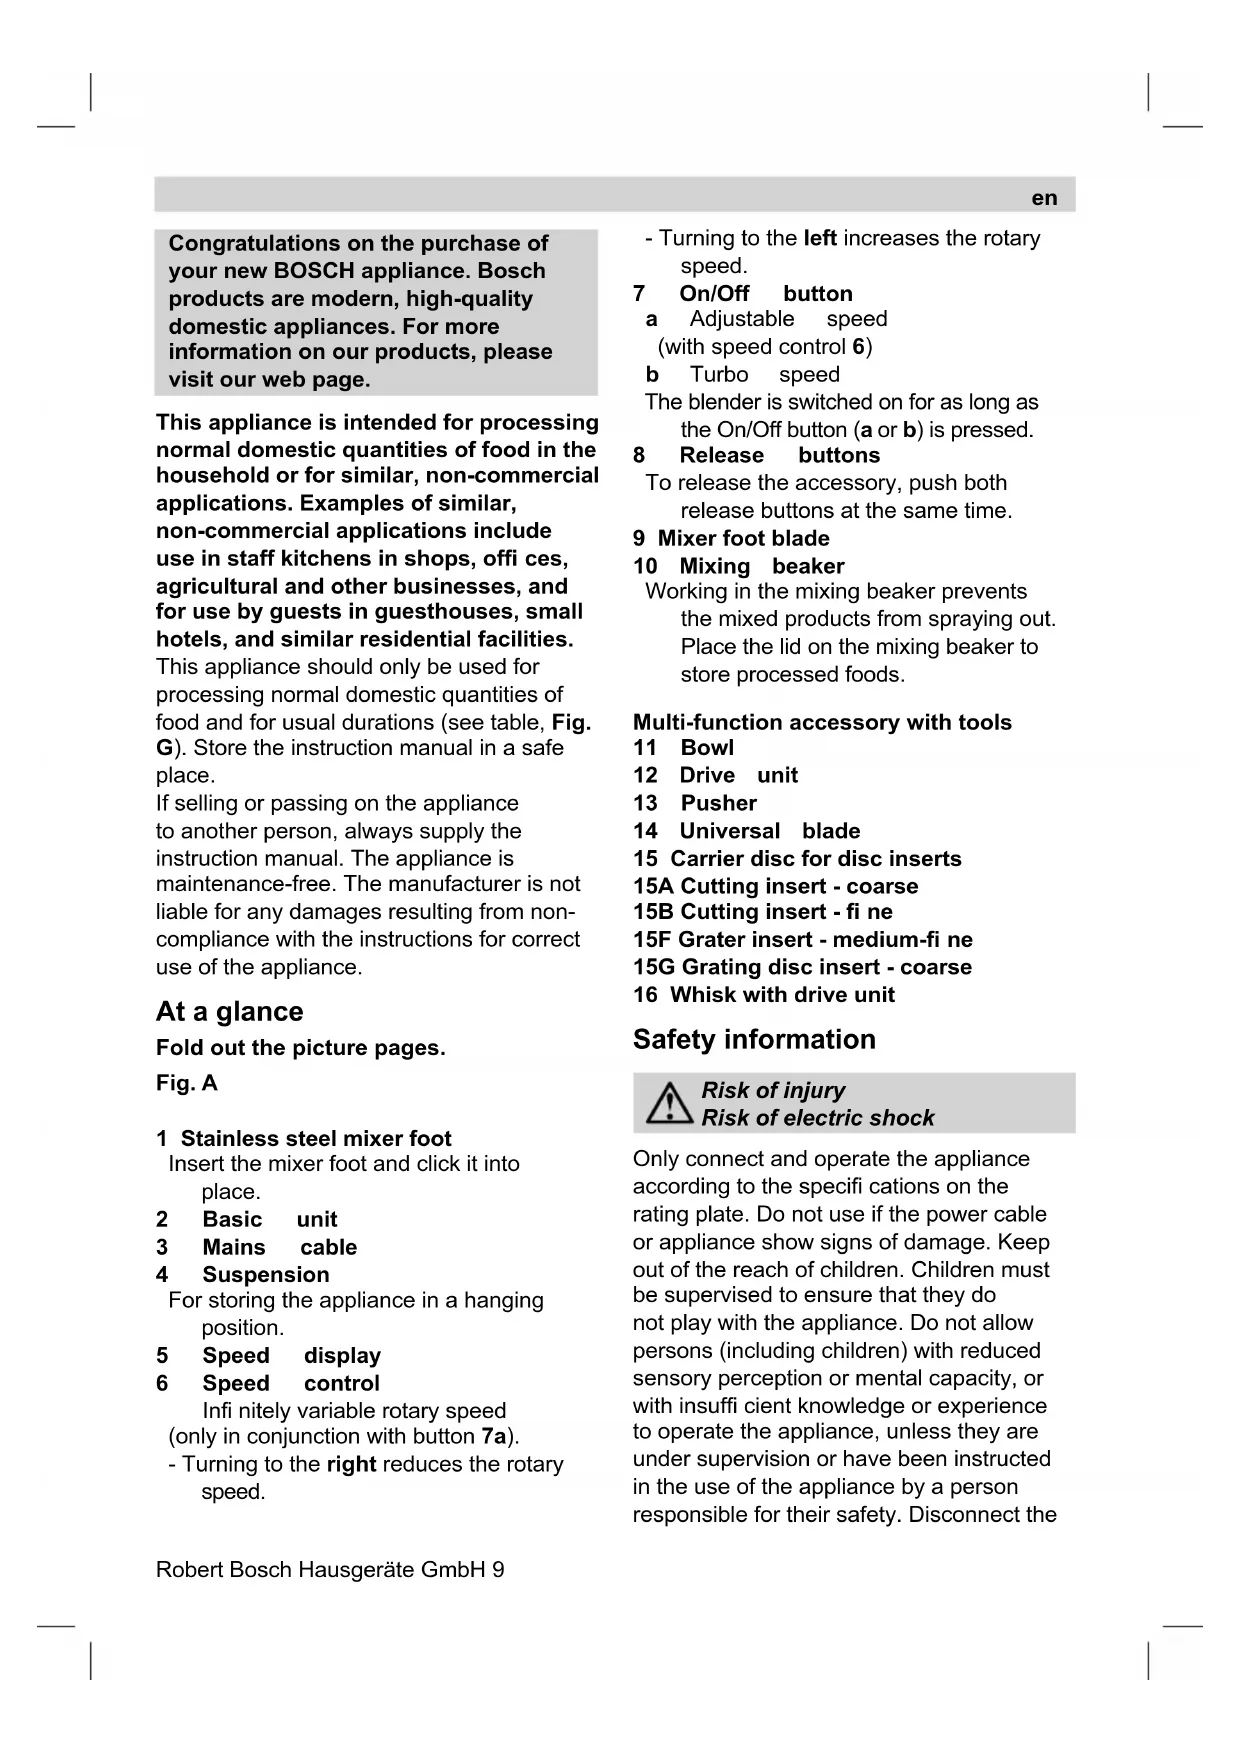
Congratulations on the purchase of your new BOSCH appliance. Bosch products are modern, high-quality domestic appliances. For more information on our products, please visit our web page.
This appliance is intended for processing normal domestic quantities of food in the household or for similar, non-commercial applications. Examples of similar, non-commercial applications include use in staff kitchens in shops, offies, agricultural and other businesses, and for use by guests in guesthouses, small hotels, and similar residential facilities.
This appliance should only be used for processing normal domestic quantities of food and for usual durations (see table, Fig. G). Store the instruction manual in a safe place.
If selling or passing on the appliance to another person, always supply the instruction manual. The appliance is maintenance-free. The manufacturer is not liable for any damages resulting from noncompliance with the instructions for correct use of the appliance.
At a glance
Fold out the picture pages.
Fig. A
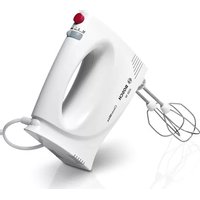
1 Stainless steel mixer foot
Insert the mixer foot and click it into place.
2 Basic unit
3 Mains cable
4 Suspension
For storing the appliance in a hanging position.
5 Speed display
6 Speed control
Infinitely variable rotary speed (only in conjunction with button 7a).
-
Turning to the right reduces the rotary speed.
-
Turning to the left increases the rotary speed.
7 On/Off button
a Adjustable speed (with speed control 6)
b Turbo speed
The blender is switched on for as long as the On/Off button (a or b) is pressed.
8 Release buttons
To release the accessory, push both release buttons at the same time.
9 Mixer foot blade
10 Mixing beaker
Working in the mixing beaker prevents the mixed products from spraying out. Place the lid on the mixing beaker to store processed foods.
Multi-function accessory with tools
11 Bowl
12 Drive unit
13 Pusher
14 Universal blade
15 Carrier disc for disc inserts
15A Cutting insert - coarse
15B Cutting insert - fine
15F Grater insert - medium-fi ne
15G Grating disc insert - coarse
16 Whisk with drive unit
Safety information

Risk of injury Risk of electric shock
Only connect and operate the appliance according to the specifi cations on the rating plate. Do not use if the power cable or appliance show signs of damage. Keep out of the reach of children. Children must be supervised to ensure that they do not play with the appliance. Do not allow persons (including children) with reduced sensory perception or mental capacity, or with insufficient knowledge or experience to operate the appliance, unless they are under supervision or have been instructed in the use of the appliance by a person responsible for their safety. Disconnect the
en
plug before assembly, after use, before cleaning, before leaving the room and in the event of a malfunction. Do not stretch the power cable across sharp edges or hot surfaces. If the power cable of this appliance is damaged, it must be replaced by the manufacturer, their after-sales service or a similarly qualified person in order to prevent hazards. Repairs to the appliance must only be performed by our after-sales service.
Do not use the blender with wet hands and do not operate it while empty. Only operate the blender using original accessories. Take care when processing hot liquids. Liquids may spray out during processing.
Do not immerse the appliance in liquid further than the join between the mixer foot and basic unit, and never hold under running water. Never immerse the drive unit of the multi-function accessory in water and do not put it in the dishwasher. The detachable shaft can be briefly rinsed under running water.
It is recommended that you do not leave the appliance switched on for longer than is required to process the required food.
Never place the mixer foot onto hot surfaces and do not use to mix very hot products.
Allow hot food products to cool to 80^ or below before processing with the mixer foot.
Only switch on the appliance once the tools and accessories are fully fitted.
Only change the tools and accessories when the appliance has come to a complete stop and the mains plug has been unplugged.
The bowl of the multi-function accessory must not be used to heat food in a microwave. The bowl must only be used for its intended purpose.
Explanation of symbols on the appliance and accessories

Caution: Rotating tools.
insert fingers into the flling opening.
Operation
Clean the appliance and accessories thoroughly before using for the first time, see "Cleaning and care".
Blender

Risk of injury due to sharp blade/ rotating drive
Never touch the blade on the mixer foot.
Do not clean the mixer foot blade using bare hands. Always use a brush.
Important:
Only fit and remove the mixer foot when the appliance has come to a complete stop.
For mixing mayonnaise, sauces, mixed drinks, baby food, cooked fruit and vegetables, and for processing ice. For pureeing soups.

The blender is not suitable for preparing mashed potato.
Preparation
Fig.B
- Clean all parts before use.
- Fully unwind the mains cable.
- Insert the mixer foot into the basic unit and click into place.
- Plug in the mains plug.
- Place the food in the mixing beaker or similar high-sided beaker.

The blender works better if the food to be processed contains some liquid.
-
Set the required speed using the speed regulator.
-
Turning to the right reduces the rotary speed.
- Turning to the left increases the rotary speed.
In general, the turbo speed is recommended for processing food. For liquids, hot foodstuffs and for mixing together solids and liquids (e.g. muesli into yoghurt), it is advisable to use the speed control.
The current speed is shown in the speed display when the On/Off button is activated. The more segments that light up, the higher the set speed.
- Hold the blender and beaker firmly.
- Switch on the blender by pressing the required On/Off button.

The blender remains switched on for as long as the On/Off button is pressed.

To prevent the mixing products from spraying out, do not press the On/Off button until the mixer foot is immersed in the food to be mixed. Always switch off the blender before extracting it from the mixed food.
- When you have finished processing the food, release the On/Off button.
- Unplug the mains plug
- Press the release buttons and remove the mixer foot from the basic unit.
Tip for crushing ice:
Place 2-3 ice cubes in the mixing beaker or similar plastic beaker. Hold the blender in the beaker, switch on, and press down onto the ice cubes. Lift and lower the appliance repeatedly onto the ice.
Multi-function accessory with tools

Risk of injury due to sharp blade/ rotating drive
Never insert fingers into the bowl during operation. Always use the pusher (13) to push ingredients into the beaker.
The drive continues to run for a short time after the blender is switched off. Do not change the tool until the drive has come to a complete stop.
When working with the multi-function accessory, the appliance can only be switched on if the drive unit is screwed tightly in place.
Important:
Only fit and remove the basic unit to/ from the drive unit of the multi-function accessory when the appliance has come to a complete stop.
Universal blade (14)
For chopping meat, hard cheese, onions, herbs, garlic, fruit, vegetables, nuts, and almonds. It is important to note the maximum quantities in the table (Fig. G).

Risk of injury due to sharp blade.
Never touch the blade in the bowl. Do not clean the universal blade using bare hands. Always use a brush. Only handle the universal blade by the plastic part.

Caution:
Before chopping meat, ensure that all gristle, bones and tendons have been removed. The multi-function accessory is not suitable for chopping very hard materials (e.g. coffee beans, radishes, nutmeg) or frozen food (e.g. fruit).
Preparation
Fig. C
- Place the bowl on a smooth, clean work surface and press down.
- Insert the blade.
- Place the food in the bowl.
- Place the drive unit on the bowl with the pusher inserted (align arrow a on the drive unit with any catch b on the bowl) and turn in an anti-clockwise direction until it clicks into place.
- Place the basic unit on the drive unit and allow to click into place.
- Plug in the mains plug.
- Hold the basic unit and the bowl firmly and switch on the appliance. In general, the turbo speed is recommended for processing food with the multi-function accessory.
- When you have finished processing, release the On/Off switch.
- Unplug the mains plug
en
Chopping inserts (15A, 15B, 15F, 15G)
Risk of injury due to sharp blade. Pay particular attention when handling the inserts. Note the shape and position of the insert when inserting into the carrier disc. Only handle the carrier disc using the recessed handles provided.
Cutting insert - coarse (A)
Set the basic unit to the required speed (we recommend low) for cutting: gherkins, carrots, and potatoes.
Cutting insert - fine (B)
Set the basic unit to the required speed (we recommend low) for cutting: gherkins, carrots, beetroot, courgettes.
Grater insert - medium-fi ne (F)
Set the basic unit to the required speed (we recommend high) for grating: apples, carrots, cheese, white cabbage.
Grater disc insert - coarse (G)
Set the basic unit to the required speed (we recommend high) to grate ingredients for: dumplings, potato fritters and crunchy salads.
Caution: Do not process hard foods, e.g. parmesan, chocolate, etc. using the cutter or grater disc inserts (A, B, F or G).
Preparation
Fig. D
- Place the bowl on a smooth, clean work surface and press down.
- Place the required insert into the carrier disc. Note the shape and position of the insert (fig. D-1a).
- Place the carrier disc onto the pivot on the base of the bowl.
- Place the drive unit on the bowl with the pusher inserted (align arrow a on the drive unit with any catch b on the bowl) and turn in an anti-clockwise direction until it clicks into place.
Risk of injury due to sharp blade. Never insert fingers into the flling hole during operation. Always use the pusher (13) to push ingredients into the beaker.
- Place the basic unit on the drive unit and allow to click into place.
- Plug in the mains plug.
- Hold the basic unit and the bowl firmly and switch on the appliance. Set the required speed.
i First switch on the appliance, set the speed, and then place the food to be chopped or grated in the bowl.
- Fill the bowl with the food to be chopped or grated.
- Push the food to be chopped or grated applying only light pressure on the pusher.
i Do not exert excess pressure onto the food to be chopped or grated (e.g. cheese) using the pusher (13), otherwise the appliance may switch off due to overload, see "Troubleshooting".
- Remove the pusher and add the ingredients through the filling opening.
- When you have finished processing, release the On/Off switch.
- Unplug the mains plug
Caution: Empty the bowl before it becomes so full that the chopped or grated food reaches the carrier disc.
Whisk
For whipping cream, whisking eggs, and frothing milk (cold milk, max. 8^ , or hot milk, approx. 60^ ).
Caution: Only connect and remove the drive unit to/from the whisk when the appliance has come to a complete stop.
Preparation
Fig. E
- Fill the mixing beaker with food.
- Insert the mixer foot into the basic unit and click into place.
- Push the whisk into the drive unit and click into place.
- Plug in the mains plug.
- Hold the basic unit and mixing beaker firmly and press the On/Off switch.
- Use the speed control to prevent the mixed food from spraying out.
- When you have fi nished processing, release the On/Off switch.
- Unplug the mains plug
When you have fi nished
- Switch off the basic unit and disconnect the mains plug.
- Removing the mixer foot: Press the release buttons and remove the basic unit from the mixer foot.
-
Removing the multi-function accessory and tools:
-
Press the release buttons and remove the basic unit from the drive unit.
- Turn the drive unit clockwise and remove from the bowl.
- If using the universal blade: Only handle and remove the universal blade using the plastic part.
-
If using the carrier disc with cutting insert: Only handle and remove the carrier disc using the recessed handles. Rotate the carrier disc and carefully push out the insert from the underside (fig. F).
-
Removing the whisk:
-
Remove the whisk from the drive unit.
-
Press the release buttons and remove the drive unit from the basic unit.
-
Clean all parts, see "Cleaning and care".
Cleaning and care
Risk of electric shock: Never immerse the basic unit in water and do not clean in the dishwasher. Do not use steam cleaners. This may damage surfaces. Do not use abrasive cleaning agents.
i When processing carrots or red cabbage, for example, the plastic parts may become stained. These stains can be removed using a few drops of cooking oil.
Cleaning the basic unit
- Unplug the mains plug.
- Wipe the basic unit with a damp cloth and rub dry.
- The mixing beaker can be cleaned in the dishwasher.
- Place the mixer foot in the dishwasher in an upright position (mixing foot blade at the top) or clean with a brush under running water.
- Allow the mixer foot to dry in an upright position, to allow water to drain out.
Cleaning the multi-function accessory and tools
Risk of injury due to sharp blade. Only handle the universal blade using the plastic handle. Only handle the carrier disc using the recessed handles provided. Caution:
Never immerse the drive unit of the multifunction accessory in water and do not put it in the dishwasher. The detachable shaft can be briefly rinsed under running water.
- The bowl, pusher, cutting inserts, carrier disc for disc inserts and blade are all dishwasher-proof.
- Wipe the drive unit with a damp cloth or rinse briefly under running water.
en
Cleaning the whisk

Caution:
Never immerse the drive unit in water and do not clean in the dishwasher or under running water.
- The whisk can be washed in the dishwasher, the drive unit should be wiped using a damp cloth.
Troubleshooting
| Fault Remedy | |
| Appliance switches off during operation or the speed display begins to flash. | The overload safety device has been activated. • Switch off the appliance and disconnect the mains plug. • Allow the appliance to cool for approx. 1 hour to deactivate the overload protection. • Switch the appliance back on again. |
If the fault is not resolved, please contact our after-sales service.
Disposal
This appliance has been identified in accordance with the European directive 2002/96/EG on Waste Electrical and Electronic Equipment
- WEEE. The Directive paves the way for effective EU-wide withdrawal and utilization of waste appliances.
Please ask your dealer or inquire at your local authority about current means of disposal.
Guarantee
The guarantee condition for this appliance are as defi ned by our representative in the country in which it is sold. Details regarding these condition can be obtained from the dealer from whom the appliance was purchased.
The bill of sale or receipt must be produced when making any claim under the terms of this guarantee.
fr
Aeendringer forbeholds.
no
Kutteinnsats - grov (A)
Endringer forbeholds.
SV
and electronic equipment - WEEE).
Maxai pyevikns xpnns (14)
TIA TOV TEUAXIOPO KPeAToC, OKAnpoTuPioU, KpEmuOoiW, apwpatIKov QuTov, OkOpDou, PPOUTW, Laxavikov, KapuOoiW, auuydaaw. IPOOE TOTWOHNTIOT EIK.G

KivduvoTpaumatouaTo KOPTepo maayaip!
Mnv πiavETe TOTe to paXaipI eOa
oTo mV KAtapicEe TnTe to
paXaipI yevikns xPnOncs pe yuupva Xepia.
Xpnoipoiote Mi aBoUptoa.
PiavETe to paXaipI yevikns xPnOncs movo
aTto pLaotiko epoc.

Pooooh!
7! Pniv Tov Teuaxio Tou Kpeato
aTouaKpuVEToUc Xovopouc, Ta Kokka KaTouc TeovTEc. To TOnuAeIToupyiKo
Eaptnua Dv Eivai KatalAnlo Yia Tov
Teuaxio pOlu OkAnpWv UAIKWv (KokkoI KaPe, paTavakia, ooxokapda) KaI
KaTeyuEvwV TpoipmuV (PpOuta n aHa TaPómoia).
PnoeToia
EIK.C
ToTIOeTnOte To mIoA TAVw oEmuAeia KAI KAaApn EITIAPVEIA EpyaoiaC KAI TIEOTe TO.
ToTOnoTeInoTe To maxaipI.
- PpoooEoTe Ta Tpofoia.
ToTOnoTeTne To TPOoApTnma eTadoOns TnC KIVNcM E ToTTOeTneEvo To EmuO Ioaywns Tavw OTo MIOA (To BLooc a OTo TPOoApTnma eTadoOns TnC KIVNc Tavw OE MIA OTIOaBnTote MuTb OTo MIOA) KAI OTPeTE To EvAvTi a OTN φopTaWv DEIKTuPoLoyoiu, WoITou va aOgpaiaei.
ToTOnoTeTnTnBaoikn OuaKeun Tavw 0To TPOoApTnMa EtaOoNc Tng KInong KAI aPnoTe Tn va aOaAioEi.
-Σuvδεοτε TO φις Σην πρία του ρεύματος.
KpatnoTe Otaepa Tn Baoikn Ouakeun KAI TO MTOA KAI EVepyoTIOInote Tn Ouakeun. TeviKa n TaXuNTa Turbo Ouviotatai yia Tnv ETTEepyaia Tpoipmuw V e To TIOULeIToupyiko EApntma.
MTea Tnv ETEepyoia apnoTe ELEUepeo TO IAnktpo EVepyoToinong.
Tpaβnξετ to φις από ηην πρία.
H E T E P A O I T W V O K L N P W V T P O- φιμων, ΜT W S T P. X. T N P U E Z A V A, O K O L A T A K T A. μE TO E Ε A P T N A K O T N C, ξ U O I M A T O C ἡ T P I P I M A T O C (A, B, F ἡ G) ὑΕ V E N T I P E N T E T A I.
el
PnoeToia
Eik. D
ToTIOeTnOte To mIoA TAVw oE mia AEA KA KApN ETTIAPVEx IA EpyaOiaC KAI TIEOTE TO.
ToTOeTnOte To ETIuumTo EApntma OTo 6ioKo stnpieNc. PooEeTe Tn MOpn KAI Tn ΘeON Tou EApntmuatoC (Eik. D-1a)!
ToTOnToDIOKOTnpiNc TAVW OTOV TEPoTov TUOeva Tou pioA.
ToTtOeTnTo TPOoAptnma eTadoonns TnKIVnOcE ToTTOeTneVTo Emuo EIOAYWnC (TO BEOa a OTO TPOoApTnma eTadoonns TnKIVnOc navw oia OTIOAONTE MuTN b OTO mIo) KAI OTPeVTTe EvAVTIA Otn FopTa TWV DEIKTuV TOU POAOIou, wOTou va aospaloei.

Kivouoc paumuioou ano ta koepa maiaipia!
Kara tn diapkeia tns etoupyiac nnu aTAAwveTE TOTe Ta xepia oac OTO avoiyma TnnpwoC. Ia TO npwojmo twv uikowxpoiooiei Te navtoTe to EmuoI eOaywyns (13).
ToTOnTeTnBaaikn ouakeun navw 0To TPOoaptnma eTaoosnC nC kivnoNc KAI aPnoTe Tn va aopaloei.
- SuvóéOTe TO φiç OTηv Tpiζa Touρεúματος.
KpatnoTe oTaepa Tn Baoikn ouokean KAI TO mToA KAI EVpyoToinote Tn ouokean. PuOioTe Tnv ETIouuunr taXutnta.

PwTa EvpyoToinote Tn oukeun, puOmuTe Tov apiOTo twv OtpoWV KAI ETA PPOOeTo TO UIAKO YIA KOITn n IuOIO.
Tnpoupe to dikaiwma aalaywv.
Kesme tertibati -ince (B)
-ObepTaHHn npabOpuy 3MeHwye WbNdkicTb.
-ObepTaHHn Nibopyu 36inbWye WBNdkicTb.
7 KnaBiawa yBimKHeHHa
a PerynboBaHa WBNdkicTb (3 peYyTATopOM WBNdkocTi o6epTaHn6)
b Turbo-pekum
BneHep BMnKaetbCra HaTnCKaHHaM KnaBiWi (a a6o b).
8 Knabiwi po36lokyBaHHa
ДяЗЯТТпрILAДЯ OДHоасноНатиСИтБобИВiКлавиI.
9 Hix 6IeHepa
10 CkIaHka
BnKOpncTaHnckn3an06irae po36pn3kyBaHHIO npOdykTy. n36epirAHn roTOBOro npOdykTy B cKnHaHnI HaKnTe II KpnUkoI.
BaratoФункцioHaNbHe npnilaДЯ ta iHcTpymeHTn
11 Yama
12 Kpnshka
13 トobxay
14 Hix-noDi pi6HouBa
15 TpMaay BCTaBnX nckib
15A Nsck IJRA WnHkyBaHHHa BeNkI mMaTKn
15BДиСКДЯшИнКуВаHHЯHaДpi6Hi шMaTKN
15FДиCK-Терka - cepeHЯ
15GДиСК-Терка -Велка
16 BiHvnK 3 peDyKTOpom
Texhika 6e3nekn

He6e3neka npaHeHH He6e3neka ypaKeHH eJekmpuHm cmpymOM
BmkaTe Ta BnKOpNCTOBuTe npnaIa InuIe 3iINO 3 daHIMn Ha nacnpTHii Ta6niCi. He DO3BOJAEbCk KopNCtYBaTncr npnaIaOM npn POUKoDKeHHi MepeKeBOrKa6eJIIO. TpmaTe npnaIy 3axNuEHomy Bi dIteMicui.CnilkyTe 3a TMM, uOb dITn He rpaIncs3 npnaIaOM.
Oco6n(BKJIOUHO3IITbMn)3i3HIXKeHM CnpNHHaTTaM,3OBMeXeHIMnPO3yMOBIMM MOXJIINBOCTaMn a6o Oc6b, LIO He MaHTb DOCTaTHbO 3HaHb Ta IocBiy,He DOnyCKaOTbCra
do KopncTyBaHn npnaDom.BoHm MoKyTb ce
po6ntn IInIe nId Hargydom a6o 3a Bka3iBkamn
oc6n, yKa Hece BiIDNoBidaJbHicTb 3a IXHIO
6e3neky. BtIraIte BnIKy 3 po3ETKn nepei
3bnpaHHaM Ta OunIeHNHa M npnAdy, nCnla
kopncTyBaHHa NHM, a TAKOK BNXOJaYN 3
npimieHHa Y BnIaNkax HecnpaBHOCTe
Bpo6ti npnAhy.CniKyuTe 3a TmM, u66
ka6JIb He TopKaBCra roCTpNx KpaIOK a60
rapaHx NOBepXOHb. 3AmHy NOsKOJKeHOrO
ka6JIIO eJeKTOKINBHeHHa MOKe pnoBOHTn
Piue KOMNaHia-BnPo6Hnk, ii cepBicHa
niTpIMKa a6o KBaIqikOBaHn CneCiAnlICT,
U6bYhNKHyTN He6e3NeuHx CNTyaCiI.
Pemont npnnaMy MoKyb npoBOnTu Nnwe cneuaicnt HaIo cepBicHoI cnyXbN.
He TopkaTecb 3aHypBoHaHoro 6IeHepa BOIOrIMn pykAm Ta He Do3BOJrTe IOMy npauOBaTn dapeMHO. BnkOpNCTOByTe
6IeHep IInse 3 opnirHaBnM npnlaDjam. BybTe oBepeKHi npn o6pO6i rapaoyoi piHNi. PdHa MoKe p036pn3KaTncb.
He 3aHypioTe npiJa y piDnHy Bnue Micu npEHaHHHa HIXKn 6IeHepa Do 6Ioky eNeKTPOBnHyHa Ta He CnpMaOBynte Ha ue Micu BoHNn CTpyM. 3a6OpOHReTbcra 3aHypOBaTu y BOy Ta MInu y NocyDomnHi MaunHi KpNkU YaSi. I MoXHa WbNko OOnlickyBatn NiD 6ixyOIO BOHO.
PekomeHdyTbcra TpImaTn npnaI yBIMKHeHm Iiue nIac o6pO6Kn npOyKTu. He knaIb hIXkU 6IeHepa Ha rapu i nobEpxHi Ta He o6pO6JrTe Heo dYxke rapu i npOyKTu. Ipeed o6pO6KO 6IeHepom ocTydiTb npOyKT Do TempepaTyprn y 80^ afo HxKHe!
BmkaIte npnilad, liuwe kkuo poboyi iHCTpyMeHTa npiladra BCTaHOJI npabNlbHo.
Ipeed 3amHOIO npuaDra Ta iHCTpyMeHTIB BMnKaIte npuaT Ta BITraTe MepeXeBNI uTekep 3 po3ETKn.
3a6bOpHЯεTbcB XoHOMy pa3i BnKOpNCTOByBaTu KpUShky 6araToΦyHKIioHaNbHorO npJaIaIJa IJIa
po3irpiBaHHa Ctpab y MikpOxBnIbOBI neHi a6o 3 6yIb-RAKOIO HsIO MoTOH, He BkA3aHOB BInpo6HNKOM.
POnsHeHHaOcMbONiBHa npnlaTi npnlaDi

ObepeXHo! DeTani, 10 oBeptaOTbcra!
TpOMJIte pyKu y 3aBaHTaKyBaIbHn OTBip.
3aHypobAHn 6IeHep He npn3HaueHn dna npuroTyBaHHa KapToPnHaHO rpope.
PiIroTobKa
Man. B
- Pered BnKOpncTaHHaM npomHte yci detani.
-Повсгюpo3MOTaHTeМержеви Ka6eJIb.
BcTaHOBIb HIXKy 6JEnHepa y 6IOK eNeKTPoDnBuYHa Do UyTHoro 3ByKy fikcaui.
uk
- PnueHaTe MepeXeBn TeKeep Do pO3eTKn.
- POKlaDiTb npOdyKTu y cKJHky a6o B 6yDb-aykn iHnBnBCOKn nocuD.

3aHpyOBaHn 6JIeHep npaIOBAtIME KpaIe, KaIcO Do CKNaIy noDiPi6HbOBAHnx npOdyKTIB BXoNTMe piHa.
BctaHOBiTb 6aKaHy WbUdkicTb o6epTaHHpeyJrTopom.
- O6eptaHnna npaBopyy 3MeHwye WbNdkicTb.
- OseptaHnna Nibopyu 36inbIyue WBNdkicTb.
B zuIOMy peKOMeHdyEcBcR
BnKOpNCTOByBaTn Typ6o-peXm dIra
obpo6Kn HepiKnx npOdykTIB. Pn
obpo6ci piDHH, rapaynx npOdykTIB Ta
np niDiMiuYBaHNi (HaNP., MIOcNIB Do
noIpyTy) peKOMeHdyEMO KOpNCTyBaTncs
peryIaTOPom WbUdkocTi oBeptAHnR.
Pn HaTnCKaHHi KnaBiWi yBIMKHeHHa
BCTaHOBJIeHa WbUdkicTb BKa3yEcTbcR
Ha iHdNKaTopi. Ym 6iNbWe cerMeHTIB
ROPITb, TmM BUsa BCTaHOBJIeHa
WBUdkicTb.
MiUHO TpIMaTe 6JeHdep Ta cKJIaHKy.
- BmkaTe 6JeHep HaTnCKaHHaM Ha KnaBiSy 6axaHoro peKIMy.

BneHep 6yde yBimKHeHO, nOKn Bn TpmaTe KnaBiSy yBIMKHeHHaTNCHeHO.

Uo6 yHnKHyTu po36pn3kyBaHH npOyKTy,HaTnCKaIe KNaBiuy YbIMKHeHHЯ NiIe ToDi, KOJI N HIXKa npJauy 3aHypeHa y npOyKT. BmNkaTe 6IeHep, nepu Hix BnHraT NoRo HIXKy 3 npOyKTy.
- Picna o6po6kn npOdykTy BiDnyctiB knabiIy yBIMKHeHHa.
BntarHitb MepexeBn uTekep 3 po3etkn.
HaTnchItb KnaBiiWi po36IOKyBaHHra Ta BiD'EDHaIte HIXKy 6JIeHepa BiD 6IOKy eIeKtpoDbNryHa.
Iopada dna noDpi6HeHHn IbOy:
IoknadiTycknHky 6neHepa a6oB 6yDb-ky iHwy nactNKOBy cKJnHKy 2-3 Ky6nKnNbOy.3aHypTe 6neHep y cKJnHKy, yBIMKHiTb Ioro Ta npNTCHiTb Do ky6nKiB NbOy.KjIbKa pa3IB NiD himiB npnJaTa 3HOBy npNTCHiTb Ioro Do NbOy.
BaratoФункцioHaJIbHe npIaДЯ Ta IInCTpyMeHTN

He6e3neKa npaHeHHa 2ocmpmu Hoxamu ma o6epmoBum pomopom!
Ppomraom ekcnnyamaui He 3aHypioume pyku y aawy. Ipa npocyaanna inapeidichmib 3a8xdu Kopucmyumecb wmoexaem (13).
Iicna bumkHeHHa deuayn npauoe ue Kopomku yac 3a ihepuieo. 3amHoume poboyi hcmpymemu nuwe nicna noBHO2O 3yUnHeHH npuna dy.
Ppu pobomi 3 baamofyHKuioHaBHum npunaedam npunaad moxna BMukamu nuwe nicra npabunbHO2O bcmaHOeHHra ma fikcyaHnKpuuku.
BaxJueo!
3Himamu ma ecmahoeblougam npunaodmoxHa nuey eumKHeHomy cmaHi.
Hix-noDipi6HOBauch (14)
Для подбннma, Тьердх сирib, cn6yni, trab, yachnky, oboiv, Фpyктib, ropixib ta mrdanIO. Oob'ra3koBO dOtpmmyTeCb pekomehdauii zuodo MaKcmaJIbHOI KIIbKOCTI npOdyKTIB, HabedeHoi B TabniCi (man.G).

He6e3neKa npaHeHHra 2ocmpum HOXEM!
3abopohembocmopkamuc pykamu Hoxa 8 awi. He ouuuyume hixnodpi6HOBau pykamu, Kopucmyumec uimkoio.
Bepimb hix-nodpi6HOBaY nuwe 3a uOz0 nnacmuKoBy yacmuHy.
Yeasa! Ipeod npdiheHHm M'ca budajme 3 Hb02o Kicmku, xpaui ma cyxoxunna. BaaamocpyHKioHnbe npunaed He npudamhe dna npdiheHHa dyke mepdux npodykmie (kaobux 3epeh, pebku, MyckamHux zoipixie) ma 3amopokehux npodykmie (ppykmie moo).
PiIroTobka
Man. C
BctaHOBiTb yaUy Ha rJaKu Ta YnCTy po6oy NOBepxHIO Ta TPOXn npNTnCHiTb ii.
BcTaHOBiHIX.
- POKnaɪtB yawy npódykTN.
BCTaHOBIb Ha qaWy KpUkky 3i ITOBXaUeM (uO6 cTpInka a cyMicTnIacb 3 6yDb-RAKIM BnCTynom b Ha qaWi) Ta NOBepHiTb II npOTn rOdINHHNKOBoi cTpInKn Do 3ByKy φikcaii.
BctaHOBIb eNEKtpoDBnHyn Ha KpnuKy do CyTHoro 3Byky pfikcauii.
-Приедни Te Мержеви StTekepdo po3eTkn.
MiUHO yTpmyuOuYaUy Ta eJeKTPoDBnHy, yBIMKHiTb npUJaB. B ciInomy peKOMeHdyEcbra NKOpNCTOBByBaTH Typ6o-peXm Dnna 06p6Kn 6araTofoHKioHaNbHM npUJaDnM HepiIX npOdyKTIB.
- Picna o6p06kn BiDnyctiB Knabiy yBIMKHeHHa.
BntarHItb MepeKeBn uTekep 3 po3eTKN.
ДиСКИ ДЯ ШИнКуВаHHЯ,ДиСКИ-ТерКИ (15A, 15B, 15F, 15G)
He6e3neKa npaHeHHra oocpum HOXeM!
Bydme ocobnuo obepexnipu pobomi 3ecmaehmu duckamu! Cniidkyume 3a npabunbHO ycmahOBKOIO duckie ympumau. Bepimb mpumau nuwe 3a npuzhauehi dny ubozo 3a2nubneHH.
ДиСК ДпЯ StHKyBaHHЯ Ha BeNkI ShMaTkn (A)
BctaHOBiTb Ha eJekTpOdBnHyHi 6axaHy (Mn peKOMeHdyEmo Hn3bky) WbNdkicTb o6epTaHHI dIy IINHKyBaHHr OrypuiB, MOpKBn, KapToPi.
ДиСК ДЯ SHHkyBaHHHaДpi6Hi WMaTKn (B)
BctaHOBiTb Ha eJekTpoDbuRHyi 6aXaHy (Mn peKOMeHdyEmo Hn3bKy) WbNdkicTb oBeptaHHI dIy IINHKyBaHHI orypciB, MOpKBn, bpykY, uykHi.
ДиCK-Терka-cepeня(F)
BctaHOBiTb Ha eJekTpOdBnuryHi 6aKaHy (Mn peKOMeHnyEmo BnCOy) WBNdkictb oBeptAHNJa HATnpaHHra6lyk, MOpKBn, cnpy, kanyCTn.
ДиCK-Терka-Beлиka(G)
BctaHOBiTb Ha eIeKToPDBuRHyI 6aKaHy (Mn peKOMeHdUeMo BnCOky) WbNdkiCTb oBeptAHnI dI npiroTyBaHHraIyUoK, KapTOJIHnX OlaAdKiB Ta CnpNX OBOueBX caNatB.
Yb2a! He do38oJembcn o6pobnmu mepdi npodykmu,nap.,napMe3an, wokonad moo, duckamu-mepkamu ma duckamu dna uunkybaHHA (A,B,F a6o G).
IirodroTobka
Man. D
BctaHOBiTb yauy Ha rnaKy Ta YnCTy po6oy noBepxHIO Ta TPOXn npntncHITb II.
BCTaHOBIb 6axaHn DnCK y TpIMaU. CnIdKyIte 3a npaBnIbHM BCTaHOBJeHHM BCTaBHOrO DnCKy (MaI. D-1a)!
BcTaHOBIb TpIMaH a CtpNKeHb Ha dHi yaJI.
BCTaHOBIb KPNUky 3i UTOBxayem (uO6 CTpiIka a cyMIcTIaNacb 3 6yDb-IAKIM BnCTynom b Ha yAa) Ta NOBepHiTb II npOTN rOINHHIKOBOI CTpiINkN Do 3ByKy φikcaui.
uk

He6e3neka npaehnra 2ocmpum HOXEM!
Ppomraom ekcnnyamaui He 3aHypuoyme pyku y 3aBaHmaKyBaIbHu omeip.
Ipa npocybaHH iHaPeDiHmie 3a6xdu Kopucmyu mecb umoexaem (13).
BcTaHOBIb eNEKTpOdBnHyH Ka KpnUky Do UyTHoro 3ByKy fiKcauii.
- PnpEHaTe MepExeBn wTeKepeo3eTKn.
MiUHO yTpmyuOu n uauy Ta eIeKtpoDBnHy, yBIMKnHt b npuaD. BCTaHOItb 6axaHv WbNkictb.

Cnouatky yBIMKHiTb npnla, BCTaHOBITb WBNkICTb OBeptaanHna, a IInwe NOTIM KnaDiTb npOdyKT dnn NoDpi6HeHH.
- POKnaɪtB npOdyKT dny shHkyBaHHa6o HATnOaHH.
- JERKIM HaTNCHEHHM WTOBXaHa npocvBaIte npOdyKT dna nOdp6HeHH.

He npiknaaTe BENKx 3ycnIb,
IO6 npOTncHyT npOdyKT (HApP.
pN HApi3aHHi Cnpy) ITOBxAueM
(13), iHaKne npnilad MoKe
BIMKHyTnca Ypee3 NepeBaHTaXeHHa,
INB. PO3dIn "Uo po6ntu y BnnaDky
HeCnpabHOcti".
BnmiTb wTOBXaTu daaTe HAcTyHIn iHRpeDiEHTNupe3 3aBaHTaXyBaJIbHNI JIOK.
- Picna 60p6kn BiDnyctitb knabiy VBIMKHeHH.
BHTaHITb MepeXeBn uTekep 3 pO3ETK.

yeaae!
Cnycmowyme qawy, nepw hix 60ha 3anoeHumbcra do mpumaya duckie dna wunkybaHHma duckie-mepok.
Bihyuk
Дя 36ивань ВершкIB,Ячнix 6iNKIB Ta MOJOUHOI nIH (XOJIODHe MOnOKo, MaKc. 8^ ,a6o rapaue moJOKo,pn6n.60°C).

yeaa!
BcmaHOeIoume ma 3Himaume biuK 3 peykmopom, nuwe konu 6neHep bi'edhaHu bio eNekmpomepexi.
PiIroTobKa
Man. E
- POKlaDiTb npOdyKTu y cKJHky 6JIeHepa.
BcTaHOBIb peyKTop y 6nok eNEKtpoDburyHa do CyTHoro 3Byky fikcaui.
BcTaHOBIb BiHnK y peDyKTop Do 3ByKy fiikcaui. - PpncdHaHTe MepexeBn UTeKepe Do PO3eTK.
MiUHO yTpIMyOu cKnIHy Ta eNEKTOBnHy,HaTNCHTb KnaBiuy VBIMKHeHHa.
KopncTyuTecpeyIaTopom WbNdkocTi o6epTaHH, uo6 yHnKHyTu PO36pN3KvBaHH npOdykTV. - Picna o6po6kn BiDnyctitb knabiuy yBIMKHeHHa.
BntraHtB mepeXeBn wTekep 3 po3etkn.
3akihueHHpo60Tu
BumkhItb eNeKtpoDbuHyh Ta BtTnHiMepeKeBn uTEKeD 3 PO3ETKn.
3HHTT HIXK6JeHepa:HaTNCiTB KnaBisi po36nokyBaHHra Ta BID'EdHaIte HIXKy 6JeHepa BiD 6NOKy eJektpoDBuHyHa.
3HATTA 6araToOpyHKcioHaIbHoro npnlaDra Ta iHCTpyMeHTiB:
- HatnchItb knaBisi po36nokyBaHHa Ta 3HIMtB eJekTPODvRHyN 3 KpNIkN.
IIOBepHITb KpUShky B HapPmKy IODHHNKOBOI CTpiJIK Ta 3HIMiTb II 3 Yauu - Pnpo60ti 3 HOXEMnOpi6HIOBaem: Bi3bMitb HIXNpOpi6HIOBauch 3a NOro NNactKOBuy aactHy Ta BnIMtB NOro 3 Yaaji.
- Pnpo60ti 3 TpImaem BCTabHnx DnCKIB nIe IODpi6HeHHa: Bi3bMITb TpIma3a npN3HaueHi dIy cboro 3aRn6neHHra Ta BmMTb 3 YaJI.
uk
IpeBepHItb TpMaT Ta oBepeXHo BHTNCiTb BCTaBHn DnCK 3HN3y (MaI. F).
3HATTTBihUka:
3HimiTb BiHnK 3peDyKTopa.
- Hatnchitb knaBiWi po36NokyBaHHa Ta BiD'EnHaIte peyKTop BiD 6NoKy eNeKToBnryHa.
- Nowt itb yci de tani, nB. po3iN "OunuHn Ta dOrJyD".
OuHHeHHa Ta DOrJa
He6e3neka ypaXeHHa eIekmpu4HUM cmpymOM!
3abopohembca 3ahypuoamuy body ma Mumu y nocydomuui Mauuhi 6nok eIekmpodbuayha. 3abopohemcbc bukopucmooyamnpooe ouuueHH! Poepxhi moxymb nowkodumuc. 3abopohemcbc bukopucmooyamu abpaunbi ouuuybaNbHi 3acobu.

Pn o6p6ci, HAp., MOpKBu Ta 6pyKy, nlaCTNKOBi DeTani MoKytb Nopap6yBaTncs, IX MOKHa OunchTu KInbKOMa KpanlMa PocnHHOJ onii.
OuHcHn H6Ioky eKeTpoDvBnryHa
BntaHitb MepexeBn uTekep 3 po3etkn!
- PpOtpiB 6IOK eNEKtpoDnBuRyHa BOIOrnM pyuHnKOM Ta BnTpib Hacyxo.
- Ckny6IeHepa MoXHa NOMTN B NOcydOmHi MaunHi.
Hixky 6IeHepa MInTe B MaunHi y BeptnKaIbHOMy NIOJKeHHi (HOXEM DOROp) a6O YNCTITb UITKOIO nID 6IXyOBOdoIO.
Bucyitb hixky 6neHepa y BeptnkaIbHomy nOIOxehHi, 3 Hei BNTekna BOda.
OuHHeHHaRaToOpyHKcioHaJIbHoro npIaIra Ta iHCTpyMeHTiB

He6e3neKa npaHeHHra 2ocmpum Hoxkem!
Bepimb hix-nodpi6hou8a nuwe 3a uo2o nnacmu8y pykormky. Bepimb mpumau nuwe 3a npuzhauehi dny uo2o 3aunu6nennr.
yeaa!
3a6bopohembcra 3aHypuoamu y body ma Mmu y nocydomuui MuuHi Kpuuky awi. I MoxHa uBko ononickyeamu NiD 6ixkyoio bdoio.
- UaSha, WTOBxAu, DnCKn DnJyBaHHa, TpMaJ DnJ DaNCKiBaTa HOxIMoKHa MNTb NocydomnHi MaunHi.
Kpnuky nIwse npotpiB BONORM pyuHnKOM a6o WbNdkO onoNoCHiTb NiD 6jkyo BOHO.
OuHHeHH BInHnKa

y8aa!
3a6opohmcbra 3ahypobamu y body pedykmop, Mumu u0zo nid bixkyo10 bodo afo y nocydoumuHi MuunHi.
- BiHcNK MoXHa MHTu B NocyDOMnHiMaunHi, peDyKTop Tpe6a Niue npOTnpaTn BOJOrm puSHNkOM.
Ioo po6nTu BnnaKu HecnpaBHOcti
HecnpabHictb YdyHeHHa
Пид час роботи ВИМИКаЕТбСЯ прILAД a6o почиаE MЛГOTiTи iHДИКaTOp шВИДКОCTI.
AknboBaHn 3axnCT Bi npeBaHTaxeHH.
BumkhItb npnilad Ta BmMitb MepexeBn 1Tekep 3 po3eTKn.
-ДаHTn npuJaDy OXOJOnHyTN npOTaROM np6JI. 1roJHH,io6 DeakTbByBaTn 3axNCT BiD nepeBaHTaXeHHa.
3HOBy yBIMKHiTb npnna.
Kuo HecnpaBnicty CyHyTN He BdaIoc, 3BepHITbc DO cepBicHO CIyX6N.
uk
PekomeHdaui 3 ytni3aui
Дани пилад позанецни вidiноьдюci i3 Директую CBponeicbkoRo CoO3y 2002/96/EG npo ytniiaцio eJeKtpnHoro ta
eNeKtpoHOrO yCTaTkyBaHHn (waste electrical and electronic equipment - WEEE).InpeKtNbA Bn3Haaye npraDOK 36opy Ta yTuPi3aui CTapnx npuJaIB Ha Tepntopii ycix KpaIH EC. 3a iHOpmaueIO npo akTyaNbHi Iwnx yTuPi3aui 3BepHiTbc8 dyb JaCka Do CBoro Cneuii3OBaHO TOpROUa a6o do aDMHiCTpaui CBOei rPOMaIN.
TapaHTia
YMOBn rapaHTiI DnI yIbOro npInaHy Bn3HaayoTbcra HaaIM npedCTabHnikOM y KpaIH, De npInaD 6yB npOaHni. PoDPobuCi uXy MOB MoXHa OTPMaTH BiT TOPROBc, y JKOro npInaD 6yB KyPHeH. BucyBaOCh 6yDb-ky BMORY y BiNObiIDHOcti i3 daHOIO rapaHTicIO, cIid NODaBATN Yek Ha npOaHNI TOBap a60 KBNTaHciIO.
BHeceHHa 3mH He BnKJIIOHaeTbcra.
Iop3dpabBnaem Bac c nokynkoHOBOro np6opa qnpmbi BOSCH.Bbl npno6peNi COBpeMeHHyIO, KaueCTBeHHyIO DOMaunHOIO TexHNky.CBeDeHnO dpyrnx Haunx N3dennxBbI HauTe Ha Haem INHTepHeTcaHTe.
DaHbI np6Op npedHa3NaueH dJa 6pa60TKn 6b1uHoro dJa DomaUHeRo Xo3raCTBa KOJInuCeTBA npOdyKTOB nJIn dJa aHaONuHoro HEnpOMbIuJeHHoro NcNoJIb3OBaHna.
IcnoJb3yIte npnbop TOnbKO dIa
6pa6oTKn He6OJIbWOrO KOJIueCTBa
IpoDyKTOB B TeUeHne KOpOTKOrO
BpeMeHn (cm. Ta6JIuCy, Pnc. G). XpaHnte
pyKOBODCTBO NO 3KcnIyatauN.
Pn nepeaue MUKcepa HObOMy BnaJeIbUy He 3a6yDbTe nepeaTaTb TaKke pyKOBOcTBO.
Pnp6op He Tpe6yeT TexHueckoro
06cnykBAHn. Pn HecO6JIHOdeHn
yKa3aHn NO npAunbHOMy IcNoIb3OBaHnIO
Pnp6opa n3rOToBnteH he HecET
OTBeTCTBeHHOCtB 3a erO NOBpeXdEHN.
Kpatkoe onncahne
Pa3BepHnTe cTpaHnCbI c pncyHkAmn.
Pnc.A
1 Hoxka 6IeHepa I3 HepKaBeIOsei CTaJIu
BctabJIaIte HOxKy 6JIeHepa Do UeJUka.
2 Blok 3JIeKtpoDbuRaTeJa
3 CeTeBoi Ka6eJb
4 KpIok IJnNoDBeWNBaHnA
IpeD BkHoueHnem npbopa y6eHTecb
B TOM, YTO pa6OuH nHCTpyMeHTbl N
pInHaJdJIeXHOCTN yCTaHOBJIeHbI npaBnJbHO.
IpeD 3aMeHOJ npHaJdJIeXHOCTe
BbIKIOuaTe np6Op I BbIHMaIte BUNKy I3
p03ETKn.
3aPpeaaeTcNcNoB3OBaTb YaWy Dnpa30rpeBa 6nOd B MmKpOBoJHOBoN neuN IIO6bIX dpYrnx ceJeN, KpOme yKa3aHHbIXn3ROTOBtTeMe.
IopcHnK CmB0Jam Ha np6ope n npHaJIeXHOCTx

OcToPoxHo! BpaUoUneCnIeTAn! He onyckaTe pyKn B3aRpy3OuHoe OTBepCTne.
Ponb30BaHne np6opom
Ipepe npBbIM nCIOJb3OBaHnem TuaTeJIbHO ouHCTnte np6op nPpHaadJeXHoCTn, CM. rI. «OuHcTka uYxOd».
NorpyxHOn 6JeHnDep
Onachocmbmpaemupoea ocmpbIMU HOxamu/ epauzaouzumcra pomopom
He mpozaume HOX E HOXKe 6neHepa pykamu.
He yucmume HOx pykamu. Nolb3yumecb uemkou.
Baxho!
YcmaHaBuaume u cHumaime HOKky 6neHepa moIbKO npu bIKIOueHHOM npu6ope.
Длгпри�OTOBнЯ MaNoHe3a, coycob, KOKTeHNei, DeTCKnx Cmecen, nOpe n3 BapEhIX OBOUeN nФpyKTOB NДЯ KOLKN nbda. Длгпри�OTOBня cynOB-nOpe.

Бленьер He npedHa3Hauen ДяприroTOBJIeHЯ KapTopeJIbHoro nIOpe.
NoDrToBka
Pnc.B
- Pered nCnoJIb3OBAHnEM BbIMOnTe BCE DeTaJI.
-ПОЛНOCtью pa3MOTaIte ceTeBOJ Ka6eJIb. - YctaHOBInTe HOXky 6JEnHepa B 6JOK 3JIeKToPbBNrAteTJe DO UeJIyKa.
BcTaBbTe BnIKy Bpo3eTKy. - Poioknte npOdykTbI B cTaKaH nnDpyrHyIO BBICOKyIO EMKoCTb.

BleHep pa6oTaet lyuwe,ecn B COCTaB N3MeIbYaeMbIX N CMeUINBaEmbIX PPOyKTOB BXOINT XNIDKOCTb.
- YCTaHOBNTe HxKHyIO CKOPOCTb BpaueHn.
BpaueHne BnpaBO yMeHbwaet CKOpOCTb.
BpaueHne BNeBO yBEnuHBaet CKOpOCTb.
Длг obpa6OTKN HeKnDkNx npOdyKTOB peKOMeHnyETcN cNoJIb30BaTb Tpy6OpexHM.Длг JnIkoCTeR, TropaHx npOdyKTOB nДлг NOdMeuBAHnHaPnPmEp, MIOcNe K NOrypTy MbIpeKOMeHnyem CAMOCToTeNbHO HAcTpAnBaTb CKOpOCTb BpaSeHnIpn Haxatn KNOpKn BkIoUeHnHaCTpoEHNa CkOpOCTb BpaSeHnIoka3bIbaetcra Ha INdIkatope. Yem 6OJIbWe cerMeHTOB rOpNT, TeM BblweCKOpOCTb.
Kpenko depknte 6neHep n ctaKaH.
BknHouHTe 6IeHep, HaxaB Ha KhoNky HxKHOrO peKIMa.

Hn3kyu CKOpocTb)ДЛЯ SHINKOBaHnOrypUOB, MOPKOBu, CBeKbl, Ka6auchOBuYKKInH.
Waste Electrical and Electronic Equipment)
plzjblzydzjdtalglz.(-WEEE
gaaas
(1) 1,2,3,4 , 1,2,3,4
sill jaiiaiall jll sl aaiil o jg 1 gall
a 1
Jalll Jg jn 1000 1111 1111 1111 1111 1111
山
aillio jilao aizoo g jll ae gao oed
J clay 8 y a d jai l gbi J L
14
clll wgjjl iogaa jy
Jlss Jlls
12 < 2 < 32
J
Ld 111111111111111111111111111111111111111111111111111111111
J 1
a 2
bod alls
y
jy jia jia jia jia jia jia jia jia jia jia
.
J 1 J 1 1 1 1 1 1 1 1 1 1 1 1 1 1 1 1 1 1 1 1 1 1 1 1 1 1 1 1 1 1 1 1
A 1
wJg aeg y Jy jy 10000000000000000000000000000000000000000000000000000
j421 150!
yliy 1
34 ÷ 21 = 21( 21)
D
aiaai iiai jiai jiai jiai jiai jiai jiai jiai jiai jiai jiai jiai jiai jiai jiai jiai jiai jiai jiai jiai jiai jiai jiai jiai jiai jiai jiai jiai jiai jiai jiai jiai jiai jiai j
Jolalall jaiill gajll Jaiill jyj
!(D-1a)
. clo 11
1
aLj 15g jy 12 12 12 12 12 12 12 12
(14) pax 1
aill jll g llg 111 111 111 111 111 111 111 111 111 111 111 111 111 111 1
- 1,2,3,4 与 S = 1/2 .
y 1
y
y
y
14
yIi11 100g jll g b0 7
ii11111111111111111111111111111111111111111 2
34 ÷ 21 = 21除1
C
a b i g uol Jac zb w o c l g 1 a l c abzilg . jll yj p . q j j j j j
g a 15
a gaa a c (a p) a 15
a 15
a 15
a 15
a 15
a 15
a 15
a 15
a 15
a 15
a 15
a 15
a 15
a 15
JcLg 8 Jd jaii Ioo Jgbol Xie jglj
121 121 121 121
1
ailll lglll g 1g, aiee iLw blyi
b2 = 12a
j 1
Lalai aiiia auiuSill iinlall
jglg 21 g 21 g aasll lal
- gao zai jie 51 jiu liang jiao
aill lal 11 j
y
A
AE United Arab Emirates,
BSH Home Appliances FZE
Round About 13
Plot Nr MO-0532A
17312 Jebel Ali Free Zone - Dubai
Tel.: 048814401
Fax: 04 881 4805
HEATHERTON, Victoria 3202
Tel.: 1300 368 339
Fax: 1300 306 818
valid only in AUS
mailto:bshau-as@bshg.com
BA Bosna i Hercegovina, Bosnia-Herzegovina
"HIGH" d.o.o.
Odobasina 57
71000 Sarajewo
Info-Line: 061 100 905
Fax: 033213513
mailto:delicnanda@hotmail.com
BE Belgique, Belgie, Belgium
BSH Home Appliances S.A.
Bosch Hvidevareservice
Telegrafvej 4
2750 Ballerup
Tel.: 44898985
Fax:44898986
mailto:BSH-Service.dk@
BSHG.com
EE Eesti, Estonia
SIMSON OÜ
RAUA 55
10152 Tallinn
Tel.: 0627 8730
Fax: 0627 8733
mailto:teenindus@simson.ee
ES España, Spain
BSH Electrodomésticos
Espana S.A.
To arrange an engineer visit or to order replacement spare parts or accessories
Tel.: 0844 892 8979
GR Greece, EAA
BSH Ikiakes Siskeves A.B.E.
Central Branch Services
17 km E.O. Athinon-Lamias &
Potamou 20
145 64 Kifisia
Greece - Athens
Tel.: 2104 277 701
Fax: 2104 277 669
North-Greece - Thessaloniki
Tel.: 2310 497 200
Fax: 2310 497 220
South-Greece - Heraklion/Kreta
Tel.: 2810 325 403
Fax: 2810 324 585
Central-Greece - Patras
Tel.: 2610 330 478
Fax: 2610 331 832
mailto:cs_gr_helpdesk@bshg.com
HK Hong Kong, 香港
BSH Home Appliances Limited
Unit 1 & 2, 3rd Floor
North Block, Skyway House
3 Sham Mong Road
Tai Kok Tsui, Kowloon
Hong Kong
Tel.: 2565 6151
Fax: 2565 6252
mailto:bshhkg.service@bshg.com
HR Hrvatska, Croatia
Andabaka d.o.o.
Gunduliceva 10
21000 Split
Info-Line: 021 481 403
Info-Fax: 021 481 402
mailto:servis@andabaka.hr
HU Magyarorszag, Hungary
IE Republic of Ireland
BSH Home Appliances Ltd.
Unit F4, Ballymount Drive
Ballymount Industrial Estate
Walkinstown
Dublin 12
Service Requests.
Spares and Accessories
Tel.: 01450 2655
Fax: 01450 2520
IL Israel,
C/S/B Home Appliance Ltd.
Uiel Building
2, Hamelacha St.
Industrial Park North
71293 Lod
Tel.: 089777222
Fax: 08 9777 245
mailto:csb-serv@zahav.net.il
IS Iceland
Smith & Norland hf.
Noatuni 4
105 Reykjavik
Tel.: 0520 3000
Fax: 0520 3011
www.sminor.is
IT Italia, Italy
LT Lietuva, Lithuania
Senuku prekybos centras UAB
Jonavos g. 62
44192 Kaunas
Tel.: 0372 12146
Fax: 0372 12165
www.senukai.lt
LU Luxembourg
MK Macedonia, MaKeDoHnJa
GORENEC
Jane Sandanski 69 lok.3
Skopje 1000
Tel.: 02 2454 600
Mobil: 070/697 463
mailto:gorenec@yahoo.com
MT Malta
Oxford House Ltd.
Notabile Road
Mriehel BKR 14
Tel.: 021 442 334
Fax: 021 488 656
www.oxfordhouse.com.mt
NL Nederland, Netherlands
Unit F 2, 4 Orbit Drive
Mairangi BAY
Auckland 0632
Tel.: 094770492
Fax: 094772647
mailto:bshnz-cs@bshg.com
PL Polska, Poland
Union Industrial Building
Block A, #01-03
577177 Singapore
Tel: 6751 5000
Fax: 6751 5005
mailto:bshsgp.service@bshg.com
SI Slovenija, Slovenia
BSH Hišni aparati d.o.o.
Litostrojska 48
1000 Ljubljana
Tel.: 015830887
Fax: 015830889
Chung Hsiao E. Road, Sec. 1
Taipei ROC 100
Tel.: 02 5556 2556
Fax: 02 5556 1235
www.boschappliance.com.tw
UA Ukraine, YkpaHa
TOB "BCX IobyToBa Texhika"
TeN.: 044 4902095
XK Kosovo
NTP GAMA
Rruga Mag Prishtine-Ferizaj
70000 Ferizaj
Tel.: 038 502 448
Fax: 029 021 434
mailto:gama_mb@yahoo.com
XS Srbija, Serbia
15th Road Randjespark
Private Bag X36, Randjespark
1685 Midrand-Johannesburg
Tel.: 086 002 6724
Fax:0866171780
mailto:applianceserviceza@
bshg.com
bosch-infoteam@bshg.com