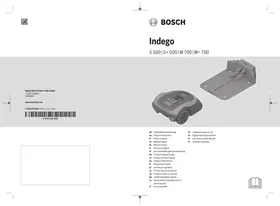
INDEGO S 500 | S+ 500 | M 700 | M+ 700 - Lawn mower BOSCH - Free user manual and instructions
Find the device manual for free INDEGO S 500 | S+ 500 | M 700 | M+ 700 BOSCH in PDF.

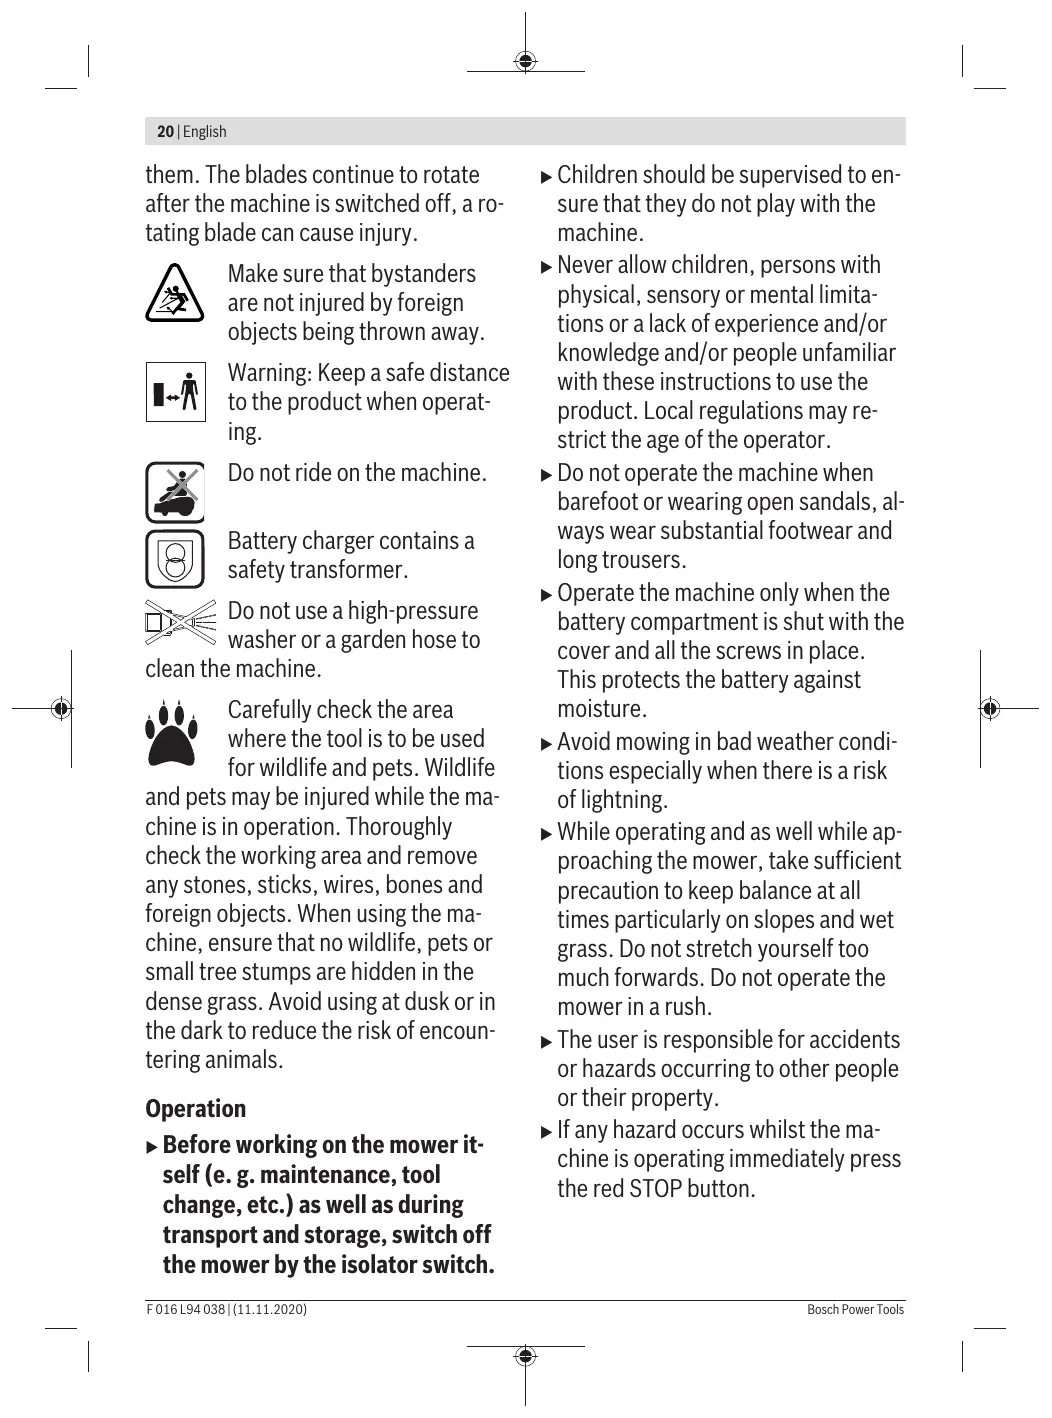


| Brand | Bosch |
| Model | INDEGO S 500 / S+ 500 / M 700 / M+ 700 |
| Product type | Robotic lawn mower |
| Cutting width | 19 cm |
| Adjustable cutting height | 30 – 50 mm (3 positions) |
| Max lawn area | 500 m² (S 500 / S+ 500), 700 m² (M 700 / M+ 700) |
| Max slope | 15° / 27 % |
| Weight (according to EPTA 01:2014) | 7.6 kg (S 500 / M 700), 7.7 kg (S+ 500 / M+ 700) |
| Protection rating | IPX4 (mower and charging station) |
| Battery | Lithium-ion 18 V, 2.5 Ah, 5 cells |
| Average runtime | 60 min (S 500 / S+ 500), 75 min (M 700 / M+ 700) |
| Max charging time | 60 min |
| Mains power supply | 220-240 V AC, 50-60 Hz, IPX7 power supply unit |
| Boundary wire supplied | 150 m (S 500 / S+ 500), 175 m (M 700 / M+ 700) |
| Max boundary wire length | 350 m |
| Noise level | 61 dB(A) (measured sound power), 63 dB(A) guaranteed |
| Special features S+/M+ | GSM connectivity, Bosch Smart Garden app, SmartMowing |
| Cutting functions | LogiCut, SpotMow, edge cutting, intensive mode |
| Safety | Lift, tilt, slope, impact sensors; automatic blade stop |
| Maintenance | Clean with soft brush; reversible blades; wear gloves mandatory |
Frequently Asked Questions - INDEGO S 500 | S+ 500 | M 700 | M+ 700 BOSCH
User questions about INDEGO S 500 | S+ 500 | M 700 | M+ 700 BOSCH
0 question about this device. Answer the ones you know or ask your own.
Ask a new question about this device
Download the instructions for your Lawn mower in PDF format for free! Find your manual INDEGO S 500 | S+ 500 | M 700 | M+ 700 - BOSCH and take your electronic device back in hand. On this page are published all the documents necessary for the use of your device. INDEGO S 500 | S+ 500 | M 700 | M+ 700 by BOSCH.
USER MANUAL INDEGO S 500 | S+ 500 | M 700 | M+ 700 BOSCH
www.bosch-garden.com
for purchasing the Indego Robotic Mower.
Please read the safety instructions provided below before installing the Indego.
Safety Notes
Warning! Read all safety warnings and all instructions. Make yourself familiar with the controls and the proper use of the machine. Please keep the instructions safe for later use!
Explanation of symbols on the machine

General hazard safety alert.
Ensure no exits are blocked or obstructed by the machine.

Warning: Read user instructions before operating the product.

Warning: Operate the isolator switch before working on or lifting the machine.

Caution: Do not touch rotating blades. The blades are sharp. Beware of severing fingers.

Wait until all machine components have completely stopped before touching
20 | English
them. The blades continue to rotate after the machine is switched off, a rotating blade can cause injury.

Make sure that bystanders are not injured by foreign objects being thrown away.

Warning: Keep a safe distance to the product when operat ing.

Do not ride on the machine.

Battery charger contains a safety transformer.
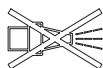
Do not use a high-pressure washer or a garden hose to the machine.

Carefully check the area where the tool is to be used for wildlife and pets. Wildlife
and pets may be injured while the machine is in operation. Thoroughly check the working area and remove any stones, sticks, wires, bones and foreign objects. When using the machine, ensure that no wildlife, pets or small tree stumps are hidden in the dense grass. Avoid using at dusk or in the dark to reduce the risk of encountering animals.
Operation
Before working on the mower itself (e.g. maintenance, tool change, etc.) as well as during transport and storage, switch off the mower by the isolator switch.
Children should be supervised to ensure that they do not play with the machine.
- Never allow children, persons with physical, sensory or mental limitations or a lack of experience and/or knowledge and/or people unfamiliar with these instructions to use the product. Local regulations may restrict the age of the operator.
Do not operate the machine when barefoot or wearing open sandals, always wear substantial footwear and long trousers.
- Operate the machine only when the battery compartment is shut with the cover and all the screws in place. This protects the battery against moisture.
Avoid mowing in bad weather conditions especially when there is a risk of lightning.
- While operating and as well while approaching the mower, take sufficient precaution to keep balance at all times particularly on slopes and wet grass. Do not stretch yourself too much forwards. Do not operate the mower in a rush.
The user is responsible for accidents or hazards occurring to other people or their property.
If any hazard occurs whilst the machine is operating immediately press the red STOP button.
Ensure correct installation of the perimeter wire as instructed in the installation guide.

For complete instructions on the Indego installation, please refer to the Installation Guide
provided with the product.
Periodically inspect the area where the mower is used and remove all stones, sticks, wires and other foreign objects.
- Do not run any live mains cables in the working area. If a mains cable becomes entangled in the robotic mower it must be isolated before any attempt to remove it.
Periodically inspect to see that the blades, blade bolts and cutter assembly are not worn or damaged. Replace worn or damaged blades and bolts in sets to preserve balance.
- Never operate the machine with defective guards or without safety devices.
Do not put hands or feet near or under rotating parts.
- Never pick up or carry the machine while the motor is running.
Do not leave the machine to operate unattended if you know that there are pets, children or people in the immediate vicinity.
- Start the machine according to the instructions standing well away from rotating parts.
Do not use the product at the same time as a sprinkler or use the schedule to ensure that the two systems never run simultaneously.
If for any reason the product is submerged, take it away from water and turn it off using the isolator switch. Do not attempt to switch the product on but contact your Bosch Service Centre.
Do not modify this product. Unauthorized modifications may impair the safety of your product and may result in increased noise and vibration.
Turn off the product using the isolator switch:
- before clearing a blockage,
- before checking, cleaning or working on the machine,
- before storage
- if the machine vibrates abnormally (stop and check immediately),
- after striking a foreign object, inspect the machine for damage and get advice on necessary repairs from your Bosch Service Centre.
Maintenance
Always wear gardening gloves when handling or working near the sharp blades.
Before working on the mower, turn it off using the isolator switch.
Before working on the docking station or power supply, remove plug from mains.
Clean the exterior of the machine thoroughly using a soft brush and cloth. Do not use water, solvents or polishes.
Remove all grass and debris, especially from the ventilation slots.
Turn the mower upside down and clean the blade area and the swivel castors regularly. Use a stiff brush or scraper to remove compacted grass clippings (see figure I).
Blades are reversible.
Make sure all nuts, bolts and screws are tight to ensure safe working with the garden tool. (see figure J)
Periodically visually inspect the machine and replace worn or damaged parts for safety.
Ensure that only official Bosch replacement parts are used.
Replace all blades and bolts as a set as required.
Storage in winter
Turn off the mower using the isolator switch.
The mower will operate between 5^ and 45^ . During the winter season once the temperature in the garden is consistently below 5^ store the mower and the docking station in a secure, dry place, out of the reach of children.
Do not place other objects on the mower or docking station.
It is recommended to use the original packaging when transporting the Indego over long distances.
- Store the mower only within a temperature range between -20^ and 50^ . As an example, do not leave the mower in the car in summer.
USB
The mower has a USB interface which is to be used exclusively for software updates (see figure M). Use only approved USB.org sticks (formatted to FAT 32) and approved USB.org OTG cables.
For more information on software updates, please refer to www.bosch-diy.com/indego-help.
- Do not use the USB interface for any additional purposes. Do not plug any external devices. Do not operate the machine with the cover of the USB port open.
Recommendations for Optimal Handling of the Battery Pack
Do not open the battery. There is a risk of short-circuiting.


Protect the battery against heat (e.g., against continuous intense sunlight), fire,
water, and moisture. There is a risk of explosion.
- Keep any unfitted battery away from paper clips, coins, keys, nails, screws or other small metal objects, that can make a connec
tion from one terminal to another.
Shorting the battery terminals together may cause burns or a fire.
In case of damage and improper use of the battery pack, vapours may be emitted. Ventilate the area and seek medical help in case of complaints. The vapours can irritate the respiratory system.
The battery can be damaged by pointed objects such as nails or screwdrivers or by force applied externally. An internal short circuit can occur and the battery can burn, smoke, explode or overheat.
If used incorrectly or if the battery is damaged, flammable liquid may be ejected from the battery. Contact with this liquid should be avoided. If contact accidentally occurs, rinse off with water. If the liquid comes into contact with your eyes, seek additional medical attention. Liquid ejected from the battery may cause irritation or burns.
Do not short-circuit the battery. There is a risk of explosion.
- Use only Bosch battery packs intended specifically for the machine. Use of any other battery packs may create a risk of injury and fire.
- Ensure the switch is in the off position before inserting battery. Inserting the battery pack into machines that have the switch on can cause accidents.
- Only open the battery compartment when the battery is exhausted. Leave the battery in the machine for storage in winter. The built-in battery is very long-lasting; do not open the battery compartment until you notice a significant reduction in the runtime between two battery charging procedures.
The Indego will operate between 5^ and 45^ . If the battery temperature is outside this range, the Indego will display a message and will not leave the docking station. If operating, the Indego will return to the docking station or stay in place.
Recharge only in the Bosch approved docking station.
SafetyWarnings for Docking Station and Power Supply
Only use the original Bosch docking station and power cord to charge the mower. Otherwise there is danger of fire and explosion.
Check the docking station, power supply unit, cables and plugs periodically. If damage or ageing is detected, isolate from the docking station or power supply and do not use them. Never open the docking station or power supply yourself. Have repairs performed only by a qualified Bosch technician and only using original spare parts. A damaged docking station, power
24|English
supply, cable or plug increases the risk of an electric shock.
Do not operate the docking station and power supply on easily flammable surfaces (e. g., paper, textiles, etc.) or surroundings. The heating of the docking station and power supply during the charging process can pose a fire hazard.
Supervise children at all times. This will ensure that children do not play with the docking station, power supply or the machine.
The voltage indicated on the power supply must correspond to the voltage of the power source.
We recommend that the power supply is only connected into a socket which is protected by a circuit-breaker that would be actuated by a 30mA residual current. Check your Residual Current Device (RCD) at regular intervals.
The supply cord must be inspected for signs of damage at regular intervals.
In the event of flooding of the docking station turn off power supply at mains and contact Bosch Service Centre.
- Never touch the mains plug or any other plugs with wet hands.
Technical Data
| Robotic Lawnmower | SI Unit | Indego S 500 | Indego S+ 500 | Indego M 700 | Indego M+ 700 |
| Article number | 3600HB02.. | 3600HB03.. | 3600HB02.. | 3600HB03.. | |
| Cutting width | cm | 19 | 19 | 19 | 19 |
- Do not run over, crush or pull the cables. Protect the cables from heat, oil and sharp edges.
The power supply is double insulated for safety and requires no earth connection. The operating voltage is 230 V AC, 50 Hz (for non-EU countries 220 V, 240 V as applicable). Contact your Bosch Service Centre for details. If in doubt contact a qualified electrician or the nearest Bosch Service Centre.
Symbols
The following symbols are important for reading and understanding the operating instructions especially the diagrams. Take note of the symbols and their meaning. The correct interpretation of the symbols will help you to use the garden product in a better and safer manner.
| Symbol | Meaning |
| Wear protective gloves | |
| √ | Permitted action |
| × | Prohibited action |
| Accessories/Spare Parts |
Intended Use
The mower is intended for domestic lawn mowing.
Do not operate the mower indoors.
Do not use the mower for any other purpose because of the increased risk of accidents and damage to the mower. Never attempt to modify the mower in any way since this may result in accidents or damage to the mower.
| Robotic Lawnmower | SI Unit | Indego S 500 | Indego S+ 500 | Indego M 700 | Indego M+ 700 |
| Height of cut | mm | 30-50 | 30-50 | 30-50 | 30-50 |
| Slope angle (max.) | °/% | 15/27 | 15/27 | 15/27 | 15/27 |
| Size of lawn area | |||||
| -maximal | \( m^2 \) | 500 | 500 | 700 | 700 |
| -per charge up to\(^A\) | \( m^2 \) | 70 | 70 | 85 | 85 |
| Operating frequency range (Induct-ive sensor) | kHz | - | 5 | - | 5 |
| max. magnetic field strength (In-ductive sensor) (at 10 m) | dBμA/m | - | 44 | - | 44 |
| Operating frequency range (GSM) | MHz | - | 880-960 | - | 880-960 |
| MHz | - | 1710-1880 | - | 1710-1880 | |
| Max. transmit power (GSM) | dBm | - | 33 | - | 33 |
| Weight according to EPTA-Proced-ure 01:2014 | kg | 7.6 | 7.7 | 7.6 | 7.7 |
| Protection type | IPX4 | IPX4 | IPX4 | IPX4 | |
| Serial number | see type plate on garden tool | ||||
| Battery | Li-Ion | Li-Ion | Li-Ion | Li-Ion | |
| Rated voltage | VDC | 18 | 18 | 18 | 18 |
| Capacity | Ah | 2.5 | 2.5 | 2.5 | 2.5 |
| Number of battery cells | 5 | 5 | 5 | 5 | |
| Operating time, average\(^A\) | min | 60 | 60 | 75 | 75 |
| Charging period (max.) | min | 60 | 60 | 60 | 60 |
| Battery type | PBA 18V...W-.2.5 Ah | PBA 18V...W-.2.5 Ah | PBA 18V...W-.2.5 Ah | PBA 18V...W-.2.5 Ah | |
| Perimeter wire | |||||
| -wire supplied | m | 150 | 150 | 175 | 175 |
| -minimum required length | m | 20 | 20 | 20 | 20 |
| -maximum permissible length | m | 350 | 350 | 350 | 350 |
| Docking station | |||||
| Article number | 1 600 A02 546 | 1 600 A02 546 | 1 600 A02 546 | 1 600 A02 546 | |
| Input voltage | VDC | 24 | 24 | 24 | 24 |
| Power consumption charging/peri-meter wire switched on | W | 73/2.6 | 73/2.6 | 73/2.6 | 73/2.6 |
| Charging current (up to) | A | 2.3 | 2.3 | 2.3 | 2.3 |
| Allowable charging temperature range\(^B\) | °C | 5-45 | 5-45 | 5-45 | 5-45 |
| Weight according to EPTA-Proced-ure 01:2014 | kg | 1.65 | 1.65 | 1.65 | 1.65 |
| Protection type | IPX4 | IPX4 | IPX4 | IPX4 | |
| Power supply unit | |||||
| Article number | |||||
| Switzerland | F 016 L90 934 | F 016 L90 934 | F 016 L90 934 | F 016 L90 934 | |
| United Kingdom | F 016 L90 935 | F 016 L90 935 | F 016 L90 935 | F 016 L90 935 | |
| Rest of Europe | F 016 L90 916 | F 016 L90 916 | F 016 L90 916 | F 016 L90 916 | |
| Input voltage (AC) | V | 220-240 | 220-240 | 220-240 | 220-240 |
26 | English
| Robotic Lawnmower | SI Unit | Indego S 500 | Indego S+ 500 | Indego M 700 | Indego M+ 700 |
| Protection class | 凹/II | 凹/II | 凹/II | 凹/II | |
| Frequency | Hz | 50-60 | 50-60 | 50-60 | 50-60 |
| Output voltage (DC) | V | 24 | 24 | 24 | 24 |
| Protection type | IPX7 | IPX7 | IPX7 | IPX7 | |
| Weight | kg | 1.25 | 1.25 | 1.25 | 1.25 |
A) Depends on cutting height, grass conditions and moisture
B) Internal battery temperature
Noise/Vibration Information
Noise emission values determined according to EN 50636-2-107.
Typically the A-weighted noise levels of the product are: Sound power level 61 dB(A). Uncertainty K = 2 dB.
Explanation of Figures
| Action | Figure | Page |
| Accessories | A | 339 |
| Delivery scope/unpacking the mower | B | 340 |
| Laying out perimeter wire | C | 340 |
| Extending perimeter wire | D | 341 |
| Laying perimeter wire around new in-ner object | E | 341 |
| Lifting up and carrying the mower | F | 342 |
| Setting the height of cut | G | 342 |
| SpotMow | H | 343 |
| Cleaning | I | 343 |
| Maintenance | J | 344 |
| Adding a further lawn area | K | 344 |
| - with additional docking station (right) | ||
| - without additional docking station (top left) | ||
| Replacing the battery | L | 345 |
| Software update | M | 346-347 |
| Power supply unit connection | N | 348 |
Installation
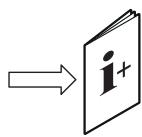
With the following QR code, you can view a video on how to install the mower under www.bosch-diy.com/indego-help. Alternatively, follow the Installation Guide delivered with the product.


Check if the perimeter wire is fully pegged to the ground avoiding any slack lengths of wire. Any loose wire can be a trip hazard.
Remove stones, loose pieces of wood, wire, live mains cables and other foreign objects from the cutting area.
Make sure that the cutting area is even and has no ditches, grooves and steep slopes above 15^ / 27% that are clear obstructions for the mower.
The docking station must be positioned on the wire at an outer edge of the cutting area. It may not be positioned on the side of a tool or garden shed standing as an island within the lawn to be mowed.
It is recommended that you mow your lawn once with a conventional lawnmower before installing and before the first mowing of the new season and whenever the grass clippings would be longer than 5mm
The mower's cutting system is designed to cut small lengths of grass (30 - 50mm) . The clippings can remain as mulch to fertilize the lawn. The height of cut for mower can be adjusted to 30, 40 and 50mm .
It is recommended to start with a higher setting and then gradually decrease the height of cut as the wire disappears under the grass. This prevents your Indego from cutting the wire.
Additional perimeter wire can be added using a wire connector (see figures D-E).
The perimeter wire can be extended up to a maximum length of 350m .
The perimeter wire can be buried up to 5cm under the ground (or under non-metallic slabs).
To avoid causing damage to the perimeter wire, do not vertically rake the area where it is positioned.
When laying out the wire avoid angles of less than 45^ . This can affect the performance.
Display
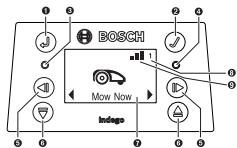
| Symbol | Meaning | |
| 1 | Back button | |
| 2 | Confirm button | |
| If the confirm button is pressed whilst mowing, the mower will return to the docking station | ||
| 3 | Red LED on: mower error | |
| 4 | Green LED on: mower is switched on | |
| Green LED off: The mower is inactive and your four-digit PIN code is required for activation. Or the mower is shut off, the isolator switch must be turned on and your four digit PIN code must be entered to activate the mower. Note: during a software update, the green LED and red LED will be on. | ||
| Left/right button | |
| Down/up button | |
| Display with dialog screen | |
| Garden number (shown when more than one garden map in the mower memory) | |
| Only with Indego S+ 500 and M+ 700: | |
| Network signal present | |
| Network signal absent |
The display switches into sleep mode, if no input is made for 10 minutes.
Adding a further Lawn Area (see figure K)
To install the Indego to an additional lawn area, please follow the instructions in the Installation Guide.
Separate lawn area with separate docking station (see figure K, right side): The mower can be used on up to three different lawn areas. For an additional lawn area, a separate docking station (see figure A) and the necessary perimeter wire and pegs are required. If a schedule or the "Bosch AUTO" calendar function or the Bosch "SmartMowing" functionality is set, the grass of the area it is in will be cut, within the defined time slots.
Switch off the mower when transporting it between the individual lawn areas.
Note: software updates have to be carried out on the mower in every docking station.
To ensure remembering which docking station belongs to which lawn area, it is recommended to label the docking stations with the lawn area number and description when storing them for winter.
Without separate docking station: It is possible to connect the lawn areas by placing the perimeter wire between the two lawn areas parallel to each other as close as possible (see figure K, top left). The additional lawn area without docking station is not recorded in the map memory and the mower will not use the LogiCut cutting strategy in this lawn area without the docking station. The maximum recommended lawn area without docking station is 45 / 50m^2 (for Indego 500/700 models). The mower will mow until it runs out of battery and will need to be carried back to the docking station for charging.
Mowing
Do not let children ride the mower.
Press the stop button on top of the mower before lifting. Always lift the mower by its handle. (see figure F)
Only with Indego S 500 and M 700: After successful installation you can either immediately begin to mow by confirming "Mow now" on the display, or wait for the next scheduled cutting period, as programmed by the "Bosch AUTO" Calendar Function (previous setting required).
A manual mowing schedule can also be set up according to your specific needs.
Only with Indego S+ 500 and M+ 700: After successful installation, you can begin mowing immediately by confirming "Mow now" on the display, or on the free Bosch Smart Gardening App by pressing "mow". You could also set up a programmed schedule, using the Bosch "SmartMowing" functionality, which can also plan future cutting sessions based on when it is forecasted to rain. You could also set up a programmed schedule in the calendar using the display or the Bosch Smart Gardening App.
The mower must mow a lawn area 3 times completely (do 3 full cuts) to learn the lawn area. During the learning phase, the visual result may not be optimal.
Approximate runtimes for complete lawn area coverage using LogiCut are listed below. Please note that the runtimes will vary depending on the lawn complexity and number of objects within the lawn area.
100m^2 4h
500m^2 16h
700m^2 22h
Set a schedule with frequent repetitions. This achieves good mowing results, the battery charge will last longer and you avoid debris on the lawn.
When the mower is mowing
In "manual" mode, the mower works until the lawn is mowed. Mowing is interrupted only for charging the battery.
28|English
When the lawn area is mowed, the mower returns to the docking station.
In the programmable "Schedule" mode, with the "Bosch AUTO" calendar function or with the Bosch "SmartMowing" functionality, the mower operates continuously for a set period of time. Mowing is interrupted only for charging the battery. If the lawn area is mowed before the time period expires, the mower returns to the dock.
To stop mowing prematurely, press the Stop button or send the mower back to the docking station pressing the confirm button
With Indego S+ 500 and M+ 700 you can send the mower back to the docking station, by pressing the "Dock" button on the free Bosch Smart Gardening App.
Energy saving mode
The mower reduces its energy consumption by automatically switching off the power in the perimeter wire when it is not mowing and not being charged.
To wake up the mower manually from the energy saving mode, press the confirm button and afterwards select either "Mow now" or another "Mowing mode", while the mower is in the docking station.
With Indego S+ 500 and M+ 700 you can wake up the mower remotely from the energy saving mode, by pressing the "mow" button on the free Bosch Smart Gardening App. For mowing based on an active schedule or with the "Bosch AUTO" calendar function or with the Bosch "SmartMowing" functionality, the energy saving mode is automatically ended.
Mowing small lawn areas with „SpotMow“
SpotMow is intended for mowing small areas that require special treatment without having to mow the whole lawn, such as the area under a piece of garden furniture that has been removed. The mower is positioned at the lower left corner of the intended area to mow (see figure H). The final mowed area depends on the lawn conditions; it will not necessarily be an exact square. After completion of „Spot-
Mow", follow the instructions on the screen.
Note: For safety reasons, „SpotMow“ cannot be used outside the perimeter wire.
Sensors
The mower is equipped with the following sensors:
- The lift-up sensor is activated when the mower is lifted.
- The rollover sensor detects when the mower tips over.
- The tilt sensor is activated when the mower reaches a slope angle of 32^ .
When one of the sensors is activated, e.g. the lift-up sensor, the drive motors and cutting blades are stopped. A message is indicated in the display, e.g. "lift-up".
- The obstacle sensor detects objects/obstacles alongside the entire front edge of the mower and causes a change of direction.
Battery charging
The battery is equipped with temperature monitoring that allows charging only if the battery internal temperature is in the range between 5^ and 45^ .
The lithium-ion battery is supplied partially charged. It is recommended to charge the mower during installation of the perimeter wire in the docking station.
The lithium-ion battery can be charged at any time without reducing its service life. Interrupting the charging procedure does not damage the battery.
When the battery is run flat or discharged, the mower is shut off by means of a protective circuit: the blades no longer move.
Replacing the Battery (see figure L)
Note: The battery only needs to be replaced when it is exhausted. It is not intended to charge the battery outside the mower.
Using unsuitable batteries can lead to malfunctions or damage the mower.
Heavily used batteries may have a significant effect in the mower run time.
Do not use non-rechargeable batteries in the mower.
Use only batteries specified by the manufacturer.
Note: Always wear protective gloves when handling or working near the sharp blades.
Switch off the mower by the isolator switch.
Remove the 5 screws of the battery compartment cover with a Torx T-20 screwdriver.
Pivot the used battery with the guide rail out of the battery compartment until the battery unlocking button can be seen and accessed. Press the battery unlocking button and remove the battery.
Insert the new battery into the guide rail until the locking mechanism can be heard to engage. Pivot back the battery with the guide rail into the battery compartment. Mount the battery compartment cover and screw it tight with the 5 screws.
The battery compartment cover protects the battery against moisture during operation.
Updating the Software (see figure M)
To update the software, you need a USB.org stick (FAT 32 formatted) and a USB OTG cable.
When a new software version is available, you can find it on the Internet under "www.bosch-diy.com/indego-help". Load the "IN8xxxx.bin" file onto the USB.org stick.
Turn the mower over and remove the cover from the USB port. Connect the USB OTG cable with the USB.org stick.
Place the mower in the docking station and make sure that the docking station is connected to mains (LED on docking station is on). The mower must be switched on, the display alight and the battery must be at least 70% charged.
When the update starts, the following message appears in the display "Do you want to update from version x to version y?"
Confirm by pressing the confirm button .During the update, both LEDs in the mower will flash.
At the end of the update, the mower restarts.
Remove the USB OTG cable and the USB.org stick. Close the cover of the USB port.
Additionally for Indego S+ 500 and M+ 700: You can download the software via the Bosch Smart Gardening app.
Menu Navigation
The table below explains the various menu items.
| Main Menu | Sub-menu 1 | Sub-menu 2 | Explanation |
| Mow now | Pressing the confirm button will send the mower to mow. In “Off/ Manual”, the mower works until the display shows “lawn complete”. In “Schedule” mode, with the “Bosch AUTO” calendar function or with the Bosch “SmartMowing” functionality, the mower will operate until the end of the time period or until the display shows “lawn complete” (whichever comes first). | ||
| Calendar | Only for Indego S 500 and M 700: Bosch AUTO | The “Bosch AUTO” calendar function is optimised based on the size of the lawn area. In the default setting, the mower does two full cuts a week and starts at 8 am. The following settings are possible: | |
| Number of complete mowing cycles per week | 1 to 3 | ||
| Weekday | Days on which mowing is allowed (e.g. to exclude Sundays). | ||
| Start time | Only possible for the first time slot (applies to all active days). | ||
| Only for Indego S+ 500 and M+ 700: SmartMowing | The Bosch “SmartMowing” function is optimised based on the size of the lawn area and gives additional functionality to connect to a local weather data provider. In the default setting, the mower does two full cuts a week and starts at 8 am. You can set up your SmartMowing schedule by using the free Bosch Smart Gardening App. | ||
| Schedule | Edit (selected day) | Program a mowing schedule by setting individual mowing days and slots (up to 2 per day). | |
| Don't mow/Delete slot | This will delete the corresponding slot for the selected day. The number of full cuts per week for the actual schedule are shown at the bottom of the display. | ||
| Off/Manual | Choose this option when no schedule should be used. The mower starts mowing only by activating “Mow now”. With Indego S+ 500 und M+ 700 you can start mowing, by selecting “mow” in the free Bosch Smart Gardening App. | ||
| Settings | Mowing mode | SpotMow | Indego S / S + 500: Select between a size of 2 m x 2 m and 3 m x 3 m. Indego M / M + 700: Select between a size of 2 m x 2 m, 3 m x 3 m and 4 m x 4 m. |
| Mow without docking station | Mower will mow in the additional lawn area without docking station in random mode until it runs out of battery. | ||
| Border cut | Indego S / S + 500: The mower makes an border cut at the beginning of each complete cut. |
30|English
| Main Menu | Sub-menu 1 | Sub-menu 2 | Explanation |
| Indego M / M + 700: Select between the mowing settings: cut border once every full cut (default setting), once every two full cuts, or (off) when no border cut is to be carried out. | |||
| Intensive mode | The mower mows more thoroughly, returns to possible unmown areas and mows on shorter tracks. The mower needs considerably longer for a complete cut. | ||
| Security | Auto Lock | If buttons are not pressed for 3 min. they will be automatically locked. | |
| Recommended for safety reasons and protection against theft. | |||
| - On | PIN code is required for reactivation after Auto Lock. | ||
| - Off | The buttons are always ready for input. | ||
| Change PIN | Changing of a PIN code requires entering of existing PIN code first. | ||
| Alarm | |||
| - On | Alarm is activated. | ||
| - Off | Alarm is deactivated. | ||
| Date & Time | Change the date and time. | ||
| Set Language | Change the display language. | ||
| Settings | Info | System status | Information on battery charge, system information and operating and charging time for the mower. |
| Advanced | Wire ID | Change the perimeter wire ID when possible interferences are nearby. | |
| Docking station position | Use the default setting when the docking station is placed at the edge of the lawn; and the Corner setting when placed in a corner. | ||
| Sensor setting/Lawn condition | Select between Low (uneven ground), Normal and High (slippery ground). Mower bump sensor will become more or less sensitive depending on lawn condition selected. | ||
| Remap | Deletes the current map of the lawn area. | ||
| Factory reset | Reset the mower to factory settings will delete all personal settings (not PIN). | ||
| After a factory reset, the mower will need to remap the lawn area. | |||
| Garden overview | Displays the number of mapped lawn areas, their size, their wire ID and the date of the last time the lawn area was cut. | ||
| Delete garden | Delete one specific lawn area map or select to delete all maps at once. | ||
| Tools | Level check | Information about the ground angle of the mower. If the mower is in the docking station and the dot on the display is not within the indicated circle, the docking station must be mounted at a new, more level location. |
Wire signal
Detects the wire signal received from the perimeter wire, indicating its strength (for Service Agent).
The mower will not receive a wire signal while in the docking station.
Troubleshooting
Online Support

http://www.bosch-diy.com/indego-help


| Problem | Possible Cause | Corrective Measure |
| The LED on the dock-ing station flashes | The perimeter wire is interrupted, too long or too short. Wire not connected and mower not in the docking station. | Check that the perimeter wire is not interrupted and is between 20 and 350 meters in length. Then switch power supply off and then on again.Follow instructions in Installation Guide to install the mower. |
| Excessive vibrations/noise | Blade bolt loose | Tighten blade bolt to torque of 2.5 Nm. |
| Cutting blade damaged/bent | Replace cutting blade (see figure J). | |
| Mower not docking reliably | Perimeter wire not properly layed out around docking station | Follow instructions in Installation Guide on layout of peri-meter wire. |
| Perimeter wire close to a source of interfer-ence | Remove any excess (e.g. coiled up) perimeter wire around the docking station.Change perimeter wire ID in the menu. | |
| Wrong docking station position setting | Change setting in the "Advanced" menu. | |
| Mower fails to operate | Isolator switch not turned on | Remove mower out of docking station, turn isolator switch on and place mower back into docking station (ensure docking station is on - LED lights up green). |
| Possible clogging | Always turn isolator switch off first, then check under-neth the mower. Clear out as necessary (always wear protective gloves). | |
| Battery not fully charged | Place mower in the docking station to allow to charge. Docking station must be on. | |
| Grass too long | Mow lawn with conventional lawnmower to its lowest height-of-cut setting before using the mower. | |
| Battery too hot/cold | The mower operates when the battery internal battery temperature is between 5 °C – 45 °C. Allow mower to cool down/warm up. If the error occurs frequently, the docking station should be positioned in the shade. |
32 | English
| Problem | Possible Cause | Corrective Measure |
| Mower standing on lawn with the display switched off | Operational problems | Press confirm button for screen to light up, or place mower in docking station. |
| Mower does not charge | Battery too hot/cold | The mower operates when the battery internal temperat-ure is between 5 °C – 45 °C. Allow mower to cool down/ warm up. If the error occurs frequently, the docking sta-tion should be positioned in the shade. |
| Docking station not switched on | Switch on power supply to docking station. If docking station does not start, contact your Bosch Service Centre. | |
| Charging pins corroded | Clean the charging pins. | |
| Battery not fitted, incorrectly fitted or in-correct battery for mower | Insert battery correctly (see figure L). Use the appropri-ate Bosch battery. | |
| Mower out of peri-meter wire | Perimeter wire on a slope | Leave 30 cm between the perimeter wire and the slope. |
| Obstacle near perimeter wire | Remove obstacle. | |
| Parts of the lawn area left uncut | Mower requires more cuts to finish garden | Allow mower to run for 3 full cuts to cover whole lawn area. Alternatively use the "Intensive mode" under "Mow-ing mode". |
| Time slot not long enough for garden size | Increase mowing time slot or:- use "Bosch AUTO" calendar function (with Indego S 500 and M 700)- use Bosch "SmartMowing" functionality (with In-dego S+ 500 and M+ 700) | |
| Distance between perimeter wires too small | Increase distance between the perimeter wires to a min-imum of 75 cm. | |
| Rough mowing conditions | Select "uneven ground/low sensitivity" option from menu item "lawn condition/bump sensor". | |
| Flatten garden/remove/bumps/mark out unsuitable areas with the perimeter wire - Please follow the instruc-tions in the Installation Guide. | ||
| Grass too long | Select "uneven ground/low sensitivity" option from menu item "lawn condition/bump sensor". | |
| Slopes in garden too steep | Ensure mower only operates on slopes of 15 degrees or less and full garden is not on a slope. | |
| Mower gets stuck in garden | Objects/obstacles not marked out | Use the perimeter wire to mark off obstacles where the mower often gets stuck. |
| Newly laid turf | Allow a few weeks for the soil to settle before using the mower. | |
| Change setting in menu item "lawn condition / bump sensor" to low sensitivity / uneven. | ||
| After watering, wait as long as possible until you start the mower. | ||
| Mower unintentionally cuts flowers, etc. or runs over certain obstacles | Objects/obstacles below 5 cm not marked out | Mark obstacle using perimeter wire leaving 30 cm from object or remove objects/obstacles. |
| Mower does not ap-pear to cut logically | LogiCut system depends on the garden conditions. Mower does not necessarily have to continue in the next uncut area. | Further information can be found on the Installation Guide. |
| If behaviour re-occurs often, remap garden. | ||
| Mower does not always go in a straight line when travelling between areas | No corrective action needed. | |
| Mower frequently does not find right position or turns on the spot | Change wire ID. | |
| Wire crossed while marking an object | Follow instructions in the Installation Guide. | |
| Mower runs in random paths in an additional lawn without docking station. | Normal behaviour. The LogiCut system only works in areas with docking station. | |
| Perimeter wire keeps being cut | Wire is not taut between pegs | Make wire taut and ensure distance between pegs is maximum 75 cm. Follow instructions in the Installation Guide. Use the wire connectors to repair the cut. |
| Distance between pegs is more than 75 cm | ||
| Mower leaves ragged finish/poor quality of cut | The mower does not mow often enough | Mow more frequently for a good result (e.g. by means of more/longer slots in schedule). |
| Cutting blades blunt | Reverse or replace cutting blades (see figure J). | |
| Possible clogging | Always turn isolator switch off first, then check underneath the mower. Clear out as necessary (always wear protective gloves). | |
| Perimeter wire not detected | No power at the docking station | Check if the docking station is powered up (LED is on). |
| Perimeter wire damaged/cut | Check perimeter wire for damage. | |
| Wrong installation (e.g. not enough distance between wires) | Follow instructions in the Installation Guide. | |
| Perimeter wire close to a source of interference | Remove any excess (e.g. coiled up) perimeter wire around the docking station. Change perimeter wire ID in the menu. | |
| Height-of-cut button stuck | Possible clogging | Always turn isolator switch off first, then check underneath the mower. Clear out as necessary (always wear protective gloves). |
After-sales Service and Application Service
www.bosch-garden.com
In all correspondence and spare parts orders, please always include the 10-digit article number given on the type plate of the mower.
It is possible, that the software version of your mower is required (see „Menu > Settings > Info“).
If the mower is requested to be sent to the service centre, the mower and docking station must always be sent together. Do not remove the battery.
Before sending in, remove any personalised top cover that may have been fitted and any accessory cover.
Great Britain
Robert Bosch Ltd. (B.S.C.)
P.O.Box 98
Broadwater Park
North Orbital Road
Denham Uxbridge
UB95HJ
At www.bosch-pt.co.uk you can order spare parts or arrange the collection of a product in need of servicing or repair.
Tel. Service: (0344) 7360109
E-Mail: boschservicecentre@bosch.com
Ireland
Origo Ltd.
Unit 23 Magna Drive
Magna Business Park
City West
Dublin 24
Tel. Service: (01) 4666700
Fax: (01) 4666888
Australia, New Zealand and Pacific Islands
Robert Bosch Australia Pty. Ltd.
Power Tools
Locked Bag 66
Clayton South VIC 3169
Customer Contact Center
Inside Australia:
Phone: (01300) 307044
Fax: (01300) 307045
Inside New Zealand:
Phone: (0800) 543353
Fax: (0800) 428570
Outside AU and NZ:
Phone: +61 395415555
www.bosch-pt.com.au
www.bosch-pt.co.nz
Republic of South Africa
Customer service
Hotline: (011) 6519600
Gauteng - BSC Service Centre
35 Roper Street, New Centre
Johannesburg
Tel.: (011) 4939375
Fax: (011) 4930126
E-Mail: bsctools@icon.co.za
KZN - BSC Service Centre
Unit E, Almar Centre
143 Crompton Street
Pinetown
Tel.: (031) 7012120
Fax: (031) 7012446
E-Mail: bsc.dur@za.bosch.com
Western Cape - BSC Service Centre
Democracy Way, Prosperity Park
Milnerton
Tel.: (021) 5512577
Fax: (021) 5513223
E-Mail: bsc@zsd.co.za
Bosch Headquarters
Midrand, Gauteng
Tel.: (011) 6519600
Fax: (011) 6519880
E-Mail: rbsa-hq.pts@za.bosch.com
Transport
The contained lithium-ion batteries are subject to the Dangerous Goods Legislation requirements. The batteries are suitable for road-transport by the user without further restrictions.
When shipping by third parties (e.g.: by air transport or forwarding agency), special requirements on packaging and labelling must be observed. For preparation of the item being shipped, consulting an expert for hazardous material is required.
Dispatch battery packs only when the housing is undamaged. Tape or mask off open contacts and pack up the battery in such a manner that it cannot move around in the packaging. Please also observe the possibility of more detailed national regulations.
Disposal

The garden product, batteries, accessories and packaging should be sorted for environmental-friendly recycling.

Do not dispose of garden products and batteries/rechargeable batteries into household waste!
Only for EC countries:
According to the European law 2012/19/EU, electrical and electronic equipments that are no longer usable, and accord
ing to the European law 2006/66/EC, defective or used battery packs/batteries, must be collected separately and disposed of in an environmentally correct manner. Contact your Bosch Service Centre for details.
Battery packs/batteries:
Li-Ion:
Please observe the instructions under Transport.
UK Importer:
Robert Bosch Ltd.
Broadwater Park
North Orbital Road
Uxbridge UB9 5HJ
François
Merci
www.bosch-garden.com
www.bosch-garden.com
Robert Bosch Argentina Industrial S.A.
Calle Blanco Encalada 250 - San Isidro
B1642AMQ
www.bosch-garden.com
www.bosch-garden.com
www.bosch-garden.com
www.bosch-garden.com
Bosch Service Center
Telegrafvej 3
2750 Ballerup
På www.bosch-pt.dkk kan der online bestilles resededele el-ler oprettes en reparations ordre.
TIf. Service Center: 44898855
Fax: 44898755
E-Mail: vaerktoej@dk.bosch.com
Transport
www.bosch-garden.com
Bosch Service Center
Telegrafvej 3
2750 Ballerup
Danmark
Tel.: (08) 7501820 (inom Sverige)
Fax: (011) 187691
Transport
De litiumjonbatterier som ingar ar underkastade kraven for farligt gods. Anvandaren kan utan ytterligare forpliktelser transportera batterierna pa allman vag.
Endast for EU-lander:
www.bosch-garden.com
Oppgi alltid det 10-sifrede saksummeret ifolge typeskiltet på klipperen ved alle spørsmål og bestillinger av resedeler.
www.bosch-garden.com
www.bosch-garden.com
Robert Bosch Sp. z o.o.
www.bosch-garden.com
Bosch Service Center PT
K Vapence 1621/16
692 01 Mikulov
www.bosch-garden.com
V pripe ak'ychkol'vek otazok a objednavok nahrdnych suciastok uvdzajte bezpodmienecne 10-miestne vecné cislo uvedené na typovom stitku kosacky.
www.bosch-garden.com
Y6eHNTecbBTOM,HTOcaIOBbINHCTpyMeHT He 6IOKnpyET HHe 3aIpaJXdaET BblXOdbI.

PpeDynpexdene: PpOuHTaIte HNCTpyKcHIO NO 3KcNPy-atauH, PpeJde Yem BkHIO
aTb n3deneIe.

Ipeynpexdene: Ipejde yem BbINHraTb pa60tbi Ha caOBOM INCTpyMeHTe HIN
IODHIMaTb CaIOBbI INHCTpymENT, IPNBEInTe B DeINCTBnE pa3beHNHTeIb.

OcToPOxHo:He npKa- caInTeScb K BpaUaIOuMmCra HOXam.Hoxn ocTpbIe.Octo
poxho, cyuectByet OnaHocTb yTpaTbI naBueB Ha Horax Hn Ha pykax.

Ppejde yem npnkacaTbcra K DeTaIaM caIOBOrO nHcTpMeHTa,poJoxdTe,POKa BCE
eTo DeTaII NIOHOCbIO He OCTaHOBcTc. HoKn IpoOJkaOT BpaaATbcN HeKOtOpoe Bpemr IocIe BbIKIoueHnCaIOBOrO INCTpyMeHTa N MOyT pInuHHNTb TeIecHbIe IOBpeKdEHN.

Cleinte 3a tem, yTo6bI OTtetaUuHne uXkeOpHbI npedMeTbI He TpaBMnPOBaHn Haxo
He cTaBbTe dpyrHe npeMeTbI Ha ra30HOKOcNkU Hn Ha 3apdHyIO CTaH-
PnpeBo3Ke Indego Ha daIbHne paCCTOaHHNcNoIb3yIteOpuHaJIbHyU yNaKOBky.
XpaHnTe ra3oHOKOncIky TOnbKO npi TeMnepeIype oT-20°C Do 50°C. HApP., He ocTaBnIe caObBi INHCTpyMeHT JeTOM B MaShInHe.
USB
Fa3OHOKOCnIka OChaSeHa INHTep-phiEcom USB, KOTOpbI npeHa3Ha-ueH NCKIIOUHTeBHo DJIa OBHBeHnRA IIO (cm. pnc. M). NcNoJIb3yIteToIbKO dOnyuSeHHbIe QJNeIi-HaKoNITeHN USB.org (OTfOpMaTHnpOBaHHbIE NOd FAT 32) n dOnyuSeHHbIe Ka6eHN OTG USB.org.
Для поусаньоee поробнου
инфорmaцио6обновених по-
граимного obecneчесс.
www.bosch-diy.com/indego-help.
He nCpOJIb3yIte HHTepΦeIc USB dIa IHBIX cIeIe. He NOpKIIuOaJIte HNKaKHe BHeUHHe yCTpoIcTbA. He 3KcPnIyATnpUyTe H3dEJIne C OTKpbI- ToKpbIshKO rHe3da USB.
Yka3aHnO OTHoCHTeNbHO ONTmAlbHOrO 6paueHnC aKKymIaTOPHo 6aTaapee
He BcKpbIbAaTe aKKymyIaTOp. Pn3Tom BO3HnKaet ONaCHOCTb KOpOTKO-TO 3aMbIkaHn.

3aunuaiTe aKKymyIaTop OT BbICOKHX Tempeatyp (HaNP.,OT dInHtBHoro Ha-
rpeBaHnHa coHnce),OrH,BoDbl N BnaR.3To co3daet onaCHOctb B3pbl Ba.
3aunuaTe He BCTaBHeHbI aK KymyTOp OT KaHcIepcknx CKePOnK, MoHET, KInUeY, rBO3- Dei, BNHTOB IN dpyrNx He6oNbX MeTaNnueCKNX ppeMToB, KOtOp bIe MOrTy 3aKOpOTNb PONIOca.
KopoTkoe 3aMbikaHne pOJIocOB aK KymyIaTOPa MoKeT npNBecT N K OxOraRam HnNoJapy.
Пи NOвржденин И НерраBNь-HOM ИспОльбЗOBаHHn aKKуМУлТОpa MOryT BblДeЯТьСа napbl.ПpoBETPNTe TeppITOpHIO n OБразИТecь KВрач пи наличи Кало6 Na COCTOЯнe 3ДОРOBь.Выханe NapOBMOжETnpINBeCTN K pa3ДраЖeHHIOdbIXaTeNbHbIXpyTei.
OctpbIMN ppeMMeTAMH,HaNP., TBO3dEM HIN OTBepTKoI, a TaKKe BHeuHM CNIOBbIM BO3deJCTBnE MoxHo IOBpeDHTb aKKymyTopHyU 6atapeU.3To MoKET npIN-BeCTN K BHyTpEHem KYOPOTKOMy 3aMbIKaHHU, BO3rOpaHHU C 3aDbIMNe
HnEM, B3pblBy nIII nepeIpeBy aKKyMylTOpH0N 6batapei.
Pn HnepaBnHbOM nCnoB3OBaHnn n3 aKKymyIaTopa MoKet noTeuch KndKocTb. N36eAaTe cOpnKocHOBeHHcHe. Pn CnyaHOM KOHTAKTe IpomOte COOTBcTByIOoee MeCTo BODo. EcN 3Ta KndKocTb IOnaTeB rna3a,TO Do-ONHNTelbHo 6paTntecb 3a NOMoCbIO K BpaCy. BbTEKaIOUaay aKKymyJIaTOPHaay KndKocTb MoKet npNBecTI K pa3dpaJaeHHIO KOxHn IN K OXkOram.
He 3ambikaite haKopoTko aKKymyIaTOp.3TO c03daet ONaCHOCTb B3PbIBa.
HcnoIb3yIeToIbKO ppeDycMOtpeHHbIe IJIaAHHO caIOBOrO HNCTpymEnTa aKKymJrTOphbIE 6aTapei npOn3BOJcTBa Bosch. IcNoIb30BaHHe dpynX aKKymJrTOpHbIX 6aTapei MoKeT pINBeCTn K TpaBMam N UpeBaTO BO3HNKOBHeHEm IPOjapa.
Y6eHNTecb,yTO caIOBbI HNCTpyMeHT BbIKIIOueH,IpexJe cEmBCTaBJIaTb aKKymJITOPHyIO 6atapeo.YcTaHOBka aKKymJITOPHO6atapeu BO BKIIIOUeHNbI CaIOBbIHHCTpyMeHT MOKeT pINBeCTN K HeCCHACTHOMy CnUcaIO.
OTKpbIbAaTe aKKymyJIaTOpHbI OTEcK,ToIbKO eCNI aKKymyJIaTOp H3pacXoIOBaJ cBOJ pecypc.OCTaBJIaIe aKKymyJIaTOp IJa XpaHeHnHa 3IMy B 3JeKTPOINHCTpyMeHTe.
BCTPOEHHbI aKKyMylrTOP oyeH bOJIROBeUHbI, He OTKpbIbAITe aKKyMylrTOPbI OTcEK, NOKa He cTAHet 3aMeTHO 3HaunTeIbHOe COKpaIeHne BpeMeHn pa6Otbl MeJdy DByM 3aPdKaMn aKKyMylrTopa.
Indego pa6oTaet B dHaana3OHe ot 5^ do 45^. EcnI tempepatya akKymyTAToPA hXoDHTcra 3a npedeMaM NTOGO dHaana3OHa, Indego oTo6paJxAeT coo6uHne H He NOKndaet 3apRdHyU cTahnIO. B npoucece 3kCnPyataunl Indego BO3BpauaTecna 3apRdHyU cTahnIO nIn OCTaETcCTOATb Ha MeCTe.
3apraKa DOnJxHa OcyuIeCTBJIaTbC TaIbKO B DoNyUeHHoH cHpMoB Bosch 3apAHO CTaHcH.
Yka3aHnno TExHnke 6e30nacHoCTn dIy 3apAnHoro yctpoiCTBa n 6loKa pHTaHH
Длязарядкг ra30HOKOcHKn Hc- noIb3yIte TOnbKO opnHnaIbHyIO 3apdHyIO CTaHcIIO n OpnHnaIb- hIi ceTeBOJ shHyp Bosch. B npoTIBHOM Clyuae BO3HnKaet ONaCHOCTb B3PbIBa N BO3rOpaHnJ.
Perylaepno npobepaTe 3apdhyo cTanuio,6nok nHTaHna,shypr u wTeencb. B cnyuae nobpejdeHn nn H3MeHenn OTKIouhTe 3apdhyo cTaNcHIO nn 6nok nTaHnO TcETn He NcNoB3yute nx.He BckpbBaaiTe 3apdhyo cTaNcHIO nn 6nok nHTaHna camoc-CToTeNbHO.PemOnTHbIe pa60tbl
pa3pewaeTcBbINOJHrToTbKO KBaHnΦuNpOBaHHOMy NepcoHany Bosch n TOnbKO c HcNoIb3ObaHnemOpnHaHbHbIX 3anacte. IopBpeJeHn3apdHn CTaHcH,6LoKaPiTaHn,ShHypaPiTaHn HnISteCSeJIPOBbIshaIOT PnCK NopaKeHn3JIeKTPnueckm TOKOM.
He nCnoIb3yIte 3apAHyIO CTaH- u 6Lok PHTaHHa Ha IerKoBocPnAmehaUoSeiCs NOBepXHOCTN (HaNP., Ha 6ymare, TkaHax N T. d.) HnB6n3n ropuHx MaTepeHaoB. B CBy3n c HarpeBaHNem 3a-paHON CTaHcnn i 6Loka PHTaHHa BO BpEMa 3apAdkn BO3HnKaet ONaCHOCTb BO3rOpAHn.
He octabnne dete63 npncmotpa. He noJxHbI ng- paTbcra 3apdnoi cTaHcnei, bIOKOM PHTAHN HIN caObIM HNCTpyMEHTOM.
HapjEne HCTouHnKa NtAHnJaONKHO COOTBETCTBOBaTb DaHHbIMHa 6Ioke NtAHn.
PeKOMeHnyeTcI NOdklUoyaTb 3TOT 6JOK NITaHnI TOnbKO K pO3eTKe, OCHaUeHHo YCTPOINCTBOM 3aUHTHO TO OKJIIOUeHHN C TOKOM cpa6aTBiBAH NIA 30 mA. PeryIrpHo IpoBepaTe yHKUHOHaJIbHyIO CnOCO6HOCTb YCTPOINCTBa 3aUHTHOrO OKJIIOUeHHN.
CeteBoi shHyp Heo6xOdmo peryIaRHO npOBepaTb Ha HAnuHe NoBpeXdEHH.
Bcnyae 3aToPJIeHnJ3apJHOn CTaHcNtOKJIIOUHTe 6Iok PNTaHnO T
CETHIOOBpaHTeCbBCEPBCHyO MaCTepckyo Bosch.
Hnkorga He kacaTeCb cTeBOro 1TepceIyIpynx 1TepceIeMOKpbIMn pykam.
He nepee3xajTe uepe3 shhyp nHTaHn, He cdaBnBaIte erO n He TAHnTe 3a Hero, nockoly Bbl MoKeTe erO NOBpeNTb. 3aunuae Te shyp OT BbICOKHX Tempeatyp, Macen n OCTpbIX KpaEB.
www.bosch-garden.com
BoBcex 3a npocax n 3aka3ax 3aunacte Te obra3atelbno yka3blBaIte 10-3haHbI TOBAPbI HOpE IIO 3aBODckO Ta6nUKe ra3OHOKoNKn.
www.bosch-garden.com
www.bosch-garden.com
Prilikom narucivanja rezervnih dijelova i kod svih upita svakako navedite 10-znamenkasti broj articla prema označnoj pločici kosilice.
Mozda ce biti potrebna verzija softvera kosilice (vidi „Izbornik > Postavke > Informacije".
www.bosch-garden.com
www.bosch-garden.com
Pieprasot konsultacijas un pasutot rezerves dalas, noteiktipazinojiet 10 zimju izstradajuma numuru, kas noradits uzzaliena plaveja markejuma plaksnites.
www.bosch-garden.com
Conformity assessment procedure in accordance with annex VI. Product category: 32
Notified body: DEKRA Certification B.V., Meander 1051, 6825 MJ Arnhem, Netherlands, Nr. 0344
2014/53/EU: EU type examination no. ATCB025979 by notified body no. 1588., ACB, Inc., 6731 Whittier Avenue, Suite C110, Mc-Lean, Virginia 22101, United States
Technical file at:
Whittier Avenue, Suite C110, Mc-Lean, Virginia 22101, United States
Whittier Avenue, Suite C110, Mc-Lean, Virginia 22101, United States
2014/53/EU: EU type examination no. ATCB025979 by notified body no. 1588., ACB, Inc., 6731 Whittier Avenue, Suite C110, Mc-Lean, Virginia 22101, United States
TexHnKaIbIK KxKaTtap:
ro 2000/14/CE:Nivel māsurat al puterii sonore 61 dB(A), incertitudine K = 2 dB, nivel garantat al puterii sonore 63 dB(A)
Whittier Avenue, Suite C110, Mc-Lean, Virginia 22101, United States
Techniné dokumentacija saugoma:

BOSCH
- Robert Bosch Power Tools GmbH, PT/ECS,
70538 Stuttgart,GERMANY
Henk Becker
Chairman of Executive
Management
Helmut Heinzelmann
Head of Product Certification

Robert Bosch Power Tools GmbH, 70538 Stuttgart, GERMANY
Stuttgart, 04.11.2020