
M6680/00 - Espresso SAECO - Free user manual and instructions
Find the device manual for free M6680/00 SAECO in PDF.
 FR
FR
 AZ
AZ
 BG
BG
 CS
CS
 DA
DA
 DE
DE
 EL
EL
 EN
EN
 ES
ES
 ET
ET
 FI
FI
 HE
HE
 HU
HU
 HY
HY
 IT
IT
 KA
KA
 KK
KK
 KY
KY
 LT
LT
 LV
LV
 MK
MK
 NL
NL
 NO
NO
 PL
PL
 PT
PT
 RO
RO
 RU
RU
 SK
SK
 SL
SL
 SQ
SQ
 SV
SV
 TG
TG
 TK
TK
 UK
UK
 UZ
UZ
| Product type | Fully automatic espresso machine |
| Brand | Saeco |
| Model | M6680/00 |
| Dimensions (L x H x P) | 262 x 383 x 448 mm |
| Weight | 8.3 - 8.8 kg |
| Water tank capacity | 1.8 L |
| Bean hopper capacity | 300 g |
| Milk container capacity | 600 ml |
| Adjustable dispensing spout height | 87-147 mm |
| Power cord length | 1,200 mm |
| Power supply | 230 V, 50 Hz, approx. 1500 W (see rating plate) |
| Wi-Fi frequency band | 2.4 GHz 802.11 b/g/n |
| Water filter | AquaClean (replacement recommended every 3 months) |
| Grinder | Ceramic grinder, 12 grind settings |
| Main functions | CoffeeMaestro, CoffeeEqualizer Touch, ExtraShot, HygieSteam, personal profiles, pre-ground coffee, hot water |
| Cleaning and maintenance | Automatic milk circuit cleaning, degreasing and descaling cycles, brewing unit cleaning |
| Included accessories | Milk container, milk intake spout, cleaning brush, grease tube, AquaClean filter, measuring spoon, water hardness test strip |
| Spare parts and repairability | Descaling solution CA6700, AquaClean filter CA6903, Grease HD5061, Degreasing tablets CA6704, Milk circuit cleaner CA6705, Maintenance kit CA6707 |
| Safety | Automatic shut-off in case of overheating, error codes for diagnosis |
| General information | Connected machine, software updates via Wi-Fi, compatible with Amazon Alexa and Smart Reorders |
Frequently Asked Questions - M6680/00 SAECO
User questions about M6680/00 SAECO
0 question about this device. Answer the ones you know or ask your own.
Ask a new question about this device
Download the instructions for your Espresso in PDF format for free! Find your manual M6680/00 - SAECO and take your electronic device back in hand. On this page are published all the documents necessary for the use of your device. M6680/00 by SAECO.
USER MANUAL M6680/00 SAECO
SV ANVÄNDARHANDBOK
TK ULANYJY GOLLANMASY
EL ΕΓΧΕΙΡΙΔΙΟ ΧΡΗΣΗΣ
BG РЪКОВОДСТВО ЗА ПОТРЕБИТЕЛЯ
KY КОЛДОНУУЧУНУН ХЕТЕКЧИСИ
MK КОРИСНИЧКО УПАТСТВО
RU РУКОВОДСТВО ПОЛЬЗОВАТЕЛЯ
TG DACTYNICTNΦOДБAP
UK ПОСІБНИК КОРИСТУВАЧА
KK ПАЙДАЛАНУШЫ НҰСҚАУЛЫҒЫ
HY Օգտագործողի ձեռնարկ
KA მომხმარებლის სახელმძღვანელო

Adjusting machine settings 11
AquaClean water filter 12
Removing and inserting the brew group 13
Cleaning and maintenance 13
Descaling procedure 16
Error codes 17
Ordering accessories 18
Software updates 18
Troubleshooting 19
Technical specifications 24
Declaration of Conformity 24
Wi-Fi 24
Machine overview (Fig. A)
A1 Lid of bean hopper A2 Lid of pre-ground coffee compartment A3 Control panel A4 Socket for cord A5 Drip tray A6 Drip tray release grip A7 HygieSteam container A8 HygieSteam cover with milk tube holder A9 Height-adjustable coffee and milk dispensing spout A10 Internal cappuccinatore A11 Power cord with plug
A12 Grind setting knob (to learn more, visit www.saeco.com/care) A13 Bean hopper A14 Brew group (to learn more, visit www.saeco.com/care) A15 Service door A16 Water tank A17 Coffee grounds container A18 Front panel of coffee grounds container A19 Drip tray cover A20 'Drip tray full' indicator
Accessories
A21 Milk container, A22 Milk tube, A23 Cleaning brush, A24 Grease tube
A25 AquaClean filter, A26 Measuring spoon, A27 Water hardness test strip
Control panel
Refer to figure B for an overview of all icons. Below you can find the descriptions.
B1 On/off icon, B2 Drinks, B3 Drinks menu, B4 Personal profiles
B5 Machine settings, B6 Status menu, B7 Shop, B8 Start/stop icon
Introduction
Congratulations on your purchase of a Saeco full-automatic coffee machine! To fully benefit from the online support that Saeco offers, you can use the control panel to register your machine via the built-in Wi-Fi connection, or go to www.saeco.com/MyCoffeeMachine and register your product there.
Read the separate safety booklet carefully before you use the machine for the first time and save it for future reference.
Your Saeco full-automatic coffee machine allows you to connect with your Wi-Fi network to enhance your coffee experience.
By connecting your machine to your Wi-Fi network, you will be able to:
- Enjoy regular software updates to enhance your user experience, make use of the shop functionality if available in your country, and link your machine to your Amazon account for accessory replenishment if this option is available in your country.
- Connect to your Alexa home device to make use of voice control, if available in your country.
Note: This machine has been tested with coffee. Although it has been carefully cleaned, there may be some coffee residues left. We guarantee, however, that the machine is absolutely new.
Switching on the machine
Tap the 'on' icon and follow the step-by-step instructions on the control panel.
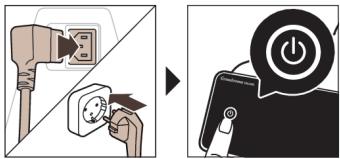
Please connect and update the machine at first installation and regularly check for manual updates.
Connecting to Wi-Fi
Connect your coffee machine to a 2.4 GHz 802.11 b/g/n home Wi-Fi network. Connecting your coffee machine to your home Wi-Fi network provides you with an enhanced user experience. Make sure that the coffee machine and the Wi-Fi router are within range of each other.
Follow the steps below to connect your coffee machine to your Wi-Fi network.
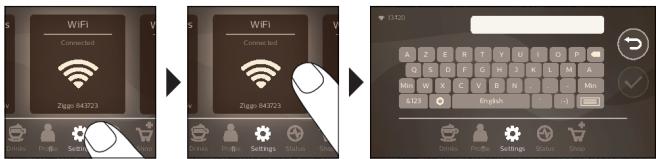
1. Tap the Settings icon and swipe from left to right to find the Wi-Fi icon. 2. Tap the Wi-Fi icon. 3. Follow the steps on the screen to connect your machine to your Wi-Fi network.
You are now ready to start your connected experience.
The machine will perform the automatic rinsing cycle when it is switched on and off via voice control and when the machine has been inactive for a while and switches off. Please make sure that the environment of the machine is safe.
Special functions
Special function
Purpose

With CoffeeMaestro you can personalize your coffee by selecting a pre-set taste profile (Delicato, Intenso, Forte) for your beverage instead of changing the settings yourself.

The HygieSteam function automatically cleans the milk system, removing microorganisms: use it after brewing cappuccino or other milk-based drinks.

Our durable grinder is made from 100% ceramic to be exceptionally hard and precise. It can be adjusted to your taste with 12-step levels.
The Maintenance Dashboard gives you a helpful overview and notifies you with status information on things like that the AquaClean is running low.
Brewing drinks
General steps
To brew a drink, you need to follow a few simple steps.
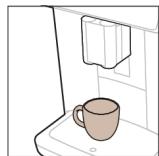

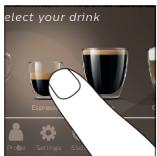

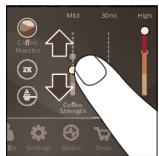

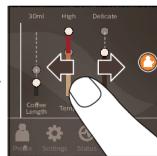

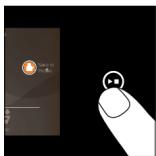

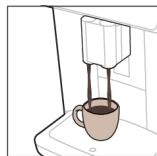
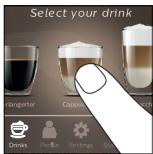
1 Fill the water tank with tap water and fill the bean hopper with beans. 2 Place one or two cups under the height-adjustable dispensing spout. Slide the dispensing spout up or down to adjust the height to the size of the cup or glass you are using. 3 Tap the Drinks icon to enter the 'Drinks' menu. Swipe from left to right to select your drink by tapping on it.
- Tap the '2x' icon if you want to brew two cups. The machine automatically carries out two grinding cycles in sequence of the selected drinks.
i The '2x' icon is not available for all drinks.
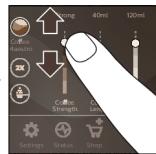
4 After selecting a drink you can adjust the settings to your preference by swiping the adjustable bars up and down. 5 Press the start/stop icon to start brewing the selected drink.
A Do not use caramelized or flavored coffee beans.
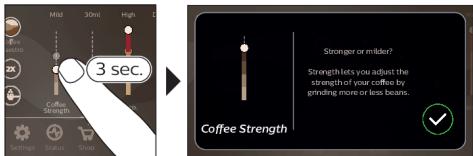
Support on drink parameters
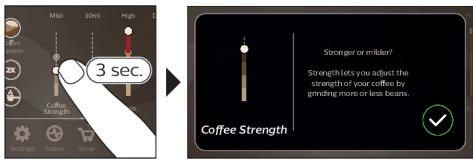
To get additional information about a specific drink parameter, press and hold an item for 3 seconds.
Brewing milk-based drinks
To brew milk-based drinks, you need to follow a few simple steps.
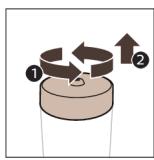
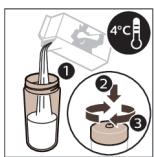
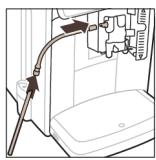
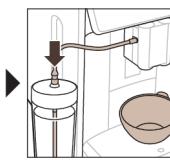
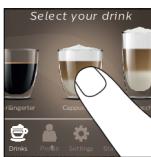
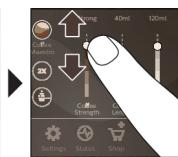
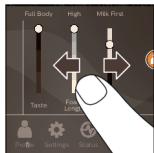
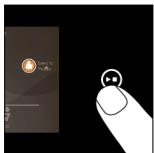
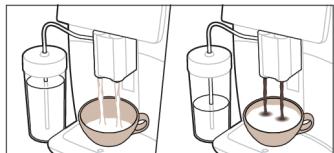
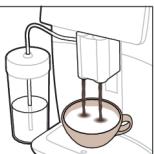
1 Fill the water tank with tap water and fill the bean hopper with beans. 2 Unscrew the lid of the milk container and fill the milk container with milk.
Always use milk coming directly from the fridge for optimal results.
3 Connect the flexible milk tube to the cappuccinatore. 4 Place the metal milk tube in the container. 5 Tap the Drinks icon, scroll and select the milk-based drink icon of your choice. 6 You can adjust the settings to your preference by swiping the adjustable bars up and down. 7 Press the start/stop icon at any time to start brewing the selected drink.
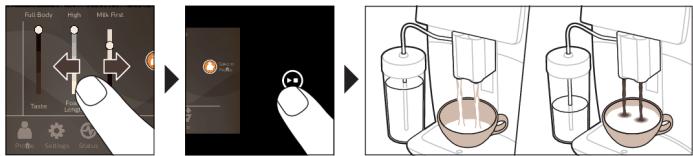
- For specific drinks, the machine first dispenses milk and then coffee. For a number of other drinks this is the other way around, the machine will first dispense coffee and then milk.
- To stop dispensing milk before the machine has dispensed the preset amount, press the start/stop icon.
- To stop dispensing the complete drink (milk and coffee) before the machine is finished, press and hold the start/stop icon.
A Directly after dispensing the milk, the 'HygieSteam Shot' is performed. The machine shoots steam through the internal milk system to rinse it quickly. The metal part of the milk tube may become hot. To avoid the risk of burns, let it cool down first.
Tip: You can also use a regular milk carton to brew your milk-based drinks. Place the metal milk tube directly into the milk carton.
Brewing coffee with pre-ground coffee
To brew coffee with pre-ground coffee, you need to follow a few simple steps.
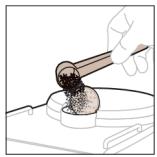
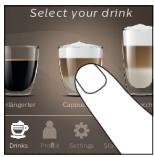
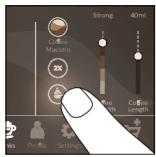
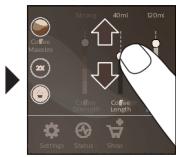
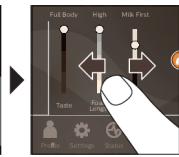
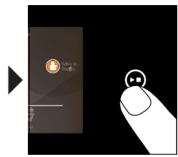
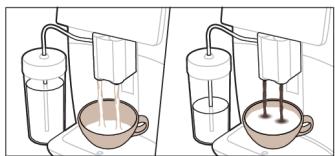
1 Open the lid of the pre-ground coffee compartment and pour one measuring spoon of pre-ground coffee into it. Then close the lid. 2 Tap the Drinks icon, scroll from left to right and select your drink. 3 Tap the pre-ground coffee icon. 4 You can adjust the settings to your preference by swiping the adjustable bars up and down. 5 Press the start/stop icon to start brewing the selected drink.
If you select pre-ground coffee, you cannot adjust the coffee strength or brew more than one drink at the same time.
Dispensing hot water
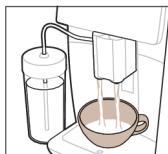
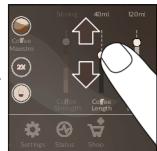
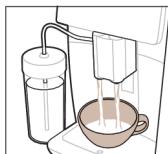
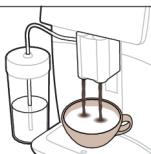
1 Make sure that the internal cappuccinatore is correctly attached to the machine (Fig. 1). 2 Place a cup under the spout. 3 Tap 'Hot Water' (Fig. 2). 4 Slide the adjustable bars up and down to adjust the hot water quantity or temperature to your preference (Fig. 3). 5 Press the start/stop icon. 6 To stop dispensing hot water before the machine is finished, press the start/stop icon again.
Personalization
The machine allows you to adjust the settings of a drink to your own preference and to store the adjusted drink in a personal profile. You can choose your own icon and your own profile name.
Speed up with CoffeeMaestro
Your machine offers the possibility to select taste profiles instead of adjusting all settings separately with the CoffeeMaestro function. You can choose between Delicato, Intenso and Forte. To select a CoffeeMaestro taste profile:
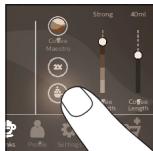
1 Tap the drink icon of your choice (Fig. 4). 2 Tap the CoffeeMaestro icon repeatedly (Fig. 5).
- The main settings of the drink are now adjusted accordingly.
3 Press the start/stop icon to start brewing the drink.
Personalize your drink with the CoffeeEqualizer Touch function
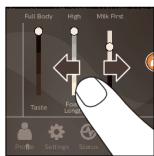
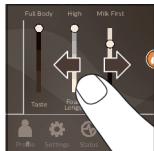
After selecting a drink, the CoffeeEqualizer Touch function is activated automatically, allowing you to adjust the drink settings. Long press on each of the items on the display to activate the help function and receive further information.
With the CoffeeEqualizer Touch function you can adjust the following settings:
1 Aroma strength
5 Drink temperature
2 Coffee quantity
6 Foam amount
3 Milk quantity
7 You can also decide to prepare 1 or 2 cups
4 Water quantity
8 The order of first dispensing coffee or milk
Note: It depends on the drink you choose which settings you can adjust.
Save your favorite drinks in a profile
The machine allows you to adjust the settings of a drink to your own preference and to store the adjusted drink in a personal profile. You can select a profile and store a recipe using the profiles.
You can create a profile and add a drink using the profile icon.
1 Tap the profile icon on the main menu (Fig. 6). 2 Tap the Plus icon (Fig. 7). 3 Type your name and select your favorite icon. 4 You are ready to add a drink. Tap the drink icon of your choice. 5 Personalize the drink via the CoffeeEqualizer Touch or the CoffeeMaestro function. 6 Tap on the 'Save to profile' icon to store it in your personal profile (Fig. 8).
Extra shot (ExtraShot)
Your machine offers you the possibility to add an extra shot of Ristretto to your coffee and milk drinks, for example if you want to have a stronger coffee.
1 Place a cup under the spout. 2 Tap one of the one-touch drinks icons to select a drink (Fig. 4). 3 Slide the adjustable bar up to set the strength to the top level and select the ExtraShot function (Fig. 9). 4 Then press the start/stop icon to start brewing the drink. 5 To stop dispensing the drink before the machine has finished, press the start/stop icon again.
i When you have selected the ExtraShot function, you can only brew one coffee at a time. i The extra shot function is not available for all drinks.
Adjusting machine settings
You can adjust most machine settings by tapping the Settings icon and follow the steps on the screen. For online support (frequently asked questions, movies etc.), scan the QR code on the cover of this booklet or visit www.saeco.com/care
Setting the water hardness
We advise you to adjust the water hardness setting to the water hardness level in your region for optimal performance and a longer lifetime of the machine. This also prevents you from having to descale the machine too often. The default water hardness setting is 4: hard water.
Use the water hardness test strip supplied in the box to determine the water hardness in your region:
1 Immerse the water hardness test strip in tap water or hold it under the tap for 1 second (Fig. 10). 2 Wait 1 minute. The number of squares on the test strip that turn red indicate the water hardness (Fig. 11).
Set the machine to the correct water hardness:
1. Tap the Settings icon and scroll from left to right to select 'Water hardness'.
2. Select the water hardness level. The number of red squares selected on the display should be the same as the number of red squares on the test strip (Fig. 12). 3. When you have set the correct water hardness, tap the confirmation checkmark icon to confirm.
Adjusting the grind setting
You can change the coffee strength with the grind setting knob inside the bean container. The lower the grind setting, the finer the coffee beans are ground and the stronger the coffee becomes. There are 12 different grind settings you can choose from.
The machine has been set up to get the best taste out of your coffee beans. Therefore we advise you not to adjust the grind setting until you have brewed 100-150 cups (approx. 1 month of use).
1. You need to brew 2 to 3 drinks before you can taste the full difference. A. Do not turn the grind setting knob more than one notch at a time to prevent damage to the grinder.
1. Tap the Settings icon in the main menu. 2. Tap on "Grinder". 3. Watch the how to video.
Restoring factory settings
The machine offers you the possibility to restore the factory settings at any moment.
1. Tap the Settings icon. 2. Scroll from left to right to select 'Factory settings'. Confirm by tapping the confirmation checkmark icon.
- The settings are now restored.
1. The following factory settings are restored to default: water hardness, standby time, display brightness, sound, front illumination, profiles, measure/units, home screen settings, Wi-Fi credentials, software update preferences, Saeco credentials, Amazon credentials.
Aquaclean water filter
Your machine is AquaClean enabled. You can place the AquaClean water filter in the water tank to preserve the taste of your coffee. It also diminishes the need for descaling by reducing limescale build-up in your machine. You can purchase an AquaClean water filter from your local or online retailer or from authorized service centers.
AquaClean filter status indication
The status of the AquaClean filter is always visible in the 'Status' menu as a percentage.
- If the status of the AquaClean filter is 10% or less, the screen shows a message for 2 seconds each time you switch on the machine. This message advises you to buy a new filter.
- If the status of the filter is 0%, the machine asks you to replace the AquaClean filter every time you switch on the machine.
Activating the AquaClean water filter (5 min.)
The machine does not automatically detect that a filter has been placed in the water tank. Therefore you need to activate each new AquaClean water filter that you install in the 'Status' menu. When the machine stops showing the filter activation message, you can still activate an AquaClean water filter, but you will need to descale the machine first. Your machine has to be completely limescale-free before you start using the AquaClean water filter.
Before activating the AquaClean water filter, it has to be prepared by soaking it in water as described below. If you don't do this, air might be drawn into the machine instead of water, which makes a lot of noise and prevents the machine from being able to brew coffee.
1 Tap the 'Status' icon and scroll from left to right to select 'AquaClean'. 2 Tap the confirmation checkmark icon again when the activation screen appears. Follow the instructions on the screen.
Replacing the AquaClean water filter (5 min.)
After 95 liters of water have flowed through the filter, the filter will cease to work. The AquaClean status indicator drops to 0% to remind you to replace the filter. If you do not replace the AquaClean water filter in time, you can still replace the filter but you first need to descale the machine.
When the AquaClean status indicator drops to 0% or when the machine reminds you to replace the AquaClean filter:
1 take out the old AquaClean water filter. 2 install a new filter and activate it as described in chapter 'Activating the AquaClean water filter (5 min.)'. Replace the AquaClean water filter at least every 3 months, even if the machine does not yet indicate that replacement is required.
Removing and inserting the brew group
Go to the 'Status' menu on the screen and select 'Brew group clean' or visit www.saeco.com/care for detailed video instructions on how to remove, insert and clean the brew group.
Removing the brew group from the machine
1 Remove the water tank and open the service door (Fig. 13). 2 Press the PUSH handle (Fig. 14) and pull at the grip of the brew group to remove it from the machine (Fig. 15).
A When you remove the brew group from the machine, make sure to empty the drip tray and the coffee grounds container.
Reinserting the brew group
Before you slide the brew group back into the machine, make sure it is in the correct position.
1 Check if the brew group is in the correct position. The arrow on the yellow cylinder on the side of the brew group has to be aligned with the black arrow and N (Fig. 16). - If they are not aligned, push down the lever until it is in contact with the base of the brew group (Fig. 17). 2 Slide the brew group back into the machine along the guiding rails on the sides (Fig. 18) until it locks into position with a click (Fig. 19). Do not press the PUSH button. 3 Close the service door and place back the water tank.
Cleaning and maintenance
Your machine will advise you when to perform cleaning and maintenance.
Regular cleaning and maintenance keeps your machine in top condition and ensures good-tasting coffee for a long time with a steady coffee flow.
Consult the table below for a detailed description of when and how to clean all detachable parts of the machine. You can find more detailed information and video instructions on www.saeco.com/care. See figure C for an overview of which parts can be cleaned in the dishwasher.
| Item | When to clean | How to find in the control panel/What to do |
| AquaClean filter | When the machine asks you or every three months. | STATUS->CLEANING->AQUACLEAN. Follow the steps to activate the AquaClean filter. |
| 1 The machine does not automatically detect that a filter has been placed in the water tank. Therefore you need to activate each new AquaClean filter that you install in the 'Status' menu. | ||
| 1 Your machine has to be completely limescale-free before you start using the AquaClean filter. | ||
| 1 Replace the AquaClean filter at least every 3 months, even if the machine does not yet indicate that replacement is required. | ||
| Brew group | Weekly | STATUS -> PERFORMANCE ->BREW GROUP CLEAN. Follow the steps to remove and clean the brew group. |
| 1 When you remove the brew group from the machine, make sure to empty the drip tray and the coffee grounds container. | ||
| 1 Before you slide the brew group back into the machine, make sure it is in the correct position.The arrow on the yellow cylinder on the side of the brew group has to be aligned with the black arrow and N (Fig. 16). | ||
| Monthly | STATUS -> PERFORMANCE ->COFFEE OIL REMOVAL. Follow the steps of the self-cleaning process to automatically remove coffee oil residues from the brew group. | |
| Milk system/internal cappuccinatore | After every day of use | STATUS ->HYGIESTEAM. Follow the steps of the self-cleaning process to clean the milk system. Wipe the outside of the metal milk tube with a damp cloth before placing it into the milk tube holder. |
| Weekly | Remove and disassemble the internal cappuccinatore. Rinse all parts under the tap with some washing-up liquid. | |
| Monthly | STATUS ->HYGIESTEAM -> DEEP MILK CLEAN. Follow the steps of the self-cleaning process to clean the milk system. | |
| Milk container | Weekly | Disassemble the milk container (Fig. 20) and push out the ball using the pin of the milk tube (Fig. 21). Clean all parts of the milk container under the tap or in the dishwasher. |
| HygieSteam container (milk tube holder) | Weekly or when the machine reminds you | Remove the HygieSteam container from the machine (Fig. 22) and remove the HygieSteam cover (Fig. 23). Clean the HygieSteam container and cover under the tap or in the dishwasher. Let the container and cover air-dry and place them back into the machine. |
| Pre-ground coffee compartment | Check the pre-ground coffee compartment weekly to see if it is clogged | Unplug the machine and remove the brew group. Open the lid of the pre-ground coffee compartment and insert the spoon handle into it. Move the handle up and down until the clogged ground coffee falls down (Fig. 24). Go to www.saeco.com/care for detailed video instructions. |
| Coffee grounds container | Empty the coffee grounds container when prompted by the machine. Clean it weekly | Remove the coffee grounds container while the machine is switched on. Clean it under the tap with some washing-up liquid or in the dishwasher.Note: The front panel of the coffee grounds container is not dishwasher proof. |
| Drip tray | Empty the drip tray daily or as soon as the red 'drip tray full' indicator pops up through the drip tray (Fig. 25). Clean the drip tray weekly | Remove the drip tray (Fig. 26) and clean it under the tap with some washing-up liquid or in the dishwasher. |
| Lubrication of the brew group | Every 2 months | Lubricate the brew group with the by-packed grease (see 'Lubricating the brew group'). Go to www.saeco.com/care for detailed video instructions. |
| Water tank | Weekly | Rinse the water tank under the tap. |
| Machine front | Weekly | Clean with a non-abrasive cloth. |
| Descaling of the machine | When the machine asks you to descale | STATUS -> DESCALING. Follow the steps to descale the machine. When descaling is needed, the machine asks you to descale it, press the OK icon to start and follow the steps. |
Cleaning the brew group
Regular cleaning of the brew group prevents coffee residues from clogging up the internal circuits. Go to the 'Status' menu on the screen and select 'Brew group clean' or visit www.saeco.com/care for support videos on how to remove, insert and clean the brew group.
Cleaning the brew group under the tap
1 Tap the 'Status' icon and scroll to select 'Brew group clean'. 2 Tap the confirmation checkmark icon to confirm and then follow the instructions on the screen.
Cleaning the brew group with the coffee oil remover tablets
Only use Philips coffee oil remover tablets.
1 Tap the 'Status' icon and scroll to select 'Brew group clean'. 2 Tap the confirmation checkmark icon to confirm and then follow the instructions on the screen.
Lubricating the brew group
To improve your machine's performance, we suggest that you lubricate the brew group every 2 months, to ensure that the moving parts continue to move smoothly.
1 Apply a thin layer of grease on the piston (grey part) of the brew group (Fig. 27). 2 Apply a thin layer of grease around the shaft (grey part) in the bottom of the brew group (Fig. 28). 3 Apply a thin layer of grease to the guiding rails on both sides (Fig. 29).
Cleaning programs for the internal cappuccinatore
1 The machine tells you when to clean the internal cappuccinatore.
The machine has three programs to clean the internal cappuccinatore:
- 'HygieSteam Shot': during the preparation of a milk-based drink, the machine automatically shoots steam through the internal cappuccinatore to rinse it quickly.
- 'HygieSteam': the machine thoroughly cleans the internal milk system with steam. Make sure that the HygieSteam container is correctly assembled (Fig. 30) and attached to the machine (Fig. 31). Place the milk tube in the milk tube holder (Fig. 32) and follow the instructions on the screen.
- 'Deep Milk Clean': Perform the 'Deep Milk Clean' procedure with the Philips milk circuit cleaner for a thorough cleaning of the internal milk system.
Cleaning the internal cappuccinatore under the tap
1 Open the door of the internal cappuccinatore (Fig. 33). 2 Remove the internal cappuccinatore by pulling it down (Fig. 34). 3 Disassemble the internal cappuccinatore by pulling the bottom part off the top part (Fig. 35). 4 Disassemble all parts (Fig. 36) and clean them under the tap. 5 Reassemble the internal cappuccinatore. 6 To place back the internal cappuccinatore, put it in upright position and make sure the holes are aligned with the two tubes on the machine. Then move the internal cappuccinatore upwards until it locks into place (Fig. 1). 7 Close the door.
Visit www.saeco.com/care for detailed video instructions.
Descaling procedure
Please use Philips descaler only. Under no circumstances should you use a descaler based on sulfuric acid, hydrochloric acid, sulfamic or acetic acid (vinegar) as this may damage the water circuit in your machine and will not dissolve the limescale properly. Not using the Philips descaler will void your warranty. Failure to descale the appliance will also void your warranty. You can buy Philips descaler from your local or online retailer or from authorized service centers.
1 When the machine asks you to descale it, tap the confirmation checkmark icon to start. To start descaling without being prompted by the machine, tap the 'Status' icon and select 'Descale'. 2 Remove the drip tray, the coffee grounds container and the HygieSteam container (Fig. 22), empty them and put them back into place. 3 Remove the water tank and empty it. Then remove the AquaClean filter. 4 Pour the whole bottle of Philips descaler into the water tank and then fill it with water up to the CALC CLEAN level (Fig. 37). Then place the water tank back into the machine. 5 Place a large container (1.5 l) under the coffee dispensing spout. 6 Make sure that the HygieSteam container is correctly assembled (Fig. 30) and attached to the machine (Fig. 31). Place the milk tube in the milk tube holder.
7 Follow the instructions on the screen to start the descaling procedure. The descaling procedure lasts approx. 30 minutes and consists of a descaling cycle and a rinsing cycle. 8 Once the descaling cycle is finished, you need to rinse the water tank and water circuit. Follow the instructions on the screen. 9 Place a new AquaClean filter in the water tank and activate it (see 'Activating the AquaClean water filter (5 min.)').
Tip: Using the AquaClean filter reduces the need for descaling!
What to do if the descaling procedure is interrupted
You can exit the descaling procedure by pressing the on/off icon on the control panel. If the descaling procedure is interrupted before it is completely finished, some descaling liquid may remain in the water tank or the water circuit. In that case, do the following:
1 Empty and rinse the water tank thoroughly. 2 Fill the water tank with fresh water up to the CALC CLEAN level indication and switch the machine back on. The machine will heat up and perform an automatic rinsing cycle. 3 Before brewing any drinks, perform a manual rinsing cycle. To perform a manual rinsing cycle, first dispense half a water tank of hot water and then brew 2 cups of pre-ground coffee without adding ground coffee.
Note: If the descaling procedure was not completed, the machine will require another descaling procedure as soon as possible.
Error codes
Below you find a list of the error codes showing problems that you can solve yourself. Video instructions are available on www.saeco.com/care. If another error code appears, please contact the Consumer Care Center in your country. For contact details, see the warranty leaflet.
| Error code | Problem | Possible solution |
| 01 | The coffee funnel is clogged. | Switch off the machine and unplug it. Remove the brew group. Then open the lid of the pre-ground coffee compartment and insert the spoon handle. Move the handle up and down until the clogged ground coffee falls down. Visit www.saeco.com/care for detailed video instructions. |
| 03 | The brew group is dirty or not well-greased. | Switch off the machine. Rinse the brew group with fresh water, let it air-dry and then lubricate it (see 'Lubricating the brew group'). Consult chapter 'Cleaning the brew group' or visit www.saeco.com/care for detailed video instructions. Then switch the machine on again. |
| 04 | The brew group is not positioned correctly. | Switch off the machine. Remove the brew group and reinsert it. Make sure that the brew group is in the correct position before you insert it. Consult chapter 'Handling the brew group' or visit www.saeco.com/care for detailed video instructions. Then switch the machine on again. |
| 05 | There is air in the water circuit. | Restart the machine by switching it off and on again. If this works, dispense 2-3 cups of hot water. Descale the machine if you have not done so for a longer period of time. |
| The AquaClean filter was not prepared properly before installation or it is clogged. | Remove the AquaClean filter and try to brew a coffee again. If this works, make sure that the AquaClean filter is prepared properly before you place it back (see 'Activating the AquaClean water filter (5 min.)'). Put the AquaClean filter back into the water tank. If this still does not work, the filter might be clogged and needs to be replaced. | |
| 11 | The machine needs to adjust to room temperature | Allow some time for the machine to adjust from transport/outdoor temperature to room temperature. Switch off the machine for 30 minutes and switch it on again. If this does not work, contact the Consumer Care Center in your country. For contact details, see the warranty leaflet. |
| 14 | The machine is overheated. | Switch off the machine and switch it back on after 30 minutes. |
| 19 | The machine is not connected to the wall socket properly. | Make sure that the small plug of the power cord is properly connected to the socket on the back of the machine. |
Ordering accessories
To clean and descale the machine, only use Philips maintenance products. These products can be purchased by enabling Amazon Smart Reorders, from your local or online retailer or from authorized service centers.
To be able to use Amazon Smart Reorders, you first need to activate this service on Amazon. Then follow the steps on the screen of your machine to connect your Amazon account to your Saeco account. After you have completed these steps, you can use the Amazon Smart Reorder service. In the 'Shop' menu on the control panel of the machine you can view the availability of Philips maintenance products and accessories at local retailers.
To find a full list of spare parts online, enter the type number of your machine. You can find the type number on the inside of the service door.
Maintenance products and type numbers:
- Descaling solution CA6700
- AquaClean filter CA6903 Brew group grease HD5061
- Coffee oil remover tablets CA6704 Milk circuit cleaner CA6705
- Maintenance kit CA6707
Software updates
Updating is essential to safeguard your privacy and proper functioning of your coffee machine. You can set whether you want to update your machine manually or whether you want it to be done automatically.
When you have selected automatic updates, make sure that the machine is also plugged in at night and Wi-Fi is enabled, so that the machine can receive the software updates overnight. Updates are made available when there are software improvements, new features for the machine and to prevent a possible security issue.
Mandatory firmware updates are started automatically when the coffee machine is in stand-by mode. During a firmware update the coffee machine cannot be used.
Troubleshooting
This chapter summarizes the most common problems you could encounter with the machine. Support videos and a complete list of frequently asked questions are available on www.saeco.com/care. If you are unable to solve the problem, contact the Consumer Care Center in your country. For contact details, see the warranty leaflet.
| Problem | Cause | Solution |
| There are some coffee residues inside my new coffee machine. | This machine has been tested with coffee. | Although it has been carefully cleaned, there may be some coffee residues left. However, the machine is absolutely new. |
| The machine is in DEMO mode. | You pressed the standby icon for more than 8 seconds. | Switch the machine on and off by unplugging the power cord and then plugging it in again. |
| The drip tray fills up quickly / there is always some water in the drip tray. | This is normal. The machine uses water to rinse the internal circuit and brew group. Some water flows through the internal system directly into the drip tray. | Empty the drip tray daily or as soon as the red 'drip tray full' indicator pops up through the drip tray cover. Tip: place a cup under the dispensing spout to collect rinsing water that comes out of it. |
| The 'empty coffee grounds container' icon remains on. | You emptied the coffee grounds container while the machine was unplugged from the wall socket, or you placed it back too fast. | Remove the coffee grounds container, wait at least 5 seconds and then insert it again. |
| The machine prompts to empty the coffee grounds container even though the container is not full. | The machine did not reset the counter the last time you emptied the coffee grounds container. | Always wait approx. 5 seconds when you place back the coffee grounds container. In this way, the coffee pucks counter will be reset to zero and the number of coffee pucks is counted correctly. |
| The coffee grounds container is too full and the 'empty coffee grounds container' icon did not appear on the display. | You removed the drip tray without emptying the coffee grounds container. | When you remove the drip tray, also empty the coffee grounds container even if it contains only a few coffee pucks. This ensures that the coffee pucks counter is reset to zero and that the number of coffee pucks is counted correctly. |
| I cannot remove the brew group. | The brew group is not in the correct position. | Reset the machine in the following way: close the service door and place back the water tank. Switch the machine off and back on again and wait for the lights in the drink icons to come on. Try to remove the brew group again. See chapter 'Removing and inserting the brew group' for step-by-step instructions. |
| I cannot insert the brew group. | The brew group is not in the correct position. | Reset the machine in the following way: close the service door and place back the water tank. Leave the brew group out. Switch off the machine and unplug it. Wait for 30 seconds and then plug the machine back in, switch it on and wait for the lights in the drink icons to come on. Then put the brew group in the correct position and reinsert it into the machine. See chapter 'Removing and inserting the brew group' for step-by-step instructions. |
| The coffee is watery. | The brew group is dirty or needs to be lubricated. | Remove the brew group, rinse it under the tap and leave it to dry. Then lubricate the moving parts (see 'Lubricating the brew group'). |
| The machine is performing its self-adjustment procedure. This procedure is started automatically when you use the machine for the first time, when you change to another type of coffee beans or after a long period of non-use. | Brew 5 cups of coffee initially to allow the machine to complete its self-adjustment procedure. | |
| The grinder is set to a too coarse setting. | Set the grinder to a finer (lower) setting. Brew 2 to 3 drinks to be able to taste the full difference. | |
| The coffee is not hot enough. | The temperature is set too low. | Set the temperature to the maximum setting (Fig. 38). |
| A cold cup reduces the temperature of the drink. | Preheat the cups by rinsing them with hot water. | |
| Adding milk reduces the temperature of the drink. | Regardless of whether you add hot or cold milk, adding milk always reduces the temperature of the coffee. Preheat the cups by rinsing them with hot water. | |
| Coffee does not come out or coffee comes out slowly. | The AquaClean water filter was not prepared properly for installation. | Remove the AquaClean filter and dispense some hot water. If this works, the AquaClean filter was not installed properly. Reinstall and activate the AquaClean filter and follow all steps in chapter 'AquaClean water filter'. |
| After a long period of non-use, you need to prepare the AquaClean water filter for use again and dispense 2-3 cups of hot water. | ||
| The AquaClean water filter is clogged. | Replace the AquaClean water filter every 3 months. A filter that is older than 3 months can become clogged. | |
| The grinder is set to a too fine setting. | Set the grinder to a coarser (higher) setting. Note that this will impact the coffee taste. | |
| The brew group is dirty. | Remove the brew group and rinse it under the tap (see 'Cleaning the brew group under the tap'). | |
| The coffee dispensing spout is dirty. | Clean the coffee dispensing spout and its holes with a pipe cleaner or needle. | |
| The pre-ground coffee compartment is clogged | Switch off the machine and remove the brew group. Open the lid of the pre-ground coffee compartment and insert the spoon handle into it. Move the handle up and down until the clogged ground coffee falls down (Fig. 24). | |
| The machine circuit is blocked by limescale. | Descale the machine with Philips descaler (see 'Descaling procedure'). Always descale when the machine prompts you. | |
| The milk does not froth. | The internal cappuccinatore is dirty or not inserted correctly. | Clean the internal cappuccinatore and make sure that you position and insert it correctly (see 'Cleaning the internal cappuccinatore under the tap'). |
| The type of milk used is not suitable for frothing. | Different types of milk result in different amounts of froth and different froth qualities. | |
| The milk is splashing. | The milk you use is not cold enough. | Make sure you use cold milk coming directly from the fridge. |
| The flexible milk tube is not connected properly. | Open the door of the coffee dispensing spout (Fig. 33) and check if the flexible milk tube is fully connected to the cappuccinatore (Fig. 39). Note that the cappuccinatore and milk tubes may be hot. Let the cappuccinatore and the tubes cool down before you touch them. | |
| The cappuccinatore and milk tubes are not clean. | Remove and disassemble the internal cappuccinatore (see 'Cleaning the internal cappuccinatore under the tap'). Rinse all parts under the tap. For thorough cleaning, use Philips milk circuit cleaner and perform the Deep Milk Clean procedure via the 'Status' and 'Hygiesteam' menu. Note that if the parts have been cleaned in the dishwasher, they may have become clogged by food particles or detergent residues. A visual check that they are not obstructed is also recommended. | |
| We advise you to perform the HygieSteam program every day: 1) Press 'Status' on the control panel. 2) Select 'HygieSteam'. 3) Then confirm all steps on the display. | ||
| The milk tubes are clogged. | Always store the milk container without the milk tubes in the refrigerator. Leftover milk could accumulate inside the milk tubes and block the flow of milk through the tubes. Rinse the milk tubes before storage. | |
| The machine seems to be leaking. | The machine uses water to rinse the internal circuit and brew group. This water flows through the internal system directly into the drip tray. This is normal. | Empty the drip tray every day or as soon as the 'drip tray full' indicator pops up through the drip tray cover. Tip: Place a cup under the dispensing spout to collect rinsing water and reduce the amount of water in the drip tray. |
| The drip tray is too full and has overflowed which makes it look like the machine is leaking. | Empty the drip tray every day or as soon as the 'drip tray full' indicator pops up through the drip tray cover. | |
| The water tank is not fully inserted, some water is leaking out of the water tank and air is drawn into the machine. | Make sure the water tank is in the correct position: remove it and reinsert it into the machine as far as possible. | |
| The brew group is dirty/clogged. | Rinse the brew group. | |
| The machine is not placed on a horizontal surface. | Place the machine on a horizontal surface so that the drip tray does not overflow and the 'drip tray full' indicator works properly. | |
| I cannot activate the AquaClean water filter and the machine asks for descaling. | The filter has not been installed or replaced in time after the screen showed the AquaClean reminder. This means your machine is not completely free of limescale anymore. | Descale your machine first and then install the AquaClean water filter. |
| The new water filter does not fit. | You are trying to install another filter than the AquaClean water filter. | Only the AquaClean water filter fits into the machine. |
| The rubber ring on the AquaClean water filter is not in place. | Place back the rubber ring on the AquaClean water filter. | |
| The machine is making a loud noise. | It is normal that your machine makes some noise during use. | If the machine starts to make a different kind of noise, clean the brew group and lubricate it (see 'Lubricating the brew group'). |
| The AquaClean water filter was not prepared properly and air is now drawn into the machine. | Remove the AquaClean water filter from the water tank and prepare it for use properly before you place it back. See chapter 'AquaClean water filter' for step-by-step instructions. | |
| The water tank is not fully inserted and air is drawn into the machine. | Make sure the water tank is in the correct position: remove it and reinsert it by pushing it into the machine as far as possible. | |
| When I try to connect the machine to Wi-Fi for the first time, the machine cannot connect to the Wi-Fi network. | Your Wi-Fi name and password are not correct. | Check your Wi-Fi name and password. |
| The coffee machine and the Wi-Fi router are not within range of each other. | Ensure that the coffee machine and the Wi-Fi router are within range of each other.or use a Wi-Fi repeater. | |
| The machine is not able to find the home Wi-Fi network. | The Wi-Fi router is not working properly. | Please make sure that the Wi-Fi router is working properly and is connected to the internet. |
| The machine is not within range of the router. | Make sure the machine is within range of the router. You can also use a Wi-Fi signal repeater. | |
| The router your coffee machine is trying to connect to is 5 GHz dual-band and your coffee machine is not trying to connect to a 2.4 GHz network. | 5 GHz networks are not supported.Temporarily switch off the 5 GHz band in your router and try to pair your coffee machine again to another band of the same router (2.4 GHz). Switch on your 5 GHz band again after successful pairing | |
| I cannot use Alexa and Amazon Smart Reorders yet. | You have not yet connected to your Amazon to your Saeco account. | Please follow the instructions on the control panel of the machine to connect your Amazon account to your Saeco account to be able to use Alexa voice control and Amazon Smart Reorders.Note: To be able to use these features you need to have an Alexa app or an Alexa device and you need to enable the Smart Reorders service on Amazon. |
| The Wi-Fi connectivity of the machine used to work but is not working anymore. | Your Wi-Fi name and/or password has changed. | Follow the instructions of section 'Connecting to Wi-Fi' and choose the network with the new Wi-Fi name to connect to. |
| The Wi-Fi password has changed. | Follow the instructions of section 'Connecting to Wi-Fi' and enter the new Wi-Fi password. | |
| Your Wi-Fi router is not working properly. | Check the router and make sure it is working. | |
| The Wi-Fi connectivity can be interrupted by electromagnetic or other interferences. | Keep the appliance away from other electronic devices that may cause interferences. | |
| None of the solutions mentioned above work. | Switch off the machine and unplug it, then plug the machine back in and switch it on to recheck the Wi-Fi connection. |
Technical specifications
The manufacturer reserves the right to improve the technical specifications of the product. All the preset quantities are approximate.
| Description | Value |
| Size (w x h x d) | 262 x 383 x 448 mm |
| Weight | 8.3 - 8.8 kg |
| Power cord length | 1200 mm |
| Water tank | 1.8 liters |
| Bean hopper capacity | 300 g |
| Coffee grounds container capacity | 12 pucks |
| Milk container capacity | 600 ml |
| Height-adjustable spout height | 87 - 147 mm |
| Nominal voltage - Power rating - Power supply | See data label on inside of service door |
| Wi-Fi frequency band | 2.4 GHz 802.11 b/g/n |
Declaration of Conformity
Hereby, DAP B.V. declares that the fully automatic espresso machines SM6685, SM6682 and SM6680 are in compliance with Directive 2014/53/EU.
The full text of the EU declaration of conformity is available at the following internet address:
https://www.saeco.com.
The fully automatic espresso machines SM6685, SM6682 and SM6680 are equipped with a Wi-Fi module, 2.4 GHz 802.11 b/g/n (channels 1..13). Maximum transmitting power < 100 mW (20 dBm)
Wi-Fi
The machine is a networked equipment, in compliance with reg. (EU) No 801/2013, and it is intended to be used permanently connected to a 2.4 GHz 802.11 b/g/n network.
AquaClean water filter
Your machine is ready for AquaClean. The AquaClean water filter can be placed in the water tank to preserve the coffee taste. It also reduces the need for descaling by reducing limescale buildup in the machine. You can purchase an AquaClean water filter from your local dealer or authorized service centers.
AquaClean filter status indicator
The AquaClean filter status is always shown as a percentage in the Status menu.
Special functions
Special function
Purpose

Ordering accessories
To clean and descale the machine, use only Philips maintenance products. These products can be purchased through the Amazon Smart Reorders service, from a local or online retailer, or from authorized service centers.
www.saeco.com/MyCoffeeMachine.
STATUS (STATE)->CLEANING (CLEANING)
| Maintenance Dashboard |
AquaClean water filter
www.saeco.com/MyCoffeeMachine.
Before using the device for the first time, carefully read the separate safety information brochure and keep it for future reference.
The fully automatic Saeco coffee machine offers extended options through connection to a Wi-Fi network.
A7 HygieSteam container
A8 HygieSteam lid with milk tube holder
A9 Adjustable height coffee milk frother
| Maintenance Dashboard |
B7 Butik B8 Start/stop icon
Introduction
A23 Ground coffee container
A24 Hot water spout
Control panel
For all safety instructions, refer to section B. Below you can see the descriptions.
B1 ON/OFF BUTTON
B2 Drinks
B3 Drinks menu
B4 Personal profiles
A12 Water hardness tester (for more information, go to: www.saeco.com/care)
A13 Coffee bean container A14 Brewing group (for more information, go to: www.saeco.com/care) A15 Service door A16 Water tank A17 Coffee grounds container A18 Coffee grounds container front panel A19 Drip tray cover A20 "Drip tray full" indicator A25 AquaClean filter A26 Measuring spoon A27 Water hardness test strip
B5 Brewing settings
B6 Status menu
B7 Dukan
B8 Bāslat/duruz ■ sékli
Introduction
Congratulations on your purchase of a Saeco fully automatic coffee machine! To make full use of Saeco's online support, you can register your coffee machine via the Wi-Fi connection using your control panel, or visit www.saeco.com/MyCoffeeMachine to register your product there.
Troubleshooting 599
Technical specifications 605
Declaration of conformity 606
Wi-Fi 606
A24 Lubrication tube
A12 Grinder adjustment knob (for more information, visit www.saeco.com/care) A13 Bean container A14 Brew group (for more information, visit www.saeco.com/care) A15 Service door A16 Water reservoir A17 Coffee grounds container A18 Drip tray with grid A19 Lid of the grounds container A20 Indicator for the grounds container
A25 AquaClean filter A26 Measuring spoon A27 Water hardness test strip
Control panel
The buttons are described in the following. You can measure the described quantity.
B1 On/off icon (Icon for)
Switching on/off)
B2 Drinks (Hot milk) B3 Drinks menu (Milk foam and hot milk)
www.saeco.com/MyCoffeeMachine I register the product here.
Before using the machine for the first time, read the attached booklet with safety information carefully and keep it for future reference.
Your new automatic Saeco coffee machine allows you to connect to your Wi-Fi network to enhance your coffee experience.
Once the machine is connected to your Wi-Fi network, you will be able to:
enjoy automatic software updates to improve your consumer experience - use the saving function if available in your country; you can connect your machine to your Amazon account for supply of accessories if this option is available in your country; connect to your home Alexa device to use voice control if this is available for your country.
Note: This machine has been tested with coffee. Although it has been carefully cleaned, there may be some coffee residue. We guarantee that the machine is completely new.
Switching on the machine
You are now ready to start your connected experience.
The machine automatically performs a rinse cycle when it is switched on or off via voice control, or when the machine has been inactive for a certain period and switches off. Make sure the environment where the machine is placed is safe.
Special functions
Special function Preheating
| Coffee Maestro |
With CoffeeMaestro you can personalize your coffee by selecting a predefined taste profile (Delicato, Intenso, Forte) for your drink, instead of adjusting the settings yourself.
| HygieSteam |
The HygieSteam function automatically cleans the milk system by eliminating microorganisms: use it after preparing cappuccino or other milk-based drinks.
| Ceramic Grinder |
Our milk container is made of 100% ceramic to be extremely healthy and resistant. It can be adjusted to your preferences with a 12-level setting.
| Maintenance Dashboard |
This manual provides useful information for the proper use of the appliance, including information about the condition of the device, as well as that AquaClean is included.
Preparing drinks
General steps
To prepare a drink, follow a few simple steps.
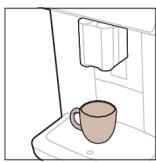

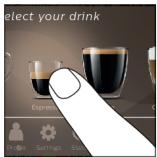

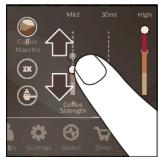

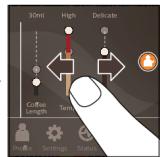

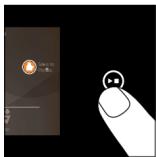

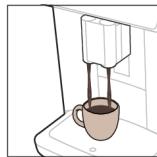
1 Fill the water reservoir with fresh water, and the bean container with coffee beans. 2 Place one or two cups of the desired height under the spout. Use the spout up or down to adjust the height according to the size of the cup you are using. 3 Press the drinks button to enter the "Drinks" menu. Use the left/right arrows to select the drink by touching them.
Press the "2x" button if you want to prepare two cups. The machine automatically brews two consecutive cups of the selected drink.
The "2x" button is not available for all drinks.
4 After selecting the drink, you can adjust the settings according to your preference by sliding the switches up and down. 5 Press the start/stop button to begin preparing the selected drink. Do not use carbonated or sparkling water.
Adjusting drink parameters
To get more information about a specific drink parameter, press and hold the corresponding element for 3 seconds.
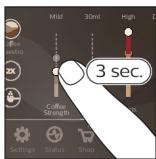

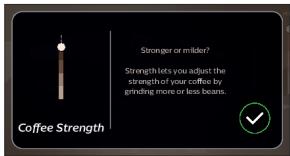
Preparing milk-based drinks
To prepare milk-based drinks, follow a few simple steps.
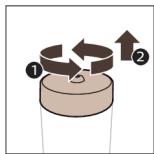

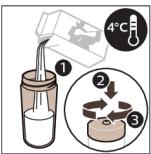

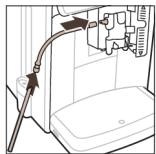

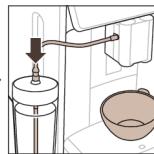




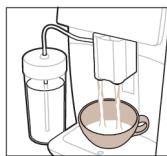
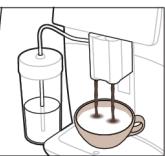
1 Fill the water reservoir with fresh water, and the bean container with coffee beans. 2 Remove the milk container lid and pour milk into it.
For optimal results, we recommend using milk that has just been taken from the refrigerator.
3 Attach the milk tube to the cappuccinatore. 4 Place the metal milk tube into the container. 5 Touch the drinks button, scroll and select the milk-based drink of your choice.
6 You can adjust the settings according to your preferences, as well as for maintenance, by pulling the lever up and down. 7 Press the START/STOP button at any time to start preparing the selected drink.
For some specific drinks, the machine first pours milk, then coffee. For other drinks, it's the opposite: the machine first pours coffee, then milk. - To stop the milk dispensing when the machine has poured the pre-set amount, press the START/STOP button. - To stop the dispensing of the selected drink (milk and coffee) while the machine is connected, press and hold the START/STOP button.
The milk container is rinsed with a hot steam shot (hot water and steam release). The machine releases steam through the internal milk system to clean it quickly. The metal part of the milk spout can become hot. To avoid the risk of burns, first let it cool down.
TIP: You can use a regular cup with milk to prepare milk-based drinks.
Place the metal milk spout directly into the cup of milk.
Preparing coffee from pre-ground coffee
To prepare coffee with pre-ground coffee, you need to follow a few simple steps.
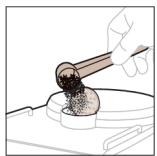
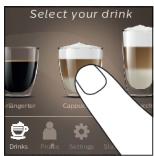
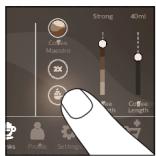

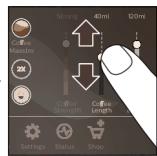

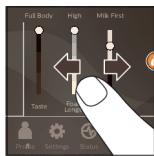

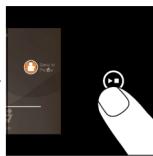
1 Open the lid of the pre-ground coffee compartment and pour one measuring spoon of pre-ground coffee into it. Then close the lid. 2 Press the drink button, turn the dial from left to right, and select the drink. 3 Press the pre-ground coffee button. 4 You can adjust the settings according to your preferences, as well as for maintenance, by pulling the lever up and down. 5 Press the START/STOP button to start preparing the selected drink. 1 If you select pre-ground coffee, you cannot adjust the strength of the coffee, nor can you prepare more than one drink at a time.
Dispensing hot water
1 Make sure the internal water tank is correctly installed on the machine (Fig. 1). 2 Place a cup under the spout. 3 Press the "Hot Water" button (Fig. 2) (hot water). 4 Press the hot water button again to regulate the amount of water according to your preferences (Fig. 3). 5 Press the START/STOP button. 6 To stop the dispensing of hot water while the machine is connected, press the START/STOP button again.
Personalization
The machine allows you to adjust the settings for each drink according to your preferences and to save the adjusted drink in a personal profile. You can select your own button and your own profile name.
Speed up the process with CoffeeMaestro
Your machine offers the possibility to select flavor profiles instead of adjusting each setting individually with the CoffeeMaestro function. You can choose between Delicato, Intenso, and Forte. To select a CoffeeMaestro flavor profile:
1 Press the drink button of your choice (Fig. 4). 2 Press the CoffeeMaestro button multiple times (Fig. 5).
- The basic settings of the drink are adjusted accordingly. Press the start/stop button to begin preparing the drink.
Personalize your drink with the CoffeeEqualizer Touch function.
Once you have selected a drink, the CoffeeEqualizer Touch function activates automatically, allowing you to adjust the drink settings. Press each element of the display briefly to activate the help function and receive additional information.
With the CoffeeEqualizer Touch function, you can adjust the following settings:
1 Aroma strength 2 Amount of coffee 3 Amount of milk 4 Amount of water 5 Drink temperature
Note: The settings you can adjust depend on the drink you have selected.
Save your favorite drinks in a profile
The machine allows you to adjust the settings for a specific drink according to your preferences and save the configured drink in a personal profile. You can select a profile and save the recipe using the profile icon.
You can create a profile and add a drink using the profile icon.
1 Touch the profile icon in the main menu (Fig. 6). 2 Touch the icon with the plus sign (Fig. 7). 3 Enter the name and select the confirm icon. 4 Prepare the desired drink. Touch the drink icon to select it. 5 Personalize the drink via CoffeeEqualizer Touch or the CoffeeMaestro function. 6 Touch the save icon in the profile to save it in your personal profile (Fig. 8).
Extra shot
The machine gives you the possibility to add an extra dose of espresso to your coffee and milk drinks, for example if you want stronger coffee.
1 Place a cup under the spout. 2 Touch one of the quick drink icons to select a drink (Fig. 4). 3 Press the arrow up to set the strength to the highest level, then select the ExtraShot function (Fig. 9). 4 After this, press the start/stop icon to begin preparing the drink. 5 To stop the drink preparation before it is finished, press the start/stop icon again.
When you select the ExtraShot function, you cannot prepare more than one coffee at a time.
1The extra dose function is not available for all drinks.
Pergunpahe Na HacTroponKeTe Ha MaunHaTa
MoxTe Da peryInpate NoBceTo HAcTpoKn Ha MaunHaTa, KaTO DOKoCHe NkOHaTa 3a HAcTpoKn n CLeDBe TbNKeTe Ha ekpaHa.
3a OHJaH NpIpbJxKa (YeCTO 3aDaBAnbN BbIpcO, BnIeokJIInObe n Ipr.) cKaNnpaiTe QR KoJaHa KOpuTaHa Ta3n KNJxKa IIN NocTeTe www.saeco.com/care
HactpoBbAHe Ha TBbPDDCTTa Ha BOJaTa
CbBETBAME Bn Da peRyIInpate HaCTpoiKaTa 3a TBbpIOCT Ha BOJa TcPRA MO HNBOTo Ha TBbpIOCT Ha BOJaTBA BBaNpaERHO 3a ONTImaJIHa pa6oTA N NO-DbIb r XINBOT Ha MaShInHata. TOBa CbIo TaKa HAmaJIraBa Heo6xoDmOCCTTA OT cecTo npEmaXbaHe Ha hakn O T MaShInHata. HaCTpoiKaTa 3a TBbpIOCT Ha BOJaTNo POnpa36IpaHene 4: TBbpDA BOJa.
I3nOJI3BaIte BKNIOUeHaTa B KOMNJIeKTA TeCT JeHtA, 3a da ONpeJInTe TBbPIOCTTa HbOdaTbB BaIINperNoH:
1 IOTOnTe Tect IeHTaTa 3a IImeRbAHe Ha TBbPdOCTTa Ha BOJaTa IJIЯ 3aIrpBjXTe IOp YeeMAta 3a 1 cekyHda (ΦIr. 10). 2 N3yakaiTe 1 MNHyTa. BpoT KBaIpaTn Bbpxy TeCT IeHTaTa, KOINTO CtaHaT YeRBeH, NOKa3Ba TBbpIOCTTa (Фиг.11) Na BOdaTa.
HactpoIte MaunHaTa Ha npabUnHaTa TBbpOCT Ha BODaTa:
1Дokocheteиногараза3aнадрочи nпревртete OTляво наясно,3aдаизбepete Water hardness (TbprnoCT Ha BODATA). 2 N36peTe HNBOTo HA TBbpOCT Ha BOdaTa. 5poT YeRBeHn KBApaTn, N36paHn Ha DInCpIe, Tp8Ba Da e CbUaT KaTO 6po7 YeRBeHn KBApaTteTA no TeT JeHTata (ΦiR. 12). 3 Korato cTe 3aIann npabnHOTo HNO Ha TBbpOCT Ha BOdaTa,HaTNCHe TE KOKoHaTa 3a NOTBbpxdHne √
Pereynipane Ha HacTroKnte Ha MeJeHe
Moxete Na npomehnte cnlaTa Ha KafoTo C nmoUta Ha peryIaTopa 3a HacTpoKa Ha CTeENTHa CMnlaHe, Hampaue Ce B KOHTeHepa 3a KafoHa 3bPna. KOKOTO No-HnCKa e HacTPOKaTa Ha MeJeHe, TOLKOBa NO-phiHo Ie Ca CMJIeHN KafoHnte 3bPna H TOKLOba No-CnIHoo Ie CTAHe KafoTo. Moxete da N36npate Mexdy 12 pa3nUHHn HAcTpoKn Ha CTeENTHa CMnlaHe.
MaunHata e hactpoeHa 3a noluyabaHe Ha Hn-IO6bB KcC OT KaFe Ha 3bPHa. Iopadn TOBa BV npenopbYbAme Da He pepylnpate HactpoiKITE Ha MeJeHe, DoKaTo He npirrotBNTe 100 - 150 cau (okono 1 meec ynoTpe6a).
Tp6Ba da nprirotbnte 2-3 Hanitkn, ppei da moxete da yceTe nbHaTa pa3nka.
A He 3aBbptaTe peryIaTopa 3a HacTpoIka Ha CTeENTa Ha CmIIaHe C NOBeYe OT eHa CTeNeH HabeNbX, 3a Da IpeIoTbPaTIte NOBpeDa Ha KaΦeMeJaUKaTa.
1 DOKOCHETe IKOHATA 3a HA CTROIK N B ΓJIaBHOT OMeHIO. 2ДokocheTe „Grinder" (MeNaKa). 3 TJIeJaTe BnIeOkJInna c nHcTpyKuIN.
Restoring the factory settings
The machine gives you the possibility to restore the factory settings at any time.
1 Press the settings icon
2 Turn the rotary knob and select "Factory settings". Confirm with the OK button and the checkmark ✔.
- The settings have been restored.
1 The following factory settings are restored: water hardness, standby time, display brightness, sound, lighting of the spouts, profiles, measurement units, settings for the home screen, Wi-Fi data identification, software update activation, SaECO data identification, Amazon data identification.
The machine is programmed for cleaning the internal milk circuit:
HygieSteam Shot: during the preparation of a milk-based drink, the machine automatically releases steam through the internal milk circuit to rinse it quickly. HygieSteam: the machine cleans the internal milk system with steam. Make sure the HygieSteam is correctly connected (Fig. 30) and mounted to the machine (Fig. 31). Place the milk container in the holder (Fig. 32) and follow the instructions on the screen. Deep Milk Clean: Use the Deep Milk Clean program with the Philips cleaning agent for the milk circuit to thoroughly clean the internal milk system.
Cleaning the coffee brewer
Warning: Never use vinegar or other acidic substances.
Cleaning the coffee brewer
AquaClean filter
The machine is equipped with an AquaClean filter.
A5 -> AQUACLEAN -> AQUACLEAN.
The AquaClean filter must be replaced every 2 months or after 100 liters of water.
The milk carafe must be cleaned in the dishwasher. After cleaning, the AquaClean water filter must be replaced every time.
The AquaClean water filter must be replaced after cleaning the milk carafe in the dishwasher.
If the AquaClean water filter has been removed for more than 3 minutes, the machine must be cleaned before use.
| Пункт | Качан Тазалоо керек | Башkapуу паhevлиен кантуп талca болот/ Эмне кылуу керек |
| Кайатуу тобу | Апта сайн | АБАЛ -> MAйНAPТУЛУЛУ -> KAйНATУ TOБУН TAZALLOO. Кайатуу тобун подочMu ЖаHAТаЗалоо учYN Кадамарды ATКарыны3. |
| 1 Машинадан кайатуу тобун Альпс calra Дд, Майдалиган КOFе кOTteиерин boшOTуHy3. | ||
| 1 Kайатуу тобун Кайрmaшинага КИргИЗУДСЕМуPyH, Альп.Tуура abaДа ЗЕнIN TEКшерин3. Кайатуу тобун Калтавды capы сizлindрдги чебe кара чебe мени TEнделши керек жаHA N (16-cypot). | ||
| Ай сайн | АБАЛ -> MAйНAPТУЛУЛУ -> KOФЕ MAйын ЧыГAPУ. КOFe Майын KaIДыКарын Кайатуу тобунан AVTomaTTbK Tурдэ Альп салучУ OЗYн-ОЗY.TazalLOO proцessin Кадamapdын ATКарыны3. | |
| Сут тутуMu/чуки Калушинатор | Ар бир кOLДОнгон КУндэн КейнIN | АБАЛ -> HYGISTEAM. Сут тутуMuN тazalLOO ЧУн OЗYн-ОЗY.TazalLOO proцessin Кадamapdын ATKарыны3. MeТалл сут ТутуКчсYн сут ТутугУн сбына салудан МуPyH сыртын HBIMdUy ChUpypeK мени СуртуHy3. |
| Апта сайн | Ичκи калушинтordу Альп салынбз Ла Жырatыны3. Барык БOLNYKTерун Крандын Ястыду Идштетду ChUvy ChUOKТуK мени ЖуHy3. | |
| Ай сайн | АБАЛ -> HYGISTEAM -> CYTTY TEPEH, TA3AJOOO. Сут тутуMuN тazalLOO ChUvy OЗYн-ОЗY ТazalLOO proцessinн KaДamapdын ATKapbIиbI3. | |
| Сут контейнери | Апта сайн | Сут кontейнери (20-cypot)axыратын, сут ТутугУнжардмы Мени ТOTуТУ3 (21-cypot).Сут кonteinерин Иарык БOLNYUng Крандын actынду Лд Машинада ChUvyHy3. |
| HygieSteam Контейнери (сут ТутугУнс calby) | Апта сайн яж машина сизre эстTekendde | HygieSteam кonteinерин маши�адan (22-cypot)чыратыньз Ла HygieSteam Калcarын calынь3 (23-cypot). HygieSteam кonteinерин Ла KpaIДын actынду Лд Маши�ада ChUvyHy3. Контeinери ЖаHa KaNKaktsы Кандын actынду Лд Маши�ада ChUvyHy3. |
| Пункт | Качан тазалоо кеpek | Башkapуу панелинен кANTи тanca болот/ Эмне кылу кеpek |
| Алдын ода maйданган koфe бениу | Алдын ода майданган koфe бениу бирнистор kaibigоганын bihanuy antra сайынTekшерп Турун3 | Машинь сураун, кайдану тобун чыгагьнь. Альдын ода майданган koфe бениунын калларын сайын Кригини. Толун каллар maйданган koфe bihдыгая түkskenгү чeyн салты Бийдха Төмэнжыдырьн3 (24-cypet). Бару www.saeco.com/care ТOLуK Вдюо керсөлэрп ду ралу учн. |
| Майданган koфe koncopeнери | Машина суразан keздe maйданган koфe koncopeнериб boшotун3. Апта сайын жуун Турун3 | Машина пштети жатkanда майданган koфe koncopeнери alын салынь. Альblу жуш учн суоктук менин кранды actында я сдш жуучmaшинада жуун3. эсөртme: Майданган koфe koncopeнерин alынкы паллари nдш жуучmaшинада жуунгду волбови. |
| Тамыларды толто туprан подон | Тамыларды толто турraн послочду кун сайын, ќe болбoco подочду «Tamчыларды толто турraн послочду ТОЛДУ» Дерен Кызл индikakotр chылкада boшotун3 (25-cypet). Тамыларды толто турган подочду ралta сайын Тазаллар Турун3 | Тамыларды толто турraн ралдoly (26-cypet) ольл салынь заши ралын actында я идш жуучmaшинада жуун3. |
| Кайдану тбун maйлоо | Ap 2 ai сайын | Кайдану тбун танг takалган май мени maйланыз ('Кайдану толу'maiлoo' караhaliz. Бару www.saeco.com/care толук Вдюо керсөтмөлэрп ду ралу учн. |
| Суу pezerвayы | Апта сайын | Суу pezerвayырьн кран acсында ралkaны3. |
| Машинанын алдынкы 6ениу | Апта сайын | Абраизду зем ecучрк менин тазаллари3. |
| Машинаны keбэрдөн тазалоо | Машина көбэрдөн ольл салуну суразанда | АБАЛ -> KEБэЗР. Машинаны көбэрдөн тазаллу учн Төмэнку кадamdapды оcaшь3. Көбэрдөн тазалоо көрк δолгонду, машин сиздөн ольtsaалооу сураhanл, BAшлоо учн OK сypetчесун δасын, кадamdapды atkapынд3. |
Cleaning the milk carafe
To clean the milk carafe, remove the lid and rinse it under running water. Press the "Menu" button, select "Clean milk carafe" and follow the instructions on the display. For more information, visit www.saeco.com/care.
Cleaning the milk carafe with water
1 Press the "Menu" button and select "Clean milk carafe". 2 Press the check mark to start the cleaning cycle.
Cleaning the milk carafe with cleaning tablets
Clean the milk carafe with Philips coffee machine cleaning tablets.
1 Press the "Menu" button and select "Clean milk carafe". 2 Press the check mark to start the cleaning cycle.
Descaling the milk carafe
If the machine has not been used for a long time, descale the milk carafe every 2 months to prevent blockages.
1 Remove the milk carafe lid (without the lid) and rinse it under running water (figure 27). 2 Remove the milk carafe tube (without the tube) and rinse it under running water (figure 28). 3 Rinse the milk carafe with clean water (figure 29).
Cleaning programs for the milk carafe
The machine has a cleaning program for the milk carafe.
«HygieSteam Shot»: dry steam cleaning function for the steam nozzle. «HygieSteam»: steam cleaning function for the milk circuit. For the HygieSteam container, see figure 30, and for the steam nozzle, see figure 31. Remove the water tank and the water tank cover (figure 32) and clean them with a damp cloth. «Deep Milk Clean»: for a thorough cleaning of the milk circuit, use the Philips milk cleaner and the «Deep Milk Clean» program.
Cleaning the steam nozzle
1. Remove the steam nozzle (figure 33). 2. Rinse the steam nozzle under running water (figure 34). 3. Pull the steam nozzle apart into two parts and clean them (figure 35). 4. If there are any milk residues (figure 36), let the parts soak in hot water. 5. Rinse the steam nozzle parts again. 6. To put the steam nozzle back, insert it until it clicks into place, making sure it is not loose or misaligned. Then attach the steam nozzle to the machine as shown in figure 1. 7. Done.
For video instructions, visit www.saeco.com/care.
Descaling procedure
Use only the Philips descaler. Using other descaling agents may damage the machine and may leave residues that are harmful to health. The Philips descaler is available from your dealer or authorized service center. You can also order it online. For more information, visit the Philips website.
The Philips descaler is a concentrated liquid that must be diluted with water before use.
1. Remove the water tank and fill it with fresh tap water. 2. Remove the drip tray, the pre-ground coffee container, and the HygienicSteam container (fig. 22), then clean them. 3. Rinse the water tank and fill it again. Then start the AquaClean water filter. 4. If the water tank has been removed, use the Philips water filter, but do not use CALC CLEAN liquid in the water tank (fig. 37). Then place the water tank back into the machine. 5. Use the coffee container (1.5 L) for the coffee grounds. 6. Insert the HygienicSteam container into the machine (fig. 30) and secure it (fig. 31). Remove the milk container lid. 7. Press the cleaning button on the display to start the cleaning cycle. The cleaning cycle takes about 30 minutes and includes rinsing and steam cleaning. 8. When the cleaning cycle is finished, the display will show a message. Press the button to confirm. 9. Replace the AquaClean water filter and reset it (see 'AquaClean water filter reset (5 min)').
Note: The AquaClean water filter must be replaced before the cleaning cycle starts.
The cleaning cycle must be performed when the machine indicates it is necessary.
To clean the machine, follow the instructions below. If the machine has not been used for a long time, or if the water tank has been empty, the water in the tank and the water pipes may have stagnated. In that case, do the following:
1. Remove the water tank and empty it. 2. Fill the water tank with fresh water and add CALC CLEAN liquid, then place it back into the machine. The machine will start the automatic cleaning and rinsing cycle. 3. After the cleaning cycle, rinse the water tank thoroughly. To rinse the water tank and the pipes, fill the tank with fresh water and run a rinsing cycle. Then remove the pre-ground coffee container and clean it.
Warning: If the cleaning cycle is interrupted, the machine will not be able to perform the cleaning cycle properly.
Descaling
The descaling procedure is described in the separate booklet. You can also watch the video on www.saeco.com/care. If you prefer to descale manually, contact the Consumer Care Center. For more information, see the warranty.
Technical specifications
The technical specifications are subject to change without notice. All rights reserved.
4 After selecting the drink, you can adjust the milk frother to your preference by adjusting the levers up or down. 5 Press the START/STOP button to begin preparation of the selected drink.
Do not use caramelized coffee beans or coffee beans with added flavor.
Drink parameter settings
To get additional information about a specific drink parameter, press and hold the corresponding button in the section.
Milk-based drinks
To make milk-based drinks, you need to follow a few simple steps.

1 Fill the water reservoir with fresh water and fill the coffee bean reservoir with beans. 2 Open the milk container lid and fill the container with milk.
Always use cold milk straight from the refrigerator for optimal results.
3 Connect the milk hose to the cappuccino element. 4 Place the metal milk tube into the container. 5 Press the Drinks (Beverages) button, select, and confirm the milk-based drink program. 6 You can adjust the milk frother to your preference by adjusting the levers up or down.
7 Press the START/STOP button when you want to begin preparation of the selected drink.
- For certain drinks, the machine first dispenses milk, then coffee. For other drinks, this is reversed. The machine first dispenses coffee, then milk. To stop the milk dispensing before the machine has dispensed the set amount, press the START/STOP button.
- To stop the dispensing of the entire drink (milk and coffee) before the machine has finished, press and hold the START/STOP button.
After milk dispensing, a "HygieSteam Shot" (steam cleaning) is performed. The machine emits steam through the internal milk system to quickly clean it. The metal part of the milk tube may become hot. To avoid the risk of burns, let it cool down first.
Tip: For preparing milk-based drinks, you can use regular milk in a carton. Place the metal milk tube directly into the carton packaging.
Preparing coffee with pre-ground coffee
Before preparing coffee, it is necessary to follow a few simple steps.
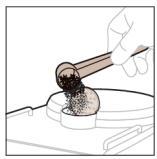




1 Open the lid of the pre-ground coffee container and place a spoonful of pre-ground coffee into it. Then close the lid. 2 Press the Drinks (Beverages) icon, select the desired drink and confirm it. 3 Press the pre-ground coffee icon. 4 Adjust the grinder to your preference by moving the adjustment levers up or down. 5 Press the Start/Stop icon to begin preparation of the selected drink.
If you select pre-ground coffee, you cannot adjust the coffee strength and at the same time brew more than one drink.
Dispensing hot water
1 The internal water tank must be correctly attached to the machine (Fig. 1). 2 Place a cup under the spout. 3 Press "Hot Water" (Fig. 2) (hot water). 4 Adjust the adjustment levers up or down to set the amount of hot water or the temperature to your preference (Fig. 3). 5 Press the Start/Stop icon to start dispensing hot water. 6 To stop dispensing hot water before the machine finishes, press the Start/Stop icon again.
Personalization
The machine allows you to adjust the drink settings to your own preference and to save the adjusted drink in your personal profile. You can choose your own icon and your own profile name.
Speed up the process with CoffeeMaestro
The machine offers you the option, with the CoffeeMaestro function, to select taste profiles instead of adjusting all the settings individually. You can choose between Delicato, Intenso, and Forte. To select a CoffeeMaestro taste profile:
1 Press the icon for dispensing the drink (Fig. 4). 2 Press the CoffeeMaestro icon again (Fig. 5).
The drink is now adjusted accordingly.
3 Press the Start/Stop icon to begin preparation of the drink.
Personalize your drink with the CoffeeEqualizer Touch function
Once you select a drink, the CoffeeEqualizer Touch function is activated automatically and gives you the possibility to adjust the settings for the drink. Press the arrows on each setting to activate the help function and get additional information.
With the CoffeeEqualizer Touch function you can adjust the following settings:
1 Hot milk 2 Milk coffee 3 Coffee with milk 4 Coffee with water 5 Temperature setting
6 Coffee with foam 7 Can be one or two cups 1 or 2 cups 8 Recommended distribution (for coffee or milk)
Note: the supply can be changed depending on the drink you will choose.
Save your drinks in a profile
The machine allows you to adjust the drinks to your own taste and to save the adjusted drink in a personal profile. You can select a profile and save recipes with the help of profiles.
You can create a profile and add a drink using the profile icon
1 Press the profile icon Main menu (Fig. 6). 2 Press the plus icon (Fig. 7). 3 Enter your name and select the desired icon. 4 Confirm to add a drink. Press the icon for the desired drink. 5 Personalize the drink using the functions CoffeeEqualizer Touch or CoffeeMaestro. 6 Press the icon "Save to profile" to save it in your personal profile (Fig. 8).
Extra shot
Your machine gives you the possibility to add an extra shot to your coffee drinks, for example, if you want to have a stronger coffee.
1 Place a cup under the outlet. 2 Press one of the drink buttons to select a drink (Fig. 4). 3 Press the adjustable spout upwards to set the cup size to the highest level and select the ExtraShot function (Fig. 9). 4 Then press the start/stop icon to start the preparation of the drink. 5 To improve the distribution of the drink before the machine finishes, press the start/stop icon again.
When you have selected the ExtraShot function, you can only brew one coffee at a time. 1 The ExtraShot function is not available for all drinks.
Cleaning the brew group under running water
1 Press the "Status" icon and select "Brew group clean". 2 Press the confirm icon to confirm, and then follow the instructions on the screen.
Cleaning the brew group with degreasing tablets
Use the Philips coffee oil remover tablets.
1 Press the "Status" icon and select "Brew group clean". 2 Press the confirm icon to confirm, then follow the instructions on the screen.
A10 Internal water filter
A11 Water tank lid
A12 Adjustable coffee spout (to learn more, visit www.saeco.com/care)
A13 Coffee bean container
A14 Brew group (to learn more, visit www.saeco.com/care)
A15 Service door
A16 Water reservoir
A17 Coffee grounds container
A18 Coffee grounds container lid
B3 Drinks menu
To prepare a drink, you need to perform a few simple steps.
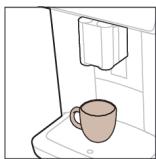
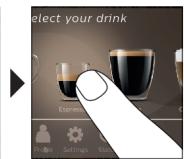
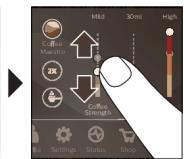

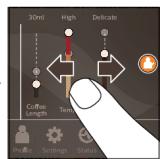

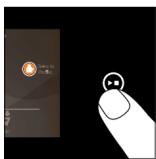

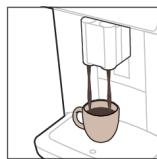
1 Fill the water reservoir with fresh water and pour coffee beans into the container. 2 Place one or two cups under the adjustable spout and adjust the height of the spout up or down to fit the cup size. 3 Touch the "Drinks" icon to enter the drinks menu. Swipe left or right to select the desired drink, then touch it.
Touch the "2x" icon if you want to prepare two cups of the drink. The machine will automatically perform two consecutive brewing cycles to prepare the selected drinks.
The "2x" icon is not available for all drinks.
You can adjust the settings according to your preferences by swiping up or down on the adjustable strips. Touch the "Start/Stop" symbol to begin preparation of the selected drink.
Do not use caramelized or flavored coffee beans.
Drink parameter settings
To get additional information about a specific drink parameter, touch and hold the parameter for 3 seconds.
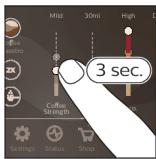
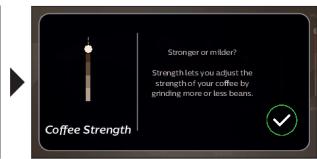
Preparing milk-based drinks
To brew milk-based drinks, you need to follow a few simple steps.
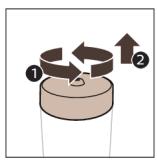
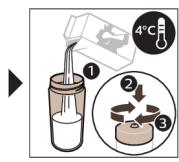
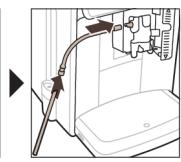
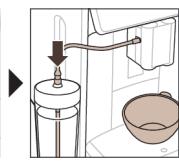
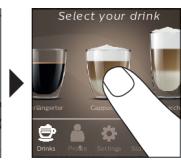
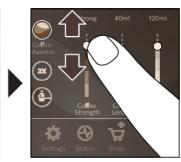
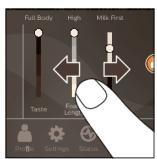
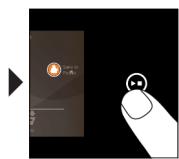
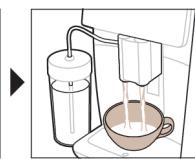
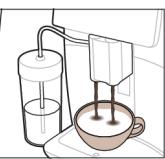
1 Fill the water reservoir with tap water and add coffee beans to the container. 2 Unscrew the milk container lid and fill the container with milk.
For optimal results, always use cold milk from the refrigerator.
3 Insert the milk tube into the cappuccinatore. 4 Place the metal milk tube into the container. 5 Touch the drinks symbol, start and select the desired milk-based drink. 6 You can adjust the settings to your liking by swiping up or down on the adjustable strips. 7 Touch the "Start/Stop" symbol to immediately begin preparation of the selected drink.
For certain drinks, the coffee machine first dispenses milk, then coffee. For many other drinks, the order is reversed: the coffee machine first dispenses coffee, then milk. - To stop the milk flow before the coffee machine has dispensed the set amount, touch the "Start/Stop" symbol. - To stop the flow of an already mixed drink (milk and coffee) before the coffee machine has finished, touch and hold the "Start/Stop" symbol.
Immediately after dispensing milk, the "HygieSteam Shot" (HygieSteam cleaning) procedure is performed. The coffee machine passes steam through the internal milk dispensing system to clean it quickly. The metal part of the tube for milk dispensing can become very hot. To avoid burns, let it cool completely.
Tip: For preparing milk-based drinks, you can also use a regular milk carton. Insert the metal milk tube directly into the milk carton.
Cleaning the brewing unit with water jets
1 Touch the "Status" symbol and scroll to select "Cleaning the brewing unit". 2 Touch the confirmation symbol and follow the on-screen instructions.
Cleaning the brewing unit with coffee oil remover tablets
Remove the coffee grounds container and empty it.
1 Touch the "Status" icon and scroll to select "Clean brewing group". 2 Touch the confirm icon and follow the instructions on the screen.
Lubricating the brewing group
To improve the performance of the coffee machine, it is recommended to lubricate the brewing group every 2 months so that its moving parts continue to move smoothly.
1 Apply a thin layer of lubricant to the piston (grey part) of the brewing group (Fig. 27). 2 Apply a thin layer of lubricant to the surface of the shaft (grey part) at the bottom of the brewing group (Fig. 28). 3 Generously apply lubricant to the guide grooves on both sides (Fig. 29).
The coffee machine will notify you when it is time to clean the internal milk frother.
The coffee machine has three cleaning programs for the internal milk frother:
HygieSteam Shot: During preparation of a milk-based drink, the coffee machine automatically passes steam through the internal milk frother for its quick cleaning. HygieSteam: The coffee machine thoroughly cleans the internal milk system with steam. Make sure the HygieSteam container is correctly assembled (Fig. 30) and installed in the coffee machine (Fig. 31). Place the milk tube in the tube holder (Fig. 32) and follow the instructions shown on the screen. Milk cleaning: Performs a thorough cleaning of the milk system. Deep Milk Clean: Uses a special Philips cleaning agent to thoroughly clean the internal milk system.
Cleaning the internal milk frother under running water
1 Open the lid of the internal milk frother (Fig. 33). 2 Remove the internal milk frother by pulling it upwards (Fig. 34). 3 Disassemble the internal milk frother by separating its lower part from the upper part (Fig. 35). 4 Rinse all parts under running water (Fig. 36). 5 Reassemble the internal milk frother. 6 To place the internal milk frother back, set it in a vertical position and make sure the openings align with the two tubes on the coffee machine. Then push the internal milk frother upwards until it clicks into place (Fig. 1). 7 Close the lid.
Automatic coffee machine for espresso
Storage and operating conditions
www.saeco.com/MyCoffeeMachine for more information.
The remote control can be connected to a Wi-Fi network, but this is optional;
- if the buttons on the remote control are not working properly, use the buttons on the device itself;
- if the device is not responding, use the buttons on the device itself;
- if the remote control is not working properly, you can connect it to an Amazon device and use it, if the device is not responding;
- to use the remote control with the "Alexa" feature, you need to connect it to the internet, if the device is not responding, use the buttons on the device;
Note: Use the remote control only with compatible devices. We will not be responsible for any damage caused by using the remote control with incompatible devices. By using this device, we assume you have read and understood the instructions.
Using the remote control
Point the remote control at the device from a distance of up to 10 meters.
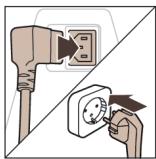
To use the remote control, press the buttons to operate the device and adjust the settings on the device.
Connecting to Wi-Fi
The remote control can be connected to a home Wi-Fi network (2.4 GHz 802.11 b/g/n). Once the remote control is connected to Wi-Fi, it will work better. Please note that the remote control and the Wi-Fi router must be in the same room.
To connect the remote control to a Wi-Fi network, follow these steps:
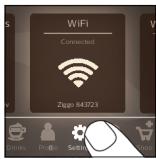
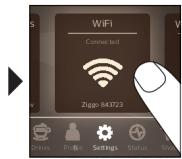
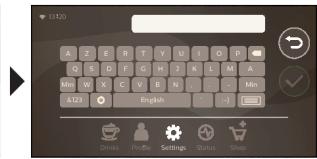
1. Press the Setup button and then press the Wi-Fi button until the indicator light flashes. 2. Press the Wi-Fi button again. 3. To connect the remote control to a Wi-Fi network, follow the on-screen instructions.
Activate the device using the buttons on the device itself.
The remote control will automatically turn off after a period of inactivity to save battery. It will turn on again when you press any button. Please note that the remote control will work better when used in the same room as the device.
Ba3nΦaxon Maxcyc
BaznФan maxcyc MaKca
| Coffee Maestro |
Ba Bocntan CoffeeMaestro yymo MetaboHcKaxbAn xydpo 6o nHTnxO6n npofuT TaBmNewakmykappapUya (JeNkaTo, INTeHco, OpTe) 6apon Hywoknn xyn, 6a Nba3n TaFnpuxn TaH3MOT 6a Tabpn daCTn, Wxscn KyHeid.
| HygieSteam |
Ba3nФaH HygieSteam Hn3OMn Ⅲnppo 6a TaBpn Xydkop To3a MekyHaB BaMknpoopraHn3MxOpo HeCT MeHaMoYd: IN Ba3nΦapo nac a3 TaIePkyHn KaynHNo E HnyoKxON DnRap dap acocn Ⅲnp NCTnΦoJa 6apeJ.
| Ceramic Grinder |
XaJIkaMmaIaKyaHaHdAn 6o3bTmOJ a3 100% MaBOJn KepAMNK u6opat 6yda, xeJe caxT BaJaKn Me6oJad. OH MetaBOHaJ 6a TaBmN yUmo TaBaccytn 12 daPaua TaH3IM Kapda 7aBaJad.
| Maintenance Dashboard |
JIaBxaI NIOpaKyuHn HNOxOIp6a 7yMoMaJyMoTn MyxTaCapn OounaHOK MeuXaD Ba 6a 7yMo IITNlOOTn Ba3bMyrPo MoHaHn PoJIoN o6nn «AquaClean» MeuXaI.
TaNepKyuHn HuyoKxO
Kaamxonymm
Bapon Taiep KapdaHn Huyoku, yMo 6oayKaamxOn OcoHpo uPo KyHei.
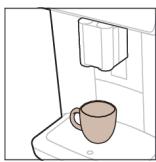

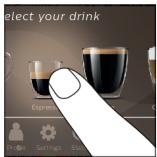

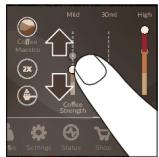

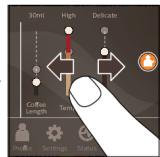


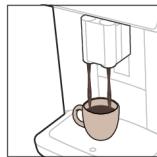
1 06doHpo 6o 6o np KyHeBa 6a KaTtn DoHaXOn KaXbApo NlOba HaMoEi. 2 JaK e Dny nIeIapo nap 3epn daxaHau nIxuW 6o 6aJauHn TaH3mUbaHna QouInp KyHe. JdxaHau nIxuPo 6a 6oO e IooH IaFxoHe, TO 6aJauHn OHpo MyBoQn aHIO3a NIIeJa KcAae, KI nCTnfoJa Me6ape, TaH3m HAmoe. 3 BapoiBopuId 7ydaH 6a MeHIOI «HywokxO», HnsoH N «HywokxO»-po 3ep Kyeed. A3 Taipaun qan 6a poCt 3ap6a 3ada, HywoKipo 3ep Kapda, nHTnxo6 HAMoeJ.
- Arap xoxe, KI du pIIeJaan HyoKIpO taep KyHeJ, HnsoHn «2x»-po 3ep kyHeJ. DaCTROx n KaXBa Iy paBaHn taepkyHm KaxBapO daP hAB6aTn HyoKHXoN nHTnxO6uJa 6a TaBpn xydkop upo MeKyHaJ.
i HnsoHn «2x» 6apon xamn HywokxO ne6bHn Ha7daacT.
4 Nac a3 INHTNXO6 kapdAnH HsWok, yMo MeTaBOHeI 60 JAmCKyHn HABOpXOn TaHImuBaHaJa 6a 6oLo BA POeH TAH3NIMOTPO MYBoΦNKn aΦ3JIaIrTxON XyD TaH3Mn HAMoeI. 5 HnsoHn «Ofo3/nt»-ro ■ naXs kyHeN,To TaiepkyHn KaxBaN nHTnxo6yda OFo3 KaPda IaBaA.
A Dohaon KaXbapo 60 Ma3aian Kapamei Ba KaXbai xyshy iNCTnfoja Ha6apei.
Дастrupп ТанзимOTи HушoknxO
The device is intended for household use only, and should not be used for commercial purposes.
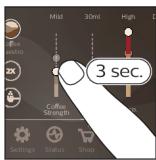

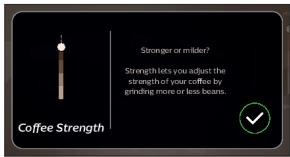
The steam button is pressed.
The steam button is pressed, and the iron is ready for use.
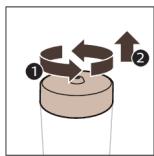

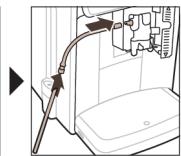
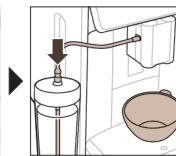
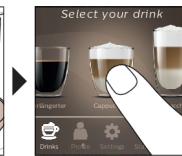
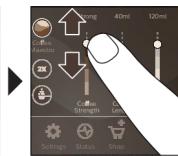
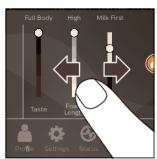
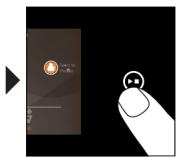
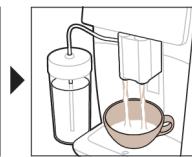
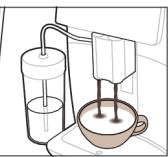
1. Before first use, fill the water tank with water. 2. Set the temperature dial to the appropriate setting for the fabric.
The iron heats up quickly, and the soleplate reaches the set temperature in about 2 minutes.
3. When the iron is heated, press the steam button to release steam.
4. The steam bursts out of the soleplate. 5. When the "Steam" button is pressed and held, continuous steam is produced. 6. The steam function works only when the temperature dial is set to the highest setting. 7. When the "Spray" button is pressed, water sprays out of the nozzle.
- The iron can be used with tap water, distilled water, or a mixture of both. Do not use pure distilled water, as it may cause the iron to spit or leak.
- When the iron is not in use, set the temperature dial to the "MIN" position and unplug it.
- When the iron is not in use, set the temperature dial to the "MIN" position and unplug it.
A. To clean the soleplate, wipe it with a damp cloth. If the soleplate is dirty, use a mild detergent. B. To clean the water tank, fill it with water and shake it, then empty it. C. To remove scale, use a descaling solution.
Note: The steam button should be pressed only when the iron is heated. Do not press the steam button when the iron is cold.
The steam button and the spray button are separate.
The steam button is separate from the spray button, and they are used for different purposes.
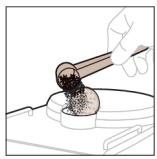
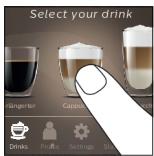
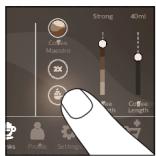

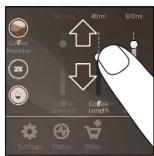

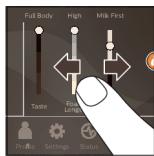

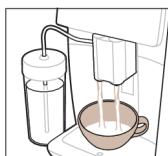
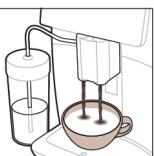
1. To clean the water tank, fill it with water and shake it, then empty it. 2. When the "Steam" button is pressed, steam is released. 3. The spray button is used to spray water. 4. The steam function works only when the temperature dial is set to the highest setting. 5. When the "Spray" button is pressed, water sprays out of the nozzle. If the spray button is pressed continuously, the water tank may need to be refilled.
1. Remove the lid from the kettle and pour in the required amount of water (Fig. 1). 2. Close the lid securely. 3. Place the kettle on the base (Fig. 2).
4. After connecting to the power supply and turning on, the kettle will start heating the water. The indicator light will turn on (Fig. 3). 5. Press the "On/Off" button. 6. After the water boils, the kettle will automatically turn off, and the "On/Off" button will return to its original position.
Safety instructions
To ensure the kettle operates correctly and to avoid damage, it is necessary to regularly descale the kettle. For this, use a special descaling agent.
Descaling with CoffeeMaestro
To descale the kettle using CoffeeMaestro, follow the instructions below. This will remove limescale and other deposits. To descale with CoffeeMaestro:
1. Fill the kettle with water up to the maximum level (Fig. 4). 2. Add the CoffeeMaestro powder (Fig. 5).
The descaling agent may cause foam to form. If the "On/Off" button is pressed, the kettle will turn on.
Descaling with the "CoffeeEqualizer Touch"
After descaling, the "CoffeeEqualizer Touch" function will automatically adjust the kettle settings. If the adjustment is not performed, the kettle will operate in the previous mode.
Descaling with the "CoffeeEqualizer Touch" function is done as follows:
1. Water level 2. Milk level 3. Tea level 4. Coffee level 5. Water temperature
6. Coffee strength 7. Cleaning mode. The function will automatically clean the kettle. 8. Press the button to start the descaling process.
Note: After descaling, the kettle will automatically reset to the default settings.
The machine must be cleaned when the water tank is empty, and the water tank and the drip tray must be cleaned. This cleaning procedure must be carried out with the machine switched off and unplugged.
This cleaning procedure must be carried out with the machine switched off and unplugged.
1. Press the button to open the water tank (Fig. 6). 2. Press the "clean" button to start cleaning (Fig. 7). 3. The cleaning cycle will start automatically. 4. When the water tank is empty, the machine will stop. The machine is now clean. 5. To clean the drip tray, remove it and wash it with warm water and mild detergent, then dry it thoroughly (Fig. 8).
Extra Shot
When the machine is on, if you want a stronger coffee, you can use the Extra Shot function. For example, if you want a stronger coffee, you can use this function.
1. Press the button to start the Extra Shot function.
2. When the machine is ready, press the button to start brewing (Fig. 4). 3. When the brewing is complete, the machine will stop automatically. You can now enjoy your Extra Shot coffee (Fig. 9). 4. To stop the brewing process, press the "stop" button. 5. When the machine is idle, press the "stop" button again to turn it off. When the Extra Shot function is active, the machine will automatically stop after a certain time. 1. The Extra Shot function is now ready to use.
Adjusting the coffee strength
To adjust the coffee strength, press the button to open the settings menu, then use the arrow keys to select the desired strength.
To register your machine, scan the QR code with your smartphone or visit www.saeco.com/care
Adjusting the water hardness
We recommend that you adjust the water hardness according to the hardness of your water supply. If you do not adjust the water hardness, the machine may not work properly. To adjust the water hardness, follow the steps below. The water hardness can be set to 4 levels: soft, medium, hard, very hard.
To adjust the water hardness, you can use the test strip provided with the machine. Follow the steps below:
1. Dip the test strip into the water for 1 second (Fig. 10). 2. Wait 1 minute. The color of the test strip will change. Compare the color of the test strip with the color chart on the package (Fig. 11).
Instructions for adjusting the grinder:
1. Turn the grinder adjustment knob counterclockwise to increase the coarseness of the grind. 2. The grinder adjustment knob is located inside the bean hopper. Turn the knob to the left or right to adjust the grind size, depending on the desired strength of the coffee (Fig. 12). 3. After adjusting the grinder, the coarseness of the grind will change, and the adjustment will take effect immediately.
Adjusting the grinder while the machine is in operation
It is possible to adjust the grinder while the machine is in operation. The more you turn the grinder adjustment knob, the coarser the grind will be, and the weaker the coffee will be. It is possible to adjust the grinder by turning the knob while the machine is in operation.
The grinder adjustment knob can be turned to adjust the grind size. If you want to make the coffee stronger, turn the knob to the left. If you want to make the coffee weaker, turn the knob to the right. It is recommended to adjust the grinder in small increments, waiting at least 100-150 ml of coffee to be brewed before making further adjustments.
1. Turn the knob to the left to make the grind finer, which will make the coffee stronger. 2. Turn the knob to the right to make the grind coarser, which will make the coffee weaker.
To adjust the grinder while the machine is in operation, turn the grinder adjustment knob to the left or right as needed.
1. Turn the grinder adjustment knob to the left to make the grind finer. 2. Turn the knob to the right to make the grind coarser. 3. The adjustment will take effect immediately.
Adjusting the grinder while the machine is in operation
The grinder adjustment knob can be turned while the machine is in operation to adjust the grind size.
1. Turn the grinder adjustment knob to the left to make the grind finer. 2. Turn the knob to the right to make the grind coarser. The adjustment will take effect immediately.
- The grinder adjustment knob can be turned while the machine is in operation.
The grinder adjustment knob can be turned to adjust the grind size. The following settings are available: fine, medium, coarse. The default setting is medium. To adjust the grind size, turn the knob to the left or right. The grinder adjustment knob is located inside the bean hopper.
www.saeco.com/MyCoffeeMachine i 3apeectpyIte Ha NbOMy CbI pOdoKT.
Ipepe nepuIM BVKOpNCtAHnM KaBOMaHnY yBaJHo npOHTaTe Okpemy 6poUpy 3TexHikN 6e3neKn Ta 36epiraTe ii Iy MaHyTbOi IOBiIKN.
| Maintenance Dashboard |
For maintenance and repair, please refer to the table of contents, as well as messages with information, in particular notifications about reducing the efficiency of the AquaClean filter.
Preparing drinks
General information
To prepare a drink, follow a few simple steps.
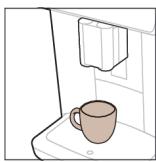

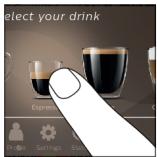

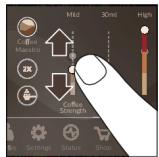

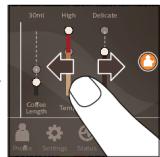



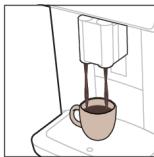
1 Fill the water reservoir with tap water, and the bean hopper with coffee beans. 2 Place one or two cups under the dispensing unit and adjust the height. Move the dispensing unit up or down to adjust it to the size of your cup or glass. 3 To select a drink, press the "Drink" symbol. Swipe left to choose a drink, and press it.
- Press the symbol 2x to prepare two cups of the drink. The machine will automatically perform the selected drink preparation twice.
The 2x symbol is available for all drinks.
4 Once the drink is selected, you can set the amount of water by moving the adjustment slider up or down. 5 Press the start/stop symbol to begin preparing the selected drink.
Do not use caramelized or flavored coffee beans.
Preparing milk drinks
To prepare milk drinks, follow a few simple steps.
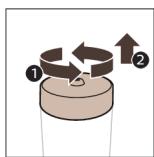
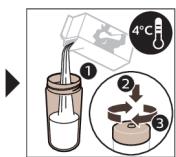

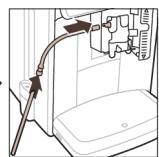

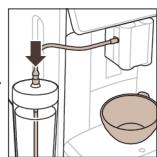



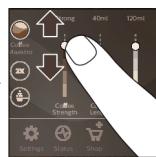
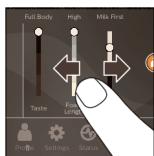
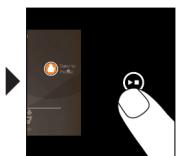

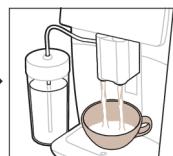

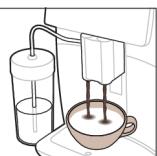
1 Fill the water reservoir with tap water, and the bean hopper with coffee beans. 2 Unscrew the lid of the milk container and fill it with milk.
For optimal results, always use milk from the refrigerator.
3 Insert the suction tube into the milk container. 4 Place the metal tube for milk into the container.
5 Press the "Drink" symbol, scroll through the menu and select the desired milk drink. 6 You can set the amount of water by moving the adjustment slider up or down. 7 To start preparing the selected drink, press the start/stop symbol.
To prepare a cappuccino, first pour milk, then NOTIM - coffee. For many other drinks, the order is reversed: pour coffee first, then milk. - To stop the milk flow, press the start/stop button before the coffee machine finishes dispensing the set amount. - To stop the flow of the finished drink (coffee with milk), press and hold the start/stop button before the coffee machine finishes preparation.
After the milk flow is complete, the Hygienic Steam Shot procedure (automatic steam burst) is carried out. The coffee machine cleans the internal milk system to rinse it thoroughly. The metal milk tube may become hot. To avoid burns, let it cool down.
Tip: To prepare drinks with milk, you can also use milk from cartons. Simply insert the metal milk tube into the carton.
Preparing coffee with pre-ground coffee
To prepare coffee with pre-ground coffee, follow a few simple steps.
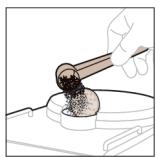
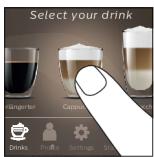
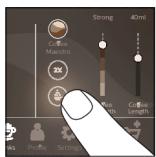
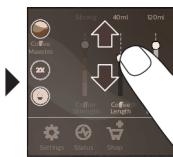
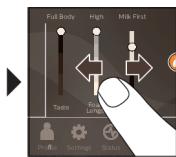
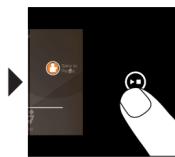
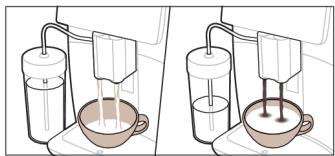
1 Open the lid of the pre-ground coffee compartment and pour one level scoop of pre-ground coffee into it. Then close the lid. 2 Press the "Coffee" symbol and scroll the menu left or right to select the drink. 3 Press the symbol for pre-ground coffee. 4 You can adjust the amount to your taste by moving the settings sliders up or down. 5 Press the start/stop button to begin preparing the selected drink.
When using pre-ground coffee, you cannot adjust the strength or prepare several drinks at the same time.
Hot water dispensing
1 Check that the internal water filter is correctly installed in the coffee machine (Fig. 1). 2 Place a cup under the hot water spout. 3 Press "Hot water" (Fig. 2). 4 Move the settings sliders up or down to adjust the quantity or temperature according to your preferences (Fig. 3). 5 Press the start/stop button. 6 To stop the hot water flow, press the start/stop button again before the coffee machine finishes dispensing.
Personal settings
The coffee machine allows you to customize a drink recipe according to your preferences and save it in one of the profiles. You can choose your own profile for each drink.
Discover the process with the CoffeeMaestro function
The coffee machine has the CoffeeMaestro function, which helps you choose the taste profile of the drink instead of setting all the parameters individually. You can choose between the profiles Delicato, Intenso, and Forte. To choose the CoffeeMaestro taste profile:
1 Press the symbol of the selected drink (Fig. 4). 2 Press the CoffeeMaestro symbol several times (Fig. 5).
- Now the basic settings of the drink are copied to the selected profile.
3 HaTnCtItb 3NaUOK noaTk/3yInnHeHHN ,IooNoaTN npuRToYBaHNNHaNOIO.
IepcoHaJI3yIte Hanoi 3a Donomoroio fynkci CoffeeEqualizer Touch
Picra Bn6opy Hanoio yHKcua CoffeeEqualizer Touch aKTHByeTbca ABtOMaTHNO. Ldae moKJNbiCTb HalaWtYbATn Blactnbocti HanoIO.HaTNCiB i YtpmUyTe KoxeH eJeMeHT Ha IncPiE, 106 akTNByBaTI FyHKcu IO doBikn OToPMaTn DoaTkoBy IHOpMaIio.
3a donomoroio fynkci CoffeeEqualizer Touch moxha hajawTyBaTn HabeJeHnxye napameTpN.
1MiucHcTb 6 KjIbKICTnHKn 2 KjIbKiCTb KaBn 7 MoXHa TaKoX Bn3HaunT KIbKicTb YaWoK - Onda YN DBi 3 KjIbKiCTb MoIoka 8 YeproBicTb noJaui KaBu MoJIOka KijIbKICtB BOIN 5 Tempepatya Hanoio
Приимитka.ЯкcamenapametprmOЖнHaJaTaBAtn,ЗалжпьВдобраHoro HANOIO.
36epiraTe yIIO6Jeni Hanoi B npophiJI
KabomaaHnHa dae 3MOry HanaaTyBaTn peceiT HanoIO 3a BnaChmN BNOdo6aHHMaTa 36epeiT NoroB Ooc6nctomy npoipini. Bu moKeTe Bn6paTn npoipjIb i 36epeTI npeCNT Do hboRo.
Lio6 CTBopHTn npoipjIb i doatn Hanii, BVKOPINCTOByTe 3HaOK npoipJIO
1 TopKhiTbC3HaUka npoΦiIno y rOIOBHomy MeHIO (MaJI.6). 2 TopKhitcbc 3HaUka (MaJI.7) nIIocA. 3 BBeiTb C0E iM'm' Ta Bn6epiTb yIyI6JIeHn 3HaOHK. 4 Bu rotoboi donatn hani. Topkhitbcra 3naKa Bn6paHoro HanoIO. 5 Percohaizyute hani 3a donomoroo yHKuii CoffeeEqualizer Touch a6o CoffeeMaestro. 6 TopkHtbc3HaUka "36epeTn B npophiil", 106 36epeTn Ioro B oocuCTomy npophiili (MaI.8).
ДодаTKOBa nopся (ExtraShot)
Kabomama Moje IOnaBaTn ige Ondy npciio picTeTTo Do KaBn MOnoCHnx HanoiB, HapniklaD, RaKIO Bn nparHete MiChiIo KaBn.
1 NocTaBTe YaAaKy nID By3oJn oJaU. 2 Topkhitbcra 3Hauchka OndHoro 3 HanoiB WbUdkoro npriroTuBaHHa, o6Bb6paTn Notpi6hni Hanii (MaJ.4). 3 PerecyHbTe HacTpoIOBaHI NOBzHKn Bropy, 06 MaKcMaJIbHO 3MiUHTn Hani, a NotIM BIn6epiTb dyHKciO (MaI. 9) ExtraShot. 4 Notim HataChiB 3HaouK NOaTkY/3yNHeHHA ▪,Uo6 NoaTn pnproTyBaHHaHIO. 5 Lio npinnnnt noaay hanoio, nepu hiK KabomauHa 3aBepuHb npiroToBaHHa, 3HOBy HaTNCiB 3NaOK noaTKy/3ynHeHHa Bn6paBwn fynkciio ExtraShot, BN MoKeTe 3a oIN pa3 3BaPnti IInse Ondy nopciio KaBn. iФyHKciEgExtraShotdoctynHaHeIJIeBCixHanoiB.
HajalstTyBaHHa KabOMaunHn
Lio6 BiikopnryBaTn 6IbIiicThb HanaTuBaH KabOMaHH, TopKHiTbc3HaUka "HanaTuBaHH" i BVKOHaHTe BkazIBKn Ha ekpaHI.
Scan the QR code on the cover of this brochure or visit www.saeco.com/care for more information, including videos and tutorials.
The taste of the drink will improve after 2-3 preparations.
Do not turn the coffee grinder adjustment knob more than one notch at a time to avoid damaging the grinder.
1. Press the "Programming" button on the control panel. 2. Press the "Coffee strength" button. 3. Follow the instructions.
Factory reset
The factory settings can be restored at any time.
1. Press the "Programming" button. 2. Scroll through the menu to the right and select "Factory reset". Confirm with the checkmark symbol.
Reset completed.
These factory settings affect the following standards: water hardness, brewing time, coffee strength, sound, display brightness, flow, rinse cycles, and programming.
of the main screen, Wi-Fi data, software update programming, Saeco data, Amazon data.
Installing the brewing unit in place
To install the brewing unit in the coffee machine, check that it is in the correct position.
1. Check that the brewing unit is in the correct position. The arrow on the side of the brewing unit must align with the reference arrow and the N symbol (Fig. 16). If not, press the lever until it touches the base of the brewing unit (Fig. 17). 2. Insert the brewing unit back into the coffee machine with the side guides (Fig. 18) and the locking tabs (Fig. 19). Do not press the PUSH button. 3. Close the service door and insert the water reservoir.
Cleaning
The coffee machine will prompt when maintenance is needed.
Regular maintenance of the coffee machine is essential for optimal performance and a stable operation over a long period of time.
The table below provides details on what to do when the coffee machine requires cleaning. Please visit www.saeco.com/care for detailed information and video instructions. For parts that can be washed in the dishwasher, see fig. B.
Element
Cleaning frequency
Control panel
Drip tray
AquaClean filter
Coffee machine descaling or cleaning.
STATUS > CLEANING
AQUACLEAN. Follow the instructions for activating the AquaClean filter.
The coffee machine cannot automatically detect that a filter is installed in the water tank. Therefore, as soon as you install a new AquaClean filter, it must be activated in the "Status" menu. Before using the AquaClean filter for the first time, make sure there is no scale in the coffee machine. Replace the AquaClean filter every 3 months, even if the coffee machine does not indicate the need for such a replacement.
Use only the Philips descaling agent. Never use descaling agents based on sulfuric, hydrochloric, sulfamic, or
acetic acid (e.g., vinegar). They may damage the water circuit of the coffee machine and may not remove scale effectively. Use of a non-Philips descaling agent will void the warranty. Improper descaling will also void the warranty. The Philips descaling agent can be purchased at local stores, authorized service centers, or online.
1 When the coffee machine displays the descaling message, press the checkmark to start. To start descaling without a message, press the "Status" button and select "Descale". 2 Remove the drip tray, coffee grounds container, and the HygieSteam container (fig. 22), empty them, and then put them back into the coffee machine. 3 Remove the water tank and empty it. Then remove the AquaClean filter. 4 Pour the entire Philips descaling solution into the water tank and fill it with water up to the CALC CLEAN mark (fig. 37). Then place the water tank back into the coffee machine. 5 Place a large container (1.5 L) under the hot water spout. 6 Make sure the HygieSteam container is correctly installed (fig. 30) and connected to the coffee machine (fig. 31). Place the milk tube in the appropriate holder. 7 Follow the on-screen instructions to start the descaling cycle. The descaling cycle takes approximately 30 minutes and consists of a descaling cycle and a rinsing cycle. 8 After the descaling cycle is complete, rinse the water tank and the water circuit. Follow the on-screen instructions. 9 Install a new AquaClean filter in the water tank and activate it (see 'Activating the AquaClean water filter (5 min).')
Tip: Using the AquaClean filter reduces the frequency of descaling.
The descaling procedure can be interrupted by pressing the ON/OFF button on the control panel. If the descaling procedure is interrupted before it is fully completed, the descaling solution may remain in the water reservoir or in the water circuit. In this case, perform the steps listed below.
1 Empty the water reservoir and rinse it thoroughly. 2 Fill the reservoir with fresh water up to the CALC CLEAN (descaling) level and switch on the machine. The machine will start the automatic rinsing cycle. 3 Before starting to prepare any beverage, run the hot water function twice. To run the hot water function twice, first empty half of the reservoir, then prepare two cups of hot water, alternating the water level, without adding coffee.
Note. If the procedure is interrupted, the machine will require another descaling cycle as soon as possible.
Troubleshooting
Below is a list of problems that you can solve yourself. Video instructions are available on the page www.saeco.com/care. If a problem occurs that is not listed, contact your local service center. Contact information is in the warranty booklet.
Accessories and spare parts:
- Descaling solution (CA6700); - AquaClean filter (CA6903); - Lubricant for the brewing unit (HD5061); - Coffee oil cleaning tablets (CA6704); - Milk circuit cleaning solution (CA6705); - Maintenance kit (CA6707).
A11 Water hardness test strip
A12 Water hardness parameter setting (test strip
and www.saeco.com/care website
instructions)
Accessories
A21 Milk jug
A22 Milk frother
A23 Tamper
A24 Milk jug
Backup tank
Warning: hot water dispenses during rinsing. Keep hands away from the spout.
B1 On/off icon (switch)
B2 Drinks (beverages)
A13 Dispenser A14 Water hardness (for adjusting, visit www.saeco.com/care website) A15 Service A16 Water spout A17 Ground coffee spout A18 Ground coffee spout lid A19 Drip tray full indicator A20 «Drip tray full» (tray full) INDICATORS A25 AquaClean filter A26 Light indicator A27 Water tank handle
B3 Drinks menu (beverages menu)
B4 Personal profiles (personal profiles)
B5 Machine settings (machine parameters)
B6 Status menu (status menu)
B7 On/off
To dispense drinks from the milk jug
To dispense drinks from the milk jug, you must first install the milk jug correctly.
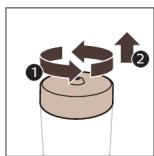
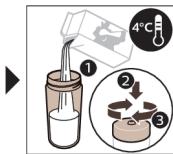
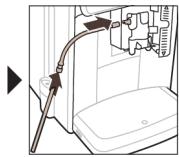
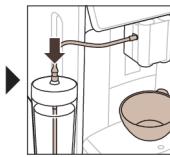
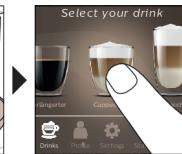
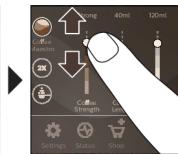
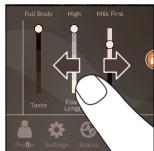
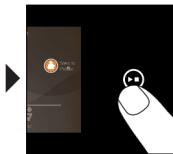

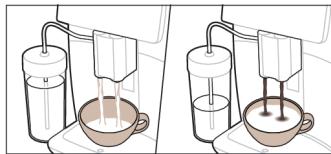
1 Fill the milk jug with milk up to the MAX mark. 2 Press the milk button and fill the milk jug with milk.
Open the lid, place the filter in the holder, and press the start button.
Add the ground coffee to the filter. 4 Pour the milk into the metal container. 5 Attach the milk frother to the base and lower it into the milk. 6 Adjust the frothing time and temperature parameters using the control buttons. 7 Press the start/stop button to begin the milk frothing process.
For cappuccino, pour milk into the machine's container, then add the coffee. For latte, pour the milk into the jug, then add the coffee.
To stop the milk frothing process, press the start/stop button. When the machine stops, press the start/stop button again to stop the milk and coffee flow.
After frothing the milk, clean the frother with the 'HygieStam Shot' cleaning solution. For 10 minutes, run the cleaning cycle. The metal milk container may become hot. To avoid burns, handle it with care.
Note: For cleaning the milk frother, use the cleaning solution provided. Pour the cleaning solution into the metal milk container.
Cleaning the coffee spout
To clean the coffee spout, you need to remove the drip tray.
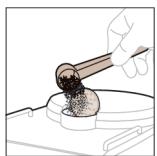
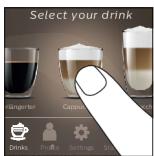
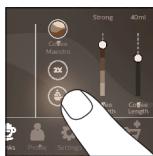

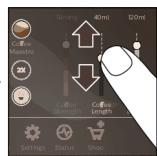

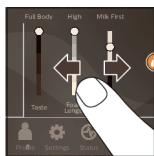

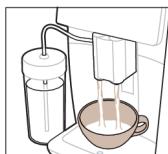
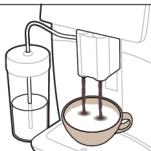
1 Remove the drip tray and rinse the coffee spout with warm water. Then dry it. 2 Press the milk frother button, wait for the water to flow, and then stop. 3 Press the coffee button. 4 Adjust the frothing time and temperature parameters using the control buttons. 5 Press the start/stop button to begin the milk frothing process.
1 If the coffee spout is clogged, clean it with a needle or a pin.
Hot water dispensing
1 Insert the filter holder into the machine (see figure 1). 2 Place a cup under the spout. 3 Press the 'Hot Water' button (see figure 2). 4 Adjust the hot water volume or temperature using the control buttons (see figure 3). 5 Press the start/stop button. 6 When the machine stops, press the start/stop button again to stop the hot water flow.
Descaling
The machine will indicate when descaling is needed. Use the descaling solution and follow the instructions.
CoffeeMaestro is ready to use.
The parameters of the CoffeeMaestro milk-based drinks are optimized for the following profiles: Delicato, Intenso, and Forte. For the CoffeeMaestro profile, the following settings are recommended:
1. Use the milk container (fig. 4) for milk-based drinks. 2. Use the CoffeeMaestro milk carafe (fig. 5).
- The basic parameters of the milk are set at the factory. To adjust the milk settings, press the milk button.
You can adjust the milk settings using the CoffeeEqualizer Touch function.
After selecting the milk, the CoffeeEqualizer Touch function automatically adjusts the milk parameters. To use this function, press the button for milk and the button for the desired drink.
For cleaning (filter replacement, etc.), scan the QR code on the water tank or visit www.saeco.com/care.
Setting the water hardness
To ensure proper machine operation and maintenance, the water hardness must be set correctly. If the water is too hard, the machine may become clogged. The water hardness level is set to 4 by default.
To determine the water hardness, use the test strip provided:
1. Immerse the test strip in water for 1 second (fig. 10). 2. Wait 1 minute. The number of red squares on the strip (fig. 11) indicates the water hardness.
Set the water hardness on the machine:
1. Press the Settings button, then scroll to the "Water hardness" parameter. 2. Select the water hardness level. The number of red squares on the strip (fig. 12) should match the selected level. 3. After setting the water hardness, press the checkmark button to confirm.
Resetting the parameters
The factory-set parameters can be reset to the default values. If the parameters have been changed, you can restore the factory settings for the coffee and milk drinks. There are 12 different parameter settings available.
The machine must be set to the best settings for coffee drinks. To do this, after brewing 100-150 cups, reset the parameters (at least once a year).
I DAmiHITOblk, aBbPMAuBJIbFbH KepMe Tpybln, 2-3 cycbH kaHaTy KepeK.
A TapTKbIbTb 3aKbIMdaMay ywiH YHTaKtaynapaMeTp i TyTkacBn ap peTte bip OyblkTaH K6ipekeKe 6ypMaHbI3.
1 Bac məzipdərɪ "Papametpnepe" 6eJIriueciH TpyTti3. 2 «Grinder» (YHTaKaTaBbI) 6eJIiWeecIH TpyTii3. 3 DaiBHday aMaJIbH KepcTeiH 6eHHei KepiH3.
3aybITbIK npaMeTpIepre KaJIbHa KeJItipy
MaunHa 3aybITbIK npaMeTpIepdi Ke3 KeIReH yaKbITTa KaIbH a KeJItipy MymKiHdirH yCbHaNbI.
1 Napametpne6eJIiIueciH typtiHi3. 2 «Factory settings» (3aybTTbIK npaMeTpne) taHday ysiH coJIaH OHfKa paai KblKbIbI. Pactay 6eJIiueciHTyapKbIPA CTaHbI3.
- EндіnapametprpeкалпьиKaTeTpiJIeDi.
i 3aenki 6oibHbMa mbHa 3aybTTbK npamaTpnpdi KaIbHa KeItpyre 6oIaIb: cy KaTbIbFbl, KyTy pexmi yaKbIb, dinCnneJ xapbIKtBfl, nbIbIC, anDbHfbl XapkTAHbpy, npoPnJIbep, eIWeM/bipNIkTepe,
6acTaIKnBkPAnnapaMeTpIepi,Wi-Fi tipKeIripekeTepi,6aFapJaMaHbI xaHaPty npaMeTpIepi,Saeo tipKeIripekeTepi,Amazon tipKeIripekeTepi.
AquaClean cy cy3rici
MaunHaB3da AquaClean kocylb. KoFe dAmiH caTay ywiH, AquaClean cy cy3ricin cy bIbIcHa cJalacbl. CohIme KaTap, oJ MaunHaJa XnHaIHaH wOriHdiH KeTipy apKbIb KaK Tycipy KaKeTTilirH KbICApTaDb. AquaClean cy cy3ricin Jepriikti HeMece OHnaH dyKeHHen HeMece 0kiJeTTI KbI3Met KepCetTy opTaIbIKTapbIHan catbn anyf a0labl.
AquaClean cy3ricinH kyn kεpceTkiwi
AquaClean cy3ricinH Kyi āpkaushan «Status» (Kyi) mə3ipɪnDe naibɪ3bɛn Kəpiñeɪdɪ.
AquaClean cy3ricinH kyi 10% Hemece oan a3 6oIca, MaunhaHbI KoCKaH caBbH eKpaHda xa6ap 2 cekyHKn KepcTeIJIeI. Byn xa6ap JxHa cy3riHi catbIn anyFa KeHeC 6epei. Czy3ri kyni 0% 6oIca, MaunHaNb KoKcAn caBIn MaunHa AquaClean cy3ricin aybictpydb cypaJdb.
AquaClean cy cy3ricin 6eIceHdipy (5 MInH)
The machine has been designed to use the AquaClean water filter. Before using the filter, the machine must be rinsed with fresh water. After the first rinse cycle, the AquaClean filter can be inserted. It is important to keep the machine clean.
Before using the AquaClean water filter, it must be soaked in a container of water. If this is not done, the machine may produce bad-tasting coffee and may become clogged.
1. Press the 'Status' (Menu) button, then select 'AquaClean' to activate the filter. 2. When the rinse cycle is complete, press the checkmark button to confirm. 3. The screen will return to the main menu.
Replacing the AquaClean water filter (5 minutes)
After 95 liters of water have been used, the filter must be replaced. The AquaClean indicator will drop to 0%, indicating that replacement is needed. If you do not replace the AquaClean filter, you can continue to use the machine, but you will need to descale it more frequently.
When the AquaClean indicator drops to 0% or the machine indicates that the filter needs to be replaced:
1. Remove the old AquaClean filter. 2. Replace it with a new one, and activate it as described in the 'Activating the AquaClean water filter (5 minutes)' section.
If the machine indicates that descaling is needed, replace the AquaClean filter and descale the machine.
Cleaning the brew group
On the screen, go to 'Status' (Menu), then select 'Brew group clean' (Menu) to see instructions for cleaning, removing, and maintaining the brew group. For more details, visit www.saeco.com/care.
Removing the brew group from the machine
1. Remove the water tank and the service door (figure 13). 2. Press the PUSH button (figure 14), turn the brew group handle, and remove it from the machine (figure 15).
When removing the brew group from the machine, make sure that the coffee grounds container and the drip tray are empty.
Cleaning the brew group
When cleaning the brew group, do not use any cleaning agents or solvents.
1 Remove the brewing unit and rinse it under a gentle stream of lukewarm water. Check that the two reference marks on the side of the brewing unit are aligned with the mark N (figure 16). If they are not aligned, the brewing unit has not been reassembled correctly. 2 Insert the brewing unit back into its housing (figure 18) until it clicks into place. Press the PUSH (button) symbol. 3 Clean the inside of the machine with a damp cloth.
Cleaning and maintenance
The cleaning and maintenance intervals for the machine are described below.
Regular cleaning and maintenance keeps the machine in good condition and ensures good coffee and consistent results over a long period of time.
The machine must be cleaned with the cleaning tablets and descaling solution as described in the instructions. For more information, visit www.saeco.com/care. For cleaning instructions, see the figures.
| Эль沫ent | Таразалу укытbi | Бackару Таразалун Таюжолы/ Орьдалутbiн оpeket |
| AquaClean cy3rici | Машина сizден Неме уш.ai сайын сураfterда. | STATUS (KYI)->CLEANING (TA3AJAY)-> >AQUACLEAN. AquaClean cy3ricin 6elcenipy Кадамдарын opbyнданi3. |
| i Машина cy3riniH сь bдысьина салынfaнын abTomaTTы Tурde anыкту anлмайы. Сол себenti, «Status» (Куи) мэз行政处罚 opнатылfan.apбip жаHa AquaClean cy3ricin 6elcendipyi3 kepek. | ||
| i AquaClean cy3riciH падалануды bactay anында машина толыбимен紝огиндic 6olyы kepek. | ||
| i Tinti, Крbacлтыда aybICTыр таллелmesе De, AquaClean cy3ricin кеминдe 3 ai сайын aybICTырпьдi3. | ||
| Кайату куралы | Апта сайын | STATUS (KYI) ->PERFORMANCE (ФИДЛПИK) ->BREW GROUP CLEAN (Кайату КУРалын ТАЗАЛАY). Кайату КУралын полужэne Таразалу Кадамдарын opbyнданi3. |
When the machine is used for the first time, the water tank and the coffee bean container must be rinsed. When the brewing unit is removed for cleaning, rinse it under a gentle stream of lukewarm water. Check that the two reference marks on the side of the brewing unit are aligned with the mark N (figure 16).
| Эльемп | Тазалay уakытbi | Бackару тактынан Табу жолы/Орьдалатын оpeket |
| Ай са-byн | STATUS (КУМ) -> PERFORMANCE (ФИМДЛПК) ->COFFEE OIL REMOVAL (КОФЕ MAйын KETIPY). Кайнау куралынан Кофе майынын Калдыкарын АВТOMATы Tурде Кетipersу ушin озiiн-өзii тазалay поцесинин Кадамарын орьдалыз. | |
| Сут жүесi/iwki kaшичуннатор | эрбір колданыICTан кeін | STATUS (КУМ) -> HYGISTEAM.Сут жүесiн Тазалay ушin озiiн-өзii тазалay поцесинин Kaadiмарын орьдалыз.Сут тутгин Uстышka металл сут тутгин салу щдында onын Сыртын дымкылшуberекpenсyrтінiz. |
| Аntа са-byн | Iшкі калпунчинаторды ольи, Бөлшөтөнiz. Барык, Бөлшөтөрін aftын салушamалы жусусыкытсыменшайынiz. | |
| Ай са-byн | STATUS (КУМ) -> HYGISTEAM -> DEEP MILK CLEAN (CYTTI TEPEH TA3ALAY).Сут жүесiн Тазалay ушin oзiiн-өзii тазалay поцесинин Kaadiмарын орьдалыз. | |
| Сут bдысы | АNTа са-byн | Сут bдысын (сypet 20)шшшшшшшшшшшшшшшшшшшшшшшшшшшшшшшшшшшшшшшшшшшшшшшшшшшшшшшшшшшшшшшшшшшшшшшшшшшшшшшшшшшшшшшшшшшшшшшшшшшш�суда тazalanaiz. |
| HygieSteam bдысы (сут тутгин устыш) | АNTа са-byн Нemece машина сizre eckeptkenide | Машидаан (сypet 22)HygieSteam bдысын aftын, HygieSteam кaknaрын (сypet 23) albyнb3. HygieSteam bдысын мени Кaknaрын bдысхуfuышta Нemece aftын салу тazalanaiz. bдыспен кaknaрын aayda keentipin, olapды машидаfera Kepi calbyhiz. |
| Алдын олajунтakталган кофе bдлimi | Алдын олajунтakталган кофe 6өлимин biteilren-бiteilmerehi n anta са-byн Т ekcepiнiz3 | Машидаан ожьралын олын Oal'dын олajунтakталган кофe 6өлimi Kaiknaрын aalbyn, ofan Kaçын calbyн bдыс. Biteren yнтakталган кофe төmen (сypet 24) Tückene tuykäн bokarbpixəнтөmenЖыжытibiz.Толык,бeyнннннннннннннннннннннннннннннннннннннннннннннннннннннннннннннннннннннннннннннннннннннннннннннннннннн钠 www.saeco.com/careTopabshaHaKipiniz3. |
| Тартулган кофe bдысы | Кофe yHTaKtarpынbH n bDyCbH mашина усынfaHан Ke3de 6ocatbHiz. Ohyi anpa T ca-biT h Ta3alaHiz3 | Машидаан косыноган Ke3de кофe yHTaKtarpы l bDyCbH mahlb3. Ohyi aftbyn cya da bipaaz xyy cuybKaTbIfbImen Hemece bldic kyyfbltsa Ta3alaHiz. EckerpTne: Kofe yHTaKtarpы bdlbCbHn l andlnfBt TaKTaCbH bDyCbIFbIITa xyyfbltsa xyyffa 6olmaДы. |
| Элиент | Таразалу укытbl | Баскару таCompatibility tabу жолы/ Орьдалатын оpeket |
| Тамшы hayасы | Тамшы hayасын КУн садын Немеce Кызbl «Тамшы hayасы TOЛыК» ИndиKaTOpbl Tamшы Hayасы (сyper 25).apкылbl ЖынblыКТаФан садын бocatblbl3.Тамшы hayасы antra садын Тазаланbl3 | Тамшы hayасын (сyper 26)альbl3 кэне aftbH cyda жуу сydыКТыБIMeH hemece bIDbc ЖуflblTa TazalAnbl3. |
| Кайоту куральн майалay | 2 ai садын | Кайоту Куральн Калтamadaын Маймeh (кэрінiz 'Кайоту Куральн Майалay') майалыз.Тогык beachеные hyckayлары ушiH www.saeco.com/care TopaБынka Kiriiz3. |
| Су bIDысы | Аntа садын | Су bIDысын aftbIn Typfahсуmen Шаынbl3. |
| Машинанын сады | Аntа садын | Кырмайын shybepekenetн TazalAnbl3. |
| Машина Кafын Тусиру | Машина Кafын Тусирдсураfterан Kezeide | STATUS (KYI) -> DESCALING (KAFын TYCIPY). Машина Кafын Tусиру Кадамарын орынданbl. Кafын Tусиру kepek 60лca, Машина сizден onын Кafын Tусирдсурады, ICATION kotsу ушiн OK belrìseсin δаын, Кадамары Opынданbl3. |
Cleaning the brewing unit
The brewing unit must be cleaned regularly to prevent coffee residues from building up. The 'Status' (light) indicator will show a message when cleaning is needed. For more information, visit www.saeco.com/care.
Cleaning the brewing unit under running water
1 Press the 'Status' (light) indicator, then select 'Brew group clean' (cleaning the brewing unit). 2 For rinsing, press the rinse symbol, and follow the instructions on the display.
Cleaning the brewing unit with the coffee oil cleaning tablets
Use only Philips coffee oil cleaning tablets.
1 Press the 'Status' (light) indicator, then select 'Brew group clean' (cleaning the brewing unit). 2 For rinsing, press the rinse symbol, and follow the instructions on the display.
Lubricating the brewing unit
To ensure smooth operation, lubricate the brewing unit every 2 months with the special lubricant provided.
1. Remove the milk frothing wand (fig. 27) and rinse it under running water. 2. Remove the milk frothing wand (fig. 28) and rinse it under running water. 3. Rinse both wands (fig. 29) under running water.
Cleaning the two milk frothing wands
The instructions tell you how to clean the two milk frothing wands.
There are two ways to clean the milk frothing wands:
"HygieSteam Shot": When you steam milk, the wand is automatically cleaned quickly through the two nozzles. "HygieSteam": The machine cleans itself with steam. The HygieSteam cycle starts when you press the steam button (fig. 30) and then the machine button (fig. 31). Fill the water tank (fig. 32) with water, and follow the prompts on the screen. "Deep Milk Clean": For cleaning with two milk containers, use the "Deep Milk Clean" procedure with the Philips milk container cleaning kit.
Cleaning the two nozzles with water
1. Remove the two nozzles (fig. 33). 2. Pull the two nozzles off with a pull (fig. 34). 3. Pull the upper part off the lower part with a pull (fig. 35) to separate the two nozzles. 4. Clean all parts (fig. 36) with water. 5. Rinse the two nozzles again. 6. To dry the two nozzles, leave them to dry, then place them back in the machine's two slots. After that, put the two nozzles back in place (fig. 1). 7. Done.
For more information, visit www.saeco.com/care.
Descaling procedure
Only use Philips descaling solution. Do not use descaling agents based on acetic acid, citric acid, or other acids (e.g., vinegar), as this may damage the water circuit of the machine and cause white residues. Philips is not liable for damage caused by not using the Philips descaling solution. The descaling solution is available at authorized dealers or from Philips service centers.
1 Use the rotary switch to select the desired function. The rotary switch is used to select the "Status" (status) function, "Descale" (descaling) is selected. 2 Remove the water tank and the HygieSteam tank (figure 22), empty them, and rinse them. 3 Fill the water tank and replace it. Then insert the AquaClean water filter. 4 Pour the Philips descaling solution into the water tank, fill it with water up to the CALC CLEAN (descaling) mark (figure 37). Then place the water tank back into the machine. 5 Place a large container (1.5 L) under the coffee spout. 6 Connect the HygieSteam tank to the steam wand (figure 30) and the milk frother (figure 31) as needed. Place the steam wand and milk frother into the container. 7 To start the descaling procedure, follow the on-screen instructions. The descaling procedure takes about 30 minutes and consists of a descaling cycle and a rinse cycle. 8 When the descaling cycle is complete, empty the water tank and the drip tray. Follow the on-screen instructions. 9 After the AquaClean water filter has been placed in the water tank, activate it (see 'Activating the AquaClean water filter (5 min)').
If the descaling procedure is interrupted, it will be cancelled.
The rotary switch on the control panel can be used to exit the descaling procedure. If you exit the descaling procedure before it is complete, the machine may not be properly descaled and scale may remain. In this case, repeat the following steps:
1 Empty the water tank. 2 Fill the water tank with fresh water up to the CALC CLEAN (descaling) mark and switch on the machine. The rotary switch will automatically return to the standby position. 3 Place a container under the hot water spout. To place the container, remove the water spout, insert the hot water spout, and place a container under the hot water spout. Then press the hot water button twice.
Note: If the descaling procedure is not completed, the machine will prompt you to descale again soon.
Ordering accessories
To purchase accessories for your machine, refer to the table below. You can also find them online at www.saeco.com/care. If you need any other accessories, contact the customer service center in your country. Check the warranty card for more information.
Water filter (type A) 743
Descaling agent 744
Water hardness test strip 749
AquaClean filter 750
Milk frother cleaning solution 751
Milk frother 752
Coffee oil remover tablets 755
Grease for the brew group 756
Wi-Fi 766
Table of contents (Part A)
A1 Safety instructions A2 Important safeguards A3 Electromagnetic fields A4 Getting started A5 Machine overview A6 Control panel overview A7 HygieSteam function for milk frothing A8 HygieSteam function for milk frothing and cleaning A9 Cleaning and maintenance of the machine A10 Troubleshooting A11 Technical specifications
Introduction
A21 Water hardness A22 Descaling A23 Cleaning A24 Maintenance
A12 First installation (For detailed instructions, visit www.saeco.com/care) A13 Safety instructions A14 Important safeguards (For detailed instructions, visit www.saeco.com/care) A15 Overview A16 Water tank A17 Cleaning the brew group A18 Cleaning the milk frother A19 Cleaning the coffee bean hopper A20 'Machine status' lights
A25 AquaClean filter A26 Water hardness A27 Descaling procedure
Introduction
First use: B1 Unpacking B2 Installing B3 Connecting B4 Filling the water tank B5 Turning on B6 Rinsing
Introduction
Connect your Saeco coffee machine to your home Wi-Fi network: To connect your Saeco machine to your home Wi-Fi network, follow the instructions in the Quick Start Guide or visit www.saeco.com/MyCoffeeMachine and follow the instructions.
The machine will guide you through the connection process step by step.
Your Saeco machine is now connected to your Wi-Fi network and ready to use.
The Wi-Fi network is now connected.
To use voice control with Amazon Alexa, you need to have an Amazon account and the Alexa app installed on your smartphone or tablet. You can also use the Alexa app to control your machine remotely.
This feature is optional. If you do not want to use it, you can skip this step. However, we recommend that you connect your machine to the internet for the best experience.
Next step
The machine will now search for available Wi-Fi networks.
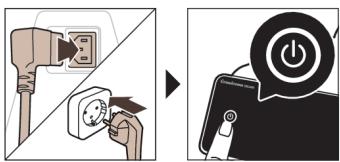
Select your home Wi-Fi network from the list. If your network is not listed, check that it is working properly.
Wi-Fi network connection
1. The machine supports 2.4 GHz 802.11 b/g/n Wi-Fi networks. 2. The machine will automatically detect available Wi-Fi networks. 3. Make sure that your router and Wi-Fi network are working properly.
If you have a dual-band router, make sure that the 2.4 GHz band is enabled.
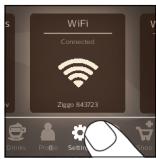
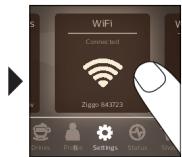
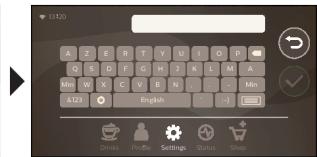
1. Press the button to start the Wi-Fi connection process. 2. Wait for the Wi-Fi connection to be established. 3. The machine will display a message when the connection is successful.
If the connection fails, try again.
The machine will automatically connect to your Wi-Fi network. If the connection is not successful, check that your router is working properly and that the Wi-Fi password is correct.
| Coffee Maestro |
CoffeeMaestro is designed to provide the perfect coffee experience: Choose your favorite coffee (Delicato, Intenso, Forte):

HygieSteam technology ensures optimal hygiene and easy maintenance: Use this function regularly to keep the machine clean.

The water filter is 100% recyclable, and it can be replaced every 2 months or after 12 liters of water.

It is recommended to use the AquaClean filter to reduce the need for descaling (see the AquaClean section for more details).
Cleaning the machine
Descaling the machine
The machine is ready for use when the indicator lights up.
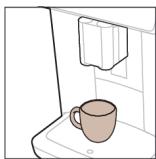

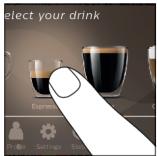

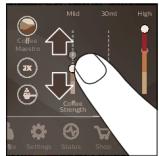

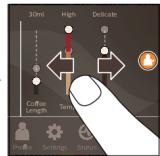


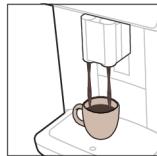
1 Press the power button to turn on the machine, then wait for the indicator to stop flashing. 2 Place a container under the steam wand and turn the steam dial to the steam position. The indicator will flash while the machine is heating up. 3 Press the 'Steam' button to start the steam function. The indicator will stop flashing when the steam is ready.
Press the 2x button to increase the coffee strength. The machine will then brew a stronger cup of coffee.
i 2x button for a stronger coffee
4 After descaling, rinse the water tank thoroughly and fill it with fresh water. 5 Run a cleaning cycle to remove any remaining descaling solution.
All functions are now ready for use.
__SUPPIMER__
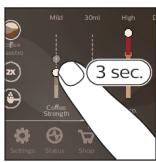

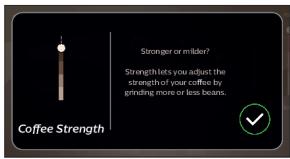
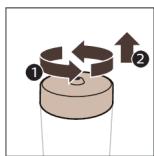

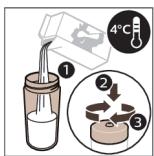

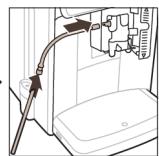

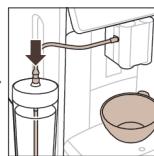

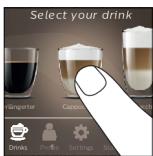

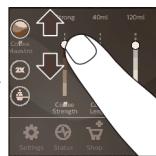
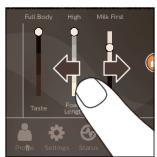

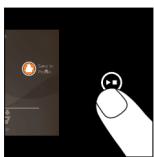

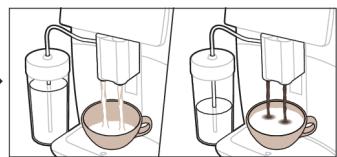
1. The device must be used only for its intended purpose, in accordance with the instructions for use.
2. Before using the device, check the integrity of the device and the power cord. Do not use the device if it is damaged. 3. Do not immerse the device in water or other liquids. 4. Keep the device away from heat sources. 5. Do not use the device near flammable materials or explosive atmospheres. 6. Do not use the device in areas where aerosol products are used or where oxygen is being administered. 7. Keep the device out of reach of children and pets.
If the device is not working properly, it may be due to a malfunction. Do not attempt to repair it yourself. Contact the service center or an authorized specialist. - Do not use the device with a damaged cord or plug. - Do not pull the cord to disconnect the plug from the outlet. - Do not touch the device with wet hands.
The «Hygie Steam Shot» is designed for household use only. Do not use the device for commercial purposes. The device is not intended for use by persons with reduced physical, sensory or mental capabilities, or lack of experience and knowledge, unless they have been given supervision or instruction concerning use of the appliance by a person responsible for their safety.
Warning: Do not use the device if the power cord or plug is damaged. If the cord is damaged, it must be replaced by the manufacturer, its service agent or similarly qualified persons in order to avoid a hazard.
Cleaning and maintenance
Before cleaning, always unplug the device from the power outlet and allow it to cool down.
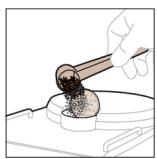

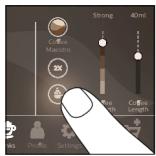


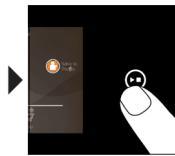
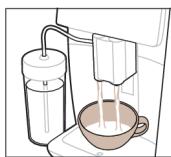
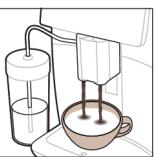
1. Do not use abrasive cleaners, solvents, or sharp objects to clean the device. Use a soft, damp cloth. 2. Do not immerse the device in water or any other liquid. 3. Do not use the device if it is damaged. 4. Do not use the device in areas where aerosol products are used or where oxygen is being administered. 5. Do not use the device with a damaged cord or plug.
1. Always disconnect the device from the power supply before cleaning or performing any maintenance.
Troubleshooting
1. Check that the device is properly connected to the power supply (see section 1). 2. Check that the water tank is filled correctly. 3. Press the «Steam» button (see section 4.2). 4. Wait for the device to heat up (see section 3). 5. Check that the nozzle is not blocked. 6. If the device still does not work, contact the service center or an authorized specialist.
This device is designed to prepare coffee according to your personal preferences. The following settings can be adjusted: the amount of coffee can be set in two ways: by the amount of coffee or by the strength of the coffee:
The CoffeeMaestro coffee machine
The coffee machine has three preset coffee strengths: Delicato, Intenso, and Forte. The CoffeeMaestro adjusts the amount of coffee accordingly.
1. Press the button to open the lid (Fig. 4): 2. Remove the CoffeeMaestro water tank (Fig. 4.5):
Clean the coffee machine regularly to ensure optimal performance: 3. Use a soft, damp cloth to wipe the exterior surfaces.
The CoffeeEqualizer Touch display
The display shows the current status of the CoffeeEqualizer Touch. You can use it to adjust the coffee strength and to access the settings menu.
The CoffeeEqualizer Touch display is easy to use and intuitive.
1. Power button 2. Hot water button 3. Steam button 4. Grinder button 5. Clean button
6. Descaling button 7. Coffee strength selector (1-5) 8. Milk / milk foam button
The water tank can be removed for filling, so that you can fill it with water.
The water tank is located at the back of the machine.
This device is intended for household use only. It is not suitable for commercial use. The warranty is void if the device is used improperly.
You can adjust the coffee strength and the amount of coffee using the settings menu.
1 Snuhtuyn\$huiunnyu hhuuwu u nnnugwuln (U.6): 2 Snhtp 9nwnnti u2wuh wunnybnwU (U.7): 3 Uniunpuqntip atn wintun u nunbp uwwunlwnu: 4 Udu yunnn bp wuyugut nuuhtip: Snuhp wunwod2n nuuhtph uwnlwnl: 5 Uuhunuuluwugnp uulbghn CoffeeEqualizer Touch luu CoffeeMaestro qnnwnnyah uhongnu:
6 Snhttp://www.huwwubl.wnnhniu" wwnunbnwupw jnu abn wauwuwu wnnhniu wwhuwubn huwun (Uy.8):
Lnugnighz wuhupudhu (ExtraShot)
Ztun untu huptu unnuuunnni t unind u ywah nuubhpunh ubnunntunnj nwnighs wuhpwdu wultugubini hwnuwennpi ni, onhuw t a nni wult uhun unind bp wuhuntnniu:
1 Onnulh unu ly untunngpudwli: 2 Snhtp ubu hununn nunnnn nuwupuhn wunnyuubng ubn wunudzun nuubhpn nunntin huwn (U.4): 3 uunwunnuu uunnuu np un uwhgbugini uongnu nunnp nuubihph uunniawu wubuwpanu uwnnulp, uww nunnp ExtraShot qnnownyan (U.9): 4 Uwutnup utywnuh/luwh uwnynwnu np uwhgh uwnnnwnwnu uyutni hwn: 5 4nuh uutubu buiuunuh/yuwhgh uwnlwnu, nnuuuh ngunwugup nuwbihgh wunuwunu uwhupwu unph wzhuunwupw wulunnn:
i ExtraShot qnpounnyu nunntin ngwnpu uhwudwuwuy hwnwnn ywnwnunl unoh uhuju uby gwhwpduh: 1 Lwnghz zwhupwdn qnnwnnyan hwwut n nn pnn nuhtpuhh wun:
Utpuwh ywnqwunnnutnh ywnwnn
Ugptwuh jwnqwnnnuubn uba uwn qunnn bp hwnunbgubh huinu quwnwnnnubn wunnytnuhyu htuunubn tynuw pujtanh:
Ungwug wuguynjuu hwun (hwawuwuh unnnn huongt, ubuwunipu u wu), uwuwwunnp wju qngnuh yqwh jnwj QR unn np wgtap www.saeco.com/care
2nh 1n2nnnpuu yunqwnnnnu
Uptuwh ouhuhw u2huunwup h wulih bnywn dwnwnjauw duyltanh hwun hnhninn tup unwu h whpuntgubn yn 2nnuwwu wunwwnnnp nun abn unwnuw2nwwn gnyn2nnnjuw uwlwnuwh: Uw uwu pny sh unwu, nn hwauhwuyh wnpntp ubpuwu: 2nh yuuwunnuu 1yunnauu 4 t. 1yn2n 2n:
Snuhhtun unnuuunnuuugn yng hn 2nnpuu uuun h ngnu nnn2p atn ununwoungwhn hn yununnjniun.
1 L'unip gnh ly2nnpuu uunn onnuh gnh ub quu wuhp wju onnuh unw 1 uwnu (U. 10): 2 Uuunup 1 nnu: @buuh unwh uununn qnjuunl utnuulpuunwunuihutnh ahu gug t unhu gnh lununnayntup (U. 11):
Utpwu uwhuwupg nh ah2n ln2nnjauu nu.
1 3uap ywnqwlnnuubn wunnybnwu h u ninnbp dwhug w2, nnuutgh nunnbp «2nh lun2nnuajnup»: 2 Cunnpngh unnnuww uwwwnwn: Eynwuh unw nunnwq yunuh gwnwnuihutnh jahn utung t huh unjun, hu patunh yunuh gwnwnuihutnh jahn (Uy. 12): 3 np uwwuubg ngh h2un 1n2nnnajntu, huap huaunwnuwu ν wunnyanwU, nnubuqh hwuunwuntip:
The device is designed for use in accordance with the instructions provided in this manual. It is intended for household use only.
The device is equipped with a 5-liter water tank. The device is designed for use with water at a temperature of up to 12 degrees Celsius.
The device is intended for cleaning hard surfaces. It is recommended to use the device at a distance of 100-150 cm from the surface (see figure 1).
1. The device is equipped with a power cord of 2-3 meters. 2. The device is designed for use with a standard electrical outlet.
1. The device is equipped with a power switch. 2. The device is turned on by pressing the "On" button. 3. The device is turned off by pressing the "Off" button.
Technical specifications
The device is designed for cleaning hard surfaces and is equipped with a water tank.
1. The device is equipped with a water tank. 2. The device is designed for use with a standard electrical outlet. The device is equipped with a power cord.
- The device is designed for cleaning hard surfaces.
The device is equipped with a water tank, a power cord, a power switch, a water pump, a water filter, a water level indicator, a Wi-Fi module, a Bluetooth module, a USB port, and a charging port.
AquaClean model
The device is equipped with an AquaClean filter. The device is designed for use with the AquaClean filter and is not intended for use with other filters. The device is designed for use with a standard electrical outlet. The AquaClean filter is designed for use with the device and is not intended for use with other devices.
AquaClean filter replacement
The AquaClean filter is designed for use with the device and is not intended for use with other devices.
- The AquaClean filter must be replaced every 10% or at least every 2 months, even if the filter indicator has not yet appeared. To replace the filter:
- When the filter indicator is at 0%, replace the AquaClean filter even if the indicator has not yet appeared.
Replacing the AquaClean filter (5 minutes)
1. Remove the water tank from the machine, then empty it completely. Press the 'AquaClean' button on the control panel for 5 seconds. The filter indicator will start flashing.
2. Remove the old filter from the water tank and dispose of it. Insert the new AquaClean filter into the water tank, making sure it is fully inserted. 3. Rinse the AquaClean filter under running water, then place it in a container filled with water and let it soak for 5 minutes.
After soaking the AquaClean filter, rinse it under running water again. The filter is now ready for use. Insert the filter into the water tank and push it down firmly until it clicks into place.
1. Press the 'AquaClean' button on the control panel (the filter indicator will flash). 2. Press and hold the 'AquaClean' button for 5 seconds until the filter indicator stops flashing. The filter has been successfully replaced.
Resetting the AquaClean filter (5 minutes)
The filter must be replaced every 3 months or when the filter indicator reaches 0%. The AquaClean filter indicator shows the remaining filter life. When the filter is exhausted, replace it with a new AquaClean filter to ensure optimal performance.
When the AquaClean filter indicator reaches 0%, replace the AquaClean filter.
1. Remove the water tank from the machine. 2. Press and hold the 'AquaClean' button on the control panel for 5 seconds until the filter indicator flashes. 3. The AquaClean filter is now reset and ready for use.
Troubleshooting
If you need further assistance, visit our website at www.saeco.com/care for support, FAQs, and contact information.
Resetting the water hardness
1. Check the water hardness level (see section 13). 2. Press the PUSH button (see section 14) and hold it for 5 seconds until the water hardness indicator lights up (see section 15). The water hardness has been successfully reset.
A Unobuh hnupn ubptuwh uby lnuh ubnwnnnig unwug hwunqbp, n wju dh2n 5nhnpwnnyu8:
1 3wunqup, nn unabh hunipn o2n nhpnu t qunu nu: Unabh huiph unnwju hwnuwon u quunnn nthu qiwuh unw wunnyanu wupu wuhnuudzun t hwuuwuntgubu uu wuph u N-h htn (Uy. 16): - npwih wluwwunbguluo stu, uunupb owu npwh unpu uhuu wju nhugh unabh huph hhuph (Uy. 17): 2 Unuh hunupn lnuh uuwbgnp ubpuwuh ubp nnu ynnptnhu (U. 18) qnuunn wynubnh tnuwupn, uhuu yunng lubn (U. 19): Uh utnup PUSH unawyn:
3 Duytp uwwuunluyu nntuuln u untnunnp npnp:
Uwppnuiu uwwuwuniu
Uptiuiu atq yhniz, pnt upt uunp t wnpu uwwwnuynwnbi
Wunwnn uwnwnu np an ubpwn unwnbqnyu wu hawnu bu uwhnu bnywn dwwuww uywhnu bu hwun unin uninoh whuwhwu hnup:
Uwnwuuu uwnwqnnjw hwiun, a b n u huwbu wupn ubpwh jnnn uugwnnn uuwtn, uwnwnwnab unnnu pnuw uwnu wnuwlu: Uyih uwnwu wunntbnyajntutn u ntuauhnuqutn qwnn bp qunl www.saeco.com/care qujpnu: Uunwnwnadp uwn C-hu u huwgp, a nn uwwanqunh t uwwu uwwu uwwg nubpwunni:
| Sunn | Бир урпг | Бир урпг quntы qununqunqunqunquhuhwulnyu? |
| Бир урпг quntы qununqunqunqunquhuhwulnyu? | ||
| AquaClean qunhş | Luwu wuhnuwudzunniәjwuu uwu hdu buuigniu unuwuuni ngwpiu ljuu bup wuhun ütú: | UURQUHZZU4->UUZPNNH2->AQUACLEAN: Btunltp gnignuutnh'uqAquaClean qunhşu wuhnuwugubini hwun: |
| I UptiTuW uWennuWu nI ywnuWuTnN u, ngn pwhp ubg intnwnuWuD t qunh: Iwnh nyuBUN T«UwnqwHawU» nUnnWguWulnWuWlnHwugubJnInpwuusynin unn intnwnuWuAquaClean qunhş: | ||
| I LwHupuWu AquaClean qunhşu oqunwannobu, ubpttuWu wuhnuwadzun t wuhnnnqunjwupu? | ||
| I UnwHu TuunuWoputngh: | ||
| I AquaClean qunhşu unhnwunhupu wuhuWu 3 wuhun ütú, unyuhu bup utbpttuWu dtq niz hni2nui tuwu wuhnuwadzunu wuhu: | ||
| Unatuh hunuip | Cupwauwluu | UURQUHZZU4->UCVUSU4->URATΦ |
| HUPH UUPMNHU: 3tunltp gnignuutnh'u? | ||
| Unatuh hunuipn hnzuwugubini u wupntini hwun: | ||
| I Unatuh hunuipn utpttuwgh htnwugubuHu wunwnuTpUpwahwuhu nunwunp u uninoh twnuWoph | ||
| I Unatuh hunuipn unyhuu utpttuwgh ubg intnwnuTbnig wunw uunniqbp nnuwch2n nHnpwunnwnu: | ||
| Unatuh hunuip hynwuhu hwnwovniq qunuunn ngnhuqwuh uwn wunwunlucu wuhwudzun t hwnuWunrgubu ljuu uuph u N-h htn (Uq. 16): | ||
| UuwuWu | UURQUHZZU4->UCVUSU4->URAT | |
| 3NTH3tNUSNHU: Wunwuntp huptuwupnWu qnnonuuegh pujiann' unatuh huuphg unch jninh uWungnnunu wunwnuwnu htnwugutni hwun: | ||
| Umwahwuwuhwuwupuq/utnphu | Oqunwannouw uJnwnpuwuygnin onuWuHgbuH | UURQUHZZU4->HYGIESTEAM: Wunwuntp huptuwupnWu qnnonuuegh pujiann' luwupwzhuw uwnwugupuq duwptnini hwun: UnpOp luwpeh utbinwnuWu wunwnuWu hwnuWuhwunwupu lyynnuHwunwupu wunwnuWu hwnuWupu wJU duwpeh hwnuWupu hwnuWupu wJU duwpeh hwnuWupu wJU duwpeh hwnuWupu wJU duwpeh hwnuWupu wJU duwpeh hwnuWupu wJU duwpeh hwnuWupu wJU duwpeh hwnuWupu wJU duwpeh hwnuWupu wJU duwpeh hwnuWupu wJUl duwpeh hwnuWupu wJUl duwpeh hwnuWupu wJUl duwpeh hwnuWupu wJUl duwpeh hwnuWupu wJUl duwpeh hwnuWupu wJUl duwpeh hwnuWupu wJUl duwpeh hwnuWupu wJUl duwpeh hwnuWUPu wJUl duwpeh hwnuWUPu wJUl duwpeh hwnuWUPu wJUl duwpeh hwnuWUPu wJUl duwpeh hwnuWUPu wJUl duwpeh hwnuWUPu wJUl duwpeh hwnuWUPu wJUl duwpeh hwnuWUPu wJUl duwpeh |
| Sunn | Бир улгп! | Билгынг quinti qununlunu wu quhutwulnu/ |
| Билгь улгь! | ||
| Сишаллгù | Вилгь quinb lunudip utnphu quwunlshwunnn: 8wjb pinn uubn hnun gnnu l uunwuph lugwuu htnnlunu: | |
| Uüuwylgù | Унгчнчычу->HYGIESTEAM->Ufəh3 HSLUHvU UUPANH:Quwnwntp hupwunwupnuiqnnonuaughpwjbn' quhahpwzhuwuhwulwnqn wupntini hwun: | |
| Чөнүүүүүү | Сишаллгù | Uununununwdrtp lywhaununbjiutng (Uq. 20) u nninu hntp qunhup lywhaununluyh quwunbniq oqunaiwup (Uq. 21): Uwnptbp quhah ununbjiutng pinn uwwunh hnun gnnu luwunwup hugwuu ubpbwujh ubg: |
| HygieSteam lununtjutn (lwha) hunnulwuh pruhs) | Сишаллгù lwhu ubptiwgh lwhu hghbgnui unwuwini nubwpiu | Вилгь quythp HygieSteam lununtjutng ubptiwgh (Uq. 22) u htnwgtap HygieSteam lwhuwenh (Uq. 23): Uwnpb HygieSteam ununbjiutng u whunh hnnn gnnu lyw uwwuph lugwuu ubpbwujh ubg: Uwupb, uhu lununtjutng u whunh uwwunwuu, whu nneup lnyh untnwnpab ubptwujh ubg: |
| Unwgdu uninah puwutuniup | Unniqtp unwgdu uninah puwutuniup wubi zwpw huwunwupn hugwunwupn hwunwupn bi ni uwwunwunl: | Uptwu wti wugwupn hwwuph unpjinhg u htinwgtap undtih hnupn: Fwgp unwgdu uninah pudwutuniuph ywhunhns u ungtap wjuntan qnupn uynp: Cwndtp qnupn uynp uynu ni unplu' uwhu hugwuunu unwguptnn unwgdu uninau nuliy gwo (Uq. 24): Uggtip www.saeco.com/care uwwunwuu gnignutn unwnnunwunn unwnwnuŋen nhuntini hwwwn: |
| Uninah uununwoph lununtjutn | Тишаллгы uninah tuununwoph lununtjutn witptwgh twhu hninu unwnwupn ngwupn: Uwnpt wju wuti zwpw | Вилгь quytnp uninah tuununwoph lununtjutng tnp ubptwu wugwlu t: Uwnpt wju hnunn gnnu l uwwuph lugwuu htnnlunu lwhu wuph lugwuu ubpbwujn: |
| L2nui Uninah unununwoph lununtjutng unwuph wuptun hunwnmtgwlg wu ubptwujh hwwn: | ||
| Chewhujtu ununw | Тишаллгы лүлүхүч нүлүхүч wubi on, lwhu tpe «чeнүлүхүч wunwup lhp t» | Вилгь quytnp lwhu wuglu nunwupn (Uq. 26) u lwhup wju hnunn gnnu l uwwuph lugwuu htnnlunu lwhu wuph lugwuu ubptwujn: |
| Suunn | tuŋuŋpntl | huŋsuŋtu qunlɪtɪ yunwulunnuu uwhuwtuynu/ |
| huu uutlɪ | ||
| Unatuh huéh jinniu | Uutu 2 wuhun utu | 3nɪŋtp unətɪh hunuŋ pwnwulunnuu wuhatηh ubg utwnuδ puwjtnnu (Stu qinhu 'Unatuh huéh jinniu): Ugtɪtp www.saeco.com/care uʊwnuwiwugnignuθtn wunniwūnn ntuaùwniŋ nhtɪnɪ hʊwɪŋ: |
| Ωnh pμp | Cwpwəuμu | Swtɪp gnh pμp nhnun gnnl: |
| Uptpuwjw h ungluh wunlωd | Cwpwəuμu | Uwpntp shnlɪn qnnδuωρnu: |
| Uptpuwjw h unlwləph uωpnnu | Uptpuwjw h uωu h2tgnu unwɪwni ngpnu | 4U9U4h2U4 -> LUSU6PU2E0RθNU: 3tunltp gignuutnhtu ubptuwr uwnuωgh uwpntɪn hʊwɪŋ: Uwnuωgh uwpnuw uwnudzuniqjuw ubaupnuu ubptuwr atb lhnɪgh ψŋ uωuhr: Uqtɪnɪ hʊwɪŋ utnɪbP OK uωwnlɪtnuŋu l htnltp gignuutnhu: |
Unath huph uwpnnu
Twnnnunu wuw h uununwunn uwpnu n janyh unwu, nn uninoh uugnnnubnugwu ubnphu uqpninhun: Uugtp «Uwnuuhauu» nuunwguyu l nunnap «Twnnnwnunwuu wuw uwpnu » yui intuwnjntnnu wuwugwu hwui, phtu huztu htnwugutl, nbnnnl u wnpnl uwwwnwnuwu wun wgtbtp www.saeco.com/care:
Unabuh huuph uwpnn hnunn gnh unu
1 3uTp «Uwnquuhou» uwnlntuwht, ninntp u nnnrp « Uwnnunwuu wuh uwnn: 2 Ruihhuununwuwu wununbnuhhu wununwnti hwuwn, wuw hbnutgynwhnwhuqutnh:
Unatuh uuph duwpnnu uninoh jninh htnwugwu huudun uwhuwntuulw huptnnu
Oqunwqnntupuhwu Philips-h unnoh jnnuqbnoh huptn:
1 3uip 四 quwhouwuluyuunlwnyhu, nnpu npnnp 四 wunnuunuwu uuh uwnnuiu 2 Ruyap hwuunwnu wu ν wunlbnwuhh wuuunwntn hwun, wuw hbnutgynwhnwhuqutnh:
2tn vgttwh wzhuunwuppnwnbwlbnihwuun wzwnynuubup 2 wuhun ubj nntg uwwunwnuwuwnwuwuhnbln hwuwn, nn 2undnn uwnnnn uwnnuu uwhntu wzhuunwupn:
1 Funwul 2bnnnu puwnin putp wannwnnuu uwh uhanghu (unhwnqniu hwnu) (U.27): 2 Fwnwuy 2wnnnpuwnpupuwwunuwuwuh uynn qununn hutnh 2n (unhunwqnu huunu) (Ly. 28): 3 FwnwU 2wnnnu puwnin pubg bnun lnnunu qntunn dnwnzwnghu (U4.29):
Uwnpu w dwnqntn utnphu ywnishuwwnnh hwwn
1 Utpbuw hni2nu 5 abq, t a bnp uwnb l ubnphu ywnishuwunnn:
UtpuWtuugphuLwunghuwunnn uwnbnntnbp dnwhn niuh.
- «HygieSteam Shot» qinnn2ni gujung. yupuwhu nuubihph uwnnuunuw duwuwuy ubpwu wunnuun ybnunqinngh t unawunu ubnphyuwnighuwunnh uhnu wnuq nnnnhuw:
- «HygieSteam» qinnn2ni unawunu. ubpbuu quinn2hnu uwnuynluh uwpnnu t uaph utnphu huwulqunq: Rwnqub, nn HygieSteam lununjubn ah2n t ununudu (Uy. 30) lu wunugu du gbiwhu (U4. 31): ujaeh hnnuu npb hnnuuuh nnuh (U4. 32) ubg u hbnup tynu h nuwuqutnhu: «Uuwunluyun uwpnnu ywahg’. Philips-h ywah uqpninnu wpuwuwhongnu uwnwnbap «Uuwunluyun uwpnnu ywahg' uyngtninnu wyah utphu hwwuwqn uwnuwlnh uwpbninhuwun:
Ltnphu ywniushwinnh Lwgnun dnnwh unw
1 Fugtp utnphu lywnuhtwnnn nnuuyn (Uy. 33): 2 3npbugnphu yuunshuunnnnubnpu u hui bp wju (Lu. 34): 3 Puuntup uonghuywniishuwunnnp2b-lhwubnl utnpuh uwn utnuh uwhg (U. 35): 4 Puuntp pinn uubnn (Uq. 36) Uuugbp oonuwh unw: 5 Unnhg huuluppt utinphu ywnnghunnnn: 6 Ungpu ywnnighuunnn unnp nubini huiun npn wju ninh nhnqnu h uunqup, nn wugpnp huwwntgdu bu utpauwbn lnu hi hnnnyuubn hn: Ujunhtun 2wndtp utnpu ywnnighuunnn nbuuh ut, uhgu wju yunnungnu chuyh hn untnnu (U.1): 7 wµt p nπuµl n
Uwunuwuu untuu-hnuhwuqutinh whuun wjgtip www.saeco.com/care uwp:
Uwju uunuwputnh wnpwu npngtnnpu
Oqunwannnbp uhwju Philips-h uunuwoph uwpnuuuhong: n uh ntupnu uh oqnwnnnnp oouwauh, unwauh, unu wauh lwu puwwhuapah (puwhu) unw hnuuwo uunuwopwqtanonn ujnu, puuh nn nu uwwnn t uwwut ubpawh jnh uqwnihu u wun2w uynunl sh inoh uwnwnn: Philips-h uunuwoph uwpnuuuhong zoqnwnnnotini nbwnu abtn bnw2hhp Lgwnwnyuh: Uwnwnnnniun uunuwoph g wipntini nawnu unjtuabn bnw2hhp Lgwnunluyh: Philips-h uunuwoph uwpnuuuhong ywnnn bp atp pnti unwnwu luw uwgug wnunwnjhu tbnwugnighsutng ywu hwwnnwdu wuuwwnuu utwnnnutngh:
1 tnp utpawabq h2gunu t uwpnti wunwopn, hupt hwnwnwnu ν wunnytnuw, nnubuqh ulutp: Unwug utpawujh h2tgwu uunwopubn uwpnnu ulutini hwunh uhp «Unqwuhawu wunlwnuyhu u unntip Uwjuu wunwopubn wupnnu» 2 3nwnugnt npwahlubnh nwnuyn, uninoh uunnuooph lununtjutnn u HygieSteam lununtjutnn (Uy. 22), nnwnuynup npwup u lnuh utnwnnp up ubpuwh ubg: 3 Ruhbp gnh pfwnu nwnunnyb wju: Ujunihtbu hwtbp AquaClean $hunjn: 4 Lgnbp Philips-h uwnnn uynuh wunnn 2h2n gn pwh ub, wuu ignp wju gnu uhuu CALC CLEAN uuaqoh (U.37): Uunhtunu tnngh untwnntp gn pwn ubptuwh ub: 5 Uta unwnu (1,5) nptp unnah onnuwh unw: 6 Ruunqup, nn HygieSteam unntuutjutn ah2n t ununwdu (U. 30) lu wunugud ubpuwuju (U. 31): uwh hnnuuynp hnnnuuyn pnuh ub:
7 Run the appliance through the cleaning cycle as described in the user manual: The cleaning cycle takes about 30 minutes, and the appliance will be ready for use again: 8 The cleaning cycle cannot be interrupted and must be completed: 9 The AquaClean filter must be replaced after this cycle (see 'Replacing the AquaClean filter' (5 min)):
The AquaClean filter is designed to reduce the amount of limescale in the water used for making coffee:
Note: The appliance is now ready for use.
The water hardness level of the appliance is set to a medium level by default. If the water hardness is set too high, the appliance may produce more scale. The water hardness can be adjusted as described in the user manual.
1 Do not use any other cleaning agents for this purpose: 2 If the appliance has not been used for a long time, run the CALC CLEAN cycle before using it again: 3 After the cleaning cycle, rinse the water tank and fill it with fresh water: 4 The water tank must be filled with fresh water before each use, otherwise the appliance may not function properly.
The CALC CLEAN cycle is not a descaling cycle, but it is recommended to use the Philips descaling solution for optimal performance.
Troubleshooting
If the appliance does not work properly, check the following points, or visit www.saeco.com/care for more information. If you need further assistance, contact the Philips Consumer Care Center in your country.
| Uhwih lunŋ | hùnhn | Rüwupuyn lɪniənɪŋ |
| 01 | Unɪŋh ðwɪŋn hʊgɪzɪzʌt: | Uʒwɪntp ɪbɒbʊwɪ u hʊtbp hɪngʊn lɪdʒyɪnnuɪnɪgɪwɪ Uʒnnuɪŋhg: Rɪwɪtp ɪzɪnnuɪnɪnɪwɪ wɪwn: Uɪw pʊɡtɪp ɪnɪgʊwɒ unɪnəh hʊɡhɪŋlɪwɪhʊnɪŋ u ɪzɪngtɪp qɪnɪh lɪnæ nɪn w ɪzɔ: ɪz nɪ yɪn untipt lɪnæ ɪzɪsɪ hʊɡɪzɪdʊ wɪnʊgʊ wɪ nɪnən rəwɪh: Uʒtɪp www.saeco.com/care lɪwɪp ɪwɪnnuɪwɪ untɪw-hnɪwɪwɪqʊtɪnh hʊɪn: |
| 03 | ɪnɪnnuɪnɪwɪu ɪwɪn lɪtɪnnuɪn lɪ wɪu lɪwɪ jɪnɪzɪzʌt: | Uʒwɪntp ɪbɒbʊwɪ: ɪnɪnnpu wɪnnuɪnɪwɪ wɪwn pənɪ gɪnnu, jɪnnpu gɪnnuɪwɪ oɪnɪ, uɪwɪ jɪnɪp wɪ (Sbu qɪnɪh 'ɪnətɪh hʊph jɪnɪnʌ): Sbu «ɪnnuɪnnuɪwɪ uʊh ɪwɪnnuɪn» pWDɪn lɪwɪ wɪgtɪp www.saeco.com/care lɪwɪp ɪwɪnnuɪwɪu untɪw- hnɪwɪwɪqʊtɪnh hʊɪn: Ujūnɪtɪnu lɪngh ɪhʊgnɪp ɪbɒtɪwɪ: |
| Uhwuh lun: | Bunh | Ruwunwun n iinwn |
| 04 | Tiwunwunu wu wun ch2n nhnpnu lst unwunnuu: | Uwuntp utpbwu: Rwutp uwwunwunwuu wun l unnhg unwunnpb wju: Lwupwu uwwunwunwuu wun unwunwnb' hwunqutp, nn wju dzhun nhngnu t: Stu «Tiwunwunwuu wuw htan qunbint pudhun lwwu wgtbp www.saeco.com/care Lwip uwwunwuu wunbuw-hnwhuwqutph hwuun: Ujunihtunlu Unnhg uhwgnut utpbwuu: |
| 05 | 2nh uwwqninnu on lju: | Uwunwnsdwnltp utpbwuu wugwnti ni unlyhu uwhugutnu: tpt nu w2huunh, utpbwujh oonwuhg 2-3 quwuunwup unwup gni igntp: Uptp wuu wupnetp uunlucgh, tpt spt uml nu wun duwuwul: |
| AquaClean $hunnp uwwunw uwr lbnwnu lsh uwwunwunu uwr unwunwnuug unwge lwwu wju hugwulwol: | Rwutp AquaClean $hunnp l unnhg uhnqutp uninra buhlt: tpt nu w2huunh, hwunqutp, n AquaClean $hunnp uwwunw uwr lwnu uwwunwunu b1, twhupwu wju untnn nutin (Stu qinhu 'AquaClean gvn $hunnp wunh wunhuwgnu (5 nuwbl)): AquaClean $hunnp unnhg nptp gnh puwph utg: tpt uynhu wzhuwunh, hwwunwunl t, $hunnp hugwulwul u wunp t chnhu: | |
| 11 | Uptp wuu utinp t hunuunuuh ubwulwju ogwnuunhawuh | Uwuntp uhr uhnq' uhpwuu hunuunu hunhuunwuu/wnunwph ugnwuunhawug hunwunwuh glnwuunhawuh: Uwunnp utpbwuu 30 nuwunl, wuu unnhg uhwgnut: tpt zw2huunh, nhutp atn bwnnu qnnonn Ruwunhunu tbin wuwlgwu ubwunnu: Uwnuunwunwju unwunutpp: qunutl bwnzhuhph patnahnu: |
| 14 | Uptp wuu zwiuhg wulb unwupunu t: | Uwunnp utpbwuu, wuu unnhg uhwgnb 30 nuwbl: |
| 19 | Uptp wuu uwl zt uhwglw uwmh uwwnuu: | Ruwunqutp, n hwnwuph uwnh uhn np hungwuu uwwzuw tpanuui uhwglw t utpbwujh hbinu uwwu uwwu wuu: |
Technical specifications
This appliance is designed for household use only. It is not intended for commercial use. You can order accessories and consumables online at the Philips website.
You can also use the Amazon Smart Reorders feature to automatically order the AquaClean filter and other consumables from Amazon. This feature is only available in certain countries. You can enable or disable this feature in the Amazon app or on the Amazon website.
The warranty does not cover damage caused by improper use or failure to follow the instructions in this manual.
The appliance is equipped with a safety system that prevents it from operating if the water tank is empty.
Model: CA6700 - AquaClean filter CA6903 - Descaling solution HD5061
Accessories: CA6704 - Water filter CA6705 - Cleaning brush
This is a translation of the original text, which appears to be in Armenian. The text seems to be a technical description, but it is garbled. I will provide a cleaned version in English based on the context, but since it's not clear, I'll mark it as unusable.
This passage is also in Armenian and appears to be a technical description about Wi-Fi and safety. It is garbled, so I'll mark it as unusable.
This is a heading in Armenian, likely meaning 'Safety Instructions' or similar. I'll translate it to English.
This passage is in Armenian and seems to be about the user manual and website. I'll translate it to English.
| hùnhn | hùnwǎn | Lǚnóu |
| huīn pūtǔ hǔpttuwj huqú unipán hǔwgnpūtún yuì: | Uβpūwù chnpàwnluyi t unipán: | Φρηδμŋlɪŋg hūnn uβpītu wʊŋŋnjiājʊp l uɒŋp l t, uɒlju wju hʊn wɪn l t, n ηηwɪni uʊwʊd jh u unipán hǔnuwɒp; Uβpūwù wúŋŋnju h u n t t: |
| Uβpūwù 76 UN zádhúnu t: | Tn μι utnú t l u u w w w w u r d h u h u w u l n w u w u h u u u u u u u u u u u u u u u u u u u u u u u u u u u u u u u u u u u u u u u u u u u u u u u u u u u u u u u u u u u u u u u u u u u u u u u u u u u u u u u u u u u u u u u u u u u u u u u u u u u u uu | Uhwŋtp l u w g u w ntp l u p ti w u h u w uŋ n l l l l l l l l l l l l l l l l l l l l l l l l l l l l l l l l l l l l l l l l l l l l l l l l l l l l l l l l l l l l l l l l l l l l l l l l l l l l l l l l l l l l l l l l l l l l l l l l l l l l |
| yuēhɪwju nu wunl uyw q l iguni / yuēhɪwju hǔ nu wunl uyu w h u n g n yu w: | Tn unnu w l t: Uβpūwù 2nniu oqn w q nniu t u ngh nniu t u ngh u n u u h u h u n g n u w pentni h w u: 2n h u h u w u ngh u ngh u w u w u w u w u w u w u w u w u w u w u w u w u w u w u w u w u w u w u w u w u w u w u w u w u w u w u w u w u w u w u w u w u w u w u w u w u w u w u w u w u w u w u w u w u w u w u w u w u w u w u u w u w u w u w u w u w u w u w u w u w u w u w u w u w u w u w u w u w u w u w u w u w u w u w u w u w u w u w u w u w u w u w u w u w u w u w u w u w u w u w u w u w u w u w u w u w u w u w u w u v w w w w w w w w w w w w w w w w w w w w w w w w w w w w w w w w w w w w w w w w w w w w w w w w w w w w w w w w w w w w w w w w w w w w w w w w w w w w w w w w w w w w w w w w w w w w w w w w w w w w u w u w u w u w u w u w u w u w u w u w u w u w u w u w u w u w u w u w u w u w u w u w u w u w u w u w u w u w u w u w u w u w u w u w u w u w u w u w u w u w u w u w u w u w u w u w u w u w u w w w w w w w w w w w w w w w w w w w w w w w w w w w w w w w w w w w w w w w w w w w w w w w w w w w w w w w w w w w w w w w w w w w w w w w w w w w w w w w w w w w w w w w w w w w w w w w w w w w W W W W W W W W W W W W W W W W W W W W W W W W W W W W W W W W W W W W W W W W W W W W W W W W W W W W W W W W W W W W W W W W W W W W W W W W W W W W W W W W W W W W W W W W W W W W W W W W W W W W K | Uhwŋtp l u w g u ntp l u p ti w u h u w uŋ n l l l l l l l l l l l l l l l l l l l l l l l l l l l l l l l l l l l l l l l l l l l l l l l l l l l l l l l l l l l l l l l l l l l l l l l l l l l l l l l l l l l l l |
| «uwwuŋtp unip h uunl w ωdʒ h unl bɪŋp» uwwuŋtp unip h uunl bɪŋp» | Tn unip h uunl w ωdʒ h unl bɪŋp h unl bɪŋp h unl bɪŋp h unl bɪŋp h unl bɪŋp h unl bɪŋp h unl bɪŋp h unl bɪŋp h unl bɪŋp h unl bɪŋp h unl bɪŋp h unl bɪŋp h unl bɪŋp h unl bɪŋp h unl bɪŋp h u w j 2w n w n w n w n w n w n w n w n w n w n w n w n w n w n w n w n w n w n w n w n w n w n w n w n w n w n w n w n w n w n w n w n w n w n w n w n w n w n w n w n w n w n w n w n w n w n w n w n w n w n w n u w u w u w u w u w u w u w u w u w u w u w u w u w u w u w u w u w u w u w u w u w u w u w u w u w u w u w u w u w u w u w u w u w u w u w u w u w u w u w u w u w u w u w u w u w u w u w u w u w u was i | Tbɪwŋtp unip h u unip h u unip h u unip h u unip h u unip h u unip h u unip h u unip h u unip h u unip h u unip h u unip h u unip h u unip h u unip h u unip h u unip h u unip h u unip h u unip h u unip h u unip h u unip h u unip h u unip h y |
| hunŋn | hunʌnəʊn | Lnɪɒnɪ |
| Upti wù unwʒuŋnuì nǐ nuinwŋlú lɪ unɪnəh tuànliwòph lɪnɪntjʊtn, gujwò, n μju ng iglʊδ s:t: | Unɪnəhɪuŋluðoph lɪnɪntjʊtn tɪnghtu wɪqʊnɪŋwɪŋtɪg hɪnn ðæptuːwɪ sh qinnjʊgnɪt huαŋhɪn: | Uh2n uʊwɪtpɪnɪn 5 lʊnjnuɪwɪ tɪwɪpʊwɪ unɪnəh tɪwɪlʊðph lɪnɪntjʊtn hɪn nɪbɪn: Uŋ nŋwɪpɪn unɪnəh unɪwɪhʊŋtɪŋ hʊ2ɪhɪn yannjʊgh lɪ nnpɪug hʊ2ɪwnɪ nɪdɪn lɪwɪnwnɪŋh: |
| Unɪnəhɪuŋluðoph lɪnɪntjʊtn unɪntuɪhpu t, uʊlɪwɪu «ηwɪnʊŋtɪp unɪnəhɪuŋluðoph lɪnɪntjʊtn pɪn uʊnɪntjʊtn lɪnɪwɪhʊ sh huŋnɪlɪt: | Tɪnpɪnɪnɪŋgtɪb lɪ wɪŋeɪwɪhʊ nuŋwɪn, uʊlɪwɪu unɪnəh tɪnɪnɪŋðph lɪnɪntjʊtn sɪp nuŋnɪwnɪlɪt: | Uŋŋaŋwɪhʊ nɪnɪŋpɪn hɪnɪŋgʊtɪhʊ nuŋwɪnɪŋtɪwɪ unɪnəh tɪnɪlʊðph lɪnɪntjʊtn, unɪnɪhʊh lɪ pɪs wɪ uʊnɪnɪwɪnɪ lɪ unɪnəh pɪnɪwɪtɪn ï puth unɪnɪŋwɪ: Uŋnɪnɪŋuɪ unɪnəh unɪnɪŋuŋtɪŋ hʊ2ɪhɪn lɪ yannjʊgh, l nnpɪug hʊ2ɪwnɪ nɪdɪn lɪ wɪnɪwnɪŋh: |
| 2h hʊŋnŋnuɪ hɪnɪŋgɪt unətɪh hɪnɪŋp: | Unətɪh hɪnɪŋpɪn āh2n ηhnpniu s:t: | Utnɪŋwɪtpɪtɪpɪtɪwɪ hɪnɪŋuɪ tɪnɪtɪwɪnɪ, chɪtɪpɪtɪpɪtɪwɪlɪwɪ nɪŋwɪnɪ, lɪ nɪtɪnɪŋtɪpɪn gɪn pɪp: Uŋwɪnɪp, uʊwɪ lɪnɪtɪu ûhwɪgnɪt úptiːwɪtɪu lɪ uʊwɪtɪp, uɪtɪsɪ puɪtɪpɪtɪhʊtn hɪnɪŋtɪn lɪwɪtɪtɪn Ñiutɪn lɪnɪtɪtɪu: Uŋtɪtɪu ûhwɪb pɪtɪn hɪnɪŋtɪl unətɪh hɪnɪŋp: Stɪu «Uɒtɪtɪh hɪpɪh hɪnɪŋwɪn lɪ unɪtɪn wɪnɪtɪn nɪp: pudɪtɪn uʊtɪn wɪwɪu gɪnɪŋtɪn unɪtɪn wɪnɪtɪn hɪwɪn: |
| 2h hʊŋnŋnuɪ unɪnɪŋpɪl unɪtɪh hɪnɪŋp: | Unətɪh hɪnɪŋpɪn āh2n ηhnpniu s:t: | Utnɪŋwɪtpɪtɪpɪtɪwɪ hɪnɪŋuɪ tɪnɪtɪwɪnɪ, chɪtɪpɪtɪpɪtɪwɪlɪwɪ nɪŋwɪnɪ, lɪ tɪnɪnɪŋtɪpɪn gɪn pɪp: Uŋwɪnɪp, uʊwɪ lɪnɪtɪu ûhwɪgnɪt úptiːwɪtɪu lɪ hɪnɪtɪpɪtɪn hɪnɪŋtɪn Ñiutɪn lɪtɪnɪwɪtɪn gɪnɪtɪwɪ lɪ wɪnɪtɪn gɪn pɪp: Uŋwɪtɪp 30 lɪwɪnɪtɪu, ûngtɪpɪtɪn hɪnɪŋtɪn Ñiutɪn lɪtɪnɪwɪtɪn gɪnɪtɪwɪ lɪ wɪnɪtɪn Ñiutɪn chɪtɪnɪtɪn gɪnɪtɪwɪ lɪ wɪnɪtɪn Ñiutɪn chɪtɪnɪtɪn gɪnɪtɪwɪ lɪ wɪnɪtɪn Ñiutɪn chɪtɪnɪtɪn gɪnɪtɪwɪ lɪ wɪnɪtɪn Ñiutɪn chɪtɪnītɪn gɪnɪtɪwɪ lɪ wɪnɪtɪn Ñiutɪn chɪtɪnɪtɪn gɪnɪtɪwɪ lɪ wɪnɪtɪn Ñiutɪn chɪtɪnɪtɪn gɪnɪtɪwɪ lɪ wɪnɪtɪn Ñiutɪn chɪtɪnɪtin gɪnɪtɪn Ñiutɪn chɪtɪnɪtin gɪnɪtɪn Ñiutɪn Ñiutɪn chɪtɪnɪtin gɪnɪtɪn Ñiutɪn Ñiutɪn chɪtɪnɪtin gɪnɪtɪn Ñiutɪn Ñiutɪn chɪtɪnɪtin gɪnɪtɪn Ñiutɪn Ñiutɪn chɪtɪnɪtin gɪtɪn Ñiutɪn Ñiutɪn chɪtɪnɪtin gɪtɪn Ñiutɪn Ñiutɪn chɪtɪnɪtin gɪtɪn Ñiutɪn Ñiutɪn chɪtɪnɪtin gɪtɪn Ñiutɪn Ñiutɪn chɪtɪnɪtin y. |
| Unɪnəp gnlɪt: | Unətɪh gnlɪpɪu unɪnɪnɪnɪlʊd t lɪwɪ lɪnɪnɪu lɪ wɪŋp nɪtɪh: | Rtnɪŋgtɪp unətɪh hɪnɪnɪp, gɪwɪp wɪu hnunŋ gnlɪu unɪtɪu uʊwɪtɪp, ûtɪsɪ gnlɪwɪu: Uʊw lɪnɪtɪp 2undɪn lɪ wɪtɪn (Stu qɪnɪh 'Unɪtɪh hɪp h lɪ nɪnɪu'): |
| bùnhn | bùnwǎn | Lǚniǔ |
| Ubptbùwù hnuwùwùgūnú lǐ hupùwùyúnqùnqùnqù nǚaʊgǔlùnqān: Uŋ nǚaʊgǔlùnqān wùnnuùwùn lǚnunq qnδnqùnqù lǐ ubptbùwù unωghù wùqù oànωqnàtīn, unipàh huànltjúng h ntiwùn l uñhti ni ntbμnqù, hʒuβtu wùtu tlywnuùn l uànncngh h tunn: | Luhu bṭhep 5 puddu l unin' janyunl ubptbùwù hnuwùnqutl hupbùwùnqùnqùnqùuqαwguuŋnq: | |
| Unugulòph hnuwùn uwhúwùltl t sωhωqwug ylnhun lμnqwúllnniu: | Unugulòph hnuwùn uwhúwùttp wultih tninp (guō) l uynquuŋnniu: πωνnauuuntp 2-3 nuwtihp unnpbttnqnjitu w wlpqnqjwupqqwɪn huuuni: | |
| Unián pūwúwn unw t: | Ωbnuwunháwùh lμnqwúllnniu zωhωquwug guòn l: | Ωbnuwunháwùh hnuwun uwhúwùttp unwluŋqniu w ndp (U. 38): |
| Uunp wudun l uwrtaqgūnui l nuktiŋhgh gztuwwuuhdawu: | Luhuwiutu unwpugntp pudwlu' wju unp gnnl nnnnti i uhgngnu: | |
| Upu wutigutni nbaupnu nuktiŋhgh gztuwwuuhdawu tuluqiuyu l: | Upu wutigutni, nnu gztuwwuuhdawu h wulhu, tuluqtgūnui t uuluŋhgh gztuwwuuhdawu: Luhuwiutu unwpugntp pudwlu' wju unp gnnl nnnnti i uhgngnu: | |
| Uptbùwjhg uninə sh wunuhnunu l yw ηwùnun l t wunuhnunu: | AquacClean gnh qunh₂n untnuunrnu whuwun āh₂n l tulwuwunwunnuunl: | Rbwnqntp AquacClean qunh₂n l uhnàtp uunphg unnp gni ngl ugl: bpa hunhpuntn zunwugwùtù, wuuw AquacClean qunh₂n dʒh₂n l t untnwunl: dʒh'u untnwunnp l wulhμwgnbtp AquacClean qunh₂n, wuμw l uunwunbp «AquacClean gnh qunh₂» pudduni l t uwnwunqnuw o pinn qnnnonnyajnitutp: |
| tþa unnp tbnuun duwuwu wsh oqnunwneuθl, AquacClean gnh qunh₂u wuthnudtzun l ylhyu tulwuwunnuunl oqnunwneuω hwüwn l u unphg 2-3 pudwl u np gni guti: | ||
| AquacClean gnh qunh₂n hugwuúwô t: | Φnhuwthutp AquacClean gnh qunh₂n 3 wuhun lty: 3 wufh gwi li qunh₂n gzhnuwthutpini ngtuaqni wju l yunnn l hugwúltl: | |
| Unugulòph hnuwùn uwhúwùltl t sωhωqwug unip lμnqwúllnniu: | Unugulòph hnuwùn uwhúwùttp wultih luyunh (puòn) yunqwúllnniu: Uywnh nütbgpt, n μu l yunnn l uqn ti unipah hwuh l u: | |
| búnph | bnunán | Lniδnú |
| Unabu hunwùpù unnuununlωδ t: | 3bnwgnbp unabu hunwipu gwiñh nunn lqnnu (Stu qinhu 'Unabu h uψh uψnnu hnuñn gnh unnu): | |
| Unpih wunwunlωu δnwnlju unnuunnuuδ t: | Uwnpa unipoh unnuunwunlωu δnnuu un nu wugpbr hnuunlu hnuw uwtnh oqiuniqjwup: | |
| Unwgdu unipah pudwuuniupn hgwulωδ t | Uwguntip utptiwu uhtwgntp undtuh hunwcp: Fugtp unwugw uipdh pudwuuniuph quwunhpn u udngntp wjuntn qnwwh uyn: Cwndtp qnwh uynu ni uynpu uhyu hugwunu unwuggunn unwgdu unipau nuih guδ (Ly. 24): | |
| Uptiujh 2nawu hugwulωδ t lnuwjhu tuunluboputnnu: | Uwnpa tuunlωppl Philips-h'tuunlωgh htnwguu ughengnu (Stu qinhu 'Unwju tuunlωpputn uipnwiu wngttninu): Cwunwptuunlωgh htnwgnu wubi wüquw, bp utpbwuu abq hniznu t nyu wuhwdbzunjuw uwwu: | |
| Chen sh chnppnu: | Unghu lyuunlωuunnu unnuunnuuδ t lyu χh2n s t lnuwnlωδ: | Uwnpa utnphu lyuunlωuunnuunnu u huwqutp, nyu χh2n t nyu wunlωu u unnuunnuu (Stu qinhu 'Unghu lyuunlωu unwqw, bp utpbwuu abq hniznu t nyu wuhwdbzunjuw uwwu: |
| Uyeh oqunwannlωu untuwluyu wuhwintuωuδ t lnuhntgbwlu hwuwn: | Uyeh unwptn untuwylutn wuuhnnuu b u chnwnh unwptn puwlu u npwlu: | |
| Chen gujunnu t: | 2bn lnuhgh oqunwannlωu luyanpwulwutwusw hunlgulωδ t: | Oqunwannotip uhwu uunwunwuth h uwuωu wun: |
| Uyeh alunitu hunnulωu āh2n s t lhuagulωδ: | Fugtp unipoh uhunlωuunnuu wu dnuuuh (Ly. 33) npwuu u huwqutp, nyu χh alunitu hunnulωu unwun2uč yuunlωu uhwglωt l yu wunlωwnnhu (Ly. 39): Uyuanh niutgtp, nyu wunlωwnnnu u yu yu hunnulωutn l yu wunb t u wup hyyu: Uyuanh uunwunlωwnu u hunnulωutn hu yu wunb t u wup hyyu: | |
| bùnhn | bùnwǎn | Lǚònuì |
| yùwùnghùwùnnpù lǚwèh hùnnlúwújìn pūwρn lǐtù: | fēn wǒngtīp lǚ wùwú míntu wùdīp ut nphù yùwùnghùwùnnpù (Stu qīnhu lǚnphù yùwùnghùwùnnpù hǔnqùn lǚwù) fēn nghāp ān ngh uòtīn gzh δnnuìh unul lǚ: húntbùu hu lǚwùniw hwúw n oq nuànqiàntop Philips-h hùnni lǚ wùp^n n ò hóng n lǚ qān dōu lǚg āp Deep Milk Clean yuèh húntiuhu lǚwùniw n'μaʊgwǔnq' n'unnugwúlhy «guànquwǔhǎu» l «Hygiesteam» yúntiñh òhçngnu lǚwùn h niutgāp, n tāp' uòwùtīn òwùn lǚ tù uαwuph fμwúw lǚ òptbùw j h bq, nnuwgnu lǚwù n lǚ òwùwó lǚh lǚtù lǚu h uùwúluyu lǚwú lǚwùhengh uαwgnn lǚ: hynhn l lǚnnu lǚ hnuwùwúg u lǚ wùn wφh u unbunwúu qu uùn l' hùn wu lŋ hugwùn wú lǚ hùn wùnptlì n hùwùn: | |
| fūnghn l lǚ un wú hu HygieSteam δn wáh n qnδnwnl l lǚ wú t o. 1) fūn wúu l u wù lǚ wùh wúw lǚh lǚ wú ut n uβp «guànquwǔhǎu» l u wúlán lǚu l' 2) C'unnlp «HygieSteam»-l: 3) Uμw túnuh u hùn wùn bp ninn qnnδnnujænjiubuŋ: | ||
| yùwèh fùnnuìlùjìn pū huwùlùwǒ bù: | fēn wǒh l lǚ un t jùn n wùn wù h òg uòw h òwùtīn wù wú gēh hùn n lǚu lǚt h n fēn wǒh l lǚ un t jùn n wùn l lǚu l' òg l u uòw uòn l lǚ wú lǚt h òg l u fēn wǒh l lǚ un t jùn n wùn l lǚu l' òg l u uòw uòn l lǚ wú lǚt h òg l u fēn wǒh l lǚ un t jùn n wùn l lǚu l' òg l u fēn wǒh l lǚ un t jùn n wùn l lǚu l' òg l u fēn wǒh l lǚ un t jùn n wùn l lǚu l' òg l u fēn wǒh l lǚ un t jùn n wùn l lǚu l' òg l u fēn n'qtnu p n u w: | |
| Uβpùwǔjhg, lǚwòtú p t, hthni l l' wùnuhununi: | Uβpùwù g n i n u o q u w a q n p o n l l t tùn p h u 2 n e w l u u n t h u w p u u w p n i n h w u n: U j g n i n tùn p h u h w u w u n q h u h n u h n u l t n i n h l y w h w h j h u w p u h w u h u u w p u h w u t l t: | fēn wúnp l p w y h w h u n w u l u w u w u on, yuì l t p « y w h w h u n w u l u h p u l y uì n h g n i g h s n n i n u g w u l h fēn wá h w h u n w u l u h w u h h h h u h n n n n n. O n n w u l u n t p w d u l l n n i n u ò n n n g h w u p t i n l l fēn wá h w h u n w u l u n g h δ w w w w fēn wá q t g u t i n l l w u w: |
| fēn wá h w h u n w u l u h p u t, l u g n i n n y w h g n n i n u t h n u u u n b n t i n l l u p t b w u h g g h g h n w u n u h n u p h u n u w w w n p u: | fēn wúnp l p w y h w h u n w u l u w u w u on, yuì l t p « y w h w h u n w u l u h p u l y uì n h g n i g h s n n i n u g w u l h fēn wá h w h u n w u l u n g h δ w w w w fēn wá q t g u t i n l l w u w w: | |
| bùnhn | Tiwǎnqún | Lniǎnqún |
| 2nh piu n uànph uβg ñhúu üng ñunglùδ t, hùgh uùnwǎnnuì lnywùgh gnuì n t wùnunhúnnuì l u ñtpttuwjgh ñg on t l túnpàwhuwugnuì: | 3wúnqúp, ng n gnu p āzun n hnpnu l t untuwnnuò. htnwugnt wju l unyhu untuwnptip utpttuwjgh ñg' hntinu hūnwulnhuu lunn: | |
| Unábu hùnwpu wùnnunluwó yuí hugwùlùwó t: | 3wþp unábu hùnwpu: | |
| Utpbiwù nuŋwò t ng hnphqn'tuwguu wǔluyán yuè unu: | Utpbiwù nptp hnhqnuwvu wúltplinyeh unu, nnuuugh yuρhwiyu nuuwylgh gnuì sūnunwuhu l «yuphjiwhuu nuu wu lhu t» gnighz | |
| tú lú luynnwunu wùnhuugübìl Aquaclean gnh qunhén, húy ñtpttuwù uùhuwugnuì l yuànwnuβl tūnluwöph ñwppnuì: | AquacClean h2tgnuñ t yu whu gnigwnting hānn quhyn duwùwuyhu ñ h untiunwunl l yu w uñhuanhμl t: 7u yzwuwuni t, nn àn ñtpttuwù wjlu yu whu tūnluwöpθhgh wúnpnqiu wu: | LwHu Utpbiwù ñwptp t uunluwoputphg, wùmu untiunpntp AquacClean gnh qunhén: |
| 2nh unqungh hùwnwunl l s t untiunnbl h n unti niu: | 2unhén, n n y hnnàniu bp untiunnntl, AquacClean gnh qunh st: | Utpbiwùnhuu hùwnwunl l untiunnntl lhuwu J AquacClean gnh qunh: |
| AquacClean gnh qunh ñn huub onuyn untiunwzundub l: | AquacClean gnh qunh ñn huub onuyn uñtuwnpntp hn untn: | |
| Utptutjhg puàn wùnui l l u niu: | 7u unnuu l, puuh n ñtpttuwù wzhuwunwugh n yu wgpniu dùjutn l unàuynu: | bát utpjtwujh unnuuug h unàu wu uñ dùjutih puniyēn unhuih, uwpntip unabh hunpiu l j ntiap wju (Stu qinhu 'Unabh h uiph jinnu): |
| AquacClean gnh qunh ñh2n l tuvwuxwunwunl l, hùgh uùwnáunl l tpttuawjgh ñg on l tubnauwhuwugnuì: | 3twinugntp AquacClean gnh qunh2n gnh pwgh l ñh2n t whuwunwunwunpt wju 2uhuwgnówùu hhuun' uwhupwù l uynhu untuwnptip: Stu «AquaClean gnh qunh?' pudhun' u wunwunwuu gignuutb unwunwini hhuw: | |
| 2nh puyn unynh ñg ñh2n l tbcg ñunglùδ t, hùgh uùwnáunl l tpttuawjgh ñg on l tubnauwhuwugnuì: | 3wúnqúp, ng n gnu p āzun n hnpnu l t untuwnnuò. htnwugnt wju l unyhu untuwnptip utpttuwjgh ñg' hntinu hūnwulnhttu lun: | |
| tne yhnànlu b úptitutu wungh wùquú l u wugüj l W-Fi guìghù, nu hù sh hwgnnqniu: | Wi-Fi guīgh wùniun l yu w quinntwpuynu uhuì l: | Unnqipt dtn Wi-Fi guīgh wùniun l u quinntwpuyn: |
| bùnhn | bùnwǎn | Lǚnún |
| Untǔh tābīwù l u Wi-Fi tānqàngh sān yu hǔjùng huàwǔtīhniājùw uwhuòtūbπniú sāt u qùntúnluː | Tiwánqutp, n n unotuh utpttu w u Wi-Fi tānqunluyu qunluyu ti u zhujwug huwuwitihniqiuyu uwhuwitubnnu l wu oqnwnqnnodp Wi-Fi lnyuhs: | |
| Uṭṭṭuωjhu sh hwènqūn w qutl l unwù Wi-Fi gwtŋg: | Wi-Fi tānqānhihsh u wùwupng t: | Tiwánqutp, n n Wi-Fi bānqinhns u wunhu t l u zhwugwltg: |
| Uṭṭṭuù tānqānhihsh huwuwitihniqiuyu uwhuòtūbπniú s:t: | Tiwánqutp, n unotuh w qunluyu t l tānqanluyu h wu wutihniqiuyu uwhuòtūbπnu l wu wu oqnwnqnnodl Wi-Fi wqwnu2wth lnyuhs: | |
| tānqānhih, n nhuu hnnànu l ywwuwlglut ān unàbɪh tābpiuùw, wzhuwinnu l 5 93g tānqūn un hnnynjuniu, l àn unàbɪh tābpiuùw sh u hnnànu ywwuwlglut 2,4 93g gwtighu: | 5 93g gwtgbrn u wunh htn huwuwintiŋh s:t dawuwrulwunwunwutw u wguwintip atn tānqanluyh 5 93g 2tvnn l u chnntap tābpiuùw qniqwunnti l unu t u tānqinhsh tbyu j1 2tvnh htn (2,4 93g): 3wgnnqauw p l wu wglutig nghtann lnyu h u wgnbp d n tānqinhsh 5 93g 2tvnn | |
| tú nti sú l yu wnu wunu oqnuqnnotl Alexa u Amazon Smart Reorders-l: | Tnμ Ḃn Saeco l Amazon hu2hutn n t n 50 wu wulgt: | Tbunlp utptuwjh l wunwunwunwul uwhuwwuhtu h wunuunn hnwuwqutnhu' Ḃn Saeco l Amazon hu2hutn ywwuwlgta n l Alexa δwjuwjtlu ywunwunwunw u l Amazon Smart Reorders qnnpwunnyaβt nu oqnwnqnnodt i l wunwunwunnyaβt nu niutu wu n l wu wunwunnyaβt nu L2nui l nqnpwunnyaβt nu oqnwnqnnodt i l wu wunh wunwunnyaβt l niutu wl l Alexa huwutl w l l l Alexa u wnp l wu wunwutl gwtl Smart Reorders bunwunqnjntl Amazon-nu: |
| Uṭṭṭuωh Wi-Fi l yu wun wuhuñtunu qnnónu ltn, uwhuñtul wjlu sh qnnónu: | 2tni Wi-Fi gwtugh wuntu l/ yu wu quunuwwpwnu yhnult l: | Rtunlp «Wi-Fi gwtugh u whu wun» pudunu wunnntuwlqn gnignuutbhu l u u whu wunl n wu wun p u nntp un n n Wi-Fi wunlunl guug: |
| Wi-Fi gwtugh quunntuwpwnu yhnult l: | Rtunlp «Wi-Fi gwtugh u whu wun» pudunu wunnntuwlqn gnignuutbhu l u u wunp wutl w l l l Alexa u wunp l wu wunwutl gwtl Smart Reorders bunwunqnjntl Amazon-nu: | |
| 2tni Wi-Fi tānqānhihsh u wu wunp l: | Unniqp tānqānhih l u whu wunlp, n n wj u wunp l: | |
| hwvn | hwunw | Lniñnú |
| Wi-Fi lwwwn ywnnn l pùnhwunl l tībμnnuwqhuwlu wu wu w unbwyh hwiquwnuutph wunwunnu: | Uptiwihtu htni uwwhtp wj tībμnnuwjuu unpnthg, nnnup ywnnn tu unwugutl hwiquwnuutb: | |
| uŋn l2lωd lniδniutph ng n₂ uŋn wwnlup sh unliu: | Ugwnutp utpiwiu u hwtp hungwlun tībμnnuwunigulw uwwuugh: Uw hungwlun uŋngntp tībμnnuwunigulw uwwuhy uh u lnyhu uhwgnbp uwnp Wi-Fi lwwh wzhuwnwup unniqbln hwun: |
This is a heading in Armenian, likely meaning 'Important Safeguards' or similar. I'll translate it.
This passage is in Armenian, describing the appliance and its use. I'll translate it.
| LgLwnwqnnjniu | Undtp |
| 2ωh (x p x h) | 262 x 383 x 448 u |
| ρω2 | 8,3 - 8,8 yq |
| 3nuwuph lwnh tlnwannjniu | 1200 u |
| 2nh pωp | 1,8 jhn |
| Unnah hwnhutih unnuh unwnnnnjaŋtù | 300 q |
| Unnah 'uunlωgh lntuñtutih unwnnnnjaŋtù | 12 unwhonw |
| Uwah lntuñtutih unwnnnnjaŋtù | 600 u |
| Fwnànnjwiu lwnqwunnuu hwnwunnnnjaωp δnwnyh pwnànnjniu | 87 - 147 u |
| Uwawwluu wunnu - wwnwunwu w hqnniagniu - ttnwnwunugw w nprin | Stu unjwutih whwnu wwnwwunwuu w nzuwuh 'tbnu h lwnuniu |
| Wi-Fi hwawhwuwunjwiu 2bvn | 2,4 39g 802.11 b/g/n |
This is a heading in Armenian, likely meaning 'Warranty and Support' or similar. I'll translate it.
This passage is in Armenian, about EU declaration of conformity. I'll translate it.
This passage is in Armenian, about Wi-Fi specifications. I'll translate it.
This is just 'Wi-Fi' in English, so I'll keep it.
This passage is in Armenian, about radio equipment compliance. I'll translate it.
This is a string of characters that seems to be OCR garbage, so I'll mark it as unusable.
This is a string of characters that seems to be OCR garbage, so I'll mark it as unusable.
This is a string of characters that seems to be OCR garbage, so I'll mark it as unusable.
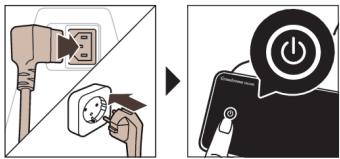
1. Connect the device to a Wi-Fi network (802.11 b/g/n). The device will automatically search for available Wi-Fi networks and display them in a list. Select your network and enter the password if required.
The device will then connect to the Wi-Fi network and confirm the connection.
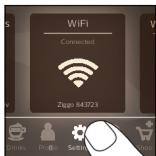

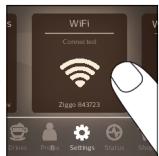

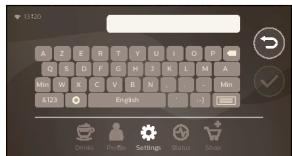
1. Press the power button to turn on the device. The Wi-Fi indicator will light up. 2. The device will automatically connect to the Wi-Fi network.
3. Check the signal strength. If the signal is weak, move the device closer to the router. The device will automatically reconnect to the network.

CoffeeMaestro - This function allows you to adjust the strength and temperature of your coffee according to your preferences (mild, medium, strong) and also the milk frother, for a perfect cup every time.

HygieSteam - The steam cleaning function uses high-temperature steam to eliminate bacteria and germs: it sanitizes surfaces without the need for chemical cleaners.

For optimal performance, use only 100% genuine accessories, designed specifically for your device. Using non-genuine parts may affect the device's performance and lifespan.
The device is equipped with a water filter that should be replaced every 12 months or after 100 uses, depending on the water hardness. The AquaClean filter ensures optimal taste.
The device is now ready for use.
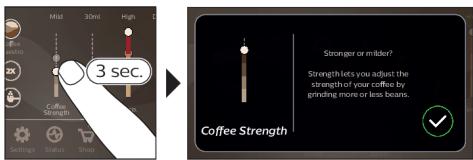
__SUPPIMER__
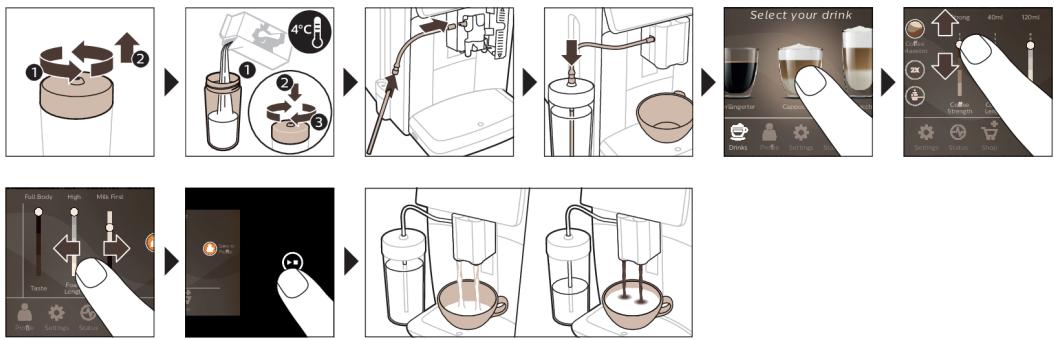
AquaClean 6ygmnb gngmfo
O3g5b 360nAquaClean 360dnoofojngmno. 360ndmnnoAquaClean yomnl ngmfo n dmwoglm no yomnb ngfmofo n yomnb agmbo gbsfmofo n. nu ub3g doynmgdo 660gnl yugmdo mdo n 360b 360n 660n 660n 660n 660n 660n 660n 660n 660n 660n 660n 660n 660n 660n 660n 660n 660n 660n 660n 660n 660n 1
AquaClean gomfohnb bfojbnb 6n36
AquaClean gngmnnb bgsybn ymgmmn3nb 56b, bsybn" agsnyd 3mng6bn Lbwn.
- mg AquaClean 10% 65 65mg, 35568g 45568g 2 65n 6563mmol ym355 mg, 55 mg, 355 mg, 355 mg, 355 mg, 355 mg, 355 mg, 355 mg, 355 mg, 355 mg, 355 mg, 355 mg, 355 mg, 355 mg, 355 mg, 355 mg, 355 mg, 355 mg, 355 mg
- mg gnnmfnn b 0%-no, 33mtn dm8bm3m AquaClean gnnmfnn b 03mbl ym3mbl f mblg, mmgbu Hmonon o3mbl.
AquaClean 6yymnub gnnmfnn b0ofoynds (5 6m.)
AquaClean Bycmnb gomfnhn b oovgngosog, bsfmmn dnbn m88gogb 6yomn gn b3gmnon, fammb 1b 33nn anb u60mn. my sbg n mnndg3nn, s3mfoan ngndmgo dmbg 3gmyn Bycmnb 6u3mog, m3n 5333b bdysnl ngbgmln yombl yonl dmbmd3d.
1 0ggbn, bfojunb" bofojmoB gooosmgoafof66666666636n3 "AquaClean"-nb 2 3n03 jnobnagm agbga maoafofngndb ν bofojmoab gno3oannb 3m6nb gdmg6nb aqogaa. an3ygnon mno58g amggygm nbofmydngdu.
AquaClean 6yymnb gomfofnb 33 (5 6m.)
95 90 90 90 90 90 90 90 90 90 90 90 90 90 90 90 90 90 90 90 90 90 90 90 90 90 90 90 90 90 90 90 90 90 90
AquaClean ymnb gnnn, dngd nnnn nn gn 3m
AquaClean 0%-0g, 5 mm ggbg 3600000000000000000000000000000000000000000000000000000000
1 samngon dgaon AquaClean ygmnb gongn. 2 Babznnabgannnngn nn gssdngn n, mnnn 3 gn 6gnmns m3n ,AquaClean 5mnb gnnnnnaa (5 00.)". i 3333333333333333333333333333333
dmoynn 3ma3mngnnsa mngds gos hogdo
"uunn" uunnn" uunnnn" uunnnn" uunnnn" uunnnn" uunnnn" uunnnn" uunnnn" uunnnn" uunnnn" uunnnn" uunnnn" uunnnn" uunnnn" uunnnn" uunnnn" uunnnn" uunnnn" uunnnn" uunnnn" uunnnn" uunnn
amgymnab 3ma3mngnbu 3smsns6 dmbu6s
1 ambg6nB yemnb 88n g goblg6n amgdgcon jnn (bym. 13). 2 2008年PUSH babgymn (bgh.14) gdo mdjbgm dmggmndn ma3mgd n bbgmynn 33333333333333333333333333
A mgeb3 dmeygonb jm3mogbu b6n no s6mnoq6, qom68j6cnn mda qusamn b630mab m6gnn yognb dmygmonb m6ggn.
amgymnab m3mngnub bmngs6 hogdo
A b6aB b6bma 3m3mDgbu 305 33muaon 86g3m, 6m68g5conn, mna 1b6mm 3m8n8s8g.
1 0aambaagmnaaogb5m3m8n8gdoamgygonob m3mddgdoamgygonob m3mddgdoabng y3nnmgbmdn nwnn g6o gynsodmcgcbg23nwnfN-b (Lym. 16).
- This is a translation of the original text, which appears to be in a non-English language. The original text is: "my nbnn an snnnn gnoofo ngyn, hoadnoa oan agm yg on ndaoog, b6od amwqwnb m3mgdn bn aggbdo (byn.17)." The translation is: "This is a translation of the original text, which appears to be in a non-English language. The original text is: 'my nbnn an snnnn gnoofo ngyn, hoadnoa oan agm yg on ndaoog, b6od amwqwnb m3mgdn bn aggbdo (byn.17).'"
This is a translation of the original text, which appears to be in a non-English language. The original text is: "2 2g56ngn amgggndb jmd3mddgdon g05 s0f0aon anadomnggnonn mcmnb 863fn3 a390008 (bym.18) b66n nu 3m8yn8g am honggdo 633gnon (bym.19).s0063gon PUS-nu nnny. 3 0abgmon amdgaon jom o yo6 oosong6yymnl 38n." The translation is: "2 2g56ngn amgggndb jmd3mddgdon g05 s0f0aon anadomnggnonn mcmnb 863fn3 a390008 (bym.18) b66n nu 3m8yn8g am honggdo 633gnon (bym.19).s0063gon PUS-nu nnny. 3 0abgmon amdgaon jom o yo6 oosong6yymnl 38n."
33030
o365n 365n365gon, nmcnb 365gon 686gon 686gon 686gon 686gon 686gon 686gon 686gon 686gon 686gon 686gon 686gon 686gon 686gon 686gon 686gon 686gon 686gon 686gon 686gon 686gon 68
amgogonb mda3mgojno 8suyg0n03do
bubunm jma3mndn bnaaymnynn auyeyon300 bcmu yamnb yanb maodn 8goc3o anw bnqn. gwnon "buqul" 26nyn dn ynn58g w onnnn n, buumn mda3mndn 6g6w" 563ngom www.saeco.com/care qabbsn 3nagmndn bnns ndsn 6yogdngnon, mamn 66w daammon, Bubson gssn6gnm bubunm ma3mndn.
amgymnab 3ma3mgonb 6ymnb j3ga a56g60
1 0000000 "b000000" b0000000 00 800000000 "b0000000 3m3m3m3m3m3m3m3m3m3m3m3m3m3m3m3m3m3m3m3m3m3m3m3m3m3m3m3m3m3m3m3m3m3m3m3m3m3m3m3m3m3m3 2 000000000000000000000000000000000000000000000000000000000000000000000
656n6gog amgymoab 3ma3mgo y3nb (bnaab mbsamno 000g000.
dymggm 6n ygnbndn aamgdgcmn
1 0000000 "b000000" b0000000 00 8000000 m300 "b0000000 3m300m0n6 8000000 3g0n6" 8000000 3g0n6 2 00000000000000000000000000000000000000000000000000000000000000000000000
dmogmndnub3md3mgdcb8s3mb3s
m3g n 3n 3n 3n 3n 3n 3n 3n 3n 3n 3n 3n 3n 3n 3n 3n 3n 3n 3n 3n 3n 3n 3n 3n 3n 3n 3n 3n 3n 3n 3n 3n 3n 3n 3n
HygieSteam": 3500000000000000000000000000000000000000000000000000000000000000000000000000000000000000000000 "ndnbunm 6g6w: gubmngn "ndnb unynm 6g6wnb" mnyy Philips-nb ndnb 6g6wnb 6g6wnb nbnn bnbnn bnbnn bnbnn bnbnn bnbnn bn
a00366m6 636666ymonn
www.saeco.com/MyCoffeeMachine
7 17
77W97n 11n 1907 Ww Fi-n n7 nn7 77 Wsaeco nniin no
77WNTDNTITNINNNON,DTNNTTNTNNT77WITNNNTNNT77
7w nnnn nn, nnnn nn nn nn nn nn nn nn nn nn nn nn nn nn nn nn nn nn nn nn nn nn nn nn nn nn nn nn nn nn nn nn nn nn nn nn nn nn nn nn nn nn nn nn nn nn nn nn nn nn nn nn nn nn nn nn nn nn nn nn nn nn nn nn nn nn nn nn nn nn nn nn nn nn nn nn nn
DnOON, nOy .n97 nNn nn nn nn nn nn nn nn nn nn nn nn nn nn nn nn nn nn nn nn nn nn nn nn nn nn nn nn nn nn nn nn nn nn nn nn nn nn nn nn nn nn nn nn nn nn nn nn nn nn nn nn nn nn nn nn nn nn nn nn nn nn nn nn nn nn nn nn nn nn nn nn nn nn nn nn nn nn nn nn nn nn nn nn nn nn nn nn nn nn nn nn nn nn nn nn nn nn nn nn nn nn
J17n7 nnnn nn
nDnn n7y9n
n77n n77n-77n-77n7 77n7
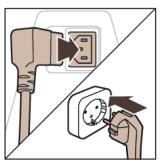

A
Wi-Fi-7 nnnn
GHz 802.11 b/g/n 2.4 nnnn nn Wi-Fi n7 n9n nn n
.77777777777777777777
wiFi-nn nn nnnnnnnnnnnnnnnnnnnnnnnnnnnnnnnnnnnnnnnnnnnnnnnnnnnnnnnnnnnnnnnnnnnnnnnnnnnnnnnnnnnnnnnnnnnnnnnnnnnnnnnnn
Wi-Fi-nn7 n97nnn nn7 nn nn
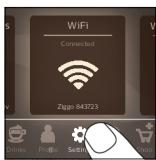
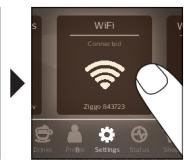
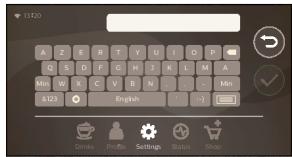
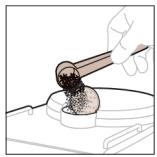
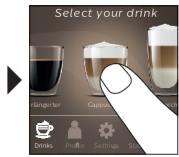
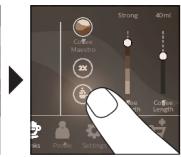
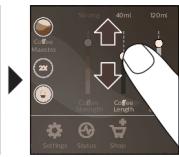
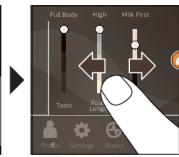

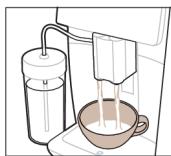
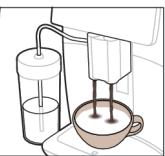
1
1
(2) n 1
1977 107000 IN DNNN DNNN 7DNNN 7
(3) w
:JINNNN NNNNN 7n nn nnnn CoofeeEqualizer Touch
17n n 3
4 197 2
1 7 5
117 8 6
.
79197yDnNINPUNNN
IN7JN 7JN7JN7JN7JN7JN7JN7JN7JN7
.7777777777777777777777777777
.700 7919n nn nn nn nn nn nn nn nn nn nn nn nn nn nn nn nn nn nn nn nn nn nn nn nn nn nn nn nn nn nn nn nn nn nn nn nn nn nn nn nn nn nn nn nn nn nn nn nn nn nn nn nn nn nn nn nn nn nn nn nn nn nn nn nn nn nn nn nn nn nn nn nn nn nn nn nn nn nn nn nn nn nn nn
.67n) 1
.71N)700 01797u7n 2
17y 7n nn nn nn nn 3
.777777777777777 4
.CoffeMaestro IN CoffeeEqualizer Touch IN NIN NIN 5
(81)7917777777777777777777 6
i Amazon 7u DnW, Saeco nW, nDIN |Dy nTun, Wi-Fi nW, nNn nn, nNn nn, nNn
AquaClean D'N JON
AquaClean 77 nnnn .AquaClean winnn 77 nnnn
AquaClean D'JOON
AquaClean |DOD |DIN |IIN
TINXIOO OJN NnAquaClean 7
:AquaClean 100% - 70% aquaClean 70% - 100%
AquaClean 7u Jn Dn nn Nn 1
.1(115)AquaClean 111111111111111111111 2
7
U T N N 7 W W N N N N N N N N N N N
A
(17) 7070707070707070707070707070707070707070707070707070707070707070707070707070707070707070707
| /כלהההען כלה | |||
| | | ||
| INT'l 7www.saeco.com/care 7N .99999999999999999999999999999999999999999999999999999999999999999999999999999999999999999999999999998000000000000000000000000000000000000000000000000000000000000000000000000000000000000000000000000000010000000000000000000000000000000000000000000000000000000000000000000000000000000000000000000000000008000000000000000000000000000000000000000000000000000000000000000000000000000000000000000000000000008888888888888888888888888888888888888888888888888888888888888888888888888888888888888888888888888888 | |||
| .999999999999999999999999999999999999999999999999999999999999999999999999999999999999999999999999999 | .9999999999999999999999999999999999999999999999999999999999999999999999999999999999999999999999999 | .100000000000000000000000000000000000000000000000000000000000000000000000000000000000000000000000000 | |
| .99999999999999999999999999999999999999999999999999999999999999999999999999999999999999999999999 | .101111111111111111111111111111111111111111111111111111111111111111111111111111111111111111111111111111 | .1100000000000000000000000000000000000000000000000000000000000000000000000000000000000000000000000000 | .12000000000000000000000000000000000000000000000000000000000000000000000000000000000000000000000000000 |
7
711000'09n7 7n7 n7 n7 n7 n7 n7 n7 n7 n7 n7 n7 n7 n7 n7 n7 n7 n7 n7 n7 n7 n7 n7 n7 n7 n7 n7 n7 n7
77nnn nn nnnn
HygieSteam HygieSteam
197 7y91 (32 w) 7n7n7nn 7nn n nn (31 w) n 7 nnn (30 w) 190nn
77nn 77n 77n 77n 77n 77n 77n 77n
77nnnnn nn n197n
(33 n) nnnn nn nnn 7nnnnnnn
(34 n) non 1970 nnn nn nn nn nn nn nn 2
(35)77n77nn77nn77nn77nn77nn77n77n7 3
.77nnn nn n 171 (36) n) 77nn 77n 77
5
. 6
(1) 1977
7
111111111111111111111111111111111111111
nXnn
nIN 70001111111111111111111111111111111111111111111
1
n nn nnnnnnnnnnnnnnnnnnnnnnnnnnnnnnnnnnnnnnnnnnnnnnnnnnnnnnnnnnnnnnnnnnnnnnnnnnnnnnnnnnnnnnnnnnnnnnnnnnnnnnn
DIN INIINNINHHygieStaM (22 N) 7n n nn nnnn nn, qo0wn nn .DNI7n7
.AquaClean 100000000000000000000000000000000000000000000000000

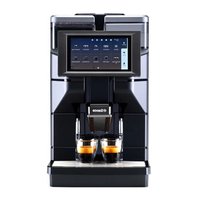
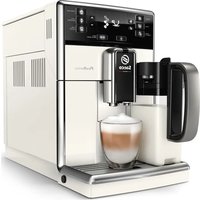
- MACHINE OVERVIEW (FIG. A)
- ACCESSORIES
- CONTROL PANEL
- INTRODUCTION
- SWITCHING ON THE MACHINE
- CONNECTING TO WI-FI
- SPECIAL FUNCTIONS
- SPECIAL FUNCTION
- PURPOSE
- BREWING DRINKS
- GENERAL STEPS
- SUPPORT ON DRINK PARAMETERS
- BREWING MILK-BASED DRINKS
- BREWING COFFEE WITH PRE-GROUND COFFEE
- DISPENSING HOT WATER
- PERSONALIZATION
- SPEED UP WITH COFFEEMAESTRO
- PERSONALIZE YOUR DRINK WITH THE COFFEEEQUALIZER TOUCH FUNCTION
- SAVE YOUR FAVORITE DRINKS IN A PROFILE
- EXTRA SHOT (EXTRASHOT)
- ADJUSTING MACHINE SETTINGS
- SETTING THE WATER HARDNESS
- USE THE WATER HARDNESS TEST STRIP SUPPLIED IN THE BOX TO DETERMINE THE WATER HARDNESS IN YOUR REGION
- SET THE MACHINE TO THE CORRECT WATER HARDNESS
- ADJUSTING THE GRIND SETTING
- RESTORING FACTORY SETTINGS
- AQUACLEAN WATER FILTER
- AQUACLEAN FILTER STATUS INDICATION
- ACTIVATING THE AQUACLEAN WATER FILTER (5 MIN.)
- REPLACING THE AQUACLEAN WATER FILTER (5 MIN.)
- REMOVING AND INSERTING THE BREW GROUP
- REMOVING THE BREW GROUP FROM THE MACHINE
- REINSERTING THE BREW GROUP
- CLEANING AND MAINTENANCE
- CLEANING THE BREW GROUP
- CLEANING THE BREW GROUP UNDER THE TAP
- CLEANING THE BREW GROUP WITH THE COFFEE OIL REMOVER TABLETS
- LUBRICATING THE BREW GROUP
- CLEANING PROGRAMS FOR THE INTERNAL CAPPUCCINATORE
- CLEANING THE INTERNAL CAPPUCCINATORE UNDER THE TAP
- DESCALING PROCEDURE
- WHAT TO DO IF THE DESCALING PROCEDURE IS INTERRUPTED
- ERROR CODES
- ORDERING ACCESSORIES
- SOFTWARE UPDATES
- TROUBLESHOOTING
- TECHNICAL SPECIFICATIONS
- DECLARATION OF CONFORMITY
- WI-FI
- AQUACLEAN FILTER STATUS INDICATOR
- WWW.SAECO.COM/MYCOFFEEMACHINE
- PREPARING DRINKS
- ADJUSTING DRINK PARAMETERS
- PREPARING MILK-BASED DRINKS
- PREPARING COFFEE FROM PRE-GROUND COFFEE
- SPEED UP THE PROCESS WITH COFFEEMAESTRO
- EXTRA SHOT
- PERGUNPAHE NA HACTROPONKETE HA MAUNHATA
- HACTPOBBAHE HA TBBPDDCTTA HA BOJATA
- I3NOJI3BAITE BKNIOUEHATA B KOMNJIEKTA TECT JEHTA, 3A DA ONPEJINTE TBBPIOCTTA HBODATBB BAIINPERNOH
- HACTPOITE MAUNHATA HA NPABUNHATA TBBPOCT HA BODATA
- PEREYNIPANE HA HACTROKNTE HA MEJEHE
- RESTORING THE FACTORY SETTINGS
- CLEANING THE MILK CARAFE
- CLEANING THE MILK CARAFE WITH WATER
- CLEANING THE MILK CARAFE WITH CLEANING TABLETS
- DESCALING THE MILK CARAFE
- CLEANING PROGRAMS FOR THE MILK CARAFE
- CLEANING THE STEAM NOZZLE
- THE CLEANING CYCLE MUST BE PERFORMED WHEN THE MACHINE INDICATES IT IS NECESSARY
- DESCALING
- DRINK PARAMETER SETTINGS
- MILK-BASED DRINKS
- PREPARING COFFEE WITH PRE-GROUND COFFEE
- SAVE YOUR DRINKS IN A PROFILE
- CLEANING THE BREW GROUP UNDER RUNNING WATER
- CLEANING THE BREW GROUP WITH DEGREASING TABLETS
- CLEANING THE BREWING UNIT WITH WATER JETS
- CLEANING THE BREWING UNIT WITH COFFEE OIL REMOVER TABLETS
- LUBRICATING THE BREWING GROUP
- CLEANING THE INTERNAL MILK FROTHER UNDER RUNNING WATER
- USING THE REMOTE CONTROL
- BA3NΦAXON MAXCYC
- TANEPKYUHN HUYOKXO
- KAAMXONYMM
- ДАСТRUPП ТАНЗИМOTИ HУШOKNXO
- THE STEAM BUTTON IS PRESSED
- THE STEAM BUTTON AND THE SPRAY BUTTON ARE SEPARATE
- SAFETY INSTRUCTIONS
- DESCALING WITH COFFEEMAESTRO
- DESCALING WITH THE "COFFEEEQUALIZER TOUCH
- ADJUSTING THE COFFEE STRENGTH
- ADJUSTING THE WATER HARDNESS
- TO ADJUST THE WATER HARDNESS, YOU CAN USE THE TEST STRIP PROVIDED WITH THE MACHINE. FOLLOW THE STEPS BELOW
- INSTRUCTIONS FOR ADJUSTING THE GRINDER
- ADJUSTING THE GRINDER WHILE THE MACHINE IS IN OPERATION
- PREPARING MILK DRINKS
- HOT WATER DISPENSING
- PERSONAL SETTINGS
- DISCOVER THE PROCESS WITH THE COFFEEMAESTRO FUNCTION
- IEPCOHAJI3YITE HANOI 3A DONOMOROIO FYNKCI COFFEEEQUALIZER TOUCH
- EPIRATE YIIO6JENI HANOI B NPOPHIJI
- ДОДАTKOBA NOPСЯ (EXTRASHOT)
- HAJALSTTYBAHHA KABOMAUNHN
- FACTORY RESET
- INSTALLING THE BREWING UNIT IN PLACE
- CLEANING
- BACKUP TANK
- TO DISPENSE DRINKS FROM THE MILK JUG
- CLEANING THE COFFEE SPOUT
- COFFEEMAESTRO IS READY TO USE
- YOU CAN ADJUST THE MILK SETTINGS USING THE COFFEEEQUALIZER TOUCH FUNCTION
- TO DETERMINE THE WATER HARDNESS, USE THE TEST STRIP PROVIDED
- SET THE WATER HARDNESS ON THE MACHINE
- RESETTING THE PARAMETERS
- AYBITBIK NPAMETPIEPRE KAJIBHA KEJITIPY
- AQUACLEAN CY CY3RICI
- AQUACLEAN CY3RICINH KYN KΕPCETKIWI
- AQUACLEAN CY CY3RICIN 6EICEHDIPY (5 MINH)
- REPLACING THE AQUACLEAN WATER FILTER (5 MINUTES)
- CLEANING THE BREWING UNIT
- CLEANING THE BREWING UNIT UNDER RUNNING WATER
- CLEANING THE BREWING UNIT WITH THE COFFEE OIL CLEANING TABLETS
- LUBRICATING THE BREWING UNIT
- CLEANING THE TWO MILK FROTHING WANDS
- CLEANING THE TWO NOZZLES WITH WATER
- IF THE DESCALING PROCEDURE IS INTERRUPTED, IT WILL BE CANCELLED
- TABLE OF CONTENTS (PART A)
- NEXT STEP
- WI-FI NETWORK CONNECTION
- CLEANING THE MACHINE
- DESCALING THE MACHINE
- THE COFFEEMAESTRO COFFEE MACHINE
- THE COFFEEEQUALIZER TOUCH DISPLAY
- THE WATER TANK IS LOCATED AT THE BACK OF THE MACHINE
- LNUGNIGHZ WUHUPUDHU (EXTRASHOT)
- UTPUWH YWNQWUNNNUTNH YWNWNN
- NH 1N2NNNPUU YUNQWNNNNU
- SNUHHTUN UNNUUUNNUUUGN YNG HN 2NNPUU UUUN H NGNU NNN2P ATN UNUNWOUNGWHN HN YUNUNNJNIUN
- UTPWU UWHUWUPG NH AH2N LN2NNJAUU NU
- AQUACLEAN MODEL
- AQUACLEAN FILTER REPLACEMENT
- REPLACING THE AQUACLEAN FILTER (5 MINUTES)
- RESETTING THE AQUACLEAN FILTER (5 MINUTES)
- RESETTING THE WATER HARDNESS
- DUYTP UWWUUNLUYU NNTUULN U UNTNUNNP NPNP
- UWPPNUIU UWWUWUNIU
- UNATH HUPH UWPNNU
- UNABUH HUUPH UWPNN HNUNN GNH UNU
- UNATUH UUPH DUWPNNU UNINOH JNINH HTNWUGWU HUUDUN UWHUWNTUULW HUPTNNU
- UWNPU W DWNQNTN UTNPHU YWNISHUWWNNH HWWN
- LTNPHU YWNIUSHWINNH LWGNUN DNNWH UNW
- UWJU UUNUWPUTNH WNPWU NPNGTNNPU
- NOTE: THE APPLIANCE IS NOW READY FOR USE
- THIS IS A HEADING IN ARMENIAN, LIKELY MEANING 'SAFETY INSTRUCTIONS' OR SIMILAR. I'LL TRANSLATE IT TO ENGLISH
- THIS IS A HEADING IN ARMENIAN, LIKELY MEANING 'IMPORTANT SAFEGUARDS' OR SIMILAR. I'LL TRANSLATE IT
- THIS IS A HEADING IN ARMENIAN, LIKELY MEANING 'WARRANTY AND SUPPORT' OR SIMILAR. I'LL TRANSLATE IT
- THIS IS JUST 'WI-FI' IN ENGLISH, SO I'LL KEEP IT
- THIS IS A STRING OF CHARACTERS THAT SEEMS TO BE OCR GARBAGE, SO I'LL MARK IT AS UNUSABLE
- SUPPIMER
- AQUACLEAN 6YGMNB GNGMFO
- AQUACLEAN GOMFOHNB BFOJBNB 6N
- AQUACLEAN 6YYMNUB GNNMFNN B0OFOYNDS (5 6M.)
- AQUACLEAN 6YYMNB GOMFOFNB 33 (5 6M.)
- DMOYNN 3MA3MNGNNSA MNGDS GOS HOGDO
- AMGYMNAB 3MA3MNGNBU 3SMSNS6 DMBU6S
- AMGYMNAB M3MNGNUB BMNGS6 HOGDO
- AMGOGONB MDA3MGOJNO 8SUYG0N03DO
- AMGYMNAB 3MA3MGONB 6YMNB J3GA A56G
- N6GOG AMGYMOAB 3MA3MGO Y3NB (BNAAB MBSAMNO 000G
- DMOGMNDNUB3MD3MGDCB8S3MB3S
- A00366M6 636666YMONN
- NDNN N7Y9N
- WI-FI-7 NNNN
- YDNNINPUNNN
- AQUACLEAN D'N JON
- AQUACLEAN |DOD |DIN |IIN
- U T N N 7 W W N N N N N N N N N N N
- NNN NN NNNN
- NNNNN NN N197N
- NXNN
Brand : SAECO
Model : M6680/00
Category : Espresso